
Kristina Seleshanko's Blog, page 8
September 15, 2022
You Should Be Eating That! (Waste Not, Want Not in the Garden)
 According to 2022 statistics, throughout the world, about 1.4 billion tons of food are wasted every single year. The U.S. wastes more food than any other country, throwing away 40 million tons each year. That's the equivalent of 219 pounds of waste per person...and 30 to 40% of our entire food supply! We can do better.
And as homesteaders, we can not only do better, but we can find food where others only see something worth throwing away. The fact is, our society doesn't always recognize food - even great-tasting food. We throw away (or compost) a great deal that could fill our families' bellies. Here are some examples.
Broccoli and Cauliflower
In North America, we waste so much of the broccoli plant! We wait for the seed heads (florets) to get to just the right stage of maturity, snip them off, eat them, and compost the rest. But the truth is, every part of broccoli is edible.First, instead of just eating the florets, make sure you eat the stems, too. Chop them up into pieces about half the size that you chop the florets, then cook them all together. The thick center stalks are edible, too, though they should be peeled before cooking. All these parts of the broccoli can also be blanched for three minutes and frozen for later use.
 Every part of broccoli is edible - not just the florets or heads.
Perhaps even more neglected are broccoli leaves. They can be cooked and eaten exactly like any other leafy green. Ideally, harvest the leaves after harvesting the broccoli head. (Although it is okay to harvest leaves before the head matures, it does reduce the plant's ability to photosynthesize; be sure to always leave at least three of the top leaves on each plant.) The leaves will keep in the refrigerator for two or three days if you don't wash them before putting them in an open plastic bag in the crisper drawer. You may also freeze the leaves; blanch them for two minutes first.
 Broccoli divided up by edible part. Left to right: Stalks, stems/florets, and leaves.
(adsbygoogle = window.adsbygoogle || []).push({});
If the leaves have thick center stems, cut them away before cooking, eating, or freezing the leaves. (But those leaf stems are food, too, so don't throw them away. They need a longer cooking time than the leaves, so they should be prepared separately - perhaps with the broccoli's main stems.)
 Broccoli stems and peeled stalks, blanched and ready to freeze.
And yes, cauliflower stems and leaves are edible, too. You may find that the very bottom of the thick center stalk is too tough for your palate, but the rest of the stems are quite tender, even without peeling.
 Many root crops, including radishes, offer much more than just their roots for food.
Radishes, Turnips, and Beets
These vegetables are grown for their roots...but the leaves are edible and tasty, too. Don't be put off by the somewhat prickly leaves of radishes and turnips; those prickles disappear as soon as the leaves are cooked. And beet leaves? They are a true delicacy, being sweeter than most leafy greens.
With turnip leaves, you'll want to remove the thick center stems before cooking (but the stems can be eaten, just as with cauliflower and broccoli leaf stems). All these leaves are best eaten within a few days of harvest; store them unwashed in the fridge, in an open plastic bag, in the crisper drawer. Radish, turnip, and beet leaves can also be blanched for two minutes and then frozen.
 Sauteed radish greens served alongside pork chops and asparagus.
 Radish seed pods are yummy!
(adsbygoogle = window.adsbygoogle || []).push({});
And if you want to have even more fun with radishes, let them go to seed. Their seed pods are quite tasty eaten raw, or lightly cooked in, say, a stir fry.
 Squash blossoms, stems, and leaves are edible.
Squash
Summer and winter squashes (including pumpkin and zucchini) offer a prolific harvest for most homesteaders, but did you know it's not just the fruit of the plant that is edible? That's right, you can also eat squash flowers, squash leaves, squash stems, and squash seeds.
The flowers are often battered and fried or stuffed and steamed. To avoid reducing the fruit crop of the plant, manually pollinate female flowers before removing the male flowers for eating.
In some countries, the leaves are the main crop harvested from squash plants. The easiest way to eat squash leaves is to only select the younger examples, which are cooked like any other leafy green. (Always leave behind more leaves than you harvest so the plant can continue to grow.) When eating bigger, older leaves, some people like to rip out the center stems, tearing away the stringy part at the heart of the leaves. I recommend harvesting the leaves just before you cook them, although they can also be blanched for two minutes and then frozen. Avoid eating squash leaves that are affected with powdery mildew.
 Ricotta stuffed squash blossoms. Courtesy of Sharon.
Squash stems are edible, too. Some chefs slice them to look like penne pasta by cutting the ends at an angle (after first scraping the outer part of the stems to remove their stringy fibers). Next, blanch them for 10 seconds, then drain thoroughly and lightly cook in pasta sauce. I've also seen square stems scraped, cut into pieces, stuffed with ricotta, and fried.
You are probably familiar with roasted pumpkin seeds, but the seeds from any type of squash can be roasted and eaten. Toss in olive oil, season with plenty of salt and pepper, and roast in a 400 degree F. oven. Watch the seeds closely so they don't burn, and turn them once during cooking.
And while we're discussing avoiding waste in the squash garden, note this: If you end up with winter squash fruit that won't have time to mature before a hard frost hits, eat them anyway. Young winter squash can be eaten just like summer squashes.
Tomatoes
For some reason, many people believe tomato leaves are toxic. This is a myth, perhaps left over from the days when the entire plant was thought poisonous. Like many greens, tomato leaves are best harvested shortly before cooking, and you should keep more leaves on the plant than what you take away, unless your tomato plant requires hard pruning. Cook them like any other leafy green, but bear in mind they have a heady aroma.
 Save those tomato skins!
Tomato leaves are best, I think, added to a traditional pesto or tomato sauce (pureeing a few leaves along with the other ingredients). Other ideas for using tomato leaves include infusing them in olive oil or dehydrating the leaves and sprinkling the resulting powder on pizza, eggs, or pasta. You can also use the stems and leaves of tomatoes as an infusion for soups; just wrap the leaves in some cheesecloth that's tied into a bag and drop them into soup during the last 10 minutes of cooking. Remove the bag before serving.
 Tomato paste made from dried tomato skins.
(adsbygoogle = window.adsbygoogle || []).push({});
And if you ever peel your tomatoes (say, for canning) don't throw away the skins! Instead, dry them in a dehydrator at 135 degrees F., then powder them in a coffee grinder. Now whenever you need tomato paste, mix two parts of this powder to one part water. You can also use the tomato skin powder as a seasoning to sprinkle over eggs, pizza, or meat.
Celery
When harvesting celery don't compost the leaves; eat them! Use them sprinkled over food, much like you'd use fresh parsley. Or dehydrate them at 135 degrees F., grind them into powder, and use the powder as a seasoning. You can even make your own celery salt; just mix together half celery leaf powder and half non-iodized salt. (I have a whole post on making celery salt here.)
 Don't toss celery leaves!
Brussels Sprouts and Cabbage
 All cabbage leaves are edible.
Most people only eat the "baby cabbages" that Brussels sprout plants produce, but you can eat all the leaves off this plant. Harvest them as the plant grows (being sure to leave behind at least four of the uppermost leaves) and use them just like cabbage or other leafy greens. The same is true for the leafy tops that appear before the plant goes to seed.
The stalks of Brussels sprouts are edible, too. Wait until you've harvested the main crop (the small heads most people recognize as Brussels sprouts), then use your sharpest knife to cut the stalks into manageable sizes. The stalk pieces then need cooking. The traditional way to do this is to braise them for two to three hours, but you can shorten this time considerably by using a pressure cooker. In an Instant Pot, for example, pour in a couple of cups of stock or bone broth, add the cut stalks, and pressure cook for about 45 minutes. Remove the stems and allow them to cool until you can handle them. Cut vertically down the center of each stalk, revealing their soft inner core. With a spoon, scrape out the stalks, keeping the soft inner parts and composting the tough outer layer. The soft parts taste a bit like artichoke hearts and can be used as part of a dip, as a stuffing, or as a mash, all by themselves.
 The tender "marrow" inside Brussels sprout stems. Courtesy of H. Alexander Talbot and Wikimedia.
(adsbygoogle = window.adsbygoogle || []).push({});
As for cabbages, it's not just the tight heads that are edible. All the leaves may be eaten, though t
he older, larger leaves can be a bit tough. (To help tame tough leafy greens, remove the stalks, then stack the leaves. Roll them into a cigar shape and slice very thin before cooking.) Carrots are more than orange roots!
Carrots
If you aren't saving the green leaves of your carrots, you're missing out! They make a nice parsley substitute. Or use them in place of basil in pesto, or chop and sprinkle them over salads, soups, stews, and stir-fries.
I do not recommend harvesting the leaves before you pull up the carrots; there are some wild plants that have leaves closely resembling carrot tops and unfortunately, they are deadly. So always pull up the carrots first, then chop off the leaves and use them. The unwashed leaves may be stored in an unsealed plastic bag in the crisper drawer for several days, or you may freeze them.
Sweet Potatoes
Although most people grow sweet potatoes for their root crop, the leaves of sweet potatoes are also a tasty and nutritious harvest. Eat them raw or cooked. In their raw state, they are a bit bitter, making them a nice addition to a salad. Cooked, they are mild and sweet and can be used as a spinach substitute.
Sweet potato stems are also edible and are traditionally used in stir fries. (It's smart to cook the stems separately from the leaves because the stems require a longer cooking time.) Usually, the stems are peeled, but some people find this step unnecessary. Try it both ways and see what you prefer.
Irish Potatoes
In North America, we have a habit of peeling potatoes before eating them. Yet not only are the skins edible, but they are packed with nutrients. For this reason, I cook my potatoes with the skins on - even when I make mashed potatoes. But if you prefer to remove the skins, save them and roast or fry them after seasoning with salt and perhaps some paprika; they make a tasty treat!
 Fried potato skins topped with Parmesan. Courtesy of John Ong.
 (adsbygoogle = window.adsbygoogle || []).push({});
Pea Shoots
 Pea shoots are edible. Courtesy of Charles Haynes.While most Americans just eat the seeds and pods of the pea, pea shoots are a popular Asian food. The "shoots" are just the young, tendril-tipped parts of the plant. Sauté them whole (traditionally, in a stir fry) or add them raw to salads. Ideally, harvest pea shoots right before eating, though they will keep a day or two in the fridge in an unsealed bag in the crisper drawer.
 Watermelons
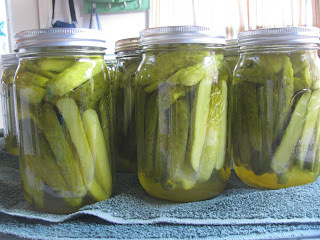
Did you know that watermelon rinds are perfectly edible? In fact, they are traditionally used to make pickles! (Click here for the recipe.) Peeled and julienned, they also make a nice addition to stir-fries, or they can be shredded and sprinkled into salads.
 Watermelon rind pickles.
Watermelon seeds can also be eaten raw or cooked. Some people even roast them like pumpkin seeds.
 Kohlrabi bulbs, stems, and leaves are edible.
Lettuce
When your lettuce is done producing leaves for the season, save the center stalk. Peeled and chopped, it's excellent roasted. Or slice it into thin rounds and sauté.
Kohlrabi
Not everyone may be familiar with this odd-looking vegetable that is grown for the round ball it produces just above the soil line. But even people who love growing kohlrabi often don't know that the leaves and stems are edible, too. Cook them just like any other leafy green; to store them or later use, blanch them for two minutes and then freeze.
Corn
Once you've eaten your fresh corn (or you've removed the kernels to freeze or can it), be sure to save the cobs. They make an old-fashioned jelly with a sweet corn flavor that many people feel resembles honey. (Click here for the recipe.)
You may also wish to hang onto the corn silk. While it's not typically consumed as food, it does make a dandy herbal tea (just put about 1 tablespoon of chopped corn silk in a tea ball and steep in a cup of hot water) and is traditionally used as a treatment for bedwetting, urinary tract infections, gout, and kidney stones.
 Corn silk is useful. Courtesy of Emilian Robert Vicol.
 (adsbygoogle = window.adsbygoogle || []).push({});
Beans
Bean leaves are edible, and while they are safe to eat raw, most people prefer them cooked. Young leaves are favored because they are more tender; just be sure to keep most of the bean's leaves on the plant so it can continue to grow and mature.
Sunflowers
 All parts of sunflowers are edible.
The leaves of sunflowers are edible (eat them like any other leafy green), and the cooked stalks taste something like celery. But more people enjoy eating the buds lightly steamed or blanched. Add a bit of butter, salt, and maybe some minced garlic, and you've got a rare treat. Of course, eating the buds means you'll get fewer flowers and seeds, so some people prefer to eat raw sunflower petals in a salad, just before allowing the head to dry so the seeds can be harvested.
IMPORTANT NOTE: Please remember that not all parts of all vegetables and fruits are edible. In fact, in some cases, they can be deadly. So while every food mentioned in this article is safe to eat, do careful research before consuming something not mentioned here.
(adsbygoogle = window.adsbygoogle || []).push({});


September 8, 2022
How to Preserve Summer Squash (canning, dehydrating, freezing, and freeze drying)

This post may contain affiliate links. All opinions are my own. Please see FCC disclosure for full information. Thank you for supporting this site!
This time of year, I get pleading questions from readers asking how to preserve the glut of zucchini and other summer squash their garden is producing. And yes! Summer squash is highly productive... But that's actually a good thing, because summer squash is also easy to preserve in a number of ways, including through canning, dehydrating, freezing, and freeze drying.
Let's Talk Size
We've all done it. One day, we go out into the garden and peek through the squash leaves, thinking: "That zucchini will be just the perfect size tomorrow." Then tomorrow comes, we go out into the garden, and the zucchini is - no exaggeration - the size of a baseball bat! Therefore, I urge you not to believe the myth that the summer squash can wait for harvesting until tomorrow. It's a lie, I tell you, a lie! Pick it today...because smaller squash makes better eating.
 Larger summer squashes are filled with large seeds. These seeds are not only difficult to fully dry out when dehydrating or freeze drying, but they create unpleasant chunks in your fresh or canned food. Therefore, if you do end up with oversized summer squash, I suggest feeding it to your livestock (save the seeds first, if you're growing an open-pollinated variety that is at least 800 feet away from any other summer squash). Or shred larger squashes and use them immediately in baked goods, or freeze the shreds for baking later in the year. (More on that in a moment.)
How to Dehydrate Summer Squash
Zucchini and all other types of summer squash can be dried in an electric or solar dehydrator several different ways. (Here's the modern version of the electric dehydrator I've been using for well over a decade.)
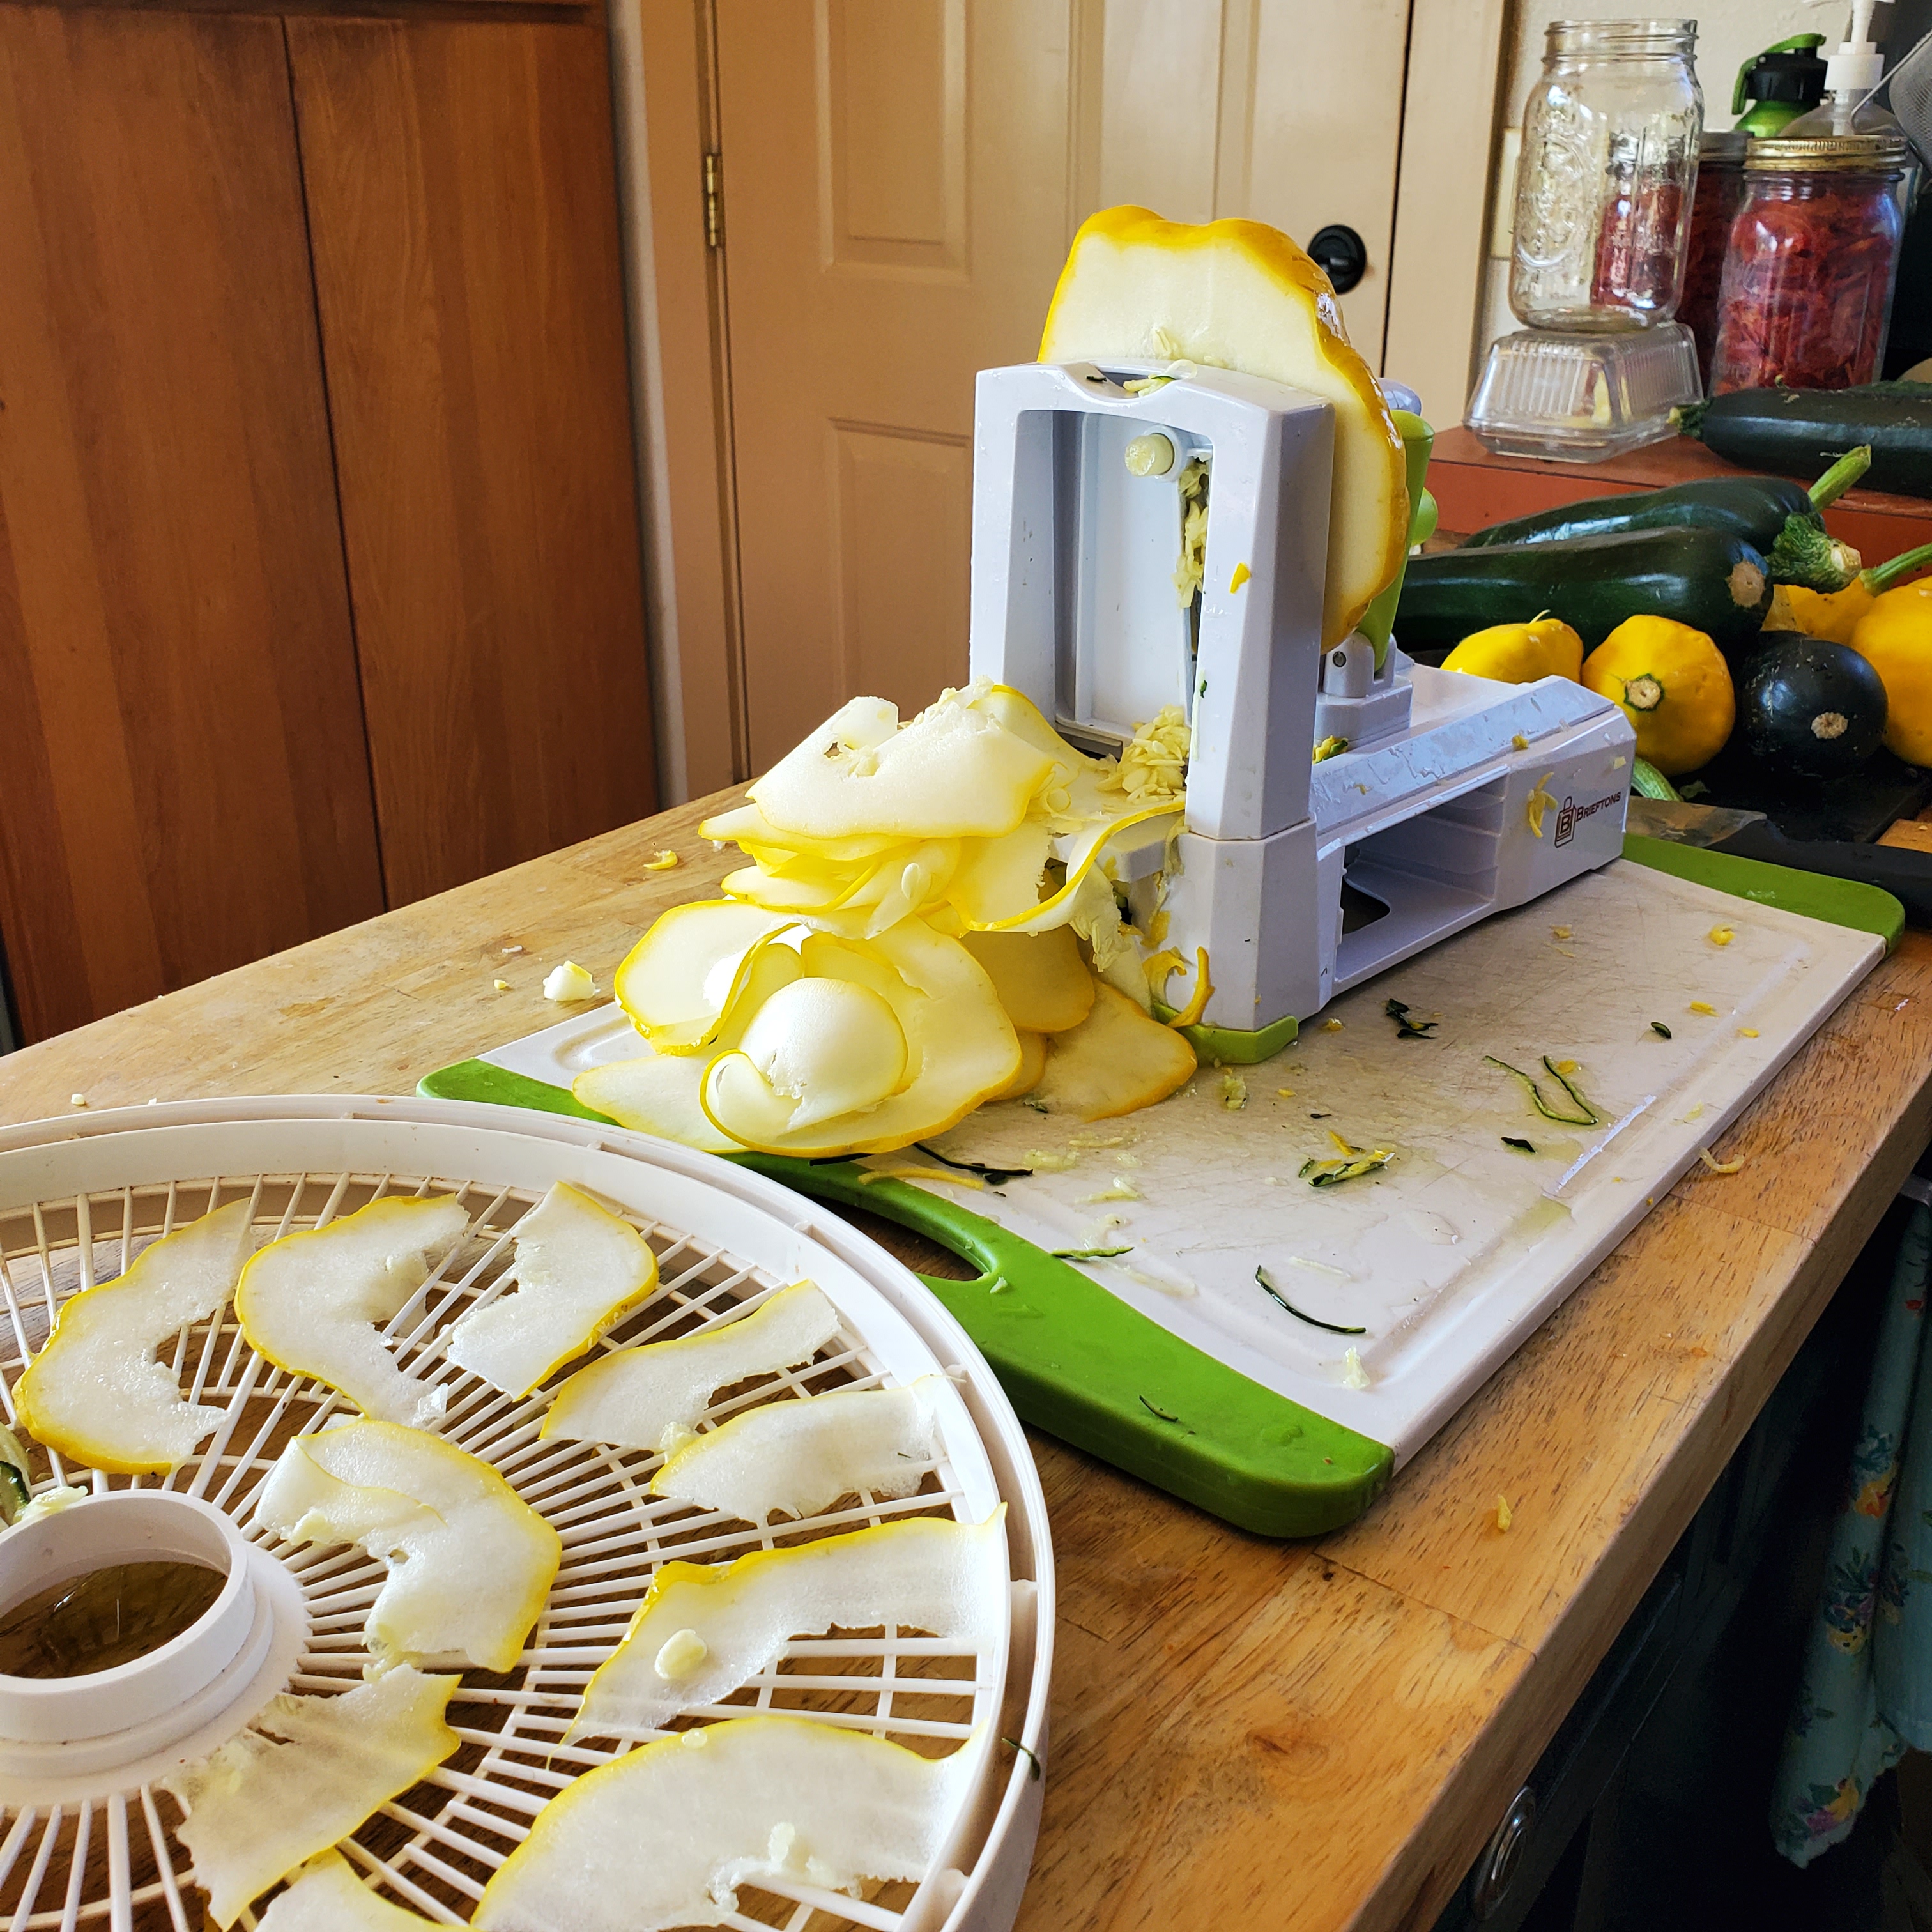
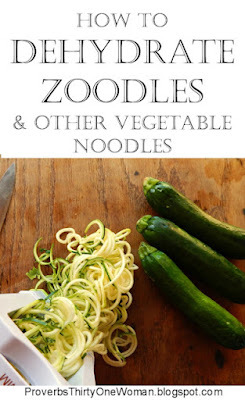
My favorite way to dry summer squash is by first turning it into zoodles. ("Zoodles" are a trendy name for zucchini or other summer squashes used as a substitute for flour-based noodles.) Zoodles typically resemble spaghetti noodles and are usually made with a vegetable spiralizer (an inexpensive tool available at most stores that carry kitchen gadgets; this is the one I use). You can also make zoodles look more like lasagna noodles by cutting them with a mandolin or vegetable peeler. (My spiralizer also cuts squash lasagna-style.) Either way, zoodles dehydrate beautifully.
 Making zoodles from yellow summer squash.
 Forming zoodle "nests" from spiralized zucchini.
Dried spaghetti-style zoodles can be prone to breaking into a gazillion pieces. To prevent this, I recommend dehydrating them in small "nests." To make these nests, lay a large mouth canning jar ring on the tray of your dehydrator and fill it with zoodles. Carefully remove the ring before dehydrating.
 Dehydrated zuchhini zoodles.
  Dried zoodles store perfectly in wide mouth canning jars.
(adsbygoogle = window.adsbygoogle || []).push({});
If you're drying lasagna-style zoodles, just lay them flat on the trays of your dehydrator, making sure they don't touch each other. If your method of cutting these noodles creates one long zoodle, simply tear the zoodle every so often to get the size you desire, then place these pieces on the trays of your dehydrator.
 Turning patty pan squash into lasagna-style noodles.
Set the dehydrator to 135 degrees F. and dry until the zoodles are entirely crisp. To test for doneness, break a zoodle. No moisture should come from the break. You can read more about making and storing zoodles in this post.
Another way to dehydrate summer squash is as "chips." Slice the squash into rounds, season as desired, and dehydrate at 135 degrees F. (Very thin slices may tend to stick to your dehydrator's trays, and too-thick slices will take a long time to dry.) These chips make yummy, healthy snacks. If you think you'll eat them pretty quickly, I recommend tossing them in a little olive oil before dehydrating. (Adding oil may cause quicker spoilage if you plan to store the chips long term.) Salt well (this helps with crispness) and, if you like, sprinkle seasonings such as paprika and chipotle powder or ranch seasoning before dehydrating.
 Zucchini "chips."
(adsbygoogle = window.adsbygoogle || []).push({});
Of course, you can simply dehydrate summer squash chunks, too. These are great for adding to soups and stews. Just make sure they are cut no thicker than 1/4 inch, or they may be difficult to get fully dry.
You can also dehydrate shredded summer squash if you use a fruit roll tray cover or parchment paper over your machine's trays. Place only a somewhat thin layer of squash shreds on the prepared trays so the squash will dry quickly and thoroughly. You can throw these dried shreds directly into soups and stews or you can rehydrate them and use them in baking.
If you live in a moist or humid area, you may find dried summer squash is prone to rehydrating while in storage. I therefore suggest adding a desiccant pack to each jar. Storing your finished product in glass canning jars with canning jar lids (not plastic lids) can also help with this. (Plastic lids don't give an airtight seal.)
If you don't have an electric or solar dehydrator, you may dry summer squash in your oven. To do so, place the prepared squash on a wire cooling rack set inside a rimmed baking sheet. Use your oven's lowest temperature, and prop open the door, if possible. (Getting your oven as close to the ideal temperature of 135 degrees F. will result in a higher quality finished product.) If your oven has a warming drawer, drying the squash there is an even better option.
How to Freeze Summer Squash
When I freeze summer squash, it's usually for use in zucchini bread. I simply shred the squash (any type of summer squash works for "zucchini bread"!) with a cheese grater or food processor, measure it out (according to the called-for amount in my zucchini bread recipe - which you can find here), pop it in a freezer bag, and put it in the freezer. When I want to make zucchini bread, I thaw the bag, then drain the squash well. (You may also press the squash with a clean cloth or paper towels to remove excess moisture before baking.)
 Frozen summer squash is the basis of my zucchini bread.
Summer squash also freezes well in 1/2 inch rounds that are perfect for casseroles or soups. Blanching the squash first is considered best, since this helps retain nutrients and makes the food last longer in the freezer: Bring a pot of water to a boil, then add the sliced squash. When the water begins to boil again (which should be less than a minute; if it takes longer, you've put too many veggies in the water), start timing 3 minutes. After 3 minutes, immediately remove the squash and dunk it in an ice bath. Once the squash is well-drained and dry, pack it into freezer bags.
Short on time? You may also simply cut up summer squash and throw it into freezer bags without blanching it first. In this situation, I recommend using the squash within 2 months.
(adsbygoogle = window.adsbygoogle || []).push({});
In addition to shreds and chunks, you may freeze lasagna-type zoodles. Blanch for 3 minutes, then dump in an ice bath. When completely cool, allow the squash to drain. To prevent the slices from sticking together in the freezer, pre-freeze them on a baking sheet lined with parchment paper. When the slices are hard, you may transfer them to a freezer bag.
It's also possible to freeze spaghetti-style zoodles, but they will end up too mushy to use as a satisfactory pasta substitute. They are a good addition to soup, however. Blanching will turn them mushier, so if you chose to freeze spaghetti-style zoodles, I recommend skipping the blanching and using the squash within 2 months.
How to Can Summer Squash
The general rule of thumb is that summer squash should not be canned. That's because this low acid vegetable isn't tested safe to can all by itself...and also because pieces of summer squash, when pressure canned, turn to mush. That said, there are several tested safe recipes for canning summer squash, including Zucchini Pineapple, Tomatoes with Zucchini, and mixed vegetables. In addition, zucchini can be used as a substitute for cucumbers in any tested safe cucumber pickle recipe. Finally, there are several recipes specifically for using summer squash in relish or pickles. Below are the three I used this year. (The addition of high acid vinegar or fruit is what makes these recipes safe for water bath canning.)
 Canning zucchini relish.
Zucchini Relish Recipe
from The Ball Complete Book of Home Preserving
12 cups finely chopped zucchini
4 cups chopped onion
2 red bell peppers, chopped
1 green bell pepper, chopped
1/3 cup pickling salt
2 1/2 cups granulated cane sugar
2 1/2 cups distilled white vinegar (5% acidity)
1 tablespoon ground nutmeg
1 tablespoon ground turmeric
4 tablespoons prepared horseradish
1 chili pepper (mild or hot), chopped (with seeds, if you like things hot; without seeds if you don't)
1. In a stainless steel or glass bowl, stir together the zucchini, onions, bell peppers, and salt. Cover and allow to stand in a cool place overnight.
2. Drain the contents of the bowl and rinse the mixture with cool, running water. Drain well. Use your hands to squeeze out any excess moisture.
3. Pour the zucchini mixture, sugar, vinegar, nutmeg, turmeric, horseradish, and chili pepper into a large stainless steel saucepan. Bring to a boil, stirring occasionally. Reduce the heat and gently boil, stirring often, for about 45 minutes, or until the liquid is reduced. The mixture should have the consistency of a thin store-bought relish.
4. Ladle hot relish into hot pint or 8-oz. jars, leaving 1/2 inch headspace. Process in a water bath canner for 15 minutes, adjusting for altitude.Makes about 5 pint jars.
(adsbygoogle = window.adsbygoogle || []).push({});
Squash Pickle Medley Recipe
 Canning summer squash pickles.
from The All New Ball Book of Canning and Preserving
1 lb. small to medium summer squash (no big seeds)
1 small onion, cut into thin slices
1/3 cup pickling salt
2 cups white vinegar (5% acidity)
2 cups granulated sugar
1 teaspoon mustard seeds
1/2 teaspoon celery seeds
1/4 teaspoon ground turmeric
1. Wash squash and trim off the stem and blossom ends. Cut into 1/4 inch rounds.
2. In a large bowl, toss together the prepared squash and the salt. Cover with a thick layer of ice cubes and let sit at room temperature for 3 hours.
3. Drain the squash, but don't rinse. Combine vinegar, sugar, mustard seeds, celery seeds, and turmeric in a medium stainless steel pot and bring to a boil.
4. Tightly pack squash/onion mixture into hot pint jars, leaving 1/2 inch headspace. Pour hot brine over the squash, leaving 1/2 inch headspace.
5. Process jars for 20 minutes in a boiling water bath canner, adjusting for altitude. Makes about 5 pint jars.
Summer Squash Pickles Recipe
 I used zucchini and patty pan squash for these pickles.
from The Ball Complete Book of Home Preserving
4 cups cubed, seeded, peeled summer squash
1 1/3 cups onion
2 cups water
1 1/4 cups granulated sugar
1 cup white vinegar (5% acidity)
1 teaspoon pickling salt
1 teaspoon dry mustard
1/2 teaspoon ground turmeric
1/2 teaspoon ground ginger
1. In a large bowl, combine squash and onion.
2. In a large stainless steel saucepan, combine water, sugar, vinegar, salt, mustard, turmeric, and ginger and bring to a boil, stirring until sugar is completely dissolved.
3. Add the squash and onions to the pan and return to a boil. Boil for 10 minutes, or until squash is slightly tender.
4. Pack hot vegetables into hot 8 oz. jars, leaving 1/2 inch headspace. Pour additional brine over the veggies, as needed, retaining 1/2 inch headspace.
5. Process for 10 minutes in a boiling water bath canner, adjusting for altitude. Makes 4-5 8 oz. jars.
(adsbygoogle = window.adsbygoogle || []).push({});
Freeze Drying Summer Squash
Summer squash freeze drys well - just be sure to not use squash with large seeds (because they are difficult to get thoroughly dry). Either slice or cube the squash, then blanch it by dipping it into boiling water for 3 minutes. Drain immediately and plunge into ice until cool. Drain until the squash is well dried, then pop onto the trays of the freeze dryer. I recommend a single layer for chunked summer squash, but slices can be placed on trays in layers. If you want to make "chips," cut and season as described for dehydrated chips. (Do know that freeze dried summer squash chips will be foam-like and not as crispy as dehydrated chips.)
Run the squash through the freeze dryer until there are no cold spots on the vegetables, then package in Mylar bags with oxygen absorbers. Packaged this way, the squash will stay shelf stable for at least 10 years. Learn more about freeze drying in this post. Purchase the freeze dryer I use here.
Related Posts:


 And don't forget my vegetable cookbook!

*Cover image courtesy of Jay & Melissa Malouin.
August 12, 2022
Summer on the Homestead
 Freshly harvested cabbage, cauliflower, onions, and summer squash.
“And if you will indeed obey my commandments that I command you today, to love the Lord your God, and to serve him with all your heart and with all your soul, he will give the rain for your land in its season, the early rain and the later rain, that you may gather in your grain and your wine and your oil. And he will give grass in your fields for your livestock, and you shall eat and be full."
"For you have forgotten the God of your salvation and have not remembered the Rock of your refuge; therefore, though you plant pleasant plants and sow the vine-branch of a stranger, though you make them grow on the day that you plant them, and make them blossom in the morning that you sow, yet the harvest will flee away in a day of grief and incurable pain."
________________
This summer, homesteading has been a bit of a challenge. While some of you are experiencing oppressive heat, we're among those who are having an oddly cool summer. That might sound refreshing to some of you, but it means the garden is not growing as well as I'd like.
You may recall that I have a big new garden, and overall, I'm really pleased with it. But the summer vegetables are struggling. While my tomato plants have grown big and healthy-looking, temperatures just haven't been right for blossoms, let alone ripe red 'maters. Only just the other day did I finally get some red cherry tomatoes from the greenhouse. The cucumbers are vining at last, and I finally have lots of blooms...but only one tiny cucumber is growing, even though it's nearly mid-August.Summer squash? Barely producing. Yard long beans? Still short, spindly, and producing nothing. You get the idea. I'd been hoping we'd have a hot fall to make up for this cool summer, but the wild animals say autumn is on it's way - and indeed, there's a bite in the air.
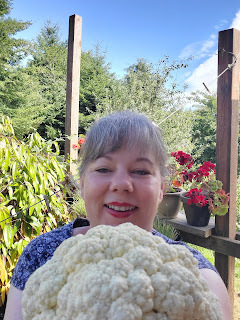 Now that's a cauliflower!
 Cabbages and Brussels sprouts, early this summer.
 Onions.
 Thinned carrots. If you wait until they begin showing some shoulders, your thinnings will actually be bigger and more useful.
And the orchard? It's at least a month behind. The plum trees are at last, producing and I'm currently very busy preserving as many plums as possible, while also sharing the bounty with others. But it will be a very bad year for apples, which are normally our main orchard harvest. This spring, right as the apple trees were blooming, we had a lot of rain followed by prolonged freezing temps. Now there are just a handful of apples ripening on our trees.
Our livestock have been struggling, too. For example, with quail, I normally replace our breeding/egg laying birds on butcher day, but the last time I butchered, I kept the same breeder birds instead of replacing them with younger ones. That was a big mistake. I ended up with one rooster who died and another who isn't properly fertilizing eggs. Thankfully, a neighbor for whom we hatched some quail eggs gave me one of his roosters. We're hoping he's properly fertilizing eggs. But this year has been plagued with terrible hatches, including one where all the chicks died of cold when their waterer inexplicably dumped all its contents into the brooder in the middle of the night.
In the rabbitry, most of Fiona's last litter was stillborn, then she suddenly dropped a lot of weight. I'm nursing her back into condition, but she'll be out of commission for a while. Bluebelle has suddenly decided she doesn't want anything to do with the bucks, too. So strange!
The bird flu has officially reached backyard homesteads in my county, and rabbit Ebola (RHD2) is confirmed in nearby counties. When we went to the county fair this year, we took precautions: We wore shoes we never wear around our animals, then came home and changed clothes and washed our hands. I'm trying to find a local vet who will vaccinate our breeding rabbits for RHD2, but hardly anyone in my area has heard of it, even though it is a well-documented and devastating disease.
 Dehydrating a few zoodles.
 My lone cucumber.
All this is particularly frustrating because food prices keep skyrocketing and I have concerns about food scarcity. My last grocery shopping trip revealed a store with almost no non-processed meat and nearly zero wheat products; the only bread I found was almost $14! I never eat wheat and my husband rarely does, but our kids do. So they will do without or I will have to find time to make some bread from scratch. (Hard to do when I'm spending most of my day tending the garden and preserving the harvest.) Thankfully, there is still flour available in stores, but I wonder how long that will last.
And did I mention that my husband is currently out of work? (Please, if you feel inclined, pray that he will find a new job where he is well treated. And, if you can, please help support this blog by purchasing my books or supporting my advertisers.)
But - and this is a big but - here's the deal: God is in control...and I can trust in him. It's not really up to me to provide everything my family needs. He's the farmer; I'm just the farmer's helper. It's His job to take care of us; he promises He will, and He never lies. There's Nobody I trust more...so why fret?
So I keep homesteading, caring for my family, and trying to help people through my writing, knowing it will all work out for the good of those who love Him.
And it's certainly not all bad news. I've been harvesting broccoli, turnips, radishes, kale, cabbages, green beans, cauliflower...and I've been preserving some of this harvest, including bits and pieces I used to compost (including broccoli stems and stalks, broccoli and cauliflower leaves, and the tough outer cabbage leaves). I'm thankful for every little bit.
Keep homesteading, friends!
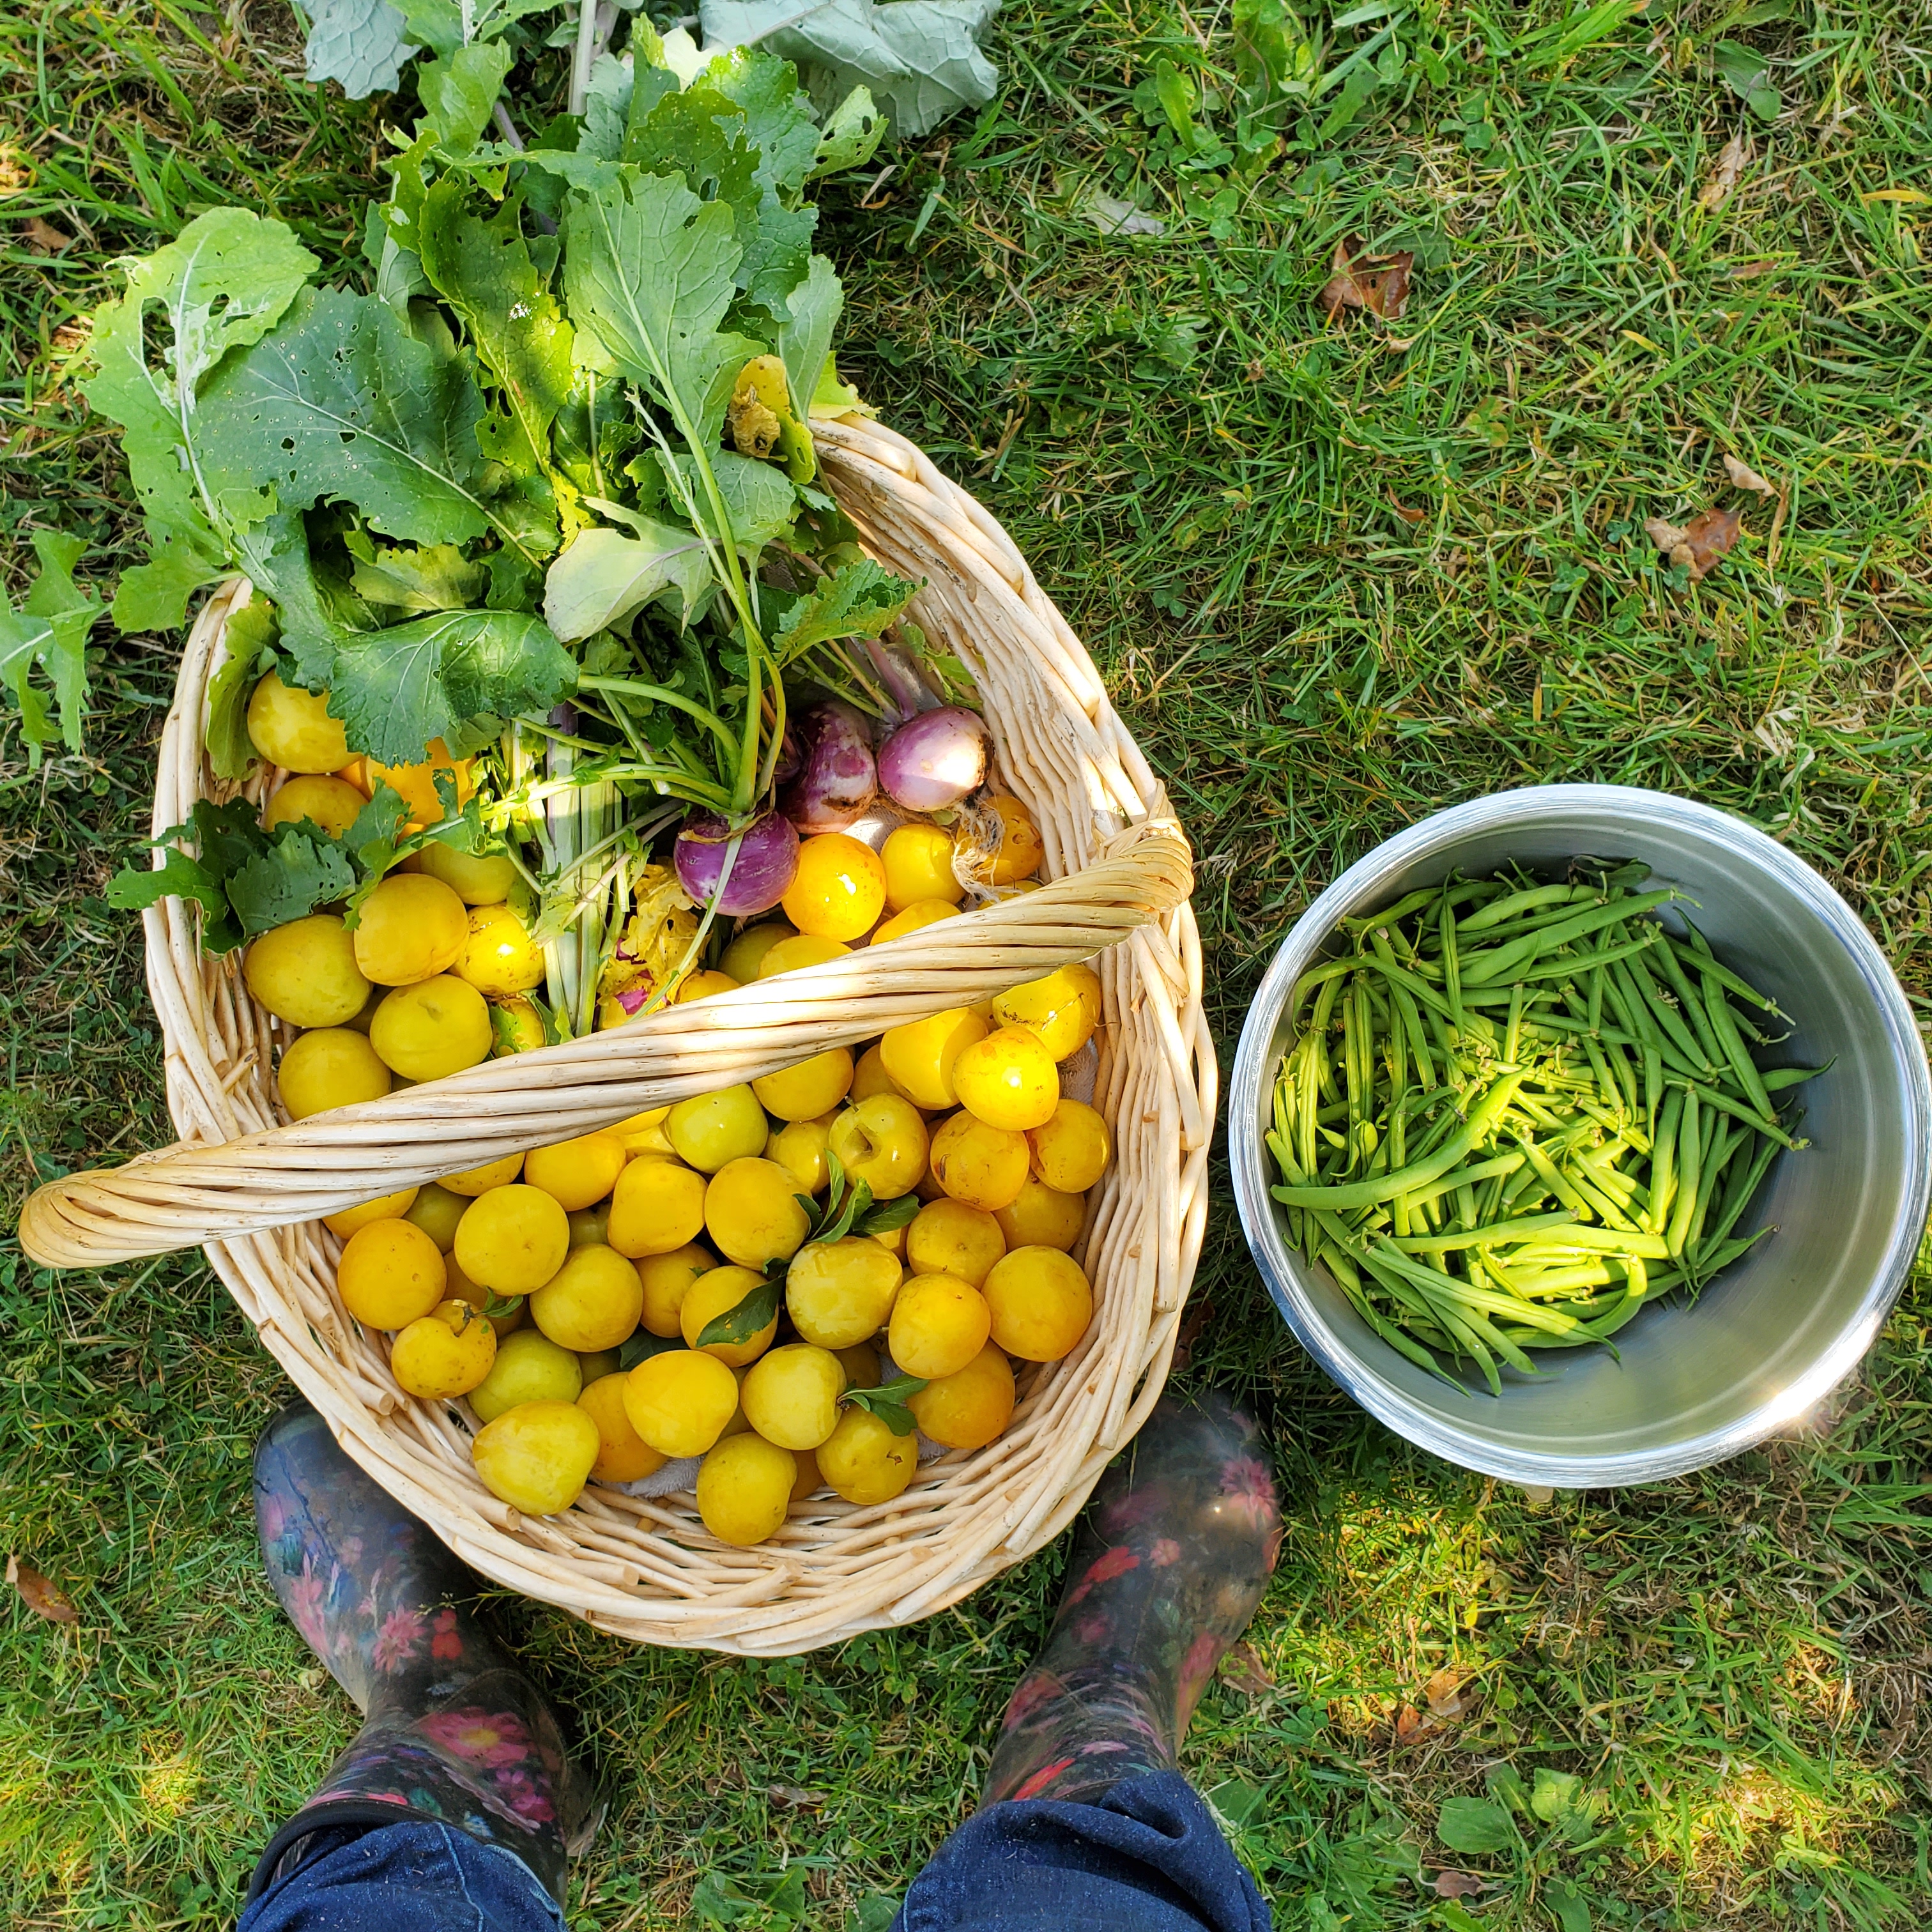 A few turnips, green beans, and yellow plums.
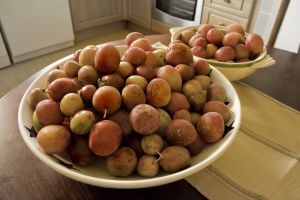
 Dehydrating yellow plums.
 Yellow plum preserves.
 Yellow plum jam and preserves.
 The awesome washing station my husband built from scraps. Now I can wash the dirt off veggies right in the garden, which keeps soil out of my kitchen (and prevents it from going down the drain).
 Related Posts:

 Canning, Dehydrating, and Freezing Plums
July 13, 2022
How to Preserve Cucumbers

This post may contain affiliate links. All opinions are my own. Please see FCC disclosure for full information. Thank you for supporting this site!
Cucumbers are a staple of the summer vegetable garden, but if conditions are right, their harvest can come in fast and heavy...leaving you wondering what you're going to do with all those cukes. If you want to preserve the refreshing taste of cucumbers for the winter months, or if you're growing more cucumbers than you can eat before they spoil, never fear; there are lots of good ways to preserve cucumbers so you can enjoy eating them any time of year.
A Few Words About Harvesting Cucumbers
Some people struggle to know the best time to harvest cucumbers, and since the first step toward successfully preserving any vegetable is to harvest it correctly, let's address this topic briefly.
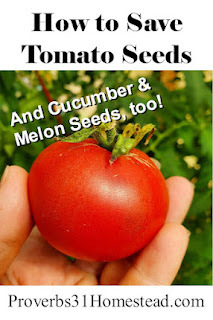
First, it's important to understand that color matters. Generally, cucumbers turn yellow when they over-ripen. Some people don't mind the flavor of cucumbers when they are just starting to turn yellow, but I wouldn't recommend them for canning projects. Once the cucumber is fully yellow, it's no longer recommended for eating, because of poor flavor and texture. (A good use for fully yellow, open-pollinated cucumbers, however, is to save the seeds for planting next year. See this post for complete how-tos on saving cucumber seeds.)
Other causes of yellowing cucumbers include over-watering, Cucumber Mosaic Virus, nitrogen deficiency, or deprivation of sunlight. There are also some varieties of cucumbers that are supposed to ripen yellow instead of green.
For best results when preserving cucumbers, harvest them long before they begin turning yellow, ideally in the morning before it gets hot, and by using scissors or a knife to cut them off the vine. If you want to make pickles, it's best to harvest cucumbers when they are 2 to 3 inches in length.
One of the most common complaints about homegrown cucumbers is that they taste bitter. This is common when cucumbers are grown under stressful situations - in particular, when they don't get enough water or they are watered inconsistently. The good news is, that bitterness can almost always be removed by peeling the cucumber and then cutting off the stem end.
Dehydrating Cucumbers
Cucumber slices dehydrate nicely and can make a yummy, healthy snack. Dehydrated quarter-inch slices are also handy if you want to powder the cukes for later use. (Cucumber powder is a delicious addition to homemade salad dressing, for example).
 Dehydrated cucumber "chips."
(adsbygoogle = window.adsbygoogle || []).push({});
Place the slices (peeled or not peeled) in a single layer on the tray of an electric dehydrator; don't let the pieces touch. Dehydrate at 135 degrees F. until you can snap them in half and no moisture comes out of the vegetable. Allow the slices to cool completely, then store in glass jars with metal lids and place them in a cool, dry, dark location for up to a year.
If you don't have an electric dehydrator, you may use your oven. If your oven has a warming drawer, put a wire cooling rack on top of a rimmed baking sheet, and set the cucumber slices on the rack. Place inside the warming drawer until the slices are crisp. If your oven doesn't have a warming drawer, use the same baking sheet and wire cooling rack method, but turn your oven to its lowest setting, keeping the door ajar.
Do note that rehydrated cucumber slices will not be crispy like fresh cucumbers.
If desired, you may season the cucumber slices before dehydrating. Good choices include sea salt and pepper, dry Ranch seasoning, dry French onion mix - or, try one of the recipes here:
Salt & Vinegar Cucumber Chips
For every 4 large cucumbers, mix together 2 tablespoons olive oil, 2 teaspoons sea salt, and 4 teaspoons apple cider vinegar in a bowl. Fully coat the cucumber slices in the seasoning before dehydrating.
BBQ Cucumber Chips
For every 3 large cucumbers, mix together: 1 tablespoon paprika 2 teaspoons garlic powder 1 teaspoon onion powder 1 teaspoon chili powder 1/2 teaspoon mustard powder 1/4 teaspoon cayenne 1/2 cup apple cider vinegar Sprinkle over cucumber slices before dehydrating.
Dill Cucumber Chips
For every 2 large cucumbers, use about 1 tablespoon dried dill weed. Season cucumber slices with sea salt and the dill before dehydrating.
(adsbygoogle = window.adsbygoogle || []).push({});
Freeze Drying Cucumbers
Although freeze drying is a different process than dehydrating (see this post for a full explanation) cucumbers can be prepared much the same way as you would for dehydrating, including any fun seasonings that turn them into snackable "chips." Some people also like to make cucumber power from freeze dried, sliced cucumbers, which they use in hot dishes to lightly season and add nutrition.
To freeze dry cucumbers, just pop slices onto the machine's trays (it's fine to overlap pieces and lay down more than one layer, but too many layers will take forever to fully freeze dry), put them in the machine, and freeze dry. You'll know the cucumbers are done when there are no cold spots anywhere on them.
Freezing Cucumbers
Freezing is probably not the first method you imagine when thinking of preserving cucumbers, but it can work quite well. You can't freeze cucumbers and expect them to thaw out to a crispy state, however, so plan on using frozen cukes where you want the flavor of cucumbers, but don't need the crunchy texture of fresh cucumbers.
One easy way to freeze cucumbers (and end up with a product that's perfect for making flavored water, dips, soups, smoothies, and more) is to slice the vegetable in rounds, place the slices in a single layer on a rimmed baking sheet, pop them in the freezer, and let them get hard and fully frozen. Then you can put the rounds into freezer bags and store them in the freezer for about a year. You can also freeze shredded or chopped cucumber, put it in ice cube trays, cover with water, and freeze hard. Once the ice cubes are completely frozen, transfer to a freezer bag. Again, these will last about a year.
.jpg) Cucumber ice cubes.
Cucumber ice cubes.My 1963 copy of The Farm Journals' Freezing and Canning Cookbook recommends the following: "Peel, seed and put [cucumbers] through food chopper. Pack in ice cube trays, freeze. Remove from trays, wrap and place in freezer. DO NOT THAW; crush cubes at last minute to toss in salads for summertime flavor."
(adsbygoogle = window.adsbygoogle || []).push({});
Canning Cucumbers
Cucumbers are a low acid veggie - and low acid vegetables should be pressure canned...right? Well, not cucumbers...because pressure canning turns them to mush. Therefore, canned cucumbers should always be pickled. The added vinegar in pickles raises the pH of the veggie, allowing cucumbers to be safely processed in a water bath canner. In any pickle recipe, you may can the cucumbers whole, in spears, or sliced.
Pickling cucumbers are different in a few ways from "regular" cucumbers (often called "slicing cucumbers" or "salad cucumbers"). For one thing, they are harvested at a small size (2 to 3 inches long). This not only ensures the cuke's skin is a bit firmer, helping them hold up during the canning process, but it also means the vegetable has smaller, less obtrusive seeds.
 Icing cucumbers before pickling.
The first "trick" to getting crunchy, not mushy, canned pickles, is to can the cucumbers immediately after harvesting. If this is impossible, or if you are buying pickling cucumbers, soak the cukes in salted ice water (1/2 cup canning or kosher salt for every 4 cups of water) for 12 hours before canning. Always cut 1/4 inch off the blossom end of the cucumbers...and it doesn't hurt to add a fresh grape leaf (full of tannins that help keep pickles crisp) to each jar.
 Adding tannin to your jars, in the form of, say, grape leaves, helps keep pickles crunchy.
I don't recommend using grocery store cucumbers for canned pickles, since they are waxed and have been sitting around for quite a while.
DIY Pickling Spice
1 cinnamon stick (about 4 inches long), broken into pieces
5 dried bay leaves, crumbled
2 tablespoons mustard seeds
1 tablespoon whole allspice
1 tablespoon coriander seeds
1 tablespoon whole black peppercorns
1 tablespoon ground ginger
1 tablespoon dill seeds
2 teaspoons cardamom seeds
1 - 2 teaspoons hot pepper flakes
1 teaspoon whole cloves
Stir together and store in a canning jar for up to a year in a cool, dry, dark location.
For great cucumber pickle recipes for canning, see The National Center for Home Food Preservation website, or see the pickle and relish recipes that Ball offers for free online. In addition, Healthy Canning offers tested safe cucumber pickle recipes.
(adsbygoogle = window.adsbygoogle || []).push({});
Fermenting Cucumbers
Fermenting is the old school way of making pickles...and as an added benefit, fermented pickles contain healthy probiotics that canned pickles do not. When fermenting, it's important to carefully follow a trusted recipe; altering it in any way may lead to mold growth or even botulism poisoning.
Always use pickling cucumbers - and for traditional dill pickles, harvest them at 4 inches long. For the crunchiest, best quality pickles, begin fermenting cucumbers right after harvesting. Scrub the cucumbers thoroughly and remove 1/4 inch from the blossom end.
 Making fermented pickles.
You will need a 1-gallon glass jar for every 5 lbs. of fresh cucumbers (or a 5-gallon stone crock, 25 lbs. of cucumbers). Both jars and crocks should be freshly washed in hot, soapy water before beginning.
Pack prepared cucumbers into the container until it is about 75 percent full. (Don't under- or over-pack the container or fermentation will be inhibited.)
Add the brine, then create an anaerobic environment by keeping the cucumbers under the water. For a glass jar, a weight made especially for this purpose is ideal. Cover jars with a double layer of cheesecloth held in place with a rubber band and place jars inside a bowl, in case the liquid overflows during fermentation. Store in a dark location where temps are 70 - 75 degrees F. At this temp, the fermentation process will take about 3 to 4 weeks. (Temps as cool as 55 degrees F. are okay, but the fermentation will take longer.)
Make sure the brine continues to cover the cucumbers; if it doesn't add more brine.
For more tips on fermenting pickles, see the Minnesota University Extension Office website.
For a classic fermented dill pickle recipe, see The National Center for Home Food Preservation.
Related Posts:
 Pickles: The EASIEST Thing to Can
(adsbygoogle = window.adsbygoogle || []).push({});
June 29, 2022
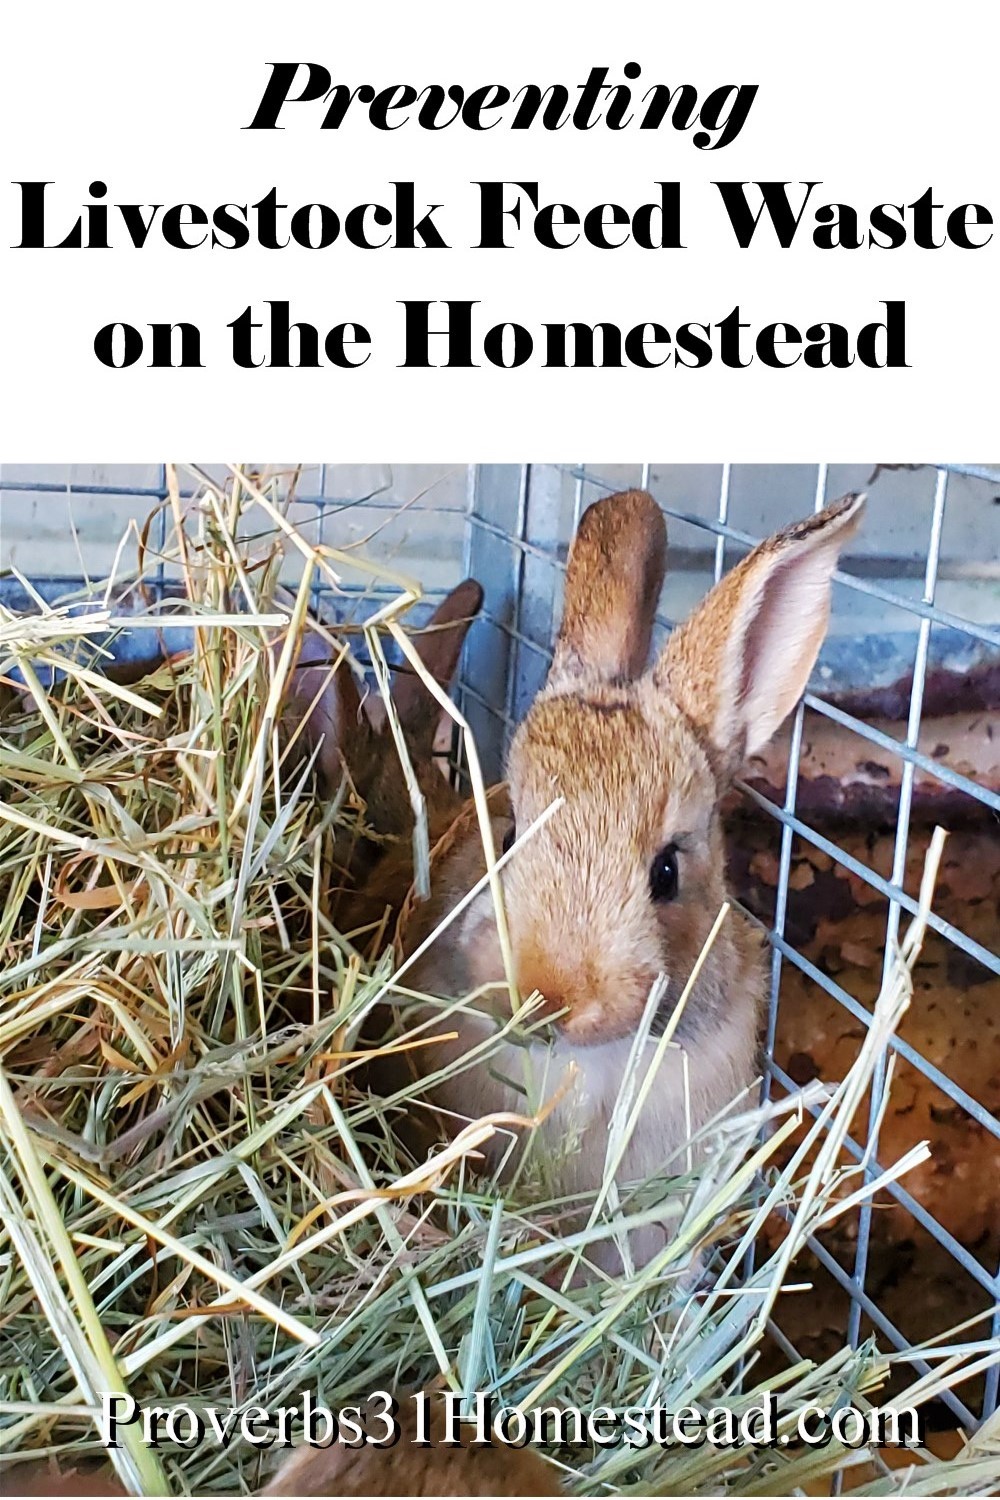
Preventing Livestock Feed Waste on the Homestead
 This post may contain affiliate links. All opinions are my own. Please see FCC disclosure for full information. Thank you for supporting this site!
When raising livestock, feed is the highest ongoing expense homesteaders typically experience. Any time is therefore a great time to assess your feed system - but given the fact that commercial feed costs are currently skyrocketing, now is an especially ideal time to revamp and avoid feed waste wherever possible.
No matter what animals you raise, one excellent place to begin this process is by focusing on just how much food your livestock truly needs. That means doing a little research, either by calling your local Extension Office or by consulting a reliable husbandry guide, such as the Storey's Guides for various livestock. You'll want to know exactly what the nutritional requirements are for each of your animals, as well as how much of that food they need each day.
For example, according to Storey's Guide to Raising Rabbits, per day an adult male rabbit needs 2 or 3 oz. of a feed with 12 - 15% protein, 2 - 3.5% fat, and 20 - 27% fiber. Therefore, instead of free-feeding your bucks, you will likely save on feed by measuring out pellets for each rabbit. As a bonus, you'll avoid having overweight and consequently unhealthy animals. The same principle applies to all livestock. (Bear in mind that pregnant, nursing, or juvenile animals have different nutritional requirements from livestock not in those categories.)
Another important step to take, no matter the animals you raise, is to access whether you are storing feed in a way that minimizes waste. Once opened, bagged feed should be transferred to an air-tight metal or plastic container (like this); this keeps it fresh and prevents wild animals from consuming it. While it's a good idea to keep extra bagged feed on hand, also bear in mind that over time it will lose nutritional value - and eventually will spoil.
Hay should also be stored to carefully prevent mold. Bring it indoors, to a place with good ventilation and no water leaks. (Ideally, it should be stored in a building away from the barn, so that if the hay does mold internally, building up enough heat to spark a fire, it won't kill your livestock. That said, it's okay to have a bale or two kept in the barn, as long as it will be used right away.) Place bales on wooden pallets so they don't wick up moisture from the ground and so there is good airflow around the bales. If you're stacking bales, alternate the orientation of each row; for example, the first row might have the long end of each bale facing you, while the next row will have the short end facing you. This helps increase airflow. If you have round bales, line them up end to end and keep rows a minimum of three feet apart.
If the hay is stored anywhere that's open (such as a carport with three sides or a shed with only a roof), cover the hay with a tarp to prevent sunlight from decreasing the nutrients in the hay, as well as to help keep the hay dry. Just be sure to tarp loosely, or airflow will be reduced, leading to moldy hay.
In addition, it's important to keep barns or any area where you feed livestock routinely clean. Dropped feed attracts rodents, which can harm your livestock while also encouraging rodents to chew into other areas where feed is stored.
Rabbits
If your rabbits dig in their pellets, first make sure you're using J feeders (not bowls) placed at your rabbits' face level; this height makes it difficult for rabbits to dig in their food. Digging in pellets can also be a sign that a doe is pregnant and wants to nest; in such cases, placing a nesting box and hay or straw in her cage will put an end to the digging.

(adsbygoogle = window.adsbygoogle || []).push({});
In addition, if you put treats - things like black oil sunflower seeds and oats - in the pellet feeder, rabbits may dig hoping to find more goodies. Instead, use a separate bowl to feed treats or supplements.
Finally, some rabbits dig out of boredom. Giving toys like fir cones, sticks, pumice stones, and empty toilet paper rolls stuffed tightly with hay can make a big difference in undesirable behavior. And if you have a doe who hasn't been bred recently, her boredom will likely disappear once she becomes pregnant.
Help prevent hay waste among rabbits by feeding from hay bales, rather than from bagged hay that is chopped (and therefore easily falls through the floors of cages). Utilizing hay feeders, attached to the side of the cage, can also greatly reduce hay waste in the rabbitry.
Quail
Coturnix quail are notorious wasters of feed. They love to stick their faces into their pellets or crumbles, then toss around their food. To help prevent this problem, make homemade no waste feeders; they won't truly eliminate all waste, but they will help a lot. You can find many ideas for no waste quail feeders online; typically, they require quail to stick their heads inside a small piece of plastic pipe (or something similar) in order to reach the feed. The quail will still shake feed around, but the feed will land back inside the feeder, instead of on the ground.

(adsbygoogle = window.adsbygoogle || []).push({});
Another useful trick, whether using a no-waste feeder or not, is to place a metal pie plate beneath each feeder to help catch any wasted food. Each day, remove any stray manure in these plates and reuse the feed.
Chickens & Other Poultry
In general, most poultry waste less feed if you give them pellets, rather than crumbles. Like rabbits, chickens and some other poultry will push aside pellets in favor of goodies like sunflower seeds, mealworms, and kitchen scraps - so when you do feed treats, do so in a different, designated feeder or bowl. In addition, placing feeders higher - on bricks or hanging so they are not easy for chickens to scratch in - can help prevent waste.
.jpg) Image courtesy of
Image courtesy of Bosque Village
Chickens and other poultry also sometimes "make trouble" when they are bored, so if you have animals knocking over or digging around in feeders, it's a good idea to give them something else to occupy their time. For example, you could hang vegetables (cabbage is a great choice for chickens) for them to peck at and play with. If your birds are in a run, you might also consider extending it so the poultry have more room to explore.
Horses
For feed or supplements offered in a bucket or tub, invest in a feeder meant to hang from a fence. (Horses often like to paw the ground when feeding and you don't want their legs getting caught in fencing; this is why a bucket meant just for this purpose is better than most homemade contraptions.) Hanging feeders will keep horses from knocking over buckets with their feet, or from nosing around a bowl and knocking it over.
 Photo courtesy of
 Andrew Wilkinson
(adsbygoogle = window.adsbygoogle || []).push({});
Alternatively, you could put a feed bucket inside a car tire. (The bucket needs to fit snugly.) You can also place a horse feeder inside a larger container; for example, a feed bucket inside an empty water trough. The trough should catch most of the feed that otherwise would fall to the ground.
If your horses tend to waste hay, implementing a hay net will help prevent hay from falling on the ground and being trampled. Slow hay nets also help horses take their time eating, which is a great health benefit for them.
Some horses will also drag around hay because they are walking back and forth between their hay and their water source. Moving their water closer to the hay will help limit hay waste.
Another trick is to wet the hay before you feed it to your horses. (This has the added health benefit of helping the hay move steadily through the horses' digestive system.) The easiest way to do this is to put the hay in a tub, then fill the tub with water. Of course, you'll have to dump the entire tub at the end of the day and use fresh water for each feeding.
Goats & Sheep
Don't feed goats hay piled on the ground; most goats will refuse to eat any hay that is close to the soil or is even a little dirty. Instead, use a hay feeder that requires goats or sheep to stick their heads through a hole in the feeder in order to reach the hay. (If your animals have horns, the holes in the feeder should only be large enough for them to get their snout inside; you don't want their horns getting stuck in the feeder). You can also use a hay net, usually designed for horses, to feed hornless goats and sheep.
 Some homesteaders prefer to feed their goats pellets (which are made of compressed hay) because this results in much less waste.
Cattle
According to the Ohio State University Extension Office, ranchers can expect to see 25 - 45% of the hay they feed their cattle go to waste because it falls on the ground and gets trampled. When trying to reduce these percentages, the type of hay bale you choose matters. Large round bales are the most wasteful; expect 45% of the hay to go to waste. Put a round bale in a hay rack, however, and you'll lose considerably less: about 9%. Square bales are the least wasteful; if you put them in a hay rack, you can expect to lose just 7%.
 Photo courtesy of the
Alabama Extension (adsbygoogle = window.adsbygoogle || []).push({});
Also consider changing the surroundings of your feeding area. If the location is well-draining and covered with crushed gravel or concrete, most hay that gets dropped will still get eaten.
If you leave bales in the pasture, you can limit hay waste by only giving cattle access to enough bales for a day or two. Protect the rest with electric fencing.
Another possibility is to grind or chop hay before feeding it to cattle. Try feeding chopped hay in tires so that it does not blow around in the wind.
Pigs
Like horses, pigs will spill feed when they wander off to take a drink. To help prevent waste, keep their water near their feed.
.jpg) Photo courtesy of
Photo courtesy of LadyDragonfly
You could also consider buying an on-demand pig feeder, or making your own low waste pig feeder. For the latter, there are innumerable ideas online (here's just one) but all the best ones involve keeping the pigs heads well inside the feeder and have barriers that prevent pigs from pushing feed outside the trough.
(adsbygoogle = window.adsbygoogle || []).push({});June 15, 2022
Canning Rabbit (or Chicken) - 3 Different Ways! (with Video)
 This post may contain affiliate links. All opinions are my own. Please see FCC disclosure for full information. Thank you for supporting this site!
Canning rabbit is very easy, frees up space in the freezer, and makes for super quick meals. The resulting meat is tender and moist and is perfect for any recipe where you'd use shredded chicken. (And, in fact, you may can chicken exactly as I'm describing in this post, too!) Be sure to watch the video (below), which takes you step-by-step through these processes.
Method #1: Raw Pack
I find this is quickest, easiest method, and my family loves the resulting meat.
1. To each quart jar you'll be using, add an optional 1 teaspoon of canning salt or other non-iodized fine salt. For each pint jar, add an optional 1/2 teaspoon salt.
2. Pack jars with raw, deboned meat, leaving 1 to 1 1/4 inch headspace. Do NOT add any liquid. (The meat will produce liquid during the canning process.)

3. Carefully clean the jar rims, add lids, and put on screwbands. Place jars in a pressure canner. Secure the lid.
4. Turn the heat to medium high and wait for stream to begin escaping the pressure canner's vent. Allow the steam to escape for 10 minutes.
5. Place the rocker on top of the vent and allow the pressure to come to 11 lbs. (Click here for important info on adjusting processing according to your altitude.) If using a rocker gauge, allow it to begin moving. Adjust the heat in small increments as necessary, to ensure the pressure remains correct and the rocker is moving at the correct speed. (Refer to your canner's manual for more complete information.)
6. Begin timing. Process pints for 75 minutes and quarts for 90 minutes.
7. When the processing time is up, turn off the heat and allow the pressure canner to naturally come to zero pressure.
8. Remove the rocker and wait 2 minutes.
9. Remove the canner lid and wait 10 minutes.
10. Remove jars from the canner and allow them to sit untouched overnight.
.jpg) 11. In the morning, check the seals on the jars, remove the ring bands, and wash jars before putting them in the pantry.
11. In the morning, check the seals on the jars, remove the ring bands, and wash jars before putting them in the pantry. Method #2: Hot Pack (without bones)
This method is a bit more fussy, but some people prefer the texture of the meat when it's canned this way.
1. The day before canning, partially cook a whole rabbit. It should be about 2/3r
ds cooked. In my Instant Pot, I cook for about 7 or 8 minutes. You may also boil, steam, or bake the meat. Do NOT fully cooked meat.
2. Allow the meat to cool until it's easy to touch, then remove the meat from the bones.
3. In a pot, heat chicken or rabbit stock. (They are interchangeable. If using homemade stock, be sure to allow it to sit in the refrigerator overnight, then scrape the fat off the top the next day.) Add the partially cooked rabbit meat and heat to a simmer.
4. Into hot quart jars, add optional canning salt (or other non-iodized, fine salt): 1 teaspoon for quarts and 1/2 teaspoons for pints.
4. Using a slotted spoon to remove the meat from the pot, pack jars with partially cooked meat, leaving 1 1/4 inch headspace.
.jpg) 5. Pour hot stock over the meat, retaining 1 1/4 inch headspace. Bubble jars and adjust headspace, if needed.
5. Pour hot stock over the meat, retaining 1 1/4 inch headspace. Bubble jars and adjust headspace, if needed. 3. Carefully clean the jar rims, add lids, and put on screwbands. Place jars in a pressure canner. Secure the lid on the pressure canner.
4. Turn the heat to medium high and wait for stream to begin escaping the pressure canner's vent. Allow the steam to escape for 10 minutes.
5. Place the rocker on top of the vent and allow the pressure to come to 11 lbs. (Click here for important info on adjusting processing according to your altitude.) If using a rocker gauge, allow the gauge to begin moving. Adjust the heat as necessary, to ensure the pressure remains correct and the rocker is moving at the correct speed. (Refer to your canner's manual for more complete information.)
6. Begin timing. Process pints for 75 minutes and quarts for 90 minutes.
7. When the processing time is up, turn off the heat and allow the pressure canner to naturally come to zero pressure.
8. Remove the rocker and wait 2 minutes.
9. Remove the canner lid and wait 10 minutes.
10. Remove jars from the canner and allow them to sit untouched overnight.
.jpg) 11. In the morning, check the seals on the jars, remove the ring bands, and wash jars before putting them in the pantry.
11. In the morning, check the seals on the jars, remove the ring bands, and wash jars before putting them in the pantry.Method #3: Hot Pack (with bones)
With rabbit, you cannot get the entire animal into canning jars with the bones still in place. However, the front legs fit into pint jars and quart jars will hold back legs, too. It's okay to mix bone-in meat with deboned meat, but be sure to use the longer processing time called for with partially cooked rabbit without bones (above). Do NOT mix partially cooked and raw meat in the same jars.
1. Partially cook a whole rabbit. It should be about 2/3rds cooked. In my Instant Pot, I cook for about 7 or 8 minutes. You may also boil, steam, or bake the meat. Do NOT use fully cooked meat.
2. In a pot, heat chicken or rabbit stock. (They are interchangeable. If you use homemade stock, be sure to allow it to sit in the refrigerator overnight, then scrape the fat off the top the next day.) Add the partially cooked rabbit meat with the bones in and heat to a simmer.
4. Into hot quart jars, add optional canning salt (or other non-iodized, fine salt: 1 teaspoon for quarts and 1/2 teaspoons for pints.
4. Pack jars with partially cooked meat, leaving 1 1/4 inch headspace.
5. Pour hot stock over the meat, retaining 1 1/4 inch headspace. Bubble jars and adjust headspace, if needed.
3. Carefully clean the jar rims, add lids, and put on screwbands. Place jars in a pressure canner. Secure the lid on the pressure canner.
4. Turn the heat to medium high and wait for stream to begin escaping the pressure canner's vent. Allow the steam to escape for 10 minutes.
5. Place the rocker on top of the vent and allow the pressure to come to 11 lbs. (Click here for important info on adjusting processing according to your altitude.) If using a rocker gauge, allow the gauge to begin moving. Adjust the heat as necessary, to ensure the pressure remains correct and the rocker is moving at the correct speed. (Refer to your canner's manual for more complete information.)
6. Begin timing.Process pints for 65 minutes and quarts for 75 minutes.
7. When the processing time is up, turn off the heat and allow the pressure canner to naturally come to zero pressure.
8. Remove the rocker and wait 2 minutes.
9. Remove the canner lid and wait 10 minutes.
10. Remove jars from the canner and allow them to sit untouched overnight.
11. In the morning, check the seals on the jars, remove the ring bands, and wash jars before putting them in the pantry.
June 6, 2022
Canning Q & A: 2022

This post may contain affiliate links. All opinions are my own. Please see FCC disclosure for full information. Thank you for supporting this site!
It's been a few years since I published a Canning Q&A, but this year, with so many canning newbies out there, I think it's time to revive the tradition! (You can read my Canning Q&A posts from previous years here: 2010, 2011, 2012, 2013.)
Q: Please explain the difference between a water bath canner and a pressure canner. Do I need both?
A: A water bath canner (sometimes called a boiling water canner) is used for high acid foods such as fruit, jams/jellies, and pickles. It is really just a big pot (with a rack in it to prevent canning jars from touching the bottom) with a lid. Water bathing is an excellent place to begin when you're new to canning.
A pressure canner (which is different from a pressure cooker) is for low acid foods such as meat and non-pickled vegetables. These foods provide an ideal environment for botulism spores to grow and the temperature reached by boiling water cannot kill those spores; no matter how long you boil, the spores survive. A pressure canner reaches temperatures above boiling water, which is why low acid foods can only be safely canned in a pressure canner.
So...if you want to can low acid foods, you definitely need a pressure canner. However, it is possible to use a pressure canner as a water bath canner (learn more about that here) as long as the water in the canner can go a couple of inches over your jars. The downside to this method is that pressure canners tend to be heavy and take longer to reach a boil.
Q: Is it true that you shouldn't boil canning lids? My mother always boiled them.
A: New single use canning lids are made with a different sealing compound than they used to be. Boiling or simmering them will actually increase the risk of jars not sealing. Modern single use lids should not be heated before placing them on jars.

(adsbygoogle = window.adsbygoogle || []).push({});
Q: Is it true that I don't have to sterilize jars for canning?
A: Yes, it's true! Once upon a time, some canning recipes called for processing times that were under 10 minutes. That is no longer the case (because now we know this increases the chances of food borne illness and mold that can cause botulism spores to grow). All tested safe canning recipes now call for at least10 minutes of processing time - and therefore sterilizing jars before filling them is no longer necessary.
Q: How long will my home canned foods last?
A: A very, very long time! As long as you used a tested safe recipe and method and the seal on the jar remains intact, that food is safe to eat. After about a year, the food will slowly begin to lose nutrition and flavor...but I have to tell you, I've eaten decades old home canned food and could not tell it hadn't been canned yesterday! For more complete information on this topic, head over to my post on "How Long Do Home Canned Foods Last?"

(adsbygoogle = window.adsbygoogle || []).push({});
Q: Does my canner have to be full?
A: If you don't have enough jars of food to fill your canner, you can definitely still process the jars. However, studies show that not having the canner full of jars can affect heat distribution, which in turn could potentially lead to pathogens not being killed. So in such instances, it's smart to go ahead and fill jars with water (no lids needed, unless you want canned water on hand) and add them to the canner before processing.
Q: I want to can jam in pint sized jars. How long should I process them?
A: There is no tested safe way to can jam in pint sized jars. In fact, the rule in canning is that you may never put the food in a jar that is larger than what the recipe calls for. This is because there is no way to know (without lab testing) how long you'll need to process the jar so that all the pathogens that may make you ill are killed.
(On the other hand, you may go down on jar sizes. In other words, if the recipe calls for pint jars and you want to use half pint jars, that is fine. But you must use the same processing time as the pint sized jar called for. As you can imagine, in some instances, this may result in a loss of quality. For example, fruit may come out mushy.)
Q: I am trying to reduce sugar in my family's diet. Can I use the sweetener of my choice instead of the called-for sugar?
A: Not necessarily. The only artificial sweetener that is approved for canning is Splenda. For health reasons, I hope you will avoid man-made sweeteners. Of the natural low carb sweeteners, only Stevia is approved for canning. I do know people who use, say, monk fruit or erythritol in canning, but it has not been tested as safe. You can learn more about why these sweetener may not be safe here. Also, if you are making jam/jelly, you will need to use a pectin that doesn't require sugar in order to gel; I recommend Pomona's Pectin. Learn more about low- or no-sugar canning here.

(adsbygoogle = window.adsbygoogle || []).push({});
Q: I have a huge can of tomatoes that I bought from Costco. Can I re-can them in smaller jars?
A: It's important to understand that the density of food changes once it is canned.This means that if you re-can food, there may be spots in the jar that are not adequately heated through to kill pathogens. The food will also be lower quality because it will become more mushy and will lose more nutrients. In short, this is a "no."
Q: I know I can stack jars in my pressure canner, but can I stack jars in my water bath canner?
A: Yes. But remember that you're going to need a rack between the layers of jars. A water bath canner rack likely won't work, because the handles will get in the way of the canner lid. But a pressure canner rack will work as long as it fits inside your canner. Also bear in mind that the water must cover your jars by at least a couple of inches. Not all water bath canners are tall enough for a double stack of jars to fit.
 Q: I am a rebel canner. I prefer to use methods our ancestors used for centuries. Science is always changing; why should I trust it?
A: First, for those who don't know, "rebel canners" (sometimes called "cowboy canners") basically don't follow any of the scientific rules for canning. They tend to water bath everything, sometimes for hours, and insist they are doing things the way our ancestors did.
However, home canning isn't centuries old. While canning was invented in 1795, it was almost never put into practice, and when it was, tin cans were used. In 1858, the mason jar was patented, but it wasn't until the 1880s that home canning become common...and even then, only high acid foods were canned at home. (I have a large collection of antique cookbooks and household guides that back this assertion up.) Pressure cookers were invented in 1679, but were extremely dangerous and not remotely common. Pressure canners were widely available by the early 1900s, and were always touted for home canning low acid foods.
I agree that our knowledge of science is always changing, but we are talking very basic stuff here: Did the process kill pathogens or not? There's nothing to get confused about there.
 I will never convince a rebel canner to mend her ways, but I can encourage those who are new to canning to stick to the methods and recipes published by Ball and The National Center for Home Food Preservation. These recipes have been tested for safety.
And for those who argue that "Grandma always did it and we never got sick:"
1. This is like saying, "I drive home drunk every night and have never gotten into an accident; therefore, drunk driving is safe."
2. You probably did get "the stomach flu" now and then. (Not every food borne illness is botulism, thank goodness.)
3. All the most recent cases of botulism poisoning from home canned food have been from reel-canned foods. Please don't risk the health of others; children and the elderly are most at risk.
To learn more about this topic, check out "When Home Canned Food Goes Bad" and "What You Need to Know about Home Canning and Botulism."
June 2, 2022
Radish Recipe Roundup! More than 13 Fantastic Ways to Eat Radishes
 The humble radish isn't appreciated nearly enough. It grows extremely easily from seed, is quicker than Speedy Gonzalas (most radishes are ready to harvest in about 25 days), and is one of the first crops available in the spring. We should celebrate it more, grow it more, eat it more!
 Don't like the peppery flavor of radishes? No worries! There are plenty of ways around that! Some radishes don't have that peppery flavor at all (try daikon or sweet varieties), and even those classic red peppery radishes can be eaten in such a way that their "bite" completely disappears.
Here are some of my favorite ways to celebrate radishes each year:
1. Turn 'em into dip.
This super simple recipe combines radishes and cream cheese to make a zesty dip for chips, crackers, cucumber slices, or even pork rinds. This is a great treat for movie night or for when you have guests over.
2. Turn 'em into salsa.
Who doesn't love fresh salsa? But you can make yours more unique by adding radishes, as in this recipe from Delish.3. Use 'em in beef stew.
This amazes people. I take ordinary, peppery radishes and pop them whole or halved into a soup or stew, then pressure cook. (You can use a slow cooker or the stove top, if you prefer.) When the meal is done cooking, the radishes don't taste AT ALL peppery! Click here for my beef stew with radishes recipe.
 Beef Stew with Radishes.
4. Roast 'em.
I do love me some roasted veggies, and radishes are a good choice for this cooking method. Martha Stewart Living gives a good recipe for this simple-to-create side dish.
5. Make "Loaded Radishes."
It's true that radishes are often used as a low carb alternative to potatoes...and this recipe by That Low Carb Life is pretty darn tasty. I mean, what doesn't taste great with cheese, sour cream, and bacon slathered on top? Don't expect the radishes to taste exactly like potatoes and remember that the longer you cook the veg, the less peppery they will be.
 "Loaded" radish recipe by That Low Carb Life.
(adsbygoogle = window.adsbygoogle || []).push({});
6. Throw 'em in the air fryer.
Air frying radishes is similar to roasting radishes, and the resulting food has just a bit of peppery flavor left behind. You can air fry radishes halved or quartered, or you can make them into radish chips. Or, for a special treat, try Pinch of Yum's cinnamon sugar radish chips.
7. Turn 'em into "hashbrowns."
Let's be clear: These do not taste like potato hash browns. But I hear they DO taste great! (They include eggs, which I SADLY cannot tolerate, so I can not offer my personal opinion on this recipe by Low Carb Yum.) That said, I sometimes grate radishes and saute them in a well oiled pan. Season with sea salt and pepper and garnish with some chives and you've got a yummy side dish.
 Radish "Hashbrown" recipe by Low Carb Yum.
8. Braise 'em.
Braising can make foods taste a little bland...but it does a good job of taking the bite out of radishes, if you don't like their peppery flavor. The trick is to add lots of flavor back to the dish. This recipe with bacon, butter, shallots, and balsamic vinegar is just the thing!
9. Make 'em into Slaw.
Take boring old coleslaw and turn it into something special with the addition of radishes, as shown in this recipe.
10. Grill 'em.
This method still keeps a bit of that classic radish bite. I Breathe I'm Hungry has a delicious butter and herb recipe you definitely should try.
 Grilled Radishes by I Breathe, I'm Hungry.
(adsbygoogle = window.adsbygoogle || []).push({});
11. Pickle 'em.
It's super easy to make refrigerator pickles with radishes. These make a tasty snack, or an addition to a salad or sandwich. I use the recipe over at Simply Delicious, but omit the sugar. You can also ferment radishes, which gives them real pickled flavor that's packed with probiotics.
12. Eat 'em buttered.
This is a very French way of eating radishes, especially breakfast radishes: Slice the radish, salt it with good sea salt, and smear it with good butter. You'll be surprised how the butter removes the "bite" in table radishes!
11. Saute 'em.
Radishes. Bacon drippings. Shallots. Thyme. Garlic....oh my. Just try it. Sauteed radishes also make a great potato substitute in breakfast hash. Use this recipe for inspiration.
12. Don't forget radish leaves!
While radish leaves can seem too prickly to eat, those prickles disappear once they are cooked. Try sauteing them like any other green, or turn them into soup or pesto. You can even use them in place of spinach in a quiche.
13. Radish seed pods are yummy, too!
If you leave the radishes in the garden too long and they develop seed pods - no worries! Just eat the seed pods!
Finally, don't forget to check out the radish recipes in my book A Vegetable for Every Season!

* Cover image courtesy of OakleyOriginals.
(adsbygoogle = window.adsbygoogle || []).push({});
May 26, 2022
Spring on the Homestead
 A few poppies I planted this year.
"So if you faithfully obey the commands I am giving you today—to love the Lord your God and to serve him with all your heart and with all your soul— then I will send rain on your land in its season, both autumn and spring rains, so that you may gather in your grain, new wine and olive oil. I will provide grass in the fields for your cattle, and you will eat and be satisfied."
_____________________________
In the six springs we've experienced on this homestead, this spring has been - by far - the rainiest and coldest. In fact, it hasn't felt like spring at all until the past couple of weeks, when the sun blessedly returned and a little warmth started creeping into our days.
All that rain slowed many of our spring plans, but we are catching up. One of our goals was to get the new garden spot going before spring planting. I'm thrilled to say that is DONE! I wrote all about how we created an easy no-dig garden, plus put up deer fencing, right here.
 The new garden.
The garden isn't truly done, of course; what garden ever is? But I have food growing and know that, with the Lord's blessing, I should be able to grow most of our vegetables this year. I've planted Legend tomatoes, and hope to plant more before June. I also have some San Marzano paste tomato seedlings, but every time I plant them out, they die. Previously, I've only grown them in the greenhouse, so it may be they are extra sensitive to cold. I will try planting some more outside again soon.
I have red yard long beans and cucumbers beginning to sprout under the cattle panel trellis. I'm weirdly excited about both of these. Even though I don't eat pickles, I'm busy researching variations on cucumber pickles that I hope to can for the rest of the family. I've wanted to grow yard long beans for many years; I even tried them twice in large pots. Both times were a failure. The seeds I have are left over from our suburban homestead (and, even though I know I should have, I didn't test them for viability before planting). I was worried they could be too old to germinate, but happily my worries were for naught.
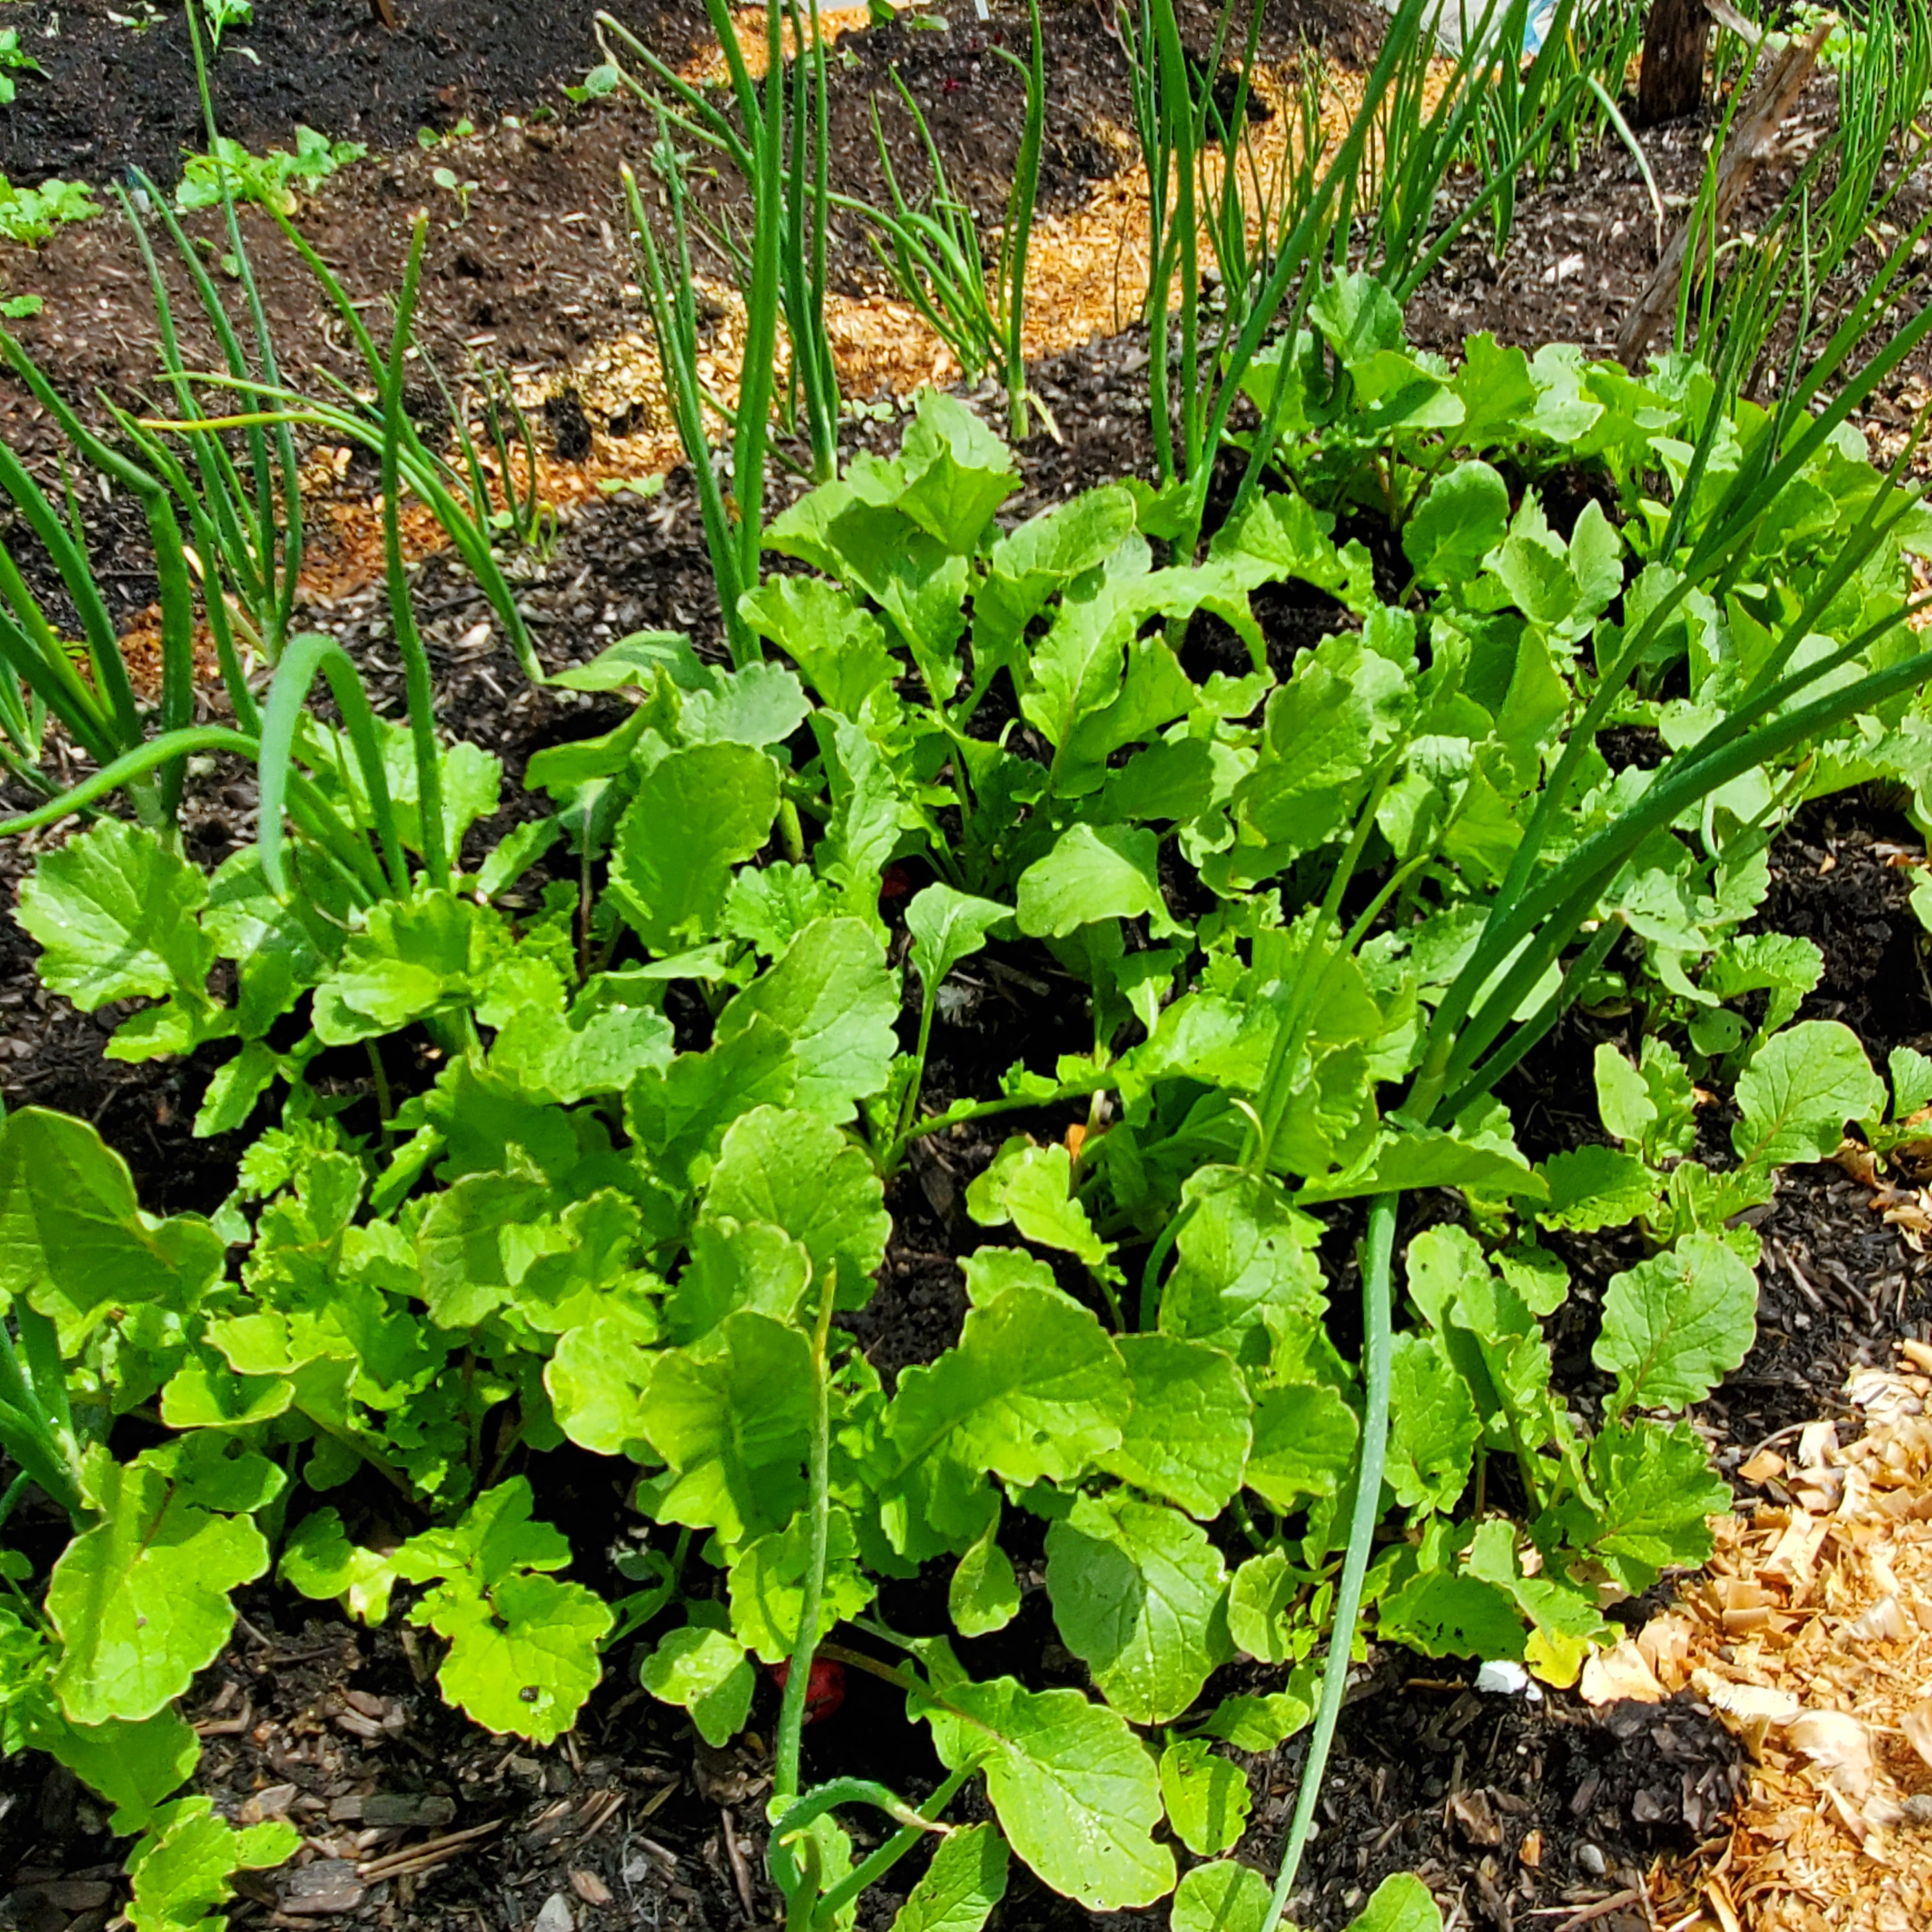 Onions and radishes.
 Cabbage and beets.
I also planted a single pumpkin seedling in the new garden. I've always wanted to grow fall pumpkins for my children, but never had the space in my garden. Sadly my kids are really too old to appreciate picking out pumpkins from our own garden now, but...I planted a pumpkin plant, anyway.
 Pumpkin.
 Other things I've planted in the new garden include: cauliflower, broccoli, collards, beets, kale, butternut squash, yellow summer squash, cabbage, Brussels sprouts, turnips, onions, bush green beans, and radishes. Radishes, which grow so very quickly and reliably, have made up our first several harvests from the new garden.
Another project we wanted to accomplish this spring was a deer fence for the asparagus bed. When I planted that bed several years ago, we didn't have the deer problem we have now. (The difference? Noisy neighbors who were up all night, we think. Now those neighbors are gone.) Sadly, during year three of growing asparagus (the first time you can really get decent a harvest from them), the deer swooped in. I don't know if the deer killed most of the asparagus plants or not - I just know I rarely see asparagus shoots, though I sometimes see the plant chomped off close to the ground. Next year I'll be able to assess the damage and start over, if need be.
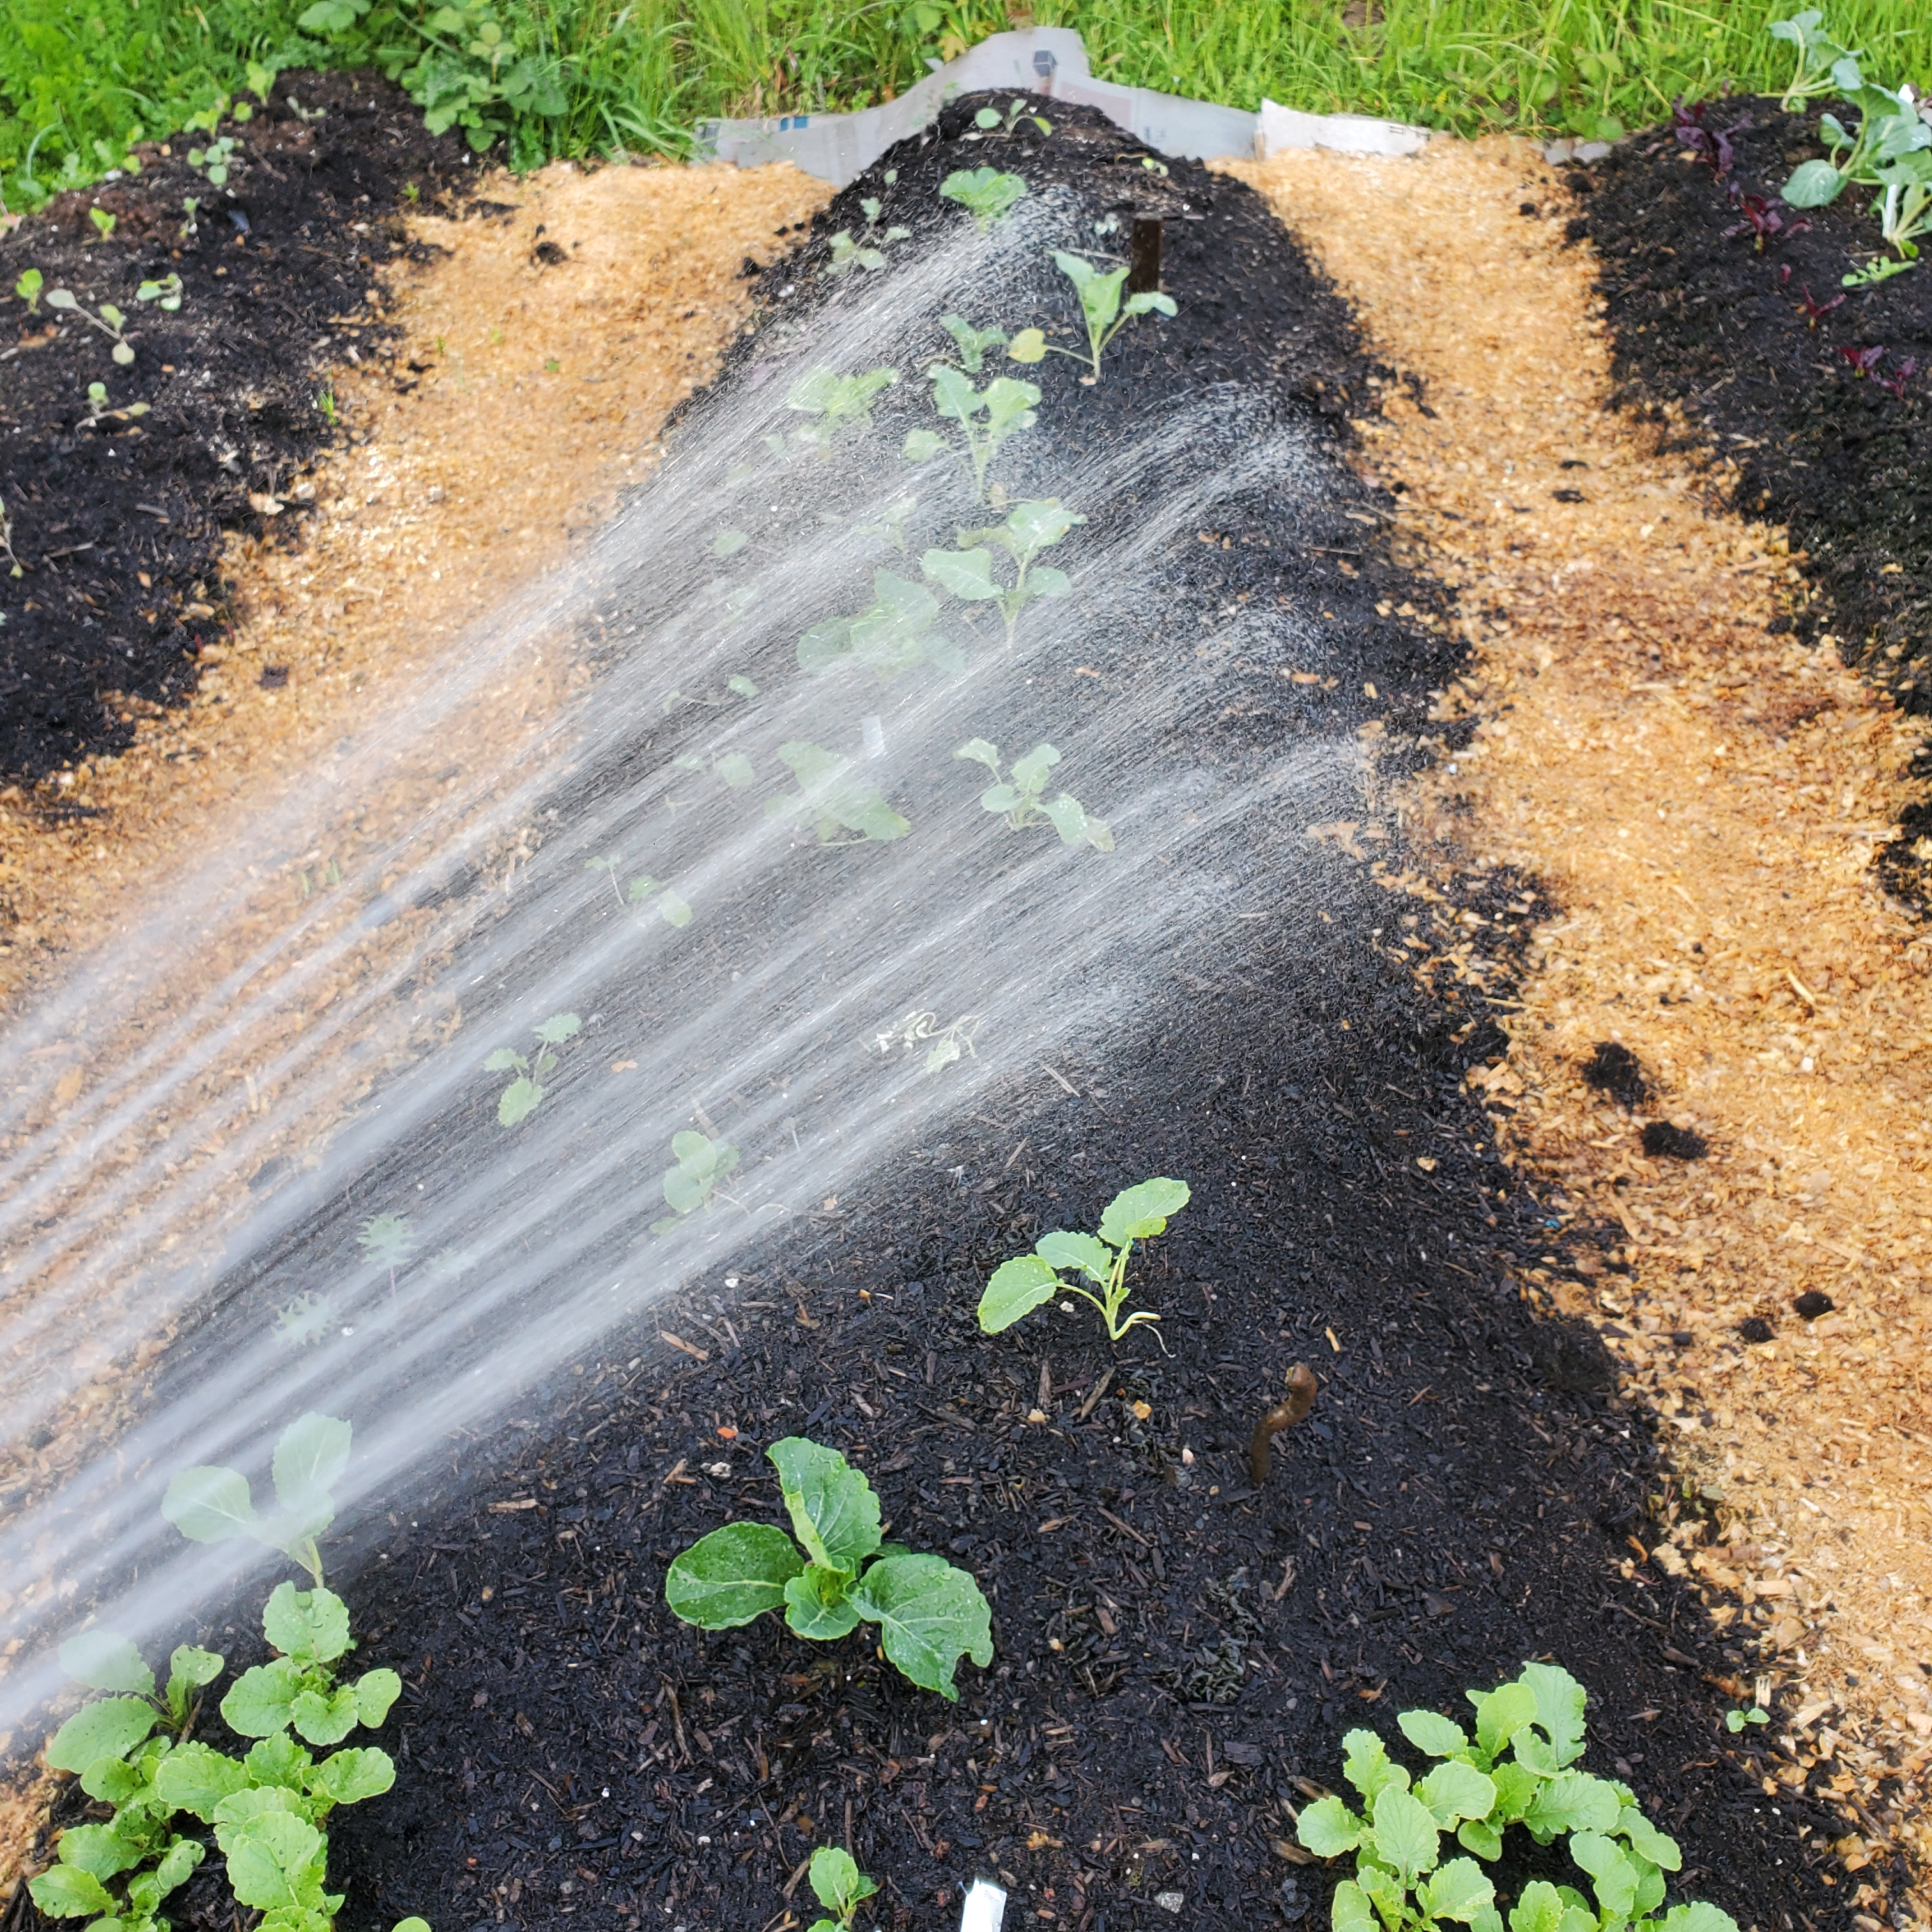 Watering the new garden.
I also have tomatoes, winter squash, and cucumbers in the greenhouse, as a hedge against failure in the new garden bed. I have grown Legend tomatoes outside before, and they do okay in our climate, though not quite as well as in the greenhouse. On the other hand, I've not had success growing winter squash outside on our mountaintop homestead - though this year, I planted seeds way early and transplanted seedlings into the garden. We'll see if that helps. I've also only grown cucumbers in the greenhouse, so this year, I'll get to see if they do well outside, too.
I planted some herbs (mostly parsley - for the rabbits - and chamomile) this year, as well as many flowers in the containers I'd previously used for vegetables. The flowers are things I think the deer will leave alone - mostly dahlias, sunflowers, and poppies. I also have zucchini seeds sprouting in our front yard; the deer have left it alone in the past. Let's pray they continue to ignore it.
 The zucchini is popping up!
 Artichokes.
 Future blueberries.
 Our first harvest of 2022.
Speaking of rabbits, ours are happily mating and producing babies. Currently, Fiona is pregnant and due quite soon. Bluebelle is nursing kits. and Clydine is waiting until there are open cages available so she can mate and have a litter. Because of the rising cost of commercial feed, I'm getting more serious about giving the rabbits fresh greens from our property. Each day, I fill a bucket with weeds and plants I know are safe for them, and bring the forage to the buns. They love it!
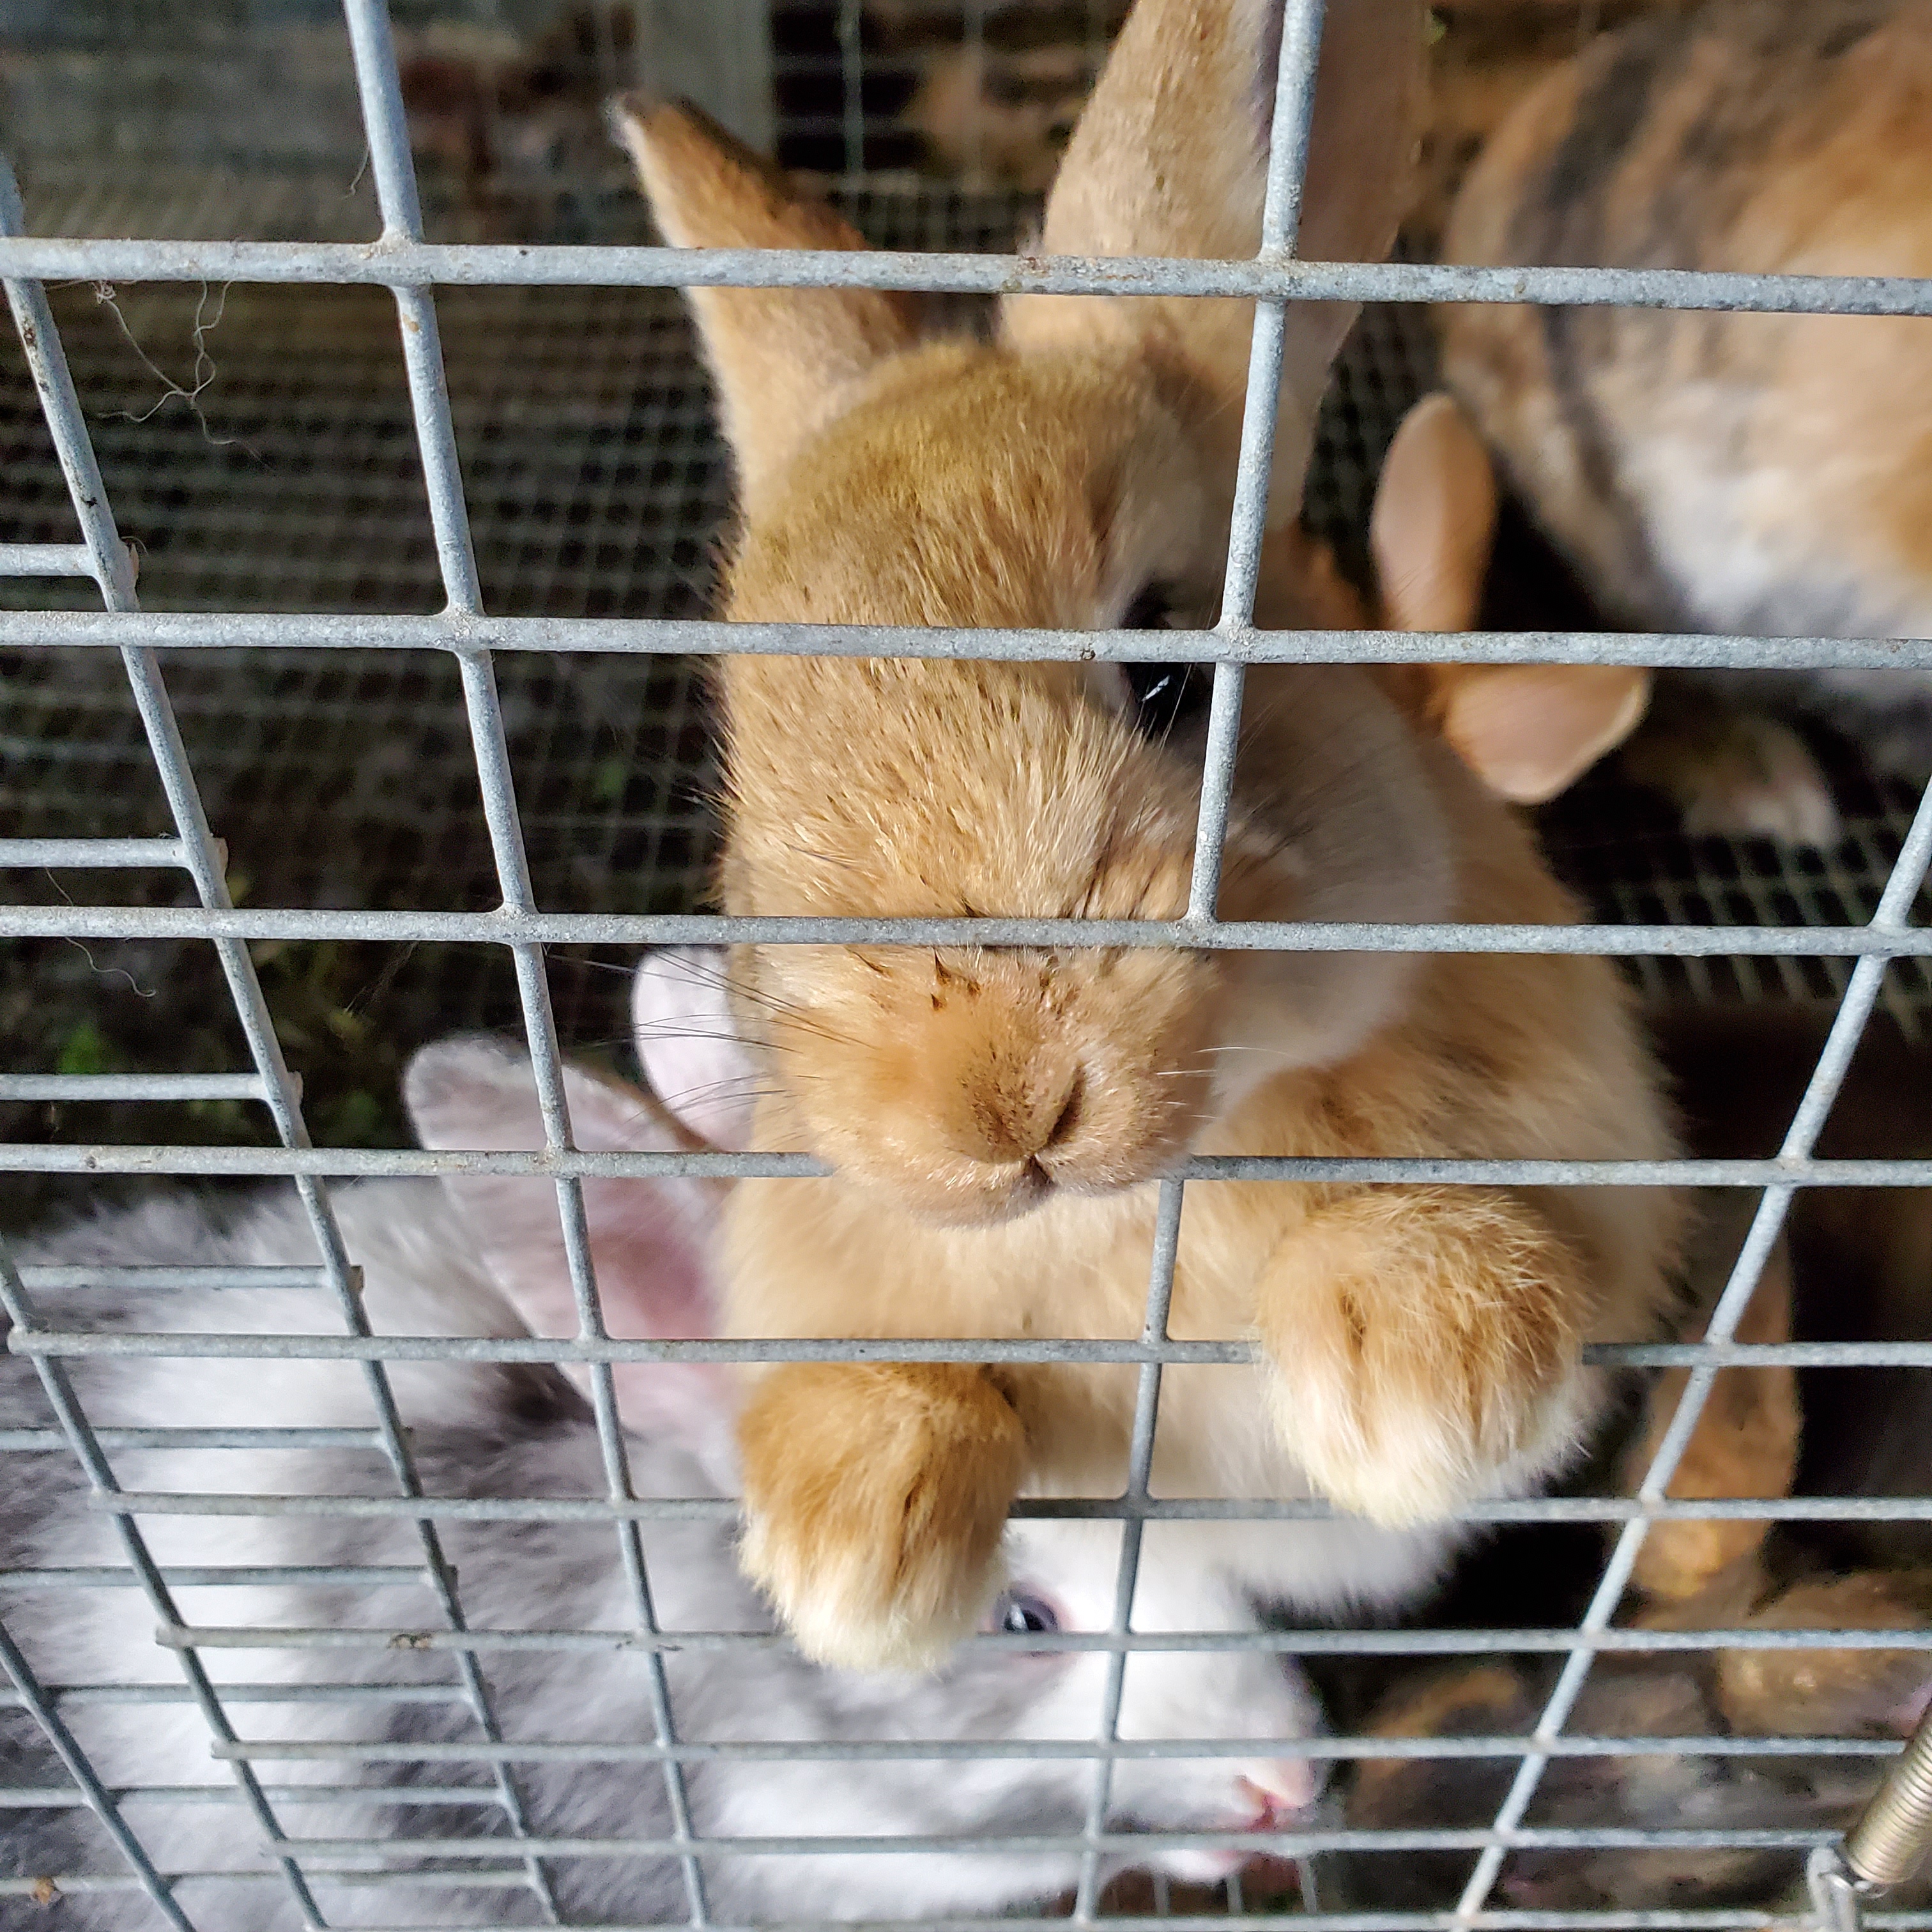
 Fiona and her kits.
I've taken to calling the quail kamikazes. Yes, they have their peaceful, quiet moments when they make cooing sounds and cuddle up together in their dirt baths. But most of the time, they act like crazy little meth-addicts. It always amazes me that one moment, they can be a happy flock, and the next moment, they peck out a hen's eyes or scalp each other. It's important to me to be real with you - and I confess, I do not particularly like raising quail. BUT they provide easy, quick meat...so they stay on our homestead. (You can read more about the benefits of raising quail here and here.) As I type, some just-hatched quail chicks are chirping in the incubator. Some are for our neighbor, but we'll keep a few for ourselves, too.
 A just-hatched quail chick.
Our chicken flock has decreased again. I had one hen die suddenly overnight. I have no idea why, but I do know it was not bird flu. Although the deadly strain of avian flu has been found in wild ducks nearby, so far my flock has survived. (Learn the very clear signs of avian influenza here.)

 It feels so good to be eating off our homestead more completely again!
And I haven't even mentioned other spring chores, like mowing, weed whacking, pruning, mowing some more, weed whacking some more, mowing some more...Keeping the wilderness at bay is difficult where we live, and never more so than in the spring. But it sure is beautiful on our mountaintop homestead. Right now we are enjoying the first flush of spring (even though spring is nearly over): The wild foxglove and daisies are in bloom, I see clumps of wild iris in the mountains around us, and many of the wild berries are flowering, too. But the thing I'm most thankful for is the return of blue skies.
 Salal berry blooms.
May 5, 2022
5 Myths about the Bird Flu
 If you follow along on this blog's Facebook page, you know I've been posting news stories about avian influenza. My goal is not to spread fear, but rather to help you prepare in case bird flu comes to your area. Increasingly, though, I've been seeing push back against info on avian flu. To a certain extent, I understand where this is coming from, but if you take the time to research the topic a little, I think you'll find a lot of what you're hearing on the Negative Nelly side of things is myth, not fact. Here are some examples.
Myth #1: The bird flu is fake.
Well, history proves this myth completely wrong. The truth is, the avian flu has been around for a long time. In 1878, the "fowl plague" struck farms; scientists now believe that was what we now call avian influenza. Then in 1924, the bird flu hit American farms again, and then, more famously in 1983. Subsequent outbreaks have occurred more and more frequently.
Bird flu is carried and spread by wild birds (especially ducks), which means natural bird migration spreads the disease easily. Some scientists believe the popularity of Asian poultry markets, which grew rapidly starting in the 1970s, also helped speed the spread of the disease. Like other types of flu, avian influenza is spread by bodily secretions, including feces and nasal secretions.
What may cause confusion, however, is that there are at least two types of bird flu. "Low Pathogenic" (LPAI) makes birds ill, but doesn't kill them. Birds infected with LPAI may appear tired, may eat less, and their egg production will drop. "Highly Pathogenic" (HPAI), however, is another story. It has a mortality rate of around 90%, killing birds within 48 hours. If HPAI hits your flock, you will know without question that something is seriously wrong. See myth #3 for a homesteader's experience with this.

(adsbygoogle = window.adsbygoogle || []).push({});
Myth #2: The government is testing flocks using inaccurate testing procedures.
The government is not randomly testing homestead and backyard flocks. Even if they wanted to, they don't have the manpower to do so. Officials only test homestead birds if a homesteader calls them for help - which likely only happens if homesteaders experience a rash of suddenly dead birds.
Even if the testing procedures that officials used were inaccurate, homesteaders can easily see whether their birds have HPAI. Symptoms include:
* A head with a blue appearance.
* Unusually wet eyes.
* Flock huddling and ruffled feathers.
* Fluid in the comb and wattles.
* Coughing.
* Bleeding of the legs under the skin.
* Sudden death.
 Image courtesy of
 cuatrok77.
(adsbygoogle = window.adsbygoogle || []).push({});
Myth #3: The government is swooping in and destroying flocks without permission.
I have found exactly zero cases of this happening. In fact, I recommend you read blog posts from homesteaders who've experienced bird flu on their land. For instance, Kirsten Lie-Nielsen, of Hostile Family Farm wrote the following:
"I did not want to [call the USDA]...I had read it would mean months not being allowed in my barn - where my goats and sheep live. I was worried they’d just swoop in with hazmat suits and no bedside manner. But they were extremely accommodating. They do not euthanize any birds until it is confirmed the disease is avian flu (and if a different disease is found, they’ll talk you through treatments). They ask you to quarantine poultry equipment and take basic hygiene steps, but are deeply respectful of your property and space, and do not make any rules about what you can or cannot do on your property. They answer any questions or concerns you may have, if you’re freaking out about any associated health risks or your other animals, they are veterinarians who will talk you through it. They also offer compensation for your flock, which may sound a bit tawdry but if your birds are a source of income for your farm that’s going to be an vital salve on the wound of losing your poultry." (Read her entire post here.)
 Image courtesy of
 Matt Tillett.
(adsbygoogle = window.adsbygoogle || []).push({});
Myth #4: There is nothing you can do to prevent bird flu from touching your homestead.
If all the CDC recommendations are followed on your homestead, it's unlikely your birds will catch avian flu. However, I doubt most homesteaders will want to go to the measures the government recommends. These include:
* Not feeding any wild birds or having ponds that attract wild waterfowl.
* Not free-ranging birds.
* Keeping birds in a well-covered run or inside a building.
* Having clothing and shoes you ONLY wear for working with your birds.
* Having a shoe station where you disinfect your shoes before and after visiting your birds.
* Not allowing any visitors to your flock. Not taking birds to any shows or fair events. Not visiting birds at show or fair events. Not visiting other people's birds on their homesteads or farms.
* Not adding any birds to your flocks, or quarantining new birds for 30 days.
* Keeping different types of flocks separate. (Turkeys separate from chickens or quail separate from ducks, for example.)
* Placing bird manure in its own compost heap and letting it sit until the pathogens are dead. Bird flu stays alive in feces for 100 days. Do not handle un-aged poultry manure with bare hands.
* Handling sick birds only with protective gear (gloves, medical mask, eye protection) and washing your hands thoroughly afterward.
 Image courtesy of
 Marco Verch.
(adsbygoogle = window.adsbygoogle || []).push({});
Myth #5: The bird flu is deadly to humans.
Avian influenza rarely affects humans - and in the rare instances when it does, symptoms are usually mild. The very first human case in the U.S. was reported on April 28, 2022; the patient's only symptom was fatigue. The human in question had been culling birds infected with avian influenza at a commercial poultry establishment.
Human deaths from avian influenza are associated with the Asian lineage of the disease, among people in direct contact with infected poultry. Scientists don't have an exact number of human deaths, but worldwide everyone agrees it is under 20 people, total.
Conclusion
Instead of being afraid of avian influenza - or being in denial about it - smart homesteaders should have a plan in place in case the bird flu reaches their area. A simple way to help avoid the disease from reaching your flock is
simply to house your birds indoors, for example, and have a set of clothes and shoes you only wear when tending your flock.
 Image courtesy of
 Rodney Campbell.
*Title image courtesy of the CDC.


