
Kristina Seleshanko's Blog, page 2
December 4, 2024
From Scratch, Healthier Marshmallows
 This post may contain affiliate links. As an Amazon Associate, and at no cost to you, I earn from qualifying purchases made through some links. Please see FCC disclosure for full information. Thank you for supporting this site!
Not unlike a lot of other moms, I began my journey into clean, healthy food when my children were little. I recall wanting to make marshmallows at home; they are not something my family eats frequently, but my children do love them in my homemade hot chocolate, come Christmastime. Yet I was also tired and overwhelmed, I felt I didn't have the time or energy to make marshmallows from scratch. So, when I could, I bought expensive organic marshmallows online. Fast forward to today. My kids were having their seasonal hot chocolate - but there were no marshmallows. I'm now older, and therefore more tired, but right at this moment, I'm less overwhelmed. So I tried making them at home.
Friends! It was so easy! And it didn't require much time at all! In fact, I'm a little mad at myself for not trying this sooner.
Now, all this said, I would not call these marshmallows healthy. They are basically just sugar. (Even if you use honey instead of granulated sugar, marshmallows are still just sugar.) But marshmallows made with this recipe do not contain the dubious ingredients of store bought marshmallows.
For example, Jet-Puffs are primarily made with corn syrup (which is fructose, a simple sugar linked to gout, fatty liver disease, diabetes, etc., plus it's made from bio-engineered corn). They also contain modified cornstarch (bio-engineered), dextrose (a highly processed form of sugar), beet sugar (bio-engineered), plus tetrasodium pyrophosphate, artificial dye, and artificial flavors. On the other hand, this homemade version is pretty darn clean. (But if you'd like to attempt a sugar free version, I encourage you to try this recipe from Wholesom Yum.)
From Scratch, Healthier Marshmallows
2 tablespoons gelatin (I use Great Lakes brand)
1 cup cold water, divided
2 cups granulated cane sugar (non-cane sugar is made from bio-engineered beets)
about 1/2 cup powdered cane sugar (see note**) or arrowroot powder
1/4 teaspoon sea salt
2 teaspoons real vanilla extract
Olive oil (or other neutral-tasting oil)
NOTE: ** Store bought powdered sugar usually contains bio-engineered cornstarch. To avoid this, you can make your own powdered sugar simply by running granulated cane sugar through a food processor until it reaches the correct consistency.
1. Lightly grease the bottom and sides of a 9-inch square baking dish with the oil. Add some powdered sugar or arrowroot powder to the dish and, tilting the pan around, cover the bottom and sides evenly. Set aside.
2. In a small bowl, pour 1/2 cup cold water over the gelatin. Set aside for 10 minutes.
3. Pour the remaining 1/2 cup of water into a medium saucepan and add the granulated sugar. Place over medium heat and stir until the sugar is completely dissolved.
4. Add the gelatin mixture to the saucepan. DO NOT STIR. Turn up the heat. When the temperature of the liquid reaches 240 degree F., remove the pan from the heat. (Hint: It will reach temperature quickly.)
 Adding the gelatin to the sugar water.
5. Carefully pour the mixture into the bowl of a stand mixer. (A hand mixer works too, but a stand mixer makes the job easier.)
(adsbygoogle = window.adsbygoogle || []).push({});
6. Add the salt and vanilla to the mixture, then beat with the whisk attachment on LOW for 2 minutes.
 Beating on low.
7. Now increase the speed of the mixer to HIGH and beat until the mixture is soft, doubled in volume, and resembles soft whipping cream, about 10-15 minutes. (If you've ever bought "marshmallow fluff" in a jar, that's what you have right now!)
 When done, the marshmallow fluff will look like this.
(adsbygoogle = window.adsbygoogle || []).push({});
8. Using a spatula lightly greased with the oil, pour the marshmallow fluff into the prepared pan. Allow the mixture to cool completely, uncovered, for at least 3 hours.
 Let the marshmallow fluff sit for several hours.
9. Spread a small amount of powdered sugar or arrowroot powder over the top of a cutting board. Turn the pan upside down and tap the marshmallow block out of the pan. (If necessary, run a knife all along the edges of the pan, to help loosen the block.)
10. Use a knife to cut out marshmallow squares of the desired size. Or, if you prefer, use a cookie cutter to make shaped marshmallows. (You may need to lightly oil cookie cutters.) After cutting, toss the marshmallows in powdered sugar or arrowroot powder so that all sides are coated. (This helps keep the marshmallows from sticking to each other.)

 Cut the marshmallows whatever size you desire.
(adsbygoogle = window.adsbygoogle || []).push({});
Storing Homemade Marshmallows
Store your DIY marshmallows in a glass jar with an airtight lid. You may also use a Ziplock style bag. DO NOT REFRIGERATE. Instead, store on the counter out of direct sunlight, or in a pantry. (A cool pantry is best; heat may make the marshmallows stick together.)
If there are more marshmallows than you'll use within a few weeks, you may either freeze or dehydrate the extras.
To freeze, I recommend cutting off a section of the marshmallow block and then freezing that section whole. (Wrap it in plastic wrap and then pop it into a freezer bag.) You can cut it into smaller pieces after thawing.
To dehydrate, cut the marshmallows small (like the mini marshmallows you buy in the store; this makes the drying time much shorter). Lay the marshmallows in a single layer on your dehydrator trays, ideally not touching. dehydrate at 150 degrees F., or a bit lower. They are done when they are 100% crunchy and shatter when you crush them in your hands. (Be sure to allow your test marshmallows to come to room temperature before testing them! Otherwise, they will remain soft.) Store in a glass jar with an airtight lid in a dry, dark location.
Related Posts:


November 4, 2024
October on the Homestead

October is the month I begin slowing my pace. August and September are a whirlwind of preserving, and by October, I'm pretty burned out. Thankfully, that's when the harvesting begins slowing down, too.
We got our beef in October (purchased from a local rancher, since we don't have any pasture to speak of on our homestead in the woods), and while we freeze most of that meat, I do take the time to preserve both the suet fat and the bones of the animal. (You can read how I render the fat to make a truly healthy cooking oil here. And how I turn the bones into nutrient-rich bone broth here.)
I also preserve some beets, cauliflower, green beans, and so on from the fall garden.
But I also spend a lot more time resting. Reading good books. Baking. Nesting. It feels good!
 This heartwarming little book kicked off my cool weather reading.
 The fall garden.
 Drying apples.
 Canning and freeze drying bone broth.
 Rendering tallow.
October Produce Totals:
To learn more about how and why I am keeping these totals, click here.
A little note: While I make every effort to gather accurate numbers on my produce, in some cases, the numbers shared here are definitely a bit lower than the actual harvest. This is because my family steals fruit from the orchard :) and because I sometimes don't weigh leaves off main crops, even though we do usually eat them. (Example: Broccoli leaves aren't counted, just the heads, even though we eat both.)
Delicata squash 7 lbs. 11 oz.
Potatoes 5 lbs. 3.62 oz.------------> $3.39 conventional; $7.90 organic
 Cabbage.Cabbage 8 lbs. 13.75 oz.------------> $6.34 conventional; $12.68 organic
 Yellow summer squash 2 lbs.
Patty pan squash 11 oz.
 Carrots and beets.
Carrots 3 lbs. 10 oz.
------------> $2.17 conventional or organic
Turnip 7 oz.
------------> $1.05 conventional; no organic option available
 Runder Schwarzer winter radishes.
Winter radish 14.48 oz
------------> $4.48 conventional; no organic option available (My local Walmart doesn't sell winter radishes, so I compared to red table radishes)
Garlic 5 lbs 6.30 oz
------------> $25.88 conventional; no organic option available
 Cauliflower.
Cauliflower 1 lb. 14 oz.
Green beans 7 lbs. 10 oz.------------> $12.64 conventional; $4.56 organic
Beets 4 lbs. 8 oz.------------> $7.59 conventional; $13.24 organic
 Buttercup, yellow summer, and patty pan squash.
Buttercup squash 6 lbs .21 oz.
------------> $7.95 conventional; no organic option available (My local Walmart doesn't sell buttercup squash, so I used butternut squash as a comparison.)
Apples 20 lbs.
Saved in October:
$132.73 if purchased conventional; $154.37 if I purchased the organic options available.
Saved in 2024 so far:
$2,134.27 if buying conventional and $3022.58 if buying organic.
2024 Gardening Expenses
Walla Walla onion starts: $4
Cherry tomato start: $5.49 (a single plant and a hedge because the new-to-me-variety of cherry tomatoes I started from seed were looking less than robust)
Potting Soil: $47.96 (primarily for potting up peppers in the greenhouse; some will get used for flowers, too, but I won't try to parse that out.)
Organic snail bait $17.96 (I had to use more of this than is typical because we had such a cool, damp spring)
Total gardening expenses so far: $75.41
Total savings minus expenses in 2024: $2058.86 if buying conventional; $2,947.17 if buying organic when available.
 Cinderella pumpkin.
October 22, 2024
How to Render Tallow, Lard, Schmaltz (or any other animal fat)
 This post may contain affiliate links. As an Amazon Associate, and at no cost to you, I earn from qualifying purchases made through some links. Please see FCC
disclosure for full information. Thank you for supporting this site!
This post may contain affiliate links. As an Amazon Associate, and at no cost to you, I earn from qualifying purchases made through some links. Please see FCC
disclosure for full information. Thank you for supporting this site!
Once upon a time, animal fats were an important part of most cultures' diets. Today, as we re-examine highly processed, plant-based fats, many people are choosing to return to the old ways. The only problem? Buying good quality animal fats can be expensive! However, the good news is that it's very easy to render "raw" animal fats and make a high quality product.
NOTE: Today, I'm going to show you how to render tallow, but the process is the same with any animal fat.
Why Animal Fats?
It used to be that animal fats were widely used in cooking and baking. Then along came Crisco; it used a new process called hydrogenation to find a use for a by-product: cottonseed oil. Originally, the manufacturers wanted to sell Crisco as an ingredient for soap, but to really create booming sales, they instead jumped on the "pure food" bandwagon, initiated by the federal government in order to give consumers protection from adulterated and mislabeled food. Crisco, the manufacturers claimed, was a more "pure" alternative to tallow and lard. Unfortunately, we now know that the more processed a food is, the less healthy it is for you. In fact, canola oil, vegetable oil, and other highly processed oils are now understood to cause body-wide inflammation, which in turn is linked to nearly every disease. (If you'd like to read some studies supporting the idea that animal fats are healthier than highly processed fats, go here, here, here, here, and here.)
 An early Crisco sales display. Courtesy of Wikimedia Commons.
What are the Benefits of Tallow?
When used in food, grass fed and finished tallow has high levels of Conjugated Linoleic Acids (CLAs), which, studies show, fight inflammation, reduce plaque build up in arteries, reduce blood pressure, help fight cancer, and more. Grass finished tallow is also a great source of vitamins B6, B12, Ks, iron, selenium, phosphorus, riboflavin, and potassium.
In addition, tallow has 40 to 50% monounsaturated fat - believed to be the most heart-healthy fat; it's the same type found in olive oil.
When used as a lotion for the skin, tallow absorbs readily and is anti-inflammatory and anti-microbial - but won't clog your pores. It's natural levels of vitamins A, D, E and K also help create skin elasticity and help with collagen development.
(adsbygoogle = window.adsbygoogle || []).push({});
How to Use Tallow
In the U.S., tallow generally refers to the fat surrounding the kidneys of cattle, which is called suet. In other countries, tallow may refer to the kidney fat of any ruminant animal, including sheep, goat, deer, elk, and bison. Although it can prove confusing, any type of fat from any ruminant animal can also be called tallow. Just know that fats from other parts of the animal may have a stronger flavor and scent, while tallow made from suet is neutral in flavor and smell.
(By the way: Rendered pig fat is called lard; rendered chicken fat is called schmaltz. Literally any animal fat can be rendered.)
Tallow is widely used in savory cooking and baking. It's fantastic for frying. (Did you know that McDonald's original French fries were fried in tallow?) It's also used for sauteing and in savory cooking anywhere you might use store bought oil. Use it in place of butter or other fats in pie dough, biscuits, and other baked goods; it makes pastry flaky and tender. Tallow is also excellent for soap and candle making - and it's said to be the best skin moisturizer you can find. Finally, it makes an excellent fat for seasoning cast iron pots and pans.
How to Find Fat for Rendering
As homesteaders, you may collect the fat from your own cattle at butchering time. Or, if you purchase a steer for your freezer, you may request that the butcher set aside fat for you. Otherwise, you can buy unrendered fat at any good butcher's shop. You can also save the fat from any cuts of meat you buy. (I've read that the fat from beef brisket is pretty close in flavor to suet, once rendered; later in the year, I'll give it a try and let you know what I think.)
And yes, you can also buy tallow - but be sure to read labels carefully. Ideally, you want minimally processed tallow made from grass fed and finished cattle. Some tallow may be made from other animals and those, of course, have a different nutrition profile. Fatworks has a good quality tallow (as well as other rendered animal fats).
(adsbygoogle = window.adsbygoogle || []).push({});
How to Render Tallow
There are two basic ways to render any animal fat: Dry or wet. Dry rendering (where the fat is the only thing put in the pan) can result in scorching and off-flavors, unless great care is taken. Wet rendering (where a bit of water is added to the pan, along with the fat) has the potential to go bad on the shelf if the water isn't completely removed from the finished product.
Until recently, I had always wet rendered. In fact, if you're using a heavy-bottomed pan or pot on the stove, I still recommend this as the best method. (If you're only rendering small amounts of fat from cuts of meat you buy, this is also the method I recommend.) However, if you have large quantities of fat and access to an electric roaster or crock pot that can go to 150 degrees F. or lower, dry rendering is easy and do-able. I'll give directions for both methods.
How you begin this project depends on what your fat looks like. If you've butchered your own cattle, you'll see the fat around the kidneys is naturally wrapped in what Jill Winger calls "a weird sort of 'cellophane'." She recommends pulling off as much as possible, but advises that it will be impossible to remove all of that "wrapping." That's fine.
But most of us will have a butcher to do that for us. That butcher will then either give us large chunks of suet that haven't been trimmed (in which case, you'll need to cut off any bits that are not fat), or he will provide trimmed suet cut into smallish pieces. If your suet isn't ground or in at least 1/2 inch chunks, you'll start by either chopping the fat small or running it through a food processor.
FOR DRY RENDERING:
2. Turn the heat on low (150 degrees F. or less). This low temperature will help prevent the suet from burning.
3. When all the fat has melted, it's time to strain it. I recommend using a fine mesh strainer (I use these) lined with good quality (grade 50 or higher) cheesecloth (or a double or triple layer of cheap cheesecloth, which is much more "holey"). Some people like to use paper coffee filters instead of cheesecloth. Situate the lined strainer over a large bowl.
 After the first filtering: tallow on the left and what was filtered out of the fat on the right.
4. Everything that's in the strainer is bits of meat, ligaments, etc. I feed this to my dogs, cats, or meat-eating livestock. What remains in the bowl is tallow.
5. You can stop here, but I highly recommend that you repeat steps 1-4 again. This ensures the tallow is free from anything other than fat. This extra step also means you'll get a neutral smell and flavor and a longer shelf life. But first, put the bowl of tallow in the refrigerator to harden.
 Tallow hardened in a bowl after a first rendering.
Some people report that after letting the tallow harden in a bowl, they can flip the bowl and easily remove the big clump of hardened tallow; they then scrape any impurities off the bottom. However, I found it impossible to slide hardened tallow out of the bowl, even after softening it a little at room temperature or putting the bowl in a sink of warm water. Instead, I allowed the tallow to soften just a bit on the counter, then used a spoon to transfer it to the electric roasting pan. As I came near the bottom of the bowl, I tried to avoid any impurities. (I ended up mostly finding gelatinous material at the bottom of the bowl; I reserved this for using as broth for cooking.)
 Tallow returned to the pan and beginning to melt after a first rendering.
6. After repeating steps 1-4, you may pour the finished tallow into (absolutely dry) glass jars, to be stored in the pantry or fridge. Pure tallow will last at least 6 months, and up to a year, in the pantry. It may also be refrigerated. Or you may line a rimmed baking sheet with waxed paper, and pour the warm tallow on top. Once the tallow begins turning solid, transfer the sheet to the fridge to harden further, then use a knife to slice the tallow into bars. Remove the bars with a spatula and wrap in plastic wrap, wax paper, or waxed fabric. This makes the tallow easier to freeze - allowing you to pull out and thaw smaller quantities at a time.
 Tallow cut into bars and wrapped in some of the gazillion rolls of plastic wrap I inherited from my mom :)
FOR WET RENDERING ONLY:
Before melting the fat, weigh it. For every pound, put about 1/2 cup of water into your cooking device. Now add the fat. (It's fine to use frozen suet with the wet rendering process.)
 Fully frozen suet going into the electric roaster, along with water.
Turn the heat to low (150 degrees F. or so). Do not use a lid; you want the water to be able to evaporate out of the fat.
Now follow steps 1-4, above.
 The electric roaster after the first rendering. Clean all this up before rendering again.
After straining the fat, clean and dry the pot thoroughly, then return the tallow to the pot and cook at 225-250 degrees F. If there's water still in the fat, the mixture will bubble. Continuously hold the fat at this temperature until all bubbling stops. (Bubbles mean there is still water present.)
Is rendering tallow a smelly process?
I've heard horror stories about how rendering tallow stinks up the whole house, but I did not find that to be the case at all. There was a very mild beef scent in my kitchen only. If the process is smelly for others, I can only guess at the cause. Perhaps the fat wasn't trimmed well before rendering began and/or suet wasn't used.
What color should my tallow be?
Warm tallow is golden in color. Cooled tallow is typically pure white. I say "typically" because dairy farmers tell me that tallow from dairy cattle cools to a yellow color. But if you're not using fat from a dairy cow, cooled tallow that isn't white is the result of cooking it too hot or not filtering it well.
 The tallow to the left is cooled; the tallow to the right is still warm.
Should my tallow smell?
It should have a very slight scent only. Typically, stinky tallow means the fat wasn't filtered well enough. In fact, in soap making, tallow is often rendered and filtered many times, so if you are bothered by the scent of your homemade tallow, just keep rendering and filtering it. In addition, if you use fat that isn't suet, it may also have a stronger smell and taste.
How do I use this hard tallow?
If your house is cooler than the mid-70s, the tallow will be hard and difficult to scoop out of a jar. To make removal easier, place the jar in a bowl of warm water or temporarily place it next to a heat source (like a wood stove).
Can I reuse my tallow?
Traditionally, tallow and other animal fats were reused after frying food. So if you fry French fries in tallow, strain the fat through a fine sieve lined with cheesecloth, and then pour it (warm but not hot) into a glass jar. Strongly flavored or scented foods will make the tallow taste different, so you may wish to dump tallow that was used to cook, say, fish; or you may simply wish to strain it, mark it as "fish tallow," and use it the next time you cook fish.
(adsbygoogle = window.adsbygoogle || []).push({});
Related Articles:

October 4, 2024
How to Make Bone Broth or Beef Stock
This is an updated version of a post that originally appeared in 2014.
I've written before about making stock - from chicken, vegetables, fish, and beef - but recently we purchased half a steer, and I found myself with a lot of wonderful beef bones. And since more and more people are buying their beef in bulk and have far more access to beef bones than they used to, I felt a new - more detailed - post was warranted on making your own beef stock. (Not buying part of a steer anytime soon? You can still make your own beef stock. Just find a real butcher's shop and request some beef "soup bones." These are bones that still have some meat on them, and which are full of good marrow. They will be inexpensive - or the butcher might give them to you for free.)

Please note that all you really need to make stock is bones and water. All the other ingredients are optional - but do improve the flavor of the stock and the nutrition of the finished product. So feel free to vary the ingredients, depending upon what you have on hand.
NOTE: The main instructions below explain how to make broth the old school way: In a big pot on the stove. To read about alternative methods, scroll to the end of the numbered instructions.
Ingredients:
About 5 - 8 lbs. beef soup bones, cut into pieces (the butcher will do that for you)
Water
Optional ingredients:
Sea salt
Pepper
Vegetables (I keep a Ziplock bag in my freezer of trimmed carrot ends and leaves, celery ends and leaves, and onion skins and trimmings; these can go into the pot without being chopped or defrosted. You may also add 2 or 3 coves of garlic, a bit of fresh parsley, a couple of bay leaves, a few sprigs of fresh thyme...But also consider how you'll use the finished broth. Sometimes it's best to keep things simple so that your broth is most versatile.)
Vinegar (This helps leach the nutrients from the bones; it's important to use vinegar if you'll be using the bones more than once to make broth. I use Braggs apple cider vinegar.)
(adsbygoogle = window.adsbygoogle || []).push({});
How to Make Beef Stock
1. Preheat the oven to 450 degrees F.
2. Place the beef bones in the roasting pan. Most likely, you'll get frozen bones from the butcher. You don't need to defrost them - just stick them in the pan, frozen. Add any carrots, celery, onions, and garlic to the pan, if using. Once the oven is fully preheated, place the pan in the oven and roast until the meat on the bones looks cooked through. With frozen bones, this takes approximately 60 minutes. If the bones weren't frozen when you put them in the oven, it will take about 30 - 40 minutes. (NOTE: The roasting stage is also optional, but greatly improves the flavor of the stock.)
In the photos below, you'll notice I absentmindedly added the herbs at the roasting stage. This by no means ruined the stock, but I do think it's better to leave the herbs out until the simmering stage.
 Before roasting.
 After roasting.
(adsbygoogle = window.adsbygoogle || []).push({});
3. Pour the contents of the roasting pan into a large pot. Be sure to include any fat and liquid in the pan. Add additional seasonings, as desired.

4. Add 1/2 cup of water to the roasting pan and use a spoon to scrape the bits of beef off the bottom of the pan. Pour into the stock pot. Add enough water to cover the contents of the pot. Add a splash of vinegar, if using.
5. Bring the pot to a boil, then reduce the heat and simmer gently about 4 hours.
6. Strain the contents of the pot, reserving the liquid. The vegetables can be composted or given to your livestock. Any meat on the bones can be picked off and frozen for soup made at a later date.
In addition, I recommend reusing the bones for at least one more batch of broth. If you want to do this, it's okay to re-freeze the bones to use another day. But whenever you reuse bones, do be sure to add a splash of vinegar at the simmering stage; it will help leach more nutrients from the bones.
7. Allow to stock to cool on the counter, then place it, covered, in the refrigerator overnight. In the morning, skim off any congealed fat you find on top of the stock. It should be firm enough that you can just lift it out with your fingers. (If it's not, it's because there wasn't much fat on the bones; in that case, use a small strainer or a slotted spoon to remove as much fat as possible. If desired, you can keep the fat in the refrigerator and use it for savory cooking.)
 Overnight, all the fat rises to the top and becomes firm enough to lift out.
 The stock is finished. It turned out beautifully gelatinous.
ALTERNATIVE METHODS:
In an electric roaster: Roast the bones in an electric roaster set to 450 degrees F. Add water and other ingredients, if desired. Bring the mixture nearly to a boil, then reduce the temperature so the broth gently simmers. Allow to simmer overnight. (This is my favorite method because I can make so much broth all in one fell swoop - and it requires very little of my time!)
In a crock pot: Once the bones are roasted, transfer to a crock pot, along with the other ingredients and any scrapings from the roasting pan. Bring the mixture nearly to a boil, then reduce the heat to a gentle simmer. Allow to simmer overnight.
In an Instant Pot: See directions and video here.
Preserving Broth
Once the stock has been chilled and the fat cap removed, it may now be frozen, canned, or freeze dried.
Freeze in freezer containers/bags or in canning jars with straight sides. (Jars with "shoulders" are much more likely to break in the freezer.) Leave 1 1/2 inches of headspace - i.e., the empty space between the top of the food and the rim of the jar.
To can, reheat the broth to boiling, then ladle into hot canning jars, leaving 1 inch headspace. Process in a pressure canner: pints 20 minutes, quarts 25 minutes. If you live at a high altitude, read this important information about adjusting canning times.
To freeze dry, spoon the finished broth onto trays, pop into the freeze dryer, and let the machine do its magic! Store in Mylar bags with appropriately sized oxygen absorbers, or, for short term storage, in canning jars with air tight lids.

var addthis_config = {"data_track_addressbar":true};
September 30, 2024
September on the Homestead
 The garden in September.
Not unexpectedly, it's been an exhausting month. Harvesting and preserving takes up most of my time in September...and while I'm thankful for all that food to nourish my family, I'm ready for the season to wind down!
The garden has been a series of blessings and disappointments. For example, I was harvesting wonderful, vine ripened tomatoes - which are a big deal where I live; vine ripened tomatoes just aren't a given in our cool climate. (Oregon Spring tomatoes were the clear winner this year. They ripened faster than anything else and tasted wonderful!) Then we had two days of rain and late bight hit big time. I had to pull out all 28 of my tomato plants. I lost a lot of fruit due to blight on the tomatoes themselves, but as you can see by looking at the tally below, I actually ended up with a nice harvest. I didn't really use a lot of green tomatoes this year; I gave most away (and didn't include them in my produce tally) - although I did can a batch of green tomato mincemeat pie filling. I chose to ripen most of the fruit on the counter.
 Green tomato mincemeat pie filing.
 Crushed tomatoes.
Summer squash was also disappointing, as you can see from the totals below. In all my years of growing food, I have never had the summer squash do this badly! I am comforted by knowing that most people in my area experience the same thing, due to cooler than typical summer weather.
On the other hand, it looks like my winter squash did okay. I think most of it will ripen before a hard frost - Lord willing! And there's a nice supply of carrots, kale, collards, cabbage, and beets sitting in the garden until I'm ready to harvest it. The Brussels sprouts are looking splendid, too - though I'll wait until after the first hard frost to harvest them, since frost improves their flavor so much.
 Winter Luxury pie pumpkin.
Overall, despite less than ideal weather, I still grew plenty of food. I am thankful.
In other homestead news, I'm busy trying to clean out the freezer, as the beef we ordered from a friend is expected next week. That added to my food preservation chores, too, but who can complain?
Finally, I added a couple of fun designs to the Proverbs 31 Homestead merch store. There are men's and women's t-shirts, hoodies, sweatshirts, mugs, bags, aprons, and stickers. Check it out here!


August Produce Totals:
To learn more about how and why I am keeping these totals, click here.
A little note: While I make every effort to gather accurate numbers on my produce, in some cases, the numbers shared here are definitely a bit lower than the actual harvest. This is because my family steals fruit from the orchard :) and because I sometimes don't weigh leaves off main crops, even though we do usually eat them. (Example: Broccoli leaves aren't counted, just the heads, even though we eat both.)
Apples 103 lbs.

Green beans 14 oz------------> $2.99 conventional; $4.56 organic
Scarlet runner beans 3 lbs 1 oz.
Tomatoes, slicing 234 lbs.
------------> $463.32 conventional; $575.64 organic (My local Walmart doesn't have organic slicing tomatoes, so I used the price of organic Romas as a comparison.)
Tomatoes, cherry 2 lbs. 21 oz.
Broccoli 1 lb. 54 oz.
Patty pan squash 2 lbs. .09 oz.
Walla Walla onions 178 lbs.


Bell peppers 2 lbs. .32 oz.
------------> $1.13 conventional; $1.14 organic
Jalapenos 2.18 oz.
Serrano .27 oz
Grapes 5 lbs.

Blueberries 2 lbs. 11.21 oz.
Pears 47 lbs.


Zucchini 14.40 oz.
------------> $1.86 conventional; $2.96 organic
Yellow summer squash 14.62 oz.
 Beets 7 lbs. .48 oz.------------> $1.87 conventional; $129.40 organic
 Cabbage 7 lbs. 12 oz.
Cauliflower 4 lbs. 46 oz.
Yukon Gold potatoes 12 lbs.

Delicata squash 2 lbs. 11.08 oz.
 Carrots 2 lbs. 5 oz.------------> $1.70 conventional; $2.14 organic
 Saved in August:
$736.52 if purchased conventional; $1,472.66 if I purchased the organic options available.
Saved in 2024 so far:
$2,001.54 if buying conventional and $2,868.21 if buying organic.
2024 Gardening Expenses
Walla Walla onion starts: $4
Cherry tomato start: $5.49 (a single plant and a hedge because the new-to-me-variety of cherry tomatoes I started from seed were looking less than robust)
Potting Soil: $47.96 (primarily for potting up peppers in the greenhouse; some will get used for flowers, too, but I won't try to parse that out.)
Organic snail bait $17.96 (I had to use more of this than is typical because we had such a cool, damp spring)
Total gardening expenses so far: $75.41
Total savings minus expenses in 2024: $1,926.13 if buying conventional; $2,792.80 if buying organic when available.
September 17, 2024
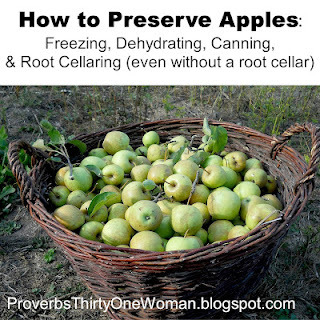
How to Preserve Pears (Canning, Drying, Root Cellaring, Freezing, and Freeze Drying!)

This post may contain affiliate links. At no cost to you, I may earn from qualifying purchases made through some links. Please see FCC disclosure for full information. Thank you for supporting this site!
In most parts of the United States, pears are one of the hardiest fruit crops around. Many abandoned homesteads still have pear trees producing abundantly, and adding pears to your yard or orchard is a great long-term homesteading plan. Fortunately, pears are also pretty versatile and lend themselves well to preserving through cold storage, dehydrating, freezing, freeze drying, and canning.
Harvesting Pears
The first trick to preserving pears is to know when to harvest the fruit. The first year our pear tree produced, it gave just a single fruit and I let it sit on the tree far too long. By the time I picked that lone pear, the fruit was mostly rotted. You can bet I didn't make that mistake again!
The best indication of when to harvest pears is how easily they come off the tree. Grasp the bottom of the pear and tip the fruit upward. If the stem readily snaps off the branch, the pear is ready for harvest.
After harvesting, many pears benefit from a one or two day chilling period at about 30 degrees F., which will enhance the fruit's flavor and sweetness. After chilling, you may let pears ripen at room temperature. Don't let them get too soft, though, or they will be much more difficult to preserve. (Do note that if you plan to store your pears in cold storage, you don't want to ripen them on the counter first. Instead, put the pears directly into storage, as explained below, and ripen on the counter as needed.)
And if you've got a pear that doesn't want to soften up on the counter? It's likely an old fashioned cooking pear. These will never feel soft like, say, a Bartlett does. But that's okay, because they are fabulous cooked, made into jam/preserves, or pearbutter or pearsauce.
Root Cellaring Pears
 Prepping pears for cool storage.
 Pears can happily sit in a root cellar (or a root cellar-like environment) for 2 or 3 months - sometimes longer. Some varieties store better than others, with D'Anjou, Winter Nelis, Comice, and Bosc topping the list of pears that are perfect for cold storage. (If you aren't fortunate enough to have a root cellar, you may still be able to store pears for a few months in a cool environment like your garage, basement, cool closet, or an extra refrigerator.)
Only unblemished pears store well, and fruit with the stems still attached fair better than fruit with stems that have been pulled out. Wrap individual pears in black and white newspaper or brown packing paper, then place them in a single layer in a box - preferably one lined with perforated plastic.
The storage area should ideally be 20 - 31 degrees F. with 80 - 90 percent relative humidity. If stored at too high a temperature, pears will start rotting before they ever ripen. (Although some varieties of pears tolerate higher temperatures better than others.) Check the temperature and humidity in several areas in your root cellar to find the best spot for storing pears.
Since pears emit ethylene gas, which speeds the ripening and spoiling of many other foods, keep them stored well away from asparagus, broccoli, Brussels sprouts, cabbage, carrots, cauliflower, greens, peppers, potatoes, squash, sweet potatoes, and yams.
In addition, it's an excellent idea to sort the pears by size before storing them. Small pears will ripen more quickly, so keep them all together and eat them first.
Canning Pears
 Pears canned in light syrup.
(adsbygoogle = window.adsbygoogle || []).push({});
Peeling is what makes canning pears a bit fussy and time consuming, so many people wonder: Is peeling pears before canning them necessary? A lot of people try canning pears with the peels on and report they like them just fine. A few even say they prefer them to pears that have had their peels removed. I think it depends upon what type of pear you're canning; it seems some pear peels come through the canning process more palatable than others.
The real question is, however, does leaving the peels on make canned pears less safe to eat? The answer is yes. The peels are more likely to contain microorganisms that cause spoilage and foodborne illness and unless the tested safe canning recipe (from Ball/Bernardin, The National Center for Home Food Preservation, the Extension offices, or the USDA) specifically says it's okay to leave the peels on, they must be removed or the end product may spoil in the pantry.
With firm fruit, you may be able to use an apple peeler/corer to peel pears more quickly, or you may simply use a paring knife or fruit peeler. You may also blanch firm pears to remove their peel:
1. Bring a large pot of water to a boil.
2. Add a layer of pears. Wait 15 - 20 seconds, then remove the pears with a slotted spoon.
3. Plunge the pears into ice water.
4. As soon as the fruit is cool enough to handle, use your thumbs to push the peels off the pears. (If the peels don't readily slip off, place the pears back into the boiling water for a few more seconds.)
Another note of interest is that pears and apples are safely interchangeable in home canning recipes. That means you can exchange pears for any test safe canning recipe you like, including pie filling and juice.
Canned Pear Halves
These are delicious straight out of the jar, and perfect for a simple, healthy dessert. You may also use canned pear halves to make cobblers, pie, and similar baked goods. Recipe here.
 Pear halves canned in light syrup.
(adsbygoogle = window.adsbygoogle || []).push({});
Pearsauce
Like applesauce, but with pears. This is a special treat at our house - and the perfect way to deal with pears that are too soft to can into halves. Recipe here.
Pear Butter
This delicious cousin of apple butter is under-appreciated and another good way to use up softer pears. Use it like a jam. See recipe here.
 Pear butter.
Pear Mincemeat Pie Filling
Nothing you can buy in the store compares to this treat, which is perfect for the holidays. Makes about 9 pints. Recipe adapted from The Ball Blue Book by UCCE Master Food Preservers of El Dorado County. BONUS: You don't have to peel the pears!
1. Peel, quarter, and core 7 lbs. pears. Cut 1 lemon into quarters and remove the seeds.
2. Chop the pears, lemon, and 2 lbs. of seedless raisins.
3. Pour the fruit mixture into a large, nonreactive pot. Add 6 3/4 cups granulated sugar, 1 tablespoon ground cloves, 1 tablespoon ground cinnamon, 1 tablespoon ground nutmeg, 1 tablespoon ground allspice, 1 teaspoon ground ginger, and 1 cup white vinegar. Bring to a boil over medium heat and simmer for 40 minutes, stirring often.
4. Ladle into hot canning jars, leaving 1/4 inch headspace. Process pint jars 25 minutes in a water bath canner. (See NOTE at the bottom of this post for important safety information about adjusting processing times for your altitude.)
 Pear mincemeat pie filling.
(adsbygoogle = window.adsbygoogle || []).push({});
Quick Pickled Pears
For those who love pickles, pickled pears should not be missed. This is a perfect preserving method for small, hard pears. Recipe here.
Pectin-Free Spiced Pear Jam
Makes about 6 jelly jars.
1. In a large pot, combine 8 cups coarsely chopped pears, 4 cups granulated sugar, 1 teaspoon ground cinnamon, and 1/4 teaspoon ground cloves. Bring to a boil over medium high heat.
2. Reduce the heat and simmer until thick, about 1 1/2 - 2 hours. Stir often to prevent scorching.
3. Ladle into hot jelly jars, leaving 1/4 inch headspace. Process in a water bath canner for 10 minutes. (See NOTE at the bottom of this post for important safety information about adjusting processing times for your altitude.)
Carrot Cake Jam (The Ball Complete Book of Home Preserving)
Autumn Cranberry Pear Jam (The Ball Complete Book of Home Preserving)
Cinnamon Pear Jam (The Ball Complete Book of Home Preserving)
Ginger Pear Marmalade (The Ball Complete Book of Home Preserving)
Ginger Pear Preserves (The Ball Complete Book of Home Preserving)
Hot 'n' Sweet Chili Sauce (The Ball Complete Book of Home Preserving)
Pear Jelly (The Ball Complete Book of Home Preserving)
Pear Port Compote (The Ball Complete Book of Home Preserving)
Peppery Pear Salsa (The Ball Complete Book of Home Preserving)
Seasoned Pear Almond Conserve (The Ball Complete Book of Home Preserving)
Spirited Pears (The Ball Complete Book of Home Preserving)
Summer Fruit Cocktail (The Ball Complete Book of Home Preserving)
Summer Salsa (The Ball Complete Book of Home Preserving)
Pear Chutney (The Ball Blue Book, 38th edition)
Pears in Cinnamon Apple Juice (The Ball Blue Book, 38th edition)
Pears and Nectarines in Grape Juice (The Ball Blue Book, 38th edition)
(adsbygoogle = window.adsbygoogle || []).push({});
Freezing Pears
I tend to prefer shelf stable methods of preservation, but when the harvest days are hot and busy, sometimes freezing fruit feels a bit easier! Happily, pears freeze well, and are especially useful for baking projects.
1. Peel and core pears. Slice. The National Center for Home Food Preservation recommends slicing medium-sized pears into twelfths, and large pears into sixteenths. To prevent browning, place pear slices in lemon water (1 tablespoon of juice per cup of water) as you go.
2. Prepare a syrup. For a very light syrup, dissolve 1/2 cup granulated sugar into 4 cups warm water, stirring until the water is clear. For a heavier syrup, use 2 3/4 cups of granulated sugar and 4 cups of water. Allow the syrup to come to room temperature. (You may also freeze pears in plain water, but the end result may be bland.)
3. Place prepared pears in a freezer container and cover with the syrup, leaving 1/2 inch headspace. To keep the pears under the syrup (which will help prevent browning and off flavors), place a crumbled piece of wax paper between the fruit and the container's opening.
Frozen Pear Pie Filling
This delicious pie filling is suitable only for freezing or using right away, since it contains cornstarch (an ingredient not considered safe for canning).
1. Peel, core, and dice about 7 pears into medium chunks. Toss the prepared pears with 3 tablespoons of lemon juice.
2. Pour the pears into a medium saucepan placed over medium high heat. Cook and stir for about 8 minutes, letting the pears break down. They will become juicy, but you should still have pear chunks in the pan. Remove from the heat.
3. In a small bowl, stir together 1 cup packed brown sugar, 1 tablespoon ground cinnamon, 1 teaspoon ground nutmeg, and 3 tablespoons of cornstarch.
4. Gently stir the sugar mixture into the pears and place the saucepan back over the heat. Stir constantly for about 2 minutes, or until the mixture thickens.
5. Remove from the heat and allow to cool. Transfer to freezer containers, leaving 1/2 inch headspace.
Dehydrating Pears
 Dried pears.
Dehydrated pears are a sweet treat that my kids eat like candy. They also take less of my hands-on time, which makes dried pears a real win-win on our homestead. If desired, you may rehydrate these pears for baking projects.
1. Slice pears. Thinner slices dry more quickly. If you wish to prevent browning, place the slices in a lemon water mixture (1 tablespoon of juice to 1 cup of water) as you go. Sometimes I don't even bother to core pears before dehydrating; I just cut them into circles. Other times, I core the pears and dehydrate half moons.
2. Place the prepared pears on the tray of a food dehydrator. Pieces should not touch.
3. Dehydrate at 135 degrees F. Rotate trays at least once.
4. To determine whether the pears are fully dehydrated, tear a piece. If no liquid comes out, it's done. Remove dehydrated pears as they become available, to avoid over-drying. Consolidate the remaining pear pieces to speed the drying time.
5. Store dehydrated pears in an air tight container in a cool, dark location. They will keep at least a year.You may also dehydrate pear pieces in the oven or your oven's warming drawer. Lay them on a footed cooling rack, placed on top of a rimmed baking sheet and use the lowest temperature your oven has, as close to 135 degrees F. as possible.
You may also dry pears in the sun when you'll be having a series of warm, dry days. Turn them once or twice a day.
(adsbygoogle = window.adsbygoogle || []).push({});
Freeze Drying Pears
Freeze dried pear slices are a delicious snack that retain more nutrients than dehydrated slices. And like dehydrated pear slices, you may rehydrate them and use them in baking.
To freeze dry pear slices, prepare them exactly as described in the dehydrating section, then place them in a single layer on the trays of your freeze dryer. I recommend lining the trays with parchment paper so the fruit doesn't stick To get more fruit on each tray, place a layer of parchment paper over the first layer of pear slices, and add more slices on top. Run the machine. Store freeze dried pears in a canning jar (for short term storage) or in Mylar bags with appropriately-sized oxygen absorbers (for storage up to 20 years).
NOTE that all canning processing times are appropriate for those living at an altitude of 1,000 feet or lower. If your altitude is higher, please click here for important safety information.
Related Posts:

(adsbygoogle = window.adsbygoogle || []).push({});
August 31, 2024
August on the Homestead
 The first head of cabbage from the garden.
This month's produce totals have been a bit eye-opening for me. First, it's important to note that this is a lousy growing year. Like much of the U.S., we've had terrible weather for growing food; while many of you have been overly hot, we've been unusually cool. It's disappointing...and I found myself wishing that I'd chosen a different year to share produce totals with you. But then I realized this is the perfect year to share my totals with you because it reveals that even in a lousy year, we are still money ahead. Gardening pays off much more than people realize, even when only considering the financial aspects of it.
But the other way this produce tally surprises me is in regards to fruit. The last time I undertook such totals (back in 2013), we lived in the suburbs. I didn't grow a lot of fruit. So I was shocked to look at grocery store fruit prices and then multiply them by what we're getting out of our orchard. Again, this is a lousy year for the orchard; we aren't seeing much of a harvest at all. Still, some of the cost savings are shocking. Look at the blueberry figures! I had to re-run them five times before I could believe the figure was true.
 The garden in August.

One last thought: This gardening year has cemented in my mind how important it is to preserve, preserve, preserve. When you have abundant harvests, keep preserving, even if you're preserving more than you can eat in one year! For example, I wish I had dehydrated more summer squash last year. I had a huge glut of squash, and I gave tons away, thinking I had plenty preserved. Nope. This year, I'm getting almost no summer squash, so I will have to do without in the coming year. Bad gardening years are a reality. They will happen.
 Dinner of beef, homegrown broccoli, and wild foraged mushrooms.
Still, I'm very thankful for what I can grow and that God is providing us with as much as He is. I haven't had to buy any produce (except things that don't grow here, like oranges...but those are niceties, not necessities). And the food taste so good! Soooo much better than anything I can buy. Thank you, Lord!
August Produce Totals:
To learn more about how and why I am keeping these totals, click here.
A little note: While I make every effort to gather accurate numbers on my produce, in some cases, the numbers shared here are definitely a bit lower than the actual harvest. This is because my family steals fruit from the orchard :) and because I sometimes don't weigh leaves off main crops, even though we do usually eat them. (Example: Broccoli leaves aren't counted, just the heads, even though we eat both.)
Tomatoes 3 lbs.
Cherry Tomatoes 7 oz.
------------> $2.40 conventional; no organic options available. Oregon Spring tomatoes have been the first to ripen this year.
Walla Walla Onions 6 lbs. 6 oz.
------------> $7.51 conventional; no organic options available. (My Walmart did not have Walla Wallas, so I compared to the only sweet onions they carry.) Walla Walla onions.
Egyptian Walking Onions 3 lbs. 10 oz.
------------> $36.54 conventional; no organic options available. (Walmart doesn't carry walking onions, so I used the prices for shallots.)Green Beans 16 lbs. 10 oz.
------------> $28.66 conventional; $83.84 organicScarlet Runner Beans 7 oz.
------------> $3.13 conventional; $8.84 organic (Walmart doesn't sell scarlet runner beans - so I used the price for green beans.) Scarlet runner beans.
Turnips 1 lb. 2 oz.
Serrano Peppers 2 oz.
------------> $0.80 conventional; no organic options available.Jalapeno Peppers 3 oz.
------------> $0.30 conventional; no organic options available. A colorful harvest of peppers, tomatoes, and patty pan squash.
Carrots 2 lbs.
Broccoli 5 lbs. 16 oz.
 Umpqua broccoli.
Beets 7 lbs. 9 oz.
Cabbage 4 lbs. 13 oz
 A harvest of beets, carrots, broccoli, and green beans.
Patty Pan Squash 5 lbs. 3 oz.
Yukon Gold Potatoes 21 lbs. 8 oz.
------------> $16.96 conventional;$43,38 organic About half the potato harvest.
Bell Peppers 1 lb.------------> $15.84 conventional; $55.36 organic
Blueberries: 42 lb. 19 oz.
------------> $228.03 conventional; no organic options available. The blueberry harvest has been amazing!
Red Plums:10 lbs. 5 oz.
------------> $34.86 conventional; no organic options available.
Yellow Plums 5 lbs.
Figs 5 lbs. 5 oz.
Apples 31 lbs.
 The first of the apples.
Crabapples 12 lbs. 13 oz.
------------> $23.89 conventional; $34.69 organic (My Walmart doesn't sell crabapples, so I used a regular apple price.)Pears 4 lbs.
------------> $7.92 conventional; no organic options available. Organic pears.
Saved in August:
$727.29 if purchased conventional; $1,041.18 if I purchased the organic options available.
Saved in 2024 so far:
$1,265.02 if buying conventional and $1,395.55 if buying organic.
2024 Gardening Expenses
Walla Walla onion starts: $4
Cherry tomato start: $5.49 (a single plant and a hedge because the new-to-me-variety of cherry tomatoes I started from seed were looking less than robust)
Potting Soil: $47.96 (primarily for potting up peppers in the greenhouse; some will get used for flowers, too, but I won't try to parse that out.)
Organic snail bait $17.96 (I had to use more of this than is typical because we had such a cool, damp spring)
Total gardening expenses so far: $75.41
Total savings minus expenses in 2024: $1,189.61 if buying conventional; $1,320.14 if buying organic when available.
August 20, 2024
What to Do with Green Tomatoes (Ripening, Canning, Dehydrating, Freezing, and More!)

This post may contain affiliate links. At no cost to you, I may earn from qualifying purchases made through some links. Please see FCC disclosure for full information. Thank you for supporting this site!
When you live where the weather is cool enough thatripe tomatoes are never a certainty (as I do), you do everything you can to help yourtomatoes ripen. But you also learn that while ripe, red tomatoes are a prizedcrop, unripe green tomatoes are just as valuable. Try as I might to get largecrops of ripe tomatoes, each year, I grow far more unripe, green tomatoes. Andin the fall, if large amounts of rain are expected (which causes tomatoesto split), or if the first hard frost is predicted, I harvest every singlegreen tomato before they are damaged by the weather. I can make excellent useof them - and so can you!
First, What About Ripening Green Tomatoes?
The first thing you should consider is whether ornot you want to ripen green tomatoes indoors. It's easy to do, and makes theharvest last much longer. (Via indoor ripening, I've had fresh tomatoes forChristmas.) The downside to this is, despite what some influencers are sayingon the social media, tomatoes ripened off the vine are not as good as those thatare ripened on the vine. However, they are certainly better-tasting than storebought tomatoes!
There are a few different ways to ripen tomatoes,but I go with what I feel is the easiest: I lay the tomatoes out in a singlelayer, away from direct sunlight. (It's temperature, not sunlight, that ripenstomatoes; letting tomatoes sit in the sun seems to make them spoil more quickly.)If I have room to do so, I prefer to put the tomatoes in a darkish location,like a pantry shelf. Otherwise, I lay them out on my kitchen counter or a largetable.
 Ripening tomatoes indoors.
 The shallow boxes canning jars are sold in are excellent for storing green tomatoes as they ripen.
Are Indoor Ripened Tomatoes Safe to Preserve?
It's worth noting that some Extension offices don'trecommend using indoor-ripened tomatoes for canning, because "the properacidity may not develop." On the other hand, the USDA and The NationalCenter for Home Food Preservation recommend that vine-ripened tomatoes are only"preferable" for canning.
Also note that if you let tomato plants get killedby frost, the tomatoes left on the vine are fine for cooking and baking, butthey are not safe for canning, due to changes in acidity. Finally, tomatoes that show signs of disease (such as late blight) are not safe for canning. However, if the plant is diseased but the fruit itself show nosign of disease, they are safe for canning.
(adsbygoogle = window.adsbygoogle || []).push({});Preserving Green Tomatoes
There are lots of good ways to preserve greentomatoes. My favorite method is canning, simply because there are so many deliciousrecipes out there for canned green tomatoes. In addition, you can safely substitute unripe, green tomatoes for tomatillos in any canning recipe.
Green Tomato Mincemeat
 Green tomato mincemeat pie filling.
This is my family's absolute favorite green tomatorecipe. It makes a truly scrumptious pie filling or basis for a cobbler orcrisp. This recipe comes from the National Center for Home Food Preservationand makes about 7 quarts. (I use two quart jars for each pie.)
4 quarts chopped green tomatoes
3 quarts peeled and chopped tart apples
1 lbs. dark seedless raisins
1 lb. white raisins
1/4 cup minced orange peel (from about 1 mediumorange)
2 cups water
2 1/2 cups brown sugar
2 1/2 cups white granulated sugar
1/2 cup white vinegar (5% acidity)
1 cup bottled lemon juice
2 tablespoonsground cinnamon
1 teaspoonground nutmeg
1 teaspoonground cloves
1. Combine all the ingredients in a large saucepanplaced over medium-low heat. Cook and stir often, until the ingredients are tenderand slightly thickened (about 35 to 40 minutes).
2. Ladle hot filling into hot quart jars, leaving1/2-inch headspace. Process in a water bath canner for 15 minutes.*
 This mincemeat makes a scrumptious pie!
Green Tomato Salsa
 Green salsa.
This is a very good, mild salsa from the Universityof Main Extension Office. My family likes it as a change of pace in tacos ortaco salad, or over enchiladas. Makes about 5 pints.
5 cupschopped green tomatoes (unpeeled or peeled)
6 clovesgarlic, finely chopped
1 1/2 cupschopped long green chilies (remove the seeds for a mild salsa, leave them for aspicier salsa)
1tablespoon ground cumin
1/2 cupchopped jalapeno peppers (with seeds for a hotter salsa, seeds removed for amild salsa)
1 - 3tablespoons oregano leaves
4 cupschopped onions
1tablespoon canning salt
1 cupbottled lemon or lime juice
1 teaspoonblack pepper
1. Combineall the ingredients in a large saucepan and place over high heat, stirringoften, until it boils. Reduce the heat and simmer 20 minutes, stirring now andthen.
2. Ladleinto hot pint jars, leaving 1/2 inch headspace. Process in a water bath cannerfor 15 minutes.*
(adsbygoogle = window.adsbygoogle || []).push({});
Green Tomato Slices
If you love fried green tomatoes, or use greentomatoes in various savory dishes, give this recipe from the University of MainExtension Office a try.
Wash green tomatoes, core them, and slice. Pack intopint canning jars, adding 1 tablespoon bottled lemon juice or 1/4 teaspooncitric acid, to ensure safe acidity. For quart jars, add 2 tablespoons bottledlemon juice or 1/2 teaspoon citric acid. Cover the tomatoes with boiling water,leaving 1/2 inch headspace. If desired, add 1/4 teaspoon canning salt to eachjar. Process in a water bath canner: pints for 40 minutes, quarts for 45minutes.*
 Green tomato relish.
More canning recipes for green tomatoes:
Spiced Green Tomatoes from The National Center for Home Food Preservation
Pickled Sweet Green Tomatoes from The National Center for Home Food Preservation
Kosher Style Dill Green Tomato Pickles from The National Center for Home Food Preservation
Pickled Green Tomato Relish from The National Center for Home Food Preservation
Green Salsa from The National Center for Home Food Preservation
Rummage Relish from The National Center for Home Food Preservation
Tangy Relish from The National Center for Home Food Preservation
Piccalilli from The National Center for Home Food Preservation
Fall Garden Relish from The National Center for Home Food Preservation
Kosher Green Tomato Pickles from So Easy to Preserve (by The University of Georgia Extension)
Green Tomato Relish from So Easy to Preserve (by The University of Georgia Extension)
Green Tomato Salsa from the Ball Blue Book (37th edition)
Green Tomato Relish from The Ball Blue Book (38th edition)
Green Tomato Hot Pepper Mix from The Ball Blue Book (38th edition)
Dilled Green Tomatoes from The Ball Blue Book (38th edition)
Escabeche from The Ball Blue Book (38th edition)
Thai Green Tomato Chutney from The All New Ball Book of Canning and Preserving (also in The Ball Complete Book of Home Preserving)
Green Tomato & Hot Pepper Pickles from The All New Ball Book of Canning and Preserving
DilledGreen Tomato Pickles from The Ball Complete Book of Home Preserving
Green Tomto Relish from The Ball Complete Book of Home Preserving
Green Chili Sauce from The Ball Complete Book of Home Preserving
Chow Chow Relish from The Ball Complete Book of Home Preserving
Minced Mustard Pickles with green tomatoes from The Ball Complete Book of Home Preserving
Piccadilli Relish from The Ball Complete Book of Home Preserving
Salsa Verde from The Ball Complete Book of Home Preserving
In addition, the USDA Complete Guide to Home Canning says:"Green tomatoes are more acidic than ripened fruit and can be canned safely" in place of red, ripe tomatoes in recipes that call for tomatoes by themselves. Just be sure to peel the green tomatoes (with a soft skin peeler) if the recipe calls for peeling.

Freezing Green Tomatoes
If you prefer to freeze your harvest:Wash and core green tomatoes, then cut into cubes or slices. Spread out theprepared tomatoes in a single layer on a rimmed baking sheet, then pop them inthe freezer. Once the tomatoes are frozen hard, transfer them to a freezer bag.Frozen slices can be dipped in flour and fried without thawing first.
(adsbygoogle = window.adsbygoogle || []).push({});Dehydrating Green Tomatoes
Dried green tomatoes are handy for desserts orsavory dishes. Begin by peeling and coring the tomatoes, then chop them intocubes 1/2 inch or smaller. Dry at 140 degrees F. When you can tear a pieceapart and no liquid seeps out, the tomatoes are done. Store in a glass jar witha metal lid and store in a dark, cool location for up to a year. To rehydrate,cover the tomatoes with water and allow to soak for about an hour.
Fermenting Green Tomatoes
 Fermented green tomatoes. Photo by Warren Layton.
If you want to get some good probiotics in yourdiet, you'll be happy to know green tomatoes ferment well. As with allfermenting projects, be sure to freshly wash everything (your tools, yourcontainers, your fruit, and your hands) before beginning.
4cups distilled water
2tablespoons fine sea salt
11/2 lbs green tomatoes, quartered (the tomato pieces should all be about thesame size)
4medium hot peppers, sliced 1/4 inch thick (optional)
6medium garlic cloves
1.Warm 2 cups of the water in a saucepan placed over medium heat. Add the saltand stir until the salt dissolves. Remove the pan from the stove and allow thewater to completely cool.
2.Place the prepared tomatoes in a quart-sized jar. Add the peppers (if using)and garlic. Pour the cooled brine over the vegetables. Pack everything intightly. The vegetables must be completely covered with the brine.
3.Place a fermentation weight over the vegetables, as well as a burper. If youhave neither, you may use a jelly jar filled with marbles as a weight, then covereverything with cheesecloth to keep bugs out. Place the quart jar in a bowl, incase liquid overflows during fermentation. Place in a location out of directsunlight.
4.In about 14 days, taste a tomato (using a freshly washed fork). If you like theflavor, remove the burper and weight, cover the jar with a plastic or metallid, and store in the refrigerator. If you think the tomatoes need morefermenting time, leave them for up to 6 weeks or so, tasting every few daysuntil you like the flavor.
(adsbygoogle = window.adsbygoogle || []).push({});
Cookingand Baking with Green Tomatoes
You canalso use up your green tomato crop right away by using them in savory or sweetdishes.
* Green Tomato Pie (tastes just like apple pie!)
 Green tomato pie tastes like apple pie!
* Green Tomato Enchilada Sauce
* Oven or Air Fried Green Tomatoes (or traditional Fried Green Tomatoes)
* Green Tomato Jam (not for canning; keep in the freezer or refrigerator)
SAFETY NOTE:
While millions of people have eaten green tomatoes without negative side effects, and while neither the USDA nor the Extension offices have expressed concern about canning or eating green tomatoes, Ball points out that unripe green tomatoes can contain something called solanine, which, if eaten in large quantities, can be toxic. If you want to be extra careful, Ball recommends only eating darker green tomatoes, saving pale green ones (which, they say, are higher in solanine) for off-the-vine ripening.
(adsbygoogle = window.adsbygoogle || []).push({});
August 13, 2024
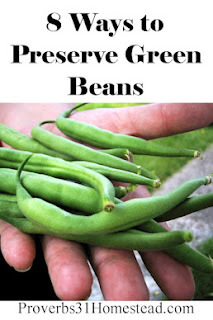
8 Ways to Preserve Green Beans

This post may contain affiliate links. As an Amazon Associate, and at no cost to you, I earn from qualifying purchases made through some links. Please see FCC disclosure for full information. Thank you for supporting this site!
Wild green beans (also known as string beans, snap beans, or French beans) were growing in the New World when Columbus arrived - and while he did bring some green bean plants back to Europe, they were considered ornamental. The flowers were pretty, but the seed pods were tough and not pleasant to eat. Over time, however, humans selected and hybridized green beans that produced a more tender and edible pod. By1889, snap beans were available from Burpee, the nation's largest seed seller, and in 1894, the first stringless green bean was introduced. Today, there are probably thousands of varieties of green beans for gardeners to choose from - and there are many ways to safely and successfully preserve them. Here are the top eight:
1. Drying Green Beans, The Modern Way
A simple way to preserve green beans is to pop them into an electric dehydrator. If the beans are large, or you simply prefer your green beans in smaller pieces, cut or snap the beans first. Place the prepared beans on the trays of the dehydrator in a single layer and set the temperature to 135 degrees F. The green beans are dry when you can snap a large piece in half and no moisture seeps from it.
Store fully dried green beans in a glass jar with an airtight, metal lid in a cool, dark location. To use dried green beans, pour them directly into soups or rehydrate them in cool water for about 1 hour before draining and cooking. (Hot water will rehydrate the beans faster, but it also partially cooks them.)
If desired, you may blanch the green beans before drying them, which helps preserve their color and nutritional value and will make larger green beans easier to rehydrate. To do so, bring a pot of water to a boil and add the green beans. After 3 minutes, drain and plunge the beans into ice water.
2. Drying Green Beans, the Old School Way
 Leather britches. Photo by Eiler Lyntha Scott.
 Personally, I prefer the quality of green beans when they are dehydrated the modern way - but if you don't have a dehydrator, or you just want to give a nod to the homesteaders who came before you, creating "leather britches" (as the old-timers called them) is still a great way to preserve green beans.
First, pinch off the stems of fresh green beans. (As with green beans dried the modern way, you may wish to blanch the beans first.) Then, using a large hand sewing needle threaded with kitchen string or quilting thread, pierce a green bean right through the middle (or at least one inch down from one end). To secure this bean, leave a tail about 2 inches long and tie the tail into a knot. Continue piercing more green beans until the string is full, but it's best to leave space between the beans, for good air circulation. Tie off the other end of the string to secure the green beans in place.Hang the green bean string in a dark, dry location. The beans are done drying when you can break open a large bean and no moisture seeps from it. Store and use exactly as you would green beans dried with an electric dehydrator (see above).
3. Pickled Green Beans (2 Ways)
 Dilly beans can be safely water bathed.
(adsbygoogle = window.adsbygoogle || []).push({});
Green beans are a low acid food and therefore must be pressure canned...unless you pickle them. "Dilly beans" is the traditional name for pickled green beans; they make a great snack, side dish, or addition to a salad. See the recipe I use by clicking here.
For a little something different, you may also water bath this 3-Bean Salad, which makes a great side dish. (Although oil is generally not considered safe for canning, this recipe is approved by The National Center for Home Food Preservation and is tested-safe.)
3 cups green beans, washed, stems removed
3 cups cooked or canned and drained kidney beans
2 cups cooked or canned and drained garbanzo beans
1 cup chopped onion
2/3 cup chopped sweet pepper
1 cup red wine vinegar (5% acidity)
1 cup bottled lemon juice (It must be bottled juice, because the acidity in fresh lemon juice can vary too much, which could make this recipe unsafe.)
1 1/2 cups granulated sugar
1/2 cup olive oil
1 teaspoon canning or non-iodized salt
1. Bring a large pot of water to a boil over high heat. While waiting for the water to boil, fill a clean sink with ice water.
2. Pour the green beans into the pot. When the water returns to a boil, begin timing 3 minutes. When 3 minutes have passed, drain the beans and plunge them into the prepared ice water.
3. In a large bowl, combine the fully cooled green beans, kidney beans, garbanzo beans, onion, and sweet pepper. Set aside.
4. In a large stainless steel pot, combine the vinegar, lemon juice, sugar, olive oil, salt, and water. Bring to a boil.
5. Carefully add the bean mixture to the vinegar mixture and let it simmer over medium heat for 15 minutes.
6. Remove the pot from the burner and allow the mixture to cool until it's lukewarm. Refrigerate for 12 to 14 hours.
7. Bring the bean mixture to a boil and ladle into hot pint-sized canning jars, leaving 1/2 inch headspace. Process in a water bath canner for 10 minutes.* Makes about 5 - 6 pints.
4. Pressure Canned Green Beans (a Few Ways)
 Pressure canned green beans.
If you don't want pickled green beans, but still want to can your harvest, here's the way to do it safely. You will need about 2 lbs. of fresh, young green beans per quart jar.
1. Prepare the green beans by washing them and removing their stems. Trim the ends and snap into smaller pieces, if desired.
2. Place prepared green beans into a pot and cover with water. Boil 5 minutes.
3. Using a ladle, pack hot green beans into hot canning jars, leaving 1-inch headspace. If desired, add 1/2 teaspoon of canning or non-iodized salt to each jar.
4. Cover the beans with hot cooking liquid, maintaining 1-inch headspace.
5. Process jars in a pressure canner at 10 lbs. pressure: 20 minutes for pint jars and 25 minutes for quart jars.*
In addition, Ball has several other pressure canned green beans recipes, including Lemon Garlic Green Beans, Balsamic Beans, and Green Beans and Mushrooms, all found in The All New Ball Book of Canning and Preserving.
5. Freezing Green Beans (2 Ways)
 To blanch or not to blanch frozen green beans?
(adsbygoogle = window.adsbygoogle || []).push({});
Blanching green beans before freezing them is considered best because it helps maintain color and nutritional value.
1. Wash the green beans. Remove the stems. If desired, snap into smaller pieces.
2. Place a pot of water over high heat; bring to a boil. While waiting for the water to boil, prepare ice water in a clean sink.
3. Once the water is boiling, add the green beans. When the water returns to a boil, begin timing 3 minutes. (If it takes more than a minute for the water to re-boil, you're putting too many green beans in the pot at one time.) Drain the beans and plunge them into the ice water.
4. Once the beans are completely cool, drain thoroughly, pat dry, and pack into freezer-safe containers, leaving 1/2 inch headspace.
Some people - myself included - actually prefer to not blanch green beans before freezing them. I find these beans easily last a year in the freezer and their texture is much more like fresh beans.
1. Remove the stem ends. If desired, chop or snap the beans into smaller pieces.
2. Place the green beans in freezer bags. Partially seal the bags, then squeeze out any excess air. Seal completely and pop into the freezer.
6. Lacto-Fermented Green Beans
 Fermented green beans. Photo by So Fuego Productions.
If you don't want to use electricity to preserve green beans, fermenting is handy...plus it aids gut health with good probiotics.
Fresh green beans, washed, stems removed
4 garlic cloves
2 whole dill heads (or 2 fresh sprigs or 1 tablespoon dill seeds)
1 - 2 bay leaves
1 teaspoon mustard seeds
1 teaspoon peppercorns
1 tablespoon pickling or kosher salt
1. Wash everything you will use (quart-sized canning jar, knife, utensils, your hands...) in hot, soapy water.
2. Place the garlic, dill, bay leaves, mustard seeds, mustard seeds, and peppercorns in the bottom of the quart jar. Add the green beans, packing them tight.
3. Pour 2 cups of non-chlorinated water into a saucepan and add the salt, stirring until it is dissolved. If needed, heat the mixture on the stove to get the salt to fully dissolve, then allow the brine to cool completely.
4. Pour the cool salt brine over the green beans in the jar.
5. Weight the beans down with a glass weight and cover the jar with a clean cloth secured with a bit of string or a rubber band. (Or use a pickle pipe.)
6. Place the jar on your counter, away from direct sunlight. Placing the jar in a bowl will help prevent messy brine overflow. Check the jar daily to ensure the beans are under the brine. If necessary, add additional brine. After a week, taste the beans. Keep fermenting until you like the taste, then store the beans in the refrigerator or other cold location.
7. Freeze Dried Green Beans (2 Ways)
(adsbygoogle = window.adsbygoogle || []).push({});Home freeze drying allows you to preserve most of the green bean's nutrients and then store them for at least 20 years. (Not sure what the difference between dehydrated and freeze dried is? Click here for a full explanation.) There are two basic ways to freeze dry green beans, depending upon how you want to use them.
If you want to eat the green beans as a snack (without rehydrating them first), you don't need to blanch them. Simply trim off the stems, cut into pieces (if desired), and (if you wish) season. To get the seasoning to stick, you'll first need to lightly coat the beans in oil. This oil means the green beans won't last for years in storage (because the fat will go rancid), but if you plan on snacking on the beans within a few months, it will be fine.
If you want to use your freeze dried green beans for cooking, you should blanch them first, as described in the drying section, above. This ensures the green beans rehydrate well.
Pop the prepared green beans onto the trays of your freeze dryer, keeping them in a single layer, and turn on the machine. When the beans are fully freeze dried, store them in a glass jar with an air tight metal lid in a cool, dark location for up to a year, or place them inside Mylar bags with appropriate-sized oxygen absorbers, seal, and store for up to 20 years or so.
8. Salted Green Beans
(adsbygoogle = window.adsbygoogle || []).push({});Before canning and freezing were used to preserve food, salting was an important preservation method. It may take about 1-1/4 to 1-1/2 pounds of green beans to fill a quart jar.
1. Wash and dry the green beans. Remove the stems.
2.Wash a wide mouth glass jar with hot, soapy water, rinse, and dry thoroughly. Place a layer of non-iodized salt in the bottom of the jar.
3. Place a thin layer of green beans on top of the salt. Avoid overlapping the beans as much as possible. Press down on the beans, then add another layer of salt on top of them. Continue making thin layers of beans and salt, ending with a layer of salt.
4. Place a lid on the jar and store it in a cool, dark location. For added safety, I use the refrigerator, but traditionally, salted food was kept in a cellar or other rustic fridge.
The beans should remain fresh for many months. To use the beans, rinse with running water, then place in a bowl of fresh water for about 2 hours. Drain and use as you would fresh green beans.
* If you live above 1,000 feet above sea level, you'll need to add to the processing time of anything you can. For water bath canning, add the following:1,001 - 3,000 feet - add 5 minutes3,001 - 6,000 feet - add 10 minutes6,001 - 8,000 feet - add 15 minutes8,001 - 10,000 feet - add 20 minutes
Cover Image by zoyachubby.
Related Articles:

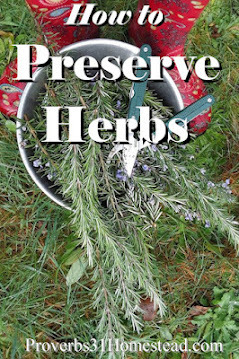
(adsbygoogle = window.adsbygoogle || []).push({});
August 7, 2024
How to Can Pickled Beets
 Pickled beets are probably my husband's favorite home canned item. It's impossible for me to can enough of these for him! Thankfully, they are easy to make, as you can see below. Do note that you can easily change the flavor of these beets, simply by omitting the spices (as I usually do) or by switching up the spices used. Ball recommends three different spice blends to try, and I've included all of them below.
(Don't have a lot of beets or just prefer to make refrigerator pickles? Click here for a pickled beet recipe that's ideal for those situations.)
How to Can Pickled Beets
(from The Ball Complete Book of Home Preserving)
First, prepare the beets. This may be done the day before canning, if desired:
1. Scrub the beets very well. Leave the roots and about 1 inch of stem in place. (This will help the beets keep their color during the next step.)
2. Put the beets in a pot, the largest on the bottom and the smallest on top. Add enough water to cover the beets, then place on the stove over high heat.
3. Boil the beets until fork tender. Small beets may be ready in as little as 10 minutes; large ones might take 20 minutes or more. Check the beets regularly, removing them individually once they are fork tender, and placing them in ice water (or under cold, running tap water).
4. As the beets cool enough to handle, easily push off their skins, stems, and small roots. Cut into 1/4 inch slices or chunks.
 Peeled beets. These are Bull's Blood variety.
(HINT: Allow the water the beets were boiled in to cool and use it to irrigate plants. It has nutrients in that will lightly fertilize them.)
 Cutting up the beets.
(adsbygoogle = window.adsbygoogle || []).push({});
Next, prepare the brine. For every 10 cups of prepared beets, you will need:
2 1/2 cups white distilled vinegar (5% acidity)
1 cup water
1 cup granulated sugar (You may safely use less sugar, but remember that the pickles will taste more vinegary if you do)
3 tablespoons of pickling spice (OPTIONAL! I don't use any spices in the pickled beets I make for my husband. However, if you wish, you may use store bought pickling spice, or use one of the recipes Ball recommends, found at the bottom of this page.)
1. If using the pickling spice, place it in the center of a square made from a double layer of cheesecloth. Bring up the corners of the cloth and tie them together with kitchen twine, making a bag.
2. In a large stainless steel pot, combine the spice bag (if using), vinegar, water, and sugar. Bring to a boil, stirring until the sugar is completely dissolved. If using the spice bag, boil for 15 minutes. Otherwise, move on to step 3 as soon as the brine comes to a full boil.
3. Carefully spoon the prepared beets into the pot of brine and bring the mixture back to a boil.
 Bringing the brine and beets back to a boil.
4. With a slotted spoon, ladle beets into hot pint jars, leaving a generous 1/2 inch headspace.
5. Ladle hot vinegar mixture over the beets, leaving a generous 1/2 inch headspace. Bubble the jar and wipe the rim clean. Add a lid and screwband and put the jar in a canner of hot water. Repeat until all the beets are in jars.
 Filling the jars.
(adsbygoogle = window.adsbygoogle || []).push({});
6. Process the jars in a water bath or steam canner for 30 minutes. (If you are at 1001 to 3,000 feet, process for 35 minutes; 3,001 to 6,000 feet, 40 minutes; above 6,000 feet, 45 minutes.)
10 cups of prepared beets makes approximately 6 pints.

DIY Pickling Spice:
1 (4-inch) cinnamon stick, broken into pieces
5 bay leaves, crushed
2 tablespoons mustard seeds
1 tablespoon whole allspice
1 tablespoon coriander seeds
1 tablespoon whole black peppercorns
1 tablespoon ground ginger
1 tablespoon dill seeds
2 teaspoons cardamom seeds
1 to 2 teaspoons hot pepper flakes
1 teaspoon whole cloves
Sweet Spice Mix:
10 whole cloves
2 (4-inch) cinnamon sticks, broken into pieces
Caraway Spice Mix:
2 tablespoons caraway seeds
2 teaspoons whole black peppercorns
Related Posts:

(adsbygoogle = window.adsbygoogle || []).push({});


