
Kristina Seleshanko's Blog, page 7
March 22, 2023
How and Why to Grow Potatoes in Grow Bags
 This post may contain affiliate links. As an Amazon Associate, and at no cost to you, I earn from qualifying purchases made through some links. Please see FCC disclosure for full information. Thank you for supporting this site!
I've been growing potatoes in grow bags since 2011. Why would I do that when I have plenty of space to plant them in the ground? Because I find grow bags produce bigger harvests. It's true!
I've often wondered why this is; I don't have a definitive answer, but some folks claim it's due to the felt-like material most grow bags are made of. When the roots of the potatoes touch the sides of the bag, they say, those roots branch out more than usual, which in turn creates more potatoes.
There are other good reasons to grow potatoes in grow bags, too. They are an excellent choice if you don't have a lot of space for rows of potatoes, for example, or if you have lousy garden soil.
What Type of Potatoes to Put in Grow Bags
 Late-season varieties do especially well in grow bags.
I typically only grow late-season potatoes (usually Kennebec, but this year I couldn't find that variety, so I went with Yukon Gold); I can certainly vouch that they do well in grow bags. In fact, it seems late-season potatoes benefit most from the rooting action created by grow bags. That said, you can really grow any type of Irish potato in a grow bag.
Do, however, make the effort to buy seed potatoes. These are not really seeds, but are small potatoes grown just for the purpose of making new plants. Store bought potatoes (even if organic) are sprayed with inhibitors that help prevent potatoes from growing green shoots as quickly as they naturally would. In addition, store bought potatoes (or even potatoes you've grown yourself) were not grown specifically to make vibrant "seed." They may also harbor disease, even if the mother plant showed no sign of disease. By spending just a bit on seed potatoes, you ensure a healthier, more robust harvest.
If your seed potatoes don't yet have "eyes" (i.e., little sprouts coming up out of them), you should encourage them to grow by leaving the seed potatoes in a cool spot with natural sunlight for approximately 1 month to 8 weeks before planting. However, while this practice (called "chitting") is widely recommended, and while there is some evidence that chitting makes potatoes grow faster (according to Plant Your Patch, chitting results in 20% more yield from plants), if you neglect to chit your potatoes, it isn't the end of the world.
 Seed potato with an "eye."
(adsbygoogle = window.adsbygoogle || []).push({});
What you really do need to do, though, it cut up any seed potatoes that are bigger than a chicken's egg. About 2 days before planting, simply take a knife and cut the seed potatoes into approximately egg-sized pieces, being sure each piece has at least one eye (preferably two). Let these sit for a couple of days so they can develop a "skin" over the cut parts, which helps reduce the risk of rot once you plant the seed potatoes.
When to Plant Potatoes
When it comes to planting times, it's wise to consult the packaging your potatoes came in. It should contain either a chart or a graphic showing your country divided into different growing zones. From this, find your zone and the planting dates suggested for your area and the type of potatoes you are growing.
In general, though, you should plant potatoes after your last threat of frost has passed and when the soil temperature is 55 degrees F. during the day. If the soil is very wet, put off planting potatoes until it's dried out a bit.
Where to Plant Potatoes
Well, duh! Plant them in grow bags, right? Yes, yes...but where should you put these grow bags? Potatoes prefer sunny locations, so look for a spot with at least 6 hours of sunlight a day. In the past, I've grown potatoes in part shade - it is do-able, but your yields will be smaller.
How to Plant Potatoes in Grow Bags
Potatoes prefer nutrient-rich, slightly acidic (pH 5.8 to 6.5) soil, but they also aren't very fussy. They'll grow in most soil types - just make sure whatever you use is well-draining. So if your garden soil is heavy clay, you're better off using potting soil in your grow bag.
1. To begin, put about 1 inch of manure (mine is rabbit manure, filled with worms, since it's been sitting in a pile in my garden area for a while) in the bottom of each grow bag. If you don't have manure that's ready for gardening (most types must be aged), you could put compost in the bottom of the bags instead. (You could also mix manure or compost in with your garden soil before filling the bags.)
 Adding manure or compost.
(adsbygoogle = window.adsbygoogle || []).push({});
2. Now add about 4 inches of soil to the bag.
3. Next, plant the seed potatoes. Perhaps counterintuitively, potatoes grown in grow bags produce higher yields if you crowd them a bit, so plant 3 or 4 in a 30-gallon bag. Dig down a couple of inches, and place the potatoes eye-side up.
 Place potato seeds eye side up.
 Crowd your potato seeds a bit.
4. Cover the potatoes with more soil, so they are about 3 or 4 inches under the dirt.
5. Fold down the sides of the grow bag (creating a cuff), until it's just a couple of inches above the soil. This allows the plants, once they sprout, to get more sun.
6. If you're not expecting rain, water well.
How to Care for Potatoes in Grow Bags
Once the potato leaves are about 8 inches tall, add more soil to the grow bag. It's fine if some of the leaves get buried in the soil. Unfold the cuff of the grow bag as needed to accommodate the additional soil.
Repeat this step as often as necessary throughout the growing season.

(adsbygoogle = window.adsbygoogle || []).push({});
tr-caption" style="text-align: center;">Potatoes sprouting in a grow bag.
Potatoes in grow bags (or any type of container) dry out more quickly than if they're grown in the ground, so pay careful attention to irrigation. If you can stick your finger 1 inch down into the soil and it feels dry, you need to water. On the other hand, you don't want your potatoes sitting in a soggy grow bag. Aim to keep the moisture level in the bag even throughout the growing season
How to Harvest Potatoes Grown in a Grow Bag
 Thriving grow bag potatoes. Soon the tops will yellow and wilt, a sign that harvest time is near.
As the potato plant nears harvesting season (which varies, depending on the type of potatoes you're growing), the leaves will yellow and the stems will wilt. When this happens, stop watering. Wait a week or two.
Now, at last, you can harvest your potatoes. I do this by carefully digging around the grow bag with my hands; a hand held spade works, too, but if you want to store your potatoes, don't nick or puncture them. If you're stronger than I am, you can also dump the contents of the grow bag into a wheelbarrow and pull out the potatoes you find.
Brush the dirt off the potatoes with your hands; do not wash them until you're ready to cook them. Put the potatoes in a single layer in a cool room, covered with a bed sheet to help block sunlight. This allows the potatoes to "cure," letting the skins dry out. Potatoes with thin skins (like fingerlings) cure quickly; those with thick skins (like Russets) take longer. Generally, potatoes cure in 7 to 10 days.
Store the cured potatoes in a cool, dark location, ideally with a temperature of about 45 to 55 degrees F. Cardboard boxes are great for storing potatoes; baskets, with their potentially pokey edges that can damage the crop, are not. If you've grown several types of potatoes, it's smart to sort out the ones with thinner skins, so they can be eaten first; thin-skinned potatoes don't last very long in storage.
Reuse!
The soil you've used for growing your potatoes can be re-used for non-nightshade plants. (Using the same soil for more potatoes or for any plant in the potato family - which includes tomatoes, peppers, and eggplant - means the soil won't have all the nutrients needed...and it's more likely to harbor diseases that will maim or kill those plants.) It's smart to add compost or other organic matter before re-using the soil, however. Another option is to dump the used soil in your compost bin or use it as dust bathing material for your chickens or quail.
The grow bags can be used again next year. I've had my original grow bags for 12 years, and they are still working great! This year, I wanted to add to my arsenal of bags, but couldn't find the exact ones I purchased years ago, so I bought these. So far, they seem quite comparable to my original bags.
Other Ways to Plant Potatoes
If this method doesn't trickle your fancy, there are plenty of other ways to plant potatoes! Check out this post for all the best methods.
Cover image courtesy of Conall. A version of this article first appeared in July 2013.
(adsbygoogle = window.adsbygoogle || []).push({});


February 15, 2023
Avoiding Homestead Burnout
 This post may contain affiliate links. As an Amazon Associate, and at no cost to you, I earn from qualifying purchases made through some links. Please see FCC disclosure for full information. Thank you for supporting this site!
No matter how enthusiastic you are about homesteading, no matter how experienced you are living the homesteading lifestyle, the truth is, burnout can and does happen. Some people allow burnout to become so bad, they give up the homesteading lifestyle altogether. But in my experience, if you learn to recognize the early signs of burnout, you can address and fix it.
The First Sign of Burnout
The first sign of burnout is usually fatigue. Since the homesteading world is full of people who are used to working hard, it can be difficult for us to stop and rest when we're tired. We want to press forward and get stuff done. Yet it's essential to rest in order to avoid burnout.
As homesteaders, we learn to "read" nature; we recognize the hints God gives us when the first frost is near, or when our sheep are close to giving birth, or when our rabbits are grumpy because they want to mate. But sometimes we forget to read our own bodies. If you're tired, your body is begging for rest. Giving it what it needs will not only help prevent burnout, but it will keep you physically and mentally healthier.
Many times, homesteaders feel they can't rest; there's simply too much to do. This is a lie we tell ourselves. The fact is, if we don't rest, we're actually putting ourselves and our homestead in greater jeopardy. Our health is likely to fail - and that will limit our ability to live the homesteading life.
In addition to getting plenty of sleep, I highly recommend giving yourself at least a half hour every morning (or, better yet, every morning and evening) to pray, keep a journal, read something uplifting, sing, or just think about things quietly. This is not the time to binge-watch TV or scroll through social media; those activities aren't truly curative. The idea here is to spend some restful, restorative time on yourself every single day.

(adsbygoogle = window.adsbygoogle || []).push({});
Self-Reflection
When you're feeling frustrated, stressed, or tired, it's also helpful to stop and think honestly about yourself. This often isn't easy - but try to imagine what a close, good friend might observe about your attitude, your health, and your lifestyle.
For example, I tend to think that if I don't get things done myself, they will never get done at all. Or at least, they won't get done correctly. However, if I look at myself critically, I know this sort of thinking is detrimental. Homesteading is messy. It just is. But if the basics get done (the livestock are fed, watered, and safe, most of the harvest gets in, and we eat whole foods), I shouldn't beat myself up. I am only one person. I cannot do it all myself. Period. So I have to force myself to let go. To let my kids pick the green beans, for example - even if they do accidentally pull up some plants or leave beans on the vine. This is reality. (And it also happens to be good for my kids; they need to experience being close to their food and learning great work ethic.)
To-Dos
When we experience burnout, often we've simply made our to-do list impossibly long. It helps me to remember that back in the days of the pioneers, nobody did it all on their own. They still bought certain foods, clothing, cooking gear, etc. Neighbors helped each other out. And people lived more simply than we do now; they didn't grow nearly as many veggies, for example, and they certainly didn't run greenhouses or care for high-maintenance animals.
So, learning from my ancestors, I need to try to keep things simple, especially when burnout is threatening. I find it helps to write down an honest and complete list of every single thing I'm doing daily (and perhaps weekly and monthly). From that list, I first find things I can completely omit. The idea here is to have a list only of things that must get done. For example, if you spend time on social media, that would be a good thing to cut; it's easy to waste a lot of time online, yet few people feel fulfilled after scrolling through Facebook. You could also cut things like growing vegetables that aren't a mainstay of your diet, window cleaning, mowing areas of your land that don't truly require it, or volunteering. Remember, you don't necessarily have to omit these things forever. You are just paring down your list to the bare minimum of what you must do.
Next, I find things my kids can do. There's always something! It could be as simple as collecting the eggs twice a day or it might be something a little more challenging, like taking over the laundry for the household. It's easy to underestimate what kids can do, so once again, I think back to my ancestors and the jobs - some of them difficult - that even little children did. Of course, I'm not suggesting making your children slaves or having them work so much they don't have time to play. But we should all be able to agree that chores are good for kids - giving them a sense of accomplishment, not to mention real-life skills. (I've blogged a lot about this topic over the years, but I especially recommend reading "Age Appropriate Chores for Kids," "An Important Role in the Household - What Your Child Needs to Know," and "Chores Teach Helpfulness," if you haven't done so recently.)
Next, if there are other people you could delegate to, don't be afraid to ask them for help. For instance, when I'm in the midst of fall preserving craziness, my husband - though busy with his own work - can pick up some of my chores so that I don't fall into complete burnout.

(adsbygoogle = window.adsbygoogle || []).push({});
Sometimes livestock can take up slack for me, too. For example, I can use our chickens to clean up the fall garden or the floor of the summer orchard.
Also consider switching to less time-consuming methods. For instance, I don't pull plants out of the garden before winter; this saves me time and energy when I am feeling exhausted from the big push of preserving season, And it's good for the soil. (The plant roots rot, pouring nutrients into the soil; plus leaving plants in the soil helps prevent erosion.)
Finally, consider if there's anything you can delay for one month. For instance, can I throw whole tomatoes in the freezer and tackle canning them into sauce during the winter months? (Yes, I certainly can! Whew!)
Reassessing
I believe that if you do the above, you'll find you have the time to rest and then feel refreshed. But, if you're still feeling overwhelmed, consider getting some outside help. There are probably few homesteaders who can afford to hire help, but you might be able to find someone who wants mentoring and will give you their time for free as long as you teach them the ropes. But yes, teaching people does take time, and some people can be flaky, so you must consider that.
If mentoring isn't doable, it's time to reassess your lifestyle. (Actually, it's a good idea for all of us to reassess our lifestyle from time to time.) I recommend asking yourself about your goals. Are they realistic? Often we enter homesteading thinking we're going to grow all our fruits and vegetables, and raise cattle and goats and chickens and pigs, and cook everything from scratch, and homeschool...Often only by doing can we realize these are lofty goals for a single person - or even a single family - to aspire to. I won't say this goal is impossible, but it is challenging, and it's always best to gradually work our way up to such a lifestyle.

(adsbygoogle = window.adsbygoogle || []).push({});
While doing so, it's also important to remember what stage of life we're in. Just because something isn't working for us right now, doesn't mean we might not be able to work in those things at a different stage of life. For example, if you're a mom with young children, it's important to remember they won't always need so much of your time. Be gentle with yourself now, and be at peace with the fact that as your children age, you'll be able to dedicate more and more time to homesteading - hopefully, with them working alongside you.
Or perhaps you find yourself getting older, and you need to reassess what you can realistically do on your homestead. I sure know that physical labor is getting harder and harder as I age, so I'm always thinking of way to make chores easier on my body. I admire people who are willing to realize they are in this situation and who adjust their life accordingly. I aim to be like them.
Ask yourself: If my goals aren't realistic, how can I realistically re-envision them? For example, maybe you could focus on raising only two types of meat instead of three or four. Or maybe you could barter eggs or fruit from your homestead for meat some other homesteader has in abundance. Or maybe you just need to buy half a beef from a local ranch.
You could also assess your systems and how you can make life easier for yourself by having better ones. Spending the money on an automatic hen house door, for example, can be a godsend to exhausted homesteaders during the summer months. Installing drip irrigation instead of hand watering is a huge time saver. Even small things, like putting in automatic water systems for your livestock, can make a big difference in how much time and energy homesteading requires. (And not all these systems have to cost money! For example, you could implement succession planting so that your harvests are more spread out and easier to preserve.)
Count Your Blessings
Finally, when times feel tough, it's tremendously helpful to make a list of your blessings - and to observe other people around you and the tough times they are going through. Mindset is everything. Be encouraged!
Homesteading can be immensely rewarding - it's just important to remember there is no one way to do it. Let it be a pleasure in your life, resting and paring back when needed, and I'm sure you'll never regret this down-to-earth lifestyle choice.
February 7, 2023
Winter on the Homestead
 It's been a while since I've posted a homestead update...and that's mostly intentional. After the exhausting harvesting season, for me, winter is a time to rest. This is part of what I love about homesteading: It's so much more connected to nature than modern life tends to be. After all, the plants and animals are busy all fall...and then everything takes a nice long winter break. It's healing. It's spiritual. And it's especially needed the older I get!
Yet despite trying to rest, the truth is, our homestead is in upheaval. There are hammers pounding, saws cutting, and building debris everywhere. (If you've wondered why I haven't done any YouTube videos lately, this is why. There's just too much noise over here!) I'll admit all this chaos is stressful, but it's for a good cause. You see, when we purchased this land seven years ago, the house was not only unfinished but it was just...weird. For example, you had to walk through a little closet to get into the bathroom. And the kitchen? Well, it was about the size of an RV kitchen, minus the cabinetry. It was difficult from a homesteading point of view. (Imagine preserving food and cooking two or three meals a day when you only have about three feet of counter space and no place to store your pots and pans!) It was also uncomfortable just from a standard living point of view.
 The kitchen when we moved in.
 The kitchen today.
So even though our timing is lousy (just last week, the roofer told me material costs had gone up 9%), we decided it was now or never. Already, my kitchen is looking a million times better. (Seriously, I don't think any of you who haven't been in my kitchen in real life can really appreciate the dramatic change and how happy I am about it!) And soon, my washer and dryer, which have been in an outbuilding a fair distance from the house, will be inside the house. (No more working around the weather!) And the walls will be finished. And you won't have to walk through a weird little closet to get to the toilet.
 Winter cauliflower! (Variety: Baby.)
(adsbygoogle = window.adsbygoogle || []).push({});
The new garden has done splendidly this winter. I've been harvesting Brussels sprouts, cabbage, kale, turnips, and beets all winter, and everywhere I laid down cardboard and mulch is mostly weed free; the few weeds that did pop up pull out very easily. I did neglect to get the entire garden area covered with cardboard and mulch (I was just too worn out with other homesteading activities last fall), so soon, my husband will mow down the weeds that over winter and we will cover them with cardboard and mulch. We're also planning on pushing out the western fence line of the garden, for some added growing space. I'm hoping to plant Egyptian Walking Onions this fall, and I want to grow more winter squash this summer. (See why I think winter squash is such a boon on the homestead by clicking here.)
 Planting peas.
Already, I've planted out pea seeds, to grow up the cattle panel trellis. I've begun my winter sowing, too. So far, I've started several tomato seeds (San Marzano, Legend, Galahad, and Darkstar), Amazing cauliflower, Delta yellow summer squash, Winter Luxury pumpkin, Discuss buttercup squash, Hunter butternut squash, kohlrabi, and Purple Top turnips.
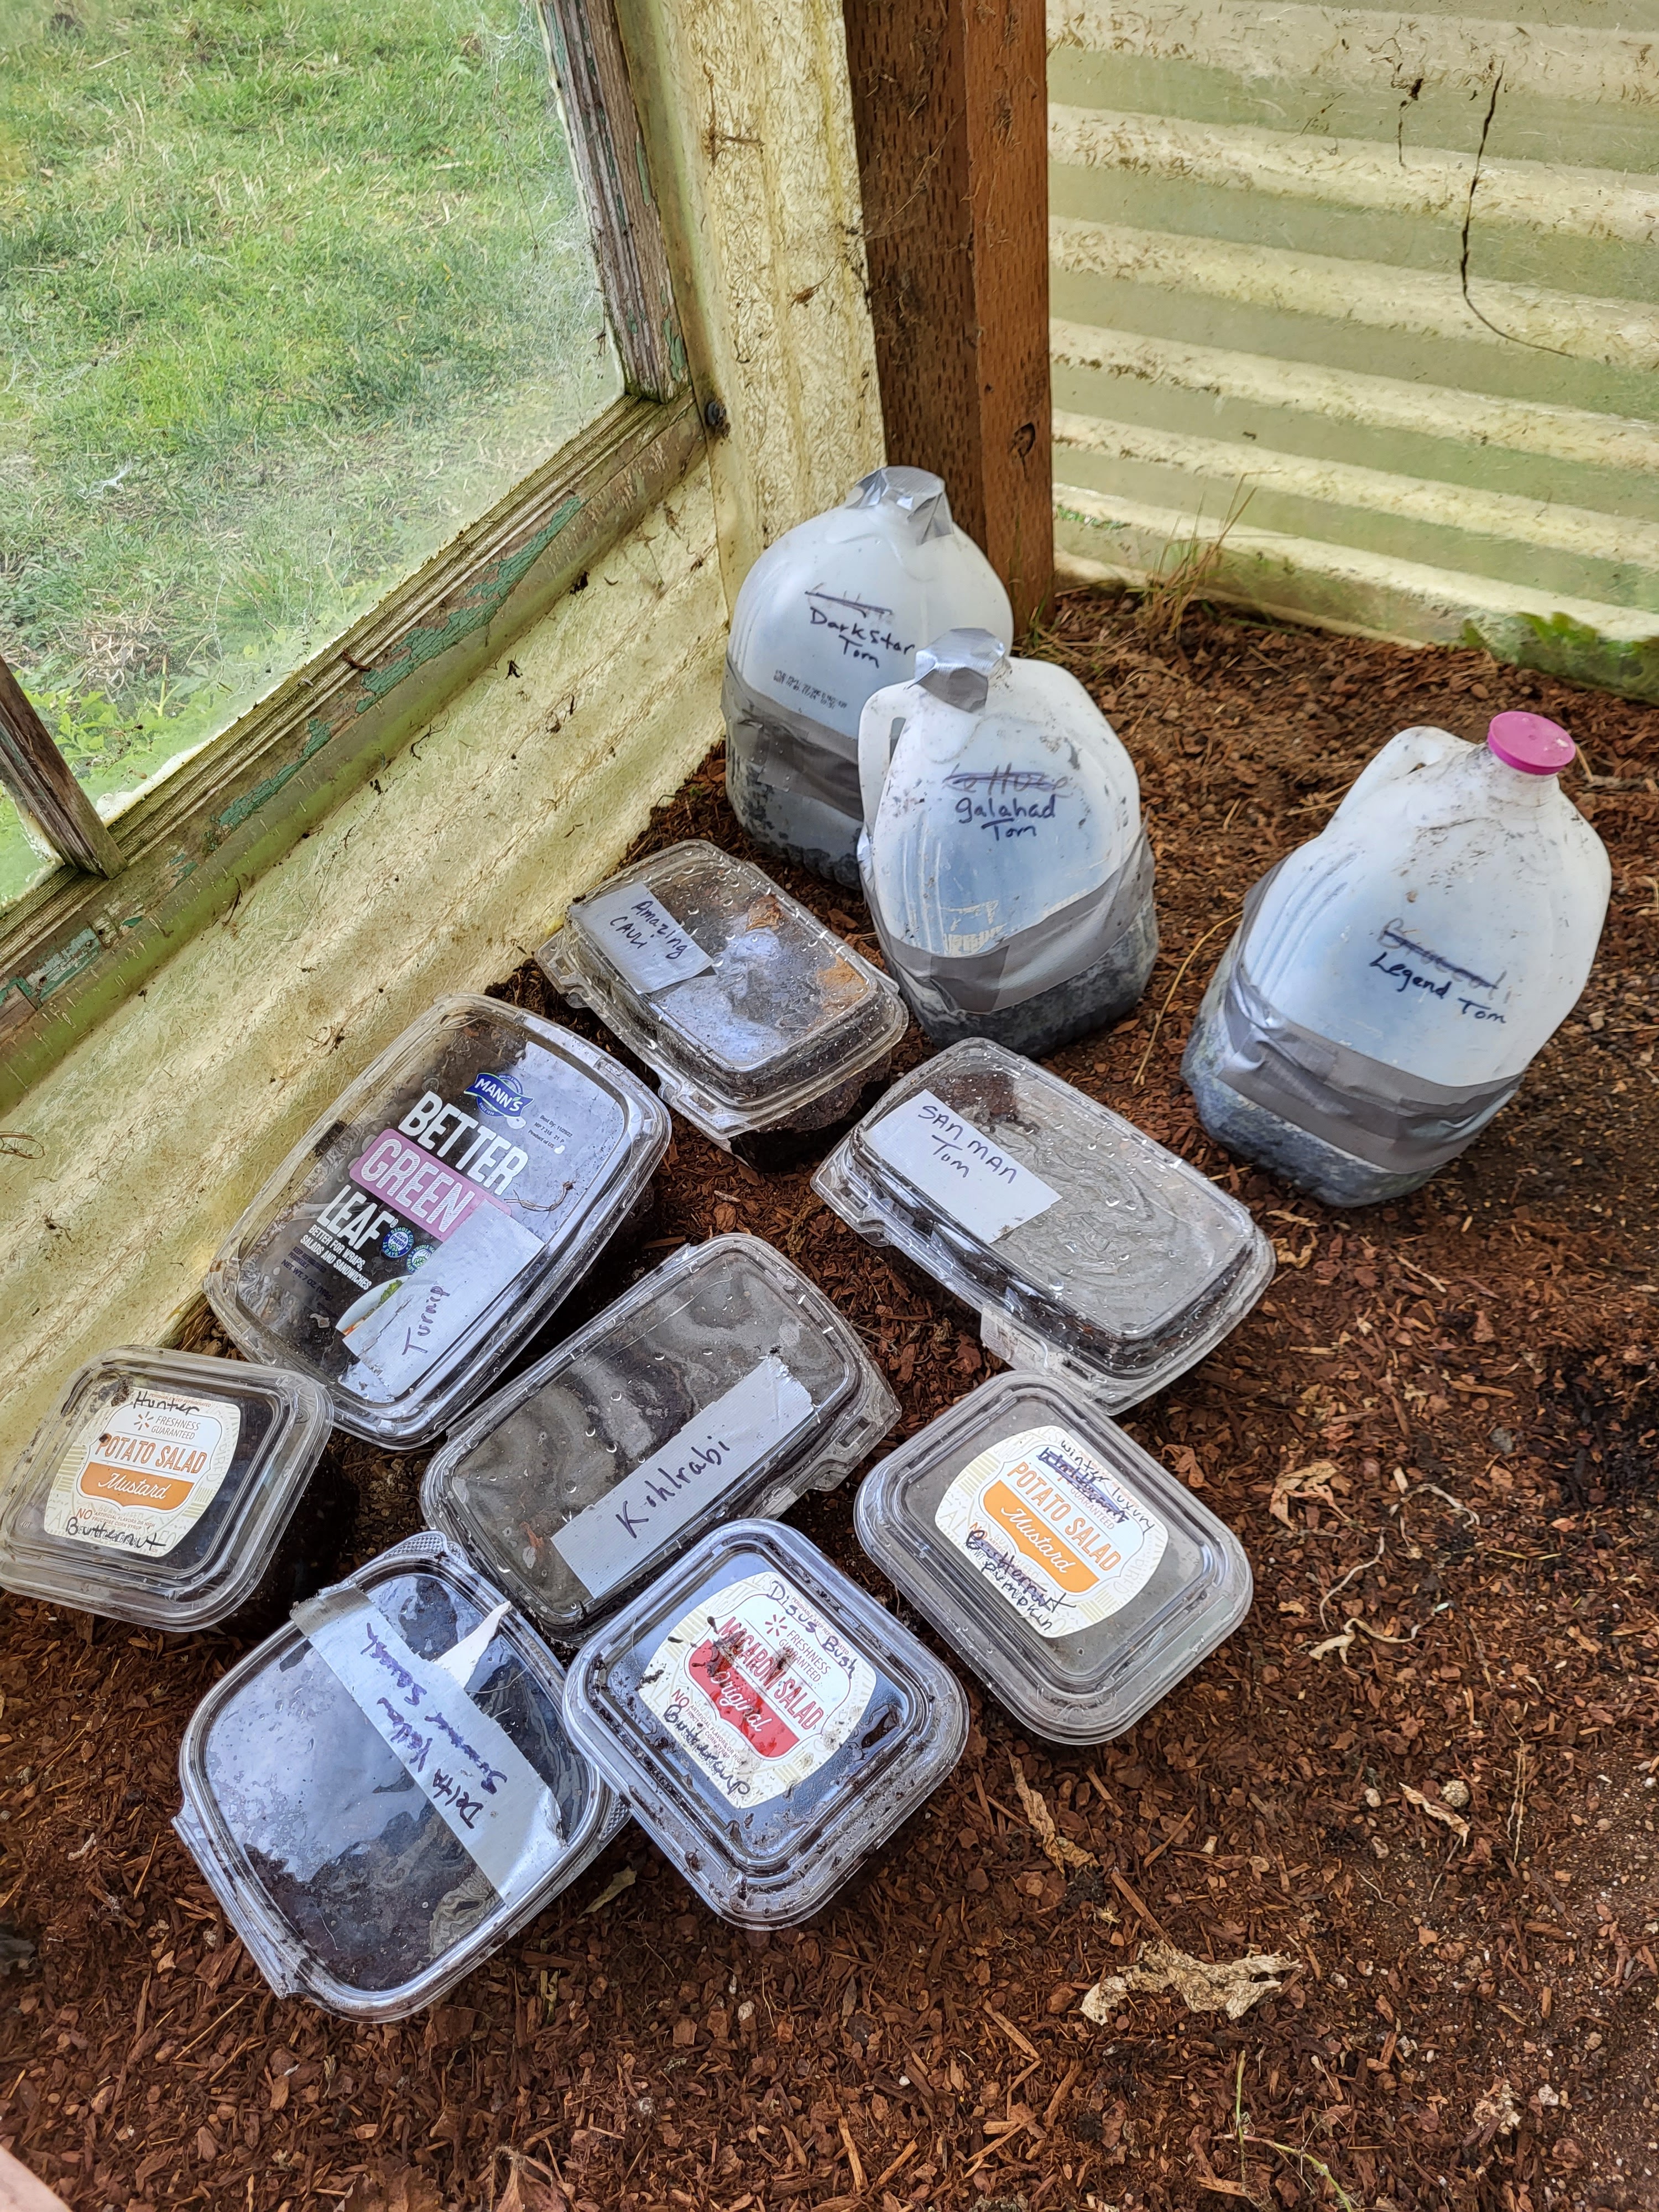 My winter sown seeds stay in the greenhouse ONLY so they don't blow away during high winds. A greenhouse is absolutely not needed to be successful with winter sowing!
On the livestock front, our hens are laying plenty of eggs. (I've been astonished to see people jump so readily into the belief that feed manufacturers are purposefully mixing feed incorrectly so that hens don't lay eggs. Let me just say this: I use the main chicken feed that people cite in this conspiracy and my hens are laying just fine. If you want to know the real reason your hens aren't laying, see this post.) Our hens are in their third year, so we hope to replace our flock this spring. Unfortunately, right now we don't have a place in our house to safely brood chicks! So we shall see.
The quail are their usual crazy selves. They eat the same thing as the chickens and they are laying fine, also.
 Now that the days are lengthening, we are getting more eggs.
(adsbygoogle = window.adsbygoogle || []).push({});
We've had some heartbreak among the rabbits, though. It began with a rat infestation. Sadly, if you homestead in the woods, rodents are something you have to address. Our problem is that when nature is providing plenty of food for wild critters, it's really difficult to trap or bait rodents. So this winter, we've been working very hard to get the population down.
Our "barn cats" do an impressive job. They are fat - and not off cat food. (Our dear, ancient cat, Loki, left us a dead rat just before he died last month.) But there's only so much the cats can do when the rat population is this high. To top it off, we not only have non-native rats (the Norway rat that come to mind when most people think of rats), but we have native bushy-tailed tree rats (a.k.a. packrats, Neotoma cinerea).
 We miss Loki.
 Tigger, tracking rodents in the greenhouse.
I've never seen rodents this bad and I blame several extremely mild winters for their booming population. My first indication that they were out of control was finding a rat living in a nest inside the small wood house we put in the cages of all our pet rabbits. (The rabbit living with this rat showed absolutely no signs of being upset by his roommate...He is our friendliest rabbit and likes to hang out with all animals, including the dog.) Next, I kept encountering a rat I couldn't see, but who would scream every time I came into the rabbitry. Then I found a rat nesting in the manure tray of an empty cage. Worst of all, one morning when it was still dim out, I put my hand inside one rabbit's J-feeder (to feel how much feed was left in it) and instead of touching pellets, I touched something soft and furry. I yanked my hand out, and a little gray face peeked out from the top of the feeder. I screamed...a couple of times. (I can't help myself. I'm a prissy girl when it comes to rats and mice.) And then I slammed the lid shut on the feeder and texted my husband to come take care of the rodent. (Seriously, this rat had a cozy little house in there! He slept on the feed pellets and apparently shut the door of the feeder down after himself for warmth!)
So, now we have feeding stations with poison in them all around the rabbitry. (The feeding stations keep the cats and other critters away from the poison, and the rats go into their burrows to die, preventing wildlife from eating the poisoned rats.)
But I was still finding rat droppings, so we knew we still had some rodents around. This especially bothered me because rats are known to eat the extremities off rabbit kits. We've never had that problem in the past, but I've been very concerned it might become a problem. Well, this morning, it finally happened...
You see, I'd been trying to breed two beautiful sisters, Chocolate and Vanilla. They are young, so I wasn't surprised when they did not lift for either of my bucks. (Lifting her rear end is a sign the doe is ready to mate.) In addition, when I attempted these matings, the bucks never "fell off." (For those of you who've never seen rabbits mate, when the buck ejaculates, he literally falls off the doe.)
 Vanilla and Chocolate.
And yet, this morning when I went to Chocolate and Vanilla's cage, I found a large litter of dead kits strewn across the floor. Worse, rats had been at them. (Ugh!!! I do believe, however, the kits were dead before the rats got there.) Apparently, a doe can fail to lift and a buck can fail to fall off and the mating can still be successful. I learned a lesson...the hard way. Chocolate and Vanilla are bonded, so they live in the same cage - so I'm not positive which one was the mother. Whichever doe had the babies never pulled fur for them, though, so they would not have survived even if I had provided a nest for the kits. I take solace in that...and understand that it's not unusual for first-time rabbit mothers to lose their litters. So, I cleaned up, pampered my girls, put a nesting box in their cage (just in case one of them is pregnant), and we will try again. Sigh.
 Fiona and Fido.
 Fiona.
But the most heartbreaking moment this winter was the death of my beautiful, sweet Fiona. Fido and Fiona were our starting pair of homestead rabbits, given to us when a neighbor brought them home (a "couple of hippies gave them to me," he said) and his wife was not receptive to keeping them. My kids had had pet rabbits for several years, so we weren't unfamiliar with rabbit-raising, but F & F were our first venture into meat rabbits.
Fido and Fiona, however, are/were as much pets as livestock. We all loved Fiona for her beauty, the gorgeous, multi-colored kits she gave us, her gentleness, and her absolute sweetness. But the last time she gave birth, she struggled. Her labor was prolonged, and all but two kits were born dead. (I've kept those two kits; they are Chocolate and Vanilla.) She never really recovered from that birth, despite the fact that I pampered her with lots of grass time, special treats, and so on. This winter, she seemed bright eyed, perky, and excited to see me, but one morning I went into the rabbitry and she was dead. I cried lots of tears that day. Loosing animals is the really hard part of homesteading and I share these stories with you because I want to be as transparent and honest as possible about what homesteading is like. It ain't all funny goat kids and beautiful, clean chicken eggs, friends.
And failure? It's a given in homesteading. Even when you've been gardening and raising animals for many years. To be successful in life, you really have to know, deep down, that only through failure can you really learn and succeed. Homesteading certainly drives that truth home
Despite some setbacks, I'm feeling positive about the coming busy months on our homestead. This is the first year our entire orchard has been pruned. (My husband is out of work right now, so he actually had time to get this enormous task done.) The garden should be as good or better as last year. And I think the animals will thrive after a rough start in 2023.I'm looking forward to growing and raising lots of healthy food for my family and friends - and I hope I can inspire you to do the same!
(adsbygoogle = window.adsbygoogle || []).push({});
January 25, 2023
My Chickens Aren't Laying! What Can I Do About It?
 With the price of grocery store eggs jumping sky-high, many homesteaders feel especially pressed to get good production out of their laying hens...And a lot of you are asking me why your hens aren't laying well right now. Some of you are even complaining your hens aren't laying at all. Thankfully, this is usually a problem that's relatively easy to fix. In fact, if your hens aren't laying well, the solution is likely in this article. Just consider a few questions:
1. Are your hens getting enough sunlight?
Eggs are a seasonal food because in the winter, when the days are shorter and darker, hens naturally stop or slow their laying. The reality is, hens require 14 - 16 hours of sunlight every day in order to lay eggs. Lack of this sunlight is the most common cause for slow or non-existent egg laying.
If you want to induce your hens to lay eggs even when the days are shorter, you'll need to use supplemental light in your chicken coop; just a plain old light bulb on a timer will do the trick. (Do not use a heat lamp bulb.) You'll need to take into consideration both sunrise and sunset to determine how long the light needs to be on, always making sure the hens get at least 14 hours of light a day. For best results, be sure the light bulb comes on in the morning, when the hens are locked up in the hen house.
Do note that using supplemental light can be a fire hazard and that inducing your hens to lay during the winter may shorten their egg-laying years.
2. How old are your hens?
Most hens begin reducing their egg production after year three. Older hens will still lay - but not as often. If you have older hens in your flock and you aren't willing to deal with lower egg production, it's time to either replace the hens or add new, fresh hens to your flock.
3. Did you purchase the right breed?
When it comes to egg-laying, not all breeds are created equal. While it's fun to choose pretty hens or hens that lay fun-looking eggs, the best way to choose laying hens is to look for high production breeds. These include Aconda, New Hampshire, Australorp, Plymouth Rock, Rhode Island Red, and White Leghorn. (Here is a handy comparison chart.)
In addition, consider which breeds lay best during the winter months: Black Australorps, Rhode Island Reds, Buff Orpingtons, Golden Buffs, Columbian Wyandottes, Green Queens, Easter Eggers, Olive Eggers, and Blue Ameraucanas, for example.
 Australorps are an excellent laying breed.
(adsbygoogle = window.adsbygoogle || []).push({}); 4. Are they eating right?
To lay at optimal levels, give hens laying feed. Yes, hens need 15 to 18% protein in their feed, but there are other nutritional elements that affect their laying, too. (For more info on that, click here.)
If you have one or more roosters, you should use flock raiser instead of layer feed. (Because it's higher in calcium and may cause kidney damage in roosters. In addition, layer feed is not high enough in protein for roosters, which can lead to health problems such as stunting and muscle loss.)
If your hens aren't laying well on the feed you currently have them on, read the nutrition information on the package carefully. Even if the manufacturer claims the feed is balanced, consider switching brands. (Most manufacturers make feed for multiple types of animals, which can and has led to mistakes in feed makeup in the past.)
In addition, you'll need to ensure the feed is fresh. Don't stock up on more feed than your chickens can eat in a month or so - and once a bag is open, keep the feed in a sealed bin for freshness.
Also, for best egg production, don't give your hens lots of garden and kitchen scraps, mealworms, corn, and other treats. It's difficult for chickens to overeat because only so much food will fit into their crop - a "bag" in the chicken's digestive system where food is stored for about 12 hours before it slowly passes through the stomach (where it gets doused with digestive juices) and then the gizzard (where it is ground up, or "chewed"). If you fill your hens up with treats, they don't have room in their crop to eat pellets - and remember, their pellets are formulated to encourage excellent egg production. (If your hens are mostly free range, understand that you are trading off a more natural lifestyle for potentially slower egg production.)
5. Are your hens dehydrated?
When hens are dehydrated, their laying slows down considerably. Make sure your hens always have access to fresh, clean water.
6. Are they stressed?
Anything that stresses out hens, including predators, rodents in the hen house, having too large a flock for the space allotted, having too many roosters, having an overly-dominate rooster, having things around the coop that startle them, etc., can lead to lower egg production. Happy hens lay more eggs!
The most common stressor in chickens is molting - the natural loss of old feathers and growth of new ones. This usually occurs in the fall. It's perfectly normal and natural for hens to stop laying during this time and there's really nothing you can do to change that.
 Check for eggs frequently.
(adsbygoogle = window.adsbygoogle || []).push({});
7. Are they broody?
If you have one or more hens who insist on sitting on eggs, have plucked their breast, and/or feel warm to the touch, they will not lay. They are broody (i.e. wanting to hatch eggs) and their bodies are putting all their energy into that task.
You can either let the hens hatch the eggs (or let them naturally lose interest in hatching the eggs, which isn't uncommon), or you can break the hen of her broodiness by putting her in a plastic tote with no bedding. Give her pellets and water, but nothing else. Put the lid on the bin (make sure you've drilled many air holes in it) and place the bin in a cool location, like the floor of a garage. In a few days, the hen's body temperature will cool down and she'll no longer feel broody.
8. Are they ill?
Sick hens stop laying eggs, so when egg production drops, it doesn't hurt to look over each chicken in your flock, making sure they look and feel healthy. If you think any hen seems ill, isolate her from the rest of the flock, in case the illness is contagious.
9. Are they hiding their eggs? Or is something eating their eggs?
Another possibility is that either the hens are hiding their eggs in a "safe" location (like the bushes) or that something is eating the eggs they are laying. If you find empty eggshells in the coop or run, it's likely your chickens are eating their own eggs; for tips on how to change that, see this post. If you find eggs with small holes pecked in them, or you find no eggs at all, wildlife may be to blame; for tips on how to remedy that, read this post.
 When you have a glut of eggs, preserve some.
(adsbygoogle = window.adsbygoogle || []).push({});
Hedging Against Egg-Laying Problems
By understanding the above points, you can definitely help prevent a lack of eggs on your homestead - but it also makes sense to have a backup plan, in case you have an unexpected shortage. That backup system is preservation. If you preserve eggs when you have a glut of them (instead of selling them, giving them away, or feeding them back to your chickens), you can ensure you have eggs even when your hens aren't laying.
My favorite methods for doing this are:
1. Keeping unwashed eggs in the refrigerator. They easily last 6 months or longer.
2. Freeze drying eggs. When properly stored in Mylar bags with oxygen absorbers, these eggs will last many years.
If you don't have a freeze dryer, an alternative I like is keeping eggs in the freezer.
For tips on freezing eggs, and for ideas about other ways to preserve eggs (including water glassing, coating in mineral oil, and more), click here.
(adsbygoogle = window.adsbygoogle || []).push({});
January 10, 2023
Should You Install a Commercial Stove in Your Home?
 I am not being compensated in any way for this post. It's contents are strictly my opinions, based on research and experience.
Have you ever thought that having a commercial range (perhaps with five or six burners) would be handy? As a from-scratch cook, I certainly have, but ultimately, I always felt such a stove was a luxury item I simply didn't need. I never seriously considered buying a commercial range for my homestead kitchen...until quite recently.
When we began the kitchen remodel on our homestead this year, I knew I couldn't keep the stove that came with our house; it's been in poor shape since we moved here and is only getting worse. So I began to examine modern, consumer-grade ranges closely. In case you haven't had the opportunity to do this yourself, let me tell you: They don't make appliances like they used to. Grandma may have owned one stove in her entire adult life, but today you're lucky if you get three years out of a stove. And since the shutdowns, you can really see - plainly with your eyes - that quality has dropped in the making of major appliances. The metal used is thinner and often shows obvious flaws, any cast iron used is lightweight, electronics are cheap, and so on.
Then I started reading reviews. I've found most "professional reviews" (those in print magazines or on major websites) are clearly paid for - or at least the appliances are not tested for any real length of time. Consumer reviews with the highest ratings tend to be posted by people who say things like, "I just had this range installed and I love the way it looks in my kitchen!" But when you start reading reviews by people who've had the appliance for six months or more, you quickly learn they are experiencing problems with their purchase. I don't know about you, but I don't want to spend a thousand dollars or more on an appliance only to have to replace it in two or three years - or maybe sooner!
So...I started looking at more expensive offerings, like Cafe and Forno. The trouble is, while these ranges look lovely, they are made by the same manufacturers as the common consumer grade stoves. You pay more for a great look, but the quality and longevity of the appliance is still awful, according to consumer reviews.
Now, you might be thinking the best thing to do is just buy a new stove every couple of years, but if you use propane or gas, let me caution you against that. There is a huge push to get gas stoves off the market. Many states and cities no longer allow gas lines to run to new homes, there are campaigns telling consumers gas is poisonous in your home (based on only one study; here's a refuting article; note that the study in question never mentions propane), and the media pushes the idea that electric stoves are more environmentally friendly. And just last night, I saw that the federal government is considering banning all gas ranges. I don't doubt that there will come a time when gas ranges will be very difficult to buy.
I've come to the conclusion that if you need to buy a stove, and you want it to last, you need to purchase a commercial brand.
 Photo courtesy of Todd Dailey.
 However: Important Points to Consider
If you're considering buying a commercial range for your home kitchen, you'll need to think about some important things before you actually make your purchase:
1. Do you want electric, gas, or LP (propane)? There aren't many quality commercial stoves that run on electricity (because it's very difficult to get consistent heat with electric burners; some commercial ranges include gas ovens, however.) And if you want gas or propane, you must buy a stove that is specific to that fuel source.
When I made the tentative decision that I should put a commercial range in my kitchen, my first thought was to buy something used and save a wad of cash. One of the difficulties I had, however, was that I kept finding natural gas ranges, but there is no gas line to our house. I use propane. I also learned that most manufacturers caution against conversion kits (and may not even sell you the parts) because you'll have to completely disassemble to the stove in order to switch it over. Therefore, it's vital to buy a stove that's already configured for either gas or propane - whichever fuel you'll be using.
2. Think about clearances. At one point, I had a lead on a brand new, but older, Royal range; a neighbor was willing to sell it to me for the same price I would have paid for a new consumer grade stove. I was pretty thrilled...until I looked at the installation instructions. This is when I learned that the vast majority of commercial ranges require large clearances. ("Clearance" is the space between the stove and the wall or cabinets.) This is because most commercial ovens aren't insulated and the cooktops tend to extend near the edge of the range. Since commercial burners run considerably hotter than a consumer burners (25,000 to 35,000 BTUs versus 9,000 - 12,000 BTUs), I'm sure you can see where heat - and threat of fire - is a real issue. (Think about how a commercial kitchen is set up: There are no flammable materials, like wood cabinets. Everything is stainless steel.)
To give you an idea of how hot that Royal range runs, it has a clearance of 12 inches from all combustible surfaces, whereas my wood cook stove only has a clearance of 6 inches!
Yes, it is possible to put up non-combustible surfaces around your range, but their installation certainly requires additional materials and labor - and may damage your cabinets. Plus, an uninsulated oven is going to make your kitchen HOT.
In addition, if young kids will be in your kitchen, consider that a quick touch of a commercial range could burn them quite seriously.
3. Consider pilot lights. When I was thinking about buying that Royal range, I learned that one of its features was a pilot light that was on at all times. This is old school, which I like. But I also realized it was going to use more fuel (in my case, propane from a smallish bottle) - and that it would make my kitchen hotter.
4. Check with your insurance company. Did you know that many insurance companies won't cover fires in your home if you install a commercial stove in your kitchen? You can probably guess why: Commercial ranges, due to the intense heat they create and their open flames near the edge of the stove, can more easily cause fires. Some insurance companies will be okay with commercial ranges IF you install a fire suppression system and a commercial range hood - but that's a costly set up.
5. Consider your vent hood. Assuming your insurance company is okay with a commercial range, it's important for you to equip your kitchen with a range hood that can keep up with the smoke and heat a commercial range produces. (This article provides the formula you need to determine how many cubic feet of air - or CFM - you need for your stove.) Depending on the range you select, an appropriate range hood may need to be commercial grade - which is usually costly.
6. Consider the warranty. Many commercial range manufacturers void their warranty if their stoves are installed in a home environment.
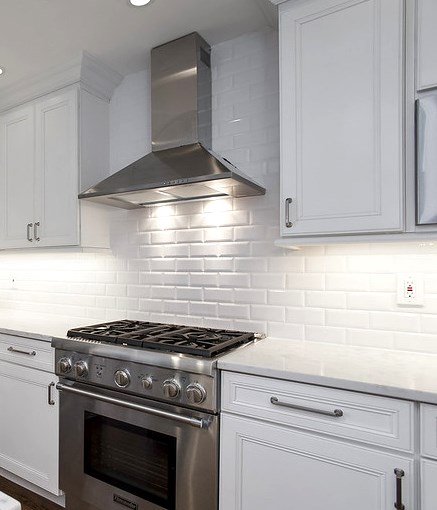 Photo courtesy of Paintzen.
(adsbygoogle = window.adsbygoogle || []).push({});
Why I Chose a Commercial Range for Our Homestead
After a ton of research and waffling, I still ended up purchasing a commercial range for my homestead kitchen. I wanted a range that would last and I believe that nothing currently produced by consumer grade manufacturers will do that. I also ruled out the vast majority of commercial ranges due to clearances, insurance issues, and excessive heat. But I did find that at least two brands of commercial stoves are actually appropriate for home use: Wolf and Viking.
Both Viking and Wolf are American made and have strong reputations for quality in the restaurant industry. My husband's cousin, who is an accomplished professional chef, says both are very good, but Wolf is hands down her favorite to cook on. Wolf is also built to last a very long time, with a cast iron framework no other brand seems to match.
(Do note that I was looking only at 30 inch ranges. Larger ranges made by these manufacturers may or may not be safe for home installation. I recommend that you download the installation instructions - and talk to your insurance agent - before making a purchase.)
In the end, I bought a Wolf. (Expected delivery isn't until July...but the dealer explained this is because electronics are so difficult to get right now. Wolf had a choice: They could either slow sales while they waited for the quality electronics they prefer, or they could move manufacturing along quickly by switching to Chinese electronics. They stuck with the first choice, which is another reason I went with Wolf.)
Although a Wolf range is not inexpensive (it's a huge investment for me!), in the long run, it will save me money because:
1. It will be the last stove I ever have to buy.
2. It runs efficiently. (The oven is insulated and there are no pilot lights that stay on 24/7.)
3. It has zero clearances, just like consumer grade stoves...therefore, installation is standard.
4. A commercial hood is not required for my 30 inch stove, so I was able to buy a relatively inexpensive vent hood at a home improvement center.
4. The warranty is excellent (even with a residential installation.
In addition, it seems that over time, Wolf products retain more value than other appliances. One source claims a 36 inch Wolf stove depreciates just 7%.
 Photo courtesy of Stephen Harris.
(adsbygoogle = window.adsbygoogle || []).push({});
Buying New or Used
If you've made the decision to buy a commercial stove for your home, the next question you should ask yourself is whether or not you should buy it used. Yes, you may save a lot of money if you buy used, but remember these things:
1. Pay attention to the fuel source. If you need gas or LP (propane), the used equipment should be set up specifically for that fuel. (See #1, above.)
2. Note whether or not the range has been used in a commercial kitchen. A stove that's used commercially runs all day, every day and has a lot more wear and tear.
3. Note how old it is. I saw thirty and forty year ranges being sold on Facebook marketplace. I was concerned, however, that parts might not be all that easy to purchase...and that I might end up throwing a lot of parts at a range this old. (A lot would depend on what setting the stove was used in - commercial or home - and how well the owner took care of it.)
4. Consider shipping. I saw one Wolf range on eBay that seemed perfect. It was the newest model, used in a vacation home (so it was barely used), and the price was right. Shipping, at $700, still made the purchase seem smart. However, I would have had no real recourse if there was shipping damage or if the product was misrepresented.
Now that I'm done wrestling with myself over what range to buy for our kitchen, I can't wait to see my new Wolf installed! I encourage you to explore the possibility of putting a commercial stove in your own home. If you do your homework first, I think you'll be glad to have made a wise investment.
(adsbygoogle = window.adsbygoogle || []).push({});
December 30, 2022
Top Posts from 2022 - and All Time!
I've been blogging here for 13 years - and most years, when I look at what posts were most popular, I'm surprised. This year, though, I felt like I was more in sync with you, my readers...and perhaps that's because of this blog's fairly recent transition from a home keeping/mommy blog that included homesteading to a blog that focuses 100% on homesteading. What do you think?
At any rate, I like to share the most popular posts with you in case you've missed some of them. And I hope you find it fun to also look at this blog's all-time most popular posts.
Are there any surprises for you? Are there any additional posts you recommend to other readers? Let us know in the comments!
Most Popular Posts for 2022:
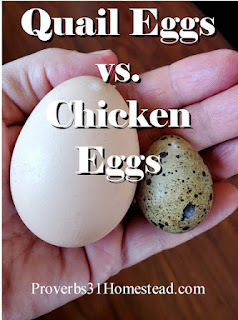
# 10. Comparing Quail Eggs and Chicken Eggs

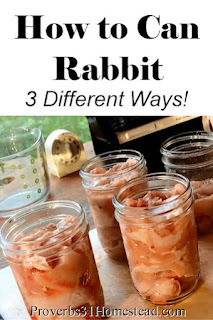
# 8. Canning Rabbit (or Chicken) 3 Different Ways
 # 7. How to Preserve Cucumbers
 # 6. Creating a New Vegetable Garden, Step-by-Step

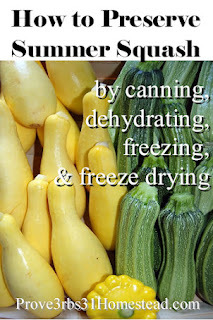
# 5. How to Preserve Summer Squash
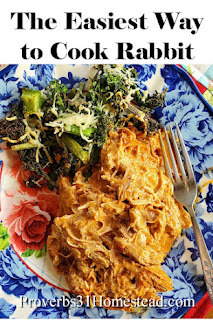
# 4. The Easiest Way to Cook Rabbit
# 3. Canning with Monk Fruit: Is it Safe?
# 2. 10 Foods to Never Can at Home
# 1. The Biggest Mistake I Made Raising Quail

Most Popular Posts of All-Time:
# 10. 6 Ways to Teach Kids the Books of the Bible

# 9. How to Make Meatloaf that's Not Greasy
# 8. How to Turn a Feed Sack into a Grocery or Shopping Bag
# 7. The Biggest Mistake I Made Raising Quail
# 6. How to EASILY Clean Ceilings & Walls

# 5. Quail vs. Chickens: Which is Better?

# 4. The EASIEST Salisbury Steak Recipe
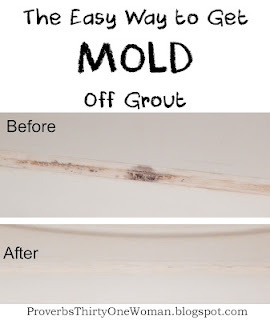
# 3. The Easy Way to Get Mold Off Grout
# 1. How to Plan a Medicinal Herb Garden

November 21, 2022
Gift Ideas for Homesteaders (2022)

This post may contain affiliate links. As an Amazon Associate, and at no cost to you, I earn from qualifying purchases made through some links. Please see FCC disclosure for full information. Thank you for supporting this site!
'Tis the season for gift-giving! And if you've got a homesteader in your life, you've come to the right place to find gift ideas...because this list is different from most of what you'll see on the Internet: I've only included things I actually love and use and can highly recommend. (In a few instances, as noted below, I've linked to a slightly newer version of what I actually use.)
So whether you want the perfect gift for the homesteader in your life or you need ideas for your own wishlist, I think you'll find these items truly useful and practical.
Kitchen:

Presto Pressure Canner: My first choice for pressure canning. (I recommend adding on the 3-piece pressure regulator/rocker gauge, so you never have to calibrate dial gauge again. Learn more about that here.) If you want a pressure canner that will outlast you, though, the All American is the way to go. (I use both.)
Stainless Steel Water Bath Canner: Traditional water bath canners eventually rust and need replacing. That won't happen if you upgrade to stainless steel.
Canning Ladle: I absolutely love this thing because it holds so much more than an ordinary ladle. It's super handy when canning - a couple of scoops fills a pint jar...but of course it works for other kitchen use, too.
Victorinox Chef Knife:Affordable, yet good quality. My go-to kitchen knife.
Marttiini Fillet Knife: I use this knife for cutting rabbit and chicken into pieces, as well as for cleaning and filleting fish.
Nesco Dehydrator: I've been using my Nescos for many, many years and prefer them to more expensive brands. (I've linked to the new version of what I use.) I bought added trays plus "fruit roll sheets" for small things (like herbs) that may fall through the wholes in the trays.
Immersion Blender: Indispensable for making applesauce, soup, and so on. This one has lasted me many years.
Instant Pot: I love this gadget for whipping up dinner quickly when I've been busy on the homestead all day. Unlike a traditional pressure cooker, you don't have to babysit this baby. I like having these two colored seals; I use one color for savory foods and the other for sweet foods. (Because no one wants their cheesecake to taste like pot roast.)
Blanching Basket/Instant Pot Steamer Basket: The best way to hard boil farm fresh eggs is in the Instant Pot - and this basket makes the job a lot easier! It's also great for steaming veggies in the IP. Additionally, I use it as an excellent blanching basket (in a regular cooking pot) when I'm freezing garden fresh veggies.
Restaurant-Style Stainless Mixing Bowls: These are very similar to what I use continually all throughout the harvesting and preserving season. They hold a ton, whether you're harvesting fruits and veggies, prepping food for canning, or doing "big" baking. I always have four or five on hand.
Corer: This is marketed as an apple corer, but I use it exclusively for pitting plums. Really the only reasonable way to pit smallish cling fruit when you're canning!
Apple Peeler/Slicer/Corer: An must when preserving apples.
Mason Jar Canisters: This set is very similar to one I have. I love the look AND the function!
Whirley Pop Popcorn Popper: Our favorite way to make popcorn.
Batter Bowl: I use this clear glass batter bowl constantly.
KitchenAid Mixer: The only mixer you'll ever need. I use it not just for baking, but for butter making, shredding cooked chicken or rabbit, and so much more.
Fermentation Weights: These are perfect for small batch fermented food made in canning jars. This is the newer version of what I use.
Coffee (and Herb) Grinder: I use this mostly for grinding dried herbs and tomato skins, but it's a great coffee grinder, too.
Water Distiller: If you need distilled water for a CPAP machine, or for any other reason, we've found this distiller fast and reliable.
Mason Jar Soap Pumps: Turn any canning jar into a soap dispenser. I love these!
Freezer Alarm: Help protect the food in your freezer by using this simple thermometer that will alarm when the freezer gets too warm because the power goes out or your freezer has died.
Canning Jars: Because canners always need more jars! I buy wide mouth whenever possible, because they are most versatile.
Bernardin Canning Lids: This is the brand of one-time jar lids that I prefer.
Harvest Right Reusable Canning Lids: The brand of reusable canning lids I prefer.
Harvest Right Freeze Dryer: I absolutely love mine. By far the easiest method of preserving food for the long term.
Farm & Garden:

Leatherman: Leathermans are high quality multi-tools that get constant use on our homestead.
Alpaca Socks: I wear these all winter.The warmest socks I've ever had.
Sloggers: I never feel like I can spend the money to get Boggs or Muck boots, so I buy Sloggers. One pair lasts me years.
Deshedding Brush: This is an absolute must for our guardian dog! No other brush compares.
Wide-Brimmed Hat: For sun protection. My husband wears this one.
Soil Test Kit: It's really vital to know what your soil is doing. This is the kit I use yearly.
Lifestraw: Always good to have on the homestead or when camping, hunting, or hiking. Safely filters any water.
KW Cages: These are one brand of rabbit cages I use. They work for quail, too. Probably the best quality you can get for the price.
Yard Hydrant: Install these so you never have to dewater your yard faucets for frost protection.
Aluminum Plant Tags: These are the best way to mark your plants. No more faded labels!
Fiskars Hand Pruners: I use these constantly.
Kneeling Pad: This is very similar to the one I have. I couldn't garden without it! (And it comes in handy for household chores, too.)
Books & Magazines:

The Backyard Homestead by Carleen Madigan. If I had to recommend only one book for beginning homesteaders, this would be the one.
The Backyard Homestead Guide to Raising Animals by Gail Damerow. This book provides a good overview of the most typical homestead animals, giving insight into their care and the costs of raising them.
The Storey's Guides. I always recommend reading the Storey guide for whatever livestock you want to raise.
The Rabbit Raising Problem Solver by Karen Patry. The book to read if you want to raise rabbits.
Beyond the Pellet by Boyd Craven. A guide to feeding rabbits naturally.
The Backyard Homestead Book of Kitchen Know-How by Andrea Chesman. An excellent resource for those wanting to learn to cook from scratch.
The Woodland Homestead by Brett McLeod. This book is more useful to those living in the Eastern U.S., but does a good job of opening eyes about the possibilities of homesteading in the forest.
The Hands-On Home by Erica Strauss. A beautiful book that not only is a great guide to natural homekeeping, but offers recipes for both from scratch food and natural cleaning and beauty products.
Herbal Medicine by Dian Dincin Buchman. One of the most useful books on the topic and one that I refer to repeatedly.
Making Plant Medicine by Richo Cech. An excellent, detailed guide.
Epic Tomatoes by Craig LeHoullier. The ultimate guide to tomato growing.
The Ball Complete Book of Home Preserving. The canning book I refer to over and over again.
USDA Complete Guide to Home Canning. If you've ever wished there was a print copy of the recipes found at The National Center for Home Food Preservation...here it is!
Butchering by Adam Danforth. Hands down the best butchering book out there.
Woodstove Cookery by Jane Cooper. My wood cookstove isn't yet installed, but I've found this simple guide to using it helpful. It's packed with recipes, too.
Hardcore Carnivore by Jess Pryles. Learn how to really cook meat.
I also recommend my own books The Ultimate Dandelion Cookbook and The Ultimate Dandelion Medicine Book :)
Subscriptions to Backwoods Home and Self-Sufficiency magazines will keep you learning all year long.
Creature Comforts:

Elderberry Orange Zinger Tea: Amazing stuff! Medicinal and soooo tasty!
Bird Coffee Mug: I love drinking tea and coffee in this beautiful mug. It even has a travel lid so I can haul it out into the garden.
Eye/Sinus Pack: This is amazing for tired or dry eyes or to help relieve sinus pressure.
Hemp Seed Oil: This takes care of my tired, achy muscles.
October 26, 2022
The Biggest Mistake I Made Raising Quail

This post may contain affiliate links. As an Amazon Associate, and at no cost to you, I earn from qualifying purchases made through some links. Please see FCC disclosure for full information. Thank you for supporting this site!
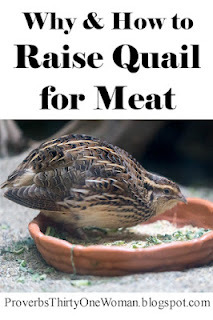
Quail are the latest, greatest homestead critters - especially among those who don't have a lot of land or no decent pasture. All in all, I've found coturnix quail a useful addition to our homestead. As I've written before, it's hard to beat an animal that starts producing eggs at only 6 weeks of life and is ready to harvest for meat in just 8 to 10 weeks from hatching.
There are - of course - down sides to raising coturnix quail for eggs and/or meat. For instance, most quail-keepers will tell you quail can be really brutal with each other, even when raised in the best possible environment. But this year, I discovered the biggest downside to raising quail: They don't age well.
Back When Raising Quail was Good...
When I first started raising quail, I began with fertilized eggs from a local homesteader. (You can also purchase fertilized eggs online. I do not recommend buying chicks, since coturnix chicks are much more fragile than chicken chicks. They rarely survive shipment and may even die between a local seller's brooder and your own.) We hatched these eggs in our incubator, grew the chicks in a brooder with heat plates, and then put them outside in cages once they were fully feathered.
 The brooders I use.
(adsbygoogle = window.adsbygoogle || []).push({});
When I knew the quail were sexually mature (hens were laying eggs, roosters were crowing, and I witnessed a rooster mating with hens), I began saving eggs to incubate. Once that second batch of eggs hatched and the resulting birds were mature, I butchered the original flock and replaced them with the new, young quail. (I had excess young quail, and I butchered those, too.)
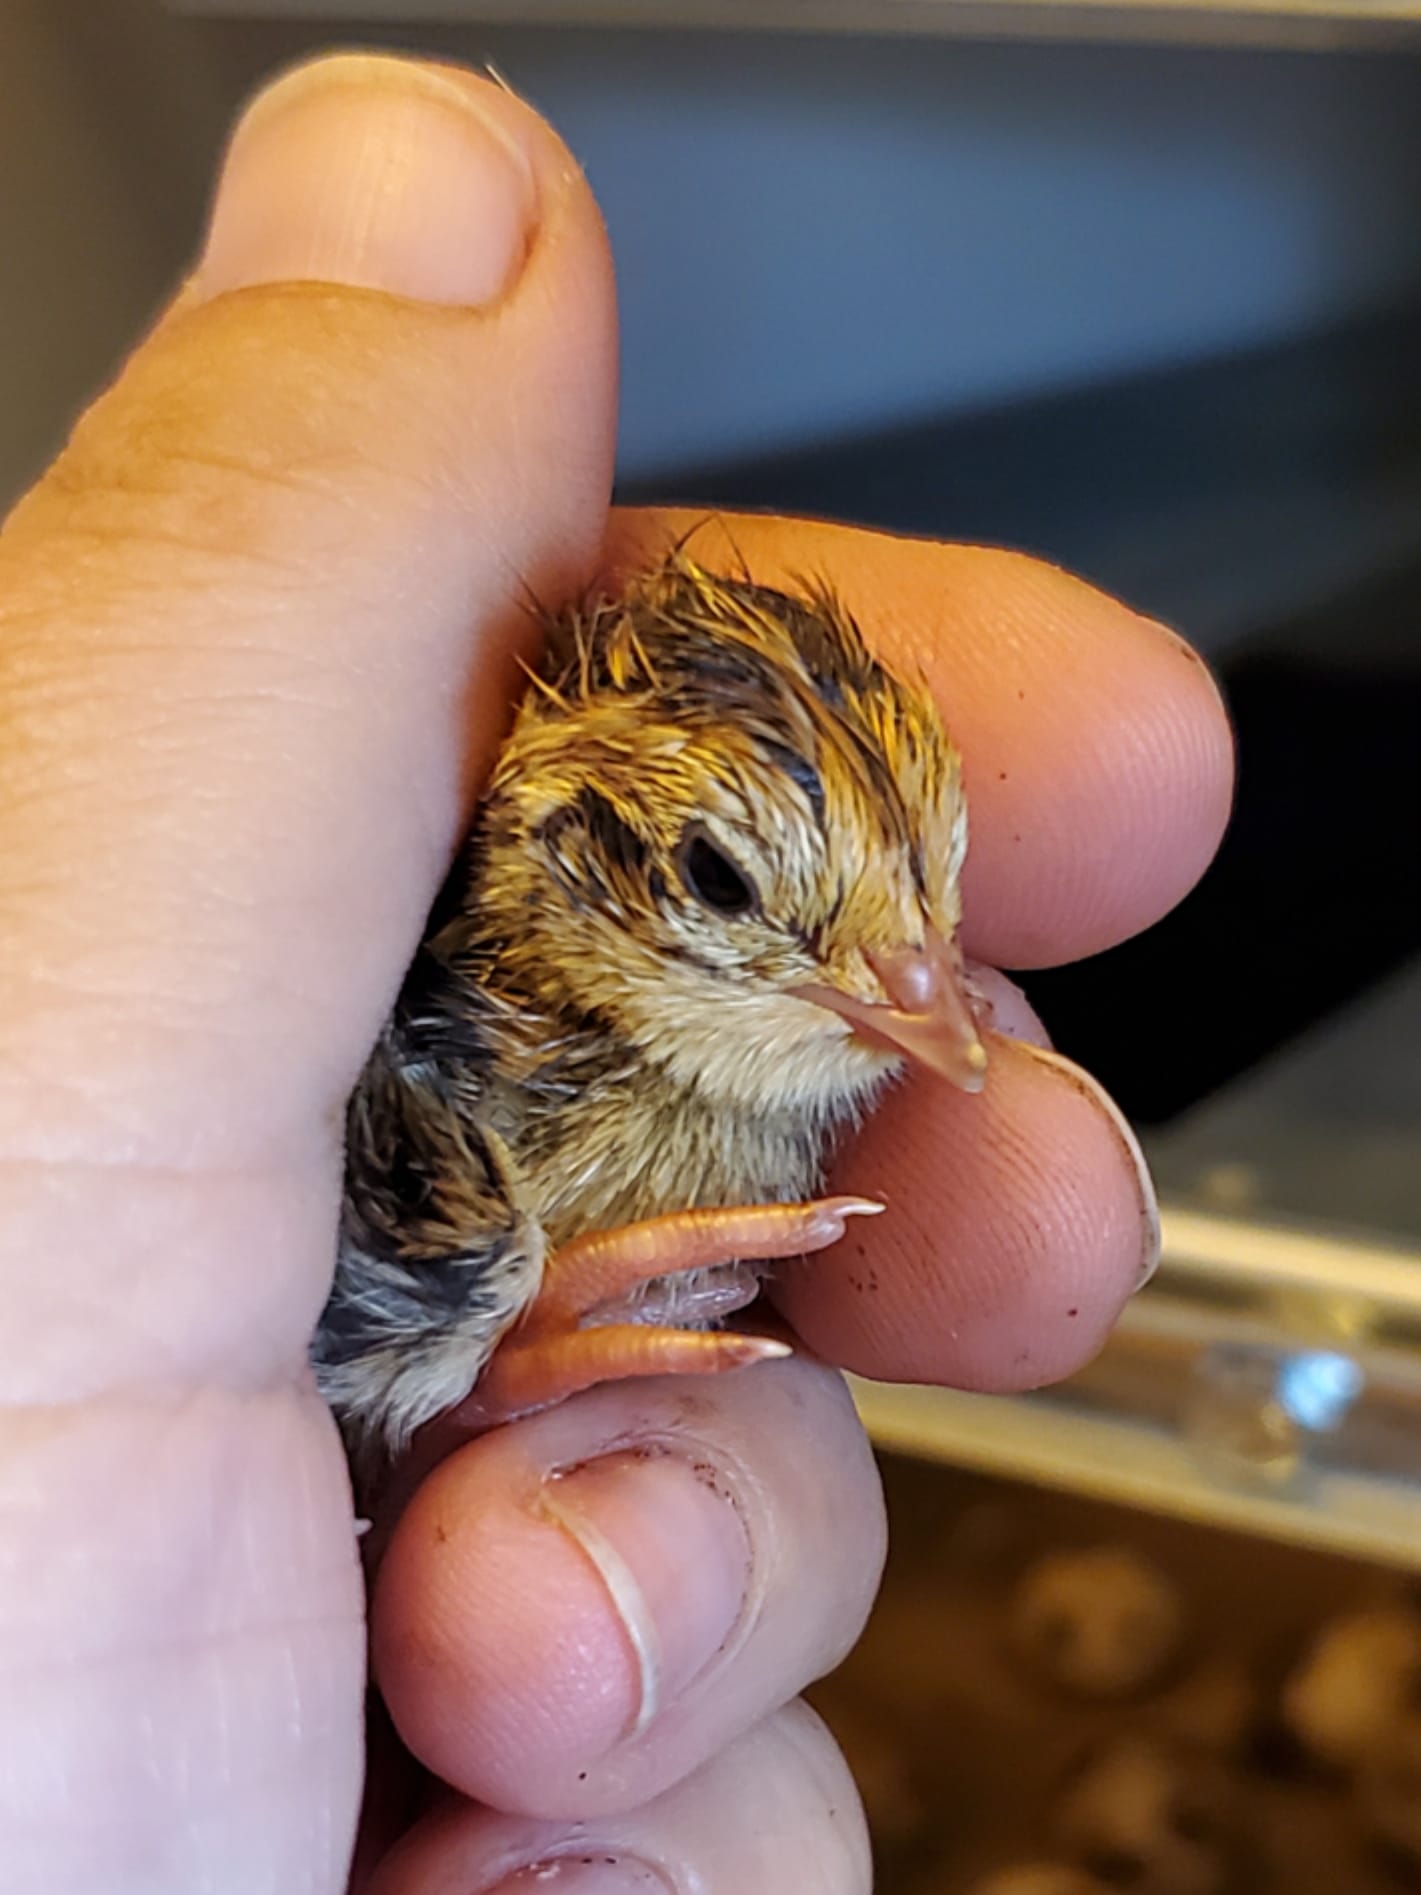 Coturnix quail chick.
But I noticed that in some coturnix quail groups I belong to, many people kept their older quail as breeders for a year or more. On a whim, I decided to do the same: I butchered only my young birds and kept my older birds for breeders. And that's when all my problems began.
The Problem with Quail
Within perhaps six months, my older birds started having issues. They weren't laying well (even with supplemental light) and once in a while, one would die unexpectedly. When I started incubating eggs, we found a great many were not fertile. Our hatch rates dropped...a lot. Then the breeding quail started to develop curled toes. (I believe this is a sign of a B vitamin deficiency and have just started supplementing our quail with Rooster Booster.)
We also had some problems that weren't related to the age of our breeders. For example, I lost an entire hatch of chicks because their waterer spurted all its water out in the middle of the night. I have no idea how this happened, but it resulted in all the chicks dying from cold. (And of course, it happened just as I was trying another thing folks in my quail group suggested: Using paper towels on the bottom of the brooder, instead of the then-hard-to-find shavings I normally use. Shavings might have wicked up enough moisture for the chicks to survive until I found them in the morning. Paper towels definitely did not.) I also lost another batch of chicks - one by one - due (I think) to a bacterial issue. Both situations were heart-breaking.
 Quail chicks in their brooder.
(adsbygoogle = window.adsbygoogle || []).push({});
To say it's been an awful year for raising quail on our homestead puts it mildly.
Lesson Learned
But getting back to our main issues, which only occurred among our older quail, I learned my lesson: I will never keep older birds again.
I currently have a small flock of young quail that are almost at butchering age. As soon as they are ready, I will butcher my older birds and choose the best of the young bunch to become my new breeders. We also plan on ordering some fertilized eggs, to bring fresh blood into our flock.
Here's the thing about homesteading: I don't care how long you've been at it, there is always something new to learn. I hope this is a lesson I can help you avoid learning the hard way!
Related Posts:
(adsbygoogle = window.adsbygoogle || []).push({});
October 18, 2022
10 Foods to NEVER Can at Home
 This post may contain affiliate links. All opinions are my own. Please see FCC disclosure for full information. Thank you for supporting this site!
There is a lot more to canning than merely getting the lid to seal on a jar of food.
Some of the important considerations food scientists take into account when determining that a canning recipe is safe include the density and pH of the food, as well as the heat circulation in the jars and in the canner itself. Once these things are carefully determined in a lab, scientists inoculate test jars with microbes such as botulism spores, then monitor them during the canning process to ensure every particle of food reaches a temperature that will kill those microbes. This is done repeatedly, using different processing times and food from different sources, so scientists can ensure the results are consistent and not just an anomaly. Then, every so often, existing canning recipes are tested again, using new scientific knowledge and advances. When needed, the recipes are revised.
Unfortunately, none of this can be done accurately at home, which is why canners should always have an up-to-date copy of a Ball canning book or The National Center for Home Food Preservation website handy. The recipes from those sources are tested safe - meaning that if you follow them and use correct canning procedures, the food will be safe to eat and store in your pantry.
Unfortunately, some people are distrustful of what they consider "government canning rules." (Even though Ball, a private company, plays a huge role in the safety of home canning by testing their own recipes.) This, along with misunderstandings about canning history and science, has led to an uptick in botulism cases from home-canned food. (Other types of food borne illnesses from home-canned food aren't tracked; however, they are much more common than botulism poisoning. Click here for more information on botulism and home canning.)
No one wants food poisoning - and especially not botulism poisoning, which can cause great injury or even death. The goal of home canning should always be to provide safe, healthy food for those we love.
The good news is, we know which foods are tested safe to can and which are not. Below you'll find foods some people try to can at home, and why they are not actually safe for home canning.
1. Dry beans.

Beans are perfectly safe to can (learn how here), but dry beans must always be rehydrated and partially pre-cooked before canning. This is because there hasn't been any testing done on canning dried beans without rehydrating and pre-cooking them first; therefore no one knows how long you'd have to process such beans in order to kill harmful microbes.
In addition, the older dry beans get, the more water they require to fully rehydrate. Therefore, if you can beans without rehydrating them first, you can easily end up with only partially rehydrated food. This means the water in the canner will not fully heat the beans in your jars. Proper, thorough heating is vital in order to kill any microorganisms that could make you sick.
Fully soaking dry beans, then giving them the partial pre-cook all tested safe recipes call for also means that some of the starch from the beans gets released before they go into jars. If you skip this step, the extra starch in each jar will make the food denser...which means the beans may not get heated thoroughly enough to kill off microbes.
To preserve dry beans without rehydrating them, store them in a Mylar bag with an oxygen absorber kept inside a sealed bucket. Cooked beans may also be frozen.
(adsbygoogle = window.adsbygoogle || []).push({});
2. Processed meat.

When I first started canning, I canned processed meats like ham and corned beef. I thought this was safe, since my Ball canning book gave instructions on canning pork and beef. But once meat is processed or cured, its density changes; no testing has been done to determine how to bring such meats to a temperature that will kill microbes that could make you sick.
There are a few tested safe recipes from Ball and The National Center for Home Food Preservation that call for small amounts of ham or bacon. These recipes are safe because the creators understood the density issues with processed meat and tested the processing times accordingly. This does not mean that canning ham or bacon is, in general, safe.
Instead, store processed meats in the freezer or, if they aren't too fatty, run them through a freeze dryer.
3. Certain Vegetables.
While vegetables in general are safe to pressure can (or to water bath can, if there is a tested safe pickling recipe for them), there are certain vegetables with no tested safe recipes for canning. This is due, in part, to the fact that they will turn to mush when canned in a way that kills off harmful microorganisms. These veggies include broccoli, Brussels sprouts, cabbage, cauliflower, eggplant, summer squash, olives, lettuce, and artichokes.
Except for olives and whole Brussels sprouts, these vegetables may be preserved through dehydration. All but the olives may be freeze dried. (Dehydrated or freeze dried lettuce will crumble easily, so plan to use it as a powder.) All but lettuce and olives may also be frozen for storage.
4. Nuts.
 Image courtesy of Wikimedia Commons and Silar.
Years ago, there were some recommended recipes for canning nuts, but due to more thorough testing, they are no longer recommended. We now know that salmonella can thrive under the conditions once suggested for home-canned nuts.
To keep nuts for a longer period, freeze them.
5. Ground poultry.
It's perfectly safe to can ground beef, so why not can ground poultry (such as chicken or turkey)? Well, there simply hasn't been any testing to see how long ground poultry - which has a different density than chunks or pieces of poultry - would need to be processed to kill off harmful microbes. An exception to this rule is the tested safe spaghetti sauce recipe in the USDA's So Easy to Preserve book.
To preserve ground poultry, freeze dry or freeze it.
(adsbygoogle = window.adsbygoogle || []).push({});
6. Dairy and Fats.
 Courtesy of Wikimedia Commons and Rainer Zensz.
 While there are people who home can their homestead milk, butter, or lard, there are no tested safe ways to can dairy or fats of any type at home. This is largely because dairy becomes thick when canned, which makes it difficult to heat thoroughly - which is the only way to kill microbes that could make you sick. Plus, fats tend to go rancid, no matter how they are processed.
Yes, commercial canneries offer some canned dairy and fats in grocery stores, but home canning uses completely different equipment than commercial canning.
The best way to preserve dairy is to either freeze it or freeze dry it. Or, if you want shelf-stable butter, you can turn it into ghee, which can sit in the pantry for at least 3 months.
7. Eggs.
There are absolutely no tested safe ways to home can eggs. In fact, one of the more recent cases of botulism poisoning in the U.S. was from pickled eggs canned at home; the man who ate them only recovered after prolonged medical treatment.
It's safe to make homemade pickled eggs, but they must include enough vinegar to acidify them (use a trusted recipe) and they must be stored in the refrigerator.
Instead of canning eggs, consider storing unwashed eggs in the fridge for 6 months or more; or you may freeze or freeze dry them, or use mineral oil or lime to preserve them for a few months. Click here for details and more ideas on how to preserve eggs.
8. Pasta, rice, and other grains.
It's fine to put pasta and grains in a canning jar and store them in the refrigerator, freezer, or pantry. You can even vacuum seal them. But they should never actually be canned. This includes putting pasta, rice, or grains in home-canned soups or using flour or cornstarch as a thickener in, say, home-canned pie filling. Canning makes grains go rancid, and during the canning process, they don't get heated thoroughly enough to kill off potentially harmful organisms.
Pasta, rice, and other grains are best stored dry. For long-term storage, put them in a Mylar bag with an oxygen absorber, inside a sealed bucket.
9. Pumpkin Puree.
 Courtesy of Brownies for Dinner.
Although most people love the idea of canning their homegrown pumpkins into pumpkin puree that can be used to make pies, it's not safe to do so. In fact, in the 1970s it was found that there was simply too much variation in the viscosity of pumpkin puree to give safe guidelines for home canning it.
That said, you may safely can pumpkin and winter squash chunks, which can be pureed after opening the jar. In addition, pumpkin puree may be frozen, dehydrated, or freeze dried.
(adsbygoogle = window.adsbygoogle || []).push({});
10. Previously canned food.
Some people love the idea of buying a big, oversized can of food from a restaurant supply or big box store, opening it, and then re-canning the contents into smaller jars. Unfortunately, this has never been tested safe. The initial processing of the food in a commercial cannery changes its density - and possibly its pH; this means you could be canning up food poisoning if you re-can the food. In addition, re-canning depletes the food of more nutrients and can turn the food to mush.
Instead, plan to freeze or freeze dry excessive amounts of canned food.
Related Posts:

(adsbygoogle = window.adsbygoogle || []).push({});
September 21, 2022
No Till Fall Garden Tour
Wanna see how my new garden (built this spring) looks in mid-September? Plus, learn how to ripen green tomatoes OFF the vine, how I organically deal with pests, and what went WRONG in my garden this year? Watch the video below, or head straight over to the Proverbs 31 Homestead YouTube channel!


