
Kristina Seleshanko's Blog, page 9
April 20, 2022
The Easiest Way to Cook Rabbit (Shredded Rabbit Recipe)
 This post may contain affiliate links. As an Amazon Associate, and at no cost to you, I earn from qualifying purchases made through some links. Please see FCC disclosure for full information. Thank you for supporting this site!
For centuries, rabbit was a mainstay in the European and American diet. It fell by the wayside in the mid-20th century...perhaps because after rationing during World War II, there was a big push to get beef, pork, and chicken back into our now-unrestricted diets. (Rabbit had been one of the easiest-to-obtain meats during the war.) Today, there is a resurgence in interest in both eating rabbit and raising rabbits at home for food. Trouble is, very few people have ever tasted rabbit, let alone cooked it. Two common questions I receive are "What does rabbit taste like?" and "How do you cook rabbit?"
What Does Rabbit Taste Like?
"It tastes like chicken," is a common trope about any unfamiliar meat, but in the case of rabbit, it's pretty apt. Some people literally cannot tell the difference between rabbit and chicken. Others can taste a difference, but conclude that rabbit is "like the very best chicken you've ever had." To my family, rabbit has a "cleaner" and slightly more complex flavor than chicken. And unlike chicken, rabbit has only white meat.
Also note that domestic rabbit tastes different from the wild rabbits found in North America, for a couple of reasons:
#1, they are a different species! Domestic rabbits (also known as European wild rabbits) are Oryctolagus cuniculus. Cottontails are the only wild rabbits in the New World and are in the genus Sylvilagus. (Hares are in the genus Lepus.)
#2, rabbit meat flavor depends, in some part, on what the animal eats. Wild rabbits generally have quite a different diet from domestic rabbits and their flavor may even change depending upon the time of year they are hunted.
(adsbygoogle = window.adsbygoogle || []).push({});
Prepping Rabbit Meat
If you purchase rabbit from a butcher's shop, grocery store, or farmer's market, the proper preparation of the meat has already been done for you. But if you are preparing your own freshly butchered meat, it's important to know what to do once the rabbit is dispatched and cleaned. Without this vital step, you can end up with very tough food.
After cleaning a rabbit, you may either immediately cook it or you may let it rest before cooking. All animals go into rigor mortis after death; this process includes the tightening of muscles. If you eat an animal that's in rigor, the meat will be very tough and difficult to chew. But by letting the carcass rest, it will pass through rigor mortis - and natural enzymes in the meat will make it much more edible.
There are several ways to rest rabbit, but the two most common are as follows:
1. Place a whole, cleaned rabbit in a pot with a lid in the refrigerator. This method results in the red rabbit meat often seen in Europe. For better air flow around all parts of the meat, place a rack in the bottom of the pot.
2. Place a whole, cleaned rabbit in a container of ice water (which is usually salted). This is the method I use; I like that the salt also helps draw out any blood that might still be in the meat. Just be sure you keep adding ice as it melts.
How long should you rest the rabbit? In my experience, at least 2 days. (Personally, I feel 3 days is best.) After resting, you may either cook the rabbit or freeze it.
(adsbygoogle = window.adsbygoogle || []).push({});
The Easiest Way to Cook Rabbit
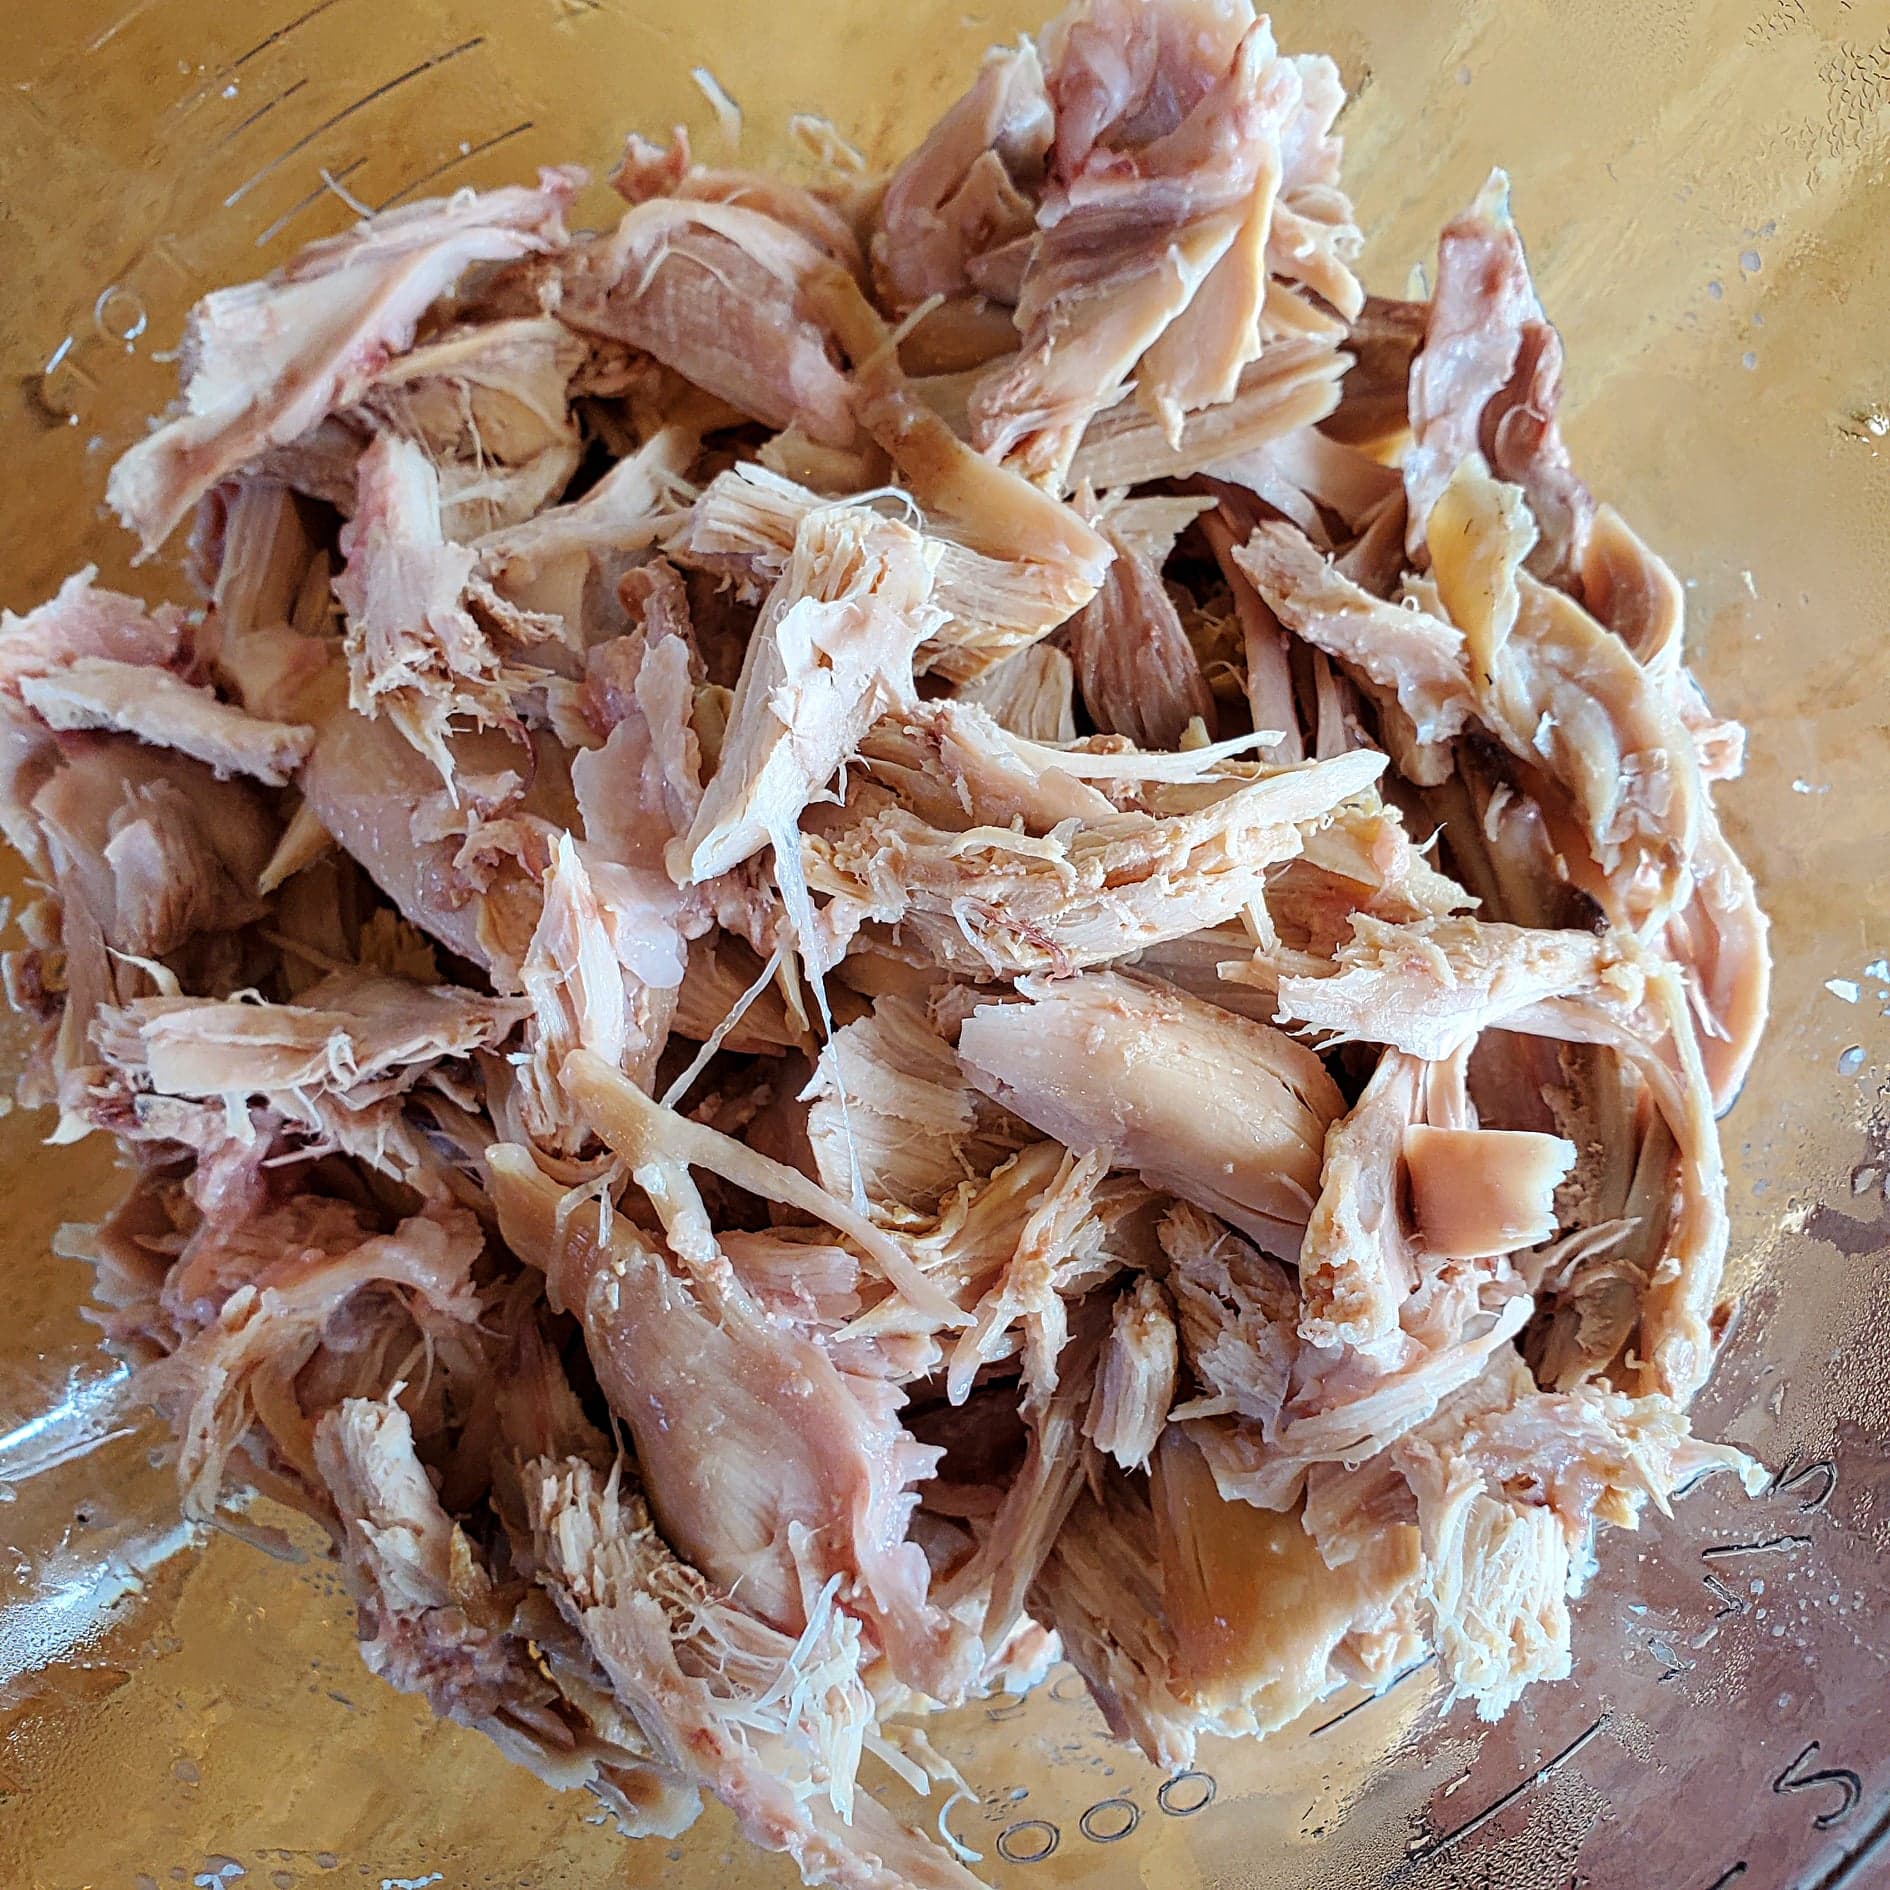
If you're new to rabbit, in my opinion the best way to prepare the unfamiliar meat is to cook it, then shred it and use it as a chicken replacement in your favorite shredded chicken recipes.
To Shred Rabbit in an Instant Pot:
1. Pour 1 cup of chicken or rabbit broth/stock into an Instant Pot, then add a whole rabbit.
 2. Secure the lid in place. Cook on Manual for 45 minutes.
 3. Quick release the steam and carefully transfer the rabbit to a rimmed baking sheet or baking pan, using slotted spatulas or spoons. Allow to cool until you can easily touch the rabbit without burning your hands.
 4. Using your hands, remove the meat from the carcass, pulling it into smaller pieces that resemble shredded chicken.

To Shred Rabbit in a Crock Pot or Slow Cooker:
1. Place a whole rabbit in the crock pot and cover with 1 1/2 cup of chicken or rabbit broth/stock.
2. Cook until meat is falling off the bones. If you cook on high, that will be around 2 to 3 hours; if you cook on low, it can be up to 6 hours.
3. Using a pair of slotted spatulas or spoons, carefully remove the rabbit from the crock pot and allow to cool. Then follow step 4, above.
To Shred Rabbit on the Stove Top:
1. Place a whole rabbit in a large pot and cover it with water or stock/broth.
2. Bring the pot to a simmer and keep it just barely simmering for about 1 1/2 hours, or until the meat falls off the bone easily. Do not boil or the meat will be dry and tough.
3. Carefully remove the rabbit from the pot, allow to cool, and follow step 4, above.
IN ALL CASES: Store the leftover broth in a glass jar in the refrigerator and use it in place of chicken stock; you may also freeze the broth. Keep the rabbit bones to make more stock.
 Shredded Rabbit Recipes To Try
The resulting shredded rabbit can be used right away in any recipe calling for shredded chicken. (Or, you may freeze the shredded rabbit for later use.) Recipe ideas include tacos, enchiladas, pot pie, casseroles, and "BBQ" sandwiches. Three of my family's top choices are: Keto Rabbit Pot Pie, Keto Salsa Rabbit (shown in this post's title photo), and Keto Enchilada Rabbit. You could also try shredded rabbit in my "Barbecued" Burritos, BLT Salad, and Chicken Fajitas.
Related Posts:


(adsbygoogle = window.adsbygoogle || []).push({});


April 14, 2022
How Grow Enough Vegetables for a Whole Year
 "How do I know how many vegetables to plant so I can feed my family for a whole year?" It's a hugely common question - but one that has no easy, pat answer. In fact, if anyone gives you a pat answer, you should be skeptical. Very skeptical.
That's because there are a ton of variables. What gives one family veggies for a year is not the same as what gives another family enough veg for a year. One obvious example is that a family whose meals are centered around meat, with vegetables as a side, is not going to eat the same amount of veggies as a family who eats very little (or no) meat.
There are also less obvious things to consider, like:
* Variety. (Certain varieties of green beans are going to produce more food than others. The same can be said of nearly any vegetable. Speaking very generally, hybrid varieties produce more food than heirlooms, but among every type of vegetable, the amount of food produced by certain varieties can vary widely. Want more food from every plant? Seek out varieties described as "abundant," "large cropping," "large harvesting," etc.)
* Nutrition concerns. (Some people prefer to grow heirlooms because some evidence suggests hybrids may offer less nutrition.Those focused on getting the most nutrition from their veggies will also choose veg that are higher in vitamins, such as leafy greens, cauliflower, broccoli, sweet potatoes, and beets, or veggies higher in protein - though plant protein is incomplete - such as green peas, beans, Brussels sprouts, kale, and potatoes.)
* Garden conditions. (Your soil, your region, your micro-climate, and the weather that particular year, all have a huge affect on how much food your plants produce. Have a more productive garden by understanding what grows well in your area and by choosing varieties suited to it. Looking for quick-growing varieties that can be replanted several times in the growing season also increase productivity.)
* Growing methods. (For example, those who intensive garden without fertilizing heavily will probably grow less food than those who garden less intensively in rich organic soil. On the other hand, you can grow more food in a smaller space if your pathways are narrow and you avoid narrow rows of vegetables.)
* Storage. (Whether or not you store your harvest makes a huge difference in how much you should grow. If you don't can, freeze, dehydrate, freeze dry, or root cellar food, you'll need to grow much less...and, except in very mild regions, should expect to have to buy vegetables during the winter.)
 Artichokes take up a lot of space and are therefore best avoided in small gardens.
(adsbygoogle = window.adsbygoogle || []).push({});
* Personal tastes. (For example, you might cook with tomatoes several times a week, but another family only cooks with them once a week. Your family may love eating summer squash, while another family detests squash and prefers to focus on other vegetables.)
A General Guideline from the Past
 A Victory Garden plan from The New Garden Encyclopedia.
One of my favorite gardening books is The New Garden Encyclopedia, published in 1945; it includes an entire section on planting Victory Gardens - vegetable gardens designed to feed civilians during World War II, when a lot of commercially-grown food bypassed civilians and went straight to our troops.
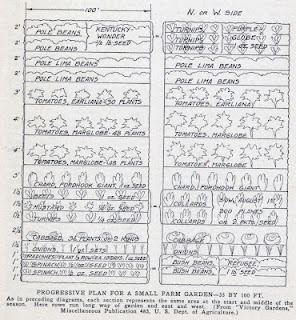
The Encyclopedia offers some interesting information on how much space a Victory Garden should consume: "The usual size is 1,000 sq. ft. of garden area for each person in the family. Thus a family of five would have a garden 50 by 100 or 5,000 sq. ft. - which would keep one person rather busy during spare time." In England, where food was much more scarce, but space perhaps more limited, the author writes that a garden 2,500 sq. ft. was typical, and required three or four hours of work per week. (That seems a rather low estimate of time spent, in my opinion, especially if the garden is new.)
The New Garden Encyclopedia also recommends:
* growing enough leafy greens so that each person in the family can eat 13 lbs.per week. This may seem like a lot of poundage, but remember that leafy greens like collards, kale, cabbage, and spinach shrink considerably once they are cooked. The author claims 3,330 sq. ft. of earth is needed for this endeavor.
* growing 11 lbs. of "other vegetables" per week, which would require 1,600 sq. ft. of soil. (This is very general, since some vegetables, like tomatoes and corn, take up much more room than others.)
* growing just 4 lbs. of tomatoes per person per week, which the author claims needs 500 sq. ft. of space.
* growing 14 lbs. of potatoes per person per week, which requires 2,500 sq. ft. of soil.
(adsbygoogle = window.adsbygoogle || []).push({});
Following these guidelines, a garden for one person would need to be 4,600 sq. ft. per person!
Below is another chart the Encyclopedia offered, detailing how much space each crop should take up in a Victory Garden.
Bear in mind the focus here was on a basic garden, using conventional rows (so a fair amount of wasted space), and older varieties.
Now fast forward to my very first canning book, The Ball Blue Book from 1984. Perhaps surprisingly, this reference includes a "Garden Planning Guide" chart, suggesting how much of each fruit or vegetable should be planted in order to obtain a certain number of canned goods. I cannot reproduce this handy chart without violating copyright laws, but I've done the next best thing: I've created my own chart, using Ball's figures. You can download the .PDF here.
More Tips
Now, these are helpful (I think) guidelines, but keep in mind a few things:
*New gardeners may quickly become overwhelmed by a large garden. If you've never grown food before, I highly recommend that you start small. As a newbie, you are going to make mistakes. In a smaller garden, it's easier to limit those mistakes and losses. Instead, plan on expanding your garden a bit every year.
 New gardeners should start with small gardens.
* A large garden can take quite a bit of time to maintain, depending upon the gardening methods you choose.
* To get a good idea of how many vegetables your family actually eats, jot down what you consume in one month's time. Now multiply that by 12.
* You can maximize your garden by choosing more productive and more space-saving plants. For instance, artichoke plants are rather large, are perennials (meaning you plant them once and don't pull them out of the garden), and only give a harvest once a year. In the amount of space an artichoke takes, you could plant a lot of leafy greens or several pole beans, which will keep providing food throughout the growing season.
* You can intercrop for more productivity. For instance, lets say you're growing lettuce, which is shallow rooted. Try intercropping it with carrots or parsnips, which have deep roots, but not a lot of leaves above ground. Or, if you have the space to grow corn, remember that it grows rather slowly, so you can intercrop a faster-growing vegetable, like turnips, in the corn bed. (A very fast-growing veg that is excellent for intercropping almost anywhere is radish. Don't like fresh radishes? Try cooking them; this takes the "bite" out and makes a low carb substitute for potatoes.)
 Carrots interplanted with cabbage.
(adsbygoogle = window.adsbygoogle || []).push({});
* Succession planting is helpful, especially if you don't preserve food. For example, plant a few beet seeds one week, then a few more a week later, then more a week after that. In this way, you can have fresh beets over a longer period of time.
* Especially the first year, and especially if space is limited, focus on calorie dense vegetables that your family will eat a lot of, in place of veggies you like to eat, but don't eat much of.
 Turnips grow quickly and can be stored in the fridge for months. Their leaves make a tasty green, too.
* Not everything has to grow in one large vegetable garden. When I lived in the suburbs, I had one rather traditional backyard vegetable garden, but then also planted food in the brick flower planter in front of my house, the mow strip, and the side yard.
 Cabbages planted in a brick flower bed on our old homestead in the suburbs.
* Remember to consider that not all vegetables that you like to eat may grow well in your area.
(adsbygoogle = window.adsbygoogle || []).push({});
A version of this post originally appeared in December of 2011.
March 30, 2022
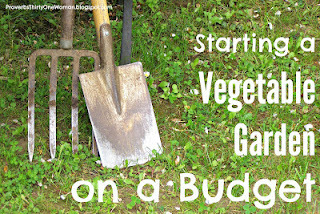
Creating a New Vegetable Garden - Step by Step!
 If you've been reading this blog for a while, you know I've not had a traditional vegetable garden since we moved out of the suburbs and onto our mountaintop homestead almost six years ago. A variety of things kept me from making a "proper" garden, including expense, time pressures, and not being sure where to put a large garden. (Yes, we live on acreage, but much of that acreage is wooded.) Instead, I've been planting in one raised bed (inter-cropping various veggies with asparagus) as well as in pots, old bathtubs, and pieces of culvert pipe. It's been less than ideal. (May I never have to drag a long hose all over our yard again!) But I was still able to grow almost all of our vegetables.
But last year, the deer RAVAGED the garden, and because of this, we had to buy store-bought veggies last fall, winter, and into this spring. (Why, after years of growing food here, did the deer suddenly get more aggressive about eating from our garden? I believe it's because our closest neighbors moved away. They were up at all hours making noise, scaring deer away. They also hunted a lot of venison. When they left, a major deterrent departed.)
So first, let me tell you how we created our new garden from scratch; then I'll detail how we are keeping the deer at bay.
How We Created Our New Vegetable Garden
We had a sunny patch of land across the driveway from our chicken coop; it held a falling-down shack, weeds, and some invasive blackberries. It seemed like a good location for a garden, so the first thing my husband did was push the shack over with an excavator; he then hauled the debris to the dump. (Truly, nothing was salvageable!)
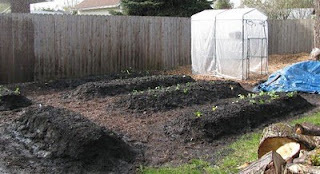
 The garden site after the shack and debris were removed and the soil was scraped.
(adsbygoogle = window.adsbygoogle || []).push({});
Next, he scraped the soil, removing as many of the blackberries as possible. These invasive blackberries are notorious where I live, being almost impossible to completely remove. Digging them up helps, but there are always roots left behind. We will have to really keep on top of them so they don't overtake the space again.
Our soil is heavy clay. I've learned the hard way, elsewhere in our yard, that even easy-to-grow domestic plants struggle to grow in our native soil. So I sourced some garden soil mixed with lots of compost and my husband trucked it home. (If you don't have the ability to truck in soil yourself, find a place that will bring soil or compost to you. This is what I did with the vegetable garden at our suburban homestead. If you're starting just a small garden, you can use homemade compost. Learn how to make compost here. Just remember that compost takes time to decompose into something you can use in the garden.)
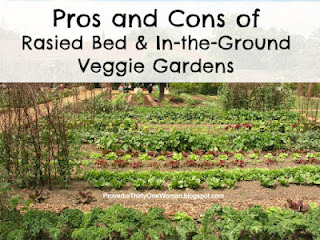
I spent a lot of time mulling over what to do next. Raised beds would have been ideal, but they are fairly expensive, especially with the cost of wood these days. While we do live in the woods, none of our trees are hardwood - and we live in a damp environment; using our own lumber for raised beds would mean replacing the wood every few years - definitely not something we wanted to do.
Then I considered weed barrier cloth. This is designed to go directly over tilled or mowed ground; to plant seedlings, you cut holes in the cloth just big enough for each plant. But this makes it hard to rotate crops, because the holes are permanent and any hole left without a plant growing in it will allow weeds to crop up. In addition, I like to direct sow some things, so a barrier cloth was problematic for that reason, too. Finally, good barrier cloth isn't cheap - and its made of synthetic materials, meaning it leaves plastic-like particles behind as they break down. (I do not recommend cheap barrier plastic; it degrades fairly quickly and then you have bits of plastic floating all around your garden, contaminating your soil.)
I also considered lasagna gardening (also called sheet mulching), but I did not have access to enough organic materials, such as peat moss, hay, dead leaves, etc. (You can read more about the lasagna gardening method here.)
Finally, I decided to use a similar no-dig method. I'd used this method in a small way in our suburban gardens, and it worked well. Yes, currently our weeds are more persistent than most people's (because there are no concrete streets, sidewalks, or driveways to keep weeds at bay, and there's lots of wild land surrounding us with tons of weeds - plus, we have a fair amount of wind, which blows weed seeds into our garden beds). However, I believe that with persistence, this method will work for us.
(adsbygoogle = window.adsbygoogle || []).push({});
To begin, my husband freshly mowed the area. Then I laid down cardboard in a double layer, always well overlapping any edges or openings. Ideally, I would have watered that cardboard down, but I forgot to. It really wasn't a big deal, since the water just helps begin the process of breaking down the cardboard - and spring is rainy for us. (In other words, nature did the watering for me.)
Then we spread some manure over the cardboard; you can skip this step, but we have lots of rabbit, quail, and chicken manure, so I figured I may as well use it. Finally, we put the garden soil/compost mixture on top, shaped into a berm. We cheated and used a backhoe for this, but in the past, I have definitely done it the old fashioned way, with a wheel barrow and a shovel.
 Layered cardboard, followed by a sprinkling of manure. (The manure is optional.)
 Covering the cardboard with garden soil or compost.
The amount of cardboard I'll need to finish this garden is...well, quite a lot. It has to be corrugated and it can't be shiny. I posted an "In Search of" ad for cardboard boxes on Facebook Marketplace and no one replied. I even searched online for places to buy cardboard in bulk - but I didn't have any luck. (I didn't really want to spend money on this, anyway.) So, I kept my eye open on Marketplace and periodically found someone who'd recently moved and had boxes they were giving away. Usually, these boxes were already broken down and all I had to do was remove any stickers and packing tape from them. I also put the word out amongst our family that I would take any and all corrugated cardboard boxes - and consequently, my dad-in-law brought us a nice bundle. I also plan to ask around at furniture and appliance stores.
(adsbygoogle = window.adsbygoogle || []).push({});
In all cases, I'm not picky about what I take. If someone offers me a bunch of boxes and a few have shiny photos on them (which are likely plastic-coated and therefore unsuitable for gardening), I take them, along with anything else they offer. They are doing me a favor, so I can dispose of inappropriate boxes, as needed.
In the next few days, I'll be covering the pathways (which are now cardboard-covered) with wood chips I can get for free locally.
Although most people (who don't live in wild areas) won't find this a big issue, if weeds do start cropping up in the garden beds, I will just trim them, cover them completely with cardboard, and then cover the cardboard with mulch, compost, or soil. Repeat as needed.
Steps to Create a No-Dig Garden:
Step 1: Prepare the area by mowing.
Step 2: Lay down double layers of cardboard, overlapping the edges well. If there are any holes or slits in the cardboard, you'll need to cover them with a different piece of cardboard (or weeds will grow up through the holes).
Step 3: Water down the cardboard. (I skipped this step because I let the rain do it for me after I completed step 4.)
Step 4: Lay aged manure over the cardboard (optional), then lay finished compost or good garden soil over the cardboard.
Step 5: Lay organic mulch, such as straw or wood chips, in the pathways. (This will help break down the cardboard and prevent future weed growth. Plus, it makes the garden look nicer.)
(adsbygoogle = window.adsbygoogle || []).push({});
And that's really all there is to it! As you can see from the photos, I only have a few berms finished at this time. I need to add more, for sure, but this is a great start and it's easy to keep adding berms as time and materials allow. (A lot of people wonder if the berms stay in place or if the soil "drifts" or washes flat. I live in a rainy, windy area, and I have no issue with the soil washing or drifting away. In my suburban garden, I patted the sides of the berms firmly with my hands, thinking erosion might be an issue; this time, I skipped that step.)
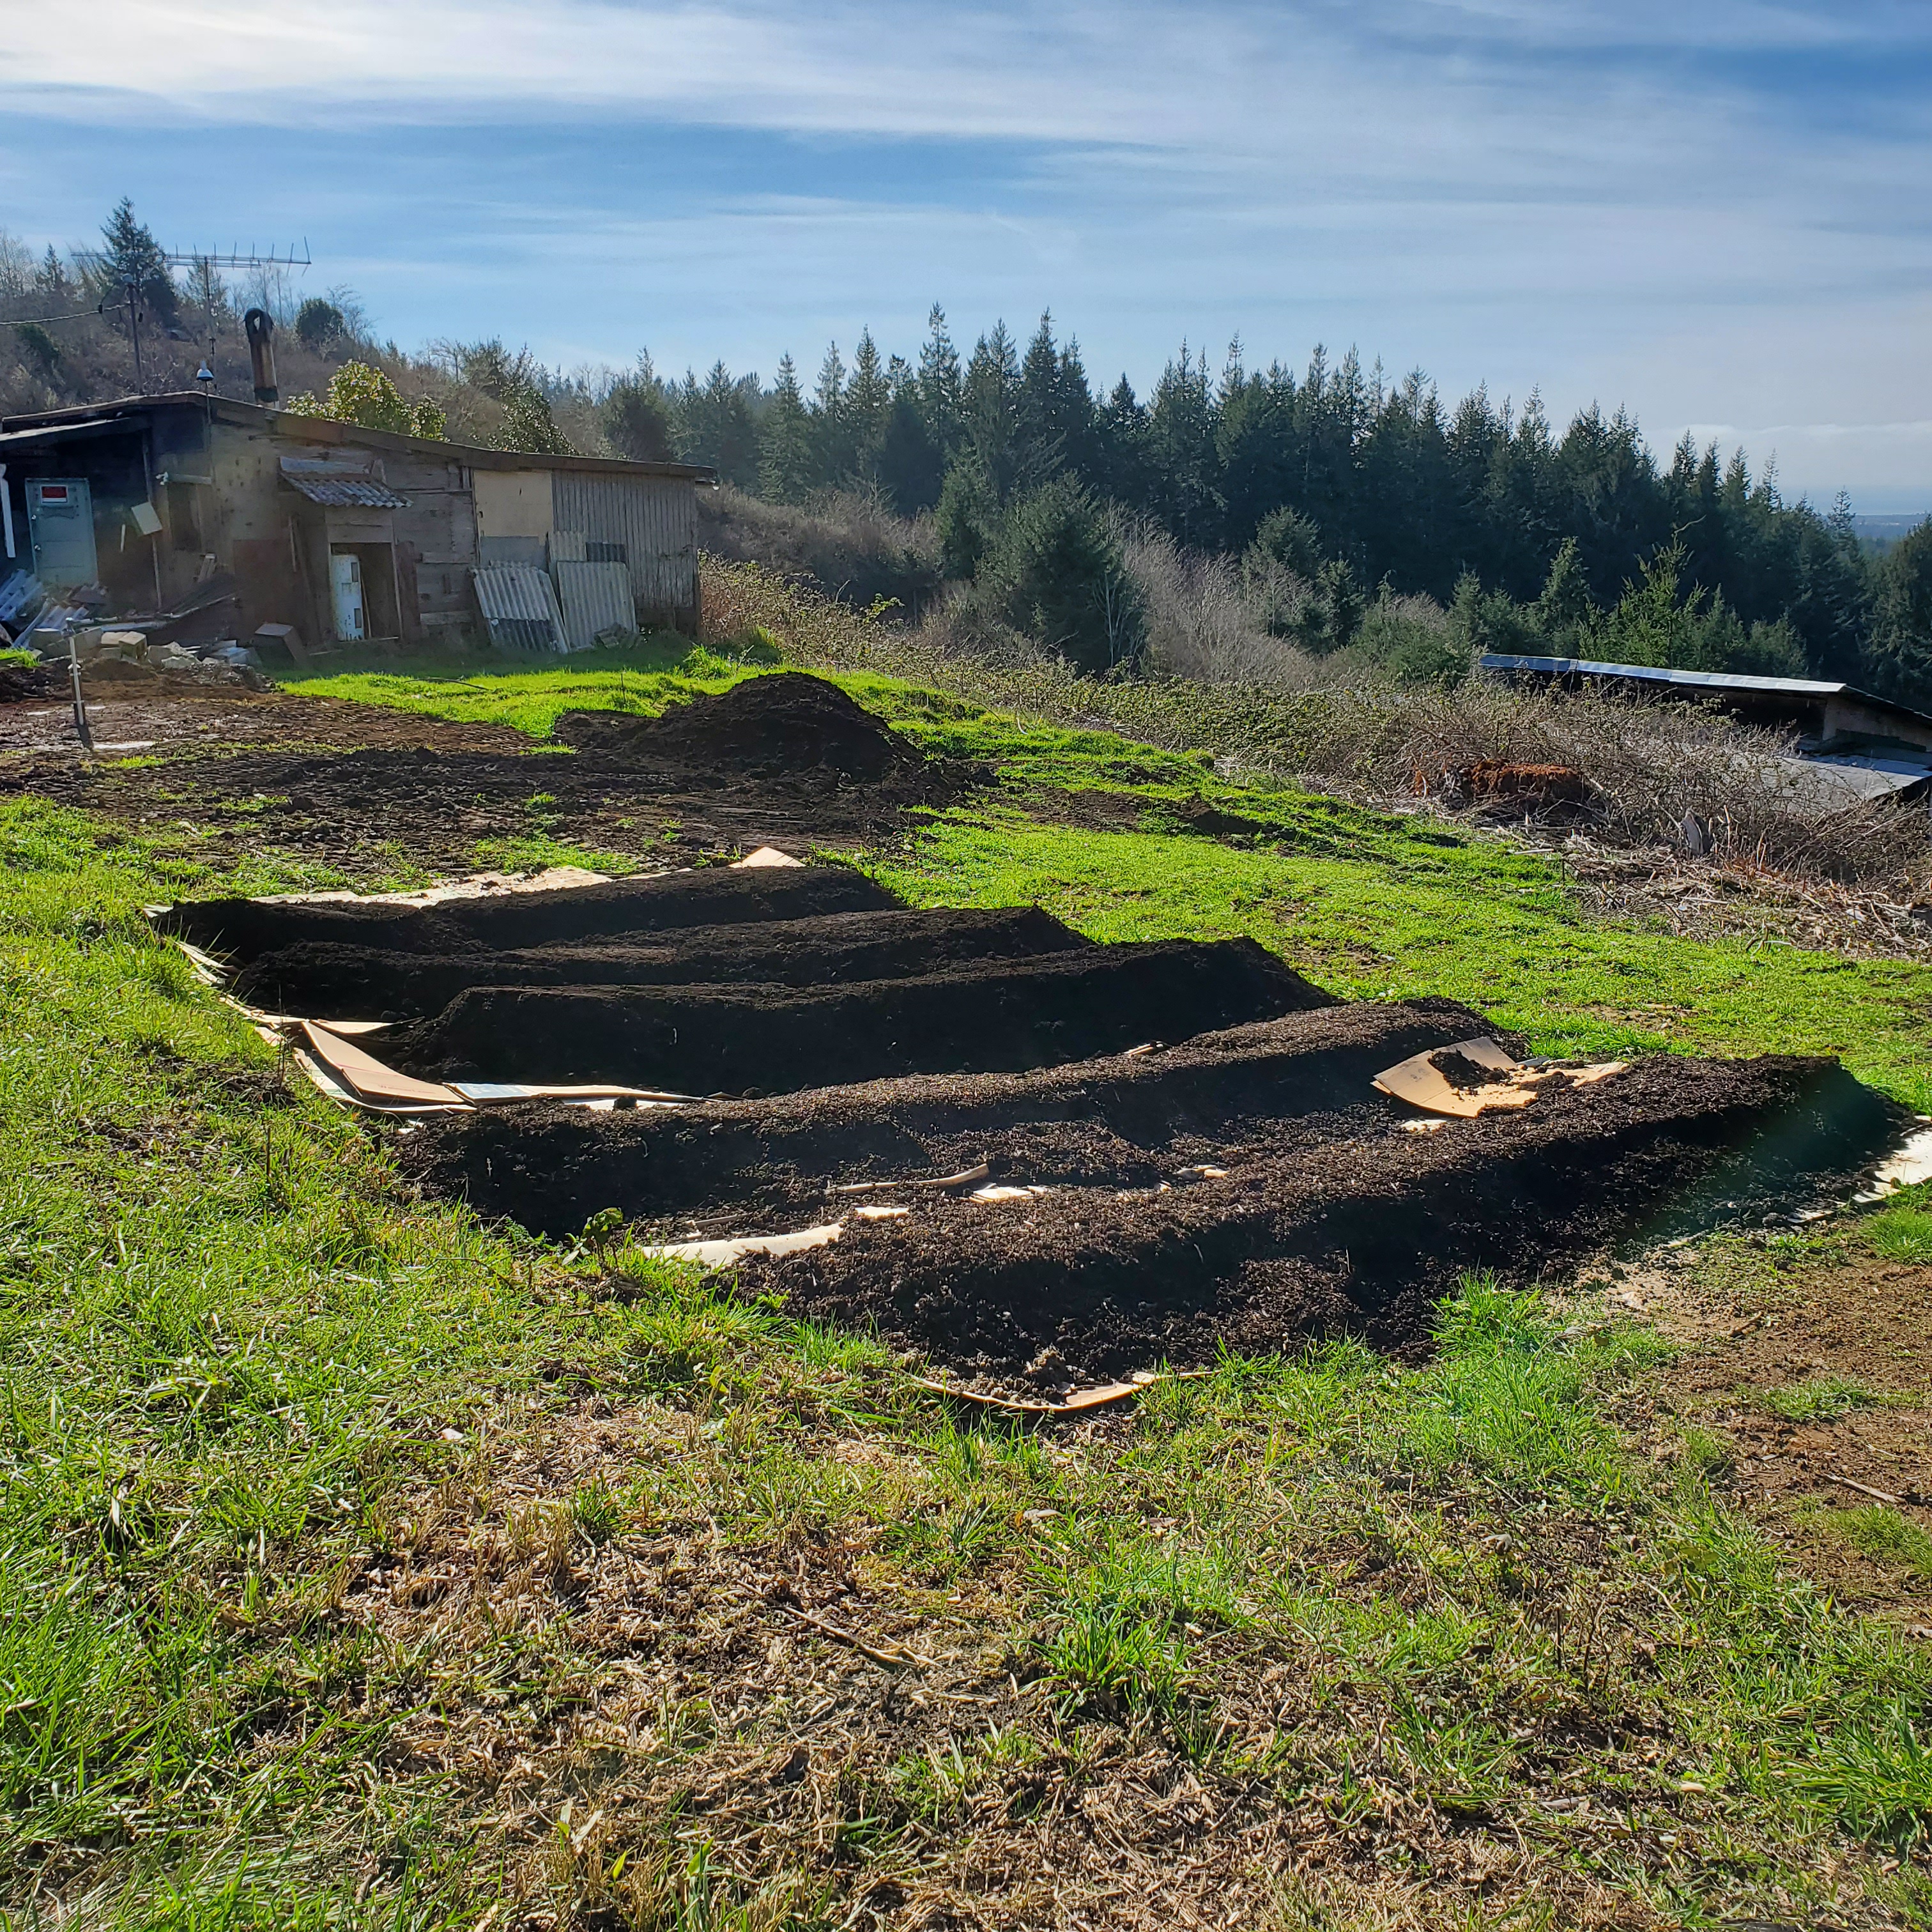 The first several berms are completed!
Bonus: Worms LOVE cardboard! They will appear out of nowhere and start doing their good work in your garden: enriching the soil with their manure, creating humus, improving soil structure, and more. Plus, by not tilling, you avoid damaging the soil...and the left-behind weeds and their roots, which have been storing up nutrients, gradually rot in the soil, fertilizing your desirable plants.
P.S. I'd be remiss if I didn't mention that my husband also put in a faucet (hydrant) especially for this garden bed!

 Our Deer Fence
I extensively researched ways to keep deer out of the garden; I even tried some of the tricks people swear by. What I found was that while some of those tricks work, they usually don't work permanently; the deer get used to whatever trick you're using and it no longer deters them.
So what is the least expensive, most sure way of keeping deer out? A deer fence. Which wasn't what I wanted to believe, since fencing is expensive. But growing our own food is very important to us and we have a large population of deer at all times of the year; we just needed to bite the bullet.
(adsbygoogle = window.adsbygoogle || []).push({});
I looked at lots of different deer fencing, but in order to keep things as inexpensive as possible, deer netting was going to be as fancy as we got. Still, there is deer netting and there is deer netting. Some of it is quite thin and won't hold up over time, and some of it is thick and UV treated so it will last many years. I ended up choosing Tenax brand, maximum strength, which is supposed to last 20 years. I purchased it from Deer Busters. If you follow that link (I'm not an affiliate; I'm just sharing what worked for us!), you can see it's not cheap - but I think it's absolutely essential to garden success in my area. I was also pleased to find that the roll we purchased will allow plenty of fencing for the expansion I want to create in the garden next year.
The next hurdle was posts. Again, for us, wood was not a good option. Rot-resistant wood was just too expensive for our plans; t-posts, on the other hand, pretty much last forever. But we needed tall t-posts - at least10 feet. No one in our area had any. When I asked our local businesses if they could order in tall t-posts, they said they had no control over the sizes they were selling. Because there are shortages in metal and workers, manufacturers are only shipping out the most popular t-posts sizes, which - at least in my area - are all shorter than we required.
I even went online looking for tall t-posts (even though I figured the shipping would be crazy expensive). Nope. Couldn't find them there, either. So my amazing husband decided to buy shorter t-posts and weld them together to create 10 foot posts. That worked like a charm!
 My hubby welding t-posts to the correct length.
To put up the fence, my husband used a t-post driver to pound the posts into the ground at equal distances around the garden. That's no easy job, especially when the posts are 10 feet tall and the ground is uneven! (He had to stand in our side-by-side's truck bed for most of this job.) Then he attached the deer fencing (which, thankfully, was pretty easy to work with) to the t-posts with zip ties.
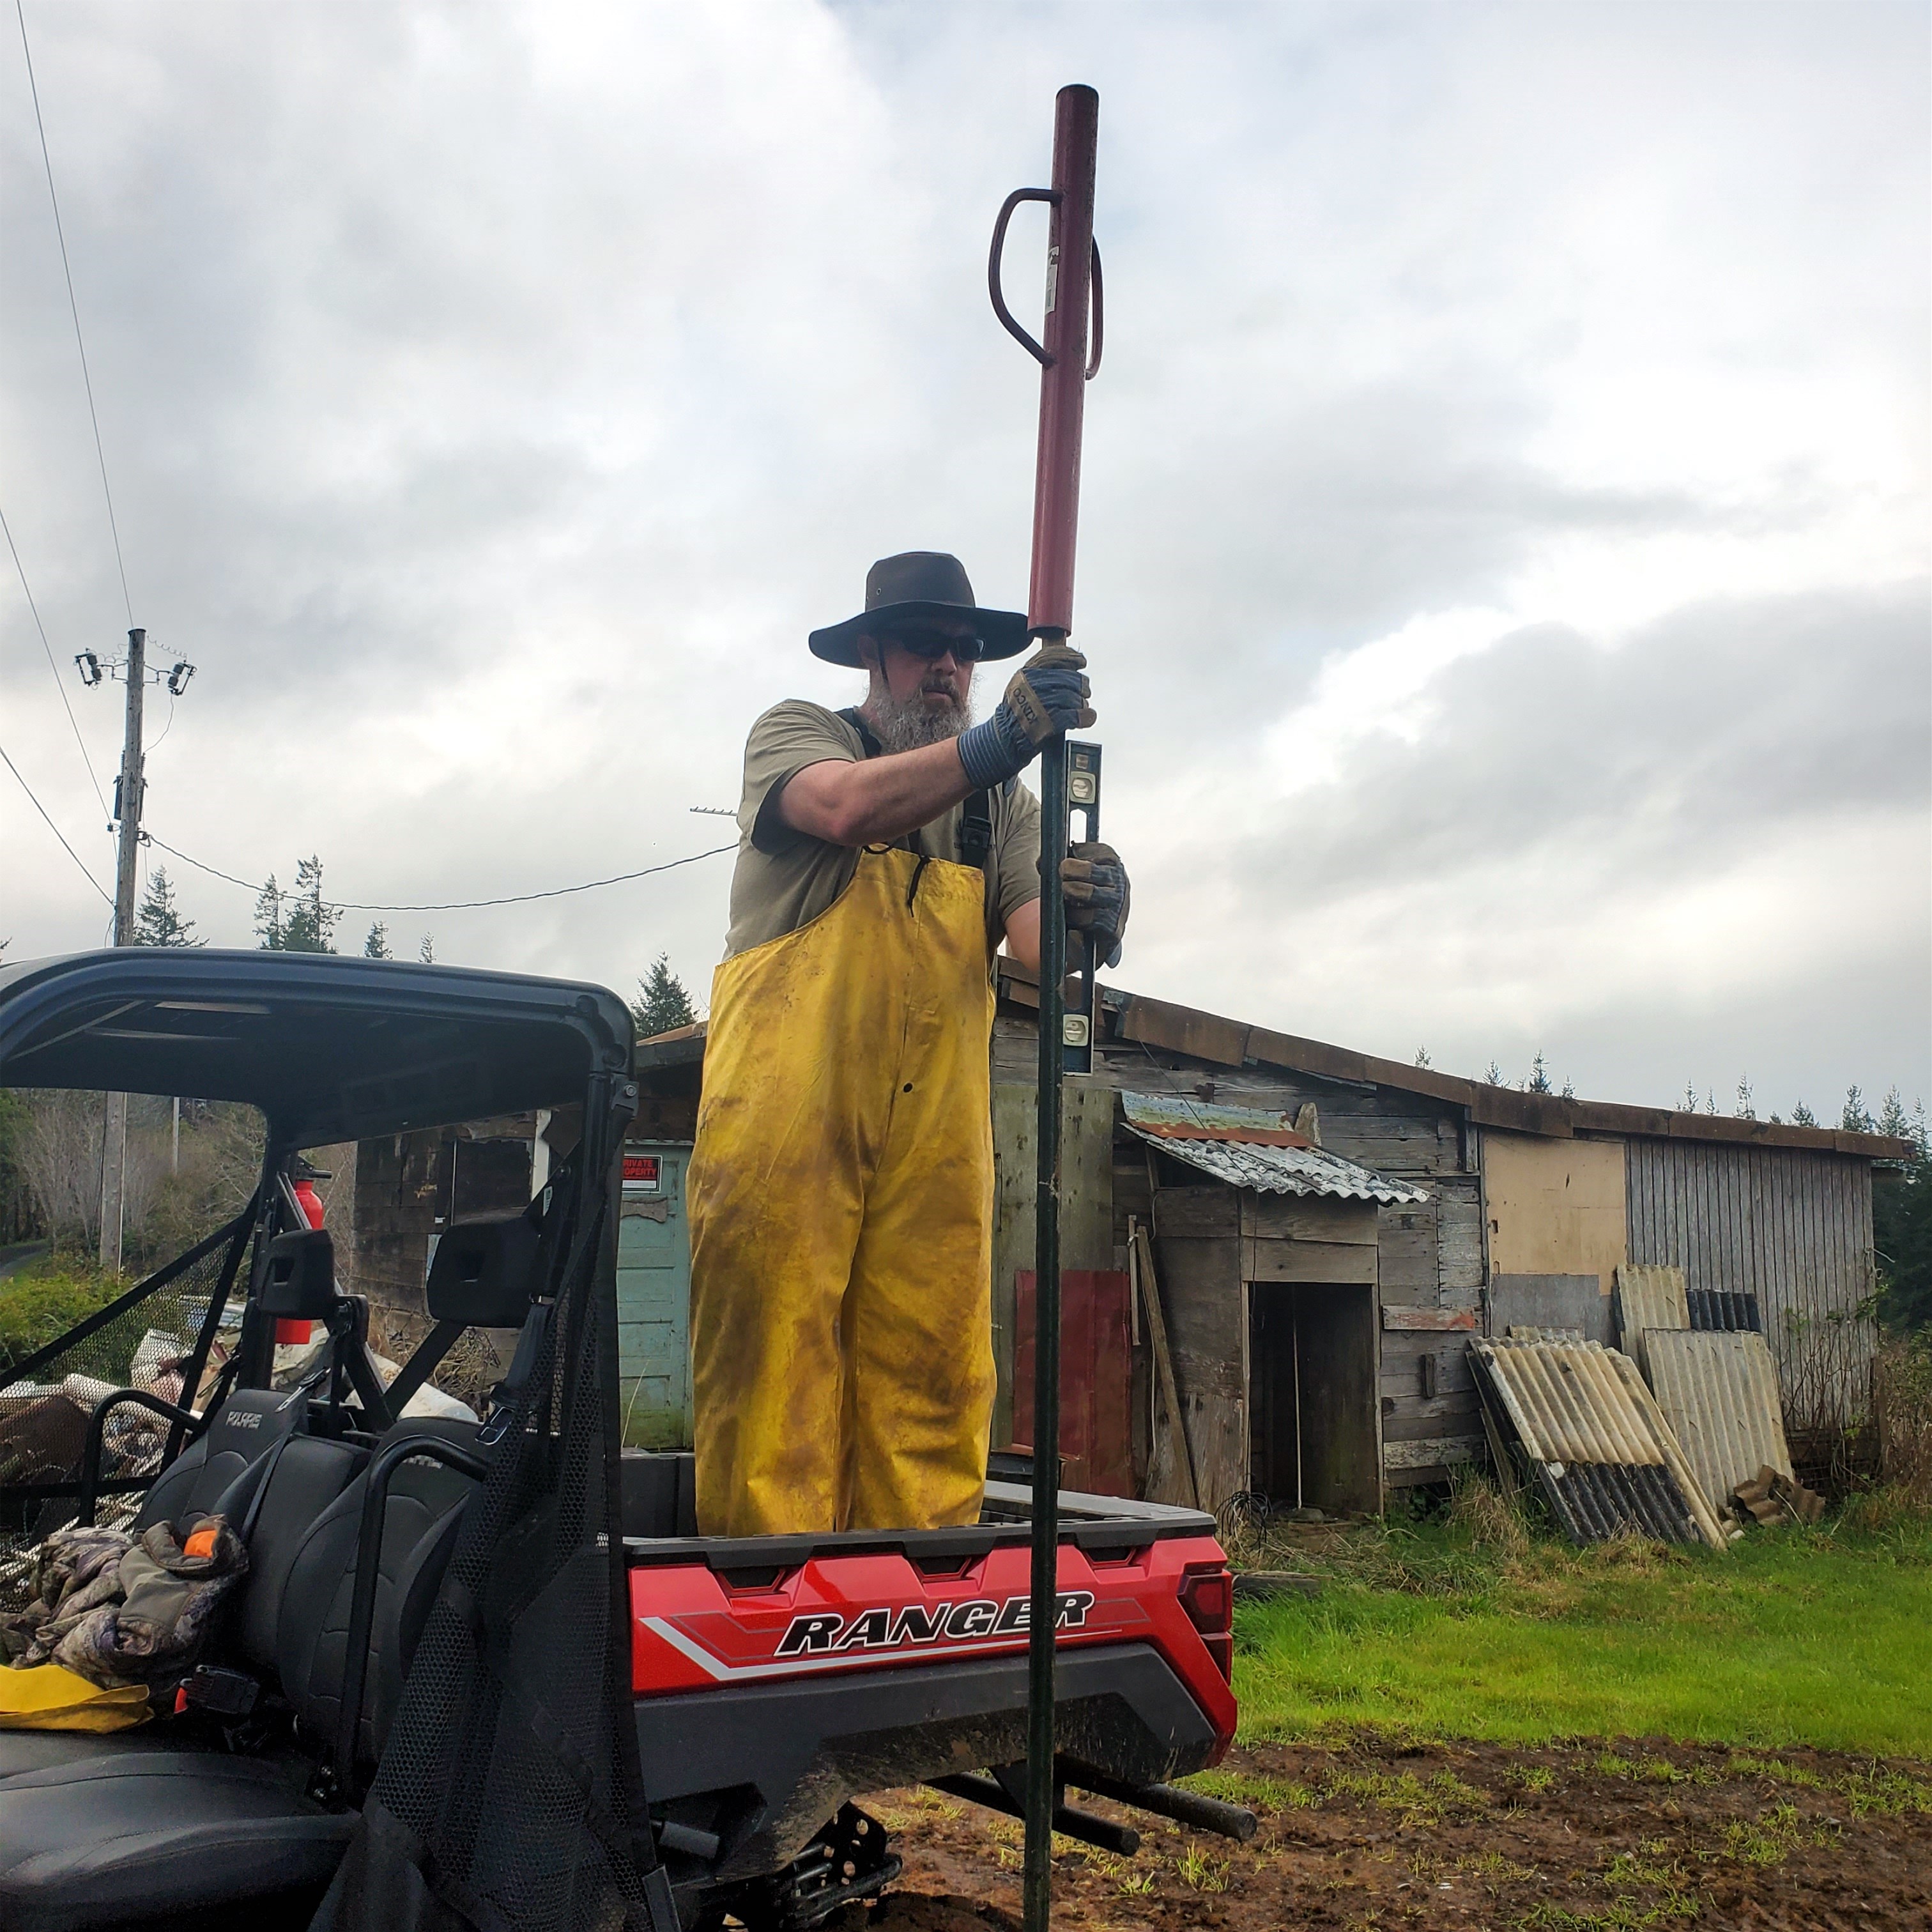 Pounding t-posts.
 Only how many more to go??
(adsbygoogle = window.adsbygoogle || []).push({});
To create the "gate" for humans to get in and out of the garden, he simply left one end of the fencing free and stiffened the cut end by clamping it between a couple of pieces of wood that are screwed together. He attached three bungee cords to this wood, which easily hook onto the opposite t-posts, creating a latch.
 The very simple "gate."
  The latch.
 Close up of the latch.
 The fencing, while not fancy, isn't obtrusive, either. Notice I have both a manure pile and a soil pile for the building of additional berms.
A few days ago, I planted some onion starts and radish and lettuce seeds into one of the beds. May the growing begin!
 The garden is still a work in progress, but I'm already growing food.
Other Ideas for Creating Gardens:
How to Plan a Small Vegetable Garden
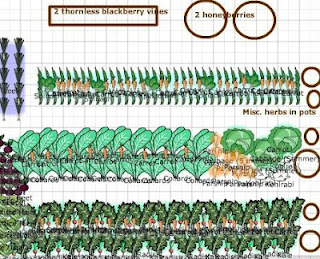

How Many Vegetables to Plant?

 Working with Poor Soil
March 22, 2022
Skyrocketing Food Prices Due to Current Events: What You Can Do About It
 Did you know that Russia and Ukraine grow about 30 percent of the world's wheat? (They are the world's top and fifth exporters, respectively.) Did you also know that American wheat farmers are finding they can't sell their wheat? The middlemen are afraid to buy the grain at its current high price (up 30 percent) because they fear they'll be unable to make a profit - or worse, may go backward financially? What are the consequences of these facts?
Major news outlets are saying many countries, including Egypt, Congo, Burkina Faso, Lebanon, Libya, Somalia, Sudan, and Yemen will face a real starvation crisis, as they buy most of their wheat from the region. (Ukraine has also stopped exports of other important food crops, adding to the potentially catastrophic effect.) I think we can expect to see humanitarian organizations develop a great need for money and supplies to feed these people. I think our government may end up sending some U.S.-grown wheat and other foodstuffs overseas. I pray circumstances won't lead to such a lack of food that civil unrest ensues.
For the U.S., the war in Ukraine aggravates an already troubled market. As of late February 2022, only 25 percent of the wheat grown in Kansas (the U.S.'s top producer of the crop) are in good condition, due to dry weather. Fertilizer costs are soaring, since they are derived from oil. Russia and Belarus make 42 percent of the world's potash - a vital soil amendment farmers rely on. Nitrogen, also an important commercial farm input, is made from natural gas - a top export from Russia. Add to this the rising cost of fuel for tractors and other farm equipment and the difficulty in getting certain supplies (like tires, tractors parts, and so on), and you can see American farmers are facing great difficulties.
Now add on manufacturing and distribution woes like shortages in containers, increased costs in making plastic containers (because they are petroleum products), costs of trucking, etc., - not to mention overall high inflation - and you can see that Americans can expect to see even higher food prices in the near future. (As an aside, did you know the government changed the way it calculated inflation in 1980? The new way makes inflation seem lower. But if you use the same method to calculate inflation as was used in the 1970s, current inflation is much worse than it was during the Carter administration.)
And it's not just wheat products like bread, cereal, and baked goods that are increasing in price. It's also vegetables (due to skyrocketing costs in fertilizer and duel) and meat. (Why meat? Because in commercial farming, nearly all animals are fed grain.)
Maybe it's because I've been reading and watching a lot about rationing during World War II, but I can't help but draw parallels. England found itself in a real bind because it relied so heavily on foreign countries to grow its food; they had to scramble to become more self-sufficient when it became evident the Nazis were going to do everything possible to cut off their food imports. By the end of WWII, rations were quite measly, even with donations of food and seeds from the United States.
 English rations at the beginning of World War II.
I'm not anti-imports, but I do think that as a nation we need to learn from history and re-examine our reliance on other countries for important basics.
What Can the Average Person Do?
If you don't yet homestead, or you don't grow or raise most of your food, you will be hit harder by this tornado of problems than those who do. BUT that doesn't mean there's nothing you can do to make rising food costs less onerous. First, I recommend you start or expand your deep pantry - that is, shelf-stable foods you keep on hand. I've written a whole article about how to do this; click here to read it.
You can also make connections with local ranchers now, before they are totally inundated with requests for meat. Buy a quarter or a half of beef (learn how here) or a pig. Become acquainted with and purchase from farmers who offer chicken or smaller-animal meats for sale. Happily for those who don't have large freezers, it's increasingly common for ranchers or farmers to allow consumers to buy just a few cuts at a time; some offer monthly subscription boxes, too. (Do try to keep it local, though. By doing so, your costs should be a bit lower, plus you'll support your local farmer and keep money in your local community.) It's also smart to learn to pressure can, so you can store more meat while using up less freezer space.
 Local food is usually less expensive, allows you to preserve at a discount, and supports your community. Photo courtesy of Edgar Zuniga Jr.
 (adsbygoogle = window.adsbygoogle || []).push({});
While you're at it, get to know the farmers at your local farmer's market. Buy from them. When veggies or fruit are in season, buy in bulk and learn to can and freeze (and maybe dehydrate or freeze-dry) the food.
Start growing something. Even if you live in a city, you may be able to get space to grow food at a community garden. Or you can grow herbs on your windowsill, or tomatoes on your balcony. Every bit will help.
You can also stock up on flour, beans, oats, and other dried carbohydrates. Buy big bags at Costco, a restaurant supply store, or Walmart; seal them in Mylar bags, and store those in air-tight buckets. (There are tips for this type of food storage at The Pantry Mama.)
I also recommend you think about how you would eat if flour and grain products were expensive or difficult to come by. Maybe it's time to give that healthy low-carb diet a try ;)
What Can Homesteaders Do?
First, I encourage you to use this spring to start or expand your vegetable garden. Call it a Victory Garden, if you like. This will put a good dent in your grocery bill, and can make you less reliant on grains. (Because you'll be eating more veggies in place of those grains.) It will also give you the ability to share with others who may need a helping hand with food.
 WWII Victory Gardens need a comeback.
I've heard a few homesteaders say they are giving up raising animals because they expect the cost of feed to skyrocket. I counter that the skyrocketing of feed makes now an excellent time to raise your own meat. After all, commercial ranchers will be passing on the high cost of feed to packagers and packagers will pass it on to consumers...and the cost of butchering, packaging, and transportation - not to mention profit - will all be added on to the cost of store-bought meat. Therefore, homestead-raised meat will be less expensive than store-bought - especially if you raise those animals thoughtfully.
(adsbygoogle = window.adsbygoogle || []).push({});
For example, a neighbor recently offered us some goat kids, and while I love goats and have always wanted some, we cannot yet raise them on pasture. (Our fencing is fine for sheep, but not nearly strong enough for goats, who like to climb things. We are not in a position right now to add goat-proof fencing, even if we could find the supplies to do so.) That means any goats we'd keep wouldn't have much in the way of grass and weeds to browse, so we'd have to feed them mostly store-bought food; knowing grain prices are going up, I think this is not the right choice for us right now.
 Use animal tractors, when possible. Photo courtesy of Jessica Reeder.
I'm also eye-balling more ways to feed our rabbits and chickens fresh food, rather than store-bought pellets. I don't feel I can tractor either of these animals, given predation on our homestead, but I can grow more vegetables for livestock. I can also be sure to give our rabbits and chickens more weeds from our land. (Be wary of adding grain fodder to your homestead, since the price of grain seed will likely skyrocket, just as the finished grain is.)
I haven't had much luck getting our quail to eat anything but commercially made pellets, so if it comes down to it, I may have to eliminate quail from our homestead. On the other hand, if we do replace the Soay sheep we lost to a predator, I won't have to worry about store-bought feed for them. They are excellent grazers and browsers, only needing a wee bit of supplemental hay in the winter.
As I mentioned in my last post, we are planning on building a barn. One part of that barn will be for pigs, so I'm considering Idaho Pasture pigs, who are good foragers but don't till or dig up the land. And of course, we'd plan on giving any pigs all the table scraps we can scrounge up. Maybe it's even a good time to revive an old WWII practice: Pig clubs. Ask neighbors, relatives, or friends to save and contribute all their kitchen waste to feeding your pigs; in return, give them a portion of the meat at butchering.
 Choose livestock that can eat entirely or mostly natural food, rather than commercial feed. Photo courtesy of Alexandr Frolov.
I think you can see what I'm getting at. Really, for most homesteaders, the line of thinking won't change much because homesteaders are already looking to be more self-sufficient and regenerative. But shortage and inflation may spur you to more actively and quickly pursue those goals.
__________________
"...I have learned to be content with whatever I have. I know what it is to have little, and I know what it is to have plenty. In any and all circumstances I have learned the secret of being well-fed and of going hungry, of having plenty and of being in need. I can do all things through him who strengthens me."
Philippians 4: 11-13
* Cover image courtesy of
Dietmar Rabich and Wikimedia Commons.
March 17, 2022
Weekend Links & Updates (with Spring Inspiration!)
 This post may contain affiliate links. All opinions are my own. Please see FCC disclosure for full information. Thank you for supporting this site!
_________
"May my teaching drop like the rain, my speech condense like the dew; like gentle rain on grass, like showers on new growth. For I will proclaim the name of the Lord; ascribe greatness to our God!"
_____________________
When you live in the woods, spring cleaning is not something you can overlook. Yet that's exactly what I did last year; when my mom died., pretty much everything in my life dropped to the wayside. So this year, spring cleaning has been a bigger job than usual!
The combination of living on a gravel road, living in the woods (the cobwebs, people!), having a dog in and out of the house, having a wood stove for heat, and just plain farm living, means dust and debris build up quickly! I'm thankful our house is pretty small, because that means there is less to clean. (Haha!)Anyhow, I'm nearly done, but if you want some guidelines and checklists for getting through your spring cleaning, check out this series of posts.
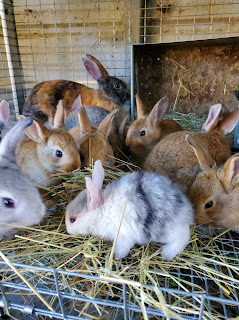
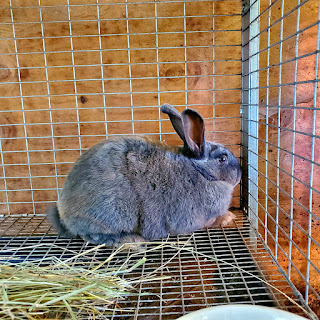
In addition to spring cleaning, I'm caring for all the critters, of course, including baby rabbits and some quail chicks we recently hatched. Thankfully the quail chicks are out of the brooder (which is in our house) and living outside now. Their dander definitely contributes to a dusty house!
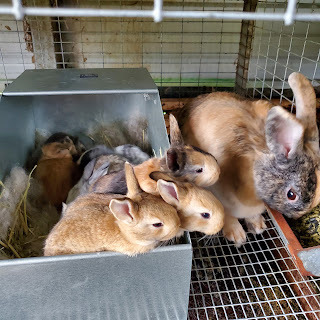 All the kits are still in their nests, but Fiona's kits (shown here) should be hopping out any day now!
 A freshly-hatched quail chick.
My husband and I are nearing the completion of our new vegetable garden. Although I don't have as many beds as I eventually will, I have enough to start planting. We hope to put up the deer fence this weekend; then we'll need to fence the asparagus bed. Sadly, we haven't harvested much asparagus yet because the deer get to the delicious sprigs before we do. (Once the main garden bed is finished, I'll post a step-by-step guide on how we did it. We chose the EASY route!)
 My winter sown veggies are doing well.
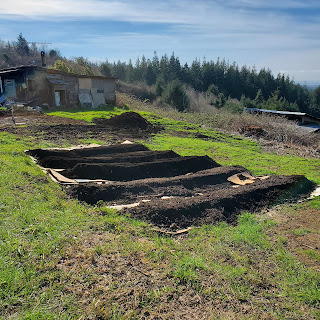 The new veggie garden...so far.
We're also prepping for a barn. My husband cut down a tree or two, and now he's harvesting them for firewood. Then he'll prep the ground for a foundation before we put up a pole barn where we hope to house the rabbits, quail, and eventually some pigs and sheep or goats.
In my spare time, I've been loving quilting - something I just didn't have time for last year.
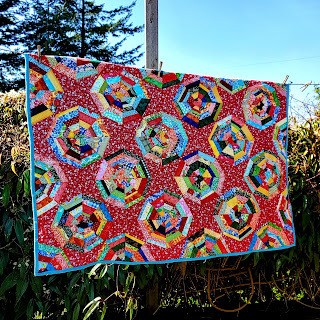 An all-scrap spider web quilt I just finished.
 A sunflower table-topper I made as a reminder to pray for the people of Ukraine...and in remembrance of my husband's grandparents who fled Ukraine when the Bolsheviks were taking over.
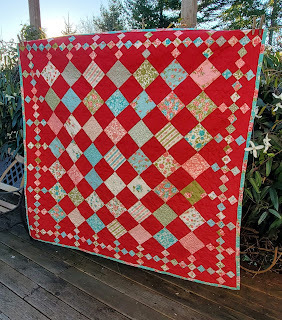 My Diamond Patch quilt. I started this just before my mom died. I made a point to finish it just before the one-year anniversary of her death.
 I started cutting out this vintage-inspired apron before my mom died. I finished it last month.
I've also been enjoying learning a lot about farming and cooking during World War II. I'm a bit of a history buff, but even if you're not, there's a lot homesteaders can learn by studying this topic. I came into this journey by finding the BBC series Wartime Kitchen & Garden on YouTube. I found the English techniques for dealing with shortages and food demand interesting and learned some things I didn't know. This inspired me to buy the book by the same name; the book has a LOT of different information, like stories by people who lived through the war (including the presenters Ruth Mott and Harry Dodson) and actual cooking and baking recipes. I recommend it! (Admittedly, it's expensive on Amazon, so I purchased a used copy of eBay. HINT: Search for the book, then save the search. eBay will send you an email whenever a listing that fits your search term comes up, making it easy to shop by price. Just bear in mind that authors earn nothing when you buy books used.)
This in turn led me to watch The Wartime Farm on YouTube. I'd watched The Victorian Farm (on Amazon streaming), The Edwardian Farm (on Amazon), and The Tudor Monastary Farm (on Amazon) previously; they are all well worth watching both from a historical point of view and as a modern homesteader wanting to learn from the past. But The Wartime Farm is probably my favorite because I learned SO MUCH I didn't know! This series also has a book, which I've ordered, but haven't yet received.
Finally, I discovered a fun podcast called Victory Kitchen. This focuses on rationing and wartime cooking in the U.S. (whereas the other sources I've mentioned are all British) and not only has interesting historical facts but includes the host trying and sharing wartime recipes.
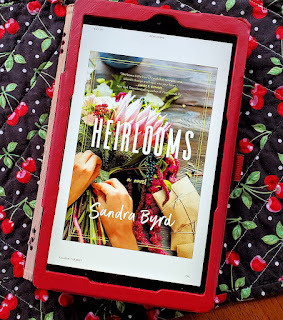
Speaking of excellent reads, if you've never read a novel by Sandra Byrd, you're really missing out. I haven't read one yet that wasn't excellent - and her newest book, Heirlooms is no exception. This is a beautiful, multi-generational story about hope, perseverance, love, making our way in this world, and making a difference in this world. I laughed, I cried, I closed the book feeling better about life. I highly recommend this read! (I was blessed with an advanced copy, but I recommend advance ordering a copy so you can read it as soon as it's available.)
 Other Stuff * The bird flu is spreading in the U.S., putting backyard chickens and other poultry at risk. Be prepared to house your birds in a shed or barn!
 * How to REALLY save the bees: "The needs of wild bees are so different that, as some experts say, raising honeybees to save pollinators is like raising chickens to help birds. Though many homeowners respond to 'save a bee' campaigns by purchasing hives, the practice is unlikely to improve honeybee health and may harm other bees by increasing competition for floral resources and exacerbating the risk of disease transmission."
* Testing older seeds to see if they are still viable
* Creating a deep pantry to hedge against inflation and shortages.
* Freeze drying vs. dehydrating: What's the difference?
* How to Stretch Your Meat Budget.
* How to Plan a Medicinal Herb Garden.
* Foraging for wild food: Finding & Eating Miner's Lettuce
* The dandelions are coming (if you don't have them already)! Don't forget to grab your copies of my popular books The Ultimate Dandelion Cookbook and The Ultimate Dandelion Medicine Book!


March 1, 2022
9 Reasons For Sheep on a Small Homestead

This post may contain affiliate links. All opinions are my own. Please see FCC disclosure for full information. Thank you for supporting this site!
When we first moved to our mountaintop homestead, the idea of having sheep never crossed my mind. After all, our land is mostly wooded; we don't have pasture, per se. How could we economically raise sheep? And why would we want to?
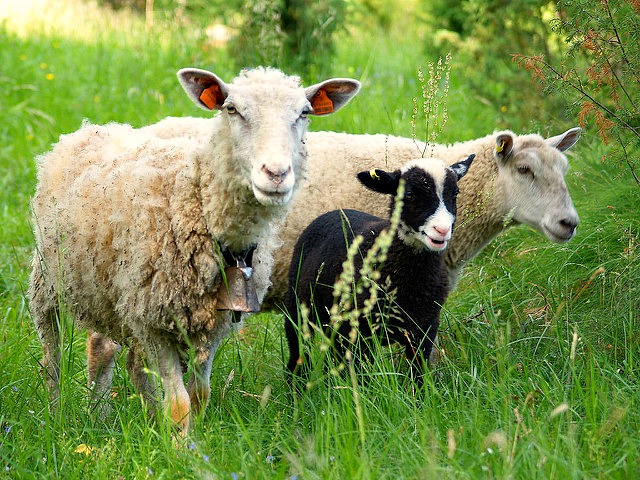
As we learned, however, there are many good reasons for small homesteads to have sheep. And even though we lost our small flock of Soay sheep to a predator this year, we hope to add sheep back onto our homestead very soon. The truth is, we hate being without them!
Reason #1: Sheep are excellent brush eaters.
Many people believe sheep only eat grass, but they actually enjoy eating brush, too. If you choose a heritage breed, they will even prefer brush over grass, making them better brush eaters than goats! Unlike goats, heritage sheep are not picky eaters; they also prefer vegetation that's lower to the ground, whereas goats tend to eat vegetation that's at their eye-level or above. Truly, this is the most important reason for sheep on our homestead; they eliminate a great deal of mower and weed whacking work!
Although all sheep will eat brush and forbs (leafy green plants other than grass), particularly good breeds for brush-eating include St. Croix, Alpines Steinschaf Hebridean, Babydoll Southdown, Bentheimer Landschaf, Braunes Bergschaf, Drenthe Heath, and Soay.
Reason #2: Their fencing needs are less expensive.
One prohibition to having larger livestock is the high cost of fencing. Pigs need a good electric fence, cattle need acres of fencing, and goats? Well, they need Fort Knox! But sheep are generally docile, not overly-curious, and pretty willing to go where you want them to go. It doesn't take much of a fence to keep them where you want them. Simple sheep fencing and t-posts are all they need.
 Courtesy of Andrei Niemimäki
 Reason #3: Sheep don't require fancy housing.
Unless you live where predation is high, your sheep won't need a fancy barn. A simple three-sided shelter made from inexpensive, upcycled materials is all they'll need to help them shelter from wind, rain, and snow. (If you choose to allow your sheep to lamb during winter months, they will require more substantial housing.)
(adsbygoogle = window.adsbygoogle || []).push({});
Reason #4: Sheep are not expensive to feed.
Assuming they have decent forage, you won't have to supplement with store-bought feed. This is especially true with heritage breeds. If your winters kill off grass and brush, you will only need to buy hay during these colder months.
Reason #5: Sheep don't require a lot of time.
If you give your sheep forage and clean water, they can essentially take care of themselves. Some breeds need their hooves trimmed once or twice a year (depending on breed and pasture conditions) and their fleece shaved, but some heritage breeds don't even require this.
(adsbygoogle = window.adsbygoogle || []).push({});
Reason #6: Sheep manure is excellent for the garden.
Your garden will love any sheep manure you add to it. It's high in phosphorus and potassium - both important for good plant growth. Because it's a "cold" manure, it doesn't require aging or composting before it can be used, and it makes a wonderful mulch or top dressing because it's virtually odorless.
 Courtesy of Antony Stanley
 Reason #7: Lamb chops and mutton.
Need I say more?
Even if meat isn't the main reason you raise sheep, there will always be the opportunity to benefit from thinning the flock. The best meat breeds are widely considered to be Soay, Suffolk, Texel, Dorper, Southdown, Border Leicester, Corriedale , Barbados Black Belly, Shetland, Cheviot, Dorset, and Katahdin.
Reason #8: You can sell their fleece.
Even if you have a very small flock, you can probably find somebody who wants their wool and is willing to pay for it. Any sheep's wool can be used for spinning, but some more popular breeds for wool include Blue Faced Leicester, Dorset, Finnsheep, Lincoln, Shetland, Longwool, Merino, Suffolk, Coltswold, and Navajo-Churro.
(adsbygoogle = window.adsbygoogle || []).push({});
Reason #9: You can milk sheep.
All across the world, people drink sheep's milk and use it to make dairy products. In fact, cheese maker's consider sheep's milk the finest raw material.
As it happens, sheep's milk is easier for human's to digest than cow's milk and is higher in protein, vitamin C, vitamin B12, magnesium, folate, and calcium than either cow's or goat's milk. It's also considered the creamiest milk available and is naturally homogenized.
 Just understand that some breeds will give more milk than others. For example, East Friesians are the highest milk producers in the sheep world; they give 79 to 158 gallons of milk over a 200 to 300 day lactation period. Other good milk breeds include Lacaune, Assaf, Awassi, British Milk Sheep, Chios, Islandic, Bergamasca, Clun Forest, Bovec, Karayaka, Rideau Arcott, and Katahdin.
For more information on adding sheep to your homestead, I highly recommend Storey's Guide to Raising Sheep.
* Title image courtesy of Peter Shanks
** A version of this post first appeared in November of 2017.
(adsbygoogle = window.adsbygoogle || []).push({});
var addthis_config = {"data_track_addressbar":true};
February 11, 2022
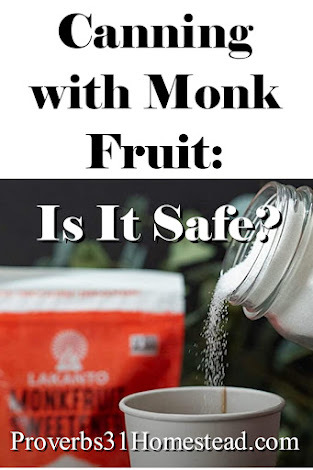
Canning with Monk Fruit: Is It Safe?
This post may contain affiliate links. As an Amazon Associate, and at no cost to you, I earn from qualifying purchases made through some links. Please see FCC disclosure for full information. Thank you for supporting this site!
As many of you know, I'm a type 2 diabetic who maintains normal blood sugar through diet (no meds). So canning without sugar is something I've done a lot of research into - and have blogged about in the past.
I'm certainly not the only one who is concerned about the absurd amount of sugar the average American consumes without even realizing it. (According to conservative estimates, Americans eat 26 lbs. of sugar per year - and this doesn't even include the many carbs in the average American diet, which turn into sugar in the body.) As I typed about with tricky names, scientific studies show sugar is an underlying cause for virtually every disease, since it creates crazy inflammation in the body.
But as more and more people come to realize this, I'm seeing an unfortunate trend in canning: The use of alternative sweeteners.
Now, alternative sweeteners aren't necessarily a bad thing, especially if they are natural and minimally processed. The trouble is, most of them have not been tested safe for canning.
You may ask: Why wouldn't a sweetener tested safe for human consumption be safe for canning? Up until recently, I could only point to man-made (artificial) sweeteners, like aspartame and saccharine, where tests have shown the heat used in home canning makes the sweetener unstable - and therefore unsuitable for home canned products. But then a lot of people would respond, "Yeah, but those are fake foods. I don't see why real foods, like monk fruit, wouldn't be safe to can with." Such people do, indeed, use their sweetener of choice (often monk fruit or erythritol) in canning. This makes me cringe, because we just don't know how these sweeteners react after the boiling they'll take in the home canning process.
Well, now the Utah State University Extension has revealed a more exact reason not to use monk fruit in canning. As they explain: "The monk fruit sweetener chemicals are extracted from the monk fruit and then blended with something to bulk it up. Each product might be different regarding pH and what is called the pH buffering capacity. Currently there are no pH tests published for canning with monk fruit, and the recommendation is to avoid the use of monk fruit in canning at this time."
If you mess with the pH of home-canned food, you can not ensure that the end-product will be safe for consumption. In other words: Do not use sweeteners in canning that are not tested-safe for canning.So what natural alternative sweeteners are tested safe for canning? Only Stevia. Perhaps the Extension offices will get more funding sometime soon so they can conduct tests on more popular natural sweeteners, like erythritol, xylitol, allulose, and, yes, monk fruit.
February 4, 2022
Why Raise Rabbits for Meat?
 This post may contain affiliate links. As an Amazon Associate, and at no cost to you, I earn from qualifying purchases made through some links. Please see FCC disclosure for full information. Thank you for supporting this site!
There are many excellent reasons for raising your own meat - everything from being more self-sufficient, to reducing the demand for conventionally-raised meat, to improving your health, to reducing environmental pollutants. The question for most homesteaders is not "Should I raise meat?" but rather "Which meat should I raise?" I strongly believe rabbits are an ideal livestock choice in most instances.
Here are what I consider the "big reasons" to raise rabbits:
* To be more self-sufficient. (If the shortages since a certain famous virus came along have taught you anything, let it be that the food supply chain is fragile.)
* To be more humane. Factory farm food (i.e. meat from the grocery store) is immoral, plain and simple. It doesn't allow animals to live anything like God intended them to, it abuses animals through intense confinement, it makes animals sick, it makes the environment sick, and it's less healthy for you.
* To be more healthy. I believe ALL meat is super food, but if you are stuck believing the (frankly) out-of-date idea that meat is bad for you, know that rabbit is lean white meat, and therefore considered healthy by pretty much everyone. And if you raise meat yourself, you know exactly what went into the animal while it was living...and you know it wasn't sprayed with chemicals or exposed to bacteria during the butchering process.
* To save money...maybe. You can possibly end up with less expensive than store bought if you raise your own rabbits, but it depends a great deal on how you feed them. Still, even feeding our rabbits mostly store bought pellets, our rabbit meat is a good deal, in my opinion. In June of 2021, I calculated that each rabbit cost us $11.88 a piece, or $2.37 per pound. I think that's an awesome deal on truly wholesome meat - and it's much cheaper than I can buy rabbit anywhere else. (The average whole rabbit in my area sells for over $40!)
 Grow out kits.
(adsbygoogle = window.adsbygoogle || []).push({});
Why rabbits over some other livestock?
* Rabbits don't take up a lot of space. If you raise them in cages, you only need perhaps three to four cages, which can be stacked, making them fit nicely even in a narrow carport, garage, side yard, or small backyard.
* Rabbits are very easy to care for. Being small animals, you don't have to worry about having enough strength to move them around. Daily care is simply water and food.
* Rabbits are quiet and their manure isn't pungent. (Rabbits do make vocalizations, but they are mostly quiet ones.)
* Rabbits are easy to butcher. The only animal I think is easier to butcher is quail, but rabbits are a heck of a lot easier to butcher than say, chickens...let alone bigger animals like pigs.
* Rabbit meat is surprisingly familiar. It tastes very similar to chicken...in fact, some people can't tell the difference between rabbit and chicken. I'd say rabbit tastes like the best-tasting chicken you've ever hand (because I think it's superior to chicken in flavor and texture).
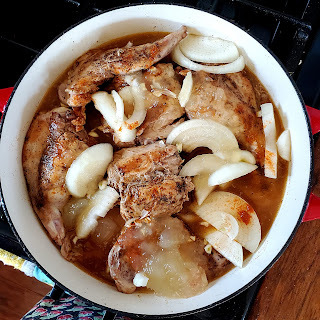 Browned rabbit waiting to be braised in the oven.
* You can raise rabbits self-sufficiently. Yes, store bought rabbit pellets are complete food and the quickest way to raise rabbits for meat. However, you very much can raise rabbits in tractors, letting them eat the grass (which should be timothy grass, orchard grass, or perennial rye grass, to support their nutritional needs) and weeds in your yard. Or, you can bring weeds, grass, and vegetables that you've grown yourself straight to their cages. Rabbits raised this way will likely grow a bit slower, but that may not matter since you aren't putting any money into feeding them.
* Rabbit manure is gold in the garden. Not only does it have four times more nutrients than cow or horse manure and twice as much as chicken manure, but it's one of the few manures that doesn't need aging. That means you can literally empty manure trays directly into the garden if you want to and it won't harm plants at all.
(adsbygoogle = window.adsbygoogle || []).push({});
But they are so cute!
Yes, cuteness is definitely a factor when people consider raising meat rabbits. I get that - but I also think chickens and pigs and cows and cute, yet most Americans eat those without much thought to their cuteness. So this is really less about cuteness and more about cultural perspective.
In the U.S., we no longer think of rabbits as food - mainly because we rarely see them in the grocery store. Not that long ago, however, they were an always-seen grocery store item - and before that, most Americans either raised their own rabbits for meat, hunted rabbits for meat, or ate rabbits from the butcher shop or their favorite restaurant. Rabbit was a really common food for humans. (Interesting tid-bit: Backyard rabbits, raised for meat, were touted along with Victory Gardens as helping to win World War II.)
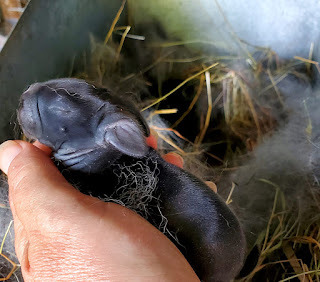 Rabbit kits are born furless. This one had just grown in its coat.
So how does one shift his or her cultural perspective? Here's my experience: I treat our pet rabbits (yes, we have a few) and our breeding rabbits differently than the rabbits we eat. I try to handle eaters only when needed, I don't name them (unless it is a silly name; for example, I'm currently on Chewy the Third, because I often end up with one rabbit kit who chews on everything, including me), and...well, I just think of them differently.
Personally, I love baby rabbits. I do sometimes hold them for fun, but I always tell myself that "I'm playing with my food." During every interaction, I remind myself these are livestock that will become my family's food. I remind myself why I want to raise my own meat. I thank God that I can raise our meat. And yeah...somehow it does help that they are less cute by the time they reach butchering age.
It has actually surprised me how much I can feel joy caring for our rabbits and still turn around and butcher them. I think this is a type of "real life" understanding many Americans have lost track of after decades of prosperity and removal from nature and real food. It's a very first world problem.
So I guess what I'm getting at is this: My state of mind has changed. I no longer think meat comes from the store, wrapped in plastic, usually in pieces that can no longer be identified as what animal they were derived from.
Proverb 23:7 says "For as he thinks in his heart, so is he." We can cultivate our thoughts to change our lives - and raising your own meat is one small way of practicing this.
(adsbygoogle = window.adsbygoogle || []).push({});
What do you need to raise rabbits?
There are three ways to raise rabbits: In cages, in tractors, and in colonies.
Raising rabbits in cages is the least natural method - but it's still the method I choose because tractors don't work well on land that isn't flat (I do live on a mountaintop, you know). In addition, we have tons of predators and nothing protects rabbits better than good cages - plus, I'm concerned about our rabbits picking up serious diseases from the ground and wildlife (especially rabbit hemorrhagic disease , aka, RHDV-2 or "bunny ebola;" if your state has RHDV-2, vaccines should become available; otherwise, RHDV-2 is easily spread and deadly in 80% of rabbits).
I have one large cage for every breeding rabbit. Each has a manure catchment tray beneath it. I put a piece of flat wood in each cage, so the rabbits can rest their feet if desired. (But honestly, none of my rabbits use them for sitting on; some just chew it, and that's fine, too. Rabbit teeth grow continually, so they need woody things to chew on.) Each cage also has a ball-type waterer (this is the one I use) and a J-feeder (the one I use). That's all the rabbits need!
 One of my breeding does.
I started with one buck (male) and one doe (female). (You can read about how I acquired them here.) Many people start with one buck and two does. I currently have two breeding bucks and three does. It's all a matter of how much rabbit you want to eat, but I think it's good to just start with a single buck and doe, so you don't get overwhelmed.
I currently feed our rabbits store bought pellets (with 18% protein), which are complete food. They literally need nothing else. However, to cut back on pellets, I also supplement the rabbits with weeds, herbs, limbs, and other things we have growing on our homestead. I also give pregnant and lactating does 1 teaspoon each black oil sunflower seeds, which I grow or buy from the wild bird department of a local store.
Rabbit cages should be covered and protected from both rain and wind. Ours are currently sitting in a three-sided carport, with extra protection provided to some cages with tarps weighed down with bricks.
Rabbit tractors might be a good option if you have flat land, not a lot of predators, and no RHDV-2 in your area. (Check your state's current RHDV-2 status here.) The tractors will need wire on the ground, so rabbits don't dig out (and predators don't dig in), and some weather protection. (Often one side of the tractor is covered on three sides with a tarp.) Even if you have good forage, it's a smart idea to supplement your rabbits with some store bought pellets, too.
A colony set up may work if you have more room, not too many predators, and no RHDV-2 in your state. I love the idea of colonies because they allow rabbits to live in the most natural setting possible. However, rabbits are big diggers, so you'll have to deeply bury wire around the perimeter of your colony. It will also need to be fenced and have some sort of top that prevents flying and climbing predators from getting in. You will have no control over when your rabbits breed, nor will you be able to check on the health of baby rabbits, who'll be born and raised inside a burrow. (I like to check on kits daily. One cold, dead rabbit kit can freeze a whole nest of otherwise healthy baby rabbits, for example.) While colony rabbits can start out just eating whatever is available in the colony setting (remember to plant appropriate grass), eventually, the rabbits will wipe out whatever is growing in the fenced in area and you'll have to bring in pellets and/or appropriate things you have growing nearby.
All-in-all, rabbits are one of the easiest types of livestock to raise, need very little space, and are pretty self-sufficient. I love having them on our homestead.
Recommended Book: The Rabbit Raising Problem Solver by Karen Patry. This is the best "how to raise rabbits" book I've encountered.
Related Articles:


(adsbygoogle = window.adsbygoogle || []).push({});
January 27, 2022
Weekend Links & Updates
 Spring has started on the homestead.
This post may contain affiliate links. As an Amazon Associate, and at no cost to you, I earn from qualifying purchases made through some links. Please see FCC disclosure for full information. Thank you for supporting this site!
I struggle a lot with feeling like there's not enough of me to go around - no more so than when it is spring. And yes, it may still be January, but on our mountaintop homestead, spring seems to be here. There's so very much to do! Lots of garden cleanup; we're trying to get a proper, large veggie garden in place, complete with a deer fence; the rabbitry needs pressure washing; the greenhouse needs caulking and paint; we're prepping a site to put up a barn; we're still cleaning up literal garbage left behind by previous owners; there's tons of indoor spring cleaning to do...you get the idea. I have to remind myself to stop and BREATHE. Prioritizing is hard, but necessary. I'm sure we won't get it all done. It's good to accept that and not get so focused on work that we forget to live!
_____________
"Be very careful, then, how you live—not as unwise but as wise, making the most of every opportunity, because the days are evil. Therefore do not be foolish, but understand what the Lord’s will is."
_________________________
Last week, I was inspired to share my favorite homesteading books - the ones I turn to again and again - after reading a Homesteaders of America Facebook page post on how important it is to have actual books (not just internet articles or videos) on hand. (Because you can access them for information even when the power or grid is down. Plus, it's good to help authors by supporting their work. Unless they are mega bestsellers, they are seriously underpaid for the time and effort they put in - and they don't earn a penny when you buy used or read a library book...something to keep in mind.) Since I know not all of you are on Facebook, I'm sharing the complete list here, too.
HOMESTEAD FOOD
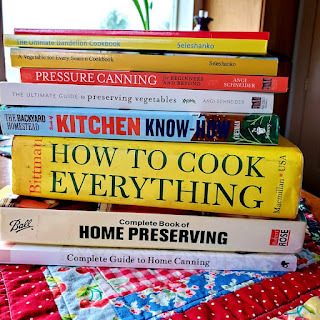
Complete Guide to Home Canning
Ball Complete Book of Home Preserving
Backyard Homestead Guide to Kitchen Know-How
The Ultimate Guide to Preserving Vegetables
Pressure Canning for Beginners and Beyond
The Ultimate Dandelion Cookbook
(adsbygoogle = window.adsbygoogle || []).push({});
GENERAL HOMESTEADING
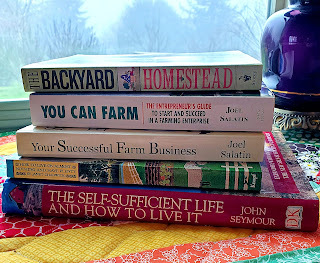
(If I had to pick just one book on general homesteading, I'd probably choose Backyard Homestead, with How to Live on Almost Nothing as a close second.)
How to Live on Almost Nothing and Have Plenty
The Self-Sufficient Life and How to Live It
HOMESTEAD ANIMALS
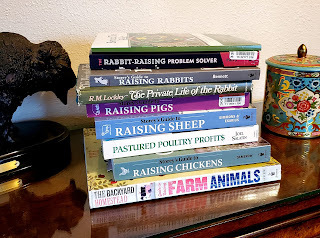
Rabbit Raising Problem Solver (If you buy only one book on raising rabbits, it should be this one.)
Storey's Guide to Raising Rabbits
The Private Life of the Rabbit
Storey's Guide to Raising Pigs
Storey's Guide to Raising Sheep
Storey's Guide to Raising Chickens
Backyard Homestead Guide to Farm Animals
(adsbygoogle = window.adsbygoogle || []).push({});
HERBS
(You may notice there are no books on foraging, which may seem odd, since most of my herbs are wild. But the truth is, good foraging books should be region-specific. Look for guides for your specific area. )
The Ultimate Dandelion Medicine Book
HOMESTEAD GARDENING

HOMESTEADING MISCELLANEOUS
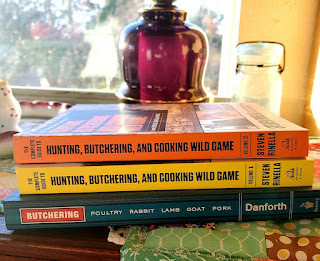
Butchering Poultry, Rabbit, Lamb, Goat, and Pork
The Complete Guide to Hunting, Butchering, and Cooking Wild Game: Vol. 1, Big Game
The Complete Guide to Hunting, Butchering, and Cooking Wild Game: Vol. 2, Small Game and Fowl
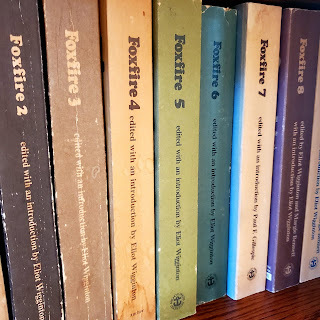
Firefox series (A little note about the Foxfire books. While I think they document a vital piece of American history and can offer homesteaders inspiration and ideas, I do not consider them great how-to books. Still, it seems remiss not to include them when talking about awesome homesteading books.)
(adsbygoogle = window.adsbygoogle || []).push({});
OTHER STUFF* Ever wonder why processed food is soooo cheap? One major reason is that taxpayers subsidize it.
* Rancher finds ancient pot of corn seed.
* Spring Cleaning Checklists. Better get to it before homestead spring madness starts!
* I am starting seeds TODAY! And so can you...no matter the weather. Learn how to winter sow.
January 24, 2022
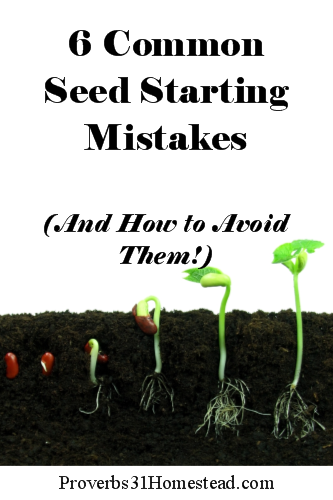
6 Common Seed Starting Mistakes (And How to Avoid Them!)
 This post may contain affiliate links. As an Amazon Associate, and at no cost to you, I earn from qualifying purchases made through some links. Please see FCC disclosure for full information. Thank you for supporting this site!
It's that time of year! I have visions of a better-than-ever garden dancing in my head, which means: I WANT TO SOW SEEDS!
Now, it's a bit early for most of you to do that (unless you use my favorite seed sowing method, called winter sowing. Seriously, you can winter sow even in the snow! Click here to learn how.). BUT even if you choose to wait a little bit to begin starting your seeds, it's definitely not too early to brush up on your seed starting technique. Whether you are brand new to starting plants from seed or you have a bit of seed starting experience under your belt, bear in mind these six oh-too-common mistakes gardeners make in their haste to get their spring garden started.
Mistake #1: Planting Too Early (or Too Late)
It's a catch-22. If you plant your seeds too early, you'll have seedlings struggling to survive until the garden is warm enough for them to be transplanted. These seedlings will grow spindly and weak, and if they don't die before you get them in the garden, their vigor will certainly be reduced, making them less productive. On the other hand, if you plant your seeds too late, you'll reduce the harvest - and you might not get a harvest at all!
So how does a person know when to start seeds? Begin by learning your area's last spring frost date. Luckily, we live in the age of the Internet, and finding that information is as easy as clicking over to this site. Once your know the date, you'll need to look at each seed packet and read the instructions for sowing. Every packet will give a "sow by" date. It might look something like this: "Sow 5 weeks before last spring frost date." Now grab a calendar, count back six weeks, and start your seeds at that time. Viola! Perfect timing!
 Courtesy Schekinov Alexey Victorovich.
Mistake #2: Not Enough Warmth
If seeds don't get enough warmth, they are a little like us: They will hide under the warmth of a (soil) blanket. That is, they won't germinate and send up leaves. Some plants can germinate using winter sowing, making your life easier, but some will really need a heat mat to get off to a good start. Different types of plants have different heat requirements, but most vegetables like it 70 to 80 degrees F. Don't have a heat mat and can't invest in one right now? Look for warm spots in your house, such as the top of the refrigerator.
Mistake #3: Too Much Sunlight
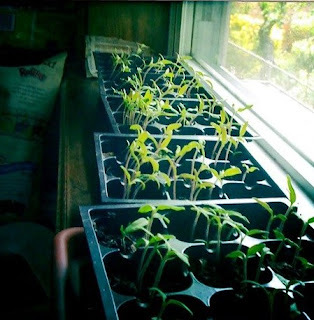
Probably the most common seed starting mistake is growing seedlings on a window sill. I don't care how sunny your window sills are, seedlings will not get sufficient light sitting on them. The sun is just too far away and the plants will become thin and spindly, putting their energy into constantly striving to get enough light instead of into growing strong roots.
Winter sowing solves this problem, as do grow lights, but if neither of those is an option right now, place ordinary fluorescent bulbs an inch or two above your seedlings, moving the bulbs up as the plants grow. Keep those lights on 12 to 18 hours each day, but be sure to turn them off, too, giving seedlings at least 8 hours of dark each night.
 Courtesy of Brian Pennington.
(adsbygoogle = window.adsbygoogle || []).push({});
Mistake #4: Over-Watering
As mentioned above, seeds can rot away from being too wet. Establish a watering schedule for seeds until they germinate, usually once or twice a day. Once seeds are sprouted, cut back slightly on watering to avoid damping off. Damping off is when sprouted seeds flop and die back from being too wet.Read more at Gardening Know How: Seed Starting Mistakes – Reasons Seeds Fail To Germinate https://www.gardeningknowhow.com/garden-how-to/propagation/seeds/seed-starting-mistakes.htm
A hugely common seed starting mistake is drowning seedlings in too much water. To prevent this, before planting seeds, water the soil thoroughly, allowing excess water to drain completely. After the seeds are planted, keep the soil moist, but not damp or wet. Once the seeds germinate, it's smart to slightly cut back on watering (but don't let the soil dry out!) in order to prevent damping off and disease.
TIP: Instead of watering your seedlings from the top, try watering them from the bottom. This requires putting seedling pots on trays, then adding water to the bottom of the trays. Try to be consistent in your watering schedule.
Read more at Gardening Know How: Seed Starting Mistakes – Reasons Seeds Fail To Germinate https://www.gardeningknowhow.com/garden-how-to/propagation/seeds/seed-starting-mistakes.htmAs mentioned above, seeds can rot away from being too wet. Establish a watering schedule for seeds until they germinate, usually once or twice a day. Once seeds are sprouted, cut back slightly on watering to avoid damping off. Damping off is when sprouted seeds flop and die back from being too wet.
Read more at Gardening Know How: Seed Starting Mistakes – Reasons Seeds Fail To Germinate https://www.gardeningknowhow.com/garden-how-to/propagation/seeds/seed-starting-mistakes.htmAs mentioned above, seeds can rot away from being too wet. Establish a watering schedule for seeds until they germinate, usually once or twice a day. Once seeds are sprouted, cut back slightly on watering to avoid damping off. Damping off is when sprouted seeds flop and die back from being too wet.
Read more at Gardening Know How: Seed Starting Mistakes – Reasons Seeds Fail To Germinate https://www.gardeningknowhow.com/garden-how-to/propagation/seeds/seed-starting-mistakes.htm
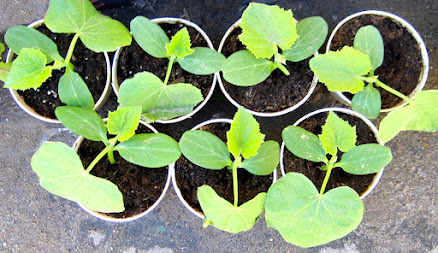
Mistake #5: Over-Fertilizing
When seeds germinate, the resulting seedlings DO NOT need fertilizer! That's because God made seeds to contain all the nutrients a just-sprouted seedling needs. Honestly, I never fertilize small seedlings, but if you feel the need to, do not attempt it until the plant's first true leaves are fully open. (True leaves are those that appear after the first two leaves - often heart-shaped - come up.) Then, only use a watered down or weak fertilizer. A more fool-proof way of giving seedlings what they need is to re-pot them with good, fresh soil.
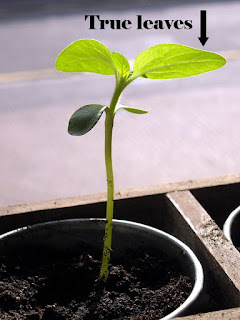 Courtesy of Rev Stan.
(adsbygoogle = window.adsbygoogle || []).push({});
Mistake #6: Not Hardening Off
You have beautiful little seedlings that you're eager to get into the garden. But wait! Those seedlings are used to being coddled, pampered, and spoiled! Unless you want them to turn sickly and perhaps die, you can't just toss them out in the harsh world of the garden . Instead, you need to help them gradually adjust to your garden's climate. This is called hardening off.
Begin at least two weeks before the plants will go into your garden beds. (If you used heat mats, slowly start reducing the temperature and the amount of time the heat mat is on, beginning just a couple of weeks after the seeds sprout. You may also wish to use an oscillating fan near your seedlings, as this will mimic wind in the garden.)
About a week before you need to plant the seedlings in the ground, take them outside in the morning, when the weather is calm. (It's not wise to begin hardening off plants during a storm, for example.) Put them in a shady, protected location for an hour or two before putting them back inside wherever they were previously growing.
Each day thereafter, put the seedlings in a slightly sunnier spot and keep them outside an hour or so longer. Make sure you give your plants gradual change. By day seven, your plants should be in full sun (assuming they are sun-loving plants) all day. On day seven, plant the seedlings in the morning.
Want Step-by-Step Instructions for starting seeds successfully? Be sure to grab my ebook Starting Seeds! It's only 99 cents!


