
Kristina Seleshanko's Blog, page 13
January 11, 2021
Making Bone Broth or Stock in an Instant Pot (with video)
Knowing how to make broth or stock from scratch is a basic skill I encourage everyone to learn. Not only does homemade taste better (with no dubious ingredients!), but it's less expensive, highly nutritious, avoids kitchen waste, and is EASY! I've blogged before about how to make bone broth and various other types of stock, but today, I'm focusing on making any type of stock or broth in an Instant Pot! Watch my video below, or scroll down for written highlights.
(adsbygoogle = window.adsbygoogle || []).push({});
Making stock or broth in the Instant Pot is very similar to making it the traditional way (in a pot on the stove). Just put meat bones and vegetable scraps in the Instant Pot, add a little seasoning (if desired), and then some water. There are two important points to remember when adding the water:
1. While all bone stock or broth has collagen in it, and collagen is what makes some stock gelatinous when cooled, your stock will only look gelatinous if you don't add too much water. A good rule of thumb is to add enough water to cover the bones by only one or two inches.
2. When using the Instant Pot to make stock or broth, be careful not to overfill. Know where the top fill line is on your IP, and don't go over it - or your IP may spray very hot water all over your kitchen,
I also like to add just a little glug of either apple cider vinegar or white distilled vinegar to the pot. This helps leach the bones of all their wonderful nutrients.
Next, put the top on the Instant Pot, turn the valve to "Sealing," and set the IP to "Manual." For vegetable broth or delicate bone stocks (like chicken and rabbit), set the timer to 50 minutes. For heavier bones (like ham, beef, or venison), set the timer to 2 hours (120 minutes).
Now let the Instant Pot do it's magic! When the IP beeps to tell you the cooking time is over, allow the pressure to come down naturally. Then remove the lid and allow the stock to cool a little. Strain out the solids and place the finished stock in the refrigerator overnight. In the morning, you'll see the fat has risen to the top and gone solid. Scrape off the fat and
You may store your stock in the refrigerator for (conservatively) about a week. Or freeze it. Or freeze dry it. Or can it. Some people also dehydrate it, but I must tell you that places like The National Center for Home Food Preservation - beacons of home preserving safety - are silent about whether or not this is safe. If you do decide to dehydrate bone stock (using fruit leather trays or parchment paper over your dehydrator's regular trays), use a temp of 160 degrees F. Store the dehydrated stock in the refrigerator (for short term use) or freezer (for long term use).


Making Bone Broth or Stock in an Instant Pot (a video)
Knowing how to make broth or stock from scratch is a basic skill I encourage everyone to learn. Not only does homemade taste better (with no dubious ingredients!), but it's less expensive, highly nutritious, avoids kitchen waste, and is EASY! I've blogged before about how to make bone broth and various other types of stock, but today, I'm focusing on making any type of stock or broth in an Instant Pot! Watch my video below, or scroll down for written highlights.
Making stock or broth in the Instant Pot is very similar to making it the traditional way (in a pot on the stove). Just put meat bones and vegetable scraps in the Instant Pot, add a little seasoning (if desired), and then some water. There are two important points to remember when adding the water:
1. While all bone stock or broth has collagen in it, and collagen is what makes some stock gelatinous when cooled, your stock will only look gelatinous if you don't add too much water. A good rule of thumb is to add enough water to cover the bones by only one or two inches.
2. When using the Instant Pot to make stock or broth, be careful not to overfill. Know where the top fill line is on your IP, and don't go over it - or your IP may spray very hot water all over your kitchen,
I also like to add just a little glug of either apple cider vinegar or white distilled vinegar to the pot. This helps leach the bones of all their wonderful nutrients.
Next, put the top on the Instant Pot, turn the valve to "Sealing," and set the IP to "Manual." For vegetable broth or delicate bone stocks (like chicken and rabbit), set the timer to 50 minutes. For heavier bones (like ham, beef, or venison), set the timer to 2 hours (120 minutes).
Now let the Instant Pot do it's magic! When the IP beeps to tell you the cooking time is over, allow the pressure to come down naturally. Then remove the lid and allow the stock to cool a little. Strain out the solids and place the finished stock in the refrigerator overnight. In the morning, you'll see the fat has risen to the top and gone solid. Scrape off the fat and
You may store your stock in the refrigerator for (conservatively) about a week. Or freeze it. Or freeze dry it. Or can it. Some people also dehydrate it, but I must tell you that places like The National Center for Home Food Preservation - beacons of home preserving safety - are silent about whether or not this is safe. If you do decide to dehydrate bone stock (using fruit leather trays or parchment paper over your dehydrator's regular trays), use a temp of 160 degrees F. Store the dehydrated stock in the refrigerator (for short term use) or freezer (for long term use).
January 5, 2021
How to Make Guacamole From Scratch (with a Video)
I don't think there is any store bought guacamole or guacamole mix that can compare with homemade green goodness! Not only that, but made-from-scratch guacamole is usually cheaper...and it's certainly free from dubious ingredients. Happily, it's quick and easy to make, too!
 From Scratch Guacamole Recipe
4 ripe avocados
1 lime
1/4 cup minced cilantro
salt and pepper
1. Cut an avocado in half lengthwise, remove the pit, and using a spoon, scoop out the green "meat" of into a medium sized bowl. Repeat with the 3 remaining avocados. Mash the avocados with the back of a large spoon.
2. Cut the lime in half and squeeze the juice on top of the mashed avocados.
3. Add the cilantro and salt and pepper to taste. Stir to combine well.
4. To help prevent the guacamole from browning, place the 4 avocado pits in the bowl. To store, cover with plastic wrap (or transfer to an air tight container) and refrigerate for up to a week.
January 4, 2021
Most Popular Posts of 2020...and some updates!
I hope you agree that it's fun to look back over the year and remember the good (and maybe reflect on the bad). I do that even with this blog; for instance, the most popular posts from last year seem so...2020. (Right?!) And if you scroll down further, I've also included this blog's all time most popular posts, which are really quite different from 2020's!
You may also notice some changes around here. Most notably, I've changed the blog name. Back in 2009, when I started blogging, my kids were little and the focus was really on being a Christian mommy and housewife. As my kids grew older, I realized how important wholesome food was and gradually began adding homesteading topics. Now that my kids are older, homesteading has become the primary topic here. While being a Proverbs 31 Woman can certainly encompass homesteading, I've felt for years that some people may find the title of the blog misleading. (People sometimes come here and expect a Bible study blog, for example.) So I finally took the plunge and renamed the blog to something I hope better reflects what's happening here! There are redirects in place, but you may find it best to update your most important bookmarks or pins.
Finally, a personal update. I'm healing quickly from my eye surgery. My wound is healed over and now I just need a little time for some swelling - and the scar - to fade. This Christmas break, I spent a bit of time reflecting on the fact that I had skin cancer. (It's hard to wrap my mind around.) And I've been feeling SO very thankful that, despite the fact that it was a type that spreads quite quickly, and despite the fact that I had it on my eye for a year and a half, it apparently did not spread. That's thanks to the Lord, for sure, and I feel my keto diet was at least in part his tool. (Cancer feeds off glucose and keto keeps glucose levels in the body low.) It's amazing how God used a recommendation from my doctor to help heal one health problem (diabetes) to heal or hold back others (including hidradenitis supporativa and skin cancer).
Most Popular Posts in 2020:
10. I Want to Homestead...But I Don't Know Where to Start!

9. Easy Refrigerator Dill Pickles Recipe.

8. The Great Canning Lid& Jar Shortage! What to Do About It.

7. How to use Harvest Guard Reusable Canning Lids.

6. Choosing Pressure Canner: Presto vs. All American.

5. How to Create a Deep Pantry.

4. How to Winter Sow Vegetables and Ornamental Plants.

3. Homesteading Q & A: Canning and Chickens.

2. Spring Cleaning Checklist: The Bathroom.

1. Nourishing Hamburger Soup in the Instant Pot.

And This Blog's All Time Most Popular Posts:
10. How to Turn a Girl's T-Shirt Into a Dress.

9. How to Freeze Kale, Collards, and Other Greens.

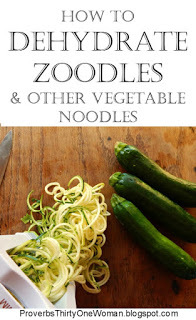
8. How to Dehydrate Zoodles & Other Vegetable Noodles.
7. How to Clean a Popcorn or Textured Ceiling.

6. 6 Ways to Teach Kids the Books of the Bible.

5. Home Made Yogurt in a Crock Pot or Slow Cooker.

4. How to Easily Clean Ceilings & Walls - Even in a Greasy Kitchen!

3. The BEST Salisbury Steak Recipe.

2. How to Train Chickens (and Get Them to Do What You Want Them to Do).

1. The Easy Way to Get Mold Off Grout.

December 19, 2020
It is Cancer
The pathology report from my surgery is back. There is a mix of good and bad news. Bad: It is cancer. Good: They removed all of it from my eyelid during the surgery. Bad: It will likely reoccur elsewhere on my body. Good: I did not need a skin graft!
For more details, check out my video below (or watch it directly on YouTube by clicking here).
December 11, 2020
I May Be Gone A While (Weekend Links & Updates)
 "And we know that God causes all things to work together for good to those who love God, to those who are called according to His purpose"
__________________
I may be absent for a while.
In October, I saw my primary care physician and mentioned a growth on my upper eyelid, which I'd had for well over a year but which had suddenly gotten larger. He lanced it, thinking it was a cyst. It wasn't a cyst. So he sent me to a dermatologist. The dermatologist took one look at it, was visibly shaken, and told me to see an ophthalmologist right away because "it looks like cancer" and he didn't personally want to mess around with my eye.
The ophthalmologist looked at my eyelid and said he would do a biopsy, but that it really looked like Molluscum contagiosum...a virus usually seen in young children but increasingly found in adults. A couple of weeks passed, and he performed a rather grueling biopsy, removing the top layers of growth and then poking around between my eye and eyelid with a Q-tip, trying to get my body to fight the virus he was sure I had.
Fast forward two more weeks. The biopsy results were in: It was not Molluscum, nor was it basal cell carcinoma. My ophthalmologist said I should see an ophthalmologist/plastic surgeon in a larger town several hours away to have the growth removed. A few weeks later, this plastic surgeon examined me and said, "I don't know what it is, but it is too suspicious to leave alone. It could be precancer or cancer." His plan: To cut off the skin on my upper eyelid (with a local anesthetic only) and then use grafted skin from below my eyebrow to replace it.
That will happen on the 15th of this month. I've been told I must do essentially nothing for a week after surgery; any strain might cause the grafted skin to die. So I've been working hard making freezer meals, prepping for Christmas, and assigning my most important homestead duties to my kids and husband.
I honestly don't know exactly when I'll be back here. Maybe I'll be itching to write and come back in just a few days. Or maybe it will be too hard to see, and I may need to wait weeks. (The eye that won't be affected is a weak-visioned eye, so that will come into play.)
Am I worried about the surgery? Sort of. I am not unfamiliar with surgeries. This will be my 9th (!) and my third in 2020 alone (!!). But I don't relish being awake during the procedure. And I confess I am more worried about how the surgery will affect my looks than I care to admit.When I get right down to it, however, I trust fully in the Lord. (Isn't it weird how we can trust the Lord 100% with our brains, but our hearts still feel anxious?)
I appreciate your prayers, of course, and I will be back here just as soon as I am able! In the meantime, I hope you have a wonderfully and peace-filled Christmas!

* Frankly, this is disgusting. If ever there were ever companies to NOT give your business to, it's these.
* So now we're expected to have a sewing pattern shortage. Due to - get this - a malware attack. 2020!!!
* This has become a new family favorite: Salsa chicken.
* Looking for last minute gift ideas? Check out these gifts in a jar ideas!
* Remember: Christmas grocery store sales are a great time to stock your pantry. Check out my other tips for creating a deep pantry, here.
* Tips for homesteading in the suburbs.
* Did you know I have a YouTube channel that focuses on homesteading? Check it out!
 Christmasy Bakes:
* These cinnamon rolls are SO delicious! I am making some this weekend to freeze for my family for Christmas. (I'll bake and frost and then freeze them, wrapped individually.)
* Seriously, you should not make any other cranberry bread but this one ;)
* These molasses cookies are so good, I've had people come up to me a DECADE after eating them and say, "Gosh those were the best. Can I have the recipe?"
* And for those, like me, who should not eat all that sugary, carby stuff, check out this list of amazing keto/low carb Christmas food - plus my tips for staying on track during the holiday season.
“...Behold, the Lamb of God, who takes away the sin of the world!" John 1:29
December 1, 2020
Nourishing Hamburger Soup in the Instant Pot, Crock Pot, or Stove Top (Keto, Low Carb, Gluten Free)
 This post may contain affiliate links. All opinions are my own. Please see FCC disclosure for full information. Thank you for supporting this site!
What could be more old fashioned than hamburger soup? It's such simple goodness - comfort food at it's most nourishing!
My family finds this recipe really hits the spot on cold days. I love that it's a frugal, healthy meal that whips up quickly. Plus, it's easy to make low carb or keto!
I usually cook this one-pot meal in my Instant Pot, but it's also very easy to make on the stove top or in a slow cooker/crock pot.
Give it a try!
 Nourishing Hamburger Soup Recipe
1 lb. ground beef
1 tablespoon beef fat, bacon drippings, or olive oil
1 medium onion, diced
2 stalks celery, sliced thin
3 cloves garlic, minced
15 oz. diced tomatoes in liquid (do not drain)
8 oz. tomato sauce
1 teaspoon Italian seasonings (or add oregano, basil, and thyme to taste)
4 cups beef broth
1 cup water
1 cup chopped green beans (frozen or fresh)
5 tablespoons real butter
1 - 1 1/2 tablespoons Worcestershire sauce
Salt and pepper
1. In the Instant Pot (or a skillet), brown the ground beef until no longer pink. Remove the beef with a slotted spoon and set aside in a bowl.
2. Drain off all but 1 tablespoon of beef fat OR drain all the beef fat and add bacon drippings (my preference) or olive oil. Once the fat is melted, add the onion, garlic, and celery. Saute until the onion is tender and translucent.
3. Add the tomatoes, tomato sauce, Italian herb, beef broth, water, green beans, butter, Worcestershire sauce, and prepared beef. Season with salt and pepper. Stir to combine.
4. Cook on Manual for 5 minutes, then quick release the steam.
Crock Pot Directions: Follow steps 1 - 3, above, using a crock pot/slow cooker instead of an Instant Pot. Cover and cook on low for 3 hours or cook on high for 1 hour.
Stove Top Directions: Follow steps 1 - 3, above, using a large pot instead of an Instant Pot and skillet. Simmer for about 15 - 20 minutes.

Check out my cookbooks!


November 24, 2020
How to Make Low Carb/Keto Pumpkin Pie (A Video)
I make this pie several times a year. It's so quick to whip up, you can even do it last minute! For the printable recipe, click here. To watch this video on YouTube, click here.
November 17, 2020
I Want to Homestead...but I Don't Know Where to Start!
 2020 will be remembered for a lot of negative things - but perhaps one positive thing it might be remembered for is large numbers of people turning to homesteading. I'm seeing a huge surge in folks showing interest in and beginning to homestead - which is a very positive thing, indeed! Yet many newbies are feeling so much urgency to get into the homesteading lifestyle, they feel overwhelmed. A lot of people are unable to start because they're so caught up in where to start.
First things first: Homesteading is not something you can jump into all at once. That is to say, unless you are very wealthy, you cannot expect to go from non-homesteader to someone with a fully working farm overnight - or even, probably, within a year's time. It takes time to build a homestead. And frankly, even if you lived in a fantasy world where your fairy godmother could magically whip up your ideal homestead in seconds. I'd still steer you away from using her services...because homesteading requires a lot of skill. If you start out with everything you want (huge garden, chickens, cattle, pigs, and so on), you will fail. A lot. It's just too much new stuff to learn all at once. However, if you take on one project at a time, you will still have some failures, but they will be less costly overall, and you'll more easily adapt and learn from those mistakes.
So if you feel like you have to do all the things right now - take a deep breath.Then release that idea as a fantasy that won't serve you well.
Start Where You Are
The number one thing I see holding people back from a homesteading life is land. While I agree that you probably cannot grow all your food in the suburbs, it's a mistake to wait until you can buy land to begin your homesteading journey.
 Quail are a nice option for small homesteads.
Remember, homesteading is mostly about skills - not things. You have a lot to learn, and frankly, it is easier if you start small. So...if you live in the city, by all means start saving up for land, but in the meantime, grow food on your windowsill, on your balcony, on your rooftop, and in a community garden. If you live in the suburbs, save for and look for land, but in the meantime, use your front and back yard for homesteading. A LOT can be done on the average suburban lot! (And if you live where HOA rules prevent you from homesteading, your first step ought to be to sell your HOA house and move to a house where you can enjoy more freedom.)
Start NOW and reap the benefits NOW while you learn skills that will help you manage a larger homestead later.
Where I Recommend Beginning
 Dehydrating is an easy way to preserve food.
Unless you eat carnivore, I highly recommend beginning your homesteading adventure by putting in a vegetable garden. When I lived in the suburbs, we had a veggie plot in the back yard...and when the neighbor's trees started shading that more than I liked, I kept only shade-tolerant crops there, and started planting sun-loving crops in the front yard. I had columnar apple trees, berries, hardy kiwi vines, and pretty much every planter grew some type food. You will learn a lot with a small garden - and make no mistake, gardens are the backbone of most homesteads.
Next, learn to preserve the food you grow. Learn to can, dehydrate, and properly freeze. Establish a deep pantry. Add some water to your pantry, for emergencies. Add a backup generator and consider how you will light and heat your home if you have an extended power outage. (When we lived in the suburbs, we had gas lamps and a wood stove for such occasions.)
Once you've got a handle on growing plants for food, if you eat eggs, I recommend getting chickens. You'll want at least 2, since they are social animals, but if you don't want to buy store bought eggs again, I recommend about 2 chickens per person in your household. Yes, most cities have ordinances about how many chickens citizens may own in the suburbs, but these days, those rules usually allow for a decent-sized flock for the average family.
 An Australorp chick.
When you've got the hang of chickens, think about meat production. For beginners, chickens and rabbits are easiest and neither takes up much room. Quail are another good option for small spaces, though they tend to be more stinky.
If you achieve all this, you'll be raising a great deal of your food - and you'll be far ahead of someone who is still making excuses about why they can't start homesteading!
More Articles to Get You Started Homesteading:
Realistic First Year Homesteading Expectations
Top 10 Tips for New Vegetable Gardeners
Fruits and Vegetables - Even From a Small Yard
How to Plan a Small Vegetable Garden
Easiest Fruits and Vegetables to Grow
Deciding What to Plant in Your Vegetable Garden
Starting a Vegetable Garden on a Budget
Newbie Vegetable Gardening Mistakes - and How to Avoid Them
Gardening From Scratch (part 1, part 2, part 3)
Why Apples Are the Best Homestead Fruit Crop
Why Winter Squash is the Perfect Homestead Food Crop
8 Common Chicken-Keeping Mistakes and How to Avoid Them
Chickens 101: Buying Chickens and Caring for Chicks
Chickens 101: Setting Up the Hen House and Run
Predator Proof Your Chicken Coop and Run
An Introduction to Raising Rabbits for Meat
How and Why to Raise Coturnix Quail for Meat
November 6, 2020
Homesteading Q & A (Canning and Chickens! A Video)
This week, I answer reader and viewer questions. Watch below, or directly on YouTube.


