
Kristina Seleshanko's Blog, page 15
August 24, 2020
Canning Without Sugar or Salt (with Video)
 This post may contain affiliate links. All opinions are my own. Please see FCC disclosure for full information. Thank you for supportin
g this site!
This post may contain affiliate links. All opinions are my own. Please see FCC disclosure for full information. Thank you for supportin
g this site!
If you're a canner or you've ever looked at a Ball canning book, you know that many canning recipes call for sugar - often LOT of sugar! - and sometimes salt. So a common question is whether or not those ingredients are necessary. Can they be omitted or reduced and still produce a safe, shelf-stable food?
Omitting Salt when Canning
Let's start with salt. Although humans require salt to function healthfully, those who consume a lot of restaurant or processed food often find their bodies are over-loaded with the mineral. Also, some doctors may ask patients to reduce their sodium due to certain health conditions (whether or not studies support that advice). So many people wonder: Do I really need to include the salt called for in canning recipes?
The answer is no. In canning, salt is not a preservative. It is there only for flavor and can safely be omitted, as per the Nation Center for Home Food Preservation website and other experts.
The only exception to this is if you ferment a food and then can it. Salt is absolutely necessary for safety in the fermenting process, therefore it cannot be omitted. (Besides, canning fermented food kills all the good probiotics fermenting creates!)
 Omitting Sugar when Canning
What is the role of sugar in canning? Sugar:
* improves flavor,
* improves texture,
* improves color,
* makes the food last longer once the jar has been opened and is stored in the refrigerator,
* and makes most types of pectin jell jams and jellies.
But the truth is, it is always safe to omit sugar in canning. The problem is, you may not like the resulting product.
Let's look at canned fruit as an example. Most tested-safe recipes call for canning any type of fruit in a sugar syrup. And while it is completely safe to can fruit in water, most people find the end result has poor flavor. The fruit will also discolor, may have a poorer texture, and won't last as long in the fridge once the jar is opened. Nevertheless, some people are satisfied with the results, especially if they choose a super sweet variety of the fruit in question and use a hot pack method. Try a small batch and see what you think.
Another alternative to canning in a sugar syrup is something that was popular during World War II, during sugar rationing. Set aside some of the fruit you're canning and crush and simmer it until its natural juices run free. Strain, add a bit of water if desired, and use it in place of sugar syrup. Of course, you are still adding sugar to the jar - just in a more natural way.
A more common alternative to sugar syrup is to use white grape juice or honey instead. But I will remind you that your body reacts to fruit juice and honey the same way it reacts to granulated sugar. Sugar is sugar is sugar, and it all causes inflammation (which is linked to pretty much every disease), strains your liver and kidneys, stimulates insulin - which makes us feel hungry, may cause gout, may cause heart disease, leads to depression, decreases cognitive health, and causes metabolic disease and diabetes. Ick.
Alternative Sweeteners for Canning

You might wonder if you can simply use your favorite alternative sweetener for canning. Unfortunately, few have been tested for safety in home canning.
Artificial (i.e. man-made) sweeteners are something I can never recommend. They can spike blood sugar and have other negative side effects. Aspartame and saccharine are known to be unsafe for home canning because heat makes them unstable. They also result in a bitter or bland end product. Splenda is, however, considered safe for canning, even though it is artificial and not optimal for health.
Unfortunately, most natural alternative sweeteners, such as monk fruit, erythritol, and xylitol haven't been tested for safety with canning. I do know people who use them in canning, but I am reluctant to use them myself, since we don't know exactly how these sweeteners react when they go trough the high heat and processing times of canning. Stevia, however, is an exception, being considered completely safe for home canning. Do use a high quality, liquid product, however, or you'll end up with weird-tasting food.
Do note that if you use an artificial or natural alternative sweetener in your home canned foods, they may not last as long once they are opened and stored in the refrigerator. One way to get around that is to can your foods in smaller jars.
See My Video on this topic (or scroll to keep reading):
A Warning About "Fruit Fresheners"
Because sugar helps prevent fruit from darkening when canning, freezing, or dehydrating, many people prefer to use a "fruit freshener" to prevent this when canning without sugar. Be forewarned, however, that if you use a store-bought fruit freshener, read the label carefully. The two most popular anti-browning products available in my area both contain sugar. Ball's Fruit Fresh lists dextrose as the first ingredient (meaning there is more of that ingredient than any other). Dextrose is a type of sugar. Mrs. Wages Fresh Fruit Preserver also lists sugar as its first ingredient.
Instead, opt for pure acid, like Ball's or Mrs. Wages citric acid; however, do note they may be GMO. Or simply use bottled lemon juice: Submerge the fruit in a mixture of 1/4 cup of lemon juice and 4 cups of water mixed together.

Canning Jam or Jelly with Less Sugar
There's no getting around it: Jam and jelly are high sugar products. Not only does the cooked down fruit contain a lot of sugar, but most pectins, which are used to "jell" the food, require large amounts of sugar in order to work.
Unfortunately, the common "low sugar" pectins aren't all that low in sugar. They contain dextrose (
There are a few ways to get around that. One is to use Pomona's Universal Pectin, which doesn't require sugar in order to form a gel. Another is to make your own pectin from tart apples.
Or you can use the old-fashioned cook down method. The key to making this method work is to understand the pectin levels in different types of fruit. If your fruit is naturally high in pectin, you're good to go. If it's not, you'll need to add some high pectin fruit in order for the jam to jell. (See "Understanding Pectin" for more details.) Tart apples, tart blackberries, lemons, limes, currants, plums (except Italian types), and sour grapes are high in pectin and are good additions to jam made primarily with lower pectin fruit.
Unfortunately, I have no way to test exactly how much sugar jam made with this method contains. After all, it concentrates the fruit's natural sugars. But I have had my family compare my cooked down jam to conventionally-made jam and they agree: My cooked down jam tastes far less sweet.
1. Pour the fruit into a heavy-bottomed saucepan. Crush it with a potato masher.
2. Stir in some sugar. I recommend starting with a minimal amount, then tasting, adding more sugar only if absolutely needed. Stir until sugar is completely dissolved.
3. Stir in bottled lemon juice - about 2 teaspoons for every 2 cups of crushed fruit. (Because the lemon juice adds acidity, it makes mold and pathogens less likely to grow in the jam. Acid also helps the jam jell. Use bottled juice, which has a standard acidity, instead of fresh juice, which could be less acidic.)
4. Bring to a boil over medium heat. Periodically, take the jam's temperature. When it has reached 220 degrees F. (sea level), it is finished. (If you are at 1,000 ft. above sea level, the jam must reach 218 degrees F. 2,000 ft = 216 degrees F. 3,000 ft. = 214 degrees F. 4,000 ft. = 212 degrees F. 5,000 ft. = 211 degrees F. 6,000 ft. = 209 degrees F. 7,000 ft. = 207 degrees F. 8,000 ft. = 205 degrees F.)
5. If you are using a low-pectin fruit for your jelly or jam, you should also do a jell test: Before you begin making the jam, place a saucer or two in the freezer. When the jam has reached the proper temperature for your elevation, remove the pot from the stove, grab a chilled saucer, and ladle a teaspoon of jam onto it. Let it cool just enough to make it safe to touch, then run your finger through the middle of the jam. If a pathway still remains where your finger ran through, the jam is set. If not, the jam needs more time to cook.
6. Ladle hot jam into hot canning jars, leaving 1/4 inch headspace. Process in a water bath canner for 10 minutes.
What I Do

Given all these choices, you might wonder what I choose to do when I'm canning. When I can fruit, I am mostly canning it for my children. I don't completely eliminate sugar from their diet, but I do try to reduce it. I am intolerant (which is a lot like being allergic) to Stevia, so I figure my kids are prone to that, too. Therefore, I simply use the least amount of sugar possible.
When I can fruit, I use the lowest sugar syrup Ball recommends, which is 5 cup of water to 1/2 cup of sugar. I use 100% cane sugar, since I know it can't be GMO. Beet sugar or sugar that doesn't cite its source is almost always GMO. Organic sugar is GMO-free, also.
When canning applesauce, if I have tart apples, I try to combine them with sweeter apples until I get a more palatable flavor. If sweeter apples aren't available, I use the least amount of sugar possible to make the sauce not too tart.
The only other food I can that calls for sugar is salsa. Sugar is sometimes used to cut the acidity in canned goods, which is why my recipe calls for it. I simply omit the sugar, and my family still loves the salsa!
 More Low Sugar Canning Tips
* When it comes to pickles and relishes, experts recommend choosing a recipe that doesn't have sugar rather than omitting the sugar in a recipe.
* When canning catsup and BBQ sauce, I recommend omitting the sugar and adding in sweetener after opening the jars.
* In really thick, syrupy preserves (not jams, but a product with uniform chunks of fruit in very thick syrup), only real sugar works. Without it, you'll end up with fruit chunks in liquid, even when using approved Splenda or Stevia as a sweetener.
* If you can fruit in water, use the hot pack method. (That is to say, heat the fruit in water until heated through, then pack it into jars, add boiling water to cover, and process in a water bath canner.)
* If you choose to use artificial sweeteners, instead of stirring them in before processing, experts recommend adding them when opening the finished jar. Artificial sweeteners aren't stable when heated, and may turn bitter or foul-tasting after processing. Foods canned with them may also lose their sweetness when sitting on the pantry shelf.
* Consider using gelatin to thicken no-sugar jams. Such jams should not be processed in a canner, but can be safely stored in the freezer.
* Some people like to use chai seeds to thicken jams, but again, this is appropriate only for products stored in the refrigerator or freezer. Do note that in some people chai seeds may cause prescriptions that lower blood sugar to do their job a little too well, making glucose drop dangerously low. If you take such a medication, definitely talk to your doctor before consuming chai. In addition, it's important to know that chai may increase estrogen in the body.


August 21, 2020
Why Homeschool Preschool?

This post originally appeared in 2011; given the current pubic school situation, I thought it was worthwhile to draw attention to it again.
Years ago, when my youngest child was three, I felt he was ready for preschool. Certainly not all three year olds are ready for any type of school; but he liked the idea of school, didn't resist preschool-style learning, and seemed eager and "do school." Yet I didn't send him off for a part-day somewhere away from home; instead, we did preschool at home. I did the same with my first born. And I never regretted it. (Not even once!) In fact, those homeschool preschool days are something we look back on with fondness.
Was I worried about socialization? Not even a little bit. First of all, my kids played with the neighborhood kids at our home and at the park playground. We sometimes went to play groups, too. Second, I don't think sticking kids into a group of other kids their own age is much of a life skill. In real life, we socialize with people of all ages. That said, even if you don't feel homeschool is what you want for most of your child's school career, there's much to be said for homeschooling them during the preschool and kindergarten years.
My main reason for doing homeschool preschool was this: What better way to infuse a love of learning than to pop your child onto the safety and love of your lap while he gains knowledge about the world?
 For those who are concerned that preschool at home may hurt children, consider that many studies find this simply isn't true. A Stanford University study that looked specifically at preschools and the children attending them concluded: "We find that attendance in preschool centers, even for short periods of time each week, hinders the rate at which young children develop social skills and display the motivation to engage classroom tasks, as reported by their kindergarten teachers."
The C.D. Howe Institute, examining the issue for Canada, discovered that children who attended preschool away from home were more likely to be anxious and hyperactive, that they had worse social skills than children who didn't attend preschool, and were more likely to be disobedient and have other behavior problems.
The University of Cambridge, looking at early education in the U.K., cites a number of studies that show pushing academics at an early age is at best pointless and at worst harmful.
These are just the beginning of studies that show preschool outside the home contributes to weaker family life, less time spent outside, and less sleep for children.
On the other hand, homeschool preschool is an excellent choice for children who are eager to learn, but are young enough that a playful, laid back approach that develops a true love of learning is desired. And the funny thing is, most moms already homeschool their preschoolers. Think about it: Have you read your child a picture book? Pointed to an object or animal and said what it is? Picked up an item and named it's color? Named an object's shape? This is all preschool learning.
More on Homeschool Preschool
Homeschool Preschool: Thoughts on Readiness
Homeschool Preschool: How Much Time? Worksheets Scissor Skills The Balance Beam Game Sorting
Colors & Shapes Numbers
Letters
Letter of the Week activities
More on Homeschooling
Day with the Dinosaurs - a free book for kids
10 Ways to Save on Homeschool Supplies
How We Homechool on a Shoestring Budget
The 7 Wonders of the World Projects
August 19, 2020
Easy Refrigerator Dill Pickles Recipe
 This post may contain affiliate links. All opinions are my own. Please see FCC disclosure for full information. Thank you for supporting this site!
I'll confess this right up front: I don't like pickles. And it's true, I actually hate anything with dill in it. I know; I'm weird. But my husband and children LOVE pickles - especially dill pickles - so I always try to keep them well supplied.
This year, I've had cucumbers dribbling in from the garden a few at a time. We don't eat very many raw cucumbers in salads and such, and so far the harvest isn't big enough to bother canning them, so I've been making refrigerator pickles.
And friends, making these pickles is SO easy! If you can use a knife, you can whip up these pickles in no time!
 Easy Refrigerator Dill Pickles Recipe
Per pint jar:
fresh, small cucumbers*
1 cup white distilled or apple cider vinegar
1 cup water
1 tablespoon non-iodized fine salt (I use Redmond's fine sea salt)
1 heaping tablespoon dill seed**
2 fresh grape leaves (optional)

1. To ensure crunchy pickles, I always soak my cucumbers in ice water before I begin. HOWEVER, the more fresh your cucumbers, the less you need to soak them. If I bring small cucumbers straight in from the garden, I just soak them while I prepare the brine. Otherwise, I recommend soaking them for at least a half hour...and up to several hours.

2. When the cucumbers are near the end of the soak time, prepare the brine: In a small saucepan, add the vinegar, water, and salt. Gently heat and stir until the salt is completely dissolved. Add the dill seeds. Turn the burner to it's lowest setting and don't let the brine boil.
3. Cut off the blossom end of every cucumber. This is another way to ensure the pickles don't end up mushy. If you're not sure which is the blossom end, cut off both ends...which I like to do anyway, just cuz.
4. Cut the cucumbers into the shape you want for your pickles. Spears tend to stay crunchier than rounds.

5. Place one grape leaf in the bottom of a quart jar. (Grape leaves help keep the pickles crunchy, but they are optional.) Pack the prepared cucumbers into the jar. (Using a canning jar is ideal, because it will easily take the heat of the warmed brine. You can use an upcycled glass jar, but it may be more likely to break when warm brine is poured into it.)
6. Pour the prepared brine over the pickles. Place the remaining grape leaf on top.

7. Put a lid on the jar and allow it to come to room temperature, then refrigerate. Allow the pickles to soak for at least a week before eating them.
* Small cucumbers result in crunchier pickles. But if you have overgrown cucumbers, you certainly can use them, too. They just aren't optimal.
** You may also use fresh dill heads, but the flavor won't be as strong.
Optional add ons:
1 garlic clove or
1 or 2 chopped jalapenos or
chili pepper flakes to taste
whole peppercorns
1 teaspoon - 1 tablespoon coriander seeds
August 13, 2020
How to Treat Blossom End Rot (It's Not Just a Calcium Deficiency!)
 This post may contain affiliate links. All opinions are my own. Please see FCC disclosure for full information. Thank you for supporting this site!
Lately, I've been seeing a lot of questions about a common problem people have when growing tomatoes, summer squashes, eggplant, peppers, and melons. It's called blossom end rot and gardeners know their plants have it when the bottom side (the blossom end) of the fruit looks like it's rotted. The good news is this: Blossom end rot has an easy, quick, organic fix. Or actually, fixes. That's because there is more than one thing that can cause blossom end rot. Here's how to manage it.
Cause #1: Lack of Calcium
Unless you live in an area where the soil is naturally rich in calcium, or you've tested your soil very recently and know its calcium levels are good, lack of adequate calcium is the most likely culprit for blossom end rot. My recommendation is to first give your plants a quick dose of calcium using something you probably already have in your house: TUMS, or any brand of chew-able antacid (but not the gel of gummy type). Simply bury the tablets around the plant in question and water in well. This will get your plants out of immediate trouble...but won't have lasting effects, so you'll need to further supplement calcium in the soil, using one of the following:
* Bone meal. This is my #1 preferred choice. It releases into the soil a bit more slowly than the items mentioned below, but in my experience it is the easiest to find in local stores.
* Lime. Do note that lime will also raise the pH of your soil, making it less acidic.
* Dolmite lime (Calcium carbonate). This will also raise magnesium levels in the soil, which is not a good thing if your magnesium levels are already on the high side.
* Hardwood ashes. Do not uses ashes from soft woods.
* Gypsum (Calcium sulfate). Make sure it is marked organic.
All these products will add calcium to the soil relatively quickly.
In the future, when you plant crops that are more likely to develop blossom end rot, you may wish to add amendments to the soil as you plant. In addition, consider adding amendments that take longer to break down at the end of the growing season, so the soil is ready to go in spring. Calcium amendments that break down slowly include:
* Ground up egg shells.
* Ground up oyster or clam shells.
 Blossom end rot on summer squash. Courtesy of kirybabe.
Cause #2: Not Enough Water
If you know your soil has plenty of calcium, it's likely you aren't watering often enough. This results in plant that can't access the calcium that's in the soil. Consistent and deep watering will solve that problem.
Cause #3: Too Much Nitrogen
If you think your plant's blossom end rot is caused by excessive use of nitrogen fertilizers, all you can really do is stop fertilizing immediately and learn from your mistakes.
 Blossom end rot on tomatoes. Courtesy of
 Scot Nelson.
Cause #4: Poor Pollination
If you're absolutely sure lack of calcium, not enough water, or too much nitrogen isn't causing the blossom end rot in your garden, it's possible poor pollination is to blame. Your best bet, then, is to hand pollinate your tomato, pepper, summer squash, melons, and eggplant flowers. This isn't as difficult as it may sound, and The Kitchn offers a great tutorial on how to do it.
July 29, 2020
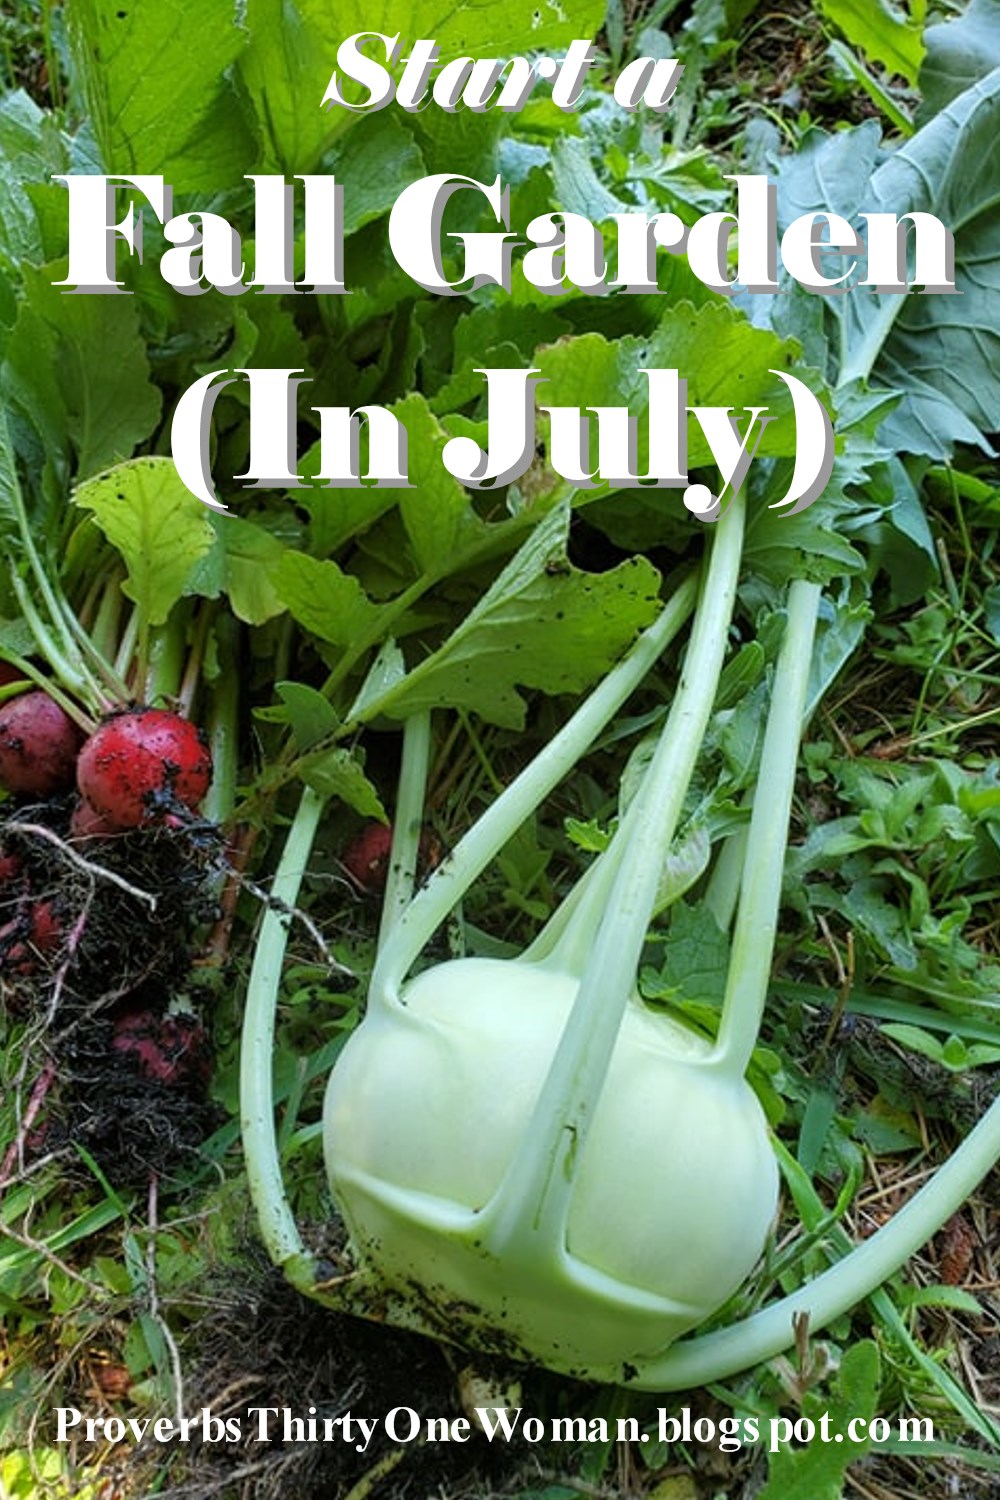
How to Start a Fall Garden - in July
This post may contain affiliate links. All opinions are my own. Please see FCC disclosure for full information. Thank you for supporting this site!
In the hot, busy gardening days of July, it may seem weird to think about beginning a fall garden...but if you want to extend your harvesting days all through autumn and perhaps through winter, NOW is the time to start!
Why Plant a Fall Garden?
To many people, vegetable gardens are a summer - and perhaps a spring - thing. But there are many benefits to planting a fall garden.
* Some types of vegetables grow better during the cool of autumn. Example: Have you ever struggled to grow spinach, or does your broccoli and cauliflower bolt (go to flower) before you can harvest it? Try growing these plants in the fall!
* Some vegetables taste better when they are grown in autumn. When frost hits kale or carrots or parsnips, for instance, the sugars found naturally in those veggies become more concentrated. This is God's all-natural version of anti-freeze...and it makes those veggies taste sweeter.
* Crops grown in the fall tend to "hold" for much longer than those same crops grown in the spring or summer. In other words, you don't have to pick everything the moment it matures; instead, let the garden act as a refrigerator so you can harvest as needed throughout the cooler months.
* Kale and, especially, collards will continue to thrive even after some snow. Certainly, they won't continuing growing, but they'll be held so you can harvest them in winter. Assuming you don't get large amounts of snow, some fall crops will live in the garden until your spring garden starts producing.
 Carrots grown in my fall garden.
* Autumn gardens have fewer weeds, fewer pests, and fewer diseases to battle. Plus, many of us enjoy gardening when it isn't blazing hot outside!
* And, of course, having a fall garden means you can grow that much more food for your family.
What Can You Grow in a Fall Garden?
Cool-season veggies are where it's at in the fall garden. These include: Asian greens, beets, broccoli, Brussels sprouts, cabbage, carrots, cauliflower, cilantro, collards, green beans, green onions, kale, kohlrabi, lettuce, mustard greens, parsley, parsnips, peas, radishes, rutabagas, Swiss chard, spinach, and turnips.
One thing I don't recommend is buying starts at a nursery or big box store. First of all, this is more expensive than starting plants from seed. Secondly, it can be difficult to find cool-season seedlings in July and August. Thirdly, if you start your plants from seed, you'll have access to more quick-maturing varieties, which is of the utmost importance when fall gardening. If, for instance, you plant peas that mature in 40 days, you're less likely to find success than if you plant peas that mature in 30 days. This is because fall gardening is all about getting your vegetables to mature before the first killing frost.
Getting the Timing Right for a Fall Garden
 A few crops that do well in a fall garden.
The most common problem gardeners have with fall gardening is that they plant their seeds too late to get a harvest. The way to fix that is to do a little planning in July.
1. To begin, you must know when the average first killing frost is for your area. You can simply call your extension office for this information (find your local office here) or you can Google "first frost" and your ZIP code.
2. Now grab the seed packet for a veggie you want to grow in your fall garden. Find the "days to maturity." All good-quality seed packets should contain this information, but if for some reason you're struggling to find it, Google the name of the variety and look at online seed catalogs that provide this vital info.
3. Using a calendar and beginning at the date of your first average killing frost, count backward the number of days the vegetable takes to reach maturity. For example:
This year, I want to plant Bull's Blood beets in my fall garden. They take about 64 days to reach maturity. Since my average first frost is around November 21st, I need to plant my beet seeds no later than September 18th.
4. Next, add buffer time. For a variety of reasons, plants can take longer to mature than the seed packet indicates. I like to add at least a week - so for my beets, I count backward seven more days to reach a planting date of September 11th.
5. Mark this date on your calendar.
6. Repeat with every variety of vegetable you want to plant in your fall garden.
 Fall is my favorite time of year to grow cauliflower.
Seed Starting Tips for the Fall Garden
While a number of cool-season veggies can be direct-sown into your garden beds (including spinach, peas, radishes, turnips, rutabagas, beets, carrots, parsnips, and green beans), some seeds have a difficult time germinating during hot summer weather. Many plants in the cabbage family and many salad greens don't germinate if it's warmer than 85 degrees F. To combat this issue, you'll need to start those seeds indoors - just as you would if you were growing them for a spring or summer garden. (To learn more about starting seeds see "The Proverbs 31 Woman Woman Guide to Seed Starting." )
Finding Space for the Fall Garden
One difficulty you may encounter is where to put your fall veggies. After all, when it's time to plant them, you'll still have all your summer crops in the garden, producing strongly. There are a few ways to deal with this:
* Plant your fall veggies in flower pots and buckets with holes drilled into the bottoms. An advantage of this method is it makes your fall garden mobile, so on very hot days, you can move your cool-season veggies to some open shade.
* Plant cool-season vegetables beneath your summer crops. For example, lettuce can do very well under tomatoes or peppers. In fact, those larger plants will help shade the lettuce from the sun, which will make the lettuce happy.
* Plant in flower spots. For example, when I lived in the suburbs, I had a brick planter directly in front of my living room window. When it was time to plant my fall garden, I pulled out the flowers and planted cabbages in their place.
 My flower planter filled with cabbage.
Ideally, of course, in the future you'll have at least one bedding area left empty, set aside for your fall garden.
Other Tips for a Great Fall Garden
* Seeds need moisture in order to germinate. The heat of summer can make that challenging, especially when you're direct-sowing in the garden. To combat this problem, try using a shade cloth. This can be something designed for the purpose (like this), or it can be just a board raised over the
 Green beans grow well in the fall.
seeding bed with rocks or bricks.
* Use mulch to help keep the soil moist for your cool-season veggies.
* Use extra caution when moving cool-season seedlings into the garden, since summer sun can shock and kill them. Give them plenty of time in the outdoor shade before moving them into the sun, and consider using a shade cloth or an overturned pot to give them a little shelter until they fully adjust. (Learn more about this process here.)
* Give special attention to irrigating your fall crops while summer temperatures are still high. Letting them dry out too much may stall their growth.
July 21, 2020
Unconventional Gardening: Why Doing it "Wrong" Might Actually be BETTER! (with video)
 This post may contain affiliate links. All opinions are my own. Please see FCC disclosure for full information. Thank you for supporting this site!
The first several years I grew tomatoes, I, in my inexperience, bought store bought seedlings, plopped them in the ground and never pruned them. Then I read over and over that you must prune tomatoes if you want a good harvest. So I started pruning my tomato plants. But I noticed something weird: Not only did I not see an improvement in the number of tomatoes I harvested, but sometimes I saw a decrease in my yields! This was my first lesson in "what everyone thinks they know isn't always right." In other words, just because a certain gardening technique is supposed to be "correct" doesn't mean it actually is!
 Growing Tomatoes without Pruning
Years after I made this discovery about tomatoes, I read the book Epic Tomatoes by tomato expert extraordinaire Craig LeHoullier. In this book (which everyone who grows tomatoes ought to read), he talks about the myth of pruning tomatoes and clarifies that suckers on tomato plants do not prevent flowering, fruiting, or ripening of tomatoes. They do not "suck energy" from the fruit itself. In fact, LeHoullier asserts (and rightly so) that removing suckers reduces yield because it decreases the chances of getting fruit. In addition, if you live in a hot area, having extra foliage (from not pruning) helps shield fruit and prevent sunscald.
I can think of only two reasons to prune tomatoes. One is to remove the bottom set of stems so the leaves don't touch the ground (thereby reducing the risk of disease). And the second is to help prevent indeterminate (vining) tomatoes from taking over the world. (Those things can get seriously huge if they are happy in their location!)
Growing Garlic without Removing Scapes

Back when we lived in the suburbs, I grew garlic in containers using conventional organic methods, and when we moved to our current homestead, I continued this practice with the garlic the previous owners left behind. I wasn't exactly sure what variety of garlic we had growing here, but my mom-in-law and sis-in-law seemed to have the same type...yet theirs did so much better than mine! I was getting tiny garlic heads, while theirs were huge.
Finally, I asked them what their secret was. Their answer: "Nothing." They just let the garlic do its thing, never cutting back the scapes (flower stems) and letting the plants go to flower and even to seed. This is completely contrary to conventional advice, which says you should cut back scapes when they appear so the plant will send its energy not into seed-making, but into growing big bulbs.
So this year, I decided to grow garlic the way my in-laws do...and lo! I got HUGE heads. Why this is, I cannot tell you; I just know it worked.
 Growing Potatoes without Hilling
Conventional wisdom says that to get the most from your potato plants, you need to hill them - that is, as they grow, you need to add more soil to them, so that only the top leaves of the plant show. When we lived in the suburbs, I grew potatoes this way in grow bags, but when we moved here, my diet radically changed. I stopped eating potatoes because I was diagnosed with type 2 diabetes (you can read about how I went from needing insulin to having total normal blood sugar through diet alone by clicking here). I still grew a few potatoes for my husband and kids to eat now and then, but I wasn't focused on big harvests. I stopped hilling my potatoes, and we always had plenty.
Then COVID and food shortages hit, and I thought, "This year, I better grow potatoes the right way." So I hilled them. What a mistake! My crop was small and the individual potatoes even smaller. I consistently find that planting the potatoes and then just leaving them alone (except for an occasional watering) gives me better results.
What This Means
The big picture here is that when things aren't going the way you expect them to, think outside the box. (True for life in general, as well as for gardening in specific!) Play around until you find what works for you. Take a small part of your garden and try a new gardening method or a new variety. Compare what you usually grow with your experiments, side by side, to see which does better.
Don't let other gardeners nay-say you. Sometimes the "rules" are meant to be broken!
View my video below on this topic:
July 17, 2020
Weekend Links & Updates
 The view from my kitchen window.
"God is our refuge and strength,
an ever-present help in trouble.
Therefore we will not fear, though the earth give way
and the mountains fall into the heart of the sea,
though its waters roar and foam
and the mountains quake with their surging."
Proverbs 46:1-3
Homesteading can be so rewarding, yet there are always difficulties. ("Anything worth doing," I tell my kids, "is likely difficult.") This year sure has been a mix of rewards and difficulties on our mountaintop.
Our chicks are at that awkward stage where they no longer look like chicks but neither do they look like hens and roosters. They are finally outside, which is a blessing. (I really don't enjoy having a brooder in the house.) We've never had chicks that refused to leave the hen house before, but that was the case with this batch. When they did finally go outside, they refused to go back in at night. My husband had to hand pick them out of a clump of bamboo in
 The chicks are in the hen house.
their run and place them inside the hen house. Our faithful dog, ever wanting to herd animals, tried to help. He scared one chick to death. Literally, it just fell over and died. Then another chick looked like it injured its leg. We thought it might just be sprained, so we left it alone; it seemed fine otherwise. A week later, it's other leg became unusable. I had to put it down.
We've also had another batch of rabbit kits. There were 11 total, but one, who looked fat and healthy, died early on. The runt got so skinny, it looked like it would pass, too - so for a while, I held Fiona (the mama) and let the runt nurse all by itself. The other kits are now three or four times bigger than the runt, but otherwise, the runt is holding it's own. All the kits are now out of the nesting box, and Fiona looks a bit harried - but everyone seems healthy.
 The rabbit kits.
 Our sheep continue to make us laugh with their curiosity and cuteness, the cats are eating up lots of rodents, and our dog thinks he's in charge of them all...except the old-man cat who came with our property. The old man knows he's in charge.
We've also been prepping the house for paint. When we moved in four years ago (time has flown!), we knew it needed paint, since the original owners only applied one coat to the house. This year, we couldn't put off the job any longer, since we were starting to see rot.
In addition, the canning kitchen, which has had a slopping floor since we moved here, suddenly seemed worse. It turned out termites had started eating one of the foundation beams. So my kids crawled under that old building (the original building on our property) and dug out at least a truck load of old trash. They found lots of literal garbage, 5 frying pans, drawers and shelves from about a gazillion old refrigerators, a baby's shoe, an old bread box, 4 hubcaps, a rather old doorknob, a few canning jars, and the skeleton and partially mummified remains of a cat. Now my father-in-law (who used to fix foundations for a living) and my daughter are working on repairing the foundation.


 Some of the junk the kids found under the canning kitchen.
The garden hasn't been doing great...the weather has just been too weird. First, it rained heavily when most of the fruit trees were blooming, keeping pollinators at bay. Then the weather remained weirdly cool. Finally, we are getting some warmth and I have harvested kale, collards, green beans, radishes, turnips, and a little broccoli from the garden. So far, there hasn't been enough to can or freeze dry, though I did freeze the broccoli, some leafy greens, and some green beans.
 The cabbage is coming along, but it's still not big enough to harvest.
Oldies But Goodies
The lazy way to freeze green beansYarrow: the common weed that's good medicineHow to make jerkyFreeze dried food vs. dehydrated food: What's the difference?
Other Links Worth Checking Out:
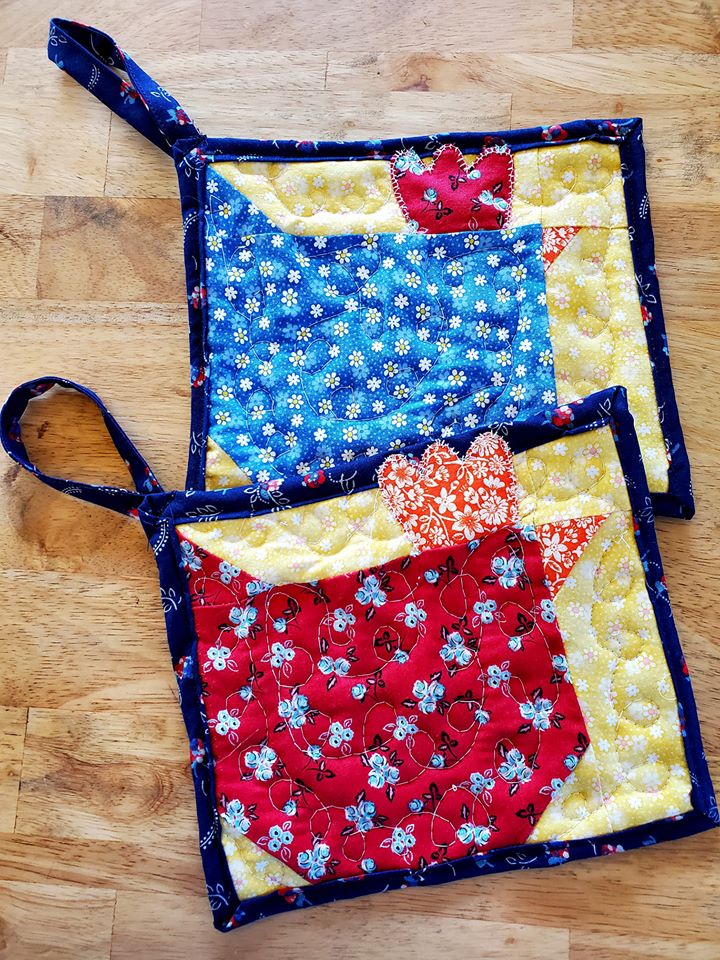
* I made these chicken potholders from a pattern I found here.* Fruits and veggies can suck up microplastics through their roots.* Study says type 1 diabetes can go into remission if you catch it quick enough and do this one thing.
* Rabbit eBola: What you need to know.
 Wild flax I found growing near our property.
 A new born fawn we found on our driveway.
June 30, 2020
How to Know When to Harvest Root Vegetables (with Video)
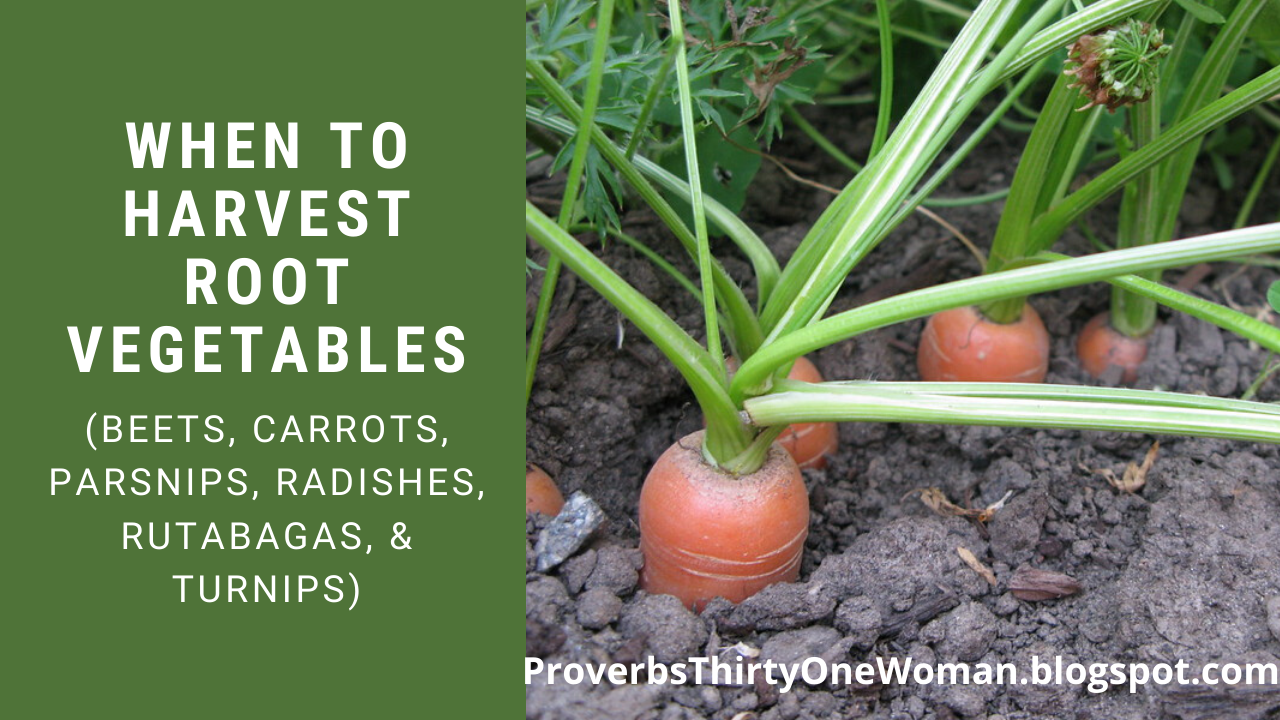
Lately, it seems like everyone is asking when they should harvest their beets, carrots, parsnips, radishes, rutabagas, and turnips. I also see a lot of people harvesting, say, their carrots, and finding them disappointingly small. The good news is, there is a super easy way to know when to harvest these crops!
But first, I want to bring up what I think is the main cause of confusion about when to harvest these veggies: seed packets. On the back of any good-quality seed packet is a bunch of great info, including "days to maturity." I see people planting their seeds and, because their seed packet said something like "days to maturity: 60," harvesting those veggies 60 days later. Trouble is, those seeds were bought by people in Alaska and Texas, Maine and Arizona. In other words, while the seeds are the same, the environments are totally different. So the "days to maturity" on seed packets is only an estimate. Assuming you have decent soil and irrigation, weather makes a huge difference between when a Texan harvests and when an Alaskan harvests the exact same variety of veg.
So if you can't rely on the seed packet to reliably tell you when to harvest your root crops, how can you know when they are ready to harvest?
Answer: When their shoulders rise above the soil. Whether we're talking beets, carrots, parsnips, radishes, rutabagas, or turnips, when the vegetables aren't suitable for harvest, you will only see leaves and stems above the soil line. But when finally you can see some of the part you eat rising above the soil line, you know the veggie is really to harvest.
Here are some examples:
 This turnip plant isn't ready to harvest. We can only see leaves and stems above the soil.
Photo courtesy of Natalie HG.
 This turnip is ready for harvest because we can see the edible part above the soil line.
Rutabagas present in the same way.
Photo courtesy of
Ula Gillion.
 Radish shoulders poking up above ground. These are ready for harvest.
Photo courtesy of
meaduva.
 These carrots have shoulders above ground and are therefore ready to harvest.
Parsnips present in the same way.
Photo courtesy of
michelle.
 This beet has some of the edible part showing above the soil; therefore, it's ready to pick.
 Photo courtesy of saiberiac. .
See more in my video:
June 26, 2020
How to Dehydrate Food at Home (a video)
June 9, 2020
Spring on the Homestead
 A wildflower bouquet.
As an Amazon Associate, I earn from qualifying purchases. All opinions are my own. Please see FCC disclosure for full information. Thank you for your support!
I hardly know where to begin. Spring is always a busy time on any homestead, but I think it's been an especially crazy spring for everyone, no? On the personal side of things, my hubby got very sick with a virus that tested negative for COVID, but his doc had him self-quarantine, anyway, since the test is only 70-80% accurate; I'm dealing with some health issues that are leading to an implanted heart monitor; and the kids are plugging away at school. (Given all that's going on, I'm even more thankful than ever that we homeschool.)
Kinda blegh on the personal side of things, to be sure. But let's focus on homesteady-things, shall we?
Chicks
 One of our new Australorp chicks.
In the past, we've hatched our own chicks using a broody hen. (To learn how, click here.) BUT we wanted to change two things about our flock this year. I wanted to go back to pure Australorps, getting rid of our barnyard mix hens. (Why? 'Cause Australorps are gentle and compliant; learn more about why I love them here.) This means we'll be getting rid of all our current hens - and our beloved rooster, Joe. He's gorgeous and he's a really good guy (nice to us, wonderful to his hens), but he is not an Australorp. We plan to give him to a neighbor.
To get started with a fresh flock, we needed chicks. But chicks were near impossible to buy this spring, due to people deciding that this year was a good year to be a bit more self-reliant. Our local feed store only allowed each FAMILY (not person) to buy 4 chicks. That's not enough for us...and who knew if they would have any Australorps? Thankfully, we were able to place a small order at Hoover's Hatchery. We'd never bought mail order chicks before, but the process was smooth and the chicks are vigorous and healthy! We grabbed 10 females and 4 males. We will pare down to one rooster, once they start maturing and showing their personality. We want to make sure whatever rooster we keep is kind to the hens - and to the humans!
 Chicks hatching in the incubator.
For the chicks' brooder, we're doing another new thing: Instead of using a heat lamp, we're using a "brooder hen," which is basically a warming plate that the chicks can stand or sit under. We chose this upgrade to lower the risk of fire, but we're discovering it makes for seemingly happier chicks, too! We find the chicks sleep more, since there isn't a light shining on them all the time - plus, it just seems a bit more natural.
This spring, we also got ourselves an incubator. I never thought we'd do that, but my husband likes the idea of selling rarer breeds of chickens someday...plus, we are preparing to add quail to our homestead. Quail are generally very bad at hatching their own eggs, so an incubator seemed like a must. For practice, my husband incubated some of our barnyard mix eggs. All the fertile eggs except one hatched. That's an excellent hatch rate! We gave those chicks to one of my hubby's friends, and he's delighted with them.
 A few of the incubator-hatched chicks we gave away.
Rabbits
I've already mentioned that the free rabbits my husband brought home after being told they were Flemish Giants turned out to be mixed breed meat rabbits. If you follow this blog on Facebook or Instagram, you also know the female, Fiona, had a litter. Unfortunately, all but one of her kits died. The one who lived, though, has thrived, and he's a ridiculously cute, fat thing. We've weaned him and soon we're planning to trade him for some fertile quail eggs, which we will hatch.
 We call our lone kit "Baby."
Garden
 Our culvert pipe planters.
I worked SO hard on the garden this spring! This was supposed to be the year I got a "real" garden in place, but due to unforeseen events, that just didn't happen. So I made due with what I had. Again, I planted lots of veggies in with the asparagus, plus I planted in several old bathtubs, in lots of pots and buckets...and my husband cut up an old culvert pipe for me to plant in, too.
Things are growing slowly because our weather is unseasonably cool. Still, I've had lots of radishes, some artichokes, a kohlrabi that I overwintered, and some kale. I normally grow just a handful of potatoes because I feel they aren't that healthy, but this year seemed a good one to grow everything possible. So instead of just letting the potatoes do their thing without any help from me, this year I'm hilling them. And they just keep getting taller! I think some of the potato plants are up to my hip now. And yesterday - finally! - I saw a tiny broccoli head.
 Every time I harvest radishes, I plant more. I use them as a low carb potato substitute.
 Yummy artichokes!
 I think this is the most beautiful kohlrabi I've ever grown!
 Cats. Good thing they are excellent mousers! :D
 A baby broccoli head.
A little experiment you might be interested in: I got a great carrot crop in 2019, but when I harvested, there were quite a few itty bitty carrot tops that obviously hadn't matured. I let them stay in the ground to see what would happen. Last month, it became clear that they were mostly growing tops and that they were trying to go to seed...so I pulled them all up. I did get a big bowl-full of carrots, so I think it was worth the extra time in the garden.a worthwhile venture.
 My carrot experiment paid off.
The fruit trees are iffy this year. I think it won't be a great year for plums, but the young pear tree looks loaded. It's too soon to say what the apples are up to.
 Pears.
 Sage in bloom.
Other Stuff
Shaun and Shannon, our Soay sheep, are doing great. I only wish they multiplied as quickly as the rabbits!
 Our Soay sheep.
Spring foraging is nearly over; I harvested quite a bit of elderflower, pineapple weed, and broad leaf plantain for medicine.
 Plantain and pineapple weed.
 Dehydrating thyme and oregano.
I recently read two books I think you might be interested in. One is a fantastic historical (set during WWII and just after) by one of my favorite modern authors, Lynn Austin. It's called If I Were You ...and if Amazon let me give it more than 5 stars, I would.
 A must-read if you love WWII-era fiction!
Another book worth picking up is The Ultimate Guide to Preserving Vegetables by Angi Schneider. I have quite a few preserving books, but mostly I use The Ball Book of Home Preserving and The Ball Blue Book a lot and the others rarely or never. But Angi's book is different. First, it covers dehydrating, freezing, and fermenting, as well as canning. Second, the recipes are mostly refreshingly DIFFERENT. (Yet the canning recipes all follow the USDA's safety guidelines.) I will definitely be trying the dried asparagus crisps, beet and horseradish sauce, canned Asian-style broccoli stems, and canned spicy cauliflower with turmeric!
 A reference worth owning.
Finally, I want to thank those of you who follow me on YouTube. There are over a thousand subscribers on the Proverbs 31 Woman channel now...which isn't much in YouTube-land - but it's incredibly encouraging to me! If you're not already subscribed, I hope you'll consider it!
 A few spring flowers.


