
Kristina Seleshanko's Blog, page 18
March 5, 2020
Spring Cleaning Checklist: The Kitchen (with a free printable!)
 As an Amazon Associate, I earn from qualifying purchases. All opinions are my own. Please see FCC disclosure for full information. Thank you for your support!
When it comes to spring cleaning, know thyself. I recall a time when I could spring clean the entire house in one day. Nowadays, not so much. I only tackle one room at a time, sometimes taking more than one day for more difficult rooms. Typically, I start with the kitchen - because it's the hardest room in the house. I figure everything is downhill from there!
For efficiency's sake (who wants to do more cleaning than necessary??), start at the top (the ceiling), and work your way down. This prevents dust and grime from landing on, say, your freshly cleaned countertops because you forgot to clean the light fixtures.
I like to start at one corner of the room and work my way around. This keeps me from forgetting steps.
For the kitchen, I recommend the following cleaning supplies:
A dust rag or two
A Mr. Clean Magic Eraser mop (learn how I use it to clean ceilings and walls here)
Lots of Magic Erasers
A sponge or two
Dawn dish soap (I haven't found another dish soap that cuts through grease as well)
Windex (which cuts through grease splendidly. It works well on just about every surface in your kitchen; just avoid cleaning the lettering on appliances with it. Sometimes it will remove lesser-quality lettering.)
Cleaning towels or paper towels
Q-tips for cleaning into crevices
Whatever cleaner you prefer for your countertops
Whatever cleaner you prefer for your floors
Vacuum (for sweeping the floor and dusting in crevices, etc.)
Procedure:
To print out this checklist, click here.
* Dust or (if needed) mop the ceiling (I recommend the Mr. Clean Magic Eraser mop; see here).
* Dust and clean light fixtures and fans. I remove the glass from fixtures and wash them with Dawn. I do the same thing with ceiling fan blades. Also replace lightbulbs, if needed.
* Dust cabinets, including the tops if they don't reach the ceiling.
* Wipe down the exterior of upper cabinets with a damp sponge and a wee bit of Dawn. Or, if they are really greasy, with Windex. Sometimes I use a Magic Eraser. (Test the Eraser in an inconspicuous spot.) Don't forget hinges and handles.
* Remove everything from the upper cabinets and vacuum the insides.
* Wipe down upper cabinet interiors with Windex and towels. Or replace shelf paper, if needed.
* Sort through the contents of the upper cabinets and throw away anything that's bad and donate what you don't use. Place keeper items back in the cabinets.
* Dust and wipe down (with a sponge and a wee bit of Dawn, or with Windex and towels) door trims.
* If you have curtains on your windows, wash them. If you have blinds, dust them. If blinds are greasy, a little Dawn or Windex will cut through the grease.
* If you have rugs in your kitchen, clean them. Wash washable rugs on the gentle cycle of your washing machine, then hang dry; shake or beat rugs that can't be washed. Set aside.
* Remove art, clocks, etc. from the walls. Dust and clean, as needed. Set aside.
* Dust and mop the kitchen walls. For the kitchen, I like to use the Mr. Clean Magic Eraser mop, as noted in the ceiling directions, above.
* Clean all windows and window frames - including the tracks! (I vacuum tracks first, then spray with Windex, which not only gets rid of grease, but also kills mold or mildew. Q-tips are handy for getting into crevices.)
* Clean all doors with a sponge and Dawn. A Magic Eraser should get rid of stubborn spots.
* Clean backsplashes with your preferred countertop cleaner or with Windex.
* Clean the sink.
* Remove everything from the countertops and clean countertops with a soapy sponge, bleach, Windex, or your preferred countertop cleaner. (Be mindful not to mix bleach with other cleaners, like Windex, or the results can be deadly!)
* As you return items to the countertops, clean them. I use Windex for most things. Give away anything you don't actually use.
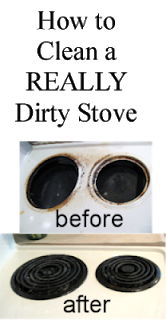
* Clean appliances inside and out. Don't forget the top of the fridge and the inside of the dishwasher! (If your refrigerator top is greasy, use Windex to make the job easier.) Click here for more info on cleaning a stove, or a REALLY dirty stovetop.
* Clean the exterior of all bottom cabinets.
* Empty the contents of the bottom cabinets and vacuum the shelves. Wipe down shelves or replace shelf paper. Vacuum inside drawers and wipe down with Windex.
* Sort through items from the bottom cabinets. If there's anything that should be donated or thrown away, do so. Put all keeper items back inside the cabinets.
* Dust and wash all floorboards. (I like to use a Magic Eraser for this job.)
* Dust or vacuum all crevices between cabinets and appliances, as well as under appliances.
* Vacuum the refrigerator's coils. If possible, move the refrigerator and clean the floor beneath it.
* Empty the trash and wash the trash can outside, using Dawn.
* Re-hang the clean curtains.
* Replace cleaned rugs, assuming they are dry.
* Re-hang all the art, clocks, etc., assuming the walls are now dry.
* Vacuum or sweep the floor.
* If there are any dirty spots on the floor where you know the mop won't reach, clean them now, using a sponge.
* Mop the floor.
Whew! Done!


March 3, 2020
Down to Earth Talk about Coronavirus
 As an Amazon Associate, I earn from qualifying purchases. All opinions are my own. Please see FCC disclosure for full information. Thank you for your support!
 Can we talk a minute about Coronavirus (COVID-19)? I don't want to cover the stuff that's already been all over the news and the Internet, but I do want to encourage you to come at this topic from a place of knowledge and trust in the Lord, rather than fear. Do your research, pray, and act accordingly, friends.
Personally, I'm not terribly worried about this virus, though I have some concerns for people who are elderly, have "weak lungs," or who have depressed immune systems. More concerning to me are the shortages we're seeing.
Drug & Cleaning Supply Shortages
In many areas, it's already almost impossible to buy cleaning supplies. Thankfully, washing your hands with ordinary soap (still easy to find!) is the best thing you can do, but if you're out and about and need hand sanitizer and can't find it in stores, I wouldn't bother spending $100 for a small bottle on Amazon. (Yes, I've seen it with my own eyes!) Instead, try making your own. Little House Living explains how.
Thankfully, basic hygiene supplies like sanitary napkins/tampons, toothpaste, and shampoo, are still readily available. But don't forget any medications you may have. The FDA has already announced that one medication (they haven't told us which one) is in short supply because it comes from China. I know it can be difficult to stock up on medications, due to insurance issues, but if you can do it, it's not a bad idea to have an extra bottle on hand.
Stocking Up on Food
 Freeze-dried food is handy.
I've also had a few people ask how they should prepare food-wise, since the federal government is recommending having at least a two-week supply of food and water on hand. But did you know that the government always recommends this, even when there's no pandemic? This is because weather occurrences, natural disasters, and so on could all quickly and easily interrupt our supply chain, leaving store shelves empty.
The recent talk of coronavirus has lead many people to suddenly buy up freeze-dried food. If you want some and can't find it, or if you simply want freeze-dried rations that will last 15 or more years and are actually healthy (Have you seen the ingredient lists on most freeze-dried food???), I recommend Valley Food Storage. You can see my complete review of their products here.
If you want freeze-dried food everyone in your family will enjoy and that you know is healthy because you prepare it yourself, I highly recommend a home freeze dryer. Harvest Right is the only company offering consumer-grade freeze dryers (commercial freeze dryers are much more expensive). You can see their products here. I have their medium-sized freeze dryer and absolutely love it!
One question I'm seeing a LOT is how to stock up on food if you eat keto. I think most folks who eat keto are used to fresh produce and meat; this makes them wonder how on earth they can have food set aside for an emergency. Let me help with that. (Don't stop reading if you don't eat keto. What I talk about here is the backbone of any healthy diet.)
First, consider food for your freezer. It's true that if the power goes out (unlikely with the Cornovirus) that the freezer can be problematic. Hopefully, you have a generator to buy you some time to use the food in your freezer before it spoils. But freezers are still a very convenient way to have a little extra food put by.
For keto, be sure to stock up on meat and frozen low carb vegetables. You can also freeze some dairy. For example, to freeze cheese, grate it, then pop it in freezer bags. It will work well for melting in casseroles or on top of food. Butter also freezes very well; just pop boxes of it directly in the freezer. You may also freeze cream cheese blocks and heavy whipping cream. Eggs last a long time in the fridge, but if you want to freeze them you can. Click here for instructions.
 Learn to home can chicken here.Next, consider how you can stock your pantry. Keto items to consider include:
* Canned meat. (You can buy canned chicken and beef at grocery stores, as well as fish such as tuna, sardines, and salmon. If you can your own meat, you can make a wider variety of meats shelf-stable.)
* Canned low carb vegetables. I get it if canned veg really isn't your thing; I don't like them much, either. However, in a pinch, I will eat some (like canned green beans). I also recommend pickles (they come in other veggies besides cucumbers), artichoke hearts, bamboo shoots, mushrooms, and tomatoes.
* Olive oil, avocado oil, coconut oil, lard, and ghee, all of which remain shelf-stable for at least months.
* Stock or broth.
* Nuts, natural peanut butter, or nut butters.
If you've got all that covered, you might add:
* Queso, sugar-free salsa, and perhaps pork rinds.
* Almond and/or coconut flour, along with your sweetener of choice.
* Freeze-dried or dehydrated berries.
 Learn to make pickled green beans here.
Conclusion
Folks, I'm not suggesting you panic, hoard, over-spend, or steal any of these items. But I do hope that this post makes you think about preparing for possible future problems, such as job loss, natural disasters or, God forbid, worse. Planning ahead isn't something to mock. It's just smart! It's what people did until a few generations ago, when they were more in touch with nature. So even if you're not worried about Coronavirus, I hope you'll add at least a little extra food and maybe some bottled water to your pantry, for those times when they might be needed.
Related Posts:


February 26, 2020
Actually Healthy Peanut Butter Cookies (Sugar Free, Keto, Low Carb, Gluten Free Recipe)
 As an Amazon Associate, I earn from qualifying purchases. All opinions are my own. Please see FCC disclosure for full information. Thank you for your support!
 As those of you who follow this blog on Facebook know, for Valentine's Day, I made no-sugar, grain-free peanut butter heart cookies. They were a HUGE hit! My husband loved their crispness combined with peanut buttery goodness, and the kids never even knew they weren't eating sugar. In fact, those cookies disappeared so fast, last week I decided to make another batch...and am sharing the recipe with you now.
 Actually Healthy* Peanut Butter Cookies Recipe
2 cups natural creamy peanut butter (the only ingredients should be peanuts and salt; I use Adam's)
1 1/2 cups erythritol (I've used both Lankanto and pure pear erythritol)
1 teaspoon baking powder
2 eggs
1/2 teaspoon sea salt
1 tablespoon real vanilla extract
1. Preheat the oven to 350 degrees F. Line a baking sheet with parchment paper and set aside.
2. In a medium-sized bowl, stir together the peanut butter and erythritol until smooth and completely blended.

3. Stir in the baking powder, eggs, salt, and vanilla extract until well blended.
4. Roll the dough into 1-inch balls and place on the prepared baking sheet about 1/2 inch apart. Use your hands to flatten each ball, then use the tongs of a fork to create the classic peanut butter cookie criss-cross pattern. (If you want to make heart-shaped cookies, head over to The Semi-Sweet Sisters for easy instructions.)


5. Bake for 15 - 17 minutes, or until golden around the edges. Cookies will be quite soft, so remove them from the baking sheet carefully, with a spatula. Allow them to cool completely on a wire rack, where they will become crispy. Store in an airtight container in the refrigerator.


Makes about 48 cookies.
This recipe is based upon one featured at "Cooking Keto with Kristie."
Nutritional Information: It's always smart to calculate your own nutritional information using the exact products you cook with. However, the approximate nutrition per cookie, according to LoseIt!, is: Calories 73, Fat 5.5g, Carbohydrates 2.1 g, Fiber 1g, Protein 2.9g
* FYI: Some people find legumes (including peanuts) inflammatory.
February 20, 2020
Choosing a Sewing Machine for the Homestead
 As an Amazon Associate, I earn from qualifying purchases. All opinions are my own. Please see FCC disclosure for full information. Thank you for your support!
 Although our society tends to view sewing as a hobby peculiar to certain creative types, the truth is, sewing machines are invaluable on the homestead. Here are just a handful of ways I use mine:
* To mend clothing, making it last longer.
* To alter clothes so they fit well.
* To upcycle old clothes into new clothes. (For example, turning a pair of old jeans into a child's skirt or an outgrown T-shirt into a dress.)
* To create new clothing if I can't find the type of clothes I want or need in stores - or if new clothes are out of reach financially. (Assuming I purchase fabric on sale, sewing clothes is definitely less expensive than buying them new, unless I buy new clothes from a store like Walmart - but the quality and longevity of home-sewn clothes are far superior to anything I can buy at big box stores.)
* To create useful items for the homestead, including curtains, quilts, pillows, pot holders, placemats, aprons, dog beds...the list is long!
In my opinion, the question isn't so much whether homesteaders should learn to sew (they definitely should!), but which sewing machine is the best choice for their lifestyle.
Is Hand Sewing an Option?
Until the 19th century, everything was sewn by hand. So technically, you do not need a sewing machine to produce clothing and other items for your homestead. However, hand sewing is time-consuming - much more time-consuming than using a machine - and on a modern, busy homestead, who has time for that?
Age is also a factor. Once upon a time, I found hand sewing relaxing, but today I struggle to make tidy stitches due to diminishing eyesight. Those who suffer from arthritis or stiff joints will find hand sewing painful, too. So as we age, hand sewing definitely becomes more burdensome.
If you only envision yourself mending items (not creating them from scratch), hand sewing may be an acceptable route for your homestead. There's something to be said for the time-honored activity of spending evenings with hand mending in your lap. But like most homesteading skills, it's best to start practicing the craft now; after you've done hand-sewn for a bit, you may decide a sewing machine is a better option for you.
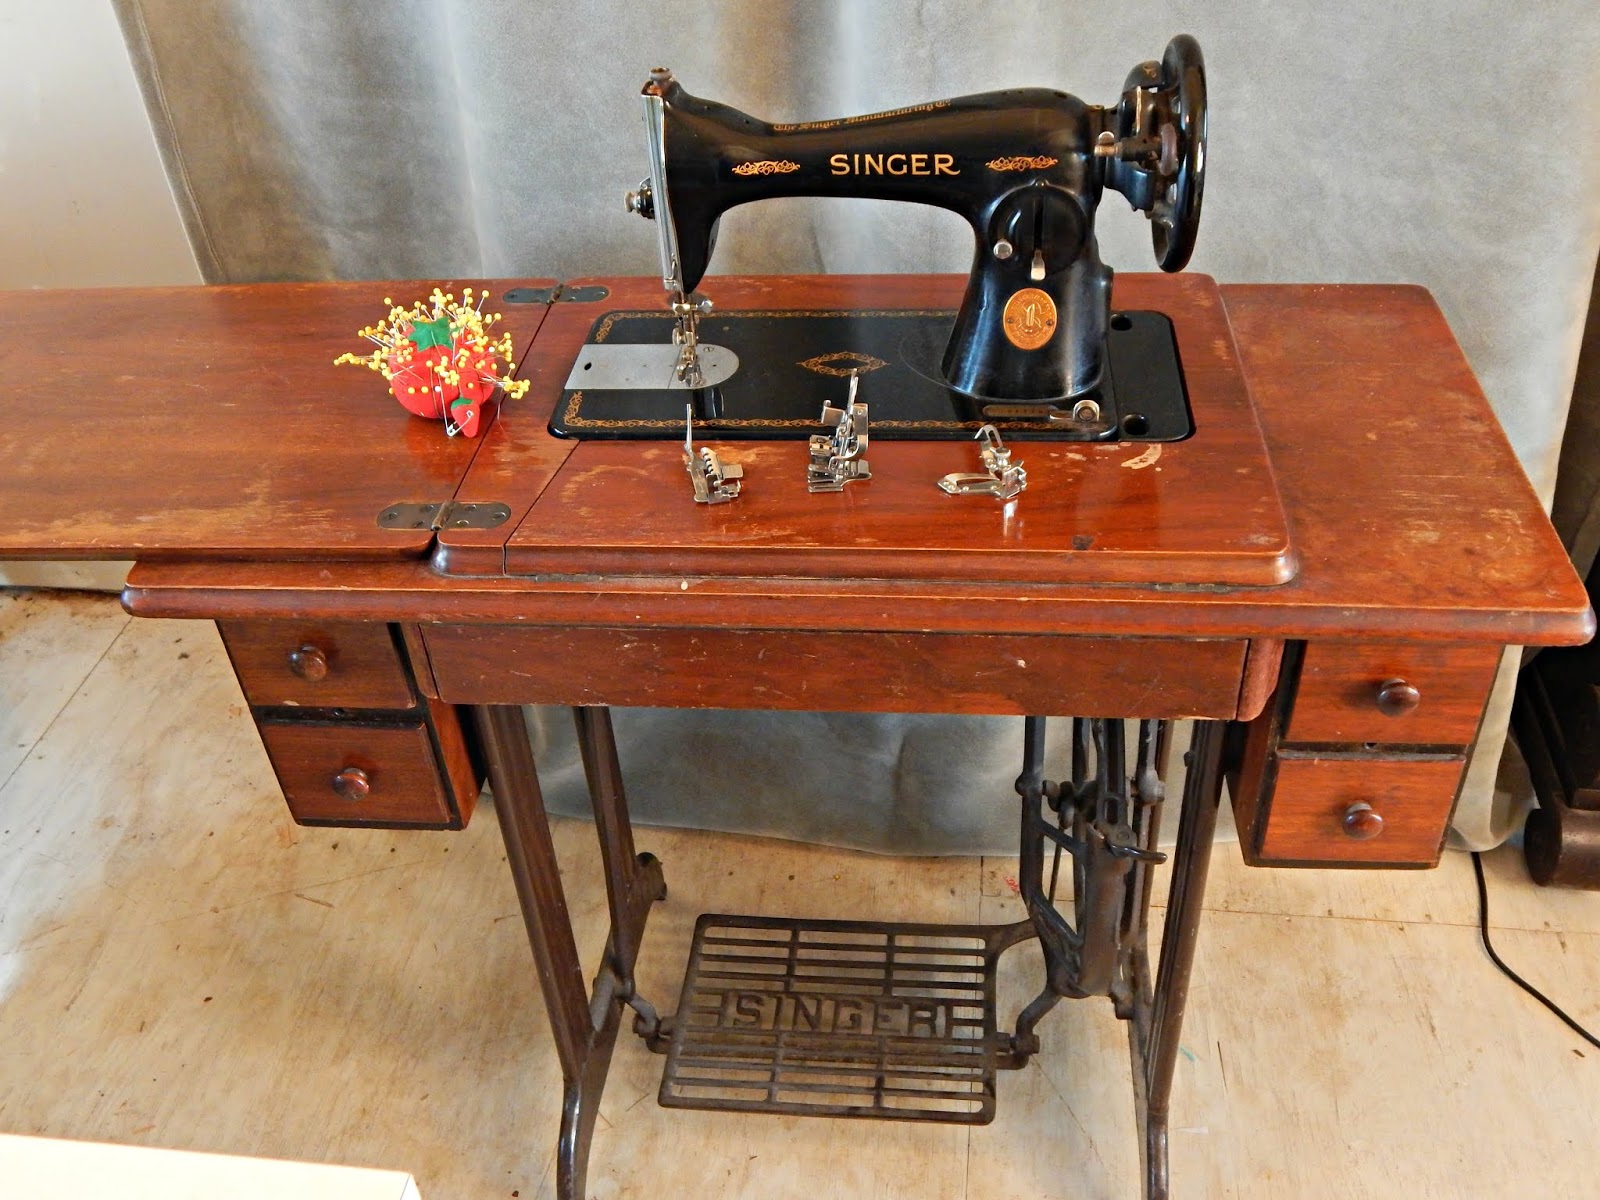 Treadle Machines
If you live off-grid - or aspire to - a treadle sewing machine is your best option. Treadles do not run on electricity, but instead are powered by a pedal pumped by foot as you sew. They are a bit tricky to learn to use (unless you're good at patting your head and rubbing your stomach!), but they do get the job done much faster than hand sewing. They are made to last, too, which is an important consideration for sustainable living.
Treadles do have certain limitations, though. They only sew straight stitches, so you'll need to work buttonholes by hand. You'll also need to finish seam edges by hand or with a method that only requires straight stitching (for example, binding raw edges with ribbon or running a line of stitches near the raw edge of tightly-woven fabric). Stretchy fabrics are also a no-go with a straight-stitch only machine. (For those, you either need a serger or a standard sewing machine that does zigzag stitches.)
Believe it or not, brand new treadle sewing machines do exist. Janome makes a popular model that must be inserted into an antique treadle sewing machine cabinet in order to function correctly. (See it here.) But the downside to a modern treadle is one of the biggest boons of an antique treadle: Quality of build.
While Janome is a great brand, their modern treadle machine is plastic. Antique treadle machines are metal. Really, not much can go wrong with an antique treadle; they are the most reliable sewing machines out there. If I were choosing between a new treadle sewing machine and an antique one, I wouldn't have to think long: An antique would win every time, due to the durability of its construction.


Buying an antique treadle machine is typically less expensive than buying a new one, anyway. Antique treadles are, in my experience, easy to find and often cost $100 or less. (At the time of writing, Janome's treadle is over $300 on Amazon, and still requires a cabinet to be operational.) But because antique treadles usually haven't been used in quite some time, you should expect yours to need a good oiling and a new belt. (Thankfully, these, like most old treadle machine parts, are usually pretty easy to find from either a local sewing machine repair store or on the internet.)
Do note that because the belt is rubber, it is something that will eventually require replacing. Even if you buy extras and store them in a cool, dry, dark environment, they won't last forever.
What brand should you choose? When buying an antique, I recommend Singer because Singer treadles are so easy to find and parts are readily available.
Vintage Electric Machines

Vintage electric sewing machines offer many advantages, including:
* They usually cost less than new sewing machines. (I typically see them for $200 or less - often much less.)
* If the machine is from 1960 or earlier, it's made completely from metal - which means it will endure much longer than modern plastic machines. Vintage machines were designed to last!
* Parts are often easy to find. (You may even be able to repair a vintage machine all by yourself.)
* Maintenance (oiling and cleaning) can be done by the user.
Good brands of pre-1960 machines include Viking, Pfaff, White, Kenmore, and Singer.
One of my sewing machines (yes, I have more than one!) is a 1960s Viking I bought for $25 from a thrift store, complete with case, manual, and accessories. Thrift stores can be an excellent place to find vintage machines, but it's wise to take thrifted machines to a repair shop. At the very least, a thrifted machine will need cleaning and oiling. A sewing machine repair shop can also spot any problems and repair them for you right away. My Viking cost $100 to clean, repair, and buy an extra (expensive) foot for.
When looking at used vintage machines, I recommend only considering machines where:
* The hand wheel turns without difficulty.
* The needle bar goes up and down.
* The feed dog (which moves the fabric under the needle) moves every time you rotate the handwheel.
* The bobbin case rotates (or swings back and forth) when you turn the handwheel.
Because a large number of hobby-sewists prefer vintage sewing machines because of their durability and reliability, many repair shops and dealers sell repaired vintage machines. These machines will be more expensive than those you find in thrift stores, but buying already-repaired machines from a dealer allows you to try out the machine before you buy it.
New Sewing Machines

I have mixed feelings about modern sewing machines. I hate that they are all plastic. I hate that the parts aren't made in the U.S. and that if the machine breaks, you have to send overseas (often to China) because parts might not be readily available locally. Less expensive (say, under $400) modern machines are not designed for repairing; the manufacturers expect them to break after a year or three. Parts are literally not made for these machines, and I've had sewing machine dealers tell me manufacturers threaten to remove their dealership status if they even attempt to repair these "cheap" machines.
Several years ago, my 1980s Pfaff stopped working correctly and instead of repairing it, I fell for all the bells and whistles of the new machines. Embroidery stitches! Self-threading needles! Sparkle and buzz! I gave my Pfaff to a thrift store and bought a Brother for about $300. The Brother soon broke, and I realized my error. Getting rid of that Pfaff was a huge mistake!
I really cannot recommend one of these cheap modern sewing machines, unless you're a hobbyist who wants to see if you like sewing before you invest more money into a machine. But since good vintage machines are in the same price range, I advise you to buy one of those instead.
All that said, there are some reliable modern machines out there - but you'll have to pay $1,000 or more for them. Juki, Jarome, Pfaff, and Viking are good brands. As with most tools, you're usually better off buying the best machine you can afford. Buying used is a possibility, but I only recommend a machine that has "low miles" and passes all the tests I recommended for vintage machines.
There's no doubt new machines offer perks. They tend to have helpful features like automatic threading, auto thread cutting (which is a real time-saver), the ability to see when the bobbin is running out of thread, useful and fancy stitches, easier speed control, smoother stitching, and so on. If they break, as long as they are higher-quality, it's pretty easy to get them repaired; your local dealership or repair shop can do it. (As far as I can tell, however, parts are only manufactured outside the United States.)
On the downside, modern machines are harder to repair yourself, compared to treadle or vintage machines. Most manufacturers also tell consumers not to oil their modern sewing machines; manufacturers want users to take their machines to a dealer once a year for this type of maintenance.
What About Sergers?
Sergers are a type of machine that sews a seam, trims it, and finishes the raw edges all at once. This is greatly time-saving, but it's not the least bit necessary for any type of sewing, even (contrary to popular opinion) when you're sewing stretch fabrics.
Many people use sergers because they feel they offer a more professional finish - that is to say, they give a result similar to mass-produced clothing. But higher-quality clothing (think couture) is still sewn with a regular sewing machine.
Because sergers are all plastic, complicated, and expensive, I personally don't they are a good homesteading tool.
What About Industrial Machines?
New or vintage industrial machines are more powerful, more dependable, and longer-lasting than most consumer-grade sewing machines. Sounds great, right? But the downside is they may be difficult to find, cost considerably more, and often only sew a straight stitch. Also, despite what many people believe, not all industrial machines can handle thicker fabrics like denim and leather.
In addition, industrial sewing machines are easier to injure yourself on. Case in point: Many years ago, when I was a manager at a fabric store, there were several employees who also worked part-time at a local clothing manufacturing facility. They admitted that nearly every new employee at the facility ran one or more needles through her fingers, simply because she was unused to how fast industrial machines worked.
Also, unless your sewing skills are already excellent, an industrial machine will go too fast for you to get quality results in your sewing.
Conclusion
 Unless sewing is your passion, probably one sewing machine is all any homestead needs. But if you "catch the bug," you may find yourself bringing home back-ups. I have two back-ups on our homestead.
The machine I sew on most often is a modern, consumer-grade Juki (see it here), which I use primarily because it does everything I need with more power and smoothness than my other machines.
But I also have that vintage Viking I mentioned earlier. It's there mostly in case my Juki needs to go in for repair. I also use the Viking for special projects. For example, recently I was sewing aprons that required a lot of gathering. Gathering feet are a bit of a pain to put on a machine because they require removing the shank that holds the sewing foot in place. Still, for each apron, I discovered that using the gathering foot saved me one hour of sewing time. That's huge! To make the sewing most efficient, I put the gathering foot on my Viking and whenever I needed to gather, I just rolled my chair away from the Juki and over to the Viking.
Finally, I have my grandmother's Singer treadle - one of the last all-metal treadles ever made. (The story goes she had to special order it because, in 1947 when she purchased it, all the stores were carrying electric machines.) As soon as I'm done restoring this classic, it will be a handy back-up if there is no electricity.
But, like most people, I started out with just one sewing machine. It wasn't fancy or expensive - but with it, I learned how to sew. Which machine will you choose to help your homestead become even more self-sufficient?
February 5, 2020
Woman (Me) Battles with Hawk to Save Chicken's Life
 Northern Goshawk. Courtesy Wikipedia Commons.As an Amazon Associate, I earn from qualifying purchases. All opinions are my own. Please see FCC disclosure for full information. Thank you for your support!
I was outside feeding the chickens - feeling pretty exhausted, actually. I'd removed the feeder from the hen house and walked several feet away to a carport where we keep our chicken feed in a rat-proof container, just like I do every afternoon. On my way back to the coop with a full feeder, I heard what I thought was squabbling amongst the chickens. I looked their way and saw what I thought was two hens bickering. (Our hens do occasionally squabble amongst themselves, though they never hurt each other.) Our rooster was also alerting, though - not just making the noises he uses when he's breaking up a hen spat. And as I came nearer, I saw he had all the other hens gathered together in a sheltered corner of the run. Suddenly, it clicked in my mind: A hawk was attempting to steal a hen.
The hen was screeching. She ran into a clump of bamboo, trying to hide within it. The hawk - a big, gray bird - followed her and landed atop her, his talons in her feathers. I yelled and waved my arms...and that danged hawk looked me straight in the eyes, showing no fear. "Beat it, lady," he seemed to say, "I'm having chicken for dinner tonight."
 A Northern Goshawk's talons and beak. Courtesy of Wikipedia Commons.I plopped the feeder down and ran inside the chicken run, still yelling and waving my arms. In the moment, I think I was mad enough to, without thinking, grab the hawk and pull him off our chicken, sharp beak and talons be damned. (I've since learned that hawks are federally protected. Injuring them in any way is a class B misdemeanor.) But thank goodness it didn't go that far; the hawk must have seen the anger in my eyes. He flew off.
 Northern Goshawk flying. Courtesy Wikipedia Commons.
The poor little hen ran over to her flock, who encircled her, protecting her from further harm. She'd lost some feathers and was scared witless, but otherwise, she was fine.
 She lost a lot of feathers!Immediately, I got on my phone and began researching what I could do to keep this hawk - who now knew several yummy meals could be found on our homestead - at bay. As I did this, my husband stood near the henhouse and witnessed the bold raptor trying to steal a hen several times.
Honestly, I was shocked by the whole thing. In all my years of keeping chickens, I'd never had problems with predatory birds. I've always chalked this up to the fact that we give our hens tree cover in their run, making it difficult for raptors to spot our hens from the sky.
I'd also never seen a big, gray hawk before. Nor had I known hawks to be so bold around humans. So the first thing I did was try to identify the bird; was it truly a hawk, as I suspected? Or some other predatory bird?
I checked several bird guidebooks, followed by a state website on local birds of prey and confirmed it was, indeed, a hawk - but a rather rare and very aggressive breed: A Northern Goshawk. This explained a lot about the attack.
That afternoon, we locked our hens in their henhouse, even though it's small. (Thankfully, they were mellow about being stuck inside for a few days.) Then, after lots of research and debate, my husband installed orange safety fencing (sometimes called snow fencing) over the top of the run by zip-tying it to the chicken wire walls of the run, as well as to existing trees in the center of the run.
 Our solution is safety fencing.We liked this solution because it was relatively inexpensive, quick to install, and we felt it was a more certain fix than most other methods. We also knew that because of its thickness and color, birds of prey would easily see it and not become entangled in it. We don't get lots of ice or snow, so we don't have to worry much about sagging due to those things. We assume the fencing will need replacing in a year or two. By then, we hope our Northern Goshawk will have found different stomping grounds, since he's obviously new to our neighborhood.
 It ain't pretty, but it works!
So far, so good!
But if you're worried about birds of prey getting to your chickens, there are a few other things you could do:
1. Have at least some black hens. When I first read this advice, I thought it was nuts. How can having black hens in your flock protect the entire flock? But once you understand that most types of hawks dislike crows, it makes more sense. Hawks are generally not very aggressive, whereas crows are. Hawks would rather not tangle with crows. From the air, apparently, black hens look too much like crows...and so the hawk flies away and finds easier pickings. But I must tell you, our flock is about half black Australopes and our hawk clearly wasn't afraid of them. I attribute this to his being the aggressive Northern Groshawk. (Although it's interesting to note that the hen he tried to grab was light gray.)
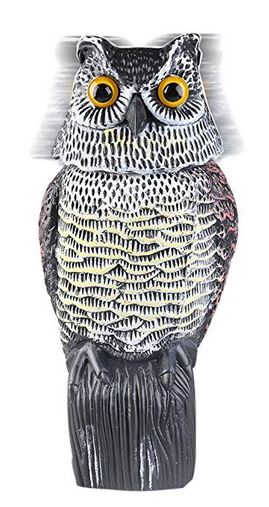 2. Put up fake owls. Most hawks don't want to tangle with another raptor, so putting up fake owls with moveable heads (like this one), and then altering their position every week or so is supposed to help. Not sure it would have made a difference with our Goshawk.
3. Have guardian dogs. Again, most hawks don't want to be attacked when they are attacking. I don't think this would have worked for us, since our hawk wasn't afraid even of humans.
4. Hang up old CDs. I did do this, but I really wouldn't trust this method alone to protect our birds from raptors. However, hanging CDs in the run cause flashes of light, which most hawks avoid.
5. Put strands of fishing line or string over the top of the run. Most people seem to suggest doing random patterns with holes no bigger than a foot apart. The idea here is that raptors don't want to get entangled. We seriously considered this fix but were concerned about what a mess it would be to clean up with the fishing line started disintegrating. It's tough to see, and would turn into tiny pieces. I was also concerned that hawks might become entangled in the fishing line, although, from what I can read online, this doesn't seem to be a problem.
6. Put bird netting over the top of the run. This seems like a really viable solution since bird netting isn't expensive. It is a pain to work with, though, and it will sag all over the place unless you add lots of posts to help hold it up. Still, for a smaller run, it could be a great solution.
7. Put chicken wire or hardware cloth over the run. Unfortunately, this requires putting up posts in the middle of the run, to keep the wire from sagging much. It's also more expensive. We bought our safety fencing locally and it ran about $75. Chicken wire would have been $135 - hardware cloth much more. But despite the cost, wire over the run is the ultimate fix.

January 27, 2020
How to Start a Keto Vegetable Garden (with tips for Winter Gardening)
 As an Amazon Associate, I earn from qualifying purchases. All opinions are my own. Please see FCC disclosure for full information. Thank you for your support!
 I've been eating keto for more than three years now, and my health has improved dramatically. (To read about why and how I switched to keto for life, check out this post.) And because, when the topic comes up, I don't hesitate to offer guidance on how to do keto correctly (there's a lot of bad advice on the Internet), emphasizing how helpful this way of eating can be for regaining health, I get a lot of questions about keto. One question that keeps popping up lately is how to change the family vegetable garden to reflect a keto diet. And it's true, if you're used to growing lots of corn and watermelon, changing your garden to reflect a keto lifestyle may seem overwhelming. Where do you even start? Let me show you how easy it can be.
1st: What Do You Eat?
The first step to planning a keto garden - or really any vegetable garden - is to make a list of vegetables you eat. And let me point out here that the healthy way to do keto is NOT to eat any vegetable you like, regardless of how many carbs it contains. All carbs, even those from veggies, turn to sugar in your body, which in turn spikes blood sugar. Yes, healthy keto includes vegetables, but it's important to count every carb and to avoid high carb veggies.
With that in mind, here is a list of keto-approved vegetables you may choose to grow in your garden:
 Artichoke
Artichoke (not Jerusalem Artichokes)
Asparagus
Bamboo shoots
Bell peppers (green are the lowest carb)
Bok choy
Brussels sprouts
Broccoli
Cabbage (green or Napa; not purple types)
Cauliflower
Cucumber
Celery
Eggplant
Endive
Fennel
Garlic
Hot peppers
Kohlrabi
Leafy Greens (including lettuce, spinach, collards, kale, mustard greens, etc.)
Mushrooms
Okra
Onions (including green onions and chives; yellow onions are lower carb than other types)
Pumpkin
Radishes
Radicchio
Rhubarb
Rutabaga (Swede)
Snow peas (not regular green peas)
Squash (including pumpkin, summer squash and zucchini, and spaghetti squash. Not winter squash.)
Tomatoes
Watercress
Wax beans
Green beans
And any culinary herbs you wish.
Please note that if you're eating keto to reduce inflammation, some (not all) people find that nightshades, which include tomatoes and peppers, cause them a great deal of inflammation. (The same is true for dairy, but that's beyond the scope of this post.)
2nd: Will it Grow?
Once you have a list of preferred vegetables, cross off any that simply don't grow in your climate. For example, I can't grow okra in my area; our temperatures are simply too cool. If you're unsure whether or not you can grow a certain vegetable in your area, first look up your USDA gardening zone here, then consult a seed catalog to see if the vegetable in question is suitable for your zone.
3rd: What Season?
 Chives, which are in the onion family
Not every vegetable gardener is aware that you can grow food in spring and fall, as well as in summer. But only certain crops do well during those cooler months; they are called "cool-season crops." Many keto-friendly vegetables are cool-season crops, so your next step is to determine which of the vegetables you like to eat fall into that category.
Cool Season Keto Vegetables:
Asparagus
Bok choy
Brussels sprouts
Broccoli
Cabbage
Cauliflower
Celery
Endive
Fennel
Garlic
Leafy Greens
Kohlrabi
Onion
Radishes
Radicchio
Rhubarb
Rutabaga
Snow peas
Some tomatoes (look for varieties grown in cold areas like Russia and Alaska)
Watercress
These vegetables generally don't grow well during summer, tending to bolt (go to seed, which makes the edible part of the plant very bitter) during hot weather. (However, if you live in a cooler climate, they may grow very well spring through fall.)
If you live where summers are hot, and have only ever planted a summer garden, you'll need to start thinking of gardening as both an early spring and fall affair.
 TomatoesTips for Newbie Gardeners
If you've never had a vegetable garden before, or have very limited growing skills, here are the vegetables I recommend starting with:
Garlic
Leafy Greens (except spinach, which can be persnickety)
Radishes
Tomatoes
These are all very easy to grow, and with the first three, you can plant the seeds directly in the soil. All of these plants also grow well in containers.
4th: How to Start Cool-Season Seeds
I'm going to assume you know how to grow warm-season vegetables. (If you don't, there's tons of how-to info out there, including posts here on this blog.) But many of you may be unfamiliar with growing vegetables in the cooler months.
Really, most things stay the same. The biggest thing is knowing when to plant. That begins with seedlings.
If you're used to purchasing seedlings from a gardening center, you may find it's difficult to find the plants you need in early spring or fall. You might need to start buying seeds, instead.
The easiest way to start cool-season vegetable seeds is to use the winter sowing method, which you can learn all about here and here. Winter sowing can take place as early as late December, and seedlings hold well for months, until your garden is ready for planting. I highly recommend this method because it's virtually fool-proof, super simple, cheap, and effective.
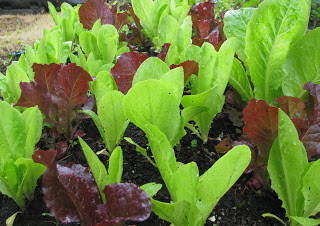 Lettuce
If you don't want to winter sow, or you need to start seeds for a fall garden during the summer months, be sure to harden off your seedlings before planting them in the ground. Seedlings started by any method other than winter sowing are too tender to take cold temps easily.
Some keto-friendly vegetables are best direct sown into your garden soil. Of the cool-season crops, these include: garlic (if you plant cloves), onion sets, radishes, snow peas, and squash. Leafy greens also do well when direct sown.
5th: When to Plant
How do you know exactly when to plant cool-season crops? Honestly, planting cool-season crops in spring can be tricky because you don't want temperatures to be too cold...nor do you want them too hot. For best results, I recommend purchasing a soil thermometer. (In a pinch, you can use a meat thermometer, but it won't be as accurate.) Only a thermometer can tell you when the soil in your garden beds reaches 50 - 70 degrees F. 4-6 inches below the surface of the soil. This is when it's safe to plant cool-season veggies.
However, most cool-season vegetables won't grow much when the soil temp is below 50 degrees F. To help things along, you may wish to use row covers, cloches, cold frames, or (around seedlings) thick layers of mulch to warm the soil.
 Green beans (Dragon's Tongue variety)Fall is an easier time to plant cool-season crops. You'll have to start seeds during August, so be sure to keep the seeds and seedlings in a cool location. I've also successfully held over seedlings after winter sowing them in the winter/early spring by simply keeping them in a cool location until I want to plant them in the fall.
To figure out when to plant in the fall, pay attention to how many days your seed catalog or seed packet says the crop requires to mature and be ready to harvest. Then, count back that many days from your average first frost date. That is your planting date. (To find your average first frost date, click here.) Here's an example:
Let's say I have some radishes that take 22 days to fully mature. Let's also say that in my area the average first frost date is late November. That means that the last time I can safely sow radish seeds is in late September.
Cool-season crops will continue growing in the winter, too, though they will grow very slowly. Most will die after a hard frost, but collards and kale usually survive even snow.
Other Tips
* In addition to getting great veggies that don't bolt, cool-season vegetable gardening has other benefits including less required irrigation, fewer insects to mess with, weeds that grow more slowly, and, of course, adding to the period of time you can grow home-grown food!
 Cabbage
* When choosing a garden spot, even for cool-season veggies, choose a location that gets full sun (at least 6 hours a day), doesn't get lots of wind, is not low-lying, and has good drainage. South-facing gardens are ideal, with rows oriented north to south.
* Make sure you have great soil. When growing vegetables during cooler weather, it's especially important that they have all the nutrients they need. While all vegetables will grow more slowly in poor soil, cool-season veg will grow especially slow under these less-than-ideal conditions.
* Raised beds keep the soil a bit warmer than if you plant vegetables directly in the ground. This can extend your growing season by giving you gardens that warm more quickly in the spring and stay warmer longer in the fall.
* To make your cool-season vegetables last longer during the late fall and winter months, consider placing hoops made of greenhouse plastic and PVC over your garden.
* Spring planted cool-season crops may not grow for long. If the weather gets suddenly hot, many will bolt (go to seed). Fall is usually a more productive time to plant cool-season crops, but don't let this discourage you from trying to plant in spring! Much depends upon your area's climate.
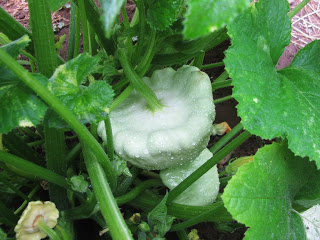 Summer squash (pattypan variety)* Choose cool-seasn varieties with the shortest growing periods. For example, if I have a choice between a vegetable that needs 60 days to mature and a different variety of the same veggie that only needs 30 days to mature, I'm definitely going to choose the 30-day vegetable. Why? For one thing, I'll get more plantings and more food from my garden. As soon as I harvest that 30-dayer, I can plant something else (or more of the same crop) in the same garden location. Also, vegetables that grow more quickly are better insurance against a sudden, early hard frost.
* For more tips on cool-season vegetable gardening, I recommend this .PDF.
January 16, 2020
Everything You Need to Know to Start Home Canning
 As an Amazon Associate, I earn from qualifying purchases. All opinions are my own. Please see FCC disclosure for full information. Thank you for your support!
There's no doubt about it; home canning is back - and in a big way! Whereas my parent's generation found canning food at home too much of a bother when grocery stores were so readily accessible, today, people are realizing home-canning gives their family more nutritious and healthy food than what comes from a store. Often at a lower price, too!
But many people are also intimidated by the process of home canning. It seems mysterious - even scary. (And it doesn't help that the media highlights seemingly every incidence of botulism related to home-canned food. But rest assured, these rare cases only occur because people egregiously break canning rules. For more info on this, hop over to "When Home Canned Food Goes Bad" and "What You Need to Know about Home Canning and Botulism.")
My own canning history reflects some of these feelings of intimidation. My initial interest was piqued in the 1990s, when I saw a magazine ad by the canning jar manufacturer Ball that offered a recipe for blueberry jam. My mother had several prolific blueberry bushes, so I was gung-ho to try this whole canning thing. But gathering the equipment seemed overwhelming. I thought it would be expensive to buy the things needed. (I was wrong, by the way.) And my mom, who recalled her own mother using wax to seal jars, kept telling me canning was a big pain. I gave up on the idea.
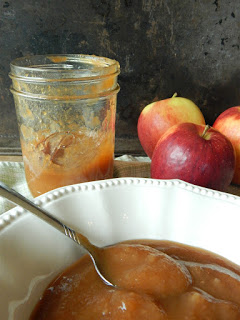 Home-canned applesauce.Years later, after I married, my husband's grandmother re-introduced the topic of canning. She lived nearby and had a prolific vegetable garden. Wanting to share her abundance with us, she called me one day and said, "Would you like to learn how to can tomatoes?" I jumped at the opportunity.
Not only did we can those tomatoes together, but she then gave me her Ball Blue Book (with canning recipes and instructions), a water bath canner, and a few accessories. I was off and running! Using the Ball Blue Book and, later, The Ball Complete Book of Home Preserving , I taught myself to can everything from apples and peaches to meat and stew. I've now been canning for nearly 20 years.
I hope I can make canning easy for you, too. In this post, I'll discuss what you need to gather before you begin canning. When you're ready to actually can, check out my old posts on water bath canning and pressure canning. This year, I hope to update these posts with more photos (and maybe even video).
The Simple Science Behind Home Canning
(Or: Why Home Canning is Safe)
Many people fear canning because they don't understand it. That is to say, they don't know the science behind why canned meat, for example, stays safe to eat when it is stored on a shelf at room temperature. With that in mind, here's a simple explanation.
All food contains microorganisms that make it spoil. These microorganisms are in the very air we breathe. But correct home canning procedures control the growth of these microorganisms.
High acid foods (which include fruit, jams, jellies and other fruit spreads, pickles, relish, salsa, chutney, and tomatoes with added lemon juice or vinegar) must be heated to 212°F for a certain length of time in order to inactivate these microorganisms. Since this is the temperature of boiling water, this is easily achieved at home through the process of water bath canning (also called "boiling water" canning).
 Canning salsa.
Low acids foods (which include vegetables, meat, soups, stews, and tomato-based sauces) must be heated to 240°F for a specific length of time in order to destroy the growth of botulinum (which is naturally occurring in the environment). Botulism spores can survive boiling water and they love a low acid environment free from air, which is why low acid foods cannot be safely water bath canned. Boiling water simply doesn't get hot enough - no matter how long you boil the food - to kill botulism spores. Therefore, low acid foods must be pressure canned.
Yes, there are people who water bath low acid foods. Don't be like them. This is a firm canning rule that if broken may cause botulism poisoning, like this lady, who water bath canned green beans, experienced.
Please also note that pressure canners are not the same as pressure cookers. For canning, only use a pressure canner, even if the manufacturer of your pressure cooker says it's acceptable for canning. (For more on that topic, click here.)
Generally, I recommend beginners start with water bath canning. It's not that pressure canning is difficult, it's just that most people are more intimidated by the pressure canner itself. Once you've had a bit of experience water bath canning, pressure canning will come easily.
Tools You'll Need to Water Bath Can
 A water bath canner and rack.
Water Bath Canner: You can use a large cooking pot with a rack on the bottom, but because the water must be two inches above the top of your largest jars, it might be hard to find such a pot. (A heavy stockpot is a good option.) Also, it can be tricky to find a canning jar rack that fits the bottom of a cooking pot. (Such a rack is absolutely essential because without it, your jars will break during the canning process. Probably the best solution to this problem is to make your own jar rack.)
Fortunately, water bath canners (which come with racks) aren't terribly expensive, so it's probably easiest to just buy one. If you're on a tight budget, check thrift stores; I often see them for $10 or so. New ones cost about $30 on Amazon. I've seen them sell for less locally.
Jars: Best practice is to use actual canning jars. Yes, glass jars used for store-bought foods such as spaghetti sauce can work for water bath canning (definitely don't use them for pressure canning; they can't withstand that process), but you will find most are the wrong size for home canning lids.
When I was building up my collection of jars, I bought new ones when they went on sale, and I scoured thrift stores for boxes of used jars. (Jars can be used over and over and over again; just make sure they don't have any cracks or chips and that the jar rims are smooth; otherwise, jars may break in the canner or not seal properly once they are filled with food.) These days, Facebook Marketplace is a good place to look for used jars.
Although I have both regular ("narrow mouth") and wide mouth jars, when I have a choice, I always pick wide mouth jars. This is because they are easier to clean and easier to fill (unless you're canning a liquid, in which case regular jars work fine). They are also suitable for use in the freezer. (Regular canning jars have "shoulders" that crack when the food inside freezes and expands.)
In addition, canning jars come in different volumes: pint, quart, 24 oz. (perfect for canning asparagus), 4-, 6-, and 8-oz. (for jelly/jam), and gallon jars (which are only suitable for canning juice). Which size you choose depends on two things:
1. Your recipe. (Some recipes are only tested safe for a specific size jar. Never, ever use a larger jar than what is called for. You may use a smaller jar, but you must still use the processing time specified for the jar size called for in the recipe.)
2. Your personal preferences. (For example, I prefer to can chicken in pint jars because this is an ideal size for the recipes I use the chicken in.)
 Canning jar rings.Rings: New jars come with rings, which are metal, circular objects that hold jar lids in place. Rings can be used over and over until they become rusty. (To prevent rust, dry well before storing and keep away from moist areas, like basements.) If you have used jars and no rings, you can buy rings separately.
Lids: New jars come with lids, but lids should only be used once. Yes, there are some people who re-use them, but this is again one of those things that can lead to foodborne illness. (Used lids may not seal properly.)
 Canning jar lids.
Lids come in regular ("narrow mouth") and wide mouth sizes. You do not need to match the brand of lid to the brand of the jar. I've taken to using Walmart's Mainstay's lids; they are less expensive and I think I get a better jar seal rate with them than I do with Ball or Kerr lids.
Jar Lifter: When jars come out of the canner, they are hot. The only safe way to remove them is with a jar lifter. (There's a lot of confusion about how to hold jar lifters. The correct way is to put your hands on the straight handles and pick up the jar with the curved ends.)
 Canning jar lifter.
Funnel: You'll probably need a funnel to fill jars. Not using one leads to dirtier jar rims, which can lead to the lids not sealing properly, which leads to the food spoiling. Use a funnel specially designed for canning jars.
Jar Bubbler: This little tool helps remove air from the jars before they go into the canner. But you can also use the handle of a plastic spoon. Don't use anything metal because it could damage your canning jars.
Headspace measurer: Headspace - the amount of empty space between the food in the jar and the lid - is really important. You can buy a special headspace measurer, or you can use an ordinary ruler, or you can just go by the screw bands on the jar. For more on that, hop over to "The Importance of Headspace in Canning."
Finding Safe Canning Recipes
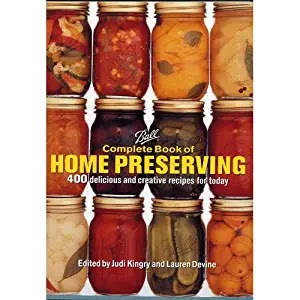 My favorite canning book.Do not use just any canning recipe you find on the Internet. A lot of them are not truly safe for canning. Instead, I recommend buying
The Ball Complete Book of Home Preserving
(my favorite canning book, which also includes complete canning instructions) or the current
Ball Blue Book
. The National Center for Home Food Preservation is also a great, free online source, as is the Ball website. There is also the Bernardin website. (Bernardin is Ball's Canadian brand.)
My favorite canning book.Do not use just any canning recipe you find on the Internet. A lot of them are not truly safe for canning. Instead, I recommend buying
The Ball Complete Book of Home Preserving
(my favorite canning book, which also includes complete canning instructions) or the current
Ball Blue Book
. The National Center for Home Food Preservation is also a great, free online source, as is the Ball website. There is also the Bernardin website. (Bernardin is Ball's Canadian brand.)In addition, there are canning recipes on this blog. They are all tested safe, unless otherwise noted. (I have posted a recipe for canning ham, which, after years of using, I discovered is not tested safe because there are no tested safe recipes for cured meat. The recipe is marked thus.)
Finding Food to Can
You may already have ideas on what types of food you want to can, but before you go out and buy (or grow) those foods, do be sure you're familiar with one of the recipe books above. This will ensure it is safe to can the food, and it will give you a complete picture of what you'll need to safely can it.
Ideally, the food you can will be either homegrown or purchased from a local farmer you trust. This way you know exactly what is (and isn't) in your food! It will also produce a better end product, assuming the food is harvest when ripe and was picked not long ago. That said, grocery store food is also perfectly safe to can.
 A pantry of home-canned, high acid foods.
For even more info to get you started on canning, see these Canning Q & A posts:
 Canning Q&A: 2013
 Canning Q&A: 2012
 Canning Q&A: 2011
 Canning Q&A: 2010
January 7, 2020
How to Plan a Medicinal Herb Garden
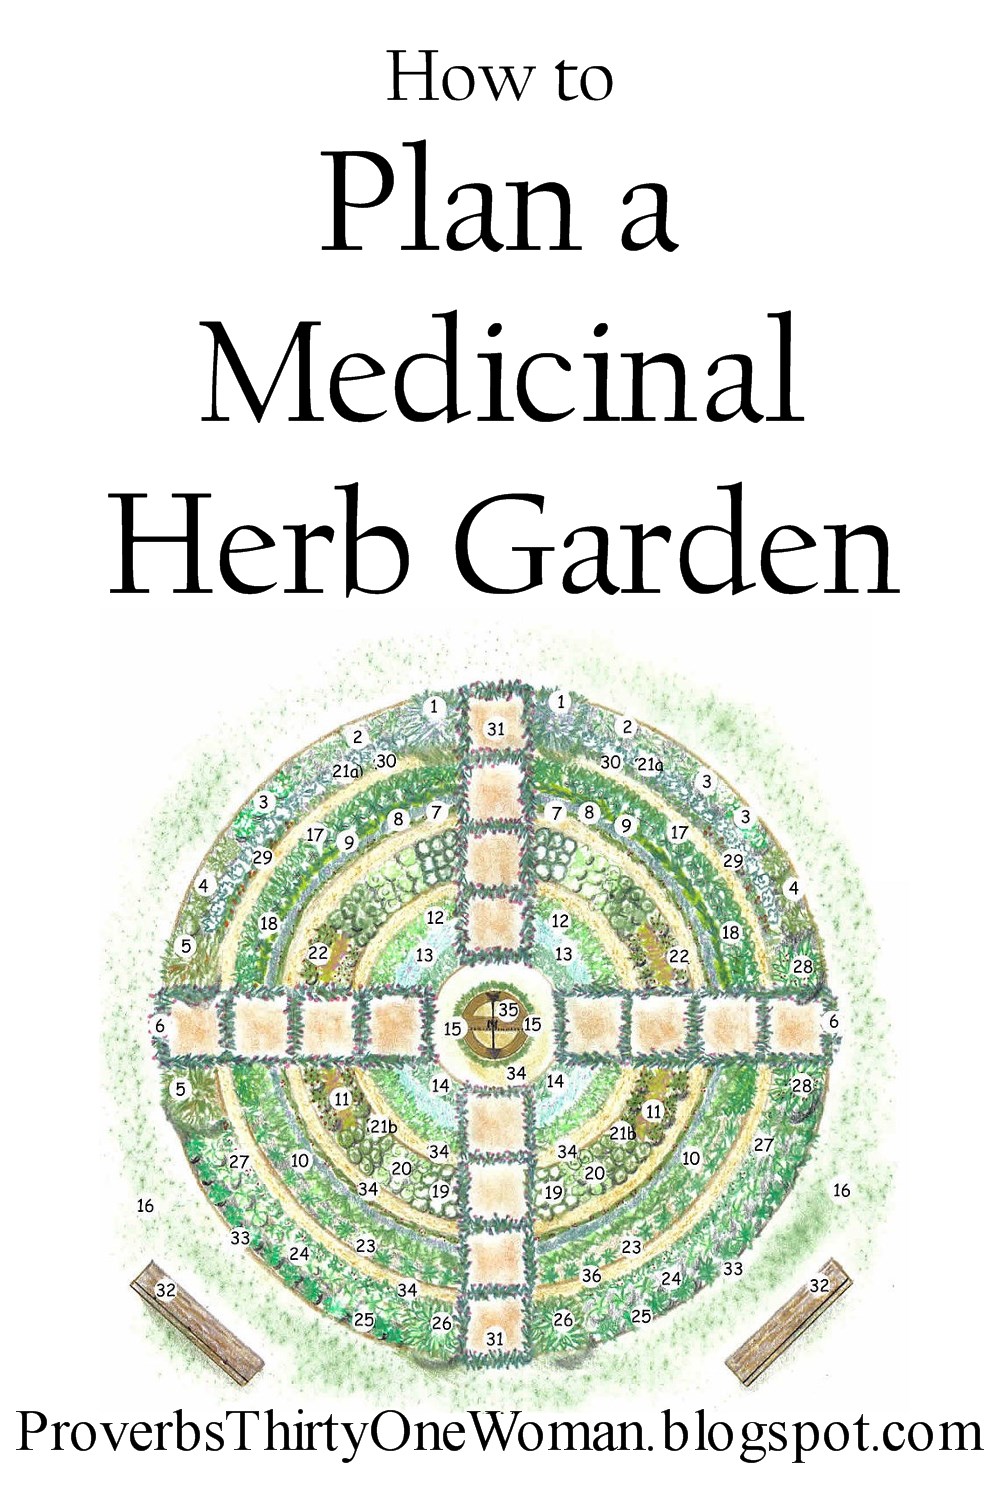 Would you love to step out into the garden and gather medicine for your family? Do you dream of a pretty garden full of useful herbs? Many of you have told me you do...but you don't know where to start. "Which herbs should I grow?" is a common question. Today, I'm going to walk you through the decision-making process - and suggest a few specific herbs, too.
The Best Way to Begin a Medicinal Herb Garden
The best place to begin planning a medicinal herb garden is not by sketching out designs or browsing through herb books or magazines. Instead, sit down with a notebook and pencil and make a few lists.
1. Start by writing down every herb you currently use for health and wellness. These are things you currently buy (or would buy if you felt you could afford to), and might include everything from cold and flu treatments to everyday supplements to treat specific ailments.
2. Next, make a list of every ailment you hope to treat via medicinal herbs. For example, you might write: immune function, colds/flu, minor wounds, insomnia, high blood pressure.
3. Now take your first list (the one of herbs you buy) and research each plant. At this point, you really only need to know if the herb will grow in your area, so I suggest a simple Google search: "USDA gardening zone" and the plant name. (For example: "USDA gardening zone echinacea.") Cross out any plants that don't grow in your zone. (To learn what your zone is, visit Garden.org.) Truly, unless you have a greenhouse or the plant lends itself to indoor growing, there's little point in trying to grow herbs that don't love your region; they simply won't thrive where you live.
4. Finally, look at your second list (the one that notes ailments). Research which herbs are best for each ailment and whether or not they grow in your region. To help you get started, see my recommendations below.
Great Immune System, Cold, and Flu Herbs
Almost everybody who is interested in herbal medicine wants to grow plants that boost the immune system and stave off colds and the flu - so let's start there. If you have some experience with natural medicine, you may already have some go-to plants for these purposes. If that's the case, you can simply Google the name of the plant and "USDA gardening zone," as recommended in step 3.
 Herbal Antibiotics
by Stephen Buhner.If you aren't familiar with herbs in the cold/flu category, here are a few that grow throughout most of the U.S. (For a much more thorough look at this class of herbs, I highly recommend Stephen Harrod Buhner's
Herbal Antibiotics
and
Herbal Antivirals
. Everyone who is serious about using herbs for medicine should own and read these books.)
Herbal Antibiotics
by Stephen Buhner.If you aren't familiar with herbs in the cold/flu category, here are a few that grow throughout most of the U.S. (For a much more thorough look at this class of herbs, I highly recommend Stephen Harrod Buhner's
Herbal Antibiotics
and
Herbal Antivirals
. Everyone who is serious about using herbs for medicine should own and read these books.)Elderberry (S. nigra and S. canadensis; USDA gardening zones 3 - 8) is powerful medicine for treating the flu and boosting the immune system. Elderberry is a bush, but it grows as large as a small tree, so you'll want to grow this plant away from most of your herbs, since it will cast shade on your garden. Hop over to The Spruce to learn how to grow elderberry.
Licorice (Glycyrrhiza glabra; USDA gardening zones 9 - 11) is another well known antiviral and immune booster, and is also good for adrenal function, certain ulcers, and works as a demulcent. Licorice likes moist, well-draining, and fertile soil. Learn more about growing it at Mother Earth News.
Sweet wormwood (Artemesia annua; USDA gardening zones 3 - 8) stimulates the immune system. It also protects the liver and builds blood, including after chemo or radiation treatment. Sweet wormwood isn't picky about soil as long as it is well-draining; it is also drought tolerant. Learn more about growing it at The Spruce.
 Elderberry flowers.
Juniper (Juniperus communis; USDA gardening zones 2 - 8) is a common ornamental plant, but it also is a strong antiviral. It's particularly useful for urinary tract and bladder infections, as well as kidney issues. It has culinary uses, too. Learn how to grow juniper over at Mother Earth News.
Ginger (Zingiber officinale; USDA gardening zones 7 or higher) is a great antiviral, and easy to use in cooking, as well as medicine. If it doesn't grow in your zone, you may be able to grow it indoors.
 Herbal Antivirals
by Stephen Buhner.See Gardener's Path for tips on growing ginger outdoors.
Herbal Antivirals
by Stephen Buhner.See Gardener's Path for tips on growing ginger outdoors.Astragalus (Astragalus membranaceous; USDA gardening zones 5 - 9) is an immune booster. Other uses for this herb include liver protection and blood building. It's native to China, but is easy to grow in many parts of the U.S. Like many herbs, it can handle shade or full sun, and likes well-drained soil. Learn more about growing it at Heirloom Organics.
Boneset (Eupatorium perfoliatum; USDA gardening zones 3 and up) is an antiviral and is also used to heal acne, improve the lymphatic system, and reduce swollen glands. It's an easy herb to grow as long as you give it rich, moist soil. Learn more about growing boneset at Heirloom Organics.
Echinacea (Echinacea spp.; USDA gardening zones 3 - 8 ) is well-known as a cold treatment, but it is also good for infections. Other uses include treating infected wounds and immunity-boosting. Learn how to grow it at American Meadows.
Garlic (Allium sativum; all USDA gardening zones). Most people think of this as a vegetable, but raw garlic is antibacterial. Almost anyone in the U.S. can grow garlic, and it is easy to tend. Learn more about growing it at Grey Duck Garlic.
Great Wound Care Herbs
Another category of herbs almost everyone is interested in is wound care. Here are some good herbs to explore and consider for your garden:
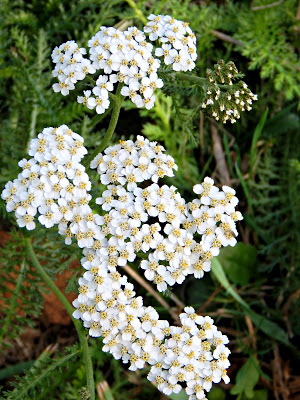 Yarrow.Yarrow (Achillea millefolium L.; USDA gardening zones 3 - 9) stops bleeding and is used to treat bug bites and minor scrapes and cuts. It loves full sun and well-draining soil. Learn how to grow yarrow over at Old Farmer's Almanac.
Plantain (Plantago lanceolata, major; USDA gardening zones 5 - 9) is an excellent "draw," as well as antiseptic and astringent. It even helps pull the flesh together for faster healing. It is a common weed in the U.S., but some herbal supply sources carry the seeds, too. See Heirloom Organics for more information on growing plantain.
Comfrey (Symphytum officinale; USDA gardening zones 4 - 8) encourages the growth of healthy new tissue and is an excellent treatment for bruises, broken bones, sprains, and pulled muscles, too. Comfrey tolerates most soils, but all varieties except Blocking 14 spread like mad. See Grow Veg for more growing tips.
Calendula (Calendula officinalis; USDA gardening zones 2 - 11) is also used to promote healthy new tissue, particularly if scarring could be detrimental. Additionally, it is an antiseptic. Calendula isn't too picky about soil and if left to go to seed, replants itself each year. See Planet Natural for tips on growing Calendula.
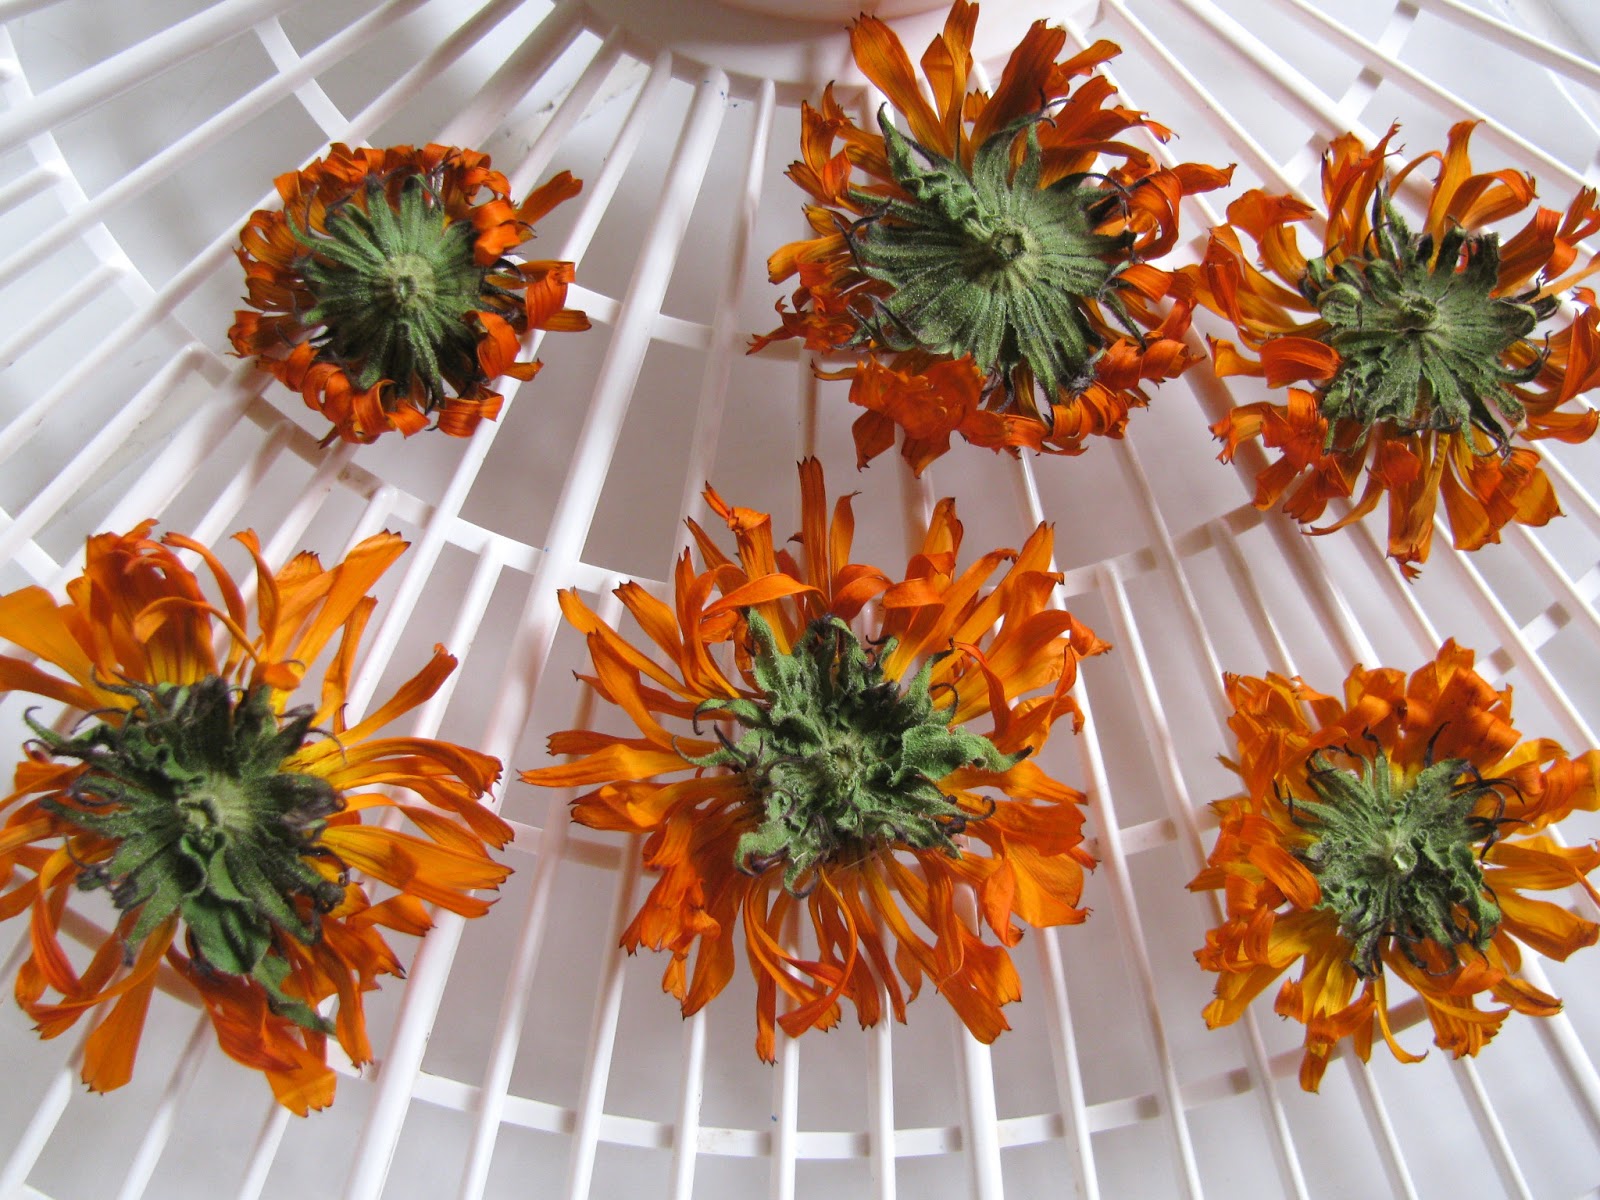 Drying calendula.
Willow (Salix spp.; most zones) is useful as a natural pain reliever and anti-inflammatory agent, much like aspirin. It also speeds the healing of wounds (when used as a wash). Willow, being a tree, should be planted where it won't shade the rest of your herb garden. See Cornell's website for more growing info.
Finishing Your List
 Making Plant Medicine
by Cech.Next, move on to special conditions you or your family have. For example, if someone in your family has a tendency toward high blood pressure, you'll want to consider growing dandelions (Taraxacum officinale) and hibiscus (Hibiscus sabdariffa L.) If someone has gout, dandelion and bugleweed (Lycopus americanus L.) may prove useful. If someone else tends toward gas, catnip (Nepeta cataria) will be handy. And so on.
Making Plant Medicine
by Cech.Next, move on to special conditions you or your family have. For example, if someone in your family has a tendency toward high blood pressure, you'll want to consider growing dandelions (Taraxacum officinale) and hibiscus (Hibiscus sabdariffa L.) If someone has gout, dandelion and bugleweed (Lycopus americanus L.) may prove useful. If someone else tends toward gas, catnip (Nepeta cataria) will be handy. And so on.If you're not sure what herbs treat the conditions you are likely to bump into, I recommend the book Making Plant Medicine by Richo Cech. It includes excellent information on various conditions and what herbs are best for treating them. (Cech also sells a nice variety of medicinal seeds that can be hard to find elsewhere.)
 The Ultimate Dandelion Medicine Book
by yours truly.
The Ultimate Dandelion Medicine Book
by yours truly.Other Tips:
* I can't stress this enough: Just because an herb that is a great treatment doesn't mean it will grow in your area. Always Google what gardening zone is assigned to each plant. Otherwise, your garden is doomed to fail.
* Start small. It's tempting to plant every herb you think you'll ever need, but you'll experience much more success if you start small, adding a few plants each year. This way, you can ensure your gardening spot is appropriate, that you have time to tend to the garden, that you'll use what you plant, and so on.
* All your medicinals don't need to be planted in one specially designated herb garden. In fact, since different plants have different soil, sun, and nutrient requirements, it's sometimes better to scatter them across appropriate places in your yard.
* Bear in mind that many herbs have ornamental varieties. For example, there are lots of pretty shades of yarrow designed to look nice in gardens, but only the original, white variety is highly medicinal. Always look at the Latin names of plants. (Again, Cech's medicinal seeds are a great resource, since he does not include any non-medicinal plants.)
 Catnip. (Courtesy of
 Claudia Daggett.)* Pay attention to how big each plant will grow. A common error is to plant herbs too close together or to put tall herbs where they will put shorter ones in shade.
* Some herbs will take over the world if you let them. For example, mints will spread everywhere unless you contain them in a pot...and even then, you might want that pot to sit on concrete so the mint doesn't root in nearby soil! Lemon balm, comfrey, chives, parsley, and bee balm are also common offenders.
* Even if you don't have a lot of room, you can enjoy medicinal herbs. Herbs do well potted on your porch, and many will thrive on your windowsill.
The #1 Biggest Mistake When Growing Herbs


Cover image courtesy Waleed Anwar.
January 2, 2020
Most Popular Posts of the DECADE!
Like everyone else (even my kids!) I'm weirded out that we are now in 2020. (It will take some getting used to, no?) So in addition to blogging about the most popular blog posts of 2019, I thought it would be fun to see what this blog's most popular posts of the decade are. Have you seen them all?
#10:
 Coming out around the same time as my popular book
The Ultimate Dandelion Cookbook
, this post has intrigued many!
Coming out around the same time as my popular book
The Ultimate Dandelion Cookbook
, this post has intrigued many!
#9:

It's never too late to start growing your own food, and this post from 2012 is a great way to get started!
#8:
 Although I try, I'm not the world's greatest housekeeper, so it cracks me up that cleaning posts, like this one from 2012, are among this blog's most popular posts.
#7:
 Three years ago, I was diagnosed with diabetes and my doctor instructed me to go on the keto diet. My blood sugar was normal within about three months - and my autoimmune disorder went into remission, and I lost 45 lbs., and my blood pressure and cholesterol returned to normal...Anyway, keto really saved my life, so I'm happy this 2017 post has helped others stick to this healthy way of eating, even during the holidays! (Learn more about how I use keto to treat diabetes here.)
#6:
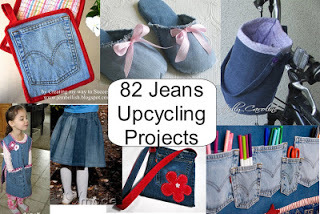 Being Mommy to little kids who were constantly ripping out their jeans inspired me to write this popular 2013 post.
#5:

My apron obsession began in 2011, and this post reflects that. (P.S. Check out how little my oldest child was!)
#4:
My husband's co-worker giving us a handful of garden-fresh beets is what inspired this popular 2014 post.
#3:
 2014's cleaning posts - especially this one about my embarrassingly greasy kitchen ceiling - were and are a hit among readers.
#2:
 This post from 2012 has long been a favorite among homesteaders!
And the #1 most popular post of the decade is:
 I'm delighted to say this simple post from 2011 is Proverb 31 Woman's most popular post of the decade!
And while we're at it, here are the most popular posts of 2019. Have you read them yet?
#5:
 If you're a Walmart shopper, you really must try this. It saves me literal HOURS each shopping trip!
#4:

And to think I almost didn't publish this post for fear you wouldn't like it!
#3:
I love that enough of you are over-run with backyard eggs that this post has gained popularity!
#2:
 I'm so happy folks are embracing less sugar in their lives!
#1:
 This is one of my family's favorite comfort foods!
A warm THANK YOU to each and every one of you for visiting this blog. My goal here, as it was way back in 2009 (when I began blogging) is to help you. Please always feel free to ask questions, to ask me to cover certain topics, or to provide general feedback! Here's to a fabulous new decade!
#10:
Coming out around the same time as my popular book
The Ultimate Dandelion Cookbook
, this post has intrigued many!#9:
It's never too late to start growing your own food, and this post from 2012 is a great way to get started!
#8:
Although I try, I'm not the world's greatest housekeeper, so it cracks me up that cleaning posts, like this one from 2012, are among this blog's most popular posts.#7:
Three years ago, I was diagnosed with diabetes and my doctor instructed me to go on the keto diet. My blood sugar was normal within about three months - and my autoimmune disorder went into remission, and I lost 45 lbs., and my blood pressure and cholesterol returned to normal...Anyway, keto really saved my life, so I'm happy this 2017 post has helped others stick to this healthy way of eating, even during the holidays! (Learn more about how I use keto to treat diabetes here.)#6:
Being Mommy to little kids who were constantly ripping out their jeans inspired me to write this popular 2013 post.#5:
My apron obsession began in 2011, and this post reflects that. (P.S. Check out how little my oldest child was!)
#4:
My husband's co-worker giving us a handful of garden-fresh beets is what inspired this popular 2014 post.
#3:
2014's cleaning posts - especially this one about my embarrassingly greasy kitchen ceiling - were and are a hit among readers.#2:
This post from 2012 has long been a favorite among homesteaders!And the #1 most popular post of the decade is:
I'm delighted to say this simple post from 2011 is Proverb 31 Woman's most popular post of the decade!And while we're at it, here are the most popular posts of 2019. Have you read them yet?
#5:
If you're a Walmart shopper, you really must try this. It saves me literal HOURS each shopping trip!#4:
And to think I almost didn't publish this post for fear you wouldn't like it!
#3:
I love that enough of you are over-run with backyard eggs that this post has gained popularity!
#2:
I'm so happy folks are embracing less sugar in their lives!#1:
This is one of my family's favorite comfort foods!A warm THANK YOU to each and every one of you for visiting this blog. My goal here, as it was way back in 2009 (when I began blogging) is to help you. Please always feel free to ask questions, to ask me to cover certain topics, or to provide general feedback! Here's to a fabulous new decade!
December 10, 2019
The Best Bibles for Children & Teens
 As an Amazon Associate, I earn from qualifying purchases. All opinions are my own. Please see FCC disclosure for full information. Thank you for your support!
When I was a child, I had one Bible that served me throughout my entire childhood...until I finally got my first "real" Bible as a teen. Waaaaaaaay back then, there were only a handful of children's Bibles available, but today, there's a plethora of children's Bibles - and you may be surprised when I say I think your child needs more than one.
As Christian mothers, one of our most important tasks is to teach our children about God. We can do this by reading our own Bibles out loud, but I strongly advise you not to use this as your only method. Children greatly enjoy having their own Bible, and small children are more likely to comprehend what's being read if the Bible contains kid-friendly pictures and easier-to-understand language. Yet even if you read a children's Bible to your kids every day, they may soon become weary of it. Not to mention, as your child grows, so will her knowledge and understanding...and her Bible should reflect that.
I recommend keeping at least 3 age-appropriate Bibles for your child at all times. This way you can rotate them, and the stories (and their meaning) stay fresher. As your child matures, switch out those Bibles for copies that better reflect your child's understanding.
When to Start Reading the Bible
It's never too early to begin reading the Bible to your child.
Let me type that again! It's never too early to begin reading the Bible to your child!
Studies show that when we read to infants, they develop better language skills. And why read them only secular stories? After all, isn't the Bible a lot more important than nursery rhymes, the alphabet, colors, and shapes? I have fond memories of reading my babies Stephen Elkins' board books filled with short Bible verses. (See the first book listed below.) My babies enjoyed the pictures - and I assure you the words did seep into their consciousness, making them able to (roughly) recite Bible verses even at a young age.
For babies and toddlers, I recommend choosing Bible storybooks with colorful and engaging pictures of animals and children. Very small children often prefer very small books that are easy for them to hold, but the most important thing Bible storybooks can do for children in this age group is introduce them to the major stories of the Bible, in addition to actual Bible verses.
I recommend:
 Little One's Bible Verses by Stephen Elkins.
 The Busy Bible by Judy Starks. (This is a felt "busy book" that's definitely worth the price!)
 Bible Stories for Tiny Tots by Kobus Sandenbuergh.
My Very Own Bible by Betty Fletcher. (This is one of those small books little children seem to love.)
Bibles for Preschoolers
Children between the ages of 3 and 5 still usually want excellent, colorful illustrations, so look for something with pictures on every page. The Bible stories for this age group can be up to four pages long, depending upon how long your child's attention span is. Bibles that have easy questions for you to ask your child can be helpful.
I recommend:

The Jesus Storybook Bible by Sally Lloyd-Jones. (I can't recommend this book enough. Even older kids and adults will find deep truths in this book.)

My Read and Rhyme Story Bible by Crystal Bowman, Cindy Kenney, and Christiane Engel.

The Big Picture Story Bible by David R. Helm. (The "big picture" here is both literal and figurative.)

The Beginner's Bible by Kelly Pulley.
 My Learn to Read Bible
by Tracy Herrast. (This book doesn't teach children to read. Instead, it uses pictures to replace some words in the stories, so children can feel like they are helping to read.)
My Learn to Read Bible
by Tracy Herrast. (This book doesn't teach children to read. Instead, it uses pictures to replace some words in the stories, so children can feel like they are helping to read.)Bibles for Gradeschoolers
As your child begins to read on her own, choose at least one Bible with easy sentences. Many Bible storybooks for this age group also include activities to make learning more fun. When your child is ready for a Bible without pictures, choose something with modern language (like the NLV or NIV), which will increase your child's comprehension.
In addition to The Big Picture Story Bible and The Jesus Storybook Bible, mentioned above, I also recommend for this age group:

The Hear Me Read Bible by Dr. Mary Manz Simon. (Fantastic for beginning readers!)
 The Young Reader's Bible
by Bonnie Bruno. (About a level 2 readers book.)
The Young Reader's Bible
by Bonnie Bruno. (About a level 2 readers book.)
 The Early Reader's Bible
by V. Gilbert Beers (Perhaps just slightly more challenging than The Young Reader's Bible.)
The Early Reader's Bible
by V. Gilbert Beers (Perhaps just slightly more challenging than The Young Reader's Bible.)
The Classic Bible Storybook by Kenneth N. Taylor. (This one is definitely for adults to read to kids.)
Bibles for Tweens and Teens
Children in this age group should be actively involved in choosing their Bibles, so make some selections ahead of time, then let your child make the final choices. In my opinion, the best Bibles for tweens and teens are "study Bibles," which contain useful commentary and notes to help your child understand the Bible more thoroughly. Emphasis should be placed on that does not teach your child what to think, but rather offers historical insight and tackles tough-to-understand passages.
I recommend:
 The New Life Bible for Boys
published by Barbour Publishing.
The New Life Bible for Boys
published by Barbour Publishing. The New Life Bible for Girls
published by Barbour Publishing.
The New Life Bible for Girls
published by Barbour Publishing.
The Adventure Bible (NIV) published by Zonderkidz.
 Rock Solid Faith Study Bible
published by Zondervan.
Rock Solid Faith Study Bible
published by Zondervan.
The Student Bible (NRSV) published by Zondervan.
A version of this post originally appeared in October of 2009. Title image by Samantha Sophia on Unsplash.


