
Kristina Seleshanko's Blog, page 19
November 20, 2019
Crustless Pumpkin Pie Recipe (Gluten Free, Low Carb, Keto)
 As an Amazon Associate, I earn from qualifying purchases. All opinions are my own. Please see FCC disclosure for full information. Thank you for your support!
Yesterday I was craving pumpkin pie, but I didn't have a lot time, and didn't want the fuss of making a crust - and, frankly, didn't want all the carbs of a crust...not even the few carbs found in a keto crust made with almond or coconut flour.
So, I whipped up crustless pumpkin pie. No lie, it took me less than 5 minutes to get into the oven!
And while you might be tempted to think this is just a quickie recipe used only to quench cravings, I assure you it's also company-appropriate! I've brought this pie to Thanksgiving and Christmas dinners for several years now and it's always a hit. It truly does taste like "the real thing," minus the carby crust (and tons of sugar).
And since I like to make things from scratch whenever possible, I've included my DIY pumpkin pie spice recipe, and my recipes for regular whipped cream from scratch, "Cool Whip" style whipped cream (have you ever looked at the ingredients in Cool Whip? Yikes!!!), and stabilized whipped cream, which is suitable for piping (if you want to get a little fancy). Again, all these recipes are super easy and can be created in minutes.
 Crustless Pumpkin Pie Recipe
butter
1 (15 oz.) can pumpkin puree (not pumpkin pie filling; I think Libby's has the best flavor)
1 cup heavy cream
2/3 cup sweetener (I used Lakanto)*
3 large eggs
2 teaspoons pumpkin pie spice (see recipe, below)
whipped cream (see instructions for making it, below)

1. Preheat the oven to 350 degrees F.
2. If you don't have pumpkin spice blend on hand, whip some up now, using the recipe below.
3. Generously butter the bottom and sides of a 10-inch glass pie plate. Set aside.
4. Dump all the ingredients (except the whipped cream) into a medium bowl and stir with a large fork until the ingredients are completely incorporated and there are no lumps. Be sure to tilt the bowl and scrape its bottom, since pumpkin puree likes to sit there, unincorporated with the rest of the ingredients.
5. Pour the mixture into the prepared pie plate and bake for 1 hour in the preheated oven, or until a toothpick inserted in the center comes out nearly clean.
6. Remove the pie from the oven and place on a wire rack to completely cool. I think the pie tastes best if you let it sit, covered, in the fridge overnight before serving. If desired, serve with whipped cream (see recipe below).
* I've been keto for almost three years now, so this amount of sweetener really tastes a little too sweet to me. I use less when baking for myself. But if you're baking for people who aren't keto or haven't been keto for very long, they will find this amount of sweetener very good, indeed.

DIY Pumpkin Pie Spice
1 teaspoon ground cinnamon
1/4 teaspoon ground nutmeg
1/4 teaspoon ground ginger
1/8 teaspoon ground cloves
Be sure to measure out 2 teaspoons of the spice blend for this recipe, because it will make slightly more than needed. (I usually triple this recipe and store it in an old spice jar for future fall baking.)

No Nasty Ingredients Whipped Cream Recipe
1. Place 1 cup of heavy whipping cream into the bowl of an electric mixer. (A stand mixer makes this job easier, but a hand mixer works, too.)
2. Beat the cream on the mixer's highest speed until it begins to look thick. Add a little sweetener, beat, and taste. Keep adding sweetener and tasting until you're satisfied it is sweet enough. (I don't like whipped cream very sweet; I used about 1/8 cup or less of Lakanto.)
3. Continue beating until stiff peaks form. It will take a few minutes.
"Cool Whip" option: Add 4 oz. of softened cream cheese before adding sweetener.
Stabilized Whip Cream option: Add 1 teaspoon of unflavored gelatin before adding sweetener. (I use Great Lakes gelatin.)


Crutless Pumpkin Pie Recipe (Gluten Free, Low Carb, Keto)
As an Amazon Associate, I earn from qualifying purchases. All opinions are my own. Please see FCC disclosure for full information. Thank you for your support!Yesterday I was craving pumpkin pie, but I didn't have a lot time, and didn't want the fuss of making a crust - and, frankly, didn't want all the carbs of a crust...not even the few carbs found in a keto crust made with almond or coconut flour.
So, I whipped up crustless pumpkin pie. No lie, it took me less than 5 minutes to get into the oven!
And while you might be tempted to think this is just a quickie recipe used only to quench cravings, I assure you it's also company-appropriate! I've brought this pie to Thanksgiving and Christmas dinners for several years now and it's always a hit. It truly does taste like "the real thing," minus the carby crust (and tons of sugar).
And since I like to make things from scratch whenever possible, I've included my DIY pumpkin pie spice recipe, and my recipes for regular whipped cream from scratch, "Cool Whip" style whipped cream (have you ever looked at the ingredients in Cool Whip? Yikes!!!), and stabilized whipped cream, which is suitable for piping (if you want to get a little fancy). Again, all these recipes are super easy and can be created in minutes.
Crustless Pumpkin Pie Recipebutter
1 (15 oz.) can pumpkin puree (not pumpkin pie filling; I think Libby's has the best flavor)
1 cup heavy cream
2/3 cup sweetener (I used Lakanto)*
3 large eggs
2 teaspoons pumpkin pie spice (see recipe, below)
whipped cream (see instructions for making it, below)
1. Preheat the oven to 350 degrees F.
2. If you don't have pumpkin spice blend on hand, whip some up now, using the recipe below.
3. Generously butter the bottom and sides of a 10-inch glass pie plate. Set aside.
4. Dump all the ingredients (except the whipped cream) into a medium bowl and stir with a large fork until the ingredients are completely incorporated and there are no lumps. Be sure to tilt the bowl and scrape its bottom, since pumpkin puree likes to sit there, unincorporated with the rest of the ingredients.
5. Pour the mixture into the prepared pie plate and bake for 1 hour in the preheated oven, or until a toothpick inserted in the center comes out nearly clean.
6. Remove the pie from the oven and place on a wire rack to completely cool. I think the pie tastes best if you let it sit, covered, in the fridge overnight before serving. If desired, serve with whipped cream (see recipe below).
* I've been keto for almost three years now, so this amount of sweetener really tastes a little too sweet to me. I use less when baking for myself. But if you're baking for people who aren't keto or haven't been keto for very long, they will find this amount of sweetener very good, indeed.
DIY Pumpkin Pie Spice
1 teaspoon ground cinnamon
1/4 teaspoon ground nutmeg
1/4 teaspoon ground ginger
1/8 teaspoon ground cloves
Be sure to measure out 2 teaspoons of the spice blend for this recipe, because it will make slightly more than needed. (I usually triple this recipe and store it in an old spice jar for future fall baking.)
No Nasty Ingredients Whipped Cream Recipe
1. Place 1 cup of heavy whipping cream into the bowl of an electric mixer. (A stand mixer makes this job easier, but a hand mixer works, too.)
2. Beat the cream on the mixer's highest speed until it begins to look thick. Add a little sweetener, beat, and taste. Keep adding sweetener and tasting until you're satisfied it is sweet enough. (I don't like whipped cream very sweet; I used about 1/8 cup or less of Lakanto.)
3. Continue beating until stiff peaks form. It will take a few minutes.
"Cool Whip" option: Add 4 oz. of softened cream cheese before adding sweetener.
Stabilized Whip Cream option: Add 1 teaspoon of unflavored gelatin before adding sweetener. (I use Great Lakes gelatin.)
November 14, 2019
How to Vacuum Like a Pro
 As an Amazon Associate, I earn from qualifying purchases. All opinions are my own. Please see FCC disclosure for full information. Thank you for supporting this site!
Even though I don't have carpet anymore, my vacuum is still my most important home-keeping tool. I'll say it again: My vacuum is THE most important housekeeping tool I own! I think it should be yours, too, since it makes such a variety of housekeeping chores so much quicker and easier.
Before Vacuums = Exhausted Housewife
But before I get into how useful vacuums are today, I want to refer back to a popular post I made on this blog's Facebook page recently. I want you to consider what life was like before vacuums.
True, wall-to-wall carpeting was rarely a thing in the 19th century or earlier, but women still had large carpets to clean. (Homes weren't well-insulated until recently, and wood floors truly needed carpets to help keep the house warm.) To accomplish this, women drug all their many carpets outside, hung them up (often on the laundry line), and beat them - hard! - with a stick to remove dust and debris. I'm sure it was quite a workout!
Women also did all the dusting by hand...and it was probably a much bigger chore in those days because homes were far less "tight" and nearby streets were often dirt.
Then in the early 1900s, the first home vacuum machine came along, priced for wealthy families only. And while it was considered labor-saving, it required the maid to lug around a 600 lb. "portable" machine.
So...let's just remember how easy we have it today, ladies!
 The first home vacuum weighed 600 lbs!Modern Vacuums = Best Friend
To really take advantage of a modern vacuum, you have to use it for more than just floors. Here's an example of how I often use my vacuum. (Which is a Shark Apex I highly recommend.)
I usually begin by extending the hose on my vacuum. Then I:
1. vacuum the front porch and doormat with the hose, as well as
2. vacuum the front door jam.
Now I close the door and focus on the inside of the house. Still using the wand, I:
3. vacuum up spider webs around the ceiling and window frames.
I then add a brush or dusting attachment and:
4. "dust" light fixtures, the tops and shelves of bookshelves, and the tops of door jams,
5. "dust" picture frames and mirrors,
6. "dust" lamp shades,
7. "dust" just about any surface (from tabletops to pianos).
Periodically, I then put the upholstery attachment on the hose and:
8. remove dust and pet hair from the furniture.
Periodically I use the hose without an attachment (or I put the crevice attachment in place) to:
 Vacuums are for more than floors (and couches)!
9. clean the crevices between the floorboards and the floor,
10. vacuum the "runners" of the sliding glass door and windows, and
11. clean the floor under the cabinets or other furniture, where the vacuum roller won't reach.
Next, I put my vacuum on the bare floor mode and:
12. vacuum the vinyl and wood floors. (I've never understood why anyone uses a broom any more!)
13. And vacuum throw or area rugs. (Depending upon your vacuum, you may need to use a different setting or attachment for rugs and throws.)
When I had wall-to-wall carpet, I then, finally, put the vacuum on carpet mode and vacuumed the carpet.
In addition to this vacuuming routine, I use the vacuum to:
* Clean filters (like the house's air filter).
* Vacuum under the refrigerator.
* Vacuum out stubborn lint from the clothes dryer.
* Clean and dust the inside of drawers or cabinets.
* Vacuum curtains or draperies. (Use the vacuum's low-suction setting or the upholstery attachment.)
Having a vacuum really does make house cleaning faster and easier. In fact, if a 19th-century woman were to watch me use one, I'm sure she'd be shocked that it takes the place of at least a few maids :)
A version of this post originally appeared in May 2010.
October 30, 2019
How to Turn a Feed Sack into a Grocery or Shopping Bag
 As an Amazon Associate, I earn from qualifying purchases. All opinions are my own. Please see FCC disclosure for full information. Thank you for supporting this site!
The internet is full of great ideas for upcycling feed bags - in fact, I posted links to my favorite ideas last year. But recently, when I posted a photo on Facebook and Instagram of an upcycled feed sack grocery bag I'd made, a lot of people had questions. So perhaps I have something to offer on the subject that hadn't been covered by others. Here are the questions I received and the easy sewing method I use for these upcycled bags.
What type of needle do you use?
I use a standard sewing machine needle, size 90/14. (Here's the exact size and brand I use.) A heavy-duty needle is not required, though some people I've talked to like using a needle designed for sewing denim (size 100/16).
Do be sure to give your machine a fresh needle when you are done with this project, because it will quickly dull sewing feed sack material.
What type of thread do you use?
I use standard, all-purpose sewing thread. (Coats and Clark.) Heavy-duty thread is not needed.
 Feed sacks make durable shopping bags.
Do you use a heavy-duty machine?
No, although admittedly my Juki has more power than an inexpensive Brother or Singer. That said, lots of people are using standard sewing machines to make similar bags, so I think it's safe to say a heavy-duty or commercial sewing machine is not necessary. Yes, the material is unusual and very strong, but it's not super-thick.
Do you use anything else special?
After some trial and error, I discovered a walking foot made a big difference in the quality of the stitches. Without it, particularly on certain feed bags, my machine tended to have loopy-looking stitches and it wasn't always easy to get the material to run smoothly through the machine. That said, it's completely possible to use a standard sewing foot and come up with a sturdy and practical finished bag. It just won't look as tidy.
Does any feed bag work?
I think so, but I choose to only use bags that are rip-stop. Our dog and cat food bags do not qualify, but our rabbit and chicken feed bags definitely do. (You can test your bags to see if they are rip-stop trying to rip them.
October 16, 2019
The Easy Way to Meal Plan
 There are three types of people: Those rare few who can go to the grocery store without a list or meal plan and end up with enough food to feed their family for a week or two; those (more common) folks who have no list or plan and buy willy-nilly and end up a few days later with "nothing to eat;" and those who make a meal plan, write a grocery list and are assured their family will have plenty to eat for several weeks.
I am the latter, and I have to say that learning to meal plan and shop accordingly has been a huge sanity saver - not to mention money-saver - for me. But I also know an awful lot of people find meal planning "impossible." They've read Internet articles telling them how to do it, but somehow when they sit down to try it for themselves, they just can't wrap their minds around it.
I admit that picking enough interesting meals for two weeks isn't my favorite thing...but over the years, I've developed a simple method of doing so. This method has many benefits, including:
* Solving the annoying problem of "what to fix" each night.
* Making my life less stressful.
* Saving money because we don't end up eating out.
* Saving money because we don't waste food.
Menu planning benefits everyone in our family, and it makes us better stewards of the money and time God has given us.
How to Make an Easy Meal Plan:
1. The day before I go shopping (which is usually the day before payday), I sit down with two pieces of paper, a pen, and my cookbooks.
I mostly rely on a binder of recipes I've printed out, but I do have a few cookbooks I use, too. The binder, frankly, makes meal planning easier, because then all the recipes I'm considering are in one place. That said, I do try to incorporate one or two new recipes every few weeks, so I may also hop onto Pinterest (see my boards here), pick out something new, and print the recipe.
2. On one piece of paper, I write numbers - one for each day I need to make dinner.
Typically, I'm buying for two weeks, so I write the numbers 1 through 14 vertically on the left-hand side of the page.
3. Now I choose a recipe I want to make within that two-week period. I write its name behind one of the numbers.
It does not matter what number it goes behind or what day I end up cooking it. I am not assigning meals for each day. I am simply choosing meals I will make some time within that two-week period.
4. Next, I read through the ingredients needed to make that meal, and write those ingredients down on the other piece of paper (which will become my shopping list).
I take the time to look in my cupboards or freezer to see if I already have any of the ingredients on hand, and I only write down ingredients I actually need to buy.

5. I repeat steps 3 - 4 until I have dinners written down for every day I'm shopping for.
TIP #1: Always include a good handful of quick dinners in your meal plan. This way, on tired days, you know you have something easy to make so you won't succumb to ordering take-out.
6. Now I think about the staple foods we eat for breakfast, lunch, and snacks. For example, for breakfast we often eat sausage and eggs. We have chickens and get eggs from them, so I only write down what I need to buy: "Sausage."
For lunch, my kids usually make sandwiches, so I write down all the ingredients they'll need for that, omitting any ingredients I already have plenty of.
If you prefer, you may make a list for breakfast and lunch, just like the one I suggest making for dinners. (Steps 3 and 4.)
TIP #2: On your shopping list, use tally marks to show how much of any one ingredient you need. For example, write "ground beef, lbs." and then use tally marks to indicate how many pounds you need to buy. Or, write "onions" and let you tally marks show many onions you should purchase.
7. When the shopping list is complete, I post the paper with the numbered dinners on my kitchen's bulletin board. (I used to use magnets to hold it onto the fridge; before that, I tape it to the inside of a cupboard door. The idea is simply to have it in an easy-to-spot location.)
8. Finally, I take the list to the grocery store and cross off items as I put them in my cart. (These days, I use Walmart Pickup, so I'm talking about a virtual cart.)
How to Use the Meal Plan:
During the week, I choose dinners from the numbered list: In the evening, after I clean up the kitchen, I decide what I'm going to make the following night. This way, I can defrost any meat I might need. Remember: I choose whatever meal I want from the list. There are no assigned days for each meal.
TIP #3: Once you've tried this method a few times, you can save yourself even more money by trying to plan meals so ingredients are shared. This way nothing goes to waste, and you actually end up buying less food.
For example, on day one, you might make beef stew (recipe here), which includes fresh slices of celery. A few nights later, you could make sloppy Joes (recipe here) to use up more of that celery so it doesn't go bad in the fridge.
TIP #4: You might notice I didn't mention looking at your grocery store's sales flier while making your meal plan. When you're just starting out, that can seem too overwhelming, so instead I suggest you simply stock up on sale items when you see them at the store. Then the next time you meal plan, be sure to include meals that use those stocked-up ingredients.
As you become more comfortable meal planning, I do definitely recommend you consider what's on sale before you choose meals for your list.
A version of this post originally appeared in January of 2010.
October 10, 2019
Weekend Links and Updates (Including the Bunny Birth Story)
 Finally got around to thinning the carrots!
This post contains affiliate links. All opinions are my own. Please see FCC disclosure for full information. Thank you for supporting this site!
Finally got around to thinning the carrots!
This post contains affiliate links. All opinions are my own. Please see FCC disclosure for full information. Thank you for supporting this site!
In which I share my favorite posts from this blog's Facebook page.
"You are my hiding place;
you will protect me from trouble
and surround me with songs of deliverance."
Psalm 32: 7
Apparently, we like to do things the hard way around here. We've spent the last several weekends moving stuff from one place to the next, to the next. Whew!
When we moved in, the previous owners left behind a lot of junk. Also, they left a 400+ lb. pool table in the middle of our upstairs master bedroom. Shortly after moving in, and thankfully before we got all our moving boxes onto our property, our pole barn burned down. (You can read about that here.) It took time to rebuild, but when we finally did, we finished getting all our moving boxes into the building and slowly began unpacking.
We have a weird, small house, so unpacking has been tricky, even after thinning out our belongings. Our ultimate plan was to turn the pole barn into a family room, since our whole family can't even comfortably sit in our tiny living room together. We decided our kids would benefit from the pool table, but moving it was going to be difficult. (The slate top is one piece, quite thin, and extremely heavy.)
Then my dad died, and - just when we thought the pole barn was ready to turn into a family room - I moved some of my dad's things (heirlooms, and furniture we needed) into the pole barn. Finally, last weekend, two of our nephews helped my husband move the pool table down the stairs and into the pole barn (without breaking the slate! Yay, boys!), and then hauled the furniture upstairs into the master bedroom.
I'm thrilled with the progress, even though both the pole barn and the master bedroom are still a mess. Baby steps! Oh, and did I mention that the master bedroom has unfinished walls and floor? Again, we like to do things the hard way ;) But that's ok. We'll get there eventually!
Of course, our big news over the past week or so is the addition of baby rabbits to our homestead. While it's true we've considered raising meat rabbits (they are an easy way to bring meat onto the homestead for minimal cost), these rabbit kits are pets. My children simply wanted the experience of caring for kits. We plan to keep one and sell the rest.
 I got the beets canned!It's kind of a long story, but here's the short version: Originally, my daughter had a male rabbit (Buddy) and wanted to give it a mate. We bought said mate (Pickles), but after many attempts and lots of false pregnancies, we determined she's infertile. Meanwhile, we got my son a rabbit (Coco). Coco was supposed to be a boy, and I never thought to check between the bunny's legs...but next thing we knew, Coco had babies...and they all died because they didn't have a nest to keep them warm (because she had the babies in the middle of the night and we didn't know she was pregnant because we didn't know he was a she). We all felt terrible.
Once we buried my dad, I promised the kids we'd mate Coco and Buddy and see what happened. Well, she definitely got pregnant! She had seven kits, born in a perfect little nest. One was a runt, and died within a day. Another, who was super-wiggly, squirmed out of the nesting box (!) in the middle of the night, fell through the wires of the cage designed to protect the babies from predators, and wiggled across the room before dying of cold. Oh, man. Animal deaths are the hardest part of homesteading.
But I'm happy to say the remaining five kits are fat and happy! Not to mention totally adorbs.
A lot of people are surprised to discover rabbits are born naked. The first time my son saw a baby rabbit (at preschool age) he thought they were piglets. It sounds strange, but it's true! They do look a lot like mini piglets. They even grunt like piglets. So, for your viewing pleasure, here's how much those little bunnies have grown:
 Just-born kits, keeping warm in their nest.
 A few hours after birth.
 A one-day-old kit.
 A 5-day-old kit.
 At 6 days old, they suddenly look more like rabbits!
 At 8 days old, the cuteness could kill you.
 At 10 days, they open their eyes!
From naked "piggie" to little rabbit in 8 days flat! Amazing!


In other news, here's my latest apron. A few years ago, my mom-in-law gave me a cute reversible apron she sewed. I loved it and wore it so much, it got really shabby. So I made a pattern of it...and here's my version.

 _______________________________________
* Because I clearly don't have enough on my plate (ahem), I created a Facebook group for the Proverbs 31 Woman blog. I hope you'll join us as we discuss home keeping, homesteading, parenting, faith, and more!
* Recall on Blue Beel Ice Cream.
* Dorset cheese recall.
 Zesty Zucchini Relish.* I tried something new this fall: Zesty Zucchini Relish from
The Ball Complete Book of Home Preserving
. In addition to the zucchini, it has onion, bell peppers, horseradish, and hot chili pepper (with the seeds). It sounds super-hot, but it must not be, because my son (who doesn't care for super-spicy food) loves it, too. I love that it's a great way to preserve zucchini!
Zesty Zucchini Relish.* I tried something new this fall: Zesty Zucchini Relish from
The Ball Complete Book of Home Preserving
. In addition to the zucchini, it has onion, bell peppers, horseradish, and hot chili pepper (with the seeds). It sounds super-hot, but it must not be, because my son (who doesn't care for super-spicy food) loves it, too. I love that it's a great way to preserve zucchini!* Have you ever made ghee? In addition to tasting a little different than butter, it's shelf-stable for many months.
* You will hear me say again and again that when canning, you must always use a tested safe recipe. But did you know there are safe ways to tweak canning recipes? I would write a post about this, except Healthy Canning has already done an excellent job explaining it all.
* An awful lot of people in our society suffer from hormone imbalances. I do believe most of this is due to the way Americans eat. (Plastics play a part, too, but that's another story.) Sugar and carbs really wreak havoc on our hormones, as do certain foods that raise estrogen levels in the body. You may know that soy is estrogenic, but did you know that chia and flax are, too?
* Most people now know that plastics (not just BPA plastics) alter our hormones. But did you know that some foods have particles of plastics in them? Here's how to spot them.
* If your child has "behavior problems," diet can certainly be the root cause. Another possible cause is a sleep disorder.
* Everyone seems to plant trees in the spring. But did you know fall is the best time to plant them?
* Fall is an excellent time to feed your garden soil to make a better harvest next year!
* Did you know that some Amazon sellers hijack reviews for their products? Here's how to spot fake reviews.
* When it comes to teens, it's best to pick your battles.
Oldies But Goodies:
30 Fall Crafts for Kids
How to Make Freezer Jam Without a Recipe
Low Sugar, No Added Pectin Apple Peel and Core Jelly
Old Fashioned Baked Apples Recipe
Herbal Remedies for Winter Illnesses
 Ah, these autumn mornings!
September 30, 2019
When Home Canned Food Goes Bad
 Applesauce is a high acid food.
This post may contain affiliate links. All opinions are my own. Please see FCC disclosure for full information. Thank you for supporting this site!
Applesauce is a high acid food.
This post may contain affiliate links. All opinions are my own. Please see FCC disclosure for full information. Thank you for supporting this site!
Two years ago, I answered the common question of how long home-canned foods last on the shelf. In the video that accompanied this post, I said I'd do another video on what signs of spoilage to look for when you open home-canned foods. Oops. I totally forgot to do that! And since someone called me out on it recently, I thought I'd better hup-to and cover the topic.
The Best Way to Know Home Canned Food is Safe
The number one way to know home-canned food is safe is simply to follow the rules. You can you trust that your home-canned food is safe if you've used a tested safe recipe . In the United States, this means a recipe from a Ball canning book (like The Ball Complete Book of Home Preservation or a recent Ball Blue Book ), the Ball website, or The National Center for Home Food Preservation website. If you get your recipe from some other source, you really have no way of knowing if it was scientifically tested for safety.
An essential part of any tested safe recipe is knowing the pH level of the food. For example, we know that fruit is high acid. This makes it considerably less likely to spoil or develop dangerous botulism. These foods are safe to water bath can.
We also know that meat and vegetables are low acid foods, much more prone to spoilage and botulism. They must be pressure canned, because botulism can't be killed until the food reaches a temperature of 240 degrees F. for a specific length of time. This is why you cannot water bath low acid foods. (Exception: It's perfectly safe to use a tested safe recipe to process pickled vegetables in a water bath canner. This is because the vinegar in the brine brings the pH of the food up considerably.)
 Only pickled vegetables may be water bath canned.It does not matter how long you boil low acid food or process them in a water bath canner. Boiling will not kill botulism because boiling water cannot reach 240 degrees F. Only a pressure canner can do that.
Yes, the Internet is full of people who insist Grandma water bathed her vegetables and never died, but science unequivocally shows that water bathing veggies and meat is dangerous. (I compare people who water bath low acid food to people who drive home drunk. Drunk drivers may say, "I've never been in an accident yet!" But that doesn't make driving drunk smart or safe. Someday, driving drunk will catch up with them. And sadly, the people most likely to die of botulism are the elderly and children - the people we want to protect the most. Do not risk their lives!)
It is true that botulism poisoning is relatively rare in the United States, and the CDC website allows us to see exactly how many cases there have been and what their causes were. A relatively small number of cases are caused by food, but among those cases, 38% are from improperly canned food.
The good news is, it's not the person who cans something following the Ball Blue Book who makes everyone ill. It's the person who completely throws out the rule book and cans in an egregious manner.
Three fairly recent cases of botulism poisoning caused by home canning instantly come to mind:
The first is a man who canned meat in a pressure cooker. A pressure cooker, mind you, not a pressure canner. They are not the same thing and you cannot safely can in a pressure cooker, no matter what the manufacturer says. (For more on this topic, click here.) The second strike against this guy was that he felt the processing took too long, so he shortened it. The third strike against him was that he noticed his finished jars had bulging lids - and rather than throw the food away, he decided he'd better eat the food up quickly. He nearly died of botulism poisoning.
 Meat is safe to can as long as you do it right!
The second case that comes to mind involved home-canned eggs. There are no tested safe recipes for canning eggs...period. 21 people got sick from this batch of eggs, and one person died.
The third case happened just this year. A woman read online that it was perfectly safe to water bath green beans. She heard all the typical arguments in favor of this method: "Grandma used to it;" "I've done it for years and never gotten sick;" "You just have to boil it for hours;" etc. Lo and behold, she ate her water bathed green beans and became very, very ill from botulism poisoning. After recovering, she came out publicly, encouraging people to follow safe canning practices.
Remember, no one can taste, smell, or see botulism, so the best way to avoid it is to use a tested safe recipe.
How to Tell Your Home Canned Food is Bad
Of course, there are other ways food goes bad. Just like the food in your refrigerator might spoil, so can home-canned food...even when a tested safe recipe is used. However, it will only spoil if the seal on the lid of the jar fails.
Therefore, the first thing you should do when you pull a jar of home-canned food off your pantry shelf is check to be sure the lid is still tightly in place. If it comes off without any resistance, the food is almost certainly bad and the contents should be thrown away.
Even if the lid appears well sealed, when you open the jar, look for these things:
* Is the lid bulging? (If it is, do not open the jar! That food is spoiled and opening the jar may spread botulism around your kitchen.)
* Do the contents of the jar look cloudy? (Do note that if you use table salt in a recipe, it will make the contents look cloudy. That's why all tested safe recipes recommend canning salt or another type of salt that does not contain minerals or added ingredients. Otherwise, how can you know sure if the jar's contents are spoiled or if the salt is causing the cloudiness?)
* Does liquid squirt out from the jar?
* Are the contents slimy?
* Is the food fermented? (Canned food should not ferment. If it does, it's a sign the food is spoiled and could make you very ill.)
* Does the food smell weird?
* Is there yeast on the food?
* Is their mold?
 Beans are low acid and require pressure canning.Once upon a time, everyone believed you could just scrape mold off high acid foods, like jam. Now we know that even though the food might not make you feel ill, consuming mold spores can have adverse health effects.
Experts also used to say that if you suspected food had spoiled, you could just boil it for ten minutes and then safely eat it. But remember, botulism can't be killed by boiling, so this is no longer recommended.
How to Safely Dispose of Spoiled Home Canned Food
What should you do in the unlikely event your home-canned food spoils? If the food is high acid (fruit), you may toss the contents of the jar in your garbage can, just like you would spoiled food from your refrigerator. But if the food is low acid (meat and non-pickled vegetables), you should take additional precautions to avoid spreading botulism all over your kitchen.
1. Put on rubber or latex gloves.
2. Place the jar with the food still in it (include the jar lid, too) in a kitchen bag. Tie off the kitchen bag, then tape the top closed. (You want to ensure botulism stays in the bag.)
Do NOT pour the food out of the jar, because this can potentially spread botulism in the immediate area, as can washing a jar that had botulism-spoiled food in it.
3. Use bleach to clean anything the jar touched, like your counter or pantry shelf. Let the bleach sit for 20 minutes before washing away.
4. Toss any towels or sponges you used in the cleanup, as well as your gloves, in another kitchen bag. Tie off the bag and seal it shut with tape.
5. Dispose of the bags in your garbage can.

September 18, 2019
Keto (or not) Beef Stew in the Instant Pot or Oven
 This post may contain affiliate links. All opinions are my own. Please see FCC disclosure for full information. Thank you for supporting this site!
Here on the homestead, dusty, hot summer turned quite suddenly to rainy autumn. And around here, with overcast skies and yellowing leaves comes the desire for comfort food, like stew. Years ago, I posted my favorite beef stew recipe, but these days, in order to combat my diabetes and autoimmune disorder, I eat keto. (Learn more about how I reversed my blood sugar to normal, here.) Potato-heavy stew is a no-go nowadays.
But that's okay. Because ever since I learned I could make an ordinary radish seem like a potato, I haven't missed potatoes in my beef stew...at all! Even my carb-loving family thinks this low carb version of beef stew leaves nothing to be desired. Trust me. Radishes are the secret ingredient here and they do not taste at all like radishes when the stew is done cooking! They look like a small red potato, have the texture of a potato cooked in stew, and have a very mild flavor. Don't be chicken; give them a try!
That said, if you're a carbivore, you can easily substitute the radishes in this recipe for chopped potatoes, and add a few carrots or other veggies into the mix, too.
I prefer to make this hearty meal in my Instant Pot, but if you don't have one, you can just as easily cook it the old fashioned way, in the oven, using a Dutch oven or even a skillet and a roasting pan. I've given oven instructions at the very end of the recipe. With either method, the meat comes out super tender, moist, and delicious!
 Keto Beef Stew in the Instant Pot
2 lbs. beef stew meat
1 tablespoon olive oil
Salt and pepper
1 1/2 cups chopped yellow onion
1 garlic clove, minced
14.5 oz, diced tomatoes in liquid
14.5 oz. beef broth
2 bay leaves
1 lb. whole radishes, roots and leaves trimmed off
1 cup sliced celery
1. Season the top of the meat cubes with salt and lots of pepper.
2. Pour oil or bacon drippings into the Instant Pot and turn the machine to saute. Once the oil is hot, add the meat, seasoned side down. Season the side of the meat now facing up with salt and pepper.
3. Brown the meat on every side. There should be no trace of pink and the meat should appear cooked and darkly browned. (This step is important to achieving beautifully tender but not dry meat.) Transfer the meat to a bowl and set aside. (See *Note below.)
 The secret to tender, moist meat is to brown it until it looks cooked.
4. Pour the onion and garlic into the Instant Pot and saute until the onion is translucent.
5. Add the tomatoes, broth, and bay leaves, along with a little more salt and pepper. Deglaze by scraping the bottom of the pot with a large spoon to remove any sticking brown bits. Simmer for 5 minutes.
6. Add the meat to the Instant Pot, put the lid on, and cook on Manual for 20 minutes. Release the steam manually.
 Almost time for this beef stew's secret ingredient!7. Add the radishes to the stew, along with the celery. Replace the lid and cook on Manual for 10 minutes. Release the steam naturally.
 The secret ingredient!
 They don't taste like radishes when the stew is done cooking.
 Delicious and healthy!Oven Method: Preheat the oven to 250 degrees F. Cook the seasoned meat in a Dutch oven placed on a stovetop burner. Transfer the darkly-browned meat to a bowl and set aside. Add onion and garlic to the pot and saute until onion is translucent. Add tomatoes, broth, and bay leaves, and season with more salt and pepper, deglazing by scraping up browned bits from the bottom of the pot using a large spoon. Simmer 5 minutes. Remove from the burner, add the meat, cover with a lid, and place the Dutch oven in the preheated oven. Bake, covered, for 1 1/2 hours. Remove from the oven and add the radishes (or other veggies) and celery. Bake, covered, another 60 minutes.
*Note: You may notice I don't recommend flouring the meat before browning it. This is because I've discovered it's totally unnecessary! No one who has eaten my stew can tell the flour is missing, so I see no need to add it - especially if you're low carb or have any sensititivies to wheat.

Makes about 10 servings.
Nutritional Information: It's always smart to calculate your own nutritional information using the exact products you cook with. However, the approximate nutrition per serving for this dish is, according to LoseIt!: Calories 292, Fat 7.6 g, Carbohydrates 10.8 g, Fiber 2.7 g, Protein 29.2 g
September 3, 2019
Cinnamon Apple Muffins Recipe
 Well, friends, my Dad's ashes are buried; we had a whirlwind trip to his home state of Missouri to accomplish this, and I absolutely adored the rolling hills and pastures lined with trees. I also immensely enjoyed seeing my cousins for the first time in about 34 years. My Mom is, unfortunately, still struggling with her health. And now it's back to school time, made more difficult because I'm helping my daughter get started in an online school. Have I preserved much this summer? Nope.
But we still have a lot of apple trees. I am grateful to God they aren't producing madly this year. This seems like a sweet kiss from Him, because I know if they were producing like bonkers, I'd be feeling stressed and guilty that I didn't have the energy to deal with them.
My kids eat a lot of fresh apples at this time of year, but there are also a few apple treats I make for them. No, they aren't low carb - and they certainly aren't keto. (Apples are much too high in natural sugars for that; even eating one slice of an apple spikes my blood sugar.) But they are a wonderful fall-ish treat: Easy to whip up, and, according to my family, DEEEEE-lish! If your family doesn't gobble them up right away, you can freeze them in individual bags and defrost them in the fridge the night before you want to eat them.
P.S. The Fall 2019 issue of Self-Reliance magazine - sister publication to Backwoods Home - has my complete article on apple recipes for breakfast, lunch, dinner, and dessert. Check it out!)

 Cinnamon Apple Muffins Recipe
 1 cup granulated sugar (If you're using a sweet apple variety, do feel free to reduce the amount of sugar used!)
3/4 cup coconut or avocado oil
2 eggs
1 teaspoon real vanilla extract
2 cups all-purpose flour
1 teaspoon ground cinnamon
3/4 teaspoon baking soda
1/2 teaspoon sea salt
1 cup coarsely chopped apples (I do not peel them.)
1. Preheat the oven to 400 degrees F. Grease the cups of a muffin pan; set aside.
2. Beat sugar and oil together until smooth.
3. Beat the eggs and vanilla extract into the sugar mixture.
4. In a separate, medium-sized bowl, whisk together flour, cinnamon, baking soda, and salt. Add the flour mixture to the sugar mixture and beat until just combined.
5. Fold in the apples. (If you've been using a mixer, fold in the apples with a large spoon.)
6. Spoon batter evenly into 12 muffin cups and bake until a toothpick inserted into the center of a muffin comes out clean, about 20 - 25 minutes.
Related Articles:


July 29, 2019
Weekend Links & Updates...Early...and Late!
 The plum harvest has begun!
This post contains affiliate links. All opinions are my own. Please see FCC disclosure for full information. Thank you for supporting this site!
The plum harvest has begun!
This post contains affiliate links. All opinions are my own. Please see FCC disclosure for full information. Thank you for supporting this site!
"Consider it pure joy, my brothers and sisters,whenever you face trials of many kinds, because you know that the testing of your faith produces perseverance. Let perseverance finish its work so that you may be mature and complete, not lacking anything."
James 1: 2-4My friends, I'm sorry I have been so absent from this blog. 2019 has been one heck of a year. Let me backtrack a little so you can get the big picture.
In February, just as I was finishing a book project for Dover Publications and planning to put in a big garden - I got a call that shook my world. My dad was going home from the hospital with hospice care. My husband, kids, and I drove out of state to be with him. We cared for him for about a week, but on the very day my husband took my kids home (he had to get back to his job), my dad died. I remained out of state for more than a month, looking after Dad's estate.
When I finally came home, I was utterly exhausted, but still dealing with SO MUCH PAPERWORK related to Dad's estate. And, on the same day my dad died, my husband's grandmother also had a terrible stroke; the family was trying to care for her in her home, then struggling to find a foster care situation for her, since her care was more than anyone in the family could handle.
In the meantime, Dover Publications sent me another contract. It was something I told them I would do before my Dad went home on hospice, and while most of me wanted to turn it down because I already had my hands too full, I knew the publisher was relying on me to fill a spot in their catalog. I didn't want to let them down. So I signed the contract and began working hard on finishing the job under a tight deadline.
Then my mom had a heart attack. And another. Docs put two stents in her arteries, which were 90% blocked. And today, she's had another heart attack.
And did I mention that I've been having some issues myself? The nausea, dizziness, vertigo, and passing out my doctor and I thought were related to my severe anemia last year have returned. Oy.
I completely trust in the Lord, but this is all still pretty stressful. All I really want to do is cuddle my kids and enjoy summer with them.
So, the blog, writing for magazines, and a whole lot of other things have fallen by the wayside.
We did go to the county fair last weekend...the first fun family thing we've done since...I can't even remember. And I have taken up sewing again - purposefully making time for fun, easy, cheerful projects. (I've been on an apron-making spree, as you can see from the photos below.)
 From a 1980s pattern: McCall's 608
 From a reprint of a 1940s pattern: Simplicity 8571.
 From a 1940s pattern: Advance 5998. It's my new orchard harvesting apron and it works GREAT!(If all these aprons put you in the mood to make one yourself, check out The Best FREE Apron Patterns on the Net.)
So...that's why I haven't posted. But for those of you who don't follow the blog on Facebook, I thought I'd take a few minutes and share my news and some interesting links. I hope you enjoy them!
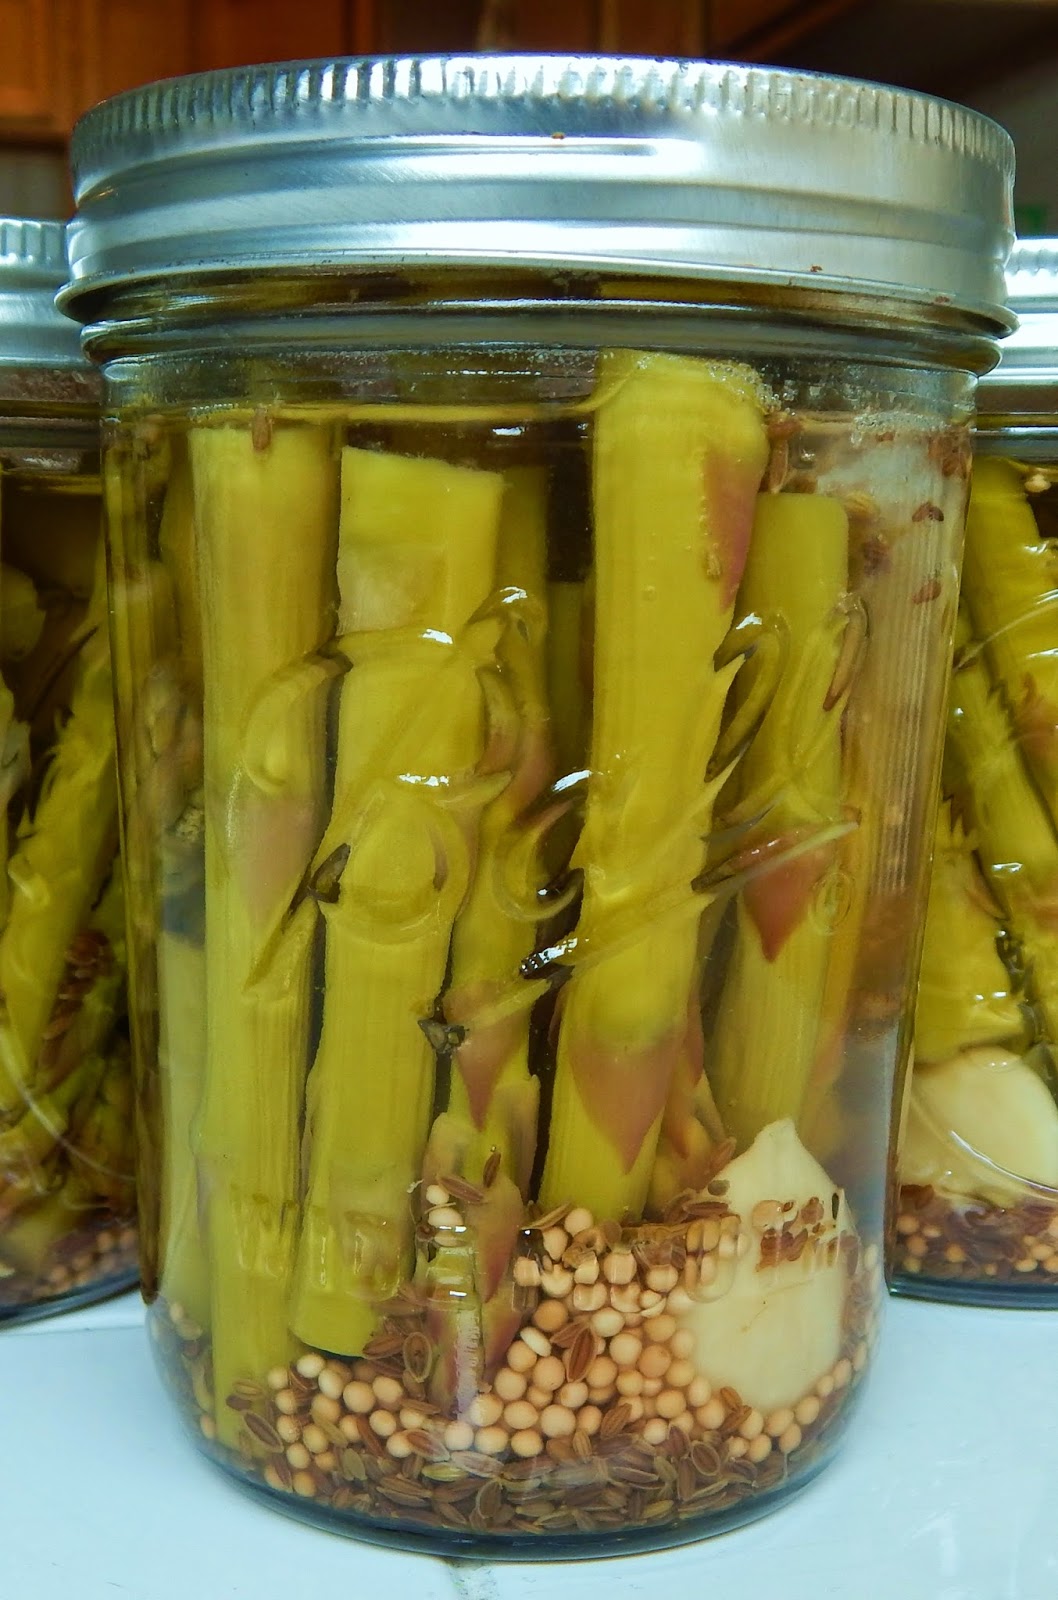
 First harvest out of any consequence this year.* Even though I didn't get a big garden in this year, my husband did build a beautiful asparagus bed. I got the asparagus planted and it's doing well! But because the asparagus is still young and relatively small, I also planted beets, radishes, turnips, and carrots in the same bed. Yesterday was my first harvest off this garden. Isn't it lovely? In the basket you'll also see a few greenhouse tomatoes, a bell pepper, and some yellow and red plums.
* My dad had several small mandarin trees he started from seed. I brought them home with me, and we'll see if they survive our cooler climate. Here are some great tips on growing citrus in cooler-climate areas.
* I get bored cooking and eating the same things over and over, so I like to regularly try new recipes. Here is something I made for the first time last week. Everyone loved it, including my chicken-hating husband! Spicy Chicken with Cauliflower Rice. I may change up the seasonings for the cauli-rice, however, since it was too cauliflowery for my kids ;)
* Being a canning "rebel" has consequences. Often it's children or the elderly you're putting at risk, but in a recent case, it was the canner herself who nearly died. Follow the rules, people. Proper canning isn't hard. There's no excuse.
* Gripe water is a safe, old timey remedy for colicky babies. Here's how to make your own.
* I cringe when I see people asking what type of poisions to use in their gardens. There are a lot of effective ways to get rid of weeds without using RoundUp. Here are a few.
* A few reasons your children should have their own garden.
 * Do you participate in Operation Christmas Child? Here are some great tips for doing so most effectively.
* Such a wonderful story: "A Group of Lions Save Christians"
* I saw this and HAD to have one. Wore it to my last doctor's appointment and my doctor LOVED it,
too! (He tells me I should be the poster child for getting diabetic blood sugars under complete control...You might want to read How I Reversed My Diabetes, if you or someone you love is suffering from diabetes.)
* An article I recently wrote for Backwoods Home magazine: How to hatch chicks with a broody hen.
Oldies But Goodies:
* Keeping the House Cool in Summer (With or Without AC)
* The 7 Wonders of the World Homeschool Project
* Low Sugar, No Added Pectin Blackberry Jam
* Canning Pickled Green Beans (Dilly Beans)


