
Kristina Seleshanko's Blog, page 99
November 30, 2012
Best Homemade Gift Ideas on the Net
 Mail or paper organizer, courtesy of Noodlehead.For Adults:
* Things I Like/Love About You. This can be as simple as a handwritten list on pretty paper or as elaborate as making a treasure chest and printing out cards with each "thing." Other variations: Make it into a book, printed on your computer; print heavy tags and hold them together with a key chain or jump ring.
* Earbud pouch.
* iPod or iPad case.
* Kindle case from old book.
* Fabric mail/papers organizer.
* Simple fleece scarves.
* Towel turned into a sunbathing necessity.
* Paperclip holder turned into a bobby pin holder.
 Glass pendant necklace, courtesy Simply Modern Mom.
* Oranges and Apples Sugar Scrub.
* Hand- or kitchen towels. (These are the only kind to have when you have little children who tend to pull down ordinary towels!)
* Glass pendant necklace.
* Pottery Barn Inspired Map Candles.
* Shell candles.
* Cake stand from Dollar Tree Plate and Glasses.
* Simple scrap rug.
* Button bracelet.
* Candle holders with old photos on them.
* Turn old sweaters into mittens. Or slippers.
 Photo candle shades. (Copyright Martha Stewart Living.)* Turn plastic bags into reusable grocery totes.
 * All-in-one placemats and utensil holders.
* A chair that turns into a mattress.
* Eye mask.
* Easy to make lotion bars.
* Felt bookmarks.
 Eye masks. (Courtesy of Amelie Atticus.)* Photograph bookmarks.
* Photo candle shades.
* Linens decorated with tiny amounts of embroidery, plus buttons.
* Use a piece of felt, pebbles, and hot glue to make a hot pad.
* Family heirloom cookbook.
For Kids:
* Cowboy chaps from old pants.
* Pirate's eyepatch.
 Monster hat. (Copyright Spoonful.)
* Monster tote bags.
* Finger puppets.
* Baby/Toddler wash towel puppets.
* Turn a store bought hat into a cute monster hat.
* Mermaid tails for dolls.
* Homemade dolls.
* Animal scraves.
* Bed in a bag.
* Child's needle kit for sewing or embroidery.
* Dinosaur tails.
* Headbands from cloth strips.
* On the go coloring kit.
* Magnetic me (magnetic paper dolls using photos of your child).
* Travel games from Altoid tin.
* Binder dollhouse.
Discover More Ideas for Homemade Gifts here:
15 Ideas for Handmade Gifts
Gifts in a Jar
Gifts in a Jar - Part II
Best FREE Apron Patterns on the Net
Homemade Art Supplies
What to Do with Empty Altoid Tins
Gifts Kids Can Make


Advent: Focusing on Him
 Since Thanksgiving, I've been exhausted and sick with one ill child and one very grumpy child. I have a feeling I'll be simplifying this December.
But one thing we will not omit next month is an advent devotional. Thriving Family magazine has a simple and to-the-heart advent activity calender this year. If you don't receive the magazine (which is free, by the way), you can download the advent publication for free, right here. The devotional calendar takes minutes a day - and I know it will help my kids (and me!) focus on the true meaning of the Christmas season.
For those of you who are feeling more energetic, check out previous posts on advent. There are many simple ideas in these posts - as well as more elaborate ones:
Advent Activities for Kids
Advent Begins!
Activities to Go With Popular Christmas Books

November 28, 2012
Noodle-Roni - Feed the Family for $2.40
 When I was growing up, my mother frequently made what she called "Noodle-Roni." We all loved it; it was filling, tasty, and even something we craved when we were ill or had eaten too much junk food. Little did I know at the time that it was something Mom fixed when our finances were running low.
These days, my slightly modified version of Noodle-Roni is a hit with everyone in my family - even my picky eater. We love it any day, but especially crave it if we are tired or ill. (It's packed with vitamin C!) And just as when my mother made the meal, Noodle-Roni is cheap to prepare. It's also mostly made with shelf stable foods, making it easy to stock up on ingredients so we can cook it anytime we desire.
My mother used only 4 simple ingredients: white flour large elbow macaroni, a large can of tomato juice, several heaping tablespoons of margarine, and - if we had a little extra money to put into the meal - ground beef.
My version also only contains 3 or 4 ingredients, but uses more healthy (and filling) ingredients - including:
* 13.25 oz. of whole grain pasta (we like either Barilla's whole grain pasta, which is 51% whole wheat, or Barilla PLUS, which also contains whole grains); usually I buy penne, rather than large elbow macaroni, because it's easy for me to find in stores, but still does a great job of holding the tomato juice in it's tube-like shape. (Cost: $1 or less.)
* 46 fl. oz. 100% real tomato juice (Cost: $1 or less.)
* about 5 tablespoons of real, unsalted butter. (Cost: $.40.)*
* about 1/2 lb. Ground beef (optional) (Cost: $1.49 or less.)
Total Cost (without meat): $2.40 (with meat: $3.89)
Serves 4 very hungry adults.
To make Noodle-Roni:
1. Fill a large pot with water and bring it to a boil. Add the pasta and cook until just tender.
2. If you will be using ground meat, brown it in a skillet. Pour off the fat.
3. In the meantime, pour the tomato juice into a large saucepan and place over medium heat.
4. Drain the pasta and return to the pot. Add about 5 tablespoons of butter. Pour the now-warm tomato juice over the whole. Stir until all the butter is melted. If using ground meat, stir it in now.
*You can use less butter - or no butter at all - but the flavor of the dish will be tremendously impacted.

November 26, 2012
Avoiding Food Waste Through Freezing
 There are three good reasons I do everything possible to avoid food waste in our home:
1. Wasting the food God gives us is being a bad steward.
2. My husband and I work too hard to waste money on food that will just spoil.
3. There are many hungry people in the world. To allow food to go to waste shows callousness to their plight.
Now that I compost kitchen scraps - or feed them to the chickens - I feel less guilty when the celery at the back of my fridge goes bad. But I would much rather we actually eat the food we buy. There are two ways I make sure this doesn't happen:
1. I plan our meals and use up certain perishable items first. (To learn my simple method of meal planning, click here.) For example, if I buy squash, I know it won't last very long in the fridge, so I serve all the meals with squash in them within a few days of purchase. If I buy cabbage, I know it will last for months in the fridge, so the cabbage meals can wait until the more perishable food is eaten.
2. I freeze the food that's most likely to go bad in the fridge before we can use it.
For that second method to work, you just have to pay attention to what seems to go bad in your fridge. Often, it's produce. In my house, it's mostly fresh herbs, onions, and bell peppers. In your house it might be something entirely different.
Some people like to freeze these foods as soon as they get home from the grocery store. If you can do that, wonderful. I cannot; by the time we've finished shopping, my kids are tired, hungry, and cranky - and I'm usually pretty beat, too. Instead, I prefer to freeze food in spare moments a day or two after shopping.
I like to freeze meats first. They are expensive and seem to go bad faster than many other foods. I simply divide them up into appropriate servings, place them in Ziplock bags, and freeze. (Don't freeze in the plastic wrap you buy them in or the meat will suffer freezer burn.) If I'm really "with it," I'll brown hamburger before freezing it, to save time later.
Next, I work on herbs. I chop them and pour each type into one Ziplock bag. When it's time to cook with them, it's easy to just reach into the bag and grab what I need. If needed, I knock the bag on the side of the counter to break apart chunks.
Next comes other vegetables - in my house, mostly onions and sweet peppers. Again, all I do is chop them and put them in one bag. I've also successfully frozen carrots, green onions, and celery without doing anything special to them first. Just chop into the size you'll use for cooking and place in a bag.
Again, I want to stress that I rarely do all this freezing in one fell swoop. Instead, I do a little at a time when:
* I'm waiting for something to cook.
* my first grader is reading to me.
* I just happen to have a spare few minutes.
Be sure to mark the Ziplock bags with the contents and the date.
Freezing these most-likely-to-rot foods isn't difficult, doesn't have to take much time, saves you cooking time later, models good stewardship, and saves money.
What foods are most likely to rot in your fridge? If you need help knowing how to freeze them, just leave a comment below, and I'll be sure to answer your questions.


November 22, 2012
Happy Thanksgiving!
 "...I do recommend and assign Thursday the 26th day of November next to be devoted by the People of these States to the service of that great and glorious Being who is the beneficent Author of all the good that was, that is, or that will be; that we may then all unite in rendering unto him our sincere and humble thanks for his kind care and protection of the People of this Country..."
George Washington1789 Thanksgiving Proclamation

November 21, 2012
Growing Kids with Gratitude
 Sadly, one common trait in our society is ingratitude. We may say we are thankful for what we have, but very often the next sentence is, "But I need more." So how can Proverbs 31 Women help their children avoid this trap and instead "give thanks in all circumstances" (1 Thes. 5:18)? Here are a few ideas.
* Play the Gratitude Game. Start by saying, "The best thing about _____ is..." and have your kids fill in the rest of the sentence. The great thing about this game is that it can be played anywhere (in the doctor's waiting room, in the car, at the kitchen table...) and you can never run out of possibilities. You can ask about everything from God to grandparents to marbles to dirt...the possibilities are endless.
* Keep a gratitude journal. If your children can draw or write, they are ready for this one. Buy them each a notebook and have them decorate it as they wish. Make sure to get a notebook for yourself, too; modeling gratitude is just as important as teaching it in other ways. Then, at a specified time every day, everyone sits down and colors a picture of or writes about something they are grateful for.
* Make a habit of writing thank you notes. For children who can't yet write, make a special phone call to say thanks instead.
* Play a Physical Gratitude Game. You'll find it here.
* Read about - or do Internet research on - those who are less fortunate. Don't limit yourself to the United States - or to the present.
* Keep a Gratitude Jar. Set a large plastic or glass jar in a prominent family area. Have the children decorate it, if you like. Keep Post-It notes or a small pad of paper and a pencil right next to it. Every day, or every week, write what you're grateful for. (For little kids who can't write, Mom or Dad can write for them, but the child must compose the note.) It's especially nice if these notes are about others in the family. For example: "I'm thankful John helped me learn to tie my shoes." Now pick a specified time to sit down as a family and read through the notes.
* Keep a gift list. Instead of having your kids make a Christmas wish list, have them make a list of what they will give to others.
* Count your blessings. After prayer at dinnertime, have each family member name at least two things they are thankful for that day.
* Create a Gratitude Book. Give your children a camera and have them photograph things they are thankful for. Have the photos developed, then have the kids make a Gratitude Book. This can be a notebook they paste the photos into, with a few words about each, or it could simply be a photo album.
* Make sure gratitude is a part of every prayer.

November 19, 2012
Canning Green or Frozen Tomatoes
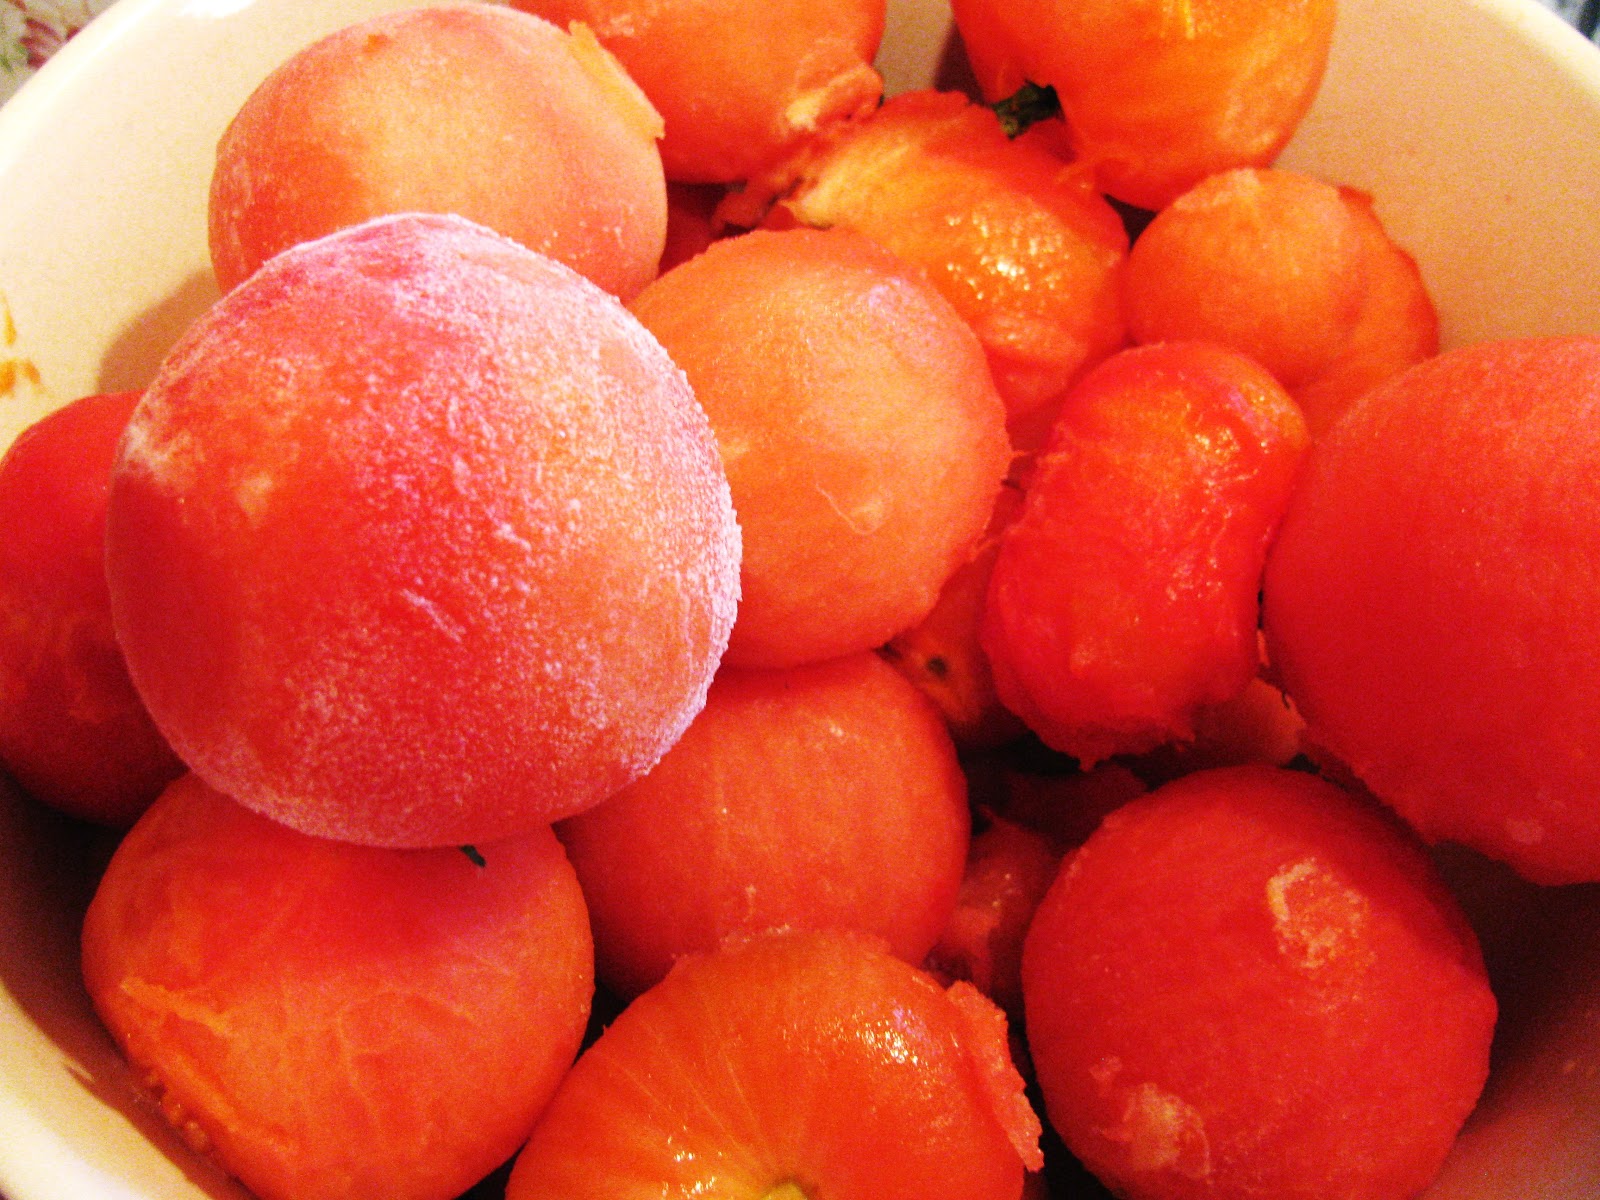 A bowl full of peeled, frozen tomatoes, waiting to be canned.In past posts, I've briefly mentioned that I never throw away green tomatoes left in my fall garden. Instead, I can them. I get lots of questions about how to do this, and I've never given all the details in a single post - until today.
In this post (or others linked here), you will learn how to:
* Eat green tomatoes, if you want to
* Ripen green tomatoes easily in your home
* Easily freeze tomatoes
* Easily make tomato paste from dried tomato skins
* Can tomatoes that have been frozen (or are fresh)
 Pick green tomatoes before the first fall frost or before the weather grows very wet.How to Eat - or Ripen - Green Tomatoes
Yes, you can eat tomatoes while they are green; learn more about that here. However, I feel they are more worthwhile if I ripen them first.
The beautiful thing about tomatoes is that once they are in the fruiting stage, they don't need sunshine to ripen. They just need some warmth. So when I know a frost is coming that will kill my tomato plants - or I know we're headed into the rainy season that will make my tomatoes split and rot - I pick the green fruit off the plants. (Some people like to pull up the whole plant and hang it somewhere relatively warm, but this is pretty messy and takes up a lot more space than my method.)
Then I set the tomatoes in a single layer (not touching) in my pantry, on top of the jars and cans already there. Once a week or so, I check on the tomatoes. As they begin turning red, I'll usually check on them every other day or so. Checking is no big deal because I get into my pantry pretty much every day.
Once any tomato is fully red and no longer hard, I either use it as if it were fresh from the vine or I freeze it. Typically, I freeze it. That's because green tomatoes ripened off the plant aren't as tasty as those that come off the plant in summer. They are still better than store bought tomatoes, mind you, but I prefer them cooked, rather than raw.
How long does it take for the tomatoes to ripen? That depends upon the variety you have, how warm your home is, and what stage of maturity the tomatoes were when you picked them. However, I generally find it takes about two months for all of my tomatoes to fully ripen.
How to Freeze Tomatoes
To freeze tomatoes (any time of year!), lay them in a single layer in the freezer. If you like, place them on a baking sheet first. Once the tomatoes are hard, transfer them to a freezer bag.
As fall and winter proceed and more and more of your tomatoes ripen, keep freezing them.
Once all the green tomatoes are ripened and frozen, you can use them as is for cooking. However, you'll have to add more liquid to whatever recipes you are making, since frozen tomatoes don't have the lovely liquid canned tomatoes do.
 Dried tomato skins stored in a jar. Add water, and you have tomato paste.Canning Frozen or Fresh Tomatoes - and Making Paste from Tomato Skins
That's why I prefer to can them. And because the tomatoes are frozen, canning is actually easier than if you were using fresh (unfrozen) tomatoes! Just clean the sink well (or use a large bowl) and fill it with hot water. Dump the tomatoes, one bag at a time, in the water. Pick one up and rub it; the skin will easily fall away. If the water cools down and the skins aren't coming off as well, add more hot water or put the tomato under running hottish water.
If you like, save the peels to dehydrate them and make an easy tomato paste. (Learn how to do that here.)
Once the peels are off the tomatoes, place them in a large bowl and let them thaw. It's absolutely vital to let them thaw before canning, or they won't come up to the proper temperature to kill bacteria. That means your home canned tomatoes will be unsafe to eat. However, if you wish to can the tomatoes cut up, it's smart to do it when they are only half thawed; it will make the job easier and less messy.
When the tomatoes are thawed, can them as you would raw, peeled tomatoes. For complete instructions on how to can tomatoes, go here.
 Home canned tomatoes.
November 16, 2012
How to Use a Whole Ham
 Cooked ham with the bone in.At this time of year, ham is often available for an excellent price - often just 99 cents a pound! But too many of don't take advantage of such sales because we can't imagine eating sliced ham for weeks on end. Happily, there are other things to do with ham! Here are some ideas.
First - What Kind of Ham?It's important to differentiate between pressed ham and real ham. For years, I thought I didn't like ham because all I'd ever tasted was pressed ham - that is, "ham" made from miscellaneous bits and pieces of the pig and pressed into shape (usually an egg or half egg). Trust me; that stuff tastes completely different from real ham, which is the upper portion of the rear leg of a pig.
For the best ham, purchase with the bone in. You may think you're paying for bone you will never use, but not only is buying it with the bone the best deal, but I'll show you how to use the bone to add great flavor in cooking.
Whether or not you choose to purchase the ham pre-cooked or not is a matter of personal preference.
 The ham bone and drippings are valuable flavor enhancers.How to Get 8 or More Dinners for 4 from a Single HamNot long ago, I purchased a 16 lb. ham for $16. I got more than 8 meals for 4 adults from that ham. Here's how:
Meal 1: Sliced ham and in-season vegetables.
Meal 2: Scramble made with large amounts of chopped ham.
Meal 3: Split pea and ham soup.
Meal 4: The split pea and ham soup was so tasty, we had it again the following night.
Meal 5: Omelets with plenty of diced ham.
Meal 6: Casserole with ham chunks in it.
Meal 7: Mac and cheese with diced ham. (The kids love it!)
Meal 8: Split pea and ham soup, which I froze and we ate several months later.
Bonus Meal 9: Soup made with pork stock.
Other IdeasThere are endless ways to use up left over ham. Check out the ham recipes at Allrecipes.com (they also have a special section for "leftover ham") or at About.com to get just a quick overview of the possibilities, which include sandwiches, salads, soups, casseroles, hash, stir fry, jambalaya, and bakes.
If you bake your own ham, be sure to keep the drippings in the pan. Use them to make gravy, or add them to the water when you cook soup. (You can freeze the drippings for later use.)
Since you purchased ham with the bone in, be sure to take advantage of the bone. Remove as much of the edible meat from the bone as you can, then dump the bone and everything else left attached it in a pot. Fill the pot with water and simmer for 1 to 2 hours. (If you like, you may also add salt, pepper, and veggies like celery and carrots.) Place the stock in the refrigerator overnight, then skim off any fat that rises to the top.
Use this stock to make soup (instead of using water or store bought stock), or use it in place of store bought broth. If you make split pea and ham soup, you can dump the bone into the soup (even after making stock) to help flavor the soup. I also usually find that after boiling the bone for a while, more edible meat comes off of it. (You may also freeze the bone for later use.)
 Canned ham.Freezing and Canning HamYour family probably won't mind a variety of ham dishes for a few days, but chances are they won't want 8 or more days of ham. So plan on freezing some of it.
For easiest use later, it's a good idea to cut the meat the way you'd use it for cooking, then freeze it in sizes suitable for those dishes. For example, I usually use ham in chunks or dice, so I'd cut the meat accordingly, then put, say, 2 cups in a freezer bag, since that's what our favorite dishes call for. For best results, remove as much air from the bag as possible and use the meat within 6 months.
You can also freeze stock made from the ham bone. Hard containers usually are easier for this (just make sure they are freezer proof), but bags work fine, too, as long as someone can hold the bag upright while you pour liquid into it.
Also consider canning some ham. It's tasty this way and is the ultimate in convenience; there's no need to thaw the meat before using it, and the meat is more tender, too. To learn how to can ham, check out this tutorial.
Finally, when you find ham on sale, it's just fine to freeze a whole ham for later use.


