
Kristina Seleshanko's Blog
October 11, 2025
How to Butcher a Chicken
 This post contains affiliate links. All opinions are my own. Please see FCC disclosure for full information. Thank you for supporting this site!
Whether you're raising chickens specifically for meat or you just have excess laying hens or roosters, you'll likely want to learn how to butcher your birds. Some homesteaders think they'll just hire out the job, but in most states, not only is it cost-prohibitive to do so, but it's a rare butcher who'll handle small quantities of birds. And while none of us delight in dispatching our livestock, the good news is, butchering chickens isn't difficult. Anyone can learn to do it.
But...there's more than one way to skin a cat - or, in this case, a chicken. No one method of getting a chicken into your freezer is the only correct way, so this post will cover the method that works best for me; feel free to adapt it to your own needs.
Mindset Matters
Before we get into the nitty gritty of slaughtering and butchering, let's take a moment to talk about mindset. If you weren't raised on a farm, or if you raise chickens more like pets than livestock, it may be difficult to wrap your mind around butchering chickens yourself. I get it! The first time we butchered chickens, my husband did most of the work and I found it difficult to even handle the warm carcasses. Fast forward a decade and I now do all the butchering myself. (Although, for most livestock, my husband still does the slaughtering.)
The best way to get your mind around butchering food is to really think about the whys. Why do I raise and butcher my own meat? First and foremost, to give my family truly healthy food. Secondly, because I firmly believe meat is an essential part of a healthy human diet, but I loathe the way grocery store meat is raised. I find it inhumane and, frankly, gross. I know I can raise my own animals to have happy lives and have quick, humane deaths. In other words, their lives and deaths will be much happier and kinder than birds raised for grocery store meat. I also appreciate that I don't have to rely on others to supply me with food - and that I know exactly what went in (and on) my food before I served it to my family. So I encourage you to research commercial meat operations - how the animals are raised, how they are fed, and the conditions under which they are slaughtered and prepared for sale. I think you'll find it motivating.
Finally, I never, ever treat our livestock like pets. From the moment they are born, I think of them as food.
Timing is (Almost) Everything
The first step to successful butchering is knowing when to slaughter your birds. There may be times when you want to butcher an older bird - say a hen who's no longer laying well - but generally, you'll want to butcher at an age when the bird has slowed down its growth and still has tender meat.
If you're raising Cornish Cross chickens (the most popular meat breed - and the one typically used in commercial farming), you'll want to butcher at 8-10 weeks of age. Heritage breed meat chickens have their own timeline. For example, Freedom Rangers and Red Rangers should be butchered at about 11-13 weeks. If you're raising laying hens and end up with extra roosters, feel free to butcher them up to about 5 months of age. After that, their meat will start getting pretty tough (which is not an insurmountable problem, as I'll discuss later, but is not what most people consider ideal). Most of the photos in this post show approximately 6-month-old roosters that were barnyard mix (i.e. mutts) from dual-purpose and layer breed chickens; they were the extras from a flock we hatched on our homestead - and were delicious eating!
Be Prepared
 My butchering stand and cone.
 It's best to not feed your birds the morning of slaughter. That said, it's not the end of the world if, out of habit, you accidentally feed them; but if this happens, you'll find food in the bird's crop and perhaps throat. As you come across this food during butchering, rinse it away promptly. You may also find manure, which is a bigger issue - but as long as you promptly rinse it away, rinse off your worktable, and then cook the bird thoroughly before eating it, you shouldn't consider the meat ruined. (In commercial settings, fecal matter from butchering chickens is so intense, birds are washed in bleach before being packaged and sold.)
Setting up your work area to make butchering as easy as possible is also important - especially if you're butchering more than one bird. I recommend using a hanging poultry cone; we hang ours on a homemade stand. (On the opposite side of the stand is the hanger we use when butchering rabbits.) Although it's possible to "make do" and use something like a traffic cone, I recommend a cone meant specifically for butchering chickens, as they are the correct size to handle the birds and will make your job easier. (Smaller make-do cones mean trying to jam a chicken inside, which makes the job harder for you and more stressful for the bird. Larger cones mean the bird can get out of the cone before slaughter or during death throes.)
You certainly can dispatch a chicken without a cone, but cones not only prevent dead chickens from running around your yard like old-timey stories tell of, but they also prevent bruising and other damage to the carcass as the bird goes through death throes. In addition, a cone aids tremendously in allowing the carcass to fully bleed out - which results in a higher-quality end product.
If you're butchering a lot of chickens at once, you might consider having more than one kill cone. This allows you to dispatch one bird and, while it's bleeding out, get another bird in a cone and dispatch it. However, for butchering smaller numbers of birds, one cone is absolutely fine - and if you have help, one person can begin cleaning a carcass while the other catches another bird and dispatches it in the killing cone.
You'll also need a worktable (ideally at a comfortable height so you don't have to bend over; I use a folding banquet table raised to the correct height by putting boards beneath its legs); several buckets (one to collect blood under the cone, at least one more for putting the "throw away" parts of the bird, and perhaps a bucket of cool water, if you'll be skinning, rather than plucking, the birds); and perhaps a bowl or bucket to reserve edible parts like hearts, livers, and feet. In addition, you'll need a garden hose, a sharp knife, a pair of sharp garden pruners, and a a cooler filled with ice for safely storing the butchered birds.
 My butchering set up.
 (adsbygoogle = window.adsbygoogle || []).push({});
As I mentioned earlier, I prefer to skin my chickens. Once you understand how to do it, it's considerably faster than plucking a bird, and it avoids the nasty smell of scalding. However, if you prefer to keep the skin on your chickens, you'll need a scalding and plucking setup. (It's possible to dry pluck birds, which requires no special setup at all, but it makes the job slower and more difficult.) Most people prefer to use a turkey fryer or a camp stove with a large pot of water for scalding. For plucking, you can use only your hands (slow), a plucker that attaches to an electric drill (faster), or a plucking drum (fastest, and achieves the most professional results).
If it's your first time butchering chickens, I suggest sticking with hand plucking or a drill attachment, since buying or making a plucking machine is more expensive. You may decide this setup works great for you - although if you know for certain you'll continue to butcher chickens, especially larger numbers of them, it makes sense to invest in a plucking machine.
Catching and Slaughtering
If you have dog or cat crates on hand, a good plan is to snatch the birds out of their coop before the sun rises in the morning. The chickens will be sleepy and docile, and you should be able to just pick them up with your hands and transfer them to a crate. Otherwise, we find a sturdy fishing net is just the thing to catch chickens. (It helps to have two people: One to herd the birds into a corner and the other to do the netting.)
Once you've caught a bird (or removed it from a crate), hold onto its legs, so it's upside down. After a few moments, the bird will relax and stop flapping its wings, at which time, you can put it head-first into the cone, breast side facing you. Usually, we have to pull the head down through the bottom hole in the cone. At this point, the bird will relax and almost go into a trance. (This is called "tonic immobility;" it's a fear response.)
With one hand, hold onto the bird's comb, arching the head back to help tighten the skin on the neck. With the other hand, place a sharp knife on the neck at the base of the skull and jaw, ensuring skin is exposed. (If you try to cut through feathers, it may cause the bird to suffer and you may not get the carcass well bled.) With your knife, cut the carotid arteries and external jugular veins by making a deep horizontal cut into the neck, across the front and both sides of the throat, just below the jaw bone. Blood will gush out. (If it trickles, you haven't made an effective cut.) This method cuts oxygen from the brain and is widely considered the most humane way to slaughter poultry.
 At this point, some people like to pith (debrain) the bird. This does make plucking (especially dry plucking) easier, since it relaxes the follicles that hold the feathers in place. To pith, hold the head with one hand, and with the other, use the tip of the knife to find the cleft in the roof of the bird's mouth. Push the knife straight into the skull. (Be careful not to push the knife all the way through and cut your opposite hand.)
 Some people like to completely cut the heads off their chickens, believing it results in a more instantaneous death. However, that method also stops the heart from beating - which means the bird won't get bled out fully. As Adam Danforth explains in his excellent book Butchering. there are also scientific studies showing that cutting off the head makes the follicles that hold the feathers in place tighten up - not a big deal if you're skinning the bird, but definitely something to consider if you want to pluck it.
After the throat is slit, the bird will move - usually quite dramatically - as it goes into "the dying quivers" (i.e. death throes). Rest assured, it is dead and the movement is just the animal's nerves turning off. Wait for the bird to completely stop moving and for all the blood to stop dripping out of the neck before you remove the bird and bring it to your worktable.
 Bleeding out.
Scalding and Plucking
(adsbygoogle = window.adsbygoogle || []).push({});
If you'd rather keep the skin on your chickens, follow these steps after slaughtering the bird:
1. Ensure the water in your large scalding pot is at 125 to 140 degrees F., which will help prevent the skin from tearing. You may also do a "hard pluck" at 140 to 160 degrees F., which makes plucking easier, but may result in skin tears. (As stated above, you can skip scalding altogether, but it does make plucking more difficult.)
2. Dunk the bird into the water, head first, to the base of the feet. Move the bird up and down in the water for approximately 3 seconds. Pull it out of the water and repeat 5 or 6 times.
3. Remove the bird from the water and test it for readiness by trying to pull out a large wing feather. If it comes out easily, the bird is ready for plucking. If it comes out with resistance or doesn't come out at all, scald again.
4. If using a plucker, follow the manufacturer's directions. If hand plucking, remove large feathers first and individually, jerking them in the direction they grow. Smaller feathers should be grabbed at their base.
5. To remove pinfeathers (i.e. undeveloped feathers), you may singe them off with a handheld propane torch, moving it across the skin quickly to avoid cooking the skin. Alternatively, you may use a butter knife, stroking it across the skin beginning at the neck and ending at the tail.
Skinning
I find skinning chickens quicker and more pleasant than plucking them. Here's how I do it:
1. Hold onto the chicken's legs and dunk the entire bird (up to the feet) into a bucket of unheated water. This will help make the feathers easier to deal with.
2. Move the bird to your worktable and, with your knife or pruners, finish slicing off the head.
3. Flip the bird onto its back and tear the skin at the breast with your hands. (With older birds, you may need to use a sharp knife to make an initial slit in the skin.) Put your fingers inside the slit and pull from opposite directions to begin removing the skin from the meat. Continue tearing off the skin, using your fingers to pry between the skin and the meat. When necessary, use a knife to take small, gentle strokes between the skin and meat.
 Tearing the breast skin.
 Use the knife, as necessary.
(adsbygoogle = window.adsbygoogle || []).push({});
4. Once the skin is removed from the breast area, skin the legs as far as possible. When you reach the feet, try bending the leg backward at the joint. With hens or younger birds, the joint should break easily. With older roosters, I'm not strong enough to break the joint, so I use my knife to gently slice around the leg where feathers turn into scaly skin, then I bend the leg backward and the joint pops. Next, use a knife or garden pruners to cut through the cartilage holding the broken joints together. If desired, set aside the feet for making amazing, collagen-rich broth. (Yes, the feet look yucky. But they are easy to peel and the broth they make is well worth the trouble! Step-by-step instructions are here.)
 What the broken joints look like.
5. Now move to the wings. Remove the skin to the first joint in the wings, then bend this joint backward to break it. Use a knife or pruners to cut through the cartilage and completely free the two parts of the wing.
6. Next, move to the back of the bird. Here, especially as you travel toward the tail feathers, the skin will likely be more difficult to remove. Use your knife to take small, gentle strokes between the skin and meat. Now all of the skin should be removed, except at the tail.
 Removing the skin from the back.
7. Chickens have scent glands on their rear ends that should be removed, lest they taint the meat. This is most easily done by simply cutting off the tail end of the bird with a knife. If you see any bright golden/orangey bits left behind, remove those, as they are part of the glands. Now the glands are gone and so are the tail feathers.
 Cutting off the tail/scent glands.
 (adsbygoogle = window.adsbygoogle || []).push({});
Finishing
1. If you skinned the bird and haven't removed the scent glands, see step 7, above.
2. The esophagus and trachea are attached to the neck in a kind of clear sac. Use a knife to separate the esophagus and trachea from the neck of the bird. Use garden pruners to cut off the neck. Set the neck aside, if desired, for broth making.
 The sac that holds the esophagus and trachea near the neck.
 From left to right: The liver and heart (saved for our dogs) and neck (saved for broth making).
3. If your hands are too big to enter the bird's vent (anus), turn the bird breast side up and use a knife to cut a small slit upwards from the vent until you have room to fit a hand inside the bird. (If necessary, also make a small cut downward from the vent.)
 Removing the internal organs.
(adsbygoogle = window.adsbygoogle || []).push({});
4. Slip a hand inside the bird, as far as possible. Curve your fingers downward and pull straight out, removing the guts. Don't squeeze. It will likely take a few tries to get everything out, but as you pull out guts, dispose of them in your gut bucket - don't let them sit on your worktable.Save the heart, kidneys, gizzard, and liver, if desired. (If you want to keep the liver, pinch off the dark, loaf-shaped gallbladder. If the gallbladder breaks before removal, the liver is ruined. To clean the gizzard, slice it open, rinse it out, and pull off the outer lining.)
IF YOU ARE BUTCHERING A HEN, it's totally normal to find eggs at various stages of development inside the bird. If you find a fully formed egg, it is safe to eat. If you find eggs with just the membranes in place, but no shells, I prefer to immediately feed those to my dogs. I don't recommend eating eggs at earlier stages of development.
 It's normal to find eggs at various stages of development inside hens. This egg has a membrane, but no shell yet.
5. Rinse the bird thoroughly and make sure everything is removed from inside its body cavity.
6. Now you can clean up the bird by rinsing it and cutting away any remaining feathers. At this point, you may wish to reserve the fat for making schmaltz (see instructions, below). Be sure the place the finished bird on ice; all organs and feet should be kept on ice, too.
 Keep the birds on ice until you're done butchering. All organs and feet should be on ice, too.
(adsbygoogle = window.adsbygoogle || []).push({});
Resting, Preserving, and Eating the Meat
You may now either cook the bird immediately or rest the meat. If you allow the bird to enter into rigor mortis and then cook it in that state, the meat will be extremely tough.
I like to rest my meat by keeping it in a cooler filled with ice. When I'm done butchering, I sprinkle a little sea salt (optional) over the meat, cover the birds with more ice, and let the cooler sit inside. Check the ice level daily, adding more ice, as needed.
 Put ice in the bottom of the cooler, with the birds on top of the ice. Salt, if desired, then add more ice on top of the birds.
You can also rest the meat in a refrigerator. Simply stick it in a container (like a pot), put the lid on, and let it sit in the fridge until it's out of rigor.
How long it takes for the meat to pass through rigor and stop being super stiff depends on the temperature it's kept at. Keep checking the meat daily. Generally, I find it takes 3 or 4 days for my meat to come out of rigor.
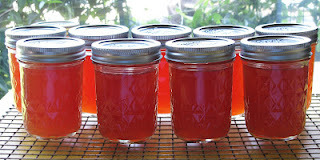
At that time, you may either cook or you preserve the meat. A simple way to do the latter is to simply wrap the bird in butcher paper; the downside to that method is the meat won't stay high quality for as long as it would if you use other methods. Some people love to use shrink bags on their poultry. I'm concerned about heated plastic leaching chemicals into my meat, so I prefer to vacuum seal my birds instead, which I believe lessons that risk. You can also pressure can the meat, or freeze dry it.
 Vacuum sealed chickens.
Remember, if your birds are older, their meat will be tough. Be sure to cook older birds low and slow or pressure cook them until their leg meat easily falls apart. If you want to can old birds, I recommend cooking them fairly tender first.
 Older birds are great cooked until very tender, as with this deconstructed rooster pot pie dish.
 Younger chickens can be cooked just like grocery store chicken.
(adsbygoogle = window.adsbygoogle || []).push({});
Making Schmaltz
Schmaltz is rendered chicken fat. Traditionally, it's used for savory cooking (if made with onions) and pastry-making (if made without onions). Younger chickens, or chickens that haven't free ranged much, will have pale fat. Older chickens or those who free range a lot, will have bright yellow fat.
To render schmaltz, place chicken fat (it's fine if skin is attached to it) in a heavy, non-reactive pan. Add about a tablespoon of water - just enough to keep the fat from initially sticking to the pan - and spread the fat out so it's in a single layer. Cook gently (slow is key to success here!) until the fat is melted and any skin in the pan is browned along the edges.
 Rendering chicken fat.
If desired, you may now add onion, in 1/4 inch slices. Gently cook until the onions and chicken skin are golden and crispy. Do not let the onions or chicken skin get burnt.
Strain the fat through a fine sieve. If desired, you may now continue cooking the skin until it's very crispy. (It makes a good snack - very much like pork rinds - or a crouton substitute for salads.) Drain the skins on a paper towel.
The schmaltz will last at least a week in a jar in the fridge and about a year in the freezer.
 Schmaltz.
Making Bone Broth
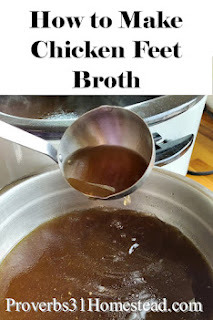
I don't like to waste any part of the birds I raise, so I always make and preserve bone broth, too. For complete directions on making chicken broth, go here. To incorporate chicken feet into the broth, go here.
 Beautiful homemade bone broth.
What to Do With Everything Else
Even when you try to use up as much of the bird as possible, there are still parts - like the feathers and the guts - that you may not know what to do with. There are several options:
* Bury them in the garden, to act as natural fertilizer. Be forewarned that animals might try to dig them up.
* Take them out into the wilderness, for wild animals to eat. (This is what we currently do.)
* If it's fly season, use the guts to make fly traps. (Directions here.)
* If you've plucked your birds, wash and dry the feathers and use them (or sell them to people who will use them) to create fishing flies and crafts.
* Throw the feathers and guts in a plastic garbage bag and take them to the dump.
A version of this post first appeared in the Winter 2024 edition of Self-Reliance magazine.
Related Posts:
 How to Can Chicken
< (adsbygoogle = window.adsbygoogle || []).push({});


September 20, 2025
How to Make Apple Cider With an Electric Juicer

This post contains affiliate links. All opinions are my own. Please see FCC disclosure for full information. Thank you for supporting this site!
Yesterday, in just four hours, I harvested about 135 lbs. of apples from our orchard, juiced them in an electric juicer, strained the juice four times, and processed 28 quarts of the juice in a water bath canner. But when I first started making apple juice/cider this way, it was a much longer, more tedious process. That was about 10 years ago, and over the years, I've refined the process to make it as efficient as I think it can be. In this post, I'll explain my process.
But first: Why not just use a cider press or a steam juicer? Well, unfortunately, a good cider press costs hundreds of dollars, and you still need a way to crush the apples first. You can build your own press, but it takes time, ingenuity, and perhaps money you don't have. Steam juicers work fine - but they are slow. If you have a lot of apples to process, I don't recommend using one. The end product will taste more "cooked," too.
It's also possible to make apple juice by cooking the apples on the stove, as described in the Ball Blue Book, but it's too time consuming for large numbers of apples - and it heats up the house more than the method I describe below.
That's why I use a juicer. Now, juicers aren't always much cheaper than cider presses. Mine is a hand me down Breville Juice Fountain Elite, and it's a really nice piece of equipment. (It would cost about $300 to replace it - though I confess, I'm impressed that the price hasn't changed in over 8 years!) But less expensive juicers work just fine, too - and there are plenty of them on the market. I'm sure you could even use a KitchenAid Mixer attachment. And I see far more used juicers on Facebook Marketplace and in thrift stores/garage sales than I do cider presses or steamers.
How to Make Apple Cider or Juice with an Electric Juicer
First, let's discuss the difference between apple cider and apple juice. In the U.S., cider is just like apple juice, except it isn't thoroughly strained - so bits of pulp remain in the liquid. Traditionally, apple cider is also left unpasteurized, but these days, it's typically pasteurized because there's a risk of e.coli, salmonella, and other harmful microorganisms from the soil, bird manure, and so on. Also of note: In the U.S. cider is not an alcoholic drink; "hard cider," on the other hand, is.
1. Read the juicer manual thoroughly, since they don't all work the same. Mine has a handy dandy container for the apple pulp to go into, plus a pitcher for the juice. (Which I've misplaced, so I used my batter bowl.) You basically plug the machine in, insert an apple or two, and turn it on.
 My juicer set up.
 2. In most cases, you do not need to prep the apples in any way - though washing them is a "best practice." I find making cider or juice is an excellent use for very small apples - and small apples don't need chopping up in order to go through the juicer. My juicer manual recommends removing the apple's stems, which I do - but I don't fret if a little bit of the stem adheres to the apple. Also, you should never use bruised apples or apples that are beginning to go bad. Doing so will increase the risk of dangerous bacteria in the finished product. If you run across apples that are bruised or have bird damage, just cut the bruises away before juicing the rest of the fruit.
3. Insert one or two apples (depending upon your juicer), and use the presser to slowly press the apple through the juicer. Slower is better because the machine will get more juice from the fruit than if you push the apples through quickly. For the same reason, I use the slow setting on my juicer. Repeat until you have as much juice as you desire.
 Extracting apple juice.
4. If you're pressing a lot of apples, you may need to empty the pulp holder more than once. You should also clean the screen now and then, to make the machine more efficient and to ensure it doesn't get plugged up with apple debris.
(adsbygoogle = window.adsbygoogle || []).push({}); (adsbygoogle = window.adsbygoogle || []).push({});
5. When you're done, you'll probably see a lot of gunk in the juice. My machine creates a lot of stiff foam that sits on top of the liquid. This does not blend into the juice, even after stirring or shaking. Therefore, I skim it off. (Don't skip this step! It will save you a lot of headache when you strain the juice.)
 The foam on top of my freshly juiced apples.
Cider, by definition, has bits of apple pulp in it. But my machine leaves a lot of gunk in, and my kids (who are the primary drinkers of the liquid) don't love it. So I strain my apple cider several times. The end product still has pulp in it - just not so much. But back when I strained using cheesecloth or coffee filters, it took FOREVER. You could alternatively put the juice in the fridge overnight and skim off what rises to the top - but I never have room in the fridge for the amount of juice I have. Therefore, I've developed the method below:
To Quickly Strain the Juice/Cider:
1. Be sure to skim, as explained in step 5, above.
2. Next, I grab a gallon sized canning jar and place the appropriately sized ForJars funnel on top. (The ForJars funnel set is key to making the straining process go quickly. For years, I used a regular kitchen strainer, which I had to hold up over a container; I had to pour extremely slowly, or the juice would overflow. It was such a pain! This funnel set is a huge improvement and truly speeds up the process. And its high quality stainless steel with a lifetime warranty.)
 The first straining.MP> (adsbygoogle = window.adsbygoogle || []).push({});
3. Put the ForJars strainer (that comes with the funnels) over the funnel and begin pouring the juice through it. Don't pour too quickly, or the strainer will quickly plug up. Instead, start pouring and notice that the foam and scum have cleared a path inside your original juice container. Pour just slow enough that most of the liquid travels through this clear "road." (Trust me, this is faster than if you use the coffee filter or cheesecloth method!) But if your strainer plugs up anyway, just use your hand to scrape away the debris in the bottom of the strainer. (BTW, everything you strain from the juice - plus all the dry pulp the juicer leaves behind - can be thrown into your compost pile!)
4. Now I grab another gallon canning jar, insert the funnel, and put a clean ForJars strainer over it. (TIP: When cleaning the strainer, always run water over the outside - not the inside. It will clean very quickly this way.) I then pour the juice from the first gallon jar into the second gallon jar.
5. Now place the largest of these kitchen strainers over a large cooking pot. Pour the liquid from the second gallon jar through it.
 Straining the cider/juice into the pot.
6. If you're planning to can the juice, begin heating it up. As the liquid nears simmering, the foam and scum will rise and become sort of hard on top. Skim it off with a ladle. If you're not going to can the juice/cider, you can let the liquid sit for a bit, or keep filtering, as desired. Either way, how much you filter out is a matter of personal preference; if you want perfectly clear juice, you'll likely need to filter more. I always can my juice/cider and do a final straining using the ForJars funnel and strainer as I pour the liquid into my canning jars.
 Skimming the foam one last time.
How to Pasteurize Apple Cider (if you don't plan to can it)
You will need a calibrated food thermometer.
1. Pour the cider into a large pot placed over high heat. Bring the liquid to 190 degrees F., or just a bit hotter. Do not allow the liquid to come to a boil. Keep the liquid at 190 degrees F. or hotter for 5 complete minutes, adjusting the stove temp as necessary.
 <
<i>Pasteurize the juice or cider at 190 degrees F. for 5 minutes.
(adsbygoogle = window.adsbygoogle || []).push({});
2. Ladle the cider into hot sterilized jars. (To sterilize jars, put them in a water bath canner and boil for 10 minutes. Water must completely cover the jars during that process.) If you'll be freezing the cider, leave a generous headspace and use jars that are straight up and down and don't have "shoulders."
How to Can Apple Cider or Apple Juice
I follow the National Center for Home Food Preservation's directions, with one exception, which I note below.
1. Place the cider or juice in a large pot and bring the liquid nearly to boiling. Do not let it boil.
2. Working one pint or quart jar at a time, ladle hot liquid into a hot canning jar, leaving 1/4 inch headspace. (If desired, filter the liquid one more time, as shown below.) Wipe the rim of the jar clean, place a lid on top, and secure it in place according to the lid manufacturer's directions. Place the jar back into a canner of hot water. Repeat until all the jars are filled or you've run out of cider/juice.
 Filling the jars.
3. Process pint or quart jars in a water bath canner for 10 minutes.*
* The NCHFP calls for sterilized jars and 5 minutes processing time. Therefore, I skip the sterilizing (as a time saver) and process jars for 10 minutes. Per NCHFP. as long as the jars are processed for at least 10 minutes, jars do not require per-sterilization. REMEMEMBER to adjust your processing time according to your altitude.
 The finished product!
A version of this post first appeared on this blog in October of 2017.
(adsbygoogle = window.adsbygoogle || []).push({});Related Posts:
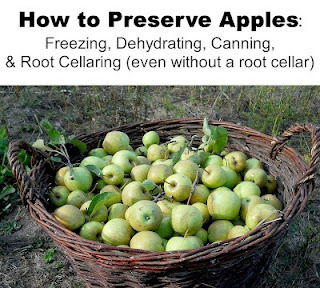
How to Preserve Apples: Canning, Freezing, Dehydrating, Root Cellaring
What to do with Crab Apples
Low Sugar, No Pectin Apple Peel and Core Jelly
Picking Unripe Apples for Making Apple Pectin
Apple Skillet Cake Recipe
Apple Spice Bread Recipe
Apple Butter Oatmeal Crumb Bars Recipe
Canning Apple Pie Jam
Freezing Apple Pie Filling
The Best Tasting, Easiest Applesauce Ever
Making Dried Apple Rings in the Warmer Drawer

September 12, 2025
Making and Canning Plum Applesauce (with Video!)

This post may contain affiliate links. At no cost to you, I may earn from qualifying purchases made through some links. Please see FCC disclosure for full information. Thank you for supporting this site!
Years ago, while browsing through a 1963 copy of Farm Journal's Freezing & Canning Cookbook, I saw the following, submitted by a Farm Journal reader: "When I have both apples and plums, I combine equal amounts of chopped, pitted plums and sliced, unpeeled apples. I cook the mixture until the fruits are soft and put it through the food mill, When sweetened to taste, I can the fruit combination like applesauce."
Now, if you've been canning very long, you probably know that "back in the day" many canning recipes weren't tested - and even those that were tested weren't tested to the high standards of today. Still, I wondered if there was a modern, tested safe recipe for this intriguing recipe.
My research lead me to The National Center for Home Food Preservation website - the gold standard when it comes to home canning safety. And there, under the "Fruit Puree" guidelines, I had my answer. Yes, it was safe to combine plums and apples and can them as sauce. (In fact, there are a number of fruits this is safe to do this with; see the guidelines here.)
That's when I altered my favorite applesauce recipe to include plums - because, like the Farm Journal reader of days gone by, I often have both plums and apples to preserve at the same time. I can save myself a lot of time and energy by combining them into one jar! Read all the directions here, or watch my video below. You can also go to my YouTube channel to watch the video.
 I use these beautiful red skinned and fleshed plums, which combine sweet-tart flavors.
Plum Applesauce Recipe
5 lbs. plums*
5 lbs. apples*
3 cups water
8 tablespoons bottled lemonjuice (5% acidity)
3 teaspoons ground cinnamon (optional)
1/2 cup granulated cane sugar(optional)
 Any apple will do for this recipe, but chose your sweet and tart flavors wisely. (See Notes, below.)
1. Wash the apples and remove their cores. Peeling is optional**. Put the prepared apples in the bottom of a large cooking pot.
2. Wash the plums and cut in half along their "seam" to easily remove the pit. (If your plums cling to the pit, use a tube-like apple corer to remove the pit.) Add the plums to the pot.
3. Add the water to the pot and place the pot over medium heat. Cook, stirring often to prevent scorching, until the apples are tender.
 Cooking down the fruit.
4. Use an immersion blender or a food mill to puree the cooked plums and apples.
5. Stir in the lemon juice. If using, stir in the cinnamon. Taste the resulting sauce. If needed, add a little sugar. Taste again; if needed, add more sugar. (The 1/2 cup sugar in this recipe is specific to my particular blend of plums and apples. It is safe to completely omit the sugar, if desired.) IF YOU DON'T WISH TO CAN THIS plum applesauce, you may now let it cool enough to place it in freezer or refrigerator containers.
 Puree the fruit and add lemon juice and optional cinnamon and sugar.
6. TO CAN: Bring the sauce to a boil.
7. One jar at a time, pour hot sauce into hot canning jars, leaving 1/2 inch headspace.
8. Process both pint and quart jars for 20 minutes in a water bath canner, adjusting for your altitude.***
Makes about 6-7 quart jars.
 Canned plum applesauce.
NOTES:
* I use red plums that are more tart than sweet and apples that are a little too sweet to be tart. Feel free to use whatever plums and apples you like, but I recommend against using both a sweet plum and a sweet apple. Try to make one fruit more on the tart side.
** Ball says that peeling apples for their applesauce recipe is optional; see the video for more details. I use their processing time for this recipe; therefore, peeling is optional.
*** Learn how to adjust for your altitude here.
RELATED POSTS:


August 19, 2025
Plum-Apple Crisp Recipe

Last night, I had a bowl of Italian plums sitting on the counter, as well as several bowls of apples sitting around, so I decided to combine these two ingredients into a dessert. The result was a crisp that my husband raved about! And the funny thing is, my husband doesn't care for the tart apples I used when eaten on their own, nor is he a big fan of our particular prune-plums. But combined? He adored them!
I used a thin-skinned, tart apple for this recipe. I didn't peel them, but if your apples have a thicker skin, you may wish to peel them. Our prune-plums are neither super sweet nor tart, so use that as a guide when choosing a plum for this recipe. Also be sure the plum you choose holds up reasonably well to cooking.
Plum-Apple Crisp
For the topping:
1 cup all-purpose flour
1/2 cup granulated cane sugar
3/4 teaspoon ground cinnamon
7 tablespoons butter, cold
1/2 teaspoon pure vanilla extract
For the filling:
2 1/2 cups of tart apples, cored and cut into thin slices
about 1 tablespoon lemon juice
2 1/2 cups prune-plums, pitted and quartered
1/3 cup dark brown sugar, packed
3 tablespoons all-purpose flour
1 teaspoon cinnamon
1/2 teaspoon sea salt
1. Preheat the oven to 375 degrees F. Butter the bottom and sides of an 11-inch cast-iron skillet (or, if you don't have one, a similarly sized baking dish). Set aside.
To make the topping:
2. Combine the flour, sugar, and cinnamon in a medium-sized bowl.
3. Cut in slices of the cold butter, then use your hands to blend the butter into the flour mixture, working it until it resembles coarse crumbs.
To make the filling:
4. Cut up the apples, place them in a large bowl, and sprinkle the lemon juice over them. Toss, to coat the apples. (The juice helps keep the apples from browning, but also adds a touch of "extra something" to the flavor.)
5. Cut up the plums and add them to the bowl of prepared apples. Toss.
6. In another large bowl, combine the brown sugar, flour, cinnamon, and salt.
7. Add the fruit to the brown sugar mixture, tossing until it is well-coated and no dry ingredients remain resting on the bottom of the bowl.
8. Pour the fruit mixture into the prepared pan or baking dish.
9. Finish the crisp's topping by stirring the vanilla into the topping mixture, then sprinkle the topping over the top of the fruit in the pan/dish.
10. Bake for 30-45 minutes, or until the fruit is bubbling and the topping is golden. Serve warm, with a little vanilla ice cream.
April 1, 2025
How Much I Saved Growing My Food in 2024
 My garden in fall of 2024.
One thing I hear a lot is that it's more expensive to grow your own food than it is to buy it. That's why, last year, I began tallying all the fruit and vegetables I grew, comparing them to grocery store prices. Is saving money the main reason I homestead? No. Being more self-sufficient and having access to high quality food are my main reasons, but saving money is important, too.
Now that my winter garden has mostly gone to seed, all the figures are in. And guess what? I absolutely saved thousands of dollars over buying my food at my local Wal-Mart. (Why did I compare to Wal-Mart? Number one because it's the main grocery store in our rural area. But also, it usually has the lowest prices in our area, so it's a great base to work from. If you normally shop at a higher-end store, just know you'll save even more by growing your own - and the quality will likely be higher, too.)
It is true that getting your garden started can cost some money (although it's a mistake to think you have to spend a lot; no till methods, in particular, can be very inexpensive), money simply isn't an excuse not to grow your own :)
Some will say that once I factor in my time, I've lost money. I still disagree. I tried to track my time in the garden this year, but kept forgetting to do it. Sorry! However, I really don't spend much time in the garden. My most active time is in the early spring, as I pull out the winter garden and prep for spring planting. This takes a few weekends worth of work, but I only spend, at most 3 or 4 hours in the garden each day, tops. After that, my garden needs me very little, because I employ no-till methods that result in few weeds. After planting, it's really all gravy, as I harvest food for my family! But also, I consider any time spent in the garden as time I don't have to spend earning money - and that's a big bonus, too. Finally, I find that few people who want to factor in time spent in the garden consider how much time they spend grocery shopping, too.
Early 2025 produce totals:
Remember, this post lists only produce we ate fresh from the garden. It does not include the vegetables we're currently eating that I preserved in 2024, nor does it include the produce I gave away. Yields would be much higher for kale, collards, and cabbage if I included everything we could have eaten, but instead chose to give away, feed the livestock, or compost.
Kale 11 lbs 12 oz.
------------> $37.60 conventional; $56.40 organic Cabbage 1 lbs 7 oz.
------------> $4.98 conventional; $6.51organic
 A harvest of Brussels sprouts - an important winter crop for my family. Brussels Sprouts 25 lbs 10 oz.
------------> $77.90 conventional; no organic option available Celery 9 lbs 10 oz.
------------> $9.40 conventional; $30.80 organic
 Grabbing a little celery. Carrots 4 lbs 7 oz.
------------> $5.68 conventional; $4.97 organic Yukon Gold Potatoes 1 lb 7 oz.
------------> $3.51 conventional; $4.97 organic Walla Walla onions 4 lbs.------------> $2.72 conventional; no organic option available (My Walmart doesn't carry Walla Wallas, so I used the prices for ordinary yellow onions) Winter radishes 7 oz.
------------> $2.17 conventional; no organic option available (My Walmart doesn't carry winter radishes, so I used the prices for ordinary red table radishes)
 A small harvest of winter radishes, which I use as a potato substitute.
Beets 1 lb. 4 oz.
------------> $3.80 conventional; no organic option available
Saved in early 2025:
$147.76 if purchased conventional; $190.24 if I purchased the organic options available.
Saved in total:
$2,832.19 if buying conventional and $3,800.79 if buying organic.
Gardening Expenses:
Walla Walla onion starts: $4
Cherry tomato start: $5.49 (a single plant and a hedge because the new-to-me-variety of cherry tomatoes I started from seed were looking less than robust)
Potting Soil: $47.96 (primarily for potting up peppers in the greenhouse; some will get used for flowers, too, but I won't try to parse that out.)
Organic snail bait $17.96 (I had to use more of this than is typical because we had such a cool, damp spring)
Total gardening expenses: $75.41
Total savings minus expenses for my 2024-planted garden:
$2,756.78 if buying conventional
$3,725.38 if buying organic when available
February 18, 2025
How to Cook an Old Laying Hen or Rooster
 Homesteaders seem to be divided into two main camps: Those who refuse to butcher excess roosters or older hens who aren't laying well - and those who, as needed, do. This post is for the latter camp.
While it's true that roosters and older laying hens are naturally more tough than young chickens raised specifically for meat, it's also true that it's easy to tenderize them. In fact, we find rooster and older hen meat quite moist and extremely flavorful. Older chickens, especially, have a lovely flavor - in fact, I recall Julia Child writing something about how the chickens in France had a better, more "chickeny" flavor; I've often wondered if that was because the chickens were older. Yum!
That said, there are a few things you should know before you butcher:
* Commercial meat breed chickens, which are the type of chicken you buy at grocery stores, are big and breasty. Good egg-laying breeds are generally quite small with teeny tiny breast and little meat; dual-purpose chickens are in between.
* Grocery store chicken is butchered at a very young age - and previous to butchering, birds are not allowed to move much. Therefore, they are much more tender than excess homestead roosters or older hens are.
* To have excess homestead roosters or laying hens become tender eating, you just need to know a couple of tricks.
Trick #1: Never butcher a rooster or laying hen and then eat it right away. Instead, age it so the meat naturally tenderizes. I recommend aging for at least four days; seven is better.
There are two basic ways to age chicken. One is to put it in a pot in the fridge. This is ideal when you only have a bird or two that needs aging. The other way is to fill a cooler with ice, add the meat, and then keep adding ice as needed. Although many people will tell you the meat must be held up from any liquid (like melting ice) during aging, I've aged chicken in ice water with excellent results. Because you'll be aging your roosters or older birds for so long, though, I do recommend draining the water daily and replacing it with fresh.
 Cock-a-leekie soup.
(adsbygoogle = window.adsbygoogle || []).push({});
Trick #2:
Cook low and slow. Like any other tough meat, old hens and roosters benefit from being cooked very slowly. This is why roosters and old hens are traditionally cooked in soups or stews. In fact, some famous dishes were originally designed for using up these tougher birds, including the Scottish soup cock-a-leekie ("rooster and leeks") - a recipe found in my A Vegetable for Every Season Cookbook - and the French coq au vin ("rooster in wine"). Just bear in mind that modern recipes use grocery store chickens; therefore, you'll need to cook your homestead rooster or old laying hen considerably longer than the recipes call for.The key is to cook the bird for a long time (8 hours is generally recommended) and with plenty of liquid.
Trick #3: Pressure cook. Just remember, your homestead rooster/old laying hen is going to take longer to cook than a grocery store chicken. Keep cooking until the leg meat falls off the bone.
Trick #4: Brine. This is not an absolute must; proper cooking, as described above, is far more important. However, brining the bird for a day or two in the fridge can help make it more tender.
 Homemade chicken stock.
Trick #5: Don't forget the bones! They make the most amazing broth or stock. The gizzards, hearts, and kidneys can go in the pot for stock, too.
A version of this post first appeared on this blog in 2013.
Related Posts:


(adsbygoogle = window.adsbygoogle || []).push({});
February 3, 2025
Easy, From-Scratch Biscuits (Updated)
 This post may contain affiliate links. As an Amazon Associate, and at no cost to you, I earn from qualifying purchases made through some links. Please see FCC disclosure for full information. Thank you for supporting this site!
I grew up eating biscuits made from a can. That's a shame because from scratch biscuits are:
* Really easy and quick to make. (My 7 year old makes them!)
* Less expensive than buying them in a can.
* And they have no dubious, unhealthy ingredients!
Easy, From Scratch Biscuits
2 cups all-purpose flour (or 1 cup all-purpose flour and 1 cup whole wheat flour)
4 teaspoons baking powder
1/4 teaspoon baking soda
3/4 teaspoon salt
2 tablespoons butter, chilled
2 tablespoons tallow (or lard, or coconut oil: I do not recommend unhealthy Crisco or vegetable shortening)
1 cup buttermilk (Buttermilk makes superior biscuits with a fluffier texture, but you can substitute 1 cup milk with 1 tablespoon white vinegar mixed in and allow it to sit for a few minutes before starting this recipe.)
1. Preheat the oven to 450 degrees F. Place parchment paper over a rimmed baking sheet, or grease the baking sheet. (Biscuits are also good baked in a cast iron skillet. Be sure to grease the bottom and sides first.)
2. In a mixing bowl, stir together the flour, baking powder, baking soda, and salt.
3. Cut up the chilled butter into relatively small pieces. Add to the flour mixture. Add the tallow or other fat.
4. With your hands (or a pastry blender), rub the butter and coconut oil into the flour mixture until there are no chunks of butter.
5. Add the buttermilk and stir. The resulting dough is very sticky.
6. Sprinkle the counter or other work surface with a little flour. Rub your hands in flour, too. Dump the dough onto the floured counter and fold it into itself until just smooth.
7. Using your hands, press the dough down so it's up to 1 inch thick. (I usually make mine a little over 1/2 inch thick.) Using a biscuit cutter cut out biscuits. (A biscuit cutter really does work best, but you can also use a round cookie cutter or a canning jar ring. You can even just use a knife and cut the biscuits square.)

(adsbygoogle = window.adsbygoogle || []).push({});
8. Place the biscuits on the baking sheet so they touch.
9. Gather together the dough scraps and repeat steps 7 and 8. Each time you do this with the scraps, the resulting biscuits will be a little less light.
10. Place the baking sheet in the middle of the oven and bake for 10 - 20 minutes, depending upon the size of the biscuits. Transfer right away to a cooling rack.

Freezing the Biscuits
(adsbygoogle = window.adsbygoogle || []).push({});
Although these biscuits whip up pretty darn quickly, you might want to try freezing some for more instant use. Just line a baking sheet with wax- or parchment paper and place the unbaked biscuits on top; they shouldn't touch each other. Place the baking sheet in the freezer until the biscuits feel solid. Transfer the biscuits to a freezer bag and freeze for up to 6 months. Be sure to thaw the biscuits completely before baking them.
Related Posts:

var addthis_config = {"data_track_addressbar":true};
(adsbygoogle = window.adsbygoogle || []).push({});
January 7, 2025
How to Grow Enough Vegetables to Feed Your Family for a Year
 This post may contain affiliate links. As an Amazon Associate, and at no cost to you, I earn from qualifying purchases made through some links. Please see FCC disclosure for full information. Thank you for supporting this site!
One of the most common questions homesteaders ask me is: "How many vegetables should I plant in order to feed my family for a whole year?" Unfortunately, this is a tough question to answer, because there are so many variables to consider. Still, I grow nearly all my family's vegetables (with the exception of a little lettuce or peppers here and there), so let me walk you through the way I determine how much to plant in our garden.
But First...You know the phrase "results may vary?" Well, that's certainly true when it comes to planning out a garden to feed your family. Here are some things that can drastically affect your personal results:
Soil: Your garden's soil has a huge impact on how much food you can successfully grow. If, for example, I plant veggies directly into our native heavy clay soil, my yields are quite modest. But if I plant the same vegetables in my rich, organic soil (here's how I made the transformation), my yields explode.
Gardening Methods: The way you choose to garden will make your plot more or less abundant. Here's an example of what I mean: In the film My Urban Garden, Carol Bowlby plants her entire backyard so there are only extremely skinny pathways to walk on. Compared to someone with the same amount of space, but using wider paths, this allows her to grow more food for her family.
Varieties: What plants you select make a difference. Not all bean plants, for example, produce the same amount of food, even when grown under the same conditions. For instance, Provider beans produce far more abundantly for me than Dragon Tongue beans...and while Yard Long beans may produce abundantly in hot climates, they produce poorly in my cooler region.
Palate: Personal taste also comes into play. For instance, if you hate eating kale, even though it's quick to grow and highly prolific, there's little point in planting it in your garden. If you adore Brussels sprouts, however, you'll want to plant more than the average person - even though Brussels take up a fair amount of room and have a long growing period - thereby producing less food than kale, even if grown in the same amount of space.
Now, Do the Math
While it's important to use math to determine how many vegetables you plant, the math isn't difficult - and I'll walk you through it step by step.
Start by keeping track of how much of each type of vegetable you eat in any given month. Just keep a notebook in the kitchen, and every time someone in your family eats a veggie, note what type it is and how many ounces or pounds were consumed. (It's best to use a kitchen scale for this; you could guess at the weight, but the calculations you make will be less accurate.) At the end of the month, use these notes to add up how many pounds of each vegetable your family ate.
Next, multiply that figure by the number of months in a year. For instance, if Jane Doe eats 2 lbs. of broccoli in a month's time, she'd multiply 2 (lbs. of broccoli) by 12 (months). The result tells her how many pounds of broccoli she eats, on average, in one year. (In this case, 24 lbs.)

(adsbygoogle = window.adsbygoogle || []).push({});
The next part can be a bit tricky because you need to consider how many pounds of food each plant is likely to produce. You can sometimes find this figure on seed packets or in seed catalogs (and if this figure is provided for your specific variety, by all means, use it for your calculations). Sometimes local extension office websites share this type of info, too. However, my pet peeve is that most sources list "how many to plant per person" (which isn't very helpful, because how do they know how much you like to eat any given vegetable?) or "how many pounds of food per square foot" (which varies too much depending on the gardening method you use).
Over the years, though, I've found general guidelines at various seed company websites, as well as a pretty realistic chart in Melissa K. Norris' book The Family Garden Plan. Using these multiple sources, I've created a handy dandy chart to make your calculations easier. (Click here to see the chart.) Just remember, the numbers given are a guideline. No one can give you a completely accurate figure of how much food your varieties in your specific conditions will yield.
Continuing to use broccoli as our example, remember that we figured Jane Doe wants to eat 24 lbs. of broccoli in a year. Looking at the chart, we see that the average broccoli plant produces about 1 lb. of broccoli head. (The leaves and stalks are edible, too, but we'll just consider those a bonus crop.) Therefore, Jane Doe will need to put about 24 broccoli plants in her garden. Since we know we're using an average yield number, and we also know disease and pests happen, I recommend that number as a minimum.
 (adsbygoogle = window.adsbygoogle || []).push({});
Some plants produce just one thing; for example, each carrot seed yields one carrot. (Other plants that do this include onions, leeks, turnips, beets, and parsnips.) This makes calculations easier. For example, if I use 2 onions a week and want enough to last a year, the math is:
2 (onions per week) x 52 (weeks in a year) = 104 onion plants needed
If you do a lot of preserving, you can also do a bit of math to figure out how much to plant. Let's say John Smith likes to can 30 pint jars of dill pickles every year. The average cucumber seed produces about 3 to 5 lbs. of cukes, so we'll use the average number of 4 to make our calculation. John's canning book tells him that he needs about 8 lbs. of pickling cucumbers to make 8 pints of pickles. So he'd do the math this way:
30 (jars) x 8 (lbs. needed for each jar) = 240 total lbs. needed
240 (lbs. needed) ÷ 4 (approximate lbs. from each plant) = 60 individual plants needed
 (adsbygoogle = window.adsbygoogle || []).push({});
Other Considerations
Once you've done the math, you'll need to think about how you'll store the resulting food. For instance, while you may want to grow 30 lbs. of cauliflower for the year, fresh cauliflower doesn't store well for long, even under optimal conditions. Therefore, you'd need to either plan to preserve a lot of the cauliflower (through freezing, freeze drying, dehydrating, or canning as pickles) or you'll need to succession plant and preserve just some of the cauliflower. This means you'll plant perhaps one or two cauliflower plants on week one, and then one or two more plants every subsequent week, allowing you to harvest fresh cauliflower throughout the growing season. Just make sure you keep in mind how long it takes your variety of cauliflower to come to maturity (information that should be on the seed packet). Always allow the plants enough time to reach harvest, given the time of year and the length of your growing season.
Those of you who eat mostly vegetables (or those of you who live where your gardens must be small) may find that when you do the math, you can't possibly grow all of your veggies in the amount of space you have. If you really want to be as self-sufficient as possible, you'll want to:
 (adsbygoogle = window.adsbygoogle || []).push({});
* Prioritize what you grow. Choose a few vegetables that you eat the most, and focus on growing those, while planning to buy the rest from the grocery store or a local farmer's market.
* Learn to eat what's in season.
* Learn to do without, or purchase certain veggies as a treat.
Also bear in mind that if you're new to gardening, trying to grow all your veggies the first year is likely a mistake. As you learn to garden, you will inevitably make mistakes...and it's better to make them in a small garden you've put less time and money into. In addition, large gardens can be overwhelming for anyone, let alone someone who doesn't have a lot of gardening experience. You don't want to plan a large garden only to get so overwhelmed by weeding, harvesting, and preserving that you can't keep up.
In such cases, I again recommend focusing on the vegetables that are most important/most used in your family. As you gain confidence and experience in gardening, plan on expanding your garden a little bit every year.
Finally, remember that all your food crops do not have to grow in one garden. Especially if your space is limited, it makes sense to spread the love around. For example, when I first started growing food in earnest, I had a small backyard vegetable plot, but then I also planted veggies in a front window planter, along our house foundation, in pots on the porch, and even in our mow strip.
 Related Articles:


December 27, 2024
November & December on the Homestead

November allowed me to slowly slow down after the crazy busy harvest season. Still, last month I had a lot of things left in the garden that weren't quite ready to harvest - especially the winter squash. But on November 28, we had our first hard frost, so they all had to come into the house. It was mostly a great winter squash season. (But a horrible summer squash year!) The butternuts did poorly; they were small and rodents chewed on them a lot. Still, I harvested some for fresh eating and canned the rest. The Cinderella pumpkin I planted produced all of one pumpkin. We haven't tasted it yet, but I did roast and puree it. I don't know if I'll grow it again; it was pretty (though not as pretty as many I've seen in photos) but also watery.
The buttercup, delicata, and acorn squash, as well as the Winter Luxury pie pumpkins, though, were quite abundant. I grew way more pumpkin than I needed - but it never hurts to can a little extra for a poor growing year.
I was a little bummed that I had to preserve a lot of the winter squash, though. Part of their appeal to me is that I can harvest them and then store them without processing and they will last many months. But this year, we had rodent problems. It started with a doe and her fawn who were managing to crawl on their bellies to get under my deer fence. To nip that in the bud, my husband installed a hot wire at the base of the fence. But this prevented our cats from hunting in the garden...which led to a lot of my winter squash having chewed rinds. And damaged rinds mean the squash won't last in storage. It made a lot of extra work for me, so hopefully we can come up with a good solution for next year!
 Part of the winter squash harvest: Pie pumpkins, "Mashed Potatoes" acorn squash, and buttercup squash.
In addition to canning winter squash chunks and freezing winter squash puree, I dehydrated the last of the abysmal summer squash crop, canned tomatoes from the freezer, and canned some bone broth.
 Dehydrating yellow summer squash.
In December, I took a complete break from preserving and my only homestead work has been caring for the livestock and laying down organic matter on top of the garden beds - mostly leaves from the Brussels sprouts and other brassicas.
At this time, I have cabbage, Brussels sprouts, kale, and collards in the garden, which can be harvest fresh all winter long. There are also a few beets, which I'll harvest as needed. Otherwise, we are eating preserved produce.
 We love our Brussels! Recipe here.
Which brings me to my produce totals for the year, which you can see below. BUT please remember, I will be cutting off the growing year when it truly ends, which will be in early 2025.
November & December Produce Totals:
To learn more about how and why I am keeping these totals, click here.
Cabbage 18 lbs 15 oz.
------------> $15.61 conventional; $28.32 organic
 Surprise! I grew some cone head cabbages. They must have been mis-packaged seeds.
Carrots 11.86 oz.
------------> $5.33 conventional; $8.30 organic
Radish 11 oz.
------------> $3.41 conventional; no organic optional available
 Some of the homestead-raised ingredients for stew, including black winter radishes.
Pie Pumpkins 33 lbs 1 oz. My Walmart did not have any fresh pumpkins! So I used the price for butternut squash. ------------> $190 conventional; no organic option available
 Freezing pumpkin puree.
Cooking pumpkins 11 lbs. 11 oz. My Walmart did not have any fresh pumpkins. So I used the price for butternut squash.
------------> $64.22 conventional; no organic option available Butternut Squash 7 lbs. 8 oz.
------------> $45.00 conventional; no organic option available
 Canning butternut squash and pie pumpkins.
Buttercup Squash 7 lbs. 3 oz. No buttercup squash at my local Walmart, so I used the price for butternut squash.
------------> $40.46 conventional; no organic option available Acorn Squash 24 lbs. 6 oz. My Walmart did not have any acorn squash! So I used the price for butternut squash.
------------> $142.18 conventional; no organic option available
 I save the seeds from all my winter squash and roast them for an added nutritional boost to our diets.
Collards 2 lbs. 3 oz.
------------> $11.96 conventional; $15.96 organic
Zucchini 10.62 oz.
Yellow Squash 4.98 oz.
------------> $0.50 conventional; $1.85 organic Green beans 2 lbs. 15 oz.
------------> $4.32 conventional; $6.88 organic
Brussels sprouts 9 lbs.
------------> $25.92 conventional; $36.00 organic
 My homegrown Brussels sprouts are big, but not at all bitter.
 Harvesting Brussels.
Saved in November & December:
$549.86 if purchased conventional; $587.97 if I purchased the organic options available.
Saved in 2024 so far:
$2,684.43 if buying conventional and $3,610.55 if buying organic.
2024 Gardening Expenses
Walla Walla onion starts: $4
Cherry tomato start: $5.49 (a single plant and a hedge because the new-to-me-variety of cherry tomatoes I started from seed were looking less than robust)
Potting Soil: $47.96 (primarily for potting up peppers in the greenhouse; some will get used for flowers, too, but I won't try to parse that out.)
Organic snail bait $17.96 (I had to use more of this than is typical because we had such a cool, damp spring)
Total gardening expenses so far: $75.41
Total savings minus expenses in 2024: $2,609.02 if buying conventional; $3,535.14 if buying organic when available.

December 9, 2024
How to Can Pumpkin and Other Winter Squash

This post may contain affiliate links. As an Amazon Associate, and at no cost to you, I earn from qualifying purchases made through some links. Please see FCC disclosure for full information. Thank you for supporting this site!
Pumpkin and other types of winter squash are safe to can - easy to can, too, if you know a few tricks of the trade! Remember, all winter squash (including pumpkin, a type of winter squash) can only be home canned using a pressure canner. (The exception is if you're using a tested safe pickled pumpkin/winter squash recipe; there's one in The Ball Complete Book of Home Preserving. The inclusion of the correct amount of vinegar makes it safe for water bath canning.)
In addition, winter squash can only be home canned in cubes; years ago, Ball tested their pumpkin puree recipe and found it wasn't consistently safe. Winter squash purees are too dense to can reliably at home and have all the contents of the jar reach the correct temperature for killing off all harmful microorganisms. The good news is, you may safely can chunks, then make puree from them upon opening the jar. Chunks are also great for making winter squash mash, or you may gently reheat the chunks in the oven or microwave to eat that way.
How to Can Pumpkin & Other Winter Squash:
You may wish to begin by reviewing my post on using a pressure canner.
1. Scrub the outside of the squash well, to reduce the bacterial load of the food in the jars.
2. Cut the squash in half and, using a metal spoon, scrape out the seeds and stringy pulp. (Set the seeds aside on a plate to dry; they can be roasted for a tasty snack. The stringy pulp can be fed to livestock or thrown into your compost pile.)
 Remove the seeds and stringy insides of the winter squash.
3. Peel the squash. I use a wide vegetable peeler, similar to this one. For my Winter Luxury pie pumpkins (which are a smaller type of pumpkin), I found it easiest to quarter the pumpkins and then peel. For larger winter squash, you might find peeling easier if you divide the vegetable into even more pieces first.
 Peel the winter squash.
(adsbygoogle = window.adsbygoogle || []).push({});
4. Cut the squash into approximate 1 inch cubes. I do this by first slicing the squash lengthwise, then cutting these 1 inch wide slices into chunks.
 Slice the winter squash into 1 inch lengths.
 Cut the slices into 1 inch cubes.
5. Blanch the squash cubes by putting them in boiling water, then allowing the water to come to a boil again. (If it doesn't boil again within 1 minute, you've added too much squash.) Beginning with the reboil, allow the squash to cook for 2 minutes, then immediately remove from the pot. DO NOT plunge into ice water!
6. Place hot squash cubes into a hot canning jar, leaving 1 inch headspace. Top each jar with boiling water, leaving 1 inch headspace. Bubble, wipe rims clean, and put on a lid and screwband.
 Leave 1 inch headspace.
(adsbygoogle = window.adsbygoogle || []).push({});
7. When all the squash is in jars, process pints for 55 minutes and quarts for 90 minutes. (Read this important information about adjusting canning times for altitude.)

Tips:
* Do NOT use this recipe for summer squash.
* Don't be tempted to bake the winter squash in order to get the shell off more easily. It's important not to over-cook the squash before canning it, as this may cause a density issue that will make your finished product unsafe.
* If you wish, prepare the squash up to the cubing step, then place the cubes a covered container in the fridge and can them the next day.
* Don't over- or under-blanch. Review the guidelines for blanching here.
* Keep the squash hot after blanching it, as it should go into the jars hot. The easiest way to accomplish this and not end up over-cooking the squash is to work in batches.
* The boiling water added to the jar may either be the same water you blanched the squash in (per The National Center for Home Food Preservation) or fresh boiling water (per Ball). If you choose to use fresh water, it's nice to use an electric kettle to boil it, as this keeps your stovetop burners free.
* This is a longish processing time, so it's smart to add a little extra water to your pressure canner so it doesn't run dry. (Running dry may damage your canner and would require the food be completely reprocessed.) Just don't allow the water to go over the tops of the jars, as you would with water bath canning.
* To use your home canned winter squash to make pie, drain off the liquid. You may also wish to let the cubes sit in a colander or sieve placed over a bowl for several hours, to get them thoroughly drained. Then, puree the squash using a blender or food processor. You may use the puree just like you would store bought pumpkin puree.
Related Posts:


