
Kristina Seleshanko's Blog, page 4
April 30, 2024
April on the Homestead
Spring is a busy time on any homestead - and mine is no exception! To top it off, we've had odd weather (sooooo much rain for this time of year!) that's interfered with some activities, plus I've been pulled away more often than usual for things like jury duty (I did get to serve on a jury for the first time ever, so that was nifty) and other family and business related duties.
 Scrubbing the greenhouse windows is just one spring chore I accomplished this month.
 My garden plan. I've already deviated from it slightly!
(adsbygoogle = window.adsbygoogle || []).push({});
>Still, the recently planted asparagus and strawberries are growing well, as are the potatoes, peas, and onions. And I've planted out most of the cool season crops in the garden, including broccoli, cauliflower, Brussels sprouts, cabbage, beets, turnips, radishes, collards, and kale. Progress!
But I'm going to keep this month's post short, and focus on the produce totals and gardening expenses:
April Produce Totals:
At this time, we're mostly eating produce that I preserved last year. Even so, we do eat fresh food from the garden during the cold months; this month, however, we used up the last of the fresh produce. To learn more about how and why I am keeping these totals, click here.
Beet root and leaves: 8 lbs. 31 oz.
Carrots: 2 lbs. 1 oz.
------------> $63.68 conventional (no organic option available at my Walmart)
Saved in March:
$95.66 if purchased organic or $90.33 if purchased conventional
Saved in 2024 so far:
$221.96 if buying organic and $109.83 if buying conventional.
2024 Gardening Expenses
Walla Walla onion starts: $4
Cherry tomato start: $5.49 (a single plant and a hedge because the new-to-me-variety of cherry tomatoes I started from seed were looking less than robust)
Potting Soil: $47.96 (primarily for potting up peppers in the greenhouse; some will get used for flowers, too, but I won't try to parse that out.)
Total gardening expenses so far: $57.45
Total savings minus expenses in 2024: $164.51 if buying organic; $48.78 if buying conventional
 Artichokes are coming on! One of my dogs pulled out this plant shortly after I photographed it. Ugh!
(adsbygoogle = window.adsbygoogle || []).push({});


April 18, 2024
Gardening with Children (Without Losing Your Mind)

This post may contain affiliate links. As an Amazon Associate, and at no cost to you, I earn from qualifying purchases made through some links. Please see FCC disclosure for full information. Thank you for supporting this site!
Having children did not alter my homesteading dreams. If anything, giving birth made me put greater emphasis on those aspirations because I wanted my kids to eat fresh, home grown, organic food. So the summer after our first child was born, I planted a vegetable garden as usual, keeping our into-everything baby in her stroller as I worked. But by the following year, that didn't cut it. Our little go-getter wanted to help Mommy. With everything.
"Fine," I thought. "All those old-timey advice books recommend getting children started with chores as soon as possible. I can start teaching her how to garden now. It will be wonderful!"
Ahem.
The first day went something like this: My toddler dumped all the carrot seeds into a pile in the grass. After I picked up as many of the minuscule seeds as possible, I tried to rearrange them to resemble a proper planting layout in the garden bed. My little helper got mad because, as she put it, "I do it!" She helped me pat down the soil over the seeds. (Success!) Then she over-watered the seeds and they floated into the garden’s pathways through the swiftly moving streams she'd created. "Done for the day!" I proclaimed.
Later, when a few tender carrot leaves managed to poke up through the soil, my darling trampled over them with oblivious (and for their size, surprisingly Godzilla-like and destructive) feet. Gardening with young children isn’t as easy as our idyllic fantasies lead us to believe. So what's a mama or daddy to do?
Why Encourage Children to Garden?
The good news is most young children naturally love gardening. Dirt, sunshine, water, flowers...These are all things kids are drawn to. (If you happen to have a child who shows little interest in gardening, it doesn't hurt to take him to farmer's markets or farms where customers are allowed to roam and see things in action. You can also read him books that inspire a love for gardening, like The Secret Garden by Frances Hodgson Burnett; How Groundhog's Garden Grew by Lynne Cherry; and Up, Down, and Around by Katherine Ayres.)
There are a great many reasons to encourage the gardening bug in your kids, aside from the one that's most obvious to homesteaders (i.e., self-sufficiency). Yes, your kids are learning an important life skill, but scientific studies show children benefit in other ways, too.
For example, some studies note that kids who grew up gardening report happy memories of their outdoor chores later in life. In one study, grade school students who gardened were better able to work in groups. They were also more likely to display characteristics like responsibility and maturity, and they had stronger interpersonal skills —including a stronger bond with their parents.
Other studies show kids who garden score higher in science than kids who don’t. And multiple studies show that kids who grow food are more enthusiastic about eating fruits and vegetables. (My personal experience confirms that!) Finally, gardening is a great way to help develop fine and gross motor skills in young children.

(adsbygoogle = window.adsbygoogle || []).push({});
Give Them A Plot of Earth
Getting children gardening at a tender age is the best way to encourage a love of growing things - even if it might prove vexing for the adults trying to teach them. One way to please both parents and children is to let kids follow their natural instincts and do it all themselves: Give your child a little bit of dirt. (If you have more than one child, be sure they each have their own, entirely separate garden areas. If you're new to this parenting thing, trust a veteran: You will regret it if you make them share.)
Your child's garden needn't be large. In fact, I recommend something small - or you run the risk she may become overwhelmed.
My children's first gardens were merely large pots with a mixture of very easy to grow plants like radishes (even if they don't enjoy eating them, kids love radishes because they grow so fast!), carrots, lettuce, pansies, and nasturtiums. You could also give your child a small raised bed or square of land - say, two or three square feet in size at most.
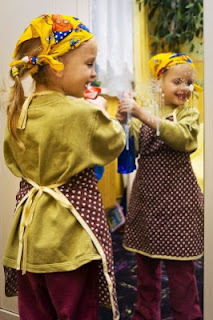
 Photo courtesy of Ruth Hartnup.
 (adsbygoogle = window.adsbygoogle || []).push({});
My kids began gardening when they were about three or four, but there were many things they did with little or no help, including:
* Drawing up a garden plan
* Helping to add amendments to the soil
* Putting soil in pots
* Digging holes for plants
* Counting out and planting seeds (albeit clumsily!)
* Adding mulch to the garden
* Creating plant markers (with painted popsicle sticks or rocks)
* Weeding
* Watering
They were also allowed to eat the food from their own gardens whenever the fancy struck them.
Once you establish a small children's garden, it's important to remember that it is your child's; resist the urge to do too much of the gardening for her. It's an interesting truth that humans learn a great deal by making mistakes, so if my kids forgot to water their gardens, I might gently remind them, but I never nagged. If their plants died, they learned a little lesson.
I do encourage you to take advantage of your children's mistakes, though; I like to turn them into science lessons. For instance, if your son over-waters his peas, give him an explanation of why too much water is bad for plants. Better yet, set up three plants for an experiment: One for him to water properly, one to over-water, and one to not water at all.
Incidentally, while child-sized gardening tools are cute, they are totally unnecessary - and because they tend toward flimsiness, may cause your child frustration. An adult's heavy plastic trowel is all most kids need. Also, if your child is quite small, a child's play watering can may be a lot easier for her to handle than a full-sized one...and it also limits your child's ability to drown the garden.
 (adsbygoogle = window.adsbygoogle || []).push({});
Helping in the "Big" Garden
There's no doubt about it. Many kids won't be totally satisfied working in their own garden; they will want to help in yours, too. The trick is to minimize the damage they may do.
I recommend beginning by involving your child in the family garden planning process. What vegetables would they like to eat next season? What fruits? If you raise animals, have your child brainstorm what could be grown to help feed those animals. (Then, when harvest time comes, allow your child to do the feeding.) Keeping gardening a family affair makes growing food much more interesting for many kids, and in years to come, your little "garden helpers" will truly be a help.
Since kids love to work alongside their parents, I also suggest working on your separate gardens - together. You work in "your" garden and your child will work in his. (It helps tremendously if his garden is located near the family garden.) This arrangement should keep your child occupied for at least a little while.
You can also give kids something related to do while you garden. Very young children can sit in an outdoor playpen with a few toys. Slightly older kids can play in a nearby sandbox, mud puddle, or a patch where they can dig holes and plant imaginary things. (Make sure they understand the rule is that digging is only allowed in a specified area.) A toy lawn mower may also keep your child busy with any grassy areas nearby.
But don't continually shove your kids out of the family garden; make them productive workers instead. For instance, when my kids were younger, I'd show them a particular type of weed - something distinctive and easy to identify. I'd point out the shape of the leaves and any other characteristics that made it unique, calling on them to use their observational skills. Then I'd ask them to pull only that specific type of weed. (I do recommend waiting until your vegetable plants are obviously bigger than the weeds in your garden, in order to minimize accidents.)
When my children were really young, an easy choice was blooming dandelions. Sure, the children didn't have the ability to dig out dandelions by their roots, but the blooms were very easy to identify. Besides, even pulling off the flowers was helping, since it prevented the weeds from going to seed. When my kids were done with their weeding, they fed the resulting pile to the chickens. This arrangement often kept them occupied long enough for me to get in a good bit of garden work.
 Photo courtesy of Ruth Hartnup.
 (adsbygoogle = window.adsbygoogle || []).push({});
Another task kids like is irrigating with a watering can. It's true they may not give the plants a good, deep watering, but they are unlikely to hurt much, either.
Not surprisingly, when my kids were younger, harvesting was their favorite part of gardening, because I allowed them to eat a certain amount of food right off the plant. (Who am I kidding? Eating food right off the plant is still their favorite part of gardening!) I figure letting them eat as they pick is healthy and gives them more enthusiasm for growing their own food and eating vegetables. My only rule was they couldn't go into the garden and gorge themselves. They had to ask permission, and they had to leave a certain amount of food behind so others in the family could have some.
Other Tips for Gardening with Children:
* Raised beds - or even berms - are a huge help if you have small children. Kids are much less likely to trample seedlings in raised beds than they are in gardens planted directly into the soil.
* Let your kids get dirty. Yes, they will track mud and dirt into the house no matter how many times you warn them not to. But getting dirty is a childhood joy and helps instill a love of homesteading in your children. (There's even scientific evidence that dirt lets good bacteria into your kids' bodies, making them less likely to become ill.) If you can, set up a simple outdoor washing station with a hose and a pebbly area for standing on, then let the kids dry off in the sun. It's the stuff of happy childhood memories!
* It may seem obvious, but do remember to keep children away from potentially dangerous objects, like tillers and lawn mowers. Tragic accidents happen every year.
 Photo courtesy of OakleyOriginals.
* Don’t neglect to keep part of your yard open as a place for kids to freely run and play. So many people today insist lawns are useless, or cram their yards with gardens and adult eating areas, obliterating open spaces for children.
I'm not promising that gardening with your children won't result in some frustrations. But I do know that with a little time and patience, working with your kids in the garden is highly rewarding, endlessly good for them, and a boon to your worn out self when they (and you) grow a little older. Gardening and childhood; it's a combination every kid deserves to experience.
Related Posts:
Age-Appropriate Chores for Kids
An Important Role in the Household - What Your Child Needs to Know

(adsbygoogle = window.adsbygoogle || []).push({});
April 16, 2024
Caring for Rabbits in Hot Weather
 Rabbits are generally easy keepers who don't mind cold temps...but hot temperatures? That's what rabbit-keepers worry about. When temperatures begin reaching the mid- to high-80s, or the temperature changes suddenly from mild to hot, you'll need to take special precautions to protect your rabbits from overheating and death. (In the wild, rabbits retreat to cool underground burrows on hot days. Their bodies simply aren't designed to help them cool off easily when temperatures rise.)
 Improve Airflow
If your rabbits are in cages, start by emptying all their manure trays. This allows for better airflow and prevents manure from holding warmer temperatures near the rabbits' bodies. Rinsing the trays afterward will also be a small step toward cooling off cages.
Next, remove any tarps that hang over the sides of cages; you may think tarps will shade the rabbits and promote a cooler cage, but I've personally lost rabbits due to this false reasoning. Airflow is absolutely essential during hot weather and tarps inhibit that. (That said, you don't want your rabbit cages or hutches sitting in the direct heat of the sun; they must be shaded by trees or buildings, or by being inside some sort of shelter, like a carport.)
It's also important to set up fans in the rabbitry, so that everyone gets a nice breeze and airflow is increased.
Cooling Effects
If your rabbits don't already have tiles to sit on, hot weather is a good time to give them some. Although good rabbit cages do not hurt rabbit feet (unless you have rabbits with bad genetics), it doesn't hurt to have a non-wired place where rabbits can sit; more importantly, tiles help keep rabbits cooler when temperatures are high.
As temperatures near the 90s, make use of evaporative cooling by hosing down the ground or floor of the rabbitry. If necessary to keep the floor wet, repeat this hosing down throughout the day.
You'll also need to give each rabbit an ice block. In fact, I recommend preparing ice blocks in the winter, before high temps hit. Being caught in a sudden heat wave with no ice blocks on hand can easily lead to rabbit deaths.
 Rabbits need help cooling off in hot weather.
To create ice blocks, I use plastic food storage containers filled with water. I freeze these until they are hard, and then pop out the ice blocks and store them in Ziplock bags in the freezer. On very hot days, rabbits can potentially go through quite a lot of these ice blocks, so it's good to have enough on hand that as blocks melt, you can supply at least two more to replace every one in use. If you tend to have a lot of hot days, larger ice blocks will make your life easier, since you won't have to replace them as often.
 Pre-making ice blocks for hot days.
Because rabbits chew on everything, always remove the ice blocks from the plastic bags before giving them to your rabbits. Likewise, avoid soda or water bottles filled with frozen water, or store-bought plastic ice packs - especially the type filled with refrigerant gel or liquid.
Although it may seem nuts, if you have more than one rabbit in an enclosure, it's likely they will cuddle during hot weather. (My guess is they are uncomfortable and seeking consolation from their friends.) If possible, have only one rabbit per cage during hot temps - but if that isn't possible, put multiple ice blocks in the cage.
Since rabbits use their ears to help regulate their body temperature, you can also dab cool water onto the backs of their ears using a hand towel, or you can gently and carefully spray the outside (not the inside) of their ears with a spray bottle filled with cold water. If you live where summers are usually quite hot, you may wish to invest in a misting system for your rabbitry.
Other Tips
If you have young kits in a nesting box, you'll find them completely uncovered in hot weather. This is a good thing, since overheated kits quickly die. Make sure the kits are getting a breeze from a fan and use all the tricks mentioned above (except, for furless kits, ice blocks and misting). If temperatures near the 90s or higher, bring the kits and their mother into a cooler building, such as an insulated garage. Be careful, however, to avoid exposing them to a big temperature swing, as this, too, has the potential to kill rabbits.
 Even recently born rabbit kits will uncover themselves during hot days.
One other thing to consider during hot weather is that bucks are naturally (and temporarily) sterile when temperatures rise. It's generally accepted that if it's 85 degrees F. or higher for at least five days, bucks experience sterility, with older bucks being more susceptible and possibly remaining sterile for up to 90 days. However, results vary depending on your particular rabbits.
Finally, if you're reading this and thinking rabbits won't work on your homestead because you regularly have high summer temperatures, look into TAMUK rabbits. This composite breed was created by Texas A & M University in the 1960s. Because they have longer than usual ears and thin fur coats, they are much more heat resistant, needing intervention only when temps are over 100 degrees F. They also are much less likely to go sterile during hot spells.
Related Posts:


March 29, 2024
March on the Homestead
 With March comes plum blossoms!
March feels like it flew by! This is due in part, to my performing in a local production of The Sound of Music. (I was asked to step in as the role of the cranky Sister Berthe when the original actress had to drop out of the show.) It's been fun, although singing "Climb Every Mountain" on opening weekend - without any rehearsal at all - was a little nerve-wracking. But our sweet and talented Reverend Mother had laryngitis, so we did what we had to do to make the show go on!
But also, the weather this month has given me some dry periods to get some real homesteading done. For example, this month I added one-year asparagus roots to my asparagus bed. Sadly, the deer had destroyed most of the plants I put in a few years back; now there's a deer fence around this raised bed, so hopefully the asparagus will thrive! I also planted some bare root June-bearing strawberries in among those asparagus.
March is also when I plant potatoes; I planted more this year than ever before - but still in the grow bags I love. I've also sown Alaska peas and Little Snow Pea White in the garden. And I've slowly been cleaning up the garden beds, giving the chickens, little by little, the bolted kale, collards, and Brussels sprouts.
 Bare root asparagus.
 Planting potatoes in grow bags.
Speaking of chickens, our new flock is doing great. I butchered all the roosters but one beautiful barred roo; he died two days later. (It looked like he had a heart attack in his sleep.) But I was able to grab a teen rooster from a person in town who was unable to keep him. He's not very assertive yet and it took some time for the head hen to accept him, but I think he'll grow up into a gentle but protective guy.
 Our new rooster is a gangly teen.
I took a break from rabbit breeding this winter, but when I suddenly realized how old our mutt Fido was, I decided to mate him with Clydine to see if I could get a son from him that would have similar characteristics. Fido (and his now deceased doe, Fiona) were our original meat rabbits, and they had excellent genetics for the job. Fido's kits usually end up at 5 lbs. dressed - about a pound bigger than our New Zealand kits. Besides, Fido is a sweetie, and I love him; keeping some of his offspring would bring me joy. Clydine had the kits on the 29th, so we shall see how they look as they mature.
 Fido and Clydine's kits.
 Tigger, on watch for rodents in the greenhouse.
 The amazing red wiggler worms in my garden!
March Produce Totals:
At this time, we're mostly eating produce that I preserved last year. Even so, we do eat fresh food from the garden during the cold months; this month, however, most of it is gone...except carrots! To learn more about how and why I am keeping these totals, click here.Carrots: 3 lbs. 5 oz.
Saved in March:
$20.28 if purchased organic or $19.50if purchased conventional.
Saved in 2024 so far:
$126.30 if buying organic and $106.23
March 19, 2024
11 Tips for Growing Great Onions

There's a certain photo of my garden that, when I post in on social media, always seems to inspire a lot of onion-growing questions. While I've given some onion-growing tips on this blog's Facebook page, today I want to expand on those and give you my very best tips for successfully growing your own onions.
1. Select the right type of onion for your area. This is the most important thing to know about onions and can literally make or break your success. All onions are broken down into three main types, called long-day, day-neutral, and short-day.
Long-day onions are best for Northern parts of the U.S. (37 - 47 degrees latitude) and should be planted in early spring (or in the fall, if allowed to overwinter in the garden and form bulbs in spring); long-day onions begin growing bulbs when days have reached 14 - 16 hours of sunlight.
Day-neutral onions (sometimes called "intermediate" onions) are best for the central states (32 - 47 degrees latitude). They begin forming bulbs when there's about 12 - 14 hours of light per day and should be planted in early spring. (The onions in the photo below are Walla Wallas - a day-neutral type.)
 The photo that has everyone asking for onion growing tips.
Short-day onions grow best in Southern parts of the U.S. (25 - 35 degrees latitude). They start growing bulbs when there's 10 - 12 hours of daylight and are usually planted in fall and allowed to overwinter in the garden, to begin growing bulbs in spring.
(adsbygoogle = window.adsbygoogle || []).push({});
2. Choose from seeds, sets, or plants. If you're new to growing onions, I recommend growing them from plants (bundles of bulbs with green or brown shoots) or sets (dormant bulbs without shoots). That said, this can limit the varieties you grow, so don't discount growing from seed. Just read the seed packet and follow its advice.
3. Make sure your soil is well draining. Onions will not grow well - and may even rot - in soil that retains a lot of water.
4. Follow the planting advice that comes with your onion seeds, sets, or plants. If needed, do an internet search to get information specific to the variety you're growing. You need to know how deep you should plant and how far apart your onions should be, in addition to what time of year to plant.
5. Keep your onions well irrigated. Onions that don't have enough water can't grow big and juicy. If you're unsure whether or not you need to water, stick your finger in the soil. If it's dry one inch down, irrigate. Mulching around your onions will reduce the amount of watering needed.
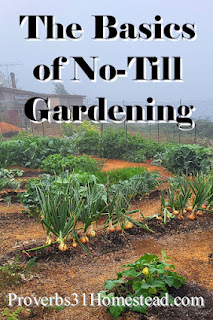
6. Keep your soil fertile. Because I use no-till methods, which includes laying organic matter on top of the soil to allow it to decompose and add nutrients to the garden, I do not need to fertilize my plants. If you garden differently, you'll want to use a balanced fertilizer (though Phosphorus and potassium are most important for bulb growth) every 2 - 4 weeks; onions are heavy feeders.
7. Do not push soil up around your onions. Many people tell me they've been taught that if their onion bulbs appear over the soil, they need to cover them up. This isn't true. As onions grow, their shoulders will naturally rise above the soil line; let them be!
 As onions grow, they will push themselves up above the soil line.
(adsbygoogle = window.adsbygoogle || [<P>]).push({});
8. If your onion bolts, eat it. When an onion develops a thicker middle stem and a flower bulb appears on top of it, it's bolting (i.e. going to seed). Harvest the onion and eat it right away; it won't store well and it won't grow bigger if left in the garden. In fact, if left in place, it may rot. (Bolting is a reaction to stress, such as temperature fluctuations or lack of water, but these stressors may not affect all your onion plants the same way.)
9. Understand when to harvest. Some onions taste great at any size (like my Walla Wallas), so it's fine to harvest one as needed. But don't harvest onions for storage until the leaves fall down and turn yellow or brown. Stop watering your onions when this happens and leave them in the ground for another week or two. Then dig out the onions, brush the soil off them, cut the leaves to about 4 inches long, and cure the bulbs in a single layer in a warm, dry environment (ideally, 7-80 degrees F.) for a couple of weeks. When the necks are fully dry, trim the leaves to 1 - 2 inches and trim the roots close to the bulbs. Store in a dry, cool, dark location, ideally at 40 to 60 degrees F. Stored onions need to breathe, so it's best to place them in a basket (just be careful not to let the basket poke holes in the onions, which will lead to rot), mesh bags, or in a single layer on top of newspaper or cardboard. (If you chose the latter, the onions will last longer if you rotate them periodically.)
 Part of last year's onion harvest,
(adsbygoogle = window.adsbygoogle || []).push({});
10. Know that not all onions store well. If you want onions that will keep in a cool location all winter long and well into spring and possibly summer, look for a storage variety, like Patterson, Cortland, or Yellow Globe. About once a month, check your stored onions for soft spots or decay. Remove and eat any onions that are no longer in good condition or they may cause nearby onions to also begin decaying. For onions that aren't storage types, dehydrate, freeze-dry, or freeze to preserve them.
11. Consider special types of onions. Last year, after many years of wanting to, I added walking onions to my garden. Walking onion types (sometimes called "topset onions") grow not only a bulb in the soil, but also bulbs on top of their leaves. As the bulbs get heavy, the leaves bend down to the soil and the topmost bulbs take root into the ground. Think of them as a perpetual onion; you'll never have to start onions from seed (or buy sets or plants) again.
 Egyptian walking onions. Courtesy of Dave Whitinger.
To grow scallions (i.e. "green onions") you should select bunching types, which don't grow large bulbs; they are really grown only for their mild green tops. As long as the bulbs remain in the soil, they will reproduce for many years. (Do note that you can simply trim regular bulb onion leaves and use them as scallions, but they may be more strongly-flavored and you should stop harvesting leaves by late spring.)
 Scallions (i.e. "green onions" or "bunching onions").
(adsbygoogle = window.adsbygoogle || []).push({});
Related Posts:

March 5, 2024
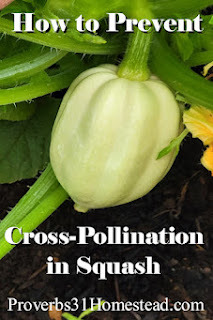
How to Prevent Cross-Pollination in Squash
 This post may contain affiliate links. At no cost to you, I may earn from qualifying purchases made through some links. Please see FCC disclosure for full information. Thank you for supporting this site!
A few years ago, my mother-in-law's cousin moved into a new house and was delighted to see squash growing in the backyard...That is, until she went to eat it. These squash didn't look like any she'd ever seen before and - more importantly - they didn't taste that great. They were, we realized, the result of cross-pollination - something you probably want to avoid in your garden.
What is Cross-Pollination?
When insects, the wind, or humans take pollen from one variety of plant and spread it to another, a hybrid is created using cross-pollination. The two plants "mate," so to speak, and their "babies" show characteristics from both varieties. However, cross-pollination can only happen between varieties of the same type of plant. Therefore, contrary to a common myth, cucumbers (Cucumis sativus) cannot cross-pollinate with zucchini...but butternut squash (Cucurbita moschata) can definitely cross-pollinate with zucchini (Cucurbita pepo).
Is Cross-Pollination a Big Deal?
Sometimes playing around with cross-pollination can be fun. Who knows? You might develop a new variety with excellent traits! However, there are two main reasons you may want to prevent cross-pollination:
 Wind and insects spread pollen around your garden, causing cross-pollination.
(adsbygoogle = window.adsbygoogle || []).push({});
1. If you are growing open-pollinated or heirloom varieties* and want to accurately save their seed, or
2. If you want volunteer plants (i.e. plants that grow from the seeds left behind in the garden by rotten fruit) to produce fruit that's just like the parent plant.
A common misconception is that cross-pollination will affect the current year's plants. For example, someone once told me that my yellow summer squash and zucchini were planted too close together; the result, this person said, would be weird fruit. However, if yellow summer squash and zucchini cross-pollinate, the parent plants will not be affected. They will continue to produce fruit that's true to the varieties planted. Cross-pollination will, however, affect the parent plant's "babies" (i.e. the seeds in the fruit, which, if planted, will result in a weird cross fruit).
Cross-pollination never affects the current year's fruit. So if you aren't saving seeds, you don't need to worry about it at all. (In vegetable gardening, there's one exception to this cross-pollination rule: Corn. The parent plants, if cross-pollinated, can grow ears of corn that aren't true to variety.)
I think there are two reasons people find the concept of cross-pollination confusing. One is that environmental factors - such as irregular irrigation or poor pollination - can create weird-looking fruit that sometimes gets incorrectly blamed on cross-pollination.
The other, more common, reason is that sometimes volunteer plants pop up in the garden and produce odd fruit. The latter happens because the previous year's squash cross-pollinated and some of the fruit was allowed to rot in the garden. This left cross-pollinated seeds in the soil, which popped up and were allowed to grow.
 Cross-pollination does not affect the current year's fruit.
(adsbygoogle = window.adsbygoogle || []).push({});
To prevent this type of mishap, I suggest two things:
1. At the end of the season, remove all fruit from your squash plants and do not compost it or allow it to rot anywhere near your garden.
2. Mark the exact planting position of your squash seeds with a stick. If any additional seedlings pop up in that area, you'll know they are volunteers that should be disposed of. (Or at least marked as a new hybrid.)
Separate Lives
But what if you want to save your open-pollinated squash seeds and have them be true to the parent plants? The most commonly quoted solution is to simply plant them further apart. The problem with this is that to truly work, you'd have to plant them at least a half mile away! Very few of us can do that. (Although the South Dakota State Extension Office website notes, "The presence of barriers such as large buildings, a thick stand of trees, or a hill can inhibit pollinator movement and allow for shorter isolation distances." Emphasis on can.)
However, there are workarounds. You could, for example, cage entire plants and place row cover fabric over them - or you could secure bags over the squash flowers. In both cases, to get fruit, you'd need to hand pollinate: Go out early in the morning and, with an artist's paintbrush or a Q-tip, collect pollen from a male flower's stamen (the penis-like growth in the center of the flower). Find a female flower, which will have a mini fruit growing just below the flower petals, and brush the pollen onto its stigma (the female version of the stamen, found in the center of the flower). For best results, the female flower should be pollinated within four hours of opening in the morning. Re-bag the flowers after pollinating. Bags or other covers can be removed from female flowers once you see that fruit is starting to grow.
 Both summer squash and winter squash are affected by cross-pollination.
(adsbygoogle = window.adsbygoogle || []).push({});
As you can imagine, bagging and hand-pollinating all the flowers on a squash plant can be time-consuming. Therefore, consider choosing just a few male and female flowers to hand-pollinate. Bag those, and once the fruit starts growing, gently and loosely tie a string on the the female flower stems so you can later identify the fruit that was hand-pollinated. Save seed only from that fruit.
You can also almost eliminate the risk of cross-pollination by separating cultivars. There are three main cultivars in the edible squash family:
Cucurbita pepo (C. pepo): such as pattypan, straightneck, New England sugar pie pumpkin, acorn, delicata, spaghetti, and zucchini squash
Cucurbita moschata (C. moschata): such as butternut, crookneck, Tromboncino, and Long Island Cheese pumpkin
Cucurbita maxima (C. maxima): such as buttercup, Hubbard, sweet meat, Red Kuri, and Cinderella pumpkin.
If you grow one plant from each cultivar, it won't generally matter if they grow close together. However, this method is not 100% effective, so if saving pure seed is important to you, I recommend bagging and hand-pollinating, instead.
* "Open-pollinated" means the plant will produce "babies" that will be true to the parent plant. "Heirloom" means an older variety of open-pollinated plant. These are in contrast to "hybrid" (or "F1") plants, which will not produce "babies" that are true to the parent plant.
 Understanding cross-pollination is vital when you want to save your own seed.
(adsbygoogle = window.adsbygoogle || []).push({});
RELATED ARTICLES:


February 28, 2024
February on the Homestead
 Dinner of homegrown food and homemade bread.
February is an exciting month on our homestead. Not only is the weather unpredictable - false spring one moment, hail or snow the next - but it's a time for prep work.
For example, I finished butchering our excess roosters. (You can read about why and how I butchered them here.) This time, things went much more easily. (Funny how some practice helps that happen!) I was pleased with the weights I saw; I had several roosters who were 5 lbs. dressed. Most were in the 4-4.5 lb. weight range. The littlest was 3.5 lbs. Bear in mind that they were not a meat breed; they were farmyard mutts from dual-purpose or layer chickens. We've already eaten a couple, and they are absolutely delicious. So much tastier than store bought, of course - they just don't have as much breast meat as commercial Cornish Cross chickens do.
So...I was down to a single rooster, which I chose because of his good looks, his friendly manner, and his eagerness to care for the hens. He spent two blissful days in rooster nirvana...and then I found him dead in the hen house. He appeared to have died in his sleep, poor guy. (That was a first.) So now I'm asking around with locals to see if I can find a rooster someone doesn't want. Sigh.
 I butchered a total of 10 roosters. Here's half.
 The not-so-lucky rooster who remained.
This made me think about our dear Fido - a meat mutt rabbit buck who has given us lots of wonderful babies. He's a gentle soul, and so handsome...and he's just not quite been himself since his mate Fiona died. I suddenly realized he's probably pretty old. We don't know his exact age, but we figure he's at least 6 years old. So I decided it was time to breed him in hopes of setting aside at least one of his offspring to keep his line going on our homestead. As usual, Fido was eager to comply, and so was Clydine.
 Fido and Clydine, over a year ago.
But the real sign that winter is nearing it's end is that I've been sowing seeds. I started my winter sowing early this month, sowing Bull's Blood beets, Umpqua broccoli, Franklin Brussels sprouts, Farao Cabbage (a new variety for me, said to stand a long time in the garden without splitting), Morris Heading collards, Amazing cauliflower, wild Russian kale, Winter Density lettuce, Javalin parsnips, Purple Top turnips, Legend tomatoes, plus a few flowers: zinnia, marigold, cosmos, and Shirley double poppies. Already, all the seeds have germinated.
 Winter sown seeds.
I also started some warm-season crops indoors: Dark Star tomatoes (which did very well for me last year), plus two new-to-me tomato varieties: Koralik and Oregon Spring. I also sowed Golden Star bell peppers, which were highly productive in my unheated greenhouse last year, as well as new-to-me Early Jalapeno and Pathfinder Serrano peppers. I'm also trying my hand at onions from seed. (Early in my homesteading journey, I tried unsuccessfully to grow onions from seed. Thereafter, I only bought sets.) I started a few Walla Walla and Patterson storage onions.
 Indoor sown seeds.
The winter garden is almost done, but for now, I still have a few things I can harvest fresh. The Brussels sprouts are looking brown on the outside, but if I peel back the first layer of leaves (like you would a cabbage), they are beautiful and tasty. I harvested the tippy tops of the Brussels (the part that looks like a small - but not mini - cabbage) a few days ago. I also harvested the cabbages in the garden, which were mostly secondary growths that appeared after harvesting the main heads. Most of these were a little bigger than a baseball.
 The February garden.
The carrots I overwintered have few leaves, but the roots are absolutely delicious! I have a few small beets, which I'll give a little more time to grow before I harvest them. There are some turnips, too. The exposed roots may not look pretty, but I'll peel them and they'll be at their peak of good flavor.My remaining kale and collards have gone to flower, which makes them bitter (though still edible). I'll let the bees enjoy the flowers for now, but will soon pull the plants and feed them to the chickens.
 Overwintered turnips.
 Overwintered carrots.
 Cabbage and Brussels sprout tops.
 Brussels sprouts.
February Produce Totals:
At this time, we're mostly eating produce that I preserved last year. Even so, we do eat fresh food from the garden during the cold months, as listed below. To learn more about how and why I am keeping these totals, click here.Serrano and Jalapeno Peppers (from the unheated greenhouse): 1.64 lbs------------> $2.59 conventional (no organic option; our Walmart doesn't sell serranos, so I used the price for jalapenos only)
Brussels sprouts: 10 lbs. 1 oz.
Brussels sprouts tops: 1 lb. 2.5 oz.
Cabbage: 3 lbs.
Carrots: 1 lb. 4 oz.
Saved in February:
$50.47 if purchased organic or $35.86 if purchased conventional.
Saved in 2024 so far:
$106.02 if buying organic and $86.73
 I learned to peel chicken feet this month!
February 20, 2024
GMOs and Purple Tomatoes
This post may contain affiliate links. At no cost to you, I may earn from qualifying purchases made through some links. Please see FCC disclosure for full information. Thank you for supporting this site!
I used to always say (and in fact, I wrote this in my most recent Self-Reliance Magazine article) that there were no GMO (bioengineered) seeds being sold to consumers - that only commercial farmers have access to them. Well, about a week ago, I discovered that has changed.
 The first GMO (bioengineered) seed sold to consumers, via Norfolk Healthy Produce.
Norfolk Plant Sciences apparently spent 20 years trying to insert the DNA of a dark purple snapdragon flower into a garden tomato they dubbed "The Purple Tomato." Now anyone can pay $20 for 10 seeds for a deep purple tomato that is touted as being high in anthocyanin, a type of antioxidant found naturally in eggplants and blueberries. Basically, Norfolk wanted to make a cool-looking tomato so "Americans [would] change their perceptions of GMO foods." Polls show most people agree bioengineered food is a bad idea, but Norfolk is striving to change that.
While inserting a flower's genes into a tomato may not exactly seem evil, bioengineering and gene editing don't stop there. Microorganism, insect, and even mammalian genes are being used - something that would never happen without human intervention. Mankind does not have a great history of messing with nature; there always are unintended consequences that we don't discover until later. (One has already popped up: Bioengineered crops creating weeds that are resistant to herbicides.)
My biggest concern, as I stated on Facebook, is that we may quickly lose our access to pure seeds. We already know commercial bioengineered crops are cross-pollinating with non-GMO plants all over the United States. Now imagine bioengineered plants in home gardens. The risk of cross-pollination and GMO contamination is much, much higher.
 Baker Creek's 2024 catalog.
(adsbygoogle = window.adsbygoogle || []).push({});
Then yesterday, Baker Creek Seeds, a business whose success can largely be attributed to their styling themselves as the source for non-GMO, heirloom seeds, made a terrible announcement. The purple tomato they featured on their 2024 catalog cover, the purple tomato they were pushing heavily in their marketing, the tomato they called "Purple Galaxy," was being pulled from sale.
Apparently, Norfolk caught wind of Purple Galaxy and contacted Baker Creek to say something along the lines of: That looks a lot like our Purple Tomato. We think you're violating our patent.
Baker Creek, in their announcement about this matter (which you can read in full at the bottom of this post), told a long story about how they found Purple Galaxy through a European plant breeder known for collecting rare tomato seeds. Apparently, this person lives in a country where bioengineering is banned and it took years for him to achieve a true purple tomato. When he was done, Baker Creek sent samples of the tomato to a European lab to be tested. Purple Galaxy "did not contain the two genetic markers" they used to test for GMO contamination, Baker Creek says.
Baker Creek further states that even after Purple Galaxy was offered in their 2024 catalog, they continued to run tests (which is interesting in and of itself) - and some of these tests were "inconclusive." After Norfolk contacted Baker Creek, they did additional testing, which "did not conclusively establish that the Purple Galaxy is truly free of any genetically-modified material."
While I applaud Baker Creek for their transparency, there are still a lot of unanswered questions here. Foremost in my mind is this: How can testing for GMO contamination be "inconclusive?" In fact, I asked Baker Creek this question; they haven't yet answered. (To be fair, they are probably inundated with questions right now.) If, indeed, Purple Galaxy is bioengineered or is GMO contaminated, how did that happen? How could it possibly have happened accidentally in a country where bioengineered food is banned? Was Baker Creek - the most famous non-GMO seed supplier - targeted and duped on purpose?
And the hardest question of all: If Baker Creek, who bothered to test their seed to check for GMO contamination, got duped, have other seed companies, not known for running such tests, been duped, too?
How bad is GMO contamination already?
If you are as concerned about this as I am, your first thought may be: "Time to save all my own seeds." But, friends, it isn't that simple. For example, corn is typically thought safe from cross-pollination if it is 250 feet away from other varieties of corn, but there are cases where GMO contamination has been found in corn grown that far away or further. To be really, truly, sure there's no unwanted cross-pollination from wind, insects, or other pollinators, you have to cover each plant with fabric that wind, insects, and animals can't penetrate, and then hand pollinate.
That said, I do encourage you to save your own seed as much as possible, and to help you do so, I recommend the book Seed to Seed by Suzanne Ashworth. Here, you'll learn techniques for saving pure seed, plus details on correctly harvesting seed from every type of vegetable.


(adsbygoogle = window.adsbygoogle || []).push({});
February 8, 2024
Easy French Bread Recipe
 This post may contain affiliate links. At no cost to you, I may earn from qualifying purchases made through some links. Please see FCC disclosure for full information. Thank you for supporting this site!
Nothing beats a crusty French bread loaf when you're serving soup or spaghetti. But store bought French bread often contains a host of dubious ingredients. For example, an "artisan" loaf from Safeway, which is a pretty clean product, as far as grocery store baked goods go, includes Soybean oil (a GMO ingredient and one of the most processed and least healthy fats you can eat), plus sugar and dextrose (both are sugar and ). Besides, if you buy your French bread, you cheat yourself of the satisfaction of making it yourself! (Not to mention, you'll miss the delightful aroma of freshly baked bread streaming through your house.)
It takes no special tools or no fancy techniques to make the French bread my family loves. Give it a try!

Easy French Bread Recipe
1 1/4 cup of warm water (80 to 90 degrees F.)
2 teaspoons granulated cane sugar
1 1/2 teaspoons active dry yeast
1 teaspoon sea salt
3 - 3 1/2 cups all purpose flour
1 egg
1 tablespoon water
1. Measure the water in a glass measuring cup, then add the sugar, stirring until dissolved. Stir in the yeast.
2. Put the salt and 3 cups of flour into a large bowl. When the water mixture is foamy (which proves that the yeast is still good), add it to the bowl and mix everything together well.
3. The dough should be soft and pliable, but not super sticky to your hands. If necessary, add a little more flour to get the right consistency. (I recommend adding it a 1/4 cup at time. In total, I usually end up with 3 1/2 cups of flour.)
4. Lightly flour your countertop and knead the dough for 6 to 8 minutes, or until smooth and elastic. (To learn how to knead dough, see the note (*), below.)
 Let the dough rise.
(adsbygoogle = window.adsbygoogle || []).push({});
5. Place a thin layer of oil on the inner surface of a large bowl, so the dough doesn't stick to it. (For bread rising, ceramic bowls or plastic rising buckets seem best.) Place the dough in the bowl, tossing it to coat its entire surface. Cover with a clean kitchen towel and place in a warm location (ideally 75 to 78 degrees F.) to rise until doubled (about 1 hour).
6. Place the dough back on the floured counter and cut it in half with a serrated knife. With your hands, press and shape the halves into rectangles measuring approximately 8 x 10 inches.
 Shape the dough into two rectangles.
7. Starting at a long end, roll up each rectangle, creating a log shape. Pinch the seam, as well as the ends, under. (If they don't want to stay pinched, wet your fingers and try again.)
 Allow the loaves to rise.
(adsbygoogle = window.adsbygoogle || []).push({});
8. A French loaf pan makes the nicest loafs, but you can simply use a baking sheet, as I do. Grease it (or place parchment paper on top of it), and place each loaf on top, several inches apart. Cover with a kitchen towel and allow the loaves to rise in a warm place for another 30 minutes.
9. Preheat the oven to 375 degrees F.
10. To get that lovely golden, crispiness on the outside of the bread, create an egg wash by beating together 1 egg with 1 tablespoon of water. Just before putting the bread in the oven, brush the wash over the top of the loaves, then use a serrated knife to cut 4 diagonal slashes on top of each loaf.
11. Bake for 20 to 25 minutes, or until golden brown. Cool on a wire rack.
 Finished French bread.
* HOW TO KNEAD BREAD:
1. Cover your hands with a light dusting of flour.2. Using the heel of your hands, press down and push the dough away from you. Then fold the dough back over itself, toward you.3. Turn the dough one quarter- to half-way around and repeat step 2.4. Follow the recipe directions to know how long to knead the dough. When the recipe doesn’t specify, knead until the dough is smooth and shiny. When you pinch a bit of well-kneaded dough in your fingers, it should feel a lot like pinching your earlobe. Related Posts: No Fail Bread for Beginners
Crowd-Pleasing Dinner Roll s


(adsbygoogle = window.adsbygoogle || []).push({});
February 5, 2024
How to Make Chicken Feet Broth
 Part of the reason I homestead is that while meat is the most important part of my healthy diet, grocery store meat is often...well, not ideal. When I raise my own meat, I know not only what those animals have eaten, but I also know they've had a contented life, and then a quick, humane death that's as stress-free as possible.
But when you start raising meat, one of the things you'll likely find yourself wanting to do is use every possible part of the animal. To me, doing otherwise seems wasteful and unthankful. That doesn't mean I always have to eat nose to tail (although I'm always experimenting with ways to do that). Sometimes, it just means feeding the dogs or chickens the bits I don't want, or taking all the remains out into the woods for the wildlife to eat - or even simply burying the remains to help feed the soil.
That said, when I recently butchered some of our roosters, I decided it was time to use chicken feet (sometimes called "chicken paws") for making broth or stock. I've known about this practice for a long time, but since we rarely butcher chickens (we prefer rabbit meat to chicken meat), I never got around to trying it. If you don't butcher your own chickens, you can simply buy chicken feet at a butcher shop or grocery store. (However, like grocery store chicken meat, they get washed in bleach...yuck!)
As it turns out, chicken feet are eaten all over the world, and in some cases, are considered a delicacy. They are rich in collagen, calcium, magnesium, glucosamine, chondroitin, and minerals. They are well worth using, and stock or broth is probably the most accessible way for newbies to use them up.
Preparing Your Own Chicken Feet
This article will take you step-by-step through the process of using chicken feet to make broth, but first I want to discuss the difference between store bought chicken feet and the feet you get from your own chickens: Cleanliness. If you raise chickens, you know how nasty their feet can get, so if you butcher your own birds, you'll need to get their feet clean before you bring them into your kitchen.
If you're plucking your chickens, you'll scald them first. One option for getting the feet clean is to use that same water you use to scald the bird to also skin the feet. The trick here is to get the feet just hot enough to make them super easy to peel, but not so hot that they start cooking and the skin clings to the bone and cartilage. (More on skinning chicken feet, below.) If you choose this method, I suggest saving all the feet for last, so you don't get poop and debris in the water you're using to scald your birds before plucking.
 A bucket of chicken feet, on butchering day.
Instead, I chose to remove the feet from each bird as I was butchering, and toss them in a nearby bucket of water. This removed most of the filth. When all the butchering was done, I put the feet in a bowl and add fresh salted water. A splash of vinegar to help remove grime is fine, too. Soak the feet in the fridge overnight, or at least for a few hours. Then rinse the feet and store them in a Ziplock-style bag in the fridge until you're ready to use them.
Peeling and De-Nailing
It's a good idea to remove the nails from each foot before you begin cooking. They aren't edible. And you really don't want to go fishing into your finished broth to find every toenail that has fallen off. (Ick!)
 Nails removed!
(adsbygoogle = window.adsbygoogle || []).push({});
To remove the nails, I used garden pruners, but good poultry shears should work, too. I chose to remove the nails before soaking the feet in a bowl of water, but it's fine to do it after soaking and rinsing, too.
 You never know where homesteading will take you!
Now the feet are ready to turn into broth!
Making Chicken Feet Broth
There are many tools you can use to make broth. The most common is simply a large pot on a stove. I chose to use an electric turkey roaster. Other options include using a crock pot or pressure cooker. Then follow these steps:
1. Stick the feet in the pot. If you have chicken necks or bones, add those, too. If desired, you may add onion skins, carrots, green carrot tops, celery, and/or a few herbs. (Don't overdo the herbs, however, or the broth may turn bitter.) Cover with water. I also like to add a dash of vinegar to help leach nutrients out of the bones, as well as a little sea salt.
 The makings of a fine broth.
(adsbygoogle = window.adsbygoogle || []).push({});
2. Bring the pot to a boil, then reduce the heat to a simmer. When the broth is dark and rich-tasting, it's done. This typically takes at least 4 hours, but best results are usually found by simmering overnight.
 The resulting, rich, beautiful broth.
3. Turn off the heat and strain out the solids. Once the pot is cool, you may wish to remove the fat. (This is only absolutely necessary if you're going to can the broth.) To do that, place the pot in the fridge, covered, overnight. In the morning, peel off any fat that has risen to the top and hardened.
 After sitting overnight, there is very little fat in this broth. This amount is safe for canning.
Now you can freeze the broth, freeze dry it, or can it. For more details - including information on how to can broth - see this post. To learn how to make beef stock, click here. For information on making vegetable and fish stock, click here.
 Finished broth. The little particles are bits of the food used to make the broth. If you prefer, you can strain those out before canning or otherwise using.
Related Posts:

(adsbygoogle = window.adsbygoogle || []).push({});


