
Kristina Seleshanko's Blog, page 6
August 21, 2023
Summer on the Homestead
 The garden this summer.
This post may contain affiliate links. As an Amazon Associate, and at no cost to you, I earn from qualifying purchases made through some links. Please see FCC disclosure for full information. Thank you for supporting this site!
"For I consider that the sufferings of this present time are not worth comparing with the glory that is to be revealed to us. "
_______________________
It's been a while since I've updated you on homestead happenings; in fact, I completely omitted a spring update! This was because I had the worst allergies ever this spring; I had to resort to taking Allegra in the morning and Benadryl at night. It certainly made homesteading difficult, since I was trying to stay inside and the allergies themselves made me super tired, but I did get all the essential spring work done. However, I completely ignored my flower beds, so now they are a weedy mess.
A more fun thing has also eaten up a good deal of my time: I'm rehearsing for the role of Mary Poppins in a local musical theater production. Some of you may know that once upon a time, I was a professional singer and actress. That was many years ago...and frankly, I haven't done a lot of theater since my kids were born, so I'm thrilled to be working on this challenging production. Nevertheless, six rehearsals a week is catching up with me.
Maybe that's why my body has been rebelling. I usually suffer from pretty severe hip pain in the spring and fall (my hips were never the same after pregnancy bedrest), but this year, it's been all summer, too. In addition, my abdominal adhesion (from having two C-sections) has really been acting up severely. Then, a couple of weekends ago, I woke up with what I think was a pinched nerve in my back - a new ailment for me. (All these aches and pains are much better now; THANK YOU to those who saw my post on Facebook and prayed for me.)
 Zucchini, green beans, jalapenos, and patty pan squash.
Due to cooler than typical weather, the garden got off to quite a slow start, but thankfully now it's producing plenty. I currently have lots of summer squash, cucumbers, Walla Walla onions, cabbages, kale, collards, turnips, beets, green beans, and kohlrabi for harvesting. Soon, they'll be more snow peas, broccoli, cauliflower, and winter squash to harvest.
Speaking of squash, much of mine got off to a rocky start. This was because a lot of my garden expansion (which was largely designed to make room for more winter squash) included bringing in new soil, which was a bit "hot" (i.e., still composting). At first, I thought the cooler weather was preventing my squash from growing (and it probably did contribute), but I soon realized my squash plants were suffering from a lack of nitrogen. I began fertilizing on overcast mornings, and now those plants are catching up. Only time will tell if I get mature winter squash before the first hard frost.
 The buttercup squash has been thriving!
 A spring harvest of broccoli, turnips, green beans, and snow peas.
 Thems some turnips!
Part of the garden expansion was also to accommodate Egyptian walking onions, which I will plant this fall. These are multiplier onions, meaning small bulbs grow at the top of the leaf stalks, the stalk bends down, and the little bulbs on top root into the soil. The idea here is that I should never have to buy onion seeds or starts again. Alas, I still feel like I need more room to plant a section for garlic, not to mention the raspberry plants I really want to grow. Perhaps next year.
This year in the greenhouse, I chose to only plant one cherry tomato, and then filled the rest of the space with bell peppers (Early Wonder), a store bought jalapeno plant, and some eggplants (Millionaire). I've been very pleased with the results! I would get little, if anything, out of these plants if I grew them outside, but they've been pretty prolific in the greenhouse.
 Peppers from the greenhouse.
 Freeze drying some of the broccoli harvest.
  Dehydrated zucchini noodles.
On the animal front, we've had ups and downs. I lost my favorite doe, the beautiful Japanese Harlequin Fiona, this winter. I loved that sweet rabbit, and I felt her loss deeply. But I was glad that I had children from her - two beautiful, big magpie does: Chocolate and Vanilla. Chocolate has already given me several litters, including the most beautiful litter of rabbits (lots of magpies and one Japanese harlequin included!). Her sister Vanilla, however, miscarried her first litter and after she gave birth to her second litter - in the wee hours of the morning - she died. I tried to save her litter by giving them to another doe (Clyde) who had 8 week olds and was still nursing. Although Clyde adopted those kits as if they were her own, they died. I'm not really sure why, but I wonder if it's because Clyde didn't have colostrum. I haven't been able to find any reliable information on this topic.
(Some people wonder why I didn't give the kits milk replacer. You can, indeed, feed kits goat milk replacer, but it requires a lot of time - you have to feel them with a sponge to prevent aspiration - and the results often lead to kit death anyway. This is because rabbit kits eat their mother's milk and manure (cecotropes) in order to get the digestive enzymes needed to properly digest any solid food. Therefore, hand fed kits often die upon weaning.
 Such cuteness!
 De babies.
Our chickens are on the older side and have definitely slowed down their egg laying, so we recently incubated some of our neighbor's chicken eggs. They are "barn yard mix" birds, which is new for us. (We've always raised pure breeds.) They are thriving, and nearly ready to go live outside.
 One of our prettier barnyard mix chicks.
We're hoping to build a new hen house for them, since our old one is starting to fall apart, but until then, we've been very happy to install an automatic door opener/closer, which is something we've wanted for a very long time. Chickcozy sent me one, and I must say, we are loving it! Soon I will write an entire post about what to look for in an auto hen house door opener/closer, so stay tuned!
As for the quail, they are still leading their crazy lives and giving us eggs and meat. And we are still hoping to someday put up a barn so that we can have sheep and other, bigger livestock again soon. (Our original flock was eaten by the local bear population.) I have no idea when that might happen, though.
 Waiting (impatiently) for tomatoes to ripen.
 Making dill pickles.
 Zucchini and patty pan squash pickles.
 Fresh dill for pickles...and beneficial insects!
RELATED POSTS:


July 20, 2023
Growing Vegetables in the Winter (HINT: Start Now!)
 This post may contain affiliate links. As an Amazon Associate, and at no cost to you, I earn from qualifying purchases made through some links. Please see FCC disclosure for full information. Thank you for supporting this site!
PLEASE NOTE: While it may seem odd to publish a piece about winter gardening in the middle of July, now is actually the time to begin planning your winter (or fall) garden. Read on for more information!
When I first started homesteading, my goal was to grow all my family's vegetables, eating lots of them fresh in the late spring, summer, and fall, and preserving the rest for winter and early spring food. It was a lofty goal, to be sure - more ambitious than I realized at the time. And it's really only been in the last few years that I've learned to truly appreciate winter gardening and the fact that I don't need to spend countless hours preserving veggies for the "off-season." Instead, I can pluck vegetables directly out of our garden in the midst of winter.
But...growing vegetables in winter? Surely that's not possible? Ah, my friends, it's completely doable - and without a fancy hothouse or supplemental lighting! As organic market gardening guru Eliot Coleman writes in his book The Winter Harvest Handbook, "It's a misconception that all vegetable crops need summerlike temperatures for best growth...Not only do many of them tolerate cold conditions and even temperatures well below freezing...they actually thrive and are sweeter, tenderer, and more flavorful" when grown in winter.
Although it astonishes many, a good portion of people in the United States can grow vegetables in winter without much effort. If you're in USDA gardening zones 5 and up, the vegetables I mention in this article should do well in your winter garden. But even if your winter temperatures drop below -15 degrees F., these plants will still grow for you; they'll just need some added protection to survive.
 Fresh kale harvested during a snowy winter.
How Much Protection Does Your Winter Garden Need?
For winter gardening, it helps tremendously to choose slower-growing varieties, as these plants tend to have more resistance to frost and snow. Therefore, instead of choosing, say, Lancelot leeks (which mature in a relatively speedy 70 days), you might instead select Giant Musselburgh (which takes 105 days to reach maturity). For most plants mentioned in this article, I've suggested varieties that are suitable for winter gardening - but don't feel these are the only varieties you can grow during winter. When looking at seed catalogs, you can spot potential winter garden varieties by looking for longer-growing types that have "winter" in their name, are noted as being cultivated in a cold region (such as Alaska or Russia), or are described as "cold hardy."
Also, even if you live in a gardening zone where winter gardens are a breeze, keep an eye on your local weather. If temperatures drop below 25 degrees F. and are expected to stay there - or drop even further - it's important to mulch over your plants. When a thick layer of straw or dry leaves is applied over soil that isn't already frozen, and also placed over growing plants, the mulch significantly warms the vegetables, preventing damage from cold.
If you live up North and get many feet of snow each winter, you're probably not eager to trek outside and shovel that snow in order to harvest a few carrots. So I recommend that you get creative. For example, while an unheated greenhouse or hoop house might be ideal, a few cold frames, low tunnels (sometimes called polytunnels), or cloches can give you a nice supply of fresh veggies for winter. Even putting a few pots in a sheltered area, like your covered porch, may give you a place to winter garden without much fuss.
No matter where you live, though, it's best to avoid picking food from your garden when the soil is frozen solid. In some cases (collards, come to mind) this might be okay if you're going to cook and eat the food immediately. But generally speaking, it's better to wait to harvest until freezing temperatures have passed and the plants thaw naturally in situ.
 While much of my garden is dormant during winter, I still harvest plenty of fresh veggies.
(adsbygoogle = window.adsbygoogle || []).push({});
Timing Is Everything
The key to making winter gardening work is to get your seeds or seedlings in the ground long before winter. The natural decrease in light in winter means that plants do little to no growing during these months. Instead, they just sit there, in a sort of hibernation, waiting to be harvested (or waiting to go to seed when spring comes). Therefore, aim to have your winter crops at full maturity when daylight drops to 10 hours or less per day. (This is sometimes called "The Persephone Period," referencing Greek methodology's harvest goddess, Persephone.) If your crops are at about 75% maturity when the Persephone Period begins, they won't reach full maturity until there are more than 10 hours of daylight available.
You can learn when your Persephone Period is by looking at the sunrise and sunset dates for your area; your local extension office can provide this information, as can many weather apps. Next, check your seed packets for each plant variety's "days to maturity;" use that figure to count backward from the start of your Persephone Period. Finally, add 2 or 3 weeks as a hedge against slow growth. This date is the very last day you should plant that crop for your winter garden.
Do note that once the Persephone Period ends, winter vegetables are likely to bolt (i.e., grow flowers and go to seed), which tends to make the edible parts of the plant bitter or woody. You can delay this problem by cutting off any flower buds as soon as they appear. However, once bolting begins, it's time to harvest (and perhaps preserve) as much as possible before the plants become good only for livestock or the compost pile. Perhaps it's specific to my region, but I also find that once the Persephone Period ends, aphids tend to attack my bolting plants. I deal with this by promptly giving our chickens affected leaves or whole plants. This stops pests in their tracks - and gives my hens a much-loved winter treat. (For more tips on dealing with aphids, see this article on organic pest control.)
 Carrots harvested in winter.
What to Grow in a Winter Garden
CARROTS and PARSNIPS: Did you know that carrots and parsnips, like most crops we'll be looking at in this article, actually taste sweeter when harvested in the winter? That's because these plants convert some of their starches to sugar in order to protect their cells from freezing; as a result, their flavor improves.In my zone 7 garden, I like to plant carrots and parsnips in the spring, then harvest them as needed all summer, fall, and winter - literally leaving them in the ground until needed. In very cold weather, don't be alarmed if the leaves of these plants die back; their edible roots are still perfectly edible.
Eskimo, Napoli, and Little Finger are nice choices for winter carrots. For parsnips, consider White Spear, Warrior, Gladiator, and Albion.
GREEN ONIONS: If you plant onions in the fall, you can clip off their green tops to use as green onions (a.k.a. scallions) all winter long. (Just be sure to always leave behind at least two leaves.) If you stop harvesting the greens in the late winter or early spring, the plant roots will develop into full-sized onions, ready to harvest that summer or fall, depending upon the variety you're growing.
For best results in the winter garden, look for onion seeds or starts that are labeled as "overwintering;" most will be "long-day" types. Bridger, Walla Walla, Hi-Keeper, Electric, and Tough Ball are popular choices.
 Winter leeks and parsnips.
(adsbygoogle = window.adsbygoogle || []).push({});
LEEKS: Leeks are a quintessential winter crop, but not all varieties are as hardy as others. In general, look for types that have thick stems, which better resist cold damage.
Durabel, Tadorna, Giant Musselburgh, and Bandit are some of the most cold hardy leeks available.
 Winter beets.
BEETS: I always seem to have some spring-planted beets that aren't mature by fall. I leave them in the ground over winter and by early spring, they are of edible size. Of course, you can also time your beets so they mature right before the Persephone Period, and then harvest beets as needed throughout the winter. Just watch their growth, especially as daylight hours begin increasing; if the beets get huge, they will likely be too woody to eat. You can also grow winter beets just for their tasty leaves.
For winter gardening, Lutz is a popular variety, as is Detroit Dark Red.
 Turnips are a great winter crop.
(adsbygoogle = window.adsbygoogle || []).push({});
TURNIPS and RUTABEGAS: These vegetables improve in the cold months, and provide not only their tasty root, but nutritious leaves that can be eaten like spinach or kale. (Don't worry if the leaves feel prickly; those prickles disappear as soon as the leaves are cooked.) Eventually, both turnips and rutabagas get woody if you let them sit in the garden too long, but they are usually slower to do this than are beets.
For winter gardening, try Purple Top or All Top turnips, as well as Helanor or Marion rutabagas.
 Brussels sprouts harvested in winter.
BRUSSELS SPROUTS: If you grow your own Brussels sprouts, you're in for a real treat; they taste so much better than the Brussels sold at grocery stores! For best flavor, wait to harvest them until after a good hard frost. Brussels sprout plants will last in the garden all winter long, unless they get buried in snow.
To avoid the plant's large leaves from getting mushy and making a mess on the round heads we like to eat, pick them off and eat them (like any other leafy green) as the heads mature. (Or, if you prefer, toss them to your livestock or into your compost pile.) If your Brussels sprout heads look unappealing due to weather damage, just peel back the first couple of layers of leaves on each head, revealing fresh, quite edible food.
Some great varieties for cold weather include Igor, Redarling, Snowdrop Kalettes, and Red Rubine.
 Kohlrabi and winter radishes.
(adsbygoogle = window.adsbygoogle || []).push({});
KOHLRABI: As long as you don't get enough snow to bury the plant, kohlrabi will sit in the garden all winter, waiting to be harvested as needed. Don't forget that their leaves are edible, too. Eventually, the bulb part will get woody, so it's smart to finish harvesting your kohlrabi before the days begin lengthening.
I find that both Giant Winter and Superschmelz varieties do well in winter gardens.
 Collard leaves after a hard frost.
KALE and COLLARDS: Both of these leafy greens sit very well in the winter garden, but collards survive snow considerably better. I plant both in the spring, and then harvest all summer, fall, and winter.
For winter kale, Wild Siberian (sometimes called Wild Russian kale) is my favorite, but Winterbor, Siber Frills, and Scarlet are also popular choices. For collards, consider Top Chop, Champion, and Georgian Southern.
 Cabbage harvested in winter.
CABBAGE: Although the outer leaves, which aren't typically eaten (although they are perfectly edible if steamed or sliced thin and then cooked) will die back, the head of cabbage itself will survive in the garden as long as the plant isn't buried in snow. Expect to peel back a few outer layers of leaves, which will be damaged by cold temps. I plant my cabbage in the spring to enjoy all the way through to the early days of the following spring.
Some particularly cold hardy cabbages include Danish Ballhead, Late Flat Dutch, and Tundra.
 Freshly harvested Jerusalem artichokes.
(adsbygoogle = window.adsbygoogle || []).push({});
JERUSALEM ARTICHOKES: Although the above-ground parts of this plant (which look a lot like sunflowers) will die back in the fall, the tuber remains quite edible all winter long. If you're unfamiliar with Jerusalem artichokes (sometimes called sunchokes), the tubers look something like a bumpy potato - and while they have a flavor that's unique from potatoes, they are eaten in the same ways (i.e., mashed, baked, fried, etc).
Be aware that a common and deserved nickname for this plant is "fartichokes;" however, eating the tubers after a hard frost makes them easier to digest - as does fermenting them into pickles. Jerusalem Artichokes also reproduce easily; because they can sometimes take over a garden, I recommend growing them only in raised beds or containers.
If your local gardening centers don't have Jerusalem Artichoke tubers to use as "seed," try looking for them in grocery stores - especially higher-end markets, or shops that focus on a wide variety of fresh produce. Store-bought tubers can be planted as seed, directly in the ground.
Crops Requiring a Little More Protection
The following plants will also provide winter harvests, but if you get sustained hard frost or snow, they will need some protection, such as a low tunnel, cold frame, or unheated greenhouse.
 Swiss chad after a hard frost. Courtesy of Local Food Initiative.
LETTUCE, SPINACH, MUSTARD GREENS, and SWISS CHARD: Although non-gardeners think of lettuce and spinach as things that grow well all year long, they both grow best in cool weather. This makes them ideal for spring, fall, and yes, winter gardens. Likewise, Swiss chard and mustard greens thrive when overwintered.
For lettuce, Little Gem, Prizehead, Red Montpelier, or Royal Oakleaf are good winter garden choices. For winter spinach, consider Giant Winter or Bloomsdale Savoy. For mustard greens, try Green in Snow and Pizzo. And for chard, consider Bietola a Costa Fine, Joy's Midnight, and Rainbow.
 Bok choy can be grown in winter. Courtesy of Jules.
(adsbygoogle = window.adsbygoogle || []).push({});
BOK CHOY: This cool-season crop doesn't mind colder temps, and if started in the summer (for fall planting), will likely provide multiple cuttings of crisp leaves and stalks.
For winter gardening, consider Baby Choi or Yellow Heart Winter varieties.
RADISHES: Most radishes don't do well in low temperatures, but if you select a winter variety, they will become a favorite in the colder months. Don't neglect to eat their tasty leaves, too!
Consider Daikon, Runder Schwarzer, or Spanish Black radishes for winter gardening.
 Broccoli and cauliflower can be harvested in early winter. Courtesy of Ella.
BROCCOLI and CAULIFLOWER: Of all the plants listed in this article, broccoli and cauliflower are the trickiest to grow in the winter garden. While both pants love growing during cooler months, they don't last long when left to sit in the garden. Therefore, it's especially important to check on these plants daily. For best flavor, both broccoli and cauliflower should be harvested when the head's buds are still tightly bunched together; if they show any sign of separating from each other, harvest immediately. Don't forget that broccoli and cauliflower leaves and stems are edible, too.
Be sure to choose winter varieties such as Snowball Y, English Winter, or Candid Charm cauliflower or Emerald Crown, Purple Sprouting, Rudolf, Sequoia, or Waltham 29 broccoli.
Once you understand winter vegetable gardening, I think you'll be delighted by the results. While most homesteaders are stuck eating canned, dried, or frozen veggies, you'll be eating fresh vegetables in the cold, dark days of winter!
RELATED POSTS:

June 23, 2023
Organic Pest Control: What REALLY Works?

This post may contain affiliate links. As an Amazon Associate, and at no cost to you, I earn from qualifying purchases made through some links. Please see FCC disclosure for full information. Thank you for supporting this site!
Not all bugs are bad. In fact, some bugs are so good, you can practically see their halos; they enrich your soil (like worms and centipedes do), eat pests that harm your plants (ladybugs, dragonflies, and spiders, for instance), and pollinate your plants (hello, bees and moths). Even "bad" bugs are tolerable if there aren't too many of them...in fact, several scientific studies show that vegetables lightly eaten by pests are actually more nutritious to eat. However, when pests start increasing in number, they can completely destroy your garden.
A few generations ago, the answer to any bug problem was to buy a man-made chemical and spray it everywhere. However, now we know this not only kills the bad bugs, but it kills the good bugs, too. Besides, who wants to grow their own food just to end up eating a bunch of pesticides? ("Cide" means "killer" in Latin, you know.)
The good news is, organic methods of pest control are extremely effective. It's just a matter of knowing how to use them.
Prevention is Key
The number one best way to deal with pests in the garden is through prevention. There are several basic ways you can reduce the risk of pests attacking your crops:
* Make great soil. If your soil is full of organic matter and well-balanced nutrients, your plants will be strong and better able to fight off pests. To ensure your soil stays in tip-top condition, do a yearly soil test and amend accordingly, add organic matter (such as manure, compost, dry grass clippings, and dry leaves) at least once a year, ideally in the late fall; this gives the amendments time to break down and enrich the soil before spring planting.
 Organic gardening is absolutely attainable.
* Rotate crops. To keep the soil healthy and help break the cycle of pest egg-laying, crop rotation is important. For example, if you plant broccoli in one spot in your garden this year, you should not plant broccoli or anything in the broccoli family in that spot for the next three years.For the purposes of vegetable crop rotation, there are only six families of plants:
1. Alliums: Like garlic, leeks, and onions.
2. Brassicas: Like broccoli, Brussels sprouts, cabbage, cauliflower, collards, kale, mustard greens, radishes, and turnips.
3. Cucurbits: Like cucumbers, melons, summer squash, and winter squash.
4. Legumes: Like green beans, peas, and peanuts.
5. Nightshades: Like eggplant, peppers, potatoes, and tomatoes.
6. Umbellifers: Like carrots, dill, fennel, parsley, and parsnips.
* Encourage wild birds and beneficial insects (that eat bad bugs) in your garden. Give birds safe places to nest and consider putting out feeders. Encourage good bugs by planting flowers that attract them in or around your vegetable garden.
* Observe your garden daily. Look closely for any changes to plants, and check under leaves and on the soil for any signs of pests or disease. Catching problems early is a major key to success in gardening.
(adsbygoogle = window.adsbygoogle || []).push({});<{>Slugs and Snails
 Garden slugs are one of my great nemeses.
On summer evenings, I can step out onto my porch and literally hear the slugs and snails chowing down on my plants. It's not an exaggeration to say we have millions of slugs and snails on our homestead, both native and non-native. Fortunately, there are many organic ways to prevent them from completely destroying our garden.
Whenever possible, I hand pick slugs and snails. I go out early in the morning - or even just after dark - and pick all the slugs and snails I see, putting them in a bucket. (You can also lay down a piece of plywood or some wood boards the day before and then turn them over in the morning to find slugs and snails hiding under them.) When I'm done picking, I sprinkle ordinary salt over the critters to kill them. (I don't recommend salting slugs and snails directly on the soil because salt builds up over time and will prevent plants from growing.)
If you have small numbers of snails, you can simply crush them with your boot; larger slugs can be dispatched by poking a stick through their bodies.
For small gardens, copper tape, which shocks slugs and snails, can be applied to pots or raised beds. However, if even one leaf grows over the copper tape, slugs and snails will use that pathway to get to your plants. Since copper tape can be pricey, I typically use other methods.
Beer traps, for example, are relatively inexpensive (use the cheapest beer you can find) and quite effective. Lay out empty tuna cans, upside-down Frisbees, or similar shallow containers, pour a bit of beer in them, and in the morning you'll find slugs and snails have drowned themselves in the brew. Rinse and repeat.
Recent studies by Oregon State University, however, find that bread dough is the very best way to attract and kill slugs and snails. Just mix together 1 cup of flour, 1 packet (about 2 1/4 teaspoons) of yeast, and about 2 cups of water. If the mixture isn't liquidy, add more water. (OSU calls this mixture a "slurry.") Pour the mixture into empty plastic containers, such as clean, empty sour cream or cottage cheese tubs. Dig a shallow hole in the garden - just big enough that the container's rim is about level with the soil. Place the container inside. Check this trap daily, removing pests and refreshing the slurry as needed.
 Banana slugs may be cool-looking, but they are garden destroyers!
But even given these useful methods, we have so many slugs and snails that I find myself needing to sprinkle iron phosphate (which occurs naturally in the soil and is best known under the brand name Sluggo) around the garden when my plants are at the vulnerable seedling stage. When applied according to the directions on the package, it is "relatively non-toxic" to pets, children, and wildlife, according to the Oregon State University Extension Office. (This means they'd have to eat a lot of it to get sick.) It can withstand some rain and irrigation before it needs re-applying.
If slugs and snails are a problem for you, you'll also want to avoid two common gardening practices: Drip hoses and larger wood bark mulch. Slugs and snails love both. (On the other hand, many people swear pine needle mulches repel these pests.)
Some gardeners swear by food-grade diatomaceous earth (DE, for short) for slugs, snails, and any pest with an exoskeleton. This readily-available powder is made from the ground up bodies of fossilized algae. There are a few drawbacks to DE, however. One is that it only works when it's kept dry, so if it rains, or you irrigate, it will require reapplication. DE is also irritating to eyes and dangerous to breathe in, so you need to pour it out with care - ideally wearing a mask and goggles. Worse, DE kills bees. To help keep the bees in your garden alive and buzzing, you should never apply DE to flowers; in fact, avoid applying it anywhere but the soil. Reduce the risk to bees even further by applying DE at dusk, when bees aren't flying around - and only when there is no wind.
In my experience, crushed eggshells work just as well against slugs and snails, but as soon as water splashes earth onto them, they become much less effective. (Both DE and eggshells work by being painful for slugs and snails to slink over.)
Finally, you might want to consider getting ducks and allowing them to roam your garden. Ducks love eating slugs and snails! The only trouble is, they will eat your desirable garden plants, too, so they are best used when the garden is dormant. For example, you could allow ducks into your garden in the late winter and early spring, when they will eat pests and gently fertilize the soil, then move them to a different area before planting your spring garden.
Incidentally, if you don't realize you have a slug problem until you harvest your veggies (the slimy suckers are famous for hiding in the inner leaves of cabbage and Brussels sprouts, for example), place the veggies in a clean sink and cover them with water. I use a dinner plate to hold the veggies down, and after a few minutes, all the slugs have crawled out of their hiding places. Most end up on the dinner plate, but a few others will be on the sides of the sink.
Aphids
 A bad aphid infestation.
These tiny, clustering pests literally suck the life out of plants, so at the first sign of aphids, kick them off with a blast of cold water from the spray nozzle of your hose. This will often completely take care of the problem, but in the days following, do check under leaves to make sure new aphids don't appear. If the aphids are attacking only one or two leaves, I prefer to simply cut off those leaves and feed them (and the aphids) to my chickens. (Alternatively, you could secure the affected leaves in a sealed plastic or paper container, then throw them away.)
If aphids still persist, organic neem oil is an excellent solution. (Not all neem oil products are organic, so read labels carefully.) Avoid spraying the oil on a windy day; you want to keep it out of your eyes and lungs. Like many pest control solutions, neem oil will have to be re-applied if it rains or you use a sprinkler. To apply it, simply spray it all over the plant, including under leaves. If you don't want to buy neem oil, you could use a homemade spray. These are usually soap based (a common recipe is 1 quart of water and 1 or 2 teaspoons of liquid dish soap), but these should be used with caution because sometimes they burn plants, especially if applied on a sunny day. Like neem oil, these soap-based sprays work by suffocating aphids.
You could also try buying and dispersing a natural predator of aphids, such as ladybugs or lacewings. In my experience, however, this isn't always successful; these predators may fly away, leaving aphids behind on your plants. I suggest you first ensure you have plenty of plants to attract these predators (for example, ladybugs love dill, carrots, fennel, and yarrow). This will help keep purchased predatory insects in place - and it will attract wild ones, too.
(adsbygoogle = window.adsbygoogle || []).push({});
Cutworms
 Black cutworm. Courtesy of
 USGS. If your seedlings look fine one day, but then are suddenly chopped off at soil level the next day, cutworms are likely to blame. Fortunately, you can stop cutworms in their tracks by using cutworm collars. You can purchase these collars at gardening centers or you can make your own from a plastic drinking cup (cut the bottom out and put the seedling inside), a toilet paper roll (cut into three-inch lengths and plant the seedlings in the center), or even rings of aluminum foil. (I've always used aluminum foil, but this year I used toilet paper rolls and found it easier and just as effective.)
Cabbage Worms
 Cabbage worm. Courtesy of the U.S. Dept. of Agriculture.
If you find small, green worms on your brassicas, you can try hand picking them off and then either squishing them or killing them in soapy water. You can also soak affected harvested veggies in salt water, which will make the pests crawl out of their hiding places and drown.
But if you want to prevent cabbage moths in the first place, place row covers over your brassicas. Just make sure you do this as soon as your garden is planted in the spring, or the pretty white moths (whose children are cabbage worms) will have a chance to lay their eggs in your garden. Another trick that some people swear by is planting orange-flowering nasturtiums in amongst your brassicas.
Truly, these steps should take care of cabbage worms, but if you find yourself in the midst of a huge infestation, you could also bring in the big guns: biological pesticides. These include Bt (Bacillus Thuringiensis, a natural soil bacteria that's toxic when ingested by insect larvae) or spinosad (a natural substance made by soil bacteria that's toxic to certain insects). Spinosad is less desirable because it may harm aquatic invertebrates and earthworms; it must also be applied at dusk so it has a chance to dry before bees are exposed to it. These pesticides are organic, but really should only be used when other measures don't do the trick.
(adsbygoogle = window.adsbygoogle || []).push({});
Grasshoppers
 A few grasshoppers are pretty harmless, but lots of them are devastating. Courtesy of Jean and Fred Hort. Who can forget the vivid image
On the Banks of Plum Creek
, Laura Ingalls Wilder's autobiographical novel, gives of a grasshopper plague? "Grasshoppers beat down from the sky and swarmed thick over the ground..." Wilder wrote. "The air whirred and the roof went on sounding like a roof in a hailstorm. Then Laura heard another sound, one big sound made of tiny nips and snips and gnawings...The grasshoppers were eating...You could hear the millions of jaws biting and chewing..." And then, when they had eaten everything in sight: "All across the dooryard the grasshoppers were walking shoulder to shoulder and end to end, so crowded that the ground seemed to be moving. Not a single one hopped. Not one turned its head. As fast as they could go, they were all walking west."
A few grasshoppers are pretty harmless, but lots of them are devastating. Courtesy of Jean and Fred Hort. Who can forget the vivid image
On the Banks of Plum Creek
, Laura Ingalls Wilder's autobiographical novel, gives of a grasshopper plague? "Grasshoppers beat down from the sky and swarmed thick over the ground..." Wilder wrote. "The air whirred and the roof went on sounding like a roof in a hailstorm. Then Laura heard another sound, one big sound made of tiny nips and snips and gnawings...The grasshoppers were eating...You could hear the millions of jaws biting and chewing..." And then, when they had eaten everything in sight: "All across the dooryard the grasshoppers were walking shoulder to shoulder and end to end, so crowded that the ground seemed to be moving. Not a single one hopped. Not one turned its head. As fast as they could go, they were all walking west." Fortunately, most gardeners don't have to worry about invasions like this. Still, even a few grasshoppers can definitely damage our plants. The good news is, just as Laura learned, chickens love eating grasshoppers. So do guinea fowl, geese, and ducks. So if you spot a large number of grasshoppers in your garden, your poultry friends should be able to take care of them.
It's also smart to encourage grasshoppers' natural predators (such as wild birds, toads, lizards, and small snakes) to take up residence in your garden. For example, you could make sure there are some slightly elevated areas with plenty of foliage for toads to hide under, build a ditch or small pond for water, and make a toad house that sits nearby.
In addition, DE and neem oil can help protect plants against grasshoppers, as can sticky traps, and Beauveria Bassiana, a natural - through pricey - fungus that kills certain insects, including grasshoppers, termites, thrips, whiteflies, and aphids. Even though this fungus is generally considered safe for beneficial insects, it should be used only as a last resort, as it does have the power to kill bees if the fungus ends up on flowers.
Squash Bugs
 A common type of squash bug. Courtesy of Christina Butler and Wikipedia Commons.
These critters can absolutely devastate your cucurbit crops, and many people find them quite a difficult enemy. Hand picking squash bugs off plants and then squashing them is an effective method (although not an easy task, since cucurbits are so viney). It's also vital to interrupt the bug's life cycle so they don't persist in your garden. Make sure you clean up all plants at the end of the season, burning rather than composting them. And while thick mulches are recommended for most gardens, squash bugs love them, so they must be avoided if you have issues with these pests.
You can also spray neem oil on any egg clusters you find (or simply scrape off the eggs with a butter knife or cut off and dispose of affected leaves). Row covers are also a helpful ally in fighting squash bugs; put them up as soon as you plant cucurbit seeds or seedlings and only remove them when the first female flowers appear. As summer progresses, predators who love to eat squash bugs (including bigeyed bugs, damsel bugs, and feather-legged flies) tend to come out in full force, so consider not planting any cucurbits until early summer.
Squash Vine Borers
 Squash vine borer. Courtesy of NY State IPM Program at Cornell University. Using crop rotation is essential if squash vine borers are a problem in your area; choosing resistant varieties may also be necessary. These resistant varieties (which include Eight Ball, Tatume, Poquito, Cucuzzi, Butternut...anything in the Cucurbita Moschata family) have thick, solid stems that repel borers. In addition, long-vined, open-pollinated summer squashes will fare better than hybrid varieties (because they develop additional roots wherever the vines touch the soil; if borers attack the plant, you can cut off the affected parts and still keep the squash alive).
 Planting squash later in the season and then keeping a row cover over it until you begin seeing female flowers, is also effective. If all else fails, Bt sprayed onto the main stem of the plant (but never the flowers) should do the trick; see the section on cabbage worms for more information on Bt.
(adsbygoogle = window.adsbygoogle || []).push({});
Cucumber Beetles
 A common striped cucumber beetle. Courtesy of Katja Schulz and Wikipedia Commons.
The main issue with this pest is that it transmits bacterial wilt to cucurbit plants; there is no effective treatment for this wilt, so affected plants will die.
Handpicking (using rubber gloves smeared with Vaseline) vacuuming (with a handheld vac), sticky traps, neem oil, and making sure to remove and burn all plants from the garden once they are spent, are helpful practices. Putting row covers over seeds or seedlings until the first female flowers appear is also highly effective, as is planting in early summer, instead of spring, when the pests are making themselves known in the garden.
Also, if you till your garden in the spring, be sure to let your poultry - especially chickens and guinea fowl - follow behind you. Cucumber beetles burrow under the soil during winter's cold conditions, but tilling brings them up where your poultry can use them as a tasty meal.
Japanese Beetles
 Japanese Beetle. Courtesy of Ryan Hodnett and Wikipedia Commons.
If you live where it's very hot or very cold, Japanese beetles shouldn't be much of a problem in your garden. Elsewhere, however, removing the pests by hand and then squishing them (or dumping them in a bucket of soapy water) is an effective method of control. Although traps are available for Japanese beetles, they may not be as effective as you wish.
Letting your chickens, guinea fowl, geese, or ducks into the garden to feast on these bugs can put an abrupt end to an infestation. The best way to do this is to allow your birds into the garden in late spring, when Japanese beetle larvae are close to the surface of the soil.In addition, using row covers at the right time of year is helpful. In the southern part of the U.S., put them up 8 weeks before mid-May; in the North, 8 weeks before mid-June. Just note that row covers keep out pollinators, too.
Hornworms
 Tomato hornworms. Courtesy of Mike Lewinski.
The very best way to get rid of hornworms is to pick them off by hand and then either squish them or dump them in soapy water. However, sometimes they are very good at hiding! If that's the case, use a blacklight to spot them; it will make the pests light up brightly.
 Hornworm damage.
(adsbygoogle = window.adsbygoogle || []).push({});
Ants
Generally, ants are more of a nuisance to the gardener than an actual pest to plants; although you might see ants crawling on your veggies, they are after honeydew (the sweet excrement of certain pests, like aphids), not the plants themselves.
However, if ants have a nest in an inappropriate place in your garden, a very easy way to get rid of them is to use Borax (a naturally occurring mineral which you can find in the laundry aisle of grocery stores). Borax is considered safe to use around pets and children, but since large quantities could make them sick, it's a good idea to watch both to ensure they don't eat the bait.
There are two tricks to using Borax as ant killer. The first is to correctly mix it with an ingredient that appeals to ants. Most ants are attracted to sugar, so the most common recipe is to mix equal parts of borax, warm water, and granulated sugar. If this doesn't seem to attract your ants, try equal parts of borax and peanut butter instead.
The second trick is to put the bait in the correct location. If you can see a line of ants marching, put the bait (placed on a plastic lid) at the beginning or end of the line. If you can see the ant's nest, put the bait there instead. The ants will eat this mixture, take it back to their nest, and die.
Fire ants are a whole different problem. They may not harm plants, but they can surely cause gardeners pain! Spinosad (as discussed in the section on cabbage worms) is highly effective against fire ants if it's applied directly to their mounds and set out as bait.
Finally, Be Vigilant!
Even though organic methods of pest control are effective, often gardeners make the mistake of not being vigilant enough. Keep checking your garden daily. Re-apply sprays or powders or granules as needed. Keep gloves, a bucket, and dish soap handy in the garden to make hand picking easier. Don't neglect to hand pick every time you see a pest. (I assure you, there are plenty more pests you don't see, so you needn't be afraid of depriving wildlife of food.)
Small problems can lead to much bigger ones, and the best way to ensure insects don't destroy your garden is to be an alert watchman.
(adsbygoogle = window.adsbygoogle || []).push({});
Related Posts:

May 23, 2023
Using Red Mulch to Grow More Tomatoes
This post may contain affiliate links. As an Amazon Associate, and at no cost to you, I earn from qualifying purchases made through some links. Please see FCC disclosure for full information. Thank you for supporting this site!
Are lots of ripe tomatoes not a sure thing where you live? Do you have trouble with tomato pests? Read on, because there may be a simple cure!

I live in a place where cool season crops (like cabbage, broccoli, and cauliflower) grow fantastically, but where warm season crops (like corn and tomatoes) don't necessarily thrive. When we first moved to this homestead nearly eight years ago, I grew all our tomatoes in a small greenhouse. They did well, but I really wanted to see if I could successfully grow tomatoes outside, freeing up the greenhouse for other things. Last year, I finally got a good-sized garden in place and my hubby surrounded it with proper deer fencing. The tomatoes I planted did well...but many of them had to be ripened indoors. (Learn how to ripen green tomatoes here.) This year, however, I'm implementing some simple, but effective help.
 Ripening green tomatoes indoors at the end of the growing season.
Increasing Chances of Ripe Tomatoes
For years I've known that there are two big things gardeners can do to increase the chance of getting ripe-on-the-vine tomatoes. One is to use a product called "wall o' water" or a plant cozy. This is a plastic tube that you fill with water and then wrap around each tomato plant. It increases warmth around tomatoes - because it's warmth, not light, that causes the fruit to ripen. While these devices work well, I grow so many tomato plants that I'd have to invest more money than I'd like to warm my entire crop.
 Vine-ripened tomatoes are what we're after!
(adsbygoogle = window.adsbygoogle || []).push({});
However, if you take a peek at those devices, you'll notice they are almost always red in color. Which leads me to the second thing gardeners can do to urge plants to grow ripe tomatoes: Use red mulch.
This may sound like a dubious old wives' tale, but Clemson University and the USDA's Agricultural Research Service did testing and development on red plastic mulch for tomatoes and discovered that this simple product can not only increase the size of individual fruit, but also increase overall tomato yields by 12 to 20%. (However, if you have ideal tomato growing conditions, red mulch may make absolutely zero difference in your crop yields; there are other benefits to using red plastic mulch, though...Keep reading.)
Now, mulch of any kind is beneficial in the garden. It helps suppress weeds and keeps moisture and warmth in the soil. But it is red plastic in particular that is magical for tomatoes. This is because certain pigments in tomato plants, called phytochromes, are actually color-sensitive proteins that regulate plant growth and development. These phytochromes have varied reactions to different types of light, and when light wavelengths from particular shades of red bounce up to tomato plants, the phytochromes make the plants fruit more abundantly and quickly.
Deterring Tomato Pests
But wait! There's more! It turns out red plastic mulch also deters root knot nematodes - pests that feed on the roots of tomato plants. The Agricultural Research Service believes this is because the light reflection from red plastic makes more of the growth of the plant happen above ground. In other words, more of the plant's energy and nutrition goes into making fruit and leaves instead of into making deeper, more nutritious roots...And without lots of nutritious roots to eat, nematodes are far less likely to attack tomato plants.
 Using red mulch can increase tomato harvests by up to 20%.
How to Apply Red Plastic Mulch to Tomatoes
You can find red plastic mulch in many places where garden supplies are sold. Because I live in a small community, I ended up purchasing mine off Amazon. Here's the exact stuff I'm using; I chose this particular plastic because it's a bit thicker (3 mil.) than many other brands, and I felt this would be easier to work with, would keep the soil warmer, and might be reusable for a few years.
I was tempted by the red plastic mulch sold by Gardener's Supply because it's perforated, which would allow rain water in. However, this was the only place I could find perforated red mulch, and it was fairly pricey once I added in shipping. Plus, if perforations allow more water in, they also allow more light in, and that could lead to more weeds - which would be more difficult to pull if they are under plastic.
First, I laid the plastic over my beds; to eliminate frustration while working alone, I chose to cut smaller pieces of the plastic and lay them down individually. Then I determined exactly where I wanted to transplant my seedlings. Everywhere I wanted a plant to go, I cut into the plastic with scissors, making a plus-sign shape. I folded back the triangles this created an then planted my tomatoes in the resulting holes. Because it's windy here, I may end up cutting off these triangle flaps; we'll see if they inhibit the seedlings in any way. Another option is to use a mulch hole burner (sometimes called a horticultural hole punch) to create perfect holes to plant your seedlings in.
 Cut a plus sign in the plastic.
 Fold back the triangle flaps and plant a tomato seedling.
(adsbygoogle = window.adsbygoogle || []).push({});
I think you could easily weigh down the plastic with mulch or soil; landscape staples might be a good choice if you choose a thicker plastic. But we are in a very windy area, so I felt bricks (which I had on hand) would be the easiest solution to keeping the plastic in place.
To irrigate my tomato plants, I water by hand with a hose, focusing the spray inside each hole in the mulch. Another good option is to install drip irrigation or a soaker hose underneath the plastic.
Is Red Mulch Good for Other Plants?
You might wonder if red plastic mulch works well for any other plants. Good question! I've found sources saying it is also helpful for peppers and eggplants (which makes sense, because tomatoes, peppers, and eggplant are all in the same nightshade family), as well as strawberries (studies show the red plastic not only increases yields, but also makes strawberries sweeter), beans, melons, and even more abundant turnip greens. As far as I can tell, not a lot of research has been done on other crops, but it could be fun to experiment and see what you think.
 My garden in progress, with some of the tomato seedlings nestled into red plastic mulch.
(adsbygoogle = window.adsbygoogle || []).push({});
BONUS: More Tips for Ensuring Ripe, Red Tomatoes
If you live in a cool climate or have a short growing season, there are a few other important things you can do to ensure you get a good crop of ripe tomatoes:
1. Choose the right variety. If you live where temperatures are not ideal for growing most tomatoes, choose varieties that were developed for cool climates, such as those in Russia and Alaska. If your growing season is short, or you really want to maximize the number of ripe tomatoes you get, select varieties that mature more quickly, too.
2. Winter sow your seeds. Not all tomato varieties will sprout when you winter sow them, but those that are ideal for cool climates should! Learn how to winter sow seeds here.
3. If you choose to start your seeds indoors, do so 6 - 8 weeks before you'll plant them outdoors. It's important to give your plants a proper head start.
4. Manure tends to warm the soil, so add it in the planting hole and consider using it as a top dressing underneath your red plastic mulch.
5. Every yard has micro-climates; put your tomato plants in the hottest spot you have.
Related Posts:


(adsbygoogle = window.adsbygoogle || []).push({});
May 9, 2023
What is the Problem with Harvest Guard Reusable Canning Lids?
I've often recommended Harvest Guard reusable canning lids in the past (for example, in this post about how to use them), but today there is a big problem with this product that you need to know about.
Last week, Harvest Guard emailed certain influencers, myself included, about a production situation they'd recently discovered. I spoke about this on Facebook and Instagram, but now that I have more information, I want to make sure those of you on YouTube and the blog know about it, too.
Watch the video below for the details, or keep reading.
During the shutdowns, Harvest Guard was hit hard, as were so many other small businesses. Once they were able to reopen their factory, the people who manufactured the rubber gaskets for their lids could not find enough workers to produce the quantities Harvest Guard required. So Harvest Guard started searching for someone else to produce their gaskets. At last, they found someone who could, but it meant buying a huge quantity of stock - much more than they were used to buying at once. Still, wanting to keep their customers stocked with reusable canning lids, they made the deal.
Some time later, however, Harvest Guard learned that these new gaskets were not truly reusable; they were one-time use only. This means that after one use, the gaskets (like the rubber on standard canning lids made by the likes of Ball) get a big indentation in them where they seal against a canning jar. These indentations don't go away, so getting a second (or third or fourth) seal from them is iffy, at best. And if you do get a seal, there's no guarantee it won't come lose in the pantry.
So, Harvest Guard announced they were reducing the price of their gaskets and offering three instead of just one with every lid. They also said that going forward, they would only sell one-time use gaskets.
Of course, the first question most people had was: "Did I buy reusable gaskets from Harvest Guard that are really only one-time use?" Immediately, I emailed Harvest Guard about this. Just yesterday, they gave an answer. Yes, it is possible you got one-time se gaskets when you were attempting to by reusable ones.
The good news is, Harvest Guard is promising to give customers who erroneously ended up with one-time use gaskets replacement reusable gaskets free of charge. All you have to do is email them at info@canninglids.com. (In your email, I recommend including a photo of your one-time use gaskets; I'd hate to see scammers get free product.)
Harvest Guard has also decided to continue selling reusable gaskets, even if just in limited quantities. Their website now clearly labels their reusable and one-time use gasket offerings.
But how do you know if you got one-time use gaskets when you bought reusable ones? Fortunately, it's easy to tell. The one-time use gaskets are bright red. The reusable ones are duller - a sort of brownish red.
 The bright red gaskets on the bottom are one-time use. The duller gaskets on top are reusable.
 Reusable gaskets (left) vs. one-time use gaskets (right), from the Harvest Guard website.
Now, I understand that many people are unhappy about this situation. I wasn't thrilled to learn that some of the gaskets I'd purchased were not reusable. HOWEVER, I have high praise for Harvest Guard. Many companies would have swept this problem under the rug. Harvest Guard, on the other hand, was open and honest with their customers. They are doing the right thing: Not only are they being transparent about their error, but they are compensating customers who mistakenly received the wrong product.
I hope you will continue to support Harvest Guard, as I will. We only have two companies making reusable canning lids; both are small businesses and I want both to stay in business because they provide a valuable homesteading product.
Can on!
April 27, 2023
Get the Most from Your Vegetable Garden
 This post may contain affiliate links. As an Amazon Associate, and at no cost to you, I earn from qualifying purchases made through some links. Please see FCC disclosure for full information. Thank you for supporting this site!
When you set your mind to grow your own food, you don't want your garden merely acceptable - you want it as productive as possible, giving high yields of healthy food. Here's my advice on how to make that happen.
Feed Your Soil
The number one thing you can do to maximize your garden and improve yields is to feed your soil well. The more accessible nutrients your soil contains, the healthier your plants are, and
the more food they will produce.
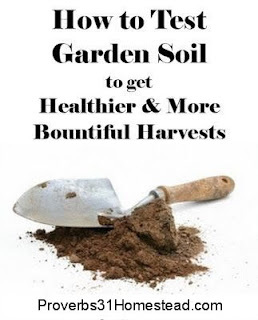
The best way to begin feeding your soil is to conduct a simple soil test. You can either purchase an inexpensive soil testing kit at a gardening center, or you can mail samples to a soil testing company. Either way, the results will tell you if your soil is low in any macronutrient, and how to amend the soil to correct any deficiencies. Ideally, testing is done in the fall, so that any organic amendments you use will have time to break down and become accessible to plants come spring - but as long as the soil isn't frozen, you really can do testing and amending any time of year.
No matter what your soil test says, however, you should always add lots of organic matter (such as manure, dry grass clippings, dry leaves, and compost) to the soil at least a couple of times a year. In my garden, I add rabbit manure (which does not have to age before going into the garden) or chicken and quail manure (which does need to age first), as well as homemade compost, to my soil in the late winter or early spring, before planting anything new in the garden. Once my garden is planted, I often add wood chip mulch. Throughout the growing seasons, I add more manure and/or compost, as needed, giving special attention to plants that feed heavily, like tomatoes. Finally, as the garden quiets down in the late fall, I add more manure, so it can break down over winter. If I'm really on top of things, I also add additional mulch, to help suppress weeds over the winter; as the mulch breaks down, it also adds nutrients to the soil.
Because vegetables grow quickly and need lots of nutrients to do so, you should also consider fertilizing your garden. For instance, I like to fertilize seedlings with fish emulsion, which is packed with nitrogen and encourages leafy green growth. I also fertilize tomatoes all season long, using manure tea or a store-bought balanced vegetable fertilizer.

If you want to maximize your garden, it's importantto plant quick-growing varieties.
(adsbygoogle = window.adsbygoogle || []).push({});Choose the Right Varieties
An oft-overlooked tip for maximizing your garden is to choose vegetable varieties that grow quickly. For example, if I have a choice between a variety of beans that takes 54 days to reach maturity and a variety that takes 75 days to reach maturity, I'll almost always go with the faster-growing variety. (The only reasons I might go with a longer-growing variety is if it has a certain disease resistance I need or if I just really favor its flavor.) If I gather in the harvest and plant something else in that quick-growing plant's place, ultimately, I get more food from the same amount of garden soil.
It's also smart to consider how many big producers vs. small producers you are planting. One example is Brussels sprouts vs. collards. Being relatively big plants that must grow all spring, summer, and fall before their delicious heads are ready for harvesting in the late fall or winter, Brussels sprouts are a small producer.
On the other hand, collards are a big producer. They produce food continually throughout spring, summer, and fall. They will even survive some snow, giving you winter harvests. If your goal is to fully maximize your garden, you'll want a lot of big producers and few, if any, small producers.
Get Cozy
Planting crops in rows is a poor use of space. Instead, plant in berms or plots. Arc the soil at the center of your berms or raised beds, which will give you a bit more space for plants.
Plant things at minimum distances apart; not only will you get more plants in your allotted space, but vegetables that grow close together choke out weeds. This saves you work and prevents weeds from competing with food crops for soil nutrients and moisture.
Also, whenever possible, interplant. For example, plant out your tomatoes in the spring, and then, in the space around those tomatoes, plant lettuce, radishes, or other quick-growing, smaller veggies that won't crowd out your tomato plants and will be harvested long before the tomato plants get large. Let no space go to waste in your garden!
 Planting in arced berms gives you more space toplant food.
(adsbygoogle = window.adsbygoogle || []).push({});
Succession Plant
If you want to eat fresh veggies, spring through fall, succession planting is highly valuable. To achieve this, simply plant a certain amount of one type of vegetable one week, and then every week or two after that, plant a little more. That first planting should reach maturity first; harvest that bounty and eat it right then. As subsequent plantings mature, continue to eat them right away.
If you're looking to can lots of vegetables, you may be inclined to avoid succession planting and instead plant all your seeds (or seedlings) at once; however, if there are vegetables that aren't safe to can (or perhaps you don't enjoy eating them after they are canned), it pays to succession plant them. Another good reason to succession plant even when you want to preserve most of your veggies is that having huge gluts of food come in all at once makes preserving exhausting. If the harvests come in a little at a time, the task of canning, freezing, or otherwise preserving the food is much more manageable.
Vertical Gardening
You can save a lot of space in your garden, allowing you to raise more food, if you grow some of your plants vertically. Train them up fences, trellises, poles, and tepees...really anything you can devise that is sturdy enough to support the growth. Good candidates for vertical growing include pole beans, cucumbers, peas, and summer squash. You can even grow smaller winter squashes and melons vertically if you devise slings made of soft netting to help support the edible part of the fruit or veggie.
 A thriving vegetable garden requires the correct amount of water.
(adsbygoogle = window.adsbygoogle || []).push({});
Optimal Watering
Last year, my neighbor stared at my vegetable garden, bemoaning his gardening skills. As we discussed why my garden was thriving and his was not, one of the important points that came up was water. I live in a windy area where we don't get rain during the summer. Therefore, during the warm months, I water my garden every single day. This astonished my neighbor. But the fact is, plants will not grow to their full potential if they are dehydrated.
Now, you may not have to water daily as I do, but you should check your soil frequently for moisture. Every day, stick a finger an inch or so down in the dirt. If it feels moist, your plants are fine. If it feels dry, you need to give them water.
When irrigating, water deeply, and whenever possible, water only at the base of plants, avoiding the leaves. Using a sprinkler is easy, but it puts a lot of water on plant leaves. Much of this water gets "wasted" through evaporation.
To avoid diseases that slow down or kill your crops, water in the morning, before it gets hot, so that any water that accidentally lands on plant leaves can evaporate off during the day. (When you water in the evening, water may linger on plants overnight, encouraging fungal and bacterial diseases.)
To water less and keep your plants stress-free, use thick layers of organic mulch to hold moisture into the soil.
Keep Weeds Down
Weeds compete with vegetables for both water and nutrients. This means a weedy garden is a struggling garden. No one wants to spend tons of time weeding, so here are a few tips for keeping weeds down while still having a life outside of the garden:
1. Use the no-dig method: Place two layers of plain cardboard (edges overlapped) over mowed weeds, and then spread either garden soil or compost (for growing spaces) or a thick layer of organic mulch (for walkways) over the top. This not only helps suppress and kill weeds, but if weeds do manage to come up, they are MUCH easier to pull. The cardboard and mulch also slowly break down, feeding the soil. (Find full instructions for creating a no-dig garden here.)
2. Weed early and often. If there are weeds in the garden, try to weed a little every day, instead of pushing yourself into marathon weeding sessions.
3. Never let weeds go to seed. If you can't pull or dig out weeds that are blossoming, cut off their heads to prevent their seeds from spreading.
4. Make sure your garden is well-weeded by the end of fall. That way, come spring, you should have fewer weeds to contend with.
 Keep your garden going into fall - and even winter!
(adsbygoogle = window.adsbygoogle || []).push({});
Extend It
As the cold months approach, gardening isn't over! For example, you could install cold frames, row covers, hoop houses, or a greenhouse to extend your growing season into winter.
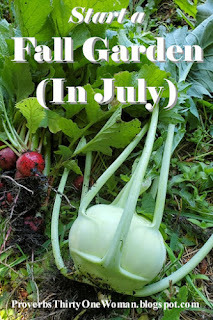
More than that, you can easily have a thriving fall garden - and, depending upon your location, even a winter garden. Choose cool-season crops (such as cabbage, lettuce, kale, collards, peas, broccoli, cauliflower, bush beans, radishes, spinach, and turnips), and sow the seed so it will have plenty of time to mature before your first hard frost. To determine this timeline, look up the first killing frost date for your area, then check your seed packets to see how many days to maturity your plants require. Count backward that exact number of days, then add time for the seeds to germinate and be transplanted out into the garden.
Here's an example of how to do that: If I want to plant Buttercrunch lettuce for my fall garden, I note that the seed packet says it takes 48 days to reach maturity. It also says the seeds take 2 to 15 days to germinate. So I need about 63 days for my lettuce to go from sowing to harvesting. If my first killing frost is November 21st, I know I need to plant the last of my lettuce no later than September 19th. If I can plant a few weeks earlier than that, all the better, since plants tend to grow more slowly as the weather cools and the hours of sunlight they see diminishes. (Do note that if your September is hot, you'll need to shade your lettuce seedlings until the weather cools; otherwise, the lettuce will tend to "bolt" or go to seed.)
For more information on creating a fall garden, click here.
 Catching problems early results in higher garden yields.
Be Vigilant
One unfortunate reason gardens can be less productive is disease and pests - but there are several ways to avoid this, or at least minimize the damage.
The first trick is to choose varieties that are resistant to the diseases that are common to your garden. Does late blight keep hitting your tomatoes, despite careful cultivation? By choosing a tomato variety that's resistant to late blight, you are far more likely to have a successful tomato harvest.
Another trick is to aim for biodiversity. Plant lots of different veggies. Throw some flowers in, too, if possible. (For instance, aphids will attack nasturtiums before they go for almost any other plant. The nasturtiums in your garden can look pretty for a while, and then become a sacrifice to save your food crops.) Also, instead of having one row of broccoli and another row of lettuce, interplant them or scatter varieties across your garden. That way, when pests or disease do come, your entire crop likely won't be hit.
If you know flying pests have been a problem in the past, be proactive and put row covers over your plants. Get them on as soon as you plant seedlings, though, or the pests may beat you to the punch.
It's also tremendously helpful to be on the lookout for early signs of disease or pests. Check your garden at least once a week - more ideally, every day - for hints that your plants are under attack. At the first sign of pests or disease, strike back! For instance, if you catch aphids when they are just beginning to suck the sap from your plants, you can spray them off with a blast of hose water or hit them with insecticidal oil, preventing a more serious problem. On the other hand, if you wait until the infestation is large, you'll likely lose your crop, no matter what steps you take.
(adsbygoogle = window.adsbygoogle || []).push({});
Related Posts:


April 20, 2023
How to Can Kale and Other Leafy Greens
 As an Amazon Associate, I earn from qualifying purchases. All opinions are my own. Please see FCC disclosure for full information. Thank you for your support!
 Last year, I over-planted kale...big time. I start all my leafy greens by seed in the spring and then we eat off them all spring, summer, fall, and winter. (Yes, kale an collards overwinter nicely unless you get feet of snow! Learn more about overwintering veggies here.) And while we love leafy greens (especially when they are sliced and then sauteed in bacon drippings or olive oil, along with some onion, garlic, salt, pepper...and maybe some bacon pieces...yum!), there was only so much we could eat. I hate to see produce go to waste - and nobody seemed to want my free offerings of kale. Although I've blanched and frozen leafy greens in the past, this winter I thought: "I should try canning this kale."
But my schedule has been hectic this year, and my kale bolted (started to flower) before I got around to the project. Usually, this makes vegetables bitter, but my kale still tasted great. So last weekend, I finally took the plunge.
But before I give you the how-tos, I want to issue a couple of small warnings. I canned my kale in the morning, and when I went back into the canning kitchen in the evening, it smelled like I had a gas or propane leak...but I don't have any gas or propane in the canning kitchen! The smell turned out to be the water in my pressure canner, which was tinted green from the kale. So if you're canning inside your home, you'll probably want to crack open a window.
Thankfully, when I opened a couple of jars several days later, the contents did not smell like gas or propane! As far as taste went, my entire family preferred the jars seasoned the way Angi Schneider suggests...but none of us were real fans of either version of canned kale. I want to stress here that we are used to lightly cooked leafy greens. If you enjoy traditional Southern-style greens, which are cooked for a long time, or store bought canned greens, you may well enjoy home-canned leafy greens. You'll never know until you try them!
IMPORTANT NOTE: Canning leafy greens requires the use of a pressure canner. (Here's the canner I used.) Do not water bath kale or other leafy greens. Do not use a pressure cooker to can them, either. (Not sure what the difference is between a pressure canner and a pressure cooker? Click here.) If it's been a while since you've pressure canned, review this how-to guide.
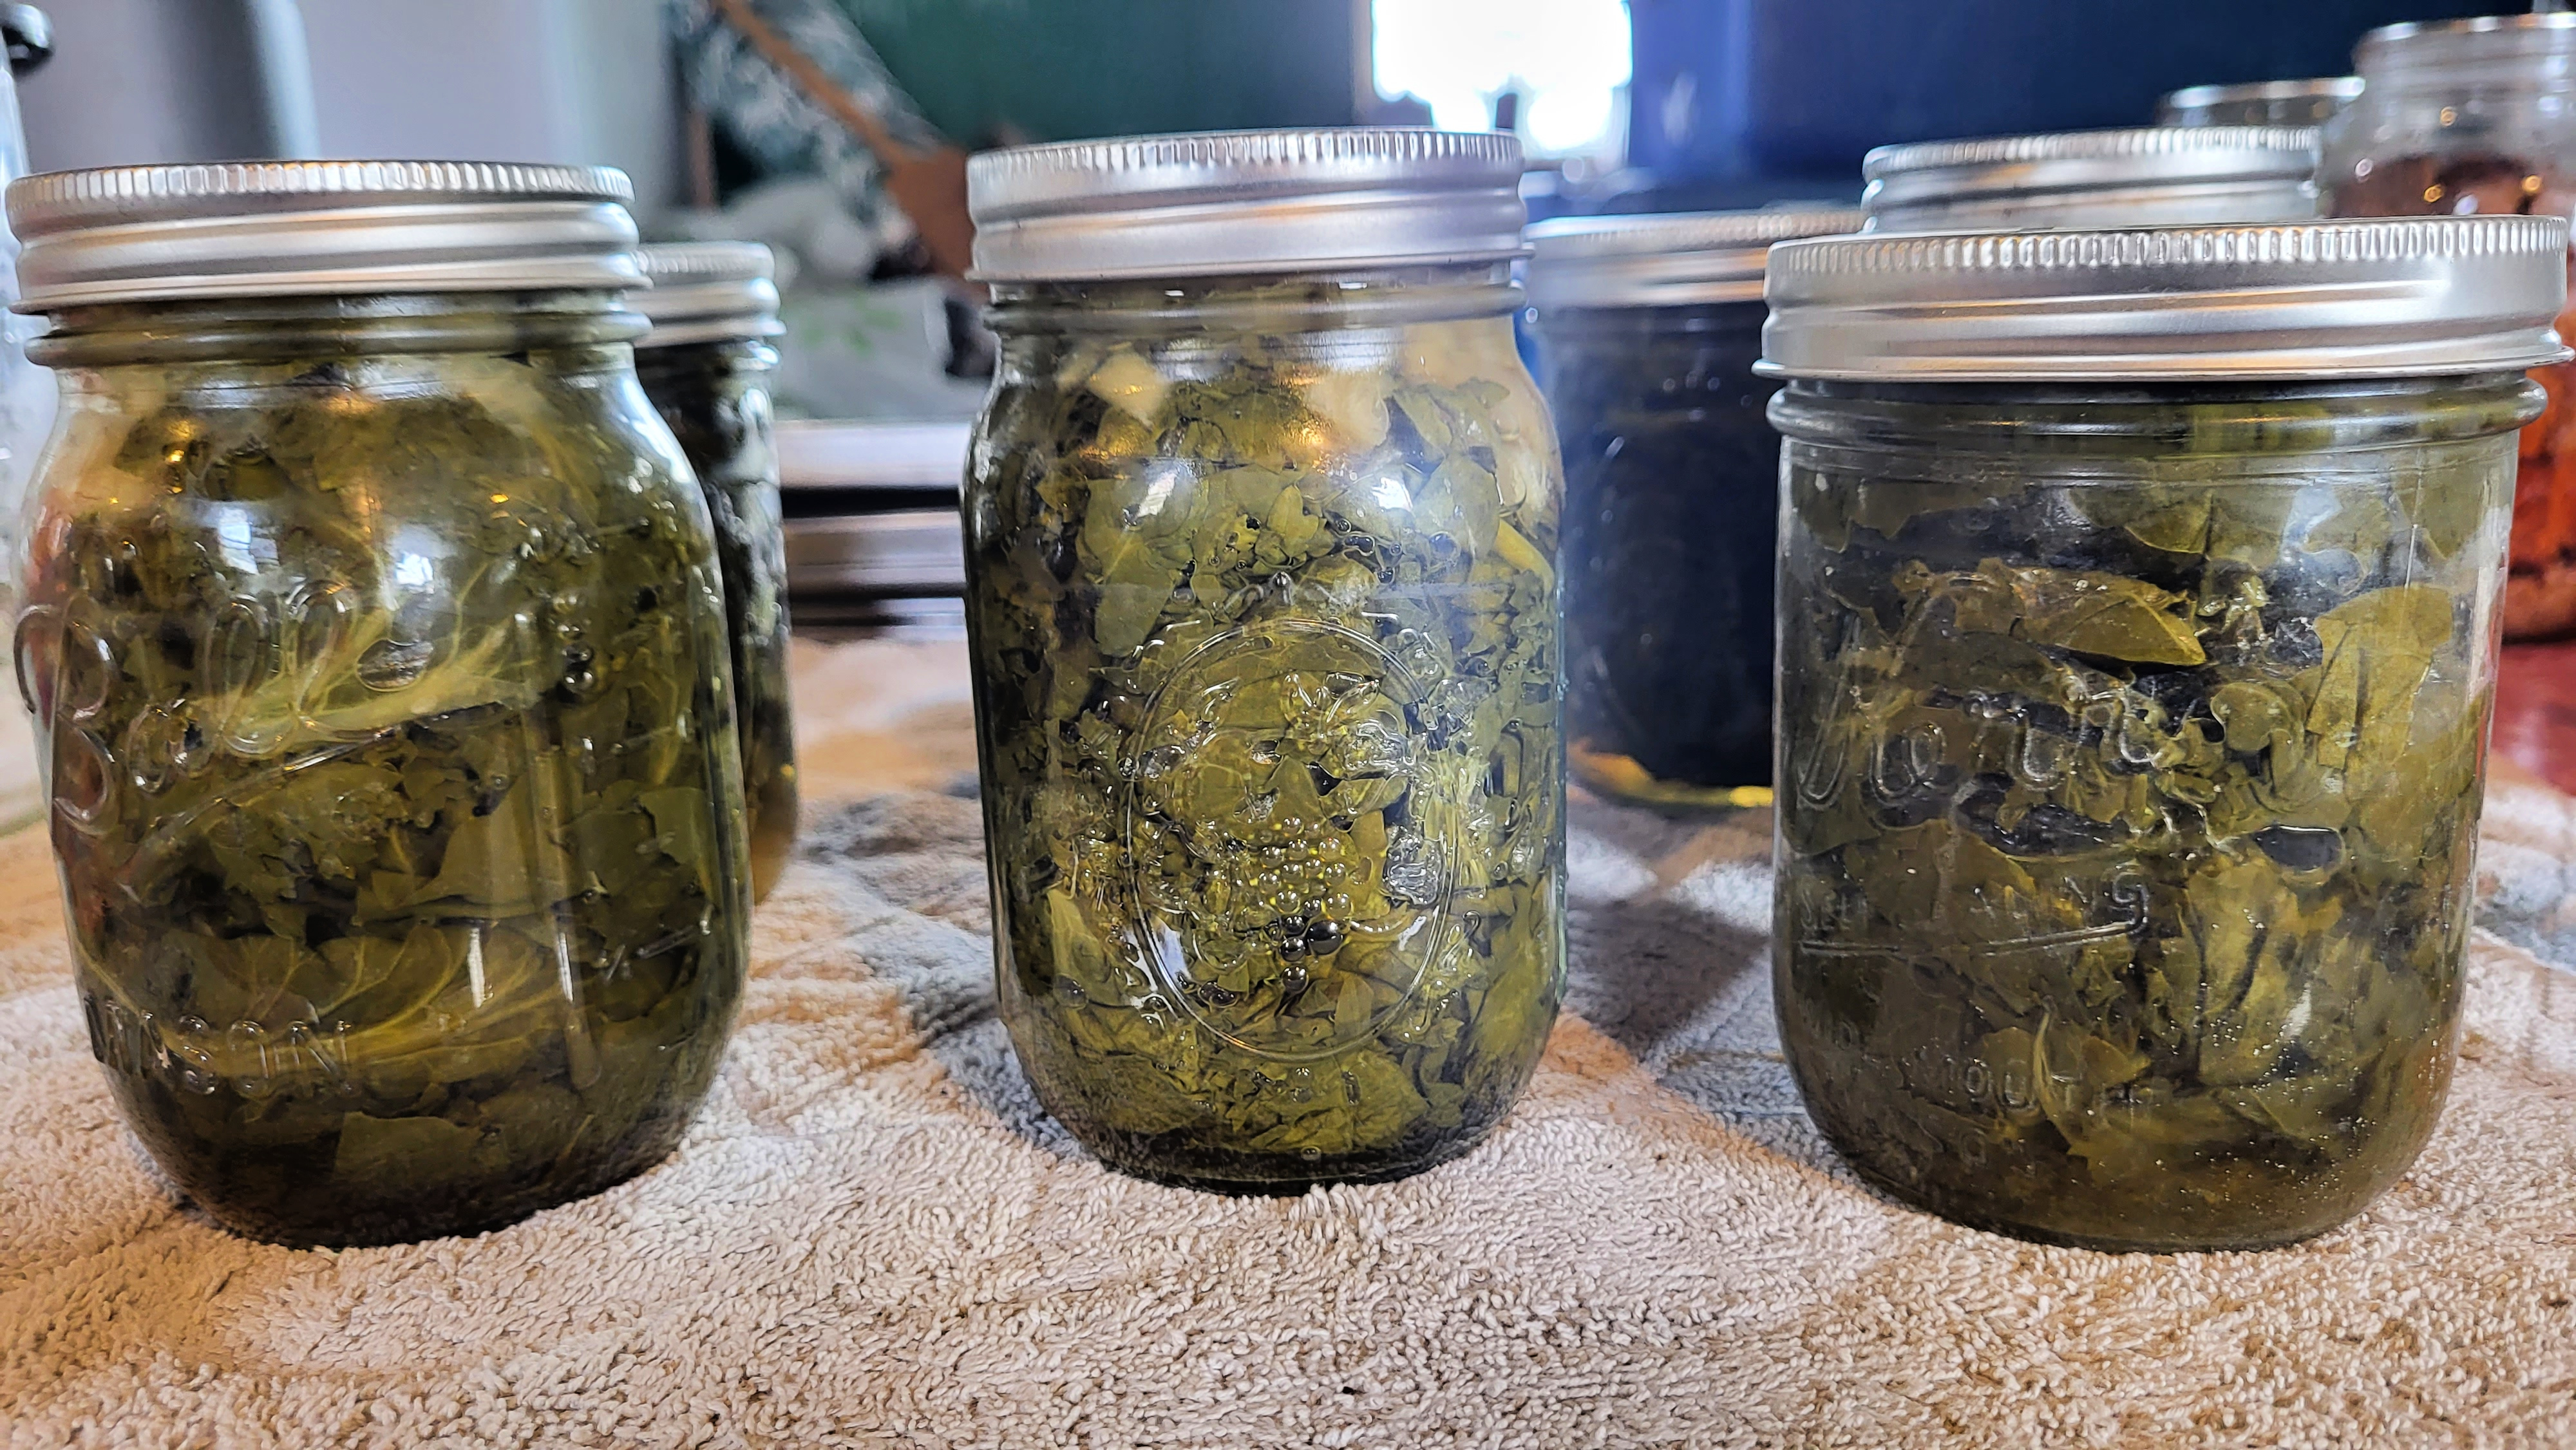
 Harvesting over-wintered kale for canning.
(adsbygoogle = window.adsbygoogle || []).push({});
How to Can Kale & Other Leafy Greens
The National Center for Home Food Preservation (NCHFP) says it takes about 28 pounds of leafy greens to fill 7 quart jars. After picking a large basket-full of kale and then removing the large stems, I had about 4 lbs. of Wild Russian kale, which gave me 7 pint jars, plus part of a half-pint jar: Enough to fill my canner. Here's the process:
1. Start by using the freshest leafy greens possible. Do not use frozen greens. Do not use older greens that are getting wilty from sitting in the refrigerator. Do not use greens that look yellow or brown.
2. NCHFP instructs us to thoroughly wash leafy greens before canning them. While I wouldn't have washed my kale before sauteing it for dinner, I went ahead and washed them for this project. I simply filled my sink with cool water and added a few large handfuls of kale at a time. If your greens are dirty, you'll need to rinse and repeat as needed. In my case, the water stayed clean, so I didn't repeat the washing.
3. Remove the thick stems. For most greens, you can simply place your fingers on the bottom of the stem, then run them down the sides of it to push off the leaves.
4. Place an inch of two of water in a large pot and place it over medium heat. Once the water is hot (not simmering or boiling), add the prepared greens. The idea here is to just wilt the leaves. To prevent overcooking, stir repeatedly. Remove wilted leaves with a slotted spoon and place them in a sink filled with ice water (to stop the cooking). You can also use a steamer basket for this step; this is the one I use.
5. In the meantime, fill a pot with water and place it over high heat. Bring to a boil.
6. Pack the prepared greens into pint or quart jars, leaving 1 inch headspace.
 Packing jars.
7. Add seasoning. NCHFP recommends 1/2 teaspoon of canning salt per pint jar or 1 teaspoon per quart jar. In The Ultimate Guide to Preserving Vegetables, Angi Schneider recommends 1/4 teaspoon of garlic powder, 1/4 teaspoon of canning salt, 1 teaspoon of bottled lemon juice, an 1/4 cup of chopped onions for every pint jar. I did some jars just with salt and some with Angi's seasonings. (See my review of Schneider's book here.)
 Adding seasoning to jars.
(adsbygoogle = window.adsbygoogle || []).push({});
8. Pour boiling water into the jars, maintaining 1 inch headspace.
9. Bubble jars, wipe rims, put on a lid and ring, and process pint jars for 1 hour and 10 minutes, quart jars for 1 hour and 30 minutes in a pressure canner.*
* NOTE: Read this important information about adjusting canning times for your altitude.

 Canned kale.
Tips for Success
Canned greens tend to lose liquid during the canning process. As long as the finished jars are at least half full of liquid once they are processed, the jars are safe to store and eat.
To help prevent liquid loss, there are several steps you can take:
1. Make sure you correctly vent your pressure canner before you begin the processing countdown: Once you seal the canner's lid, wait for steam to come out of the vent, then set a timer for 10 minutes. After the 10 minutes have passed, place the weight on the canner and allow it to begin building pressure.
2. Let your processed jars cool down extra slowly: Once the processing countdown is done and you've turned the heat off, allow the canner to naturally reach zero pressure. Then let the canner sit for another 10 minutes, untouched. Next, remove the lid of the canner for only a few moments, then put it back on WITHOUT LOCKING IT. Let it sit like that for 5 minutes. Next, remove the lid completely and let the canner sit another 5 minutes. Finally, take the jars out and let them rest undisturbed on a heat-protected counter.
(adsbygoogle = window.adsbygoogle || []).push({});
April 12, 2023
Top 13 Uses for Eggshells
 This post contains affiliate links. All opinions are my own. Please see FCC disclosure for full information. Thank you for supporting this site!
To a lot of people, eggshells are trash. But to a homesteader, that "trash" is gold. There are so many ways to use eggshells - and many benefits in doing so. Here are the very best ideas I've run across.
1. Feed Them to Your Chickens
Hens (and other egg-laying poultry) require plenty of calcium to produce eggs with strong shells. Moreover, hens who are low in calcium often develop a serious health condition called prolapsed vent (where their vent - the hole that eggs come out of - literally pushes outside of their body). Often, chicken keepers purchase specially packaged, crushed oyster shells or limestone from feed stores, but eggshells from your own flocks work just as well.
(PLEASE NOTE: I don't recommend using the shells of store-bought chicken eggs for any food-related purposes; factory-farmed hens are often deficient in macro and micro-nutrients and store-bought eggs are washed in bleach or other antimicrobial liquid before they arrive on grocery store shelves.)
You may either immediately feed your hens the shells from eggs you've just cracked, or you may collect egg shells to feed to them later. If doing the latter, it's wise to air dry the shells, then sprinkle them onto a rimmed baking sheet; bake at about 350 degrees F. until the shells are brittle, approximately 10 - 15 minutes. This kills any harmful bacteria that may be present and makes the shells much easier to crush. (If using shells from hard-boiled eggs, you may skip putting the shells in the oven.)
 Dried eggshells are perfect for birds. Courtesy of Ivan Radic.
When serving your hens eggshells, always crush them. This prevents hens from equating their just-laid eggs with food. (Because yes, chickens and other poultry will sometimes eat their own eggs.) Crushing can be done by hand (I favor putting the shells in a bag and running over them with a rolling pin), or you can run dried eggshells through a coffee grinder, blender, or food processor. (Just be aware that eggshells will scratch plastic food processor/grinder bowls.)
 It's easy to crush eggshells in a food processor.
It's considered best to offer the eggshells in a separate bowl from your chicken's feed, since this allows hens to self-regulate how much calcium they are eating. Too much calcium can lead to calcium deposits on the outside of eggshells...and eventually will damage a chicken's kidneys.
2. Feed Them to Wild Birds
Just as eggshells provide a boost of nutrition for your chickens, they can do the same for wild birds. Follow the same steps outlined above, and simply mix the crushed shells into wild bird food. If you prefer, you may place the shells on a flat surface outside - such as an empty bird bath - but be aware that this method may attract other wild animals, some of them undesirable (like rodents).
3. Feed Them to Your Dogs
Most dogs adore eggs, shells and all. I offer our dogs small amounts of eggshells immediately after cracking and using eggs. If you want to amass shells for your dogs, follow the same guidelines as you would for chickens. If you powder the dried eggshells, you can add a bit of nutrient-rich powder to their food now and then.
 Eggshells can deter slugs, snails, and even cats.
4. Use Them as a Deterrent
Crushed eggshells can keep slugs and snails from destroying your garden. Simply dry them out and crush into small pieces. (Don't powder them and don't leave large pieces behind; in this application, eggshells work because their sharp edges cut - or at least, irritate - slimy pests.) Do note that rain or heavy irrigation will shift the eggshells and perhaps cover some up with soil, making them a less effective deterrent.
Some people also find that the sharp edges of eggshells deter house cats. If, for example, you have a spot in your garden that cats use as a litter box, try putting eggshells in that location.
5. Feed Your Tomatoes
One of the most common issues gardeners have with tomatoes is blossom end rot, which is often caused by the soil not having enough calcium or by the plant being unable to absorb calcium (because of inconsistent watering, for example. Learn more about blossom end rot here.). Therefore, it's always smart to add calcium to the holes you plant tomatoes in.
For best results, use powdered eggshells, which will release their nutrients more quickly than whole or crushed shells.
6. Feed the Soil
Other plants love the nutrients in eggshells, too, so don't hesitate to add them to potting soil, or use them as a general organic amendment in the garden. Just remember that if you want those nutrients to quickly become available to your plants, you should powder the shells first.
Another way to use dried eggshells as a fertilizer is to soak them in a jar of water. Let the mixture sit for at least a week, and when the water is no longer clear, strain out the shells and use the water to irrigate your plants.
 Eggshells are an excellent addition to the compost pin. Courtesy of Lindsay.
 7. Compost Them
Similarly, eggshells make an excellent addition to compost. I usually put them in without crushing them first, but this does mean they take a long time to break down. I often have "finished" compost with still-visible eggshells in it. There's nothing wrong with that, but if you prefer, you may finely crush or powder the eggshells so they decompose faster.
8. Add to Kefir
Eggshells can be used to feed your water kefir grains and add nutrients to your finished product. Just make sure your eggs are well washed - inside and out - before you begin. Use up to one whole shell for a half-gallon of water kefir. Once the first fermentation is completed, the eggshell will be broken down and may even be completely disintegrated.
 Coffee can benefit from eggshells. Courtesy of Robert Engberg.
9. Add to Coffee
Old-timers used eggshells when making campfire coffee. They crushed the shells and put them directly in the coffee pot to keep the coffee grounds at the bottom, where they wouldn't end up in anyone's cup. If you want to try this at home, make sure you're either boiling your coffee well or using oven-dried shells, to prevent unwanted bacteria that could make you sick.
Another way eggshells are used when making coffee is to mellow out a brew and make it less acidic. For example, if you over-brew your coffee, add crushed eggshell, then strain; the flavor of the coffee will be improved. As a guideline, use a single eggshell for every 4-cup pot.
10. Add to Broth or Stock
Some people swear by adding eggshells to their homemade stock or broth - which makes some sense, when you think about it. After all, seafood shells are frequently used to make fish stock. Certainly, shells add some great micro-nutrients to the liquid, including calcium, magnesium, selenium, zinc, and phosphorus. Just add the shells to the pot when you add bones and vegetables, then strain them out when the mixture is done simmering.
11. Clean Cast Iron or Stainless Steel
If you cook with cast iron, you've likely heard of using salt to scrub out stubborn food from your pans. But did you know you can use eggshells for the same purpose? Crush the shells a bit first. They will break down as you rub, but then can be rinsed away easily. This trick works well for stainless sinks, too.
12. Make Chalk
Have your kids help you make fun sidewalk chalk by drying some eggshells and then finely grinding them. Stir together 3 tablespoons of ground eggshells with 1 tablespoon of warm or hot water, 1 tablespoon all-purpose flour, and, if desired, a bit of food coloring. Pour this mixture into an empty toilet paper tube placed on a rimmed baking sheet - or simply shape the dough-like mixture into the shape you desire. Allow it to fully dry, then remove the tube and have fun with your homemade chalk!
 Finely crushed eggshells are an old-timey tooth powder. Courtesy of Jonas Bergsten.
13. Make Tooth Powder
Many years ago, eggshells were used to clean teeth. According to some modern natural health gurus, brushing with eggshells can even improve tooth enamel. Use oven-dried eggshells (or the shells from hardboiled eggs) and grind them into a powder first. Some people like to add the ground shells to coconut oil to make brushing easier. Personally, I would consult my dentist before trying this old-timey trick.
April 4, 2023
Foraging Morel Mushrooms (Identifying, Cleaning, Storing, Preserving, and Cooking)
 This post contains affiliate links. All opinions are my own. Please see FCC disclosure for full information. Thank you for supporting this site!
I didn't grow up eating mushrooms - especially not wild ones. But I do love foraging wild food...and I can't help but get excited about mushrooms; they are fascinating - and so yummy. (A gazillion times better than store bought mushrooms!) Sadly, I haven't had a lot of time for foraging lately, but sometimes God sends you gifts you can't ignore. This weekend was one such time.
A few weeks ago, I was helping my husband extend the deer fence in our vegetable garden and I noticed a huge mushroom growing near some cabbages. I pointed it out to him and he replied, "Don't touch it! I think those are dangerous!" (He says this about all wild mushrooms and always questions me repeatedly when I feed him any new wild plant. "Are you sure this isn't going to kill me???"). I shrugged it off and went about the business of homesteading. But last weekend, as I was pulling the remaining winter turnips out of the garden, I noticed a cluster of mushrooms growing in one bed. I took some photos because I thought they were interesting.
Not long after, I posted these photos in a plant identification Facebook group. The immediate answers were exciting: "You hit gold!" and "I'm jealous!" were frequent comments. The mushrooms were morels (Morchella esculenta), one of the most sought after and expensive wild mushrooms around. And I found them though dumb luck...
Where to Find Morel Mushrooms
Or maybe not. Because it turns out there's a thing called "Landscape Morels." This is not a true variety of morel, but a commentary on where they are often found: In gardens where bark mulch has been laid down. My hunch is that last year, when I purchased and hauled in my garden soil, which is rich in native forest bark mulch, some morel spores and mycelium came along with it. So if you laid down wood chips anywhere in your yard last year, it doesn't hurt to check it this spring for any morels that might pop up!

 My landscape morels.
(adsbygoogle = window.adsbygoogle || []).push({});
Now, assuming you can't find landscape morels, you may be able to find morels in an old apple orchard - or in the woods, especially near ash, oak, elm, tulip poplar, maple, pine, sycamore, and hickory trees, as well as around any wild or feral fruit trees. Start looking for them in the early spring; they grow anytime between February to June, depending on where your climate. Early in the season, southward and westward slopes are the best places to look. Later in the season, all slopes are worth checking.
Morels don't like soggy soil that retains water, although they do like to grow along creeks and riverbeds. Morels may be more likely to grow around dead or dying trees - especially those with bark is falling off. (Do note, however, that they don't grow on trees; morels only grow in the ground.) They are also likely to grow in fields of wildflowers, or along the edge of a meadow in the woods. Finally, locations where there was a forest fire, a controlled burn, or a logging operation can be spots to look for morels, especially if a year or two has since passed. This, experts say, is especially true in conifer forests.
 Morels vary in color from tan to dark brown. Courtesy of Wikimedia Commons and Amada44.
 Morels need just the right conditions to grow, experts say. Not only do they need just the right amount of moisture, but they grow best when soil temperatures are around 50 degrees F. and air temperatures are between 50 and 60 degrees F. These weren't the temperatures we were experiencing when I found my morels - but it's still a good basic guideline.
The experts also say that morels grow between 400 and 5,000 feet in elevation, but that you're most likely to find a good number of them at 400 to 6000 feet above sea level.
One final tip: If you find one morel, slow down and look carefully around you. Almost certainly, there are more nearby.
 The largest morel I harvested weighed 4.16 oz., but there were bigger ones I left behind.
(adsbygoogle = window.adsbygoogle || []).push({});
Identifying Morel Mushrooms
Here's the number one thing to know about morels: Yes, there are look-alikes that can make you very, very ill (some even say they can kill you). However, there is one super easy way to distinguish these fungi from a morel: Cut the mushroom in half, lengthwise. A true morel is completely hollow, from cap to stem. The dangerous look-alikes are not fully hollow.
 Morels are completely hollow inside. Courtesy of Wikimedia Commons and Amada44.
 That said, it's important to add: Never eat any wild plant you are not 100% certain you've identified correctly.
Before you cut into a potential morel to check for that hollow center, however, take a good look at it's cap - that's the weird, brain-looking part on top. It should be pitted inwards. With most types of morels, the entire cap is attached to the stem, not hanging free. (There is a "half-free morel," where the cap is only partially attached to the stem; these, experts say, are harder to identify and are outside the scope of this article.) Also, with most types of morels, the cap is noticeably longer than the stem.
 Close up of a morel cap. Courtesy of Wikimedia Commons and Björn S.
(adsbygoogle = window.adsbygoogle || []).push({});
What About False Morels?
Whenever we talk about mushrooms, it's a good idea to discuss the dangers of misidentification. To prevent this problem, first cut the mushroom in half lengthwise. False morels may have air pockets where they are partially hollow inside the stem or cap, but a true morel is completely hollow.
From my research, only two look-alikes can be hollow: The half-morel (Morchella punctipes) and the Wrinkled Thimble Cap (Verpa bohemica). As stated above, half morels' caps are only partially attached to the stem. They are edible, but commonly thought inferior in flavor to true morels. True to their name, Wrinkled Thimble Caps have much smaller caps than true morels. They are edible, but only after long cooking. For photos and more information on these look-alikes, head over to this Wild Foodism's post.
Harvesting Morel Mushrooms
There's a lot of controversy in the mushrooming world about the best way to harvest morels (and mushrooms in general), but most experts say cutting the mushroom off at soil level is best. This helps prevent disruption in the soil, which is not only beneficial to soil health, but helps mushrooms survive year after year. It also tends to help keep the mushrooms cleaner.
Two other rules to live by are to never take more than you can actually use - and always leave some behind. In the case of morels, the fungi spreads both through mycelium (a mass of branched, tubular filaments, akin to roots) and through spores (reproductive cells, akin to seeds). Leaving a healthy number of mushrooms behind means the fungi can reproduce and continue as a healthy source of wild food for you and others.
Although some people like to spread mushroom spores around, thinking this will help the fungi thrive, with morels, most experts say it's probably better to let nature do it's own thing. Morels have to be fully mature and at a certain level of dehydration before their spores will release and be fruitful.
 My morel mushroom harvest.
(adsbygoogle = window.adsbygoogle || []).push({});
Cleaning Morel Mushrooms
Mushrooms tend to get dirty because...well, they grow so low to the ground. You can help ensure cleaner mushrooms by using care as you harvest them. Wipe your harvesting knife off after each harvest, and use an artist's brush or your own clean fingers to whisk off as much soil as possible before putting the mushroom in your harvesting bag or other container.
That said, most experts seem to agree it's a good idea to rinse off your morels. I cut mine in half vertically and rinsed them under cool, running water on both the outside and the inside (where bugs may linger). Only after I did this did I read that some foragers like to capture the rinse water in a container and then spread that water around an area where morels might thrive. The idea is that any spores that end up in the water might produce a new crop. Next time, I'll definitely do this.
As I rinsed the morels, I placed them in a salad spinner and spun them until they looked dry. Then I placed them inside a vegetable storage container, which is vented and designed to keep produce fresh longer. (My containers are older and I can't find them anywhere online, but these produce containers are the same idea.) Do not use an air tight container. If you don't have a produce storage container, place the morels in a paper bag and roll down the top. Store in the refrigerator.
 Cleaned morels in a produce storage container last up to a week in the fridge.
Mushrooms taste best when they are fresh, so I recommend eating at least some the same day you harvest them. Kept in a produce container, they last up to a week in the refrigerator. If you have more morels than you can eat in that time, consider sharing your harvest, or try your hand at preserving them.
Preserving Morel Mushrooms
Freeze drying or dehydrating are the two most common ways to preserve morels. To freeze dry them, place clean, halved raw morels (or if you prefer, sliced or chopped mushrooms) on the tray of a home freeze dryer. Pop them in the machine and let it do it's thing. When the machine says the mushrooms are done, pull them out and check them carefully for any cold spots. If there are cold areas, put them back in the machine and freeze dry them a bit longer. Store freeze dried morels in Mylar bags with oxygen absorbers, or (for shorter term storage) in vacuum sealed canning jars containing an oxygen absorber. In Mylar bags, mushrooms will remain shelf stable for at least 20 years (For more information on home freeze drying, see "Freeze Dried vs. Dehydrated Food: What's the Difference?")
 Home freeze dried morels.
(adsbygoogle = window.adsbygoogle || []).push({});
To dehydrate morels, place cleaned, halved (or sliced) raw mushrooms on the tray of an electric dehydrator, making sure the mushrooms aren't touching. Dehydrate at 110 degrees F. until the mushrooms appear completely dry. To check for doneness, break off a thicker piece of mushroom; no moisture should appear at the break. (For a complete guide to using an electric dehydrator, click here.)
If you live in a dry climate, you can try air drying morels. Thread a sewing needle with buttonhole or quilting thread, then run the needle through the stems of halved morel mushrooms, creating a sort of necklace. If you place a knot on each side of every mushroom half, it will help keep the morels from touching each other, which will speed their drying and help prevent rotting or molding. Hang the "necklace" up in a dry location out of direct sunlight. Use the same doneness check as for electric dehydrating.
To store dehydrated morels, place them in a glass jar with an air-tight metal lid. Store in a cool, dry, dark location for up to a year.
I do not recommend oven drying mushrooms; the results will be inferior because an oven is really too hot for the job. If you have an oven warming drawer, you could try using that; see general directions here.
To rehydrate dehydrated or freeze dried morels, pour the desired amount in a bowl and pour room temperature water over them. Allow to sit until the mushrooms are fully rehydrated.
It's also possible to freeze morels. However, if you freeze raw morels, their flavor will dissipate, so first, either boil them or saute them for 5 minutes. Pat boiled mushrooms dry before packaging. Place the prepared mushrooms inside freezer bags, squeezing out as much air as possible, and use within 6 months.
Cooking Morel Mushrooms
Morels have a wonderful, classic mushroom flavor, so they are ideal for a wide variety of dishes, including risotto, quiches, salads, burgers, grits, fried whole or halved, as part of savory sauces, etc.
It is important to note that morels should ALWAYS be cooked before eating them. Consuming them raw causes gastrointestinal distress, diarrhea, and vomiting.
If you've never eaten morels before, it's a good idea to begin with just a small amount. (This is good advice for any new-to-you food.) I recommend sauteing a small amount in butter, then adding a bit of sea salt and pepper. This has the added bonus of letting you experience the special flavor morels have, which will make it easier for you to use them in recipes.
Once we each tried our sauteed morels, I served the remainder of my harvest on pizza and in an egg hash. I plan to use the morels I preserved in stroganoff and Salisbury steak.
Related Articles:
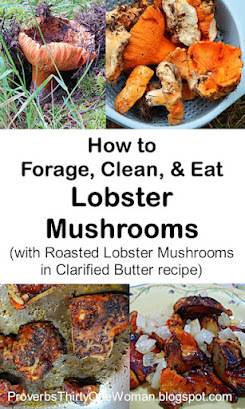


* Cover image courtesy of erin.
(adsbygoogle = window.adsbygoogle || []).push({});March 26, 2023
Why Don't We ALL Can Like the Amish? (Video)
One of the most frequent comments I get on my YouTube channel goes something like: "The Amish water bath can everything. Why shouldn't we?" In this video, I explore whether Amish canning is anything like what we think it is, using quotes from former "plain" people, as well as historical books. Check it out!
.embedtool {position: relative;height: 0;padding-top: 56%;overflow: hidden;max-width: 100%;} .embedtool iframe, .embedtool object, .embedtool embed { position: absolute; top: 0; left: 0; width: 100%; height: 100%; } .embedtool .fluid-vids {position: initial !important}


