
Kristina Seleshanko's Blog, page 3
July 30, 2024
July on the Homestead
 The garden at the end of July.
If you read about my husband's accident, you know this month has been a bit wonky. Thankfully, though, he is literally back up on his feet. He's still awfully tired, his skull bones still hurt, his injured eye still hurts, and most of the time, he still sees double if he uses both eyes. But the ophthalmologist who did his surgery thinks it's possible he may not need additional surgeries. We are thankful for his progress.
On the homestead, July is a month when we start to see bountiful harvests, and while I have been harvesting plenty to eat fresh and have been able to preserve some, our yields are not as large as they typically are. The reason? Unusually cool weather. (We've seen this happen before, when much of the nation is experiencing an especially hot summer.) I am harvesting beets, turnips, green beans, and more, but the squash, for example, are off to a really slow start. I have a couple of baby yellow summer squash and patty pan squash, a few Winter Luxury Pumpkins and Delicata winter squash, and that's it so far. I also have lots of green tomatoes - I'm just waiting for it to get warm enough for them to ripen on the vine.
In the orchard, we thought we'd have no plums this year. It was cold while the trees were in bloom this spring, preventing good pollination. But this month, my husband pointed out that there are a few plums - they were just hiding well while they were still green. So that's a nice blessing. And while even our apple harvest won't be as large as in year's past, we definitely have some on the trees. We will take what God offers!
 Apples!
 Bell peppers, growing in buckets in the greenhouse.
 The cabbage is starting to head.
  Plums.
  Yellow summer squash.
July Produce Totals:
To learn more about how and why I am keeping these totals, click here.
 The first larger harvest of 2024.
Radishes and leaves: 1 lbs. 6oz.
Snow peas: 3 lbs. 12 oz.
------------> $1.50 conventional (there are no Walla Walla onions at my Walmart, so I chose to compare them to other sweet yellow onions; no organic options at my Walmart)
 Fresh green beans and Walla Walla onions - a winning combo!
Buttercrunch lettuce: 3 oz.
Green Beans: 21 lbs 75 oz.
 Putting up green beans a few bags at a time!
Cherry Tomatoes: 2 oz.
Serrano Peppers: 1 lb. 8 oz.
Turnips with leaves: 13 oz.
Beets with leaves: 12 lbs. 38 oz.
Blueberries: 1 lb.23 oz.
Saved in July:
$137.21 if purchased conventional; $208.44 if I purchased the organic options available.
Saved in 2024 so far:
$537.73 if buying organic and $354.37 if buying conventional.
2024 Gardening Expenses
Walla Walla onion starts: $4
Cherry tomato start: $5.49 (a single plant and a hedge because the new-to-me-variety of cherry tomatoes I started from seed were looking less than robust)
Potting Soil: $47.96 (primarily for potting up peppers in the greenhouse; some will get used for flowers, too, but I won't try to parse that out.)
Organic snail bait $17.96 (I had to use more of this than is typical because we had such a cool, damp spring)
Total gardening expenses so far: $75.41
Total savings minus expenses in 2024: $462.32 if buying organic when available; $496.12 if buying conventional


July 16, 2024
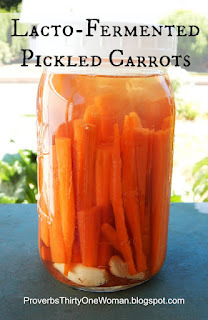
Easy Lacto-Fermented Radish Pickles

This post may contain affiliate links. As an Amazon Associate, and at no cost to you, I earn from qualifying purchases made through some links. Please see FCC disclosure for full information. Thank you for supporting this site!
Radishes are one of my favorite homestead crops. They are easy to grow, go from planting to harvesting in a few short weeks, and are one of the earliest crops in the garden. Once the weather gets warm, they tend to go to seed...but those seed pods are really tasty! And then they can be planted again in the fall garden.
Many people are unsure how to eat radishes and don't know that if you cook them, all or most of their "bite" disappears. For some of my favorite ways to eat radishes, see this post. But usually, the first thing I make with radishes is fermented pickles. These are super easy to make and are packed with pro-biotics. And the radishes become very mild tasting. They make an excellent condiment or snack.
How to Ferment Radishes
1. Slice the radishes thin. (Discard the roots into your compost pile; save the leaves to saute as a side dish.) Pop the radish slices and, if you like, one garlic clove into a quart canning jar. You could also add other seasonings at this time, if desired.

2. Now make the brine: 3 cups distilled water and 2 tablespoons sea salt. Stir until the salt is completely dissolved. If needed, you can lightly heat the water so the salt dissolves more easily; if you do this, be sure to allow the mixture to completely cool before you proceed.
 4. Put a glass weight on top of the radishes. The veggies must all be below the weight, or they will mold. This is the style glass weight I use.
5. Put a burper (i.e. "pickle pipe") on top of the jar. These are the style I use. (Put the pickle pipe on top of the jar, bump side up, then screw the canning jar ring in place.) If you don't have a burper, just put a lid loosely on the jar and plan to open the jar daily to let gas escape. 6. Place the jar in a bowl, just in case the brine overflows, and let it sit on the counter, out of direct sunlight. In about a week, taste the pickles (using a freshly washed fork). When you like the flavor, put the jar of pickles in the refrigerator. They will keep for many months. If you want your radishes more tangy, give them more time to ferment on the counter.

 Related Posts:


(adsbygoogle = window.adsbygoogle || []).push({});
July 9, 2024
Controlling Flies on the Homestead - Naturally
 This post may contain affiliate links. As an Amazon Associate, and at no cost to you, I earn from qualifying purchases made through some links. Please see FCC disclosure for full information. Thank you for supporting this site!
 If you have livestock on your homestead, let's face it: you also have flies. Flies adore animal poop. It offers the perfect environment for them to lay their eggs - plus it gives both larvae and adult flies food. But flies can reduce the health and abundance on your homestead, so it's important to keep the fly population down. Your animals, your neighbors, and your family will thank you if you do.
The Life Cycle of a Fly
If a pair of common house flies were able to live without threat, in just five months they'd have enough children to cover the entire earth...to a depth of almost 30 feet! (Source.)
Thank goodness flies have too many predators to make that actually happen, but it does prove the point that flies reproduce rapidly.Give the average house fly a moist, warm environment, along with a good supply of food, and it will go from egg to adult in only a week. It will live just 15 - 25 days, but females lay up to 500 eggs during that short lifetime.
Other types of flies are prolific, too. Horn flies, for example, start mating 3 - 5 days after birth and females lay up to 200 eggs during their lifespan. Horse flies are similarly prolific, as are virtually every other type of fly found in the U.S.
 Life cycle of the housefly. Courtesy of Clemson University.
Not Just a Nuisance
Unfortunately, flies aren't a mere annoyance; they can zap the abundance out of a homestead. To see just how much they can zap from us, let's take a look at the commercial livestock industry, where all the studies on this are conducted.
For example, studies conducted in the U.S. and Canada show that large numbers of flies decrease the profitability - by over $1.5 billion in the United States alone - of commercial cattle raising. Dairy cows who are pestered by flies produce up to 30% less milk. Beef cattle inflicted with flies show weight gain loss. (According to Dave Boxler, an entomologist with the University of Nebraska-Lincoln Extension office, calves whose mothers had protection against horn flies gained an average of 10 - 20 pounds more than calves whose mothers did not have protection.)
In addition, flies are suspected to spread more than 65 different diseases to humans, as well as spreading diseases to livestock, including mastitis and other infections. Ugh!
Keeping Things Tidy
The number one thing any of us can do to reduce the fly population on our homesteads is to avoid creating the perfect breeding ground for flies. That means, in a word: tidiness.
#1. Keep cages, pastures, and animal shelters manure-free. Flies especially love damp manure.
 Keep manure cleaned up and store it away from animals.
(adsbygoogle = window.adsbygoogle || []).push({});
#2. Use sawdust as a bedding, when appropriate for the animal. Sawdust is less likely to create the damp environment flies love and need.
#3. Keep compost piles hot. Hot heaps kill the life in fly eggs. Another option is to use enclosed compost bins.
#4. Keep both manure and compost piles far away from livestock.
#5. Understand that anywhere you allow vegetation to decay, flies will appear and reproduce. Scope out your homestead; are you leaving old plants or produce in the chicken run? (Try instead to only giving the chickens what they can reasonably eat in an hour.) Do you have spoiled hay laying around? (Compost it.) Is there any organic bedding near livestock waterers? (Compost it.) Do you have leaking or dripping water sources? (Fix 'em!)
#6. Before storage, rinse off any tools used around feed or manure, including shovels, buckets, and wheelbarrows.
#7. If you topdress your garden or fields with manure, spread it thinly. This makes it dry out quickly, becoming inhospitable to flies and their eggs.
Natural, Integrated Pest Management
In addition to being tidy, it's important to let nature work for you. For example, you could buy parasitic wasps online or at farm stores. These lay their eggs on or in fly pupae, never allowing the flies to hatch. (IMPORTANT: They are not the larger type of wasps that sting humans.)
Ideally, you'll implement parasitic wasps before your fly problem gets out of control. Generally, you'll need about 500 wasps per large animal, like a cow or horse; 250 per medium animal, like a sheep or goat; and 5 per small animal, like a rabbits or chicken. If your fly population is quite large, you may need to bring in new parasitic wasps each month. Unfortunately, the cost of parasitic wasps to the average homesteader is probably on the higher side of things.
Happily, however, another natural predator to flies is one you probably already have: Wild birds, especially swallows, flycatchers, wrens, and warblers. You can encourage a healthy wild bird population on your homestead by making sure they have access to cover (in the form of shrubs, hedges, and trees - especially if they are native plants) and water sources.Spiders are also your ally in the war against flies, so don't kill them indiscriminately. That means avoiding insecticides and allowing spiders to live as undisturbed as possible - if not in your house, then elsewhere on your homestead.
 Barn swallows eat many flies. Courtesy of Michael Gäbler.
(adsbygoogle = window.adsbygoogle || []).push({});
Other Natural Methods
Flypaper may not be pretty to look at, but it's still one of the most effective and inexpensive ways to kill adult flies. Paper works by attracting flies through scent - one that typically isn't offensive to humans; when a fly lands on the sticky paper, it can't fly away and eventually dies.
Store-bought or homemade fly traps are even more effective. These consist of a container filled with fly bait. There is only a small entrance for flies to get into the trap and no easy way for the flies to get out. Unlike flypaper, these traps are really stinky, so while they are great for outdoor use, you won't want to use them in your house. Here are the flytraps we use on our homestead - although we are considering switching to reusable ones, like these. If your trap doesn't come with bait, good choices include raw meat scraps, overripe fruit, and fresh animal manure.
In addition, when sprinkled over manure, food-grade diatomaceous earth helps dry out manure, which in turn makes it less appealing to flies. If flies lay eggs in the manure anyway, the diatomaceous earth will dry out their eggs so they don't hatch. Just be careful sprinkling it around, since it can cause respiratory problems in both livestock and humans. (Wear a mask while applying it and keep livestock and pets well away until the dust has settled.)
It may also be possible to deter flies from problematic areas of your homestead by growing certain plants around areas of high interest, such as manure piles. Mint, lavender, and rosemary are said to repel flies.
 Mint may repel flies. Courtesy of Georgfotoart.
(adsbygoogle = window.adsbygoogle || []).push({});
Some people swear by fly sprays. The type you buy are usually insecticide-based, but there are homemade versions that are all-natural and focused on plants that naturally repel flies. They are typically sprayed right on the animal - especially before milking; just be careful not to get the spray in the animals' eyes, nose, or mouth. Try this recipe:
4 cups raw apple cider vinegar
20 drops rosemary essential oil
20 drops basil essential oil
20 drops peppermint essential oil
2 tablespoons cooking or mineral oil
1 tablespoon dish soap
Pour the ingredients into a spray bottle. Shake well. Shake before each application.
 DIY fly spray.
(adsbygoogle = window.adsbygoogle || []).push({});
Gut buckets are another natural way to reduce the fly population. Any time you butcher an animal or have fish or other raw meat scraps, put them in a bucket that has a snap-on lid. Snap the lid part of the way down, leaving a little bit of the lid unsnapped so flies can get in and lay eggs. Let the bucket sit like this for a couple of days, then snap the lid entirely closed. In about another 3 days, the heat in the bucket will have killed both the eggs and the adult flies. Pop open the lid and repeat the process. This method works best during hot weather and when set out in full sun. Be forewarned: It will be stinky!
Using Chemicals - Wisely
Insecticides kill beneficial insects and disrupts the natural balance of nature, so I highly recommend using all-natural methods. That said, sometimes careful use of chemicals can bring fly numbers down to a more manageable level, at which point you can convert to all natural methods.For example, you can buy larvicides that can be applied directly to manure piles. These work by preventing larvae development. If you have beef cattle, you can also try insecticidal ear tags which work simply by repelling flies away from the livestock's face. (Insecticidal ear tags are not suitable for dairy animals.)
By being smarter than the flies - and especially by making it difficult for flies to reproduce - any homesteader can greatly reduce the fly population on their land, thereby creating a healthier, happier, and more prolific place for both animals and humans.
Cover photo courtesy of NY State IPM Program at Cornell University.
Related Articles:


(adsbygoogle = window.adsbygoogle || []).push({});
July 3, 2024
May and June on the Homestead (+ My Husband's Accident)
 The vegetable garden in June.
Well. It's been a bit since I updated you here on the blog, and there's a lot to tell. First, let me explain why I didn't give an update for May; it's our "dry month" on our homestead. There are no fresh crops to harvest and we are only eating preserved fruits and vegetables. And since these monthly updates are primarily about how much produce I'm growing on the homestead, I decided to just skip that month. Then June happened.
June was unusually cool, and the garden wasn't doing much. Which is probably a good thing, considering what happened to my husband.
One of my husband's friends ("J") lives at the very end of our rural road. J invited my hubby to come to his daughter's wedding reception, which was taking place at his home. My hubby went, looking forward to hanging out with some friends, eating some good BBQ, and having a few beers. When it was time to go home, there was no way he was going to drive, so he decided to walk his scooter back home. The road is windy, narrow, and steep - plus it was dark out - so he made sure to turn the headlights on his scooter. The motor, however, was off. Well, he didn't make it very far before he fell. He doesn't remember all the details, but he thinks he tripped and the scooter twisted around and pushed him down hard. He may have blacked out, but we're not sure.
He remembers thinking he had to get over to the side of the road and that he'd just have to wait there for someone to find him. Thankfully, as he was trying (emphasis on trying) to crawl out of the road, a careful driver spotted him. We have so many people who drive way too fast on this road, so the fact that this driver found him is a huge blessing from God. He easily could have been run over by a speeding vehicle.
 In the ER.
Even though this section of road usually has no cell service, this careful driver was able to call 911. My husband was also able to unlock his phone for her and ask her to call me. The call came through perfectly. (Later, when she tried to call her boss to tell her why she was late, she struggled to get a signal. Yeah, it was a God thing.)
I was at home in my PJs, having a lovely time with my kids, watching a movie and then just chatting. When the phone call came, I didn't recognize the name, so I let it go to voicemail. Thankfully, a minute or two later, I checked to see if a message was left. That's when I got the message no wife ever wants to hear: "Your husband had been in a serious motorcycle accident on [road name here] and he's being taken by ambulance to the hospital."
I was absolutely - to the core - terrified. I feared the worst.
As I hurriedly got dressed, all I could think or pray was, "Please save him, Lord. Please save him." Over and over and over and over again.
When I found the accident on our road, I really expected to see my husband dead or nearly so. Instead, I saw him sitting up, leaning against the his fallen scooter, holding a towel to his head. There was blood everywhere. One whole side of his face was all injury and one eye was swollen completely shut. He was speaking with a man from the fire department, who got there before the ambulance or Sheriff's deputy. I said a prayer of thanks and approached him. The first thing my husband said was, "I'm so sorry. I am okay. I'm okay."
The fireman made me step aside because, as he said later, he didn't want me to see the extent of my husband's grotesque injuries. Once they bandaged him and were sure he was somewhat stable, I came over and held my husband's hand. He said he'd had some beer and didn't want to ride his scooter home, so he was walking. I told him he was an idiot and that I loved him.
Not long after, the deputy arrived, then the ambulance. All were sure my husband had been driving drunk because his injuries were severe and there was blood all over the road. I told the deputy it wouldn't be in character for my husband to drive drunk. As the deputy later learned, the engine wasn't hot, the scooter wasn't damaged, my husband didn't have injuries on his hands, and guests had seen him walk away from the party, pushing his scooter. His story about how he was injured sounded incredulous, but it was true.
A family friend drove me to the ER, where I waited quite a long time in the waiting room, praying and asking for prayer from friends and family and this blog's Facebook community. I think it was a couple hours before a nurse came and got me and let me sit in my husband's room. He was in terrible pain (writhing, in the fetal position), but when the nurse asked his pain level, he said "Four." I told the nurse to give him more pain meds.
When I finally spoke to the doctor, he said my husband had broken the bone just below his eye and that an eye muscle was pinched and strangulated in that break. He would need surgery or there would be permanent vision damage. They needed to life flight my husband to our state's biggest city and our most renown hospital.
As they prepped my husband for this journey, I went home to two worried teenagers - still awake. (I'd been updating them by phone.) It was about 3 AM. I went to bed, wanting to get a couple of hours of sleep before I traveled four hours to the hospital.
Long story short, an eye surgeon performed emergency surgery to extract his eye muscle from the bone break, then inserted a plate in his bone, to prevent the muscle from shifting into the break again. They released him from the hospital the next day. He was wheeled away not just with the eye injury, but with a huge flap of skin on his forehead stitched back in place, stitches inside and outside his mouth, a broken tooth, a cracked tooth, a partially numb mouth, and a concussion. As you can imagine, for the first week or so, he needed help with almost everything. (Not his favorite thing!)
This was about 11 days ago. Today, he looks and feels better. His eyeball, which was pretty much black (and startled every doctor who saw it), is beginning to lose that unnerving color. His swelling is way down. His forehead wound is nearly dry and we think we can stop bandaging it soon. He is walking around a little. (And is bored out of his mind. The other day, he told me he was going to take a ride in the side-by-side. I told him, "NO.") It's still almost impossible for him to use both eyes together and the ophthalmologist who did his surgery says he'll likely need another surgery or two to get his eyes lined up right. How much his vision will be permanently affected is still unknown.
But there is much to be thankful for. It could have been much, MUCH worse.
Pardon me if I'm an emotional mess.
And there's still income to be made (solely by me) and a homestead to run (ditto). I'm managing the best I can, but I know some things will just have to slide.
As for the homestead, it's moving along...slowly. July seems to be bringing warmer weather, so that should help the garden. Spring conditions were wrong for plums, so there's no fruit in the orchard yet. (Which may be a blessing, because I'd be stressing out about trying to preserve that fruit if it were there.) I have rabbits I need to butcher, my rabbit doe is experiencing a false pregnancy (I think; either that or one of her kits inseminated her at 8 weeks of age!), everything needs mowing, and I am exhausted. It's an excellent time to remember to lean on the Lord. He is so good.
 Bell peppers are starting to appear in the greenhouse.
Now, for some better news. For a long while, my husband has been encouraging me to create some homesteading t-shirts. So for the past couple of months, I've been working to make that happen. My daughter created a design to go with my homesteading motto ("Start where you are/Use what you have/Do what you can") and I did tons of research trying to find the best place to have the shirts created. After messing around with many websites and ordering t-shirts from multiple sources, I finally settled on SpreadShirt.
And now I'm offering t-shirts for men and women, plus an apron, hoodies, a bag, mugs, and a sticker. If you'd like to help support this site, plus get a fun item to use, this is a great place to do so! You can see all the offerings in our store. Here is just a sampling:


June Produce Totals:
At this time, we're mostly eating produce that I preserved last year. Even so, we do eat fresh food from the garden during the cold months; this month, however, we used up the last of the fresh produce. To learn more about how and why I am keeping these totals, click here.
 Snow peas.
Radishes and leaves: 3 lbs. .67 oz.
Snow peas: 4 lbs. .22 oz.
------------> $11.92 conventional (no organic option available at my Walmart)
Egyptian walking onions: 13 oz. ------------> $8.19 conventional (there are no walking onions at Walmart, so I chose to compare them to shallots; no organic options at my Walmart)
 Egyptian walking onions.
Saved in June:
$107.33 if purchased conventional (no organic options available this month)
Saved in 2024 so far:
$329.29 if buying organic and $217.16 if buying conventional.
2024 Gardening Expenses
Walla Walla onion starts: $4
Cherry tomato start: $5.49 (a single plant and a hedge because the new-to-me-variety of cherry tomatoes I started from seed were looking less than robust)
Potting Soil: $47.96 (primarily for potting up peppers in the greenhouse; some will get used for flowers, too, but I won't try to parse that out.)
Organic snail bait $17.96 (I had to use more of this than is typical because we had such a cool, damp spring)
Total gardening expenses so far: $75.41
Total savings minus expenses in 2024: $253.88 if buying organic when available; $141.75 if buying conventional
June 21, 2024
Choosing the Canner That's Right for You
 This post may contain affiliate links. As an Amazon Associate, and at no cost to you, I earn from qualifying purchases made through some links. Please see FCC disclosure for full information. Thank you for supporting this site!
These days, buying a canner can be confusing. There are lots of options out there, and sorting out what you truly need - and won't be a waste of time and money - can be daunting. So allow me to walk you through what you do - and don't - need to start canning at home.
What Do You Want to Can?
The first and most important question to ask yourself is: "What do I want to preserve?" There are two basic types of canners, and which you select depends entirely on the type of food you wish to can.
If you want to can pickles or fruit or fruit products (such as jam, jelly, applesauce, apple butter), you may use either a water bath canner or a steam canner to preserve them.
(adsbygoogle = window.adsbygoogle || []).push({});
If you want to can non-pickled vegetables or meat or meat products (like broth or stock), you will need a pressure canner to preserve them.
Which Water Bath Canner is Right for You?
 A granite ware water bath canner is an inexpensive way to get started with canning.
(adsbygoogle = window.adsbygoogle || []).push({});
Water bath canning is often considered the easiest type of canning - or at least, most people find it less intimidating. It's also the type of canning that is appropriate only for high-acid foods, such as fruit or pickles. (This is because low-acid foods - like meat and non-pickled vegetables - are much more hospitable to rare but deadly botulism. To kill the botulism spores that cause botulism toxin to grow in sealed jars, you must heat the food to 240 degrees F. for a specific period of time. Water bath canners can only reach 212 degrees F., no matter how long you boil the food.)
When it comes to water bath canning (sometimes called "boiling water canning"), it may surprise you to learn that you don't necessarily need to buy any special type of canner. A large, lidded pot, big enough to hold canning jars plus at least 2 inches of water above those jars, is all that's really required. The toughest part is finding a rack to fit on the bottom of the pot, since the canning jars cannot touch the bottom, lest they break during processing. One simple way to accomplish this is to tie canning jar rings together so they fit neatly on the bottom of your pot. Voila! You have a water bath canner!
That said, pots made specifically for water bath canning often hold more canning jars and can be had inexpensively at garage sales and thrift shops. Even new water bath canners of the granite ware type aren't very expensive. (I found one with mostly 5 star reviews that is currently $13.71 on Amazon! But a more typical price is about $60.) Most people enjoy having a rack that easily lifts all the jars out of the pot and can be suspended on the pot's rim - something actual water bath canners come with.
The downside to relatively inexpensive granite ware pots is that they eventually rust - so if you're sure you're going to can for years to come, you might want to invest in a stainless steel water bath canner (generally in the $60-$80 range). These should easily last your lifetime. Do avoid cheaper, thinner stainless steel canners, as they may easily crack, especially if you lift them up when they are filled with water. (Yes, I've had it happen!)
 VKP's stainless water bath canner.
(adsbygoogle = window.adsbygoogle || []).push({});
Finally, you could consider an electric water bath canner. These are simply large pots with a built-in heating element at the base that is temperature-controlled. People often choose electric water bath canners if they have a glass top stove the manufacturer states shouldn't be canned on. The downside to electric water bath canners is that they require electricity, whereas a traditional water bath canner can be used not just on an electric stove, but also on a wood stove, or a gas or propane stove (including certain camp stoves, which is how many canners work around the flattop stove problem). In addition, electric water bath canners have a smaller jar capacity - a disadvantage to many homesteaders, but perhaps a bonus if you're single or just don't do large batch canning. Also bear in mind that while a stainless water bath canner will easily last a lifetime or longer, an electric water bath canner will only last as long as the electronics inside it can hold up.
 Ball's electric water bath canner.
Which Steam Canner is Right for You?
 A steam canner can be used instead of a water bath canner.
If you want to can high-acid foods like pickles and fruit, another safe option is to use a steam canner. Many people prefer steam canners to water bath canners because they are lightweight, require very little water to operate, and require less energy to run. In addition, steam canners make processing jars a bit quicker (because they take so little time to bring water to a boil; you should still use the same processing times as required with a water bath canner). Some steam canners also work on induction burners and glass top stoves.
There are at least two styles of steam canners available: the type that looks like a stock pot and the type that is shaped like a cake pan, with a domed lid. Only the dome-style steam canners have been third-party tested safe; there are some concerns from the Extension offices that the stock pot style steam canners allow steam to move around the pot in such a way that the contents of the jars may not get thoroughly heated, killing harmful microorganisms. (At this time, they have not conducted testing to see if that theory is true.)
Unfortunately, one downside to the dome style canners is that they have a gauge on top of the lid that faces the ceiling. If you're short, you will need to stand on a stepping stool to accurately read the gauge. But even if you're tall, you must carefully ensure you look straight down on the gauge in order to read it accurately. If you don't, you'll be subject to parallax - that is, depending upon your position, the position of the pointer on the gauge may appear to be in a different location than where it actually is. Not having the pointer in the correct position on the gauge means the canner isn't yet hot enough to kill harmful microorganisms that are potentially inside the jars.
 Steam canner gauge.
Another downside to steam canners is that they aren't appropriate for foods that require longer processing times. Because so little water is used in a steam canner, long processing times can result in all the water boiling away; this not only can warp and ruin the canner, but it can make the jars of food under-processed and therefore unsafe to store in the pantry. The processing limit on steam canners is 45 minutes, but if you too-rapidly boil the water, steam canners can go dry before that.
What Pressure Canner is Right For You?
 Pressure canning carrots.
(adsbygoogle = window.adsbygoogle || []).push({});
If you want to can meat (including fish and seafood), meat products (like bone broth), or non-pickled vegetables, you must use a pressure canner. Despite what some people on the Internet say, it's not safe to water bath these low-acid foods. (The reason is simple: Botulism spores are very common; once sealed inside a canning jar, they have the perfect environment to grow into botulism toxin, which is highly dangerous. Botulism spores are killed at 240 degrees F. and with home canning equipment, only a pressure canner can reach that temperature.)
When shopping for a pressure canner, first be sure you are looking at pressure canners, not pressure cookers. Pressure cookers are smaller and therefore go up and down in temperature much faster than pressure canners. This means that if you can food in them, your jars don't sit at the temperature required to kill harmful microorganisms for a long enough period of time, making your jars of food unsafe.
There are two basic types of pressure canners: Those with a dial gauge and those with a rocker gauge. (Some models have both.) Dial gauges must be watched periodically throughout the canning process, to ensure the pressure inside the canner is neither too high (resulting in siphoned jars that may not seal or are only partially full) or too low (resulting in food that's unsafe because required temperatures were not met). Such gauges should be checked every year for accuracy, something some hardware stores and many University Extension offices do for free each spring.
 On the left is a dial gauge. On the right is a vent that, in some models, can be replaced with a rocker gauge.
Rocker gauges require less monitoring. Once you know what the rocker gauge sounds like when the pressure inside the canner is at its the sweet spot, you don't need to have eyes on the canner. Instead, you can listen to the rocker and go about other business (like prepping more jars for canning!). No checkups are needed to safely use a rocker gauge.
If a canner you like doesn't automatically come with a rocker gauge, sometimes one can be purchased and put on the canner of your choice. Just be sure to buy the rocker designed specifically for your canner and made by your canner's manufacturer. (I don't recommend purchasing off-brand rockers because they may not actually work with your chosen canner, despite what the manufacturer says.)
In addition, most pressure canners have rubber gaskets that fit on the lid. Over time, these wear out and need replacing, though they are not expensive. Proper care of the gasket (per the manufacturer's instructions) can make these gaskets last a decade or more. Some pressure canners, however, do not have any gasket at all; instead, they have a metal-to-metal clamping system that should never need replacing.
Most pressure canners are made from aluminum because it is lightweight. This not only makes the canner easier to lift when it is full of water and jars, but it makes the water inside the canner heat up quicker. However, some brands (like All American) are made of considerably heavier aluminum. This makes for better longevity, but some people find them too heavy to comfortably lift or move.
 The two most popular pressure canners: a gasket-less All-American (left) and a gasket-fitted Presto (right).
(adsbygoogle = window.adsbygoogle || []).push({});
Another consideration is size. Clearly, the bigger the canner, the more jars it can process at a time. However, before buying a behemoth pressure canner, measure the amount of space between your stove's burners and your vent hood or kitchen cabinets. Not only does the lid of the canner need to easily clear these obstacles, but you'll want plenty of space between the steam your canner produces and your cabinetry, so you don't ruin the latter. If you like to fill your canner with water at the sink, you may also want to measure between the bottom of your sink and the top of your faucet - although most people find it easy enough to simply bring pitchers of water over to the stove to fill their canner.
Also related to size is weight. Consumer-grade stoves are not designed to withstand heavy pressure canners filled with water and jars of food. (Older stoves may hold up to this weight better than newer ones.) I've had my heavy All American canner warp and ruin coils on my electric stove, for example. While you may be able to find a special, heavy-duty "cannering coil" that fits your electric stove, even these may not hold up well to the heaviest models.
Another consideration is that many canners like to "double stack" their jars. This means they put a rack on the bottom of the pressure canner, then a layer of pint jars filled with food, then another rack on top of those jars, and then another layer of pint jars on top. Not all pressure canners are big enough to accommodate that second layer of jars. A 23-quart Presto will (though you'll have to buy a second rack), as will the 25-quart All American (which comes with two racks).
To read my comparison of the top two pressure canners (Presto and All-American), click here.
It's also certainly possible to buy a used pressure canner, but I recommend you do so with a bit of caution. Make sure you are truly buying a canner (not a cooker) and make sure you can still get a copy of the user's manual. (Often, manuals are available online for free.) You may also wish to ensure that you can still buy parts for the canner, especially gaskets and gauges. Then I strongly recommend that you take the used pressure canner to your local Extension office and have them examine it. They will tell you if any parts need replacing, and will also advise you about the general safety of the pressure canner; modern pressure canners have multiple safety checks that prevent the canner from blowing up. Older models may not.
Finally, you may be tempted to buy an electric pressure canner. Unfortunately, though, none of these have been third-party tested, and there are understandable concerns about them. The biggest one is that a pressure canner must keep the jars at a certain temperature for a specific length of time in order to kill harmful microorganisms. Current electric pressure canners have no safety features to ensure this happens every time. There's no way to calibrate the thermostats on these machines or test the electronics for failure. All it takes is for one wire to start getting worn for the temperature to no longer reach safe levels. Therefore, at this time, electric pressure canners are not recommended.
Related Articles:


(adsbygoogle = window.adsbygoogle || []).push({});
May 24, 2024
How to Make Crisp Homemade Pickles
 This post may contain affiliate links. As an Amazon Associate, and at no cost to you, I earn from qualifying purchases made through some links. Please see FCC disclosure for full information. Thank you for supporting this site!
One of the questions I'm asked most frequently is: "How do I make my homemade pickles crispy?" Indeed, there is some know-how involved. Let me walk you through it!
Refrigerate, Ferment, or Can?
Each potential method of making cucumber pickles results in a different texture. Old time pickles were almost always lacto-fermented, and this method of preserving may, indeed, give you a crunchier pickle than if you home can your cukes. Still, most people seem to feel refrigerator pickles are the crunchiest. Just note that any of these three methods can result in mushy pickles if you don't follow the tips below.
Choose the Right Cucumbers
For the best, most crunchy pickles, choosing the right type of cucumber is the most important factor. Not all cucumbers are suitable for pickle making, so look for an actual "pickling cucumber." These varieties do a much better job of staying crisp once they are canned, fermented, or refrigerated in brine. Other types of cucumbers are safe to use, but they make pickles in varying degrees of mush. Any good seed catalog will mark its pickling cucumbers clearly.
How fresh your cucumbers are also has a dramatic effect on how crispy your pickles will be. Always harvest cucumbers in the cool of the morning. - and just say no to big cukes. The larger the cucumber, the less crunchy a pickle it makes. (Plus, bigger cucumbers tend to be full of big seeds, which aren't what most people look forward to in a pickle.) Instead, select smaller cucumbers; the smaller they are, the more firm they naturally are, and the crunchier the pickle they produce. The general recommendation is to harvest cucumbers at 2- to 4-inches long. (Not sure what to do with bigger cucumbers? Eat them raw, or turn them into relish. However, avoid cucumbers that are so overripe they've turned yellow and bitter.)
It's also really important to pickle cucumbers immediately after harvesting. Some people feel they must wait to make pickles until they have a large amount of cucumbers. This is a mistake. It's better to make pickles as cucumbers become available, even if it means making one or two jars at a time.
 Smaller pickling cucumbers lead to crispier pickles.
(adsbygoogle = window.adsbygoogle || []).push({});
If Using Purchased Cucumbers...
If you don't grow your own cucumbers, buy the freshest cukes possible. Grocery stores are the worst place to buy pickling cucumbers because they've been sitting around a long time. A better choice is a local gardener or a farmer's market.
Then, when you bring the cucumbers home, give them a good soak. (NOTE: Some people insist that soaking even freshly-harvested cucumbers is a must for crisp pickles; try making some jars with soaked freshly-harvested cukes and some without soaking and see what you think.)
After trimming the cucumbers (see below), throw them into an ice bath: Pour a layer of ice into a sink, cooler, or large bowl, then add a single layer of cucumbers. Next, add another layer of ice. Repeat the layers until all the cucumbers are under ice. I also find that salting the cukes makes a big difference in pickle crunchiness: Mix together 1/2 cup of pickling salt or pure sea salt (don't use a salt with common additives like sugar, iodine, or anti-caking agents) with 4 cups of cold water. Pour this over the iced cucumbers. The water must cover the cukes, so make more salt water, as needed. You may also use dinner plates to hold the cucumbers under the water. Allow the cucumbers to soak at least 30 minutes, and preferably overnight.
 Icing cucumbers can make for crispier pickles.
(adsbygoogle = window.adsbygoogle || []).push({});
Give 'Em a Trim!
The blossom end of cucumbers contains an enzyme that, in the words of The National Center for Home Food Preservation, "may cause excessive softening of pickles." This is why you must never fail to cut away the blossom end of every single cucumber you want to turn into a pickle. The blossom end is the end opposite of where the cucumber was attached to the plant. Cut off a whole 1/4 inch from the blossom end.
Make the Cut
How you cut your cucumbers makes a difference in how crunchy they are. Slices are the least crunchy, and uncut, whole cucumbers (blossom ends removed) are the most crunchy. I always feel pickles better take on the flavor of their brine when made into spears, however. (To make spears, cut a cucumber in half, then cut those halves in half again.)
 Adding a fresh grape leaf to each jar makes for crunchier pickles.
(adsbygoogle = window.adsbygoogle || []).push({});
Add a Leaf
I always include one freshly picked grape leaf in every jar of pickles; the tannins in the leaves aid with crispiness. Other leaves said to work just as well as grape leaves include fresh oak leaves, fresh horseradish leaves or root (grate the root first), fresh raspberry or blackberry leaves, dried bay leaves (use 2 to 4 per quart jar), or black tea (1/2 teaspoon per quart size jar).
Pasteurization
If you choose to can cucumber pickles, you may wish to try a method called low temperature pasteurization. This method helps create crispier pickles - but it must be followed to a 'T" to create a shelf stable, crispy product. It's also only suitable when the tested recipe says it's an acceptable method.
To pasteurize your pickles, fill a water bath canner halfway up with water that's 120 to 140 degrees F. Add jars of pickles and then add hot water until it's 1-inch above the jars. Heat the water to 180 to 185 degrees F. for 30 minutes. I highly recommend using a calibrated thermometer for this process, or you may over- or under-process the pickles. (You may view The National Center for Home Food Preservation website instructions here.)
Tested safe recipes for this method include Quick Fresh-Packed Dill Pickles, Sweet Gherkin Pickles, 14-Day Sweet Pickles, and Quick Sweet Pickles.
 Alum can be added to fermented pickles.
(adsbygoogle = window.adsbygoogle || []).push({});
Lime, Alum, and Calcium Chloride?
Lime is an old-time way to make pickles more crunchy. The cucumbers are soaked in a food-grade lime solution for 12-24 hours, then thoroughly rinsed before canning. However, lime lowers the acidity of pickles if they are not very thoroughly rinsed. The use of lime for pickle-making is mostly discarded today because its use has been linked to botulism poisoning.
Historically, food-grade alum was also used for pickle making, but scientific testing shows it has little to no effect on the crispiness of pickles - although it does add firmness to fermented pickles when used at a rate of 1.4 teaspoon per pint. Too much alum makes mushy pickles.
Calcium chloride is often used in commercially canned pickles, and is the most recommended pickle "add on" today. It can be found in products like Xtra Crunch, Pickle Crisp, and Pickle Fresh. Calcium chloride works as well as lime at making pickles crunchy, but it does not lower acidity and therefore is a much safer option. It is not suitable for fermented pickles.
Related Posts:

(adsbygoogle = window.adsbygoogle || []).push({});
May 8, 2024
Pros & Cons of Steam Canners (Plus How to Use One!)

This post may contain affiliate links. As an Amazon Associate, and at no cost to you, I earn from qualifying purchases made through some links. Please see FCC disclosure for full information. Thank you for supporting this site!
Steam canners are the latest, greatest thing in the canning world. Except they aren't really new; they've actually been around since the early 1900s. But in those early days, manufacturers struggled to get housewives to adopt a special tool for canning high-acid foods when an ordinary cooking pot was all that was necessary to preserve their fruits, jams, and pickles. They also struggled to help home canners understand that steam canners and pressure canners were different contraptions. (Steam canners are only a replacement for water bath canners and can not be used for safely preserving low-acid foods such as meat and non-pickled veggies.)
Slowly, over the decades, steam canners faded from the home canning consciousness - until recent years, when there's been a surge of interest in them again. And, the truth is, there are some great reasons why you should consider using one.
Steam Canning is Faster
The reason I became interested in steam canning is that it makes the job of canning faster. Modern steam canners use about 2 quarts of water, whereas a boiling water canner requires 16 or more quarts. Since it takes more time to boil a larger amount of water (and since many modern steam canners are made from lightweight materials that heat up quickly), the process of steam canning is considerably faster than traditional water bath canning.
Steam Canners are Lighter
Some people love steam canners because they are so lightweight. If you're accustomed to filling a water bath canner at the sink and then carrying the pot to the stove, or if you have to keep your canner in storage much of the year and hate lugging heavy pots out of the cupboard, you'll enjoy the fact that modern steam canners are extremely light as a feather.
Steam Canners Save Energy
Obviously, if the canner brings water to a quicker boil, it's going to use less electricity, gas, or propane to operate your stove for canning. For example, with a traditional water bath canner, it can take 15 to 30 minutes to bring the water to a full boil, depending upon the power of your stove and what sort of fuel it uses. With a steam canner, however, it takes 10 minutes or less to get the water to a full boil.
 Steam canners are useful for quickly processing small batches.
(adsbygoogle = window.adsbygoogle || []).push({});
Steam Canners May Work on Glass Top Stoves & Induction Burners
Many home canners bemoan the fact that they have a glass top stove or induction burners that aren't safe to use with their traditional canners. At this time, the Victorio stainless steam canner (not their aluminum steam canner) is considered safe to use in with both. Other brands may follow suit.
 Parts of the Kitchen Crop dome-style steam canner.
As with nearly everything, there are also some downsides to steam canning:
Steam Canners Don't Keep Empty Jars Warm
If, like many canners, you're accustomed to putting empty jars in your water bath canner to preheat them, you'll have to use a different warming method when steam canning. Try keeping jars hot in the dishwasher, for example, or put them in a sink of hot tap water, or even fill them with hot tap water once or twice before filling each individual jar with food.
Steam Canners are Specialized
With water bath canning, any large pot with a lid and a rack on the bottom will work. With steam canning, you need an actual steam canner. (There are folks on the Internet using their pressure canners as steam canners, but this method has not been lab tested safe. More on this in a moment.)
Parallax is an Issue
The American Heritage Dictionary defines parallax as: "A change in the apparent position of an object relative to more distant objects, caused by a change in the observer's line of sight towards the object." In other words, depending upon your position, the position of something else may appear different than what it actually is. In modern life, we commonly experience parallax when we're typing on our phones. We think we are hitting certain letters with our fingers, but we are incorrect, due to parallax. Well, parallax is also a problem with modern steam canners.
The style of steam canner currently tested safe by sources other than the manufacturer feature a gauge on the lid that faces the ceiling. It's important to read this gauge correctly, or you may not end up with a finished product that is shelf stable - but it can also be tricky to ensure you are looking straight down on the gauge, eliminating parallax. To get around this, my 5'2" self has to stand on a stepping stool, but even tall people should make it a point to carefully look straight down on the gauge. I do not recommend using a mirror or your phone to read the gauge, due to parallax.

 Due to parallax, great care must be taken inreading a steam canner gauge. These photos were taken at exactly the same time,but at slightly different angles. The first shows the gauge not quite meetingthe black mark, which indicates the canner has not yet reached fulltemperature. The second photo makes it look like the gauge has reached fulltemperature.
(adsbygoogle = window.adsbygoogle || []).push({});
Works for Shorter Processing Only
Researchers recommend using modern steam canners for processing times of 45 minutes or less. The reason for this is that steam canners hold a lot less water than traditional water bath canners, and therefore may run out of water during longer processing times. However, a careful canner, who keeps the burner heat at the minimum to keep the water boiling, may be able to safely process jars for longer. This is a bit of a gamble, though, and you should run tests before canning any actual food.
If the canner runs low on water, you cannot stop, add water, and then wait for the water to boil again; for safe food, it's essential that the processing time (using boiling water and the correct amount of steam) be uninterrupted and that the lid of the canner never be removed. Also, any canner that runs dry may warp and therefore be ruined.
May Not Hold Many Jars
Although my Victorio steam canner manual claims it holds 7 quart jars, it cannot hold that many wide-mouth (or mixed wide- and regular-mouth) jars and have the lid fit properly. If the lid doesn't fit securely on a steam canner, excess steam escapes, which will make the canner run out of water more quickly. An ill-fitting lid may also result in the canner not reaching the correct temperature to make canned food safe and shelf-stable.
What Style of Steam Canner is Safe?
At this time, the only steam canners that have been tested by a source other than the manufacturer and found to be safe are the dome-style canners, such as Victorio's (VKP's) Kitchen Crop. These look a bit like an old-school cake storage pan, with a short base and a domed top.For now, experts at the extension offices recommend we avoid other styles of steam canners for one important reason: Dome-style and stock pot style canners make the steam move differently.
Dr. Barbara Ingham, Professor of Food Science at the University of Wisconsin-Madison, explains the thermodynamics this way: "In a dome-style canner, steam vents at the base of lid – in the ‘stock pot’ style canners, steam vents out of the top of the lid. We know that heat circulates differently in the two systems...As scientists, we cannot state that our research applies to stock-pot style canners since we did not test those in the lab...in this case, we don’t have the evidence to support stock-pot style canners as steam canners."
 Quart jars of crushed tomatoes in a steam canner base.
Other Things to Note about Steam Canners
1. When steam canning, use the same processing times that you would for a traditional water bath canner. As with water bath canning, processing time will vary according to your altitude.
2. Keep the heat as low as possible while still keeping the water boiling and the gauge indicator in the correct position. Make small, incremental changes to temperature, as needed. If you allow the water to boil too vigorously, the contents of the jars will also boil too vigorously, leading to food coming out of the jars, resulting in seal failures (just as happens in the traditional water bath canner).
3. What about using a pressure or water bath canner as a steam canner by putting a small amount of water in the bottom of the canner, putting a rack in, and then waiting for steam to escape from the lid? The University of Wisconsin speaks directly to this method, saying they cannot recommend it:
"In order for any canning process to ensure safe food is produced, there must be enough heat for a long enough time to kill pathogens and spoilage organisms that would make the product unsafe when stored on the shelf. We tested (steam) canners using thin thermometers, or thermocouples, tracking temperature at several points inside the canner and inside containers of several types of food to verify that the recommended canners and recipes would produce safe food. We compared our results to a boiling water canner that was used as recommended. For other steam canner styles or adaptations of a boiling water canner to be proven safe, a researcher would need to test the canner in a laboratory to ensure a safe product can be produced."
In addition, modern steam canners have a gauge that must be read correctly for the altitude you live in; ensuring the gauge is in the correct setting during the processing time is essential for a safe end product. Neither pressure canners nor water bath canners have this style of gauge.
 My Kitchen Crop steam cammer.
(adsbygoogle = window.adsbygoogle || []).push({});
General Directions for Using a Steam Canner
Always read the manual that comes with your steam canner and follow the directions contained therein. However, the general process for steam canning is as follows:
1. First do a temperature indicator test, which usually involves adding water to the canner, putting the lid on, and bringing the water to a boil. When the indicator on the gauge stops moving, the canner has reached its maximum temperature. Mark the location of the indicator on the gauge with a Sharpie.
2. To begin canning, fill the bottom of the canner with water in the amount indicated in the manual. Add the rack. Preheat the water to just below boiling.
3. Place filled jars with lids and rings on the rack. You can either fill the canner completely with jars or only process a single jar.
4. Put the lid on the canner and bring the water to a boil.
5. Begin your processing time when the indicator on the gauge reaches your Sharpie-marked line. Adjust the burner as needed to keep the indicator on this line, but keep stove heat to a minimum.
6. When the processing time is up, turn off the heat, but leave the lid on the canner. Wait 5 minutes.
7. Remove the lid, and then the processed jars.
Related Posts:


(adsbygoogle = window.adsbygoogle || []).push({});
May 3, 2024
Why You Should Grow Radishes (And lots of radish recipes!)

As I was sowing radish seed in my garden this week, I couldn't help but feel sad for people who think they don't like radishes, and therefore would never try to grow them. I'm betting many of them don't know there are numerous types of radishes, and not all of them are spicy or peppery; some are very mild-tasting, in fact. I also feel confident that a lot of people don't know how versatile radishes are in the kitchen. They work as a low-carb potato substitute, or add just a dash of "perk" to a wide variety of dishes, from breakfast treats to dinner sides and entrees. Plus, they are probably the easiest vegetable to grow - not to mention, one of spring's first crops.
Why Grow Radishes?
Radishes are one of the crops I recommend for children's gardens because young kids aren't typically patient - and radishes are speedy growers; many varieties are ready for harvest in only 25 days. Because of their fast and abundant nature, radishes are also a huge boon to adult gardeners. They make a welcomed first harvest from the garden, and act as a great "filler" when you harvest some other crop and suddenly have an empty spot to fill. They also make an excellent plant to intercrop with bigger, longer growing plants, such as tomatoes, Brussels sprouts, or broccoli.
Even urban gardeners can find room for a pot of radishes on their rooftop or balcony. Radishes are small, aren't very picky about their growing conditions, and they pack a nice nutritional punch.(Mostvarieties are about 19 calories per cup, sliced with about 3.9carbs per cup and are a great source of vitamin C (17 milligrams percup), potassium (268 mg), and antioxidants, plus some iron andphosphorus.)
Types of Radishes
There are at least hundreds of varieties of radishes to choose from, but this small sampling is designed to give you a better idea of the sort of culinary variety that is available in this under-appreciated vegetable.
Table Radish: These are the radishes everyone has seen in the grocery store: round, red, and peppery-tasting. They actually come in many varieties (my favorite is Roxanne), and can also be pink, purple, or white. Breakfast radishes, which are more common in Europe than in the United States, are red and elongated with a white end. They can have a slightly less peppery flavor than the classic round table radish.
 Breakfast radishes are more mild. Photo courtesy of Clyde Robinson.
 (adsbygoogle = window.adsbygoogle || []).push({});
Daikon radish: These Asian radishes are shaped more like a carrot or parsnip; in fact, if you look at Beatrix Potter's original illustrations of Peter Rabbit eating from Mr. McGreggor's garden, Peter is chowing down on daikons (not carrots, as many people presume). Unlike table radishes, daikon radishes have a very mild flavor that can, depending upon variety, have a slight sweetness. In the United States, we mostly see white daikons, but they can also be green, purple, pink, or red.
Generally, daikon radishes take about twice as long to grow as table radishes, but they are a boon to gardeners because they help break up, aerate, and improve clay and hardpan soil. Sometimes daikons are used as a cover crop for this reason; the roots also exude sugar, which attracts beneficial microorganisms. To improve pastures, some homesteaders plant daikons, allowing their livestock to eat the radish leaves and keeping the roots in the soil to slowly rot and improve the soil even further.
 Daikon radishes are very mild-tasting. Photo courtesy of John Loo.
Watermelon Radish: With light green and white skin, but pink inner flesh, watermelon radishes are sweeter than table radishes, but they do still have a bit of "bite" to them. This radish is from the daikon family, but deserves special attention because of its unique look and flavor.
 Watermelon radishes are sweeter. Photo courtesy of Quinn Dombrowski.
(adsbygoogle = window.adsbygoogle || []).push({});
Malaga radish: This deep purple radish is known for its mild flavor. The flesh is white, but may have purple at its center. Hailing from Poland, this variety is known for keeping its crispness in storage longer than most other types of radishes.
Winter Radish: Varieties like Runder Sschwazer fare much better in the colder months than other types of radishes.They can be overwintered in the garden and some store well in a cool location, like a root cellar.
 Winter radishes can overwinter in the garden. Photo courtesy of Willrad von Doomenstein.
How to Grow Radishes
In most parts of the United States, radishes grow best in spring and fall. If grown when the days are longer and hotter, they may bolt (i.e. go to flower), turning the edible root woody and bitter. But if this happens, all is not lost, because radish seed pods are also a tasty and edible treat - something like a green bean with a slightly radishy flavor.
 Radish seed pods are also tasty food.
(adsbygoogle = window.adsbygoogle || []).push({});
Radishes are not too fussy about soil, but it's a good idea to add compost to improve drainage in areas where radishes will grow. Make sure the location is sunny, with at least 6 hours of sunlight per day; if radishes are planted in shadier areas, they will grow lots of leaves (which are edible), but very small roots. It shouldn't be necessary to fertilize radishes and, in fact, too much nitrogen will also encourage lots of leaves, but small roots.
Direct sow the seeds about 4 to 6 weeks before the last spring frost (or 4 to 6 weeks before the first fall frost) at the depth and spacing indicated on the seed packet, then make sure the soil stays moist, but not soggy, until the seeds germinate. As the radishes grow, give them consistent soil moisture. Allowing radishes to dry out will make them woody and more spicy-tasting. Mulching around radishes helps with water retention.
 Even the dogs like radishes!
If you plant seeds closer than an inch or two apart (for table radishes; other radish varieties may need more room), they will need thinning once the first leaves appear. Overcrowded radishes grow small roots. To thin, simply cut off the leaves at soil level. These snippings make tasty additions to salads.
When the shoulders of the radishes pop up over the soil, they are ready for harvest. (For daikon radishes, it may be better to keep track of the days until harvest given on the seed packet, and pull the radishes then.) Leaving radishes in the ground too long makes them more peppery, and eventually makes them woody.
With the exception of some winter radishes, do not store radishes in the ground. Instead, pull them up, cut off the leaves, put the roots in a plastic bag, and store them in the crisper drawer, unwashed, with the bag only partially closed. The edible leaves can also be stored in unsealed plastic bags in the crisper drawer of the refrigerator. Leaves should be eaten within a week or so. Daikon variety roots last a week or two in the refrigerator, whereas some table radish roots may last months, although they'll gradually lose their crispness. As with most vegetables, radishes taste best when eaten immediately after harvesting.
How to Eat Radishes
Most of us have eaten sliced or chopped radishes in salads, but radishes offer much more variety than that! They can be eaten at any meal of the day. Here are some of my favorite ways to eat radishes.
If you don't care for the peppery flavor of table radishes, I highly recommend that you try adding them, whole or halved, to soups and stews. Once the meal is cooked through, the radishes will have a very mild flavor: All the pepperiness is gone! Although they won't taste exactly like potatoes, radishes cooked this way are often used as a potato substitute.
 Radishes cooked in stews or soups lose their peppery flavor and become very mild.
(adsbygoogle = window.adsbygoogle || []).push({});
Radishes may also be roasted; if you're using a spicy variety, this leaves just a bit of their peppery flavor behind. Halve or quarter the radishes, toss with olive or avocado oil, generously season with sea salt and a bit of pepper, then roast in a preheated 400 degree F. oven until tender, turning the radishes over once. You can also throw halved or quartered radishes into an air fryer for similar results. If you want to get really fancy, you can thinly slice radishes, oil, season, air fry at 400 degrees F., and eat as low carb "chips."
 Air fried radish "chips."
Similarly, radishes can be sautéed. If you grate them first, they look a bit like hashbrowns. Season them well with salt and pepper and maybe a sprinkling of chives.
 Radish hash.
You can also chop radishes and then sauté them in bacon drippings or butter. Try adding a little thyme, garlic, and shallots. Or sometimes I sauté them to the desired tenderness, then treat them with all the typical "loaded" potato ingredients, including sour cream, chives, bacon crumbles, and cheese.
 Loaded radishes.
(adsbygoogle = window.adsbygoogle || []).push({});
Radishes can also be grilled; spicy varieties will keep a little "bite" when cooked this way. It's best to pre-cook them (in a bowl filled with water, covered with a towel, and placed in the microwave for about 5 minutes or until fork-tender; you could also gently boil them until fork tender). Then skewer them and combine some melted butter, parsley, garlic, salt, and pepper in a small bowl. Brush this mixture over the radishes and grill at about 450 degrees F., turning over at least once, until browned and the desired tenderness is reached.
For a breakfast treat, the French have a centuries-long tradition of eating sliced, raw breakfast radishes with sea salt and quality butter. It may sound really weird, but I assure you, it's yummy...and the butter removes the pepperiness of table radishes! I recommend picking the radishes just before serving. You may also enjoy radishes prepared in this manner served on top of toast.
 Breakfast radishes are surprisingly mild and delicious!
As a snack, you might like pickled radishes, which also make a zingy addition to sandwiches or salads. To make quick refrigerator pickles, thinly slice about 1/2 lb. of fresh radishes. Mix together 1/2 cup of apple cider or white vinegar, 1/4 cup of water, 1 teaspoon of sea salt, 1 teaspoon of mustard seeds, 1/2 teaspoon of ground black pepper (or, for a milder flavor, 3 whole black peppercorns), 1 bay leaf, and an optional 1/2 teaspoon of red pepper flakes. You may also add up to 1/2 cup of sugar, which will tone down the vinegary-flavor. Bring this brine to a boil. Place thinly sliced radishes in a freshly washed, hot pint jar, then cover with them with the brine. Allow the jar to cool a little, then put a lid on it and refrigerate for a couple of days before consuming.
 Pickled radishes.
(adsbygoogle = window.adsbygoogle || []).push({});
If you prefer the healthy probiotics of fermented pickles, you can make radish pickles this way, instead: Stir 2 teaspoons of sea salt into 2 cups of non-chlorinated water until fully dissolved. Most radishes should be halved or quartered, but longer radishes, like daikons, can be sliced into fry-like shapes. Or you may slice the radishes into rounds. Place the prepared radishes in a freshly washed jar, then cover with the brine. If you like, you can add flavorings such as a clove of garlic and a sprig of dill, to the brine. Weigh down the food so it sits below the liquid level (a freshly washed jelly jar filled with marbles will work, or use a store-bought weight), then cover the jar with cheesecloth held in place with twine or a rubber band. Place the jar inside a bowl in case liquid overflows during fermentation, then place everything in a cool location. After the first day, begin tasting the radishes (always with a freshly washed fork) to see if you're satisfied with their level of fermentation. I don't recommend fermenting beyond 5 days. The radishes will become softer every day you ferment.
No discussion of eating radishes would be complete without mentioning the leaves. Although they may seem a little prickly (depending upon the variety), those prickles completely disappear after cooking. I love them sautéed in bacon drippings, with a little minced garlic, sea salt, pepper, and maybe chopped bacon mixed in. The leaves also can be used anywhere you'd use cooked spinach. For example, in quiches, enchiladas, stuffed chicken breasts, and casseroles.
They also make a fine pesto (substitute fresh radish leaves for basil) and a traditional soup.To make radish top soup:1. Melt 2 tablespoons of butter in a large saucepan. Add in 1 onion, diced, sautéing until tender. 2. Stir in 2 medium-sized potatoes, sliced, and 4 cups of fresh radish leaves. Add 4 cups of chicken broth and bring to a boil. Reduce the heat and simmer for half an hour. 3. Allow the soup to cool a bit, then carefully use an immersion blender to puree until smooth. (You may also use a traditional blender, carefully transferring the hot soup in portions, pureeing, then pouring into a different pot or bowl. Return the soup to the saucepan.) 4. Stir in 1/3 of a cup of heavy cream. When heated through, serve.
Cover image by Liz West.
Related Posts:

(adsbygoogle = window.adsbygoogle || []).push({});
Why You Should Grow Radishes
As I was sowing radish seed in my garden this week, I couldn't help but feel sad for people who think they don't like radishes, and therefore would never try to grow them. I'm betting many of them don't know there are numerous types of radishes, and not all of them are spicy or peppery; some are very mild-tasting, in fact. I also feel confident that a lot of people don't know how versatile radishes are in the kitchen. They work as a low-carb potato substitute, or add just a dash of "perk" to a wide variety of dishes, from breakfast treats to dinner sides and entrees. Plus, they are probably the easiest vegetable to grow - not to mention, one of spring's first crops.
Why Grow Radishes?
Radishes are one of the crops I recommend for children's gardens because young kids aren't typically patient - and radishes are speedy growers; many varieties are ready for harvest in only 25 days. Because of their fast and abundant nature, radishes are also a huge boon to adult gardeners. They make a welcomed first harvest from the garden, and act as a great "filler" when you harvest some other crop and suddenly have an empty spot to fill. They also make an excellent plant to intercrop with bigger, longer growing plants, such as tomatoes, Brussels sprouts, or broccoli.
Even urban gardeners can find room for a pot of radishes on their rooftop or balcony. Radishes are small, aren't very picky about their growing conditions, and they pack a nice nutritional punch.(Mostvarieties are about 19 calories per cup, sliced with about 3.9carbs per cup and are a great source of vitamin C (17 milligrams percup), potassium (268 mg), and antioxidants, plus some iron andphosphorus.)
Types of Radishes
There are at least hundreds of varieties of radishes to choose from, but this small sampling is designed to give you a better idea of the sort of culinary variety that is available in this under-appreciated vegetable.
Table Radish: These are the radishes everyone has seen in the grocery store: round, red, and peppery-tasting. They actually come in many varieties (my favorite is Roxanne), and can also be pink, purple, or white. Breakfast radishes, which are more common in Europe than in the United States, are red and elongated with a white end. They can have a slightly less peppery flavor than the classic round table radish.
Breakfast radishes are more mild. Photo courtesy of Clyde Robinson. (adsbygoogle = window.adsbygoogle || []).push({});
Daikon radish: These Asian radishes are shaped more like a carrot or parsnip; in fact, if you look at Beatrix Potter's original illustrations of Peter Rabbit eating from Mr. McGreggor's garden, Peter is chowing down on daikons (not carrots, as many people presume). Unlike table radishes, daikon radishes have a very mild flavor that can, depending upon variety, have a slight sweetness. In the United States, we mostly see white daikons, but they can also be green, purple, pink, or red.
Generally, daikon radishes take about twice as long to grow as table radishes, but they are a boon to gardeners because they help break up, aerate, and improve clay and hardpan soil. Sometimes daikons are used as a cover crop for this reason; the roots also exude sugar, which attracts beneficial microorganisms. To improve pastures, some homesteaders plant daikons, allowing their livestock to eat the radish leaves and keeping the roots in the soil to slowly rot and improve the soil even further.
Daikon radishes are very mild-tasting. Photo courtesy of John Loo.
Watermelon Radish: With light green and white skin, but pink inner flesh, watermelon radishes are sweeter than table radishes, but they do still have a bit of "bite" to them. This radish is from the daikon family, but deserves special attention because of its unique look and flavor.
Watermelon radishes are sweeter. Photo courtesy of Quinn Dombrowski.(adsbygoogle = window.adsbygoogle || []).push({});
Malaga radish: This deep purple radish is known for its mild flavor. The flesh is white, but may have purple at its center. Hailing from Poland, this variety is known for keeping its crispness in storage longer than most other types of radishes.
Winter Radish: Varieties like Runder Sschwazer fare much better in the colder months than other types of radishes.They can be overwintered in the garden and some store well in a cool location, like a root cellar.
Winter radishes can overwinter in the garden. Photo courtesy of Willrad von Doomenstein.How to Grow Radishes
In most parts of the United States, radishes grow best in spring and fall. If grown when the days are longer and hotter, they may bolt (i.e. go to flower), turning the edible root woody and bitter. But if this happens, all is not lost, because radish seed pods are also a tasty and edible treat - something like a green bean with a slightly radishy flavor.
Radish seed pods are also tasty food.(adsbygoogle = window.adsbygoogle || []).push({});
Radishes are not too fussy about soil, but it's a good idea to add compost to improve drainage in areas where radishes will grow. Make sure the location is sunny, with at least 6 hours of sunlight per day; if radishes are planted in shadier areas, they will grow lots of leaves (which are edible), but very small roots. It shouldn't be necessary to fertilize radishes and, in fact, too much nitrogen will also encourage lots of leaves, but small roots.
Direct sow the seeds about 4 to 6 weeks before the last spring frost (or 4 to 6 weeks before the first fall frost) at the depth and spacing indicated on the seed packet, then make sure the soil stays moist, but not soggy, until the seeds germinate. As the radishes grow, give them consistent soil moisture. Allowing radishes to dry out will make them woody and more spicy-tasting. Mulching around radishes helps with water retention.
Even the dogs like radishes!If you plant seeds closer than an inch or two apart (for table radishes; other radish varieties may need more room), they will need thinning once the first leaves appear. Overcrowded radishes grow small roots. To thin, simply cut off the leaves at soil level. These snippings make tasty additions to salads.
When the shoulders of the radishes pop up over the soil, they are ready for harvest. (For daikon radishes, it may be better to keep track of the days until harvest given on the seed packet, and pull the radishes then.) Leaving radishes in the ground too long makes them more peppery, and eventually makes them woody.
With the exception of some winter radishes, do not store radishes in the ground. Instead, pull them up, cut off the leaves, put the roots in a plastic bag, and store them in the crisper drawer, unwashed, with the bag only partially closed. The edible leaves can also be stored in unsealed plastic bags in the crisper drawer of the refrigerator. Leaves should be eaten within a week or so. Daikon variety roots last a week or two in the refrigerator, whereas some table radish roots may last months, although they'll gradually lose their crispness. As with most vegetables, radishes taste best when eaten immediately after harvesting.
How to Eat Radishes
Most of us have eaten sliced or chopped radishes in salads, but radishes offer much more variety than that! They can be eaten at any meal of the day. Here are some of my favorite ways to eat radishes.
If you don't care for the peppery flavor of table radishes, I highly recommend that you try adding them, whole or halved, to soups and stews. Once the meal is cooked through, the radishes will have a very mild flavor: All the pepperiness is gone! Although they won't taste exactly like potatoes, radishes cooked this way are often used as a potato substitute.
Radishes cooked in stews or soups lose their peppery flavor and become very mild.(adsbygoogle = window.adsbygoogle || []).push({});
Radishes may also be roasted; if you're using a spicy variety, this leaves just a bit of their peppery flavor behind. Halve or quarter the radishes, toss with olive or avocado oil, generously season with sea salt and a bit of pepper, then roast in a preheated 400 degree F. oven until tender, turning the radishes over once. You can also throw halved or quartered radishes into an air fryer for similar results. If you want to get really fancy, you can thinly slice radishes, oil, season, air fry at 400 degrees F., and eat as low carb "chips."
Air fried radish "chips."Similarly, radishes can be sautéed. If you grate them first, they look a bit like hashbrowns. Season them well with salt and pepper and maybe a sprinkling of chives.
Radish hash.You can also chop radishes and then sauté them in bacon drippings or butter. Try adding a little thyme, garlic, and shallots. Or sometimes I sauté them to the desired tenderness, then treat them with all the typical "loaded" potato ingredients, including sour cream, chives, bacon crumbles, and cheese.
Loaded radishes.(adsbygoogle = window.adsbygoogle || []).push({});
Radishes can also be grilled; spicy varieties will keep a little "bite" when cooked this way. It's best to pre-cook them (in a bowl filled with water, covered with a towel, and placed in the microwave for about 5 minutes or until fork-tender; you could also gently boil them until fork tender). Then skewer them and combine some melted butter, parsley, garlic, salt, and pepper in a small bowl. Brush this mixture over the radishes and grill at about 450 degrees F., turning over at least once, until browned and the desired tenderness is reached.
For a breakfast treat, the French have a centuries-long tradition of eating sliced, raw breakfast radishes with sea salt and quality butter. It may sound really weird, but I assure you, it's yummy...and the butter removes the pepperiness of table radishes! I recommend picking the radishes just before serving. You may also enjoy radishes prepared in this manner served on top of toast.
Breakfast radishes are surprisingly mild and delicious!As a snack, you might like pickled radishes, which also make a zingy addition to sandwiches or salads. To make quick refrigerator pickles, thinly slice about 1/2 lb. of fresh radishes. Mix together 1/2 cup of apple cider or white vinegar, 1/4 cup of water, 1 teaspoon of sea salt, 1 teaspoon of mustard seeds, 1/2 teaspoon of ground black pepper (or, for a milder flavor, 3 whole black peppercorns), 1 bay leaf, and an optional 1/2 teaspoon of red pepper flakes. You may also add up to 1/2 cup of sugar, which will tone down the vinegary-flavor. Bring this brine to a boil. Place thinly sliced radishes in a freshly washed, hot pint jar, then cover with them with the brine. Allow the jar to cool a little, then put a lid on it and refrigerate for a couple of days before consuming.
Pickled radishes.(adsbygoogle = window.adsbygoogle || []).push({});
If you prefer the healthy probiotics of fermented pickles, you can make radish pickles this way, instead: Stir 2 teaspoons of sea salt into 2 cups of non-chlorinated water until fully dissolved. Most radishes should be halved or quartered, but longer radishes, like daikons, can be sliced into fry-like shapes. Or you may slice the radishes into rounds. Place the prepared radishes in a freshly washed jar, then cover with the brine. If you like, you can add flavorings such as a clove of garlic and a sprig of dill, to the brine. Weigh down the food so it sits below the liquid level (a freshly washed jelly jar filled with marbles will work, or use a store-bought weight), then cover the jar with cheesecloth held in place with twine or a rubber band. Place the jar inside a bowl in case liquid overflows during fermentation, then place everything in a cool location. After the first day, begin tasting the radishes (always with a freshly washed fork) to see if you're satisfied with their level of fermentation. I don't recommend fermenting beyond 5 days. The radishes will become softer every day you ferment.
No discussion of eating radishes would be complete without mentioning the leaves. Although they may seem a little prickly (depending upon the variety), those prickles completely disappear after cooking. I love them sautéed in bacon drippings, with a little minced garlic, sea salt, pepper, and maybe chopped bacon mixed in. The leaves also can be used anywhere you'd use cooked spinach. For example, in quiches, enchiladas, stuffed chicken breasts, and casseroles.
They also make a fine pesto (substitute fresh radish leaves for basil) and a traditional soup.To make radish top soup:1. Melt 2 tablespoons of butter in a large saucepan. Add in 1 onion, diced, sautéing until tender. 2. Stir in 2 medium-sized potatoes, sliced, and 4 cups of fresh radish leaves. Add 4 cups of chicken broth and bring to a boil. Reduce the heat and simmer for half an hour. 3. Allow the soup to cool a bit, then carefully use an immersion blender to puree until smooth. (You may also use a traditional blender, carefully transferring the hot soup in portions, pureeing, then pouring into a different pot or bowl. Return the soup to the saucepan.) 4. Stir in 1/3 of a cup of heavy cream. When heated through, serve.
Cover image by Liz West.
Related Posts:
(adsbygoogle = window.adsbygoogle || []).push({});
May 2, 2024
A Brief History of Home Canning
 Recently, on this blog's Facebook page, I shared a brief history of canning - because it's clear that a lot of folks think home canning is older than it actually is. A few readers asked me to turn that Facebook post into a blog post, so it was easier for them to share. Your wish is my command.
 ____________
Although there are people on the internet claiming canning is ancient, true canning is a product of the French Revolutionary Wars. Napoleon needed a better way to feed his army, so the French government offered 12,000 francs to anyone who could come up with a method to safely preserve food for their soldiers. Nicolas Appert, a chef, confectioner, and distiller, inspired by this call, spent 14 years trying to find a solution. He became the inventor of canning by putting food in glass bottles reinforced with wire, corking them, putting sealing wax over the corks, wrapping the jars in canvas, and then boiling the bottles. Appert didn't really understand the science of why canning worked, but the French army trialed his canned food in about 1806, and in 1810 (some sources say 1809), Appert was awarded his 12,000 francs. Even before the French government gave their reward, however, Appert had made canning a commercial business. He was the first to use tin cans for this purpose, apparently soldering meat inside and then waiting months to see if the cans swelled. If they didn't, Appert considered the food inside safe. (Please note that we now know that is not an accurate way to ensure food won't cause illness.) In 1810, Appert published L’Art de conserver, pendant plusieurs années, toutes les substances animales et végétales (The Art of Preserving All Kinds of Animal and Vegetable Substances for Several Years). Now, others could follow in Appert's footsteps. In 1812, the first American commercial cannery opened.
 A canning bottle like Appert used. (I've searched high and low for the origin of this photo. If it belongs to you, please let me know so I can give appropriate credit!)
Mason jars were patented in 1858 and were designed to replace and exceed the cork and sealing wax some people were still using. Still, home canning wasn't a big thing; most people were still preserving food by smoking, drying, storing in fat, storing in salt, using cellars, etc. In fact, the inventor of the Mason jar, John Landis Mason, died penniless.
(adsbygoogle = window.adsbygoogle || []).push({});
 John Mason's original patent sketch.
Then along came the five Ball brothers, who - after borrowing money from their uncle - purchased a commercial canning operation in the 1880s. In 1887, they moved to Muncie, Indiana, where natural gas was plentiful for glass blowing, and slowly, home canning started becoming more popular, with Ball leading the way by selling their jars to housewives.
 An early Ball canning jar ad.
The first pressure cooker was invented in 1679, but it was dangerous because it didn't have pressure release valves, which led the machine to explode. It took decades of tinkering by various people to make pressurized cooking remotely practical. In 1895, scientists from the Massachusetts Institute of Technology (MIT) tried to figure out why canned clams got smelly and made the container they were in swell - still a common problem with meat and vegetables, even those that were commercially canned. Samuel Cate Prescott and William Lyman Underwood discovered that the microorganisms that caused the clams to do this could be killed by heating the cans up to 248 degrees F. This temperature could only be achieved by using pressure.
 A 19th century commercial cannery. No date.
(adsbygoogle = window.adsbygoogle || []).push({});
By this time, scientists certainly didn't know everything we know today about microorganisms, but enough people had become ill from eating water bathed meats and veggies that it was well understood (even in laymen's literature, as my 19th century cookbook collection shows) that the only safe foods to water bath were fruits or pickles. Pressure canners allowed commercial canneries a leg up, as they made canned non-pickled vegetables and meats safer to eat. ("Safer" but not completely safe, because scientists still didn't understand that processing times needed to vary according to type of food, size of the can, etc.) In the late 1800s, the U.S. Department of Agriculture (created in 1862) offered some recommendations on home canning fruit, fruit products, and pickles. In 1909, the first Ball canning book was published and was called The Correct Method of Preserving Fruit.In 1905, the Presto company began making large, commercial-use pressure canners, and soon after, much smaller versions for home use. By the 1910s, fueled by the war effort and food rationing, many homes took advantage of pressure canning, as well as water bath canning. In 1917, the U.S. Department of Agriculture first stepped up to warm Americans that low acid foods could only be safely canned in a pressure canner - something non-government agency books from the 1800s had been saying for decades.
 Cookbooks from the 19th century taught that only fruit and pickles were safe for water bath canning.
Unfortunately, during the early years of the 20th century, a number of botulism poisoning outbreaks occurred. In 1919 and 1920, for example, there were outbreaks from commercially canned olives. Eighteen people died in New York, Ohio, and Michigan, and smaller outbreaks happened in other states. Commercial canneries, seeing their livelihood at risk, got together to try to improve the safety of canned goods. By 1925, these commercial canneries had set up stricter rules to keep harmful microorganisms, especially botulism toxin, at bay. The federal government soon began promoting these guidelines to home canners. By the 1930s, the USDA began doing some testing in home canning, possibly inspired by more outbreaks in botulism poisoning caused by improperly home canned food (especially the much publicized cases of the Zimmer family of North Dakota, who ate water bathed green beans, followed shortly by the Hein family and friends of North Dakota, who ate water bathed peas).
 Botulism poisoning outbreaks in the early 1900s led commercial canneries to join together to discover the science behind making canning safe.
(adsbygoogle = window.adsbygoogle || []).push({});
Today, very little government testing in home canning takes place; what little is done is conducted by the Extension offices. However, the testing of home canned food (especially low acid foods) takes a great deal of time and resources that the Extension offices simply don't have funding for. Ball continues to do some testing, too. In fact, it was their testing in the 1980s that led Ball to pull a fair number of their own canning recipes. Using new tools and knowledge, they learned that some of their recipes - pumpkin puree perhaps being the most famous - were not reliably safe. (In the case of pumpkin puree, this was because the density of the pumpkin could vary to such an extent that the food might not get heated through enough to kill harmful microorganisms.) In addition, both Ball and the Extension offices review old testing periodically; rarely, recipes are pulled because the old data cannot be found. Once in a great while, a recipe is pulled because the old data combined with new knowledge shows that the recipe wasn't perfectly safe. (This happened just recently, with flower jelly recipes.) In addition, the USDA sometimes updates old standards based on new knowledge. An example of this was Ball adding acidity (like vinegar) to some of their newer recipes in order to improve the margins of safety, just this year.
(adsbygoogle = window.adsbygoogle || []).push({});


