
Kristina Seleshanko's Blog, page 10
January 13, 2022
Comparing Quail Eggs and Chicken Eggs
 This post may contain affiliate links.
As an Amazon Associate, and at no cost to you, I earn from qualifying purchases made through some links. Please see FCC disclosure for full information. Thank you for supporting this site!
This post may contain affiliate links.
As an Amazon Associate, and at no cost to you, I earn from qualifying purchases made through some links. Please see FCC disclosure for full information. Thank you for supporting this site!
Quail are the hot homestead poultry right now...and for good reason: They take up so little space, almost anyone can raise them. (For more reasons to raise quail, check out "How and Why to Raise Coturnix Quail.") But a common question readers are asking me is: How are quail eggs different from chicken eggs? Do they taste different? Do they have different nutritional value? Are they healthier? In short: Why should I eat quail eggs?
On this topic, there are a lot of bad answers on the internet. (Are you surprised??) Some people make pretty wild claims about how wonderful quail eggs are. And don't get me wrong: They are wonderful. But they aren't a cure for cancer, folks. So today I'm going to get real about how quail eggs and chicken eggs differ and why you may wish to consider eating one over the other.
Quail Eggs vs. Chicken Eggs: Taste
I think I can safely assume we all know what chicken eggs taste like. Or at least, in North America, we all know what grocery store, factory farm chicken eggs taste like. However, if you've never tasted pastured chicken eggs, or even backyard eggs where chickens roam a reasonably large chicken run, you're missing out! Not only do the eggs taste so much better than store bought, but they are healthier, too. (More on that in a minute.) So if you've never eaten pastured eggs, I encourage you to run down to your local farmer's market for some.
But compared to either grocery store or backyard chicken eggs, will quail eggs taste different? My kids say no, but every adult I know who has tried quail eggs says yes. I think this is because the ratio to egg white and egg yolk in quail eggs leans more heavily to yolk. This means quail eggs taste more buttery and have a creamier texture, too.
Quail Eggs vs. Chicken Eggs: Production
How many eggs a single chicken hen lays depends upon breed, age, and time of year. But on average, a good laying hen gives about 300 eggs per year. Coturnix quail hens, however, lay at least one egg per day (sometimes two!) and, in my experience, lay far better during the winter months, when even my Australorps (who lay better than most breeds during the darkest days of the year) aren't laying well.
Of course, you have to consider egg size, as well. A Coturnix quail egg is a little bigger than a cherry tomato (about 10 to 14 grams). A typical chicken egg weighs about 50 grams. Therefore, it takes about 5 quail eggs to equal 1 chicken egg.
 Quail lay more eggs, but it takes more of their eggs to make a recipe.
(adsbygoogle = window.adsbygoogle || []).push({});
Quail Eggs vs. Chicken Eggs: Storage Life
Both chicken and quail eggs should be stored unwashed in order to keep the natural "bloom" on them. This bloom protects the egg from bacteria and air, keeping it fresher (and healthy) longer. Unwashed chicken eggs stored in the refrigerator last at least six months. Unfortunately, quail eggs, while still safe to eat at the one month mark, will taste stale.
Quail Eggs vs. Chicken Eggs: Nutrition & Health
Despite some radical claims on the Internet, quail eggs are pretty comparable to chicken eggs when it comes to nutritional content. However, quail eggs do contain, per gram, considerably more Vitamin A, Vitamin B12, folate, choline, calcium, iron, phosphorus, and omega 3 fatty acids.
It's important to note, however, that the only scientific data we have about egg nutrition is based upon factory farm eggs. Pastured eggs, or eggs from poultry who are allowed to scratch the earth for bugs and plants, or even eggs from animals given scraps of greens, have a more impressive nutritional profile. As far as I know, no one has ever studied caged quail eggs vs. quail eggs from birds kept on the ground, but several years ago, Mother Earth News did a study showing pastured chicken's eggs had four times more omega 3s and four to six times more vitamin D than conventional chicken eggs. I think it's safe to assume eggs from quail fed more than just pellets contain better nutrition, too.
 Store bought egg (left) and backyard raised egg (right).
(adsbygoogle = window.adsbygoogle || []).push({});
At this point, I also think it's important to address how healthy eggs are for human consumption. Unfortunately, many doctors are still preaching that cholesterol in food causes increases of cholesterol in the body. Yet this hypothesis has repeatedly been shown false. For example, in 2018, in a peer reviewed, scientific journal called Nutrients, one researcher said, "The current literature does not support the notion that dietary cholesterol increases the risk of heart disease in healthy individuals." The author went further to recommend egg consumption, adding, "eggs are the only dietary source of cholesterol that is low in saturated fatty acid but is also nutrient-dense, economical and affordable." So many studies reach the same conclusion that the scientific advisory panel for the 2015 Dietary Guidelines for Americans said, “Cholesterol is not considered a nutrient of concern for over-consumption.”
I would also point out that even if it were true that dietary cholesterol caused cholesterol in the body, I would not personally be concerned. That's because scientific studies are popping up all over the world showing that higher cholesterol levels in the body are linked not to heart disease, but to longer life. For instance, a study from Japan found that "mortality is highest in the lowest cholesterol group without exception." Studies from The Netherlands and Finland have had similar results.
And...some people will complain that eggs contain too much sodium. For decades, doctors, the media, and (ironically) processed food manufacturers have pushed the idea that sodium is bad. However, the truth is that sodium is an absolutely essential nutrient. Without sodium, our other electrolytes fall out of balance. Eventually, our bodies literally crash without sodium. The key is to get the right amount of sodium and from natural foods (such as eggs) instead of from processed food. The FDA recommends 2,300 mg of sodium per day.
Comparing Common Eggs
Finally, I thought it would be interesting to compare chicken and quail eggs to other common North American poultry eggs. Notice that I've compared 100 grams of each type of egg, since these eggs vary a lot in size. I also wanted to include guinea fowl eggs, but unfortunately nobody has thoroughly studied their nutrient content. They are presumed to be pretty similar to chicken eggs, but our best study shows guinea eggs are 10 - 13% protein, 32% fat (making them higher fat than chicken eggs but less fatty than duck eggs), and - since they tend to eat a lot of bugs - their nutrient profile is thought better than factory farm chicken eggs.

Related Posts


Disclaimer: I am not a doctor, nor should anything on this website (www.Proverbs31Homestead.com) be considered medical advice. The FDA requires me to say that products mentioned, linked to, or displayed on this website are not intended to diagnose, treat, cure, or prevent any disease. The information on this web site is designed for general informational purposes only. It is not intended to be a substitute for qualified medical advice or care. There are no assurances of the information being fit or suited to your medical needs, and to the maximum extent allow by law, I disclaim any and all warranties and liabilities related to your use of any of the information obtained from the website. Your use of this website does not constitute a doctor-patient relationship. No information on this website should be considered complete, nor should it be used as a substitute for a visit to, consultation with, or the advice of a physician or other qualified health care provider.
(adsbygoogle = window.adsbygoogle || []).push({});


January 3, 2022
How to Test Garden Soil - one secret to a green thumb!

This post may contain affiliate links. As an Amazon Associate, and at no cost to you, I earn from qualifying purchases made through some links. Please see FCC disclosure for full information. Thank you for supporting this site!
When someone tells me they have a black thumb, one of the first things I ask is what type of soil they have in their garden. Almost inevitably, they either give me a blank stare or a shrug. But for any garden to find success, you must have quality soil...and the best way to know how good (or bad) your soil is, is to run a test and amend accordingly. That is the key to a green thumb.
Why Testing is Important
In order to thrive, plants require certain things, including irrigation, so many hours of sunlight...and the right nutrients and acidity in the soil. Soil is, after all, food for plants. Just as you wouldn't expect to thrive if you only ate junk food, so you can't expect plants to thrive when they don't have a nutritious "diet" from the soil.
It's smart to test your soil before beginning a garden, and then perhaps every few years or so. If you notice growth or productivity problems with your plants, that also indicates a good time to test your soil.
The best time of year for testing is the fall, but it's acceptable to test in the winter (as long as your soil isn't frozen) or even in spring or summer. However, it takes time for soil amendments to do their work; the sooner you test, the sooner the amendments you add to the soil can do their thing - and the sooner you can have a thriving garden.
 This soil test shows a pH of 6.0 - acceptable for most gardening.
Testing pH
First, test the pH of your garden soil - how acidic or alkaline it is. If the pH is too high or too low, your plants will not be healthy. For example, potatoes grown in soil that's too alkaline tend to get scab and other diseases. And while potatoes do like slightly acidic conditions, if they are grown in soil that's too acidic, they simply don't thrive - and could even potentially die.
A pH of 7.0 is considered neutral; 0 means the soil is highly acidic; 14 means it's highly alkaline. In general, food crops prefer soil that has a pH of 6.0 - 6.5, but a range of 6.0 - 7.5 is considered acceptable for most vegetables. (adsbygoogle = window.adsbygoogle || []).push({});
Other Soil Tests
Testing the soil for basic nutrients, commonly referred to as NPK, is also important. "N" stands for nitrogen, which is the nutrient that makes plants grow rapidly, putting on many leaves. Lack of nitrogen in the soil results in plants that grow slowly, turn yellow, and drop leaves. Too much nitrogen in the soil causes over-rapid growth that results in weak, spindly shoots.
 Testing NPK.
"P" stands for phosphorus, which helps plants grow a healthy root system and is especially beneficial during blooming and seed setting periods. Too little phosphorus leads to purplish stems, dull green or yellow leaves, and potentially no blooms. Too much phosphorus reduces a plant's ability to use micronutrients (especially zinc and iron), which leads to poor growth and even plant death.
"K" stands for potassium (sometimes called potash). It helps plants form chlorophyll and can aid in fighting disease. If soil lacks adequate levels of potassium, plants may appear generally sick, have small fruit, and/or older leaves that turn yellow. Too much potassium in the soil reduces a plant's ability to use other nutrients.
How to Test Your Soil
There are two main was to test your garden soil's pH and NPK. One is to send samples off to a laboratory, which typically costs $40 - $100; you can find regional labs that will do garden soil tests through your local extension office. (Find your local extension office here.) Another method is to use a home testing kit. For about $25, you can buy test kits at local garden centers or online. Kits give you everything you need to test your soil - usually multiple times.
Generally, professional laboratory testing is considered the most accurate, but for the average gardener, testing with a home kit is accurate enough, as long as you follow the directions. If you do choose to send soil samples off to a lab, be sure to gather them by following the lab's instructions to a T.
 The soil testing kit I use.
(adsbygoogle = window.adsbygoogle || []).push({});
What to Do About Imbalances
Whether you send your soil to a lab for testing or you use a DIY test kit, instructions should be included that will tell you how to amend your soil according to the test results. But here are some general guidelines.
To make soil more acidic: Amend with sphagnum peat, iron sulfate, or elemental sulfur (a.k.a. "flowers of sulfur” or "micro-fine sulfur"). Do note that sulfur can kill beneficial microbes in the soil. After adding sulfur to the soil, re-test in 40 - 60 days. You may also wish to include the following, which will, if added over a period of time, increase acidity to the soil: pine needles, woodchips, and rotted leaves or leaf mold.
To make soil more alkaline: Amend with garden lime; after adding it to the soil, re-test in 40 - 60 days. Over time, if periodically added, the following will also help make the soil more alkaline: bone meal, ground eggshells or clamshells, and small amounts of hardwood ashes.
To increase nitrogen: Amend with alfalfa meal, blood meal, shellfish meal, or ammonium sulfate.
To increase phosphate: Amend with bone meal, shellfish meal, or rock phosphate.
To increase potassium: Amend with green sand, rock phosphate, or potash-magnesia ("Sul-Po-Mag").
Always check your soil test instructions for details on how much of any given amendment you should apply to your garden soil. You can add too much of a good thing! When re-testing soil after adding amendments, expect only small changes in pH - typically, 0.5 to 1 unit, tops. Wait 5 - 6 weeks before testing and, if needed, amending again.
Optimal Soil pH for Some Common Edible Plants
Apples 5.0 - 6.5
Blackberry 5.0 - 6.0
Blueberry 4.0 - 6.0
Lemon 6.0 - 7.5
Orange 6.0 - 7.5
Peach 6.0 -7.0
Pear 6.0 - 7.5
Pecan 6.4 - 8.0
Plum 6.0 - 8.0
Raspberry (red) 5.5 - 7.0
Asparagus 6.0 - 8.0
Bean, pole 6.0 -7.5
Beet 6.0 - 7.5
Broccoli 6.0 - 7.0
Brussels sprouts 6.0 - 7.5
Cabbage 6.0 - 7.0
Carrot 5.5 - 7.0
Cauliflower 5.5 - 7.5
Celery 5.8 - 7.0
Chives 6.0 - 7.0
Cucumbers 5.5 - 7.0
Garlic 5.5 - 8.0
Kale 6.0 - 7.5
Lettuce 6.0 - 7.0
Pea, sweet 6.0 - 7.5
Pepper, sweet 5.5 - 7.0
Potatoes 4.8 - 6.5
Pumpkins 5.5 - 7.5
Radishes 6.0 - 7.0
Spinach 6.0 - 7.5
Tomato 5.5 - 7.5
(adsbygoogle = window.adsbygoogle || []).push({});
Clay, Sandy, or Loam?
In addition to running a pH and NPK test on your soil, you should understand whether your garden soil is clay, sandy, or loam.
Clay soil is made of tiny, densely packed particles. It's not ideal for gardening because it won't allow water to drain well and may prohibit plants from spreading their roots. Sandy soil has, of course, lots of sand in it. This can be beneficial, except that pure sand has no nutrients and, since water drains away quite quickly in sandy soil, plants may not get enough to drink. Loamy soil is a mixture of silt (particles that are between the size of sand and clay), sand, and clay. It's ideal for gardening since it retains the right amount of moisture and nutrients for plants.
A simple test for discovering the makeup of your soil is to sprinkle water on the ground, making the soil moist, but not wet. Scoop up a handful, squeeze it, and open your hand. Does it crumble when gently poked? Then the soil is loamy. Does the soil retain its squeezed shape even after a gentle poke? It is clay. Does the soil crumble the moment you open your hand? It is sandy.
Or, dig a hole one foot deep and about 6 inch wide and fill it with water. Allow the water to completely drain. Fill the hole with water again, but this time, pay attention to how long it takes for the water to completely drain from the hole. Well-draining soil drains 1 or 2 inches of water per hour. If the soil drains more slowly, it either has rocks blocking water drainage or is high in clay. If the latter is the case, work compost and other organic matter into the soil. If the soil drains more quickly than an inch an hour, it's too sandy and adding organic matter will also help.
December 28, 2021
Most Popuar Posts of 2021 (and of all time!)
It's tradition for me to take a peek at this blog's stats at the end of the year and find myself surprised by what posts were the most popular. This year is no exception! I was particularly surprised by the all-time most popular posts, because they have changed a LOT in the last year, which is a first in the history of this blog. (Click here to see this blog's all-time most popular posts in 2020.)
What do you think? Are there any surprises for you? Did you miss any posts other readers found most interesting or helpful?
P.S. As always, the order of the blog's most popular posts varies according to what source I use to find said posts. I don't use a scientific method to sort through the minor variations; I just go with my gut :)
2020's Most Popular Posts:
#10: How to Save Tomato Seeds (and Cucumber & Melon Seeds, Too)

#9: DIY Seed Vault

#8: 5 Homesteading Myths
 #7:
Grow Celery from Grocery Store Stalks
#7:
Grow Celery from Grocery Store Stalks

#6: Growing & Harvesting Sunflowers

#5: The Best Canning Resources for Safe Canning

#4: Are Ball's Canning Recipes Unsafe?

#3: Why I Will Never Homestead Like Joel Salatin
 #2:
How to Hard Boil Quail Eggs in an Instant Pot
#2:
How to Hard Boil Quail Eggs in an Instant Pot

#1: Quail vs. Chickens (Which is Better?)

All-Time Most Popular Posts
#10: How to Turn a Girl's T-Shirt Into a Dress

#9: The BEST Salisbury Steak Recipe
 #8:
Tender, Crowd-Pleasing Dinner Rolls
#8:
Tender, Crowd-Pleasing Dinner Rolls

#7: 7 Wonders of the World: A Homeschool or School Break Project

#6: Eat Your Weeds: Plantain

#5: How to EASILY Clean Ceilings & Walls (Even in a Greasy Kitchen!)

#4: How to Dehydrate Zoodles & Other Vegetable Noodles

#3: How I Used Potatoes to Help Heal an Infection

#2: Canning Ham (On this blog, I post tested-safe canning recipes only; however, this is an older post that I've left in place with a disclaimer about it's safety status.)

#1: The Easy Way to Get Mold Off Grout

December 7, 2021
Why I Will Never Homestead Like Joel Salatin (with video)

This post may contain affiliate links. As an Amazon Associate, and at no cost to you, I earn from qualifying purchases made through some links. Please see FCC disclosure for full information. Thank you for supporting this site!
Recently, I've been noticing some of my friends' homesteading failures are due to listening to advice. Not necessarily bad advice - but advice that isn't suited to their location.
For example, one of our neighbors has been trying to raise free-range chickens. While some people can do this with minimal loss of livestock, especially if they live in the suburbs or in farming communities, we cannot. Where we live, on the edge of forest wilderness, we simply have far too many predators - everything from bear and cougar on down to eagles, hawks, bob cat, foxes, weasels, raccoons...you name it. All chickens must, at the very least, be locked into a predator-proof house at night, but we've found that protection during the day is also necessary unless you're willing to loose your flock. A covered chicken run is a must here.
 Open compost piles don't work where they will attract wild predators. Courtesy of Ingimar Erl and Wikimedia Commons.
(adsbygoogle = window.adsbygoogle || []).push({});
More recently, another neighbor created open compost heaps. I confess that when I've read about composting, it seems that a lot of people successfully compost in large, uncovered piles - and I have never read warnings about it...not even warnings that it might attract mice and rats, which are common even in heavily peopled areas. But around here, my neighbor discovered it also attracted black bear - bear that are not afraid of humans and not afraid of digging deeply into compost heaps to find food. And bear who are not afraid of humans are a danger to themselves, as well as to any homestead.
Open compost heaps also attract dogs - both neighborhood domestic dogs and wild canines. This is was the initial reason we kept our compost in sealed bins. Yes, good, rotating compost bins aren't free, but if we want to compost anything an animal might consider food, it is an absolute must. (In case you're wondering: Even open compost heaps for yard debris such as wood chips and lawn and non-food garden clippings can attract rodents who want to nest in them.)
Another example comes from my homestead. For years, I've wanted to have chickens and rabbits in mobile tractors. I love what Joel Salatin has done with chicken tractors, and when I've read about people using tractors for rabbits, it seems like such a great idea: They keep the grass and weeds down, they get free food, plus their meat may taste better...But the reality is, I cannot homestead like Joel Salatin does on his Virginia farmland. First, we have the problem of living on a mountain; we have very little totally flat land, so gaps between the tractor and the ground would be a persistent problem, letting livestock out and predators in. Second, have I mentioned that we have a lot of predators? Even if I could keep out predators by using wire beneath the rabbits (wire wouldn't work with chickens, since they need to scratch the ground freely), predators would still try to get at our livestock, which would terrify them. I want my livestock happy, not terrified.
 Tractors are suitable only for flat land and areas with lower predator populations. Courtesy of Jessica Reeder and Wikimedia Commons.
(adsbygoogle = window.adsbygoogle || []).push({});
Perhaps no other area of homesteading is more full of bad-for-your-homestead information than gardening. Yes, there are certain principles of gardening that apply virtually everywhere, but there is also a ton of gardening advice that just isn't going to work on a wide variety of homesteads. One good example is Ruth Stout's version of no dig gardening. This method involves no tilling, virtually no digging, no irrigation, virtually no weeding, and lots of straw mulch. While this method worked brilliantly in Stout's garden, it was reliant on her particular type of weather and soil. Where I live, for example, not irrigating during the warm growing months simply doesn't work because we don't get rain during those seasons.
 Choose varieties of vegetables according to your gardening zone and microclimate. Courtesy ParentingPatch and Wikimedia Commons.
Another good example from gardening is seed recommendations. I often see homesteaders on social media asking strangers which variety of green bean or corn (or whatever) they are growing...without asking what gardening zone they are in or what their microclimate is like. Folks, veggies that thrive in Missouri are not likely to do well in Washington or Maine. I even find that what I can grow in my microclimate isn't the same as what my neighbors can grow!
Truly, I am not criticizing people who offer homesteading advice. (I am one of those people, after all!) Nor am I being critical of homesteaders who follow said advice. The homesteading life is one where you will make mistakes; every one of us will! My point here is that what works for some won't work for all...and this is something to keep in mind as you learn about homesteading and implement new projects on your homestead.
November 30, 2021
How to Sex Chicks
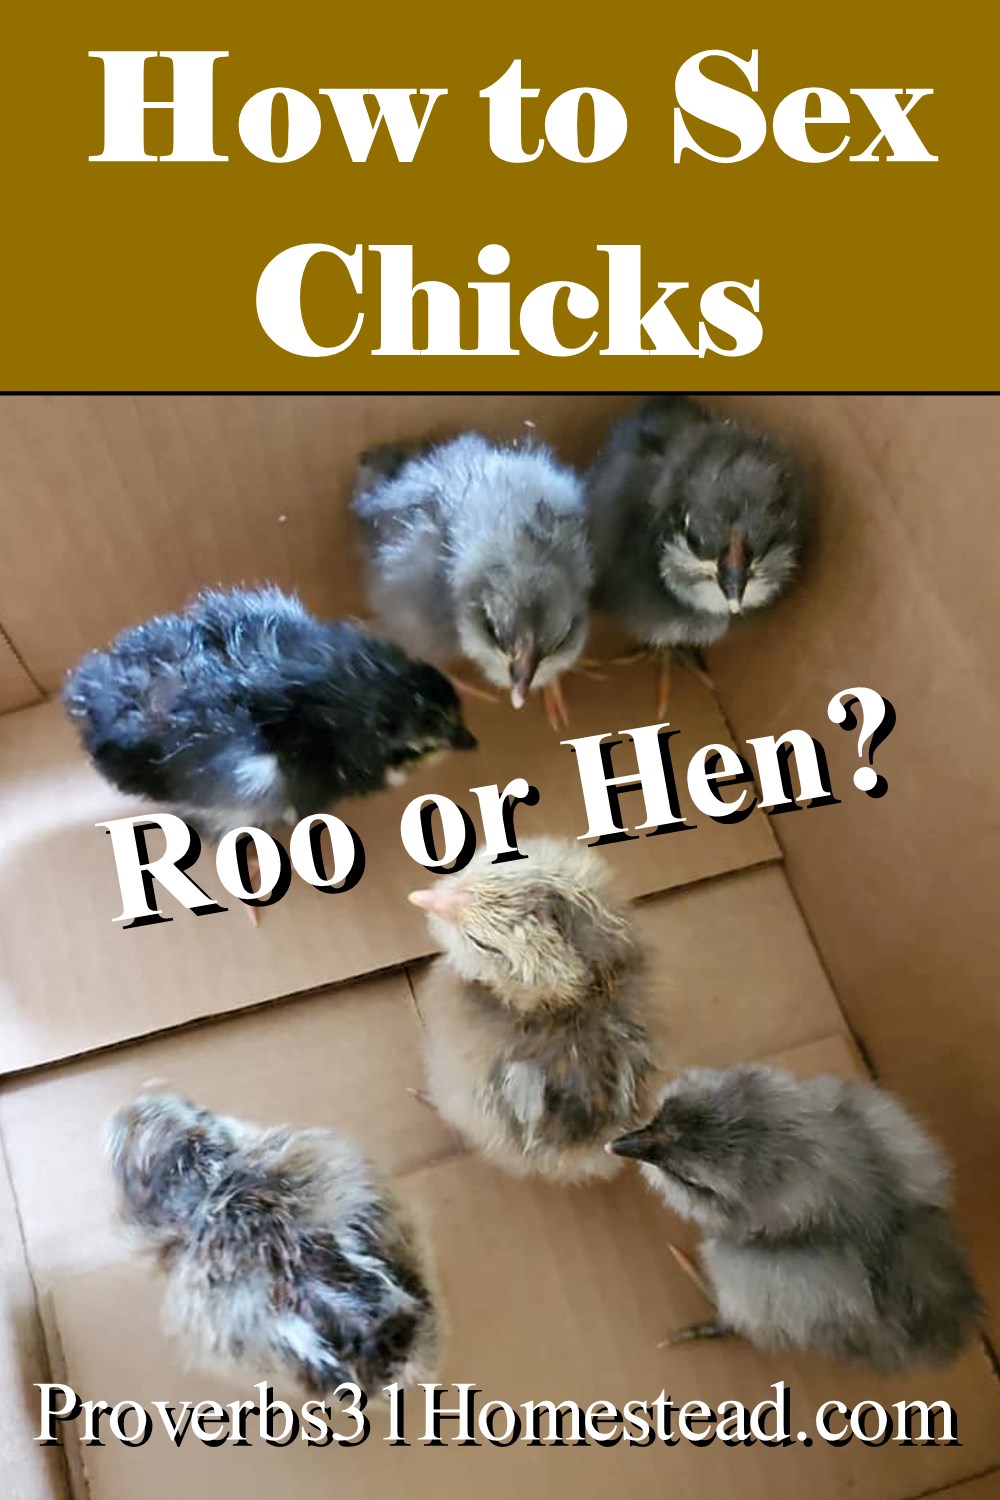 It won't be long before homesteaders will be buying and raising chicks. They may get their chicks from a variety of sources: Many purchase chicks from a local feed store or from a hatchery website. Others hatch eggs in their own incubator, or they use a broody hen in their already-existing flock. But eventually, all homesteaders want to know how to sex their chicks. The internet is full of advice on how to tell baby roosters from baby hens, but unfortunately, most of that information is misleading or downright inaccurate. So here's the real-deal scoop every homesteader with chickens should know.
Vent Sexing
By examining a chick's vent (the hole a chicken uses to expel waste and - if a hen - eggs) it's possible to see if the chick is male or female. However, vent sexing is not for those who haven't gone through proper (and rather lengthy) training; it's easy to accidentally disembowel chicks during the process. Please do not try vent sexing chicks at home.
That said, professionals can, with a 90 percent accuracy rate, turn a chick upside down, push fecal matter out of its vent, turn the vent outward, and spot the beginnings of the male sex organ. It is common for hatcheries to vent sex their chicks.
 Wing feather sexing. Courtesy of Wikimedia Commons.
Wing Feather & Color Sexing
Sometimes chicks can also be sexed by looking at their wing feathers and how quickly they come in. (Early wing feather growth usually indicates a hen.) In addition, in some breeds, cockerels have wing feathers all the same length, whereas hens have wing feathers that alternate long and short. For instance, chicks from Leghorn roosters crossed with Orpington hens can be sexed this way. However, these methods do not work for all breeds of chickens (since not all breeds reveal differences in wings according to gender). Also, after the first few days of life, these methods are unreliable.
(adsbygoogle = window.adsbygoogle || []).push({});
 A male Barred Plymouth Rock chick. Courtesy of Wikipedia Commons.
Sometimes there are coloring clues to help us sex chicks. With Barred Plymouth Rocks, for instance, both male and female chicks have a white spot on top of their heads. In hens, this spot is usually narrower and smaller. With Rhode Island Red and New Hampshire chickens, cockerels will have a white spot on their wing web. However, it's only seen on the chick's down, and as feathers come in, will disappear. Once again, such sexing methods aren't entirely accurate, but they can be helpful for homesteaders raising those breeds.
Sex Link Chickens
Because it's so difficult to accurately sex chicks, humans have refined certain breeds (through selective breeding) to make them easier to sex upon hatching. These are called sex-linked crosses. Unfortunately for homesteaders, these birds will not reproduce sex link babies.
An example of this method is to breed males with a gold gene to females with a silver gene. Upon hatching, their male offspring are silver and the females are gold. Another example is to cross non-barred Rhode Island Red cockerels with silver Barred Plymouth Rock hens. Their female offspring are born black and their male offspring are born barred.
The pros have a 99 percent accuracy rate with the sex link method. Sex link chickens include: Black Sex Links, Black Stars, Golden Comets, ISA Browns, Lohmann Browns, Red Sex Links, and Red Starts.
 Barred Plymouth Rock rooster. Courtesy of Angel Schatz and Wikipedia Commons.
 (adsbygoogle = window.adsbygoogle || []).push({});
Auto Sexing
Auto sex chickens are heritage breed birds that have easy-to-spot gender differences seen immediately upon hatching. In most cases, the females are barred, while the males are not. Happily, if you breed two auto sex chickens, they will produce auto sex babies, which is a real boon to homesteaders. Still, breeding must be selective or these traits will become less clear.
Auto sexing has an accuracy rate of 80 to 99 percent and is the most do-able early sexing method for homesteaders. Auto sex birds include Barred Plymouth Rock, Coucou de Rennes, Delaware, Legbar, and Rhosebar.
The Best Way to Sex Chickens
As you can see, it isn't easy to tell the gender of chicks. If you absolutely cannot have roosters, consider buying sexed chicks from a hatchery. If you hope to do early sexing of chicks bred on your homestead, your best bet is to raise auto sex chicks. Otherwise, the best way to know if you have a cockerel or a hen is to simply watch the chick grow. Roosters will develop wattles, larger combs, and (in most breeds) tail feathers. And - eventually - they will crow.
 Black Australorp hen and chicks.
Folk Myths about Sexing Chicks
* Despite the fact that Aristotle wrote about it, egg shape does not determine the gender of a chick.
* You cannot tell whether an embryo is a cockerel or a hen by candling an egg.
* When incubating eggs, you cannot create male or female chickens by changing the temperature of the incubator.
* Hanging a weighted string over a chick and watching which way it turns will not determine its gender.
* Picking up a chick by its scruff and looking to see if it hangs loosely or not will not determine the gender of the chick.
* Hanging the chick upside down and watching to see if it "fights" also does not determine gender.
(adsbygoogle = window.adsbygoogle || []).push({});
November 8, 2021
Weekend Links and Updates
 Catching Huckle...while Shaun and Shannon watch.
This post may contain affiliate links. As an Amazon Associate, and at no cost to you, I earn from qualifying purchases made through some links. Please see FCC disclosure for full information. Thank you for supporting this site!
"Blessed is the one who perseveres under trial because, having stood the test, that person will receive the crown of life that the Lord has promised to those who love him."
______________________________________
Times have been a bit hard on the homestead lately. First, my dear daughter lost her pet rabbit, Pickles. She was an old lady and it was not unexpected, but that doesn't make it less difficult.
I also spent about a month finding our meat rabbits loose in the yard...definitely a dangerous place for them to be, since we have almost every predator you can imagine. I finally realized the rabbits had figured out how to release themselves from their cages. People, this is unheard of! It began with Bluebelle. I kept finding her cage open - though she wasn't interested in escaping; I always found her hanging out in her cage. Then Huckle disappeared. (Thankfully, I found him in the sheep pasture and we brought him back to safety.) Then some of the kits got loose. (Again, I thankfully recovered them all.) A trail cam revealed the rabbits were bouncing against their cage doors. For fun, presumably. So now all the meat rabbits have locks on their cages (the pet rabbits never try such shenanigans). Clearly, Huckle and Bluebelle are young and smart and need lots of stimulation in their cage, so I keep adding fir cones, toilet paper tubes, etc. to keep them occupied, the little stinkers.
Then, much to our dismay, our Soay ewe, Shannon, disappeared. She just seemed to vanish, much like her lamb did this spring. There was absolutely no sign of a predator. We even thought we heard her bell in the woods once or twice. We hoped against hope that she had somehow leaped the fence (maybe because she was spooked) and we notified all our neighbors in case she showed up on their property. Then, two days later, the last of our sheep, our ram Shaun, disappeared. Again, no sign of a predator.
 Shaun and Shannon last spring.
We wondered if a human might be stealing the sheep. However, Soay are very fleet, very shy, and very difficult to catch. They knew us and loved our treats and we would have trouble catching them. I don't think there's any way a stranger could grab them - not to mention it had been wet and there were no signs of tire tracks on either the gravel or the dirt that weren't our own. (We don't live where there are paved streets!) Finally, we decided it must have been a cougar. We are in deer central, here in the woods, so we know there are cougar around. We are just surprised that there were no footprints, no blood, no fur...no sign at all. But there is not another predator in our areas who could take a full grown sheep over the fence without leaving sign behind.
(adsbygoogle = window.adsbygoogle || []).push({});
To say we are heartbroken doesn't really begin to cover it. Not seeing them at the pasture gate every morning is just awful. And there's really nothing we can do about cougar. The Department of Wildlife won't do anything about cougar without more proof that one stole our animals. And we would need a 19 foot fence and no trees anywhere near the pasture to make it completely cougar-proof. That's definitely not going to happen. So...we are not sure where we go from here. Maybe this means we can't have large animals on our homestead...which doesn't make us happy. Maybe it means I have to buy and train some livestock guardian dogs...which I really don't want to do. We have also considered putting up a barn and locking everyone up before dusk and only letting them out after dawn. This would reduce the risk of a cougar attack, but might not be enough to deter a determined cat.
I'm sorry to be such a downer today. The happiest news I have is that my husband got that famous virus for the first time. How is this happy news? Well, he's nearly over it and it just felt like a bad cold to him, that's why. He had lots of prayer covering him and we reacted immediately with over the counter and prescription meds. I'm very thankful because he does have seasonable asthma. And so far, no one else in the family has shown symptoms. Thank you, Lord!
____________
* The Christmas season is nearly upon us, and I hope you will consider giving some of my books to your friends and family! Did you know I've written 28 books? Of particular interest to homesteaders are two books on dandelions: The Ultimate Dandelion Cookbook and The Ultimate Dandelion Medicine Book. Both have 4.5 stars on Amazon and are priced affordably. I hope you'll check them out! Order Here.
 * Get a free 2022 chicken calendar!
 * Got no land? No problem! This woman farms, anyway.
* Does your state need to change its constitution to add a right to grow/raise food? How bizarre is it that this is necessary???
* Ranchers say the reason beef prices are through the roof is because of meat plants. Ranchers certainly aren't making any money...which is a good reason to buy direct from a local rancher! But some ranchers are also looking to create their own meat plants.
* A few reasons giving up meat won't save the environment.
* China tells its citizens to stock up on food now before real food shortages hit.
 The quail are laying away!
Oldies But Goodies:
* Teaching Kids to be Thankful all Year Long
* Want to homestead, but not sure where to start? Click here!
* Raising Meat When You Don't Have Acreage
* Depression-era Tips for Today
* Simple DIY low-sugar (or no-sugar) hot cocoa
(adsbygoogle = window.adsbygoogle || []).push({});
October 22, 2021
How to Save Tomato Seeds (and Cucumber & Melon Seeds, Too!)
 It's not too late to save seeds for next year's garden! And if you have ripe tomatoes (on the vine or on the counter), you can save tomato seeds. Some people think tomato seeds are difficult to save, but that's just not true. The trick is to ferment the seeds for a very short period of time before drying and storing them. And no - this process won't stink, contrary to what you may have read elsewhere. (The method outlined below is also ideal for saving cucumber and melon seeds.)
First, be sure you have open-pollinated variety tomatoes. Seeds from hybrid plants will be different from the parent and may sometimes be sterile; with open-pollinated/heirloom varieties, the seed will duplicate the parent plant. (And don't worry; there are no GMO tomatoes, cucumbers, or melons on the market...yet. Click here to learn more about seed types.)
Second, be sure you're using ripe tomatoes. (Or melons or cucumbers; cucumbers should be fully yellow before saving their seeds.) If you try to save seeds from unripe fruit, the seeds may not germinate when you plant them.
To Save Tomato Seeds:
1. Cut a ripe tomato in half and, using a spoon, scoop out the center pulp and seeds; place them in a jar. (Compost - or eat! - the outer part/skin of the tomato.)
 Use a spoon to scoop away the seeds and pulp.
2. Cover the pulp with an inch or two of water and allow the jar to sit in an out of the way location.
 Cover the pulp with water.
(adsbygoogle = window.adsbygoogle || []).push({});
3. Check the jar daily. The contents will begin to ferment, which will make the water cloudy; a whitish scunge called kahm yeast will also appear on the top.
 Kahm yeast will begin growing on top of the pulp.
 The liquid in the jar will turn cloudy.
4. As soon as you see these signs of fermentation, strain the mixture and pick out the seeds. (If you let the mixture sit longer, it may begin to stink.) The gelatinous sac surrounding the tomato seeds should be gone. If it's not, return the tomato pulp to the jar, cover with water, and allow to sit another few days.
 Unfermented tomato seeds in their gelatinous sack.
 Straining the fermented tomato seeds.
(adsbygoogle = window.adsbygoogle || []).push({});
5. Lay the sac-free tomato seeds on a plate and allow them to dry for a day or two.
6. Place the dry seeds in a glass bottle or jar with a well-fitting, metal lid. Store seeds in a cool location. (For tips on storing seeds properly, click here.)
 Dried tomato seeds.
 Store dried tomato seeds in a glass jar with a metal lid.
(adsbygoogle = window.adsbygoogle || []).push({});
October 8, 2021
The Best Canning Resources for Safe Canning

This post may contain affiliate links. All opinions are my own. Please see FCC disclosure for full information. Thank you for supporting this site!
Interest in canning has exploded over the past couple years. This is a great thing! But unfortunately, with the explosion in popularity in canning, questionable resources have also increased. Much more so than with cooking or baking, when canning you HAVE to follow some basic scientific rules in order to produce food that's safe to eat. (Never fear; it's not hard to do so!) When you're just starting out, though, it can be really confusing to know which resources are providing good information and which are not. So let me guide you.
The resource I turn to first is always The Ball Complete Book of Home Preserving. It has a wide range of both water bath and pressure canning recipes, and does a great job of explaining the science behind canning in an easy to understand way. The recipes are really practical, too, so I find myself using them continually. If I had to choose just one canning book to keep on hand, it would be this one.

Similarly, the current Ball Blue Book is a trusted guide. This is the canning book you'll find at hardware stores and wherever canning supplies are sold. Ball has been publishing this book of water bath and pressure canning recipes and how-tos since the 1920s, and it is still considered a trusted and useful resource.

The National Center for Home Food Preservation (NCHFP) website is the gold standard by which all other canning resources are compared. It maintains up-to-date information about canning in tested-safe ways...and it's entirely free! You'll find information about the science behind canning, how-tos for both water bath and pressure canning, and lots of recipes. I always like to compare whatever recipe I'm considering canning with what is on this website, just to make sure it is using safe methods and to see if the NCHFP has any variations I might like better. If you prefer to have a printed copy of what's available at the website, I recommend The Complete Guide to Home Canning.

As you can see, I generally only recommend the two authorities in canning (Ball and NCHFP), but I make an exception for Pressure Canning for Beginners by Angi Schneider. That's because Schneider understands the science behind canning and fills her books either with lesser-known tested-safe recipes, or tested-safe recipes she's tweaked in ways that are safe. (For example, we know it's perfectly safe to change dry seasonings in any canning recipe - but there can be trial and error in doing so, because some seasonings will turn bitter, or the flavor may over- or under-whelm. Schneider has taken all the guess-work out for you by safely adjusting the seasonings in a way that improves the outcome.) Schneider also does a good job of explaining the process of pressure canning - but this book is great for more advanced canners, as well as beginners. (Schneider's book The Ultimate Guide to Preserving Vegetables is also a good resource; it has some water bath and pressure canning recipes, but also addresses other methods of preserving food, including dehydrating, fermenting, and freezing.)

Related Posts:


September 28, 2021
Growing & Harvesting Sunflowers (for human food, livestock feed, and more!)
 Few plants are more cheerful than sunflowers, and with their blooms ranging from sunny yellow to orange to deep red, they make a beautiful addition to any garden. But sunflowers (Helianthus annuus) also make good food for both humans and livestock. Fortunately, they are also very easy to grow.
Getting Started with Sunflowers
It's likely you can purchase sunflower starts at your favorite nursery. However, in order to save money and have a better harvest, I recommend you skip that trip and start sunflowers from seed. By purchasing seeds you'll have access to a far wider number of sunflower varieties - plus sunflowers hate having their roots disturbed, so they'll be happier and more abundant if you don't transplant them.
Plant sunflowers seeds in a bright, sunny location, with at least 6 hours of sunlight each day. The soil should be well-draining and loose, allowing the plant's roots to go somewhat deep, which will help keep the tall sunflowers upright. Grow the tallest varieties of sunflowers in a sheltered area, where the wind won't knock them down.
If you have trouble with tunneling pests like gophers, voles, and moles, I highly recommend that you plant your sunflowers in a raised bed (with a gopher barrier beneath the soil) or in large containers. For example, I use old bathtubs. If you neglect to do this, you may find entire plants disappear, just as the seedlings are beginning to look strong and vigorous. (Ask me how I know!)
Sunflowers prefer alkaline soil, but they will grow in slightly acid conditions (pH 6.0 to 7.5). If your soil is acidic, they will be much happier in a raised bed or container with improved soil. Sunflowers love lots of organic matter, so it's an excellent idea to add fresh compost or garden-safe manure to the sunflower beds before planting.
If you choose to plant sunflowers in pots, use quite large pots, and smaller-sized sunflower varieties.
(adsbygoogle = window.adsbygoogle || []).push({});
 Sunflowers growing in our orchard.
Plant sunflower seeds in the spring, as soon as the last threat of frost is over and the ground is at least 60 degrees F. Follow the seed packet for planting directions, but generally, the seeds should be planted about an inch deep and around 6 to 12 inches apart, depending on the variety you've chosen.
If you want to grow a lot of sunflowers - especially if you're growing them for livestock feed, to attract pollinators, or just to have a pretty field of sunflowers to look at - consider choosing a less likely source for your seeds: Grab a bag of black oil sunflower seeds (BOSS) at a local big box or feed store and plant those seeds in your garden. Yes, they will germinate! And you may find this a much less expensive way to get all the planting seeds you want.
If you want staggered blooming (and harvesting), plant a few seeds one week, a few more the following week, and so on.
Water in the seeds and make sure they stay consistently damp (but not soggy) until they've germinated.
Caring for Sunflower Plants
Once the seeds germinate and seedlings begin emerging, water only once a week, as needed. Always water deeply, to encourage the roots of the plant to go deeper into the soil (and thereby make the sunflowers less likely to topple over as they grow). Over fertilization can make sunflowers fall over, so if you choose to fertilize them, do so sparingly and with weakened fertilizer.
Very large varieties of sunflowers may require staking so they don't collapse under the weight of their flower head.
(adsbygoogle = window.adsbygoogle || []).push({});
Harvesting Sunflower Seeds
Once the flower petals die and the back of the seed head is turning brownish-yellow and begins bending toward the ground, it's time to take action and protect your sunflower seeds from birds and other wildlife. You may either cover the flower heads with pantyhose legs or a few of layers of cheesecloth held in place with string - or cut off the entire head (leaving 5 or 6 inches of stem attached) and place the heads in a warm, dry location where wildlife can't reach them.
 Sunflower heads just after being cut off the stalks.
Once the heads are completely brown and dry, brush off what remains of the flowers.
 Fully dried heads, ready for harvest.
  What a head looks like before the remaining flower parts are removed...
 ...and after the flower parts are removed.
Then harvest the seeds. To begin the seed removal process, I like to rub two sunflower heads together over a bowl. Any seeds that remain on the heads, I remove with either my fingernails or thumb, moving in a circular fashion.
Some people tell me it hurts to remove sunflower seeds this way, so you should consider wearing gloves. Or use a stiff brush to remove the seeds. A few gardeners have told me that after they cut off the sunflower heads when they lose their flower petals, they hang them to finish drying. They cover each head with a paper bag, held in place with string. The seeds, they say, will naturally fall into the bags as the sunflower head dries.
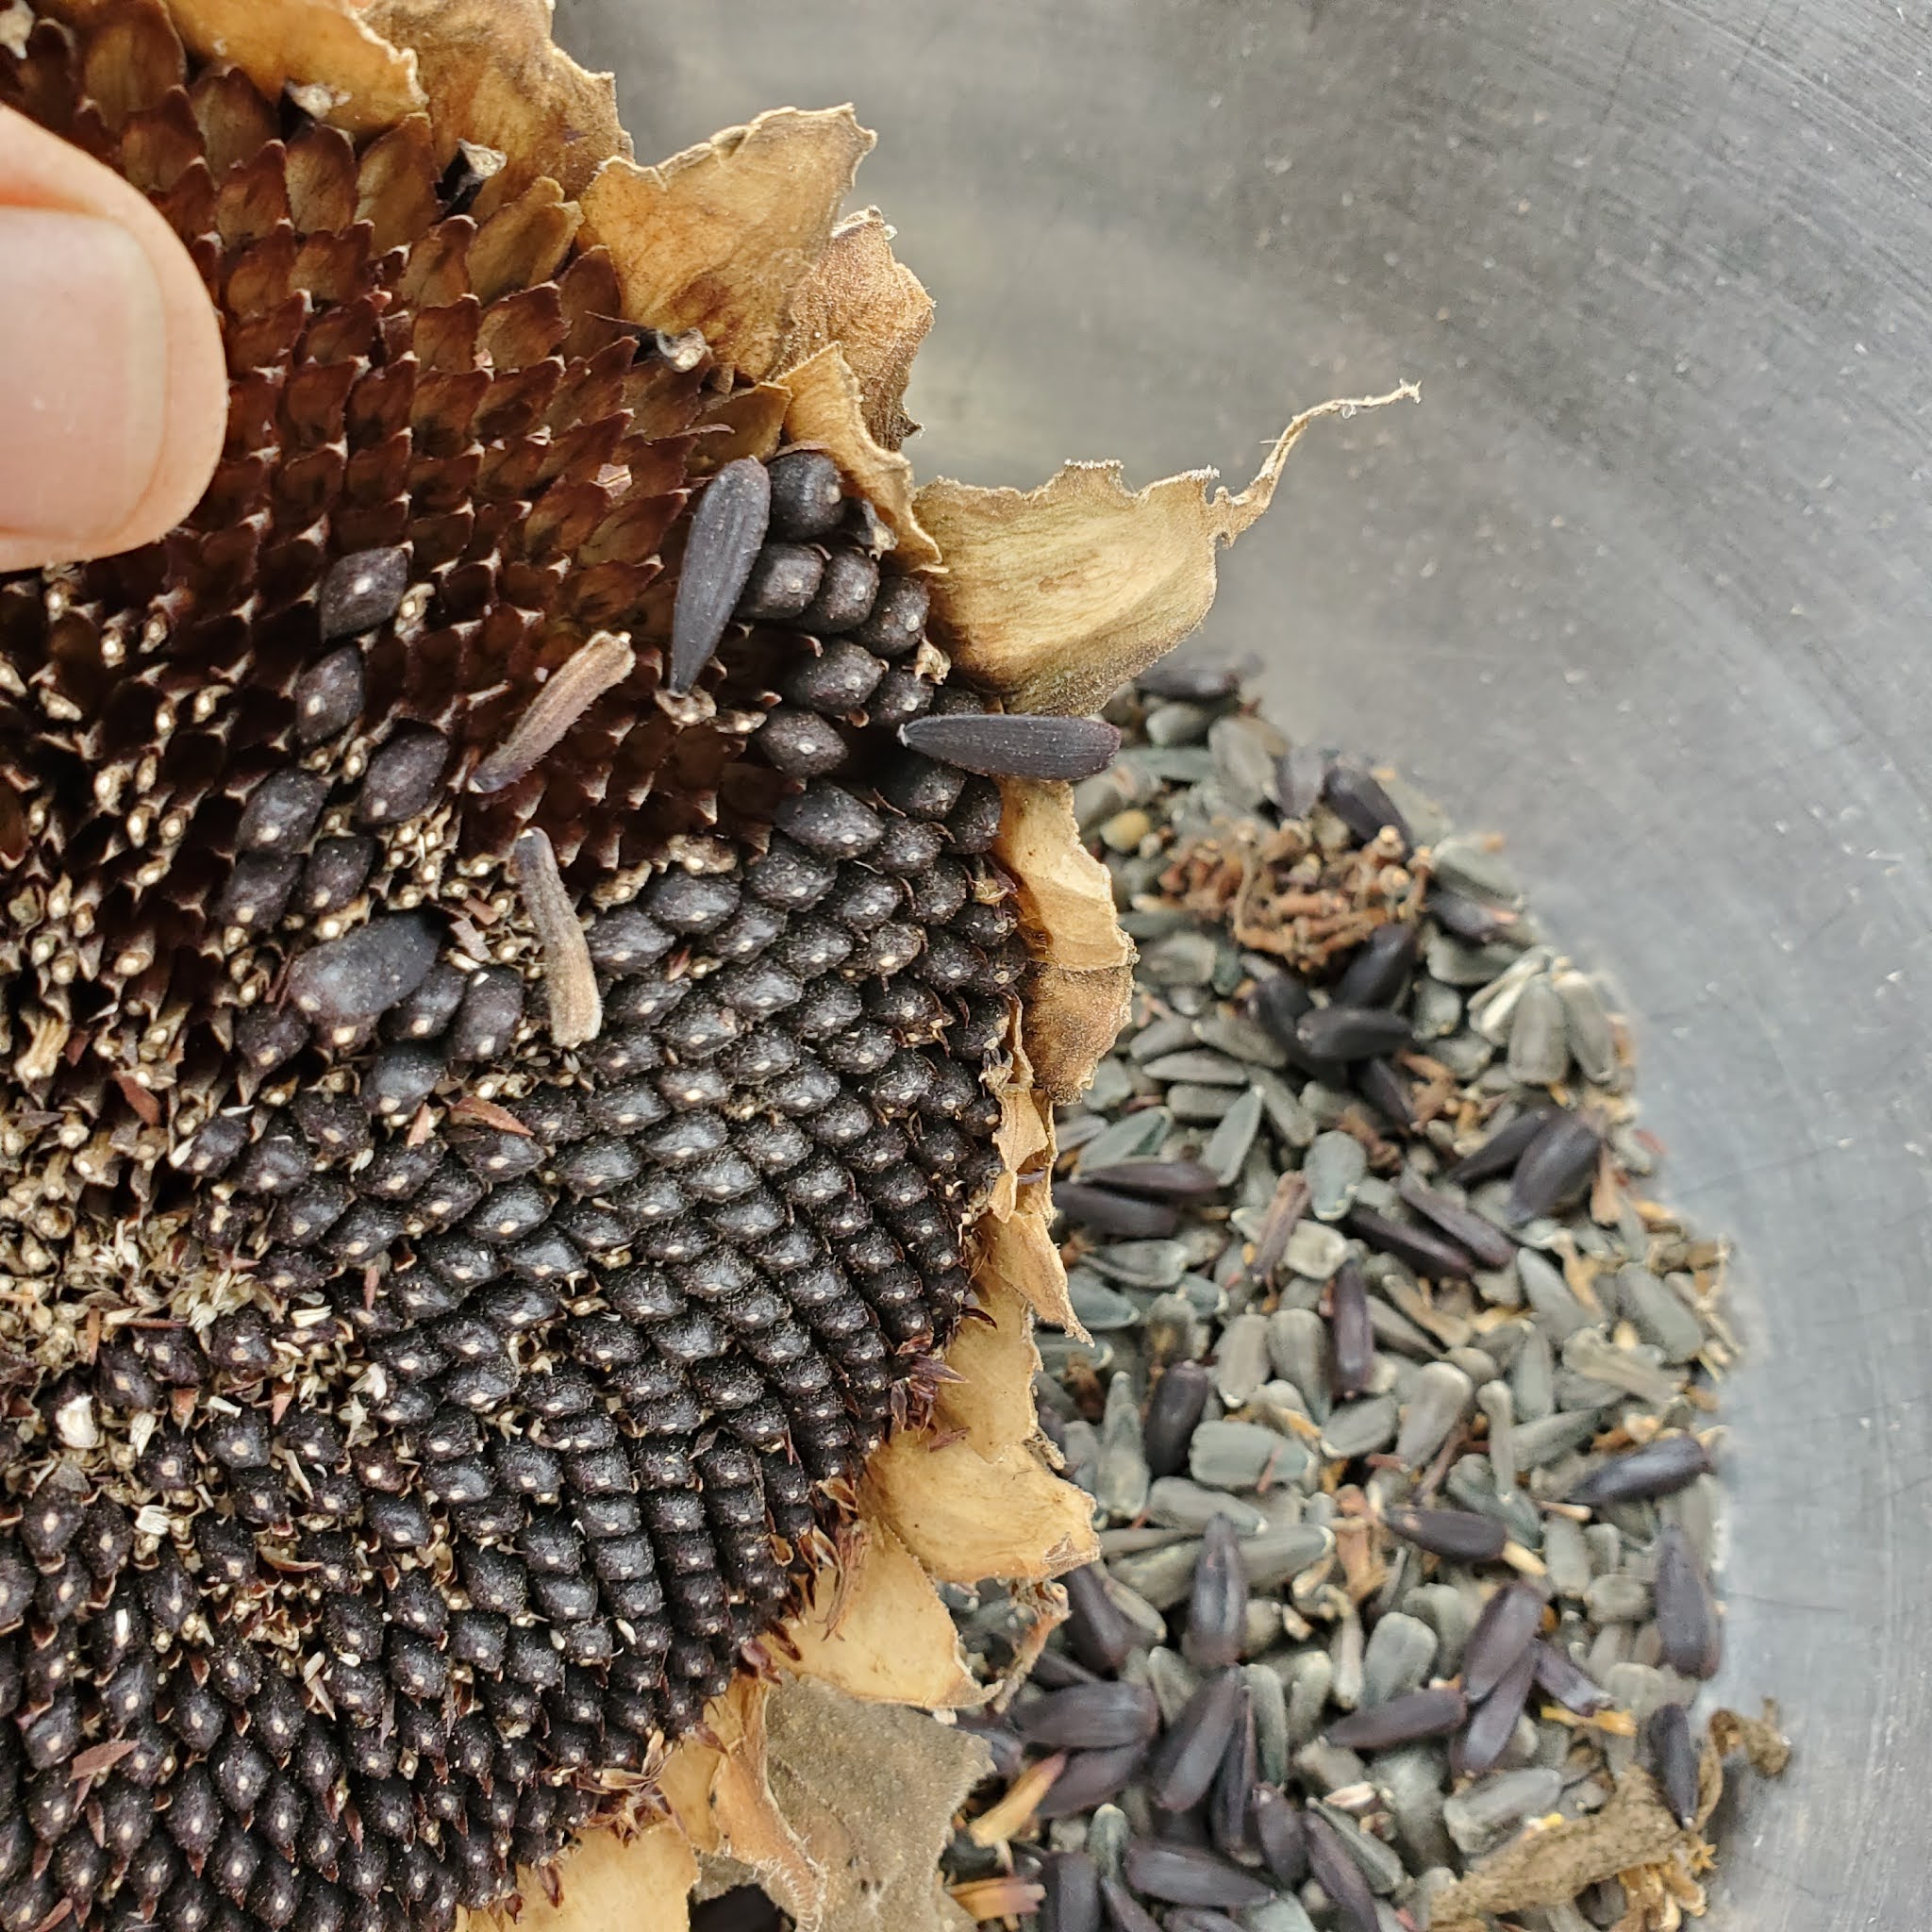 Removing the seeds.
What to Do with Sunflower Seeds
You may either eat the sunflower seeds yourself, feed them to livestock or wildlife, or keep them to grow more sunflowers next spring.
To store sunflower seeds for replanting next year, simply place them in a cool, dry, dark location. An envelope or an old medicine bottle will hold them safely.
Wildlife and livestock are usually fed black oil sunflower seeds (BOSS). Keep the dry seeds in a cloth bag in a cool, dry, dark location. (And remember that some livestock love eating the leaves and stems of the sunflower plant, too! Our rabbits adore the green leaves and stems, which I give them even before the sunflower heads begin to dry. Sheep and goats enjoy sunflower leaves and stalks, and pigs and cattle will eat the dried leaves and stalks, ground down. Rabbits, sheep, goats, cattle, chickens, quail, ducks, and turkeys also love to eat sunflower seeds, and some people say you'll get more eggs and milk if you feed them BOSS.) These seeds should last about a year.
To store raw sunflower seeds for human consumption, store them just like you would for animals.
If you prefer to store sunflower seeds roasted, they should be kept in a glass jar with a metal lid in a cool, dry, dark location. They'll last 4 or 5 months. Shelled seeds may also be stored, but only for 2 to 3 months. You may prolong the life of both shelled and roasted sunflower seeds by putting them in the freezer, where they'll stay good for about a year.
(adsbygoogle = window.adsbygoogle || []).push({});
How To Roast Sunflower Seeds
For every cup of sunflower seeds in the shell, use 1/3 to 1/2 cup of sea salt. Place the salt and seeds in a bowl and cover with water. Stir well. Allow this mixture to sit overnight.
Strain the seeds and place on a rimmed baking sheet lined with parchment paper. Roast in a preheated 325 degree F. oven for 15 to 30 minutes (depending upon the size of the seeds). Stir every 5 to 10 minutes to ensure even roasting.
If desired,you may lightly coat the seeds with olive oil and sprinkle them with seasonings before roasting.
 Brined seeds going into the oven to roast.
To roast the seeds without their shells, measure out about 1/2 cup of seeds and place them in a gallon food storage bag. Lay the bag flat on the counter and shake the bag until the seeds are in a single layer. Seal the bag. Gently roll a rolling pin over the seeds, cracking the shells.
Pour the seeds into a bowl of water. The kernels will sink and the shells will float. Use a slotted spoon to remove the shells. Drain the kernels and pat dry.
Preheat the oven to 350 degrees F. and line a rimmed baking sheet with parchment paper. Place the shelled seeds on the baking sheet and pop into the preheated oven. Roast 7 to 10 minutes, stirring periodically. Again, you may choose to oil and season the shelled seeds before roasting.
 DIY roasted sunflower seeds.
Sunflower Varieties to Try
For livestock and wild animals: Black Peredovic, Hopi Black Dye, Black Oil, and Clearfield Lonesome Dove.
For human consumption: Titan, Mongolian Giant, Mommoth Grey Striped, Mammoth Russian, and Snack Seed.
For beauty: Fantazja, Autumn Beauty, Teddy Bear, Crimson Blaze, Chocolate, Strawberry Blonde, and Red Sun.
For pollinators: Common sunflower (Hellianthus annuus) and beach sunflower (Hellianthus debilis).
(adsbygoogle = window.adsbygoogle || []).push({});September 22, 2021
Are Ball's Canning Recipes Unsafe?

This post may contain affiliate links. All opinions are my own. Please see FCC disclosure for full information. Thank you for supporting this site!
The Ball canning books have been called into question and may no longer be considered a safe source for canning recipes...so the Internet says.
Yep, I pretty surprised to read this rumor in a recent social media thread...so I did some research. What I discovered is definitely something every canner should know.
The Source of Information
In August of 2020, the Iowa State Extension Office, in it's literature on 4-H food presentations at Iowa county fairs, noted that canned food made from recipes other than those from the USDA and the country's Extension Offices would not be accepted for consideration. (At most county fairs across the U.S., one of the qualifications for all canned goods submitted for judging is that they come from a tested safe recipe; this has long meant a recipe by the USDA, an Extension Office, or a Ball canning book.) Then, about a year later, the Iowa State Extension Office stopped recommending Ball books to all canners.
These rules were made quietly, which seems to account for the fact that the news is only just now hitting the Internet hard. And it is pretty shocking. Ball has been around since the 1880s and their first recipe book was published in the early 1900s. By the 1920s, they began producing the legendary Ball Blue Books, which have always been considered excellent resources for tested safe canning recipes.
The Cooperative Extension Service system, which encourages public universities to dispense the latest, greatest info on topics related to agriculture, began even earlier - in 1862. One of the jobs of Extension Offices is to offer safe canning instructions and recipes. So why is just one Extension Office putting Ball recipes into question?
 A very early Ball Blue Book.
(adsbygoogle = window.adsbygoogle || []).push({});
The Concerns:
Apparently, the Iowa State Extension Office has a number of concerns about Ball's recipes:
1. Ball has not provided testing data to the Extension Offices or the USDA when asked to support their claims that certain recipes are safe to can.
While I can understand how this is a concern - third party, unbiased testing is always a good thing - I can also understand why Ball, which put significant time and money into testing recipes, doesn't want to share their proprietary info. But they used to.
(To show you how careful the Extension Offices are about providing only the most accurate, safe recipes, please know that they have also withdrawn their own recipes when the testing data from years ago has gone missing. The most famous example of this is canning recipes for zucchini and summer squash (unless pickled).)
2. For many years, canning experts have complained that Ball books lack precise measurements. For instance, a recipe might call for X-number of apples, but not specify volume or weight. Since apples can vary tremendously in size, this means you'll get very different amounts from, say, 10 small apples than you would from 10 "average sized" apples.
 Crabapples canned using a Ball recipe.
While this might not be a huge problem in cooking or baking, in canning it could lead to an end product that is unsafe to eat. That's because canning relies on obtaining the correct pH and density of food. If you lower the pH, you have food that could give you botulism poisoning. If you increase density (say, by adding too many apples), the food won't heat all the way through for the specific amount of time required to kill all the harmful microorganisms that can make you ill.
3. Poor editing has also been cited. The Ball books, like most books, have some errors. For example, how-to information might be partly missing, or explanations might not be clear.
(adsbygoogle = window.adsbygoogle || []).push({});
Clarification
According to Sarah Francis, who works in Food Science and Human Nutrition at the Iowa State Extension Office, other Extension Offices feel pretty similarly about the Ball books, though they have not made any official announcements about it. Just a few minutes, looking at a number of Extension Office websites, however, showed me that many are only recommending Extension Office or USDA recipes.
According to an article at The Counter, a non-profit, online news source, "Francis clarified that it’s not that they are asserting Ball recipes are unsafe, just that they can’t vouch for their safety." Tracey Brigman, the head of the National Center for Home Food Preservation (NCHFP)- a website that publishes USDA and Extension Office canning recipes - also told The Counter, “It is not that we do not recommend them [Ball recipes] per se, but we don’t endorse them because we are not familiar with their research and testing methods.”
Ball's response to The Counter? "We’re confident in our recipe validation efforts and the testing and review we go through to ensure we provide safe and quality instructions and recipes for our canners. We take pride in knowing that they have been vetted properly using standard practices from the USDA and NCHFP. We value the relationships we have with extension agencies and we hope to address the concerns of any extension agent or extension region to ensure the quality of our work remains as expected and required by our consumers. We have in the past, and will in the future, have extension leaders visit our facility to demonstrate exactly how we validate a recipe.”
 Zucchini relish is one of the few approved ways to can summer squash.
 So...What's Safe?
According to The Counter, "most of the concerns and questions coming in from concerned canners were not about the Blue Book, but about Ball’s other publications, but for clarity’s sake they adopted this black-and-white policy." Presumably, the books under scrutiny would be Ball's more recent books, including my beloved The Ball Complete Book of Home Preserving, plus The All New Ball Book of Canning and Preserving, and Ball Canning, Back to Basics.
So what's a canner to do? First and foremost, I think it's an excellent idea to always compare the Ball recipe to a similar recipe found at the NCHFP website or in the USDA's Complete Guide to Home Canning. When in doubt, choose a recipe from the latter two sources. If you have some older Ball Blue Books laying around, you can also compare the recipes in them to recipes in some of the newer Ball books. Much of the time, the recipes are very similar, and I've noted some older Blue Books are better about including weight and volume.
If you're fairly familiar with canning and what can and cannot be safely changed in a canning recipe, it's pretty easy to spot weird items in a canning recipe. For example, any recipe that calls for cornstarch, flour, dairy, noodles, or rice is an obvious no-no. (I'm not saying Ball has recipes that include these items; I'm only saying that no tested safe recipe will include them.)
If you're a new canner, and not very familiar with canning safety, I continue my recommendations to look for recipes at NCHFP, or to use the Complete Guide to Home Canning, the current edition of the Ball Blue Book, or The Ball Complete Book of Home Preserving.
If you have questions about a Ball recipe, I encourage you to email the company or join Ball's official Facebook community and ask there. Or call your local Extension Office for advice. And of course you can always post a question here on this blog.
In my opinion, the Iowa State Extension Office's treatment of this topic - not making a big announcement, but just quietly no longer recommending Ball recipes - is appropriate. In other words, the Internet has blown this story out of proportion. What a surprise.
 Antique Ball jars.


.jpg)