
Kristina Seleshanko's Blog, page 14
October 30, 2020
Weekend Links & Updates
 This post may contain affiliate links. All opinions are my own. Please see FCC disclosure for full information. Thank you for supporting this site!
"Look to the Lord and his strength;
seek his face always."
_________________________________
It's been a while since I've posted, so I thought an update was definitely in order. Life has been crazy busy, here on the homestead.
I am still canning salsa (what was I thinking, buying boxes of tomatoes on top of the tomatoes I grew???). I am also still doing some harvesting of squash, beans, tomatoes, cucumbers, and greens, and am beginning to clean up the garden in preparation for the hard frost that should hit soon.
 Most days, I take some tomatoes out of the freezer, push off their peels, and chop them for salsa.
In addition, we tasted quail for the first time last weekend. We are not big fans of eating chicken (except for my daughter, who loves it), so I was a little worried no one would like the quail. My son absolutely hated it (sigh), but the rest of us felt it was quite good. I really enjoyed the slightly more assertive flavor (compared to chicken). We will continue to raise quail for meat, at least for now. (Plus, my family says quail eggs are better tasting than chicken eggs!)
 This meal was entirely home grown.
 Quail eggs are tiny, but tasty!
We lost our refrigerator a few weeks ago, which really ruined my schedule - ha! Due to COVID-19, refrigerators are almost impossible to buy right now, so we had to make do with a small, old-school one I found at a small, local hardware store. It actually should have better longevity than a lot of fridges, but I'm not sure I'm going to like the size. I typically store a lot of veggies in the fridge because we don't have a root cellar. We shall see how it works out. (Why has COVID created a refrigerator shortage? I'm told it's because social distancing must be kept in factories. Whereas typically multiple people work on a fridge at one time, now they must do it one by one. There may also be some slow down due to difficulty in obtaining China-made parts.)
We've also been dealing with some health issues. My daughter had a cyst on her face surgically removed. Thankfully, the cyst was benign. And I've been dealing with a growth on my eyelid. It's been there for probably 1.5 years, but recently got quite a bit larger, as you may have noticed on my YouTube videos. I saw my GP about it and he referred me to a dermatologist who in turn referred me to my ophthalmologist. The ophthalmologist felt it was probably not cancer (as the derm felt it was), but a virus called molluscum contagiosum. He did a biopsy and spent a lot of (uncomfortable) time poking around my eyelid trying to get my immune system to recognize and fight the virus. But the biopsy was negative for molluscum and basal cell carcinoma. After consulting another doctor, the ophthalmologist thinks it's most likely precancerous and is sending me to a plastic surgeon who will remove it and reconstruct my eyelid so it will shut properly. Fun stuff.
It's a bit surreal to me because I think I'm low risk for skin cancer. I'm looking forward to discussing this further with the surgeon.
 Morning chore time.
And so we keep plodding away at things, ever trusting the Lord and feeling thankful for the many blessings we experience, even during difficult times.
* Just a quick note for those of you still looking for canning lids. If you don't want reusable canning lids (I really like my Harvest Guard brand reusable lids), MasonJarMerchant.com still has conventional lids in stock. Their prices are fair, their shipping quick, and they are Bernadin - Ball's Canadian brand, made in the USA.
* If you're tempted to believe a certain canning recipe or method is safe because "Grandma did it and we never died," read this important article!
* Got a lot of winter squash and you're not sure what to do with it? Check out these ideas.
* There's a new PBS show about Laura Ingalls Wilder; should be fun!
* Did you see the viral video of the jogger being chased down by a mama mountain lion? He's still alive, so he must have done something right...but if that cougar had been looking for a meal, I've little doubt the jogger wouldn't have made it home. Want to know what the experts say you should do if you bump into a cougar? Check out this article I wrote for Mother Earth News.
* I know many of you are starting to shop for Christmas. May I humbly ask that you consider giving my books as gifts? You can find them here, in topics ranging from gardening and foraging to fashion history. (Some books were written under my maiden name, Kristina Harris.)
Oldies But Goodies
* 4 Thing to Do in Fall for a Better Spring Garden.
* The Pilgrims had many gardening tricks that still work wonderfully today!
* In the mood for hot cocoa? This quick, inexpensive from-scratch recipe can be made low sugar or sugar free.
* It's time to think about Thanksgiving! If you eat low carb, check out the fantastic recipes here!


October 12, 2020
The Great Canning Lid & Jar Shortage! What to do about it.
Have you noticed there is a national shortage of canning lids and jars? Check out my video below (or directly on YouTube) for hints on what to do about it!
September 28, 2020
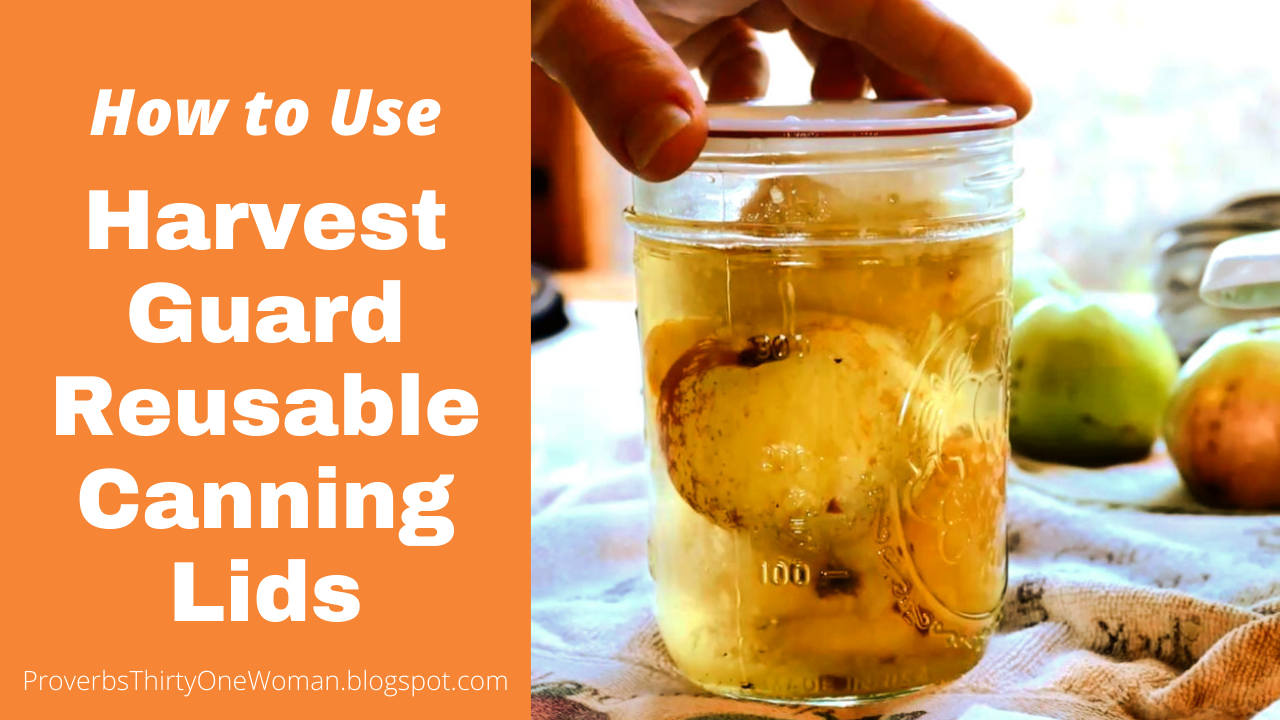
How to Use Harvest Guard Reusable Canning Lids (with Video)
 This post may contain affiliate links. All opinions are my own. Please see FCC disclosure for full information. Thank you for supporting this site!
If you've done any home canning this year, you're probably aware that we're currently experiencing a national shortage of canning lids. The reason is simple: Manufacturers simply did not anticipate the huge increase in demand they've experienced due to COVID-19 and more people growing and preserving their own food. Naturally, this shortage has brought about renewed interest in reusable canning lids.
For years, I avoided reusable canning lids because:
1. They are a bit of an upfront investment and
2. Some people have difficulty getting them to seal.
But if we can't get our hands on conventional canning lids, reusable ones seem like something we ought to look into. Therefore, I bought a small number of both Tattler reusable lids and the lesser-known Harvest Guard reusable canning lids. The Tattler website immediately informed me that shipping would be delayed due to high demand. Harvest Guard sent me a similar message shortly after I placed my order, but did offer me 10% off for my patience. Both companies insist they currently have plenty of product - that they are not sold out. The delay, as I understand it, is due to lack of personnel to pack and ship the unusually high volume of orders. I still have not received my Tattler lids, but I did recently receive my Harvest Guard lids. (You can order Harvest Guards here.)
For those who are not familiar with modern reusable lids, both brands consist of a plastic disc and a rubber gasket. Now, I can hear you thinking: "Plastic! I don't want plastic near my food!" I really do get that sentiment. But with conventional canning lids, the white part that is closest to the food is also made from plastic. The major brands are BPA-free...even though some studies show non-BPA plastic can be just as problematic as BPA plastic. The Harvest Guard lids are made from Polyoxymethylene Copolymer (also called Acetal Copolymer), which is BPA and Phthlate free plastic that is FDA and USDA approved for direct contact with food. According to the manufacturer, it has been "used extensively in the food and medical industries since the 1940’s." It is not safe to use with anything that contains 15% or more alcohol (including tinctures) and should not be taken above 250 degrees F. Harvest Guard lids are suitable both for water bath and pressure canning.
As much as I think some smartly-run American company needs to create old fashioned gasket-style canning jars (such as our grandparents or great-grandparents used) so that we can be completely free of plastic in home canning, that hasn't happened yet. Yes, there are Weck jars, but they are cost prohibitive - I assume because they are imported from Germany. Plus, as far as I can tell, they are not approved for pressure canning.
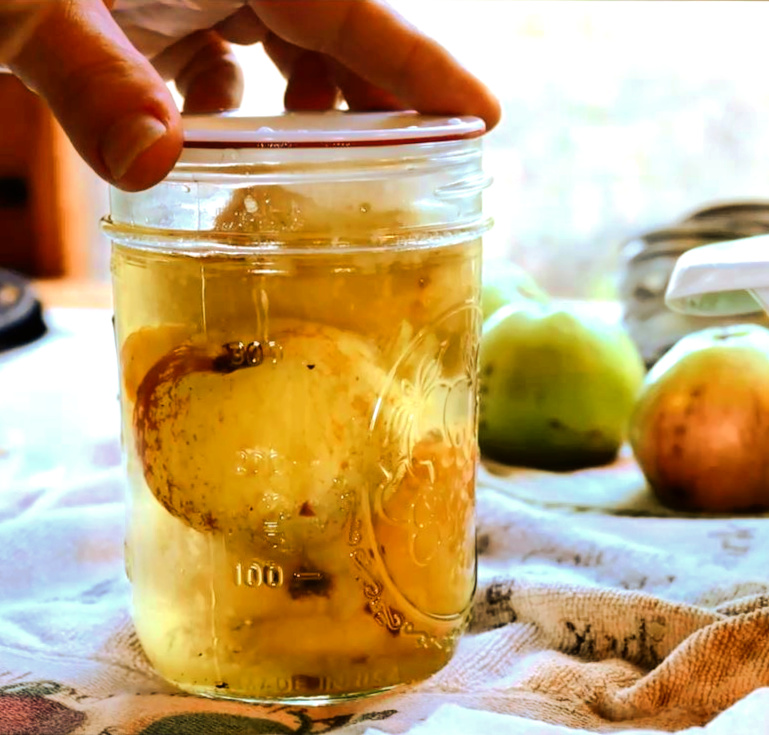
To test Harvest Guard's lids, I chose to can a few jars of water - because reusable canning lids work a little differently than conventional canning lids and I wanted to be able to focus on the process without worry of making a mistake that would waste food. All these jars sealed perfectly. In fact, I had to laugh because I had trouble opening them! Some people (like my husband) can push them open with their thumbs, but that didn't work at all for me. I ended up ordering this style can opener, said to safely open Harvest Guard lids without damaging them.)
Next, I canned some spiced crabapples. (You can find the recipe over at The National Center for Home Food Preservation website.) Again, every single jar sealed perfectly.
I was so pleased with these lids, that I immediately ordered more. I am concerned that the canning lid shortage may well last into 2021.How To Use Harvest Guard Reusable Canning Lids
When you first receive lids from Harvest Guard, you'll need to wash them in warm, soapy water. The manufacturer says both the plastic and the rubber gaskets are dishwasher safe, but I chose to hand wash mine because I feel it might be gentler on the product...Besides, my dishwasher is broken! Ha! (It's important to note that even though the lids and gaskets are reusable, they don't last forever. The rubber gaskets should be replaced as soon as they show signs of wear; the lids should last many, many years if well cared for.)
Once the lids and gaskets are washed, proceed this way. (Scroll to the bottom of the page for a video showing all the steps.):
1. Warm the lids and gaskets.
The manufacturer says you should "sterilize" them, but there is no need to sterilize if you are processing your jars for 10 minutes or longer (which you always will be if you're using a tested safe recipe. The actual food processing sterilizes the jars and lids.).
HOWEVER, you do need to pre-warm the lids and gaskets. To do this, heat a saucepan of water almost to a boil; add the lids and gaskets and turn the heat down to a gentle simmer for a minute or two. Keep the lids and gaskets HOT.
By the way, I find it easiest to put the gaskets on the lids before simmering them, but if you simmer them too hard, they will likely separate.
2. Fill a canning jar and wipe the rim clean, then use tongs to remove a lid and gasket from the hot water. (If the gasket has separated from the lid, you'll need to put it back in place.) Center the lid on the jar.
3. Place a standard canning jar ring onto the jar. Use one finger to hold the lid in place and, using the opposite hand, tighten the ring.

When the jar begins to turn, remove both your hands. Hold the jar in place with one hand (use a hotpad!) and tighten the ring with the opposite hand, giving it just a quarter twist of the wrist.

4. Repeat with all the jars, then just as you normally would.
5. After removing the jars from the canner, let them sit for 5 to 10 minutes, to cool slightly.
6. Tighten the jar rings firmly. Obviously, the jars and lids are really hot at this point, so use a towel or pot holder to protect your skin.
If for any reason the lids appear to dome upward, it means you have over-tightened the rings before processing and you should NOT attempt to tighten the bands now. (Doing so could cause hot liquid to burst out of the jars.)
7. Cover the jars with a towel and leave them alone until they come to room temperature.
8. When the jars have reached room temperature, remove the rings.
9. Test the seal of every lid by carefully picking up the jar by the lid only. If the lid comes loose, refrigerate the jar or reprocess it.

10. Mark the contents of each jar. You may wish to use a label maker or sticker on the lids or jars to note the date of processing and the contents. Some people report they write on the plastic lid with a Sharpie; when they open the jar, they use an acetone-based nail polish remover and a Q-tip to remove the writing. (Be sure to wash the lid with soap and water afterward.)
Watch me walk through the process in this video:
September 25, 2020
Weekend Links & Updates
 Fall has come to the homestead.
"I consider that our present sufferings are not worth comparing with the glory that will be revealed in us."
__________________________________________
We survived the fires. There are still many fires burning and people are still evacuated/evacuating, so keep praying. But we are thankful for rain and cooler weather in our particular area. No matter where you live (but especially if you live in the woods, as we do), fire is something you should prepare for. This unfortunate mix of power line-started and arson-started fires certainly gave us a lot to think about!
But even amid red skies and ash rain, life continued. Our dear Fiona had another litter of rabbit kits. So far, she's always had eleven at a time, and this time was no exception. So far, all have survived. They are a beautiful rainbow of coat colors, which I think is just plain fun. And now they are mostly out of the nesting box. Can you imagine having eleven toddlers to care for - and being stuck in one room with them all day and night? Poor Fiona. Sometimes she looks a little overwhelmed!
 Rabbit kits a few days old.
 One of the kits last week.
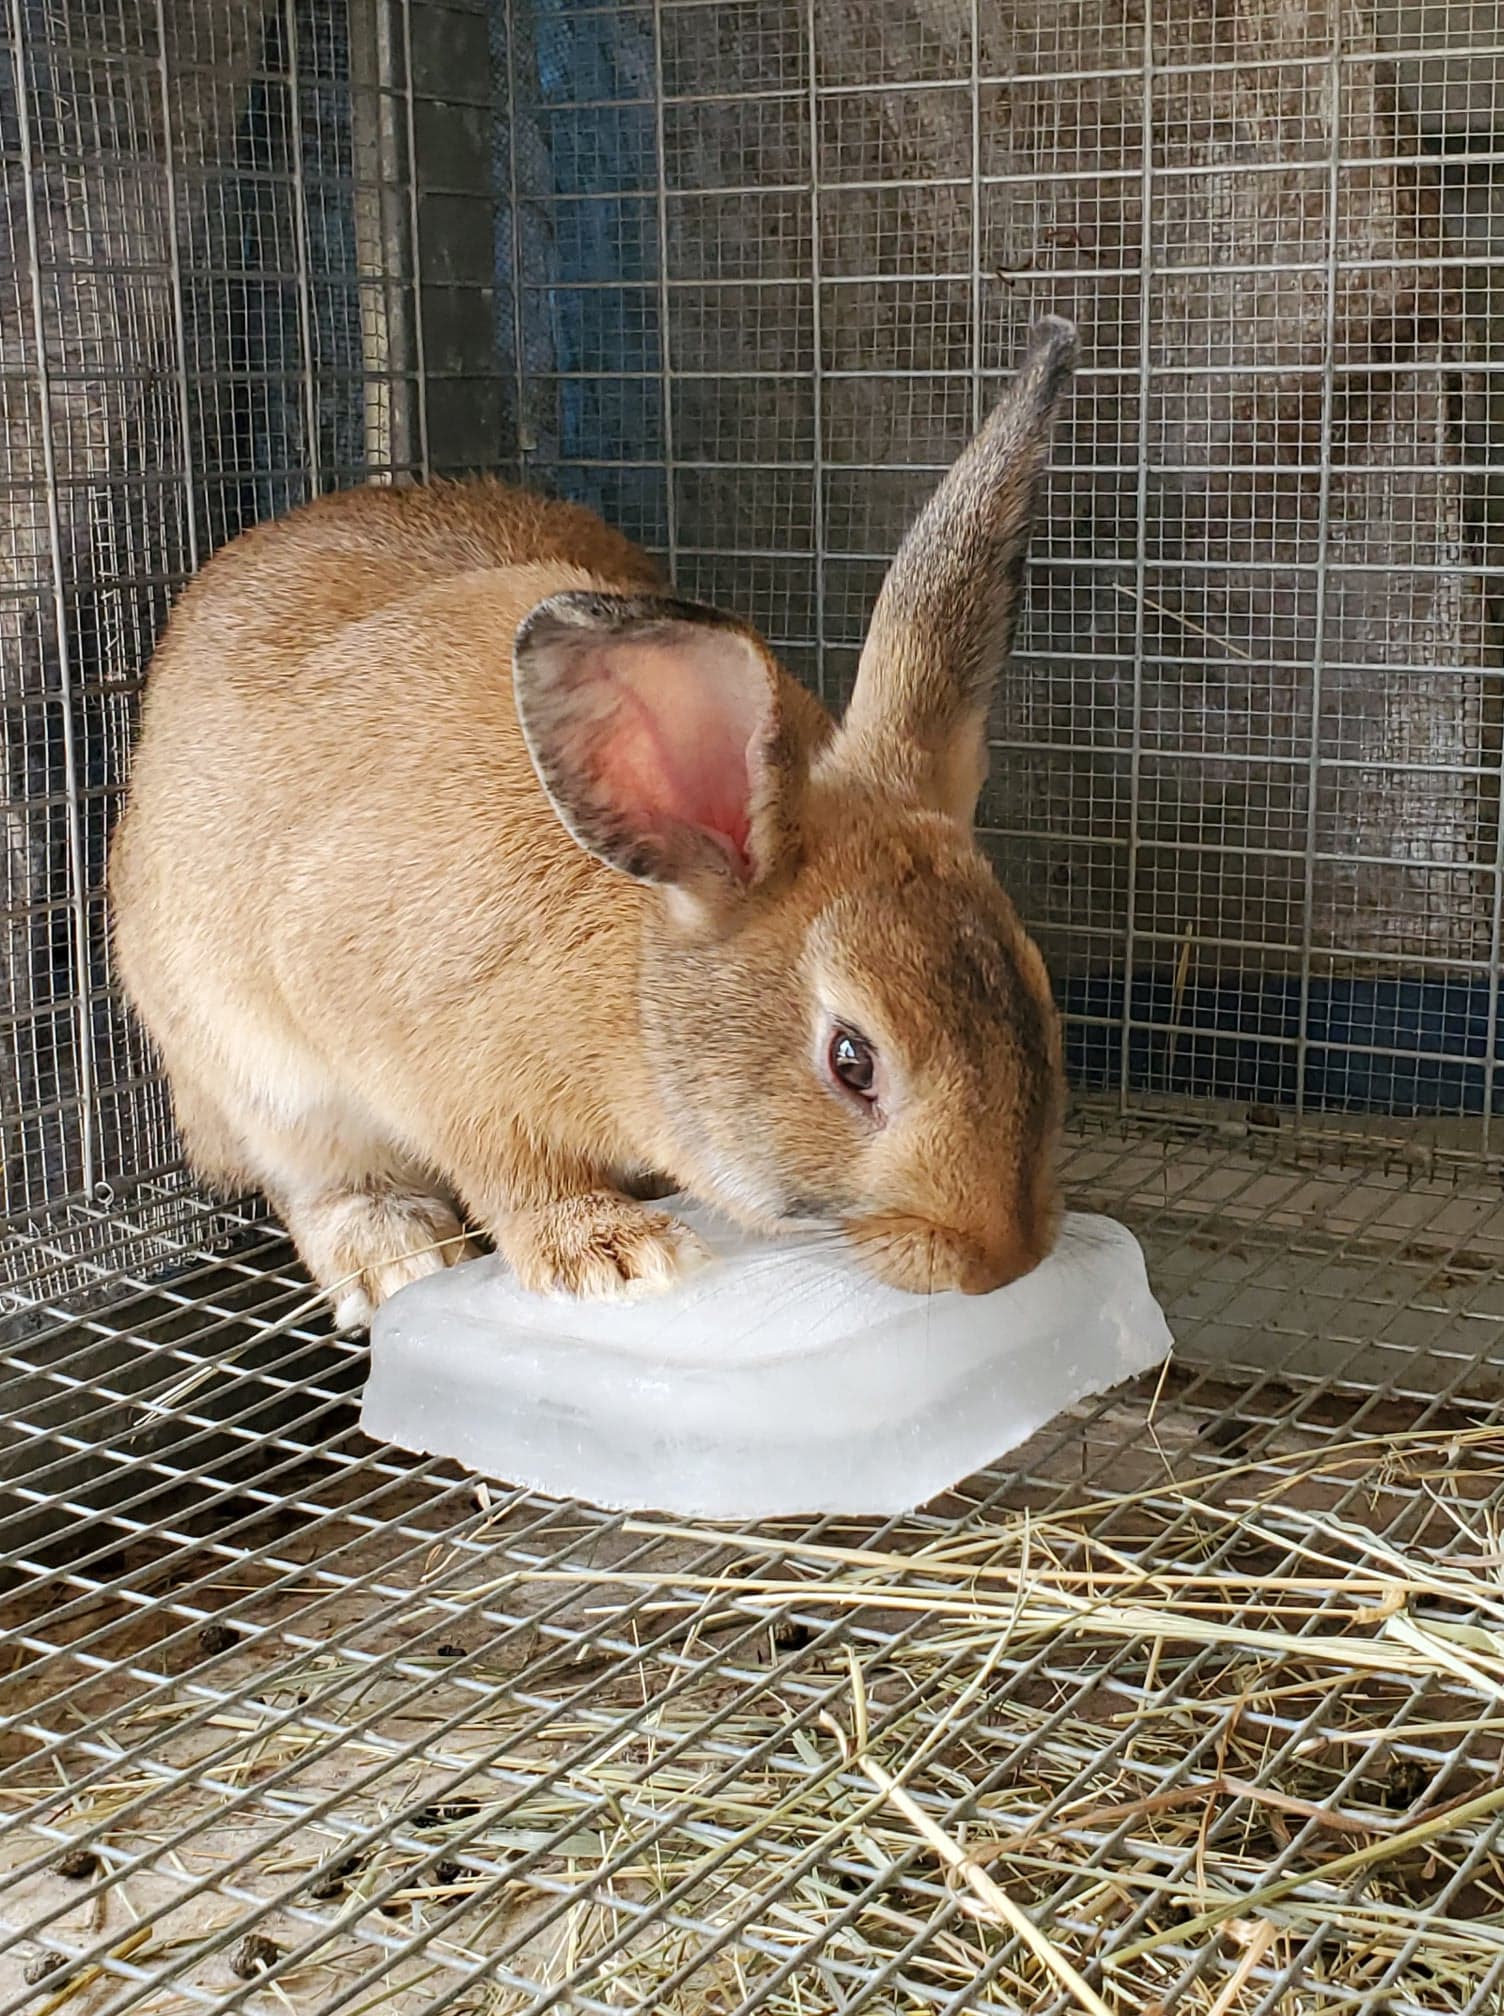
 A few does from Fiona's last litter, cooling off with an ice block.
We have decided that Shannon, our Soay ewe, isn't pregnant. She was just fat on summer grass. But Shaun, our ram, is definitely in rut, so we hope we'll have a lamb, come spring.
 Shannon eating grain from my scooper.
The quail are doing well. They seem very content in their new digs, spending most of their days dust bathing. They are camera shy, though. Every time I bring out my phone to snap a photo of them, they panic and dash into a corner.
 The quail are 6 weeks old now.
The new flock of chickens - all Australorps - are getting big. We have at least two roosters crowing, and all the roosters are (so far) friendly. We have three hens from our old flock free-ranging now. They follow us around the place like puppy dogs.
My garden did pretty well this year, but now that it is fall, the deer have ravaged it. Even the bird netting I put up - which has always kept out deer in the past - didn't do the trick this time. The deer even ate all my outdoor tomato plants...and they've never touched green tomatoes before. Before you say this is due to more deer crowding into our area due to fires...I think not. Even in the spring, we noticed the deer population was much higher than usual. I suspect the cougar that were nearby have moved to a different area.
 Still getting tomatoes!
I am still getting tomatoes from the greenhouse. Actually, this is my best year ever with our little greenhouse. When we first moved here, the soil there was severely depleted. I've fed it rabbit manure, sea kelp, lime, bone meal..and finally it's paying off. There are also carrots, cabbages, Brussels sprouts, kale, kohlrabi, beets, and a few other things still in the garden. I might even get a few green beans, even though the deer ate their tops off.
 The most housecat-like barn cat, ever: Niko.
* You don't have to throw away souring milk! Here are some tips for using it up...except that I advise just saying no to cereal :)
* Confused about the difference between Clear Jel and Sure Jell in canning? Here's a good explanation.
* It's that time of year: Time to clean your stove pipe to prevent house fires! Some good info here.
* The USDA now says selling meat from sick chickens is acceptable.
* Did you know there is a pumpkin puree shortage due to poor growing conditions? If you can't find pumpkin puree in your area, or if you find it over-priced, you can make your own! Here's how.
* Do you have cougar in your area? Check out the article I recently wrote for Mother Earth News magazine on how to keep your family and homestead safe from these formidable predators.
 I am testing out reusable canning lids this week. Expect a blog post soon!
Oldies But Goodies:
* How to freeze apple pie filling.
* How to ripen green tomatoes - and can with frozen tomatoes.
* How to roast pumpkin (and other winter squash) seeds.
September 17, 2020
Mock "Apple" Crisp made with Zucchini! (gluten free, no sugar, low carb, keto recipe)
 As an Amazon Associate, I earn from qualifying purchases. All opinions are my own. Please see FCC disclosure for full information. Thank you for your support!
I have always loved apple everything. Apple crisp and apple pie were my favorites. I've also always been fascinated by mock apple recipes, which until recent times were really common. It's not that apples were necessarily hard to come by; it's just that our ancestors hated food waste and were quite clever about turning unexpected foods into something scrumptious. Examples of foods often used to make mock apple pie or crisp include plain crackers, unripe pumpkins, unripe tomatoes, and, yes, zucchini!
For many of you, turning zucchini into apple crisp will just be a fun way to use up an abundant garden crop. For others, though, it's a way to enjoy apples again. When I discovered I had a serious case of type 2 diabetes, apples became something I had to avoid. (Apples are shockingly high in sugar. Just one slice spikes my blood!) But once or twice a year, I make this recipe...which really does taste like apples! (To learn how I reversed my diabetes naturally, click here.)
So whether you just want to experiment, use up some zucchini, or find a healthier way to enjoy a treat, give this recipe a try this fall.
[image error] Mock "Apple Crisp" from Zucchini Recipe
4 cups peeled and chopped zucchini (about 1 large zucchini)
non-iodized salt (I use Redmond Sea Salt)
2 tablespoons apple cider vinegar (I use Bragg Apple Cider)
1 tablespoon lemon juice
1/2 teaspoon real vanilla extract
1 cup of sweetener (I use erythritol made from pears)
1 teaspoon ground nutmeg
1 teaspoon ground cinnamon
4 drops of OOOFlavors Double Apple extract (You may use other brands of apple extract, but the strength of flavor may vary, requiring fewer or more drops for this recipe.)
For the topping:
1/2 cup chopped pecans or walnuts
1/2 cup almond flour
1/4 cup coconut flour
6 tablespoons of sweetener (If you've been keto for a while, like I have, you'll probably want to omit the sweetener in the topping.)
5 tablespoons of butter
[image error] Peeling the zucchini.1. Place the zucchini chunks in a colander, sprinkle liberally with salt, stir, and allow to sit for at least 20 minutes, or up to an hour. This helps eliminate the excess water in the zucchini.
2. Rinse the zucchini in cold, running water and pat dry with a flour sack kitchen towel or paper towels.
3. Preheat the oven to 350 degrees F. and grease a 9 x 9 inch baking dish with coconut oil or butter.
4. In a large bowl, combine the zucchini with the vinegar, lemon juice, vanilla, sweetener, nutmeg, cinnamon, and apple extract.
5. Pour the zucchini mixture into the prepared baking dish. Set aside.
 "Apple" filling made from zucchini chunks.
6. In a medium bowl, combine the nuts, almond flour, coconut flour, and sweetener.
7. Cut the butter into small chunks and add to the bowl with the pecan mixture. With your hands, combine the butter into the pecan mixture until the mixture is crumbly and moist. Pour this topping over the zucchini filling.
[image error] The mock "apple" crisp before going into the oven.8. Bake the crisp for 45 minutes or until the zucchini is fork-tender.
[image error]
Serves about 6. Approximate nutritional information. (It's always wise to calculated nutritional info based on the specific products you use.): 10 g. carbs (minus erythritol); 13 g. fat; 5 g. protein.
September 9, 2020
Preparing for an Evacuation
 Our yard, last night at about 5pm.
Monday night began innocently enough. We'd spent all Labor Day weekend working on our homestead: getting our house painted, canning food, building our quail pen, things like that. When our fire alarm began periodically beeping that evening, we thought it just needed batteries...only a change of batteries didn't make the beeping go away. Then our noses detected the scent of smoke.
By Tuesday - which was the first day of online school for our kids - we could see lots of smoke in the valley. Temps were expected to be over 100, so I spent a lot of the day making sure the rabbits (who are not generally good with high temps, especially when you only get high temps a few days out of the year) were as comfortable as possible. (Thankfully, it never got so hot.) We got the quail moved from the brooder to the new, beautiful pen my husband built. I helped my son with the many technical difficulties he was having with online school. And I caught up on some housework, which I always tend to get behind on during peak canning season. But by afternoon, the smoke was thick, there was a fire in the valley immediately below us, and we were getting ash fall. We began watering our yard in hopes it would prevent any sparks in the ash from creating a new fire.
 Keeping the rabbits cool with ice blocks.
 The new quail pen.
Before bedtime, we were glad to hear the fire in the valley had been put out, but we continued to have concerns about ash sparks. I even discovered that my couch and kitchen counters, which are under screened windows, were covered in ash.
The next morning, everything was smokier. Thankfully, we are not in an evacuation zone, but living in the woods we know that at any time a fire could overtake our homestead.
The old hymn based on Psalm 56:3-4 has been on my mind a lot: "When I am afraid I will trust in You, in God whose word I praise." We've been praying continually for our family, our city, our state, and our nation. We are at peace with the idea that we might have to leave everything behind and come home to nothing. But we're also pondering what we can do to make our lives easier if we must evacuate.
People
First and foremost, of course, we would make sure all people on our homestead get out alive, helping neighbors and family as needed.
Papers
We'd also make sure we have all difficult-to-replace paperwork with us. This includes: birth and marriage certificates, social security cards, passports, driver's licenses, health insurance cards, credit cards/debit cards, work or school ID cards, house deeds, vehicle titles, trust or will and burial plot paperwork, insurance cards/policies, bank account numbers, etc. Some people put all this into a "grab and go binder," which makes snagging them during an emergency super easy. I admit I have not done this, so I am putting all such paperwork in one spot so I don't have to scramble for it in an emergency.
 Looking into the valley yesterday...
 ...and looking down into the valley this morning.
Pets
Of course we will do everything possible to take our pets. That's 4 rabbits, 1 dog, and 3 cats. The cats aren't the type that hang around the house, though, and so it is sadly possible I might not be able to grab them if we have to evacuate. Ugh. We also have to think about carriers for pets. Do we have enough? Well, no we don't. But in a pinch, we can bring the rabbits in their outdoor cages. Perhaps in the future we can buy used pet carriers to have on hand for emergencies.
Livestock
Here's where it gets really icky, friends. Our livestock are all small. How on earth could we evacuate them in an emergency? I don't think we can. We could put our 2 sheep in a crate, and maybe we could take the livestock rabbits in their cages...but I don't think we'd have room for them. I don't think it's at all possible to take the quail and chickens. So...I've been pondering what we could do to make them as safe as possible on the homestead without us. But the truth is, we can only give them so many waterers and so much food at one time. Releasing them would basically spell their death. It's a very unhappy thing to think about, but it's better we sort through the options now than at the last minute.
Insurance
Another thing I've been thinking about is how to prepare for a possible insurance claim. When we first moved to this homestead, our pole barn burned down with many things inside it, so we know how difficult it can be to remember every item that was in a specific building. Therefore, I finally did something everyone should do periodically: I took a video of our house and outbuildings, trying to get shots of all our belongings. (This means opening up cupboards and such, too.) I am keeping a copy of the video on my phone, my laptop, and an external hard drive (which are all things I would take with me if we evacuate). You should also consider uploading such a video to a cloud, although you'll want to weigh the convenience with the potential privacy issues that might include.
In addition, if you have blueprints to your house and paperwork related to remodeling, put it in your grab and go binder/pile. It will be useful if your house needs rebuilding and the insurance company wants to see exactly what you had.
Other stuff
We are not yet at the point where we have to pack up clothes and toiletries, but we all have backpacks we can use for this purpose. I've also pondered what irreplaceable items I would try to bring with me, if there was enough time and space. I have a lot of family heirlooms and I know I couldn't take them all, so I'd need to prioritize. Better to think about this now than in the heat of the moment.
Another project I have in mind is to put all our family photos in one spot, so I can easily grab them for an evacuation. I have boxes and boxes of them, as well as albums, and they are scattered around the house.
In addition, it's a good idea to keep your phones charged, and have your laptop or other mobile devices charged and ready to grab during an evacuation. (Remember that texting takes less battery than making a phone call, and that you can change your outgoing message to reflect your safety for when/if concerned friends and family call for an update.)
Even if you don't live where fires are raging, I urge you to think through how you'd evacuate your home if you needed to. Gather your family photos together in one spot, make a grab and go binder, think about potential routes and how you'd deal with your animals. Although I hope you'll never have to implement these things, you'll be thankful you're prepared if you ever do experience such an emergency.
Keep praying, friends!
Giveaway winner!
September 3, 2020
Mom's Apple Cake Recipe

It's no secret our homestead has a lot of apple trees. And while the crop is sparse this year, there are some recipes I make every year, regardless...because there would be a family revolt if I didn't.
August 31, 2020
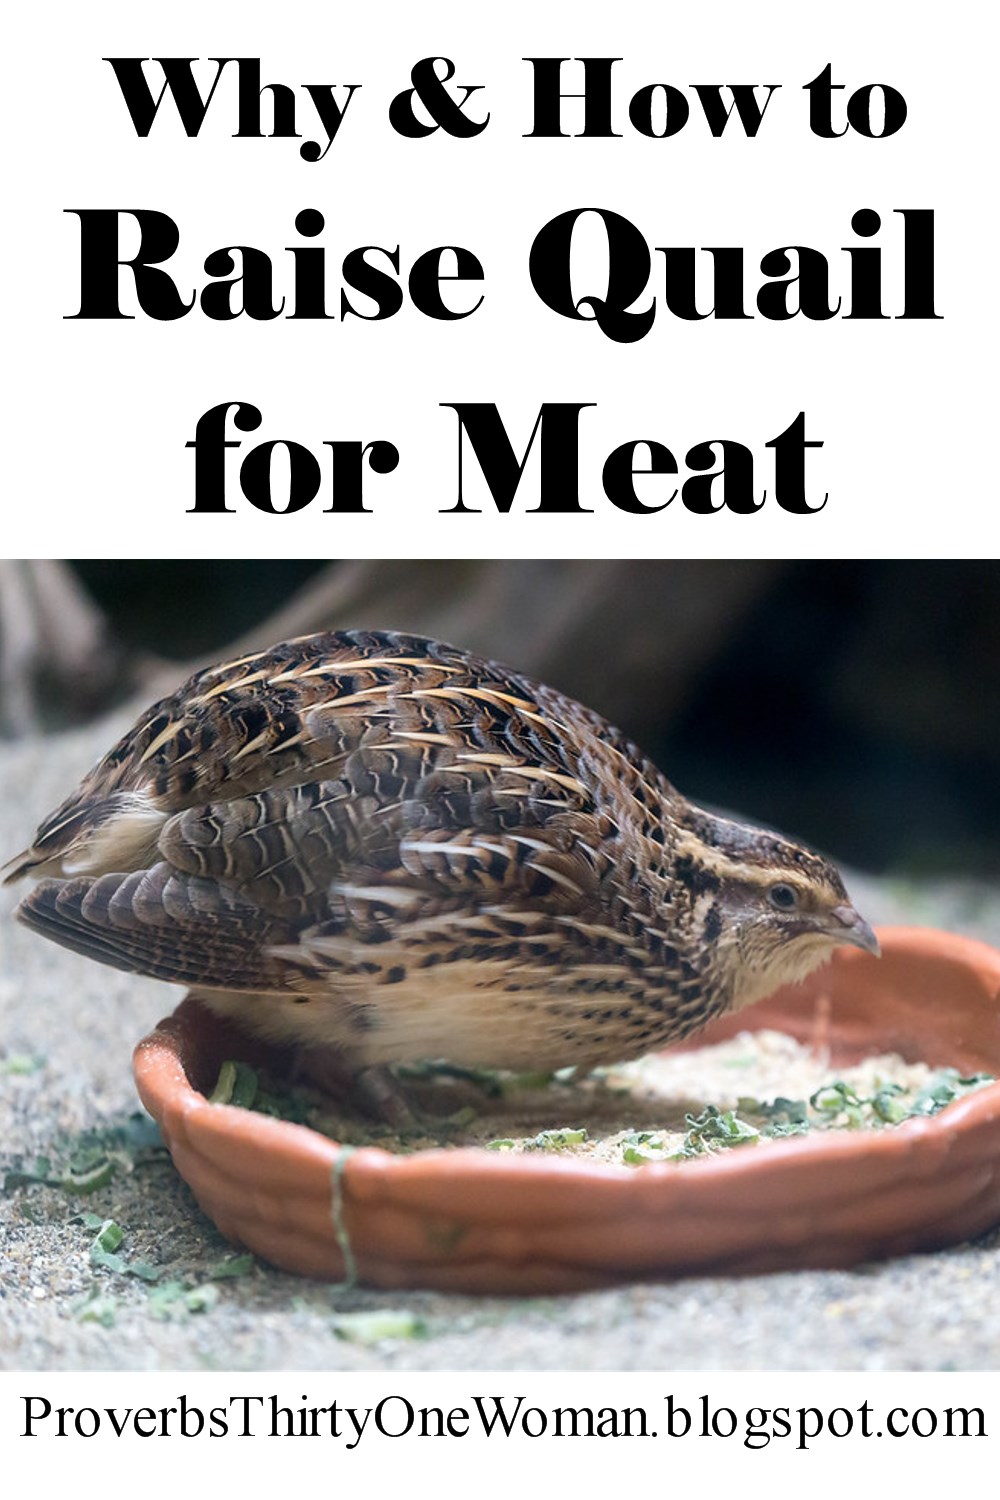
How and Why to Raise Coturnix Quail for Meat
This post may contain affiliate links. All opinions are my own. Please see FCC disclosure for full information. Thank you for supporting this site! For many years, I've wanted to raise meat on our homestead. I had many reasons, but here are just a few:
* I feel factory farming (which produces the meat found in grocery stores) is immoral because it's cruel and doesn't allow animals to live anything like God intended them to. (Many Americans are blissfully unaware of how bad factory farming is. If you haven't already, it's time to read up on this subject. Christians might start with Joel Salatin's The Marvelous Pigness of Pigs .)
* Factory farming produces meat that is less healthy than it should be, compared with more natural methods of raising meat. (Examples: it contains too much unhealthy omega 6, too little healthy omega 3, less vitamin E and beta-carotene, higher risk of salmonella and E. coli, antibiotics, etc.).
* It's difficult to afford healthy and ethically raised meat. You can't buy it in any grocery store. We have bought local grass fed beef (click here for tips on how you can do this), but other meats are just way out of our price range. (For example, I can't afford truly pasture raised chickens, which cost about $60 a bird in my area.)
* I find the more meat I eat, the better I feel and the more my health issues disappear. (I don't eat carnivore, but if you read up on why that diet works for so many people, you may be shocked!)
For this reason or that, however, we just never got around to raising meat - beyond the periodic butchering of old laying hens. For one thing, we don't have appropriate pastures or expensive fencing for the animals we really wanted to raise, like cattle and pigs. This lead to much pondering and disagreement on what animals we could realistically raise without spending a small fortune on infrastructure.
Then COVID happened. The meat departments in our local grocery stores were pretty dang bare and the stores were limiting how much a family (not even a person...a family!) could buy. They said, "Buy like you normally would - what you will eat for the week." Yeah, right. What they allowed me to buy would only feed my family for a couple of days.
So my husband and I got firm in our resolve. One way or another, we were going to raise meat on our homestead. One way we decided to do that was to begin raising quail.
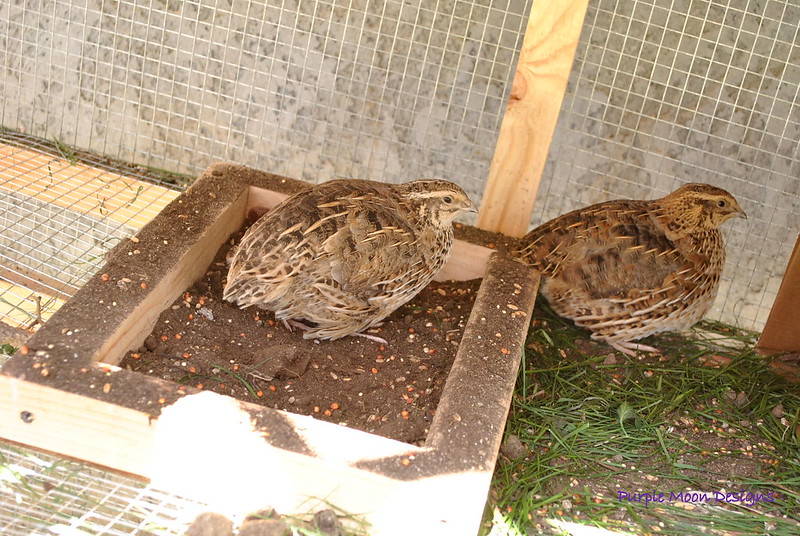 Photo courtesy of Purple Moon Designs
 But Quail are Tiny!
When I first heard about raising quail for meat, my instant reaction was that it was impractical. I mean, quail are pretty small birds. Why raise them when you could raise bigger chickens or ducks or geese? The answer is actually quite practical: The time from hatching to butchering is darn fast.
Here's what I mean:
Let's say you get yourself some fertilized coturnix quail eggs. (Coturnix - sometimes also called "Japanese quail" - are the variety most typically raised for meat.) In just 18 days, those eggs will hatch. Just six weeks later, those chicks are mature and laying eggs. By eight to ten weeks of age, they are ready to butcher.
And coturnix quail math is way better than chicken math. Let's say you start with five females (hens) and one male (cock) quail who give you about 35 eggs per week. Of those, let's say you keep some eggs to eat and incubate only 25 eggs. Then let's say you get a really conservative hatch rate of 60%. That's 15 chicks born. Because I want to stay conservative with the numbers, we'll assume three of those chicks don't survive; that leaves 12 chicks. In about nine weeks, you can butcher them and get three meals from their meat.
This means that in about 12 weeks you get 12 mature quail which give you one meal a month for three months. That's quite a bit of meat achieved quite quickly from a really small number of animals.
Raising Quail for Meat:The Positives
 Our brooder set up.
In addition to their quick hatch-to-freezer time, quail require little space. There are plenty of people living in the suburbs who are raising quail for meat. You could even raise them in the city if you have access to a rooftop.
Most people raise their quail in rabbit cages, which can be stacked one on top of the other (with poop trays in between, of course). This is a tiny footprint! (Some people raise quail in an aviary - basically an entirely fenced and topped chicken-style run. These also tend to have a small footprint, since quail are aren't large birds.)
In addition to safe housing, all quail need is fresh water and some feed (game bird or flock feed that is 21% to 25% protein). It is kind (and smart) to also give them a small, shallow Tupperware type tub with sand so they can take dust baths - and of course they love weeds and other treats, just like chickens do.
And let's talk butchering. Quail are probably the easiest animal to butcher. Many people cut off their heads with sharp poultry scissors (which is instant and painless for the bird) and then skin the birds, so there's no plucking involved.
 Quail chicks inside the brooder.
Raising Quail for Meat: The Negatives
The big down side to raising quail for meat is that they aren't self-sustaining. For example, I could raise heritage breed chickens and not give them any feed as long as I let them free range and forage for food. They will lay fewer eggs and they will take longer to come to butchering weight, but it's still do-able. Not so with coturnix quail, who are generally poor foragers. (I know some people who've tried to feed their quail bugs or worms and the quail won't touch them.) So buying feed is necessary.
In addition, you really do need an incubator. Coturnix quail, by and large, don't go broody (i.e., they won't sit on their eggs). And when they do go broody, they don't usually sit on their eggs long enough to actually hatch them. There are exceptions (and if you get a good broody quail hen, you'll definitely want to hang on to her), but you should not plan to hatch quail naturally.
How to Set Up for Meat Quail
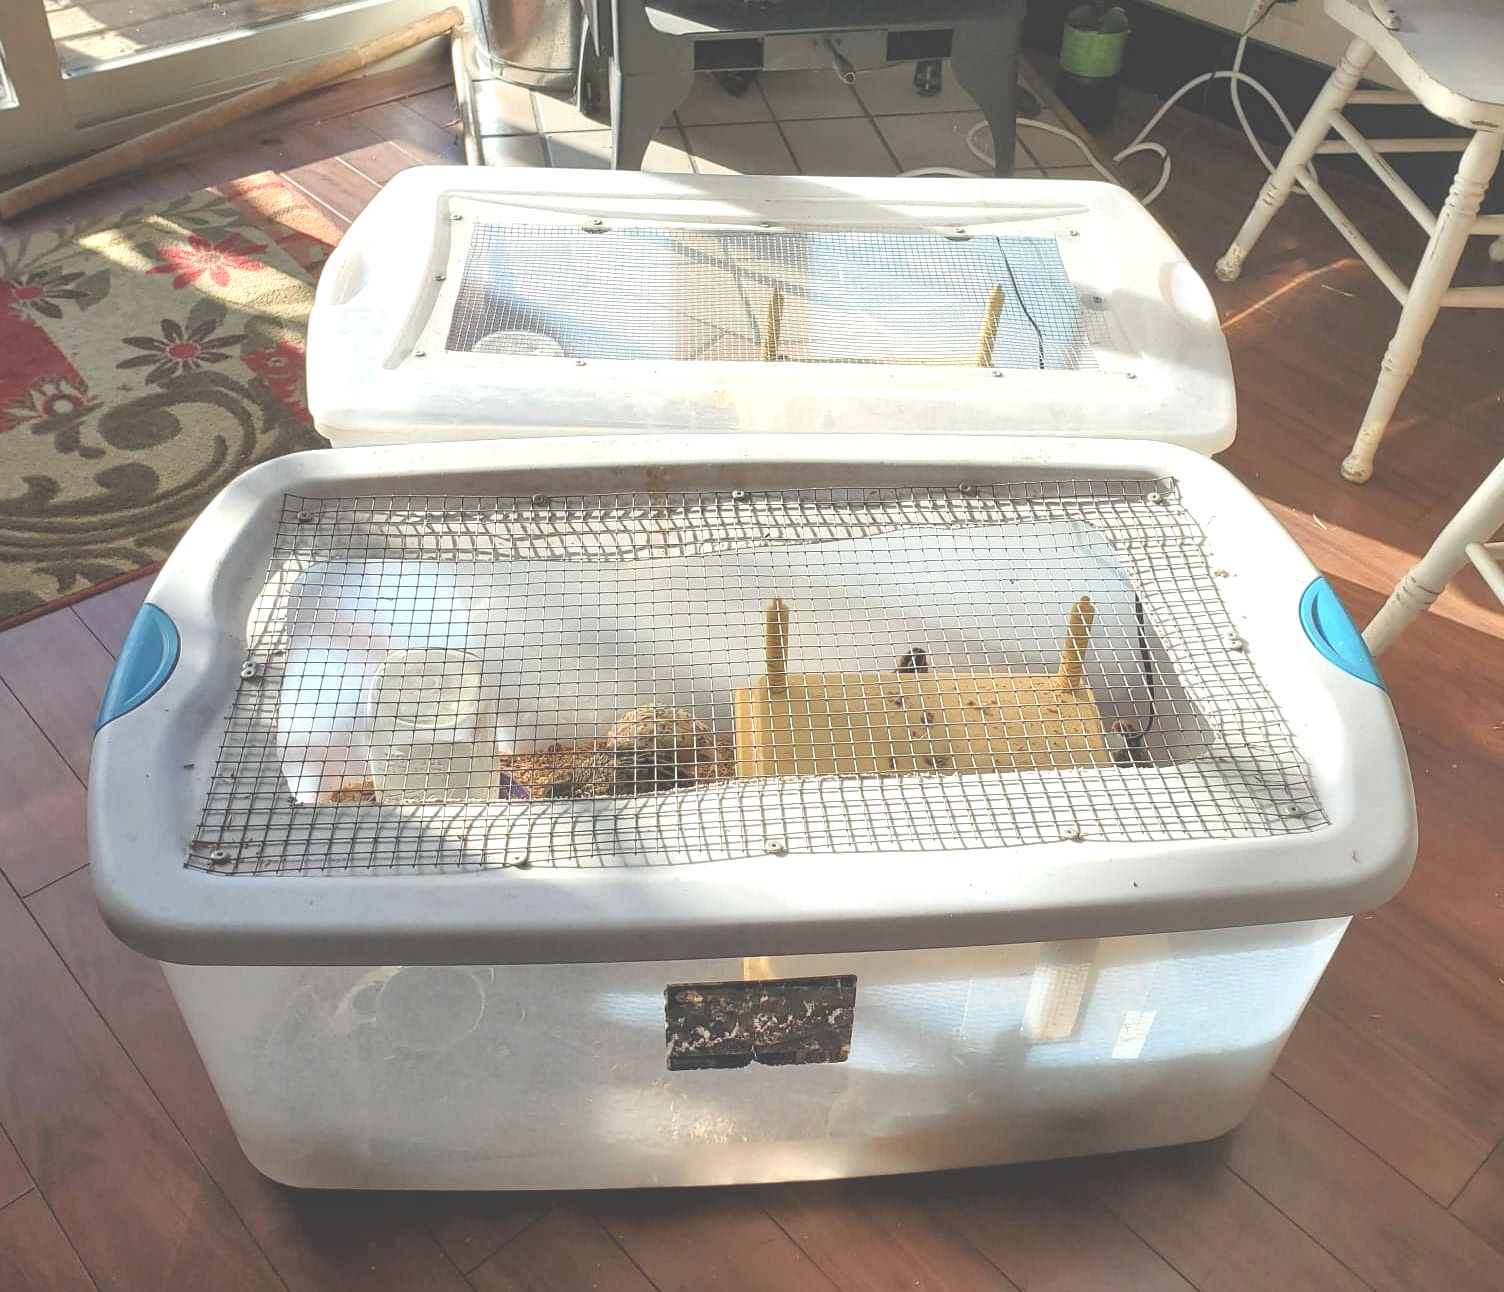
In addition to an aviary or stacked cages, you will need a brooder box. Just like baby chickens, baby quail require warmth during their early days, and they won't get that from the other mature quail in your flock.
The set up is basically the same for quail as it is for chickens. For example, you can use a Rubbermaid style plastic bin (see through is best) with hardware cloth inserted into the lid for air circulation. You'll also need a heat lamp or brooder hen (I recommend this one) to provide warmth for the chicks.
 Quail hatching in the incubator.
One thing that is different about quail, however, is their tiny size. For this reason, their waterer should either be a special quail chick waterer or just a shallow bowl or lid with marbles or rocks placed it in. (Quail chicks can and do drown even in shallow water. The marbles or rocks prevent this.) For the first week or so, it's not a bad idea to grind up their feed in a coffee grinder or food processor; otherwise, the food pieces may be too large for them to consume. (I met a lady online who literally starved her quail chicks to death by giving them feed that was too big for them to consume.)
Once the quail are about three to four weeks old, they won't need supplemental heat and will do fine in a grow out cage. At week six, they are fully mature and will begin laying eggs. Most people butcher between the ages of six to ten weeks.
And Eggs! Of course, quail lay eggs, too. They are tiny compared to chicken eggs, but still delicious. Some people who can't eat chicken eggs report success eating quail eggs instead. Do note, however, that coturnix are more sensitive to light than chickens are. Without supplemental light in the winter, your quail flock may not lay any eggs.
Title photo courtesy of Mike Verch.
August 27, 2020
GIVEAWAY + Review: The Beginner's Guide to Backyard Homesteading

This post may contain affiliate links. All opinions are my own. Please see FCC disclosure for full information. Thank you for supporting this site!
These days, there are an impressive number of beginning homesteader books to choose from, so when Rockridge Press sent me a copy of Lisa Lombardo's new The Beginner's Guide to Backyard Homesteading, I wondered: Will this book stand out from the crowd? After reading it, I have to say, "Yes!"
How so? Well, for one thing, Lombardo isn't one to meander. She offers succinct, practical advice, backed up by her years as a homesteader. She gets right to the point and uses checklists, charts, and even maps to help readers learn the information quickly. Secondly, I think Lombardo does a terrific job making this book a guide to creating a custom homestead that will truly work for your space and personality.
She begins the book by encouraging readers to come up with a homestead plan (much like a business plan, even for those who don't want to make money homesteading) and in each section of the book, she helps readers look at the feasibility of their plans: Are they going to work on your property? Are you actually going to be able to do the work in the amount of time you think you will? How much will it all cost? The Beginner's Guide to Backyard Homesteading is a book for people of action, and Lombardo does an admirable job helping readers create a practical homestead.

The book begins with the basics: Mapping out your backyard, understanding your soil and gardening zone, and creating a homestead plan. (If you want to be more organized, you're going to love all the templates Lombardo includes for tracking everything from animals to gardening expenses!) Then the book dives right into creating your homestead garden, covering all the basics, including crop rotation, succession planting, building raised beds, and selecting vegetables and herbs. Then comes coverage on fruits and nuts, as well as a more surprising chapter on growing grains and livestock feed (not a topic typically covered in books for suburban homesteaders). Next, Lombardo dives into raising poultry (mostly chickens), beekeeping, dairy animals (mostly goats), and meat animals (briefly covering critters like rabbits, pigs, and goats). These chapters do a good job of helping readers to understand what kind of yields to expect, how much the animals cost to raise, and how to prepare your homestead for them. The last chapter in the book covers extending your growing season, preserving food, running a homestead side business, and re-assessing your homestead. Lombardo caps off the book with a few recipes.
This is definitely a book to have if you need help organizing or just have little to no idea where to start in creating your homestead. I recommend it! To learn more, check out Lisa Lombardo's website.

Giveaway Time!
Lisa Lombardo and Rockridge Press also want to give away one copy of The Beginner's Guide to Backyard Homesteading to this blog's readers! This giveaway is only open to residents of the United States who are 18 years old or older. We are doing this old school: To enter, simply leave a comment on this blog post telling me one thing about your homesteading goals. The giveaway begins August 27th, 2020 and ends September 6th, 2020. If the winner does not reply to my email within 3 days, a new winner will be chosen. Good luck!
Images reprinted with permission from The Beginner's Guide to Backyard Homesteading.


![[image error]](https://1.bp.blogspot.com/-xUBgMgNjNdg/X2PQ9K-ANwI/AAAAAAAAR1k/-9vParkbHogTJ_mMZq15YfUKc2C-S7imQCLcBGAsYHQ/s2016/Mock-Apple-Crisp-Made-with-Zucchini.jpg)
![[image error]](https://1.bp.blogspot.com/-j9Hyy7yFbV4/X2PPmMa2HNI/AAAAAAAAR1M/xC0_ZBAYlKUYvxY1sSPkyZkGAOAGM404wCLcBGAsYHQ/s2016/Peeling-Zucchini.jpg)
![[image error]](https://1.bp.blogspot.com/-PwU0YZrVq6A/X2PQVYqWllI/AAAAAAAAR1c/J3kSS0YquqQV8rraXy0A1JamgUCqj8EKQCLcBGAsYHQ/s2016/Mock-Apple-Crisp-Before-Baking.jpg)
![[image error]](https://1.bp.blogspot.com/-U_E7MMW3e0s/X2PRZKiq9aI/AAAAAAAAR1s/4WSwwRYmPRsLl5UyHWCIWw4PWhSDz2ybACLcBGAsYHQ/s2016/Mock-Apple-Crisp.jpg)