
Kristina Seleshanko's Blog, page 16
June 4, 2020
The EASY Way to Can Chicken (a Video)
Canning chicken is one of the very easiest pressure canning projects you can do. Here's a new video that takes you step-by-step through the process (which, incidentally, you can also use for canning rabbit). To read the written instructions, click over to this post.


May 27, 2020
Choosing the Best Food Dehydrator
 As an Amazon Associate, I earn from qualifying purchases. All opinions are my own. Please see FCC disclosure for full information. Thank you for your support!
 One of the most common questions I see is "Which food dehydrator should I buy?" First, let me answer by giving some specific advice, then I'll offer you my personal opinion, too.
Choosing Solar or Other Methods
Before I get into selecting an electric food dehydrator, I recommend you consider two other methods of drying food at home. One is solar dehydration - the original way to dry food. This simple method can work great if you live in a dry climate, or if you're only drying food during warm, dry periods of the year.
The plus side to solar dehydration is that it requires nothing except food and a clean surface. My dad used to talk about how his Grandma (who, in the 1940s and 50s, was still wearing long dresses and making lye soap) cut up thick pieces of apples and dried them on a bed sheet out in the sun. It really can be that simple! Or you can purchase baskets to hang in a sunny spot, or you can build a solar dehydrating "machine."
The downside to solar dehydration is that it just doesn't work in a humid or damp environment.
Another option is to use your oven. The end result won't be as high in quality as if you used a good electric food dehydrator, but if you're just starting out and aren't sure if you will like home dehydrated food, or if you just have small quantities to dry, it's worth trying. To make this method work best, turn your oven to its lowest setting, keep the door ajar, and place your food on a wire cooling rack on top of a rimmed baking sheet. If your oven has a warming drawer, this is an even better option. Click here for more details on that method.
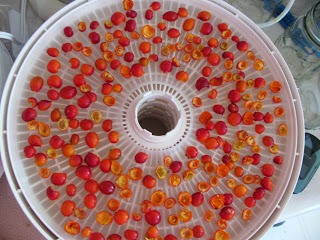 Dehydrating rose hips.
Choosing an Electric Food Dehydrator
If you want to dry a lot of high-quality food, an electric dehydrator is your best bet. The following are must-have features:
* An adjustable thermostat that goes from 95 to 160 degrees F. This feature will produce higher quality food than a dehydrator without a thermostat. The lowest setting is for herbs, and the highest is for jerky - but even if you don't see yourself drying herbs or jerky, pick a dehydrator with these temps; it shows the manufacturer is interested in quality.
* An enclosed heating element that's on top of the unit. Heating elements that are on the bottom get sticky from food drip and are therefore more likely to stop working. The heating element should have a fan or blower.
* Double wall construction. This makes the dehydrator more efficient and cuts down on drying time.
* A UL seal of approval. Again, this is a sign of safety and quality.
The Best Food Dehydrator
If I had an unlimited budget and could buy any food dehydrator I wanted, I would still buy the Nesco brand I have today. This is because:
* I can add or subtract trays. If I only have a little bit of food, I can run the machine with just a few trays, making the process more efficient. If I have a lot of food, I can add additional trays.
* They are workhorses! I've been dehydrating for about 14 years, and my Nesco American Harvests run from spring until late fall, nearly non-stop. They haven't broken down yet. (The new American Harvest model is a bit different from what I have. The Snackmaster Express appears to be most like my older American Harvests.)
* I don't mind paying more for something that works better, but in my opinion, the more expensive brands do not work better than my Nescos.
Some people are put off by the idea of rotating trays, which is what you'll need to do with any brand that allows you to add or subtract trays. To me, it's no big deal. In the morning, I rotate the trays. If the food isn't done by bedtime, I do it again at that time. Nescos work extremely well and I see no reason to buy an expensive Excalibur or Cabella's machine to take their place.
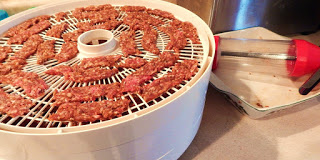 Dehydrating ground beef jerky.
Add Ons
Over time, I purchased more trays for my Nescos, to increase their capacity. I also have fruit leather liners, which are useful for making fruit roll ups, drying smaller items (like blueberries), or for liquids.
Sometimes you can also buy smaller mesh liners for trays, designed to hold items like small herb leaves. Instead, I just dry herbs while they are still on the whole stem, then strip the leaves off once they are dry.
If you're just starting out and you don't want to buy either of these add-ons, a simple solution for things that want to fall through the trays is to use parchment paper. If your dehydrator has a hole in the center, this is for proper air flow; be sure to cut the parchment paper so it doesn't block that center hole.
Related Posts:


May 12, 2020
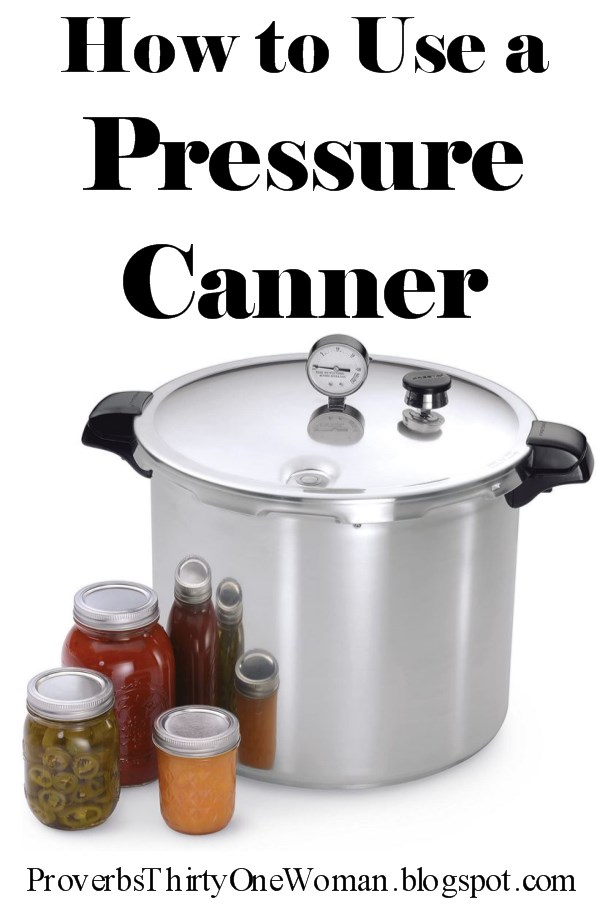
Canning 101: How to Use a Pressure Canner
 As an Amazon Associate, I earn from qualifying purchases. All opinions are my own. Please see FCC disclosure for full information. Thank you for your support!
 Any discussion about pressure canning must first begin with the question: "Why do I need a pressure canner?" For canning purposes, food can be divided into two groups: Low acid and high acid. High acid foods (which include fruits and pickled foods) are safe to can in a water bath canner. (Learn about water bath canning here.) Low acid foods (which include meat and non-pickled vegetables) must be processed at 250 degrees F. in order to kill off dangerous micro-organisms. Because water bath canners only reach a top temperature of 212 degrees F., they cannot kill off those micro-organisms, no matter how long you boil the food or process it in the canner. Therefore, a pressure canner, which can easily reach 250 degrees F. internally, is necessary for safely canning low acid foods. (To learn more about the importance of pressure canning low acid foods, please see "What You Need to Know About Botulism.")
It's extremely common for people to feel afraid of pressure canners. I admit, when I first used one (over a decade ago), I was completely intimidated by all the gauges and vents. It didn't take me long to realize, however, that pressure canning was really no more difficult than water bath canning. And if you're afraid your pressure canner is going to explode - don't be. If you stick to the top brands (Presto and All American), they are sturdy suckers with lots of safety features. They will not explode, unless (as the Boston Marathon bombers did) you try to make them do so!
If you're just starting out in pressure canning and don't want to invest a lot of money, I suggest buying a 23-quart Presto pressure canner. It works great! You should also buy an extra rack so you can double stack pint jars inside the canner - and I recommend buying a rocker gauge so you don't have to worry about the accuracy of the dial gauge that comes with the canner. (Please see this post for complete information on these features, and for a thorough comparison of Presto and All American pressure canners.)
Do also note that there is a difference between pressure cookers and pressure canners. Some manufacturers of pressure cookers like to say you can pressure can in them, but that is not safe. For more on this topic, please see "Pressure Canners vs. Pressure Cookers" and "Can I Use My Instant Pot Pressure Cooker for Canning?"
What You Will Need:

A pressure canner (not a pressure cooker!)
Canning jars
Canning lids and screw bands (Lids can't be reused, but screw bands can; new jars come with both lids and screw bands.)
Jar lifter
Plastic or wooden-handled utensil
Cooling rack or bath towel
Plus, whatever you'll need to prepare the food you're canning, like a knife and cutting board
How to Use a Pressure Canner:
1. Begin by inspecting your pressure canner's lid. Using the manufacturer's guidelines, check all the vents to ensure nothing (like food particles) is blocking them.
2. Wash the canning jars, lids, and screw bands. Jars do not need to be sterilized before canning. The canning process itself will sterilize them. (For more on this topic, click here.)
3. Fill the pressure canner with water, according to the manufacturer's directions. With the Presto, there's a line on the side of the canner to show how high the water should reach.
4. Place the prepared canning jars inside the canner, sans lids and screwbands. Place the canner on a large burner, over medium-high heat. (The idea here is to slowly warm the jars, so they don't break from heat shock.)
5. Prepare food according to a trusted recipe. My preferred source is the Ball Complete Book of Home Preserving, but other safe sources are The Ball Blue Book , the Ball website, and The National Center for Home Food Preservation website. Canned food can spoil or cause serious illness if you use a recipe that's not tested safe for home canning.
6. Using a jar lifter, remove one empty jar from the canner. Fill it with food. The recipe will tell you how much "headspace" (i.e. space between the top of the food and the top of the jar) is necessary.
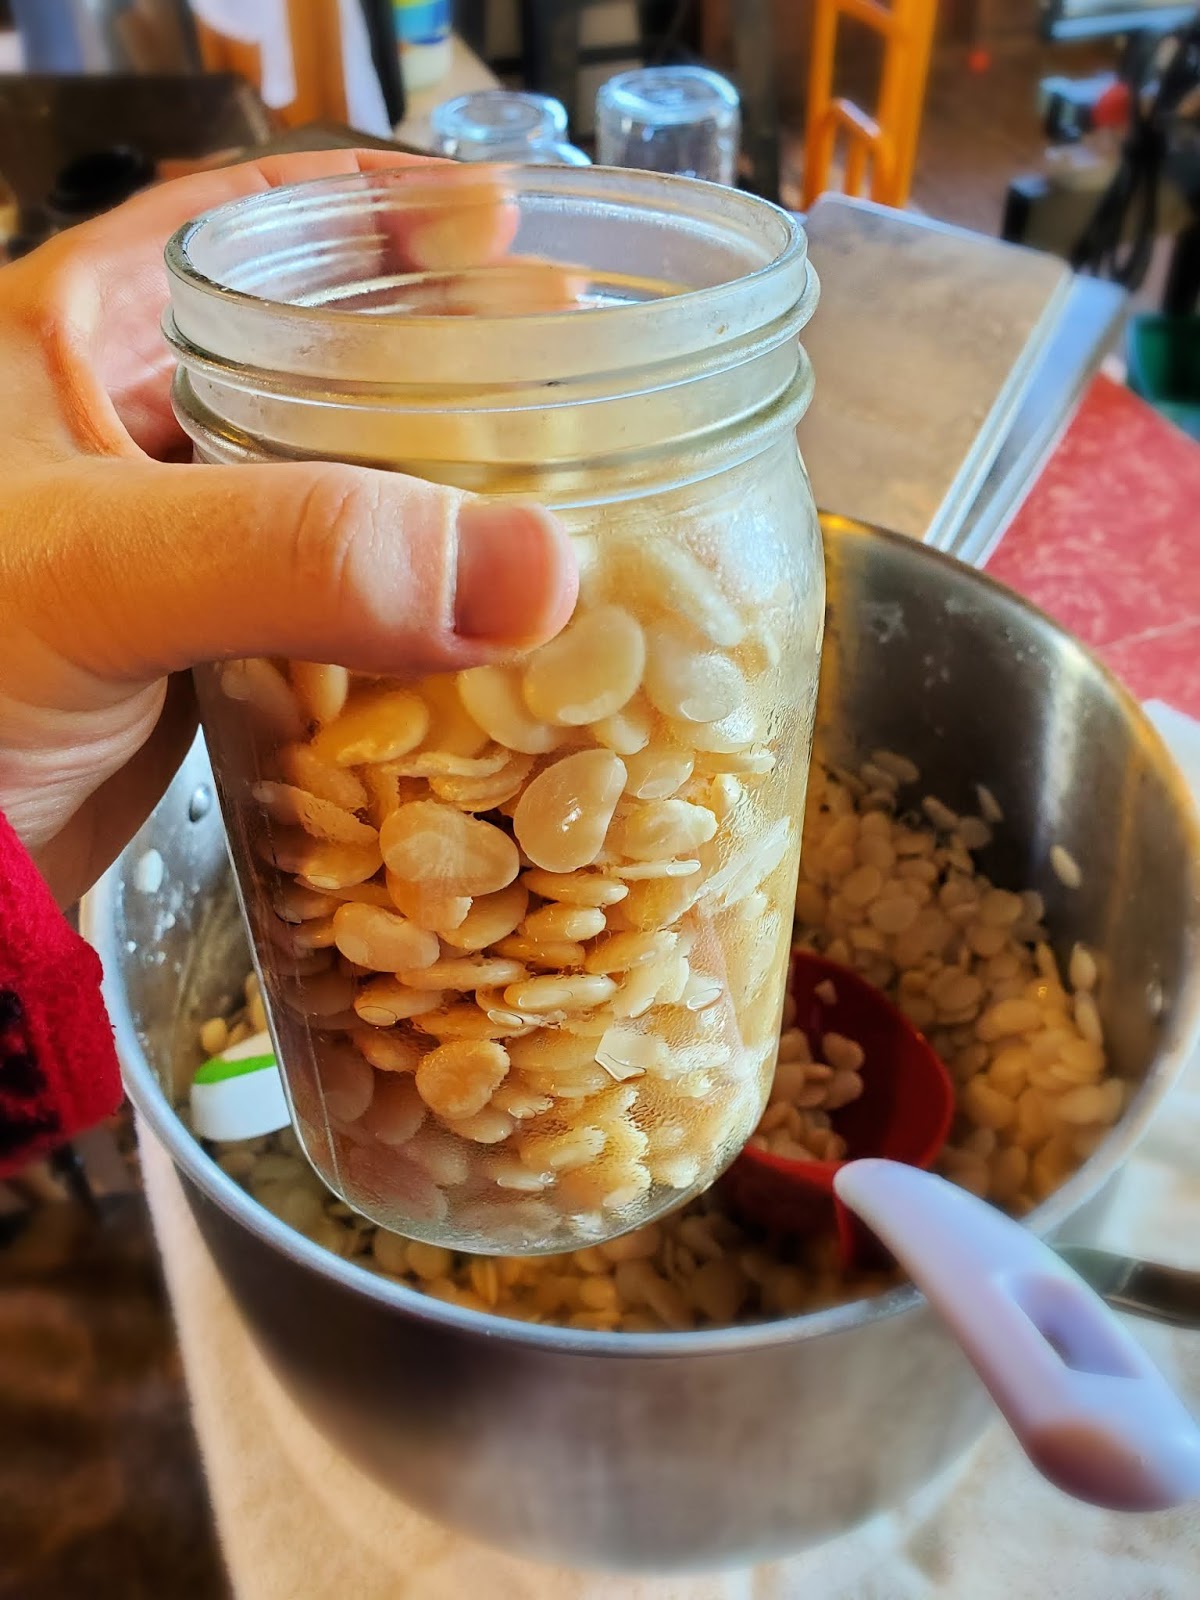 Beans should be pressure canned. Here, I'm filling a jar with rehydrated lima beans.7. Using a wooden or plastic handle (from a spoon, spatula, or some other utensil), remove any bubbles from the jar. Use an up and down (not round and round motion). Do not use a metal utensil because it may damage glass jars.
8. Wipe the rim of the jar with a clean, damp towel. Putting a bit of white vinegar on the towel will do an excellent job getting that rim really clean - the first step toward getting a good seal on the jar.
9. Put a lid on top of the jar.
10. Place one screw band on top of the jar. Screw the band in place until you just begin to feel resistance. Don't screw down hard.
11. Using a jar lifter, place the jar in the canner.
12. Repeat steps 6 through 11 with another jar, until all the food is in jars.
 Warm, filled jars in the pressure canner just before processing.13. Place the lid on the canner and lock it according to the manufacturer's directions. It may take several minutes for the water to boil, but you'll know it's boiling again when steam begins coming out of the vent at the top of the canner. Allow the steam to vent steadily for 10 minutes; see an example of venting in the video below.
14. Place the weight on the vent. (The weight comes with the pressure canner and is a sort of lid for the vent hole. See photo to the left.) If you're using a rocker gauge, use it instead.
15. If your pressure canner has a dial gauge (as shown to the left), wait until the gauge reads 10 pounds pressure before you begin timing how long your food should process. NOTE: If you live above 1,000 feet elevation, you must increase the amount of pressure used. (The processing time does not change; only the pressure changes.) Go here to discover your approximate altitude...and follow these guidelines.
If your canner has a weighted gauge, follow the manufacturer's instructions about how to use it to maintain pressure and time the processing of your food. Below, you can see a video of the rocker gauge on my Presto when the canner is at the appropriate pressure for safe canning.
16. Regulate the heat in the canner by watching the gauge and keeping it at the recommended pressure level. If necessary, turn the burner heat slightly up to increase the pressure level, or turn the heat slightly down to decrease the pressure level. Rapid changes in temperature inside the canner can lead to food siphoning out of the jars, which often leads to seal failures.
17. When the recipe's specified processing time is up, turn off the burner and let the canner cool. Do NOT remove the lid. Do NOT remove the vent weight. Do NOT place a damp towel or cold water on the canner, hoping to cool it faster.
18. When the canner gauge reads zero, let the canner sit an additional 5 minutes. Remove the vent weight. Unlock and remove the canner lid, letting the steam in the canner escape in the opposite direction from your face and body. ( HINT: The lid should come off easily; if it doesn't, give the canner another few minutes to sit, then try again.) Allow the jars to sit in the open canner for 10 minutes.
19. Remove the jars, one at a time, using a jar lifter. Place them on a strong cooling rack or on a towel placed atop your kitchen counter. Make sure that as you move the jars, you keep them upright. At this time, don't try to wipe off the jars or lids because this may prevent the lids from sealing properly.
 Pressure canned lima beans, cooling.10. Allow the jars to cool, untouched and undisturbed, for 24 hours.
21. After 24 hours, check to see if the lids have sealed: Press down on the center of each lid; a properly sealed jar lid will not move.
22. Be sure to write the contents and the date on each jar's lid.
RELATED POSTS:

Canning Chicken

Canning Chicken Soup

Canning Stew Meat

Canning Ground Beef

April 29, 2020
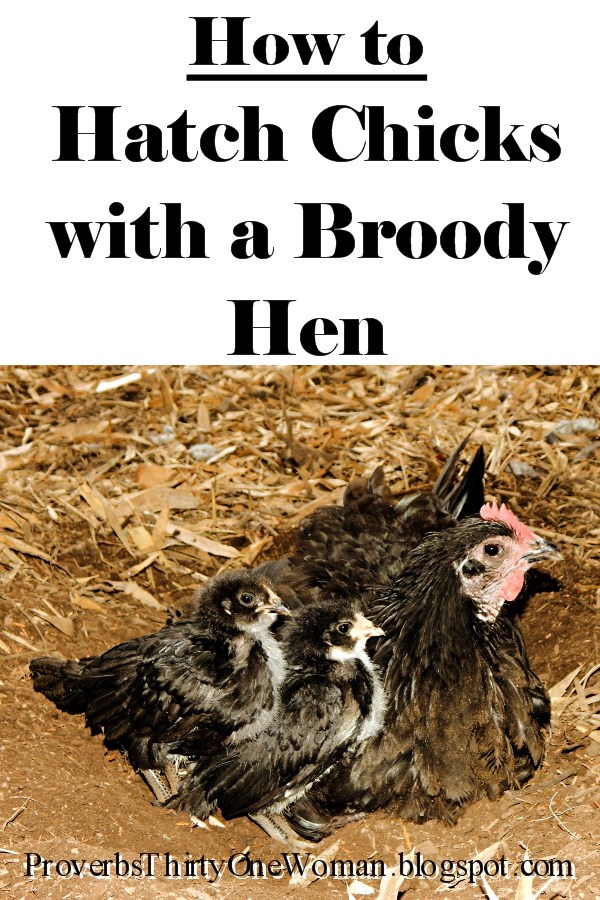
How to Hatch Chicks with a Broody Hen
 As an Amazon Associate, I earn from qualifying purchases. All opinions are my own. Please see FCC disclosure for full information. Thank you for your support!
 Do you have a hen who sits persistently on eggs? Some people get frustrated when this happens, but being the frugal and practical homesteader I am, I've learned to embrace this behavior as mostly useful. I don't care for keeping chicks in a brooder, and I dislike the expense of buying fertilized eggs and an incubator. When possible, I'd rather let a hen do all the work for me!
Unfortunately, allowing hens to hatch and care for chicks is a dying practice. Commercial hens are bred to minimize their "broody" (i.e. motherly) behavior (because broody hens don't lay eggs and a hen that's not laying eggs costs the farmer money). Even backyard homesteaders tend to see broody hens as a "pain." Therefore, there's very little information in books or magazines on how to raise chicks with a hen. This article hopes to correct that by showing you what works for me.
Broody Chicken Breeds
I was blessed to begin with an excellent breed: Australorpes. I've blogged before about how they are my favorite breed: gentle and docile, excellent layers (even through winter), not caring about hot or cold weather...but they also happen to be good mothers and are more likely to go broody than some breeds. Other breeds that may have a stronger proclivity toward broodiness include: Ameraucana, Araucana, Light and Buff Brahma, Cochin, Buff Rocks, Dark Cornish, Delaware, Dominique, Dorking, Holland, Java, Jersey Giant, New Hampshire, Buff Orpington, Plymouth Rock, Turkens, Cuckoo Marans, Sussex, Cochin bantams, Cornish bantams, and Silkies.
But even when you choose good breed, not every hen will go broody. One thing I have learned, however: Don't judge a hen too soon. It can take a year or two before even the best mother hen decides to go broody.
 Our rooster, Joe.First, Fertilized Eggs
We were thrilled to add a rooster to our flock a couple of years ago. He's a good protector of the flock and our girls just seem happier with him around. And, of course, he fertilizes our eggs. (Some people think fertilized eggs have blood spots in them, but this is a myth. And yes, fertilized eggs taste just like unfertilized eggs. Only upon close examination of an uncooked yolk can you tell that the egg is fertilized. Click here to learn how.) Young roosters may not get the job done consistently, though, so bear that in mind.
But what if you don't want or can't have a rooster? Fortunately, you can buy fertilized eggs. Look for ads on Facebook Marketplace and Craigslist. Or, conspire with another homesteader who has a rooster. I'll bet you can make a nice barter for fertilized eggs.
Encouraging Broody Behavior
When it comes to successfully and naturally hatching chicken eggs, some seasons are better than others. It's difficult for chicks to thrive when the weather is very hot or very cold, so plan accordingly. Fortunately, a good broody hen knows this, and she'll tend to only go broody when the timing is right - usually in spring (and sometimes in early fall).
To encourage your hen to go broody, there are a few things you can do. The most obvious is to leave the eggs in the nesting box, rather than collecting them. Some people like to put a "clutch" of golf balls or other fake eggs in the nest instead.
You'll know the hen is ready to be a mama when she refuses to leave the nest even when shooed away and she spends all her time on the clutch. After a few days have passed, she'll pluck feathers from her breast (so her skin is in direct contact with the eggs) and her body temperature will noticeably rise.
Preparing the Nest
 One of our broody hens feeling protective of her clutch.
It's certainly fine to allow the hen to make her own nest, but sometimes it's better to give her a little help. The biggest problem I've seen is that when the hen gets up from the nest for a quick bite of food or a little drink, the other hens may invade her nest. This can not only lead to broken eggs, but it can cause problems at hatching time. If there are eggs of multiple ages in the nest, obviously not all of them will hatch at the same time. This can lead to eggs that must be thrown away due to immature chicks inside them. (Some hens will refuse to leave unhatched eggs in the nest, which means they aren't properly caring for their chicks.)
This is why I think it's better to place the broody hen in her own, separate cage. It doesn't have to be big - just big enough for the nest, some water, and some food - but it must be predator-proof and offer shelter from the weather. A rabbit hutch or small chicken run with a roof and plenty of bedding works well.
Because transferring the hen and her eggs can lead to the hen refusing to sit, I like to collect fertilized eggs until I have the number I want to hatch. Examine each egg for cracks, holes, or odd shapes or sizes. Place only the most perfect eggs in a plastic egg box that's been washed in hot, soapy water. (Why not use ordinary egg cartons, you may ask? They may have bacteria that will transfer to the eggs, causing hatching woes.) Store the eggs point-side down in a cool location (ideally 55 degrees F., out of direct sunlight). To help prevent the embryos from sticking to the shells, place a book under one end of the container; each day, move the book to the opposite end of the container.
Every day an egg goes without incubation, it becomes a bit less viable. It is generally not considered hatchable after 7 days.
Never wash eggs you wish to hatch, since this removes their natural bloom, which protects the chicks from bacteria.
How many eggs should you collect for hatching? Generally, most hens can sit on up to a dozen eggs of the size they naturally lay. If you're unsure, collect more than you think you need, and if you find the hen has more than she can handle after a day or two of sitting, remove the excess.
Transfer the collected eggs, and then the hen, to the prepared nest. Don't worry if the hen doesn't immediately sit on the eggs. She can take up to a day to begin sitting in earnest and still have a successful hatch.
A word of caution: Lice and red mites can kill sitting hens, so a thorough examination is necessary before you let any hen sit on a clutch. If your flock has had red mite issues in the past, it's best to dust the hen with red mite powder, even if you see no signs of mites.
Caring for a Broody Hen
Even though broody hens don't eat or drink much, check her water and food levels every day, giving fresh water as needed. (Hens may lose up to 20 percent of their weight while incubating eggs; this is why hens should never be allowed to raise more than 2 clutches a year.)
It's also smart to pay attention to how much the hen is sitting. Some hens start out very broody, but lose interest and don't sit enough to keep the eggs warm. If that happens, you're out of luck and will need to throw the eggs away.
Some people like to candle eggs to ensure the hen isn't sitting on any rotten ones. But remember: every time you handle eggs, you increase the risk of hatching problems. The benefit of candling is that you can remove eggs that don't have developing embryos; if you leave them in the nest, they'll rot, making a stinky mess if they break.
Always remove any smelly eggs or eggs the hen rejects.
If you choose to candle the eggs, handle them gently, removing and replacing them one at a time. It's best to wait to candle eggs until day 7. After day 15, don't handle the eggs again.
 Our hen caring for a few of her chicks.Hatching
Around day 21, the chicks should begin hatching. Typically, they'll hatch out within a few hours of each other, but it can take anywhere from 12 hours to 3 days for the entire clutch to hatch.
After a few chicks are born, the hen will do one of three things. She'll either get off the nest to care for her chicks, leaving the remaining unhatched eggs to rot. Or she may remain on the nest and not do much for her hatched chicks (which is okay if you've isolated the hen and she still lets the chicks get warm under her). Or, most typically, the hen tends to her babies, leaving the eggs for a short time, but returning to sit if she senses the chicks within are still viable.
 Keep the chicks separate from the rest of the flock.Protecting the Chicks
 Once all the viable eggs have hatched, keep on eye on the hen to ensure she's a good mother. In rare instances, she might peck and kill the chicks, or ignore them altogether.
In addition, you'll need to put a chick waterer and feeder in the cage. Within days, a good mother will show her chicks how to use them.
I recommend letting the hen and her chicks stay in a separate cage for at least a week. Some people transfer the mother and babies to the main hen house right away, but mother hens are not always good at protecting their chicks. Also, as I learned the hard way, if you have a hen house that's raised off the ground, chicks may fall off the house ramp and die. Instead, I now put the mother and chicks in an old wire run set inside the main chicken run. (I cover the wire run with a tarp at night.) This gives the mother and chicks more room while also allowing the rest of the flock to get to know the chicks.
Wait at least a week before allowing the mother and chicks to enter the flock without protection. Stand by and make sure the other chickens don't harm the babies, though it's normal for them to peck the chicks out of curiosity. A good mother will peck and chase off any bird that comes near. If all seems well, leave the flock for perhaps 30 minutes, then check them again. Check periodically throughout the day until you are satisfied the mother can protect her chicks from the flock.
Final Pointers
The mother hen will continue to do most of the work of raising the chicks, but you should ensure there are plenty of water sources available, since occasionally fully grown chickens may bully chicks away from waterers. Also pay attention to the height of the waterers. If chicks can't easily reach them, set out supplemental chick waterers.
In addition, pay attention to what type of feed you offer. If you've been giving the chicks medicated starter feed, you'll need to switch to a non-medicated variety - because adult chickens love chick food. At 8 weeks, the chicks are ready for grower feed, which ups the protein they consume, ensuring optimal growth. Another option is to switch directly to flock feed once the chicks are integrated with the rest of the chickens; some experts say this doesn't provide enough protein for chicks, but this is less of a problem when your flock gets some free-range time than if your flock is caged. Whatever feed you select, don't give chicks layer feed; its high calcium levels can damage their bones and muscles. A good rule of thumb is to switch to layer feed at 18 - 20 weeks.
Related Posts:


 Chickens 101: Buying Chickens and Caring for Chicks
April 24, 2020
Weekend Links & Updates: Why Now is a Great Time to Raise Food
 As an Amazon Associate, I earn from qualifying purchases. All opinions are my own. Please see FCC disclosure for full information. Thank you for your support!
 Our biggest homestead news is that my husband's female rabbit had kits! Unfortunately, they were born outside a nest, and despite efforts to save them, only one survived. It is a feisty little thing, though, and fat as can be since it has no competition for food.
We've also realized that Fiona and Fido are not Flemish Giants, as my husband was told when he adopted them. Maybe somewhere along the line they got a bit of Flemish in them, but they are most likely mutts, with Harlequin and New Zealand in their blood. (We've found that when buying rabbits you cannot trust what breed the seller claims they are, unless they come with pedigreed paperwork.)
Likely these were meat rabbits...and since we've been on the fence about how to add meat to our homestead, we kind of feel God dropped these rabbits into our lap for a reason..
Which brings me to the main focus of this post: Raising and growing food. There's really never a bad time to plant a garden. But folks, there has never been a better time to grow veggies and maybe raising some meat, too. I'll detail why below, but in the meantime, if you're considering how you can add meat to our homestead, rabbits are a good choice, even if you live in the suburbs. Check out this post for details. Other easy ideas include quail and chickens, which can both be raised for eggs, also.
What if you don't want to or can't raise meat? Then I highly recommend you grow as many edible plants as possible. I predict food prices will go to go way up. Actually, where I live, they've already begun escalating. By raising vegetables and maybe some fruit, you can at least save your money for food you can't grow. The evidence is stacking up:
* 2 million chickens slaughtered over Caronavirus staffing issues
* Half a dozen meat processing plants shut down because of coronavirus outbreaks
(these are huge plants, people!)
* A relatively small number of plants process much of the beef and pork in the United States, and some of them have closed because workers are getting sick
* Farmers dump milk, break eggs, as coronavirus restaurant closings destroy demand
* Coronavirus supply chain issues cause tons of wasted food
* Some farmers have had to begin dumping potatoes
* Dumped milk, smashed eggs, plowed vegetables
Yes, the feds are working on a relief program for farmers, but the fact remains that costs will trickle back to consumers. Combine that with food shortages due to people stocking up as the federal government has recommended, and many of us are seeing lots of empty grocery store shelves.
The good news is we are at the perfect time of year for starting a garden. We are at a great time of year for foraging wild plants. We are at a very good time of year for snatching up baby animals to raise for meat or eggs or dairy. This is God's grace to us, in a time of uncertainty. I hope you'll consider growing or raising something - even if it's only on a small scale.
Ok, onto the more usual favorite links!...

* My book "The Ultimate Dandelion Cookbook" is FREE on Kindle Unlimited right now. This time of year is great for getting to know the edible and medicinal uses of the common dandelion. (If you don't have a Kindle, don't worry; the book is affordably available in both digital and print editions. Learn how to read Kindle books on any digital device by clicking here.)
* Bummed that you can't find baking yeast in the store? Make your own yeast!
* Good advice here: 7 Tips for Starting Seeds.
* Got old seeds you're not sure will work anymore? Here's how to test them!
* Want to boost your harvest? Learn How to Improve Soil Quality in Your Garden.
* How to Grow Food in as Little as 3 to 4 Weeks.
 * Quick Teriyaki Chicken is a meal my family loves...and it's pretty simple, with few ingredients, too. I serve it with steamed broccoli and I don't add any sweetener.
 Oldies But Goodies:
The Biggest LIE About Growing Tomatoes
15 Tips from the Great Depression
Homemade Yogurt in a Crock Pot
How to Plan a Medicinal Herb Garden
April 21, 2020
Foraging and Eating Sheep Sorrel
 Sorrel, in general, is one of my family's favorite wildcrafting foods because it has truly terrific flavor. We have two types of wood sorrel (often confused with clovers) - and just recently I realized we have sheep sorrel (Rumex acetosella), too!
 Take one bite of sheep sorrel and you'll see what I mean about flavor: It is lemony, tangy, and refreshing. We mostly eat the raw leaves as a snack or in a salad, but you can use them any way you'd use lettuce or spinach. (One favorite culinary use is to stuff freshly-caught fish with sorrel leaves.)
Dried leaves can be made into herbal tea. Dried and ground, the leaves are used as a thickener for soups or even as a flour substitute for noodle-making. (I haven't tried that personally, but I would use the recipe for dandelion or spinach noodles, subbing out sorrel for the other greens.)
The seeds are also edible, either raw or cooked.
The roots can be used in soups or chopped up in salads, or they can be dried and made into tea.
Sheep sorrel leaves are high in vitamin C and E, beta-carotene, and other carotenoids, and are a strong antioxidant.
In addition, sheep sorrel has traditionally been used as medicine - particularly for inflammation, scurvy, sinusitis, fevers, treating intestinal parasites, and diarrhea. The plant is also a diuretic and is used topically for rashes and eczema. It has antibacterial properties, also.
Rather notoriously, sheep sorrel is an ingredient in essiac tea, a supposedly cancer-fighting tea invented in the 1970s. (No studies support its use as a cancer fighter.)
Other names for sheep sorrel include field sorrel and red sorrel.
Sheep Sorrel Recipes
Tangy Sorrel Salad
Sorrel Soup
Salmon with Sorrel Sauce
Steaks with Mushrooms and Sorrel Sauce
Sorrel Borcht
Sweet Sorrel Tart
Butter Braised Radishes with Sorrel
Chicken with Sorrel
Chicken Sorrel Soup
Sorrel Pesto
Hint: You may use sheep sorrel as a substitute in recipes calling for other types of sorrel, including garden or French sorrel. Just realize that you'll have to harvest quite a bit more sheep sorrel than you would cultivated varieties, since wild sorrel has smaller leaves.
Identifying Sheep Sorrel
I first noticed sheep sorrel when weeding in early spring. Its leaves have a unique shape; if you use your imagination, they look like a sheep's head, complete with ears. The leaves are smooth (not hairy) and there is only one leaf per node. The lower leaves may lack the lamb's ear shape. Sorrel generally grows in patches, so if you find one plant, there's almost certainly more nearby.
 Sheep sorrel's unique leaves.
 A sheep sorrel plant at the time of seeding.
 Young sheep sorrel is low growing. Courtesy of Forrest and Kim Star and Wikipedia Commons.Another easy way to initially spot sheep sorrel is when the plant sends up seeds, later in the spring. These rosettes of seeds are reddish in color and easy to see amongst grass or other weeds. At this stage, the plant grows up to 12 inches high.
 A patch of sheep sorrel, with its red seeds above the other weeds in the area.
 Sheep sorrel seeds.
Sheep sorrel flowers, too. The female flowers are typically greenish and the male flowers more yellow or red. Unlike many plants, however, when sheep sorrel flowers, it's leaves are still quite tasty. This makes it a valuable wild edible available spring through fall.
 Male flowers. Courtesy of Harry Rose and Wikipedia Commons.
 Female flowers. Courtesy of Harry Rose and Wikipedia Commons.Sheep sorrel is not native to North America, but was brought over from Europe and Asia. It loves acidic soil or sandy soil and tends to thrive in grasslands. The first batch I found was growing around our blueberries, which is a pretty common place to find it, since blueberries also love acidic soil.
Cautions
The tart flavor of sheep sorrel is attributed to oxalic acid (which is also found in common veggies like spinach). If eaten in very large quantities, this oxalic acid can cause illness, including diarrhea, stomach pain, and abdominal cramping. If your doctor puts you on a low oxalate diet, avoid sorrels of any kind.
Do not use aluminum or cast iron cookware when preparing sorrel, as they may interact with the plant and cause a metallic flavor.
Never eat any plant unless you are 100% certain you've identified it correctly.
Related Posts:


April 15, 2020
Easiest Vegetables & Fruits to Grow
 If your parents didn't teach you to garden, if you've never tried (or had success) growing houseplants, if you can barely keep your lawn looking decent, starting a vegetable garden can be intimidating.
But if you've decided the benefits (more food security, more self-sufficiency, better nutrition, fewer or zero chemicals, and lower grocery bills) outweigh your fear, start with edibles that are easy to grow. (And, hey: Although I'm a good gardener, I'm no good with houseplants, either!)
Happily, a great many edibles are easy to grow - as long as you have decent soil, have chosen seed that grows well in your area, and are giving the plant the correct amount of sun. Here are a few I recommend trying:

Kale and Collards
These are my number one choice for new gardeners because they are so forgiving. They don't even mind a little bit of shade. In fact, kale and collards grow like weeds - and if you harvest only the outer leaves (allowing the three center leaves to remain), they will produce well into the winter months. I suggest not waiting until the leaves are as huge as supermarket kale or collards; the older, bigger leaves are more bitter and tough.
Green Beans
There's a reason school teachers often use beans for classroom lessons on seed sprouting: Plop 'em directly into the ground and they will thrive! Warning: You may have a tough time getting any green beans to the table once your family learns how fabulous they taste picked fresh off the vine. Heirloom varieties are usually pole beans, which require a trellis to climb. Bush beans are usually hybrids (which is not the same as GMO), but take up less space.

Radishes
Plant these seeds in the soil in early spring and radishes can be your first crop of the year. In addition to eating them raw, you can cook them like any other root vegetable. I use them as a substitute for potatoes (as in this stew); cooked, they lose their peppery flavor.
 Cucumbers
Whether you like them fresh in salads, want to dehydrate them to make "chips," or want to pickle them in your water bath canner, cucumbers are a vining crop that are easy to grow. Just plop those seeds directly into the soil and keep them moist, but not wet. If you want to make pickles, be sure to choose varieties noted for that use (and, for the crispiest pickles, can them the same day you harvest them).
 Tomatoes
Although tomatoes have a "difficult-to-grow" reputation in some circles, if you give them what they need, they'll produce abundant crops that make grocery store tomatoes seem like outright garbage. Start by giving them excellent soil. If you pot them, put them in a large pot - they need plenty of room for their roots. Make sure the pot has excellent drainage. Grow them in full sun. And feed them regularly with a good fertilizer. (For more details on growing tomatoes, read "How to Grow Epic Tomatoes.") Tomatoes come in two basic types: Determinate and Indeterminate. Determinate varieties are shorter and bushier. Indeterminate types vine.

Summer Squash/Winter Squash
Squash needs full sun and takes up quite a bit of room, but it produces like mad. (One way to make squash work in a small garden is to train it up a trellis, as shown in the photo to the left.) Zucchini (a type of summer squash) takes up less space than winter squash.
Carrots and Parsnips
If you don't mind carrots and parsnips that aren't perfectly shaped, you'll find these vegetables easy to grow and so much more delicious than store-bought. Perfectly shaped carrots and parsnips require soil that's completely free of rocks and debris; if you'd like try for that, get a large Rubbermaid style box, drill tons of holes in the bottom, and fill it with excellent, fine soil.
 Peas
PeasLike green beans, just plant pea seeds directly in the soil in early spring and late summer and watch them grow! They'll produce pretty flowers first, then superb food.
Garlic
Garlic is best started from cloves, and requires next to no attention while it's growing. It prefers full sun but will grow in part shade.
Herbs
Pretty much all herbs grow like weeds. Grow them in pots, or they may overtake your garden.
Lettuce
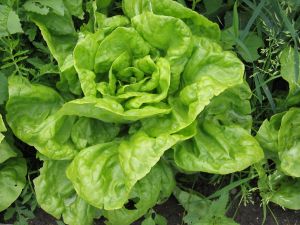 It's ridiculously easy to have fresh salad fixings available all spring, fall, and (in milder regions) winter. Lettuces don't even need full sun; in fact, they tend to prefer a little bit of shade. If you grow your own lettuce, you can experiment with a vast variety of colors, shapes, and tastes and supermarket lettuce will soon seem a bland, at best. To keep lettuces growing for the longest amount of time, remove the outer leaves first and always keep at least three inner leaves intact. One caveat: If your spring weather tends to go from cool to suddenly warm, your lettuce will tend to "bolt" - that is, start growing flowers - which will make the leaves taste bitter. If you want to avoid that, plant lettuce in late summer, when it can enjoy growing in cool fall temperatures.)
Strawberries and Blueberries
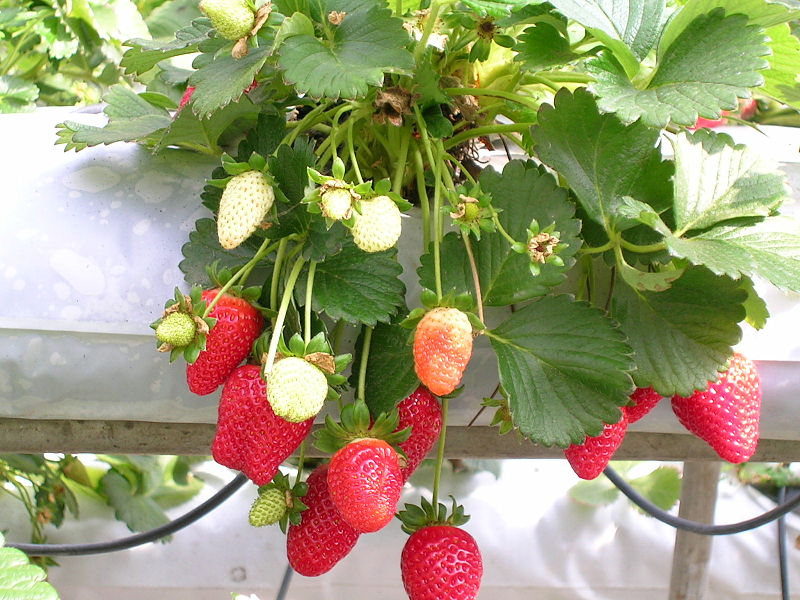
Strawberries are easy to grow from runners or plants, and while they do prefer full sun, I've had some luck growing them in part shade. Ever-bearing strawberries produce small quantities of fruit all summer and into the fall, whereas spring-bearing strawberries produce one large crop in late spring.
Blueberries are another good choice for an easy-to-grow fruit. Purchase young plants from a local nursery. They like acidic soil, so if yours is not (or you're not sure if it is), grow them in huge pots and feed them acidic fertilizer.
A version of this post first appeared on this blog in February of 2012.
April 10, 2020
Finding Easter During COVID-19
 Everything about Easter is different this year...and yet nothing is different.
It's true we aren't gathering inside churches or with extended family. The kids may not have overflowing Easter baskets. Easter dinner may look a lot less expansive. But all these things are only temporary...of this earth.
The core of Easter has not changed in nearly 2,000 years. Christ is Lord. He died to pay the penalty for our sins so that we could spend eternity with Jesus if we will just accept this stunning gift.
We have this moment. Even when times seem their best, none of us knows if we will have another on this earth. Let us live like it.
Let this Easter be an opportunity to celebrate the awe-inspiring gift God gave us through Christ. Embrace it with a full and joyous heart and live it every day forward.
Think back to that first Easter Sunday. The disciples were self-quarantined. Afraid. Questioning everything. When news of Jesus' resurrection came to them, they celebrated not in a church, but in a home. And what a celebration of the heart they had!
Let us join them fully.
Related Posts
Focusing on God During Quarantine
14 Christ-Centered Easter Ideas
The Best Empty Tomb Easter Ideas on the Net
Spring Cleaning Checklist: Bedrooms
 As an Amazon Associate, I earn from qualifying purchases. All opinions are my own. Please see FCC disclosure for full information. Thank you for your support!
 If you've been following along every week, you're probably just about done spring cleaning! All that's left for most of you is your home's bedrooms. (If you have more than the basic rooms everyone has, just use the other checklists in this series as a basis for spiffing those areas up, too. See a list of all the checklists at the bottom of this post.)
For me, bedroom cleaning is extremely satisfying. Few things are more pleasant than going to sleep in a tidy, clean room under freshly laundered bedding. On the other hand, kids' bedrooms can be a real challenge. Ugh! Even if your kids are little, I highly recommend you get them involved in the cleaning process. I know this makes the job harder for you. I really do. But it's also important for your children to learn how to clean and organize.
Personally, I like to start with the black holes that are my kids' rooms (ahem!) and finish my spring cleaning with the master bedroom - just because I like doing the hardest stuff first :)
The supplies I recommend for spring cleaning bedrooms include:
* A vacuum
* A couple of dust cloths
* Paper or cloth towels
* Mr. Clean Magic Erasers
* Windex
* Q-tips
* Sponge
* Dawn dish soap
The Procedure:
To print out this checklist, click here.
* Remove all bedding from the bed, including the mattress cover and pillows, and begin washing them.
* Remove any curtains and throw them in the washing pile, too.
* Remove any area rugs; wash those that are washable and shake out or vacuum those that aren't.
* Remove any art from the walls; dust it and set it aside in another room.
* Dust the light fixtures. Wipe them down with Windex or remove the shades and wash them in the sink with a little Dawn dish soap. Replace light bulbs, if needed.
* Dust the ceiling and walls. If necessary, mop them. (Click here for advice on mopping walls and ceilings.)
* Dust any blinds.
* Wipe down all light switches and outlets. (I use Windex and a cloth towel.)
* Clean the windows, being sure not to clean up the window tracks and frames. (I vacuum the tracks, then use Windex and Q-tips to get into the crevices.)
* Clean any mirrors and their frames.
* Dust all air conditioners and heating vents. If needed, use a damp cloth to wipe them down and a Q-tip dampened with Windex to get into crevices.
* Dust and clean doors, door frames, and doorknobs. I like to use a Mr. Clean Magic Eraser for the doors and frames.
* Vacuum and dust all lamps and lampshades.
* Dust all furniture. For items that are used for storage (like bookcases or dressers), work on one piece of furniture at a time: Remove everything stored inside and vacuum or dust the interior. Use a damp sponge or some Windex and a towel to clean really dirty spots. Then sort through all the contents you removed, discarding broken or useless things and donating anything you don't use. Put all your "keepers" back into the clean piece of furniture before moving on to the next item.
* Remove everything from the closet, creating "throw away" and "donate" piles, if needed. Dust and, if necessary, mop the walls and ceiling. Vacuum the closet floor. Replace all the items you're keeping.
* Dust the floorboards. If they still appear dirty, wipe them down with a Mr. Clean Magic Eraser.
* Vacuum the mattress using the upholstery attachment. Flip the mattress (or, if it's a pillow top, rotate it).
* Vacuum the floors. If the floors can be mopped, mop them.
* Replace artwork on the walls. Re-hang the washed and dried curtains. Replace rugs.
* Make the bed with fresh bedding.
You are DONE!
Other Posts in This Series:


April 7, 2020
Super Cheap Raised Beds for Your Vegetable Garden
 As an Amazon Associate, I earn from qualifying purchases. All opinions are my own. Please see FCC disclosure for full information. Thank you for your support!
There's no doubt a lot more people are starting vegetable gardens this year. Seed suppliers are swamped. Newbie questions are everywhere gardening or homesteading is discussed online. Gardening books are flying off the (largely digital) shelves. But some of you are probably struggling with the expense involved in starting a garden.
It's true that if you plant straight into the ground, there's very little cost involved. But if you have poor soil, for some reason need to keep most of your lawn, or have trouble getting down to ground level when tending your garden, raised beds are where it's at. (Raised beds also have the advantage of warming up quicker than garden beds that are directly dug into the soil.)
But have you looked at the costs involved in buying or building raised beds? Ouch! I'm struggling with this myself this year, so I've been brainstorming cheap and effective ways to get more vegetables planted without emptying my bank account. Here are the best ideas I've run across.
Cheap Raised Bed Ideas
 Berms on our old homestead.
* Berms are one of the easiest, most affordable ways to build raised beds. Just pile up good-quality soil and plant in it. I did this for years at our suburban homestead, and it worked beautifully! And no, rain and wind didn't carry all my soil away. However, if you need raised beds in the middle of your lawn, this method doesn't work very well because it's difficult to keep the edges of the grass trimmed.
* Hugelkultur became a buzz word in gardening several years back, but if you have access to free limbs, grass clipping, straw, and similar organic materials, it really can make for a productive raised bed! Again, though, it's not great when you must surround your beds with lawn. Learn more about hugelkultur here.
 Lasagna garden beds.
* Lasagna gardening is similar to hugelkultur, and as long as you have copious amounts of organic matter laying around, it's free or cheap. Lasagna (or "sheet mulching") beds begins with a layer of corrugated cardboard, and maybe a few layers of newspaper. Then you add "browns," like dry leaves, shredded newspaper, or peat, followed by a layer of "greens," like vegetable or fruit scraps and grass clippings. Although autumn is the best time to start lasagna beds, you can also start them in the spring or summer. For more details, read this article.
* Generally, lumber and wood aren't cheap - even if you live in logging country, as we do! But if you have access to used wood or fallen trees, consider using them for raised beds. (This can include pallets if they aren't treated with chemicals; learn how to determine this here.) Most wood of this nature will rot within a year or two, so bear that in mind. Homesteader Mark Winchell (you can follow him on Instagram) uses logs quite successfully. He says locust is the best choice because it lasts 20 - 50 years without rotting. He's also used red maple and expects it to last 5 - 8 years.

 Some of Mark Winchell's raised beds made from logs.
 Tire planters, via Flickr and
iquanyin moon
* Yes, some may think it looks tacky, but if you have old tires laying around, they are worth considering as raised beds. They work best for heat-loving plants (because the black rubber will make the beds hotter than most other raised bed materials). However, tires are made with questionable chemicals. My husband tells me the limited amount of dubious chemicals found in each tire makes this a non-issue, but I'm still gun-shy. I recommend lining tires with Visqueen plastic sheeting, which isn't supposed to leach unless exposed directly to the sun.
* Grow bags are wonderful for small spaces, but they aren't always cheap to buy. (Although there are some great deals on Amazon!) Yet if you have (or can get) cheap or free potato or coffee sacks (the type made from burlap), they will work quite well. Just don't expect them to last more than one year.
* I know not everyone has old bathtubs laying around, but they make excellent raised beds! I have four bathtub beds (one was already being used as a garden bed when we bought our rural homestead, two we found in the bushes on our land, and the third I picked up free from a friend who needed to get rid of it). If you don't have tubs laying around, check out Craigslist or Facebook Marketplace for freebies.
 Galvanized raised bed.*
Galvanized feed or water troughs
are a trendy new thing in gardening, but unless they are poor quality, they are not very affordable. Most people with animals don't get rid of metal feed troughs until they are pretty badly rusted, but still...be on the lookout for anyone who might give or sell cheap troughs they no longer need.
Galvanized raised bed.*
Galvanized feed or water troughs
are a trendy new thing in gardening, but unless they are poor quality, they are not very affordable. Most people with animals don't get rid of metal feed troughs until they are pretty badly rusted, but still...be on the lookout for anyone who might give or sell cheap troughs they no longer need.* Bricks, rocks, or cinder blocks ...If you happen to have any of these laying around, or if you can get them cheap or free, these can make beautiful and sturdy raised beds that will last many years to come.
* Don't forget smaller containers such as buckets and pots . Just make sure they have holes drilled in the bottom. The biggest problem with lots of smaller planters is that you tend to end up needing more soil per plant. Also, the smaller the container, the more watering it will require, since the soil inside it will dry out more quickly.
* Get creative! Do you have an old kiddie pool laying around? How about old dresser drawers or a table you can screw sides onto? These will all work as raised beds as long as you add drainage holes!
On our homestead, we have an old culvert pipe laying around, as well as the bottom of an old water tank . I plan on using both as raised beds this year.
Affordably Filling Raised Beds
Once you have raised beds in place, your quest for a cheap garden isn't quite fulfilled. Soil can be awfully expensive, too. As already noted, lasagna gardening and hugelkultur might be an affordable route to take (though if you have to purchase ingredients, they may be just as expensive as purchased soil). One thing's for certain, if you must bring soil in for your garden, you'll want to call around and see if anyone has a good deal on truckloads of gardening soil, since it's almost certainly cheaper than buying soil in bags. Also consider:
* If your raised beds are deeper than your plants require, fill the bottoms of them with stuff you have laying around, like broken gardening pots, small plastic nursery pots, plastic water bottles, packing peanuts, bubble wrap, nut shells, or twigs.
* If you have poorer-quality soil laying around, put that in the bottom of your raised beds. For example, I put my old potting soil in the bottom of my new garden beds.
* Add homemade compost to the tops of your beds. (Learn how to compost here.)
* Add a layer of dry leaves or straw in the bottom, middle, or top of your raised beds.
* Add animal manure to the middle or top of your soil. (For tips on how to use manure, click here.)
Now tell me: What creative, cheap ways have YOU created raised beds?
Related Posts:


