
Kristina Seleshanko's Blog, page 20
June 26, 2019
How to Make a Salve - with a Plantain Salve Recipe
 This post contains affiliate links. All opinions are my own. Please see FCC disclosure for full information.
The simplest way to begin making herbal medicine is to dry herbs and use them in teas or decoctions (the latter are very much like teas, except they use more heat to draw out the medicinal properties of tougher plant materials, such as roots). Another easy method of making traditional plant medicine is to create a salve - a sort of medicinal lotion. This post will show you how to make a plantain salve, but the steps are the same no matter what herb or combination of herbs you choose to use.
First, Why Plantain?
When most people think of plantain, they think of bananas, but in the world of herbs, plantain refers to a common weed found growing in the cracks of city sidewalks, in suburban lawns, and in rural locations. There are two types of plantain in North America: Plantago major, which has broad leaves:
 Plantago major.and Plantago lanceolata, which has narrow leaves:
 Plantago lanceolata.Click here to read a previous post on the medicinal properties of plantain.
Recently, I decided I needed a plantain salve in my life because I was being eaten alive by mosquitoes and spiders. I know from past experience that crushing a plantain leaf and applying it to bites and stings works amazingly well at removing discomfort and pain, all while encouraging healing. But it's not always convenient to hold a wad of leaves against the skin. A salve is easier to apply, quick to grab off the shelf, and doesn't require that a plantain plant growing nearby.
 Gathering broadleaf plantain leaves.Part One: Drying the Herb
To ensure the salve doesn't become moldy, it's important to dry the herb before moving on to step two. Sometimes you can get away with just partially drying the herb. I recommend this sometimes in my book The Ultimate Dandelion Medicine Book , for example. But for beginners, or when dealing with an especially wet herb, I highly recommend drying the plant thoroughly.
It's possible to air dry herbs, but to get true medicinal value from them, it's vital they hang upside down (in a small bundle secured by a rubber band or string) in a dark, cool location. Drying them in the sun or in a hot location results in discolored herbs that have lost much of their medicinal properties and flavor.
Drying herbs in a good electric dehydrator is easier and, if done correctly, probably retains more of the herb's medicinal properties. You don't need a dehydrator that costs hundreds of dollars, either. I love my Nesco American Harvest, even after a decade of use. It's never let me down and does the job just as well as an expensive machine. But whatever dehydrator you use, it should have a temperature controller that goes as low as 95 degrees F.
1. Lay the herb (in this case, plantain leaves) on the trays of the dehydrator. They will dry more quickly if they are in a single layer, not touching, but it's okay to just spread them thinly on the trays. (By the way, you can always buy more trays for your Nesco, to increase capacity.)
 Dried plantain leaves.
2. Set the temperature to 95 degrees F. (This temperature ensures relatively quick drying while also ensuring the herb's medicinal properties and flavor are not compromised.) Don't pay attention to people or articles that tell you dehydration will be finished in a certain prescribed amount of time. There are way too many variables (including the humidity in your house) to say how long the process will take. The herb is done when there is zero trace of moisture when you break a leaf, flower, stem, or root. To speed drying time, always rotate the trays of the dehydrator, even if the manufacturer says you don't have to. For more dehydrating tips, click here.
3. If you won't be going on to part 2 ("Creating the Oil") right away, allow the herb to cool to room temperature, then store in an airtight glass jar in a cool, dark location. Be sure to mark the jar with the name of the herb and the date.
You may stop the medicine-making process here and drink the dried herb as a tea or decoction. Some herbs can also be rehydrated and used in a poultice (a wet mixture applied to the skin), though it's better to use fresh herbs for that application.
Part Two: Creating the Oil
1. Fill a quart-sized glass jar with the dried herb, crushing or chopping it first to help release its medicinal properties. Really stuff the jar full, all the way to the first screw band on the jar.
2. Pour oil over the herb. Most herbalists agree the best choice is olive oil; although some people use coconut or other oils, these are more likely to mold. If you won't be making a salve, but instead will be consuming the oil (obviously only using an herb that's safe to consume), you'll also want to make sure to use a good-quality, natural oil and not a highly processed, unhealthy oil.
 Plantain leaves covered in olive oil.3. Cover the jar with a lid. (If you've chosen to use the herb not fully dried, cover the jar with a double layer of cheesecloth; this allows water from the herb to evaporate.) Place the jar in a warm location, away from direct sunlight. Allow the mixture to steep 2 - 6 weeks. Ideally, shake the jar once a day.
You may also speed up the process by either simmering the oil and herb mixture over low heat for 30 minutes - 1 hour (using a non-reactive pan), or by heating the mixture in a crock pot set to LOW for 1 - 72 hours. Allow the mixture to cool to room temperature.
4. Strain the infused oil using a fine sieve or a strainer lined in a double layer of cheesecloth. Compost or otherwise discard the herb.
If you won't be moving on to part three ("Making the Salve" right away, store the oil in an airtight glass jar in a cool, dark location. Be sure to mark the jar with the type of herb and the date.
If desired, you may stop at the oil-making stage and use the oil topically - or for culinary purposes, as long as the herb is safe to eat. (Plantain is safe to consume.)
Part Three: Making the Salve
For every 1 cup of infused oil, you will need:
1/4 cup of beeswax pastilles* (If you prefer, you may instead use grated beeswax.)
Containers for the finished salve (I used these 1 oz. cans, but 4 oz. canning jars work, too.)
 Beeswax pastilles.1. If you have a stainless steel double broiler insert, use that. If not, use a quart-sized canning jar. (It really must be a canning jar, since it must be resistant to breaking in hot water.) Place a small pan of water on the stove, and insert either the double broiler or the clean canning jar in the middle of it.
2. Pour the beeswax pastilles into the jar or double broiler. Now pour the infused oil over the beeswax.
3. Turn the heat to low and gradually warm the water. Stir the contents of the jar or double broiler occasionally, keeping a close eye out for when the beeswax suddenly melts. When this happens, immediately remove the canning jar or double broiler from the stove and turn off the heat.
 Stirring the mixture of beeswax and oil.4. Very carefully (so as not to burn yourself) pour the mixture into containers. Allow the containers to cool until they are room temperature, then secure the lids on the containers.
 Preparing to pour the beeswax mixture into salve containers.
 Allowing the salve to coo
 The finished salve.5. Mark the containers with the type of salve and the date. (I just used painter's tape and a Sharpie, but if you'll be giving the salve away as a gift, you'll probably want to use a nice-looking sticker-type label.)
 Always mark the finished salve with a name and date.
* For a softer salve, use a little less beeswax. For a firmer salve, add a little more.
To Use the Salve
Using clean fingers, apply externally to the affected area. In the case of the plantain salve, apply to bug bites, stings, or minor abrasions.
I am not a doctor, nor should anything on this website (www.ProverbsThirtyOneWoman.blogspot.com) be considered medical advice. The FDA requires me to say that products mentioned, linked to, or displayed on this website are not intended to diagnose, treat, cure, or prevent any disease. The information on this web site is designed for general informational purposes only. It is not intended to be a substitute for qualified medical advice or care. There are no assurances of the information being fit or suited to your medical needs, and to the maximum extent allowed by law disclaim any and all warranties and liabilities related to your use of any of the information obtained from the website. Your use of this website does not constitute a doctor-patient relationship. No information on this website should be considered complete, nor should it be used as a substitute for a visit to, consultation with, or the advice of a physician or other qualified health care provider.


June 18, 2019
Healthy No-Noodle Goulash - Keto, Low Carb, LCHF, Gluten Free Recipe
 This post contains affiliate links. All opinions are my own. Please see FCC disclosure for full information.
When I was a kid, my mom loved to serve her family something she called "noodle roni:" a simple dish made of margarine (back when science told us it was healthier than real butter! Ugh!), macaroni noodles, and tomato juice. (I posted the recipe years ago; you can see it here.) It was a frugal meal, perfect for tight times. But to my mom's kids (including me!), who had no clue about household budgeting, noodle roni was simply a favorite. It was what we wanted when we were fighting a cold. It was comfort food. And years later, when I married and had kids, noodle roni became one of their favorites, too.
Then, near the end of 2017, after about a decade of feeling ill yet not getting real help from any doctor, I found a new M.D. who finally gave me some answers. "You're diabetic," he said. "I can put you on insulin and blood sugar lowering meds, or you can go on a keto diet." Keto? Or Needles? That was an easy choice! And it's a choice I've never regretted. While others I know are following the American Diabetes Association way of eating and progressively becoming more ill, my body is healing. Within months of starting keto, my blood sugar was normal (my last A1C was better than my doctor's), my autoimmune disease went into remission, my cholesterol and blood pressure normalized, and I lost 45 lbs. (Learn more about reducing blood sugar through a therapeutic keto diet here.)
But let's be honest: Going keto means giving up certain foods. It helps to know those foods are slowly killing you (!), but still, I missed noodle roni. Doing a little research online, I discovered most people don't call the dish noodle roni - they call it "goulash." Turns out, the dish is based on Hungarian stew and Americans have tweaked it into a tomato and noodle dish. I could have made the meal just by omitting the noodles: tomato juice, butter, and ground beef are all keto. But I didn't think it would be very filling. After a lot of time spent browsing Pinterest, I decided cabbage would make a good substitute for the noodles, rounding out the dish nicely.
My husband and I now actually think this healthy goulash is better than Mom's noodle roni. (Sorry, Mom!) My picky eater kids love it, too. So whether you want comfort food, or food to make you feel better when you're getting sick, or a frugal meal to fit into a tight budget, I hope you'll enjoy this healthy goulash, too!
 Healthy, No-Noodle Goulash Recipe
2 lbs. ground beef 1 medium yellow onion, diced4 cloves garlic, minced1 (15 oz.) can tomato sauce1 (25 oz.) can diced tomatoes1 1/2 tablespoons coconut aminos (or soy sauce, if not strict keto)2 tablespoons dried oregano2 teaspoons dried basil1 tablespoon sea salt1/2 teaspoon ground pepper1 cabbage, cored and sliced into thin strips
1. Place a large pot of medium-high heat and add the ground beef, breaking it into small pieces with a large spoon or fork.
2. When the beef is no longer pink, pour in the onion and garlic and sautée until tender.
3. Stir in the tomato sauce, tomatoes, coconut aminos, oregano, basil, salt, and pepper. Bring to a boil over medium heat.
4. A handful at a time, add the cabbage, stirring well after each addition. Reduce heat to medium-low and cook, stirring once in a while (to prevent scorching), until cabbage is tender.

Nutritional Information: It's always smart to calculate your own nutritional information using the exact products you cook with. However, the approximate nutrition per serving for this dish is, according to LoseIt!: Calories 448, Fat 23.2g, Carbohydrates 12.8 g, Fiber 2g, Protein 35.3g
May 22, 2019
9 Ways to Preserve Eggs
 It's the time of year when every chicken keeper begins wondering "What am I going to do with all these eggs?" If you've had your fill of scrambled eggs, omelets, frittatas, quiches, meringues, custards, and other egg-laden dishes, here are nine ways to preserve those eggs for later use. After all, just as spring is the season of egg glut, winter is the season of egg famine. Wouldn't it be great to have preserved eggs for those times when your hens aren't laying well?
First, a Note about Egg Condition
Before we delve into how to preserve eggs, it's important to understand that only eggs with intact shells should be stored long term. Any cracks, chips, or holes in the eggs allow bacteria to get inside, compromising the safety of the food. In other words: Such eggs could make you very, very sick.
If I find damaged eggs in our hens' nesting boxes, I typically feed them immediately to our dog. Cooked right away, and cooked thoroughly, they are probably safe for human consumption, but I cannot recommend that practice.
In addition, when preserving eggs, it's always best to keep each egg's "bloom" - that is, the natural protective coating on the outside of the egg shell. This is removed if you wash the eggs. Therefore, really dirty eggs are best consumed right away, or preserved only by freezing. Lightly dirty eggs may be preserved by first gently scraping them with a fingernail or brush to remove light soiling.
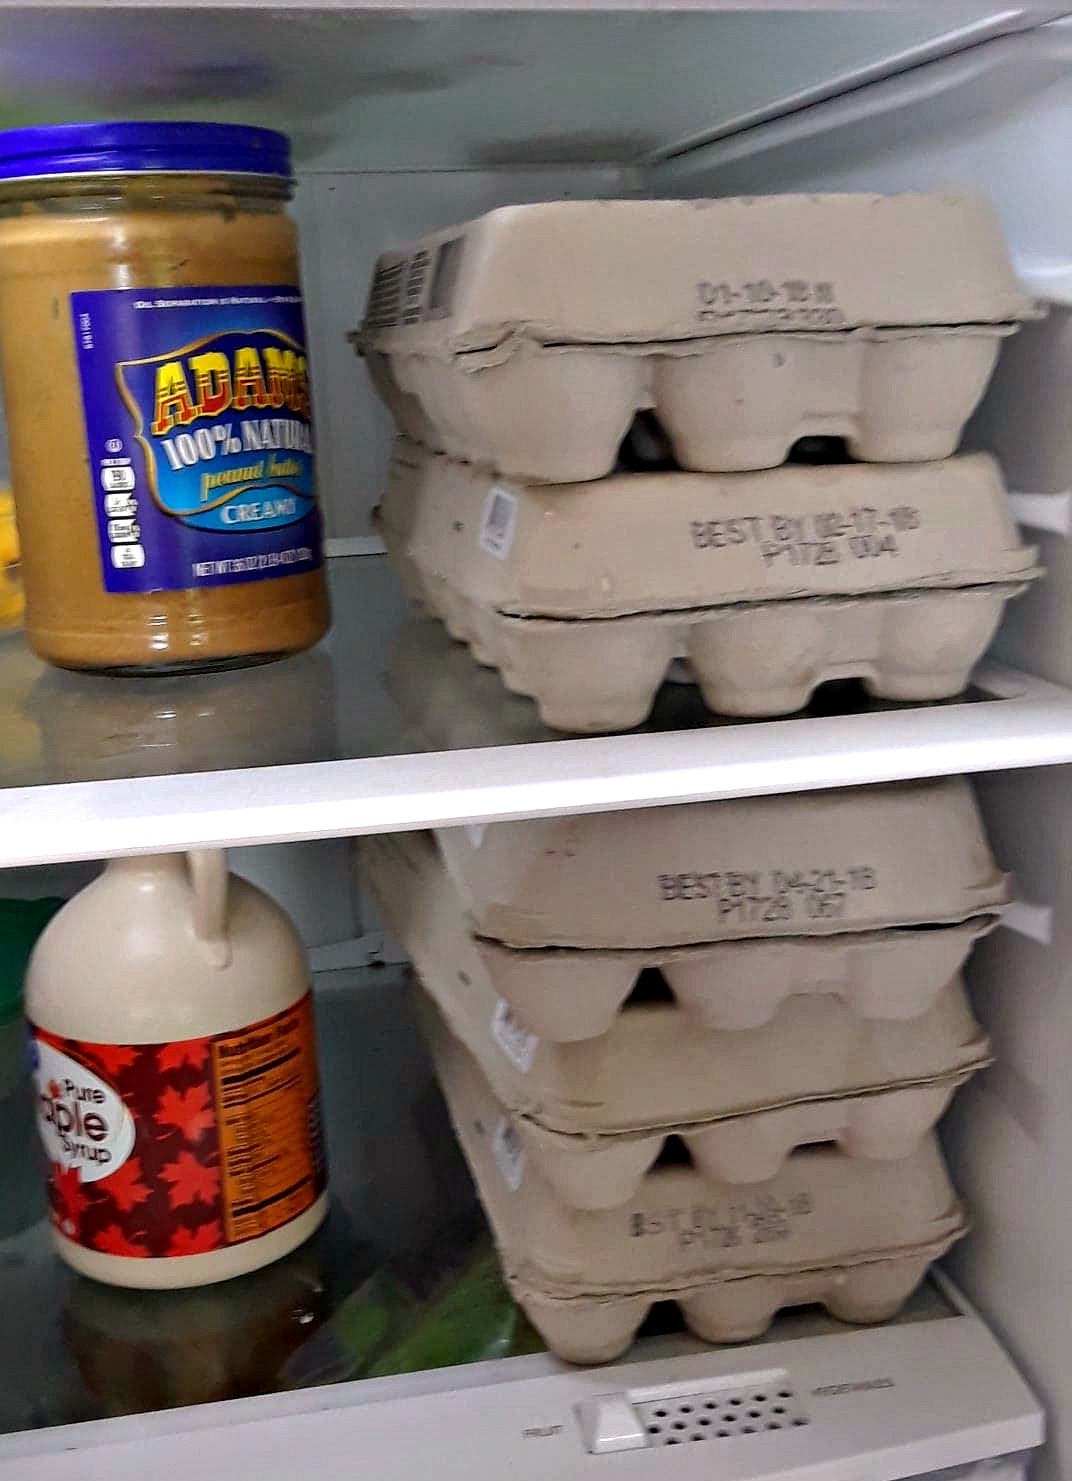 Unwashed eggs last a long time in the fridge.Preserving Eggs in the Refrigerator (6 months - 1 year)
While it's true that unwashed eggs store safely on the counter, they last considerably longer - at least 6 months - if you refrigerate them. (Store bought eggs, which are washed with a chlorine solution, don't last as long. Read more about why I don't wash our homestead eggs, here.)
Personally, I like to store our hens' eggs in 18-count cardboard egg cartons. Mine are saved from back in the days before we had a homestead flock and I was still buying eggs at the grocery store; sometimes family members gift me their cardboard egg cartons, too. You can also buy unused cartons at feed stores or online. These containers last a long time - and when they finally do start falling apart, they compost well. Other options include plastic containers designed for storing eggs in the fridge.
To extend storage length, be sure to store eggs pointy end down. The reason for this is that there is an air pocket at the fat end of every egg. This pocket helps protect the yolk (which is more susceptible than the white of the egg) from bacteria. When eggs sit pointy end up, the air - and any bacteria in the egg - will rise, making the egg go bad more quickly. Also remember that washing eggs before refrigerating them may make them go bad more quickly; I only store unwashed eggs in our fridge.
I stack my cartons, oldest eggs on top, so I know which to use first. You may also wish to date each carton. When I'm ready to use eggs, if I have any question at all about their age, I do a simple water test to make sure they are perfectly safe to eat. (Click here to see how.)
Pros: Quick and easy; eggs can be used fresh; eggs last at least 6 months.
Cons: Takes up space in the refrigerator; requires electricity.
 First, whip egg yolks and whites together.Preserving Eggs in the Freezer (1 - 2 years)
Freezing extra eggs is another easy preservation method. Once thawed, frozen eggs can be used exactly like fresh eggs. To properly freeze eggs:
1. Break open one egg at a time and pour the contents into a bowl. Whip to mix, using an immersion blender (I use this one), a whisk, or a fork.
2. Frozen eggs can feel gritty once thawed. To help prevent that, stir in 1/2 teaspoon of salt for every egg. (You may also use 1 1/2 tablespoons of granulated sugar for every egg, but really, the last thing our society needs is more sugar, right?)
3. Pour the whipped eggs into the cups of an ice cube tray or silicone mold. Freeze until solid, then transfer to a freezer-proof, airtight container, like a Ziplock or vacuum sealer bag. If you put the frozen eggs in a single layer and vacuum seal them, the eggs will take up very little space and will stay good for a year or two. Or you can just pop them in a freezer bag without vacuum sealing and use them within a year.
 In most cases, a frozen cube equals about 1 egg.Ice cube trays vary, so if you think you'll need to know exactly how much frozen egg equals a fresh egg (say, if you plan to bake with them), test your trays: Whip up a single egg and pour it into one hole in your ice cube tray. If the egg fills the one hole, one cube equals one egg.
Before using the eggs, be sure to thaw them completely in the refrigerator.
Pros: Quick and easy method; eggs can be used like fresh; eggs store up to a year (without vacuum sealing) or two (with vacuum sealing).
Cons: Salt or sugar should be added for best quality; must wait for eggs to thaw before using; takes up freezer space; requires electricity; loss of electricity will make eggs go bad.
Preserving Eggs by Dehydrating (up to 1 year)
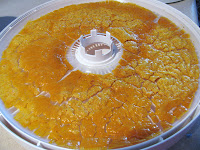 Dehydrating eggs at home.
Back in 2012, I learned many people were dehydrating eggs in electric food dehydrators. Not knowing this was a safety concern, I tried it. It was a complete flop. Not only were my dehydrated eggs terrible for baking (never giving the rise fresh eggs do), but they tasted awful when I rehydrated and scrambled them.
But the biggest reason to not dehydrate eggs at home is that the process may not kill salmonella or other, similar bacterias. In other words, it's not a perfectly safe preservation method. (Some people argue that as long as you cook the raw, re-hydrated eggs to 160 degrees F., they are safe to consume. But there are risks in handling and cross-contamination to consider, too.)
 Dehydrated eggs aren't safe - or tasty.
In order to circumvent the bacteria issue, I also tried thoroughly cooking the eggs before dehydrating them. Because fat goes rancid in dehydrated products, it was necessary to cook them without any fat in a Teflon pan. (Click here to learn why Teflon is a bad idea.) I found the resulting dehydrated eggs had little flavor. In fact, they were just gross.
If you want to know the process, see The Prairie Homestead's post on the topic. In my experience, there are better - and safer - ways to preserve eggs.
Pros: None.
Cons: Not a safe preservation method; poor quality; requires electricity.
Preserving Eggs by Freeze Drying (20 - 25 years)
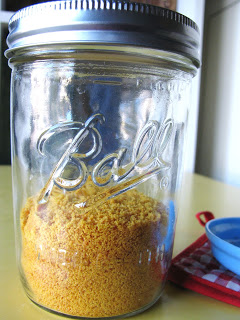
 Freeze-dried eggs are the longest-lasting.
 When you purchase dried eggs at the store, they are actually freeze dried, not dehydrated. (Click here to learn what the difference between the two is.) Freeze dryings is the only way to safely dry eggs at home.
For the cost of a refrigerator, we now have a home freeze dryer on our homestead - and I find I'm constantly using it to preserve eggs. (Please note: Harvest Right is currently the only manufacturer of consumer grade freeze dryers.) Here's how I do it:
1. Each of Harvest Right's medium freeze dryer trays easily holds about 12 eggs. Begin by whipping up one tray's worth of eggs. It's best to use an immersion blender for this job; if you don't get the whites and yolks blended well, the eggs may "burst" in the freeze dryer, causing a big mess.
2. Pour the blended eggs into one freezer dryer tray. To do this without spilling, I recommend putting the tray on a shelf in your regular freezer (like the one attatched to your fridge - not the freeze dryer itself), then pouring the prepared eggs into it. Slowly and carefully slide the tray back in your freezer. Repeat steps 1 and 2 with the remaining trays.
3. Allow the eggs to harden in the freezer; in the meantime, turn on the freeze dryer for about a half hour. (This allows the chamber to get good and cold so that when you insert trays of frozen food, they won't thaw.)
4. Transfer the trays of eggs to the freeze dryer. (You can just pop the trays immediately into the freeze dryer, without pre-freezing in your freezer, but you'll likely spill eggs in the Harvest Right, since it is designed to not sit level.)
 Raw eggs going into the freeze dryer.4. Run the eggs through the freeze dryer until completely dry and warm to the touch. Transfer to mylar bags, add an oxygen absorber, and seal the bags.
 Eggs come out foam-like. Before cooking, powder and rehydrate with water.
Stored this way in a cool, dry location, the eggs should last 20 - 25 years. After rehydrating, use these eggs just like you would fresh. To rehydrate: Mix 2 tablespoons freeze dried egg (crumbled into a powder before measuring) with 2 tablespoons of water. If you'll be scrambling the eggs, add a little extra water (or milk or cream) to allow for evaporation.
It's also fine to cook the eggs (for example, scramble them) and then freeze dry them. Because they will contain some cooking fat, they probably won't last as long on the shelf. Most people agree they don't taste quite as good when they are cooked first, but they do make for a super-easy meal.
Pros: Easy method with little hands-on time; can use the eggs like fresh; can make a quick dish by just adding water; lasts up to 25 years.
Cons: Requires mylar bags and oxygen absorbers; requires electricity.
Preserving Eggs in Mineral Oil (6 months - 1 year)
 Coating eggs in mineral oil.
This is a traditional method, but one that's been studied scientifically, and is still used on about 10% of store bought eggs (after the eggs have been washed - often in chlorine). To preserve eggs in this way, you will need food grade mineral oil (found online or in pharmacies).
I also recommend using gloves during this procedure because mineral oil is a petroleum byproduct and a known endocrine disruptor that raises estrogen levels in our bodies. This, in turn, is linked to cancer and many other health problems. Does the mineral oil seep into the egg itself? I've been unable to find an answer to that question. However, literature widely says chicken eggs are semipermeable, meaning moisture can pass through the shell. Will the oil pass through each egg's membrane? I honestly don't know. You'll have to decide.
In addition, it's important to note that this method of preservation works best on freshly laid eggs - ideally, eggs no more than 24 hours old.
1. Warm 1/4 cup of food grade mineral oil in a nonreactive pan and don some gloves.
2. Dab warmed mineral oil on your hands and pick up an egg. Cover the entire surface of the egg with mineral oil; it doesn't matter if the coating is thick or thin.
3. Place the egg in an egg carton, pointed end down.
4. Repeat until you've covered all the eggs (1/4 cup of mineral oil will cover 4 - 6 dozen eggs), then store the egg carton in a cool, dry location (like a cold cellar or garage) where the temperature stays 68 degrees F. or less (but is always above freezing). If the temperature gets warmer than that, the eggs won't last but a few weeks. You may also store the cartons in the refrigerator, the mineral oil extending the life of the eggs even longer than if stored without a mineral coating.
5. Flip the eggs over once a month. You cannot skip this step! However, to make it easier, you may simply (and carefully) turn over each egg carton.
Before using mineral coated eggs, be sure to conduct a water test to make sure they aren't bad.
By the way, a common question about this method is whether or not a different type of oil may be used. The answer is no. Other food safe oils will go rancid.
Pros: No electricity needed; eggs can be used like fresh; eggs last up to a year.
Cons: Mineral oil should be used with caution; may be unhealthy (although the FDA allows it on commercially sold eggs); requires rotating the eggs once a month.
Preserving Eggs in Water Glass (up to 5 months)
This was a common preservation method in the 19th century, said to keep eggs good for up to five months. Most people today have never heard of water glass, or its scientific name, sodium silicate (a naturally occurring mineral). Unfortunately, this chemical can cause serious breathing and lung issues if inhaled, can burn the digestive tract if consumed, and can burn the skin and eyes upon contact.
Again, I question whether sodium silicate seeps into eggs during storage; I feel there are better ways to preserve eggs. For instructions on how to water glass eggs, see this article.
Before using water glass eggs, conduct a water test to make sure the eggs aren't bad.
Pros: No electricity required; can use eggs like fresh.
Cons: Must be handled carefully; may be toxic.
Preserving Eggs in Slaked Lime (6 months - 1 year)
This is another old method, using calcium hydroxide (which is created when calcium oxide - a.k.a. lime) is mixed (i.e. "slaked") with water. For directions, click here.
Do note that food grade lime is potentially dangerous stuff. It's toxic when consumed in quantity, may cause skin and eye burns, and leads to life-threatening conditions if inhaled. Personally, I'm not comfortable with that in or around my food, even knowing that for decades, calcium hydroxide was used to crisp pickles.
Before using eggs in unslacked lime, conduct a water test to make sure they aren't bad.
Pros: No electricity needed; can use eggs like fresh.
Cons: Must be handled carefully; can be toxic.
Preserving Eggs by Pickling (4 months)
 Pickled eggs, courtesy Green Mountain Girls Farm.It's a myth that it's safe to can eggs - even pickled and canned eggs - at home. The truth is, canning eggs opens people up to botulism. (To learn more, see this CDC report.) So why can you buy canned pickled eggs at the grocery store? Because commercial canneries have different equipment and therefore different abilities than home canners.
That said, making pickled eggs to store in the fridge may extend the eggs' life a wee bit.
1. Hardboil the eggs using your favorite method. (What I do: Using a pin or sewing needle, poke one hole in the fat end of each egg; this makes fresh eggs easy to peel. Pour 1 cup of water in the bottom of a 6 qt. Instant Pot. Place a steamer basket inside the Pot, and stack eggs atop it. Steam for 5 minutes. Let the IP reduce pressure naturally for 4 minutes, then quick release and plunge eggs into cold water. Cool completely in the fridge before peeling.)
2. Peel each egg and place it in a freshly washed canning jar.
3. Choose a brine from The National Center for Home Food Preservation's website. Heat the brine to boiling, then simmer 5 minutes.
4. Pour the brine over the eggs, completely covering them. The eggs must be completely submerged in the brine to remain safe. (A quart-sized jar holds about a dozen eggs.)
5. Let the eggs sit in the fridge for at least a couple of weeks, so they can take on the flavors in the brine. The National Center for Home Food Preservation recommends eating home pickled eggs within four months.
Pros: Unique taste.
Cons: Uses up refrigerator space; requires electricity.
Preserving Egg Yolks in Salt (4 weeks)
 Salt cured egg, courtesy of Practical Self Reliance.
This very old method is similar to curing meat. In it, high amounts of salt inhibit bacterial growth so that other (good) bacteria can release lactic acid (lactobacillus). This method has become all the rage lately, but it's really more about a gourmet treat than storing eggs long term. Once cured, salted eggs should be eaten within four weeks, and for optimal safety, should be stored in the refrigerator. For details on how to salt eggs, see Practical Self Reliance's excellent how-to.
Pros: A gourmet treat.
Cons: Takes up room in the refrigerator; requires electricity to be safest.
This post featured at the Farm Fresh Tuesday Blog Hop.
May 15, 2019
Pros and Cons of Walmart Pickup - Plus $10 off your first order!
 This post contains affiliate links. All opinions are my own. Please see FCC disclosure for full information.
 I've heard a lot of people dis Walmart Pickup without ever even trying it. Some of this criticism comes from people who just flat hate Walmart and would never buy anything from them. The rest seems to come from folks who are concerned that our society is getting more and more screen-centric and that Pickup service is just another way to avoid socialization. I neither hate Walmart as an entity (and no, I'm not being compensated by them to write this or any other post*), nor do I feel their Pickup service hurts anyone's social life. I'm just a girl who loathes grocery shopping - so I decided to give Walmart Pickup a try.
Why I Use Walmart Pickup
When you live in a rural area, as we do, going to the grocery store is a much bigger deal than if you live in the city or suburbs. There are no "quick stops" to pick up one or two grocery items; a trip to the grocery store eats up more time and gas when you live in the sticks. I've also found the less we go inside the grocery store, the less money we spend - because we grab fewer impulse items.
So, for the above two economical reasons, I shop only twice a month. At this time, our homestead isn't producing meat on a regular basis, and while we eat a lot of homegrown veggies throughout much of the year, I'm still working toward total self-sufficiency in that department. So for my family of four, with two fast-growing kids who eat an awful lot (My 10-year-old has nothin' on most teenage boys!), I do buy quite a bit at the grocery store. Each trip results in an overflowing grocery cart...and pushing it through Walmart crowds is hard work, guys!
Other great reasons to use a pickup service like Walmart's include:
* You are ill...too ill to shop or just thoughtful enough you don't want to spread your germs around to everyone else.
* One or more of your kids are ill...Saving the world from germs and giving your and your family a break, too.
* You have preschoolers or babies and they are having a tough day...Enough said.
* You have mobility issues.
* Crowded places stress you out!!! (Ahem.)
How Walmart Pickup Works
Step 1: Set Up an Account
First ensure Walmart Pickup is available in your area by going here, clicking on "Walmart Grocery" (currently in the upper left of the screen), and entering your ZIP code. If it is available nearby, you'll also need to create a Walmart account, if you don't already have one for the Walmart website.

Step 2: Order your groceries.
Start adding items to your online shopping cart. I like to do this on my laptop, because I'm an old fogy and I find it easier to use my computer than my phone for this task. But you can use the Walmart Grocery app, if you prefer.
I typically use the search feature to find the product I want. For example, I might type in: Cheddar Cheese Block. From there, I can choose the brand and size I desire. (By the by, the next time you place a Walmart Pickup order, you can either just reorder everything with the click of one button or select a few items to order again, making filling your cart even easier.)
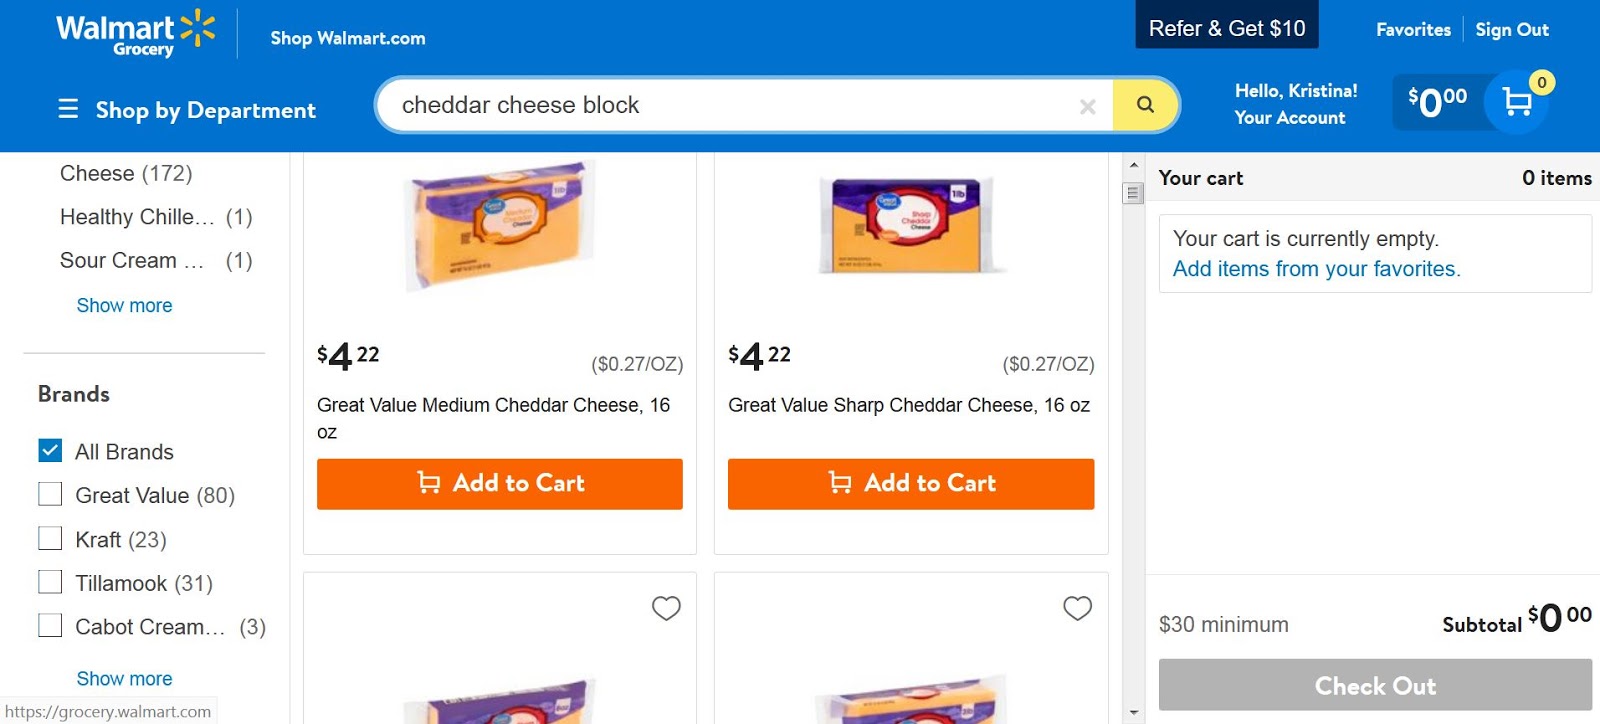
Everything I've ordered on the Walmart Grocery site has had clear descriptions, including price, nutrition labels, ingredient lists, and sizes.
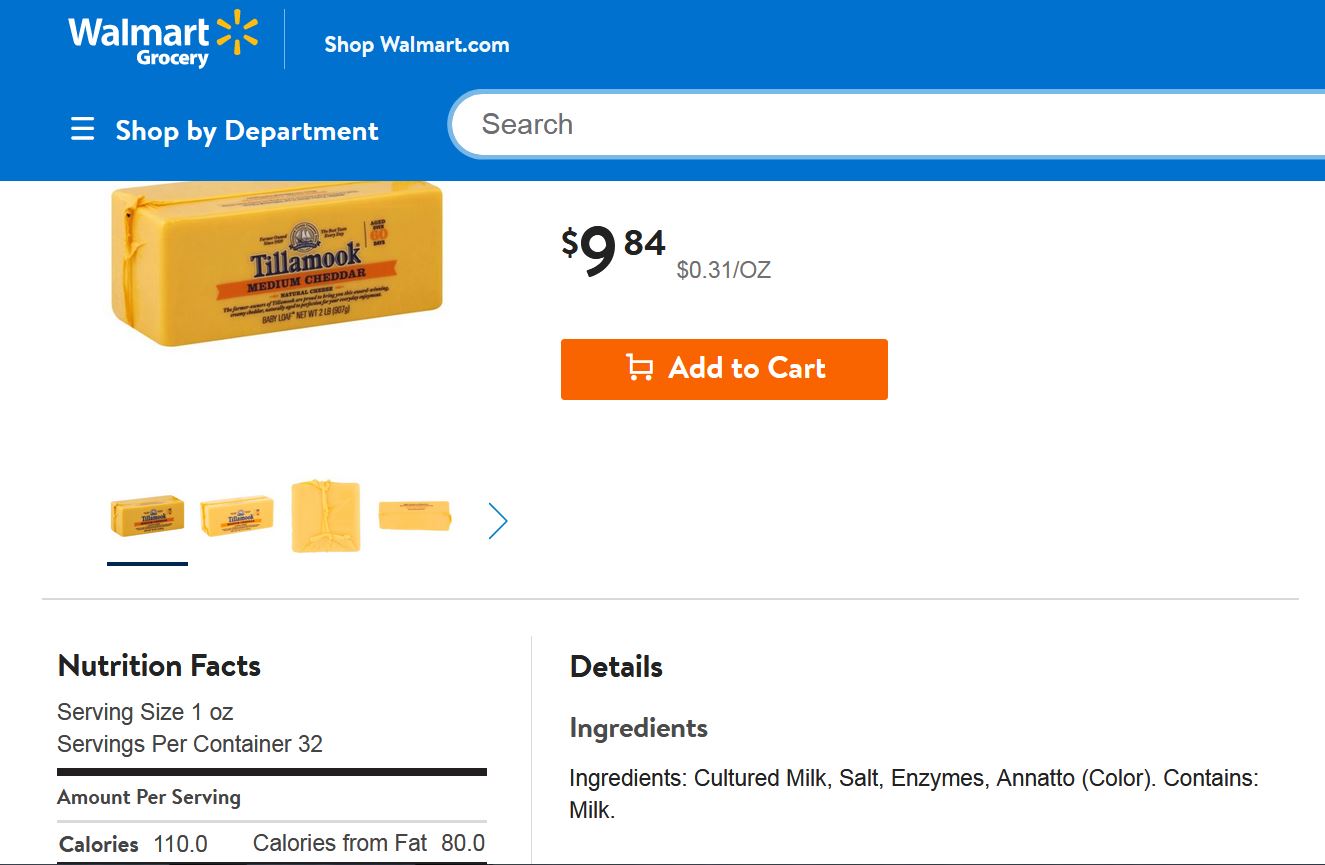
Speaking of which, the only real problem I've had with Walmart Pickup involves sizes. Apparently, I have no clue about them. For example, in my most recent order, I purchased 2 lbs. of flour to make my kids a (these days) rare treat of homemade bread (recipe here). The bag I received measured 4 x 6 inches. Who knew they even sold flour in a bag that small?! (What can you do with it? Make six cookies???) Obviously, I'm used to judging size by appearance next to other items, which is impossible to do online.
Step 2: Review your shopping cart.
This is just like reviewing your shopping cart for anything you buy online. At this point, I've changed quantities, deleted items from my cart, and added items to my cart. All of that is easy peasy.

Step 3: Tell Walmart when you want to pick up your groceries.
They will offer a variety of days and times for you to choose from, and the times are relaxed; for example, 1 - 2 pm, not 1 pm sharp.
Step 4: Tell Walmart whether or not you'll accept substitutions on any or all of your items.
In your online shopping cart, the default is a check (in a green box) beside every item you ordered; this indicates you'll accept a substitution if Walmart happens to be out of that specific item. (An example of a substitution: You ordered a 4 oz. jar of sweet pickles, but the store was out, so they give you a bigger jar of the same brand of sweet pickles or the same size jar of a different brand of sweet pickles.)
If you don't wish to accept substitutions for particular items, simply uncheck them. (If you prefer, you can also easily uncheck all items with the click of one button.)

I find this is a great feature, by the way. I, for example, never want substitutions for the breakfast sausage I buy because there's only one brand in my local Walmart that doesn't contain sugar and is low enough in carbs to suit me. As a diabetic who doesn't consume sugar, a substitution would not work for me.
Do note that your Walmart shopper will never substitute cheaper items without charging you less. In my experience, he or she will always choose an item that's the same price or more expensive than what you ordered - but even if the substitution retails for more than what you originally ordered, Walmart won't charge you the difference.
Step 5: Pay with your credit or debit card.
There is NO FEE for the Walmart Pickup service. You pay for your groceries only, with no added charges.
Step 6: Wait for Walmart to say your groceries are ready.
A Walmart employee will shop for you, then the groceries will sit in a refrigerated or frozen area near the Pickup center, waiting for you. When all that's done, Walmart will send you an email or text - whichever you tell them you prefer.

Step 7: Let Walmart know you're on the way.
This is easiest to do on your smartphone. If you have any technical difficulties with this step, the email or text also gives a phone number where you can call and tell a real person you're on the way.
By the way, this text or email also tells you exactly what substitutions, if any, were chosen. In the four times I've used Walmart Pickup, one order had one substitution and another order had two. How often you will see substitutions depends entirely upon your Walmart and how well stocked it is.
Step 8: Pull into the Pickup area of your local Walmart.
The email mentioned in step 7 includes a map to show you where it is, if you don't already know. The grocery Pickup area is designated at the store by signs and orange paint, so it's easy to spot.
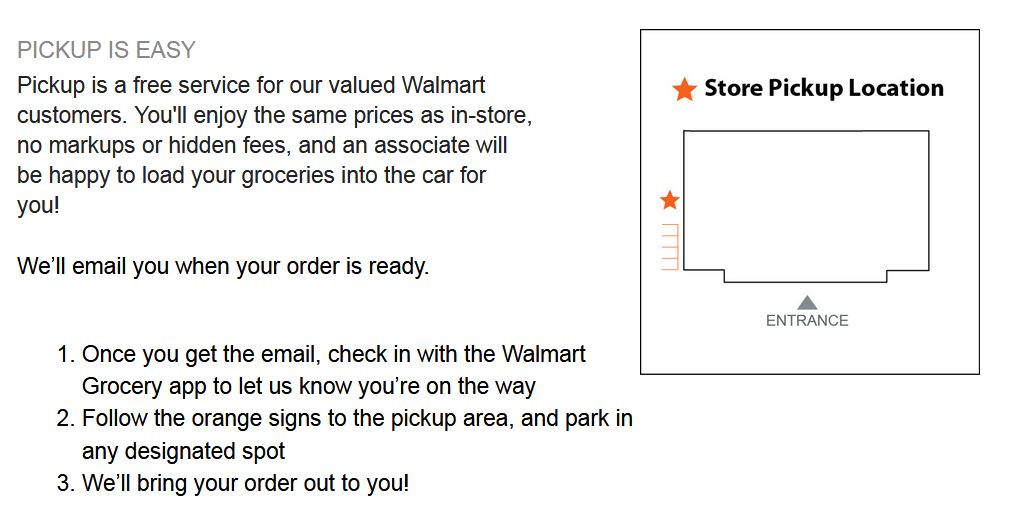
Park in a designated Pickup spot and a Walmart employee will come out to your car and verify any substitutions with you. If you decide you don't want the substitutes they chose, they will remove those items from your bags and you won't be charged for them.
The Walmart employee will then load your car with the groceries and have you sign that you received them. In my experience, they are careful about delicate items like bread and fruit, even putting special organge stickers on the bags containing them to remind everyone to use care.
Step 9: Take your groceries home and put them away!
Done!
What I Think about Walmart Pickup
I unabashedly love, love, LOVE this service! Grocery shopping used to be a 2.5 - 3-hour affair for me. Now I can quickly place my order online (in the comfort of my home) and pick it up in just a little over the time it takes to drive to Walmart. No fighting a crowded store. No waiting in line.
I've used Walmart Pickup four times now, and every time my order has been accurate, with no mistakes made. The produce has been in excellent shape, and so has the meat. (Walmart does have a policy that if you're unhappy with any item the Walmart shopper chose for you, they'll give you a full refund.)
Really my only complaint is that I no longer receive a traditional receipt that I can scan into apps like Ibotta, which give coupon-type rebates on certain items. Instead, Walmart emails me a receipt, which cannot be scanned into such apps. This is a bummer, but it's not enough to keep me from using Walmart Pickup.
Pros to Walmart Pickup:
* It's easy to order online (via your computer or your phone).
* You can order non-grocery items, too! I've ordered items found in the pharmacy and home goods sections, for example.
* Walmart remembers your preferred items and you can easily either re-order everything or just some things without having to add each item, one-by-one, to your cart.
* You get to choose the pickup time, which is flexible. (You don't have to be there at 9am sharp, for example. You have a window of one hour.)
* You can choose whether or not you'll accept substitutes, and before you accept your groceries, you can choose not to accept the particular substitutions, if any, your Walmart shopper picked for you.
* When a substitution is needed, if your Walmart shopper chooses a more expensive brand or a bigger size, you'll only be charged the price of the item you originally ordered. For instance, I recently ordered a small container of Great Value real maple syrup. My store was out of that size, so they substituted a larger container of the same product - but only charged me for the smaller size.
* You can change your order or add items to it within several hours of placing it. I've used this feature every time, because even though I make a shopping list ahead of time, I always seem to forget something!
* I've never had a long wait to get my groceries loaded. Usually, in a minute or two, someone comes out and starts loading my groceries. I'm sure as more and more people start using the service, this could potentially change. Hopefully, Walmart will be on top of demand. (And do remember that every Walmart has different management - some better than others.)
* The Walmart employees who bring my groceries out to me are friendly. In talking to them, I've learned they are excited about the new service, and love the variety they experience when shopping for other people. (It's got to be more fun than scanning items at checkout all day long.)
* Walmart has said they will never charge for this service. Walmart Pickup is FREE and is supposed to remain that way.
* Walmart does not allow employees to accept tips for this service. Depending upon your point of view, this can be a con, but if you're thinking in terms of expense, it's a bonus. (When I was in California caring for my father, I used Safeway's delivery service. It was easy, but there was a fee for delivery - plus I felt I should tip to the delivery guy. This was an added expense that under normal circumstances I could not justify at home.)
Cons to Walmart Pickup:
* There is a $30 minimum order.
* There's no "normal" print receipt that you can upload to coupon or rebate apps. Print coupons are also not accepted when you use Walmart Pickup. (Someone recently mentioned that if I go to eBates before hitting the Walmart Grocery site, I can earn money on my Pickup order that way. I'm going to try it next time I shop!)
* At this time, you can't use reusable grocery bags with Walmart Pickup.
* If you're like me, it might take time to learn what sizes to order!
* You have to place your order at least four hours before picking it up.
Conclusion
Overall, I'm blown away by how good the Walmart Pickup service is. The whole process is super easy, and it saves me tons of time and work. Although I plan to continue making a quick stop at Safeway for on-sale meat, I'll still use Walmart Pickup for most of my grocery shopping needs.
$10 OFF YOUR FIRST ORDER
If you use this link, you'll get $10 off your first order with Walmart Pickup.
* Although no one is paying me to review Walmart Pickup or promote Walmart, some of the links in this post are affiliate links, which means I earn a wee bit should you choose to purchase anything through them or use the sites mentioned. Please see the FCC disclosure for full information.
April 25, 2019
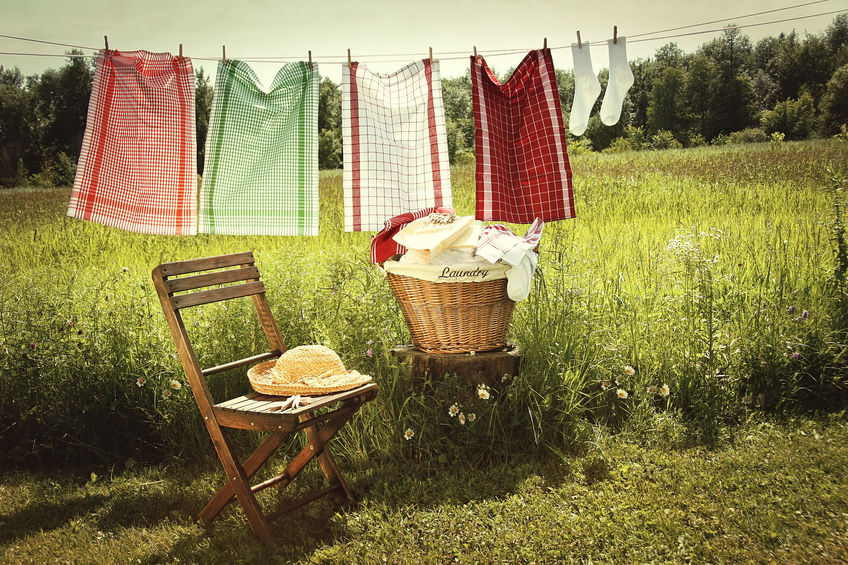
Grandma's Tips for Using a Clothesline
 This post contains affiliate links. All opinions are my own. Please see FCC disclosure for full information.
When I was a kid, every summer my Dad and I went to a magical place called Missouri. Now, maybe you don't think Missouri is magical (though you might understandably think it's beautiful), but as a child, I sure did. It was the place where Grandma lived, and it was a radically different world from the suburban California where I spent my early years. It was a place with summers that lasted forever, sweet tea, a hand pump in the front yard, and Grandma's huge, musty basement with a huge musty bed for my cousins and I to sleep in. Plus cows in the nearby pasture. And a pond to fish in and a "crick" to play in. And my Grandma's clothesline.
It might seem strange that, at a tender age, I was fascinated by Grandma's clothesline. Certainly part of my interest was that I didn't know anyone else who used one. And I loved the way Grandma hummed as she pulled pins from her apron and hung my summer shorts on the line. In other words, clotheslines hold good memories and romantic notions for me.
But there are plenty of down-to-earth reasons to have and use a clothesline on the modern day homestead, whether that's in the city or in the country. I love that my clothesline takes my household chores outside. I also appreciate that it conserves electricity and saves money while eliminating static cling (and the need for fabric softeners or dryer sheets).
Today, the art of hanging clothes isn't known to many people. However, I still remember a few tips from Grandma.
Setting Up the Clothesline
At its simplest, a clothesline is just a rope connected to two poles. Those poles should be sturdy, though, because one load of wash that's been spin-dried in the washer weighs about 15 to18 pounds. There are three basic choices for the rope itself: Plastic, nylon, and cotton. Plastic clothesline is stretch-resistant and inexpensive, but clothespins and fabric tend to slip from it. Nylon clothesline is mildew-resistant and strong, but again, it's quite slippery, making it harder to securely hang the laundry. Cotton clothesline is traditional, and although it might be counter-intuitive, seems easier to clean than synthetics. It's also not slippery.

How long should your line be? One load of laundry requires approximately 35 feet of clothesline. Don't make the line longer than this (unless you have a double pulley line) because it will sag significantly.
Where you put your clothesline matters, too. Don't place it near trees - because trees can have ticks and ticks can jump onto your laundry and then onto you. Trees may also leave debris (leaves, seeds, and so on) on your freshly washed laundry.
Generally speaking, you don't want the clothesline in full sun, either, because all that sunshine fades fabric and causes it to wear thin. Open shade is a better option. On the other hand, Grandma taught me that if your whites are looking dingy, a good hang in the sun will help brighten them.
Sometimes indoor drying is the only option. In cities and suburbs, for instance, there are sometimes ordinances against hanging laundry outdoors. Or maybe someone in your household is allergic to pollen - in which case an outdoor line may lead to clothes that cause misery. In rainy climates, indoor clotheslines may also be best.
Which brings up a good point: You don't have to use a clothesline to air dry clothes. For years, I hung clothes on hangers and hooked them over the shower stall or on the edges of doors. It didn't look pretty, but it sure got the job done.
And while you're setting up, be sure to purchase some good clothespins (like Kevin's Quality Clothespins). There are an awful lot of cheap, China-made clothespins on the market. Many of them, such as those found at The Dollar Tree or Walmart, might be fine for crafts, but they just don't hold up well for laundry. They also tend to have rough edges that can snag fabric. It's smarter to buy clothespins that are a bit more expensive, but do a better job.

Prepping the Wash
When I mention line drying clothes, people often remark how they hate stiff garments and linens. This is easily remedied, though. Just add about 1/2 cup white distilled vinegar to the wash and your clothes will dry softer. If you use a modern washing machine, pour the vinegar into the fabric softener chute and it will only enter the wash tub during the rinse cycle - perfect! If you have an older machine that doesn't have a softener chute, you can either catch the last rinse cycle and add the vinegar manually, or (less effectively) you may add the vinegar at the beginning of the wash.
Another cause of stiffly-dried clothes is using too much laundry detergent. I recommend using less detergent than suggested on the box; Consumer Reports claims that too much laundry detergent leaves behind lint and soap deposits, which can lead to mold and restricted filters, which in turn can result in mechanical failures.
Finally, the sooner you remove laundry from the washing machine, the better. Letting wet clothes sit not only makes them musty-smelling, but makes them a whole lot more wrinkled, too.
Hanging Up
To prevent soiling freshly washed laundry, it's best to wipe down the clothesline before each use. Grandma kept an old washcloth handy for just this purpose.
When she hung the laundry, Grandma always gave each piece a good snap in the air to help remove wrinkles. She also took the time to un-crinkle wadded up clothing, like pant legs, shirt sleeves, and collars. Once again, this helps make wrinkle-free laundry (and if you're like me, the last thing you need to do is add another item - in this case, ironing - to your chore list).
It's helpful to hang like items together, since it saves time when you're folding and putting away the laundry. For example, I'll often hang all my son's clothing together on the line, followed by my daughter's clothing. Or I hang all the towels, then all the socks.
A little care in hanging clothes goes a long way toward having line-dried clothes that look wrinkle-free. Not everyone agrees on the best way to hang laundry, but Grandma taught me to hang shirts and pants from the hem. Other people tell me they prefer to hang shirts right side up with clothespins in the armhole seams. Another option I sometimes use is to place shirts on a hanger and hook the hanger onto the clothesline (which saves space, too).
You can also save space on the laundry line by hanging smaller towels on one another. For example, hang one washcloth on the line, then use clothespins to attach another washcloth to the first, and so on. In addition, I often overlap items. For instance, my placemats overlap each other slightly, so I can use three clothespins to hold up two placemats, instead of four. Some people also like using store-bought sock hangers (like this one) to save space; you can use them for washcloths, too.
Whatever you do, always hang items securely or they may end up on the ground, filthy. When in doubt, use more clothespins instead of fewer - especially with heavy items. When I hang bath towels, for instance, I fold them over the clothesline almost to the halfway point and use four clothespins to keep each in place. Yes, they take a bit longer to dry this way, but they don't fall off the line, either.
Removing Laundry
Once the laundry is fully dry, Grandma removed each item, then snapped it in the air. This flicks off any little bugs that might cling to the laundry. Then she folded each item as she put it in her laundry basket. This - again - helps prevent wrinkles (do I seem preoccupied with that?) and saves time.
I'm thankful to Grandma for introducing me to her clothesline. Through experience, I've learned line-drying laundry isn't difficult - I even find it relaxing, as Grandma did. I hope you'll consider reaping the benefits of a clothesline, too.
April 12, 2019
69 Keto Easter Recipes
 For many people, sticking to a healthy diet is most difficult during holidays. We Americans tend toward indulgence; we think, "Oh, I need to treat myself once in a while!" We also associate so many traditions and warm thoughts with special-occassion food. And while some people may be able to cheat on their diet come Easter, many of us who use keto theraputically cannot. And that's okay - because keto food is deliscious! And as I like to remind myself whenever I'm a little tempted to stray into carby things:
"No food is worth being ill for."
So whether you choose keto to treat an autoimmune disorder (as I do), diabetes (also as I do), Parkinson's, heart disease, cancer...or simply because you feel so much better eating this way, let me offer up a few recipes to help you get through the Easter season without feeling deprived. I've even inclued links for creme-filled and peanut butter eggs!
For more tips on getting through social occassions and the holidays while eating keto, click here.
 Bunny dip, courtesy of That's Low Carb?!Appetizers
Low Carb Bunny Dip (serve with celery, slices of cucumber or zucchini; pork rinds; small chunks of cooked bacon; or the sour cream crackers, below.)
Keto Sour Cream & Chives Crackers
Keto Deviled Eggs with Avacado
Best Ever Deviled Eggs
Jalapeno Bacon Bombs
Edible Marbled Easter Eggs
Bacon Wrapped Avacado
Main Dishes
Low Carb Ham with Maple Glaze
Rosemary & Mustard Baked Ham
Pressure Cooker Ham
Rack of Lamb with Macadamia, Garlic, & Parsley Crust
Herb Crusted Rack of Lamb
Bread
Low Carb Hot Cross Buns
Hot Cross Buns II
 Cauliflower "Fauxtato" Salad, courtesy of Ruled.me.
Low-Carb Greek Tsoureki
Keto Easter Bubble Buns
Keto Bread Rolls
Keto Pull-Apart Rolls
Garlic Parmesan Knots
Low Carb Easter Pull-Apart Bread
Keto Cheddar Cheese Straws
 Brussels Sprouts with Creamy Parmesean Sauce.
Other Sides
Skillet Brussels Sprouts with Parmesan Sauce
Cheesy Brussels Sprouts Bake
Low Carb Green Bean Casserole
Low Carb Green Bean Casserole II
Green Beans with Onions & Bacon
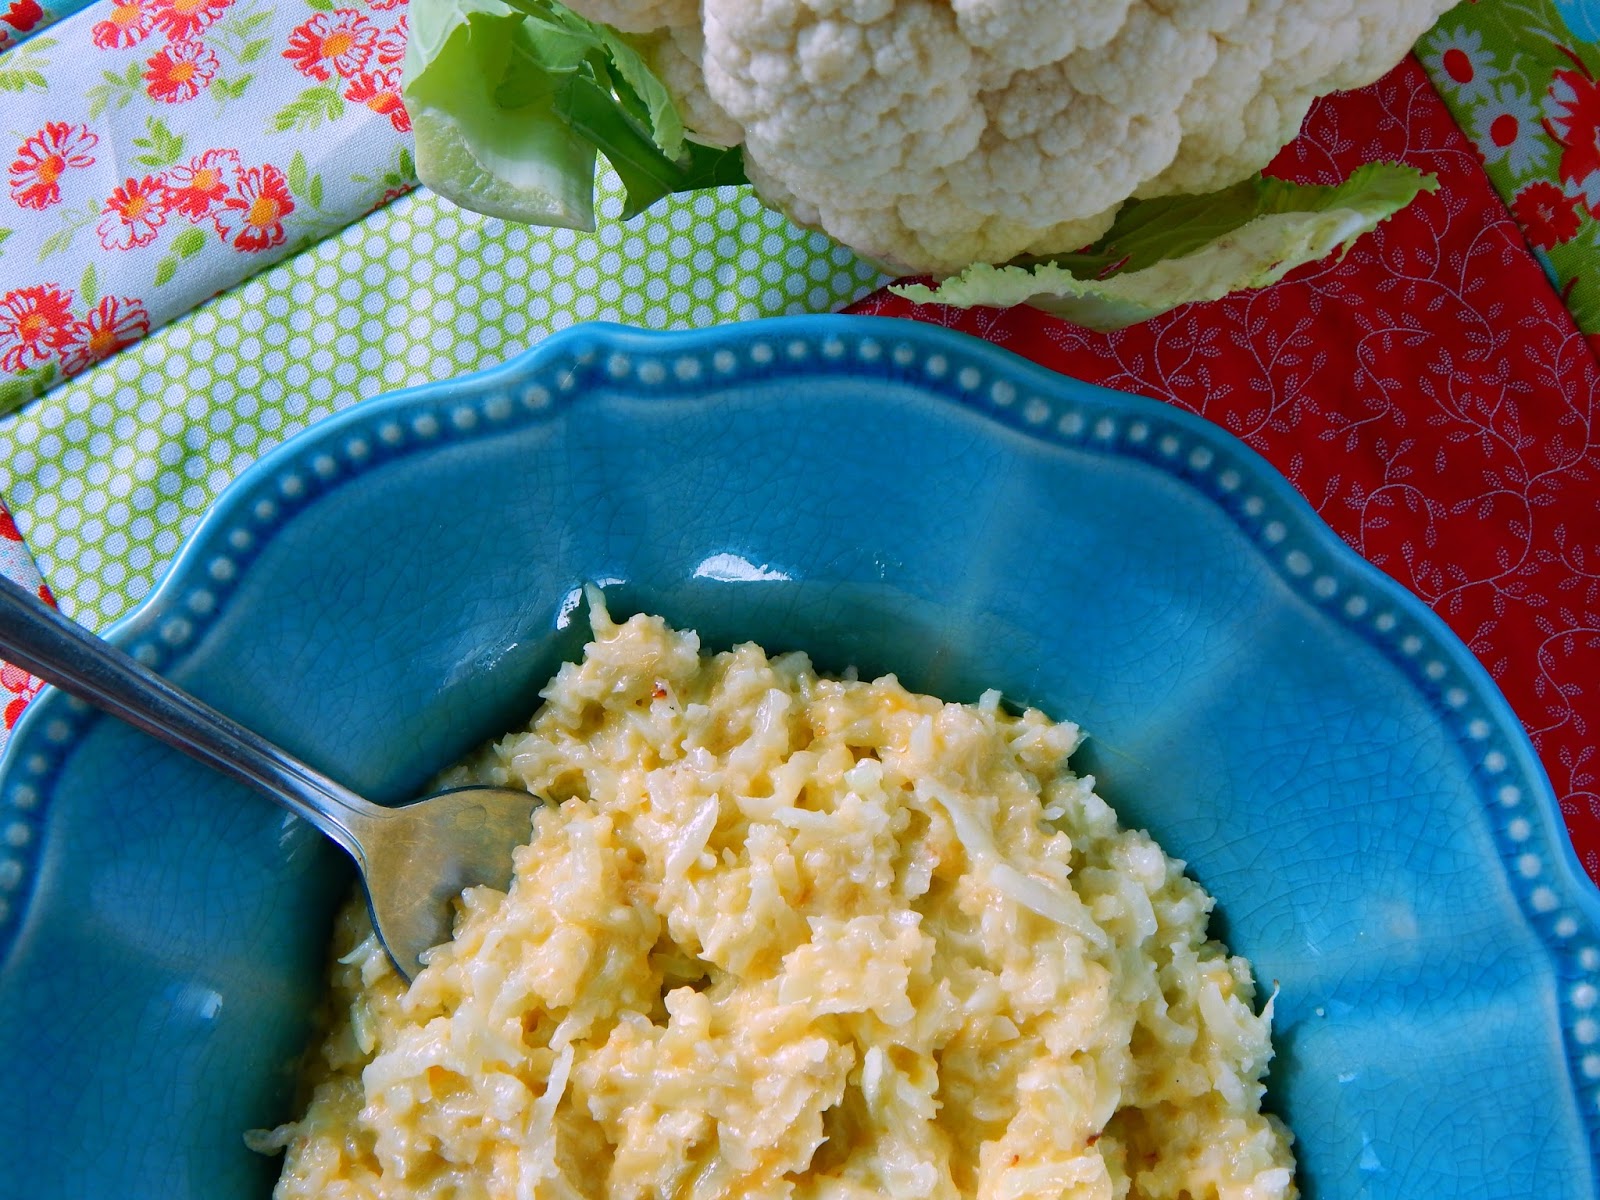 Creamy Good Cauliflower Mac and Cheese.
Cheesy Cauliflower Mash
Creamy Good Cauliflower Mac and Cheese.
Cheesy Cauliflower MashInstant Pot Deviled Egg Salad
Low Carb Scalloped "Potatoes"
Turnip Fauxtato Salad
Radish Fauxtato Salad
Cauliflower Fauxtato Salad
Cauliflower Au Gratin
Bacon Cauliflower Salad (omit sugar or sub keto-friendly sweetener)
 Asparagus with Hollandaise Sauce, courtesy of Low Carb Maven.
Cauliflower Mac & Cheese
Creamy Broccoli & Cauliflower Rice
Low Carb Asparagus with Hollandaise Sauce
Bacon Wrapped Asparagus
Crispy Asparagus Fries
Creamed Spinach
Desserts and Treats
Sugar-Free Marshmallows
Sugar-Free Peeps
Keto Peanut Butter Eggs (If the shape doesn't matter to you, this Reese's like recipe is even easier.)
Low Carb Creme Filled Chocolate Eggs
 Creme filled eggs, courtesy All Day I Dream About Food.
Buttercream Eggs
Almond Joy Easter Eggs
Chocolate Chip Cookie Dough Eggs
Keto Pound Cake
Low Carb Strawberry Shortcake Cake
Keto Individual Strawberry Shortcakes
Low Carb Strawberry Trifle
Low Carb Strawberry Mousse Tartlettes
 Individual strawberry shortcakes, courtesy of Ruled.me.
Keto Strawberry Pie
Low Carb Strawberry Lemonade Pie
Low Carb Strawberry-Topped Cheesecake
Chocolate Strawberry Low Carb Cheesecake
Keto Strawberry Rhubarb Pie
Low Carb Carrot Cake Bites
Keto Carrot Cake
Low Carb Carrot Cake
Keto Carrot Cake Cheesecake
 Sugar Free Jello, courtesy of Maria Mind, Body, Health.
Keto Carrot Cake Ice Cream
Low Carb Easter Egg Nest Cookies
Keto Banana Cream Pie
Low Carb Lemon Cream Pie
Keto Lemon Meringue Pie
Low Carb Lemon Cheesecake
Low Carb Berry Cheesecake
Healthy Sugar-Free Jello
Related Posts:


March 28, 2019
How to Test Garden Soil
 This post contains affiliate links. All opinions are my own. Please see FCC disclosure for full information. Thank you for supporting this site!
When someone tells me they have a black thumb, one of the first things I ask is what type of soil they have in their garden. Almost inevitably, they either give me a blank stare or a shrug.
In the excitement of starting a new garden, it's easy to get caught up in seed catalogs and grand gardening dreams - but for any garden to succeed, you must first do two things: Determine what type of soil you have, then test it. That is the chief key to having a so-called green thumb.
This said, there's no need to test your garden soil every year. Most extension offices recommend testing every five years or so, unless you notice growth problems in your plants. The best time of year to test soil is in the fall, but it's acceptable to test in the winter (as long as your soil isn't frozen) or even in early spring. However, it takes time for soil amendments to do their work; the sooner you test, the sooner the amendments can do their thing and the sooner you can have a thriving garden.
Different Soil Types
Clay soil is made of tiny, densely packed particles. Clay is less than ideal for gardening because water won't drain well from it (which can lead to plant rot) and may also take too long to reach plant roots (making them die of thirst). In addition, clay can prevent plants from spreading their roots - and plants without strong root systems are plagued by ill-health.
Sandy soil has - you guessed it - lots of sand in it. This can be beneficial, except that pure sand has no nutrients to feed plants and, since water drains away quite quickly in sandy soil, plants may not get enough to drink, either. On the other hand, some sand in the soil helps keep plants from getting soggy and rotting.
Loamy soil is a mixture of silt (which is particles that are between the size of sand and clay), sand, and clay. It's ideal for gardening; it retains the right amount of moisture and nutrients for plants.
How do you know which category your soil falls into? The simplest test is to sprinkle water on the ground, making the soil moist, but not wet. Scoop up a handful, squeeze it, and open your hand. Does it crumble when gently poked? Then the soil is loamy. Does the soil retain its squeezed shape even after a gentle poke? It is clay. Does the soil crumble the moment you open your hand? It is sandy.
 It can also be helpful to test the drainage of your garden's soil. To do this, dig a hole one foot deep and about 6 inches wide, then fill it with water. Allow the water to completely drain. Fill the hole with water again, but this time, pay attention to how long it takes for the water to completely drain from the hole. Well-draining soil drains 1 or 2 inches of water per hour. If the soil drains more slowly, it either has rocks blocking water drainage or is high in clay. If the latter is the case, work compost and other organic matter into the soil.
If the soil drains more quickly than an inch an hour, it's too sandy and adding organic matter will also help.
Testing pH
Next, you need to know the pH of your garden soil - how acidic or alkaline it is. If the pH is too high or too low, your plants will not be healthy. For example, potatoes grown in soil that's too alkaline tend to get scab and other diseases. And while potatoes do like slightly acidic soil, if they are grown in soil that's too acidic, they simply don't thrive and could potentially die.
A pH of 7.0 is considered neutral; 0 means the soil is highly acidic; 14 means it's highly alkaline. In general, food crops prefer soil that has a pH of 6.0 - 6.5, but a range of 6.0 - 7.5 is considered acceptable for most vegetables. Many berries prefer a range of 5.0 - 7.0 and acid-loving blueberries prefer the pH to be 4.0 - 5.3. See the chart at the end of this post for more specific guidelines for common food crops.
Other Tests to Run
In addition to knowing what type of soil you have and what its pH level is, you should test the soil for basic nutrients, commonly referred to as "NPK."
"N" stands for nitrogen, which is the nutrient that makes plants grow rapidly, putting on many leaves. Lack of nitrogen in the soil results in plants that grow slowly, turn yellow, and drop leaves. Too much nitrogen in the soil causes too-rapid growth that results in weak, spindly shoots.
"P" stands for phosphorus, which helps plants grow healthy root systems and is especially beneficial during blooming and seed setting periods. Too little phosphorus leads to purplish stems, dull green or yellow leaves, and potentially no blooms. Too much phosphorus reduces a plant's ability to use micronutrients (especially zinc and iron), which leads to poor growth and even plant death.
"K" stands for potassium (sometimes called potash). It helps plants form chlorophyll and can aid in fighting disease. If soil lacks adequate levels of potassium, plants may appear generally sick, have small fruit, and/or older leaves that turn yellow. Too much potassium in the soil reduces a plant's ability to use other nutrients.
How to Test Your Soil's pH and NPK
There are a few ways to test your garden soil's pH and NPK. One is to purchase a soil meter (like this one). A huge benefit of buying this tool (which generally sells for around $30 - $60) is that it's reusable year after year. Just stick the prongs in the soil and BAM! you have a reading. However, to remain reliable, it should be recalibrated every year, which usually includes purchasing recalbration liquid.
Another way to get your soil tested is to send a sample off to a laboratory. This typically costs $40- $100; you can find regional labs that will do garden soil tests through your local extension office. (Find your local extension office here.)
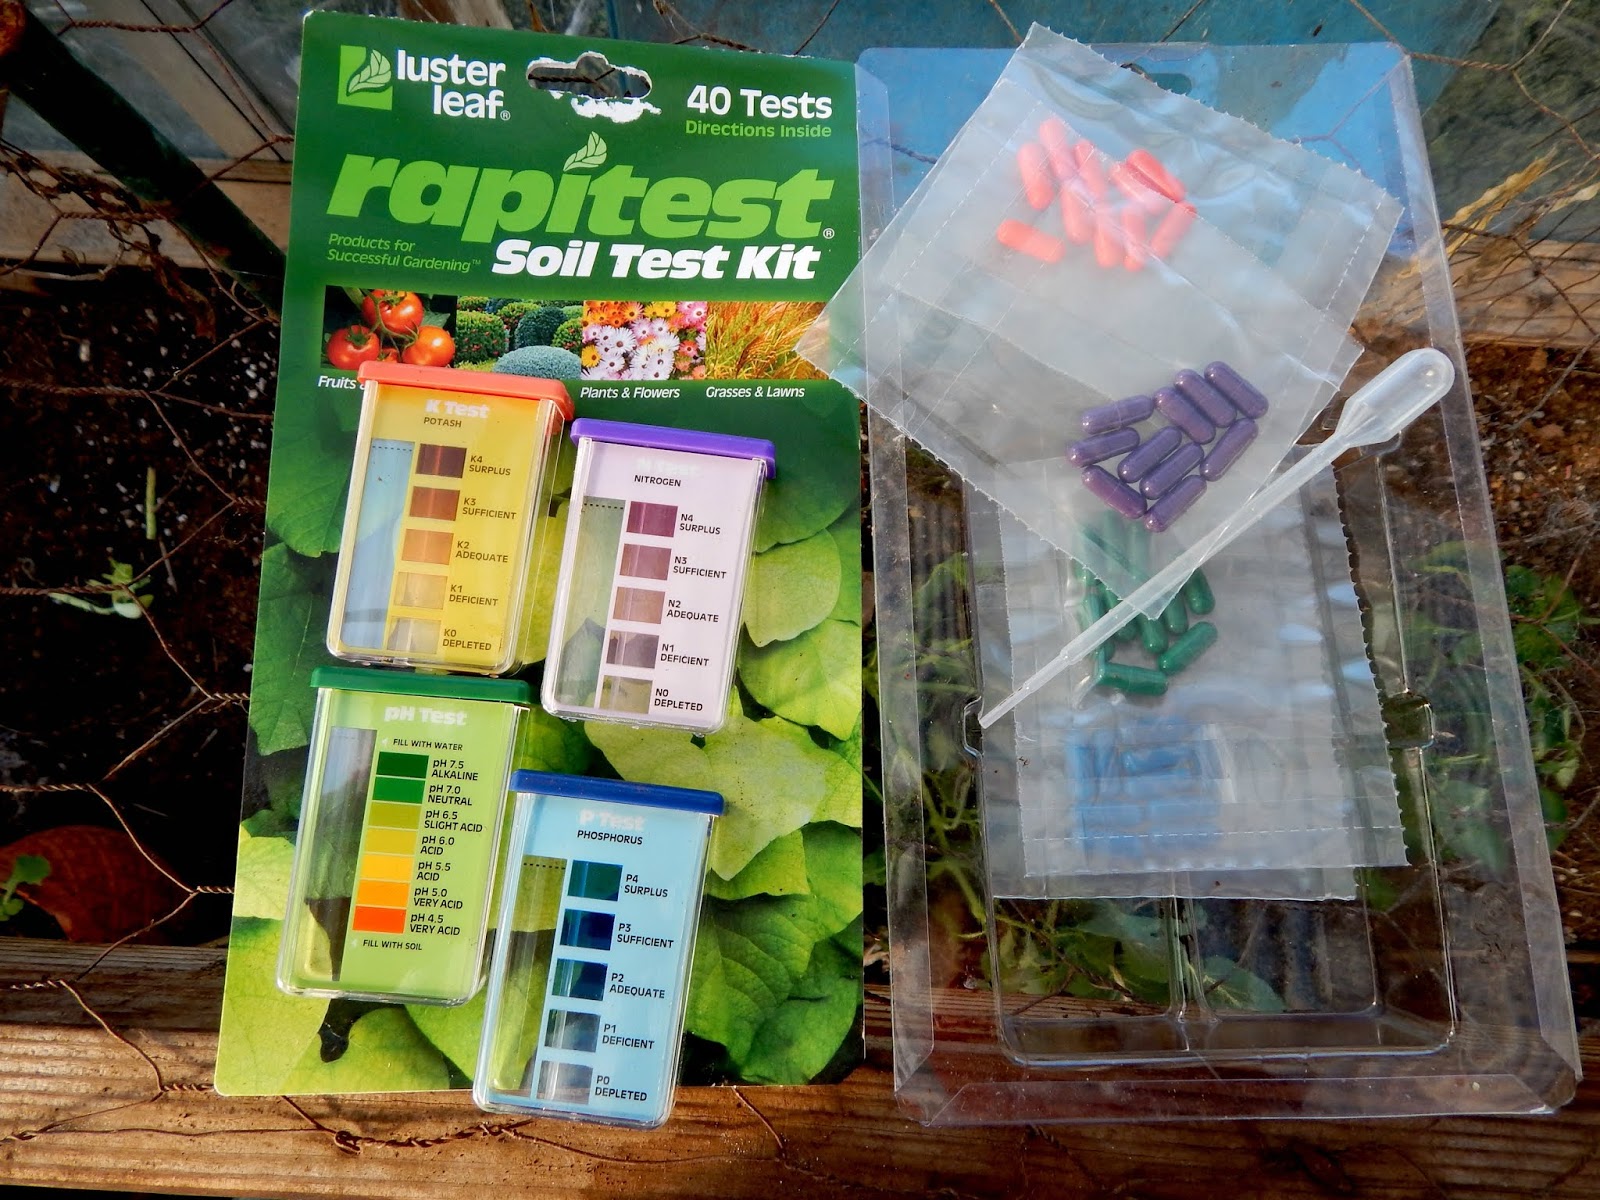
Another method (and the one I currently use) is a home testing kit (like this one). For about $25, you can buy such a kit at a local garden center or online. Kits give you everything you need to test your soil multiple times.
Generally, professional laboratory testing is considered the most accurate, but for the average gardener, any of these methods is accurate enough to prove useful.
DIY Soil Testing with a Kit
Although I keep meaning to buy a meter, I typically use a home test kit when I need to test my garden soil. To give you an idea of how easy it is to test your own soil, I'll walk you through the steps I took last fall when I tested the soil in my greenhouse. (When we moved to our homestead three years ago, I knew my small, unheated greenhouse had terrible soil, and while I've been adding lots of organic matter to it, I could tell by the state of my plants that I needed to test the soil to determine more precisely what the soil was lacking.)
I chose to use a RapidTest kit, which I've used in the past with good results. My directions and the photographs accompanying this post focus on this brand, but whatever test you choose to use, please read the instructions carefully - and follow them exactly.
I began with a pH test:
1. First, locate the tube or container used exclusively for pH testing. In my test kit, it is clearly marked and color-coded. Remove this testing container's lid.

2. In the garden soil, dig a hole that's about 4 inches deep. Remove a small amount of soil from the bottom of the hole. Throughout this process, be sure to never touch the soil with your hands.
3. Fill the testing container with soil to the fill line.

4. Find the bag that contains the color-coded capsules meant for pH testing. Carefully separate the two ends of the capsule and pour the powder that's inside into the testing container.
 5. Using the dropper included in the kit, fill the testing container to the water line using distilled water. Do not use tap or well water, which may skew the results.
6. Put the lid on the testing container and shake well. Set the container aside for one minute, or until the soil fully settles.
 7. Examine the container and compare the color of the water/soil mixture to the color chart on the side of the testing container. Find the color that's closest to your results and note the corresponding pH. When comparing colors, use natural daylight, but not direct sunlight. My test results show that my greenhouse soil is a bit acidic.
Next, I tested NPK:
1. In the garden soil, dig a hole that's about 4 inches deep. Remove soil from the bottom of that hole, never touching it with your hands.
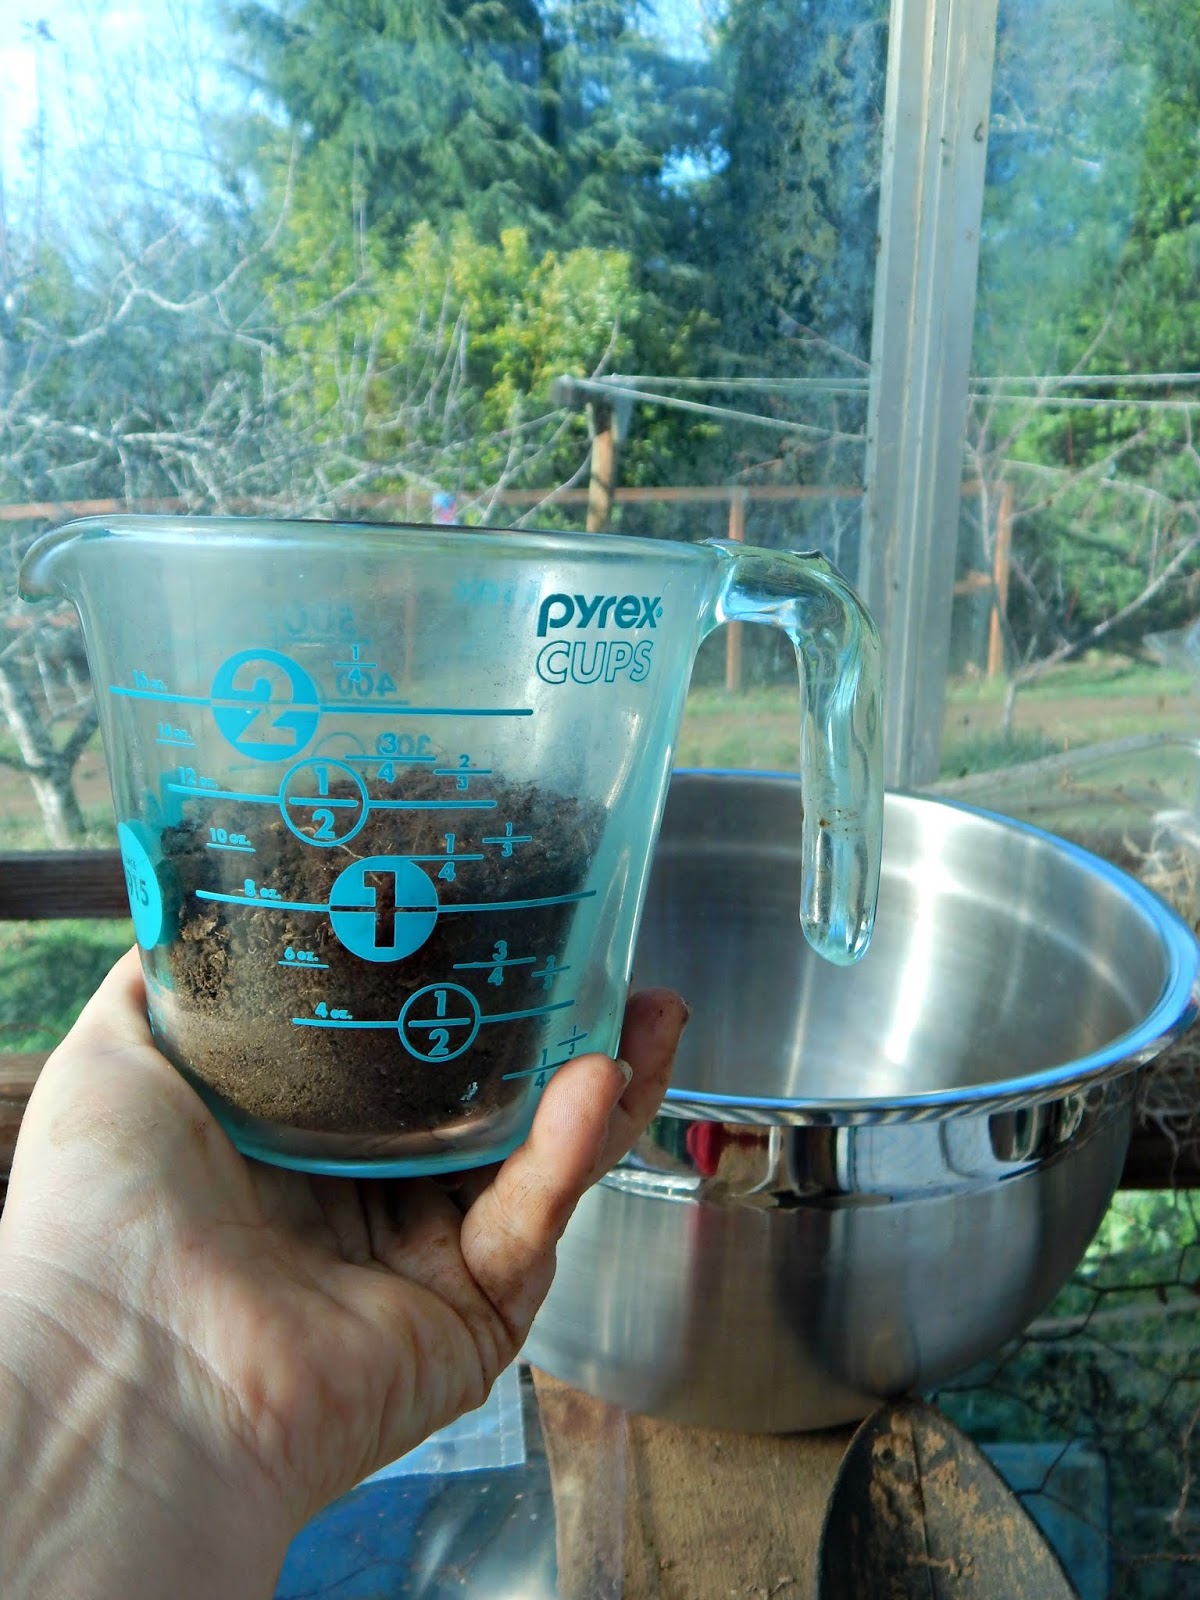
2. Fill a freshly washed, large bowl or jar with 1 part soil and 5 parts distilled water. (Tap or well water may skew the test results.) Stir or shake thoroughly for at least one minute.
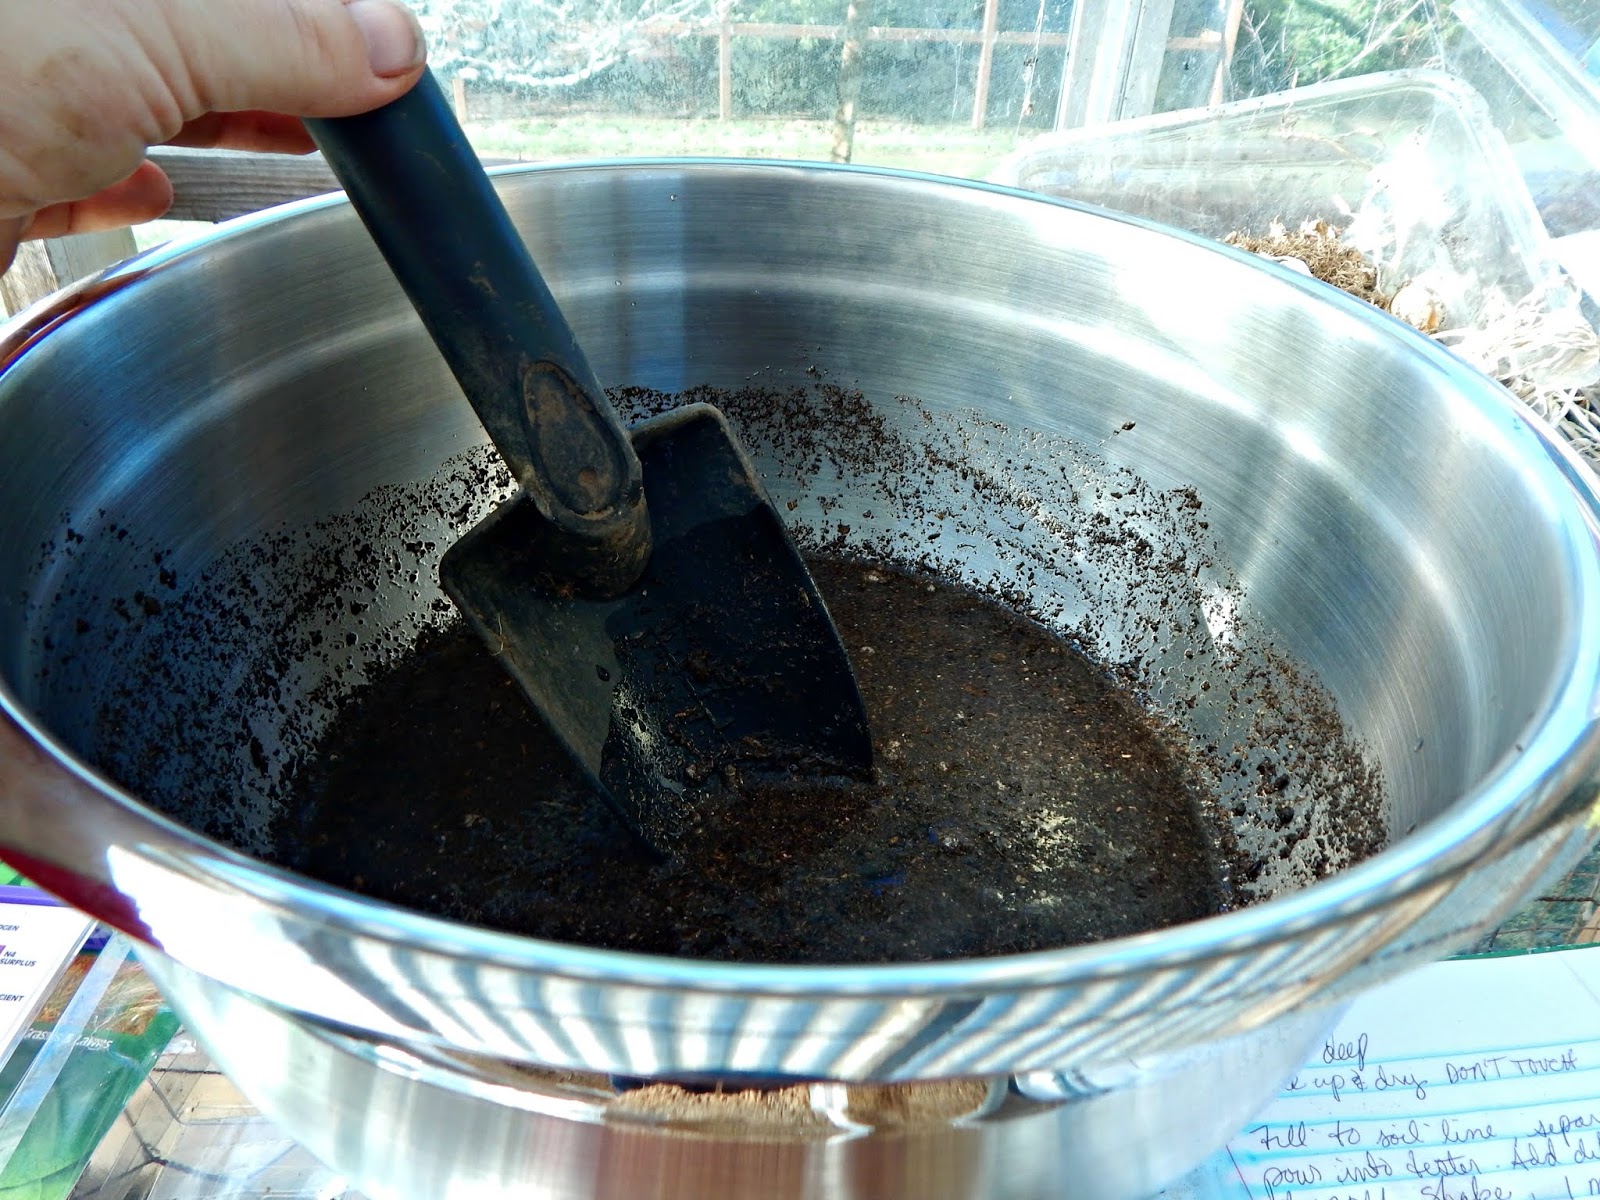 3. Allow the mixture to completely settle. This will take at least 10 minutes, but could take up to a day.
4. Find the testing containers that are marked N, P, and K. Remove their lids. Find the corresponding capsules and make sure you use the correct ones for each testing container. (With my kit, the color of the capsule matches each testing container's lid.)
5. Using the dropper included in the kit, fill each container with the water and soil mixture, to the marked line. For the most accurate test results, don't allow any sediment to get into the testing container and don't disturb the sediment in the bowl or jar you've used.
6. For each container, separate the ends of the corresponding capsule and pour the powder into the correct testing container.
7. Place the lids on the containers and shake well. Set aside for 10 minutes.
 8. Compare the liquid portion in each container to the corresponding color chart to discover whether levels are good, deficient, or excessive. When comparing colors, use natural daylight, but not direct sunlight. As you can see from my test results, the soil in my greenhouse is depleted in everything!
What to Do About Imbalances
If you send your soil to a lab for testing, your results should come back with recommendations for amending your soil to cure any imbalances. If you use a DIY kit or meter, it should also come with instructions on amending. But here are some general guidelines.
To make soil more acidic: Amend with sphagnum peat, iron sulfate, or elemental sulfur (a.k.a. "flowers of sulfur” or "micro-fine sulfur"). Do note that sulfur can kill beneficial microbes in the soil. After adding sulfur to the soil, re-test in 40 - 60 days. You may also wish to add the following, which will, if added over a period of time, add acidity to soil: pine needles, woodchips, and rotted leaves or leaf mold,
To make soil more alkaline: Amend with lime; after adding it to the soil, re-test in 40 - 60 days. Over time, if you periodically add them, the following will also help make soil more alkaline: bone meal, ground eggshells or clamshells, and small amounts of hardwood ashes. Note that making acidic soil more "sweet" for garden plants is a long-term project; you shouldn't expect just one treatment to do the trick.
To increase nitrogen: Amend with alfalfa meal, blood meal, shellfish meal, or ammonium sulfate.
To increase phosphate: Amend with bone meal or shellfish meal, or rock phosphate.
To increase potassium: Amend with greensand, rock phosphate, or potash-magnesia ("Sul-Po-Mag").
To improve clay soil: Amend with sphagnum peat, greensand, biochar, compost, and aged manure. To improve sandy soil: Amend with sphagnum peat, compost, and aged manure.
Always check your soil test instructions for details on how much of any given amendment you should apply to your garden soil. You can add too much of a good thing! When re-testing soil after adding amendments, expect only small changes in pH - typically, 0.5 to 1 unit, tops. Don't add more amendments to change pH without waiting 5 - 6 weeks between applications.
Optimal Soil pH for Some Common Edible Plants
Apples 5.0 - 6.5
Blackberry 5.0 - 6.0
Blueberry 4.0 - 6.0
Lemon 6.0 - 7.5
Orange 6.0 - 7.5
Peach 6.0 -7.0
Pear 6.0 - 7.5
Pecan 6.4 - 8.0
Plum 6.0 - 8.0
Raspberry (red) 5.5 - 7.0
Asparagus 6.0 - 8.0
Bean, pole 6.0 -7.5
Beet 6.0 - 7.5
Broccoli 6.0 - 7.0
Brussels sprouts 6.0 - 7.5
Cabbage 6.0 - 7.0
Carrot 5.5 - 7.0
Cauliflower 5.5 - 7.5
Celery 5.8 - 7.0
Chives 6.0 - 7.0
Cucumbers 5.5 - 7.0
Garlic 5.5 - 8.0
Kale 6.0 - 7.5
Lettuce 6.0 - 7.0
Pea, sweet 6.0 - 7.5
Pepper, sweet 5.5 - 7.0
Potatoes 4.8 - 6.5
Pumpkins 5.5 - 7.5
Radishes 6.0 - 7.0
Spinach 6.0 - 7.5
Tomato 5.5 - 7.5
February 26, 2019
My Dad
 I apologize for being so absent here and on social media. As those of you who follow this blog on Facebook know, last week my father came home on hospice. My husband and I spent six days taking caring of him, which was our great privilege. On Thursday, he passed away.
He did it on his own terms. He wanted to be at home, in his recliner, and he hoped he's pass in his sleep. All of that came true. Best of all, he accepted Christ as his Savior before passing.
Dad started life as a poor share cropper's son, living in Missouri. In fact, one of his great passions began when he was plowing the field with shoes so worn out, they were full of holes. Something sharp poked his foot, so he stopped plowing and discovered an arrowhead in his shoe. From then until his last year, he gathered a huge collection of Native American artifacts. We still have that original arrowhead.
He was smart as a whip, too. He went to a one-room schoolhouse, but skipped several grades. College was unaffordable and since he knew he'd be drafted, he joined the Army Reserves. Here, he seized the opportunity to get more schooling, choosing to become a surveyor. After the Army, he went into carpentry, and took night classes so he'd understand the stuff the boss knew, like how to read blueprints.
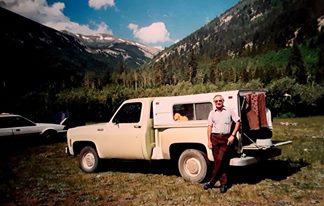 A job offer lured him away from Missouri all the way to California. The ocean didn't impress him, but he could live cheap near the beach. However, the company that had hired him was going bankrupt and couldn't finish a certain big job they were contracted for. The large construction company that had hired them allowed them to bow out, "but you'll need to give us your foreman," they said. That was dad. This lead to a decades-long career for that big construction company where he became the guy in charge of building shopping centers, hospitals, and a marine life center. When he finally retired, he was so beloved, the company said they'd send him on a trip anywhere he wanted to go.
Probably to their surprise, he told them he wanted a fishing trip in Russia. Off he went, along with a translator, bear hunter (just in case), cook, guide, and a Soviet-era helicopter to bring them in and out of the wilderness. He continued to travel to most of the national parks, Alaska, and Belize, despite the fact that he'd been diagnosed with leukemia and was given 7 to 8 years to live.

Over 20 years later, he was still going strong. Until the past two years. It was getting harder to control his leukemia, and he was suffering other illnesses, including a persistent, debilitating cough that made life difficult. And when all his sisters died, leaving him the only living sibling, he just felt ready to go.
Over and over and over again, his friends and acquaintances tell me how much they loved him, how he'd drop everything to help others, and how his quirky sense of humor had them rolling with laughter. (One couple told me their little girls - now grown - cherished the napkin fights he always started after dinner. They took to calling him "Uncle Too-Bad" because he liked to jokingly tell people "well, that's just too bad!")
Before he died, Dad told me he'd had a good life and felt at peace about passing to the next life.
I'm not sure when I'll be back to blogging, but it will happen eventually. While I'm gone, remember to tell everyone you love them, and to learn as much about your loved ones lives as you can. Someday, you will cherish those memories.

February 8, 2019
Weekend Links
 We have snow!
This post contains affiliate links. All opinions are my own. Please see FCC disclosure for full information. Thank you for supporting this site!
We have snow!
This post contains affiliate links. All opinions are my own. Please see FCC disclosure for full information. Thank you for supporting this site!
In which I share my favorite posts from this blog's Facebook page.
"Every good and perfect gift is from above, coming down from the Father of the heavenly lights, who does not change like shifting shadows. "
James 1:17
* We finally got our share of the snow! Oh, it's nothing compared to what some of you are getting, but four inches of snow is a BIG DEAL where I live! My kids love it, of course, but I confess I'm having the best time watching the animals react. Our two male cats keep trying to come inside. (And yes, they have plenty of warm, cozy places to stay that are not our house.) Our female cat, ever the huntress, just sees it as a grand opportunity to find new prey. Our youngest hens have never seen snow before and they keep hopping around the snowy part of the chicken run. The older ladies hardly seem to notice the snow. And the rooster? He'd rather stay in the hen house all day. Most fun is the dog. He loves snow! He goes outside and plays all day and when he gets tired, he sits in the snow to rest. No way, no how is he coming in until we make him!
* Thank you to everyone who picked up a copy of The Ultimate Dandelion Medicine Book! It was #1 in Herbal Medicine and Alternative Medicine and #7 in Health on Amazon and has all 5-star reviews. Now I'm hoping you will all GO LEAVE A REVIEW! Hahaha! But reviews make all the difference in Amazon helping new readers find books! By the way, I also started a Facebook group that's entirely devoted to using dandelions as food and medicine. Join us!
* While the kittens were recovering from their spay and neuter, they lived in my canning kitchen. And since they got into and on everything, it was too unsanitary to use for food preservation. Now they are healed and living outside, so I fired up my canner and freeze dryer. First, I tackled some meat in the freezer. Around Christmastime, I bought ham and turkey for 99 cents a pound - about as cheap as they get around here. I cooked the ham and we ate two meals off it, then I made ham stock and canned it, along with some ham meat. Then my husband smoked the turkey, we ate two meals off it, I canned stock from the bones, and I freeze dried the rest of the meat. When reconstituted, it tastes just like it would fresh out of the smoker!
 The turkey before freeze drying...
 and the turkey after freeze drying.
I also had about 80 eggs from our hens in the fridge, so I decided to try freeze drying them. I whipped the eggs to combine the yolks and whites and popped them into the machine. Now they are shelf stable for over 20 years and can be used to cook scrambled eggs, or for baking. I love my freeze dryer! ( Learn more about it here .)
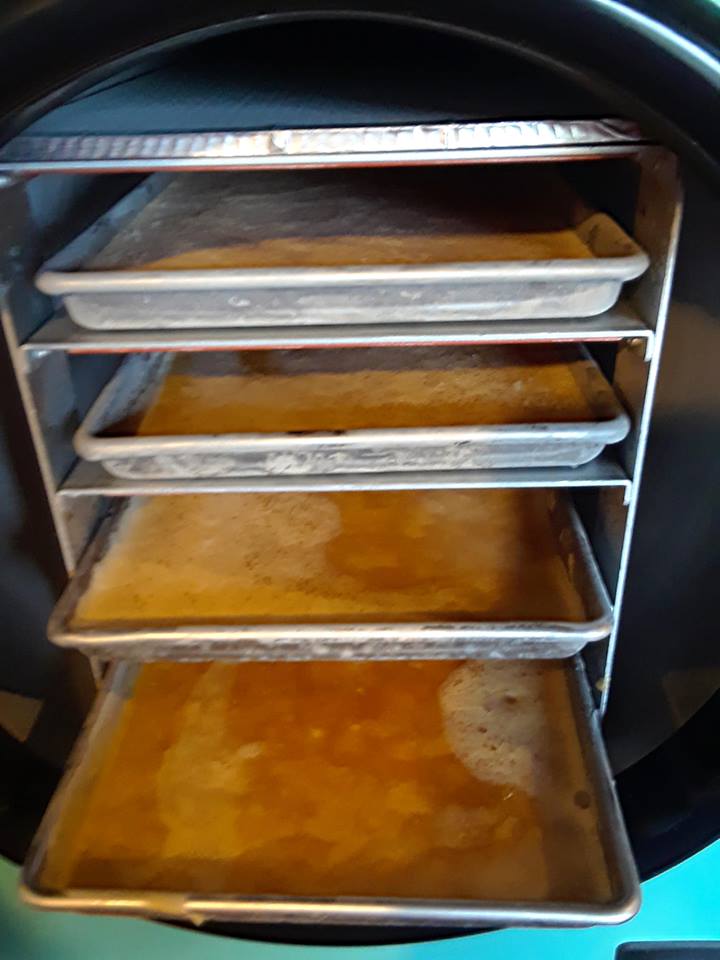 Eggs going into the freeze dryer...
 and eggs coming out of the freeze dryer.* I recently finished this novel, Between Two Shores, by one of my favorite modern novelists, Jocelyn Green. It's a straight historical (not a romance) and I LOVED it! Totally refreshing and so moving, too. I highly recommend it.
* Recall on peaches, nectarines, and plums.
* Tyson chicken nugget recall.
* Are measles making a come-back where you live? Do you know the signs and symptoms of measles?
* This will be controversial, but it's worth reading. Why getting the measles vaccine may help prevent other childhood diseases.
* The beauty of God's creation is highlighted in these microscopic images of seeds.
* Love pickles? Then you probably should try dehydrated pickle chips!
* How to make garden fertilizer with comfrey "tea."
* 6 fruit crops you can propagate from cuttings.
Oldies But Goodies:
* Foraging for Chickweed
* Why & How to Prune Blueberries for a Better Harvest
* Why I Don't Watch HGTV (and Maybe You Shouldn't Either)
February 5, 2019
4 Things I Wish I'd Known about Backyard Chickens
 I grew up with a pet chicken and have now consistently had a laying flock for about seven years (barring a short period of hen-lessness when we sold our suburban home and moved to the country). I vividly recall trying to convince my husband that having backyard chickens in the suburbs was totally do-able - and worth doing. He was difficult to persuade, but now he might be even more pro-chicken than I am!
So, needless to say, we think chicken-keeping is worthwhile. Still, if you've never had chickens before, there may be some surprises in store for you. Here are some things that surprised me when I first started keeping chickens as an adult.
1. Some hens lay a lot less than others. Actually, I did know this before I got my first flock of hens, but it took a while for me to realize just how dramatically the choice of breed affects egg laying. For example, we once had a neighbor who chose fun, fancy-looking hens, and even though they were in their prime, they only laid one egg a week. On the other hand, the chickens we kept at the same time (which were Plymouth Rocks) typically laid an egg a day. At one point, we also adopted some fully-grown Silver Wyandottes; they were sweet, mellow hens, but they weren't nearly the layers our slightly more ornery Plymouth Rocks were. (Nowadays, we're loving our Australorps; they are sweet and gentle, but excellent layers.) So before you buy, be sure to check out a good chicken breed comparison chart that offers an idea of how well each breed lays.
2. Free range birds lay fewer eggs than birds in a smaller run. At least typically. We started out with hens in a small run, letting them free range for perhaps an hour or two most days. Six birds laid six eggs a day. Then we expanded our run, and suddenly the egg production dropped to just four eggs a day. This isn't uncommon. Chickens expend a lot of energy scratching around, and may receive less balanced nutrition if they don't eat much feed; hence, they lay fewer eggs. On the other hand, hens that are given high-quality land to free range (i.e., there are lots of different kinds of bugs and plants for them to eat) produce healthier eggs. Click here to read more reasons why we no longer free range our hens.
3. You really don't have to buy store bought eggs again. It's common to read that despite having backyard hens you'll still have to buy some store-bought eggs. Assuming you don't have severe restrictions on the number of hens you're allowed to have, and assuming you don't have a huge family, this simply isn't true. Choose your breed carefully, selecting excellent layers. Keep in mind how many eggs you currently use before determining how many hens you keep. Plan to store extra eggs in the fridge; if you don't wash them before storage, they last for at least 6 months in the refrigerator. Or, freeze extra eggs instead. Then, when your hens begin molting (and therefore stop laying), you'll have plenty of eggs in the fridge or freezer to last until they begin laying again.
4. Backyard eggs are actually cheaper than store bought. Again, before we got our flock, I'd read repeatedly that keeping chickens wouldn't save us money on eggs. This definitely wasn't true; read about our .06 cent eggs here.
A version of this post originally appeared in August of 1012.
Related Posts:


|


