
Kristina Seleshanko's Blog, page 11
September 10, 2021
Weekend Links & Updates
 The last of the poppies growing on my porch.
"That is why, for Christ’s sake, I delight in weaknesses, in insults, in hardships, in persecutions, in difficulties. For when I am weak, then I am strong."
_________________________________
It's been a whirlwind of a summer, that's for sure. Until just recently, it felt like I was spending any free time - plus some of the time I'd otherwise be writing or doing homesteading projects - taking care of my mother's estate, which is a couple of hours away. It was utterly exhausting, but now the work is mostly done. Of course, summer is mostly done, too.
I did manage to get in a garden - not the large garden I'd been hoping for, but things planted here and there in miscellaneous found containers, including old bathtubs and large pipes. The garden started out well, too. The collards and kale were thriving, I got a good crop of green beans, and I grew the best broccoli crop I've ever had. But then a large doe and her older fawn showed up.
Normally, putting up bird netting keeps the deer from destroying my vegetable crops because deer typically don't like to get tangled in netting...but this duo are not like most deer. They stuck their heads under my netting and completely destroyed my garden: green beans, leafy greens, cauliflower, Brussels sprouts, beets, kohlrabi, you name it. Eaten down.
 Green beans and turnips, before the deer got 'em.
(adsbygoogle = window.adsbygoogle || []).push({});
Add to that the continually cool summer, which has meant no ripe tomatoes - even in the greenhouse - until just recently. Annnnnd...then some of my tomatoes developed blight - something I've NEVER had a problem with. It's definitely been a disappointing gardening season, but I'm counting my blessings that I was able to preserve at least some veggies. I'm also using this experience to urge my hubby along in finishing my large vegetable garden, complete with deer fence.
 Today I finally harvested a few tomatoes.
We've had better success on the animal front. We have lots of rabbit babies and a new batch of quail, all of which are looking fat and happy. We are still eyeballing our ewe, Shannon, hoping she's pregnant again after loosing her lamb to a predator earlier in the year. Currently, she and her ram, Shaun, are finishing off summer grass plus lots of plums and apples. The chickens continue to happily scratch about and lay eggs, the barn cats are still fantastic hunters, and the dog keeps a doing a wonderful job being body guard to everyone.
 It's apple season!
 Baby bunnies...so cute, it hurts.
(adsbygoogle = window.adsbygoogle || []).push({});
Lots of people are still asking me where to get canning lids. I have two recommendations:
1. MasonJarMerchant.com. They will only sell you what is IN STOCK, which currently includes both Ball lids and Bernadin lids, which are made by Ball for the Canadian market. In no way am I being paid or otherwise rewarded for bringing this website to your attention, but I have used the site repeatedly and have been very pleased with the service and the lids I've purchased from them.
2. For reusable canning lids, I still recommend Harvest Guard. (Order here.) Like most manufacturers, however, they are running behind, so if you place an order, don't expect to get your product for at least a month...maybe longer. (Now is a good time to buy lids for next spring and summer!)
 Canned apple slices.
As many of you know, in 2020, Ball claimed they'd have plenty of canning lids in stores by March of 2021. However, few of us have seen ANY lids in stores. Just recently, Ball finally spoke out about the situation, saying \their current lid production is higher than their pre-virus output. They say they are working on manufacturing more lids, but find it tricky, due to social distancing, etc. Recently on Facebook, Ball claimed they are adding additional shifts to try to increase output.
Lack of lids and new interest in canning has brought out some bad advice on canning. I recommend reading this post on why old canning practices were never safe. Also check out "When Home Canned Food Goes Bad."
Why stores are finding it difficult to keep shelves stocked. It's just one thing after another.
Canning peaches? Don't throw away the peels and pits! Make peel and pit jelly!
Make low sugar blackberry jam with the last of the season's berries!
Definitely don't miss out on old Fashioned baked apples; they are a delicious, healthy fall treat.
Are you using fall leaves for garden mulch and compost? You should be :)
If you're like me and have apples coming out your ears, you'll want to read this post on how to preserve apples by freezing, canning, drying, and root cellaring (even without a root cellar).
 I recently read Carved in Stone. Very enjoyable! I recommend it :)
 I know it's fall when the spider webs appear in the orchard.
(adsbygoogle = window.adsbygoogle || []).push({});


August 11, 2021
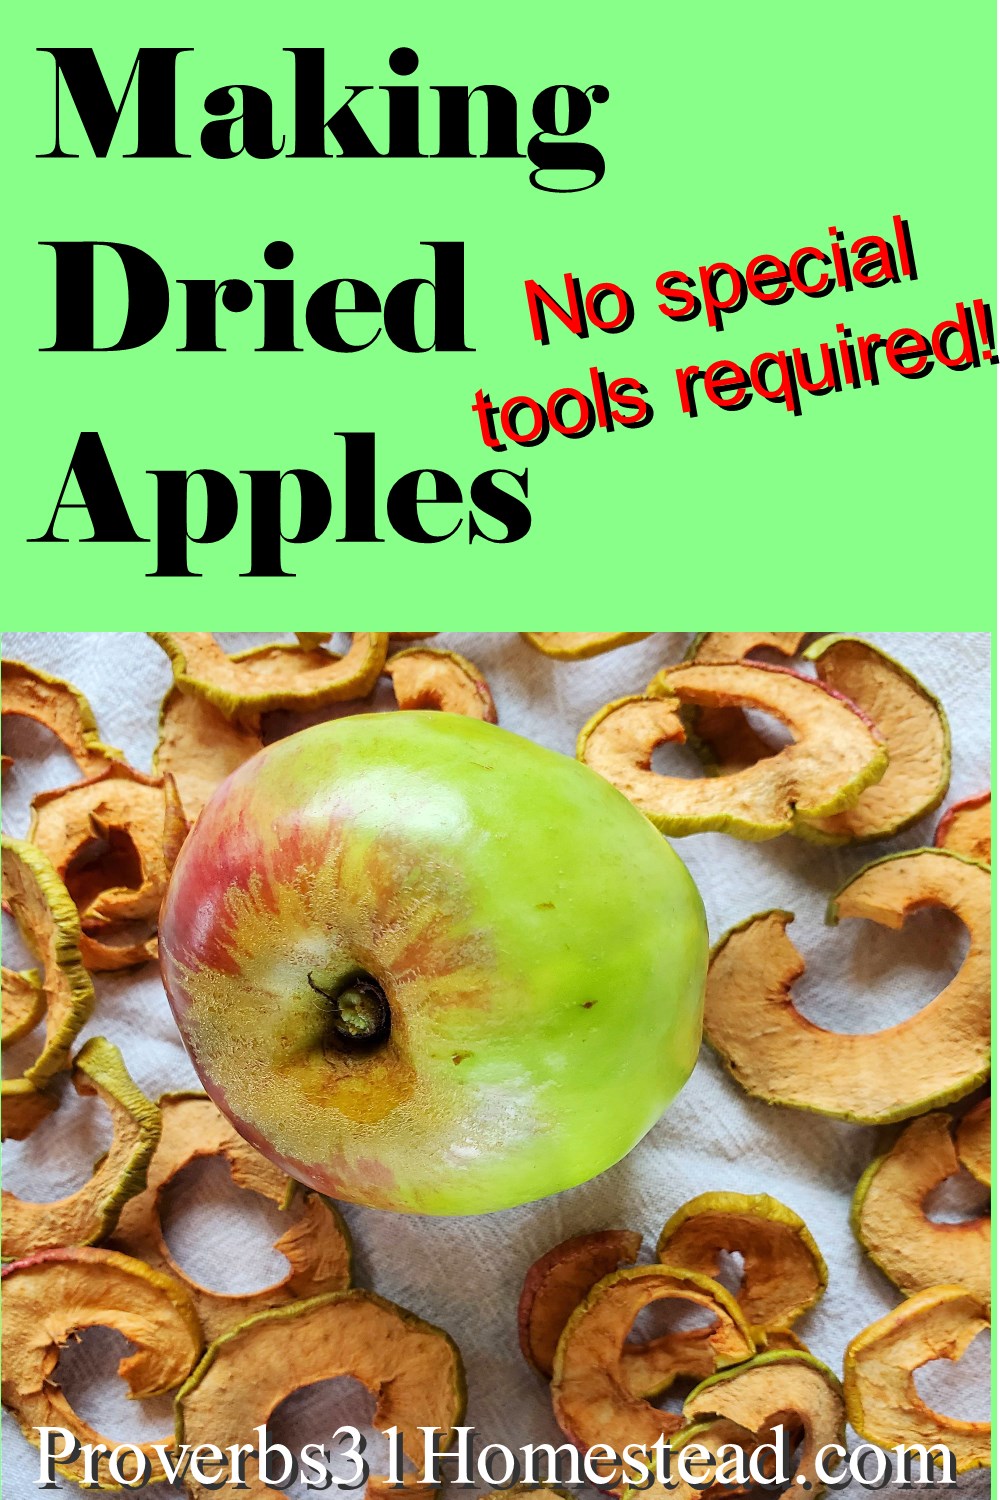
How to Dehydrate Apples - No Special Tools Required! (with video)
 This post may contain affiliate links. All opinions are my own. Please see FCC disclosure for full information. Thank you for supporting this site!
In my 14 or so years of preserving apples in earnest, first with apples foraged off public spaces in our suburban community and now on our own acreage, I've certainly experimented with a lot of methods and recipes. But year after year, I dehydrate apples because it is easy and relatively fast. Dried apples don't take up much room in the pantry, make a great snack (especially when you're on the go), and can be easily rehydrated to make things like pie and cobbler. Still, I know many of you haven't tried dehydrating apples because you think you'll need to buy special equipment to do so. But that's not true! Over the years, I've used a number of methods to dehydrate apples; let me show you the best methods. (If you prefer to watch the video version, please scroll to the bottom of this post or hop over to YouTube...and while you're there, be sure to subscribe to the Proverbs 31 Homestead channel!)
How to Dehydrate Apples
Begin by slicing the apples. The fastest, easiest way to do this is with an apple peeler/corer (this is the one I use), but there are other ways, too! Originally, I use used a knife. The best way I've found to cut apples into slices by hand is simply to start at the blossom end (the end opposite the stem) and start slicing. Don't worry about coring the apple just yet.
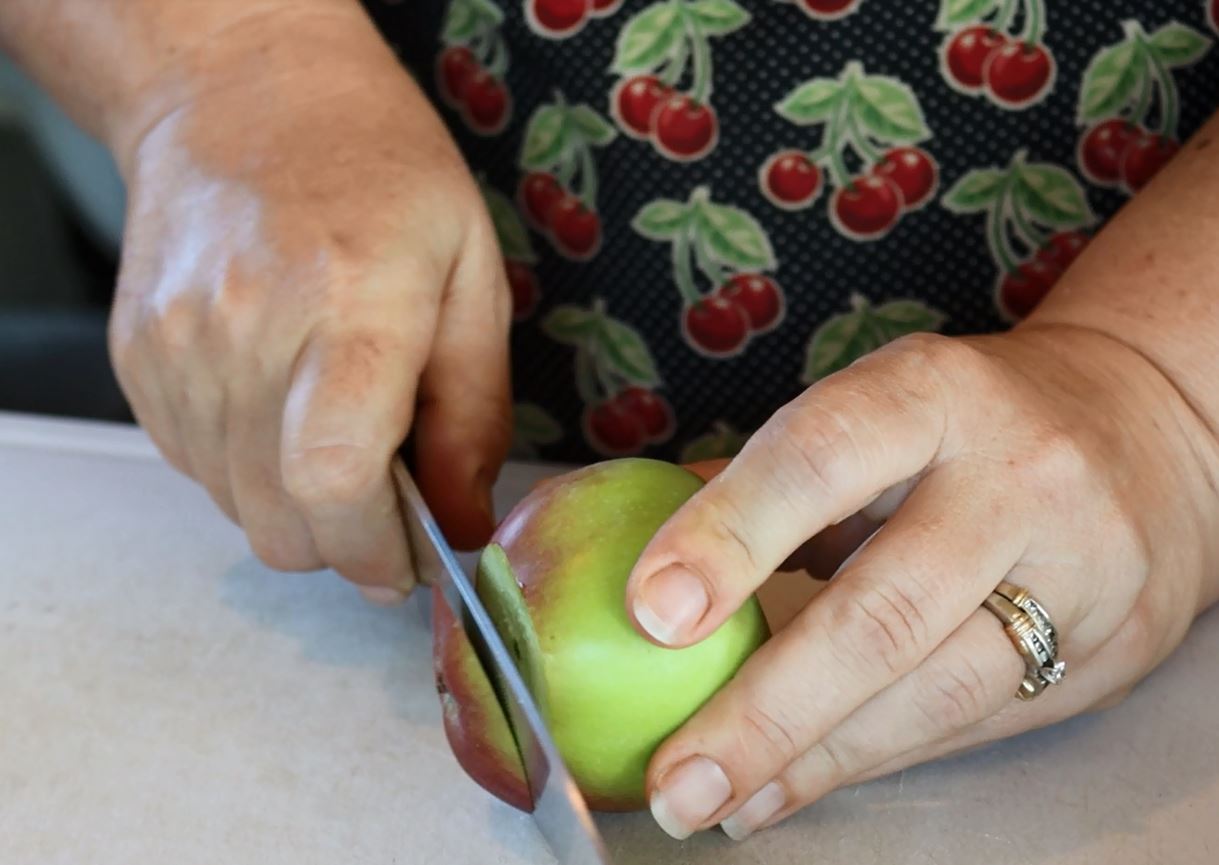
One you have the apple sliced, you can either leave the core in place (just pop out the seeds with your fingernail), or if you don't like the texture of the core, cut the cores out of each slice. I do this with a knife, making a square hole.


If you have an apple corer that works for your apples (mine, though sturdy, just doesn't get through our apples easily - though it is perfect for pitting plums!), you can certainly core the apple, then slice it. I do not recommend using an apple corer/slicer because it will create slices that are much too thick. When dehydrating apples, you want thin slices that will dry quickly. The quicker the food dries, the more nutrients it will maintain.
Apple slices will naturally begin browning when the flesh is exposed to the air. If this bothers you, fill a bowl with lemon water (1/4 cup lemon juice plus 4 cups of water) and keep the apple slices in it until you start drying them. Some people claim the lemon water helps retain nutrition in the apples, too, but I have never seen scientific evidence of that. I don't bother with lemon water, usually.
(adsbygoogle = window.adsbygoogle || []).push({});
Next, lay the apple slices out to dry. The old school way to do this is to place them in a single layer on a clean white sheet (or something similar), outside in the sun. This works well if you live in a dry, hot area, but if it is humid or not very warm, your apple slices may start getting moldy before they are fully dry.
Another method is to use your oven. Place a wire cooling rack on a rimmed baking sheet and put the apple slices on the rack in a single layer. If your oven has a warming drawer, use that. If not, put your oven on its lowest temperature setting and prop the door open. (You don't want to cook your apples, which is what you'll be doing if you use a higher temperature.)
 But, in my opinion, the best way to dry apples and achieve a top-notch end product is to use an electric dehydrator. Just lay the apple slices in a single layer on the dehydrator's trays and set the temperature to 135 degrees F. Rotate the trays of the dehydrator once or twice a day.
 No one can tell you how long it will take to dry the apples because there are too many variables, including: the variety of apple, the ripeness of the apple, and the atmospheric conditions (temperature, humidity) where you are drying them. But, to give you an idea, my Nesco American Harvest dehydrators will completely dry my apple slices in one day.

(adsbygoogle = window.adsbygoogle || []).push({});
To see if your apples are really dry, tear into a piece and look for any moisture coming from the fruit. If there is moisture, keep drying. Otherwise, place the dried apple slices into glass jars with metal lids. (Plastic allows air in.) Let the apples completely cool before you put the lid in place. Store the jar in a cool, dry, dark location. Properly dried apple slices will stay good for at least a year.

(adsbygoogle = window.adsbygoogle || []).push({});
July 13, 2021
Summer on the Homestead
 Technically, this photo is from this spring :)
This post may contain affiliate links. All opinions are my own. Please see FCC disclosure for full information. Thank you for supporting this site!
“As long as the earth endures,
seedtime and harvest,
cold and heat,
summer and winter,
day and night
will never cease.”
_____________________________________
So far, it's definitely been an unusual year on the homestead. My husband and I are still working on my mother's estate; I finally have just about everything out of her home, but there is still much to do, including cleaning, repairs, and putting the house up on the market. I feel pressured to get all that done as soon as possible, on top of all my usual homesteading and work duties, which has lead to a really exhausting spring and early summer. We are trying hard to get some fun times in with the kids, too, since last year most of our traditional summer fun things were canceled.
I did finally get the garden in...later than I'd prefer. But we are back to getting our veggies from the homestead, which is a very good thing. A lot of gardening duties had to slide. For example, my greenhouse glass never got washed and I'm only just now getting around to weeding my flower beds. When you live on the edge of the wilderness, spring weeding, weed whacking, and mowing are vital to beat back nature. We are almost caught up in that regard. I am also about ready to get our fall veggies in the ground, too. (I'm planting a fall garden in July? Yep! Learn why here.)
 I am harvesting radishes, greens, turnips, squash, and more from the garden.
 The broccoli is doing beautifully this year. I harvested the first of it in early July.
Our weather has been rather cool - so the garden seems a bit behind because of that, too. We've had a couple of quick hot spells, though, and after loosing some rabbits last year to a sudden change to hot temps, I've been wary of leaving the rabbits alone on those hot days. I recently made a video about keeping rabbits cool during hot weather; check it out to learn how I handle it.
Fiona just had another litter of kits this morning. She's such a good mama. And Bluebelle, who I introduced you to in spring, has turned into a really sweet, smart doe. In fact, I've never heard of a rabbit who can open his or her cage, but I've seen Bluebelle do it with my own eyes! She doesn't try to escape; she's just entertaining herself by working out the puzzle of unlatching the cage. So I gave more things to play with...and decided that if she's that bored, it's time for her to have some babies! However, the buck I purchased to breed with her, a blue New Zealand we named Clyde, suddenly developed a dewlap. (That's the double chin FEMALE rabbits get.) Yep, he turned out to be a she. (I now call her Clydine. Ha!)
My husband told his friend that my way of dealing with an extra rabbit was to buy more cages, and yes, that's what I ended up doing. Dang, cages are expensive right now! Not to mention hard to find. But every rabbit needs its own cage, and every doe needs two cages for her kits to grow in. Oh, and I needed another cage for the buck I was going to buy! My hubby just sighed and said, "Ok, honey." (Yes, you can also raise rabbits in colonies or tractors, but we have too many predators to make that work. Did I mention the bear that's been wandering around my garden in broad daylight??)
 Fido and Bluebelle.
(adsbygoogle = window.adsbygoogle || []).push({});
I did get another blue New Zealand buck last weekend: Huckle. (He's old enough that I trust both the breeder and myself got his gender right.) But he's still too young to breed...so I took Bluebelle over to Fido's cage. I confess, it felt kinda wrong. After all, Fido and Fiona are a love match - or so it seems to me. But while Fiona was in the cage below them building a nest, Fido and Bluebelle did the deed. I found it fascinating that there was no romance - no kissing and cuddling and talking, as Fido and Fiona always do. It was all business. (Rabbit relationships are totally fascinating and if you are a crazy rabbit lady like I am, I highly recommend you read The Private Life of the Rabbit by R.M. Lockly. If you click that link, you'll see it can be a pretty pricey out-of-print book. If you want to help support this site, you can go ahead and buy the book at that price - with my many thanks. Or you can do what I did, which was create an eBay search for the book and have eBay send emails whenever a listing matches those search terms. It took a bit, but eventually, I found a reasonably priced copy.)
 Rabbit kits, born this morning. (And temporarily uncovered and in a box so I could examine them.)
We were also wanting to hatch some quail, but I needed to wait to do this until I knew I wouldn't be spending any nights over at my mom's house, which is hours away. Quail chicks need too much attention to leave them alone for days. So we hatched a batch of eggs this weekend, and another should hatch out next weekend. They are such tiny, bug-like little birds at this stage and the house cat finds endless entertainment watching them in the brooder. (By the way, this is my first time using proper quail waterers, and I have to say, it's a real game changer. As you may know, quail chicks drown easily and regularly chicken chick waterers aren't suitable for them. Previously, I filled chicken chick waterers with marbles, to prevent the quail chicks from drowning, but those got nasty really quickly, and getting every marble clean was a real pain. I highly recommend these quail waterers instead.)
 A day old quail chick.
 Kitty tv.
After the loss of our lamb in May, we decided that a bird (like an eagle or owl) was the likely predator who stole her. Unfortunately, there's nothing we can do about that. We could try for a guardian dog, but it takes years to train one (well trained guardian dogs just do not go onto the market) and I really don't want to go through that hassle. So we're letting nature take its course. Our ram Shaun was in rut again by the end of June and we are hoping our ewe Shannon is already pregnant. Perhaps having a fall lamb will make a predatory attack less likely.
(adsbygoogle = window.adsbygoogle || []).push({});
In other news, I am mentally preparing myself for canning season to kick into high gear. We've discovered four more apple trees (can you believe it???), but since we are still well stocked with applesauce, I will mostly be making apple cider/juice and canned apple halves. (An exception will be plum applesauce, if we have enough tart red plums this year.) I will also freeze some apple pie filling and dry some apple rings. If I'm feeling energetic, I may try turning our abundant yellow plums into fruit puree, and I'm hoping our young pear tree will produce enough fruit I can can some pears, too. I plan, as usual, to freeze most of our tomatoes as they come in, to can in the fall or winter, when I'm not so pressed to can other things. I may can some wild berries this year, too, but I need to resist making jam, since we eat very little of it.
 Some American flag pies I made for Independence Day.
 I haven't had a lot of time for sewing, but I did whip up this patriotic apron and the place mats shown in the pie photo, above.
Fortunately, last year when I saw that canning lids were becoming harder to find, I stocked up - and also purchased some Harvest Guard reusable lids. (At that time, I recommended you all do the same! Click here for my instructions on using Harvest Guard reusable lids.) It is certainly frustrating that Ball claims they are stocking stores with lids, but there are none to be found in stores. (Some readers have reported they can find small amounts of lids in their stores; I have yet to see any in my area.) My best advice is to stock up on either Tattler or Harvest Guard reusable lids. They are doing their best to keep up with orders, but the sooner you purchase, the better! In the meantime, you might want to check out my video on other ideas if the canning lid shortage continues. Whatever you do, I don't recommend buying lids off Amazon, since they are still allowing fakes to be sold. They look like Ball lids but are actually cheap, thin China-made knock offs that don't give solid seals. Also consider Uline.com or Bernadin (the Canadian Ball brand) from MasonJarMerchant.com.
I also want to warn you about something else: From time to time, I receive requests to review products provided to me for free. Most of the time, I decline. But if a product looks like something I think readers might find useful, I accept - as long as the person or organization offering the item understands that I will offer my honest opinion on the product. But lately, I've been receiving offers of free canning lids. All I have to do is give them 5 stars for Amazon in return. This is crooked, folks! And explains why online "customer" reviews are no longer trustworthy. SUCH a bummer!
Whatever the case, this is not the year to stop preserving food. Grocery stores are reported to be stockpiling food as a hedge against the crazy inflation we are seeing. You should prepare for that, too. If you can't can, consider freezing, dehydrating, freeze drying, and root cellaring (even if you don't have a root cellar; learn more here).
 One of our many dragonflies.
(adsbygoogle = window.adsbygoogle || []).push({});
July 8, 2021
Are You Making These Canning Mistakes?
 This post may contain affiliate links. All opinions are my own. Please see FCC disclosure for full information. Thank you for supporting this site!
 Canning isn't difficult. Let me repeat that: Canning ISN'T difficult! That is, as long as you follow recipes and directions from a reliable canning book (I recommend The Ball Complete Book of Home Preserving) or website (The National Center for Home Food Preservation is considered the gold standard).
But if you learned to can years ago, or you learned from someone who isn't up on the latest and safest home canning practices, sometimes bad habits come into play. Some of these might not be considered a big deal; they will only waste money or time. But some errors can result in food that's unsafe to eat - possibly even creating food that has the potential to kill someone. Are you making any of these mistakes?
Mistake #1: Tweaking Recipes
Canning recipes should be followed exactly. Changes can either make foods unsafe because the changes lower pH level, or because they make the food too dense to heat completely through for the required amount of time to kill pathogens. That said, there are a few things you can safely change about canning recipes:
* Sugar preserves color and flavor, but doesn't make canned food safe to eat; therefore, it's safe to omit sugar in canning recipes. (See "Canning Without Sugar or Salt" for more information on this topic.)
* Salt is always optional in canning.
* In any canning recipe, it's safe to omit dried herbs or replace them with different dried herbs. (It is not safe to use fresh herbs; they can change the density of the food, potentially causing it not to get heated through, leaving dangerous pathogens behind.)
* It is fine to switch out pepper and onion types or varieties. Don't increase amounts, though.
* It's safe to select smaller jars than what the recipe calls for - but don't reduce the processing time. For example, if you choose to can something in a jelly jar, but the smallest size jar the recipe calls for is a pint jar, use the pint jar processing time. (Never select a larger sized jar than the recipe mentions; this can lead to pathogens not getting killed off.)
 Salt is always optional in canning recipes.
(adsbygoogle = window.adsbygoogle || []).push({});
Mistake #2: Not Adjusting for Altitude
If you live above 1,000 feet, you must adjust the processing time for your canned foods, or risk an unsafe end product. Home canning is largely about heating up food to a temperature that kills all pathogens; since water boils at lower temperatures as altitude increases and lower boiling temperatures kill pathogens less effectively, you'll have to process your jars for a longer period of time.
You can find the correct processing times for your elevation at The National Center for Home Food Preservation website. To prevent errors in this regard, I highly recommend penciling in the correct processing times for your location in every canning book you own.
Mistake #3: Using Incorrect Headspace
 Getting headspace right is easy - and also important for a safe end product.
Any safe canning recipe should explain how much headspace to use. (Headspace is the space between the top of the food and the top of the jar.) If you use too little headspace, the jars can't release air during processing, which leads to lid seal failures. Using too much headspace keeps air in the jar, causing food to darken over time; it may also eventually lead to food spoilage even though the jars sealed.
Generally speaking, jams, jellies, and juice require 1/4-inch headspace, fruit requires 1/2-inch, things that go into a pressure canner (low acid foods) need 1-inch headspace, and pie fillings need 1 1/2 inches headspace.
Don't worry if the headspace in your jars changes after canning. If you start out with the correct headspace when the jars go into the canner - and if the lids seal - the food inside the jars is safe.
For more about headspace, see "The Importance of Headspace in Canning."Mistake #4: Not Inspecting Jars
While it's easy to overlook defects in jars, doing so increases the chances those jars will break during processing or that the jars will not seal. Therefore, I recommend inspecting each and every jar as you wash it in preparation for canning - and that you inspect once again before filling jars with food. Run your finger around the jar's edge, feeling for chips, cracks, or uneven surfaces that will cause seal failure. Also look for hairline fractures or any imperfections on the rest of the jar, which could lead to breakage during processing.
Mistake #5: Over-Tightening Lids
 Getting the lid screw band correctly applied is important.
When I started canning, for the life of me I couldn't figure out why canning books said to secure the jar rings until they were "fingertip tight." What the heck did "fingertip tight" mean?? Here's what I later learned: Turn the jar screwband until you just feel resistance. If you tighten it more than that, you can overtighten, which prevents air from escaping the jar during processing. This, in turn, leads to bucked or creased lids, which are not safe for storage.
EXCEPT...when you are using re-usable canning lids. In that case, always follow the manufacturers directions on how tight to apply jar rings. (For complete instructions on using Harvest Guard reusable canning lids, click here.)
(adsbygoogle = window.adsbygoogle || []).push({});
Mistake #6: Not Using Enough Water
Water bath and pressure canners require different amounts of water inside the pot in order to safely process jars. To know how much water to put in a pressure canner, consult your manual. For water bath canning, add enough water to cover the jar tops by 1 - 2 inches. Since some water will boil off during processing, I recommend aiming for 2 inches of water above the jars. This safety measure ensures the food gets heated evenly, killing all pathogens.
Mistake #7: Not Bubbling Jars
 Some canned foods, like applesauce, will always have some bubbles in them, but it's important to try to remove as many bubbles as possible before processing.
Before putting a lid on your jars and processing them in a canner, it's important to "bubble" each and every one. This is accomplished by taking a wooden skewer or plastic spoon handle and running it between the jar and the food, removing air bubbles. (Never use metal utensils, since they can damage jars, resulting in hairline cracks.)
Failing to bubble can cause you to think the headspace in your jar is correct - but once air works its way out of the jar during processing, the contents will collapse, leaving too much headspace behind.
BUT...even if you bubble your jars correctly, you may still discover air bubbles in them after processing. The idea behind bubbling is simply to remove as much air as possible; some small amount may be left behind, especially when canning dense foods like applesauce.
Mistake #8: Sterilizing Jars
My husband's grandmother taught me to can, and part of her education in preserving was to sterilize canning jars - boiling them before filling them with food. Years ago, when certain items like jams and jelly didn't get processed in a canner, this type of jar sterilization was necessary. But it also left plenty of room for error, and sometimes resulted in food that was sealed in a jar, but still went bad. (Botulism spores and other pathogens are everywhere, so sterilizing before processing simply doesn't cut it.)
These days, all safe canning recipes should include processing times; therefore, sterilizing jars is completely unnecessary. If there are pathogens in your jars, in your equipment, or in your food, running the jars through the canner kills them.
(adsbygoogle = window.adsbygoogle || []).push({});
Mistake #9: Using a Pressure Cooker
 Low acid foods must be processed in a pressure canner, unless they are pickled.
Some pressure canners can be used as pressure cookers, but pressure cookers should never be used as pressure canners - despite what some pressure cooker manufacturers claim. The reason is simple: Pressure cookers cannot hold enough water to safely bring jar contents to a temperature that kills harmful and deadly pathogens.
In addition, pressure cookers are made of thinner metal than pressure canners, which means the time it takes them to come to pressure (and to cool down) is shorter than what a pressure canner experiences. This, in turn, means the canned food doesn't stay hot long enough to fully kill pathogens during processing. For more on this topic, see "Pressure Canners vs. Pressure Cookers."
Mistake #10: Using a Water Bath Canner
There is a growing group of people who are using water bath canners to preserve everything - even low acid foods like meat and vegetables (which are foods that, let me be clear, should only be canned with a pressure canner...unless they are pickled). They claim "this is how it was done in the old days." But there is a myriad of problems with this idea.
First, it's incorrect that water bath canning of every type of food was ever widespread. I happen to have a large collection of old household guides dating back to the early 19th century. All of these old books say only fruits, jams, and jellies should be processed at home. in a water bath canner. Of those books published after pressure canners became available, every one stresses that low acid foods (meat and vegetables) can be preserved through home canning - but only by using a pressure canner.
Second, among those few people who did practice unsafe water bath canning of low acid foods, certain measures were taken to help prevent illness. For example, the jars were stored in a refrigerator-like location (a cold root cellar) and the food was always boiled (sometimes for an hour or more) before eating. This helped kill many pathogens - although botulism can survive the temperatures of a water bath canner, even after hours of boiling.
Honestly, why anyone want to eat low acid foods canned in a water bath canner? According to its proponents, the processing times are quite long (over an hour). Boiling food for this long greatly reduces nutrients and makes it mushy. Why not just learn to pressure can? It's the only truly safe way to can low acid foods.
For more science behind the pressure canner vs. water bath canner debate, see "What You Need to Know About Botulism and Home Canning" and "Everything You Need to Know to Start Home Canning."
Mistake #11: Using Liquid and Powdered Pectin Interchangeably
 Understanding pectin will make your jams and jellies taste better.
When making jams and jellies, don't use liquid pectin when powdered pectin is what the recipe calls for - and vice versa. Liquid and powdered pectin are used in different ways and are not interchangeable.
Always follow the manufacturer's instructions on how to use whatever store-bought pectin you buy. For more about this topic, including how to use homemade pectin, see "Understanding Pectin."
(adsbygoogle = window.adsbygoogle || []).push({});
Mistake #12: Not Cleaning Processed Jars
After all the work of prepping food, getting it into jars, and processing it in a canner, it's tempting to immediately put finished jars in your cupboard. This is a mistake. Not only should processed jars sit completely undisturbed for 12 - 24 hours (while sitting at least 1 inch apart), but it's important to make sure there's no food on the outside of the jars before tucking them away in your pantry.
And yes, food can end up on the outside of your jars because some of the contents leaked out during processing. Usually, this leaves only a bit of sticky residue behind, but sometimes you might even see particles of food on the exterior of jars. Either way, dirty jars result in mold and pathogens that could make you ill. To avoid this, simply wash processed jars in warm, soapy water and dry them with a towel before putting them into storage.
Mistake #13: Throwing Out Old Jars of Food
How long home canned food stays safe to eat is a question often asked and often misunderstood. But the truth is, home canned food remains safe to eat as long as a scientifically tested recipe was used and the lid is still sealed.
Slowly, over time, canned food loses nutrients, color, and flavor, but this is a quality issue, not a safety issue. The 1 year recommendation oft quoted is a "best by" date that will ensure you eat the food when it's at its peak of nutrition. It is not an expiration date or an indication that the food will spoil after that time. For more on this topic, see "How Long Do Home Canned Foods Last?"
Related Posts:


(adsbygoogle = window.adsbygoogle || []).push({});
June 30, 2021
How to Preserve Herbs

This post may contain affiliate links. All opinions are my own. Please see FCC disclosure for full information. Thank you for supporting this site!
Home preserved herbs beat store bought herbs, hands down, zero room for argument, period. At least, if you preserve them right. Unfortunately, the preservation of herbs is often overlooked in homesteading and home making circles. But fortunately, preserving herbs is easily done and can be accomplished quite a number of ways.
First: When to Harvest Herbs
For superior results, you need to start by harvesting herbs at the right time. The general advice is to pick herb leaves (like rosemary and oregano) before the plant flowers, or the resulting dried herbs may taste "off," bitter, or less tasty. Nevertheless, I personally cannot tell the difference between the herbs I preserve before flowering and herbs I preserve while flowering. (However, if I'm preserving herbs for medicine, I always harvest before the plant flowers, to better maintain the medicinal properties of the herb.) Since flowering herbs are beautiful in the garden and a great boon to pollinators, I suggest you try preserving your herbs both ways and see if it makes a difference to your palate.
When preserving herb flowers (like chamomile and lavender), wait to harvest until the flowers are fully open. Be careful not to wait too long, though, since flowers that are beginning to brown or die off are less flavorful and medicinal.
When preserving herb seeds (like coriander or dill), wait until the seed pods just begin to brown.
When preserving herb roots (like dandelion), harvest in the early fall, when the roots are at their peak of nutrition and flavor.
The best time of day to harvest herbs is in the morning, after the dew evaporates and before the sun gets high. (Dew makes drying the herbs more difficult and may affect their flavor; warm sun releases the herb's oils into the air, making the plant less flavorful and medicinal.)
 Contrary to popular advice, I harvest herbs before and during flowering.
How to Harvest Herbs
A common mistake is not harvesting herbs frequently. Gardeners tend to want their plants to grow big before they cut anything off them, but the truth is, trimming herbs only encourages them to grow more vigorously. So harvest often, trimming perennials back to half their height; annuals may be pruned back even further. Cut just above a double set of leaves, ensuring new leaf growth will soon appear.
Annuals may be harvested right up until they die from frost, while perennials are best left to rest after August - except perhaps in areas with very mild winters.
Do NOT wash the herbs you're harvesting. Damp herbs tend to mold - and flavor may be affected, too. Dampness can also affect preservation. For instance, if you try to dry wet herbs in a dehydrator, you may end up steam cooking them instead. If you're worried about insects lingering on the plants, leave the harvested herbs on your porch (in the shade) for a half hour or so to give insects time to wander off.
(adsbygoogle = window.adsbygoogle || []).push({});
How to Air Dry Herbs
 Air drying herbs. Courtesy of Marco Verch.
The most time-honored way to preserve herbs is to air dry them. Traditionally, this means tying some herb stems together and leaving the bundles in a dry, dark location with good ventilation. This location should not be anywhere people or animals will bump into the herbs, since this can cause leaves and flowers to drop off, or prematurely release oils from the plants, resulting in a less potent end product. If you don't have a dark location that's suitable for herb drying, tie paper lunch bags (with lots of holes punched in them for ventilation) over your hanging herbs.
The ideal temperature for air drying herbs is about 68 degrees F. with low humidity. Herbs should be completely dry and crisp after 2 or 3 weeks.
Thick or succulent herbs, like basil and aloe, do not air dry well. On the other hand, herbs harvested for their seeds (like coriander and dill) are ideal for hang drying; place paper bags over the pods of these herbs to ensure the capture of drying seeds.
How to Dehydrate Herbs the Modern Way
 Drying yarrow in an electric dehydrator.
A good electric dehydrator (like this one) allow you to dry herbs at 95 degrees F., which helps retain color, flavor, and medicinal properties better than air drying. Electric dehydrating is also much faster than air drying, and more hands-off than some other methods, too.
For herbs with big leaves like basil and dandelion, place said leaves on the dehydrator's trays, sans stems. Place herbs with lots of small leaves, like oregano or thyme, on trays without removing them from their stems. To prevent long drying times, which can result in a lower quality finished product, keep herbs in a single layer.
No one - I repeat no one - can tell you how long it will take to dehydrate any particular herb. There are simply too many variables at play, including the variety of herb, the "ripeness" or age of the herb, and the atmospheric conditions in your home. For best results, check herbs every few hours to see how they are doing, and rotate the dehydrator trays once or twice a day. (Most herbs will be completely dry in a day or less.)
(adsbygoogle = window.adsbygoogle || []).push({});
When leaves, flowers, or stems are completely dry and crispy, and no moisture comes from them when you tear them apart, allow the herbs to cool to the touch. Store dried herbs in a glass jar with an airtight lid. If you've dried the herbs with their stems on, the fastest, easiest way to remove the leaves for storage is to close two fingers around the end of the stem and run them downward, pushing off the leaves. A bowl or rimmed baking sheet works best for catching these leaves. For some herbs, this method seems to work best if you start at the bottom of the stem; for others, it's best to start at the top. Experiment and see what works best for you.
Other Ways to Dry Herbs
 Microwaving sage.
Believe it or not, it's also possible to dry herbs in the oven or microwave. The oven is my least favorite method because temperatures are too hot, which results in cooking the herbs and removing more of their potency than other methods. Still, if you don't have the right conditions for air drying and don't have an electric dehydrator, this is a decent method that's still likely to give you herbs that are better than what you buy at the grocery store.
If your oven has a warming drawer, use it for drying herbs. Otherwise, use your oven on its lowest setting. Crack the door open, if possible. Place the herbs in a single layer on a wire cooling rack placed atop a rimmed baking sheet. For best results, keep the temperature as close to 95 degrees F. as possible. Thicker herbs, such as sage and rosemary tend to do well in the oven.
Using a microwave to dry herbs is not as good as using a temperature controlled dehydrator, but it's nearly as good. The downside is you can only dry a few herbs at a time, and they require your constant supervision. Still, when you have just a handful of herbs you want to dry quickly, microwave drying can come in handy.
However, I can't state strongly enough how important it is to closely watch herbs that are in the microwave; it's easy to overheat the herbs, which not only results in burnt plants, but could potentially start a fire in the microwave. Also keep in mind that every microwave is a little different, temperature-wise. Proceed at your own risk.
(adsbygoogle = window.adsbygoogle || []).push({});
To microwave herbs, place leaves or flowers in a single layer on a paper towel. Place another paper towel on top of the herbs. Turn the microwave to high for about 2 minutes. (For delicate or thin herbs, heat for 1 minute.) Check the herbs. Heat in 20-second intervals until leaves or flowers are completely dry, with no sign of moisture when you tear them apart.
A Few Herbs That Are Good for Drying
Basil, bay leaf, celery leaf, chamomile, coriander, dill seed and weed, chervil, fennel, lavender, lemon balm, lovage, marjoram, mint, oregano, parsley, rosemary, sage, savory, tarragon, and thyme all dehydrate quite well.
How to Store Dried Herbs
Do not crush herbs at the time of storage, even if you want to use them that way eventually. Crushing or cutting releases the oils in the herbs and makes them less potent. Instead, store the leaves or flowers whole and chop or crush immediately before using. Store dried herbs in a cool, dark location and they will last at least one year. After one year has passed, use the smell test to see if your herbs are still worth using. First, smell the herb in the storage jar. If there's not much scent, take one leaf or flower and crush it. If it has little or no scent, it's best to compost the herb, rather than use it, since it will have little flavor or medicinal properties if it lacks scent.
How to Freeze Herbs
 Freezing sage.
There's no doubt about it, freezing is quick and easy, and frozen herbs are more like fresh than almost any other preservation method. The downside is that freezers can fill up pretty quickly - and of course, you can loose everything you've preserved if the power goes out.
I sometimes just throw my herbs into a freezer bag and pop them in the freezer, worrying later about breaking them into clumps that are suitable for cooking. (Pounding the frozen bag onto the counter usually gives me an acceptable amount clump of herbs to use in cooking.) You may also lay herbs in a single layer on a rimmed baking sheet, place them in the freezer, and transfer them to freezer-safe containers when they are frozen solid. This prevents the herbs from sticking together in a large clump.
Sturdy herbs, like rosemary and sage, may be left on the stem. When you're ready to use them, it's easy to pluck off just what you need at that moment.
(adsbygoogle = window.adsbygoogle || []).push({});
One interesting way to freeze herbs is to make individual bouquet garni - little bundles of herb stems tied together, which are used to flavor soup, stock, and stews. To make these classic cooking bundles, choose culinary herbs. (A traditional French blend that works well for most recipes is rosemary, thyme, bay leaf, and parsley.) Choosing one or two stems of each herb, make a small bundle - about 1/4 to 1/2 inch thick max at the cut end. Tie the cut ends of the bundle together with kitchen string and place on a rimmed baking sheet to freeze. When you've tied together multiple bundles and all of them are frozen through, transfer them to a freezer bag. To use, remove one bundle from the bag and place directly into your cooking liquid. Remove the bundle before serving the dish.
Compared to other herbs, basil is a little trickier to freeze. You must use olive oil as a base, or basil will turn black upon freezing. Chop the leaves (or run them through a food processor), then stir (or pulse) in a drizzle of olive oil until the leaves are thoroughly coated. Don't over-do it, though; you want only a light coating of oil on the leaves. Now you may transfer the mixture to a freezer-safe container. A handy trick is to spoon the basil-olive oil mixture into ice cube trays and freeze until solid. Then you may pop the basil-cubes out of the tray and transfer to freezer bags.
You may also use this frozen olive oil method for other herbs. Usually, you'll want to just chop the herbs, rather than puree them. You may also chop herbs, spoon them into ice cube trays, and pour a wee bit of water over them.
To use frozen herbs, there's no need to defrost. Just pop them into the pot or skillet in their frozen state.
A Few Herbs That Are Good for Freezing
Basil, borage, chervil, cilantro, chives, dandelion leaves and flowers, dill weed, lemon balm, lemongrass, lemon verbena, lovage, mint, oregano, parsley, rosemary, sage, savory, sorrel, sweet cicely, sweet marjoram, sweet woodruff, tarragon, and thyme all freeze well. In fact, freezing is the way I recommend preserving cilantro, which looses a lot of flavor when preserved other ways.
How to Preserve Herbs in Salt
 Preserving herbs in salt.
Not so long ago, salting was the main way to preserve food. Perhaps we moderns have dismissed salting due to the misconception that foods preserved in salt must taste salty when you eat them. (Who wants super-salty cilantro? No thanks!) But when you use this method of preservation, your herbs will not taste like salt.
To preserve herbs with salt, you will need a wide-mouthed glass jar with an airtight lid, and any form of non-ionized salt you prefer. (I use fine sea salt.) A quart jar will require at least 1 lb. of salt.
Pour about 1/4 inch of salt into the bottom of the jar. Next, place a single layer of fresh herbs over the salt. Don't allow the leaves to touch. Repeat the layers until you are out of herbs, being sure the last layer is salt. Store the jar in the refrigerator or a cold cellar. The herbs should stay fresh for about 6 months in the fridge.
To use salted herbs, simply remove what you need from the jar and brush off the salt. The herbs will look and taste fresh - not at all salty. You may also reuse the salt. Often it won't taste like the herb you stored in it, but if it does take on herbal flavor, simply use that to your advantage when cooking.
(adsbygoogle = window.adsbygoogle || []).push({});
A Few Herbs That Are Good for Salting
Basil, celery leaf, cilantro, chives, dill leaf, lemon balm, parsley, and rosemary work especially well for this salting method.
How to Make Herb Salts
 Rosemary salt.
A more common method of preserving herbs is to create culinary herbal salts. For this method, you may either use dried herbs (which are better for longer-term storage in a cool, dark location) or fresh herbs (which must be kept refrigerated). You'll also need non-iodized salt.
Chop fresh herbs (or crumbled dried herbs), then measure. For herbal salts, a general guideline is to use a 4 to 1 ratio (that is, 4 parts herb, 1 part salt.) So if you measure out 4 tablespoons of herb, you'll need 1 tablespoon of salt. Add the appropriate amount of salt, stirring until the mixture is well combined. Of course, you may play around with the ratios as you see fit.
How to Freeze Dry Herbs
If you have a home freeze dryer (only Harvest Right makes them for consumers; you can learn more here and here), you can easily preserve herbs with little effort on your part. Simply place herbs on the trays of the freeze dryer, adjust the shelf temperature to between 75-100 degrees F., and let the machine do it's thing! (Most home freeze dryer users recommend 75 degrees F. for the best end product.) Store home freeze dried herbs in a glass jar with an air tight lid and an oxygen absorber.
(adsbygoogle = window.adsbygoogle || []).push({});
June 10, 2021
Raising Meat When You Don't Have Acerage

This post may contain affiliate links. All opinions are my own. Please see FCC disclosure for full information. Thank you for supporting this site!
There are many reasons people want to raise their own meat. The horrors of factory farming, contaminated grocery store food, grocery store food with more unhealthy omega-6s than healthy omega-3s, vaccines and antibiotics in commercially raised animals, environmental pollution (step into a commercial chicken farm without a respirator or drive past a hog factory and you'll understand this problem instantly!), and a desire to be a bit more self-sufficient.
Sadly, though, many people think they can't raise their own meat. Maybe they are like my family: They have acreage, but no pasture - or money for expensive fencing. Or maybe they are like we used to be: They live in the suburbs (or city) and don't have enough space for livestock. (Or do they? Keep reading!) Or maybe they are like we will someday be: Their health doesn't allow them to handle large livestock like pigs and cattle.
But the truth is, just about anyone can raise meat - and do it with very little space. The trick is to think outside the commercial farm box.
Meat Rabbits
Raising rabbits for meat is a touchy subject. I often hear: "Bunnies are too cute to eat!" To which I say, "I think cows and chickens and pigs are really cute, but you eat THEM. Heck, cows are basically big, dumb dogs and pigs (I hear) make wonderful house pets!" That said, I'm not immune to cuteness and I'm thankful meat rabbits are less cute once they reach the age of butchering. The correct mindset from the beginning of their lives helps tremendously, too. These are prey animals that God designed to make food for predators. They will have a wonderful life where they are pampered - until one moment when they are suddenly and instantly gone. It's a far better life than the life of ANY animal you buy as meat in the grocery store.
 The "meat mutts" who were our first breeders.
Personally, I think rabbits are one of the easiest animals to raise for meat. They reproduce like mad, typically having 6 to 11 kits at a time. (Some rabbits have litters into the 20s, and a rabbit past her prime will have litters with fewer than 6 kits.) Although most people allow the mother doe to rest between births, wild rabbits (the same type we've domesticated, oryctolagus cuniculus domesticus - which are different from the wild rabbits found in North America) become pregnant pretty much immediately after giving birth. If fed pellets, it takes only 12 weeks for a decent meat rabbit to reach 5 lbs., and the common wisdom says a single doe can produce 600 lbs. of meat in a single year. That's a lot of meat from an animal that doesn't take up very much space.
Rabbits don't make much noise, which means they shouldn't bother neighbors. They thump their feet to brag, to show impatience, to show dominance, to show anger, to "feel their oats" - and they make quiet grunting noises. Occasionally, you'll get a screamer. All rabbits scream if they think a predator is about to kill them, but some scream over little things - like their sister grooming them. Some males scream when they ejaculate.
(adsbygoogle = window.adsbygoogle || []).push({});
Rabbits don't have much smell, either - a good thing when you have neighbors nearby. Their urine can smell like ammonia - some rabbits are worse than others - but if you collect their urine and manure in a manure tray beneath their cage, then pour the contents in a tub or compost bin, the smell is not unpleasant. The mixture is also fantastic fertilizer - and can be put straight in the garden without aging or composting first.
 A rabbit nest with newborn kits.
For years, I put off raising meat rabbits because I wasn't sure we'd like the flavor and I just couldn't find any place that sold the meat...or when I did, it was $40 or more for a single rabbit. I wish I had plunged into rabbit-raising, anyway, because now it's hard for me to imagine someone not liking domestic rabbit meat. (Wild rabbit can taste more gamey.) Many people compare domestic rabbit meat to chicken meat - and yes, there are some similarities. But most of my family doesn't care much for chicken meat, yet we all LOVE rabbit meat. Somehow, rabbit tastes better. It is clean, mild, all white, has little fat, but has an ever so slightly more assertive flavor than chicken. In fact, if you imagine the best chicken you ever ate - but even better - you have a good idea what rabbit tastes like. I regularly use rabbit in place of chicken in recipes.
Rabbits require very little space, making them ideal for those without acreage...or even large yards. Some people do raise rabbits in a colony setting on the ground, which requires fencing in a portion of land. This clearly requires more space, more predator-proofing, and more work to keep the rabbits from digging out, and it also may expose them to more diseases, though it does imitate natural rabbit life more closely. But rabbits are pretty content in cages, which can be stacked even in a tiny side yard. The cages should be four times the size of the rabbit or larger, and should have manure collection trays, as well as waterers, feeders, and something (like a piece of wood or a large tile) to put on part of the cage bottom, so they can rest their feet. It's also important that the cages have a roof over them, to keep the rabbits dry when it rains, and a reasonable amount of wind protection.
 Rabbit kits in their nest.
I find rabbits super easy to care for. I feed and water them each day, and the mother takes care of her babies as long as I provide a good nesting box and hay to help keep it warm. I check kits daily to ensure everyone is healthy and well fed, and when I get a runt, I hold the mother and runt together so the runt can get extra feedings. I generally clean manure trays weekly.
In addition to meat and manure, rabbits can provide hides and dog treats. (For example, frozen or dehydrated ears and feet are marketable dog snacks. Hides appropriate for tanning usually come from rabbits at least 16 weeks old - a bit older than most people raise for meat.)
(adsbygoogle = window.adsbygoogle || []).push({});
While all rabbits are edible, some are better suited for meat raising because of their size and meat-to-bone ratio. New Zealand, Californian, Champagne D’Argent, and mixes (or "mutts") of Rex, Silver Foxes, Palomino, American Chinchilla, and Satin are most commonly raised. Beginners are often tempted to raise Flemish Giants for meat, since they are 20 pounds or larger at maturity. However, Flemish Giants have more bone than meat, require much larger amounts of feed to get to butchering size, and tend to be pretty expensive to purchase unless they are of mixed heritage.
 Recently weaned kits.
How much does it cost to raise rabbits? Well, as with a lot of homesteading projects, getting set up is the most expensive part. To save money, some people build their own cages, but we've been purchasing Pet Lodge cages and are pleased with their size and quality. (Admittedly, cages are hard to come by right now and cage prices have about doubled since last year. You'll definitely want to shop around.) You can also look for used cages on Craigslist or Facebook Marketplace, but be aware that cages only have a certain lifetime. If you buy used, you may find yourself needing to repair or replace sooner rather than later. For disease control, you will also need to thoroughly sanitize used cages before putting your rabbits in them.
For food, rabbits can be fed only pellets (which are compressed hay and minerals, carefully designed to be 18% protein, which facilitates healthy growth rates). They do love eating loose hay, and being able to chew on and play with this hay seems to make them more content. It's a good idea to give them sticks to chew on (to keep their ever-growing teeth from becoming problematic). You may also give rabbits certain weeds from your yard - but note that a rabbit's digestive system is pretty delicate. You shouldn't change their diet (or even pellet brand) quickly. Gradual changes are best, and unless you want to raise rabbits entirely on grass, fodder, and weeds (which is do-able), smaller amounts of each of these is best. If you do want to avoid buying pellets, rabbit tractors with wire bottoms are an excellent choice. To learn more about feeding rabbits naturally, I recommend the book Beyond the Pellet.
We feed our rabbits mainly pellets, with a little hay and weeds mixed in. We buy a middle of the road brand and really it's our only on-going cost except for a bit of hay. Currently, our meat costs $11.88 per rabbit - which is far cheaper than you can buy in anywhere! It ends up being about $2.37 per pound, which again, isn't easy to do in a grocery store or farmer's market.
 "Shake and Bake" rabbit. Courtesy Holly Webster.
(adsbygoogle = window.adsbygoogle || []).push({});
Meat Quail
Quail might seem like a bad choice for meat-raising. After all, quail are pretty small birds. However, there are some good reasons for raising meat quail - which is why they are seeing a big boom in popularity among backyard homesteaders.
 Coturnix quail.
Of course, the first reason is that, being small animals, they don't require a lot of space to raise. Yes, some people put them in aviaries on the ground, which requires at least a reasonably-sized back yard. But many people raise quail in rabbit cages. As with rabbits, these cages can be stacked and put in a small corner of a yard or alleyway, taking up minimal space. Coturnix quail (the type usually raised for meat) require a minimum of 1 square foot of space per bird. Like rabbits, these cages need something over them to keep the birds sheltered from wind and rain.
Before you decide to raise quail, you also should consider their flavor. It is not correct to compare Coturnix quail to chicken (or rabbit) meat. Coturnix have a stronger flavor than either; some people would call it "gamey," but to me "gamey" suggests something negative, and I don't think that's an accurate flavor profile for quail. Instead, I would say the texture is similar to chicken, but the flavor is more assertive.
 Quail hatching in an incubator.
Flavor aside, quail reproduce and grow very quickly, which is another reason they are so popular. The incubation period for quail eggs is only 18 days and by the time the birds are eight to ten weeks old, they are ready to butcher. Here's a pretty conservative run-down of how much meat you can expect to raise from one cock and five hens:
(adsbygoogle = window.adsbygoogle || []).push({});
Those hens should give you at least an egg a day, or 35 eggs in a week. Let's assume you keep some of those eggs to eat (they are, many people feel, much tastier than chicken eggs!) and you choose to incubate 25 of their eggs. Being very conservative with the numbers, let's say you only get a 50% hatch rate from those eggs, so 15 chicks are born. Let's say you have bad luck and 3 chicks die, leaving you with 12 live chicks. After nine weeks or so, you can butcher those chicks - so that in 12 weeks you got 12 quail, which is one meal a month for three months. (Quail meat is a bit higher in protein and most people only eat one or two birds at a sitting.)
Although rabbits aren't difficult to butcher, quail are perhaps THE easiest livestock to butcher. You don't have to even pluck them if you don't want to. You can simply peel their skin off, making for super-fast processing.
 Quail chicks are teeny-tiny.
Aside from a cage, quail need a waterer (I find the ball type rabbit waterers, like this, work best), a
feeder (I currently use a chick feeder, but am looking into some homemade "no waste feeders"). If you want your Coturnix quail to lay eggs all winter, you'll need to give them supplemental light. They are much more particular about this than chickens.
To make the quail more comfortable, each cage needs some sort of container to hold a dust bath (filled with dirt), and quail generally love having some sort of area to hide in - whether that be a small box in the cage or tree branches propped up in one corner.
For feed, the typical advice is to give quail game bird feed that is 21% to 25% protein. I've never been able to find this locally, so we feed our quail Purina Flock Raiser Crumbles, which are 20% protein. It has not been a problem for us, or for other homesteaders I know who feed similarly. You may also give quail treats like weeds and bugs, but some quail (including mine!) don't recognize these things as food. Coturnix quail are poor foragers.
Unfortunately, most Coturnix quail don't go broody and hatch their own eggs. (There are some people who swear that if you give them an aviary that replicates nature, they absolutely will hatch their own eggs.) So most people are going to need an incubator - or a breeder - to get more birds. Some people also have luck getting broody chickens to hatch their quail eggs, but if you try this, it's important to remove the quail chicks immediately. Chickens will smother or squash tiny baby quail.
 Brooding quail in storage containers with wire lids.
In addition, it's important to know that quail manure is really stinky. I mean REALLY stinky. If this will bother you or your neighbors, you will need to empty the manure trays daily (or lime the poop on a regular basis). Quail manure is useful in the garden, but it needs to age for at least several months before you can apply it, or its high nitrogen and ammonia content will kill plants. I recommend a plastic bin or bag for this aging process. Some people also bury the poop to dispose of it or to prepare future garden beds.
Quail also have a LOT of dander. I do not recommend growing them in an enclosed space like a garage or shed - although I know quite a lot of people do. (I raise mine in a three-sided carport.)
(adsbygoogle = window.adsbygoogle || []).push({});
Raising quail chicks is a lot like raising chicken chicks, although I've found quail are more delicate. They need a brooder with a heat lamp or heat plate. (This is the heat plate I use.) I currently use plastic storage bins with covers (my husband cuts out the top of the lids and inserts wire so the birds have ventilation, but are still protected and can't fly out...Yes, quail do fly.). If you use a heat plate, put it at an angle, so on one side, the top is right where the chick's backs are and the top is higher up; this way they can regulate their heat better. You'll also need a chick feeder (and may need to grind their feed so their tiny mouths can eat it) and waterer. I like to use special quail chick waterers. (Chicken chick waterers allow quail chicks to drown. You can get around this by putting rocks or marbles in a chicken chick waterer, but trust me, cleaning that is an icky job.)
And what is the cost of raising quail from hatch to butcher? First, I have to mention that quail are very

 To predator-proof our quail cages, my husband built a cage around the cages. The outer cage has 1/4 in. wire cloth.
messy eaters, so a certain amount of feed falls into their poop trays. I recycle this as much as possible, putting it back into their feeders (using a tin pie plate under their feeder helps facilitate this) or I spread it on the ground for our chickens, who scratch through and consume the feed. Homemade no waste feeders can help with this issue, too. But really, feed is our only ongoing cost, aside from electricity for the incubator and lights, and each quail costs about $3.87. That's certainly an improvement over grocery store prices!
 Braised quail.
Meat Chickens
Let me begin by saying I haven't raised chickens solely for meat, but we do butcher our old laying hens and our extra roosters. In fact, this is how many homesteaders start with meat chickens - even though the downside is that older chicken meat is more tough (though, in my experience, more flavorful).
That said, if you really want to get serious about raising chickens for meat, you're want either Cornish Cross or Red Ranger breeds. Red Rangers are a heritage breed, but they have more pinfeathers (meaning they are more time consuming to pluck), are smaller than Cornish Cross, slower growing than Cornish Cross, have tougher skin, and a MUCH smaller breast than what most people are used to.
 Only heritage meat chickens are good foragers.
Cornish Cross are a commercial breed raised to grow fast and have huge breasts. Unlike Red Rangers, they don't really forage for themselves, and since they tend to sit around all day, their manure will build up in certain locations. They aren't as hardy as other chicken breeds, but they look and taste more like store-bought chicken.
Meat chickens require a coop to secure them at night, and most people raise them in a run so they are safe from predators and their own stupidity. (Meat chickens are a lot dumber than dual-purpose or egg-laying breeds.) Some people prefer chicken tractors, giving their birds more access to grass, weeds, and bugs. All require water, of course, and at least supplemental feed (22% protein is recommended for good growth).
Meat chickens rarely go broody and hatch their own eggs, so you will need to either buy chicks periodically or incubate eggs. Chicks must be kept in a brooder with a heat lamp and will require a chick waterer and feeder.
 Meat chickens in a tractor. Courtesy of JoePhoto.
Meat chickens are typically pretty quiet, as long as nobody starts crowing. Their smell is minimal if you keep their manure cleaned up.
Cornish Cross birds are generally ready to butcher at 6 weeks (4.5 to 6 lbs.). If time gets away from you and you don't butcher by ten weeks, the birds begin developing health problems. Red Rangers are ready for butcher at nine to eleven weeks (5 - 6 lbs.)
As with all chickens, the ongoing costs are really just feed.
By the way, you might wonder if you can raise quail and chickens together. The official answer is no. Chickens and quail share diseases, but some of those diseases chickens are immune to or don't get very sick from, will quickly kill quail. BUT...I can envision having quail in cages well off the ground, in the chicken run. If you don't put a manure tray under these cages, their wasted feed (and their manure) will drop into the chicken run, which would give chickens something to scratch at and eat. It's a calculated risk.
(adsbygoogle = window.adsbygoogle || []).push({});
Other Ideas
Again, I have not personally raised the animals I'm about to discuss, but have done extensive research on them, because I've considered raising them on our homestead.
It is not uncommon to raise turkeys alongside chickens. Both have similar feed and housing requirements. But it should be noted that turkeys are susceptible to blackhead disease, which chickens can carry. Check with your local extension office to see if this is an issue in your area. Turkeys typically take about 16 to 22 weeks to reach a butchering weight of 12 to 14 lbs., but much depends upon the breed you choose.
 Backyard ducks. Courtesy of
 Robert Taylor Ducks are also worth considering. They should never be kept with chickens, since drakes will try to mate with female chickens; the drake penis is - well - LARGE, and will kill chickens. Besides, ducks require a different environment than chickens. They do want a shelter, but it needs to be low to the ground, with no roost or ramp. They should also have water to play in - and unless you have a natural pond, this water source will need frequent cleaning. Ducks are also nosier than chickens, if that matters in your particular situation. Although Muscovy ducks are quackless, they do make other noises. Ducks can really make a mess of your yard, too, since they use their beaks to dig around for food. They do offer large, tasty eggs, but they often lay where you don't want them to and their production isn't as reliable as chickens or even quail. They offer excellent slug control, but they will also eat your vegetable garden. Preferred for eating are Pekin, Muscovy, and Moulard breeds. Be prepared for a stronger flavor than chicken or turkey, as well as fattier and darker meat. Generally, ducks are butchered at 7 to 8 weeks. (They become more difficult to pluck as they age.)
Geese are another interesting option, but they do require space to graze grass, weeds, and bugs. If you live in the suburbs, you will need understanding neighbors, since geese are generally noisy. They should also have water to play in. Geese have a reputation for being aggressive - to the point that they are sometimes used as an alert system for predators, but if given lots of handling and attention, they can be very friendly. Of course, most of us don't want to get tooooo friendly with our meat. Goose meat is most commonly compared to beef (and it's worth noticing domestic goose tastes different than wild goose). Geese are generally butchered at eight to fourteen weeks, depending upon breed.
Related Posts
An Introduction to Raising Rabbits for Meat


May 27, 2021
Kristina's "Famous" Zucchini Bread

Almost 11 years ago, I discovered the zucchini bread recipe everyone talks about. And by everyone, I mean my husband. And kids. And other people I bake it for. Ha!
My husband says it is "like candy." I definitely think it has some unique ingredients that make it stand out from the crowd...so every summer, I freeze shredded zucchini for the sole purpose of baking this treat any time I want to.
A few tips: Golden raisins elevate this recipe, so use them instead of the standard dark raisins. If you have time, soak them in a little water while you whip up the rest of the ingredients. This helps ensure the raisins are plump and tasty in the finished bread.
Also, I use refined coconut oil in this recipe, since I think it is a really healthy choice - but you can also use olive oil, or probably any liquid oil you prefer.
Finally, you may also use this batter to make muffins; bake them for about 20 minutes, or until a toothpick run through their center comes out clean.

Kristina's "Famous" Zucchini Bread Recipe
3 cups shredded zucchini
4 cups all purpose flour
1 cup plus 2 tablespoons cane sugar
1/2 cup golden raisins
1/4 cup packed brown sugar
5 teaspoons baking powder
1 tablespoon grated lemon rind
1 1/2 teaspoons cinnamon
1/2 teaspoon salt
1/4 teaspoon nutmeg
1 1/2 cups milk
6 tablespoons oil
2 teaspoons real vanilla extract
2 large eggs
(adsbygoogle = window.adsbygoogle || []).push({});
1. Preheat the oven to 350 degrees F. Grease two 8x4 inch loaf pans with cooking spray or coconut oil; set aside. Press the zucchini through a sieve to remove excess moisture; set aside.
 2. In a large bowl, combine flour, 1 cup sugar, raisins, brown sugar, baking powder, rind, cinnamon, salt, and nutmeg; make a well in the center of mixture.
3. In a medium bowl, stir together the milk, oil, vanilla, and eggs. Stir in the zucchini. Add the zucchini mixture to the flour mixture, stirring until just moist.
4. Divide the batter evenly between the two prepared pans. Sprinkle the top of each loaf with 1 tablespoon sugar. Bake at 350 for 1 hour and 10 minutes, or until a knife inserted in center comes out clean.
5. Cool the loaves for 5 minutes in their pans on a wire rack. Then, remove the loaves from the pans and cool completely on the wire rack.

May 21, 2021
Tragedy and Triumph on Our Homestead

This post may contain affiliate links. All opinions are my own. Please see FCC disclosure for full information. Thank you for supporting this site!
Homesteading is definitely not for sissies. Today, for the first time ever, I thought, "Maybe this isn't the life for me."
I dismissed that thought pretty quickly, because I have a lot of reasons why I homestead and none of them have anything to do with easiness. Still, sometimes homesteading really, truly sucks. Today is one of those days.
Every morning, the sheep greet me at the pasture gate, hoping I will give them some treat to eat. Each morning, I tell them good morning and look them over visually to make sure everyone looks well. But this morning, someone was missing.
Our sweet little lamb, Bonnie, not quite 9 weeks old, was not with her parents. Unheard of. I wondered if maybe she was showing some independence, since Soay sheep, unlike more familiar breeds of sheep, don't always stick together every second of the day. I decided I'd give the sheep some molasses grain, which always gets everyone running to the manger.
No sign of Bonnie.
I went on with other chores, feeling troubled and praying that Bonnie was okay. After perhaps an hour, I returned to the sheep pasture. Still no Bonnie. And her mother was baaing incessantly. Not good.
I texted my husband at work. I was concerned about looking for Bonnie by myself, since cougar who have a meal set aside for later can and do attack humans. My husband said I'd better go make sure Bonnie wasn't caught in the fence or injured somewhere...so I grabbed my gun and my dog, as well as a fallen tree limb to make me look bigger to a predator. The dog and I walked the fence line three times. The first time, I was hoping to find the lamb stuck in the fence, even though she wasn't crying out, as I'd expect she would under those circumstances. The last two times, I looked for breaks or holes in the fence. Nothing. We wandered through the middle of the pasture as best we could. Our pasture is really a wooded area on a steep incline with brambles, so I couldn't walk every inch. But I figured if there was a body out there, the dog would find it. Nothing.
 Bonnie, only a few weeks old.
(adsbygoogle = window.adsbygoogle || []).push({});
No body, no blood...just nothing.I cried as I realized our Bonnie was gone, likely taken by a cougar - or, as a friend suggested, maybe a bobcat (which supposedly can take a large, almost-full-sized Soay over a fence line).
I'm heartbroken and trying not to torture myself with "what ifs." And now, of course, we're concerned for our adult sheep. Although the people who lived here before us had sheep and goats with only one predator attack in many years, I can't help but think about what I can do to protect our sheep if a predator returns. A guardian dog is about the only real solution, but a guardian dog who is good with half-wild Soay sheep is hard to find...and a GOOD adult guardian dog with any sheep experience is almost impossible to find. And to win against cougar, you really need two dogs.
It just seems like too much. Too much lately has been bad, terrible, no good. And so I turn to God and I think about the stories of shepherds and sheep in the Bible and ask God to protect our two remaining Soays.
 Shannon, Bonnie, and Shaun.
And then my mind turns to something good. A few weeks ago, I discovered a rabbit kit with a terrible and sudden case of wry neck (also called tilt head or torticollis). The kit - nor any of my other rabbits - had any sign of ear mites, the most common cause of wry neck in rabbits. After consulting other rabbit raisers online, most told me to cull the kit - to kill it. They said it wouldn't survive without months of careful and consuming hand-raising. A few said it probably had a parasite called E. cuniculi and I should treat it with Safe-Guard (Fenbendazole). My local feed shop did not have Safe-Guard in liquid form (which is the only accurate way to dose rabbits), so I ordered some online and hoped the rabbit kit would survive until the medicine arrived. In the meantime, I watched all my rabbits especially closely.
 This kit's head suddenly was tilting severely to one side.
(adsbygoogle = window.adsbygoogle || []).push({});
But as I read more about treatment, I realized there were no guidelines (at least that I could find) for kits. There seemed little point in treating one kit and not the others, and I didn't want to risk harm to the entire litter by guessing the medical dose. Yet I have always been one to give animals a chance to recover. I never cull runts, for example - even when I had one so small other rabbit raisers told me it had failure to thrive. Once it was weaned from its mother, it grew as big as its siblings. So...I chose to do nothing at all for the wry neck kit - except watch it carefully.
And a funny thing happened. Not only did the kit with wry neck manage to get around, albeit with great difficulty, since wry neck makes rabbits feel off-balance, but it seemed to be doing as well as its litter mates in every way except for that tilting head.
Weirder still, after perhaps five days, it seemed to me the wry neck wasn't as bad. And then two days ago I realized I couldn't discern which kit had the wry neck. In other words, the matter had completely resolved itself!
 Healthy kits!
It goes to show that the crowd can be wrong. (Perhaps they are even frequently wrong.) And I thanked God that He saved that little rabbit.
Nature is cruel. Life is hard. No lifestyle is sunshine and lollipops every day - certainly not the farming life. But as hard as today is and as much as my tears are still falling, I am thankful for these little creatures. I am thankful for this land. And I am thankful for the homesteading life God has blessed us with. It's not for sissies, but if we can weather the hard parts, we are richly rewarded with animal interaction, healthy food, and a more realistic view of the world.
_______________________
"You are my sheep, the sheep of my pasture, and I am your God, declares the Sovereign Lord."
May 18, 2021
Grow Celery from Grocery Store Stalks (Plus, How to Preserve Celery!)
How to Root Store Bought Celery
1. Cut the stalks off the celery plant. (I recommend using or preserving those stalks right away. Don't toss the leaves! You can use them in any dish that benefits from celery flavor. I like to turn the leaves into celery salt.)
2. Once the stalks are removed, you're left with a celery "base." Place this base in a shallow bowl.
3. Add some water to the bowl. The very bottom of the celery base must be submerged at all times.
[image error] Celery base sitting in a bowl of water. Notice there are three roots growing from the right hand side. These developed in the bowl of water.4. Place the bowl in an out of the way location. It doesn't need direct sun, but I wouldn't put it in the dark, either. I place mine on the kitchen counter.
5. Check the celery base every day, to ensure the water has not evaporated.If needed, add a bit more water.
6. Once you see several longish roots coming from the celery base, remove the base from the bowl and plant the celery, leaving the top of the base exposed above the soil.
(adsbygoogle = window.adsbygoogle || []).push({});
Tips for Growing Celery
* Celery grows best in rich soil that drains well.
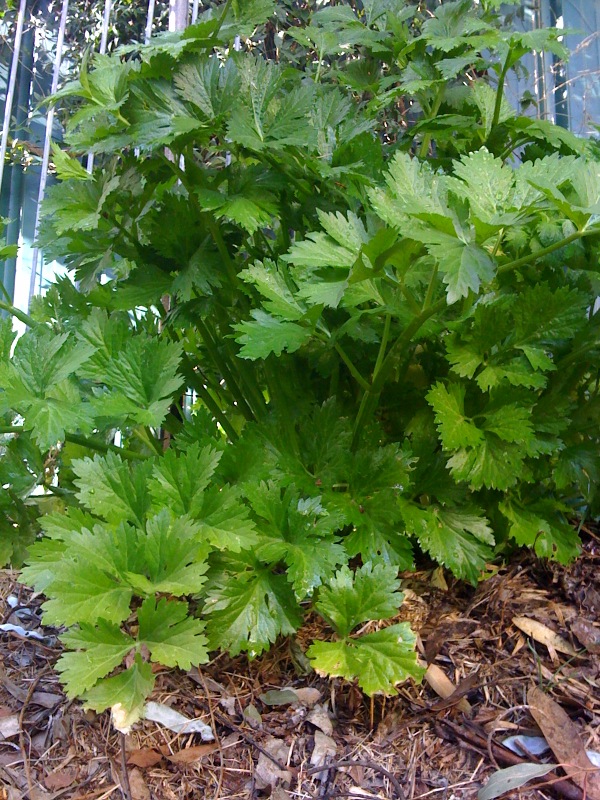 Maturing celery. Courtesy of John Tann.* Celery grows just fine in large pots.
 * Celery likes part shade or full sun. If your temps tend to be over 80 degrees, give celery dappled shade. Or put it under a shade cloth.
* Celery is a marshland plant, so it likes lots of water. Don't let it the soil completely dry out or you'll end up with pithy or hollow stalks. Adding mulch around your celery plant is helpful in retaining moisture.
* Harvest your celery as it grows. Cut off what you need at the base of the plant, leaving at least seven center stalks on the plant at all times.
[image error] Celery grown from grocery store trimmings.* Store bought celery is always "blanched" - meaning part of the plant is covered up to prevent photosynthesis. I never blanch my home grown celery and I find the flavor SO much better than store bought! But if you like very mild-tasting celery, or you live in a hot climate (which may cause your celery to taste bitter), do blanch your celery two to three weeks before you think you'll harvest. There are several ways to do this; one easy way is to wrap the stalks with newspaper, held in place lightly with string. Another easy method is to cut the top and bottom out of clean, waxed milk cartons and place one carton over each celery plant. The traditional blanching method is to mound soil over the celery stalks. Remember in all cases to keep the leaves of the plant uncovered.
* I let my celery go to seed. When some of those seeds thrive and new celery plants start to grow where nature planted them, I let the baby plants get a good start, then dig them up and transplant them.
* It's fine to collect celery seeds, too, but they are notoriously difficult to sprout. Try starting the tiny seeds in a sandy soil, then cover the them with the tiniest amount of potting soil.
Read more at Gardening Know How: Tips On How To Grow Celery https://www.gardeningknowhow.com/edible/vegetables/celery/tips-on-how-to-grow-celery.htmng them with sand and then sprinkle the sand-seed mix over the potting soil. Cover the seeds with just a little bit of soil. Celery seeds like to be planted shallowly
Read more at Gardening Know How: Tips On How To Grow Celery
(adsbygoogle = window.adsbygoogle || []).push({});
(adsbygoogle = window.adsbygoogle || []).push({});
* If you live in a location that's not ideal for growing celery (due to hot or very cold temperatures), you're probably better off looking for a variety of celery that grows well in your area. Likely, that is not a grocery store variety.
How to Preserve Celery
* Celery stalks store in the refrigerator for a few weeks; whole plants can last two or even three months. Keeping the base of the celery plant wrapped in a damp paper towel can extend this storage time. Celery "scraps" (the leaves or the base of the stalk) make an excellent addition to bone broth or stock. I throw these scraps in a bag and keep them in the freezer (along with carrot leaves and onion scraps) until I'm ready to make stock.
* Celery stalks and leaves freeze well. Just chop and put in freezer bags.
* Celery leaves and stalks also dehydrate well. See this post for more details.
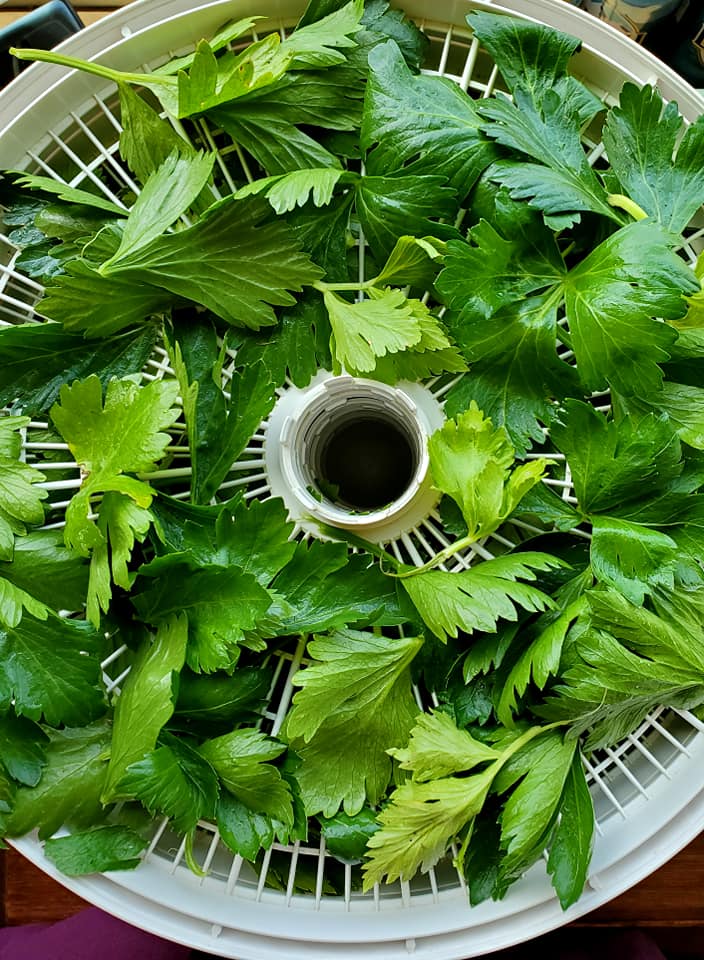 Dehydrating celery leaves.
* Celery also freeze dries very well.
 Freeze drying chopped celery stalks (and cheese).
May 4, 2021
Quail vs. Chickens: Which is Better? (with Video)
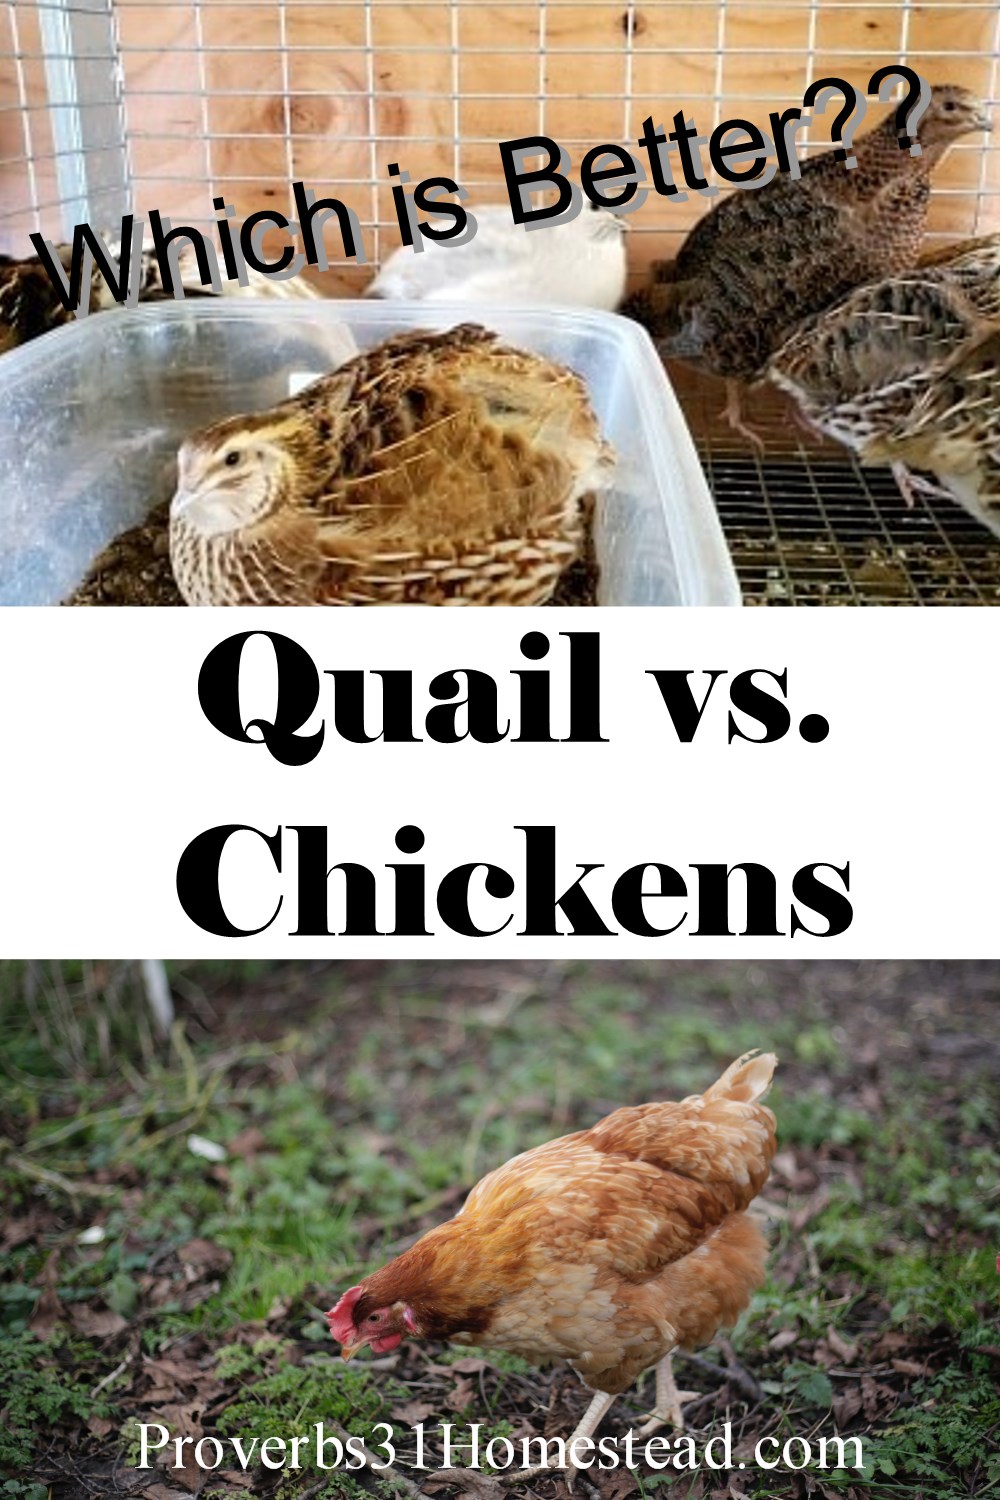 In case you haven't noticed, quail are the hot "new" animal on homesteads, both rural and urban. There are a lot of good reasons for that, as I pointed out here, but one thing many people are wondering is: Which is better? Should I choose just one? Or should I raise both? This post is designed to help you answer those questions.
 Quail & Chickens: What are They Good For?
First, let's take a brief look at why someone would want either of these animals on their homestead. Let's start with the more familiar chicken. They are good for:
* Eggs.
* Meat.
* Suburban or rural yards.
* Neighborhoods where relative quiet is expected. (As long as you only keep hens.)
Quail (by which I really mean Coturnix quail, a.k.a. Japanese quail) are good for:
* Eggs.
* Meat.
* Urban, suburban, or rural yards.
I personally have found quail are quite noisy - even the hens, but most people claim theirs are considerably quieter than chickens - and important consideration when you have neighbors nearby.
Chickens vs. Quail
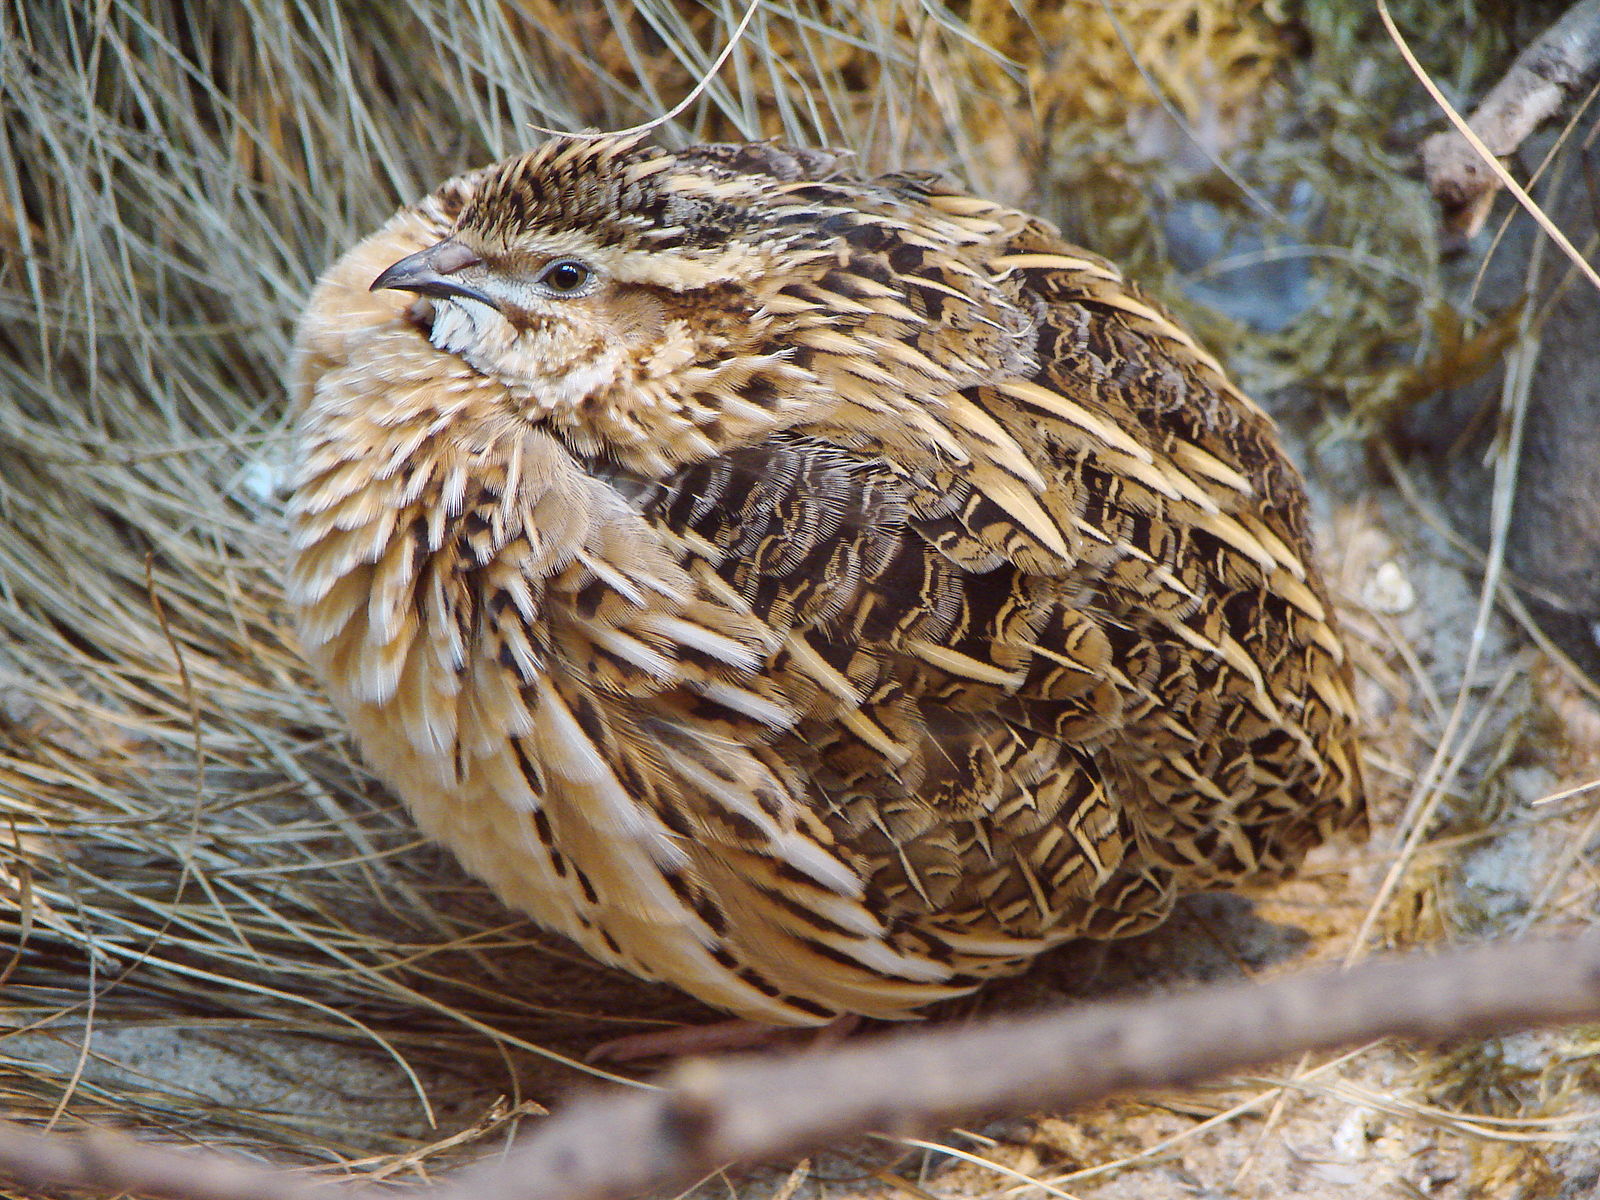 Coturnix quail. Image courtesy of Guérin Nicolas.
You might prefer quail if:
* You aren't a big fan of chicken meat.
* You like meat with a bit more flavor than chicken.
* You want animals that reproduce more quickly than chickens. Quail hatch in just 18 days and are mature at 6 to 8 weeks. Chickens take about 21 days to hatch and are mature at 16 to 24 weeks, depending upon breed.
* You want an animal that is easy to butcher. (Quail are MUCH easier than chickens!)
* You want eggs sooner. (Coturnix hens begin laying at 6 to 8 weeks. Chickens start at 18 to 26 weeks.)
* You want eggs every single day. Most chicken breeds don't give an egg a day (though Australorps mostly will!) Coturnix quail, however, absolutely do.
(adsbygoogle = window.adsbygoogle || []).push({});
* You want more eggs. The average chicken lays 150 eggs per year. The average Coturnix lays 300.
* You prefer the taste of quail eggs. I am intolerant of all eggs, but my husband says quail eggs are by far his favorite. He says they are "buttery."
* You want an animal that can truly be butchered at any age and remain edible. (Chickens tend to get very tough with age.)
 Young or old coturnix are quite edible.
* You want an animal with a better egg-to-feed ratio. Coturnix need 2.5 lbs of feed to produce 1 pound of eggs, while chickens need 2.8 - 3.2 to produce 1 pound of eggs. (Source.) HOWEVER, this doesn't offer a complete picture, since quail are horribly messy eaters. A lot of their feed will end up on the ground (if raised in an aviary) or the poop tray (if raised in cages). You can mitigate this to a certain extent by making a "zero waste" (they should be called "low waste") feeder and/or by putting a pie tin in the poop tray just under the feeder to save and reuse feed that falls through.
* You have less space. Quail need a minimum of one square foot per bird, while chickens require a minimum of 12 square feet per bird. (More space is better.)
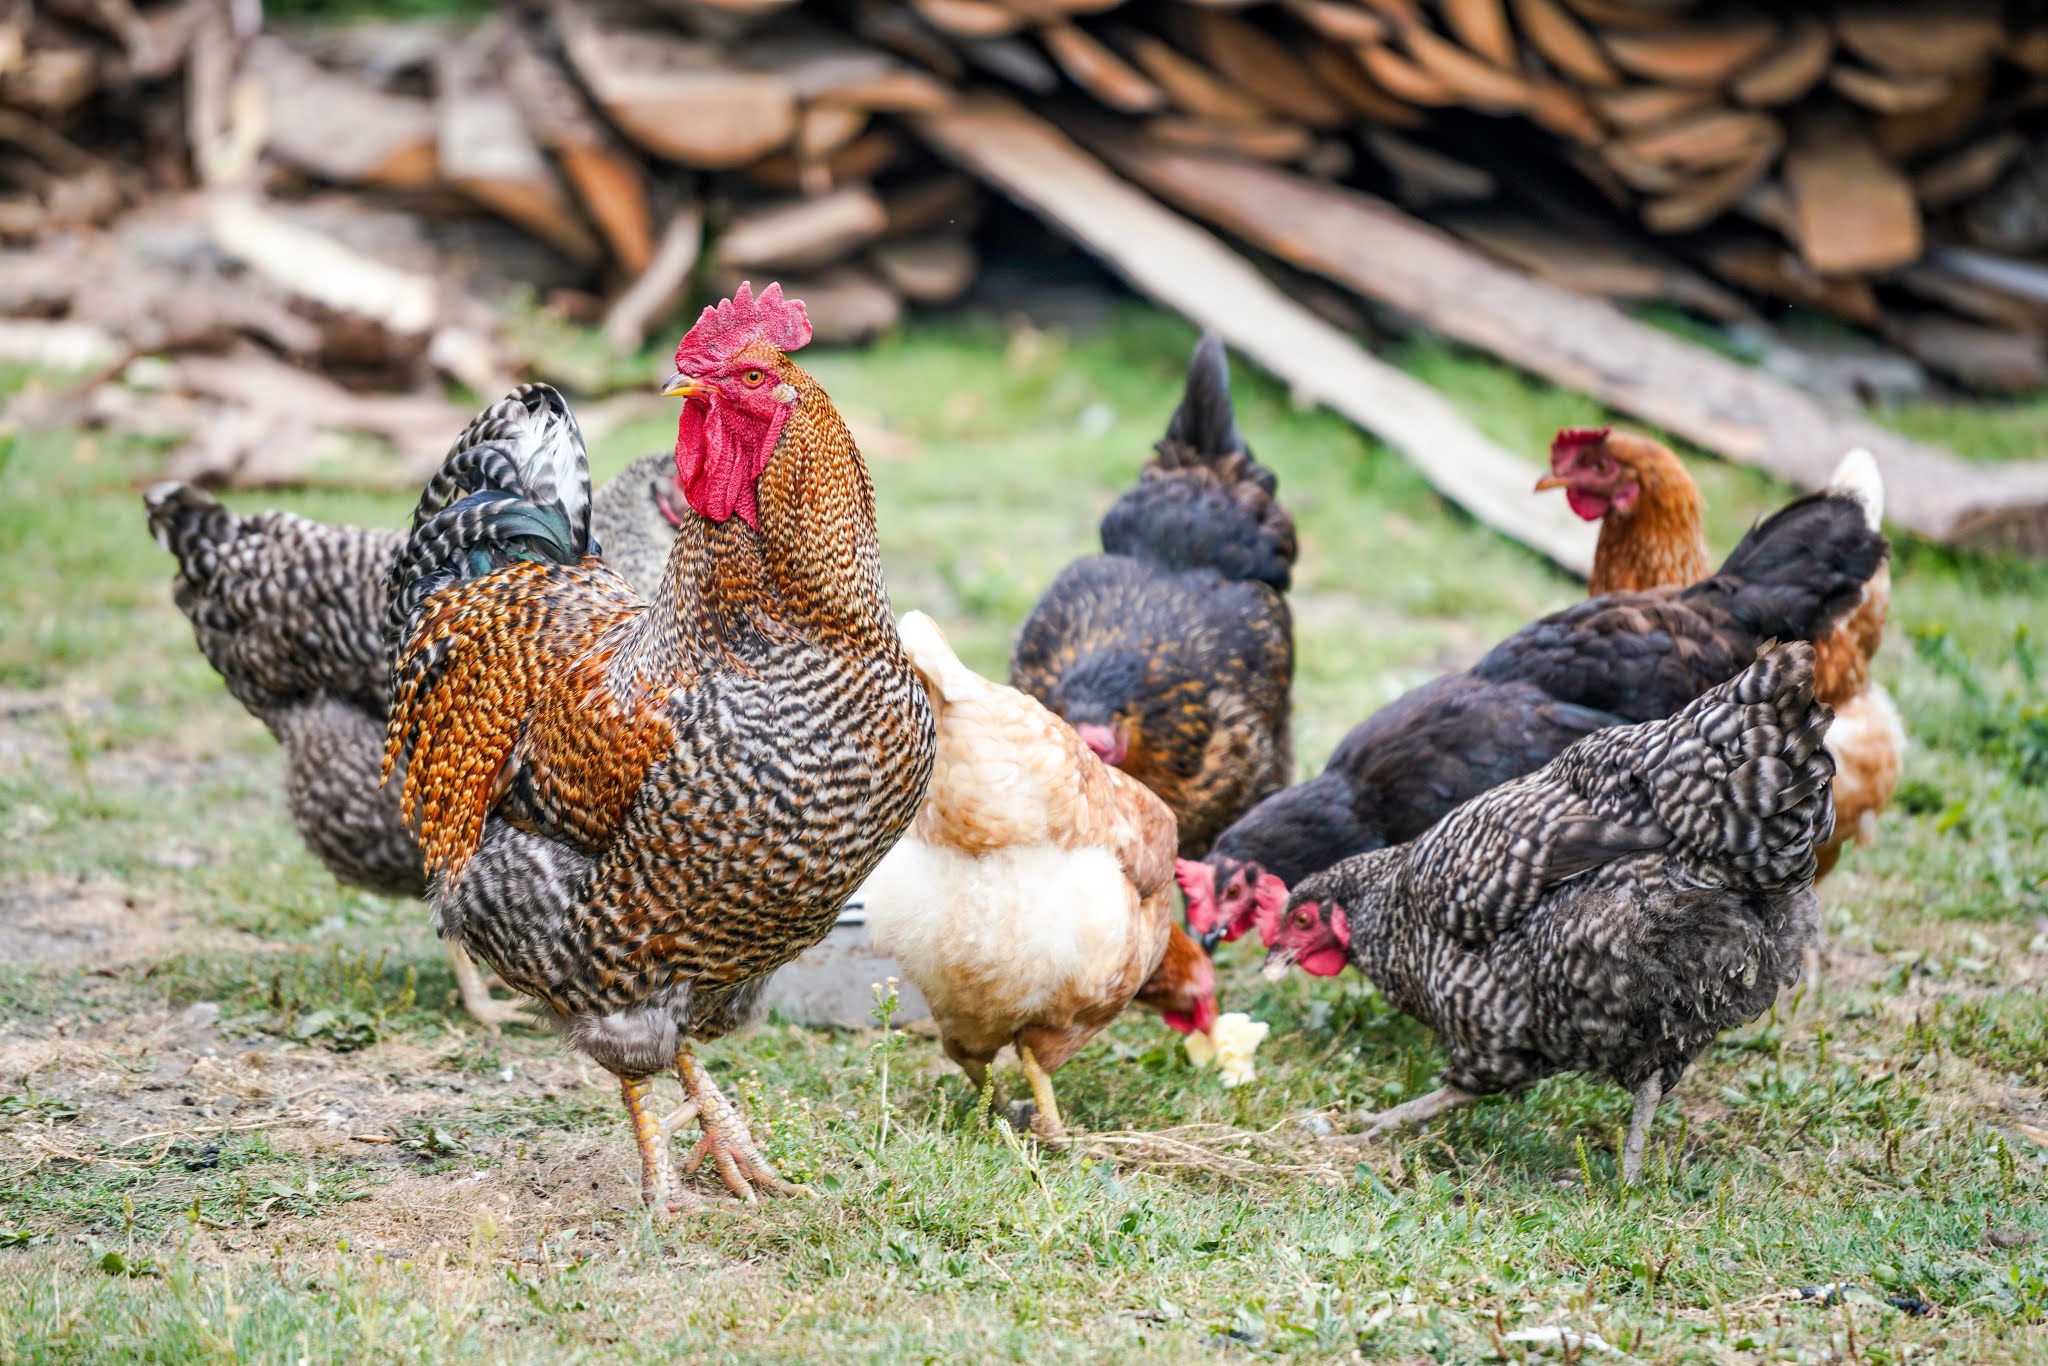 Mixed chicken flock. Courtesy of Photo by Zosia Korcz on Unsplash You might prefer chickens if:
 * You love chicken meat.
* You want animals that can often hatch and raise their own young. (Coturnix don't usually sit on their eggs, so you'll need an incubator if you want more birds. Meat chickens tend to not sit on eggs, either, however, and it can be a crap shoot as to whether or not you end up with a broody hen even if you only have egg-laying breeds. Nevertheless, it's far more likely you'll have a good mother if you're raising chickens.)
* You want an animal that can forage for part of its food. Coturnix are poor foragers. (So are Cornish Cross, the most-often-raised meat chicken.)
* You don't want an animal that is as sensitive to light changes are Coturnix. (Both chickens and quail will stop laying if natural light levels are low - as in winter - but in my experience, quail are far more sensitive than chickens and if you want continuous egg laying, you'll almost certainly have to supplement with light.)
(adsbygoogle = window.adsbygoogle || []).push({});
* You hate the smell of manure. Honestly, quail have the stinkiest manure I've ever been around, and they poop A LOT.
* You hate cleaning poop trays. If you raise quail in cages, you'll need to clean the poop trays at least once a week. Chickens, on the other hand, generally only need their house cleaned a few times a year, at most.
* You need to keep dander down. Even when raised outside, quail dander will coat everything near by.
* You want to raise fewer animals and get more meat and eggs. Let's face it, quail are small compared to chickens, and so are their eggs. While quail are very prolific, it does take more of them to get equal pounds of food. HOWEVER, quail meat is higher in protein and is therefore more filling. Most adults cannot eat more than one or two quail at a meal.
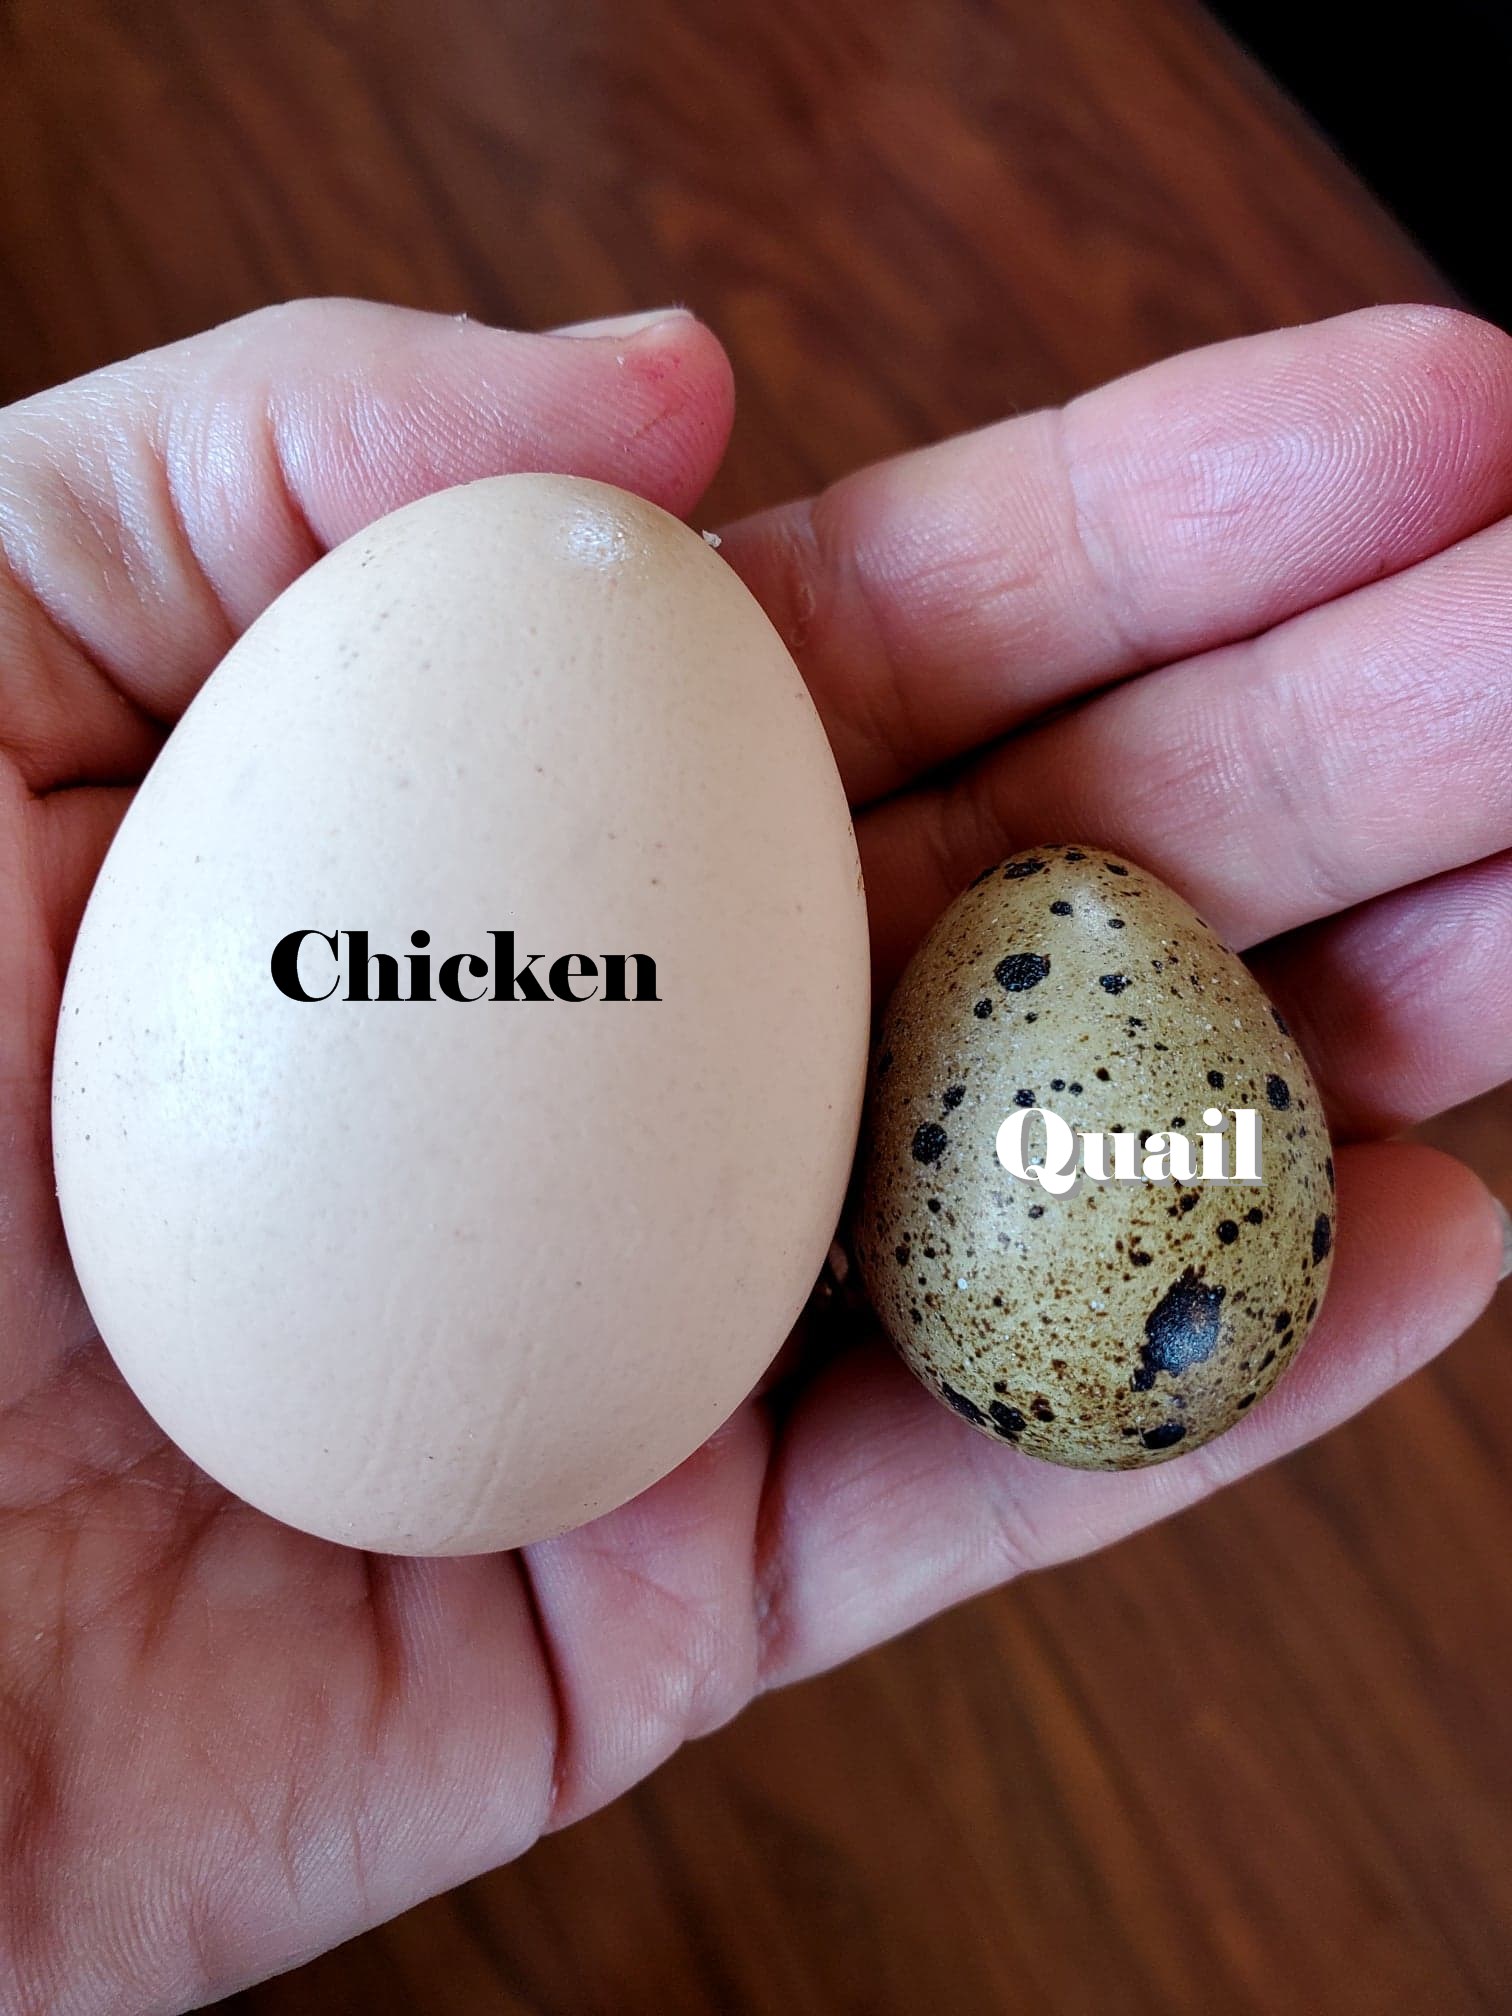 Size comparison of a typical chicken and quail egg.
* You want an animal that's easier to protect from predators. Even in a rural area, it's relatively easy to keep chickens safe as long as you have a good hen house and run. I can't imagine raising quail in a colony setting where there are lots of predators, though it's easy to do so if you raise the quail in cages.
* You want animals that work harder for the homestead. Chickens are great for turning kitchen scraps and certain gardening clippings into compost/eggs/meat. They are also a good way to clean up a garden bed at the end of the season, scratching up weeds and eating insects and plant remains. While they do so, their manure will lightly fertilize the garden beds. Quail are really not suitable for any of these things.
Conclusion
Quail vs. Chickens - Eggs
Winner: Quail
Quail vs. Chickens - Meat
Winner: Quail
Quail vs. Chickens - Space
Winner: Quail
Quail vs. Chickens - Quietness
Winner: Chickens (sans roosters)
Quail vs. Chickens - Overall Efficiency
Winner: Tossup
Let's be real. There's no one answer to the question of which bird is better, or whether you should raise one or both. It all depends upon YOU and your wants and needs. Right now on our homestead, both chickens and quail are working well for us. We hate butchering chickens and aren't big fans of chicken meat, so quail are a better choice for us meat-wise. My husband also far prefers quail eggs, but I use chicken eggs for baking and general cooking. I find quail (which we raise in cages, because we live in an area with tons of predators) more time consuming to care for.
Some day, if we have more meat sources on our homestead, I will probably stop raising quail and stick with chickens - but my husband sure will miss those quail eggs!
Related Posts:


Cover image of hen by Ben Mansfield on Unsplash.
(adsbygoogle = window.adsbygoogle || []).push({});


![[image error]](https://1.bp.blogspot.com/-RXzIIIWHRUs/YKQIDdHSahI/AAAAAAAASUM/lDiDp1ssrcQrtz06BO7X7vGbcDSUnc0mACLcBGAsYHQ/s1500/Grow-celery-from-grocery-store-stalks.jpg)
![[image error]](https://1.bp.blogspot.com/-JoNbbPLkuQg/YKQFthwjS9I/AAAAAAAASTk/s6tDwLhrP7si0glc-qt8OokFvNyjLa-YwCLcBGAsYHQ/s2015/95272287_3227643377278556_2139608438915727360_n.jpg)
![[image error]](https://1.bp.blogspot.com/-UU4CLUYlvm0/YKQGpYr3dcI/AAAAAAAASUA/2YItJx7aJWcBOhZjfBctc5bF91qKkVIHQCLcBGAsYHQ/s960/179186189_4257419540967596_8335247497348205473_n.jpg)