
Renee Wilkinson's Blog, page 8
February 11, 2015
Winter Awakening
I love the quiet of winter and stillness of it all. The cold and rain forces us inside, pleading with us to slow down. Yet in between rain showers there are signs of late-winter life and a hint that spring is closer than we might think.

Vivelli Winter Heather
You can find varieties of heaths and heathers to bloom at anytime of year. The ones on our homestead bloom from late fall through late winter when the garden is quietest. Together they create a changing carpet of color along the edges of our garden – easy to admire from the pathways.

Fragrant Sarcococca
Fragrant Sarcococca is an understated broadleaf evergreen that looks like your basic foundation shrub most of the year. Come January, it fills the air with a sweet aroma from hidden flowers. It’s not as flashy as Winter Daphne, which blooms around now with fragrant pink blossoms. But I really enjoy that it creates this pleasant, mysteriously sweet smell the no one can seem to find the source of. These are planted on either side of our front door to greet us every time we come or go.

A moderately trampled crocus
What garden is complete without crocus? They are a classic, and welcomed, sign of early spring.

Pink Muhly Grass
I wait until late February or early March to cut back our ornamental grasses. This Pink Muhly has fine foliage and pink-tinged puffs that seem to float in the air. Our winter wind storms really bring them to life.
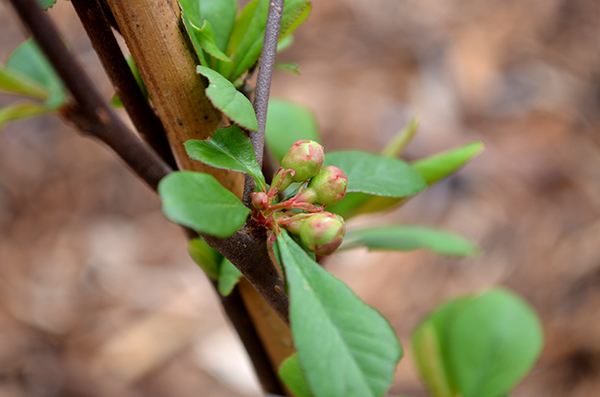
Flowering Quince buds
There are lots and lots of winter delights to observe for the true plant nerd. Buds are swelling on the flowering quince, which produces wonderfully fragrant fruit in the fall and blooms in very early spring. I think I admire buds swelling on trees and shrubs about as much as the flowers.

Evergreen Huckleberry buds
Our many blueberry and evergreen huckleberry bushes have buds forming already. Spring flowers will follow in a couple months and hopefully yield a heavy crop of berries this summer. I have a very eager toddler who can hardly wait to devour these when the fruit sets.

Blueberry buds
What signs of life do you see outside on these cold days? Who are your favorite winter flowering plants? Or do you prefer to let the garden sleep and burst to life in spring? Tell me about it in the comments below!


February 4, 2015
DIY: Upcycled Play Kitchen
Juniper loves to help – in the garden, in the kitchen or wherever we happen to be. So when my Aunt T called me from a thrift store and said, “There’s an old cabinet here that could really make a cute play kitchen…” I just had to say yes. And so began a do-it-yourself Christmas present project. Here’s the recap of how I did it.
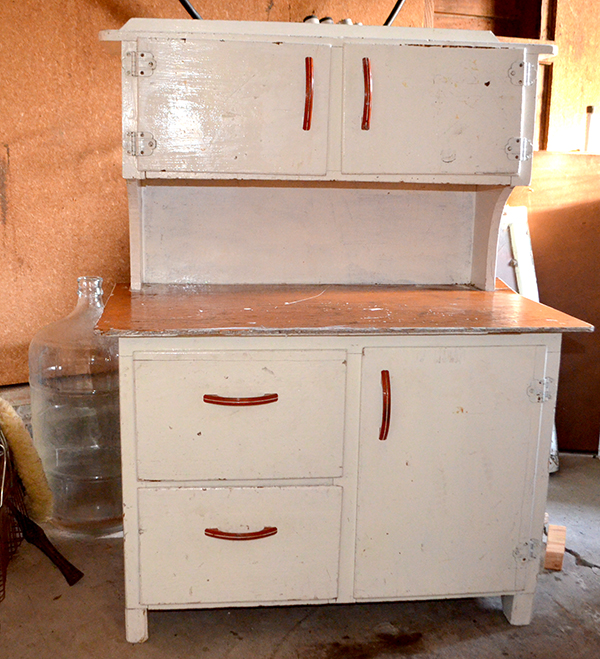
Old cabinet ready to become a play kitchen
Step 1: Find your future kitchen and prep
The cabinet we found has a low counter on it and looks like a miniature workbench. I’ve seen folks turn more challenging things like old TV cabinets, night stands, etc. into play kitchens. Get some ideas through web searches and on Pinterest. My cabinet find was so straight-forward that turning it into a kitchen was super simple.

Old cabinet ready for painting
To prep the cabinet, I do a good thorough cleaning. Once dry, I remove all the drawers and knobs to paint everything white. That gave me a good blank slate to work from, so I could decide later what color and features to add.
Step 2: Place sink area
Our cabinet was wide enough to split into two areas: stove top and washing area. I carefully drew the placement of everything in pencil on the countertop before anything was cut. That helped me plan out how it could all fit. The sink and faucet were the first things to go in, since they required cutting into the cabinet.

13/16″ drill bit for making faucet holes. I brought the faucet into the hardware store to make sure I found a perfect match!
I bought a few items to help with this step: a cheap faucet (thrift store), metal bowl (thrift store) and a 13/16″ drill bit (hardware store) that perfectly matched the holes I would need for the faucet. Altogether, those supplies were ten bucks.
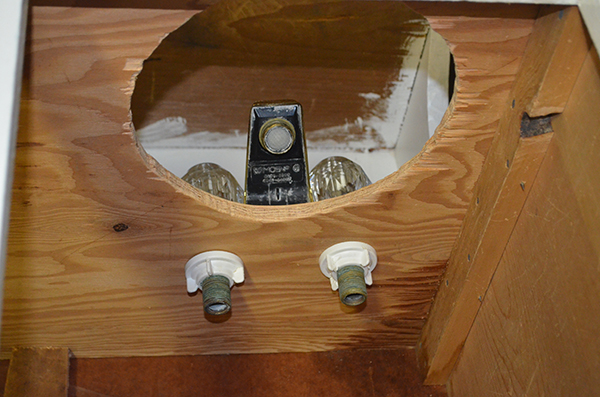
View from under the cabinet of sink hole and faucet assembly.
A jigsaw would likely work best for cutting the sink hole, but I don’t have one so I improvised with a narrow hand saw. I cut a crude hole for the metal bowl/sink and spent some time sanding to get the shape just right. After placing the sink, I used a clear caulking to keep it in place. The drill bit was just perfect for a snug-fitting faucet and I used the washers it came with to tighten into place.
Step 3: Create the stovetop
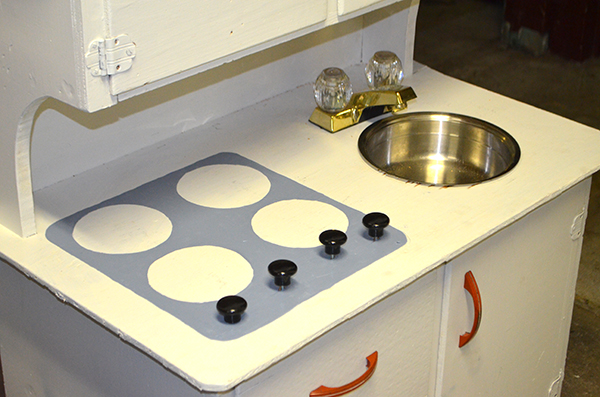
This part was a lot of fun! I used cheap plastic cabinet knobs to make on/off dials for the stove. I drilled tiny holes, placed the knobs, then tighten with washers on the other end. Leave them loose enough so your little one can still turn them. In a later picture, you’ll see I painted a tiny white dot on the edges.

Pencil marking the location of all pieces. Drawer knobs used as on/off burner dials.
I made a few mistakes with creating the burners. First, paint the area BEFORE placing the knobs. I left mine loose so I could paint right under then and around them. The second mistake – I used whatever paint I had on hand, which was oil-based. Big mistake. After two days, the paint still wasn’t dry. I ended up wiping off what I could and repainting with acrylic. Acrylic has a wide array of colors and it dries in just an hour or two.
Painting the stovetop
I painted the stovetop grey and the burners black. Kind of simple colors, but I wanted the grey to mimmick the look of metal – like most stovetops.
Step 4: Transform the cabinets
This part can vary depending on what you have to work with. I’ve seen folks take out cabinet faces and add ruffled curtains. You could simply paint the cabinet faces and call it done. I choose to make an oven with a window and a refrigerator with a “glass” shelf inside, both painted grey. The last bottom cabinet I painted blue to add some color, but the two overhead cabinets I left white.

Bottom drawers become oven with window, fridge with “glass” shelf and a storage drawer for pots and pans
For the oven door, I cut a wide hole in one drawer face, about 1″ from the interior edges, so I wouldn’t compromise the drawer construction. I measured the opening, walked to my local hardware store, and they cut a piece of plexiglass to size – plus about 1/2″ on all sides. I used an all-purpose glue to adhere the plexiglass to the inside of the drawer “window”. That way you don’t see the glue from the outside and the oven door looks more realistic.
The refrigerator was an easy change. I removed a wooden shelf, took measurements and had my local hardware store cut another piece of plexiglass to size. It fit perfectly and looks just like the glass shelves we all have in our fridges. Total cost of both pieces of plexiglass was about six bucks.
Step 5: Accessorize
After all the major pieces were in place, I took a step back to evaluate my work. I felt like there was something missing, so I decided to add some little finishing touches. I used white hooks, about two bucks a package, to screw underneath the overheard cabinets. Those became the perfect place to hang cooking utensils.
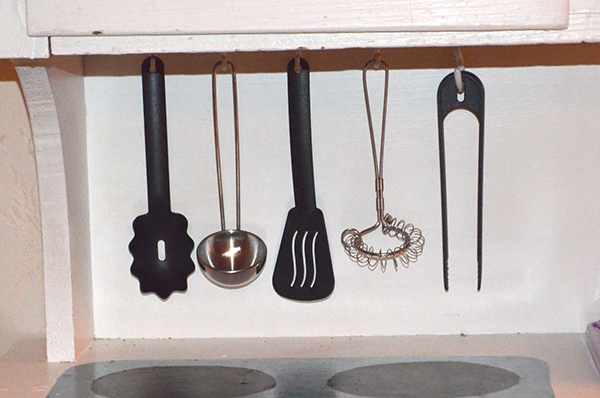
Cooking utensils hanging from small white hooks under the overhead cabinets
Next, I used a big white hook to screw onto the side of the cabinet, right under the countertop. I donated one of my vintage kitchen towels to the play kitchen cause. Juniper actually uses it a lot to wash the dishes and clean up her cooking area.

Vintage kitchen towel hanging from a large, white hook under the counter
Step 6: Play!
The final play kitchen turned out just like I wanted. It’s simple, but has all the elements you need for hours of fun. The cabinet cost $10, the construction components were about $15 and the kitchen toys (pots, pans, food) were about $20. In terms of time, I probably spent less than eight hours.
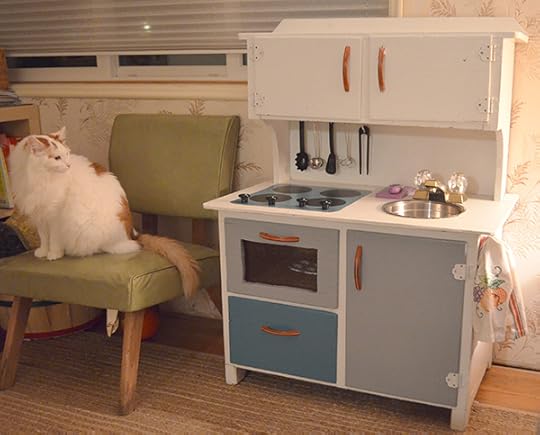
The finished play kitchen. (Don’t be fooled by the cat – he did nothing to help!)
Although this was a fun project, there were times when I thought I should have just bought a play kitchen off Craigslist! It’s hard as a working parent to make time for any extra projects. But seeing how much fun Juniper is having with this kitchen has made my hard work feel worth it.
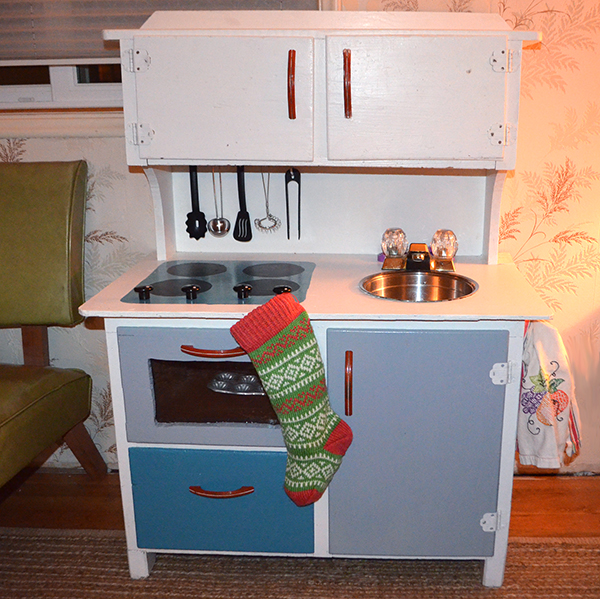
Juniper’s Christmas present
So if you come across that perfect piece of used furniture to turn into a play kitchen, don’t be intimidated! It’s an easy, fun project that can be as simple or complicated as you want it to be.I’ll never forget Juniper’s look of joyful surprise on that Christmas morning.
January 22, 2015
Lighting the Chicken Coop
To light or not to light the chicken coop? For many chicken keepers, that is the wintertime question.
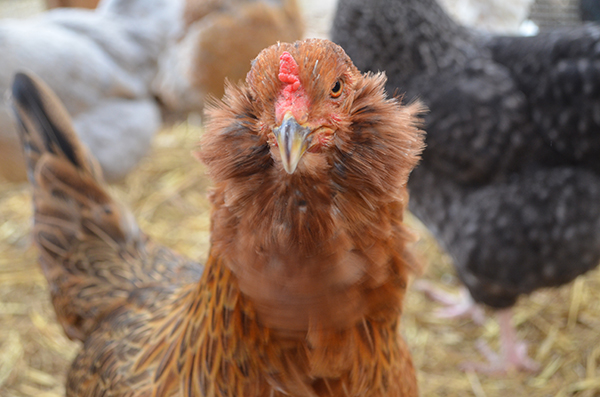
Golda, our young Americana hen
Chickens and other egg-laying creatures (like ducks) take a hiatus from producing eggs in the winter – and it’s natural for them to do so. The decreased sunlight tells them it’s not a good time to make babies, as it can be much tougher for a tender new chick to survive the cold of winter. That signals their annual molting, usually in the fall.
Really young, prolific chickens might not take any time off, but most chickens will stop laying in the winter anywhere from a few weeks to a few months. The older they are, the more vacation time they take.
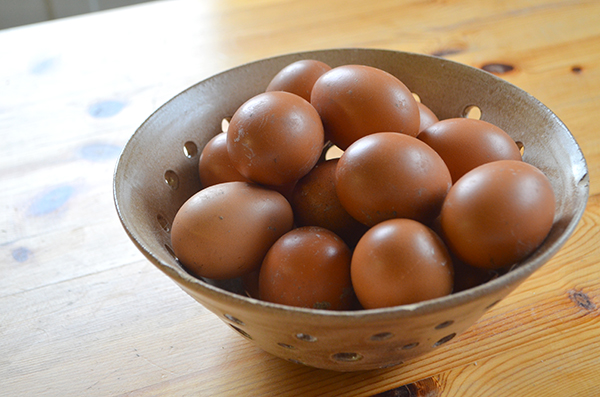
Mid-January egg bowl – the winter egg-laying hiatus is over. At least for the younger hens.
How do you force your flock to lay eggs in the winter, despite the decrease in daylight? You supplement the lack of light by setting up an artificial light source in their coop. Unlike growing seeds, the light does not need to be a grow light. It can just be a simple light bulb, like the ones you use in your house. It doesn’t need to be too bright either – something like a 9 watt fluorescent plugged into a metal dome could do the trick.

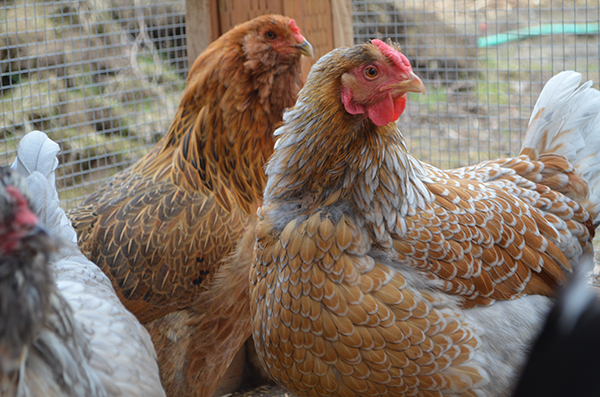
Right: Pearl, our ten year old Americana who no longer lays. Left: our younger blue-laced red Wyandottte.
The biggest challenge is how to setup the artificial light so it’s safe for your flock, which depends entirely on your coop setup. Be cautious! A warm light in a coop filled with straw or wood chips could be dangerous if the light falls into the bedding.
Most folks set the light up on a timer that turns on a few hours before daybreak. You don’t want to use the artificial light as it approaches sundown. Chickens can’t see in the dark, so letting them have access to the naturally declining light at sunset gives them some warning that it’s time to get onto their roosts before dark.
Start using artificial light after they have done their annual molting. Using an artificial light will not give them the seasonal warning they need to lose their feathers and grow in new, fluffy ones before winter. They will still molt – it’s a natural, annual process for them – but it may occur in the dead of winter when they need those fluffy feathers the most.
Two of our younger hens, who take only brief winter vacations
There are other considerations to weigh before deciding to put in an artificial light. Most importantly, hens are born with a certain number of eggs that they will release in their lifetime – just like women. Forcing them to lay through the winter will use up their lifetime supply of eggs sooner. A hen forced to lay through winter might be out of eggs by the time she’s three or four, while one that took a winter vacation can lay up to seven or longer.
So what’s the right course of action: to light or not light the coop? For me, I do not force my flock to lay through the winter. We are usually ready for an egg-hiatus after the glut of eggs we get from spring through fall. I also employ the strategy of keeping a diverse range of ages in my flock. The older girls might take a three month winter vacation, but the younger ones make up for it by only taking off a few weeks. We raise new chicks every couple years, mix them with our flock, then adopt out half of the flock – usually a mix of older and younger girls.
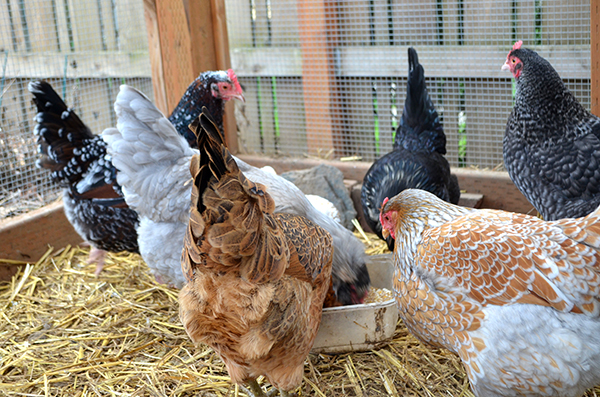
Our mixed flock ages 2-10 years old.
Our egg basket was empty for the month of December and I actually had to BUY a dozen eggs for holiday baking – gasp! So I understand the desire to keep production steady through the year. Just know your options and think about what you’ll do with your flock if they do stop laying earlier in life.
January 13, 2015
Planting Near Black Walnut
Every garden has its unique set of challenges, which is part of the reason I love garden design so much. There’s always a new problem to wrestle with in creating the perfect urban oasis. One particularly pesky problem is trying to plant near an existing Black Walnut tree.

Juglans nigra, commonly called Black Walnut. Photo by Wikipedia user MONGO.
These trees are giant, strong, majestic specimens that are prized for their nutrient-rich nuts as well as the gorgeous wood for wood-working projects. Their foliage turns a striking yellow in the fall, putting on a fantastic show.
On the downside, Black Walnut trees are pain to plant around because the tree excretes a natural substance called juglone that can suppress the growth of, or even kill, nearby plants. That’s a pretty clever evolutionary strategy to ensure the tree’s successful growth, but pretty bad news for anything else you actually want to grow near it in your garden.
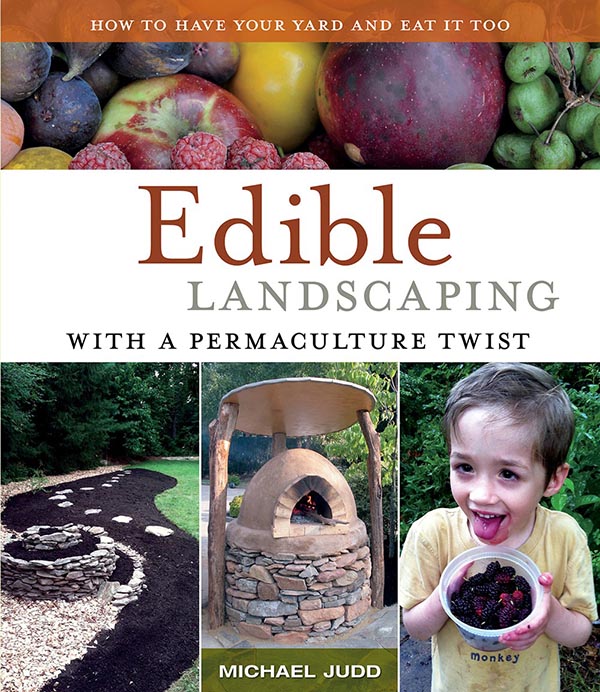
Edible Landscaping with a Permaculture Twist, by Michael Judd
Around the time I was wrestling with this particular design problem, I received a lovely copy of the book Edible Landscaping with a Permaculture Twist in the mail from first-time author Michael Judd. He saved me some research by listing great edible plants that will tolerate juglone, including:
Goumi bush
Persimmon
Paw paw
Mulberry
Currants
Black Raspberry
Alpine Strawberry
Elderberry
Goldenseal
Goumi berries
Judd’s book has more to offer than just Black Walnut advice. You’ll find advice on harvesting rainwater, growing specialty mushrooms, building earthen ovens and more – including a fair share of garden-fresh cocktail recipes. It’s available at every major bookseller, including my beloved Powell’s.
I was able to grab a few more ideas about plants that can handle close proximity to Black Walnut from Ohio State University’s Extension Services. Here is just a sample of some of the stellar ornamental plants they’ve observed growing well near Black Walnut (note this is based on observation, not clinical testing):
Japanese Maple
Eastern Redbud
Clematis ‘Red Cardinal’
Rose of Sharon
Astible
Crocus
Daylily
Coral Bells

Japanese Maple leaves ablaze in autumn
Ohio State also mentioned they have had good success growing crops like melons, squash, beans and corn. Although lots of commenters have warned to avoid putting peppers or tomatoes near them. With options like these, your plant palette might be limited near a Black Walnut, but not impossible to design.
Do you have personal experience planting near a Black Walnut on your homestead? I am curious to hear what has worked or flopped for you. Tell me about it in the comments below!
January 8, 2015
Spring Garden Prep
There might be snow or ice on the ground where you live, but it’s already time for some spring garden prep. Here are a few productive ways to get started:
Decide What to Grow
Think about what you buy most frequently from the grocery store and grow that this year! Even better, think about what you want to preserve this summer and fall and plant those berries, fruits or veggies.
If you are new to gardening, pick common vegetable varieties that are tried and true in your region, like Blue Lake pole beans, Buttercrunch lettuce and Early Girl tomatoes. Oregon State University’s Extension Services has a great list available online here.
If you are seasoned homesteader, take a look back at your garden journal to see which varieties performed best for you last year. Then grab a cup of tea, curl up with your favorite seed catalog and pick out some new ones to try.
The majority of my vegetable plot is filled with my favorite performers, but I usually leave about 20% of the garden free to experiment with new, unusual varieties. That way you get some exciting varieties to try while still banking on a productive harvest.
 Prepare for Seed Starting
Have you considered growing your vegetables from seed this year? You’ll have the widest range of vegetable varieties to choose from – far more than just what’s on the plant nursery shelf. Longterm, it will be much more economical that buying starts. However, to get started, you do need to invest in some basic equipment.
You’ll need a grow light set on a timer to ensure your seedlings get enough faux sunlight to trick them into growing big and strong. A windowsill won’t cut it. They won’t get enough sunlight – remember they need more than what nature can offer at this time of year – and the draft from the window might just kill them. A warming tray placed under your seed trays will further boost germination and growth, but it’s not necessary to successfully grow from seed.
 Order Seeds
Get your seed order in early with a respected seed source, as supplies can be limited. I prefer to order from seed companies not owned by Monsanto that are committed to growing non GMO seed. This is one of those opportunities for you to put your money where your beliefs are. Some of my go-to seed companies are Baker Creek Heirloom Seeds, Territorial Seed Company and the Seed Savers Exchange.
 Turn the Compost Pile
It’s cold and dreary outside, but get out there anyway and work off the holiday fluff. Turning the compost pile now will re-energize the micro-organisms inside, helping the pile break down even faster. With luck, you’ll have some fully composted “black gold” to spread on your garden beds come spring planting time.
 Clean Critter Cages
Our chickens have been enjoying lots of sunny, but chilly days free-ranging in the backyard. While they are out pecking around, it’s really easy to pop into their coop for a deep clean. In addition to removing all bedding, twice a year we mop the coop walls, floor and nesting boxes with diluted vinegar. We thoroughly clean their food and water dishes, which get muddy over time. After the coop dries out fully, fresh bedding goes in just around the time they come home to roost for the evening.
Organic copper tree spray and a small spray applicator – about $13 bucks
Spray Fruit Trees
Instead of spraying all your fruit trees every year, first choose disease-resistant varieties to ensure success with your home orchard. That said, even the most savvy homesteader will still run into problems sooner or later. In our case, we have a beloved Puget Gold apricot tree with blight. A sunny winter day is the best time to treat it with an organic copper spray. Your local nursery can give you specific advice on which product to spray when, but OSU also has a great online article to help out.
 Plant New Trees
The best time of year to plant new trees is in the fall, while the ground is still workable and light rains combined with mild temperatures will help get your trees established. The second best time is late winter, before the trees wake up from dormancy. They will still benefit from cool temperatures and mother nature will water them so you don’t have to.
My favorite local source for ordering edible plants is through One Green World. They have an excellent mix of old favorites and new, unusual edibles. Check out their 2015 catalog now to get your order in early.
January 4, 2015
Beating the Winter Blues
It’s wonderful living in the temperate rain forest that is the Pacific Northwest, but the rainy days of winter do take their toll come January. Here’s a few tips to help you beat any winter blues that might be creeping up.

Get Away
This year we were fortunate to take a winter escape down to sunny San Diego for a few days of much needed Vitamin D. If money and time doesn’t allow for a trip some place new, think about planning a staycation instead. Think of it like a get away – don’t make plans or run errands or check your email. Just slow down and force yourself out of the routine. You might be surprised how refreshed you are come Monday morning.

Get Outside
Peering out the window to drizzly rain or icicles? Bundle up anyway, pour yourself a thermos of hot cocoa and go for a day hike. We hiked along Torrey Pines State Park, perhaps my favorite memory from the San Diego trip. But wherever you live, taking a nice day hike after the gluttonous holidays can do wonders. The blood gets moving through your body again. You feel energized from all that fresh oxygen through your lungs.
Don’t feel like going far? Try a long urban hike around your neighborhood. And don’t forget to stop to smell the… well… fresh air.

Let in Light
Open the blinds all the way to let in as much light as possible. I open the windows too once a week to clear out stagnate, stuffy air. Those folks in northern areas get the short end of the light stick, so try to maximize how much daylight you can get while your inside.

Move It
Exercise does wonders for emotional and physical health, both of which are much needed at this time of year. The garden might be quiet, but it’s a good time of year to turn the compost pile to re-energize the micro organisms inside. Build raised beds, mend the chicken coop or even spread some mulch ahead of the growing season. These are all great ways to get a start on the garden before it springs to life, while also getting in a good workout.

Reach Out
Fresh air and a good day of garden work can do wonders, but it’s not a silver bullet to cure all things. Know when to ask for help, like seeing a therapist or reaching out to a good friend for support. The start of a new year is reason enough for many of us to make changes that are long overdue.
Any other tips of beating the winter blues? Tell me about it in the comments below! We’ve still got many months of gray skies left in Portland, so the more ideas the better.
December 26, 2014
Holiday Recap
Here is a little peek into what our Christmas celebration looked like this year. It started with a lively and wonderfully chaotic massive meal with my family. Not often do me and my three siblings get to be together, so it was a riot. And our band of kids loved bouncing off the frenzied energy that comes with the combination of childhood and Christmas Eve anticipation. 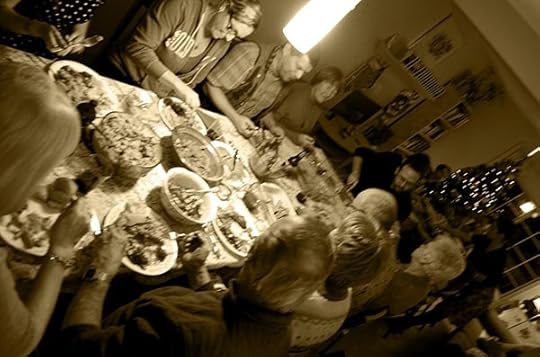 Juniper patiently posed for me in front of the Christmas tree at home – a holiday tradition for us. And yes, she is wearing reindeer pajamas.
 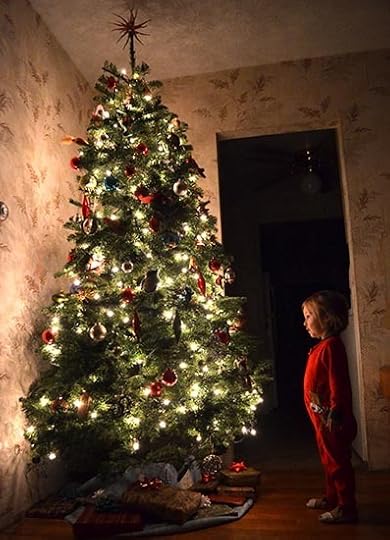 Santa came around midnight and left this cute, up-cycled kid’s kitchen. I’ll write a follow up post later on how the $10 thrift store cabinet turned into something so entertaining – both to build and to play with. I can tell that our cat Roger’s photobomb is his way of attempting to take some credit on construction, but I assure you he was no help at all.
  That evening we enjoyed a quiet crab feast with friends. Their pallet coffee table was covered with delicious cheeses, chunks of avocado, thick slices of kiwis and bananas – it was simple, elegant and totally fabulous. Crab is an easy-peasy holiday tradition for us – super easy to prepare and serve with melted butter. Is there anything better?
 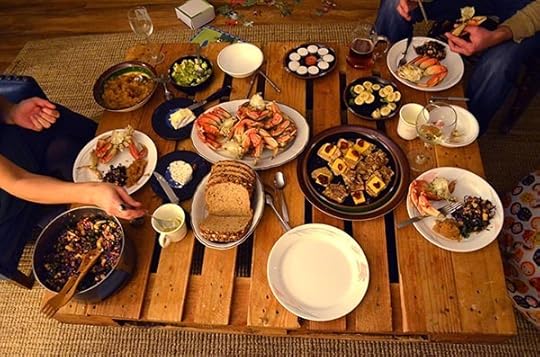 How was your holiday – frenzied, calm, tense, peaceful? I would love to hear about if you celebrate, what you celebrate, and how you celebrate in the comments below. I find it really inspiring to hear how our community views this time of year.
Here is a little peek into what our Christmas celebration...
Here is a little peek into what our Christmas celebration looked like this year. It started with a lively and wonderfully chaotic massive meal with my family. Not often do me and my three siblings get to be together, so it was a riot. And our band of kids loved bouncing off the frenzied energy that comes with the combination of childhood and Christmas Eve anticipation. Juniper patiently posed for me in front of the Christmas tree at home – a holiday tradition for us. And yes, she is wearing reindeer pajamas. Santa came around midnight and left this cute, up-cycled kid’s kitchen. I’ll write a follow up post later on how the $10 thrift store cabinet turned into something so entertaining – both to build and to play with. I can tell that our cat Roger’s photobomb is his way of attempting to take some credit on construction, but I assure you he was no help at all. That evening we enjoyed a quiet crab feast with friends. Their pallet coffee table was covered with delicious cheeses, chunks of avocado, thick slices of kiwis and bananas – it was simple, elegant and totally fabulous. Crab is an easy-peasy holiday tradition for us – super easy to prepare and serve with melted butter. Is there anything better? How was your holiday – frenzied, calm, tense, peaceful? I would love to hear about if you celebrate, what you celebrate, and how you celebrate in the comments below. I find it really inspiring to hear how our community views this time of year.
December 19, 2014
Winter Solstice Swag
You might be facing a daunting coming weekend – the last one before Christmas. It’s frenzied, rushed and every minute counts to finish shopping and check everything off your holiday to-do list. But take a moment this Sunday, December 21st, to observe the winter solstice. It’s the shortest, darkest day of the year. For me, it’s a time to look back at the past year and ahead to hope for brighter days.
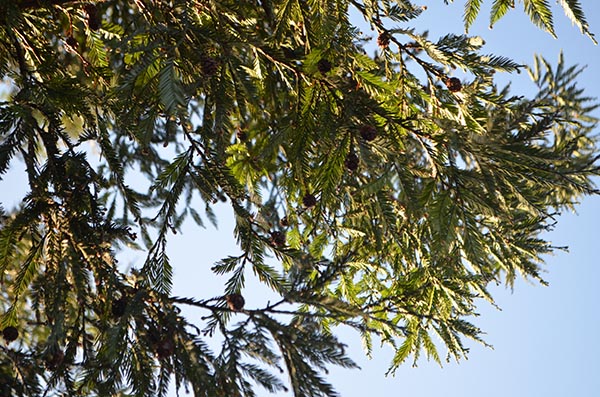
Short days, bright light as we near the winter solstice
I really enjoy observing this special day every year with some sort of ritual. It might be a warm, seasonal meal with friends or something even quieter. This year, I decided to mark the occasion by making a winter solstice swag. It could be a simple way for you to jump off the merry-go-round of modern life and celebrate life around you in this moment – if only for a moment.
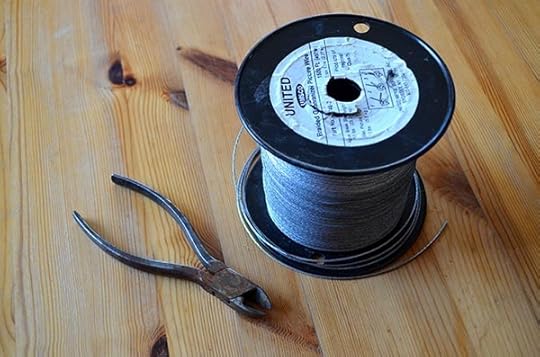
wire + wire cutters, or use what you have on hand. Twist ties from bread bags might work too!
I made a swag instead of the traditional wreath because I wanted something informal, a little messy and imperfect. It’s a reflection of how I see the world right now. There’s beauty there, but not always order. All you need are some garden clippings, wire and wire cutters. Green, floral wire is even better, but just use what you have on hand.
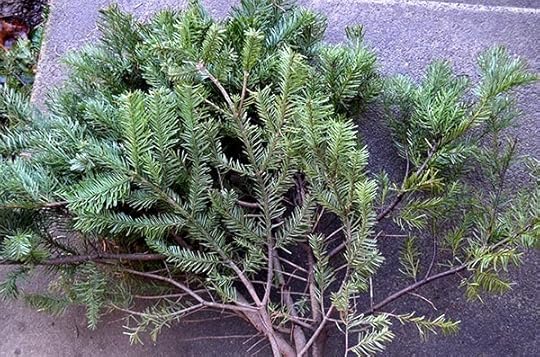
Clippings from our tree’s lower branches
We trimmed the lower branches off our Christmas tree a couple weeks ago and set them aside for this project. I started by clipping off the greenest parts and tying them together with wire.

Chilly rose hip
Next came the fun part: walking through the garden to find every little sign of beauty and grace. Even in these dark, cold days there are rose hips hanging on and hydrangea flowers still holding a hint of color. You might take a winter walk around your neighborhood to find pine cones, hawthorne berries or other treasures.
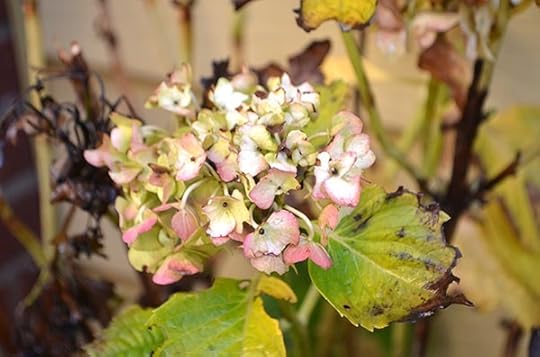
winter hydrangea flower – a hold over from last summer
As you arrange them, think about your kindergarten picture – tall/big guys in the back and short/small guys in the front. Use your wire to hold the pieces snugly together and tie it through to the back of the swag, where it’s not visible.
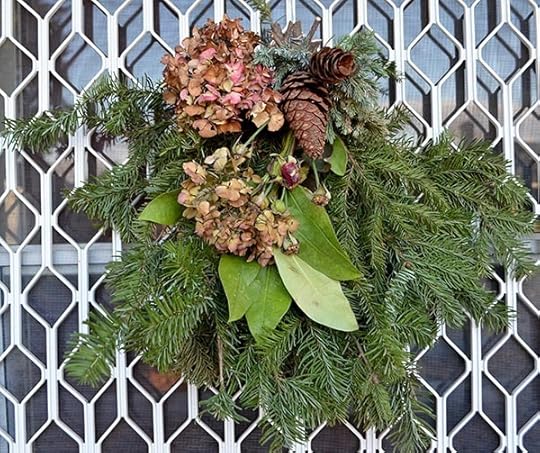
our solstice swag
As I made our swag, it felt wonderful to be really mindful of what surrounds us right now and to make a collection of those pieces. It represents my garden today – lots of hard work behind it and beauty ahead of it. And every time I come or go, I see this swag as a reminder to stop the frenzy and enjoy the moment. I hope it does the same for you!
December 17, 2014
DIY Fireplace Redo
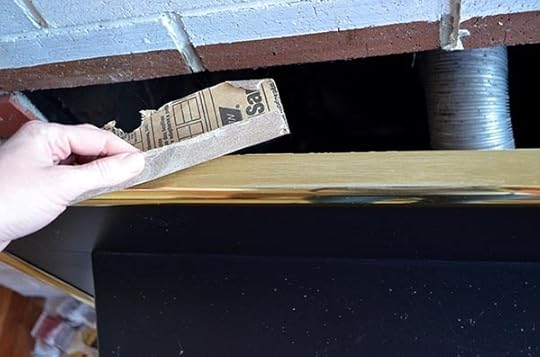
Our remodeling to-do list is about a mile long ever since we bought our fixer-upper house this summer. With chilly temperatures outside, I’ve finally had a good excuse to stay inside and knock a few off the list. This past week: rehabbing our cosmetically-challenged fireplace.

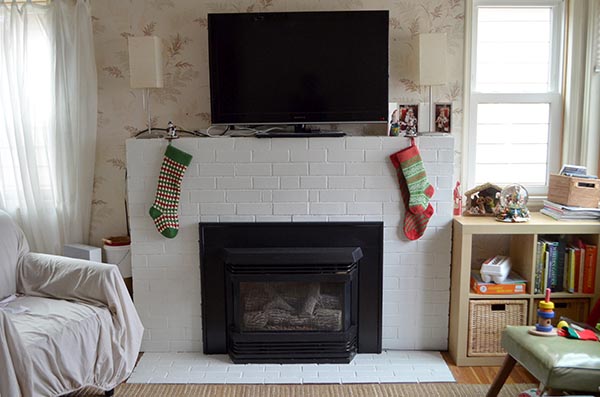
Fireplace before – thin layer of primer and outdated gas insert (never mind the TV on top. It’s a temporary spot and we hate it there!)
A fireplace was on my “must have” list for our new homestead. I love making this the focal point of our home – a place to curl up together and get cozy. Our new house has an outdated gas fireplace, but a fireplace none the less.

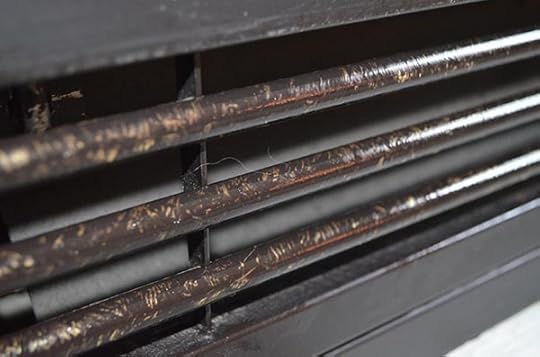
Gas fireplace insert with brass detailing. The late-80′s called and they really want it back.
The brass details make the insert look extra bulky and dated. The previous folks had painted on a thin, uneven layer of primer over the bricks. All it took was some thought, paint and a few hours to get it up to snuff.
Sanding the brass detailing to prep for painting
The first step was painting the brass details to de-emphasize the old insert. I roughed up the brass areas with sand paper, then wiped them down clean. That increases the ability of paint to adhere to a smooth surface.
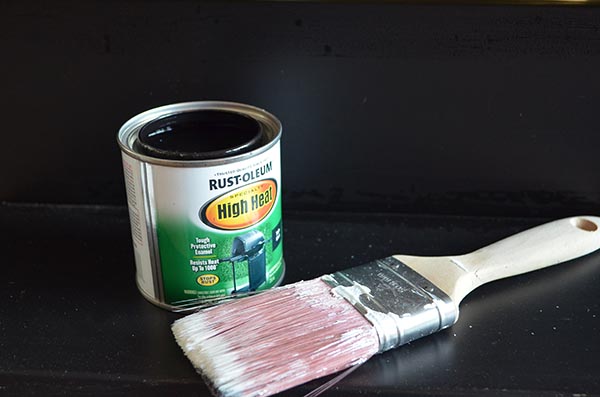
High-temperature black paint. Available in both can and spray paint form.
Next, I used high temperature paint on the sanded brass areas – the same stuff you use to paint barbecues. Some fireplace inserts will easily pop off, so you can paint them outside in the fresh air. If you go that route, use the high temperature spray paint for a nice, even coat. In my case, I attempted to remove the insert, but the insert won. So instead, I used the high temperature paint that comes in a small can instead to paint in place.
Brass detailing after the first coat of paint
All the windows were open and overhead fans were blazing as I carefully painted the sticky, oil-based paint on. Let it dry well between coats. It took me three coats of paint to completely, evenly cover all signs of brass. Be prepared to throw out your paint brush, since it will be an oil-based paint, sticky mess.

Gas insert painted!
The next step was priming the brick hearth. An uneven surface, like brick, will suck up a surprising amount of paint to get a nice, even coat. Primer is cheaper than my fancy Yolo paint, so that nice thick layer of primer made sure the surface was fully prepped for the final paint to slide on.
Gas insert and brick hearth painted. Now to get rid of that fern print, textured wallpaper…
For the final paint layer, I used the same white that we are using on all of our trim in the house (Imagine .02). It went on smooth, thanks to the thorough primer job.
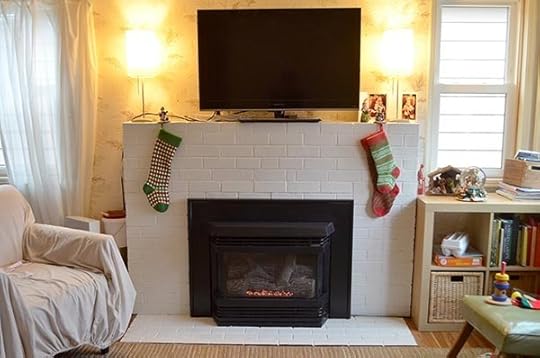
Just in time for holiday cheer
We are incredibly pleased with the final product! We already had the primer and Yolo paint from different projects, so I only spent about $6 for the small can of high temperature black paint. The fireplace is on almost every evening as the wind howls and the rain pours outside.


