
Renee Wilkinson's Blog, page 2
September 1, 2016
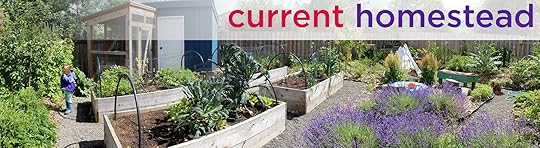
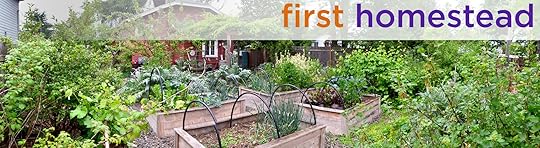
Homestead Tour
Check out before-and-after photos, garden plans and lots of pretty photos of our homesteads. See how our current home is in the process of transforming into a productive homestead after just two years. Or view images from our original homestead where we planted roots for eight lively years.


July 13, 2016
Slowing Down
I have been chronicling my journey through modern homesteading for nearly a decade, and many of you have been with me for much of that time. This website began as a place to show everyday folks like you and me what homesteading on a small, urban lot could look like. There were very few resources at that time for urban homesteading or small-scale permaculture, but times have changed and this website needs to evolve with it.

Sheet mulching our first homestead in 2007. It drew attention from the whole neighborhood with all the kids and several parents pitching in to help.
Today you can find DIY projects for the small-scale homestead everywhere, both on and off the web. We can connect with thousands of other modern homesteaders through social media to swap ideas and advice. Homesteading is now a movement embraced by mainstream culture and I couldn’t be happier to see so many lawns being replaced with edibles and hearing distant clucking down so many urban streets.
The world of blogging has also changed significantly over the last decade. Updating a blog is not just about writing anymore – it’s about managing your online presence. That translates to scheduling constant social media updates, photographing posts so they look attractive on Pinterest, and a whole host of other extensions I’m not so interested in mastering. I miss the days of putting something up on the web because you genuinely want to share it, not as a game to get people to interact with it.
As a result, I have decided to slow down the blog portion of Hip Chick Digs. I am going to keep writing, but only occassionally from here on out. I want to write when I feel compelled to share with you: a new landscape design I just finished, a plant I love, pictures of how my homestead is growing in and life updates when it’s important. I’m looking forward to spending time in my garden enjoying the space without an agenda (i.e. what should I write about this week).

Harvesting tomatoes from the Urban Farm during a photoshoot circa 2011 for my book Modern Homestead. Photo credit: Isaac Viel
My recent website redesign is intended to make some of my most popular posts more easily accessible for those folks who stumble across my site for the first time. I also wanted to make it easy for you guys to check out my landscape design work so it can inspire your outdoor spaces. That is one area I think is still lacking in the greater online (and offline) world: pictures and designs for beautiful small-scale homesteads, edible gardens and permaculture-inspired spaces. I will add more project photos to that page as projects are completed.
You can follow me on Instagram if you want to see more frequent snippets of my homesteading life. Occassionally I share a good article or photos from our homestead on Facebook. And I go through bursts on Pinterest and Houzz collecting images for my design work. In other words, if you miss my frequent writing you can still find me in other corners of the web. You can also subscribe to the RSS feed for this blog to make sure you don’t miss my future sporatic posts.
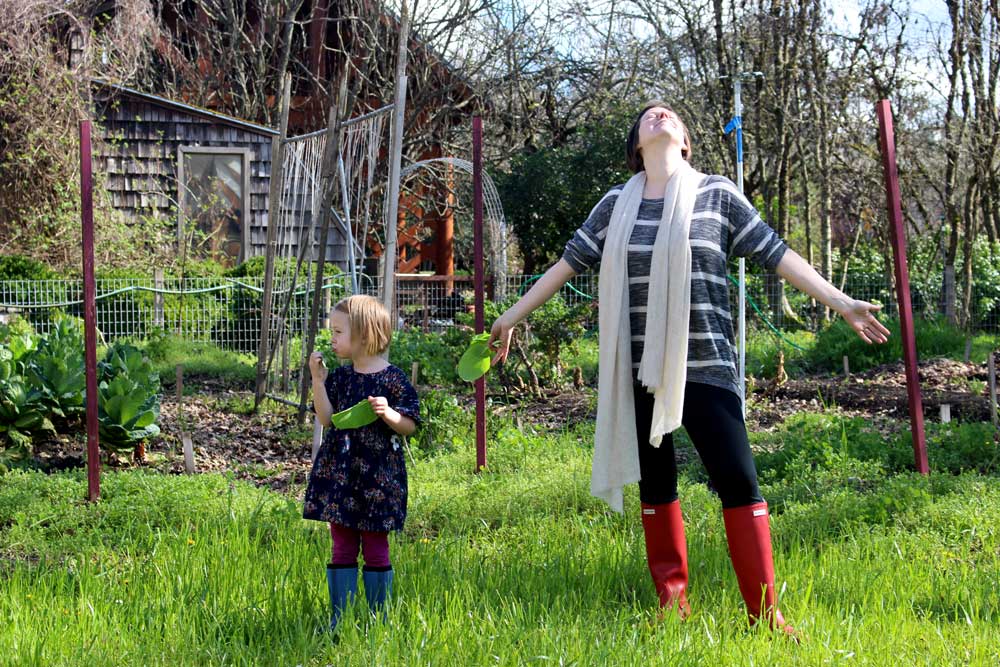
Returning to the Urban Farm with my daughter Juniper on a recent day trip
What a kingdom we have all built together where bookshelves are lined with guides on sustainable gardening, front yards are packed with edible plants and the most mainstream magazines are talking about the best heirloom tomato varieties. Thank you for being with me on this journey and I hope to still see you visiting me here from time to time. Happy homesteading!
June 18, 2016
Homestead Garden Update
It has been two years since we uprooted ourselves from our first homestead and planted roots into our new digs – still in Portland, but closer in to the center and closer to family. I wanted to give you a peek around the place to show you how things are growing in.
Front yard, spring 2016
The front yard is a drought-tolerant design that includes lots of ornamental grasses, which will reach their majestic peak in late summer. I wanted this garden to focus on textures and movement when the wind blows against our mid-century modern bungalow.
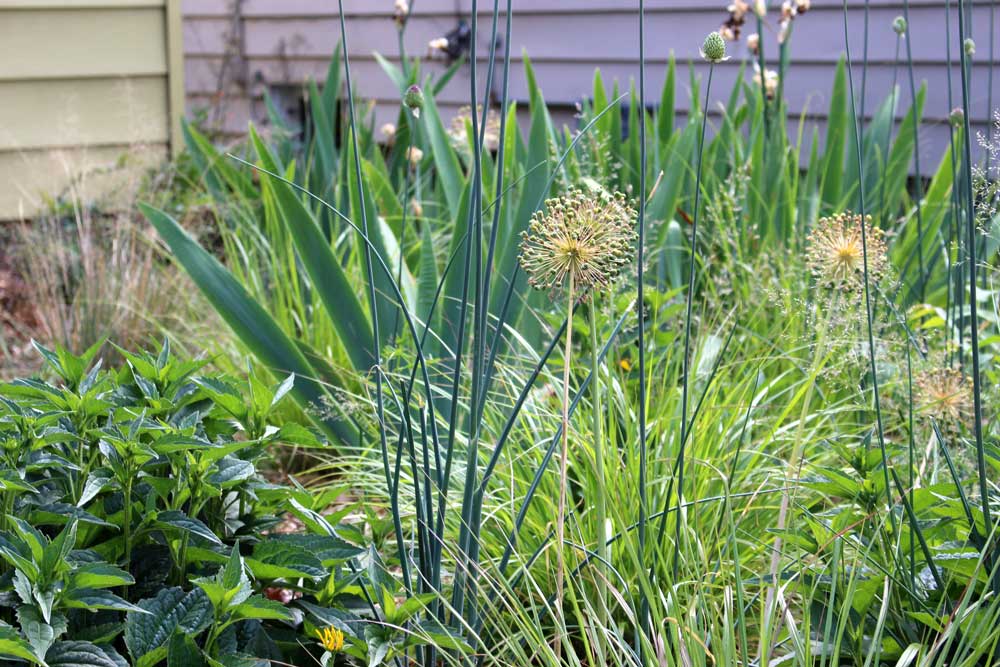
Drought-tolerant planting design in the front yard
The orange spring Oriental Poppies have faded. Purple is beginning to blossom on our flowering alliums, Blue Hill Meadow Sage and Berggarten Sage. The yellows of our Black-Eyed Susans will burst open in about a month. The Quaking Aspens are growing by leaps and bounds!

Backyard, spring 2016
We have nine fruit trees in the backyard and almost all were developing fruit for the first time this spring. I picked them off right away to keep the young trees focused on sending their energy into developing a strong root system. That will serve the trees better long-term – making them more resilient to drought, heat and stress. Next year, year three, will be the time I allow them to finally set fruit.
Juniper is busy as can be picking berries throughout the homestead. Our ever-bearing strawberries and raspberries have been her main focus for foraging, but blueberries and currants are just now beginning to ripen as well. We have enough berries planted to use fresh, but I’ll probably always be supporting our local farmers to get big enough quantities for our massive canning and freezing efforts.

Raised vegetable beds fully planted for the warm season. Pictured here: red romaine lettuces companion planted with yellow onions
The raised beds are now all officially planted out for the warm season. I harvested all of the cool crops – fava beans, spinach, leeks, etc – and transplanted out the summer starts – tomatoes, squash, melons, beans and many more. It’s the first time in several years that I feel like I’m finally on time with everything!
The folks are John Scheeper’s Kitchen Garden Seeds sent me some really cool direct-sow plants that I scattered throughout the planting bed areas. I am particularly excited about the Black Velvet Nasturtiums, Double Click Cosmos, and a bunch of unusual vegetable varieties. I’ll update you later this season to report how these little treasures perform for us.
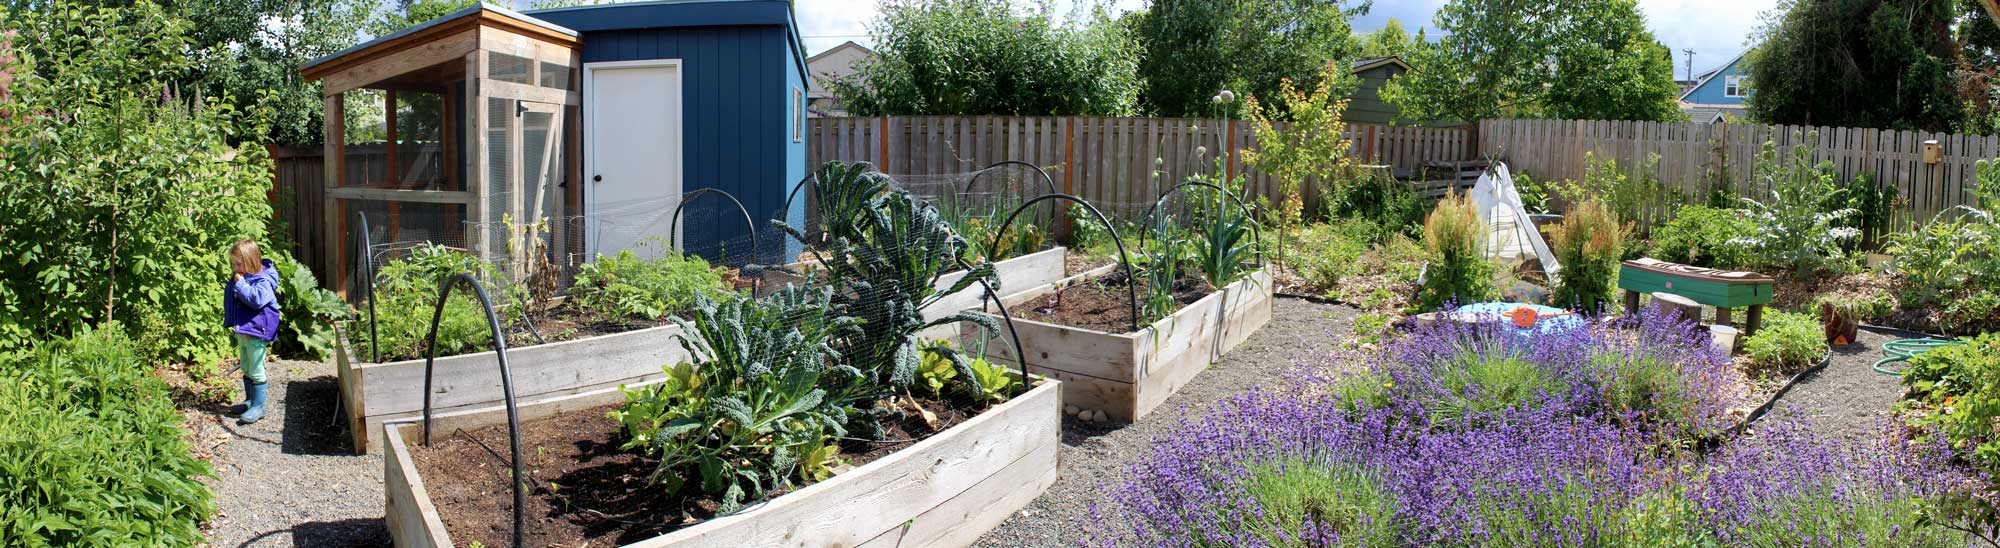
Backyard food forest and Juniper berry-hunting, spring 2016
I repeated many ornamental flowers from the front yard in the backyard. It creates a more cohesive garden when you can repeat several of the same species. Soon there will be the same flowers here as in the front yard, but the backyard also includes lavender, echinacea and other beneficial-insect attracting plants. There will always be more room for additional smaller plants, but the foundation plants are now growing in.
Hope you enjoyed the quick tour! Look for more projects to be added over time on my Portfolio page. And I will post more pictures from our homestead late summer, when everything looks positively wild and beautiful!
May 24, 2016
May Homestead Chores
Spring is turning into summer in a blink this year and the homestead is in full swing. Here is a rundown of some seasonal chores we do every year in mid-Spring to prepare for the warm months on the horizon. A little extra time spent now will keep your garden so much more manageable this growing year.
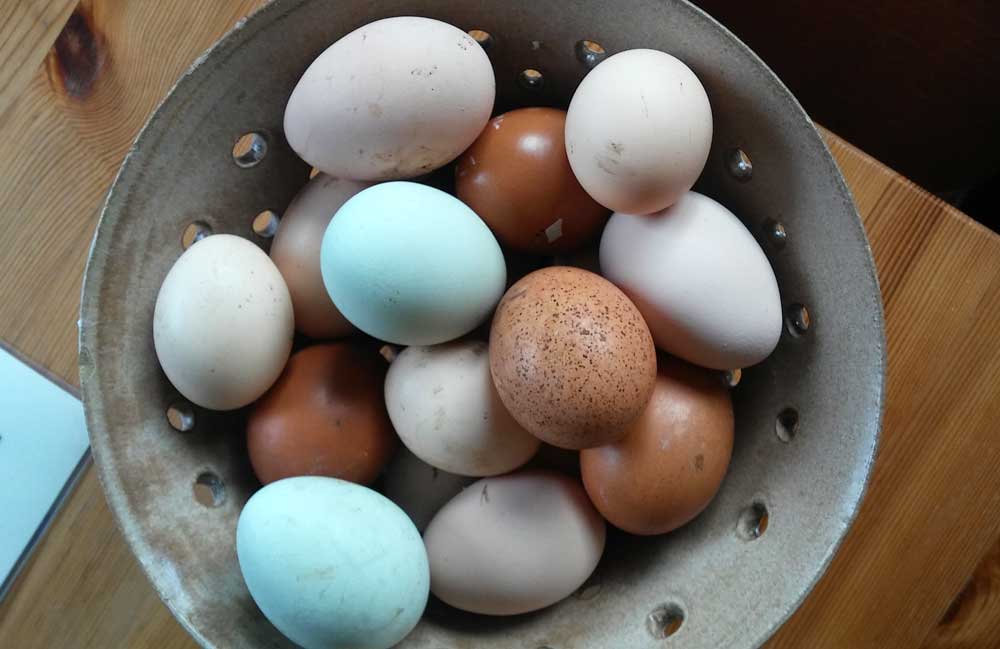
The spring egg basket
Livestock Care
Twice a year we do a deep clean on the chicken coop and look the hens over closely to check on their health. The cleaning is more thorough than our weekly clean, when we muck out the coop and refresh supplies. During the deep clean, we scrub everything down with a diluted vinegar mixture. You can read a bit more about that process in this older post Deep Coop Clean. We give them a simple health check by holding each hen, looking between their feathers and on their feet for mites, and feel their body frame for any unusual bumps.
Spring is when the hens start getting garden goodies in regular supply again. It diversifies their diet to eat a wide range of foods, and keeps our feed costs down as well. They have been munching on bolted spring crops like arugula, freshly picked weeds and in addition to the regular kitchen scraps. Their egg yolks take on a nice, deep orange color when they are eating a healthy mix of nutrient-rich foods.
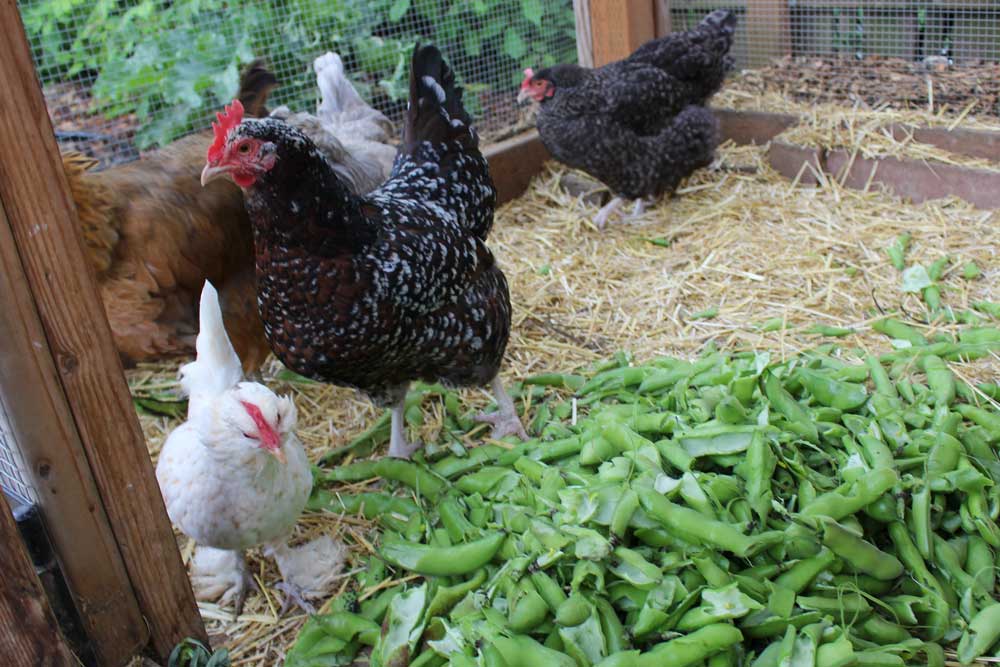
Our backyard chicken flock snacking of fava bean shells and other kitchen scraps
Soil Health
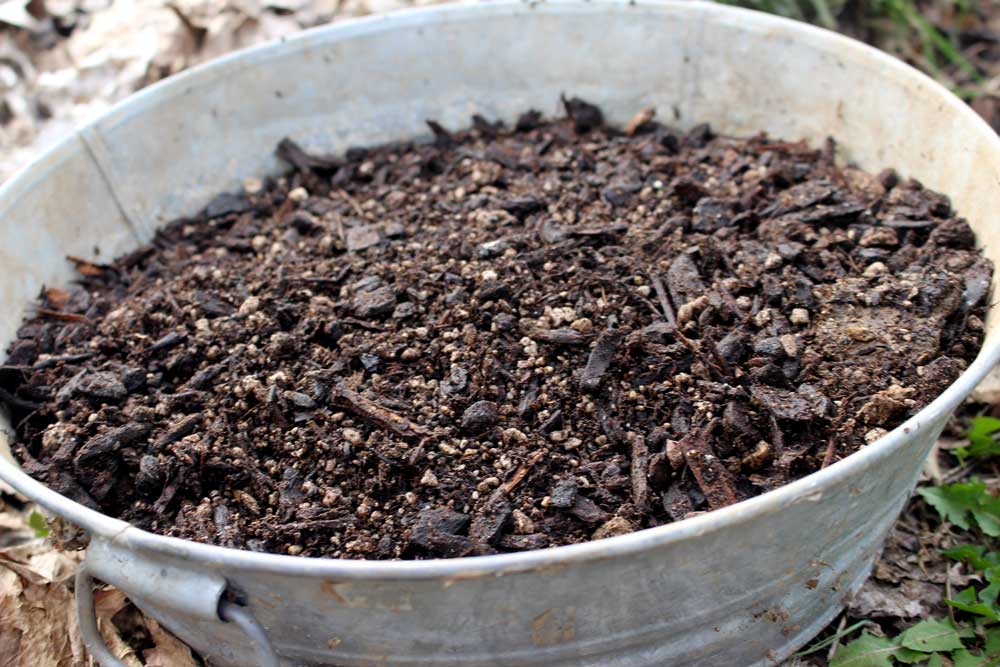
Typically at least one bin of our three-bin compost system is ready to harvest around spring planting time. We add finished compost to the raised beds before planting out our crops or top-dress around existing plants. We add compost to the beds a couple times a year to keep the soil nutrients high for our vegetables. Only the best soil makes the best vegetables.
We recently finished spreading a fresh layer of wood chip mulch on the top of almost all of the homestead – not on pathways or in the raised beds. Keeping the plant beds top-dressed with mulch will help with water retention, weed suppression and, over the time term, increase our soil structure. Read more about this in my earlier post: Using Wood Chips in the Garden.

Apply compost at least once a year if you are intensively growing vegetables. The best soil makes the best harvest.
Harvest
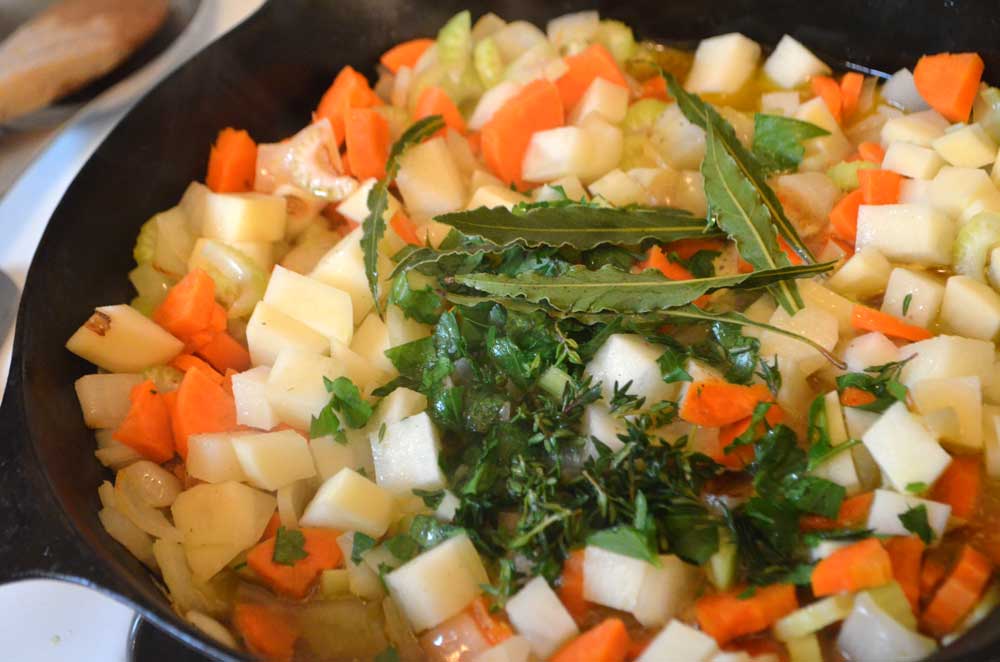
Spring crops are ripe for the picking, including leeks, spinach, arugula, artichokes, fava beans and swiss chard. Juniper helped me clean out almost all of our ripe fava beans, then dutifully helped me shell them. We ended up with about ten pounds of beans! Combine all these crisp, spring crops with the 4-5 eggs were collecting a day and our table feels very full already.
It’s time to clear the root cellar, freezer and dried foods in preparation for the main growing season. I suspect we’ll crack open the last can of tomatoes right as we start getting fresh ones from the garden. I still have at least one bag of dried apple slices in the cupboard, but those are otherwise gobbled up. As for the freezer, we’re still far from finishing the huge stash of frozen berries I picked when I was in full “nesting mode” last summer. That’s a happy problem to have.
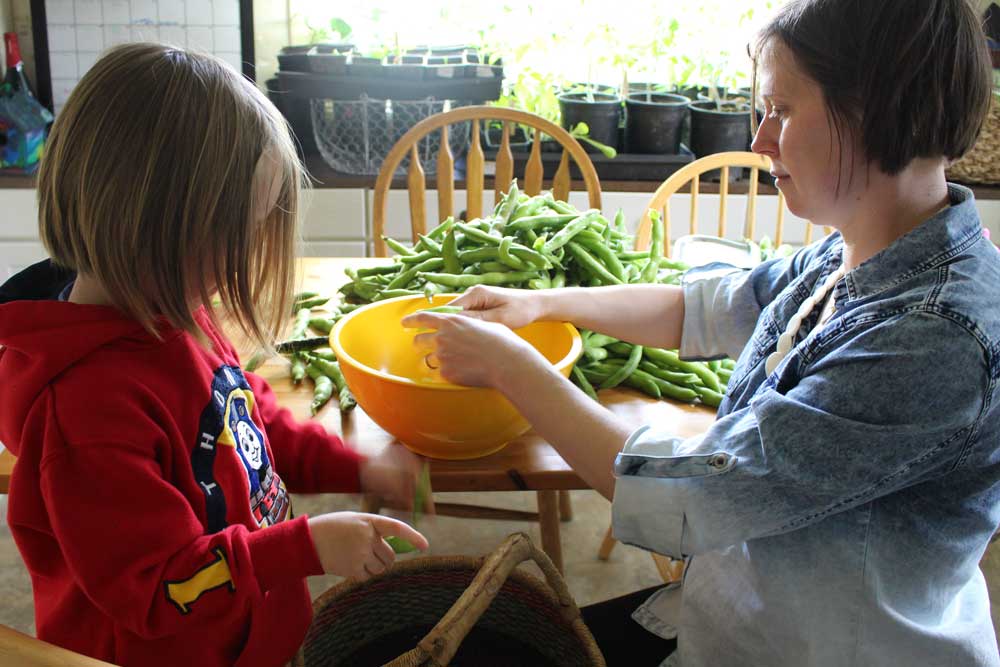
Juniper and I shelling fava beans
Water
It seems odd to think about watering the garden this early in the season, but be mindful that newly transplanted veggies do not have well-established root systems. I have already turned my drip system on in the raised beds a couple times when we had a stint of 80-degree weather without rain for a couple weeks. Keep an eye out for wilty leaves as spring turns to summer.
Our spring crops getting doused with rain showers following two weeks of sunshine
What does spring look like on your homestead? Are you ahead or behind? Tell me about it in the comments below! PS: missing me in between longer gaps in posts? Follow me on Instagram, Twitter or Facebook to get more frequent, short updates on how our homestead is doing.
May 6, 2016
Using Wood Chips in the Garden
Spring is an excellent time of year to add wood chip mulch to your garden, before summer kicks your homesteading into high gear. We just got finished spreading a fresh batch of wood chips around our homestead to cover all of our planting beds. It was a big job, but the payoff of using wood chips in your garden is worth the effort.

Front yard topped with wood chips around all of our perennial flowers, ornamental grasses, trees and shrubs
Mulch is added to the top of your plant beds – not mixed or tilled into the soil. It sits on top of your soil to help retain moisture, suppress weeds and slowly decompose, which helps improve soil structure over time. We don’t use it in our raised beds, where we intensively grow vegetables – we just add compost here regularly and hand weed often. Our wood chip mulch gets added to every other corner of the homestead though to help it flourish.
I’ve heard some folks argue that using wood chips actually takes nutrients, particularly nitrogen, away from your plants. The answer to that is a bit more complicated and really based on how you’re applying the wood chips to your garden. Tilling wood chips into your soil will tie up some nutrients, but top-dressing (like I’m recommending) doesn’t have the same effect. Read this article from OSU Extension for a more thorough answer: Wood chips for mulch?
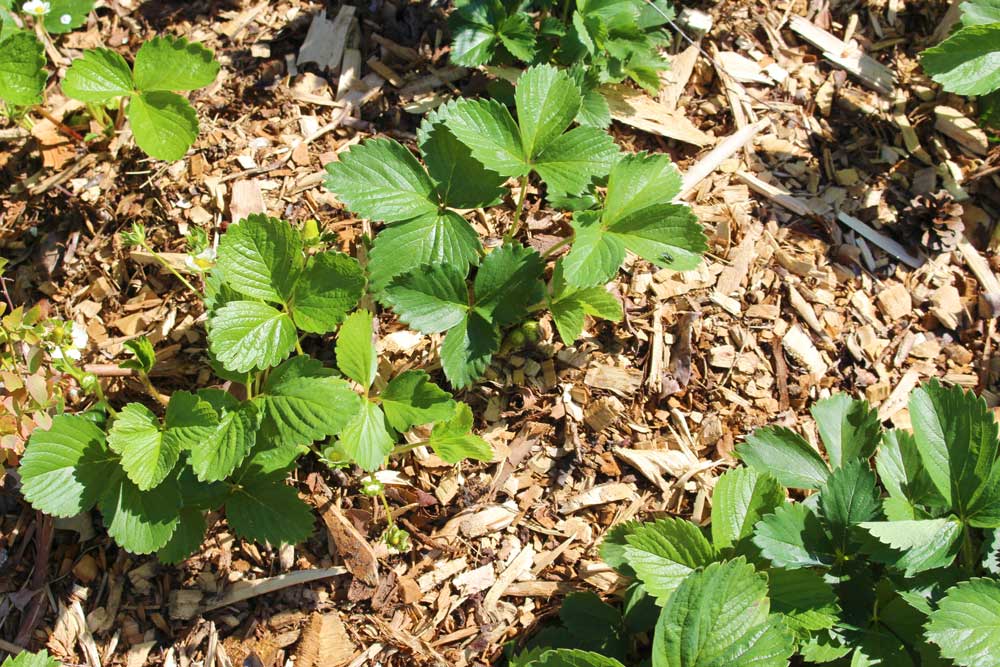
Strawberry bed topped with wood chip mulch
We used ChipDrop again this year to get a fresh mound of wood chips delivered to our home from a local arborist for free. The wood chips are more varied in size than if you bought from from a soil supplier, but the price is right! The larger the pieces, the longer it will take them to decompose, so we can get away with adding wood chips every 2-3 years as needed.
Eventually the wood chips will decompose and once they have fully broken down it is safe to dig them into your soil. At that point, the organic material has already broken down, worms have helped the process along and bacteria won’t be sequestering nutrients (particularly nitrogen). It’s a great long-term, natural and inexpensive method of improving sandy soil or heavy clay soil. It takes time and patience, but the pay off will be worth it: fluffy soil with good “loam” consistency that makes it easy for plants to grow deep roots, store water and air, plus room for micro organisms to make a home.

Finishing up the last of the wood chip pile. We spread a tarp out with cones to mark the spot where the arborists should drop our wood chip load.
It’s not too late for you to get your homestead whipped into shape with wood chips. Call around to local arborists or sign up with ChipDrop if they operate in your area. I specify no walnut trees, which can be toxic to other plants. Or add this to your fall to do list when you are cleaning up the garden for winter. That’s also a good time to layer in dried leaves and top off with wood chips. Read more about Using Dried Leaves in this earlier post. Happy mulching!
April 19, 2016
What Makes a Homestead
“What makes a homestead?” is a question I have been asked a lot over the years. Most definitions have a common theme: it’s a home attached to the land. My belief is that your perception is what makes your home into a homestead. Here are some examples of how our home life is integrated into the land we sit upon.
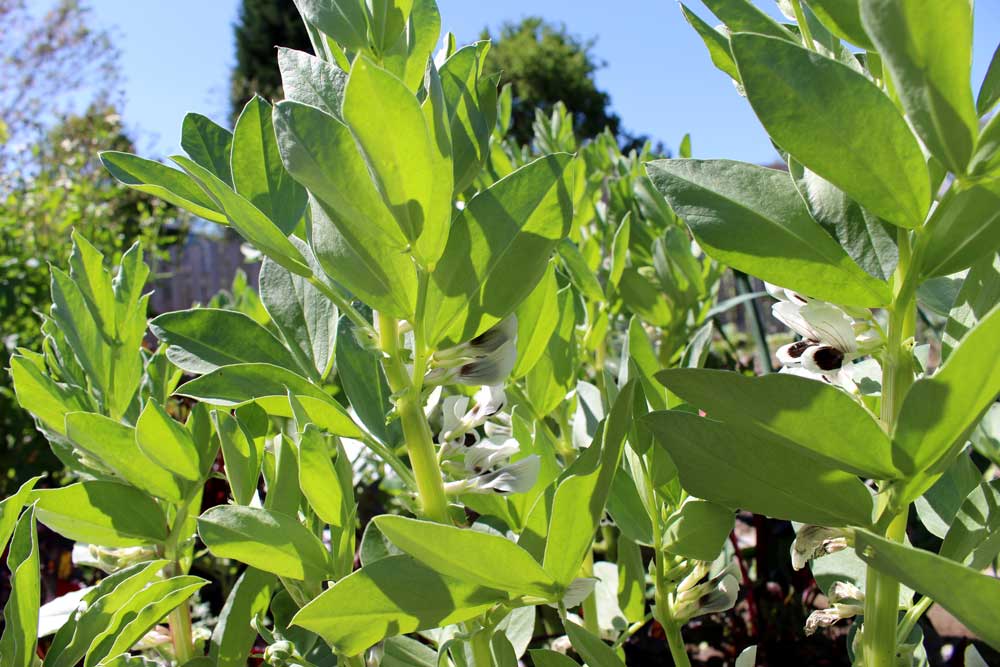
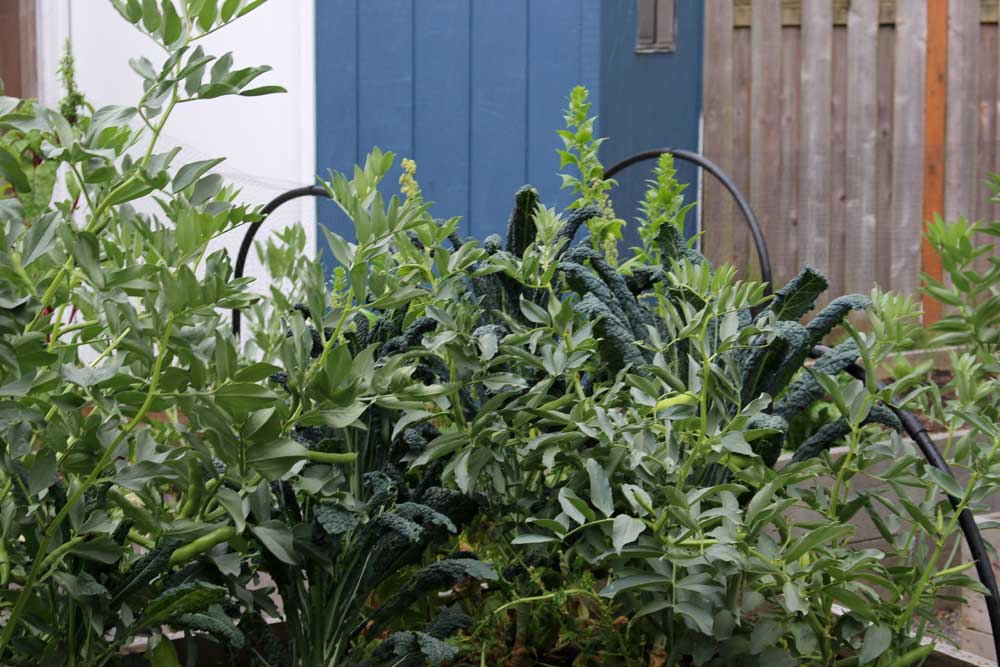
Fava beans covered with flowers and starting to set fruit
Sense the seasons
I don’t need to look at the calendar to know what time of year it is. The Asian pears bloomed weeks ago, replaced by apple blossoms that are just now beginning to fade. We’re harvesting thick, lush spinach leaves and the fava beans are reaching for the sky. The smell of our garden after a hard rain followed by a few days of brilliant sunshine tells me this is spring in Portland.
It’s a shift in your mindset when your home becomes a homestead. Books, website and the advice of others will guide you. But there is a rhythm to nature that requires all of your senses to be in tune with it. When that becomes second-nature, you’re knee-deep in homesteading.
Homegrown root vegetables and fresh herbs from our homestead
Eat from home
Most nights making dinner requires running downstairs to the cellar to grab a jar of something preserved, pulling out a bag of frozen produce we picked last season or filling our harvest basket straight from the backyard. We’re thoughtful about what we eat, where it came from and our homesteading efforts make a dent in where we source it.
There are exceptions, of course. Kids, jobs, modern-day pressures on our time mean that sometimes getting food on the table means it was prepared by someone else. That’s part of what puts the “modern” in our modern homestead. We’re balancing this lifestyle with our desire to live in the city and do other things to make a living.
I firmly reject the notion that there is a hard-and-fast ratio of homegrown food to qualify a homestead. If you plan a significant number of meals around what you grow or preserved, that’s enough for me. It’s not a contest.
A photo posted by Renee Wilkinson (@hipchickdigs) on Apr 15, 2016 at 5:28pm PDT
Process is valued
Making food from scratch creates a sense of balance and stillness in my life that I truly crave. I love the process of baking and cooking just as much as the final product. The same goes for tending livestock or raising crops. The process of cultivating our homestead is just as meaningful as the act of harvesting.
Bonus points for having the entire family lending a hand! Everything goes slower with kids, so I’ve tried hard to slow down as well. It’s more important to me that Juniper helped me harvest eggs or roll out the homemade pizza than whether we eat dinner on time.
My thoughts on the construction side of our homestead have evolved over time. Ten years ago we DIY’ed everything: chicken coops, pergolas, fences, pathways, etc. Years of working as a landscape designer has taught me to respect and value the serious skill of a professional builder. I would rather design the larger projects and have an expert build it right, rather than do it all myself and then have to rebuild later on. There are still lots of smaller projects for my DIY skills.
A photo posted by Renee Wilkinson (@hipchickdigs) on Sep 26, 2015 at 2:46pm PDT
Beyond the garden edge
Homesteading reaches far beyond our own little urban plot. It has woven itself into our vacations, pastimes and charitable work. We avoid travel during peak harvest times or we travel to places based on what’s in season there. We spend weekends hiking trails where we can forage for wild foods. We volunteer with organizations like the Portland Fruit Tree Project to harvest food for both ourselves and communities in need of fresh, healthy foods.
Homesteading is just as much a holistic lifestyle as it is a place enclosed by a fence. We can no longer tease out what counts as “homesteading” in our daily life. The lines are beyond blurred and happily so!
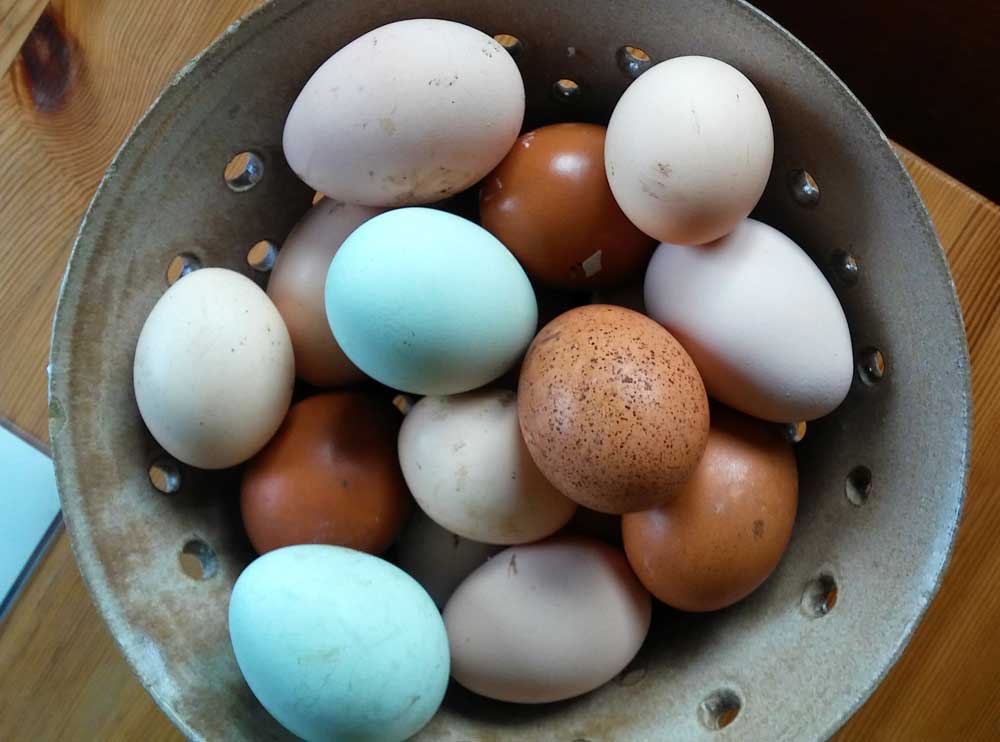
Spring eggs from our backyard hens
I would really enjoy hearing your thoughts on what makes your home a homestead. Do you have a budding homestead or are you an old hat? How is your space more than just a garden or windowsill or balcony? Tell me about it in the comments below! I’m excited to hear what you have to say.
April 1, 2016
How to Build a Fairy Garden Planter
This spring I began adding nature play “stations” throughout the homestead to make our outdoor space feel even bigger. I created a series of small fairy gardens at these stations using simple materials with Juniper’s help. They were easy projects to do together and have made a fun addition to the homestead.

Fairy gardens fit into the smallest spaces to extend play options in the garden
Our homestead has different use zones: intensive vegetable growing in the raised beds, an all-season outdoor gathering space, livestock and compost systems, meandering paths for strolling and a central open area for play. That nature play area includes a sand table (with cover to keep cats out), natural log seating and a teepee that is both kid hideout and pole bean support. The small fairy garden stations give the kids more options for quiet play in a somewhat secluded pocket, while also getting them moving all around the garden to burn off some energy.

Center of our homestead: the main nature play area surrounded by raised beds, fruit trees and in view from the patio
Making a fairy garden is as easy or complex as you want it to be! All you really need is a container, potting soil, plant starts and some imagination. You’re trying to set the stage for a miniature world, leaving room for kids to add play figurines, build tiny houses or whatever else they dream up. And less is better, as they will add to it and change the garden over time.
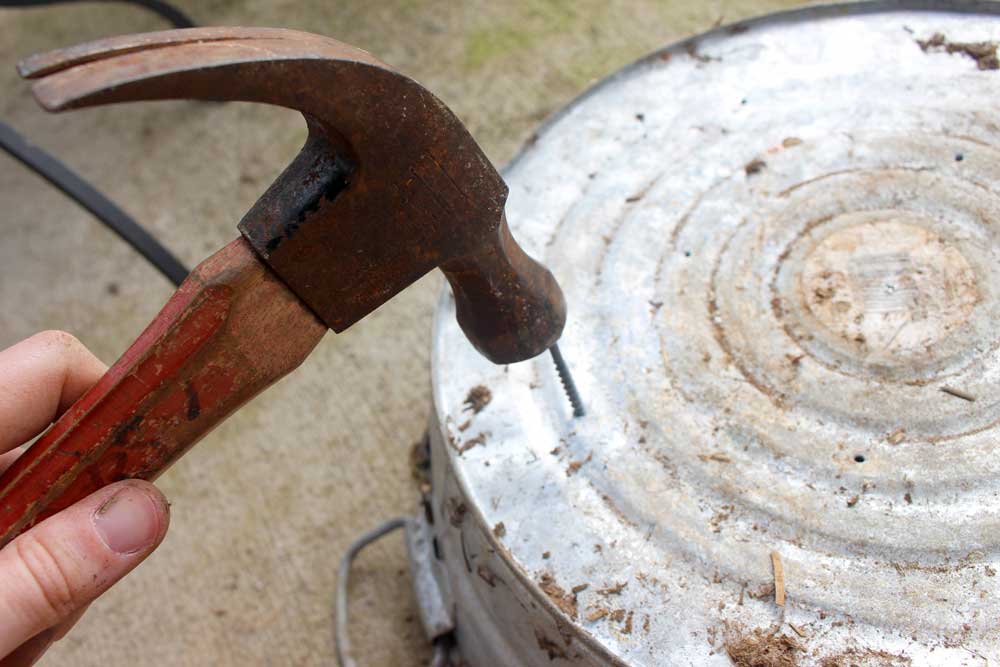
Hammer holes into tin containers for drainage
I went the easy and thrifty route with our fairy gardens by using second hand containers. I hammered drainage holes into a wide, shallow metal wash bin I discovered. Our shed has a forgotten ceramic planter I dusted off. And I used potting soil leftover from my seed starts.
Low, metal wash basin repurposed as a fairy garden container
Think about stacking functions as you pick your plants. I cut out some offshoots with roots attached from our herb garden of thyme and oregano. As they grow in, it’s another place I can dash out to harvest from when we’re making dinner.
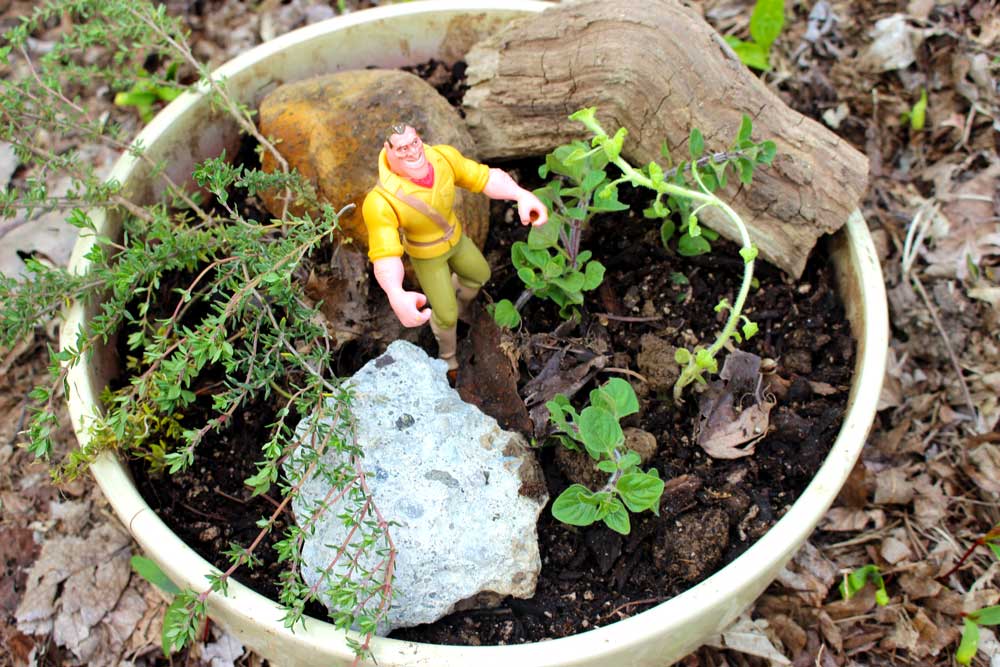
Fairy garden planted with cuttings from the herb garden
Another container we filled with succulents and sedums. This fairy garden is located in the furthest corner of the garden, where we will inevitably forget to water. These plants require low water and will thrive when left alone this summer.
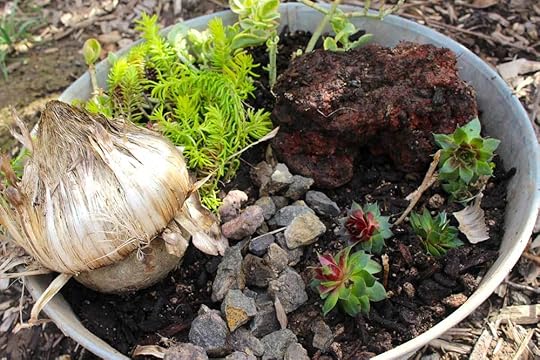
Fairy garden planted with low-water sedums and succulents. Decorated with rocks and a dried artichoke flower.
We are really pleased with these easy-peasey additions to the homestead. I would love to hear your ideas on how you integrate play into your homestead! How else do you get the whole family or household involved in your outdoor space? Tell me about it in the comments below!
March 18, 2016
Seed Starting Calendar
It’s important to start out the growing season with a plan for when and where you are going to grow your crops. I shared the “where” portion of this plan in my 2016 Vegetable Garden Plan, but take a look at my seed starting calendar to see “when” to plant in the Pacific Northwest.
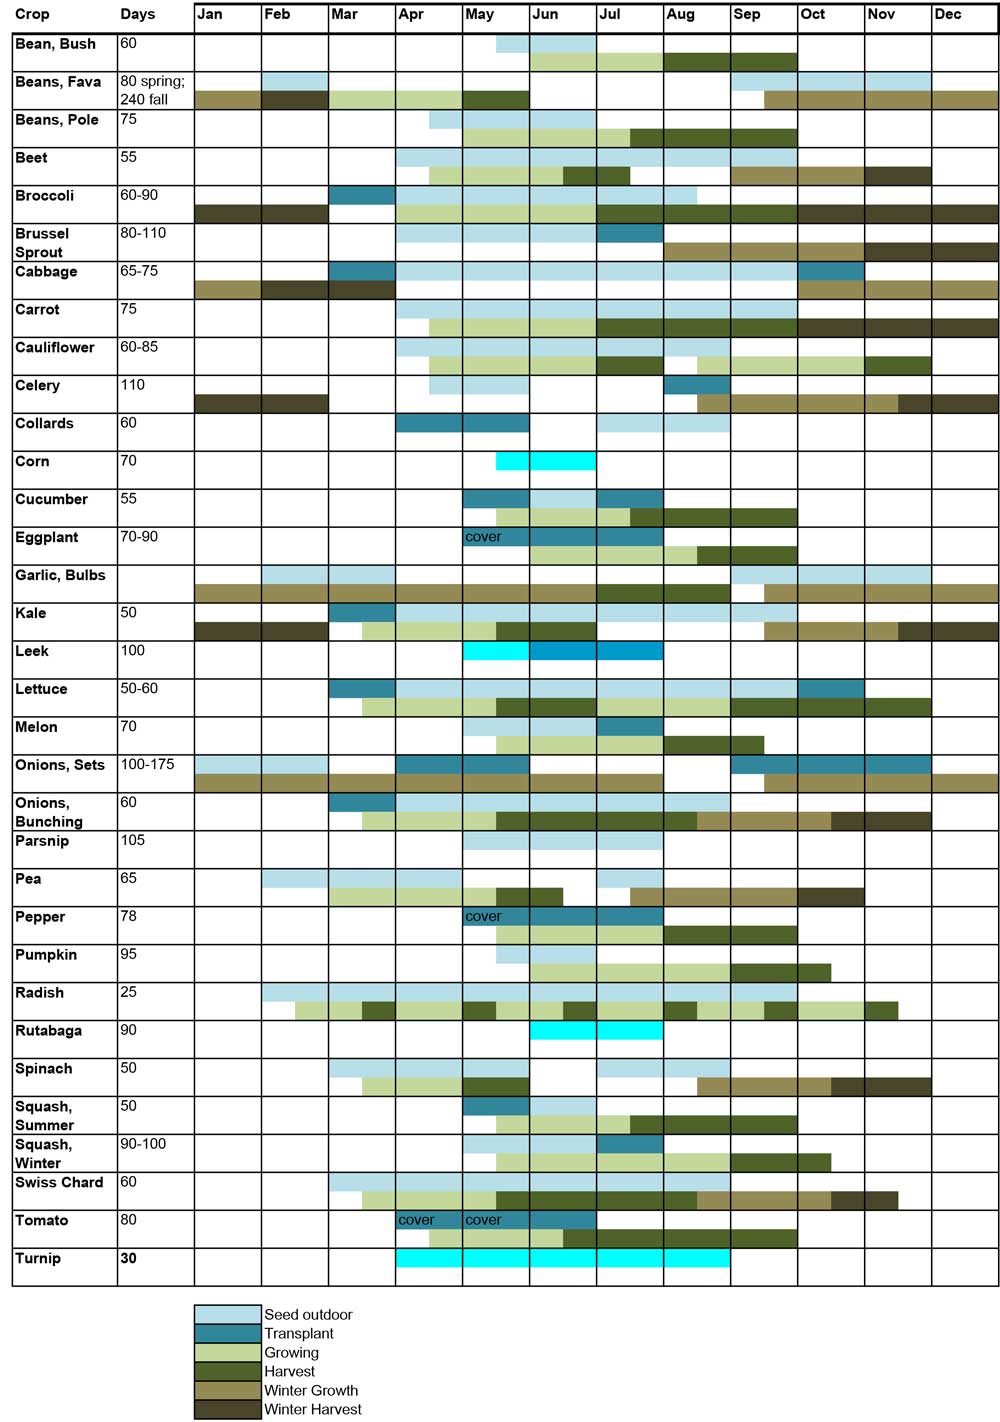
This calendar shows when to start seeds indoors, sow or transplant outside, how long the plants need to reach maturity, and when to harvest. My calendar helps me see when cool-season crops will get pulled and when I can replaced them with warm-season crops. It also prevents random, spur-of-the-moment-seed-starting that tends to happen when spring fever fits. You can download the Excel version if you’d like HERE.
I used several resources to build this spreadsheet, including Portland Nursery’s seed starting calendar, the Maritime Northwest Garden Guide, the book Growing Vegetables West of the Cascades by Steve Solomon, plus my decades of homesteading experience. After many years it becomes second-nature to know when it’s “time”, but having something formal like this spreadsheet is a good gut-check.
Based on this chart, I bundled together seed packets to group them by planting time. It helps me keep track of which varieties to direct sow or start inside by month. Many of the greens I began in February will be big enough to move outside in April. That will make room under my grow light to start my April squash seeds. Just when it seems those squash starts are getting too huge, it will be time to transplant them outside. And it keeps me from rehashing which variety of spinach or kale or whatever I decided to plant this year, since I usually have several varieties to choose from in my seed box.
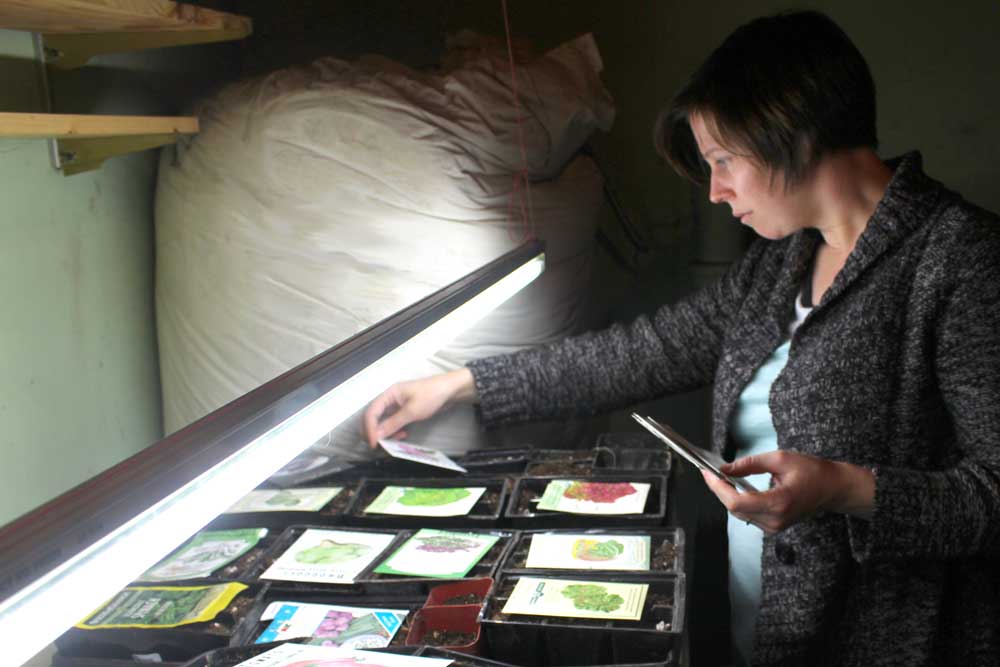
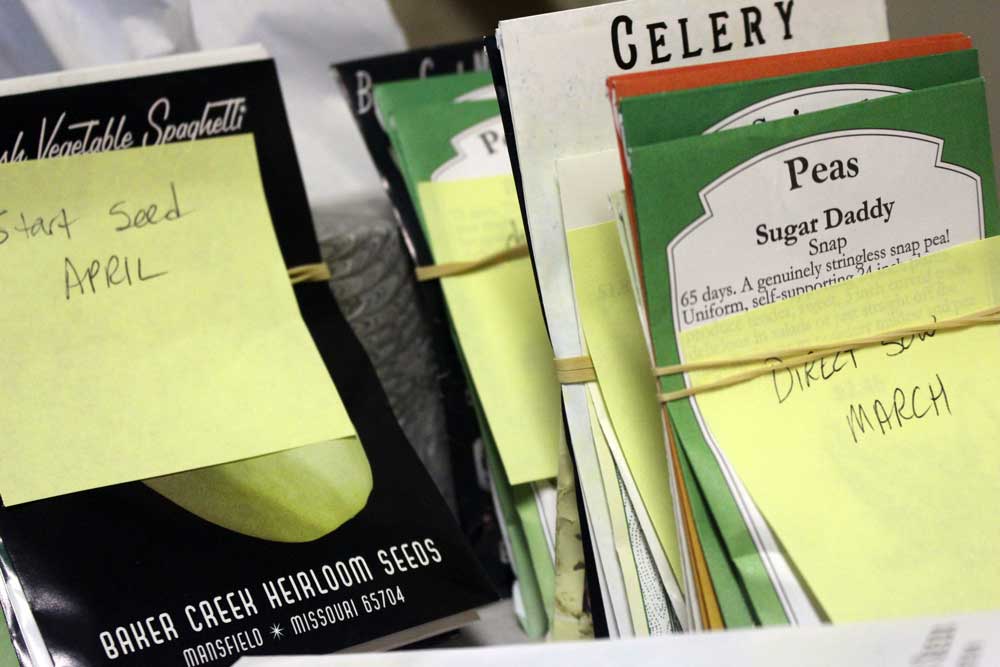
I laid out each seed packet over a grouping of seed pots prior to starting them indoor. That’s really when I decide how many of each particular variety to grow, and how many extras to grow for friends. I have a tendency to over-plant and this helps me be realistic about how much we actually need to grow – like do we really need 12 lettuces or would six be better, should we grow some extra cherry tomatoes for the kids, and do I have enough room to add pok choi?
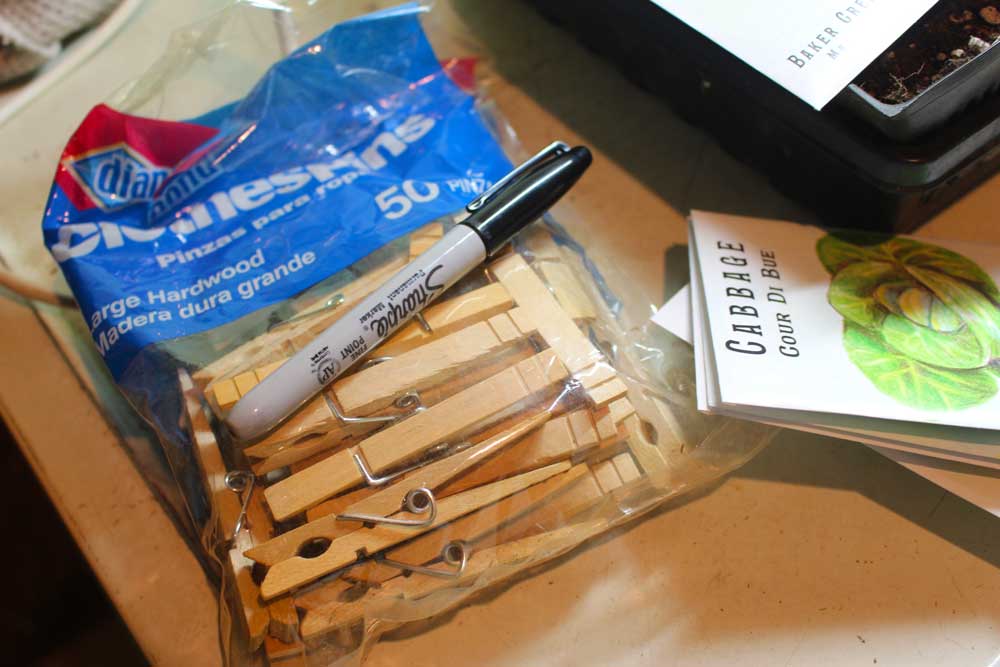
And don’t forget to label your seeds! Speaking from experience, you will never remember which seedlings where which tomato varieties unless you write it down. The simplest and fastest way to do this is to use clothes pins. I write the plant type on one side, like “lettuce”, and use the reverse side to write the cultivar name, like “Speckled Trout”. Save them and reuse every year.

If you are new to growing indoor seeds, you might find these past posts helpful: Seed Starting Basics, How to Make Newspaper Seed Pots (or watch the video version) and Early Spring Indoor Seeds. So far mine are off to a good start!
I would love to hear about whether you have started seeds already – indoor or outdoor. And how to do stay organized to maximize your homestead early in the season? Tell me about it in the comments below!
March 17, 2016
March Morning Inspiration
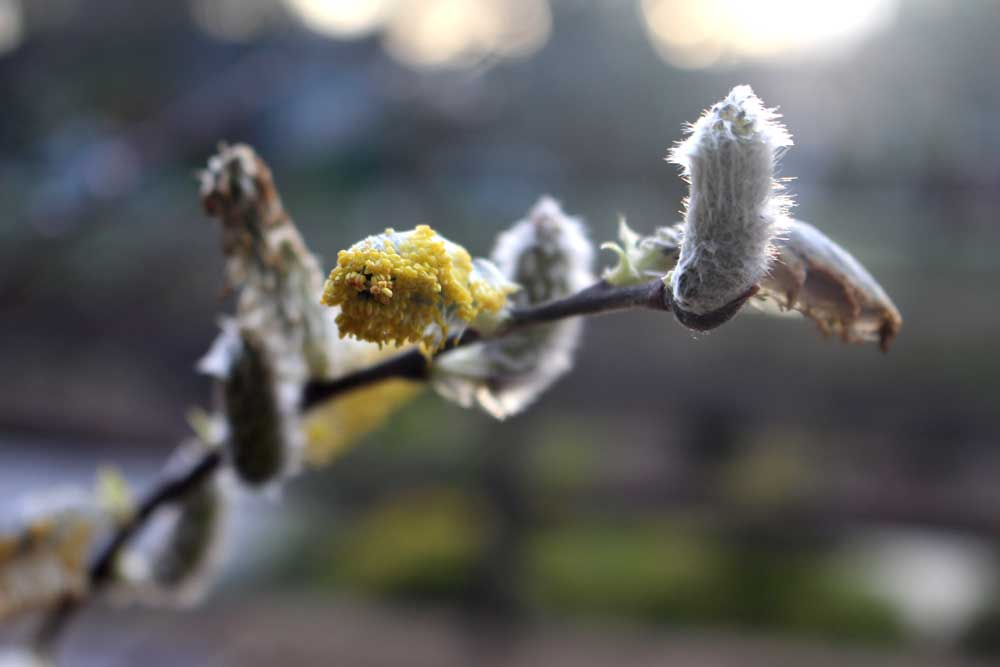
Willow waking up to spring
“A March morning is only as drab as he who walks in it without a glance skyward, ear cocked for geese.”
— Aldo Leopold.
Good morning lovely readers! I wanted to plant a little seed of inspiration for you today. These early spring days are unpredictable, but I encourage you to grab whatever sunlight nature gives us at this time of year.
I’m dashing outside between rain drops to plant those seeds or clean up that leftover debris from last fall. It’s amazing how a moment of digging our hands in the soil can be so restorative. Hope some homestead time makes it onto your to do list this weekend!
March 3, 2016
Favorite Edible Evergreens
Winter is the perfect time of year to size up the evergreen structure, or lack thereof, in your garden space. Evergreens are often overlooked and unappreciated, leading the otherwise fullest summer gardens looking sadly bare during the cold months. Consider adding an assortment of these wonderful, edible evergreens to your homesteads.
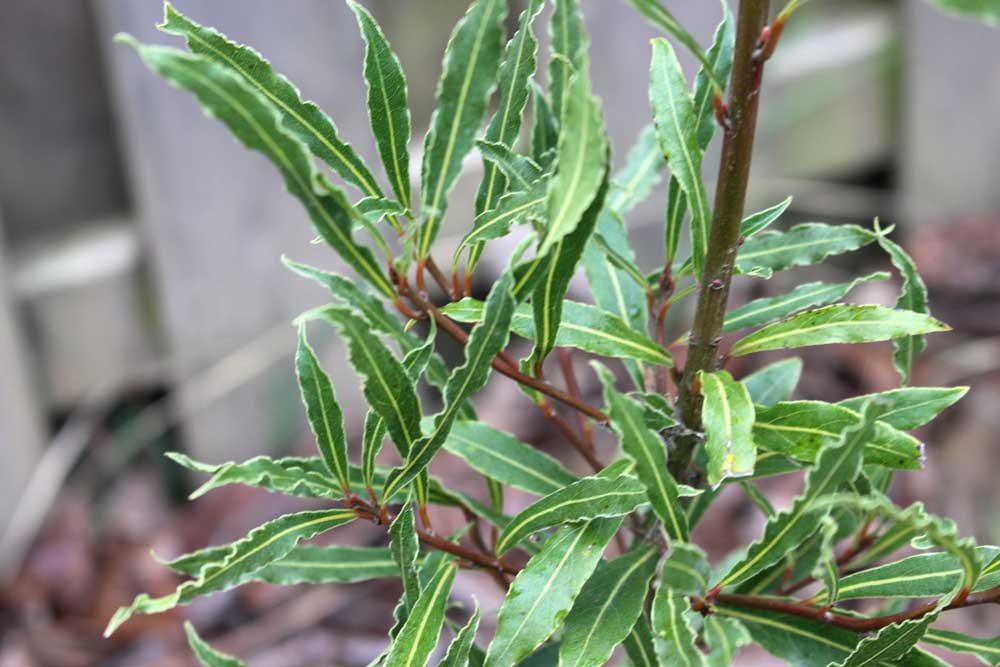
Willow Bay (Laurus nobilis)
Bay leaf tree (Laurus nobilis) grows as a large shrub or small bushy tree, getting 10-12′ at maturity. You can use the leaves from this evergreen tree year round! These trees do best in USDA zone 7 and above, Sunset zones 5-9 and 12-24. I recommend growing it as a large shrub, as you will struggle to get this plant to look like a well-shaped small tree.
We grew the straight species on our former homestead and it was surprisingly trouble free. I planted the at our current homestead to add some interesting foliage texture to our winter garden. Our plants were barely two feet tall when first planted, but grew to 10′ tall over five years. Keep that in mind when you’re looking for the perfect place to plant it on your homestead.
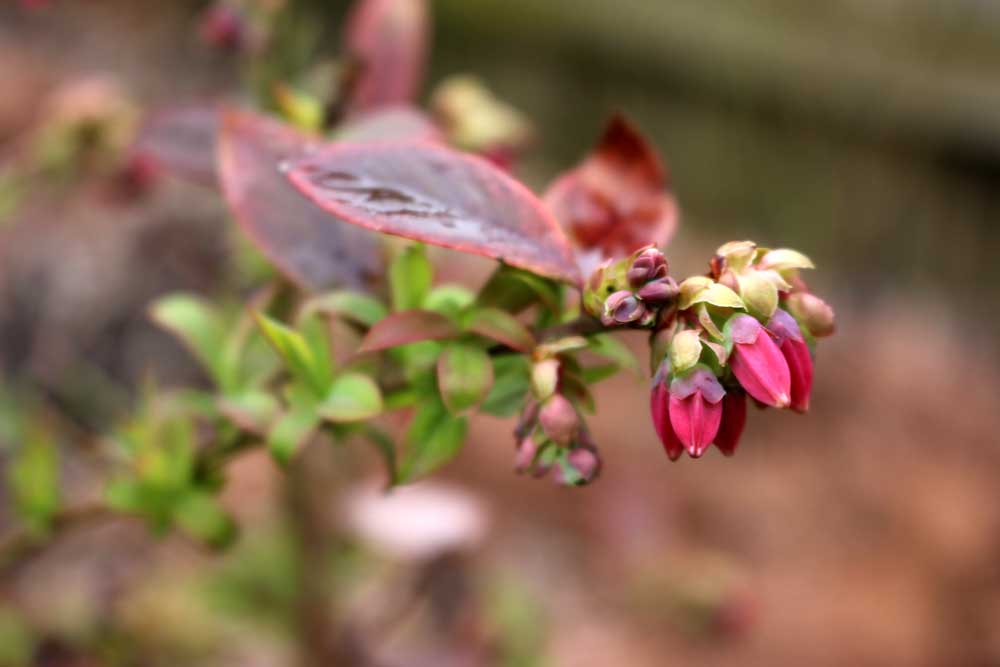
Sunshine Blueberries (Vaccinium corymbosum ‘Sunshine Blue’)
Sunshine Blueberries (Vaccinium corymbosum ‘Sunshine Blue’) are a low-bush, semi-evergreen blueberry that has stolen my homesteading heart! We have nine planted on our homestead to keep our kids busy grazing through the garden. The berries are smaller, which I prefer, and the leaves have a striking red-tinge. They are just starting to develop flower buds now which will open next month and ripen fruit June-July.
You can read all about this plant, including more pictures of the foliage, flowers and fruit, on this previous post Problem Solver: Sunshine Blueberry. They will do best in USDA Zones 5-10.
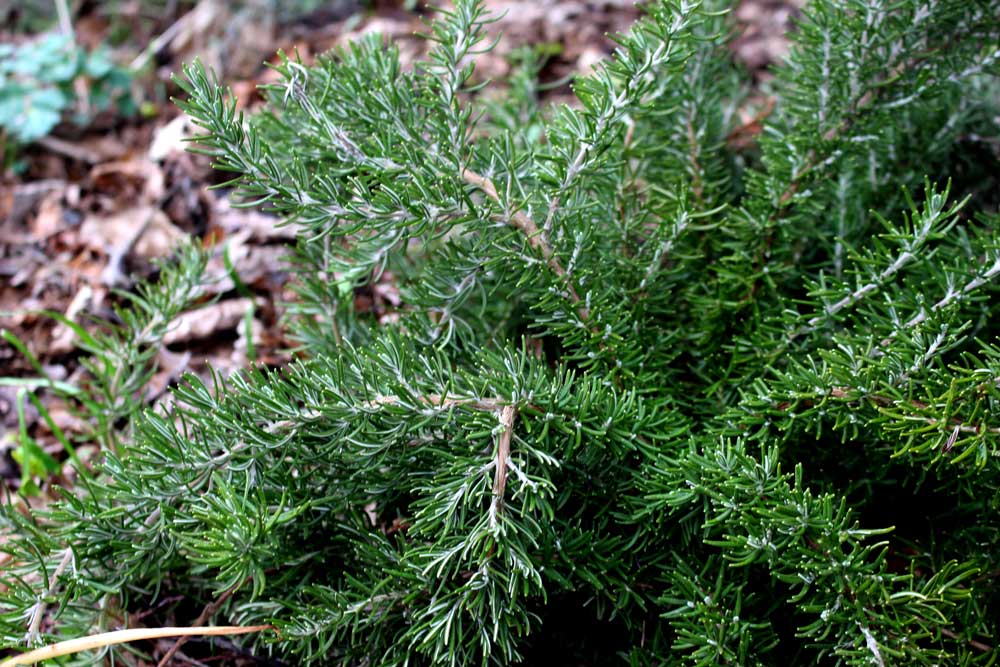
Rosemary
Rosemary and other perennial herbs are often too commonly underplanted. Using fresh herbs in cooking makes a world of difference, but perennial herbs have more to offer than flavor. Many are tough, drought-tolerant plants that are easy to grow and not effected by pests of disease. Their flowers attract beneficial insects into the garden to pollinate your fruit-bearing trees and shrubs. I love planting several of the same plant type in one area to create a striking swath of evergreen structure.
Thyme is an excellent, dense groundcover that comes in a wide range of cultivars, including ones with interesting foliage colors. Oregano is a bit taller, but can still be used as a bushier groundcover. Great ready for lots of bees when their flowers open! Rosemary varieties range from groundcover/creeping varieties to tall 6′ giants. They work really well planted as a low, 3′ hedge left unpruned, so it has a more organic shape.
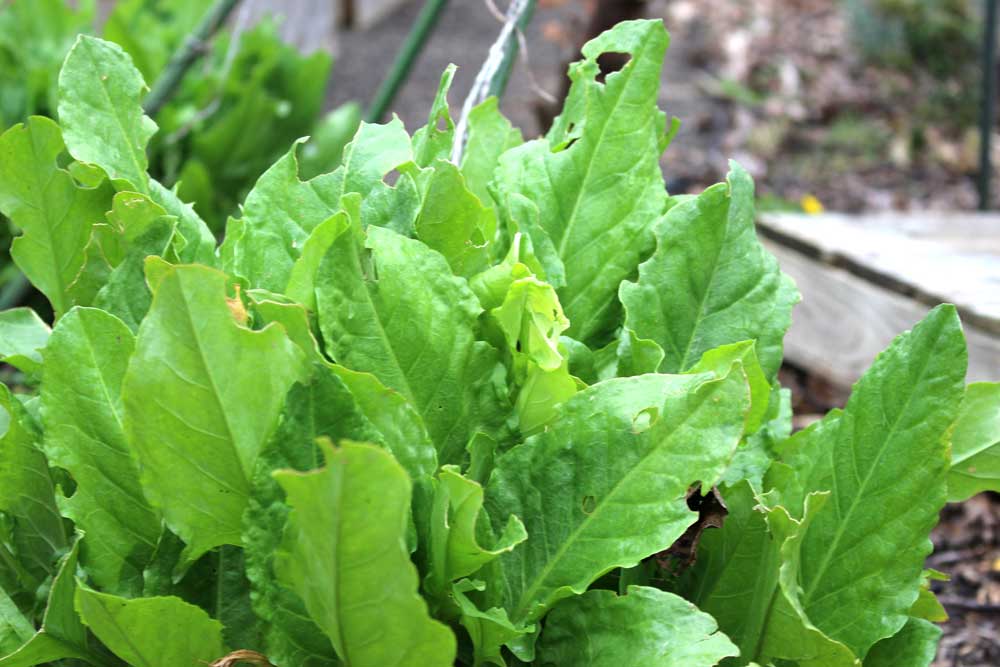
Garden Sorrel (Rumex acetosa)
Sorrel (Rumex acetosa) is a tangy, lemony herb that is high in vitamins A and C with a texture similar to spinach. Fresh leaves are excellent mixed into salads with milder greens in the spring. They will get more bitter tasting as the heat of summer increases. They are evergreen in zones 6 and above, although you can still grow it as an annual outside this range.
Oxalic acid is a naturally-occurring compound found in the leaves, which is also in spinach and kale. It can be lethal in extremely large doses – like if you’re planning to eat ten pounds of the stuff in one sitting. Don’t let that scare you off though. It’s a wonderful addition to the garden, Juniper snacks on it every time she’s outside, and we are excited to experiment more with the culinary uses of this lovely green.
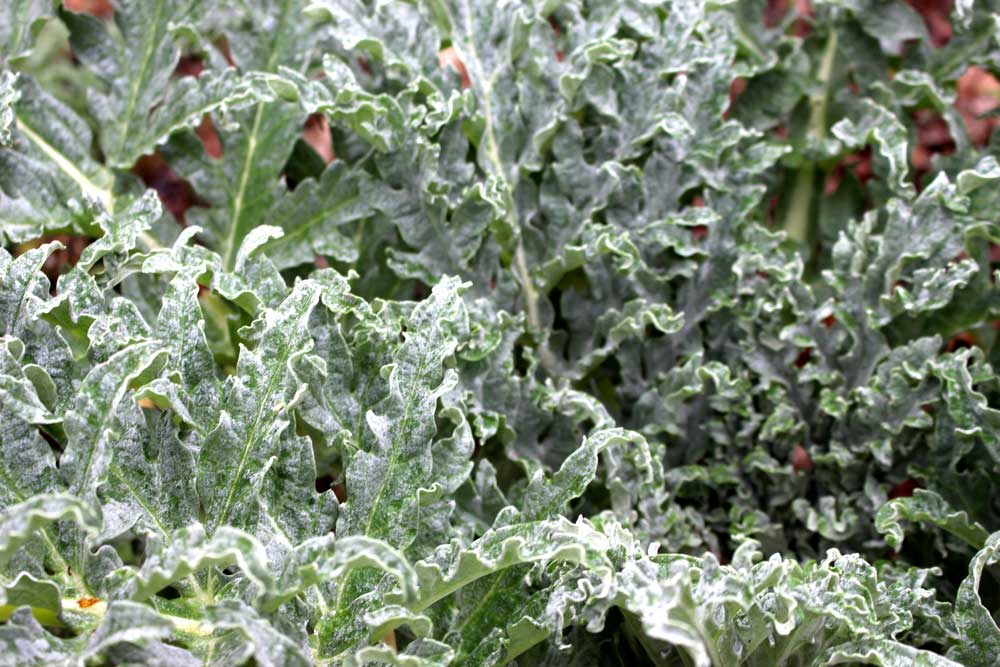
Artichokes (Cynara scolymus)
Artichokes (Cynara scolymus) are a highly textured grey-green in zones 6-11. They are my favorite vegetable and we can never grow enough of them! Look for both the green globe and newer purple varieties at your nursery. They will draw lots of bees if you allow the edible buds to open into full bloom.
I have enjoy planting these in groupings to weave throughout the garden, which you can read about in this previous post about planting an Edible Hedge of Artichokes. They look lovely planted among wilder flowers, like echinacea and rudbeckia.
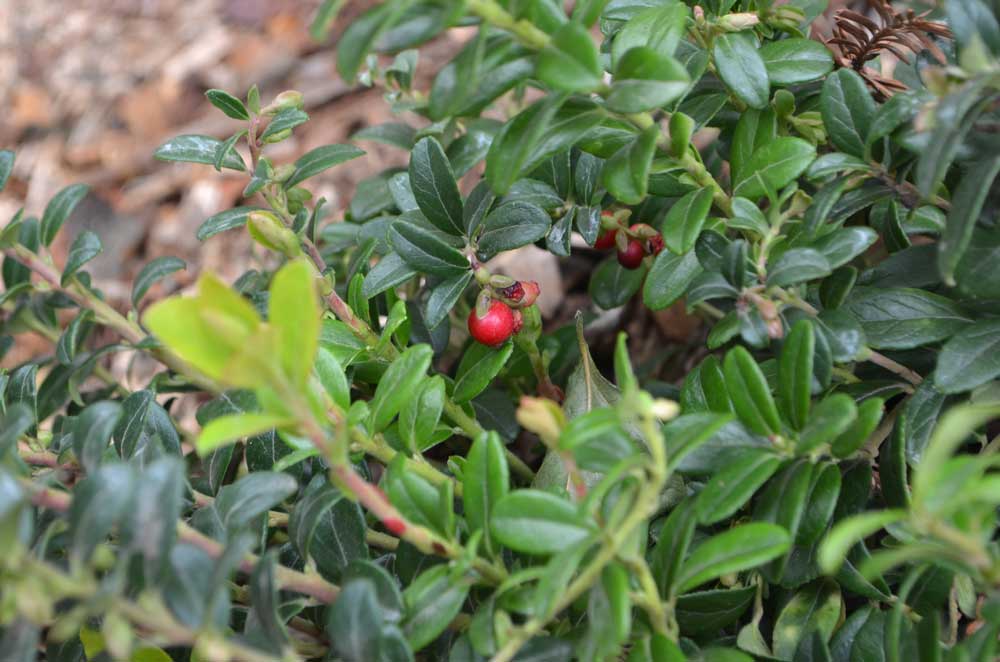
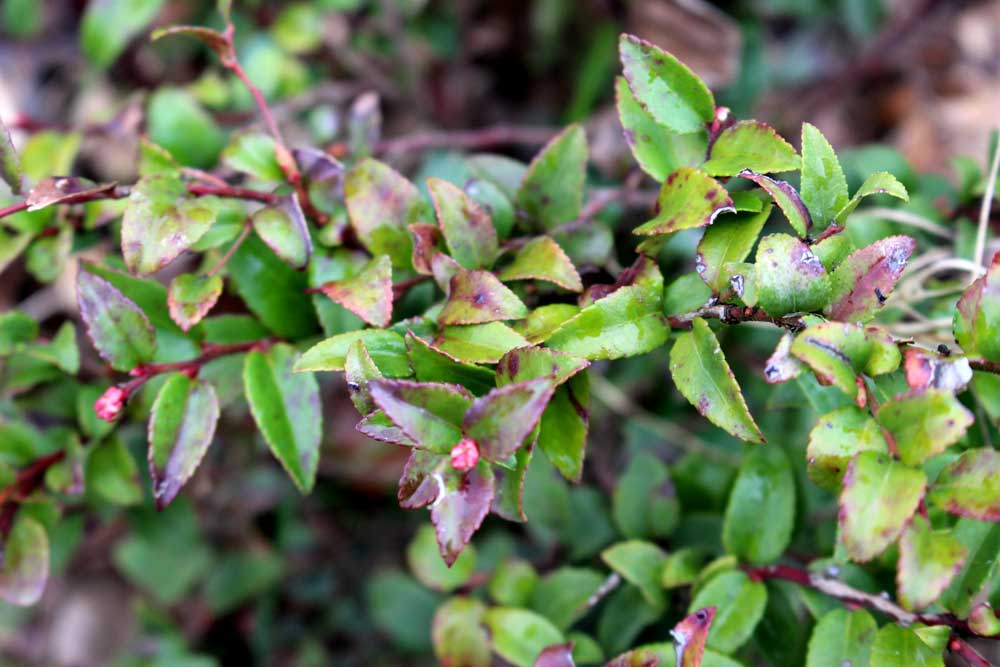
Lingonberry (Vaccinium vitis-idea)
Lingonberry (Vaccinium vitis-idea) is such a fantastic problem solver plant! It loves moist, acidic soil and will do best in USDA zones 3-9. This groundcover rarely exceeds 1′ in height and produces tart, vitamin-rich berries in the summer. The birds will love it too, making it a great plant for supporting local wildlife.
I planted several lingonberries on our current homestead and look forward to making tart jam with them as they grow in. Their glossy, dark leaves have created a really nice evergreen groundcover in some otherwise difficult spots in our garden.
Evergreen Huckleberry (Vaccinium ovatum)
Evergreen Huckleberry (Vaccinium ovatum) should be planted in every northwest garden! In the sun it will grow to 3′ once mature, but in full shade it will be double that size. We have them planted as foundation-type shrubs in the front yard, where their dark leaves serve as the perfect backdrop to wispy grasses. We also have them weaving through our sunny backyard to act as the spine of the garden, with deciduous fruiting trees and shrubs tucked between.
Expect more delicious huckleberry fruit in full sun, but you will still get some in shade as well. The birds will also compete with you for the fruit. It has a fairly narrow range of zones 6-8 and prefers acidic soil, much like it’s cousin plants blueberries and lingonberries.
What did I miss?? Do you have a favorite edible evergreen plant that you have growing on your homestead? Have you tried any of the newer plants on the market, like pineapple guavas? I am always looking for new evergreens and would love to hear about your experiences in the comments below.


