
Renee Wilkinson's Blog, page 36
January 11, 2011
Pork Tenderloin
We had a dinner party recently and I tried out a new recipe I found here for Burgundy Pork Tenderloin. It was very low maintenance and really tender. Thought I should pass along my version, as I changed quite a few things.
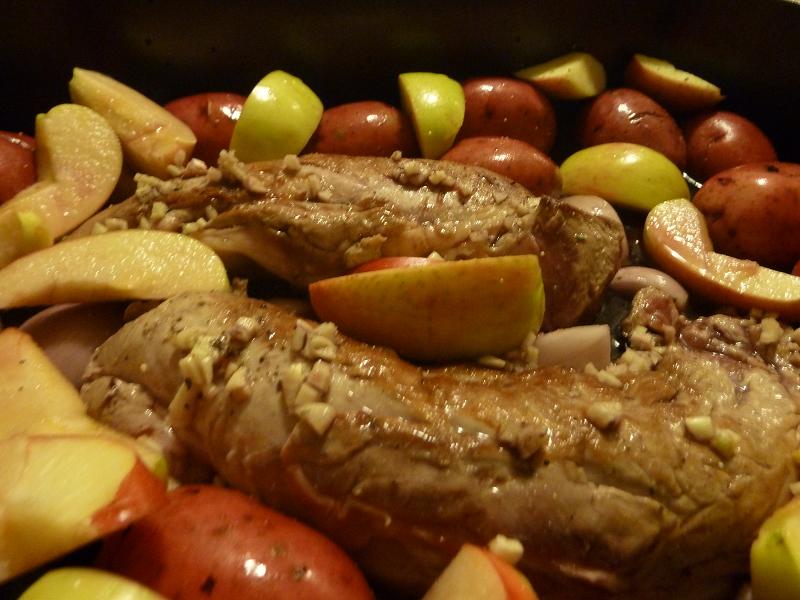
Our Version Pork Tenderloin
4pounds pork tenderloin
1 teaspoon salt
1 teaspoon ground black pepper
2 cloves garlic, minced
4 shallots, halved
Two apples, cut into thick wedges
Whole potatoes
2 cups red wine
2 cups beef broth
Water and flour for gravy
Preheat oven to 350 degrees F (175 degrees C).
Heat cast iron skillet to medium-hot. Once hot, sear pork on each side for about 1-2 minutes, until well browned.
Place pork in a large roasting pan. Sprinkle meat with salt, pepper and minced garlic. Poke a meat thermometer in thickest part.
Arrange potatoes, apples and shallots around the pork in the roasting pan. Pour wine and broth over everything.
Bake in the preheated oven until the meat thermometer reaches 160 degrees, about 45 minutes. The meat will still be pink from being cooked in red wine. When done baking, remove meat from baking dish, and place on a serving platter.
Whisk a couple tablespoons of flour with a couple cups of water. Pour wine and cooking juices into the skillet used for browning the meat and stir in the water and flour mixture. Boil mixture while stirring constantly until thickened. Add more flour or more water to reach your desired consistency.
Slice meat and cover with the gravy.
The recipe was really easy and really tasty. The apples were a little mushy, so you might try throwing them in halfway through the cooking time. This is a good for a low-key evening when you have friends over and want something hardy for wintertime!


January 7, 2011
Harry Potter Party
This is not so much "gardening" related, but I thought those of you readers with kids might appreciate it. We spent time with our little nephews over the break who live in town. They are Harry Potter fans, as are we, so we had a movie party with lots of movie-themed goodies.
Mostly the menu consisted of sweets, but I talked them into eating dinner first. We called it a Quidditch Player's Pie, which is really just a Shepard's pie. We got the idea from lots and lots of websites online, but made up a recipe on our own since I didn't like the ones I saw online. They are both fairly picky eaters, so we were crafty about how to sneak in lots and lots of veggies.
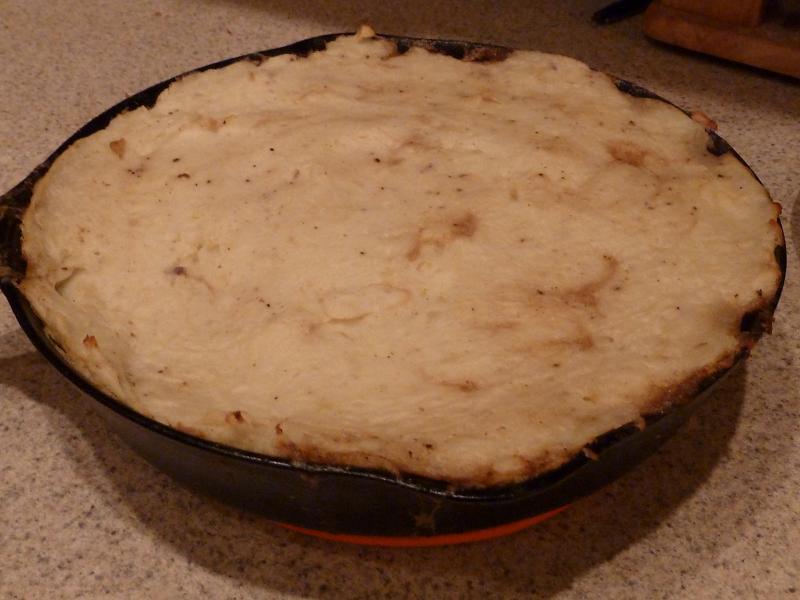
We used homegrown carrots, peas and kale plus store-bought potatoes and ground beef. In a alrge cast-iron skillet, the beef was cooked first until browned. We made a simple, creamy gravy and mixed in the cut up veggies with the beef. The "pie" was topped off with mashed potatoes, like a crust. Everything baked for about 45 minutes, until the carrots are done. We all devoured it! Awesome meal on a cold winter night.
For dessert… licorice wands, Bertie Bott's Every Flavor Beans, gooey slugs, Cauldron Cakes, and my sister-in-law baked up some pumpkin pasties.
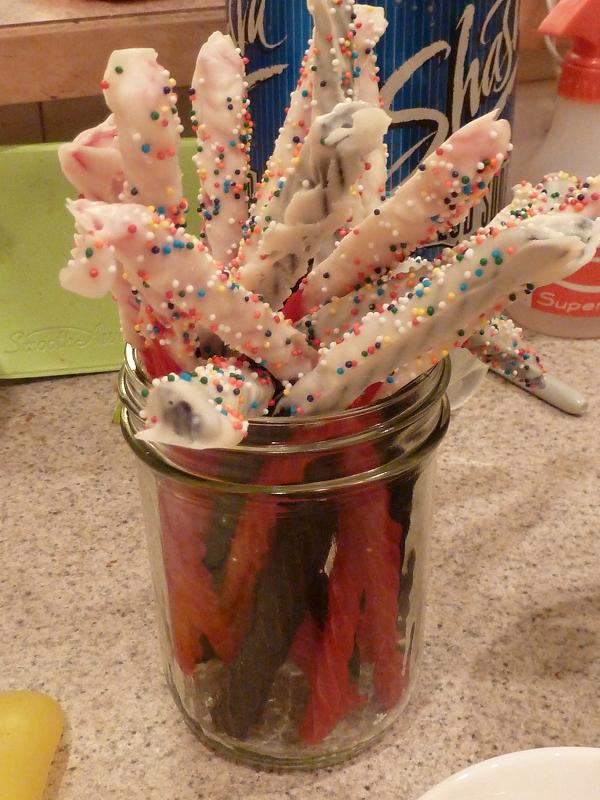
The licorice wands are just melted almond bark dipped on the ends of licorice sticks, with sprinkles on top. They dried on wax paper and were super easy to make.

The Bertie Bott's were just Jelly Bellies, although I have heard it's possible to order the "real" thing. Sounds a bit gross to eat something that tastes like booger, but whatever. I bet the kids would think it was hilarious.

The gooey slugs were gummy worms. Cheap, full of corn syrup I am sure, but a big hit.

The Cauldron Cakes were time consuming little buggers! We baked up some devil's food cupcakes. After they were cool, we added a few drops of green food coloring to frosting and frosted them all. We then sprinkled on some powdered sugar and brown sugar to make it look a little foamy. We then cut black licorice into little strips to plug in the tops like handles. I kind of wanted them to look a lot more impressive for how much time it took, but oh well.
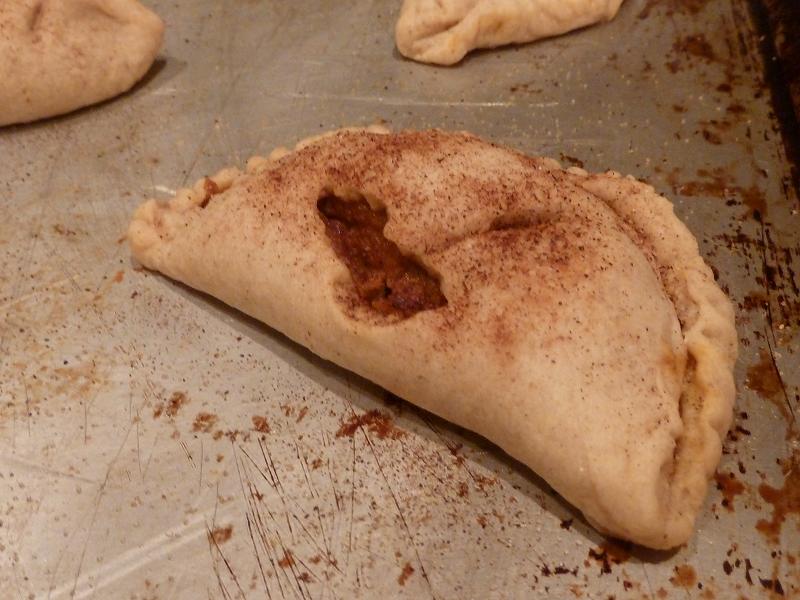
My sister-in-law made the filling for a pumpkin pie, then stuffed pastry dough into little pockets. They were so good! Just like your very own pumpkin pie.
It was super fun and the kids got WAY hopped-up on sugar. Being the auntie and uncle, we get to do these horrible things and then return said over-sugared children to their parents. Hahaha!
January 5, 2011
My Current Garden
I remember talking with a silver-haired lady a few years back about gardening. She said she has created eleven gardens in her life, and I remember thinking that sounded like a lot. Yet here I am, living in a rental house this year, again building another garden.
How many is this for me now? There was my childhood garden and about six or seven rentals that ranged from sunny windowsills to blisteringly hot balconies to nutrient-sapped outdoor spaces. I hit it big when we bought our house in Portland with a huge yard that I converted into an edible urban homestead. While that house in Portland waits patiently for us to move back in, we're living in a rental house while I finish school.
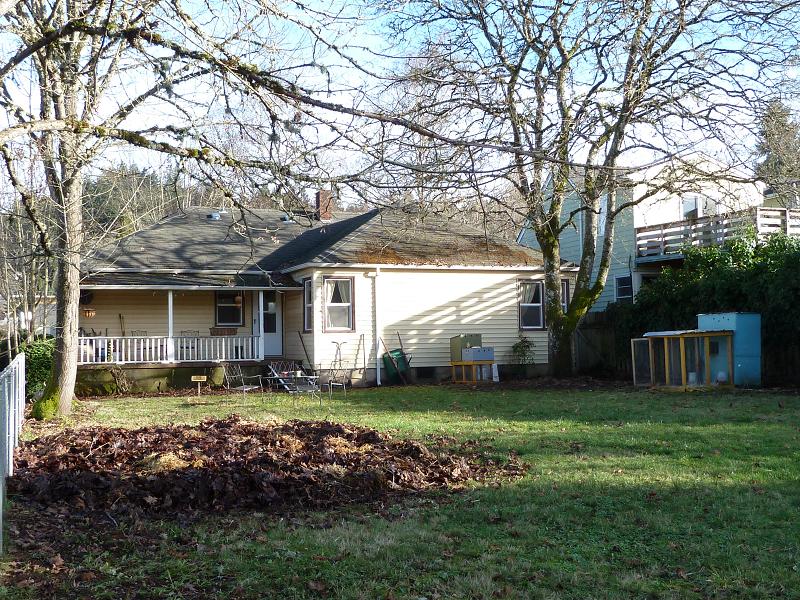
No matter how temporary though, I need a garden. The Urban Farm is my shared garden, but I want to walk a few steps at home to find fresh herbs and vegetables. So almost as soon as we moved in here, I began sheet mulching, also called in-situ (or "in place") composting.
Over the last two or three months, I determined where the sunniest spot would be for a garden in our backyard. To keep it tidy for our landlords, I kept it a simple 10′ x 10′ square near the edge of the backyard. I began by laying in food scraps, dried leaves and used bedding from the chicken coop. I sprinkled on a bit of finished compost to help innoculate the layers with microorganisms.
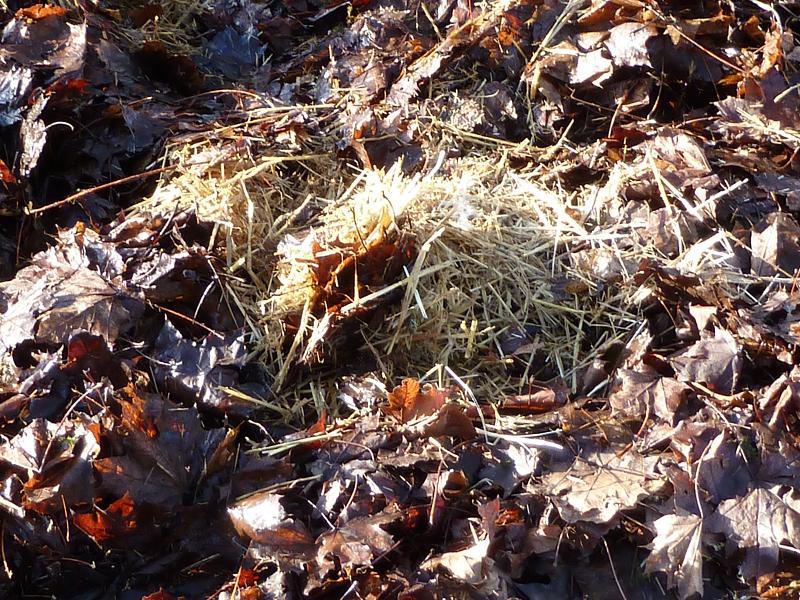
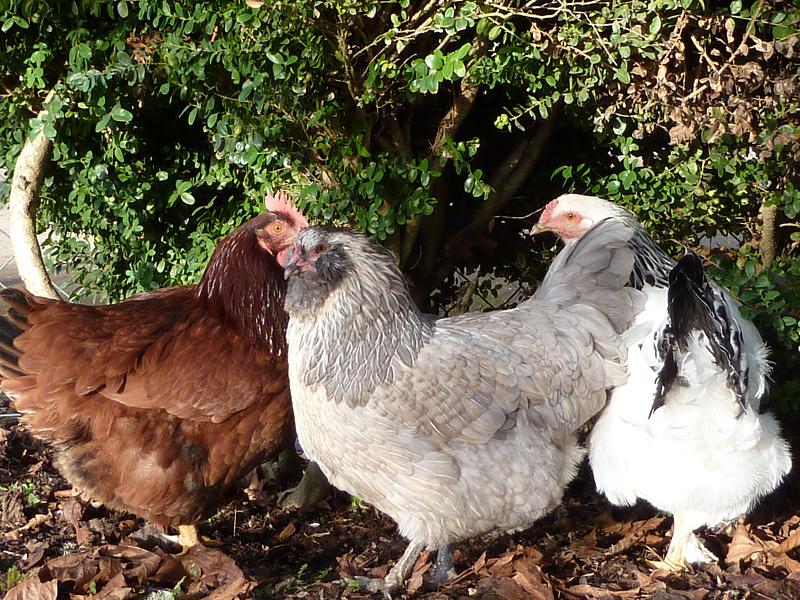
Things seem to be going well thus far. We have added more chicken bedding here and there, tossed it once or twice, and it has been quietly breaking down this winter. The chickens are free-ranging often on these cold winter days and they help toss the layers up together in their never-ending quest for worms.
When the layers have broken down more, I'm planning to create a hard edge with either rocks, scraps of broken concrete or some other "found" source. That should make the garden plot look more intentional and tidier. For now though, I'm letting it do it's magic.
Mid-February is when peas can start going in the ground, as I remember from the old saying "plants your peas on President's Day". I am hopeful the soil will be ready for planting by that time. We should know by that time how long we will stay in this house, which will determine a lot of what I grow at home this season in my backyard vs. the Urban Farm.
It feels good to be out there in the brisk cold working with my hands again. So much of my time is spent at a computer for school doing design work. But nothing gives me satisfaction like sweating over a patch of earth.
January 3, 2011
Holiday Candy
Whew, the holiday flew by! It happened just as I suspected. I had these nice, long, aimless days at the beginning. Then our company came into town, my mother-in-law, and time just flew! We spent a lot of time just here at home, admiring our beautiful Christmas tree, eating lots of cookies, and just chatting away the hours. It was wonderful.
I wanted to share a few of the candy recipes I made for the holidays. I know the last thing we feel like thinking about is making more sweets, but maybe you would want to bookmark these recipes for next year. I am not an experienced candy maker, but I am convinced I can do it after this year.
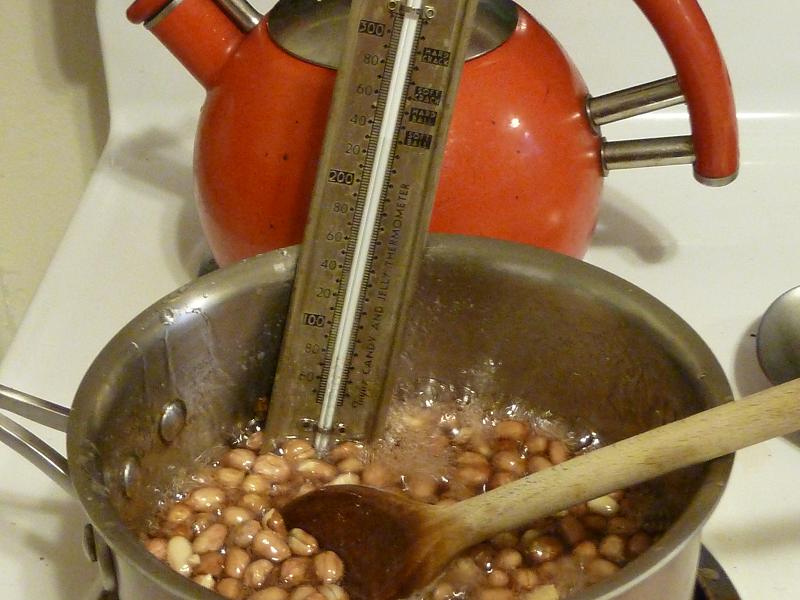
The first candy experiment was with peanut brittle. I found a great, easy recipe online here. I really hate, hate, hate using corn syrup, but I've been too afraid to experiment with a substitute. It would pain me to have to throw out a batch of something that took an hour of stirring to make, but maybe I need to belly up to the bar and get over that.

Corn syrup issue aside, the peanut brittle turned out fantastically! It seemed like a soften brittle, but still held together really well. I might use hazelnuts or something next time to mix it up. I used raw spanish peanuts, which were roasted perfectly just by cooking them with everything else.
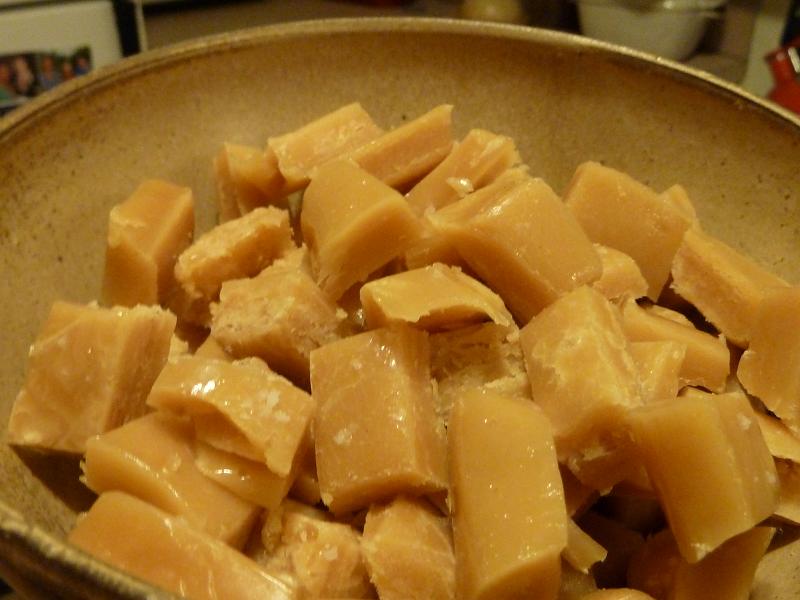
The other candy I made this year were Fleur de Sel Toffees using this recipe by Martha Stewart. I think all this chocolate business, although tasty, is over-rated, so I focused my efforts on nutty and chewy things. I am pretty sure it took me more than twelve minutes to get the mixture hot enough, but it was worth it.
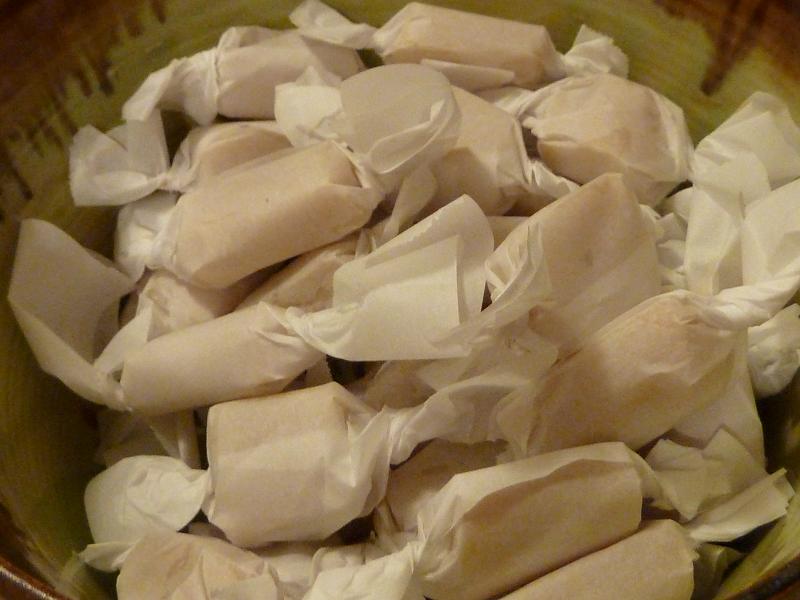
I wrapped the toffees in strips of parchment paper. I know… kind of overboard. But the end product looked like old-fashioned sweets that were fun to share with people.
Kind of ironic, but I actually don't have much of a sweet tooth. It was a great excuse to spend some time in the kitchen meditatively stirring a pot. My school mates will probably inherit lots of excess candy now that the holiday is over. I'm convinced that homemade candy is far superior to store-bought. It tastes better and you know exactly what is going into it. I'm sure when I have kids though I will have no time for such things 


