
Renee Wilkinson's Blog
September 13, 2021
Cookbook Club Podcast
Modern homesteaders are often avid home-cooks, and I am no exception. In case you are too, I wanted to make sure you all knew about the podcast I’ve launched called Cookbook Club with my friend Sara Gray.

We’ve belonged to a “real life” cookbook club for a few years now, but ever since pandemic life began it’s become a lifeline for me. Making delicious food, trying new recipes, and sharing the results with one another has kept my spirits high through isolating times. Our podcast is a way to offer that community to you all, near and far.
Each month we pick a cookbook, make a bunch of recipes from it, then get together to talk about how it went. We also dig deep into cooking topics like our favorite holiday recipes, most beloved kitchen tools, + favorite family meals. Episodes come out every two weeks + you can find it on ALL the podcast places.
Visit our website cookbookclub.show + follow us on Instagram @cookbookclubshow to stay in the loop. Please share with your food-loving pals!
The post Cookbook Club Podcast first appeared on Hip Chick Digs.

February 18, 2021
Backyard Rain Garden
Incorporating a rain garden into our homestead allows us to weave natural processes into our backyard. We can still grow lots of food, keep chickens and bees – all the fun homestead-y stuff – but we can also devote a little space to help protect our urban watershed.
 Our finished rain garden with a stone “bridge” crossing
Portland receives a lot of rain for nine months of the year and downspouts connected to the sewer can cause backflow into the river during major rain events – gross. The city encourages homeowners to disconnect their downspouts from the sewer, so rain can soak back into the ground naturally. Rain gardens are a great way to divert all that stormwater away from structures – like your house.
A rain garden can also be beautiful landscape feature and fun space for kids to explore. I designed ours to have lots of big boulders, a stone “bridge” for the kids to use, and natural rocks in various sizes. The kids love searching for cool rocks and are already using the smaller rock areas for “construction sites” with their toys.
 Our rain garden features basalt boulders + water tolerant plants
If you plan to build your own rain garden, you can learn everything you need to know from a couple helpful documents. The City of Portland has one called How to Build a Rain Garden. And Washington State created the other called Rain Garden Handbook for Western Washington.
I’ve worked as a landscape designer with Northwest Native Landscapes for years now, and we’ve designed tons of really pretty rain gardens. My DIY version wouldn’t look as nice as I wanted, so I called them for a pro build. We talked through the vision, I shared my design plan and a rough sketch, and they got to work.
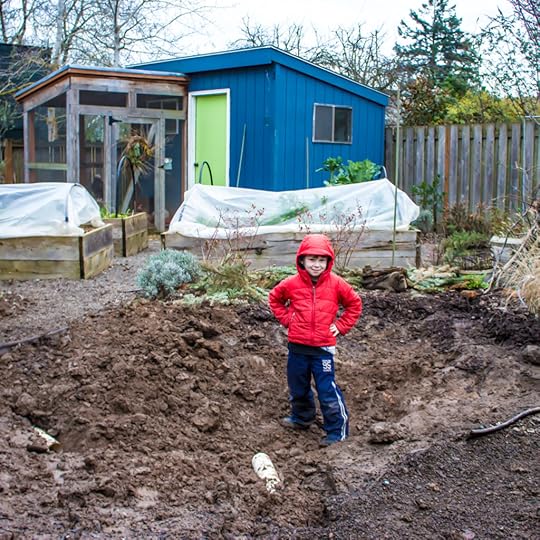 River checks progress on the excavation!
Excavation went QUICK! It’s jarring to see a massive hole in your garden-baby, but I knew it would get better. They connected our downspouts to huge pipes, trenched and buried them, and perfectly sloped them into the rain garden. You can just barely see the white pipes enter the basin where River is standing, in the photo above.
 Stone “bridge” boulders are being installed
When the big boulders arrived I was gleeful. Every garden needs some big boulders and our local basalt stone is gorgeous. The bridge was set into place first. Additional boulders were added around the perimeter. Once the boulders were in, river rock was brought in to finish things off.
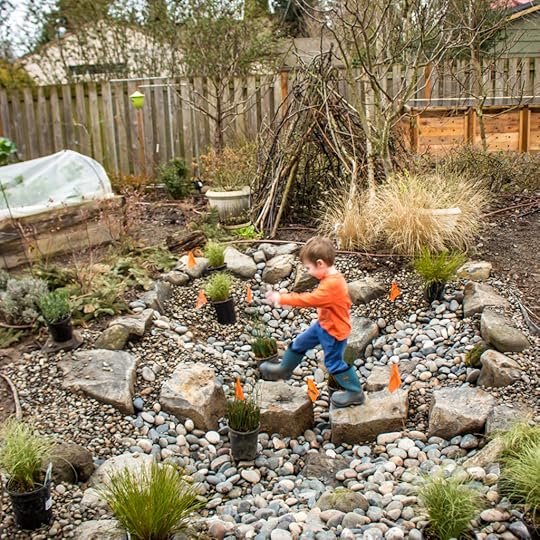 Fox tests out the stone “bridge” + plants are ready for installation
I like rain gardens that include a few plants – not too many that it feels cluttered, but just enough to contrast the rock with soft foliage. I chose the following plants for their water tolerance, evergreen foliage, and varying colors and textures:
Spreading Blue Rush (Juncus patens)Orange New Zealand Sedge (Carex testacea)Frosty Curls Sedge (Carex comans ‘Frosty Curls’)It will be rare to see standing water in the rain garden, as the water soaks pretty quickly back into the earth. But I am watching the weather forecast closer than ever before, eagerly awaiting the next massive storm. You’ll have to follow me on Instagram to see if there are updates over time.
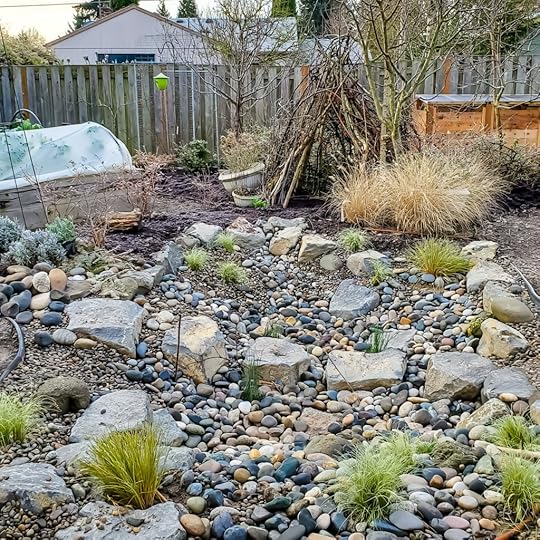 Planted rain garden with local basalt boulders + river rocks
Do you have stormwater issues? Have you built your own rain garden? I love reading your comments, so don’t be shy about sharing or just saying hello.
The post Backyard Rain Garden first appeared on Hip Chick Digs.March 19, 2020
2020 Vegetable Garden Plan
This is the most well-thought through vegetable garden I’ve ever created. Take a look at the plan I created, get tips to make your own, and get a jump on the season while we’re all cooped up at home.
 Photo: Helpful items for crafting a veggie plan include coffee, local growing calendar, time to maturity, graph paper, more coffee
1. My Garden Goal
My primary goal is to feed my family over as long of a growing season as possible. That means I’m choosing kid-friendly crops and varieties – not rare and experimental vegetables.
I made a list of the most important crops – the ones we eat on the regular. That includes: carrots, potatoes, onions, broccoli, tomatoes, winter greens, squash. It excludes: rutabaga, turnips, peppers, radishes, and other crops for sophisticated palettes.
2. Timing
Stretching food production over a long season means careful timing. I need enough space for the summer tomatoes and eggplants, but that leaves lots of space for spring/fall/winter crops in the same area. For each crop, I drew out when it’s planted, growing, and harvested.
 Photo: Drawing a calendar helped me identify companion plant combinations and openings for cool season crops
3. Space-efficiency
Companion planting allows me to pack more crops into limited space, so I made a list of potential crop combinations. We have four 4′ x 8′ raised beds for intensive vegetable growing, so every inch needs to work hard and everyone needs to get along.
Good combinations include, with an * denoting combinations in my plan:
*tomato + carrot/parsnip*tomato + basileggplant + potato + onionbean + celery + spinachlettuce + carrot + cauliflower + radish + kale*broccoli + cucumber + garlic/onion + potato*bean + eggplant + cucumber
4. Garden Plan
I drew the garden plan out with pencil and graph paper. It’s drawn to scale based on the mature plant sizes. On the same page, I made a diagram for each bed to show the timing. Draw, erase, draw, erase… Finally, I had the right mix of crops, timing, and space efficiency.
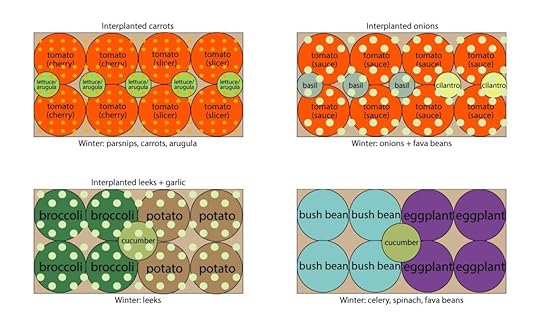 Photo: 2020 Vegetable Garden Plan to accommodate four 4’x8′ raised beds
Resources
The most helpful resources to craft your plan need to be local to your climate. Here are the most helpful ones I have found for the Pacific Northwest:
Here are my garden plans from 2016, 2015, 2014, 2013, and 2011Portland Nursery’s online vegetable planting calendar tells you when to start indoor seeds, direct sow, and transplant seedlings. Portland Nursery also offers an online companion planting guide Maritime Northwest Garden Guide, by Seattle Tilth, Carl Elliott, Rob PetersonGrowing Vegetables West of the Cascades, by Steve Solomon
November 22, 2019
Perfect Pumpkin Puree
You can easily substitute fresh pumpkin for canned pumpkin, but a couple extra steps are needed to ensure the final product is perfect. Follow these steps to ensure you end up with a perfectly roasted pumpkin that is superior in both flavor and texture.
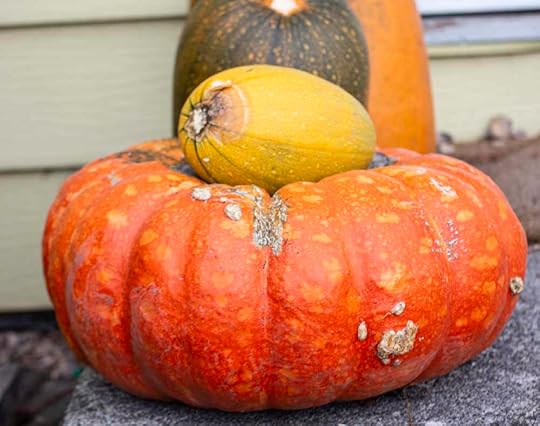 Homegrown Rogue Vif d’Etampes pumpkin with a decorative pumpkin resting on top
Selecting the Right Pumpkin
Your journey to the perfect pumpkin puree begins with choosing the right variety of pumpkin. Those big pumpkins we carve for Halloween have flesh that is watery and stringy, so leave those for just decoration.
For cooking and baking, choose pumpkin varieties with dense, sweet flesh. This includes Sugar Pumpkins, Long Island Cheese, anything with the word “Pie” in the name, Fairytale, and Rogue Vif d’Etampes (my favorite). More and more of these varieties can be found at the grocery store and farmers markets, but nothing beats growing your own.
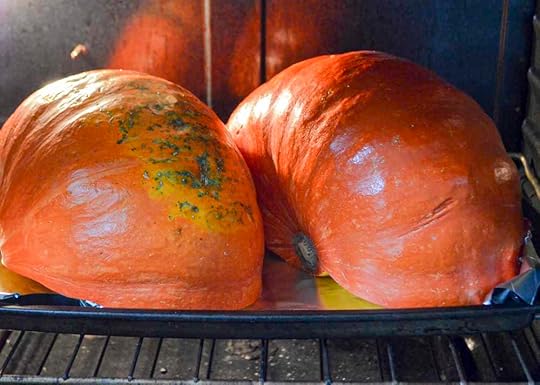
Roasting Pumpkin + Making Puree
You’ve chosen the perfect pumpkin – now let’s roast it! Roasting pumpkin is easy, but takes a little time. Do it ahead of time, set aside what you plan to use that week, and freeze the rest. You’ll have delicious pumpkin puree anytime you need it.
Preheat the oven to 375 degrees. Wash the exterior of the pumpkin, then slice it in half from top to bottom. Scoop out the seeds – mine go to the chickens, but you might want to save some to roast later. Brush a couple tablespoons of olive oil* over interior of the pumpkin. Place it cut side down on a baking sheet. Roast for 45 minutes, then check every 5 minutes to test for doneness. It should pierce easily with a fork. (Bigger pumpkins might take closer to an hour)Once tender, remove from the oven and let cool until you can safely handle it. Separate the shell from the flesh by either peeling off by hand or scooping out with a large spoon. Puree the roasted pumpkin flesh with an immersion blender (my preferred method), food processor, blender, or potato masher to your preferred consistency.
*Note: if olive oil is not your thing, you can use grapeseed, canola, vegetable oil. You can omit the oil altogether – the cut sides that touch the pan might just stick/char a little. Discard those areas prior to roasting so you don’t impart a burnt flavor into your puree.
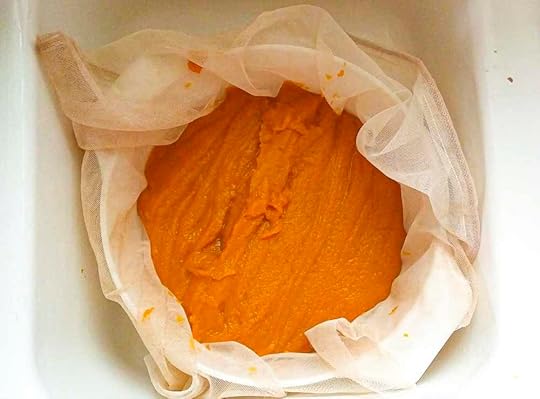 The secret to perfect pumpkin puree: drain the puree with cheesecloth
 Perfect Pumpkin Puree (Optional Step)
Many excellent cooks will claim that canned pumpkin is still superior to fresh. Their main argument is that 1) you can’t taste the difference and 2) fresh pumpkin puree is still too watery. If you take the time to drain your freshly roasted pumpkin puree, it will intensify the pumpkin flavor and result in a creamier texture.
Simply line a colander with cheesecloth, set it in the sink, and pour in the puree. Let the pumpkin puree sit anywhere from four hours to overnight.
The final result will be thick, creamy puree you can easily mound up on a spoon – similar in texture to tomato paste. The flavor is intensified because so much excess water has been purged, so you are left with more pure pumpkin deliciousness.
*Draining the pumpkin puree is optional, for those cooks who want the most perfect, persnickety puree. I’ve skipped this step for over a decade and still had great baking/cooking results using homemade puree. But for you perfectionists, give it a shot and tell me what you think.
 Frozen pumpkin puree “pucks”
Freeze Your Pumpkin Puree
Refrigerate what you plan to use in the next few days, then freeze the rest. To freeze, fill muffin tins with pumpkin puree. Place the whole muffin tin in the freezer overnight.
After firmly frozen, pop out each “pumpkin puck” and place in the labeled freezer bag for long-term storage. If they are difficult to get out, let them sit for five minutes to slightly thaw around the edges. You could also use a butter knife to carefully loosen.
Keep using that frozen pumpkin puree until it runs out or you can replace it next fall – whatever comes first. Someone out there will tell you it’s probably best within six months – there might be a slight decrease in quality the longer it’s frozen. But we all know homegrown pumpkins are only ready for harvest once a year: in the fall. So forget about that and just enjoy homemade pumpkin puree, harvested at its peak flavor, all year long.
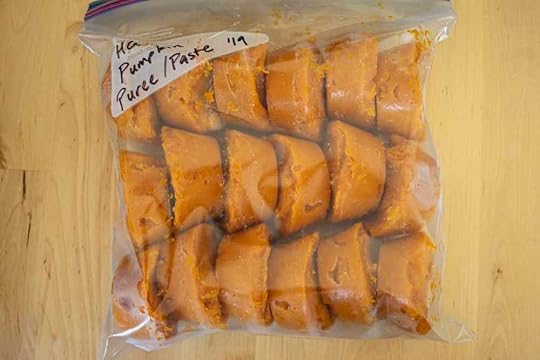 Perfect homegrown (HG) pumpkin puree ready for the deep freeze
August 15, 2019
Homesteading with Kids
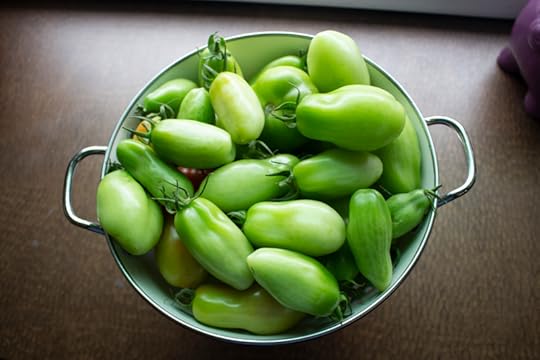 Unripe San Marzano tomatoes
This is what homesteading with children looks like. Fox, now a toddler, picked these precious San Marzano tomatoes, which he’s been doing periodically all summer. And, yes, it drives me I.N.S.A.N.E.
But the alternative is to keep the kids out of the garden or, worse, stop gardening altogether out of frustration. And then everyone loses. Let me tell you why.
Continuing to homestead on our urban plot teaches our whole family important stuff. Fox will eventually learn how to tell when our crops are ripe. He’ll assume everyone has tomatoes in his backyard and all tomatoes taste as good as ours.
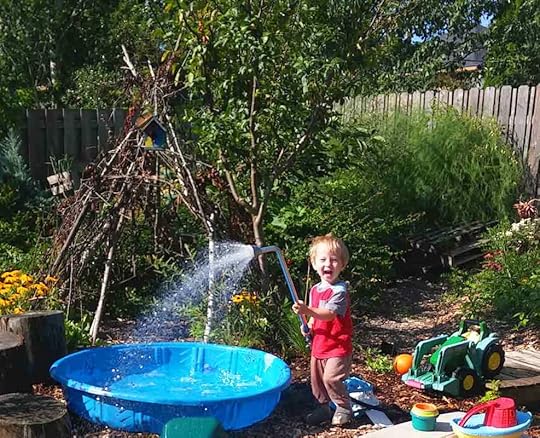 Fox wasting water + having a ball
Juniper (7 yrs) and River (4 yrs) both know a ripe tomato when they see one. They know how to water our plants deeply vs spraying water all over the pathways. They can tell a tomato plant by the smell of their leaves. As they get older, they become better and better helpers.
What am I learning? Patience. Planning. Adaptability. Flexibility. Plant extras of the things you’re super excited to harvest and lean on your local farmers (markets, u-pick, they pick, etc) to supplement when things didn’t go well with your harvest.
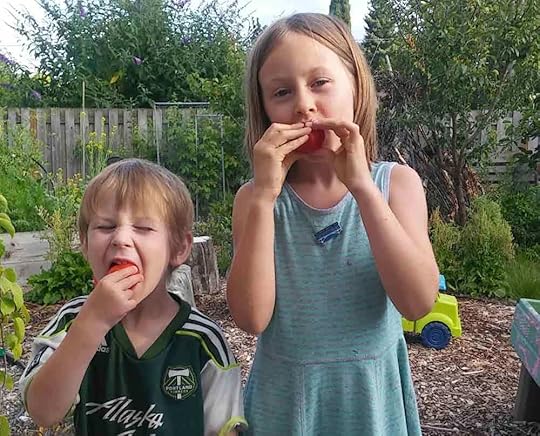 River and Juniper eating ripe tomatoes
This isn’t just about a batch of tomatoes, saving some money, supporting sustainable agriculture. This is a lifestyle for us. That means it’s woven into our daily life, and daily lives evolve over time. We’re currently in the toddler-picking-green-tomatoes-phase.
But next year he’ll know better. And maybe I’ll know a little bit more too. Like they say, “no garden is as great as next year’s garden.”
July 24, 2019
Homestead Update: Year Five
Can you believe we’ve been digging our roots into this homestead for five years already? I’m returning for intermittent blogging after taking a couple years off. And I wanted to let you all in the garden gate and show you how things have grown.
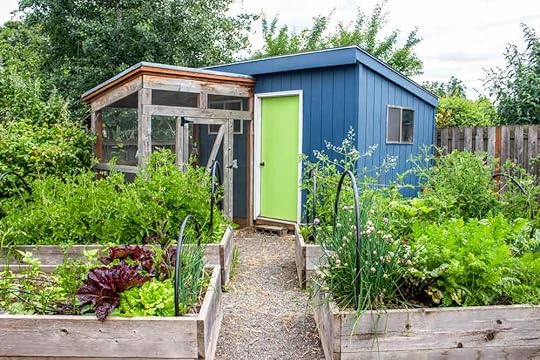 Food production central are the four large raised beds adjacent to our chicken coop/shed
Modern homesteads are about some degree of self-sufficiency, so our space has always been intended to offset our food supply. The heart of our homestead is our intensive food production: the raised beds and chicken coop.
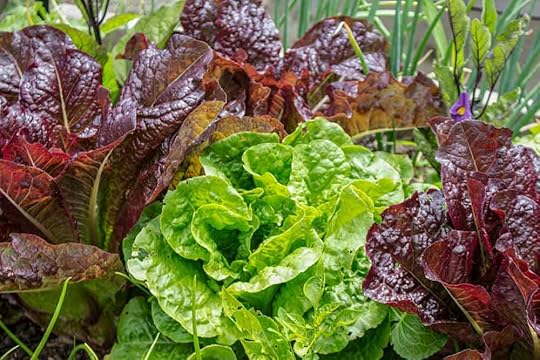
Weeds and bolted veggies go to the chickens, the chicken bedding goes into the compost, the finished compost goes into the beds. This system allows us to replenish the beds with excellent soil on a regular basis. My lettuces this year are biggest I’ve ever grown!
Our fruit trees were planted well before our last moving boxes were unpacked and they are all officially fruiting! Urban spaces are tight, so I planted trees that gave us a good variety of the fruits we love best: figs, plums, Asian pears, European pears (including an espalier), apricots, apples, and persimmons.
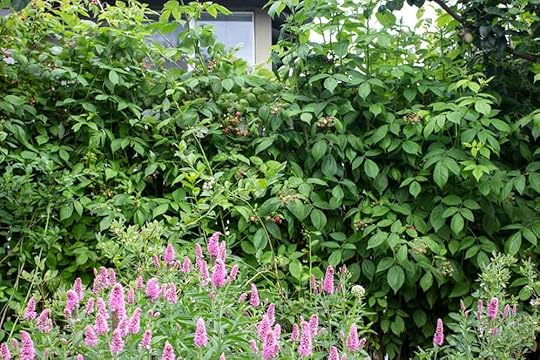
The everbearing strawberries, everbearing raspberries, low-bush and high-bush blueberries, and black currants keep the kids grazing from summer through fall. Our harvests are enough for fresh eating and canning, but I still supplement our freezer stash with local u-pick farms. Raspberries run the entire eastside of our backyard, which makes a delicious green wall.
Our space is packed with edibles, but it needed more ornamental plants to make it really sing. I’ve added more seasonal flowers, conifers for winter interest, and cool grasses. These plants support beneficial insects and wildlife, but they also make an edible garden beautiful year round.
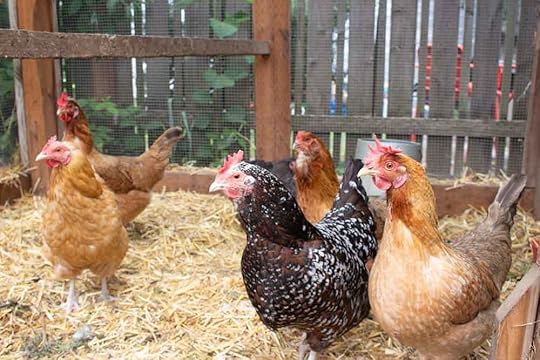
Juniper’s class raised chicks last year and we added them to our flock when they were too big for the classroom. Pearl, our 10+ year old hen, finally passed away a couple winters ago (can you believe it!). We currently get an average of 3-4 eggs a day, which helps offset our family’s protein needs.
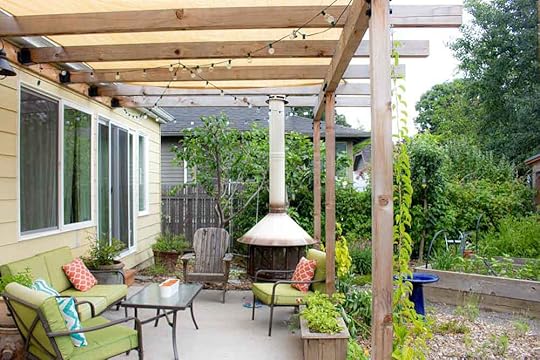
The patio has evolved into something really special. I began by designing a simple, rustic, modern pergola last summer. It gives more definition to the space as an outdoor gathering area. The structure supports four hardy kiwi vines, which will eventually provide seasonal shade and fall fruit (we’re using a shade sail on top until the vines grow in).
Recently I scored a vintage fireplace that makes the space feel complete. I feel like our backyard is more than just food production – it’s also beautiful and cozy and peaceful and all the things I dreamed it would be.
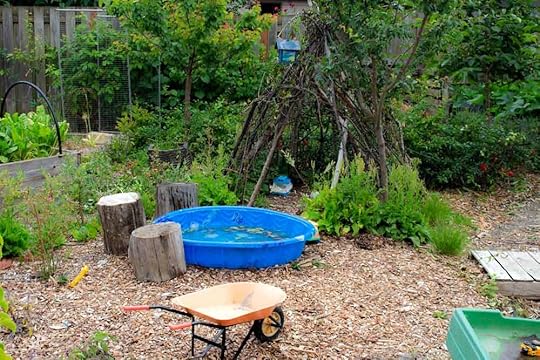
Although the kids make their way through all parts of the homestead, I am glad I left a big central area just for them. It’s a nature-based play area designed to be flexible – log stumps, teepee built with pruned fruit tree branches, movable sand table (freebie), “bridge” pallet, kiddie pool when the weather is warm…
These are all simple, free items that can be changed or repurposed over time. Like gardens, children grow and change over time. Their play spaces should be just as adaptable to change.
I hope your homesteads are growing by leaps and bounds too! I would love to hear what projects you are tackling this summer and how your homesteads are evolving.
December 21, 2017
Welcome Baby Fox
Here we are on the winter solstice, nearly three months after welcoming our sweet baby Fox. I hope you spend this darkest day of the year somewhere warm surrounded with love, with bright days ahead. Here’s the story of how we welcomed our biggest gift this year.

One of my last days of pregnancy.
This pregnancy was savored more than any other because I knew it was my last time on this journey. But it was also the most challenging with so much already on my plate. I suffered through the morning sickness followed by exhaustion like so many other working mothers – still meeting every deadline, running off to swim lessons with the kids, and all the other juggling of modern parenthood. In fact, I had my last design meeting two hours before I went into labor. (Clearly there was some kind of mental block there – like I couldn’t quite transition into the next chapter of motherhood until my design “babies” were put to bed.)
Both Juniper and River were born at the Alma Midwifery birth center in this fabulous mosaic tile birthing tub. They were magical births (click for Juniper’s birth story and River’s birth story). And hard to top. But this final birth turned out to be a very special gift for me and Jay.
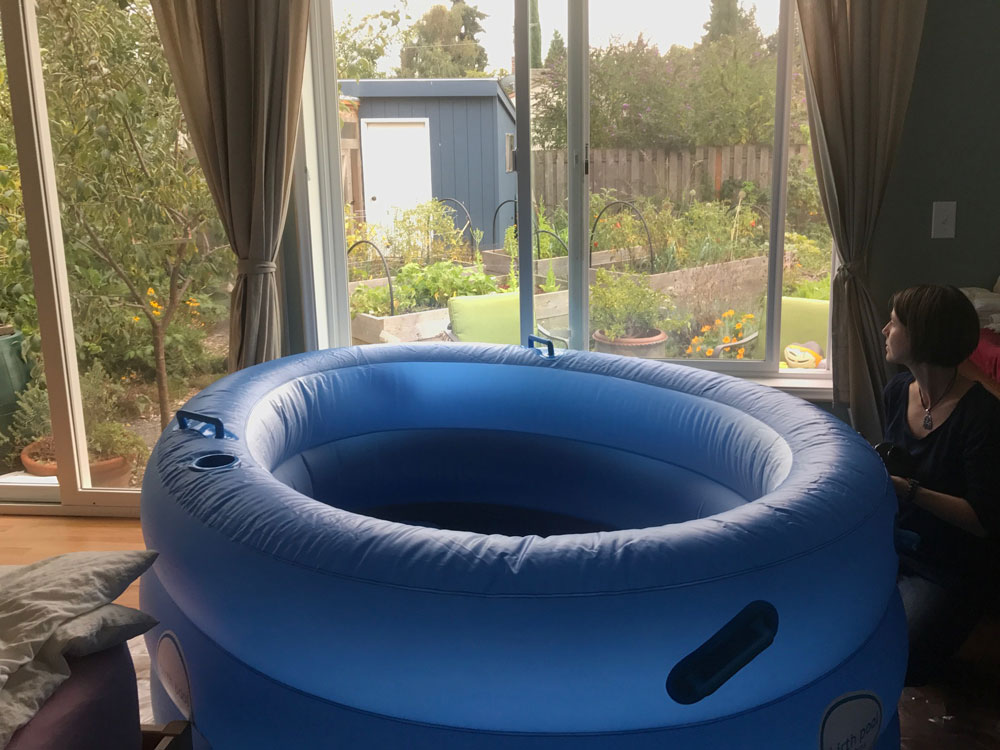
One of my midwives next to our birthing tub watching me pace the garden.
First off, we decided to have a home birth with the wildly gifted midwives from Rose City Midwifery. My prenatal care was filled with compassion, empowerment, and knowledgeable support. When my labor started, all three women from my midwife team immediately came over to our house.
The calm presence of our midwife team really allowed me and Jay to labor together. I felt so supported with him at my side through every contraction. I spent a lot of time laboring in the garden with Jay walked behind me as I stopped for contractions. We picked some late-season beans to munch on and paused periodically for the midwives to listen to me and baby.
After a few hours my labor wasn’t picking up speed like I expected it would. I started feeling like time was “wasting” and even suggested that maybe the midwives should go home to rest until things were moving along faster. I found out later they had no intention of going far, but they played along and asked to check me just one more time.
As I rested on the bed, thinking they were going to be leaving, I finally stopped worrying about time and the switch flipped – suddenly I found myself in late labor. Things got hard. The tears started flowing as I remembered vividly how tough things were now going to get.

The hard part of labor.
I made it into the birthing tub they had set up in our bedroom and I held on for dear life. When contractions got too hard, I tried not to fight it. I envisioned myself as a feather on top of the crashing waves of labor. I didn’t need to be strong. I didn’t need to keep my footing through those waves. I just needed to survive, to breath, to keep floating.
Then the contractions turned into pushing. My midwife took my arm and told me to just let me body do the work it knew how to do. She was right. My body took over, pushing the baby down. He came out into Jay’s arms underwater. Jay gently passed the baby into my arms, still under the water. I lifted this sweet little baby up into my arms among an explosion of tears.

Fox is born in the water
And just like that, we met baby Fox Allen Wilkinson. Born at home at 1:45am in the water on my birthday. Yes, we share a birthday.
He looked around a bit startled, stared up at me, and eventually started to let out a soft cry. My midwives magically moved us to my bed, where I continued to hold Fox for what felt like eternity. It was love at first sight.

Our first morning after birth.
The last few weeks have been beautiful, exhausting, restful, hard, easy… All of the things. What I struggled with most those first weeks was being so unproductive. Silly me forgot how much time it takes to care for a newborn – the nursing, the insisting on being held, the emotional guilt of wanting to put him down so I can cuddle my other two children…
It has really taken a village to keep us all happy, healthy, rested, and supported. I’m fortunate to have that village. Friends have brought over meals, gifted me a postpartum massage, taken the older kids out for playdates, shared delicious chocolate, listened to me laugh and cry and ramble.

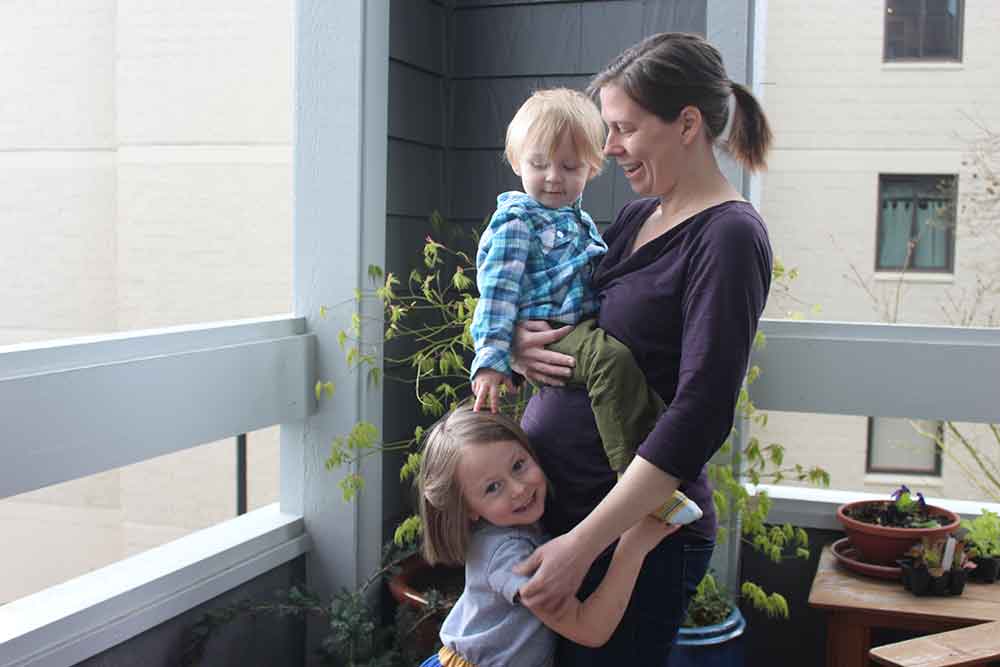
Juniper meets Fox.

River showering Fox with kisses.
Today I am easing back into my design work. Fox now smiles and laughs and coos. Juniper and River have adjusted to sharing me and Jay a bit more. River can’t stop kissing Fox. Juniper loves to hold him. Jay and I are learning to parent three and it’s an education that I expect to last our lifetimes.
It felt like the biggest decision of our lives to choose three children. And it did feel incredibly overwhelming in the beginning (and still does at times). But now we can’t imagine our life before Fox, or any of our children for that matter. The person who always felt missing is now here and our family is complete.
April 12, 2017
One More Seat
It turns out there was one more seat at our family table. We get to welcome a baby boy into the world in early October, just as summer is fading into fall. Although I am not blogging regularly anymore, the news just feels too big to not share.
 Life feels very full, but somehow I just knew we weren’t quite done with our family. Juniper and River are both excited for their new baby brother. Jay and I feel so privileged to be able to make room in our lives for one more child.
Gosh, it was agonizing at times when we were trying to decide if three kids made sense for our family. It means we less times, less money, a minivan… But is also means more love, more adventure, more sibling bonding (and bickering), another set of hands searching for berries in the garden, and never having to wonder later in life “what if?”
The first couple years with a baby made homesteading a challenge, but I have learned how to pull back on things that aren’t important. It’s ok to buy tomato starts when you have a newborn. It’s totally fine to u-pick berries when you didn’t harvest yours in time. Homesteading is not a contest or perfection – it’s just doing your best to have balance, find simplicity, be humbled by nature, live in the season.
Both kids are now old enough to help me plant the spring garden, collect eggs, feed the chickens, harvest carrots, and so on. I know I won’t get all my canning projects done this fall with a newborn. But I also know this season of life won’t last forever, and soon enough I’ll have another set of taste buds wanting to try our homemade strawberry preserves.
Expect an update from my this fall, if not sooner. In the meantime, I’ll be in my studio working on landscape designs, outside tending our homestead, or perhaps kicking my feet up to watch my family play in our garden at dusk. I hope your spring garden gets seeded soon and summer brings you lots of bumper crops.
November 15, 2016
ASLA Award Winner
 I was recently presented with a Community Service Award from the Oregon Chapter of the American Society of Landscape Architecture (actually it was months ago, but better late than never!). This award puts me up in the company of leading regional landscape architects like Carol Mayer-Reed who have received the same Community Service Award in past years. It’s a real honor!
ASLA is the professional organization for landscape architects and landscape architectural designers (like me). Landscape architecture is a really vast design field that includes designing public parks, urban waterfronts, city streetscapes, foodsheds, natural play areas, hiking trails and larger-scale natural areas (like floodplains, forests, wildlife corridors, etc).
I served on the board of this organization for two very busy years, while juggling my first years of motherhood. It was important to me to represent younger designers on this diverse board. I provided input on what types of speakers, educational sessions, design workshops and information we shared. My biggest role was managing ASLA communications with designers throughout our state.
It’s wonderful to share the news about this award because I’m not your average landscape architectural designer. I have a passion for planting design, nature play, urban agriculture and creating sustainable residential gardens. Each of those areas can at times be under-represented in this industry. An honor like this tells me that my perspective, opinions, aesthetics and working style was highly-valued by this professional organization.
We can each make a difference in the communities we serve by devoting our time and skills to causes we care about. I’m always on the board of at least one thing and spending volunteer times on several more. This is my little sign from the universe that it does make a difference and all of ours voices need to be heard.
November 3, 2016
Roasting Chanterelle Mushrooms
I spend a good chunk of the fall foraging for wild mushrooms, specifically chanterelles, around the forests of the Pacific Northwest. As I’ve gotten better, my harvests have gotten bigger and bigger – leaving me with the dilemma of how to process and preserve so many in a short period of time. After years of experimentation, I finally discovered the perfect preservation method: roasting, then freezing these golden jewels.

My latest mushroom hunting adventure yielded 50 pounds of chanterelles – half picked by me and half by my sister
You start to develop a sixth sense for mushroom hunting over time. I can just “feel” that this particular spot would be good for chanterelles. I see Douglas Fir trees overhead, a slight hillside with sunlight dappling through and not much leaf cover. And sure enough, there will be too many to count just peeking their heads barely above the soft forest floor. It’s the most wonderful and exhilarating treasure hunt!
On my most recent trip I returned with 25 pounds of chanterelles. Chanterelles are amazing when they are fresh, but that is way to many mushrooms for a family of four to eat in a week. So with trial and error I have found they are still near perfection when frozen properly.
The past few years I would saute them in batches with a little butter until they “sweat out” all their natural liquid and absorb the butter. Once cooled, into the freezer they would go. But this year, after receiving a tip from an old friend, I tried roasting instead.
Oh my goodness, this is the only way to go! It was so much faster and super-simple.
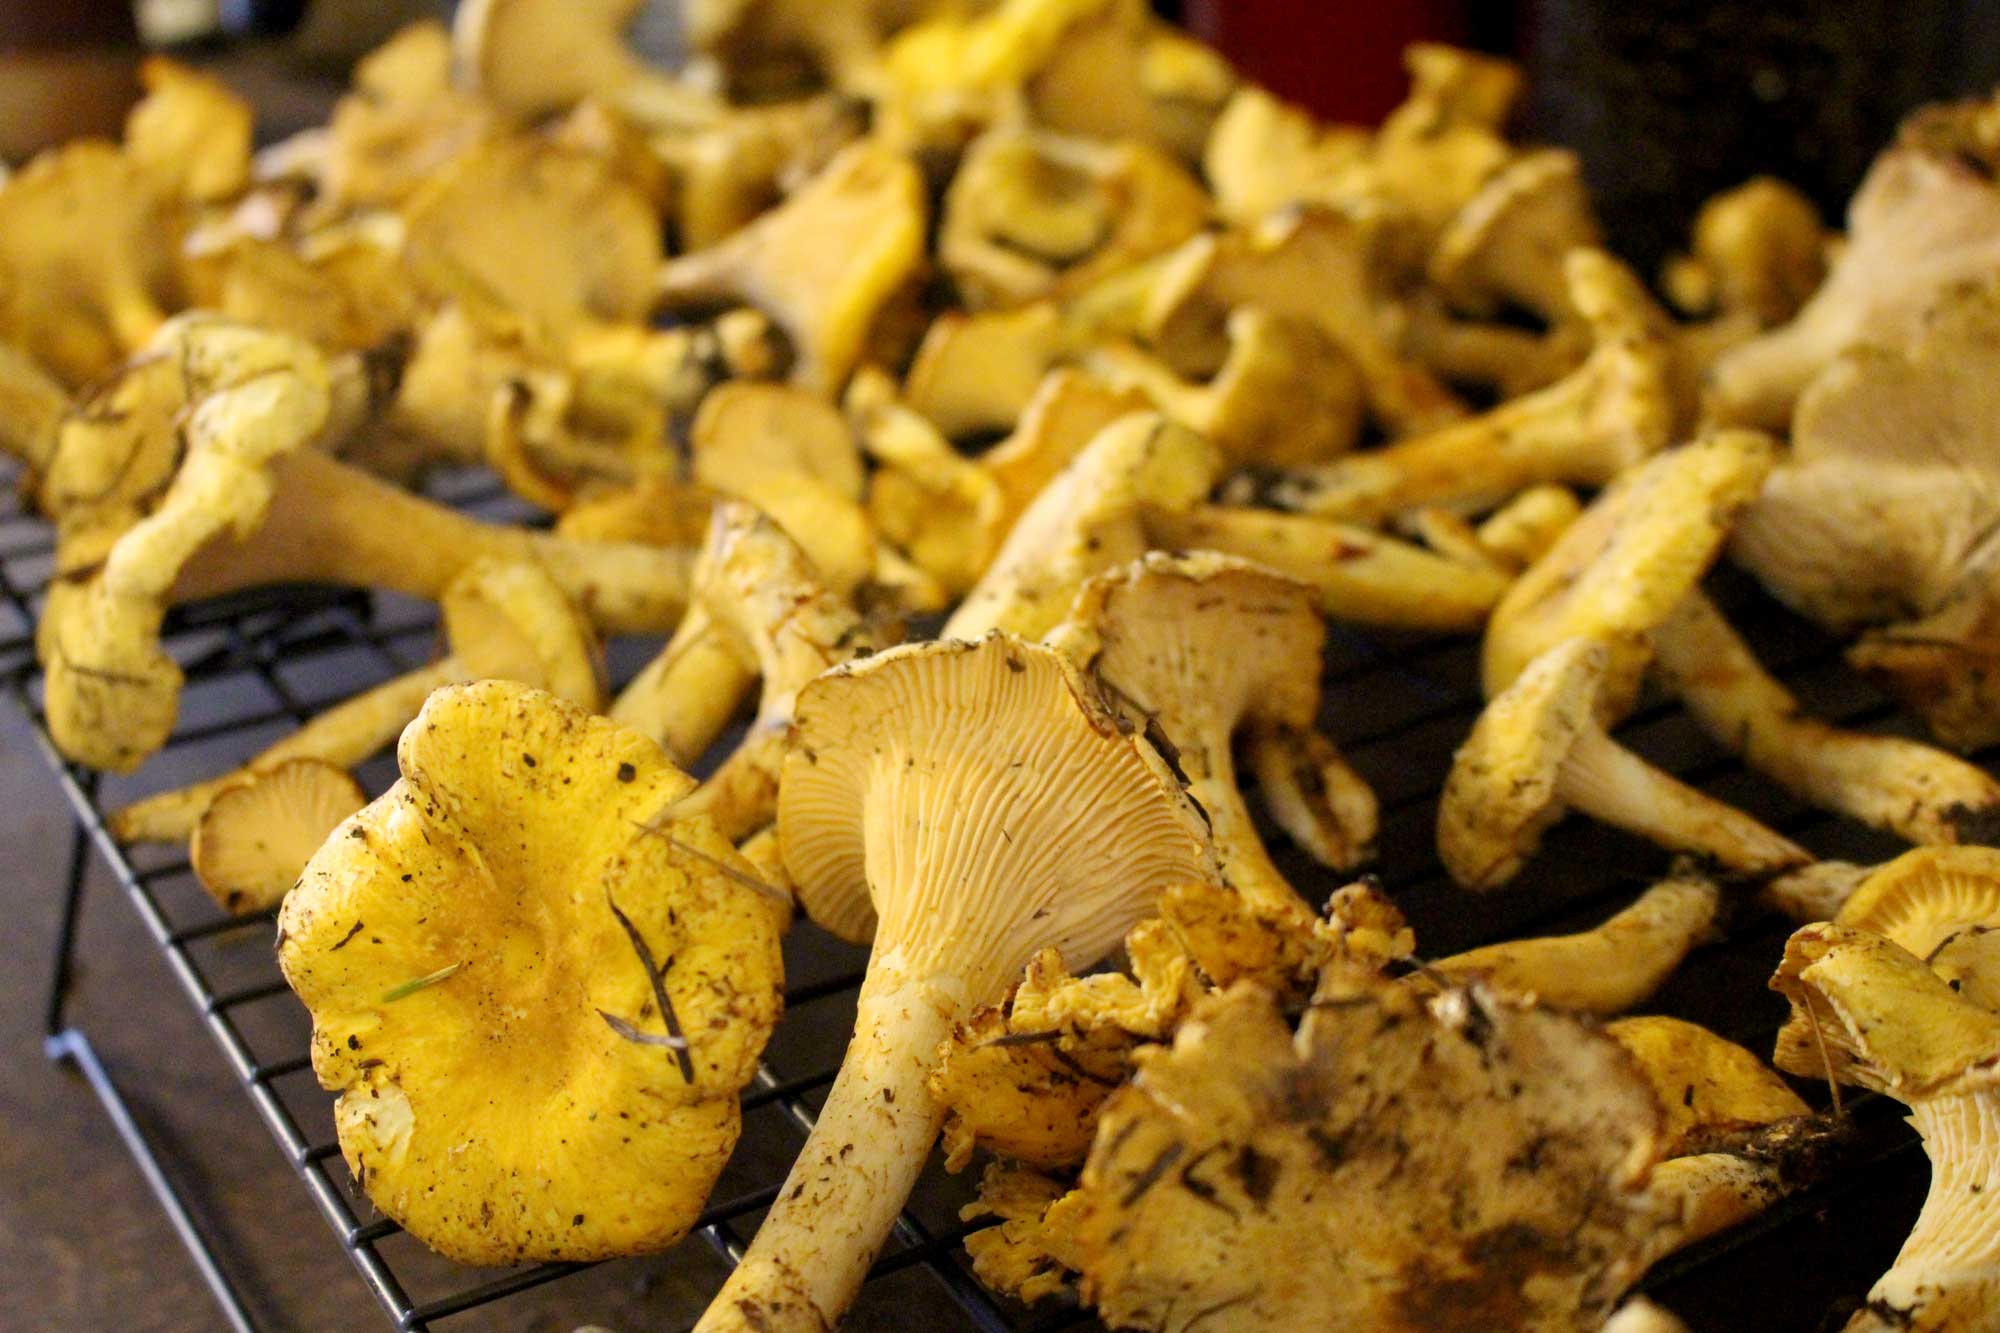
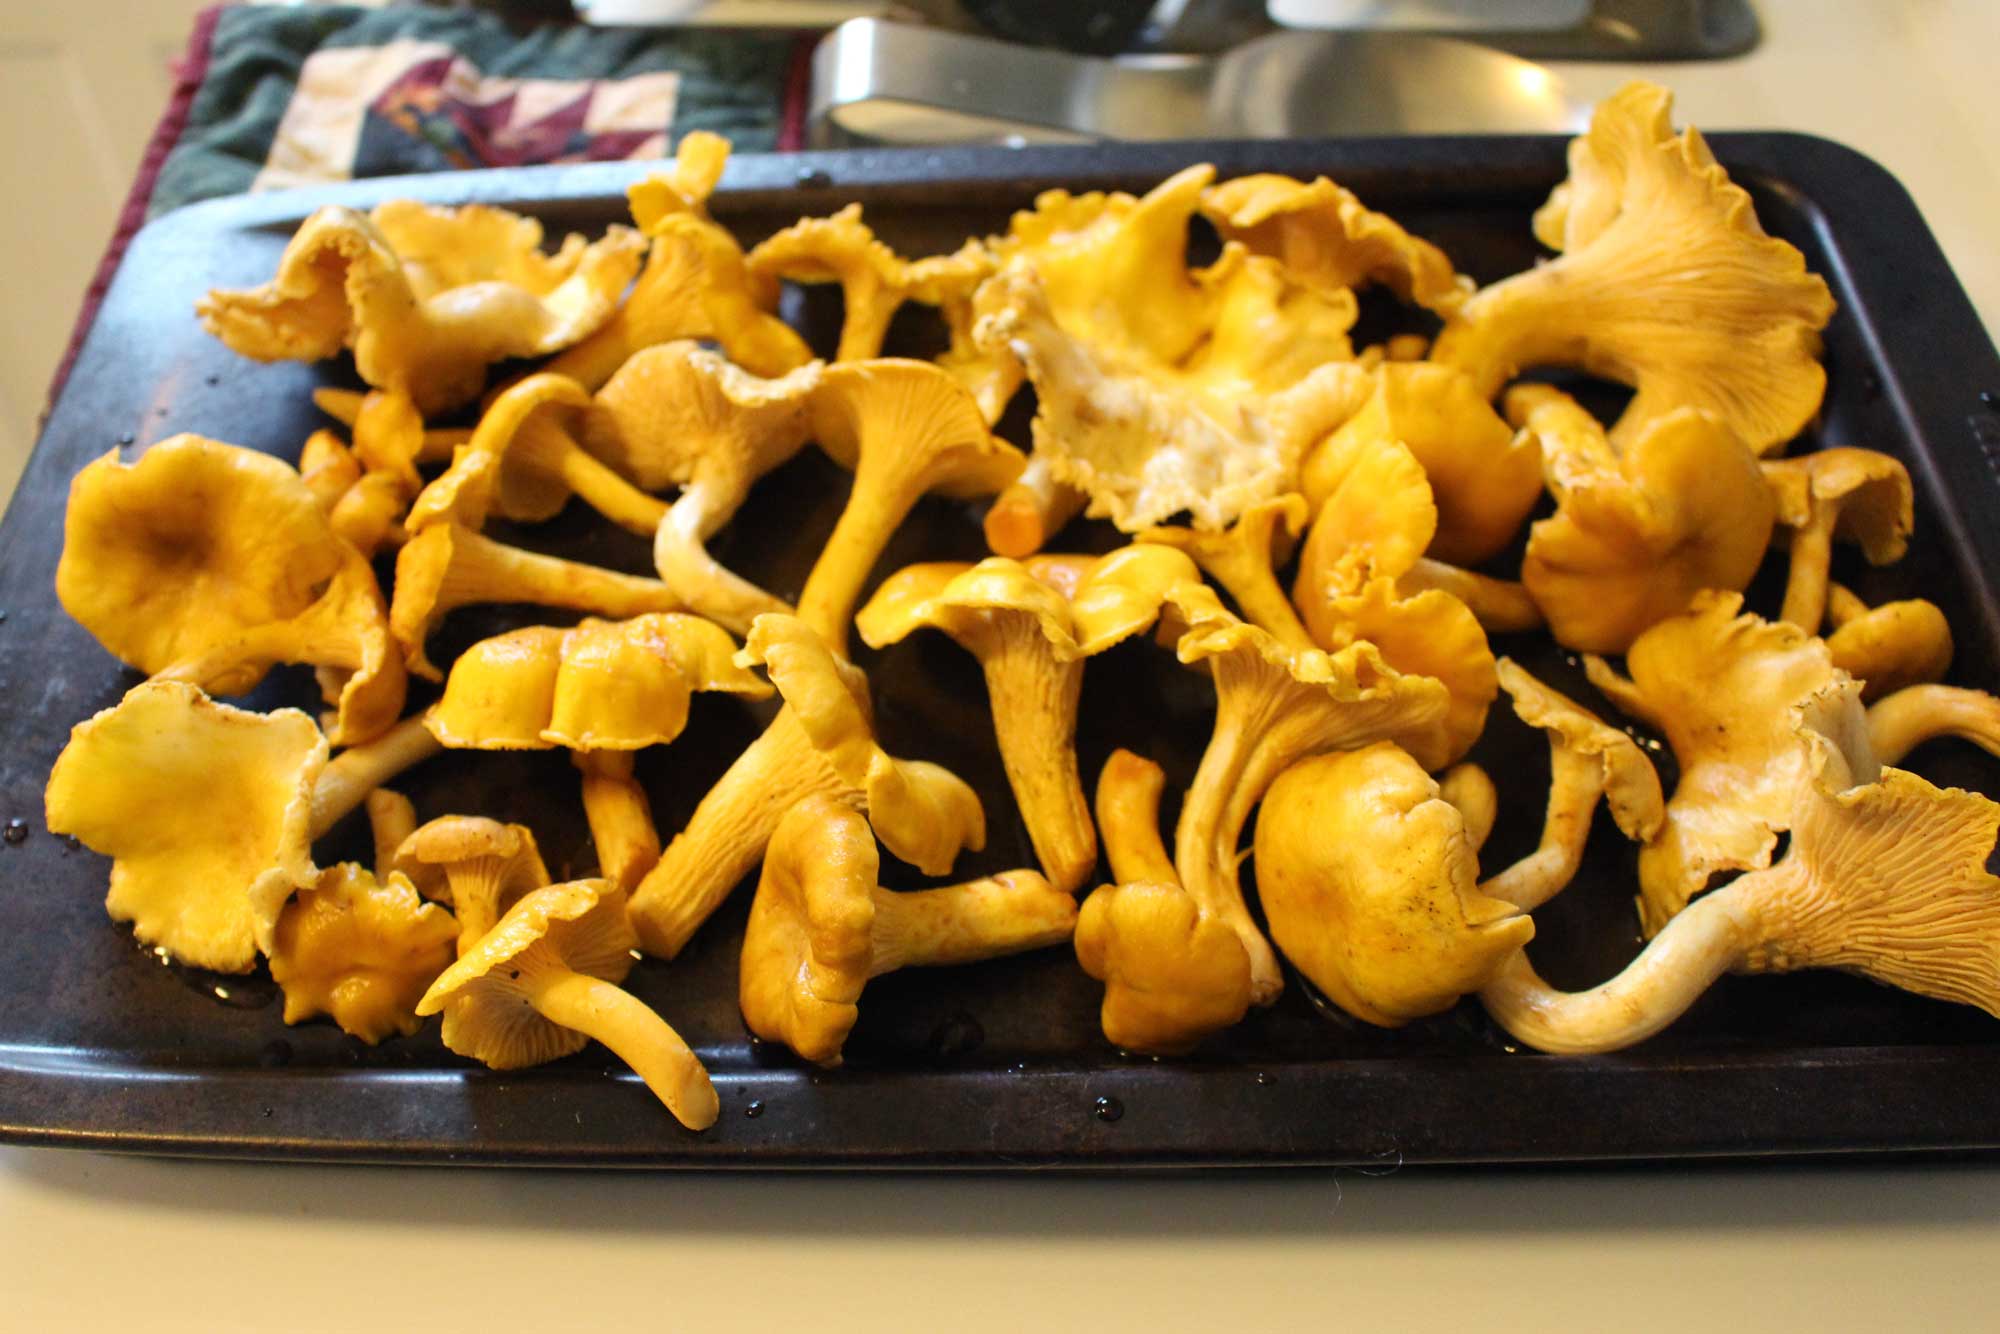
Freshly picked chanterelles ready for cleaning
The most time-consuming part of the whole process is cleaning the mushrooms, which you should not do until just before roasting. Heat the oven up to 425-450 degrees and start wiping off any forest debris.
Place the cleaned mushrooms in a single layer on cookies sheets. Then roast for 15-20 minutes. Watch them carefully, as your oven might take more or less time. Adjust the oven temp down if they get too brown too fast, or up if it seems to be taking ages.
Cleaned chanterelles arranged in a single layer on a cooking sheet – ready for roasting!
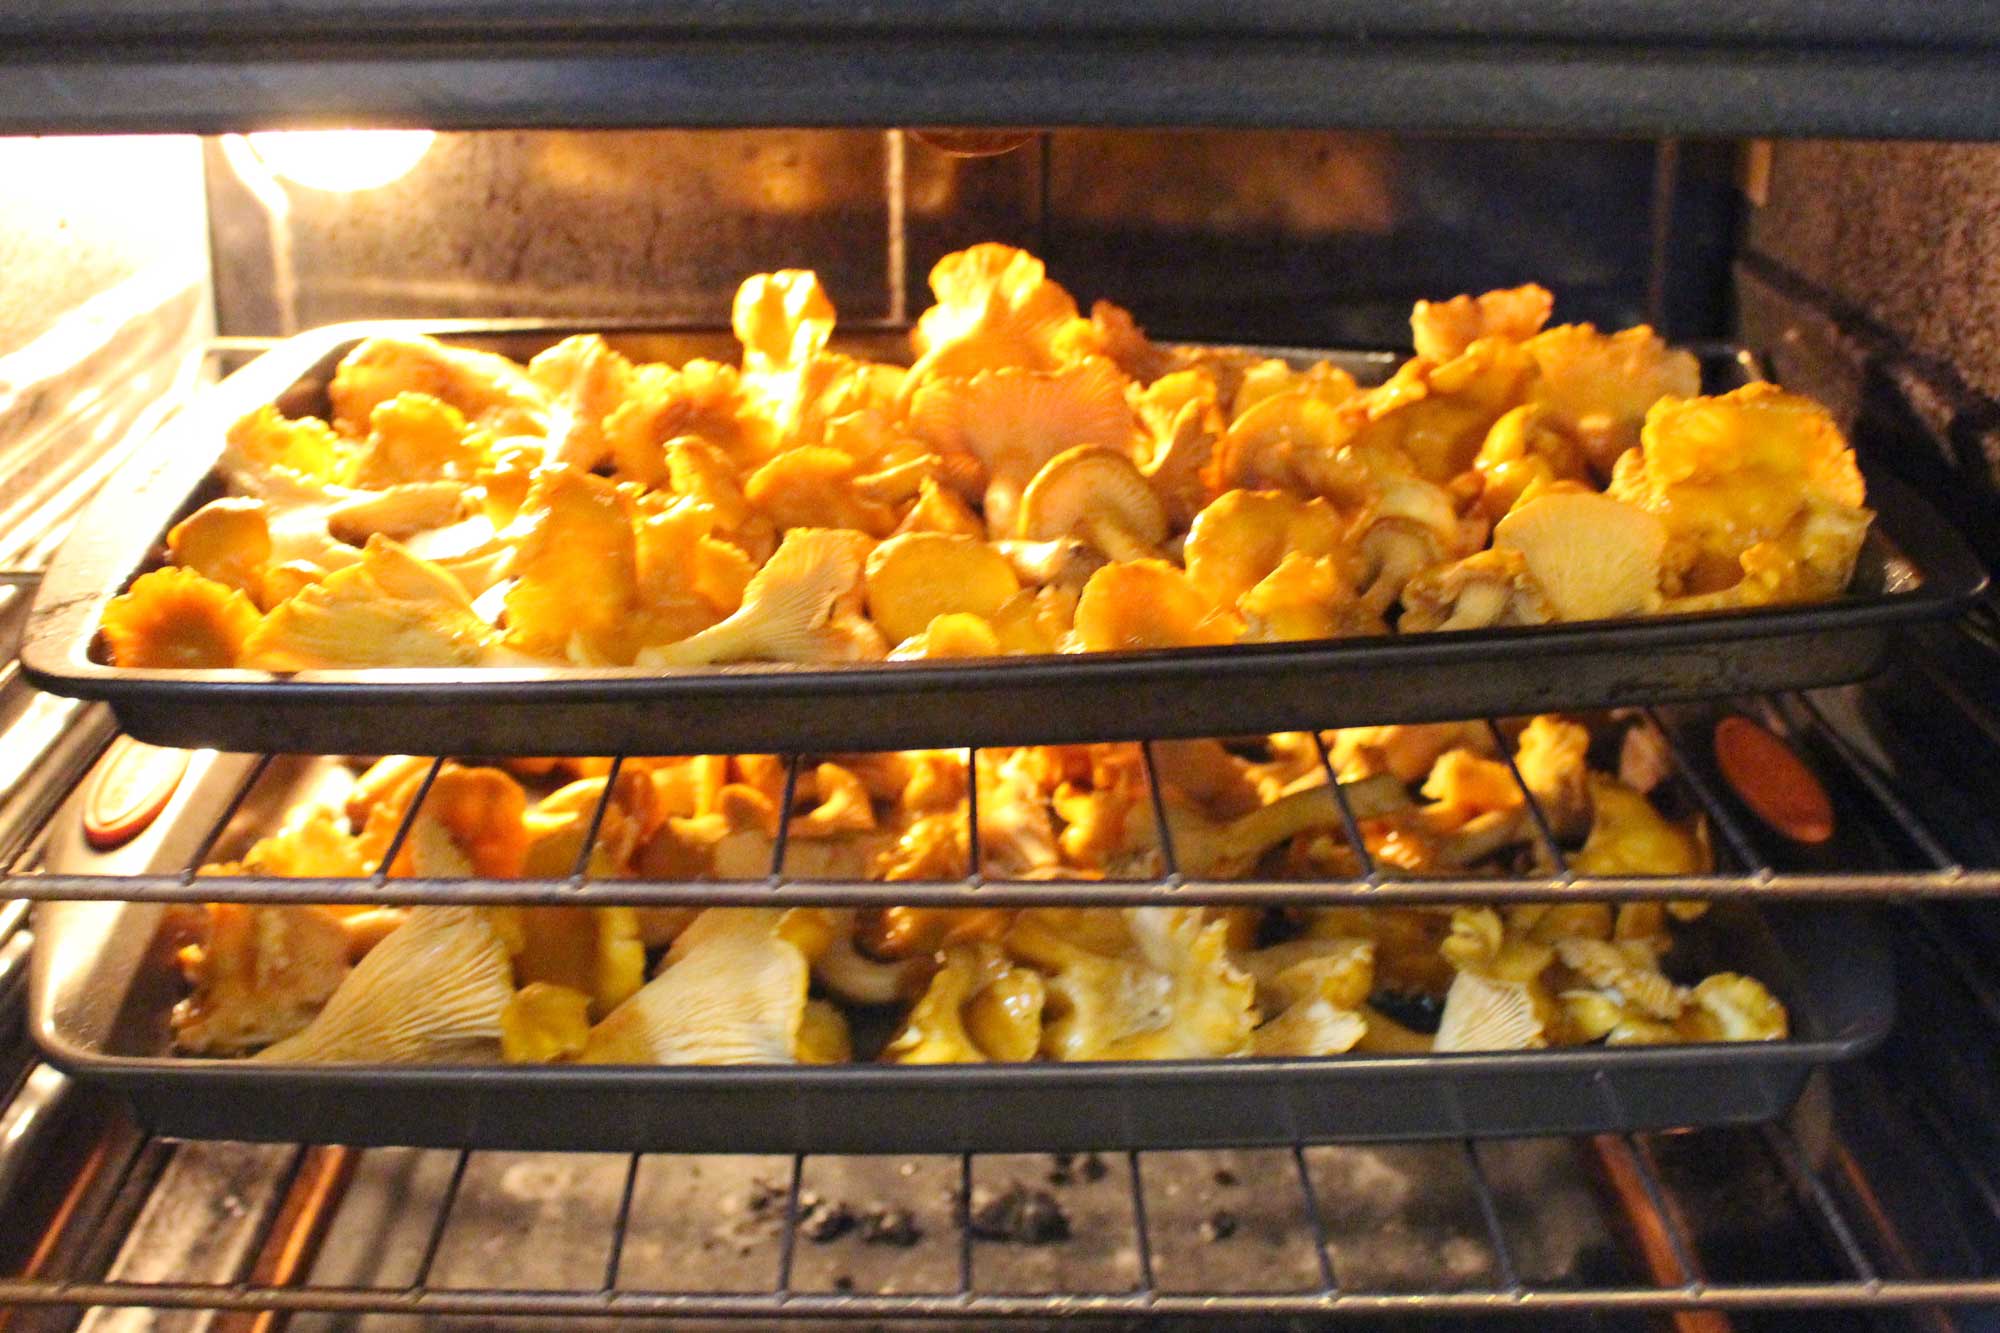
Roasting two sheets at a time
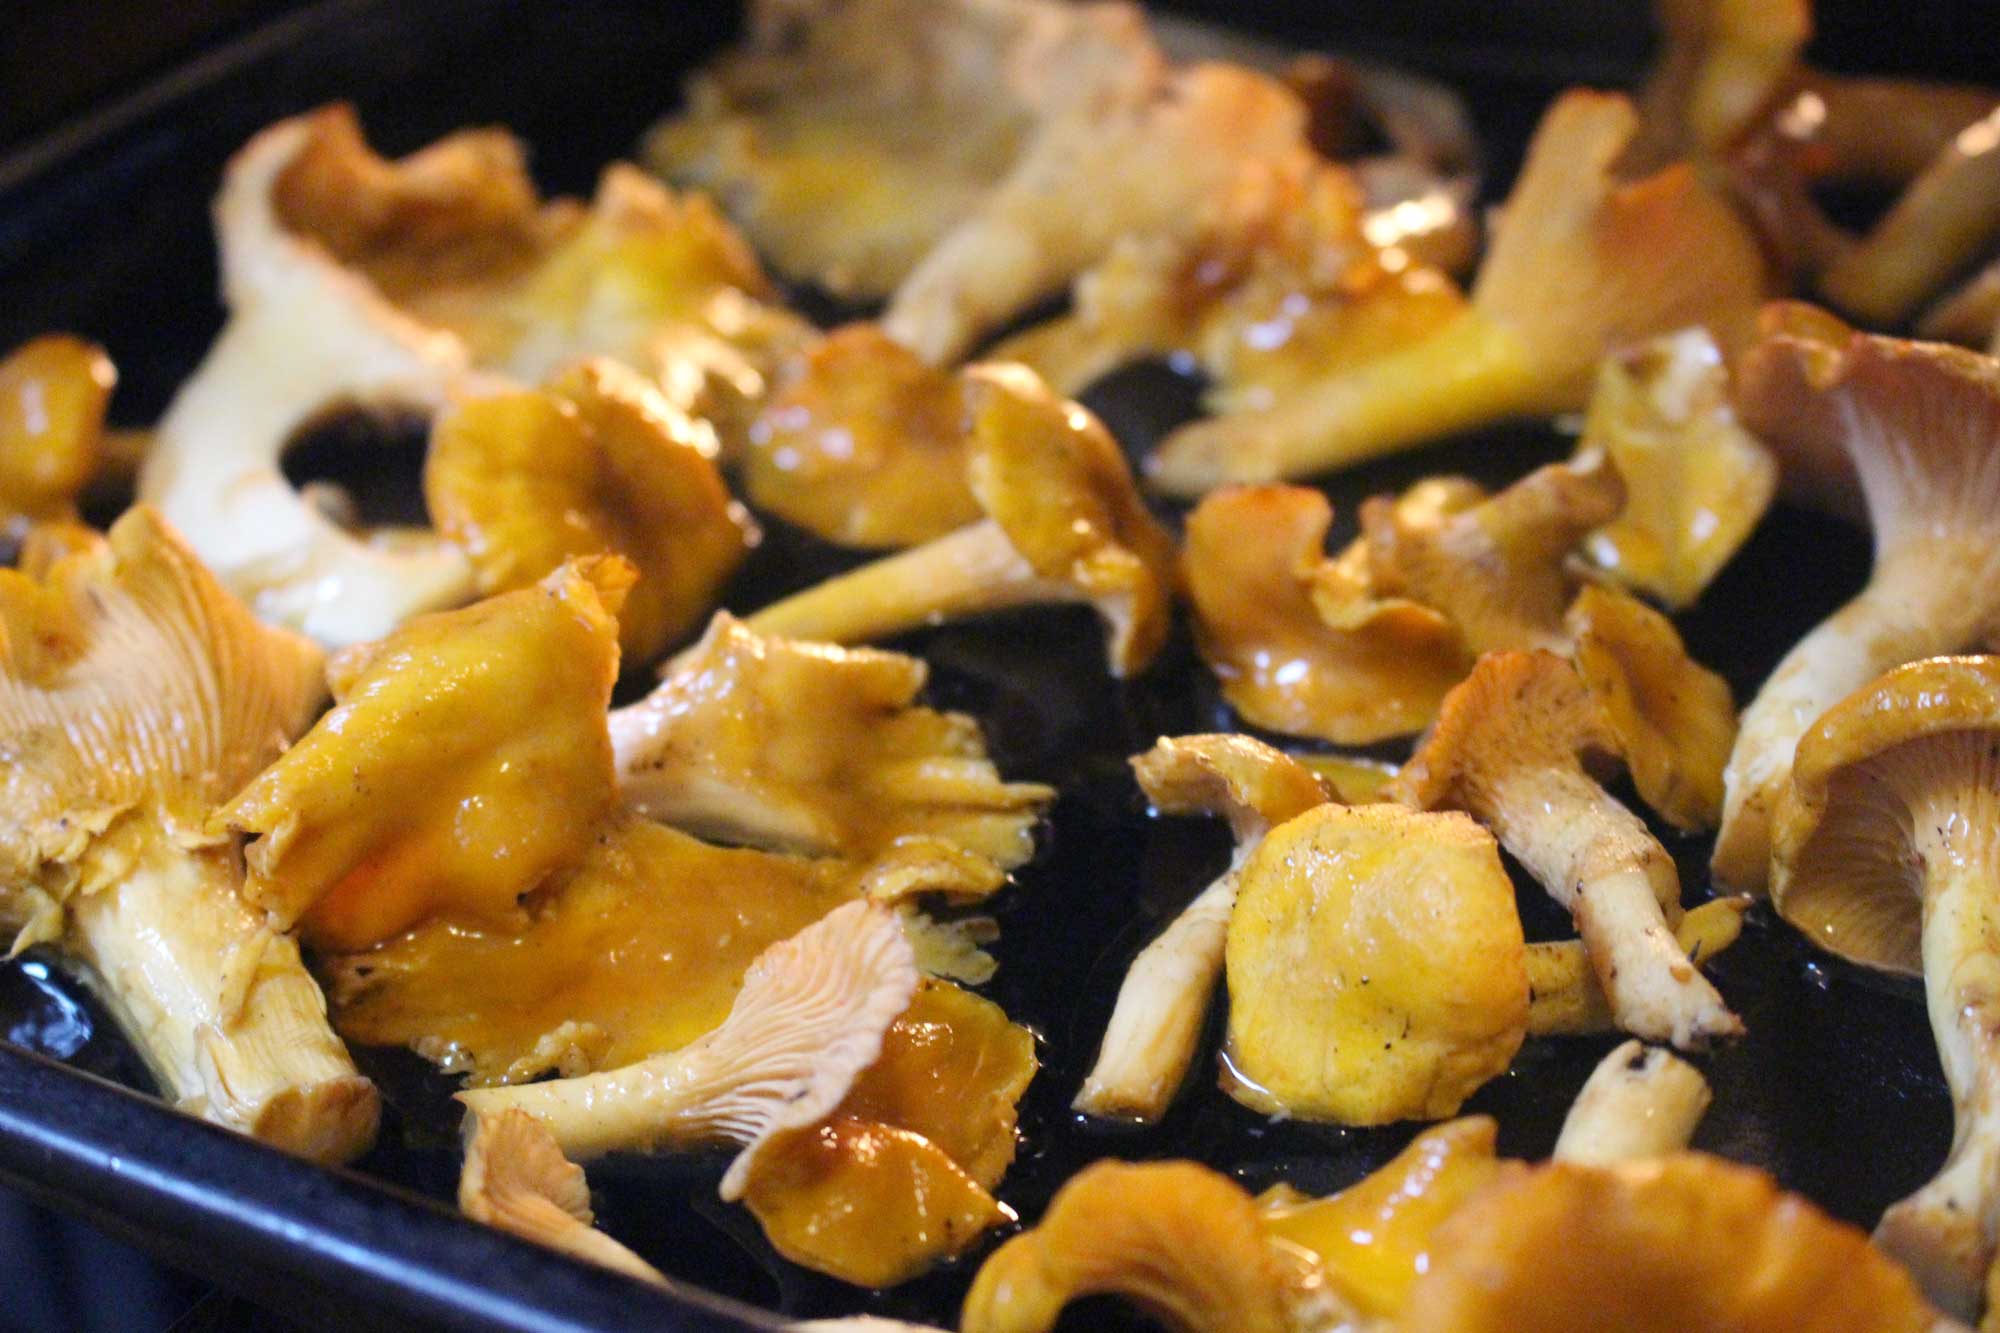
Chanterelles “sweating” out their liquid in a high temperature oven
When they have sweat out their liquid and most of that has evaporated, pull them out of the oven. Toss with a little olive oil, then pop them back in for a final 5 minutes. They are done when they are mostly dry and lightly browned.

Tossed with olive oil and roasted another five minutes. These look done because almost all liquid is gone and they are light brown

Perfectly roasted chanterelles
Cool the mushrooms fully, then freeze. Tip: Pack them into muffin tins and freeze for about an hour, or until just frozen through. Then pop them out into a freezer bag. They will be 1/2 cup increments, instead of one frozen solid block.
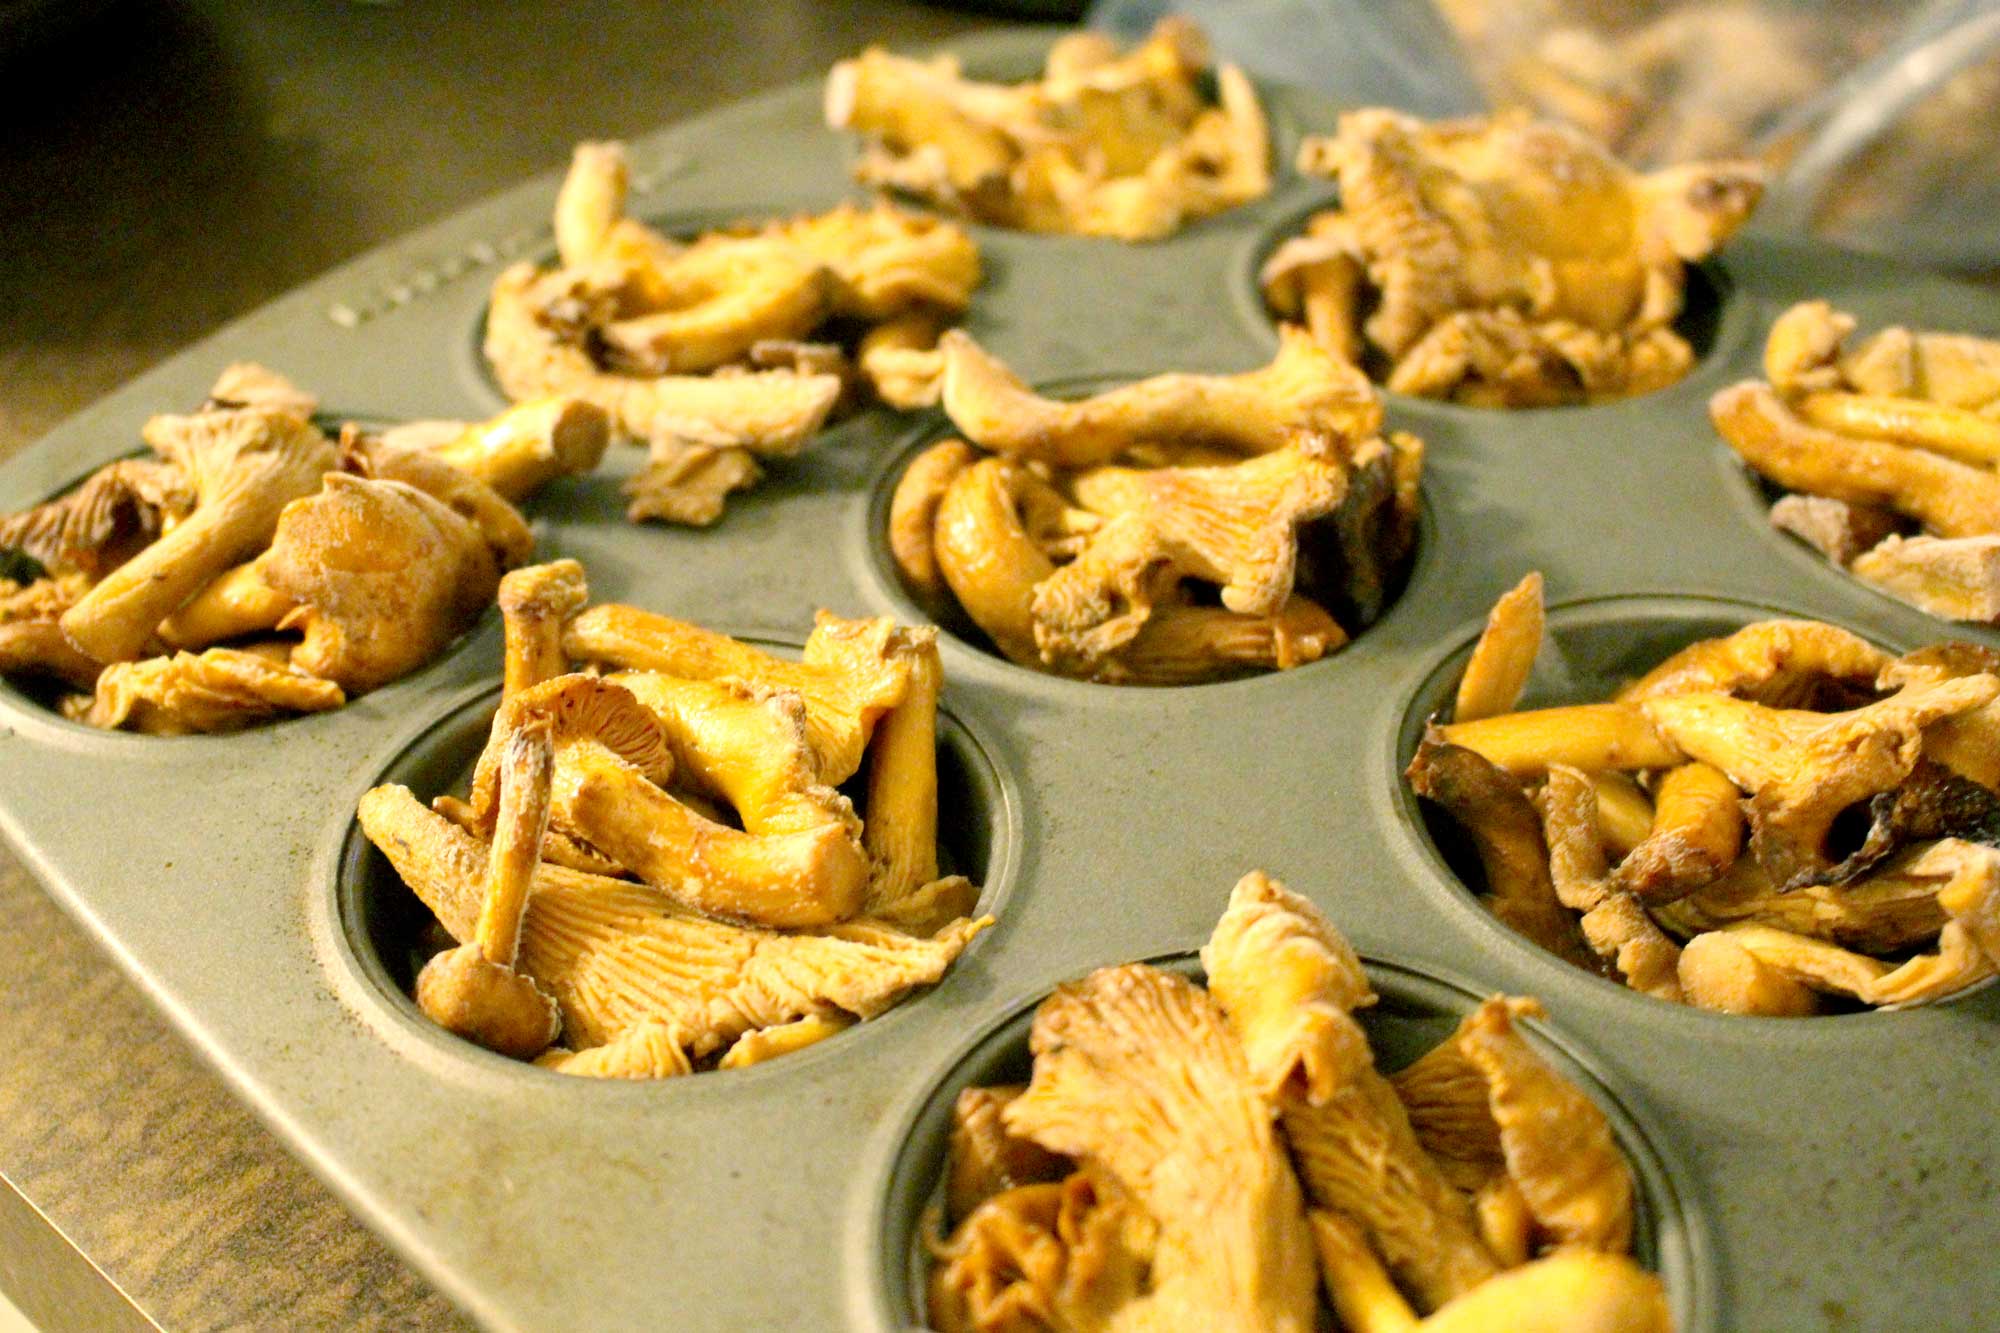
Frozen roasted chanterelle mushrooms packed into muffin tins, then popped into gallon freezer bags
I have four cookie sheets, so I kept a steady rotation going of two sheets in the oven while I cleaned mushrooms for the next two sheets. I was able to process about half of my haul that way one evening.
I ended up packing our freezer with about four gallon bags of chanterelles – the others we shared with friends or ate fresh. Mushroom season will continue through November, but I think I have enough now for many months to come. Happy hunting friends!


