
Renee Wilkinson's Blog, page 7
May 7, 2015
Cat-Proof Raised Beds
Vegetable seeds have been getting gently tucked into the garden beds for several weeks now, but neighborhood cats have been a major problem. They see this seemingly “empty” area of fine textured soil and think it would make a great litterbox. Adding composted steer or chicken manure to your beds is one thing, but cat poop should not be in your beds. Cats can transmit parasites through their feces, some of which can infect humans.
 A full garden bed is one deterrent – they can’t find a nice, open space to use. But most of our garden beds are pretty sparse this time of year with just a few seedlings getting started. And nothing makes me more miffed than seeing a perfectly planted bed tossed around, seeds and all, but an uninvited guest.
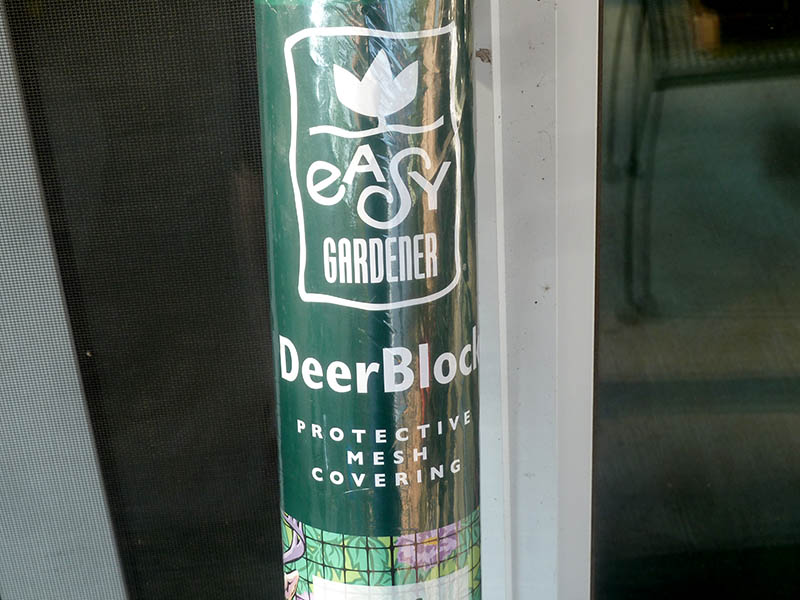
 My solution is to cover the raised beds with protecting mesh. It’s sold at home improvement stores (about $20 bucks) and often marketed as deer fencing.
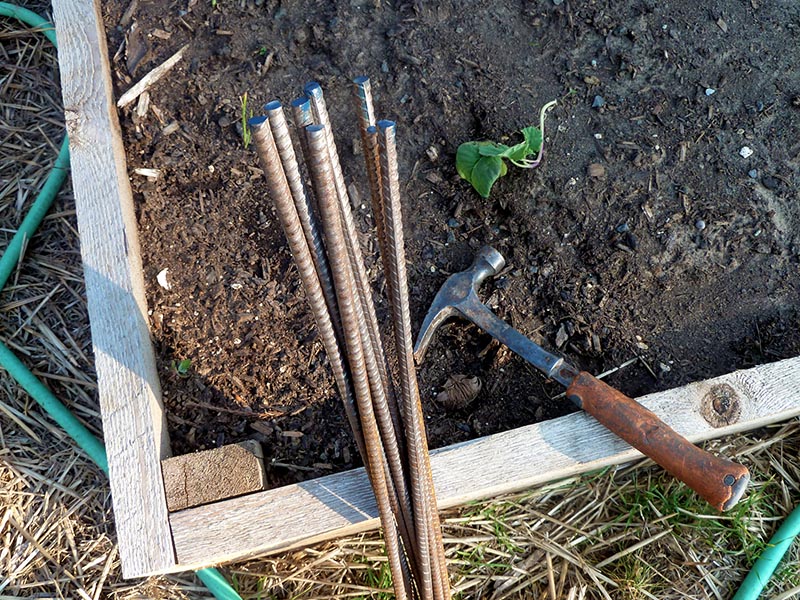
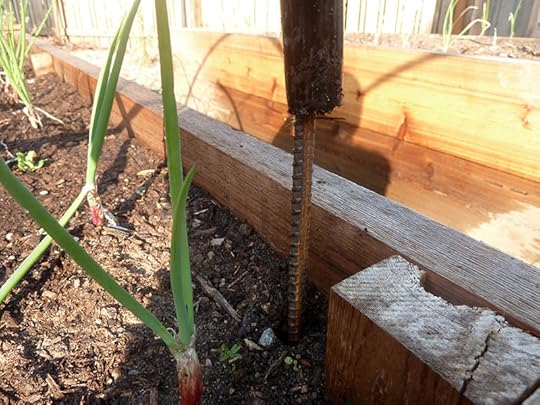
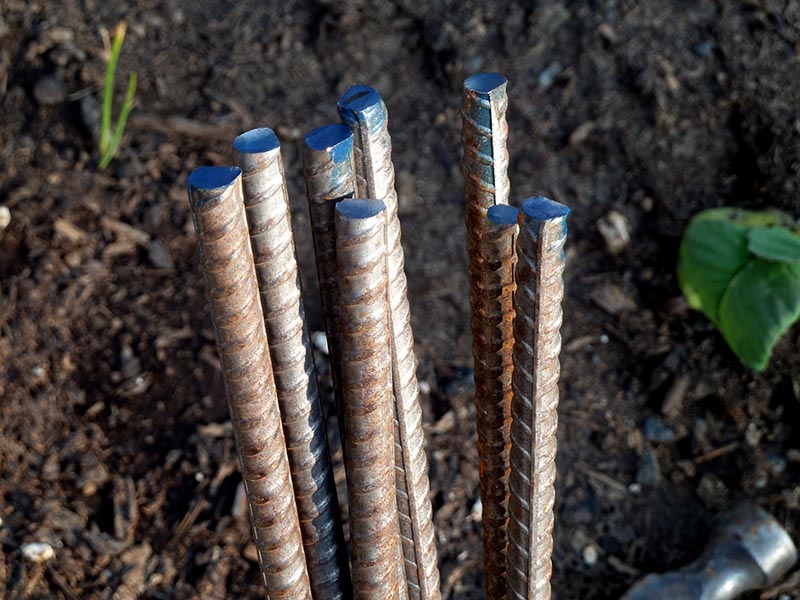 I bought some thin rebar, then hammed it every 3′ along the inside edges of my raised beds. You don’t see it when it’s placed inside the beds and I hammer it down to just above soil level. My beds are 20″ high and I used 2′ long rebar.
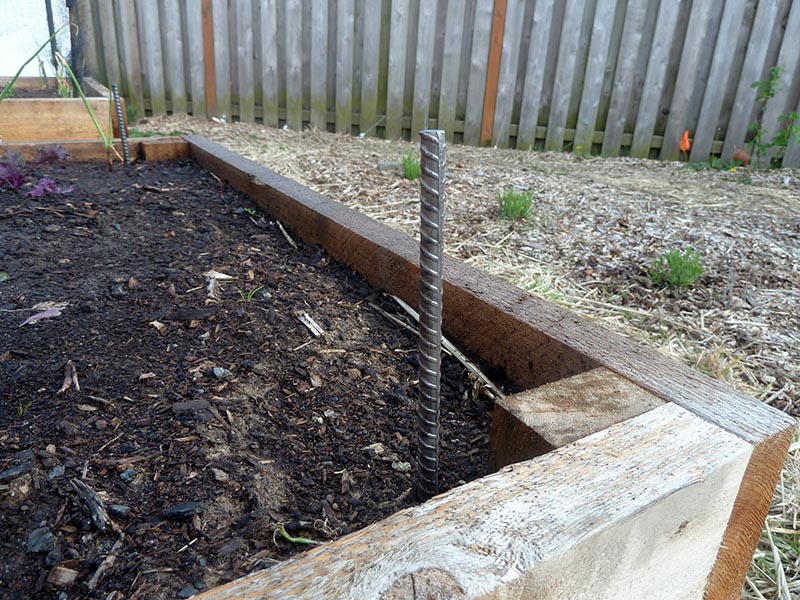 I then rigged cut lengths of thin pvc pipes across the beds, held in place over the rebar. My beds are 4′ wide, so I cut the pvc pipes to about 6-8′ in length. I suggest you measure and cut on site, to make sure your hoops will be the right height once stretched over your beds. You can hold the netting in place with twist ties (like from a bread bag).
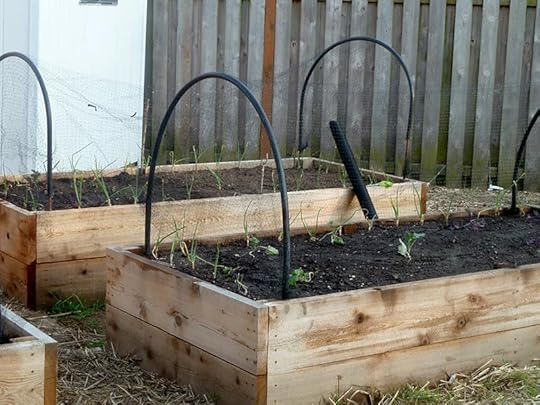
 These temporary hoops are not the most attractive sight, but I have yet to find a better, low-cost solution. Some folks build wooden frames that serve the same purpose, but those are more of an investment of time and money. And wooden frames might not be feasible over larger beds, like mine which are 4′ x 8′ each.
 The plastic mesh can be used to deter other critters as well. Throw it over blueberries to keep the birds from eating your harvest. You can cover dwarf fruit trees to save the fruit from becoming deer food.
The mesh hoops serve a dual purpose for us, as they also support our greenhouse plastic during cold months when we cover our raised beds. That extends our growing season, but also means we’re looking at the pvc pipes all year. I’m all for beauty, but when it comes to food production I prefer a fuller harvest basket over a picture-perfect garden.
 Do you have any other ideas for keeping critters outside your beds? I would love to hear about it in the comments below!


April 29, 2015
Bean Play Teepee
Long before I had a kid, I always had bean teepees in our garden. I didn’t have a lot of existing vertical space in full sun for growing beans, so I would collect long branches and pop one of these up every spring. They add a really fun, vertical element to the summer garden when they are covered with scarlet runner beans.
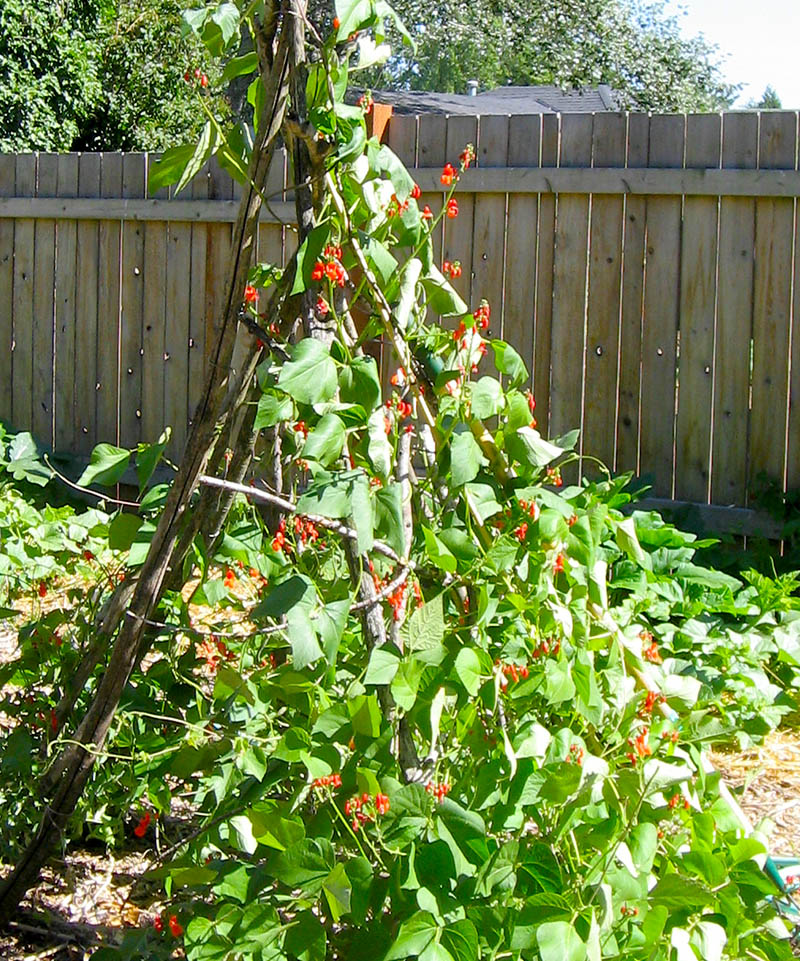
Bean teepee from our old homestead covered with scarlet runner beans
This year I dreamed of an even bigger teepee – one that could function as pole bean growing space and also a play area for Juniper. A teepee can be super fancy or super rustic – it’s all up to you. The basic supplies are simple: something to act as poles and something to tie them securely together at the top. Dropping a big chunk of change on a beautiful, whimsical garden art element can be totally worth it in the right garden. My garden, however, is not that garden so I went the rustic/simple route.
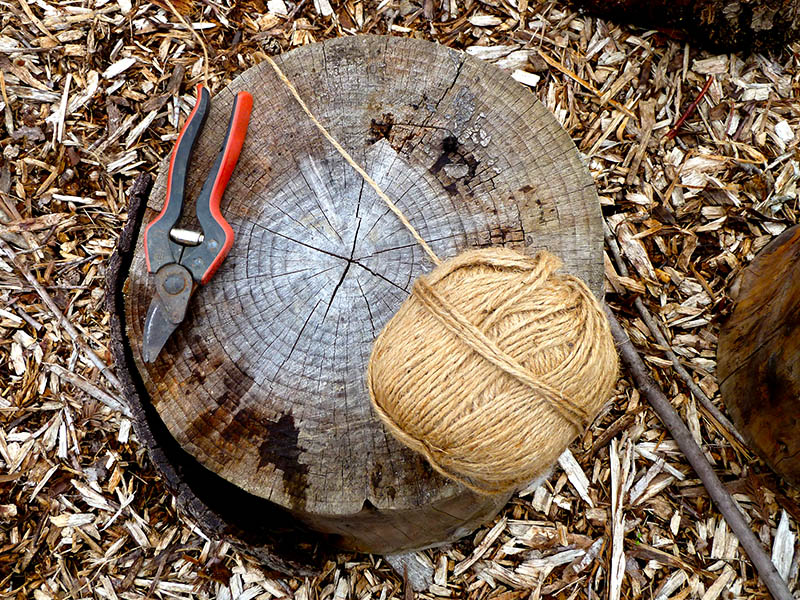
Simple supplies for constructing a teepee: poles, twine and wire, if needed
The poles can be nice bamboo poles, your old holiday tree trunk, long branches from your pruned fruit trees, or even willow shoots which will regrow into a “living” teepee once planted in soil. I dug around the tool shed and found a heap of green garden poles I inherited from my grandparents house when they downsized. It’s not as pretty, but Juniper doesn’t care and I doubt the beans will either. To tie them off, you shouldn’t need more than twine or wire.
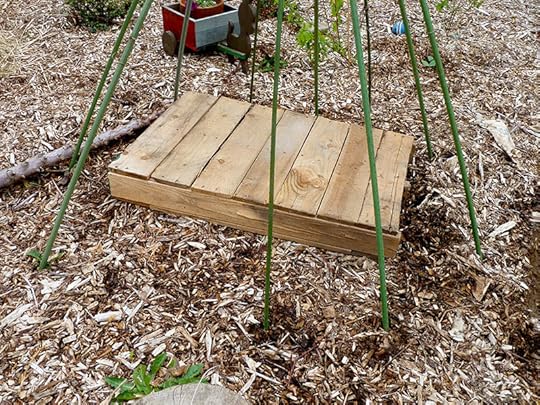
Small pallet to serve as the base for Juniper’s new hideout
I left an open area of wood chips in the middle of the garden for an ever-changing nature play area. Along the back edge, I placed a small pallet we found a few weeks ago to serve as the stage/base/seating area for the teepee. We’ll likely cover it with an old quilt so prevent slivers this summer. Juniper helped me push each pole down into the ground until it felt secure when we tried to wobble it back and forth. We used about ten 6′ tall poles to form a 4′ circle.

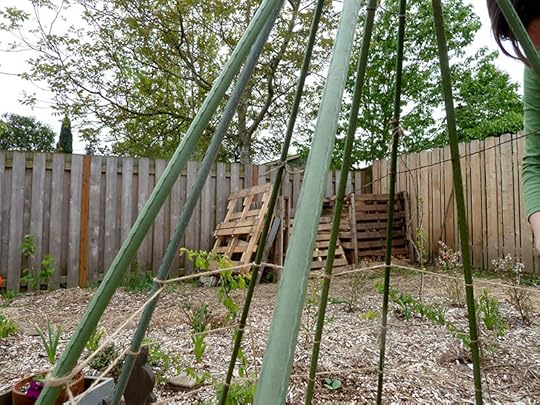
Very poorly tied off teepee using a mix of wire and twine to securely hold together
Let me be the first to say that there is a better way to tie the top of a teepee together. I wanted the dome to be as wide as possible, so I tied everything together too close to the top of each pole. To do this correctly, you should tie them together further down on the poles so there is enough room for them to overlap. That will create a narrow space where they intersect to tie off. To secure it, I used a messy combination of twine and wire. It’s not pretty, but it did the trick.
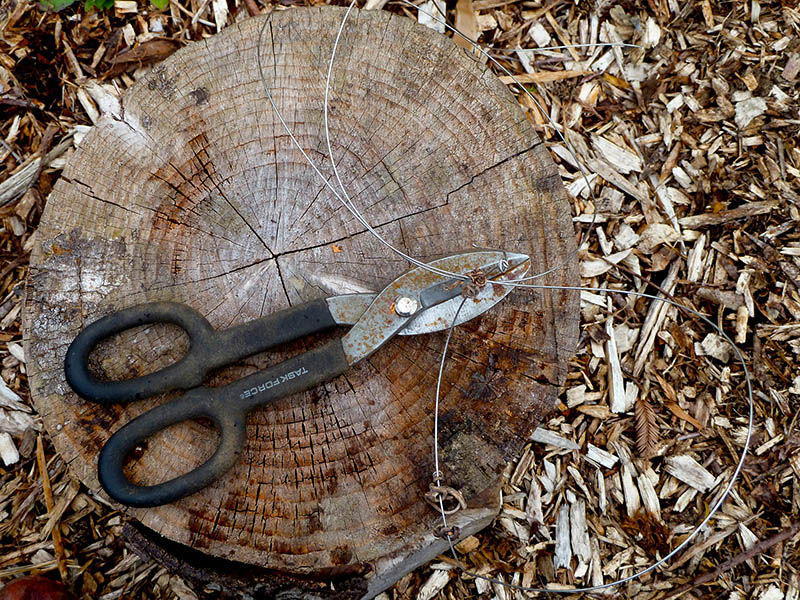
Optional supplies: wire and wire cutters
Next, Juniper and I carefully tied twine around each pole, spacing the rows of twine about 4″ apart. This will serve as the support for our pole beans – something easy for them to grab onto as they grow up the sides. Twine will relax and sag over time, so we kept it as taut as we could. I’m hoping to leave it in place until the weather destroys it a few summers from now.
Tie twine around the teepee poles every 4-6″ to help beans climb (Juniper took this picture!)
We quickly planted bean seeds in the ground, about 4-6″ apart from each other, at the base of the teepee. It’s a bit early for direct sowing beans, but Portland is having an unseasonably warm spring. They are a mix of scarlet runner beans and a green pole bean. I also planted french sorrel on either side of the teepee entrance, which is a spinach-like green with a lemony-tart flavor that Juniper loves.
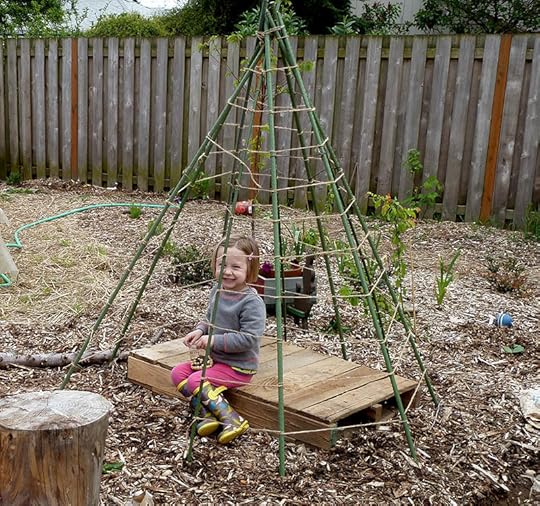
Juniper enjoying her new digs – the perfect place to sort her garden treasures.
Juniper is already loving her new play space! It’s become her little space to organize her rock collection, draw chalk on the pallet and examine her garden treasures. It makes me smile every morning when we sit down for breakfast and I see it from our kitchen window. I’m excited to show you how it grows in over the next few months!
Are you interested in making a teepee for your backyard? There are tons of great ideas online for teepees covered with sheets, teepees made from pallets and a few others I have collected on my Pinterest board. The one I made is rustic, inexpensive and super quick. It took us about 30-45 minutes from start to finish. I would love to hear about your project if you build one in your garden!
April 17, 2015
Mid-Spring Garden
The early spring blossoms have faded, but the garden is still growing by leaps and bounds. Here is a little snapshot of what’s catching my eye on the homestead in mid-Spring.
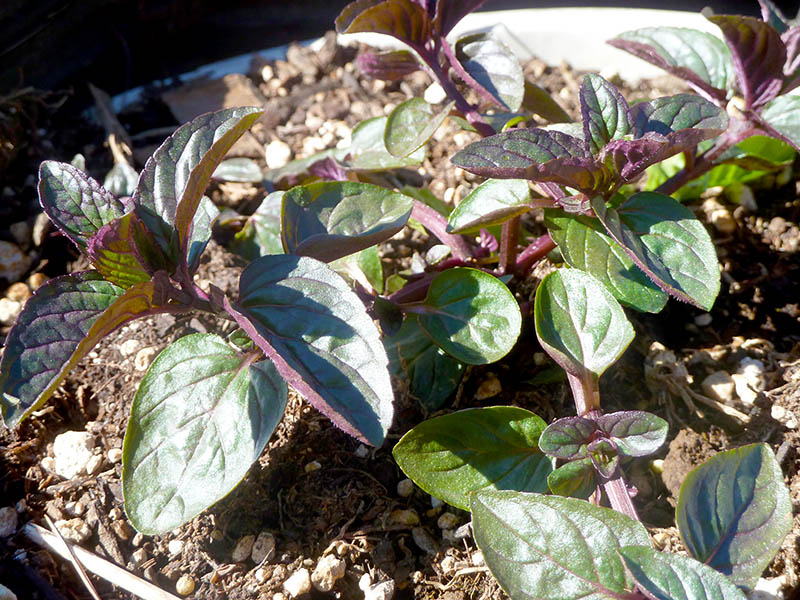
Chocolate mint planted in a pot
Several new perennial herbs have been planted – either in ground or in pots. Springtime is a great time of year to plant them, as the temperatures are still cool and we get good seasonal rain to help them become established. Herbs like rosemary, thyme, oregano and marjoram will stay evergreen in our climate and tolerate some drought once established. I planted a mix of mint in pots, as these guys tend to be invasive, taking over any area you plant them in the ground. The mix includes a common mint, chocolate mint and orange mint varieties. I’m excited for some refreshing coolers this summer!
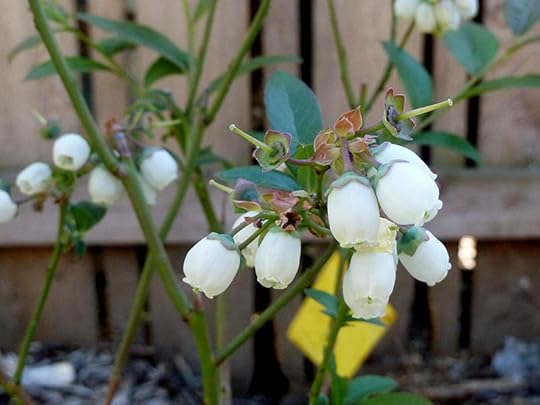
Blue Crop blueberry flowers
The highbush Blue Crop blueberries, which get about 5′ tall when mature, are covered in fat, white blooms. Meanwhile, our evergreen low-bush Sunshine Blueberries, which only get about 3′ tall, are at the end of their blooming cycle. You can already see tiny berries beginning to develop in their place.
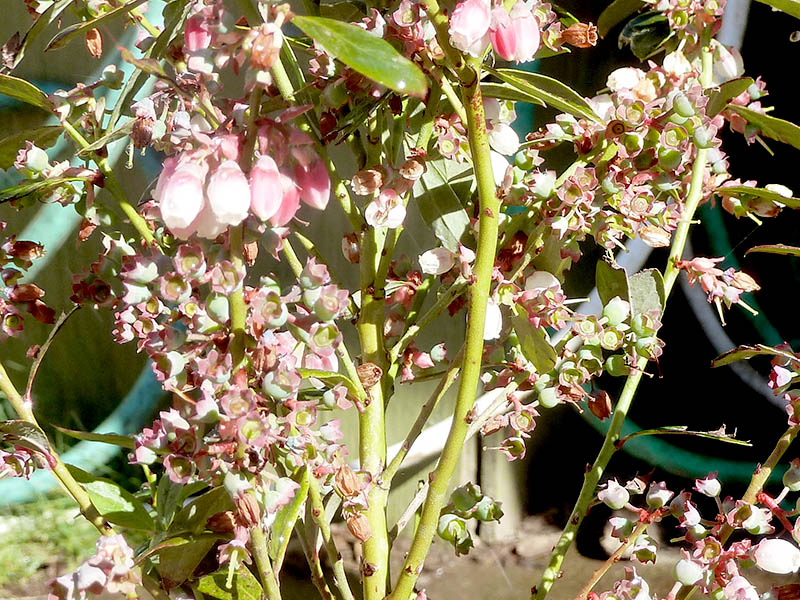
Sunshine Blue blueberry flowers fading into early fruit
The strawberries came up about a month ago, but are just blooming now. Juniper is keeping a close eye on this edible groundcover. She’s already dreaming of strawberry shortcake and has her basket all picked out for when we start visiting u-pick farms. Beware that strawberries tend to take over where ever they are planted as well. We are okay with them becoming a dense groundcover, but many people prefer to contain them in pots instead.
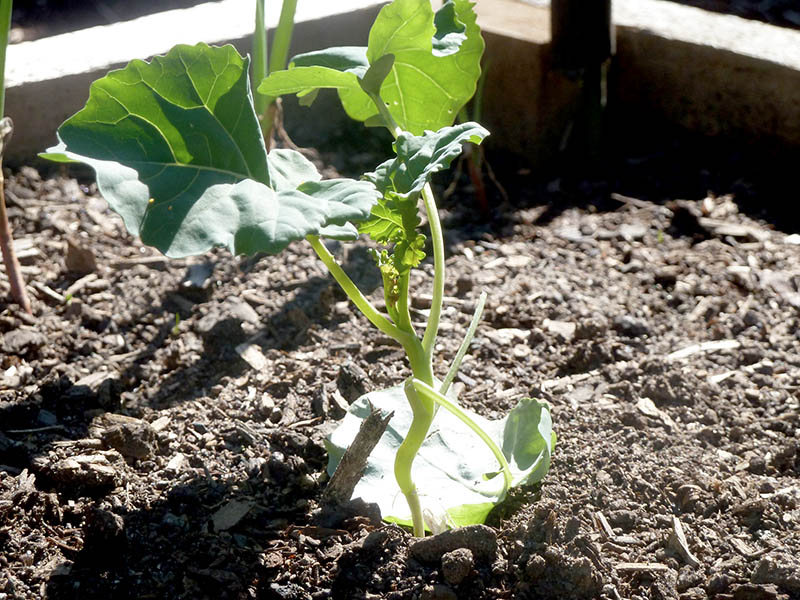
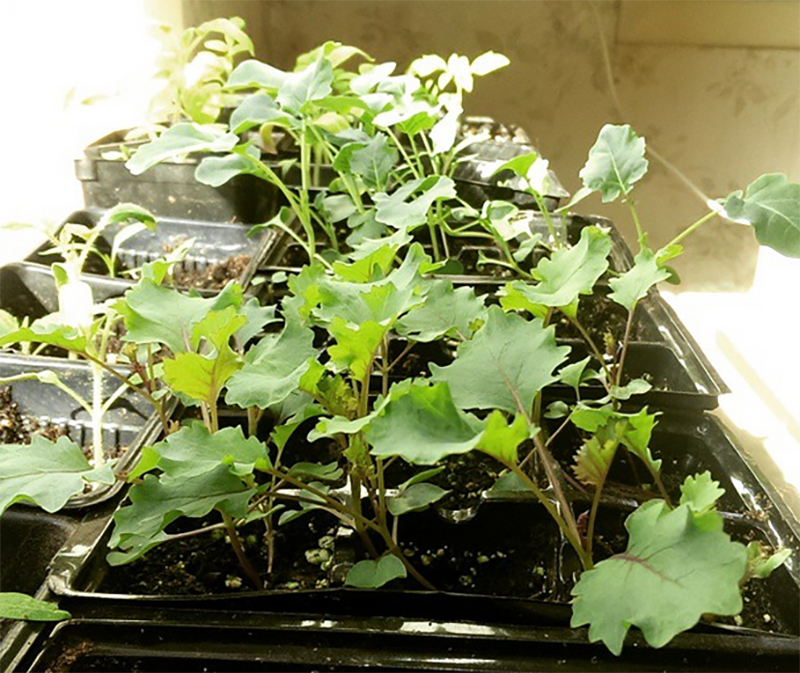
Young broccoli start transplanted outside
Our raised garden beds are already getting fuller and fuller each week. I transplanted the broccoli and kale I started from seed. I direct sowed lettuces, arugula, peas, beets and carrots. They are just starting to pop up from the soil.
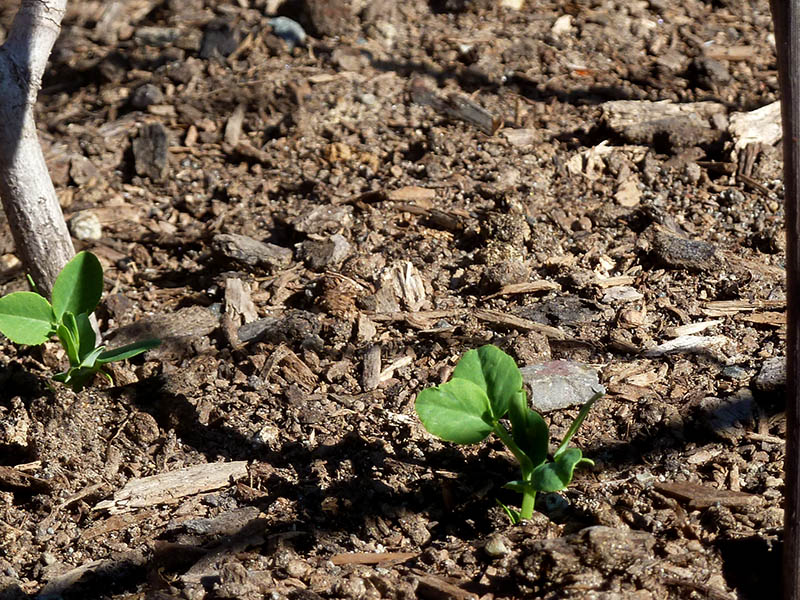
Pea greens emerging
The onion and shallot sets I planted last month are growing like mad! The potatoes are about 3-4″ above ground in their trench. I will wait until they are a little taller before filling the trenches with more soil. In general, I let about 4″ of green stay above ground. This double-dig method should yield a bigger harvest, as burying more of the greens will encourage the plants to produce more tubers (i.e. potatoes).
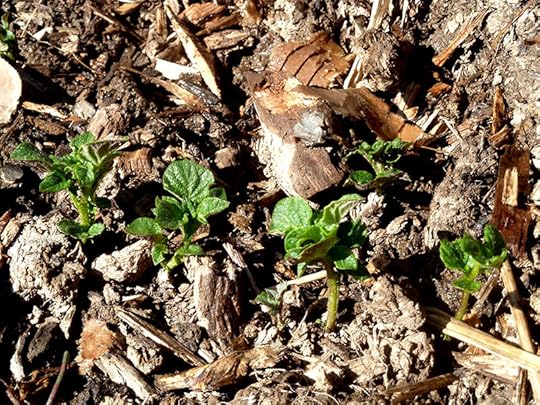
Potato greens emerging
I had just enough daylight left last night to pot up our tomatoes that I started from seed indoor. The Brandywine tomatoes in particular are very vigorous. I’m not quite sure how I’ll be able to keep all these guys clustered under the grow light until late May. Since space is such a premium inside, I may decide to transplant them out to the beds early and cover with greenhouse plastic. That should keep them warm enough to keep growing outside.
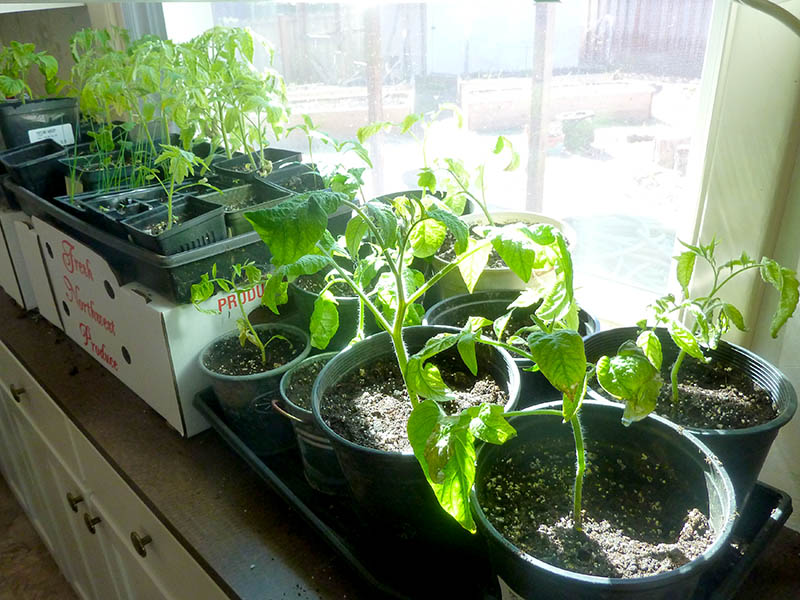
Tomatoes getting bigger… and bigger… and bigger…
Spring is always a beautifully hectic and energy-filled time of year. I would love to hear how your spring garden is growing too. Tell me about it in the comments below!
April 8, 2015
Spring Adventures
It has been a busy, busy spring on our homestead! Here is a little snapshot of what our life has looked like over the last few weeks.
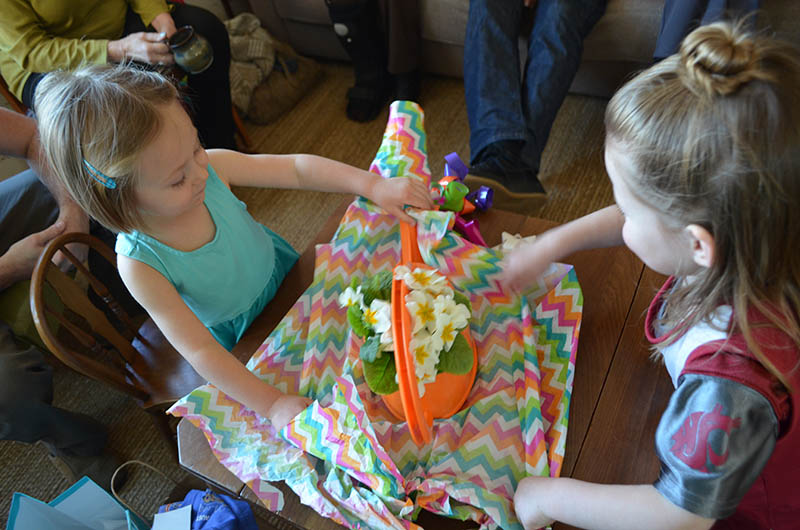
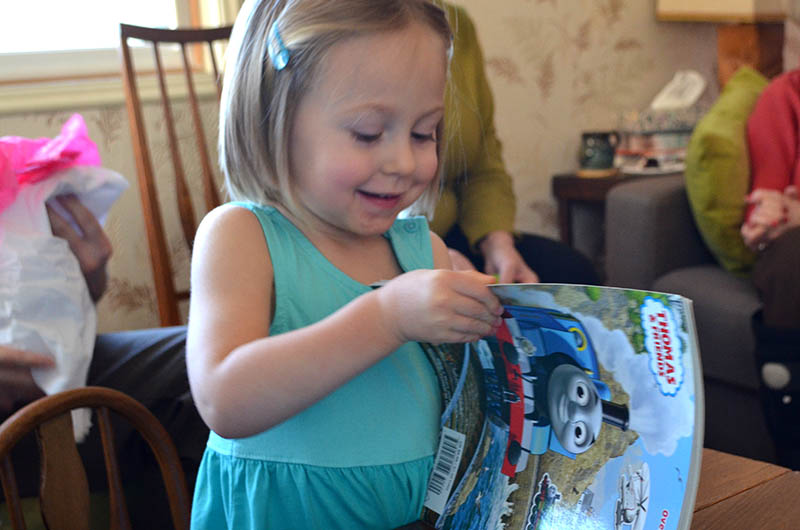
 Juniper turned three! How did that happen? Thanks to some sweet well-wishers, she now has a new wheelbarrow, watering can and bean seeds – all awesome ways to encourage little hands to help on the homestead. Our house is small, so it’s especially helpful when toys are useful as well as fun!
 Spring is the start of camping season in our family – rain or shine. We got away to Silver Falls State Park recently and rented a rustic cabin for the weekend. It’s a great, easy way to camp with kids. You bring everything but the tent. Oregon State Park yurts and cabins have bunk beds, heat (!) and usually a fire pit right outside. The bathroom facilities are shared nearby.
 Silver Falls has a great nature playground near their group camping site that I wrote about last fall, but this time we focused on trail hikes. After about seven miles we saw eight of the beautiful waterfalls. It’s a great place for a day trip or an overnight camping adventure. I think the full loop is about ten miles and you can see ten gorgeous waterfalls. A little paradise in this temperate rain forest.
 Juniper fell asleep for the last mile and half, so Jay valiantly carried her back along the Rim Trail. We were treated with some gorgeous old growth forest – so magical!
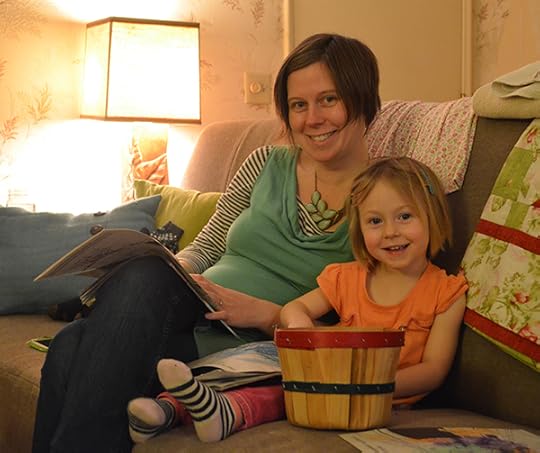
 My design work is busy, busy, busy! I’m trying to balance it with quiet down time – like snuggling with my little one on those especially rainy mornings. Modern homesteading is a challenge – balancing modern life demands with raising animals and food crops. Add modern parenting into the mix and it quickly becomes a wild adventure. It’s these tender moments that you’ll miss though if you don’t just put away the phone, close the computer and be present.

The baby belly is growing and Juniper is more than excited about becoming a big sister. Right when we think we’ve got it under control, life changes yet again. This spring, we’re rolling with the chaos and trying to savor the moment. Soon enough the garden will explode, we’ll be u-picking our way through farms and the harvest basket will be packed full.
 I would love to hear about your springtime adventures, the crops you are sowing and your dreams of summer harvesting. Feel free to share your adventures in the comments below!
March 27, 2015
Early Spring Outside Planting
I love early spring planting! You can’t plant just anything – the warm season crops still need to wait for the last frost to be well past. But in many climates you are safe to plant cool-weather crops like onion sets, potatoes, shallots, peas and others.
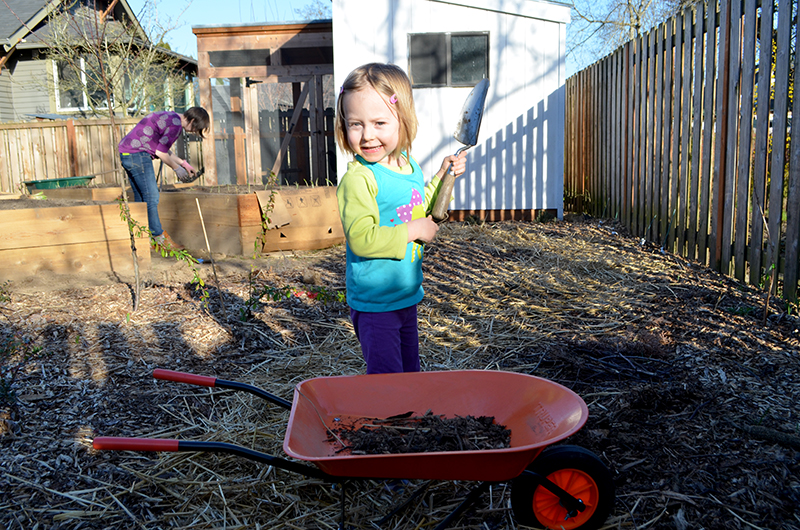
My garden helper – when she grows it, she’s more likely to eat it!
“Plant your peas on President’s Day” and “Plant your potatoes on St Patrick’s Day” are a couple old garden sayings that hold fairly true in my climate. I planted about three times as many peas as I typically do because they are a great crop for kids. Juniper will likely gobble them up before any make it inside the harvest basket. They will help add nitrogen to the soil where my tomatoes will be planted in a few months.
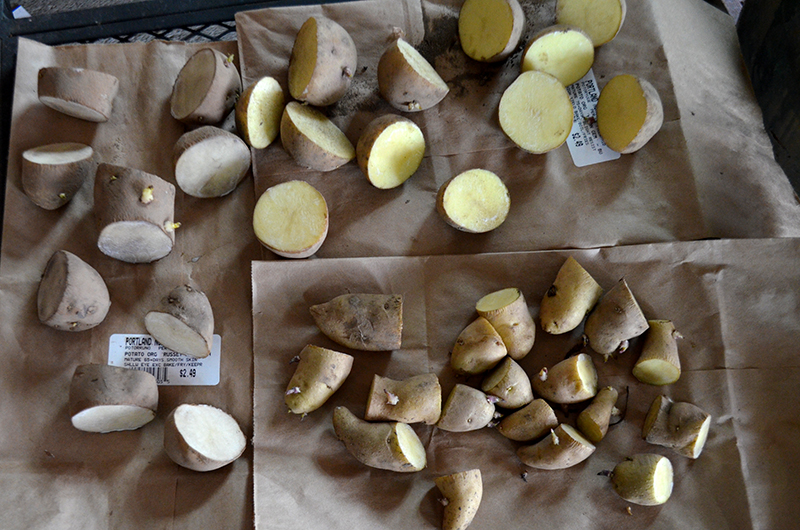
Seed potatoes cut into halves or thirds
After experimenting with growing seed potatoes vs. organic potatoes from the store, seed potatoes have been the clear winner for me in terms of yield. My local nursery carries a wide range to choose from and they are going to be the best suited to our climate. Seed potatoes are more expensive, but I stretch mine by cutting them into halves or thirds – leaving at least 2-3 “eyes” per potato chunk. I let them air out for a day so the cut side is dry when planted.
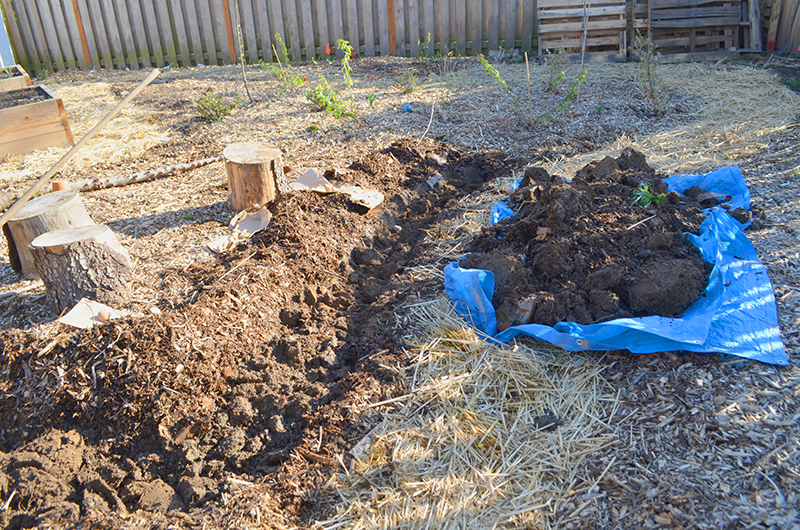
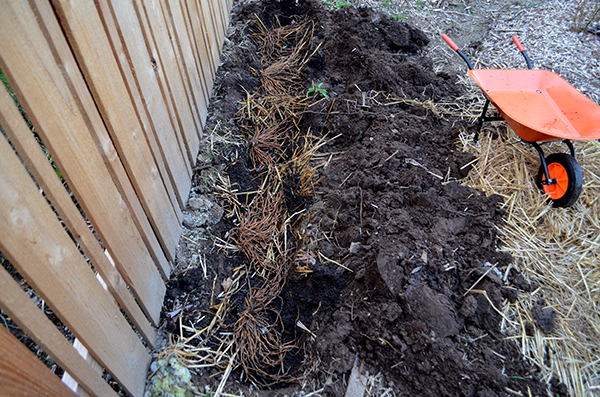
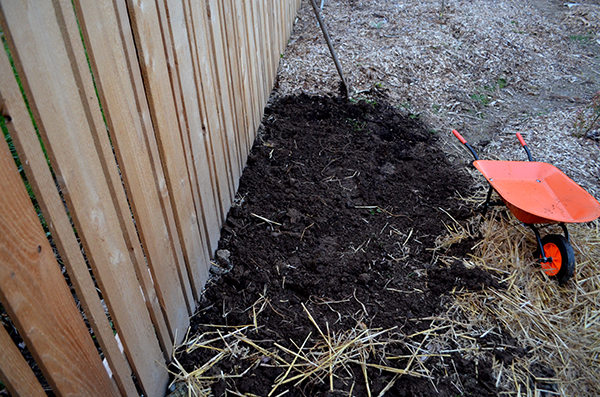
Double-digging our potato trench
I used the Double-Dig Method to plant the potatoes – where you basically dig a trench, remove the soil, then dig again and leave the loosen soil in place to plant into. The leftover soil from digging trenches was piled onto a blue tarp, which was later moved into garden storage. I will use that soil to mound the potatoes as they grow in, encouraging them to make more potatoes. By late spring this muddy trench will be a lush green edge to our garden path. We will harvest the potatoes when the leaves die back – usually late summer or early fall depending on when we have time.
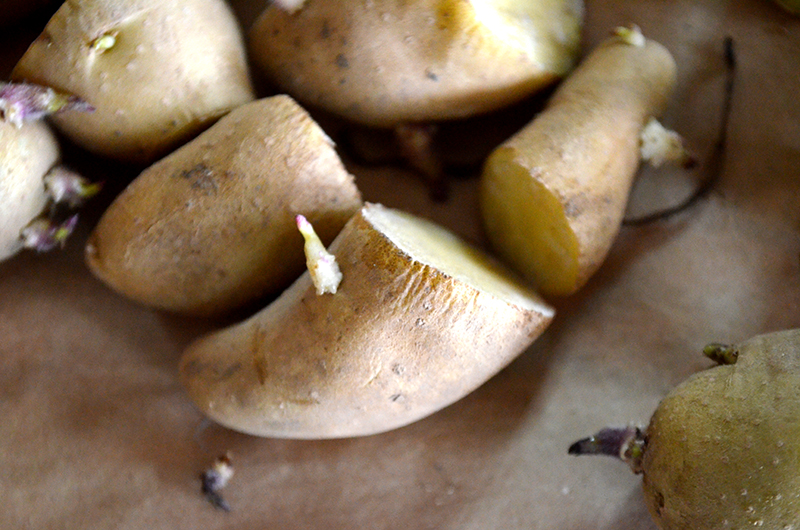
Leave about 2-3 “eyes” on each potato to ensure strong early growth
Onion sets are easy-peasy to plant. They don’t require particularly stellar soil and do not require much space. I tucked mine along the perimeter of our raised beds, about 4-6″ from the edge. They focus their growth underground, which leaves lots of space above ground for densely planted greens, future tomatoes and others. We are growing Walla Walla sweets and red onions this year – crops we eat a lot.

Planting onion sets around the edges of our raised beds
You might also be able to direct sow additional cool weather crops like lettuce, arugula, spinach, fava beans, beets and swiss chard. My four beds are planted out already, leaving a little space for the kale and broccoli starts I am growing inside still. Those will get transplanted outside in just a couple weeks. I can’t wait to see these beds packed with spring greens!
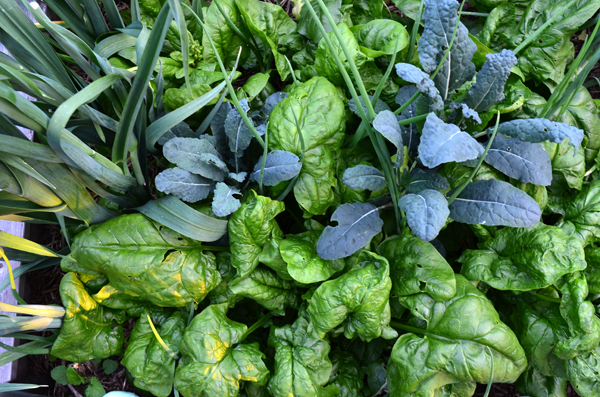
Last year’s spring vegetable bed packed with leeks, spinach and kale
As the weather warms up, many of these cool season crops will bolt. That happens just in time for them to get pulled out and my warm-season seed starts to get transplanted in, like tomatoes peppers, eggplants, etc. And it always coincides with the point where we feel ready for a break from spinach and kale.
Are you planting outside yet or is there snow still on the ground? I would love to hear what your plans are and where you are finding space for all your crops. Tell me about it in the comments below!
Early Spring Indoor Seeds
Early spring has officially arrived and it’s time to start planting the garden. Seeds should be started indoor pronto, so it’s high time to get organized and get to it!
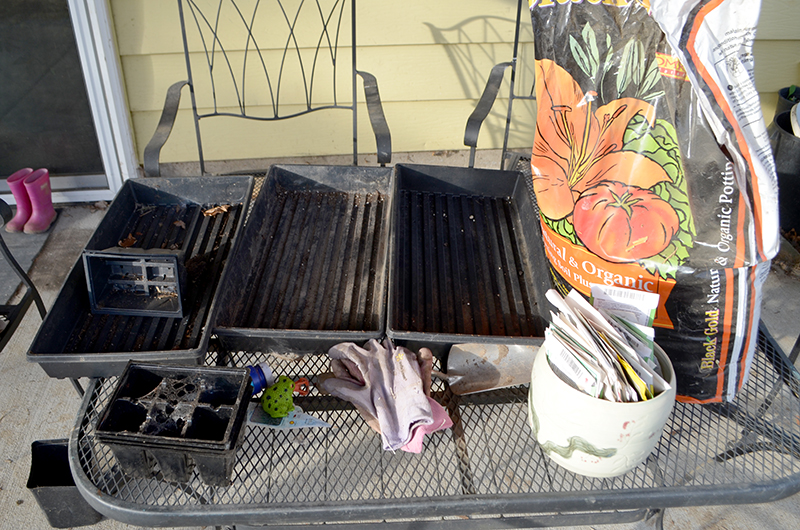 I started my seeds a couple weeks ago inside under a grow light. In past years I have made newspaper seed pots, which then get planted directly into the garden. (Watch my How to Make Newspaper Seed Pots how-to video to learn more) This year I did a 20-minute blitz of indoor seed prep using recycled black plastic seed trays I had held onto from previous years.
 I lightly filled the seed pots with potting soil – not regular garden soil. Potting soil appropriate for seeds will be a light-weight mix high in nutrients (usually compost) and have added components (some mix of coir, peat moss, and vermiculite) for good drainage and water retention. Need more guidance on starting indoor seeds? Check out my Seed Starting Basics post.
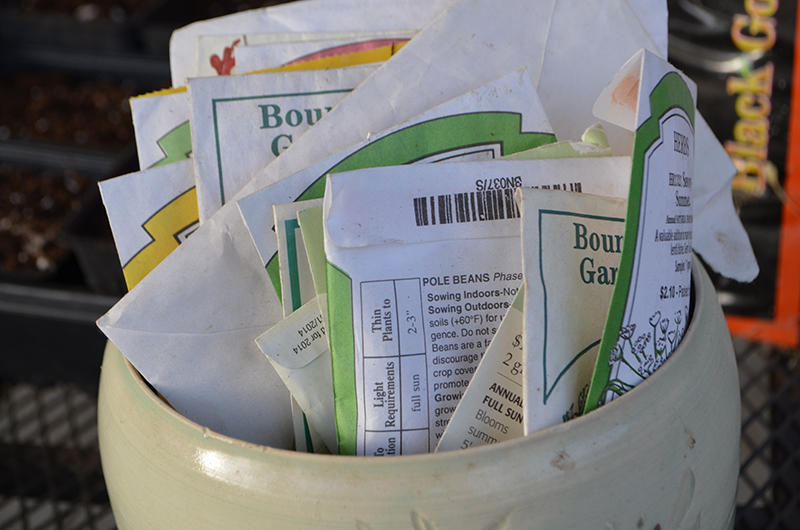
 Many seed packets will guide you on the planting depth, but it seems like several of mine do not have that info. Your general rule of thumb should be to plant seeds a depth of about two times their size. Small seeds like lettuces barely get covered with soil. Larger seeds like squash get planted about 1/2-1″ in depth.
 I am growing several varieties of tomatoes, peppers, eggplants, broccoli, kale and leeks indoors this year. Pretty soon the kale, leeks and broccoli will be transplanted outside since they can handle cool spring temperatures. I will move some indoor seed pots of squash and melons under the grow light in their place.
 All the remaining seedlings – tomatoes, peppers, eggplant, melons and squash – will get transplanted outside around Mother’s Day. Check your local guidelines, as this will vary based on where you live. Generally, it’s safe to transplant these hot-weather crops about two weeks after your last frost.
 Are you struggling to find the time to get your seed starting operation off the ground this year? Don’t sweat it. Local, independently-owned nurseries are usually your best bet for good varieties of organic vegetable starts. I bought starts when Juniper was a newborn and transplanted them into our beds. I still had a great garden that year.
If you are growing seeds inside this early spring, I would love to hear about what you have planted. Even with a fairly on-time start, a few older seed packets haven’t germinated yet. So I might be buying a handful of vegetable starts after all!
March 17, 2015
2015 Vegetable Garden Plan
It’s time to plan those vegetable beds! Spring is around the corner and thoughtful planning now allows you to maximize the amount of vegetables you can fit in your space. Think about what produce your family eats most often and make sure to include those in your plans. Also, consider factors like crop rotation and companion planting as you decide which plants will go where.
Plan what you grow based off what you eat most often
Crop rotation means you change the location of plant families from year to year. Disease and pest problems are often problematic among plants in the same family. By moving them around in your beds each year, you decrease your risk of having last year’s insects or diseases effect this year’s crop – in case they managed to overwinter in the soil. Often plants in the same family sap the soil of the same nutrients. Brassicas, for example, are heavy nitrogen feeders. This year, you might consider planting legumes in that spot to replenish the nitrogen in your soil.
Lacinato kale, a member of the Brassica family
To help stretch your space, think carefully about companion planting which couples plants together that use different spaces for growing. For example, nestling onions in between your lettuce plants is a nice companion planting. The onions grow below leaving the lettuces plenty of room above ground to get leafy.

Great companions: lettuce and onions
Consider which plants are early to bolt – basil, cilantro, spinach, etc. I try to plant those in spots where they will get shaded later in the season by taller vegetables. In this year’s plant, my tomato plants should provide some shade to the annual herbs planted in between.
Leafy potatoes plants under fruit trees, shrubs and anywhere there’s a spot of daylight
I never plant vegetable crops in the raised beds that are space hogs, which includes vines or plants larger than three feet. Those get tucked into planting beds and trellis around the garden, along with edible ground covers. I also don’t waste the great soil in my raised beds on things that can tolerate poor soil, like my perennial herbs, as these tough guys do just fine in my clay soil. This year the following vegetables will get planted outside my beds:
Potatoes: russet, yellow and fingerling
Strawberries (companion planted with shallots and garlic)
Winter squash: delicata, butternut and pumpkin
Summer squash: zucchini, pity pan/scallop
Cucumber
Peas and pole beans (over a teepee for Juniper to play in)
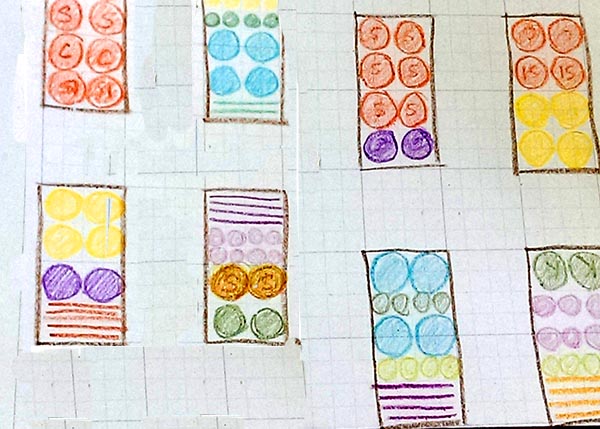
Rough sketch on graph paper of potential bed configurations
I started our plan with crayons and graph paper while coloring one evening with Juniper – super simple! Just draw out the total size of your area – in my case this is four beds that are 4′ x 8′. Then start filling in circles that match the scale of the mature plant. Plants that are typically two feet wide include tomatoes, peppers, eggplant, kale and broccoli. One foot wide plants include lettuces, arugula, spinach and annual herbs. Smaller plants I do in rows include beets and carrots.
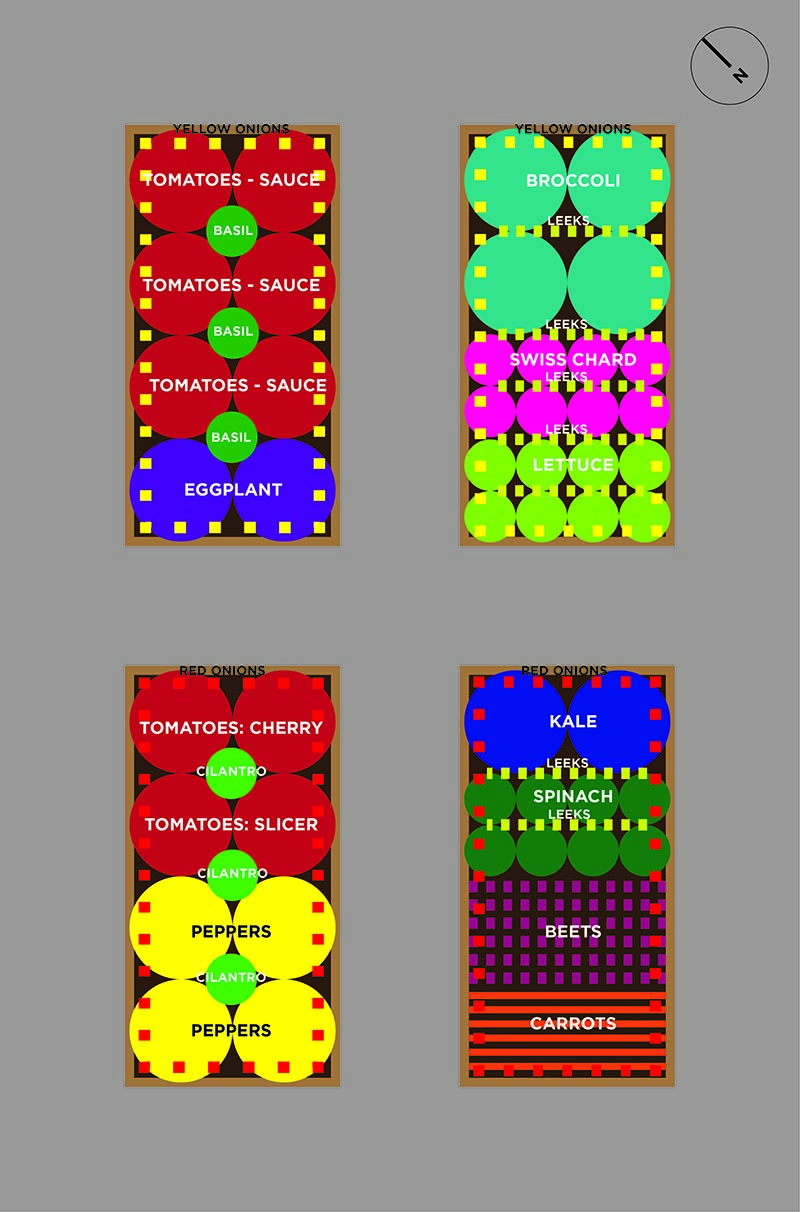
Our 2015 Vegetable Garden Plan
Here are some past vegetable garden plans for my old 4′ x 6′ beds. You’ll notice there is no 2012 as Juniper was just born. My plan that year was “plant whatever you can whenever you can”:
2014 Vegetable Garden Plan
2013 Vegetable Garden Plan
2011 Vegetable Garden Plan (irregular sized planting area)
My final version is made using Adobe Illustrator, but that’s just because I have the program already and use it for work all the time. (The gray is my 2.5′ pathway around and in between the beds – the perfect size for harvesting, weeding and watering.) Keep your plan handy as you add seeds and starts this season. It will keep you on track and make sure you have a good record of what went there, so you can refer to it when you plan the garden next year. And let me know what you’re planning to grow this year!
March 12, 2015
Building Raised Beds
It took a village to pull it off, but we finally have some gorgeous, new raised beds! The planning started a few months ago when I finished our garden plan, which included four 4×8 raised beds for intensive vegetable growing. I wanted the beds to match the style of our mid-century home with thick, horizontal lines. We chose 2 x 10 boards to achieve that aesthetic.
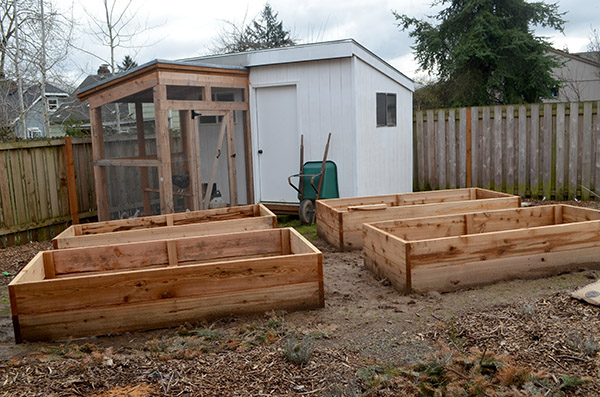
Finished raised beds using thick 2×10’s to echo the thick, horizontal lines our mid-century home.
I always recommend using untreated cedar for raised beds. Cedar is naturally rot-resistant, so all outdoor wood projects should be cedar to slow down the decay process. Juniper is becoming a popular, naturally rot-resistant option as well. It can be expensive to get in long lengths though, since Juniper trees tend to be shorter. Chemicals are used in the process of “treated” cedar, so stay away from that if you plan to grow food in what you are building.
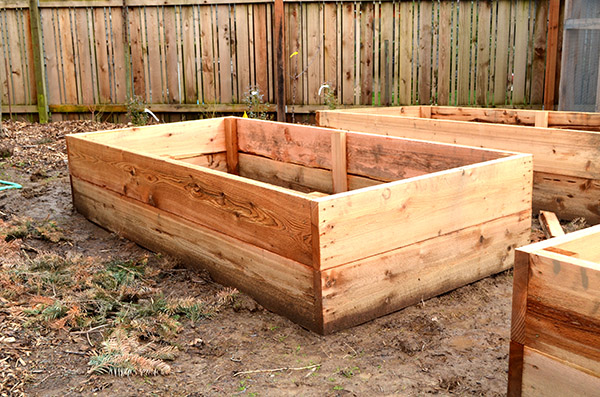
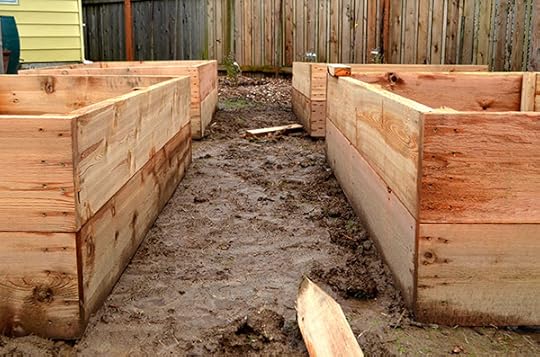
Finished 4′ x 8′ x 20″ raised beds using utility grade cedar
I got a great deal on the cedar for this project by using “utility grade” cedar. Utility grade is the roughest cut, which is not great if you want a smooth surface but doesn’t really matter for raised beds. It’s also more likely to have imperfections. Several of the boards were banged up on one side, but fine on the other. They were not damaged enough to impact the integrity of the wood – meaning, it was just cosmetic. The ugly side faces in and the nice side is what you can see on the outside. And the price was right: $12.40 per 8′ board, or $1.55 per foot.
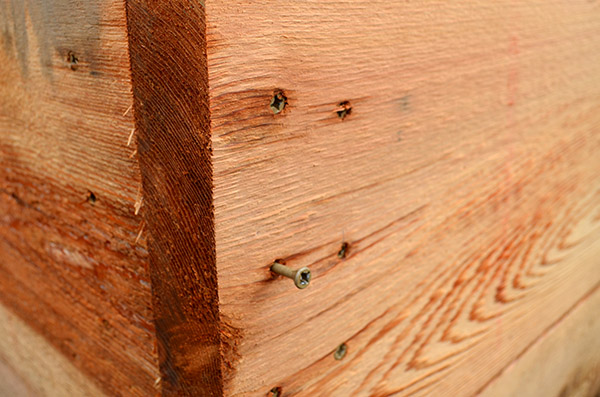
3″ screws to fasten the beds into place
We wanted four raised beds in total, each 4′ x 8′ and about 20″ tall. The total materials cost came to $388.98. Of that, $322.40 was the lumber and the rest went toward 3″ outdoor wood screws.
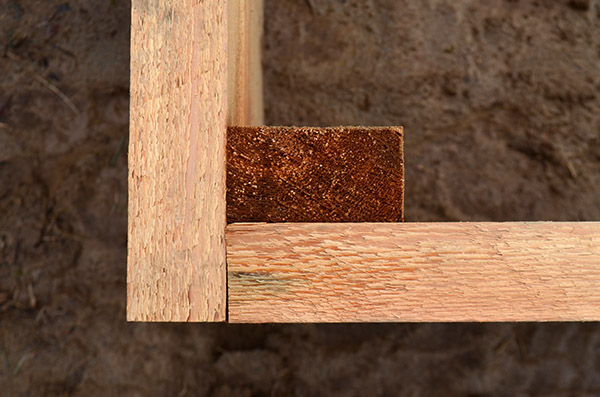
Corner assembly using halved 2×10’s (basically cut into 2×5’s)
For assembly, the same 2 x 10’s were used as corner posts. They were just cut in half lengthwise. This saved us the hassle and cost of buying 4 x 4’s to use as posts.
Finished beds perfectly positioned to allow clearance for a wheel barrow
I got very particular about the placing of the beds once they were built. Although it likely annoyed everyone to no end, I was running around with my measuring tape to ensure we had a perfect 30″ between all the beds. That is a great size for fitting a wheelbarrow in between and anything wider just takes up more garden space. Anything narrower and you’ll kick yourself in the long run.
I haven’t decided if we are leaving the wood unsealed or if we want to explore a natural sealer to preserve the color. If we leave it unsealed, the wood will fade to a light gray and match the fence.
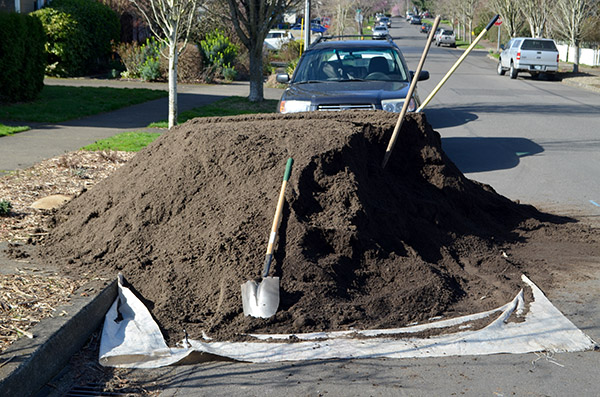
Seven cubic yards of four-way soil mix
To fill the beds, I purchased 7 cubic yards of 4-way soil mix from Mt Scott Fuel, which was about $275 bucks. It includes a balanced mix of topsoil, composted cow manure, yard debris compost and sand. The compost provides a heavy dose of nutrients and the sand will help with drainage. It’s expensive to buy soil, but it’s often the best option when you are starting from scratch and need a massive amount of soil for growing vegetables. In future years, we won’t need to add more soil. We will just add compost once or twice a year to replace any lost nutrients.
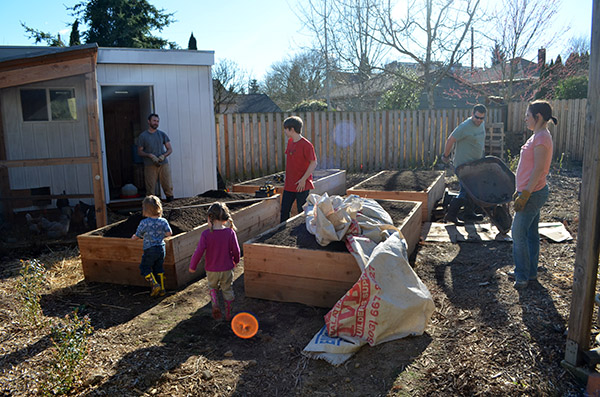
Our “village” of garden helpers
Pregnancy has me limited these days when it comes to physical labor. So instead, I called in our “village” of helpers to fill these beds with fresh soil. The little ones had fun playing in the beds as they were getting filled, although they were given stern warnings about not putting any soil in their mouths (see above note about manure being in the soil…). It was definitely bath time for these little guys at the end of the day!
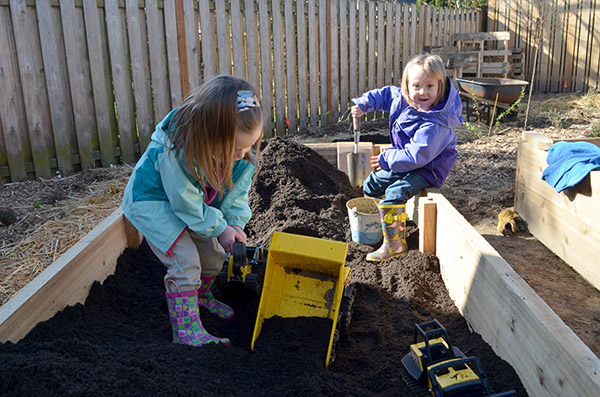
Juniper and cousin Lily
The process of building and filling the beds went smoothly because we were super organized. We had a clear plan for the bed sizes and their design, which ensured they would fit perfectly into the overall plan for the garden. We knew exactly how much lumber we needed before heading to the lumber yard and we called around in advance to find the best price on materials. Hauling the soil took about five hours with three adults, while I kept the kids entertained and worked on less labor intensive projects. The finished beds are all ready for spring planting!
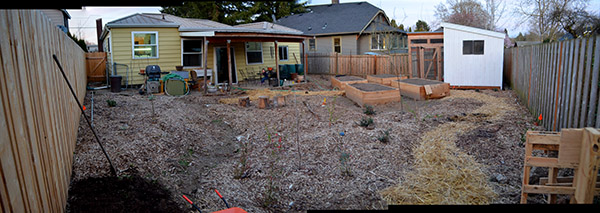
Garden March 2015
It’s even easier for me to picture what the homestead will look like in a few short years now that our beds are complete. The plants are small now, but they will grow in sooner than you think. And in a few short seasons, we’ll have an edible jungle in our backyard once again.
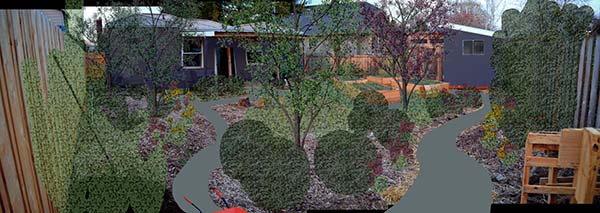
Garden vision
March 6, 2015
Growing Asparagus
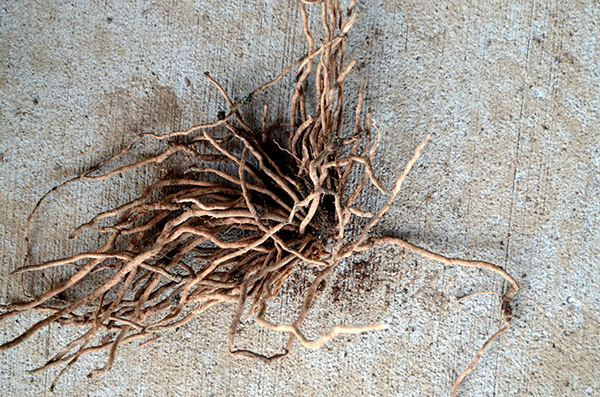
Asparagus crown
Asparagus is an adaptable, hardy vegetable that is also a rare perennial vegetable – meaning it will come back year after year to produce a harvest. It does best in climates with either cold winters or dry summers. That includes most areas of the country, so it’s likely you can grow this delicious vegetable on your homestead. Plant it in a spot with excellent drainage that receives full sun for at least six hours a day, although it can tolerate some light shade as well.
You can begin growing asparagus by two methods: from seed or from crowns. Asparagus seeds are slow to germinate and, once transplanted into your garden, will take about three years to produce a crop you can harvest. Planting crowns means you are putting a network of asparagus roots right into the soil. After two years of growing, you can harvest the crop they produce.
I have never grown asparagus on my homestead before, but I have very fond memories of them on our urban farm from my childhood and on the Urban Farm I used to work at. Planting asparagus is like planting a fruit tree – you have to be confident you’ll still be living on that homestead in 2-3 years when you get your first harvest.
Selecting Varieties
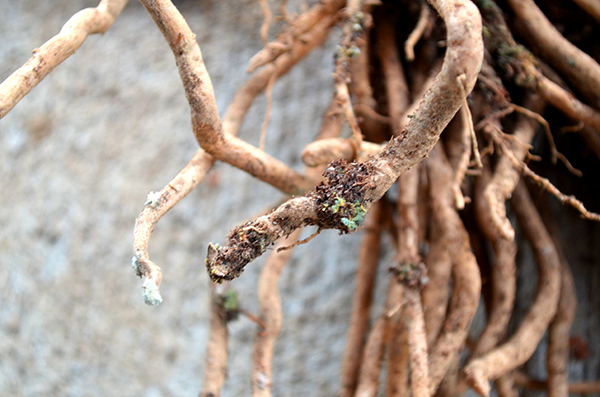
Asparagus crown
All-male asparagus varieties have been cultivated to maximize production by only producing fruit, and not producing seeds. Jersey Giant, Jersey Supreme and Jersey Knight are a few of the most popular all-male varieties. They can produce up to three times more asparagus that mixed male/female varieties.
The drawback to all-male varieties is that you won’t have the opportunity to produce more plants over time. I love swapping plants with friends, so I choose a variety that produces both male and female plants. I love creating gardens that incorporate memories from my grandmother’s irises, my Dad’s columbines, and my sister’s nasturtiums. In a couple years I will get to swap some asparagus plants to return these pretty favors.
I chose an older variety called Mary Washington, which produces large, thick, dark green shoots. This has been the most popular variety over the past century and I have a soft spot for those old tried and true vegetables, even if that means it’s not as productive as the newer ones. It has a 60 day cutting season, which should give us our fill of this sweet, crisp vegetable plus some for the freezer (after a quick blanching).
Planting Crowns
You can begin planting asparagus crowns as soon as the soil is workable without forming thick clods and average temperatures are around 50 degrees, which in Portland is now. I selected five crowns from my local nursery that were large and thick. I have the perfect spot in the garden that receives full sun and is slightly raised, so it will provide good drainage.
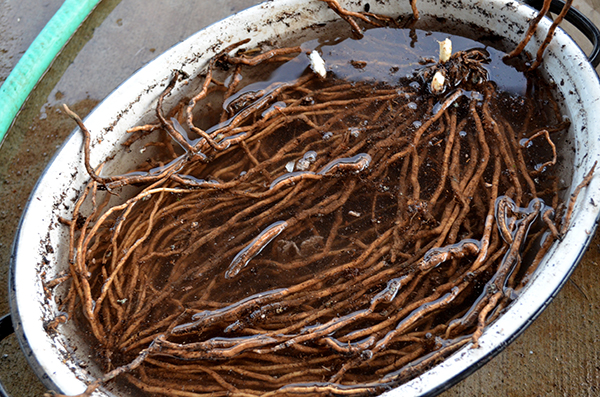
Soaking asparagus crowns prior to planting
Soak your asparagus crowns for about 30 minutes prior to planting. This is their big opportunity to store up water before transplanting.

Trench dug 8″ deep for planting
I began by shoveling out an 6-12″ deep trench that was about 12″ wide and 5′ long (for five plants). It was a bit awkward with my growing belly, but I managed.
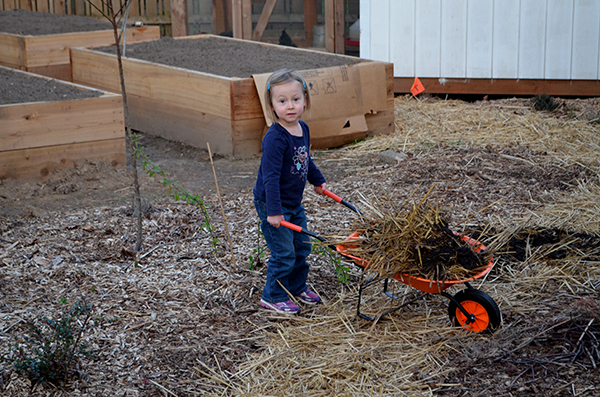
My asparagus planting helper
Next, my garden helper filled up her wheel barrow with compost. We dumped it into the newly dug trench and mixed the compost in with the soil we had removed. That helps the roots have some yummy soil to grow down into. It also breaks up the soil so the roots can get established a bit easier.
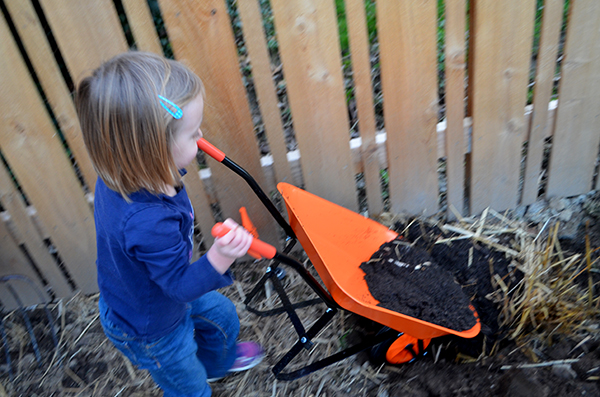
Garden helper pouring compost
I placed each crown about 12″ apart, spreading the roots out so they could expand in all directions. Avoid letting the roots from neighboring plants touch each other, which can encourage mold. Then cover the plants with soil so they sit about 2″ below soil level.
Asparagus crowns 12″ apart over compost/soil mixed beds
Although it’s winter, you still need to water your bed well after planting. You don’t want those delicate roots to get dry as they settle into their new home.
Care
Asparagus will become fairly drought-tolerant over time, but they need to be well-watered for the first couple years until established. We will also be watching the bed carefully for weeds. You don’t want the new plants to have to compete with other plants as they mature. You can mulch the asparagus bed to help with both water retention and weed suppression, but be careful that what you use for mulch doesn’t have seeds in it (as can be the case with straw).
Apply some compost to the top of the bed at the end of spring, as the summer heats up. In the fall, cut back the yellow foliage to reduce disease.
Newly planted asparagus bed with soil covering just the top 2″ of our crowns
Be Patient
Do not harvest any asparagus for the first year. The plant should be allowed to get tall and leafy. Those delicate leaves capture energy that then goes down into the crowns. This is crucial for the plant’s robust development over time. You can start harvesting when the plants are three years old.
We planted two-year old crowns, which means technically we could start harvesting our asparagus next year. Don’t use a knife to cut them – instead snap them off by hand near the base where the naturally want to break off. As we did growing up, we will harvest for a couple weeks and then allow 2-3 shoots per plant to grow up and produce leaves. Those leaves will give the crowns an energy boost, allowing us to continue harvesting new shoots for another couple months.
February 25, 2015
A Big, Big Project
It’s been year of change for us here on the homestead! At home, we are busily transforming our new space into a homestead. At work, I decided to leave my job last fall and am now blissfully happy balancing residential projects with creating nature-play spaces for Learning Landscapes Design. Life feels very full! But our biggest project tops the list of happy changes: our family is growing!
 This baby bump is actually a baby boy! We feel incredibly fortunate to become parents again and Juniper is so excited to be a big sister. I often describe parenthood as “blissful chaos” and it’s about to get even wilder around here! Our new baby will likely make his grand entrance this July.
 I am trying hard to enjoy the moment among all this change: spending time with my mom who has cancer, watching the winter waves at the beach, taking long walks as a family, sipping tea with friends, coloring with my almost-three-year-old while we color the evening away. These are the memory-making moments that will keep us warm for a lifetime.
 If this past year has taught me anything, it’s that you can’t take life for granted. It’s how you use your time here and now that matters most. I am excited to have you along for the adventure ahead!


