
Renee Wilkinson's Blog, page 10
September 10, 2014
DIY Distressing Furniture
Distressing furniture doesn’t mean your furniture is feeling panicked. It’s a term used to describe the process of making furniture pieces look weathered – also called shabby-chic. I’m in the process of going room by room at our new house to try to blend a homestead feel into our new digs and Juniper’s room is my first project.
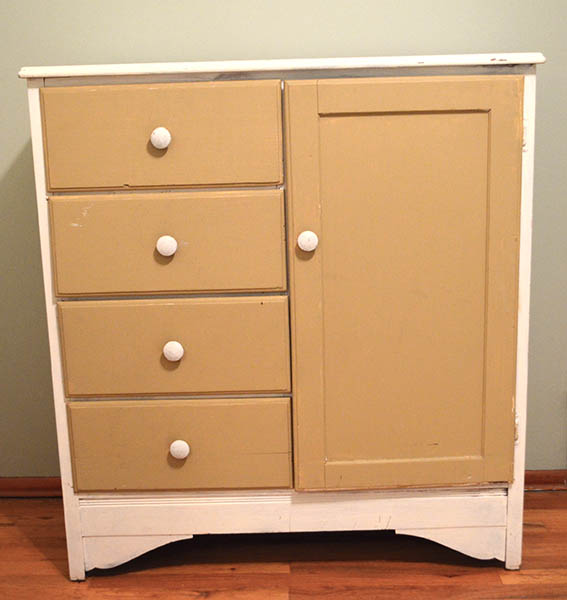 My Aunt T always finds the best stuff at thrift shops and estate sales. She scored this adorable chifferobe and immediate thought it would be perfect for Juniper.
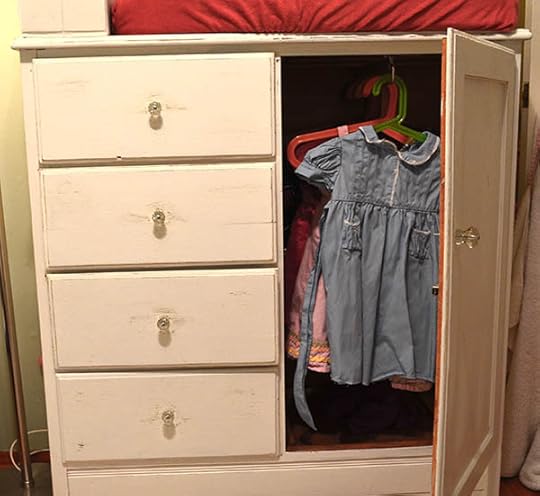
A chifferobe is an old-fashioned children’s dresser that also includes a small closet to hang their adorable clothes. I wasn’t wild about the color though, so I decided to make this my first attempt at distressing furniture.

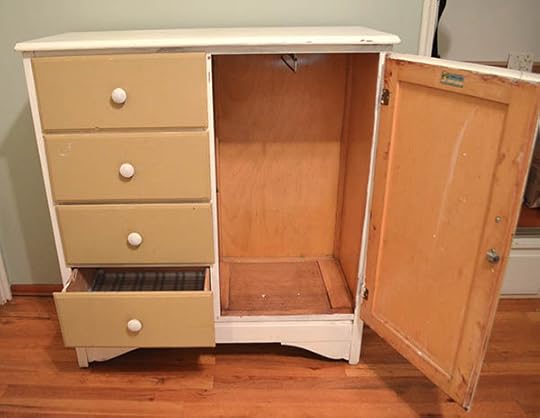
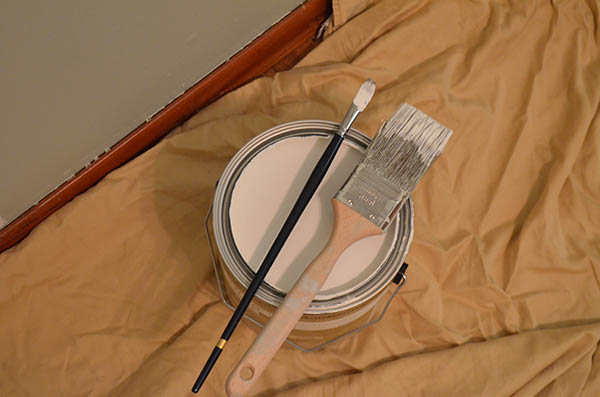
I began by removing the existing knobs, drawers and the closet door. Then every piece got painted white. It would look cute in vintage-inspired greens or blues too, but white was perfect for Juniper’s room.

After two coats, the chifferobe looked sparkly clean. Juniper helped me assemble it all back together.
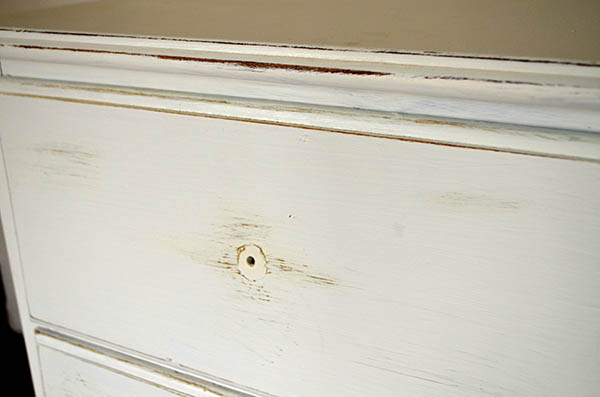
Next came the fun part: distressing. I took some sand paper and gently rubbed it along the areas that would naturally get aged over time – all the edges, corners and around the knob areas.
It’s important to take a step back often at this stage. You don’t want to overdo it or underdo it. Taking that step back helps balance where larger distressed areas are vs. smaller spots. It also helps to keep things asymmetrical, which seems more realistic.

My Aunt T also hooked me up with some charming glass knobs to replace the wooden ones that came with the chifferobe. Those added a nice touch.
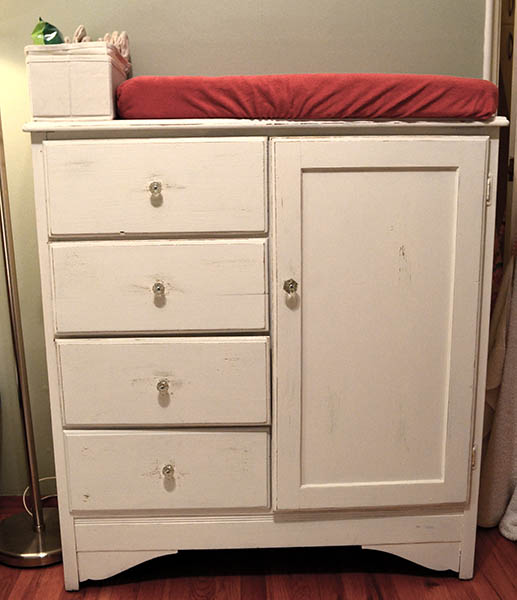
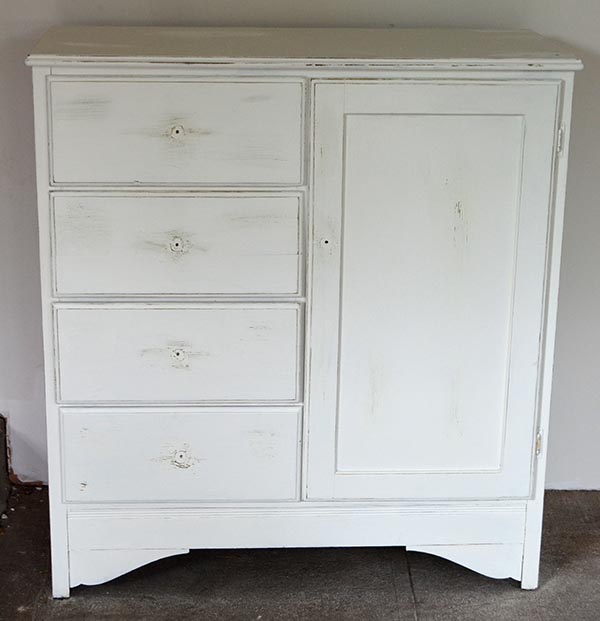
I love the way the distressed chifferobe turned out. Her changing pad and the canvas basket that keeps her diapers all organized both fit perfectly on top. It’s like these were all just made to fit together!
I think it adds some nice character to Juniper’s room, especially paired with the great vintage botanical prints I framed recently. I’m excited to see what else we can rough up around the house to help bring some of that rustic, homestead-y feel inside.


September 2, 2014
Painting a Mural
I did a lot of laboring over Labor Day weekend! Our new house is a cosmetic fixer, complete with old carpet and wallpaper in every room. Everywhere I look I see a new project, which has been overwhelming. So my new method to this madness is to finish one room at a time. Juniper’s room is first up on the list.

The mural in Juniper’s room at our old house
A big feature of her old room was the beautiful mural I painted for her. I was open to something new though in this house, so I sketched up a few options for her and let her pick. She chose the same one that was in her old room.
It can seem intimidating at first to boldly lay a paintbrush on the wall to freehand a mural, but there are ways to boost your confidence. The first step in that direction was the sketches I did. It helped Juniper decide on the design she wanted, but it also helped me decide the shape and quantity of the trees to paint.
I used a 2″ painting brush plus a nice, thin artist brush
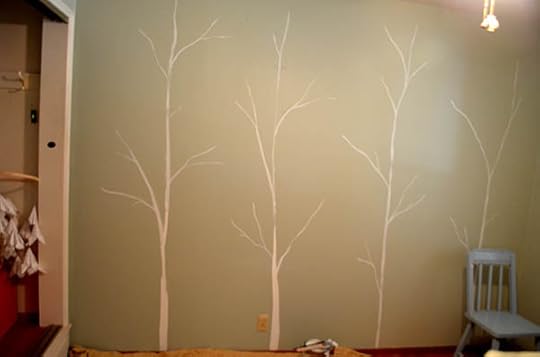
I used a 2″ painting brush and a nicer, thin brush to create the mural. I began by painting thin lines for each trunk to get the spacing right on the wall, using my earlier sketch as a guide.
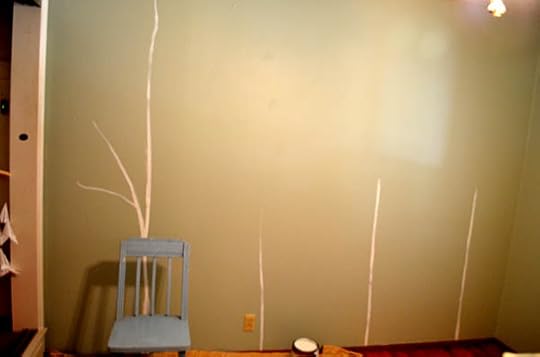
After thin trunks were drawn to determine spacing, the trees start to “grow”
After the early trunks were done, each tree began to “grow” on her wall. As one got halfway up the wall, I stopped and worked on the next one. Little by little, working back and forth between the four trees, they took on a unique central trunk up to the ceiling. If one ended up leaning too far in one direction, I could balance it out with the tree next to it.
With the same method, I began adding side branches. I imagined these were aspen trees, growing close together with upward branches. I wanted each one to seem organic, so I tried to avoid too much symmetry and included lots of crooked branches.
Skeletons for the trees are drawn – trunks and branches. It’s now time to start thickening them.
It’s important to take a step back often. After a couple branches were painted, I stood back to see how it looked. After maybe 30 minutes of working, I took a water break to leave the room. When I came back, my eyes were fresh to evaluate how things were progressing.
When I had essentially a skeleton for each tree, it was time to go back and thicken them up. Trees are typically thickest in the middle, getting gradually thinner as the tree gets taller – a rule of thumb for both the trunk and the side branches.
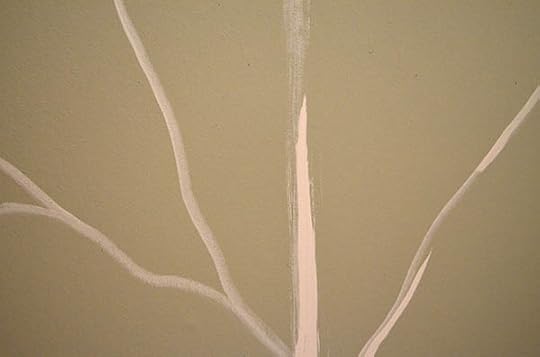
The 2″ brush was handy for adding girth to the trees, while the thin artist brush kept the edge lines clean and the branch ends nice and light
I added in a few leaves here and there after the trees were complete. I intended to add a couple birds, as I did for her old mural, but I’m waiting on that step. There’s something really serene to me about the simple way they are drawn now, so I might just leave them as is.
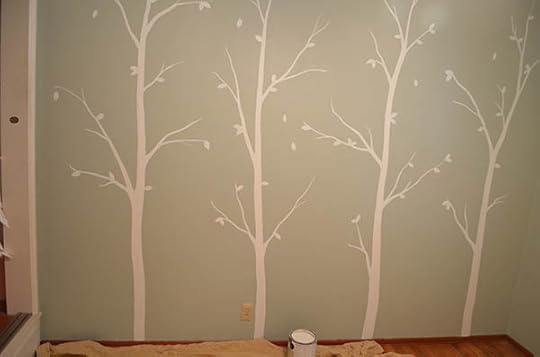
The final mural for Juniper’s new room. Each tree is unique and imperfect – just like in nature.
I am no fine artist, but choosing a simple design and taking it slow produced a mural I am really proud of. If you have been thinking about a mural in your home, hopefully this builds some confidence that you can do something similar!
August 24, 2014
Decorating with Botanical Prints
The boxes are all unpacked and the garden design is done – soon to be installed this fall. In the meantime, it’s time to start the cosmetic makeover inside our house. I don’t want my love for nature to stop at the door, so I spent some time and a little money on second hand goods that celebrate my love of plants.
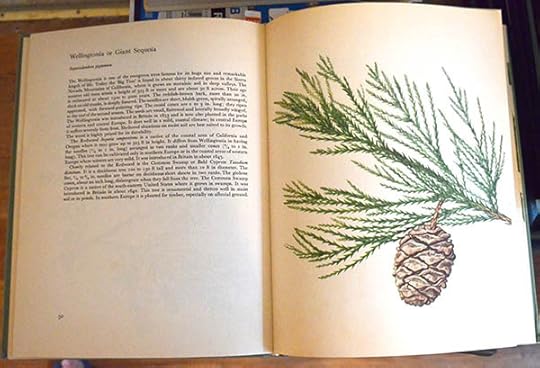
 My aunt found some old botanical books at a thrift store that she shared with me. I just adore these old plant books. Their information is often timeless and the delicate illustrations are sublime to any plant nerd’s standards. I gathered up a stack of second hand frames in various sizes, but all in black, to make a collection of my favorite drawings.
Simple frames keep the focus on the drawings. Even if the frames are slightly different, having them all the same color simplifies the collection and keeps it from seeming too busy. They just needed a good cleaning prior to framing the images.
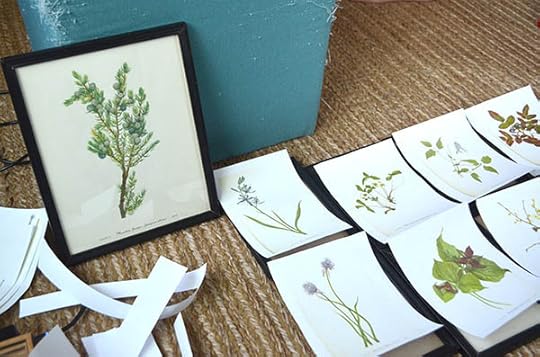
I couldn’t bring myself to tear the illustrations out of the books. Instead, I scanned in my favorite drawings to preserve the originals. I used a combination of Photoshop and InDesign to crop the drawings and size them to fit the various frames. If you don’t have those programs, you could just go old school and do it with scissors to cut your prints to size.
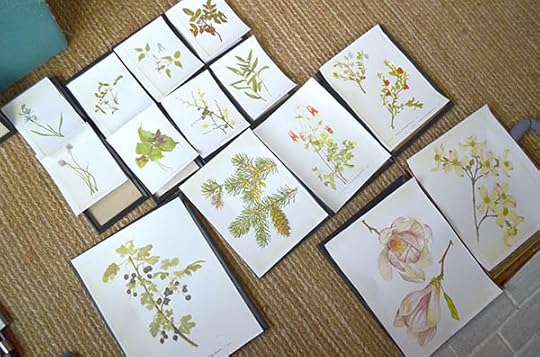
After printing, I laid out all the frames and began matching different images to different frames. I wanted a balance of floral illustrations with conifers, bushy plants with thin leggy ones.
In the end, there was a nice range of seasons in the drawings I framed. Almost all are North American natives and many are native to my own backyard in the Pacific Northwest.
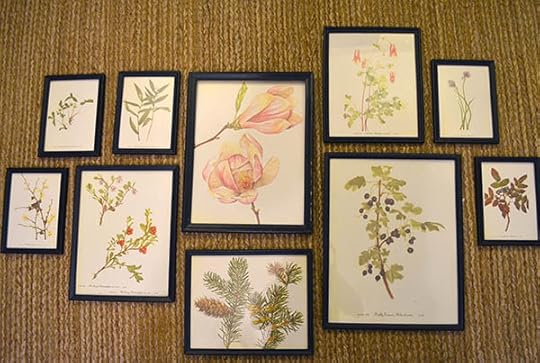
The largest grouping will go in our bedroom, where we have a nice neutral gray on the wall. A smaller collection will be in Juniper’s bedroom, including the picture of Mountain Juniper.
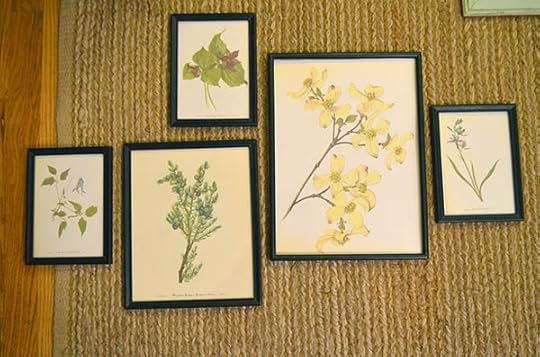
We had one stray frame that didn’t match the others in style or color. I put a sweet flowering sedge in that frame and intent to hang it in the bathroom.
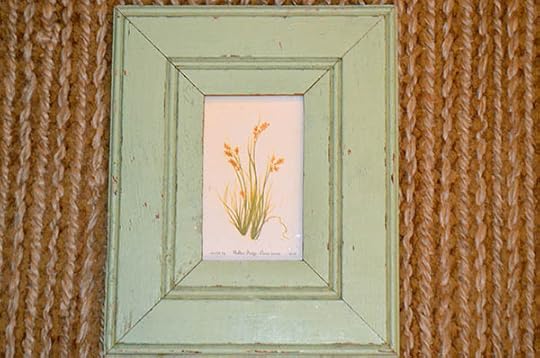
These old botanical books are still floating around out there in used bookstores or overlooked thrift store shelves. The project was really easy and didn’t cost more than a few bucks, but I think it will add a nice piece of botanical history and artistry to our new home. Stay tuned for more on how we’re adding some nature-loving updates to our cosmetic fixer!
August 15, 2014
How to Design Your Own Garden
Plant design is one of my passions and part of what led me down the road to landscape architecture. You would think the opportunity to design my own homestead from scratch would be easy-peasy, right? Wrong.
As it turns out, designing my own garden is a challenge. I don’t have that fresh perspective that I usually bring to my clients. I’m not objectively looking at my design. Instead, I’m consumed with the details both big and small – what material will the pathways be, what type of lumber cuts do I want for the raised beds, which fruit tree species will give me the best harvest, etc.
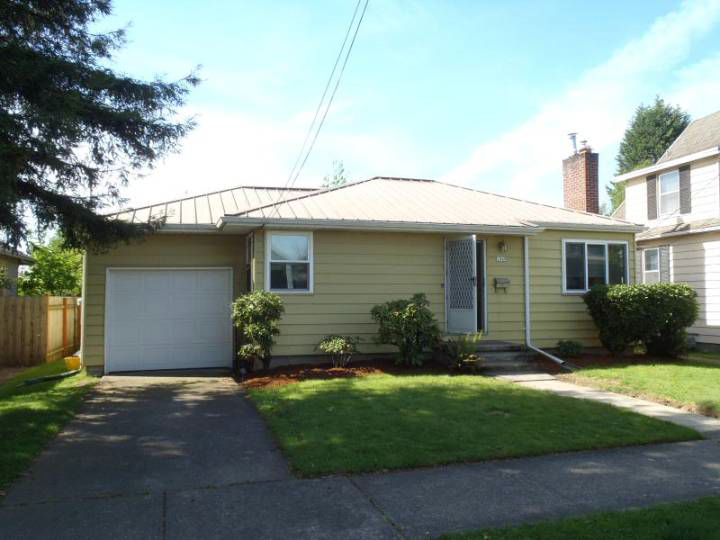
There’s a lot to do to transform this fixer into a homestead
So how do you as a homeowner begin the process of designing your own space?
PROGRAM YOUR SPACE. The “program” refers to the different elements your space has to have. For example, here is what my garden program looks like:
Edible-oriented plantings
Outdoor dining space
Raised beds for intensive vegetable gardening
Small play space for Juniper
Large compost capabilities
DIAGRAM OPPORTUNITIES/CONSTRAINTS. I made a simple drawing that showed features I wanted to highlight, like maintaining a view from the back window to our chicken coop. That is my reminder to keep plants from blocking that sight line. I also added features I wanted to hide, like the clear sight line we have from our back window into our neighbors back window. That tells me I need screening there to increase a feeling of privacy.
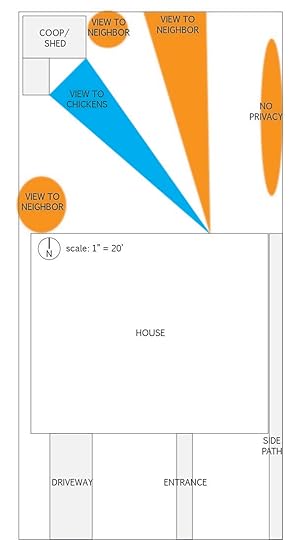
Diagram of opportunities and constraints
SKETCH DESIRE LINES. We walk to the chicken coop every evening to collect eggs. What is the easiest and most direct way to get there? We add kitchen scraps to the compost pile weekly. How would we walk from the kitchen to the compost pile? Answering these questions started to form a loose pathway system for the garden.
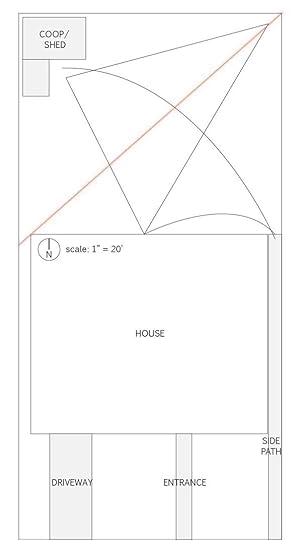
Desire lines showing direction of travel from house to coop/compost and the longest potential path line for the garden (in red)
SKETCH A LONG LINE. In addition to the utilitarian paths, I like to sketch in a long line from one corner of the garden to another. This gets incorporated into the pathway system, making it not just a utilitarian garden but one that asks you to come stroll through it. It makes the garden seem larger than it is, which is so valuable in our small urban plots.
PLACE LARGER ELEMENTS. Outdoor dining spaces placed close to the house make carrying out bowls of food easier. Forgot something? It’s a quick hop back into the house to grab it. For raised beds, I want them front and center so I can admire my hard work. I prefer compost bins be placed as far from the house as possible. It’s a longer walk to empty the kitchen scraps, but compost piles are generally not beauty queens.
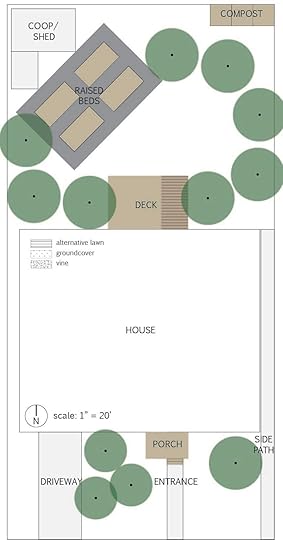
Larger site elements like raised beds, decks and large trees are placed
PLANT SPECIMENS. Trees and large shrubs get added into the plan next. Where do we need shade vs. sun? Where do we want to screen a view with an evergreen? How many fruit trees can I fit in without blocking the raised beds from full sun?
TAKE A MENTAL WALK. What does it feel like when you imagine walking down that path? Is it too straight or arbitrarily curvy? Are the shrubs too tall, so you feel claustrophobic? Or maybe too short, so it feels flat and uninteresting? Will it be hard to harvest that tree because it’s planted too close to the fence? Imagining yourself in your design is critical.
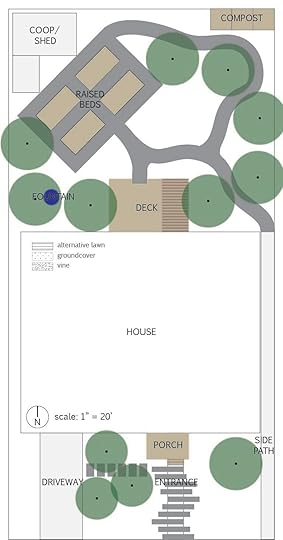
Meandering pathways, setting up views and other adjustments
SEASONAL INTEREST. As you fill in the details of plant species, think carefully about how your garden will feel throughout the year. I see so many gardens bursting with life in summer that are completely dead spaces in winter. Evergreens are the backbone to a good planting plan, so make sure you have enough! They might not be as sexy as the peonies, but they provide winter habitat for wildlife and insects. They also give the garden form and interest during the quietest times of year.
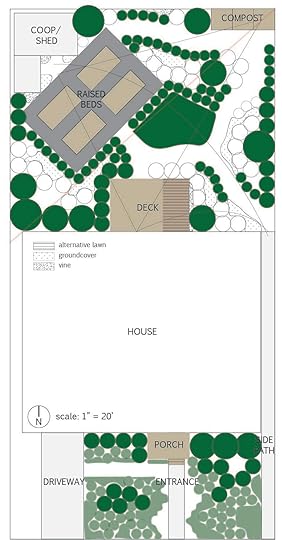
Evergreen and semi-evergreen plants
REPEAT. At this point, you should have a good skeleton drawn for your garden. But design is an iterative process, not a linear one. I’ve gone back and forth between these last few steps several times now. I’ve nudged pathways here, added more evergreen structure there and tried completely different configurations altogether.

My design isn’t done, but it’s done enough to share. I’m working on bids for installing hardscape elements and I am working on my final plant list. Financial constraints will likely mean the garden gets phased in over a couple seasons, but I am optimistic that the elements I care most about can get installed this fall.
How have you approached designing your garden? Has the process gone smoothly or have you stumbled along the way? I would love to hear about your plans in the comments below! My next steps are defining plant species and doing some pretty renderings.
August 5, 2014
My First Quilt
This has been a very unusual summer on our homestead. We are still getting settled into our fixer-upper house and busily working on garden plans. But perhaps the most important part of this summer was receiving the devastating news that my mom’s breast cancer has spread to her brain. In an instant, my image of the future changed forever.
My mom’s quilting room (yes, she has a room entirely devoted to her craft!)
She was diagnosed last fall with an aggressive form of breast cancer. She went through chemo for several months, but after completing treatment tumors were discovered covering her brain – just a month before her retirement. Her doctors estimate she has about six to nine months with us. It could be more or less, so I didn’t want to waste any precious time while she’s clear of mind.
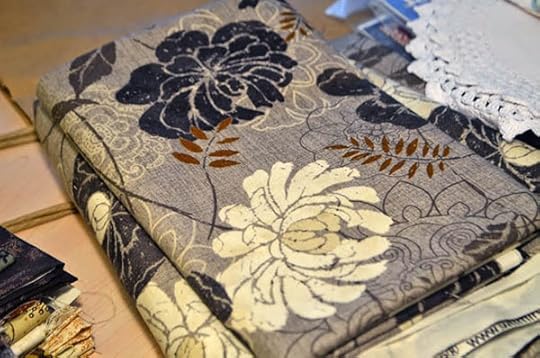
My “concept” fabric for the quilt. I chose this one first, then picked additional fabrics to match
I took the month of July off from work, which is in part why posts have been spotty lately. Highlights of our time together include visiting the Portland Chinese Garden, long talks in her peaceful backyard and working on a quilt together.
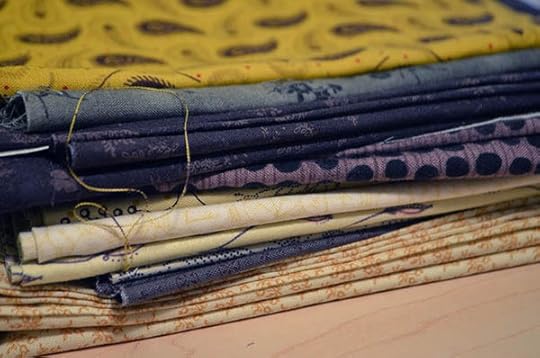
I’m in love with each and every one on this stack!
She has long been an avid quilter – gracing our home with lovely homespun gifts like bedspreads, table runners and all kinds of treasures. The bedspread she made for Jay and me as a wedding gift is pictured in this previous post.
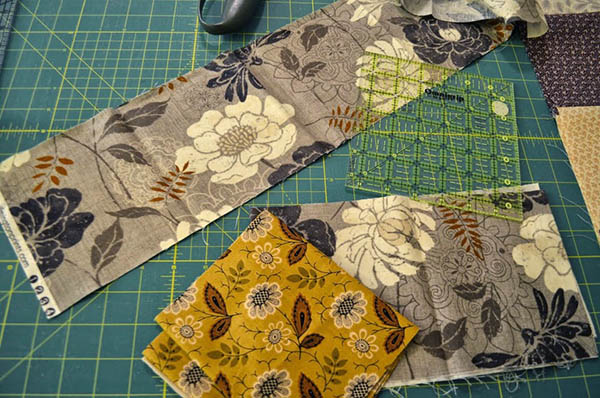
Laying out fabrics and cutting strips, then squares
I was delighted when she offered to make a quilt with me, to pass along her knowledge. I started by picking a simple quilt pattern and choosing a concept fabric – the one I’ll use the most of in this quilt. I picked about a dozen more fabrics to match that concept fabric. They are all comforting colors like calm greys, dark purples and warm yellows.

Sewing each square together in a random order. These sewn together pieces will come together to make the big quilt, with my concept fabric as the thick border and backing.
It’s my first time sewing, so the lines might not be perfectly straight when all is said and done. But there’s something so wonderful about the memories we’ve made over this quilt. Lots of laughter and lots of tears and, most of all, lots of love.

Me, my momma and my little brother Mikey taking a “selfie” during an afternoon visit
I’ll share the final quilt with you when it’s finished, but I’m in no hurry. I love having such a great excuse to spend time together. So take a little lesson away from this post: try not to waste a day with those you love. Make memories and say what you need to say. There’s no time like the present.
July 28, 2014
Chicken Coop Shed Combo
We’re slowly working on getting settled into our new homestead, which came with a dilapidated shed in the backyard. I specifically recall the house listing stating “shed has no value”. Although it was a major eye sore, I saw the potential for both garden tool storage and a sturdy chicken coop.
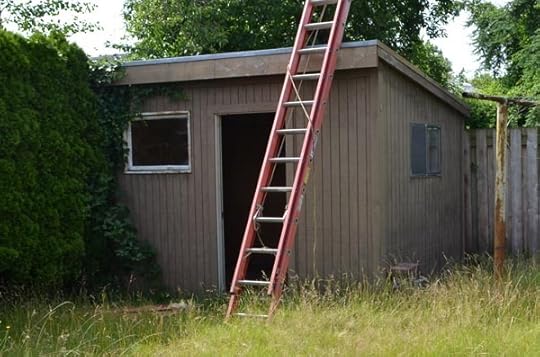
Existing shed at our new place
A local contractor rehabbed the shed, salvaging what wood he could, and rebuilding the structure. I drew up plans for him to add a chicken run, including a 3-D model with dimensions. Our new neighborhood has raccoons and I wanted something heavy and sturdy for our flock.
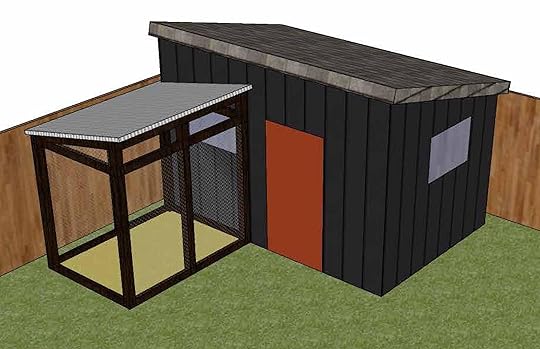
Bird’s eye view of the new shed/chicken coop design
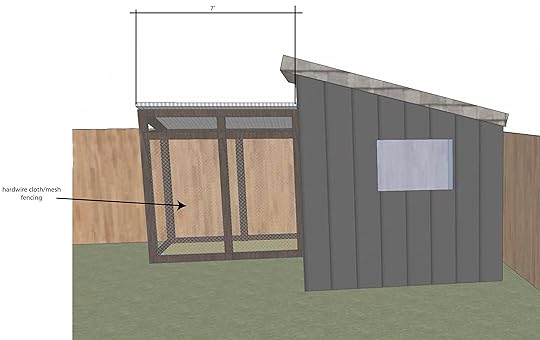
View east of the new shed/chicken coop design
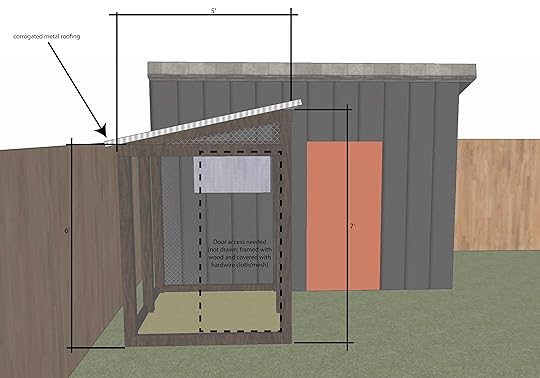
View south of the new shed/chicken coop design
Construction took about four days with three tough guys on the job. After day one, our backyard looked like the shed exploded. Some wood was able to be salvaged, but most was rotten.
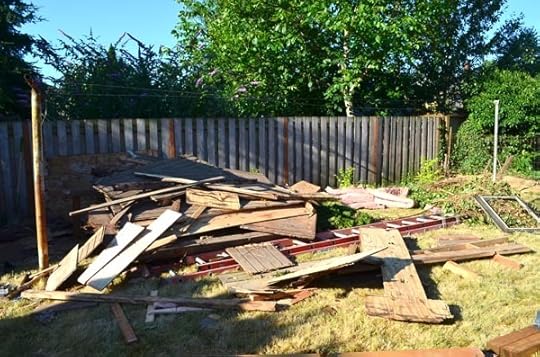
The exploded shed
We are building the hen house part of the coop ourselves. It will essentially be a big wooden box with a hinged side to open for cleaning. It will sit on the floor of the shed, which is about 2-3′ higher than the floor of the run. I’m so excited to have a dry, protected area for the bedding, feed and other supplies.

Red dashed line shows where access door will be cut. Interior red line shows where hen house will be built.
The contractor added some nice venting along the roof. Along with the two existing windows, the girls should be able to get some nice fresh air into their coop. People can be overly concerned with making the hen house air tight, but it’s actually healthier for them to get fresh ventilation.
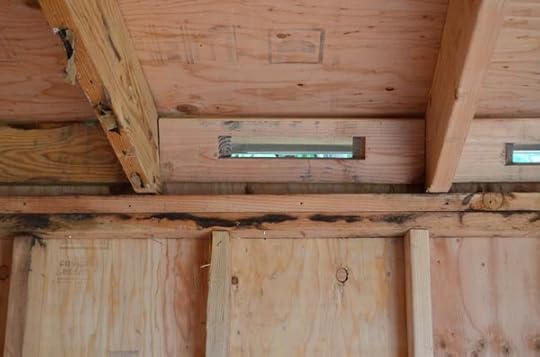
Shed vents – openings with wire coverings
The girls are already enjoying the new run. Portland has been pouring rain the last couple days and I am so happy to report the run has stayed nice and dry. No more leaky roof!
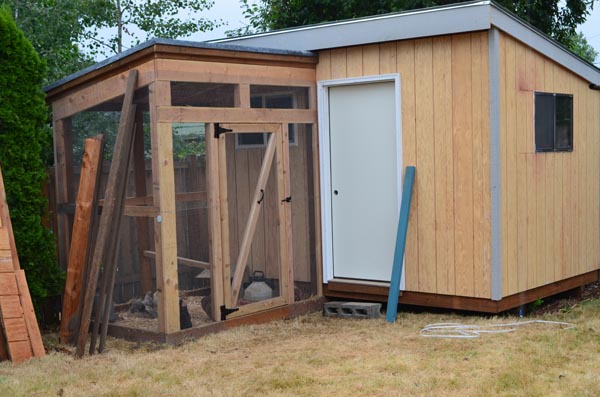
Almost finished shed/chicken coop. Still needs paint, door knob and final hen house.
Stay tuned for updates later this summer as we get the hen house finished and paint the shed. There are so many major changes planned for this soon-to-be-garden. It already feels more like home to have the girls happily settled in their new digs.
July 15, 2014
Why Practice Crop Rotation?
Put simply, crop rotation means you plant each type of vegetable in a new spot in your garden each season. You want to rotate crops for two general reasons: to reduce pests/disease and balance out nutrients in your soil.

Pests/disease usually focus on a general plant family. If you had problems with your cabbage in one spot, don’t plant anything in the brassica family there this year – like cauliflower, broccoli, etc. Pests will lay eggs or otherwise try to survive the winter in the soil. When they emerge in springtime, they’ll be looking for food in that same spot. They’ll have a harder time surviving if that food source has moved to a new place.

My continual battle with aphids
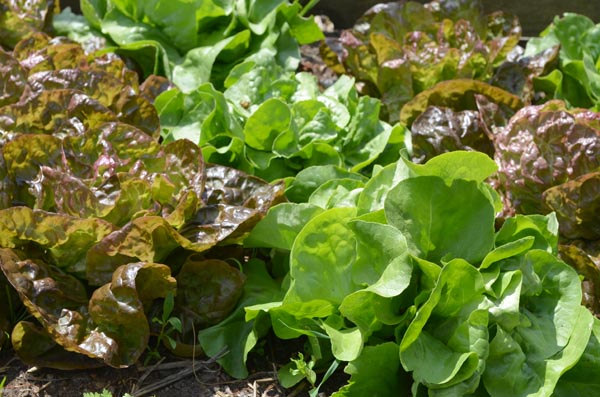
All vegetables want nutrient-rich soil with a combination of nitrogen, phosphorous and potassium. Leafy green plants are often heavy feeders of nitrogen. So the nitrogen levels where they grew last year might be lower, so put them in a new spot. If you plant peas in their place this year, the peas will add nitrogen back into the soil.
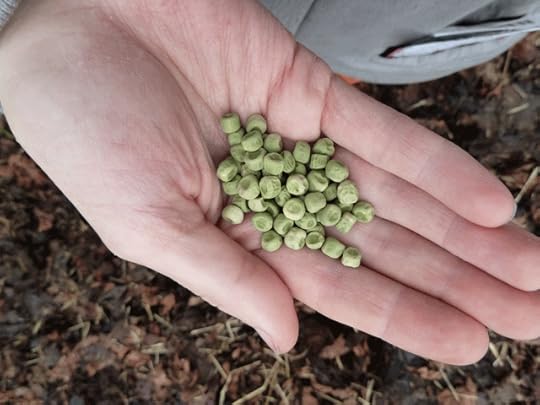
Pea seeds to be planted in a former lettuce patch, to help replenish nitrogen levels
Crop rotation can be really easy if you take just a little time to organize your garden plot. Jot down in your garden journal what got planted where this season, then refer to it when you plant your next round of crops.
Need a little more guidance? Check out my former garden plans from 2014, 2013 and 2012. You can see from one year to the next how different crops move around to different beds. Good luck and happy planting!
July 11, 2014
Toddler Homestead Chores
Having regular chores was simply part of life growing up on my family’s urban farm. Everyone in our family, both big and small, had their jobs and it gave us all an immense sense of accomplishment to pitch in. Although Juniper is only two, she already has her share of chores on our homestead that are teaching her loads of lessons.

Juniper doing daily egg collection (although we clearly missed a couple days – look at that pile of eggs!)
Juniper “assists” us with several chicken-duties: collecting eggs and gently handing them to us one at a time. She fills up their feeders with chicken feed, one small cup at a time. And she delivers garden scraps to the hens, feeding them one leaf at a time through the fence. Even at two, she has a very sweet disposition with animals – a beautiful character trait in my opinion.
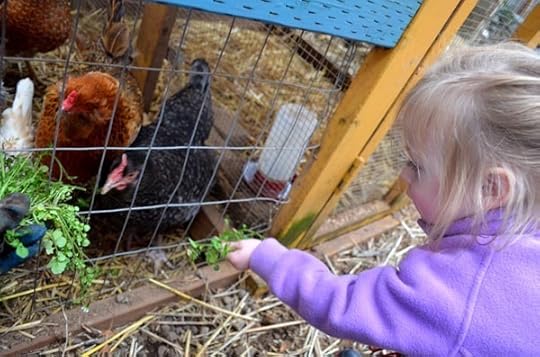
Our two year old carefully feeding the chickens
She has been an expert garden waterer since she could stand. We expect her to be both wet and entertained with this job. It teaches us as her parents that sometimes it’s ok to just let her make a mess. It teaches her that thorough watering helps our favorite vegetables grow big.

The few raspberries I was able to keep before Juniper ate them
Two is also the perfect age to start harvesting together. Most of her picked berries never make it to the bucket, but she knows that berries grow on bushes and not in cardboard containers. How many kids sadly don’t get that experience of learning where their food comes from? What a lucky little lady Juniper is.
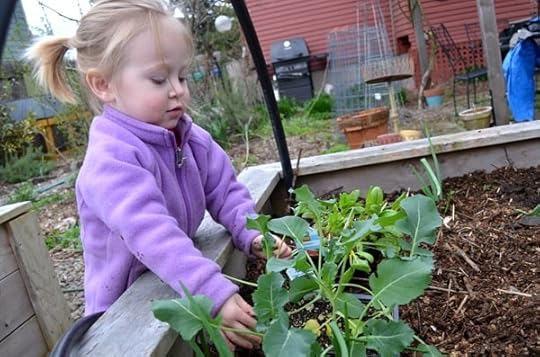
Juniper planting broccoli, her favorite veggie, in the spring. When we harvest the plant, she proudly declares she helped plant it.
One of the biggest lessons she is learning is patience. You get the sweetest berries when you let them ripen. Those early apples are going to make great pies this fall. And spending time on a job well done leads to delicious rewards.
July 2, 2014
The Sentimental Garden
This week we have officially moved onto our new homestead and new folks have moved onto our former homestead. I’ve planted over a dozen gardens, but this one is sure hard to say goodbye to.

Spring lilac
Goodbye lilac. I always envisioned this tree as a version of myself in old age - tough, gnarled and yet beautiful. The buds would swell in late winter and my anticipation would build as it announced spring to me from the kitchen window.

Asian persimmon fruit ripening
Goodbye persimmon. I planted you with one of my best friends the first summer in our garden. A few years later I rocked Juniper in my arms while I watched the buds swell, leaves emerge and the first fruits form. You were my companion during the early mornings and late evening when I was learning to mother.

Bearded irises
Goodbye irises. You were given to me by my grandmother, the 4th generation Oregon Trail pioneer, from her garden. You helped turn our front yard into a welcoming entrance.

Columbines
Goodbye columbines. My Dad gave me these flower starts a couple years ago when he came back to the live stateside after years abroad. I think of him every time I see them and count my blessings to have such a loving family full of green thumbs.
I’ve come to realize we never own a garden – we are only stewards. We cultivate and care and tend. We break sweats, we bury tears and we lift sounds of laughter into the air above it.
We planted a lot of love in this garden. As excited as I am for the journey ahead with our new homestead, I’ll take with me forever the fond memories and homesteading lessons learned here.
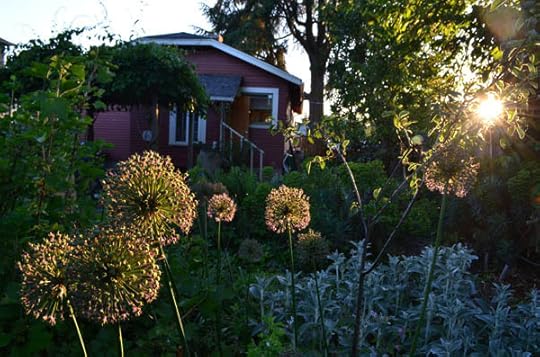
Homestead at dusk
I would love to hear your stories about beloved gardens and your most sentimental corners of your homestead. Tell me about it in the comments below! And expect look forward to a fun summer of posts about building the new homestead.
June 25, 2014
Lasagna Compost
It’s almost time to close the chapter on our former homestead, as new folks are ready to move in. I just couldn’t help but break a sweat one last time to get into shape before they take over stewardship.
Bolted spring crops ready for the compost pile
The spring vegetables had bolted to the sky. Groundcovers were eagerly encroaching on the pathways. The hardy kiwi vine was no longer happy just climbing the pergola and had it’s sights on the roof. Taming that jungle produced a mountain of garden debris, which will turn into a mountain of nutrient-rich compost.
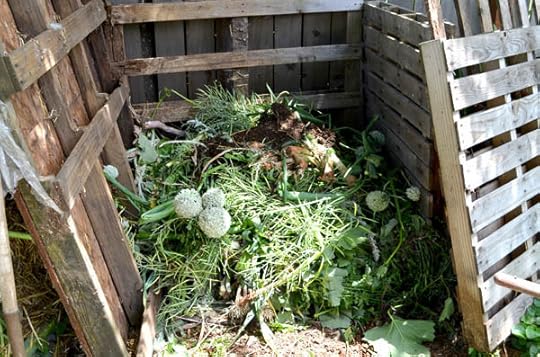
Thick layer of “greens”, about 12″ thick
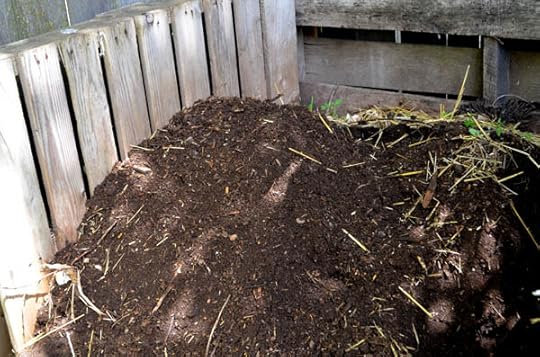
I started some fresh piles using a simple lasagna-method – making thick layers on top of each other with browns and greens. The used chicken bedding are the “browns” and the garden debris are the “greens”. Each layer is about 12″ thick and will shrink quite a bit in the next couple weeks.
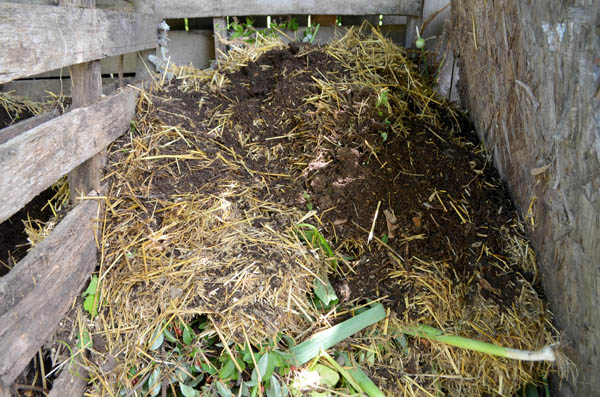
Thick layer of “browns” laid onto top of the “greens” and topped with some finished compost
You can jumpstart the decomposition process by topping off each layer with some finished compost from a nearby pile. That inoculates the new lasagna layers with microbes that are ready to work. Once your done piling the new layers as high as you can, spray the pile down with water – just enough so it’s damp, but not dripping wet.
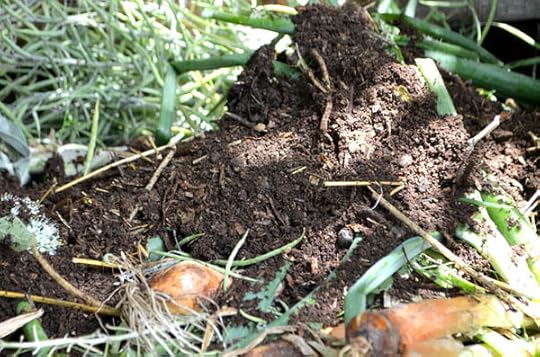
Jumpstart the decomposition process by adding some finished compost to your fresh compost piles
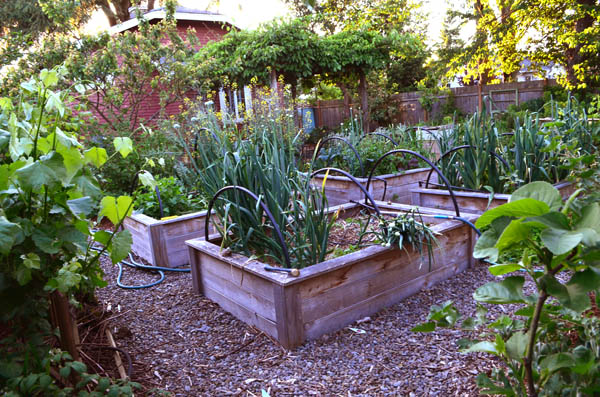
I finished the day by loading a finished pile of compost into the cleared out raised beds. Not only do the new residents have a well-tamed garden to immediately enjoy, they will also have some nutrient-rich, homemade compost ready for their next round of planting in a month or two.
Finished compost ready for the vegetable beds


