
Renee Wilkinson's Blog, page 14
December 1, 2013
Homemade Pumpkin Puree
Making homemade pumpkin puree is insanely simple and the flavor is far superior to anything you will find in a can. The most important aspect is choosing the right pumpkin.
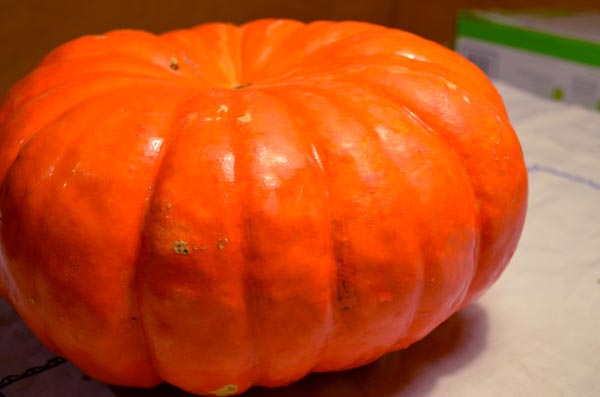
Rouge vif D’Etampes pumpkin
Grocery stores often carry small “pie” or “sugar” pumpkins that work well, as they have a higher sugar content. I tend to favor Rouge vif D’Etampes, a French heirloom, which is sweet and a good keeper. It’s as pretty as it is delicious.
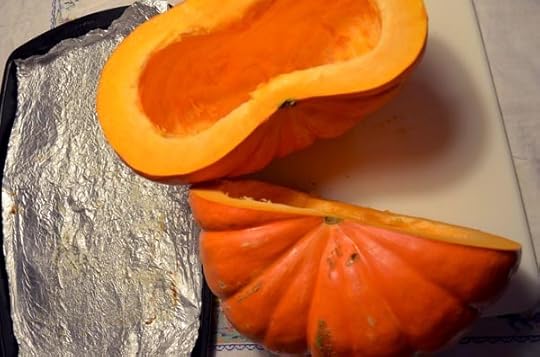
Pumpkin scraped inside and ready for roasting
Step 1: Gut it. Grab a sharp knife and slice the pumpkin in half. Scoop all the webby and seedy “guts” out of the pumpkin. You can compost the inners or feed them to your backyard flock.
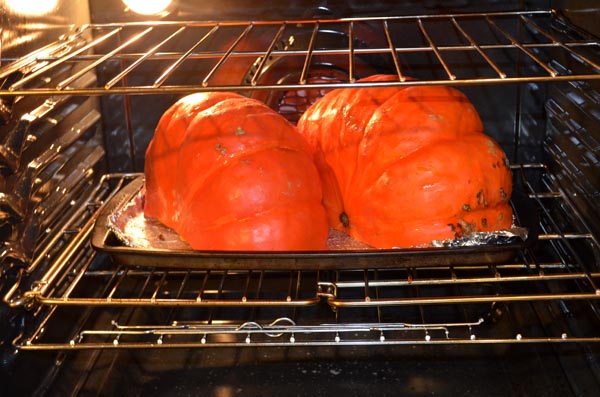
Facing cut side down in the oven
Step 2: Roast it. Place the pumpkin halves cut side down on a foil-lined basking sheet. Roast it in the oven at about 375 for an hour. You will know it’s done when you can piece the side easily with a fork.
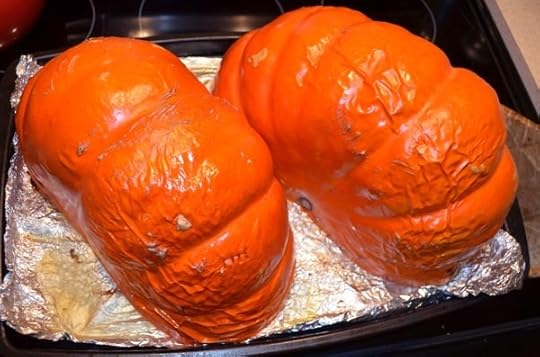
After an hour of roasting, the pumpkin halves pierce easily with a fork
Step 3: Puree it. Let the pumpkin cool a bit, then scoop the walls of the pumpkin into a big bowl. You will leave behind the hard outer skin, which should separate pretty easily now from the “meat” of the pumpkin. Use a food processor, blender or even a pastry knife to mash up the softened pumpkin.
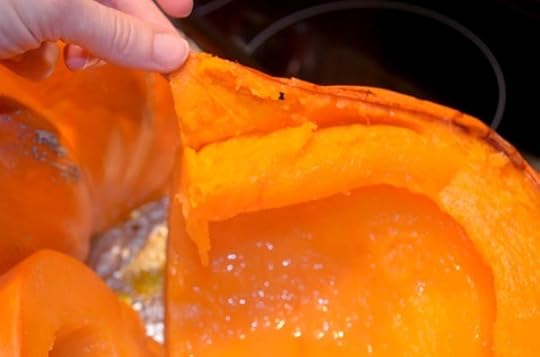
Discard the outer skin after peeling off
Step 4: Use or store it. Use it right away for soup, sweet breads, muffins, pies, etc. It will keep in the refrigerator for up to a week. Pumpkin puree also freezes really well. I pack mine into small freezer bags, about two cups of puree per bag. That seems to be a common size called for in recipes, making it easy to just thaw out what you need a little at a time.
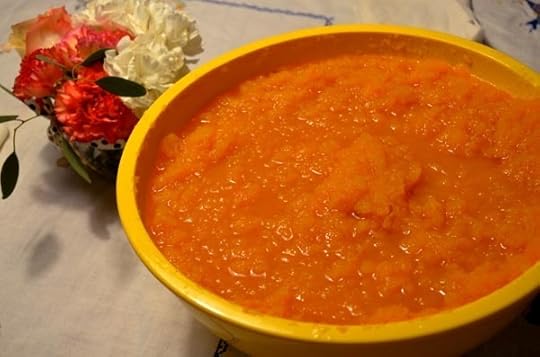
Pumpkin puree ready for baking
This big Rouge vif D’Etampes was on our front porch as a fall decoration for about a month. It was about 18″ in diameter. Once roasted, it made about 16 cups of puree that I will use this winter. Gotta love a decoration you can eat!


November 22, 2013
Cooking Winter Squash
We are up to our ears in winter squash! I decked out our front porch this year with some really fun varieties, in part so we could make some delicious meals with these beauties. There are so many fun varieties to cook with and luckily many of them will keep for weeks, or even months.
Growing winter squash takes up some prime real estate on our 1/10 of an acre urban plot. Although I have my tried-and-true favorites, I like to experiment every fall with trying new varieties from local farms. Here are a few that have earned a place on our homestead and certainly deserve a place on the Thanksgiving table.
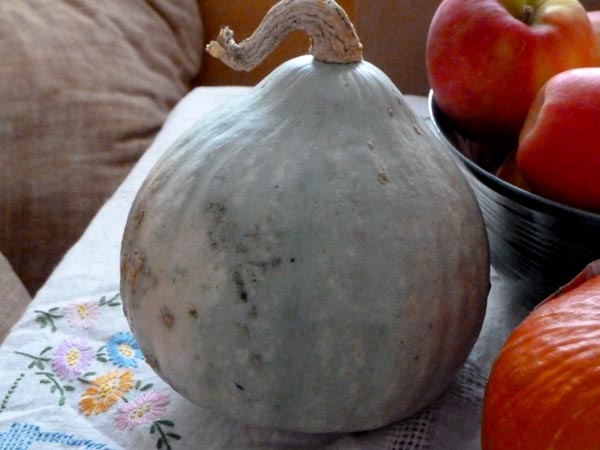
Baby Blue Hubbard
Blue Hubbard - This massive winter squash has a hard outer shell, making it an excellent storage squash, and a subtle blue-green coloration. Inside is sweet, golden flesh that lends itself well to either baking or cooking. There is also a Baby Blue variety that weights an average six pounds – a more manageable size for a family meal. But if you’re thinking Thanksgiving feast, go for the bigger variety to feed a crowd.
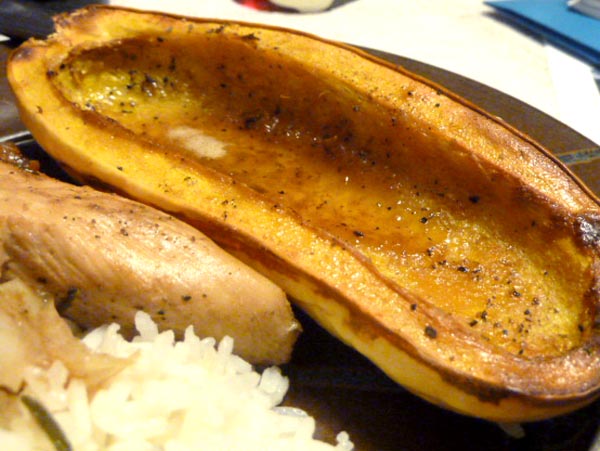
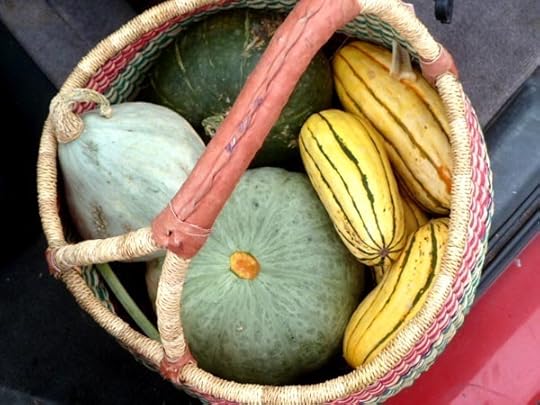
Roasted delicata squash
Delicata - We simply cannot grow enough of this favorite winter squash. The nutty flavor is delicious simply prepared and the skin is thin enough to eat, unlike many winter squashes with tougher skins. They are the perfect size for an individual serving. I often just cut them in half, scrape the seeds out, throw in a dab of butter, salt and pepper, then roast at 350 degrees for 20-30 minutes. Or you can make it a meal by stuffing with goodies like kale and sausage. Nom!
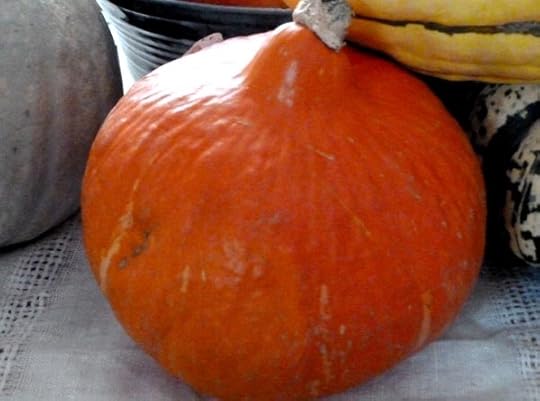
Red Kuri
Kuri – These teardrop shaped squashes come in blue and red varieties. They are typically about five pounds with thick skin and dry, sweet flesh. Because they are dry, this squash works best cooked into soup, substituted for sweet potatoes or made into curries. This is a great keeper squash that becomes sweeter when stored in a cool, dry place.
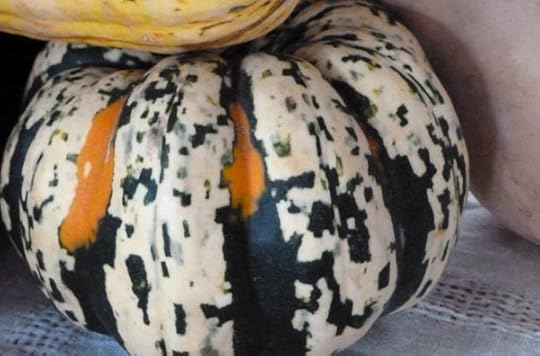
Sweet Dumpling
Sweet Dumpling - You have likely seen this dainty little winter squash. It is one of the sweetest winter squashes with yellow flesh inside. The small size makes it a great single-serving squash.
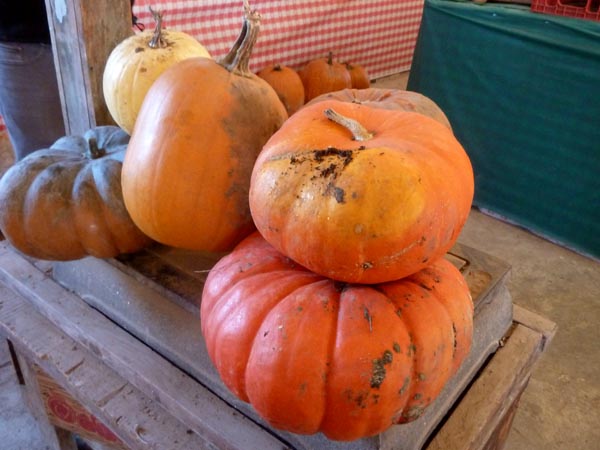
Pile o’pumpkins, including two Rogue Vif D’Etampes stacked on top of each other to the right
Rouge Vif D-Etampes – Move over sugar pumpkin. This french beauty is a show stopper to look at and, in my humble opinion, one of the best “pumpkin” flavored winter squashes out there. Also called the “Cinderella” pumpkin, this squash makes excellent pies and baked goods. One of my favorite ways to prepare it is to stuff it with everything fabulous you can imagine, roast it in the oven, and invite a gaggle of friends over to scoop out the delicious interior for dinner.
Have you discovered some new favorite winter squashes this season? I’m always looking for new varieties to grow and would love to hear which ones have won you over. Tell me about it in the comments below!
November 21, 2013
Planting Fall Garlic
It’s not too late to get a fall planting of garlic in the ground. This easy to grow crop is adaptable to different soil types and is an incredibly low-maintenance plant. My dad shared some of his garlic harvest with us and we have been saving the best and biggest bulbs to plant this fall.
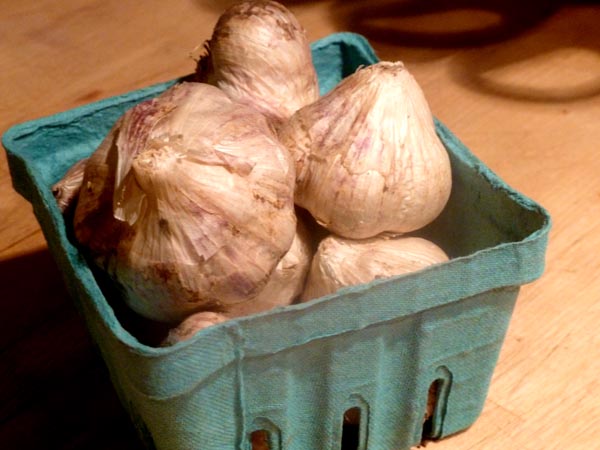
Hardneck garlic we set aside for fall planting
Garlic generally produces the best crops when planted in the fall. The winter months allow it to develop a strong root system, allowing it to take off when spring finally arrives. Ideally, you should plant your garlic a couple weeks after the first hard frost. For those in mild climates like Portland, we have most of November to still get garlic in the ground. You want it planted before the ground is hard frozen for winter.
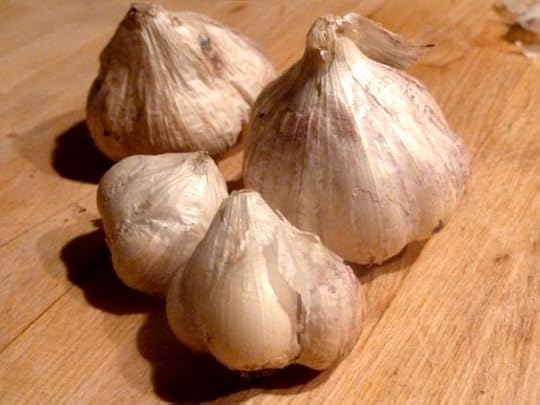
There are two groupings of garlic you can choose to plant: hardneck and softneck. The hardneck varieties are similar to what you see in the grocery store with large cloves around a main stem. They are easy to peel and have a strong garlic flavor. Softnecks generally have smaller cloves with a milder flavor. I grow a bit of both and plant stores are carrying an increasing number of interesting varieties to plant.
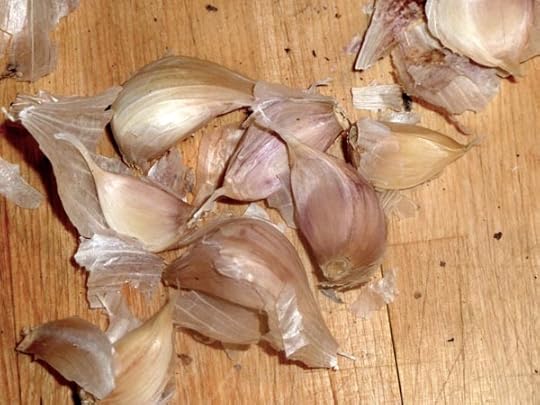
Keep the papery skins in tact when you plant for seed cloves
A general rule of thumb for planting is to sow seeds at a depth of two times the seed size. Imagine two cloves of garlic stacked on top of each other – that’s about how deep you should plant the cloves, or around 2-3″ into the soil. Keep the pointed end facing up and space each clove about 6″ apart.
Water your freshly planted garlic well, then dress the top of the soil with a thick layer of mulch. I reuse chicken bedding by placing about 6″ on top of the garlic rows, but dried leaves work well too. It will help keep the soil warm and moisture in place.
The green shoots from the new garlic will emerge in about a month, so keep your eyes peeled. They might not grow much over the coldest months of winter, but they should hang on at least. In spring, they will take off after just a few sunny, warmish days.
When harvesting garlic, eat the small ones but keep the biggest ones as your seed stock for the next planting.
I look forward to harvesting the “whips”, or scapes, which are the curly green tops that form in late spring as the plant tries to flower. You don’t want them to flower, since you want their energy going back into the bulb to make fat, juicy garlic. Cut off the “whips” with the unopened flower buds and sauteed them. They have a mild garlic flavor that tastes delicious over chicken or in stir fries.
By mid-summer, the green stalks will have turned brown and died back. That tells you it’s time to harvest the garlic. Save the best cloves to replant the following fall. This way in a few years you will have started to cultivate your very own variety of garlic. It will be well-adapted to your garden conditions and you will never need to buy garlic again!
November 13, 2013
Signs of the Homesteading Movement
Earlier this week I had the pleasure of sitting down in my kitchen for an interview with garden guru P. Allen Smith (well, I was in my kitchen but Allen was in Arkansas…). He was talking with me via Skype about my book, Modern Homestead, for his public radio program Garden Home. We chatted about our personal journeys with homesteading, keeping backyard poultry, what we are preserving this season and more. But we also talked about the growth of the modern homesteading movement.

Talking with P. Allen Smith (via Skype) from my kitchen table
I mentioned how I see feed stores popping up in very urban areas left and right – something that was hard to find just 5-10 years ago. It’s more and more common to see front lawns being replaced with vegetable beds and farmers’ markets seem to multiply every year. It’s clear that people want to know more about where their food comes from, meet the people who grow it and get their hands dirty themselves in their own back (or front) yard.
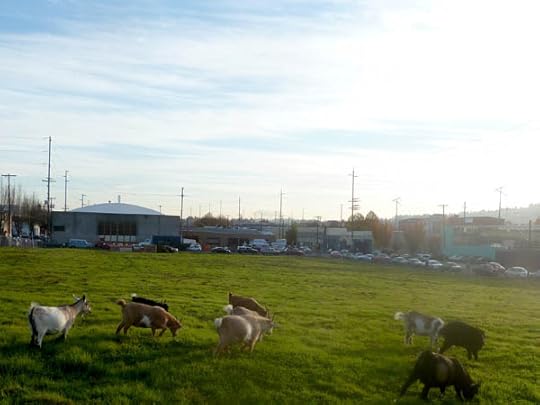
Urban goats at home in an undeveloped lot in inner southeast Portland
As with most of my interviews, I came up with all kinds of other (and perhaps more interesting) things to say after the interview was over. For example, I often walk by an empty lot in inner southeast Portland that is home to a decent-sized herd of goats. They keep the grass trimmed and the neighbor kids (and adults) fascinated with their presence.
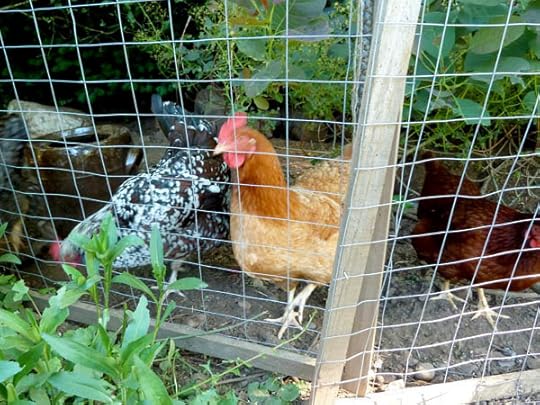
Our vacation rental house included a backyard flock
We rented a house recently that included entertainment from the home owner’s backyard chicken flock. What a deal!
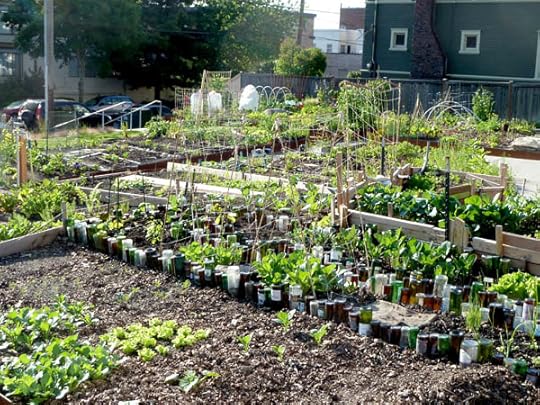
Seattle community garden in Capitol Hill
I could have mentioned the growing demand for community gardens, many of which have waiting lists months or years long. Cities are often scrambling to develop new plots to keep up with the demand.
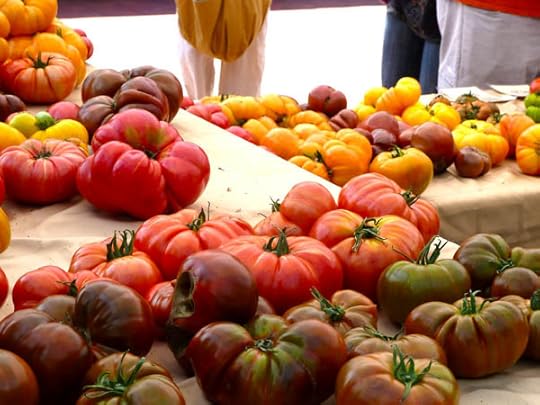
Heirloom tomatoes at a farmers market
Not only do more people know what an heirloom tomato is, many can list a few favorites at the drop of a hat. Grociery stores big and small are now carrying widen assortments on their produce shelves.
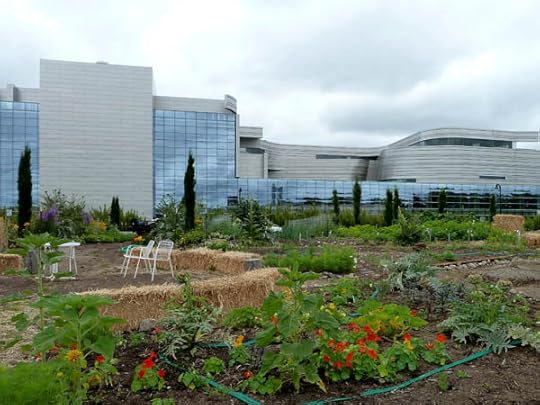
Courthouse Garden in Eugene, Oregon
Unoccupied urban lots are increasingly becoming homes to temporary or even permanent food gardens, like this gorgeous Courthouse Garden outside the Federal Courthouse in Eugene, Oregon.
I have my own reasons for thinking the modern homestead movement is growing, but I would love to hear what you think. Why are you interested in bumbling down the homesteading road? What does your homestead mean to you? Tell me about it in the comments below!
Want to hear the interview? It airs on P. Allen Smith’s Garden Home public radio show this Saturday throughout the great state of Arkansas. It will be available after airing through iTunes and on the P. Allen Smith website. I’ll post links when they become available.
November 11, 2013
DIY Baby Garden Gnome Costume
Attention busy garden-loving parents! Save this super cute and easy-peasy kid’s costume idea for next Halloween. I found an adorable version on Etsy (which is no longer available otherwise I would link to it!), but opted to spend $5 bucks at the craft store to make a a still-adorable-knock-off.
 First of all, this requires no sewing. I dream of learning how to sew one day. Until that day arrives, I am staying busy working full-time as a landscape designer, chasing chickens, keeping a winter garden growing and still making time for my beautiful family. No sew = awesome.
Supplies you will need:
1 sheet of red felt (about 11″ x 17″)
1 sheet of black felt (optional, about 11″ x 17″)
1 strand of white dangly fringe (about 12″)
Baby shirt, pants and boots (which you likely already own)
Measuring tape
Safety pins
Scissors
1. Assemble pointy hat: Measure the size of your kid’s head to figure out how wide the hat needs to be. Then roll the red felt to that width, keeping one end very pointy and pin in place to fasten. Cut off excess felt to make an even, rounded bottom of the hat.

Twist red felt so one end is pointy. Cut off excess at bottom end. Pin into place.
2. Assemble beard: Measure the distance from the edge of hat to your kiddo’s chin. Juniper wouldn’t hold still for me, so I guessed. Use safety pins to adhere either end of the fringe just under the edge of the hat, hiding the pins from view.
“Beard” material is a strip of white fringe from the fabric store.
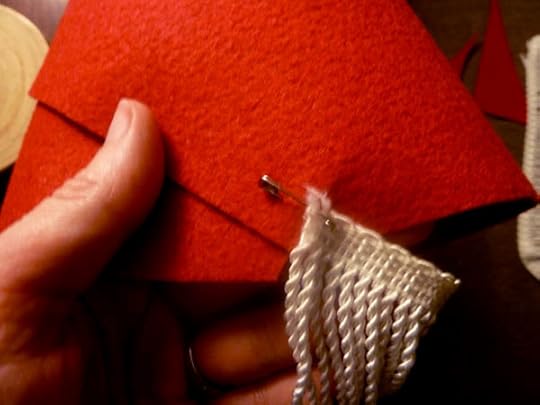
Pin either end of fringe onto either side of the hat

Assembled gnome hat & beard
3. Assemble belt (optional): Cut the black felt into a a couple 2″ thick strips. Cut a small square, 1″ x 2″, on one end of one strip. Lay it over the other strip, creating a faux belt buckle. Use safety pins to connect the two strips into one belt. Use safety pins to fasten onto the end of your kiddo’s shirt.

Use two strips of black felt for the belt buckle. Cut a rectangular opening on one end of one strip.

Lay opening over second strip of black felt. Pin to fasten together.

Pin felt belt onto the bottom of your kiddo’s shirt, overlapping the two black strips at the back so it looks like a solid strip of black felt.

Finished gnome top & belt, pinned underneath the shirt
How easy is that? It literally took me about ten minutes to assemble the night before. I didn’t even bother trying to hide the safety pins, but you certainly could pin things from behind so people can’t see the pins.
I was worried about whether Juniper would like the hat, but she LOVED the hat. In part because Jay and I laughed hysterically when she put it on and praised the heck out of her. She still insists on wearing it around the house and garden.
If you wanted to be a very authentic gnome, I recommend a light blue shirt and green or brown pants. We just used what we had on hand: a striped blue shirt, green pants and Juniper’s big black boots.
November 4, 2013
Snapshots of Autumn
The wind and rains are rolling in on these late fall evenings – a reminder that winter is rapping on our door. Here are some snippets of what autumn has looked like on our homestead.

Fall creates a mix of cool blues and gray-greens in the front yard, dotted with yellow leaves from our trumpet vine and quince shrubs. Scarlets pop up here and there from the small dogwood and aronia bush. Morning dew hangs on a spider’s web that keeps growing and growing in the dogwood.

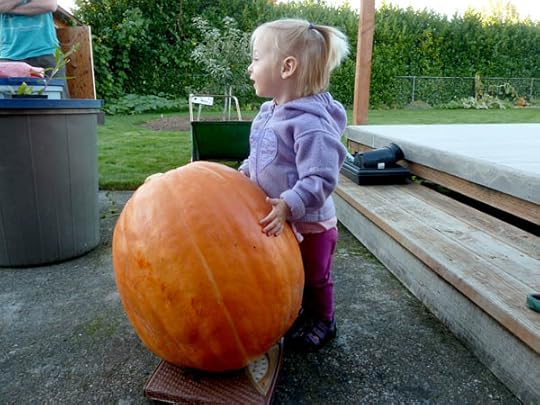
I decided this year that I wanted one HUGE pumpkin for the front porch. Thankfully, my dad helped this little dream come true with a 70 pound pumpkin he grew as a gift for Juniper.

We could barely roll this sucker into the back of our car…
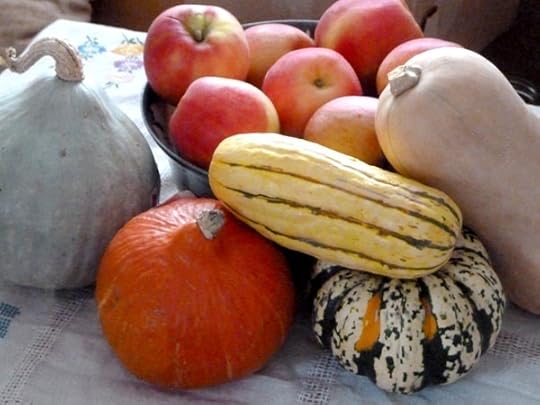
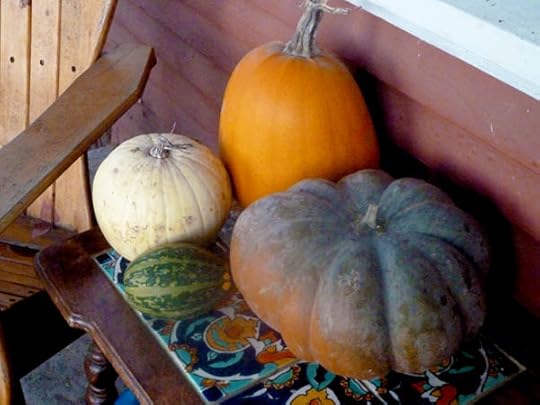
We visited a local farm to fill out the rest of the gourd collection on our porch. We’re planning to eat them one at a time over the next few weeks.
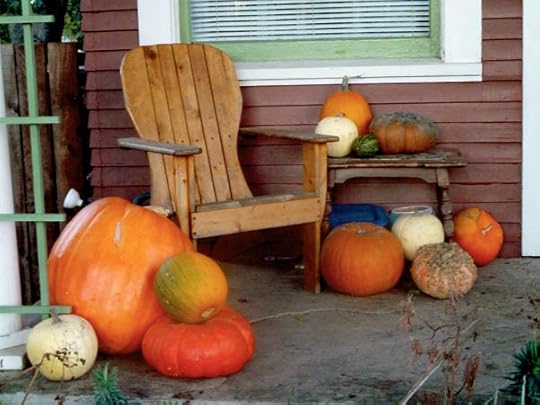
This warty, bumpy beauty is a Galeux D”Eysines. I’m especially excited to cook up this French heirloom.
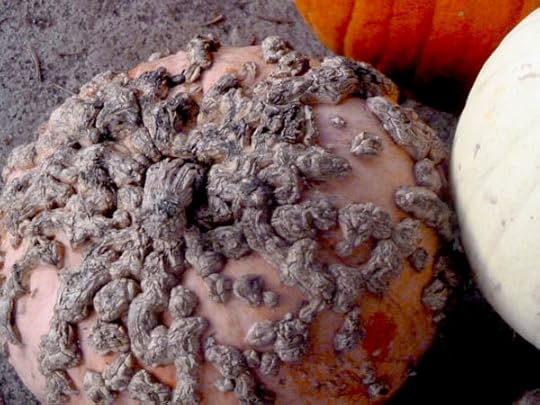
Other tasty varieties include Rogue Vif D’etampes (also called a Cinderella pumpkin), some small pie pumpkins and ghostly white pumpkins.
Last week I had a dream that I was standing in the garden in the middle of the night during the first hard frost of the year. I so vividly remember seeing the tomatoes slumped over, finally to sleep at last from the temperature dipping below freezing. I woke up the next morning, realizing it was a dream. (Of course it was – I pulled out my tomatoes weeks ago!)

The crazy thing is that night had indeed been the first hard frost – marking the end of the season. Daybreak greeted me with that low light that is so familiar to winter. It caught the asian persimmon on the side yard and just made it look electric with light. I’ve loved autumn this year, but I find myself ready to welcome winter with open arms.
October 21, 2013
Apple Harvest
It’s apple season, so it was time to visit what I consider to be the crown jewel of Oregon fruit country: Hood River. This little town about an hour east of Portland produces loads of high-quality crops ranging from cherries, plums, pears, apples and more. My sister tipped us off to the only organic apple grower in the area, which made for the perfect fall day trip.
 Mount Hood Organic Farms had bins and bins of freshly picked apples, and even pears, for us to load up on. Their prices were some of the best I’ve seen, but there was a lot more to see than fruit.

The vista of Mount Hood surrounding the farm was jaw-dropping. It was the perfect place to see that gorgeous mix of native fall color – tans, golds and burnt oranges. It sounds like this is a wedding venue as well – Jay and I remarked that it’s too bad we’re already hitched.

The barn structure is just unbelievable. I saw all kinds of Pakistan and Indian-inspired patterns in the woodwork that Farmer John was building by hand. It seemed like every corner had some new, unexpected surprise for those of us design-lovers.
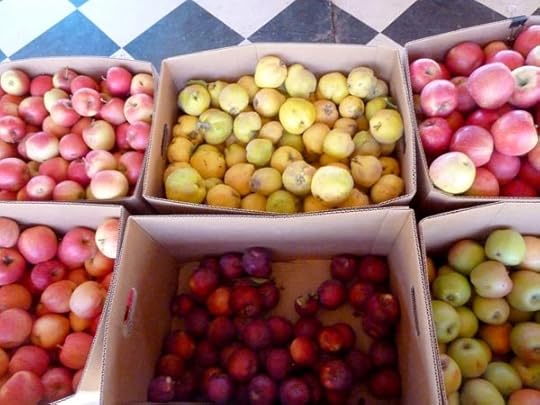
But back to the apples… We had an informal tasting tour from one of the helpful staff of the dozens of varieties they sell – from the sweet to the tart. We bagged up some lesser known varieties for fresh eating. Ambrosia has a crisp, sweet and almost perfume-like flavor. But the Mutsu was my favorite – a bit more tart, but with almost a honey-like hint.
They had deals on “seconds” Jonagold, which means they might be shaped funny or have a small blemish. These are the best for pies and canning. They are thick, juicy and somewhat tart. You won’t ruin the flavor by cooking them, which you would do with a more delicately flavored apple like the ones I mentioned above. And that hint of tartness gives you a strong “apple” flavor when it gets cooked.
We lingered on the farm for a casual picnic with family after loading up the car. I’m not facing some late nights over the next couple weeks as I can up applesauce and pack freezer bags for pies. I can’t wait to make a visit to this farm an annual tradition.
October 18, 2013
Fall Plantings
Fall is a great time of year to plant new trees and perennial shrubs for two big reasons: it gives your plants several months to work on establishing roots and there are all kinds of crazy deals right now as nurseries close out their summer stock. Just be sure to get your new purchases in the ground well in advance of your first hard freeze, when the ground gets hard.
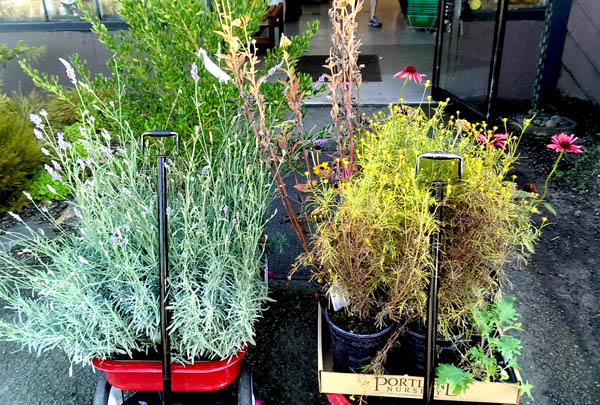
Fall plant splurge on clearance perennials
One of my favorite local nurseries has marked down tons and tons of excellent perennials. Not because they aren’t still ”good”, but because they are dying back for winter. I stocked up on drought-tolerant, flowering plants to bring some splashes of color to our front yard. They included Enchinacea, Rudbeckia, and Corelopsis - mostly in warmer shades of golds and rubies to accent the strong purples I already have planted en masse.
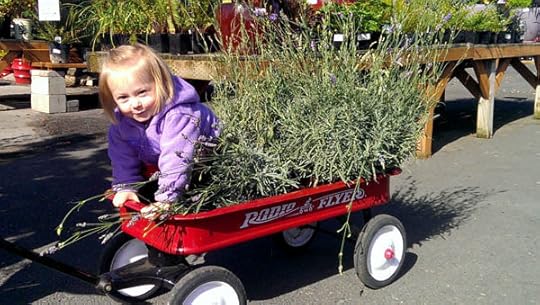
That’s a lot of lavender!
I also sprung for some French Lavender – something I have been coveting for a long time. I planted our walkway with lavender several years ago, but it was a tender variety that died during a harsh winter. French “Provence” Lavender is suppose to be hardier and I’m looking forward to the rangy plants spilling along the entrance to our house next summer.
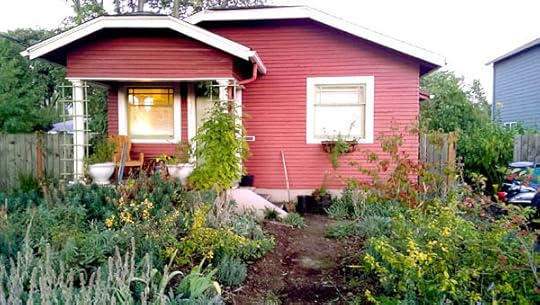
Front yard, October 2013. Almost entirely planted with cuttings from existing or freely acquired plants.
It’s also a great time of year to cut and divide your favorite bulbs and perennials. I spent a couple days doing that last year, which made a massive difference with how full and lush our front yard looked this year. In the backyard, the asters I cut and divided last fall are now bursting out of every corner, which the bees are grateful for at this time of year. It’s a great, frugal way to fill your space while repeating elements throughout your garden to give it continuity.
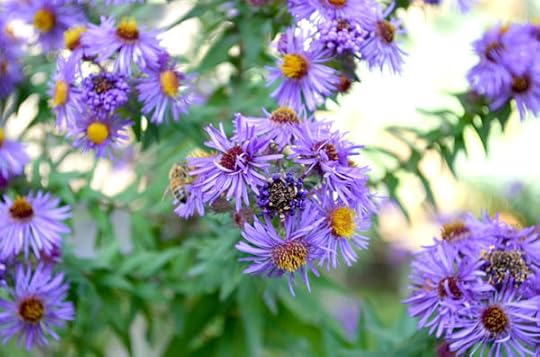
Fall asters attracting bees. A very easy perennial to dig up, cut a chunk off and replant.
I am getting more ambitious with propagating plants in the fall. Last year I successfully propagated grape vines, currants and flowering quince. This year I might try my hand at some non-edible, but very striking plants like beautyberry which provides a stunning winter-time show.
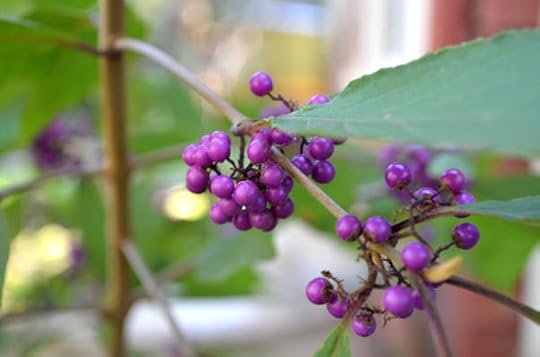
Beautyberry, which puts on a gorgeous winter show with these inedible purple berries
Are you planning to cut and divide this fall? Did you also wind up with some spontaneous plant splurges? Tell me about it in the comments below!
October 16, 2013
Prepping Beds for Winter
The days are growing darker and there is a bite in the morning breeze. Before the first frost hits, which for Portlanders is around November 15th, the homestead needs to be prepped for winter. We have had some fierce rain and wind storms already, so when we had a clear weekend I jumped on my garden to-do list.
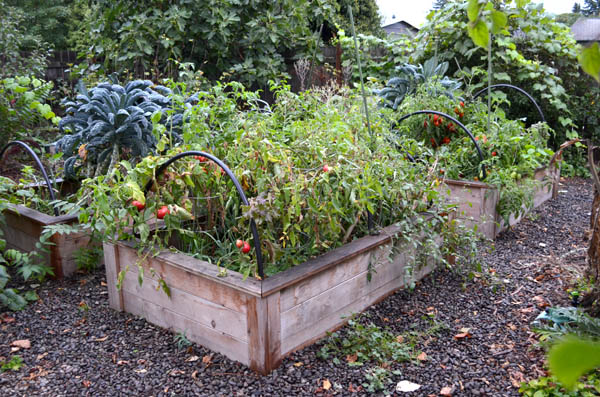
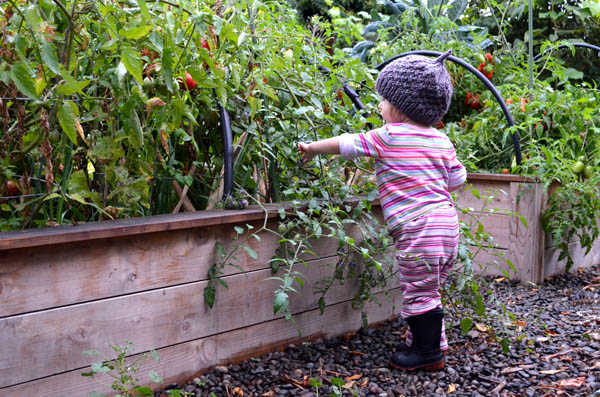
Fall vegetable beds, still producing late season tomatoes
As we all know, vegetable plants suck a ton of nutrients out of the soil every season. Every winter I try to balance the need for a winter garden with the need to replenish nutrients in the soil. The two beds that grew my winter garden last year are allowed to take a break, while the other two beds get planted out.
The two beds that grew my winter garden last year were densely planted this summer with tomatoes, peppers, eggplants, and beans. In between these bushy plants, I snuck in dozens and dozens of leeks.
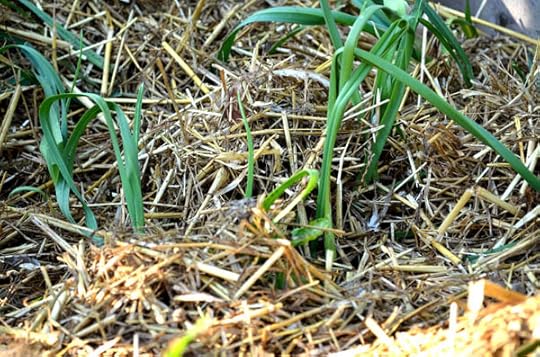
Leeks covered with thick straw & chicken manure, which will slowly break down over winter
I left the cold-hardy leeks, but pulled out all the warm-season plants. I added a nice, fluffy layer of used chicken bedding in between the leeks. This does two important things: the straw keeps the soil from getting too compacted from winter rains and the chicken manure will break down over winter to add nitrogen back into the soil. In early spring, I will turn the mostly composted straw into the beds before planting for summer.
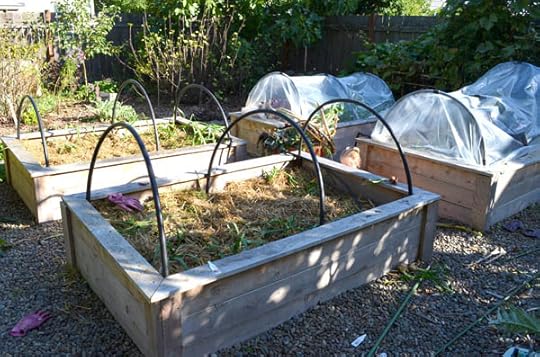
Raised vegetable beds prepped for winter
There are lots of vegetables that can be cold-hardy, but that doesn’t mean they will put on a lot of “new” growth during winter. It just means they won’t die off. To keep my vegetables growing enough to give us winter harvests, I make my two winter beds into mini hoop houses.
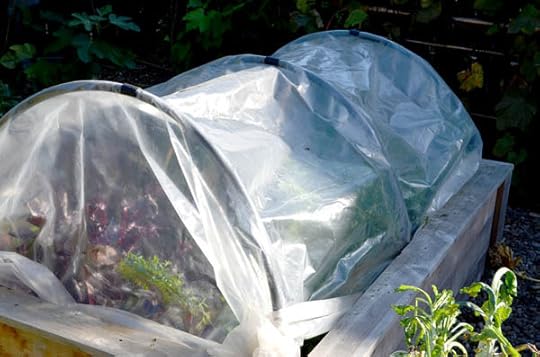
Raised vegetable beds covered with greenhouse plastic, making them into hoop houses or mini-greenhouses
I already have rebar dug into either side of the beds with pvc pipes attached to them. I attach greenhouse plastic to the hoops, securing them snuggly and tying up the ends. You can read more about that setup in my older post from last year. This makes a mini greenhouse that will keep the soil and plants a bit warmer this winter. The drawback is that I’ll need to water it periodically, since the rain is kept out along with the cold.
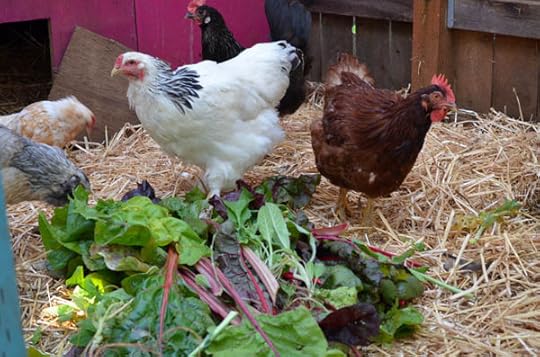
Chickens enjoying the chard and kale leftovers
The chickens enjoy this seasonal changing of the guard because they get extra goodies. Their biggest score was the Lacinato kale that I love so much, which was at least a year old and five feet high – although the picture above is their first course of swiss chard leaves that had leaf miner in them. It took them just a couple hours to devour it all.
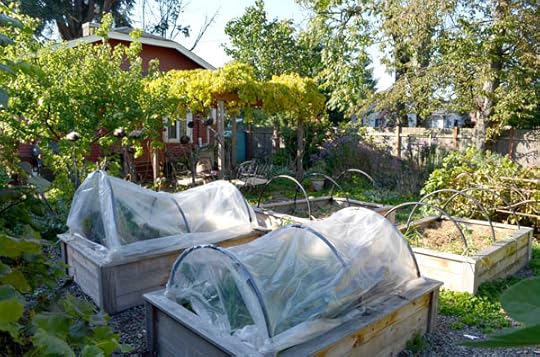
Garden ready for winter!
I love this time of year! Our cupboards are stocked, the chickens are fat and happy, and the garden beds are all prepped for the cold months ahead. I’m ready for a winter break and excited to dream about how great next year’s garden will be.
October 14, 2013
October Harvest
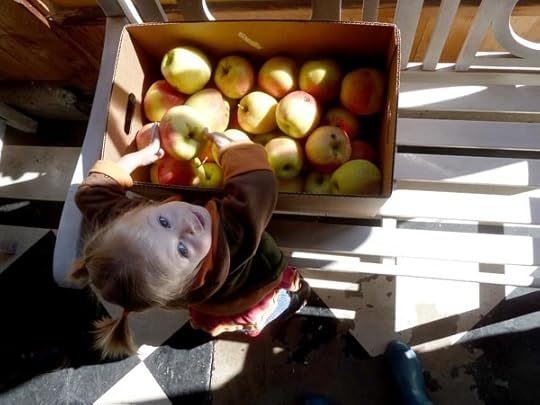
October is giving us the last drops of warm-season harvests, but it’s time to draw the curtain for winter. Juniper helped me pick the last of the ripe fruits and veggies. Her way of helping has more to do with eating than actually putting anything in the harvest basket, but I enjoy the company nevertheless.
 Our cupboard is already packed with tomatoes for winter – ketchup, marinara and stewed. And yet still I was able to harvest around 30 pounds of fruit from these last, frost-free days. To quickly preserve them, I blanched and peeled them. They were then roughly chopped and packed into gallon freezer bags. These frozen jewels are destined for soups and stews this winter, the perfect way to use frozen tomatoes.
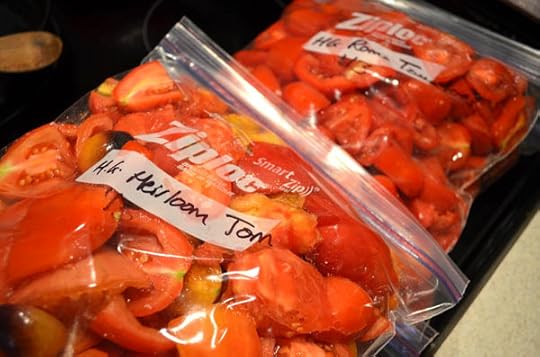
Fig trees produce two crops a year and one is always the heavier harvest. Our Desert King is perfect for the northwest, giving us a heavy “early” crop in late July. It’s always dicey whether we get a late crop at all, since an early first frost can easily ruin any ripening fruit. This year, however, we had plenty of late fall figs to enjoy – a treat we don’t normally get!

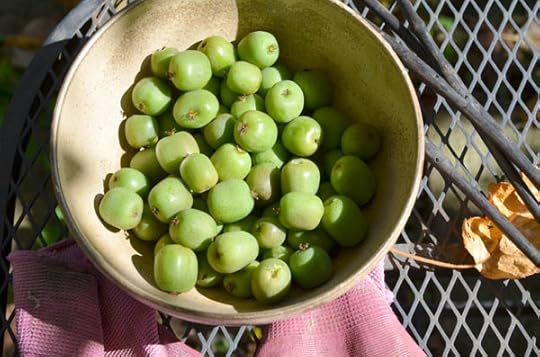
I was so excited to learn about hardy kiwis many years ago. The vines grow in colder areas and the fruit is smaller, but you don’t need to peel them. They have smooth skins, unlike the fuzzy ones we are used to in the stores. They vines also provide spectacular fall color.

This year was only the second year our vines have produced fruit. We planted the male and female about six years ago, so it’s taken them longer to mature. This bowl of sweet goodies was soon devoured for an afternoon snack and evening dessert.
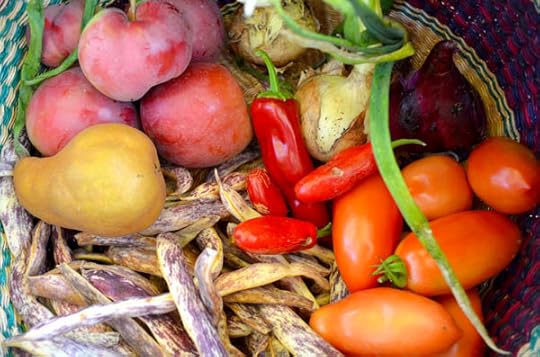
Our young apple tree and pear gave us a modest showing of fruit. I was excited to get anything considering they are not that well-established yet. We also had sweet onions, peppers and shelling beans to add to the harvest basket.
Are you still harvesting warm-weather crops from your garden? Do you feel as ready as I do to put this season to bed for winter? I’m not sure I want to see another ripe tomato until next year…


