
Renee Wilkinson's Blog, page 17
May 13, 2013
Front Yard – Spring Update
Remember back in the fall when I was busy cutting and dividing perennials for the front garden? The new little plants held on through the winter – mostly cuttings of lamb’s ear, artichoke, sage, euphorbia, and irises. It was a slow start in February, with just a few spots of green emerging from the mulch.
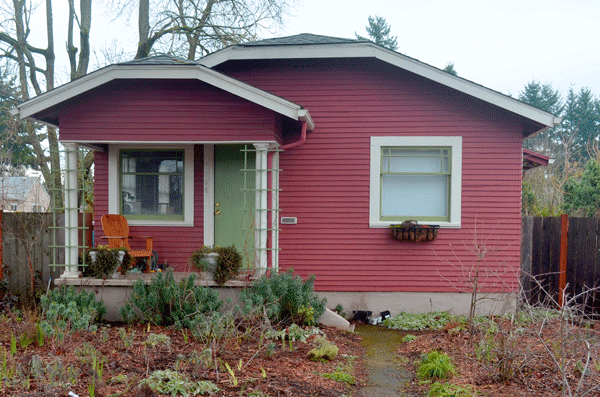
Front garden, February 2013
April rolled around and things started to take off. Colors turned from blue-greens to bright chartreuse-greens, thanks to the Euphorbia. Even in the April photo, the new transplants haven’t really started to bush out yet.
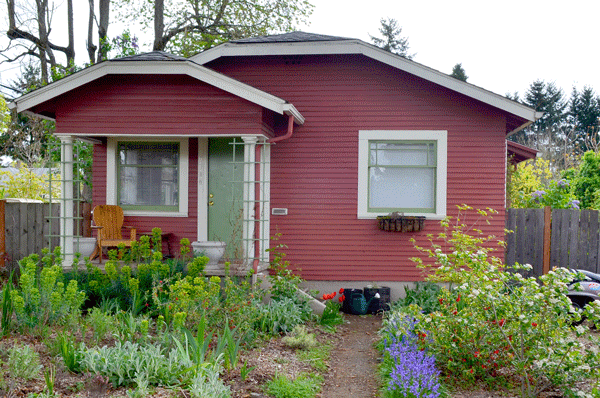
Front garden, April 2013
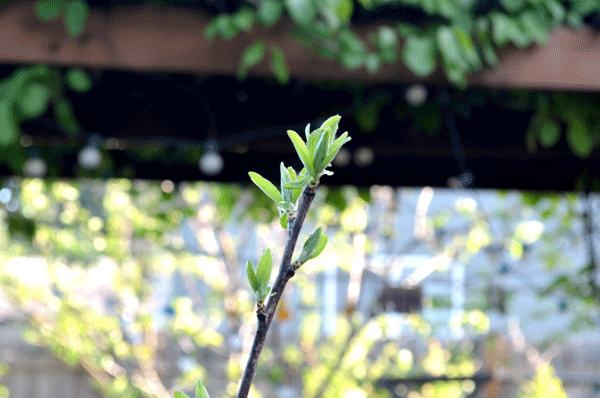
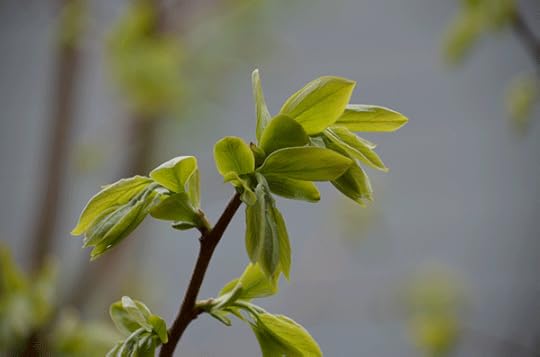
With May rolling in, the new plants are finally putting on new growth. You can see the grey-green Lamb’s Ear is getting taller. It’s hard to see, but the sage plants are filling in open areas with strong green foliage and small purple flowers.
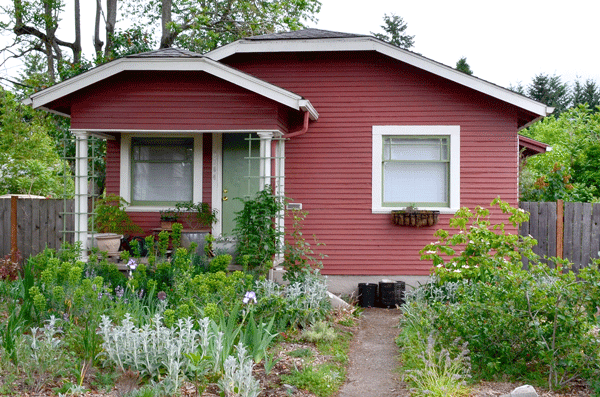
Front garden, May 2013
I am trying to focus the palette in the front yard to show off plant textures and foliage colors – lots of grey-green, purple-green, and spring-greens. I am repeating purple flowers throughout the garden to give it consistency.

Purple Sage
Purple sage does this with it’s graceful foliage. There is green sage and chives both have purple flowers emerging as well.
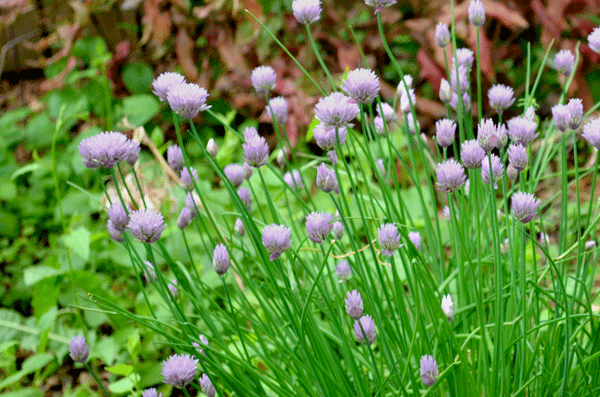
Chives
My grandmother shared some irises from her garden with me five years ago. Since then, the giant bearded irises and smaller purple ones have multiplied like mad! In the fall, I separated the crowded tubers and replanted in swirling lines through the garden. In coming years, they will get nice and thick – making a little flower stream of cool purple through the garden.
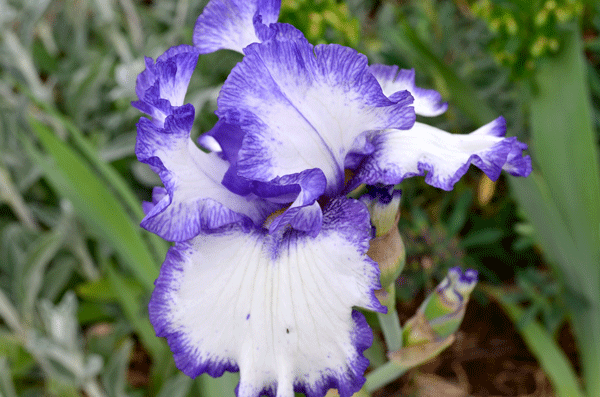
Bearded Iris
Other front yard beauties include our Korean Dogwood, just blooming now.
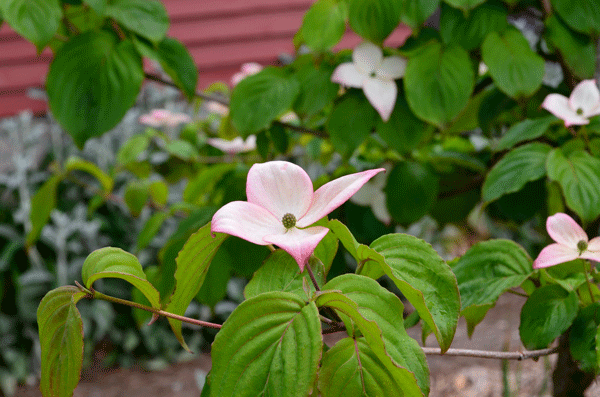
Korean Dogwood
We also have three Flowering Quinces that appears to be setting fruit!
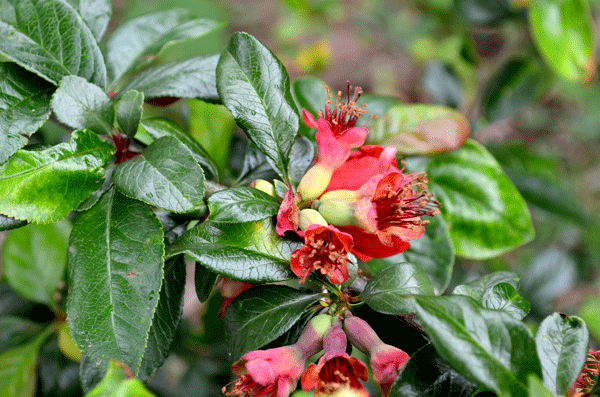
Flowering Quince setting fruit at the base of the flower
If we get some good rain, we should see the young plants put on lots of leafy growth in June. I’ll keep you all updated as this wild purple and green garden grows.
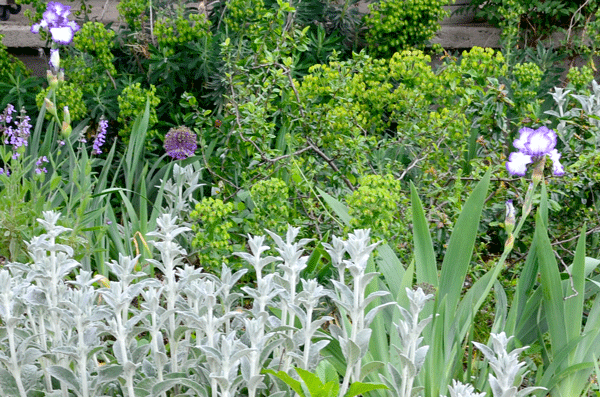
Green, grey, chartreuse, purple and white in the front garden


May 2, 2013
Baby Fruit
A home orchard is the best way to savor the delicious sweetness of summer fruits. I would argue that it is just as much fun to watch the baby fruits develop as it is to devour them when ripe. It’s like Christmas as a kid – the presents were that much more fun because of the excited anticipation leading up to the unwrapping.
 I’m not sure how our apricot tree branches will be strong enough to ripen all the fruit it is growing. Some might fall, but I expect a bumper crop this season. We should be about a month or two out from enjoying apricots at every meal. (And you can see from this picture that we may not be through the woods yet on fighting blight)
 The fig tree continues to tempt our taste buds, as always. It is covered with low maintenance fruit that will ripen in early August. Last year we literally took a bucket of figs with us on vacation. I’m already dreaming of fig pizza again this year.
 Baby pears! Look closely and you can see the area right behind the spent flowers is swelling. If you have fruit trees at home, check your apples, pears and plums for a similar sign of ripening fruit.
 The Italian Plum (or Italian Prune) I just planted a couple months ago is finally leafing out. No fruit this year though. In fact, if you have young fruit trees, you want to pick off any developing fruit for the first three years. Let it focus on establishing a healthy root system first, not producing fruit.
Are your fruit trees old enough to produce this year? Are you expecting a good harvest from them or will it be a few years before harvest time? Tell me about it in the comments below!
April 30, 2013
The Case for Boring Vegetables
My first years of gardening really focused on the divas of the produce world: tomatoes, pepper, eggplant and melons. Those are the plants that want a hot climate (something the mild NW can barely provide) and lots of water. They are the plants we garden nerds coo and crow over with one another, talking about which sexy varieties we’re adding this season.
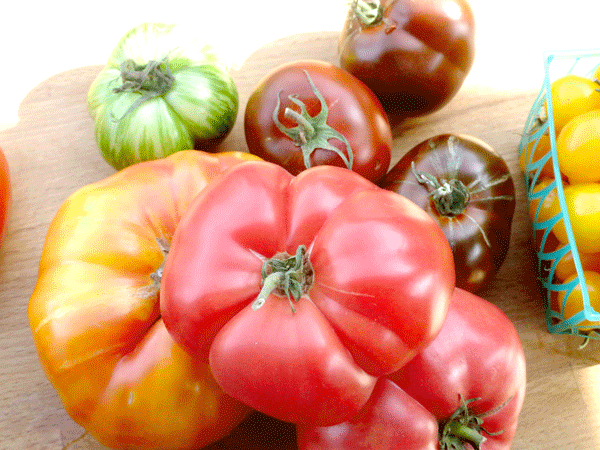
Move over sexy tomatoes!
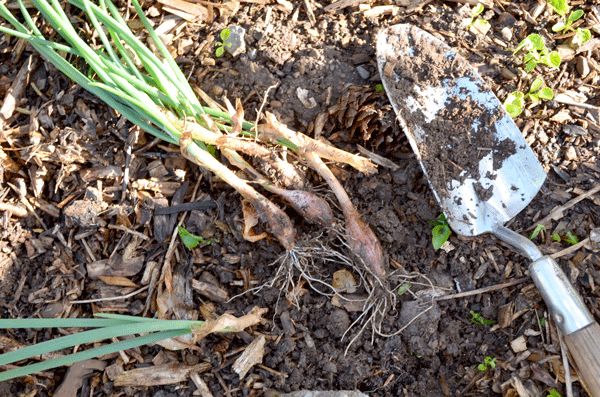
As the years have gone by, I find myself making more and more room for boring vegetables like onions, garlic, shallots and potatoes. They are tasty – don’t get me wrong – but they are not really the all-stars of most vegetable beds. I have learned though over the seasons that these are some of the vegetables we consume most often in our household – and we just can’t grow enough.
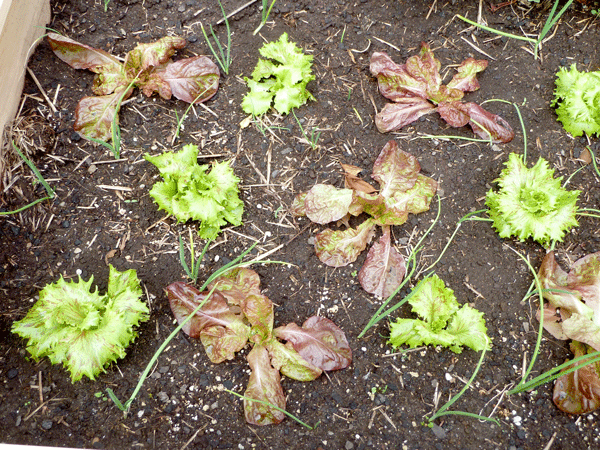
Tiny companions: onions interplanted with lettuces
The good news is that there is still plenty of room in my raised beds for the diva plants. Onions, garlic and shallots are excellent companions to anything that grows more “up” than “down” – tomatoes, peppers, eggplants, lettuces, and so on. Just tuck them into your rows, making use of that leftover space between your plants. The bulbs mature nicely under the soil without compromising the health of your other plants.
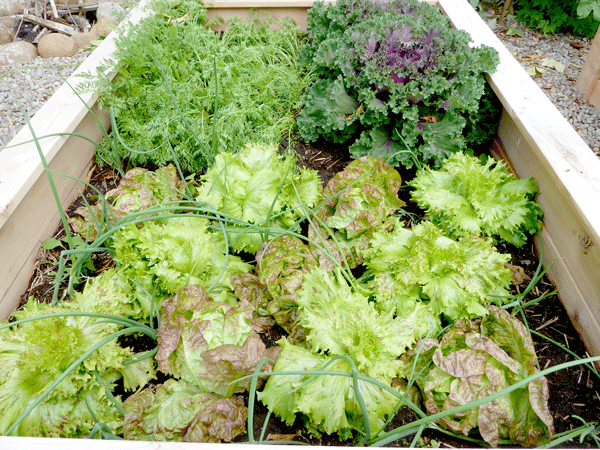
Mature companions: lettuces and onions growing together
Potatoes are broader leafing plants, but they are forgiving. I dig mine into open edges of the garden – along the fence line in front of raspberry bushes or under a semi-shady lilac tree. I try my best to remember to water them and in a good season I mound the soil up nicely around them to encourage more production.
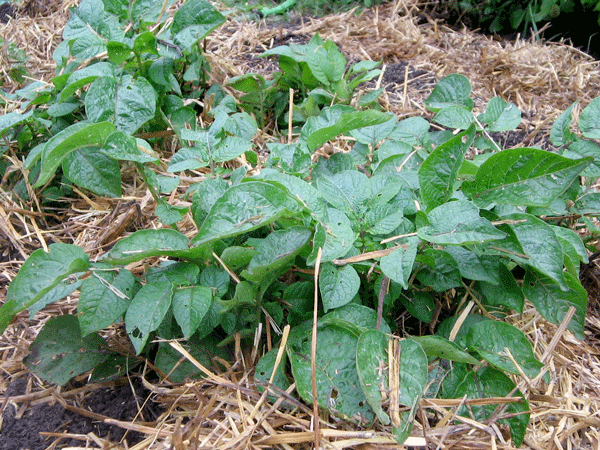
Leafy potatoes plants under fruit trees, shrubs and anywhere there’s a spot of daylight
And for an extra bonus, none of these plants will stay mad at you if you forget all about them come harvest time. Go ahead and pay more attention to the sexy tomatoes. The onions, potatoes, garlic and shallots will just sit quietly through winter and multiply even more the coming season.
Replanting shallots after forgetting to harvest them last fall = more shallots this year!
If you’re on the ball, remember to flip the flower bulb over on the onions and garlic as it forms on the stalks. You don’t want energy going into making a pretty flower. Instead, let the greens die back to brown as the plant sends it’s energy back into the bulb – making it nice and fat for harvesting. For potatoes, water through the summer and harvest when the greens die back in early fall. The haul from these seemingly boring plants will keep your larder stocked long after the memory of summer tomatoes has faded.
April 23, 2013
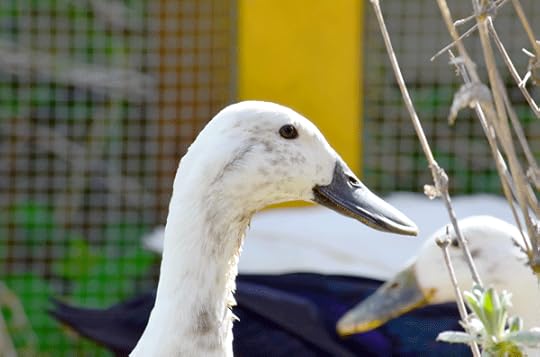
The New Girls
It was strange and sad not hearing the quacking of ducks outside our living room window when we re-homed them a couple weeks ago. I realize that most people would find quacking outside the living room window incredibly odd, but that just became the new norm here. Our plan was to replace the ducks with more chickens, adding to our existing flock. I am happy to report the quacking has been replaced with the chirping of new pullets.
Cuckoo Maran pullet
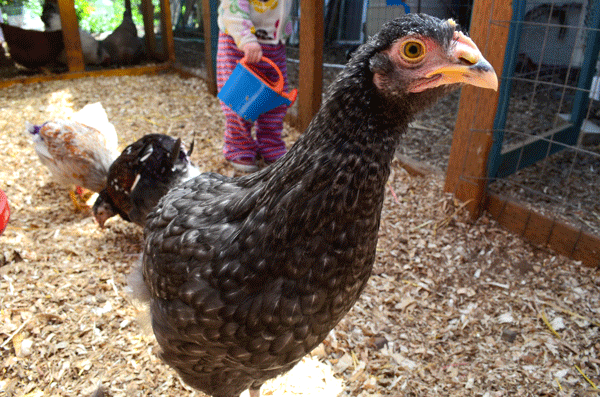
Over the years, I have owned a lot of different chicken breeds and I always love the process of deciding on new girls. The first one I settled on is a Cuckoo Maran. She has dark feathers with white speckling – similar to a Plymouth Rock. Marans lay chocolate brown eggs, which should be a treat to have in the egg basket.
Blue-Laced Red Wyandotte pullet
The next lovely lady is a Blue-laced Red Wyandotte who will lay light brown eggs. Her feathers are red in the middle with a grey-blue edging. She is a bit smaller than the other girls and was getting bullied badly at the farm I bought her from. Poor girl is missing all of her tail feathers, which are thankfully growing back in.
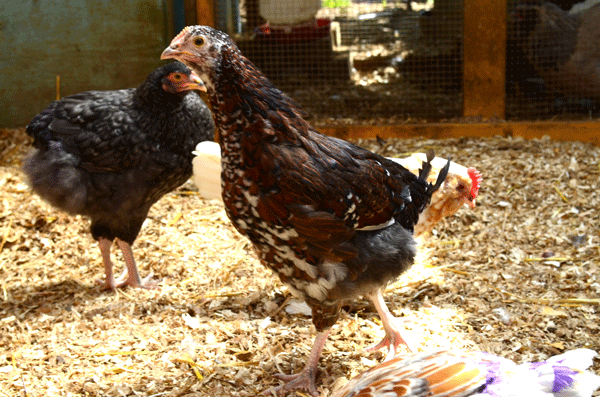
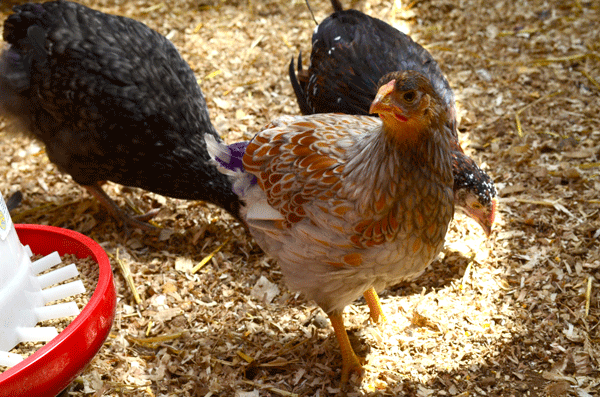
Speckled Sussex pullet
I think the Speckled Sussex might win the beauty pageant though. She is a stunning mix of mahogany feathers with black and white-tipped feathers. This breed lays light brown eggs as well.

Belgium d’Uccles bantam hen
The final chicken is not actually a pullet, but a six month old bantam. Bantams are about half the size of a standard chicken and lay adorable, tiny eggs. This gal is a spunky rare breed called Belgium D’uccles. Her feathers are honey-yellow with white speckles. She is already laying tiny peach colored eggs that melt my heart. After only a couple weeks, she is confidently bossing around the younger pullets and enjoying her place on the top of the pecking order.
Chicken farmer
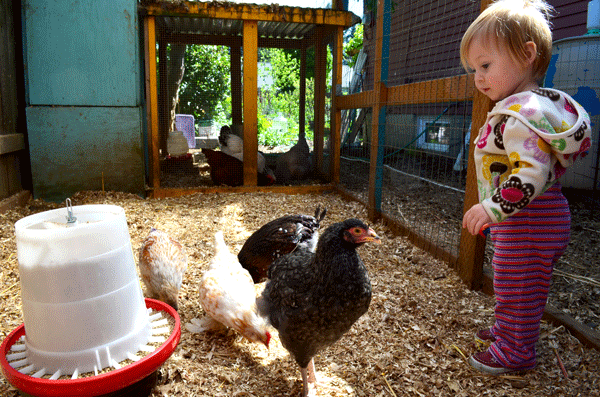
Juniper’s new favorite game is climbing our couch so she can watch the girls from the living room window. She got to feed them goodies today, which they enjoyed as much as she did. In a couple weeks we will combine them with our older chickens to make one big flock. For now, they can all see each other which will hopefully help the transition.
The only thing constant is change, right? Any shake ups on your homestead this season?
April 17, 2013
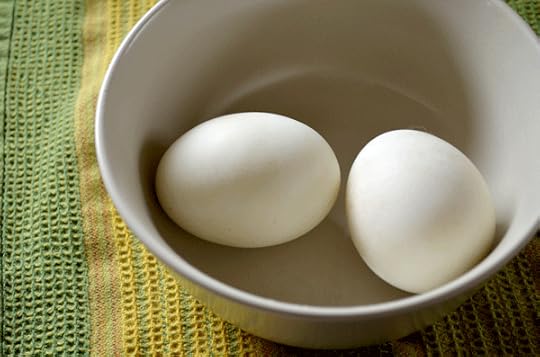
Perfect Soft-Boiled Eggs
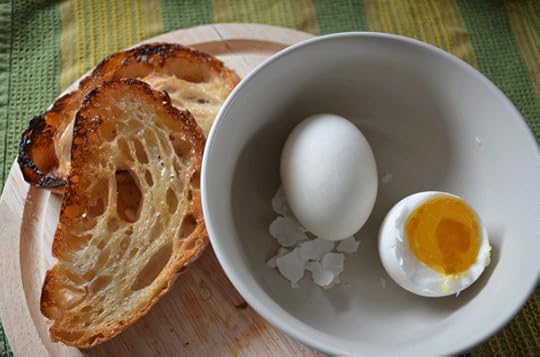
One of my favorite breakfasts is a simple soft-boiled egg or two served with thick, crusty buttered bread. Only backyard eggs will fit the bill. The soft-boiled egg leaves no distraction, so the egg itself must be packed with rich flavor. Even organic, free-range eggs from the story just don’t compare.
I am always amazed at how many folks don’t know how to properly boil an egg. If there is green on the outside of the yolk, you over did it. So let’s have a quick chat about the best way to boil an egg, and specifically how to soft-boil an egg. This dates back to my days of living as a bohemian in Barcelona, where an Argentinian roommate taught me how to properly boil an egg. Now THAT is super-vintage-Renee…

Slightly over-cooked for “soft-boiled”. The white should be firm, but the yolk should be runnier.
First, what is soft-boiled? My preference is for a soft-boiled egg that is semi-set. There is still some runny yolk to slop up with bread, but the yolk isn’t totally runny. It may take you a few tries to get it perfect since the definition of semi-set varies from one person to another.
————————————————————————————
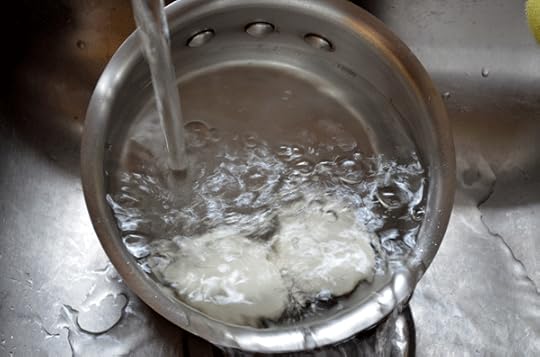
 Step 1: Start with clean washed eggs at room temperature. Place them in a saucepan. Fill with cold water. Set on the stove and turn the burn to high.

Timing starts when the eggs are boiling, not when the stove is turning on
Step 2: When the water comes to a boil, start keeping track of time. For a chicken egg, I boil it for four minutes. For a duck egg, boil for six minutes. Add 1 tsp of baking powder if you are cooking up fresh eggs to ensure the whites don’t stick to the shell.

Water is boiling = start counting the minutes!
While you wait for Step 2: Toast some bread while the water boils and slather on good quality butter. Grab the salt and pepper shaker – all the seasoning you should need.

Getting bread ready – a simple accompaniment to a deliciously simple protein
Step 3: Immediately remove the burner from the stove, place in sink and start running cold water into the saucepan. This cools down the eggs and stops them from further cooking. Do this for a couple minutes until they are no longer hot to touch.
Run cold tap water over the eggs as soon as the time is up to cool them quickly
Step4: EAT! Use the back of a spoon to crack the top of the egg, then start scooping out the delicious egg onto your toast. Close your eyes, take a bite and enjoy the simple pleasure of starting your day with a moment of delicious calm.
Sweet piece of heaven
Note: Everyone’s stove is a little different. Mine is old and temperamental, so you may need to adjust your cooking time by 1-2 minutes. Trial and error will be your guide, but hopefully these general instructions get you started in the art of cooking the perfect egg.
April 12, 2013
Awakening Garden
April has stirred the garden to life and I wanted to share some of those signs of beauty with you this morning. Of course there is a lot to be done this season, but this moment in time reminds me that there is a lot to cherish as well.
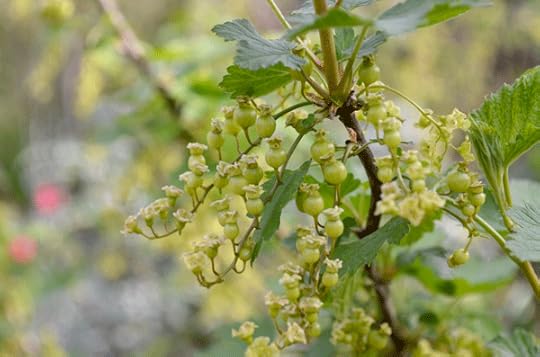 By June we will be swimming in currants! Both red and black, our many currants shrubs are already working on ripening tons of berries.
 The old lilac tree outside my kitchen window reminds me every morning that spring is in full swing.
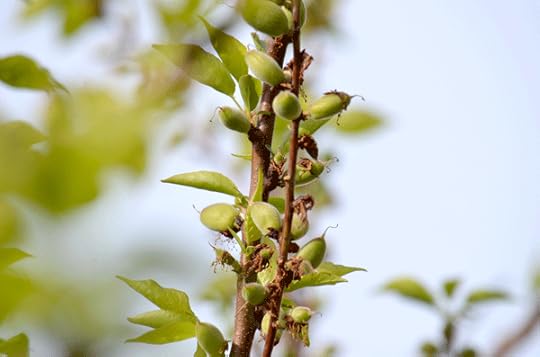 So many fuzzy green apricots! If these all ripening, I’m really not sure what we will do with all this fruit. The tree is covered with them! Time to stock up on some canning recipes I guess…
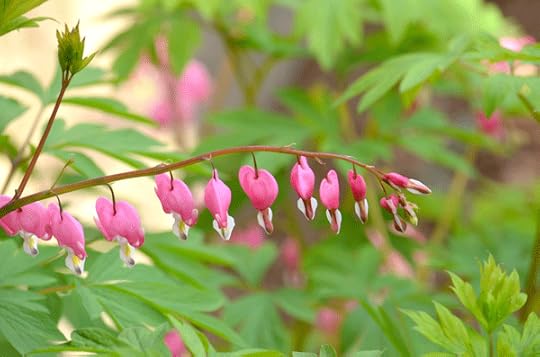 The ornamental Bleeding Heart along the north side of our house is one of the only blooming plants in that area. It’s protected from the chicken coop and is a surprising burst of color in an otherwise shady spot.
 The asian persimmon right outside Juniper’s nursery window is already leafing out. My eyes are glued to it daily waiting for the inconspicuous green flowers to emerge. We got our first fruit last year and I’m hoping for more this season.
What is blooming or setting fruit on your homestead? Every little flower or green fruit seems to be a whisper of encouragement for the growing season ahead of us!
April 9, 2013
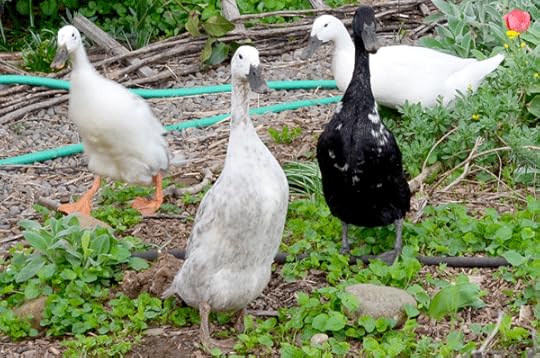
Goodbye Ducks
We have really loved adding Indian Runner ducks to our backyard livestock mix, but it has been a challenge to keep up with their needs over the last year. Although I had reservations, Jay has been patiently making the case to simplify our backyard livestock. We agreed to find a new home for the ducks and instead add to our existing chicken flock.
Ramona and Gladys, a mother-daughter pair, keeping an eye out
I still believe backyard ducks are an excellent choice for modern homesteaders, especially in the northwest where they really enjoy our wet weather. They have been prolific layers for us, with four ducks giving us more eggs than we could possibly use. They gobble up slugs and worms, for the most part leaving our veggies and other plants alone in the backyard. Their warm coats keep make them a great option for colder climates as well, where chickens might struggle with harsh winters.

Ducks eggs that we dyed for Easter
Along with the good comes some challenges. Backyard ducks require more space than chickens. Ideally they should be allowed to free-range in your fenced backyard. And they really benefit from a water element, like a kiddie pool or small pond to play in.
Our duck Pepper gobbling up slugs
But the biggest challenge was cleanliness. Ducks are messy! Bigger housing means a bigger area to clean every week. The pool water needs to be changed everyday. Their drinking water needs to be changed everyday. Their food gets everywhere as they like holding it in their mouths while dunking their heads in the drinking water to wash it down.
Never-ending pool party
Of course there are ways to make this easier. You could build a pond hooked up to a drainage hose, so you can empty the water easily. You could rig up an automatic feeder, to excess food doesn’t sit around and get soggy with all the water splashing around. But trying to make time for these new projects with a baby and work schedules was just too tall an order.
Gladys surveying the scene
I’m still conflicted about it all. To us, “pets” are inside companion animals we make a lifetime commitment to. Livestock are outside animals that we agree to keep safe, clean and fed in exchange for food – be that eggs, meat, honey, etc. That’s the deal and our emotions take notice. I was heartbroken when our old greyhound passed away last year, but felt fine butchering a chicken we raised when it turned out to be a rooster.

Pepper and Bess, whom we raised from ducklings
The ducks somehow managed to blur that line. Although I found them a great home on a couple acres just outside town, I really felt sick when they moved off our homestead. I raised them from ducklings, went through the pain of losing one to a raccoon, enjoyed watching them for hours waddle around our backyard and always imagined they would be a part of our homestead (see all past duck posts).
Goodbye girls!
Things feel a little quieter without the quacking coming from the side yard. I find myself savoring each and every last duck egg from this past week. There are new feathered friends moving in soon, but it’s a bittersweet change on our homestead this spring.
April 2, 2013
Harvesting Compost
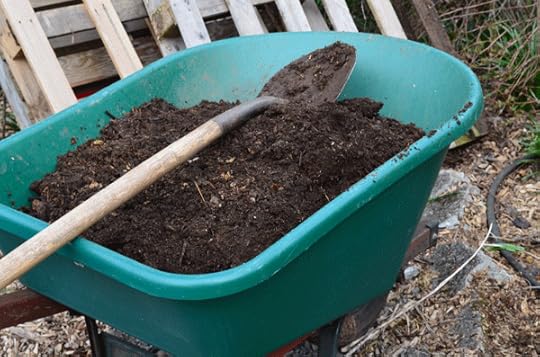
Building a compost bin system is one of the first things I do when I move into a new place. It feels good to know I am working on building good soil even before my boxes are unpacked inside. My three bin system ensures we have a constant supply of compost “cooking” outside: one pile we are adding organic matter into, one pile that is semi-broken down and another pile ready for the garden.
The middle of this compost pile has “black gold” ready for the garden beds
With spring time planting upon us, now is a great time to harvest the compost that has fully broken down. You will know it is ready for the garden when it is finely textured, dark and rich looking, and resembling soil in consistently – no big chunks of food or garden waste remain. I peeled back the top of the compost pile to reveal the “black gold” fully broken down compost. It went directly into my raised beds to replenish the soil.
 Vegetables are heavy feeders, meaning they suck a lot of nutrients from the soil. That’s a good thing! We want them full of nutrients so we can consume those for our own bodies. But it’s important to add those nutrients back in every gardening season so vegetables can easily find what they need to grow big and strong. Fully broken down compost gives your plants a broad spectrum of vitamins and minerals. It will attract micro organisms that will keep your plants healthy. (Find out more about soil healthy from my earlier post here)
 Composting at home is an easy and inexpensive way to turn your food and garden waste into a valuable product. Even if you don’t have your home compost system in place, pick up a few bags of organic compost from your local nursery to add to your soil this spring. My beds have nice, thick layers of compost added. Now we just need to get those seeds in the ground and we’ll be growing!
March 28, 2013
Seed Starting Basics
Starting your vegetables from seed is not for the faint of heart, but it can be really rewarding for those willing to put in the time and effort. The primary advantages of starting seeds are choosing from a wider range of vegetable varieties, having more control over the size and vigor of your plants, and saving some money. But don’t get too excited about saving money just yet – you’ll need to fork some over for the necessary equipment first.
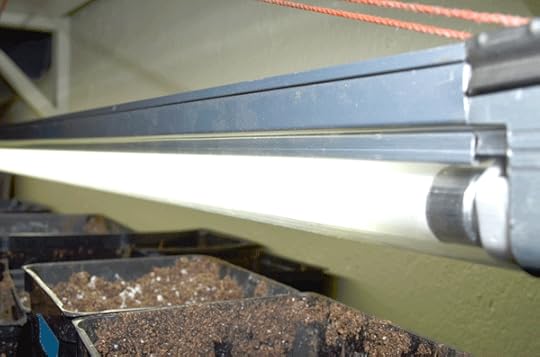 The most essential purchase is your indoor grow light. Vegetable seeds will not get the light and warmth they need from your windowsill. You might get them to sprout, and maybe even get them big enough to transplant outside, but they will likely be straggly and weak at best. It’s more likely that the draft coming from the window will give them a swift death.
Instead, invest in a good four foot long florescent tube fixture, as a regular light fixture won’t due. One with room for two light tubes should be enough, although you can spring for a fixture that holds four tubes if you are building a seedling empire. The florescent lights stay cool, which means you can put them down very, very close to the top of your plants. That is key because they need to stay about an inch above the tops of your plants. Otherwise the light intensity drops dramatically. Keep the light on over your plants for at least 16 hours a day, or even 24 hours as I’m doing.
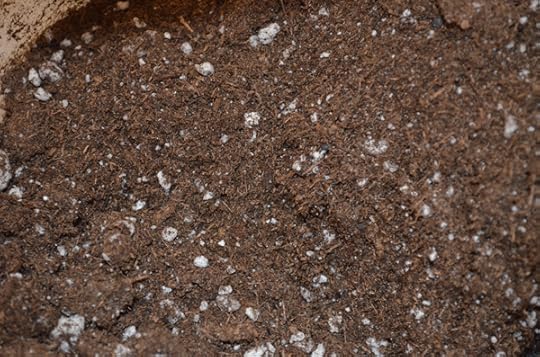 The next item on your shopping list should be a good organic seed starting mix. This is a soil-less mix that is usually comprised of light-weight materials that make it easy for your plant roots to dig down and grow. The pH is balanced and all the basic nutrients are there for them to get started. Using regular soil means your seedlings may be contenting with weed seeds and the mixture will be more difficult for the tender new roots to get a footing in. So either make your own seed starting mix or pick up a bag from your nursery.
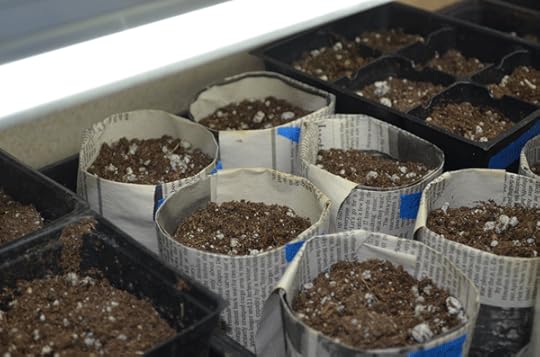 To start my seeds, I use a combination of newspaper seed pots and recycled plastic containers. You can also use things like toilet paper tubes, egg cartons, etc. Check out my tutorial about making your own newspaper seed pots using no special materials or watch my YouTube video.
The initial investment of a proper grow light and good seed starting mix will be worth it in the end. Your seedlings will be strong and healthy. You will also have a whole new world of wonderful seed varieties to choose from.
Are your seeds already growing inside? Which varieties did you choose to start this year?
March 19, 2013
How to Thin Raspberries
Our fence is lined with ever-bearing raspberries, a wonderful addition to our edible landscape. Just as the name implies, ever-bearing raspberries will give you a continual harvest throughout the summer and fall. They do well in our Pacific NW climate and are a carefree addition to the homestead. The berries deteriorate quickly after harvest, which is why growing your own is really the best way to go.
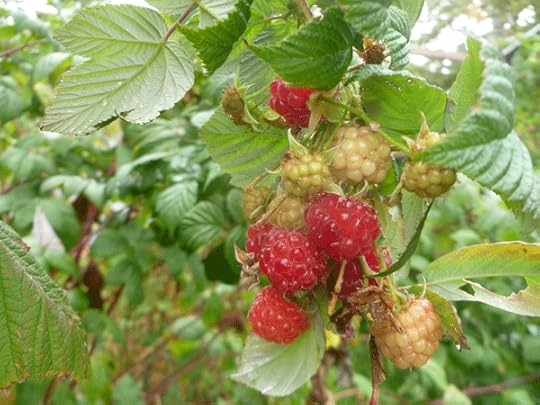
Raspberries only last a couple days once picked, making them perfect for homegrown harvesting
Our raspberries multiply like crazy! Not to the point where I would say they are invasive, but you do need to stay on top of them to keep the shoots from taking over in the garden. My strategy is to pull out the shoots as they begin to spread and replant them elsewhere in the garden. At this point, almost our whole fence line is filled with these upright berries.
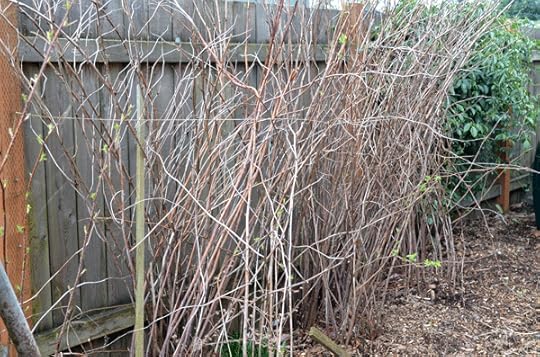
Tangled mess of raspberry plants
Winter and early spring are the best times to thin the raspberry plants. The first and second year wood will produce fruit, but the third year stems will die and no longer bear fruit. They don’t harm the plant, but they do make the raspberry patch a tangled mess, and our berries were in desperate need of thinning.

Emerging leaves from the ever-bearing raspberries
Finally this season I got to them in time! The berry stems were just starting to leaf out, so I grabbed my sharp snippers and went to work. You can tell which stems are the old ones because they will be lighter in color – a light tan color rather than a rich reddish brown (old stems circled in the picture below).
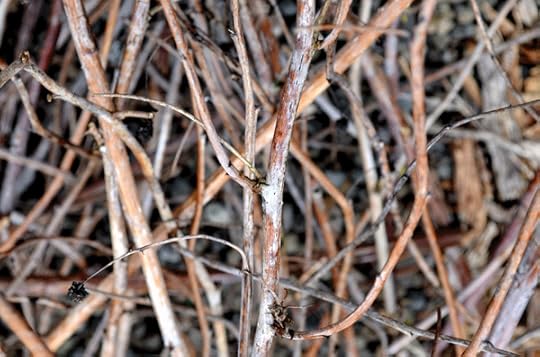
Side shoots from older, dead raspberry plants
The old stems will also have shoots coming out at their sides down by the base. Thinning at this time of year gives you extra assurance that you will snip off the right stems – just look for light colored stems that are not showing any signs of leafing out.
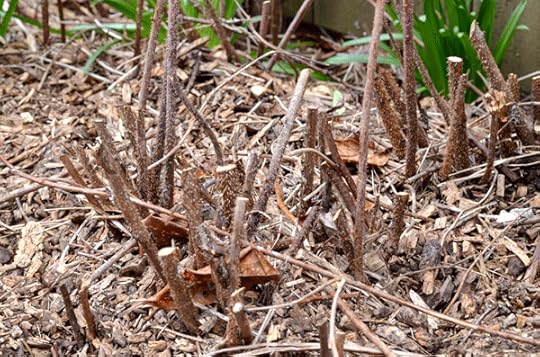
Base of raspberries with older stems cut out
As you cut them off from the base, the leftover stump should be totally brown – not a ring of green that meant the stem was still alive. I threw the cut out, dead stems into the yard debris can for pick-up from the city. They won’t add much to your compost pile, since dead plants don’t have many nutrients stored inside their walls. Plus the thick old stems will take a long time to break down fully.
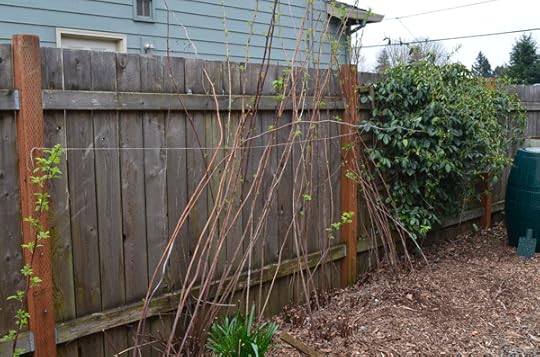
Thinned raspberries ready for the growing season
The end product looks a lot nicer in the garden. No more dead raspberry stems to wrestle with while we’re trying to harvest berries. They really are a carefree, easy to grow edible plant for even the narrowest garden spot. We’re looking forward to a long, delicious harvest!


