
Renee Wilkinson's Blog, page 21
September 7, 2012
Ducks in the Garden
It’s high time for an update on those wacky ducks on our homestead! It has been a few months since we finished construction on the duck coop and I finally got around to painting their finished duck coop. On a recent photo shoot in our backyard, the photographer said it looked like a bit of Mexico with all the bright colors. We’re been through enough iterations of coops over the years that I wanted something lively and fun in this quirky corner of the garden.
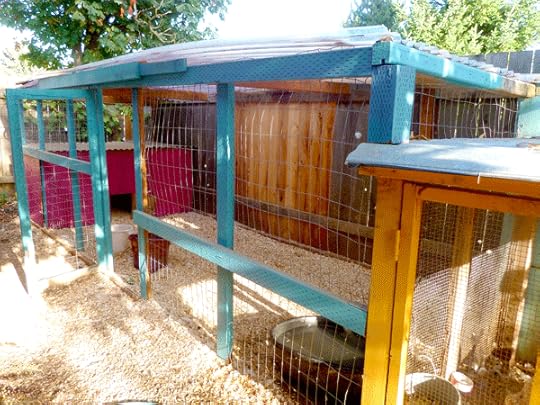
Painted duck coop (blue & pink) attached to the chicken coop (yellow)
Ducks are far less destructive in the garden than chickens. They tend to be more protein-oriented, meaning they go for slugs and bugs before they will munch on the plants. That said, I have noticed they have taken a liking to whatever they can reach along the edges of the raised beds. The beet greens in particular are thin along the edge of the beds.

Runner ducks grooming themselves out in the garden
Letting the ducks free range also keeps our feed costs down. They eat much more than our chickens, which can get expensive. Having access to the garden really helps round out their nutrition and keeps our feed costs low.
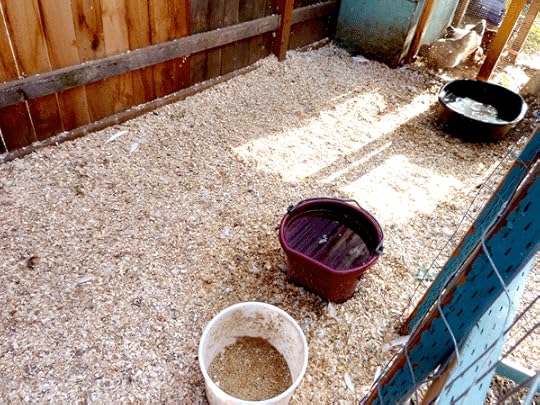
Feed in white bucket, clean drinking water in red bucket, & clean swimming pool in back corner
Ducks are more commitment in terms of time and space. They need more room than chickens to stretch their wings. We used a heavily shaded area of our garden to place the animal housing. That was a way to produce food in an area that can otherwise be challenging to grow edibles.
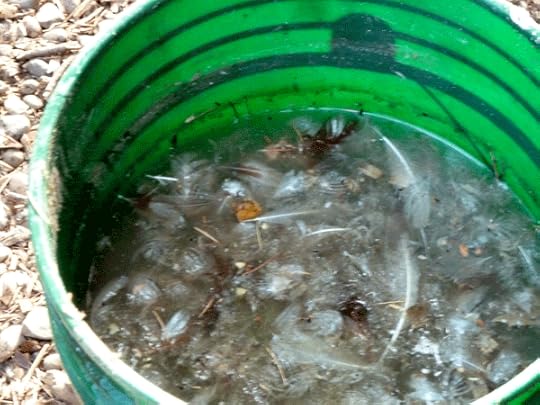
Dirty water gets transferred to buckets for pouring into the garden
Cleaning out their water bucket and swimming pool also takes some added time. It gets dirty so fast! Every other day I pour the water onto our trees and shrubs, giving them a nice dose of fertilizer, and refill them with fresh clean water. It is always so entertaining to watch the ducks scramble into the newly filled pool for yet another pool party (video below!).
What’s quacking, clucking or buzzing on your homestead? Do you have plans to add any backyard critters to your homestead? Is constructing livestock housing a fun challenge or an overwhelming burden? Tell me about it in the comments below!


September 4, 2012
Edible Hedge of Artichokes
Artichokes are hard-working, versatile additions to any edible landscape. They are perennial plants, which means they will come back year after year. One of my favorite vegetables, we eagerly harvest their unopened flower heads from spring through the fall.
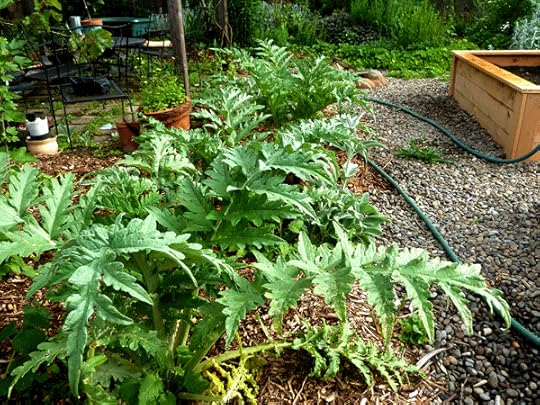
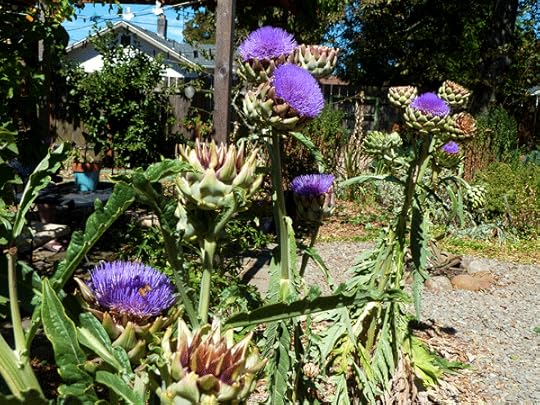
Artichoke edible hedge, 1-2 months after planting
Artichokes also make an excellent edible hedge. I planted a row of them from 4″ pots in the early spring to function as a living wall. They separate our patio from the rest of the garden, creating a more intimate gathering space. After just a couple months, the artichokes are now 3-4’ in height and have filled our harvest basket for weeks.
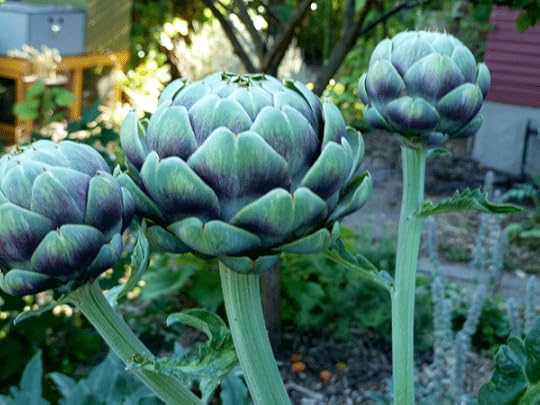
Artichoke edible hedge, 3-4 months after planting
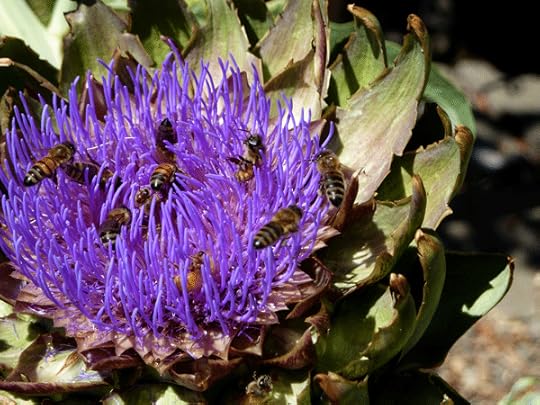
As we move into fall, the garden is producing lots of other goodies to harvest, so I have been allowing the artichoke flowers to open up. The pollen on the purple, spiky flowers has attracted honey bees and native bees in droves! I’m shocked at just how many buzzing bees are trying to cram in there at once.
Hard frosts may reduce some of the foliage from the plants in the winter, but in many climates they will leaf out bigger than before come spring time. In Portland, it’s only when we have unusually cold weather that they lose their leaves completely for the winter.
A well designed landscape needs the repetition of a few plant varieties to feel cohesive. It provides structure to your landscape and allows other plants to really stand out. We now have a couple dozen artichokes on our homestead that provide lots of food for us, pollen for the bees, and some gorgeous green in our urban slice of heaven.
We don’t need to drop a lot of cash on new artichoke plants in order to make them one of our repetitive elements in the garden. Artichokes are really easy to divide, especially as we transition into fall. I will be cutting out some of the newer offshoots at the base of the plants and replanting them throughout the garden as soon as our fall rains begin. That is a really easy way to propagate artichokes, which saves money on buying new plants.
 Do you have any favorite plants that are used repetitively in your garden? Are there edible plants that you tend to favor for hedges or creating outdoor spaces?
Hey northwesterners, I am heading up to Bellingham this coming weekend for some book events! You can catch me at the farmers market from 11am-1pm doing canning demonstrations and at 4pm at Village Books where I’ll be talking about my homesteading journey and signing books. If you’re in the area, come on by and say hello!
August 31, 2012
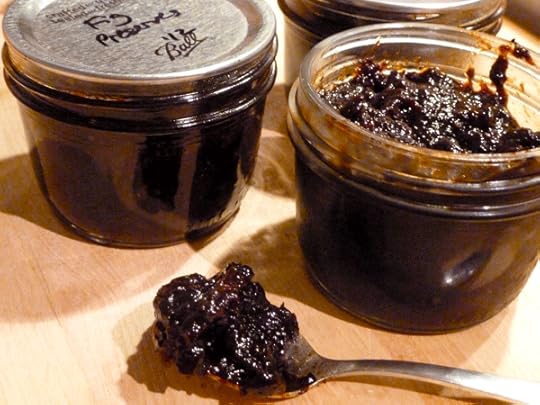
Making Fig Preserves
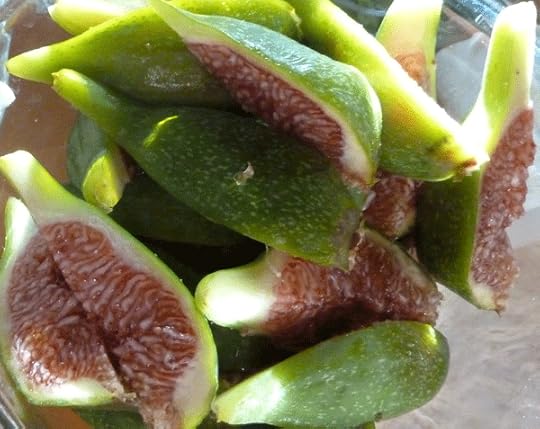
Figs are the jewels of summer, only lasting a couple days once picked, and their subtle flavor is something to be savored. But when our Desert King was bent over with fruit, I had to find ways to preserve the harvest before the figs were too far gone. This year I decided to cook up a big batch of Great Aunt Dot’s fig preserves.
 The recipe comes from my husband’s side of the family down south. Great Aunt Dot cooks her fig preserves every summer and my Aunt Emily was kind enough to share the recipe with me years ago. I have altered it a bit over time and here is the basic process:
1 quart freshly picked figs
1 pint sugar
1 lemon, cut into thin slices
water
Mix all of the ingredients in a dutch oven, except the lemons, and fill with enough water to cover. Boil the mixture for two hours. I used a hand mixer to puree the figs at this point, so they are chunky and roughly pureed.
Cook until the mixture is thick and mounds nicely on a spoon. This could take only a couple hours for the whole process or longer if you are multiplying this batch. I recently cooked up a huge batch. Instead of standing over the stove for hours, I put the preserves in a slow cooker turned on low overnight, with the lid propped up on one side for some evaporation. By morning it was thick enough to move onto the next step.
Turn in the thinly sliced lemons and cook until just warm. This makes a pretty presentation in the jar to see those long yellow strips of fruit.
Bring your canner filled with water to a boil. Ladle the hot mixture into clean pint-sized canning jars (or smaller), leaving ¼” of headspace. Wipe the rims clean with a damp cloth and adjust two-piece caps. Submerge in boiling water for forty-five minutes. Cool.
 These are going to be great holiday gifts this year to be enjoyed with roasted meat or spread on freshly baked biscuits. Are you already planning homemade gifts for the winter months? I would love to hear some of your favorite gift recipes in the comments below!
August 29, 2012
Homesteader Reunion Weekend
Suitcases are being packed for Labor Day weekend – a sign that summer is coming to a close and fall is knocking on our door. I am being whisked away to the Homestead National Monument of America in the gorgeous state of Nebraska for the Homesteader Reunion Weekend that takes place over the holiday weekend. The event celebrates the 150th anniversary of the Homestead Act of 1862 through various living history programs.
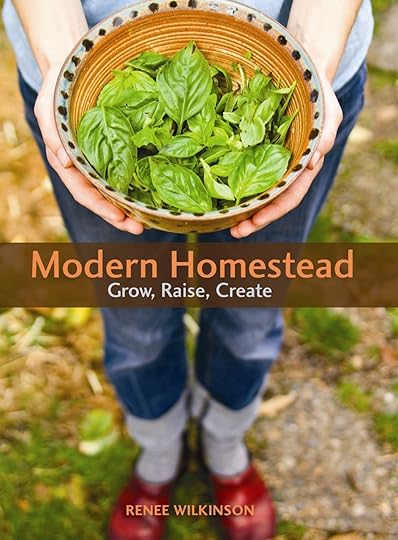 These programs include talks by living homesteaders and modern homesteaders – such as myself! I will be talking about my book Modern Homestead. My presentations will cover my family’s history of homesteading Oregon in the mid 1800′s and how that has shaped the modern lifestyle I’m living today on a 1/10th of an acre in Portland, Oregon. My talks will also give people plenty of ideas on what they can get started with this season to get their homestead up and running.
All of the events are free and open to the public. It is really a fantastic opportunity to dig deeper into our history, hear some wonderful stories, and learn more about how we can combine the homesteading roots with our busy modern lives. You can find more details about the weekend event by checking out the Living Homesteader Reunion Weekend page.
I am so excited to meet some new homesteading green thumbs, swap stories about chasing livestock and perhaps pick up some new recipes for fall canning. The Homestead Museum is located on the first tall grass prairie preservation in the country, so it should be a beautiful setting for an enriching event. If you are in the area or know someone who might be interested, spread the word!
August 23, 2012
Harvesting Aronia
Aronia is a gorgeous small shrub, more tree-like in shape, that produces heavy crops of dark blue fruit. The berries resemble blueberries, but are not nearly as sweet. They are however packed full of nutrients and a great addition to the homestead. The foliage turns a brilliant scarlet in the fall, making is as pretty as it productive.
 I harvested our one small shrub recently, which is self-fertile, as it was bending over from the weight of fruit. Our hot August days were starting to crinkle and dry the fruit, so I had to harvest it all quick! Some were a little dry, but still tasty enough to save. The berries don’t come off the plant easily, so I used scissors to cut the clusters off. To process them, I washed the fruit and carefully separated berries from stems.
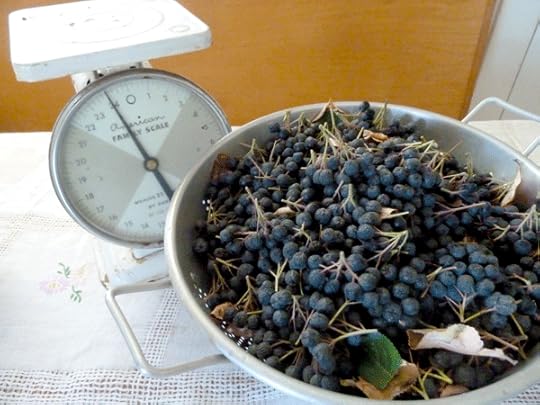 The total weight came in around five pounds – not a bad haul for one small plant. I decided to preserve them all by freezing them. Since they are not very sweet, I am planning to mix half blueberries and half aronia in smoothies this winter. That should give us a nice, nutritious start to the day using homegrown goodies.
 A tip for freezing berries: lay them out on the cookie sheet and place in the freezer. After a couple hours, the berries should be frozen and you can move them into a plastic freezer bag. This ensures the berries freeze individually, rather than in one big hard clump. It makes it easier to pull out just what you need, instead of using an ice pick to separate the solid chunk of frozen berries.
I am hoping this winter to add a couple more of these gorgeous shrubs to garden. It’s challenging to find something edible that is also ornamental. Do you have any favorites in your garden that are as tasty as they are beautiful? I would love to hear about it!
August 20, 2012
Homestead Burger
Eggs, eggs, so many eggs! With three chickens and four ducks, we are in no short supply of eggs. I came up with a new favorite recipe this weekend to use them up: the Homestead Burger. It’s super simple, but another great way to use up all those chicken or duck eggs you might have from your backyard.
 Sure, you could call this a “sandwich”. But somehow calling a “burger” helps us reframe how we enjoy our eggs. They aren’t just for breakfast or a light lunch. Instead, they can be a hearty protein that is perfect for the dinner table. Here’s how I cooked up our “burgers”.
First, I drop a tablespoon of bacon grease into a small cast iron pan and heat on medium-low. You could use olive oil, but using bacon grease adds a little salty flavor. Plus, the bacon grease was grown locally while olive oil comes from further away.
 Once warm, I cracked in two duck eggs and add some cracked pepper. Eggs are delicate to cook, so I keep the heat on medium-low so they don’t scorch. I fry the eggs until the yolks are just set, so the yolks won’t run out everywhere when I bite into them. Also, using the small cast iron pan creates a perfectly burger-sized egg “patty”.
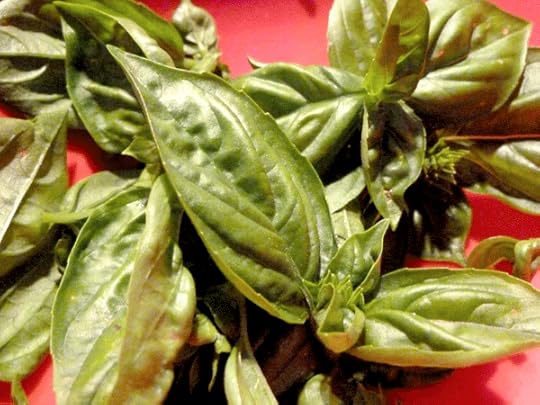 While the eggs were cooking, I toasted some hamburger buns. Once browned, I topped one side with a pile of fresh basil and the other with some good quality prosciutto. Fresh parsley would be another good herb to use if you have on hand. Just one to two slices of prosciutto are enough to give the burger a salty kick.
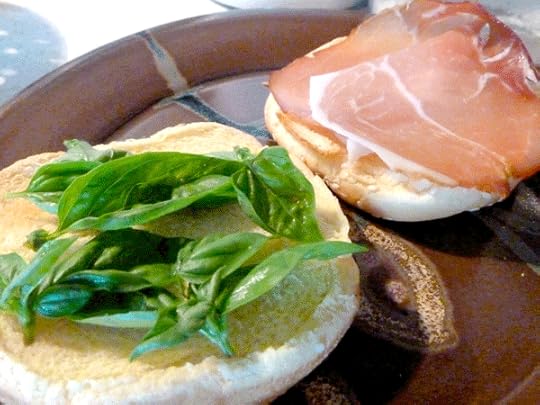 I slide the egg patty in between eh viola: the Homestead Burger. This was a really fast, simple way to enjoy our backyard bounty. It made a great protein main dish for a summertime meal. We ate is alongside some fresh veggies from the backyard. Next time I’ll roast some potato “fries” to make it even heartier.
 What are your favorite ways to eat up eggs from your flock? Have you found any new favorite recipes this summer? Tell me about it in the comments below!
August 14, 2012
Fresh Fig Pizza
Figs have to be one the best tasting fruits on the planet. These little gems only last a couple days though once picked, which is why you typically only see dried figs sold in stores. Our amazing Desert King fig tree produces a heavy crop of juicy fruit in late summer.
 Although most of the figs went into the preserving pot, we were still left with plenty for fresh eating. I wanted to share one of my favorite ways to enjoy fresh figs – on a homemade pizza. What’s even more exciting is that we cooked this lovely pizza on the barbeque!
Start by rolling out your dough thinly to about a 1/4″ thickness. We were on vacation with limited resources, so I used a wine bottle as a rolling pin.
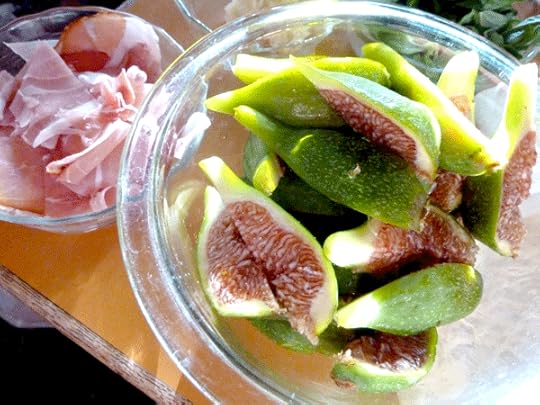
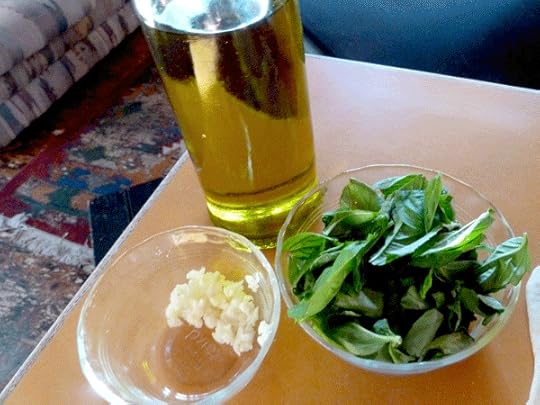 Get all of your toppings prepped, as the cooking part happens quickly when you use a barbeque. The toppings I used were minced garlic, olive oil, fresh basil, chunks of goat cheese, quartered fresh figs and strips of prosciutto. Keep them within arms reach of the grill so you can access them quickly.
 Heat up the grill for a few minutes until nice and hot. Turn it down to low and spray the grill with cooking spray to prevent sticking. Then lay the dough directly on the grill. Watch the dough carefully and pop any air bubbles as they appear. After just 2-4 minutes, flip the pizza to the other side.
Now comes the fun part: toppings! Drizzle on some olive oil to the cooked side of the dough and sprinkle with garlic. Let it cook with the cover down for a couple minutes. Then add the chunks of goat cheese and fig slices. Cover again for a couple minutes, just until the goat cheese is softened and the figs are warmed.
 Turn off the barbeque at this point, then add the prosciutto. This keeps the meat from drying out too much and warms it just enough. Transfer the pizza to a serving plate, cut and enjoy!
 The sweetness of fresh figs is excellent with the creamy, mild goat cheese. The prosciutto balances the pizza by adding some nice salty depth. This pizza is so good – you won’t need dessert!
Who knew you could barbeque pizza! Have you cooked pizza on the grill before? I would love to hear what you are grilling up on these hot summer nights. Tell me about it in the comments below!
August 8, 2012
Late Summer Broccoli
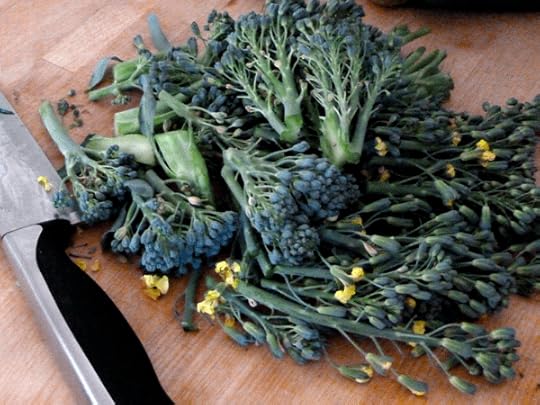
Late summer has produced broccoli plants with thick stalks ready for harvest. As hard as we try, there is far too much for us to stay on top of. It’s time to think about saving seed for next year and preserving the harvest for the winter months.
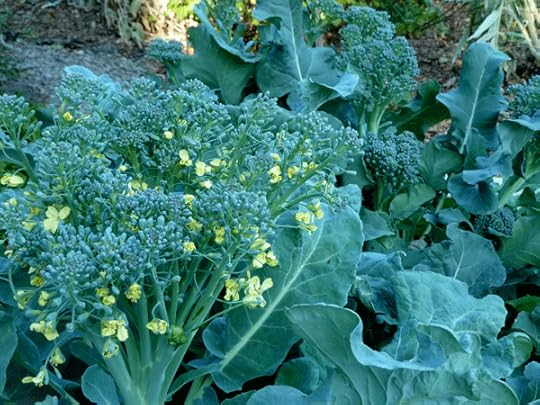 Broccoli produces lovely yellow flowers that will develop into seeds. When broccoli flowers just begin to appear, you can still eat them. But if too many flowers open, the stalks become tough and too chewy to eat. I like to save seed from the most productive plant for next year’s garden. I choose the biggest broccoli plant and allow the cluster to flower and develop seed.
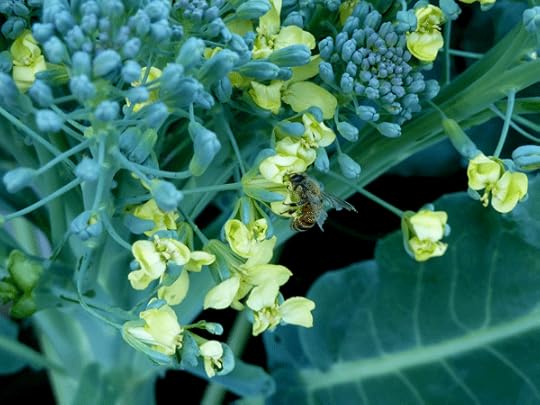 Do this every season for years and you will end up with your own special seed strain. (With winter crops, like spinach, save the seed from the hardiest plants and you end up with special strains that are more resilient to withstand cold weather!) As an added bonus, the bees will enjoy stocking up on pollen from the vegetables while they flower.
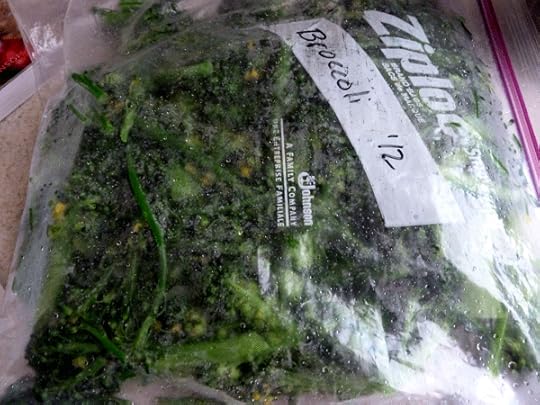
 Freezing the rest of our broccoli harvest is a simple, easy way to preserve the bounty for the cold months when our homestead is not as productive. You can’t simply throw broccoli in the freezer though. Instead, it needs to be blanched to “set” the color and flavor. Blanching is an extra step, but a relatively easy one.
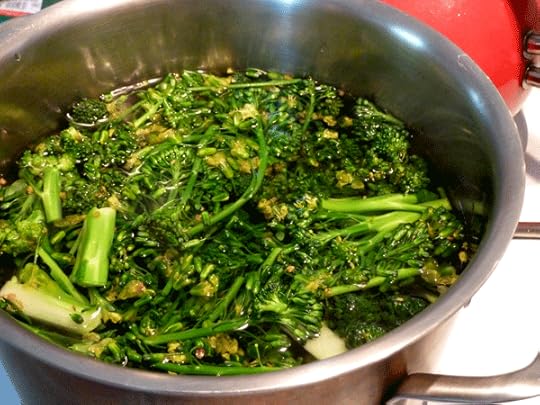 To blanch broccoli, bring a pot of water to a boil. Toss in the broccoli and let it boil for just 3-4 minutes, then plunge into cold weather. That will stop the broccoli from further cooking to cool it immediately.
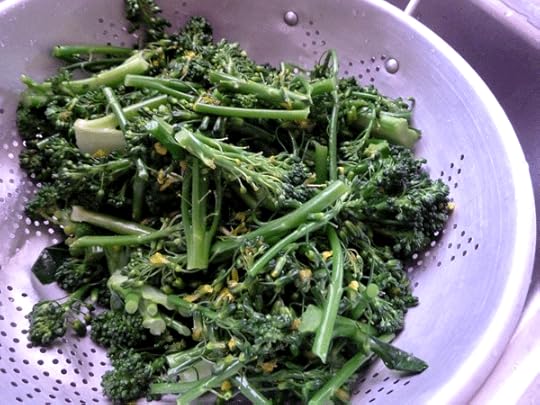 Once cool, toss into a strainer to let the water trickle out. When it has dried, you can either put it in a freezer bag altogether or lay on a cookie sheet in the freezer for a couple hours. The cookie sheet will freeze them individually, so it’s easier to pull out just a few at a time from the freezer. Once frozen, move them from a cookie sheet into the freezer bag.
 We are heading on vacation soon, so I went ahead and harvested all the broccoli except for my seed plant. When I return, some of those plants may have produced some nice side shoots to eat fresh. Otherwise, it’s time for the broccoli to get pulled out to make room for cold-hardy winter crops.
Are you freezing any produce this season to keep it through the winter? Do you have experience saving your own vegetable seeds? Share your experience in the comments below!
August 2, 2012
Pergola & Patio Update
Four years ago we built a patio and pergola in our backyard to act as the central gathering space in the garden. It’s time for an update on those projects and to share some lessons learned.
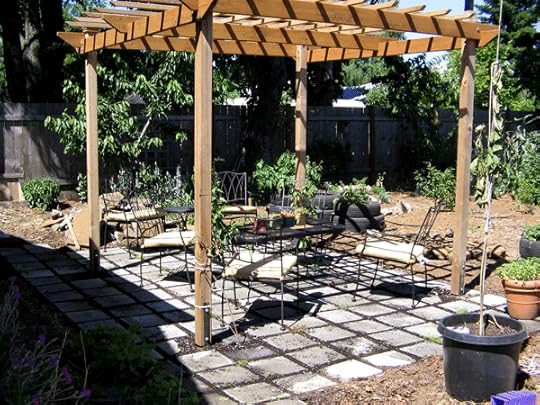
Patio and pergola freshly completed in 2008
What comes to mind first is finishing the patio in 97 degree heat. Wish I could go back in time to say “Damn girl, take it easy! Finish it over a few cool mornings and save yourself some sunburned skin.” Live and learn.

Backyard circa 2008
On the patio, we left 2″ gaps between our large pavers and planted them sparsely with carpet thyme. The hope was that the thyme would fill in all the gaps over the years to create a nice, evergreen carpet. Four years later, the carpet thyme has still not spread into all the gaps in the pavers.
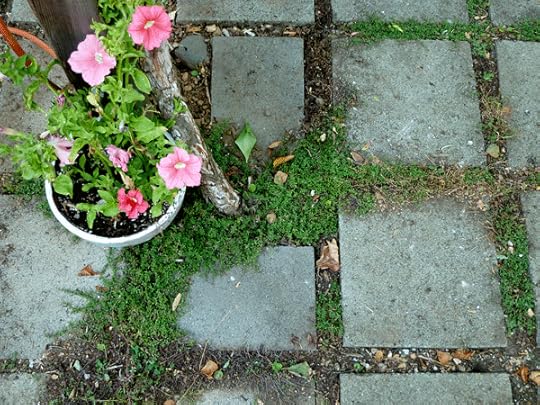
Patio in 2012 with carpet thyme
Bare soil is an open invitation for weeds, making the patio a bit of a maintenance nightmare. If we stay on top of it, weeding every month, the patio stays looking nice. Lesson learned: either spend $100 bucks on enough carpet thyme starts to fill in all the gaps or just leave sand between the pavers for a clean look.
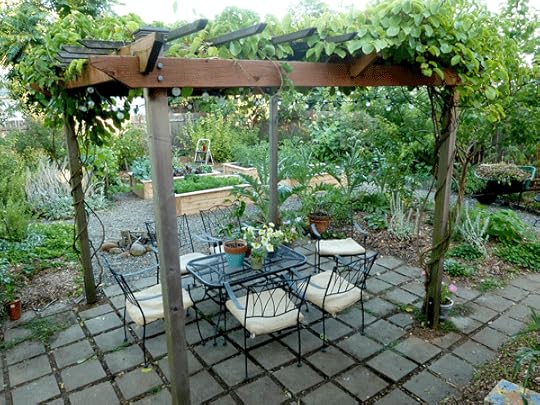
Pergola in 2012 covered with hardy kiwi vines
The pergola was planted on opposite ends with both male and female hardy kiwi vines, as they need cross pollination to produce fruit. Four years later, the deciduous kiwi vines cover the entire canopy of the pergola providing shade in the hot summer and sun in the winter.
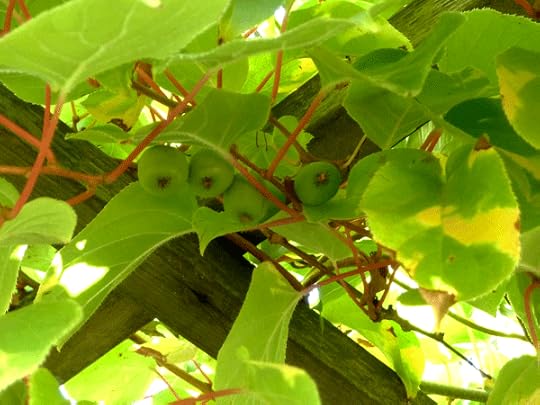
Hardy kiwi fruits ripening
It is the perfect structure to support the vigorous vines because you can admire the plant in all seasons. The green leaves are a cooling image on hot days when you’re taking refuge under their shade. You can watch the baby kiwi fruits develop and easily harvest them. In the fall, the leaves turn a brilliant gold before falling.

Mini globe outdoor lights hanging from the pergola
Additionally, the cedar used to construct the pergola has held up beautifully over time. The naturally rot-resistant wood has faded with age giving it the appearance of always having been there. We hang our clothes line from it to dry laundry on hot days and string outdoor lights form it for garden parties.
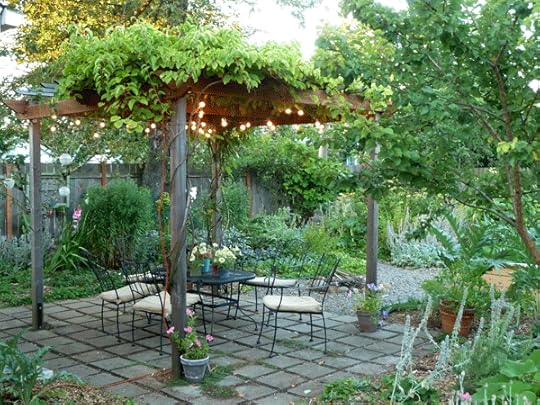
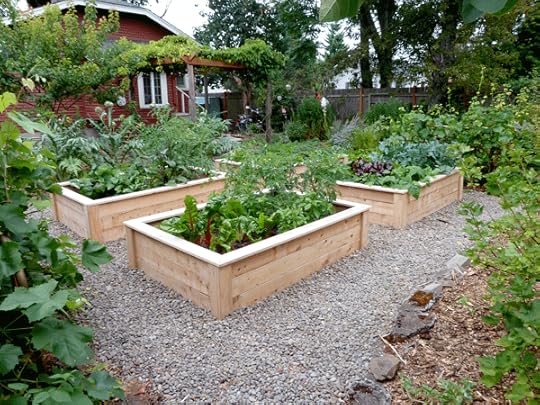
Patio and pergola in 2012: the heart of our garden
The patio and pergola were built a few months apart, but it’s hard to imagine one without the other. Not only does it function as a comfortable place for us to relax and entertain, but it also supports vertical food production. We find ourselves out there all year round, whenever there is a break in Portland showers.
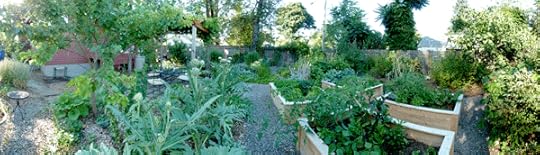
Backyard 2012
If there were a “heart” to our garden, this space is it – the perfect vantage point to admire the garden from. Where is the heart of your garden? Is there a quiet place of refuge or perhaps a larger area for dining al fresco? I would love to hear about it in the comments below!
August 1, 2012
It Takes a Village
We feel honored that our homestead is going to be featured in Country Gardens magazine! They are doing a story on our homesteading journey for an upcoming issue and had a lovely photo shoot in the garden with us yesterday. It was challenging to get the garden “picture perfect” while juggling baby Juniper, so it was time to call in help from some friends.
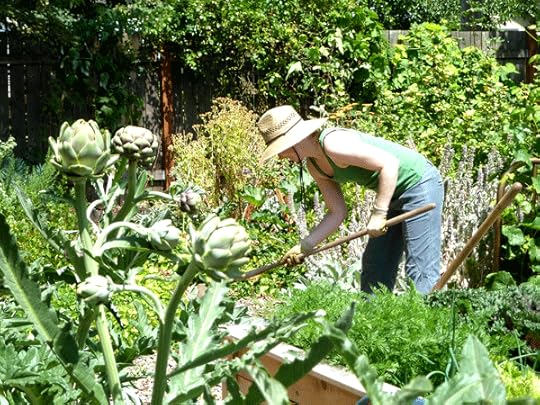
Prior to Junebug entering our lives, I could have whipped the garden into shape over the course of a weekend. But now with baby in tow, it really takes a village to pull off bigger events like presenting my thesis or hosting a photo shoot. Friends helped out by pulling weeds, cutting back overgrown plants and holding baby Juniper. In trade, they went home with fresh duck eggs and canned raspberry jam from our backyard.
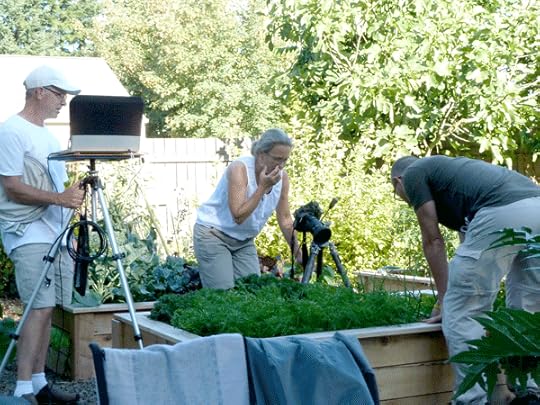 The shoot itself went really well and we loved sharing our piece of paradise with the photography team. They got some great shots of the gorgeous heirloom vegetables, bees buzzing like crazy around our herb spiral and, of course, the duck and chicken coops.
 After the shoot wrapped and the team took off, Jay and I hung out on the patio eating fresh figs and snuggling baby Juniper. It was the perfect way to celebrate the homestead we have been working so hard on. Our homestead should be in their spring or summer issue next fall. I will be sure to let you all know when it hits the stands!
 There may be a garden party in the near future to share the gorgeous garden with friends while it’s looking so picture perfect. Are you sprucing up your space for summer entertaining? Are you taming the wild corners of the garden, or taking a more hands off approach?


