
Renee Wilkinson's Blog, page 20
November 2, 2012
Catch Up
I know… I know… I’ve been quiet this week. I am planning catch up from being back in Oklahoma with Junebug for a week. My mother-in-law is making a brave move west – leaving the state she has spent 67 years living in, to be closer to us. It won’t be difficult to think of what we are most thankful for in a few weeks. Having family close makes our simple life that much richer.
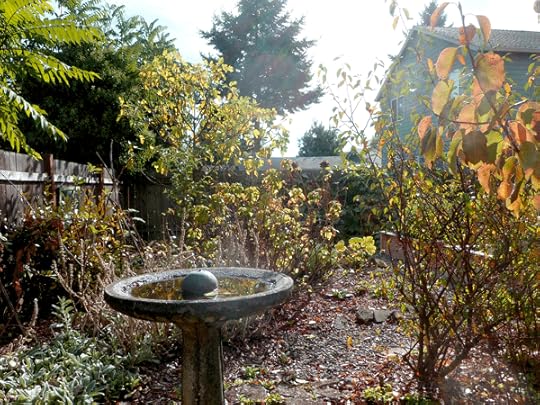
The fall garden looking less jungle-like
As far as the homestead goes, I left when colorful leaves were still on the trees.

Our Bosc pear tree in full autumn glory
Traces of fall were on the patio.
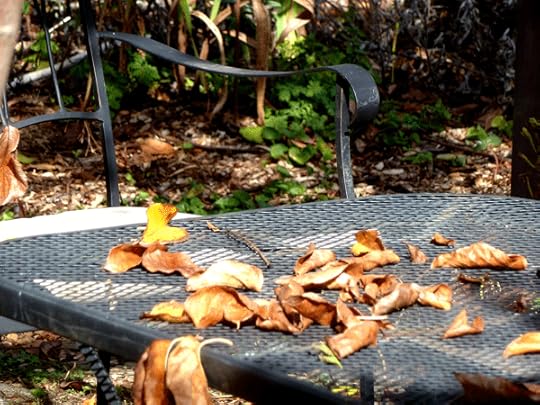
Fall leaves on the patio
I have returned to remnants of a summer that seem a far memory.
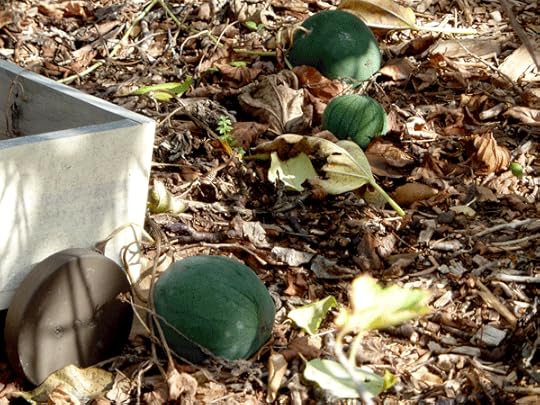
Melons that didn’t ripen in time, left to remind us of summer
Heaps of squash remind me it’s still fall, although it feels more and more like winter is knocking.

Meals for fall
It’s time to hole up inside our little hobbit house to recoup from clearing out 67 years worth of belongings. Restful weekend friends and see you next week.


October 24, 2012
DIY Baby Chick Costume
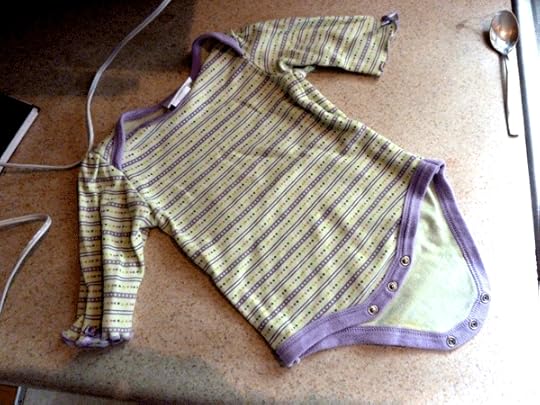
A few weeks ago, I spotted this adorable baby chick costume on Etsy and it sealed the deal: Juniper has to be a baby chick for Halloween. It’s just too cute and too farmy to pass up. I decided to make a shabbier, yet cheaper, version on my own. I think it turned out pretty cute and wanted to pass along the step-by-step method.

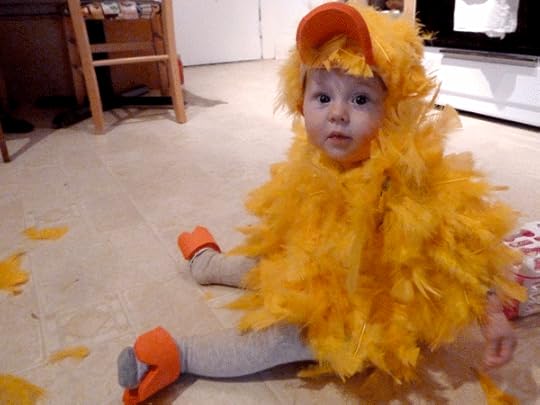
Baby Juniper in our homemade chick costume
To begin, here are the supplies you will need:
One long-sleeved onesie that currently fits your little baby chick. I opted not for one with legs. Instead my girl is wearing tights under her feathered onesie. Yellow tights would be ideal so it matches. It probably goes without saying, but this is a onesie your little one will never wear again sans feathers
 Hot glue gun and lots of glue sticks. I stopped keeping track, but it was almost a whole package.
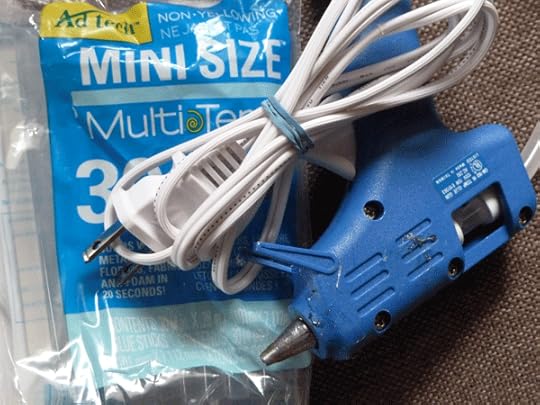 Two googly eye balls. I ended up using the larger ones.
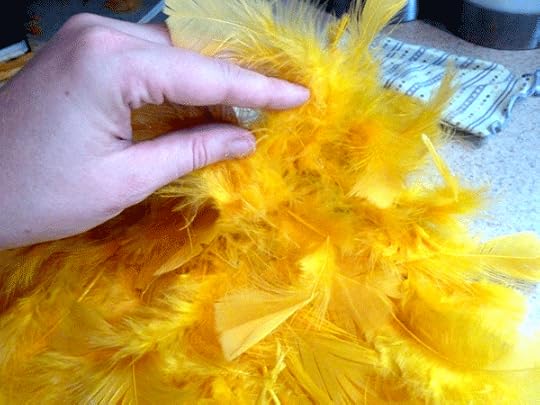
 Packs of yellow feathers. I used three packs for a nine month onesie. If you can find yellow boas, go that route. I couldn’t, so I had to buy the individual feathers. They were cheap though – I think $2 bucks a pack. I (embarrassingly) had a feather-color-consultation with some friends and we decided yellow looked most “chick-like”.
 An orange drink cozy thing. They actually sold these in the same aisle as the feathers at my local craft store for a buck a piece. I would recommend buying two.
 Other supplies include a snug fitting cloth baby hat and a pair of socks or leggings you don’t want to use anymore. We’ll get to those later, but for now let’s work on getting the chick body feathered.
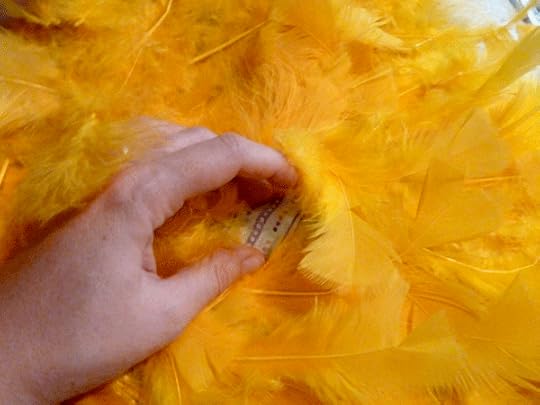
Heat up that hot glue gun and start gluing some feathers! Start at the bottom, working your way up.
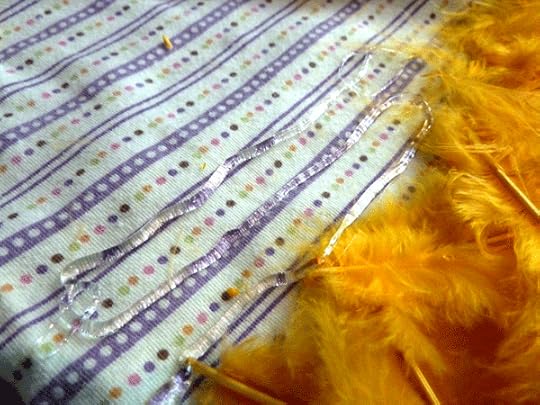 Glue a little section at a time, then press feathers into place.
 Press a small area at a time into a fan-like formation – some pointing down and others to either side. That way the costume will look nice and messy/fluffy. If you press them all down, they lay too flat.
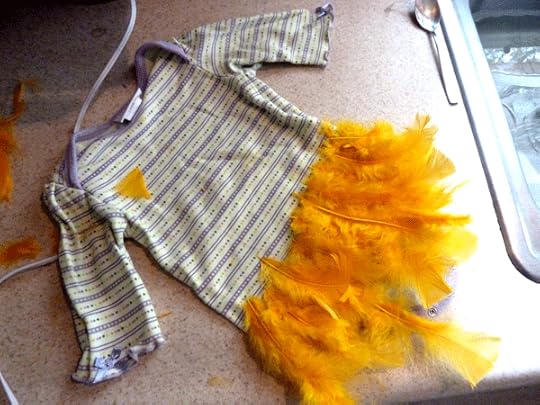
 When I was done gluing one side full of feathers, I took a step back to look at areas that were too flat or had gaps. I filled in those gaps by gluing feathers down pointing up toward the top of the outfit. That helped to fluff everything up even more.
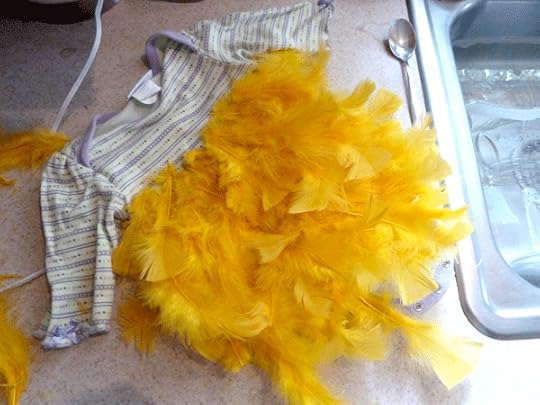
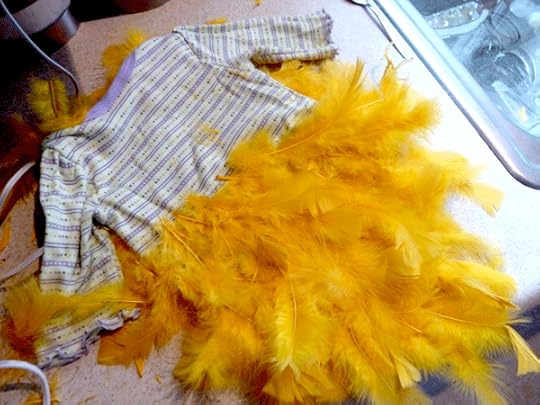
 Once the front is fully covered, turn over and work on gluing feathers onto the back of the onesie. I used one pack of feathers for the front and one for the back. The third pack covered the sleeves and gaps.
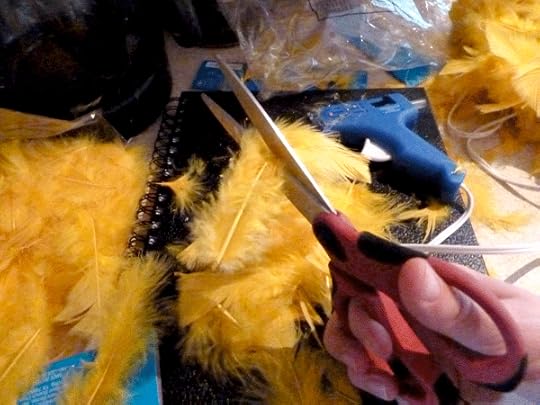
 When the back of the chick costume is finished, it’s time to work on the sleeves. At this point, cut your feathers in half (if you are using loose feathers). They will otherwise be too long on the sleeves. And since the bulk of your feathering is done, you can use just half-sized feathers to fill in gaps from here on out.
 Again, work your way from bottom to top starting at the edge of the sleeve going up toward the shoulder.
 Now your onesie is covered in feathers and it’s time for a dress rehearsal to see how it looks on your little chick. You will lose a few feathers as the fabric stretches over your baby, but hopefully you have it fluffy enough to not notice too much.
 I used blue painting tape to mark areas I missed on the onesie. The blue really made it easy to spot these gaps when I took the onesie off. I used the half-sized feathers to fill these areas in.
 Next, remove the onesie and fill in any of those areas you missed that are marked with blue tape.
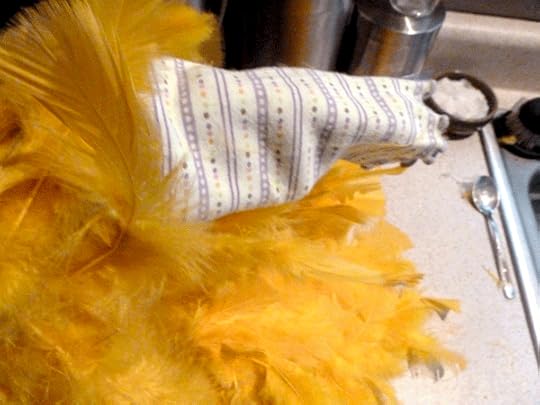
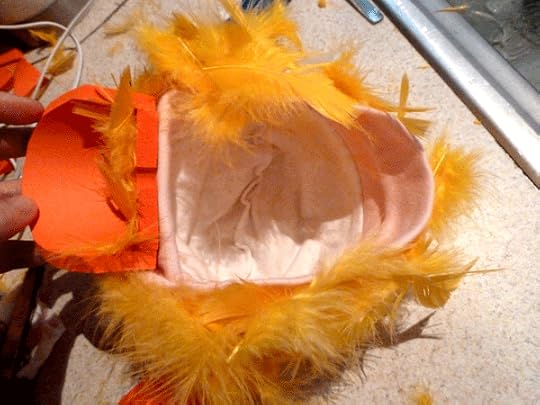
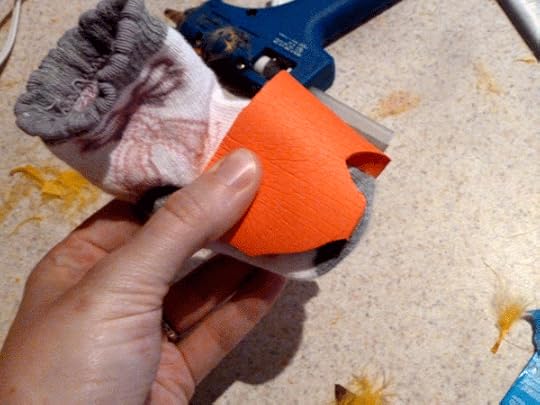
 When the onesie is sufficiently feathered, it’s time to move onto the chick head. Grab the orange cozy and cut in half vertically, including the bottom. You are left with two halves of the cozy, each with a half circle bottom. Hot glue that half bottom onto the front of the hat. This will become the bird beak. It should now stick out. Cut the brim to a half moon shape, so it looks beak-like.
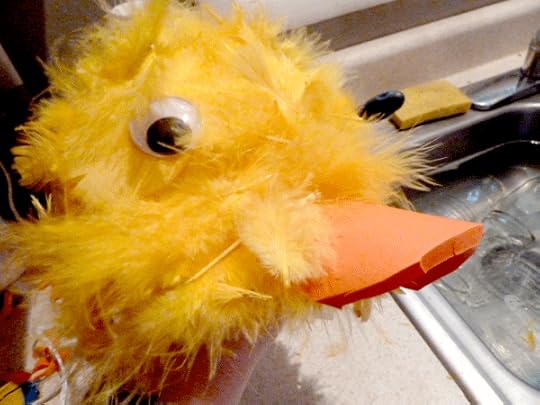
 Start feathering the cap around the beak. Again, start at the bottom brim of the hat and work your way up. Once covered with feathers, attach googly eyes to either side of the hat with the hot glue gun.
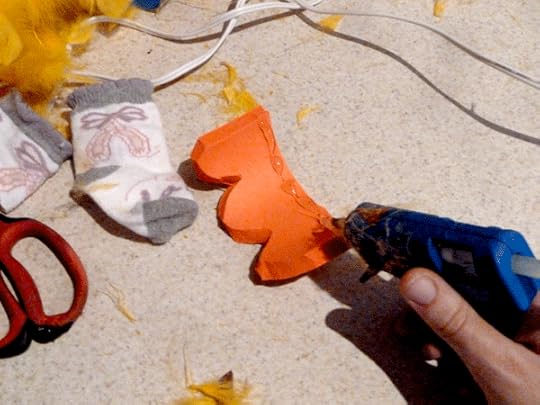
 With the hat and body done, it’s time to work on your chick feet. I only had one orange cozy, so I used that leftover half for both feet. I cut off the bottom, then cut the cozy side into another half. So I was left with two square, curved pieces. I cut what looked like a bird foot type shape to me.
I think it would look better if you made them bigger, so that’s why I recommend you have two cozies. One half would make one good bird foot.
Hold the pieces up on your baby’s feet to determine the placement. They still need to be able to walk, so I decided to place them right above her ankle.
 You can glue these onto leggings if you want, but I glued them onto baby socks we no longer need. I am cheap and didn’t want to throw away a whole set of leggings… The socks are white, so I’m hoping they will blend in with her white leggings. If you are using yellow leggings, try to use yellow socks for the feet.
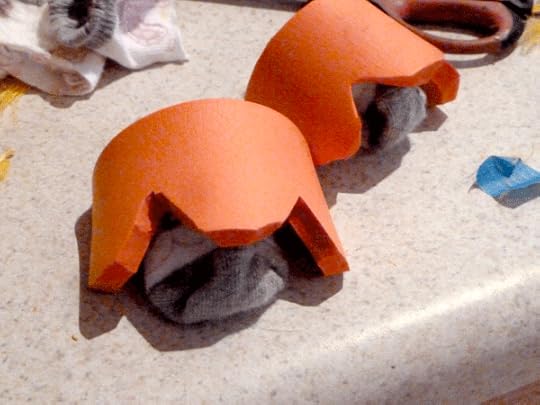
Press the orange feet into place on the socks or foot of the legging firmly. They will puff back up into their curved shape.
 You should end up with two very cute, very orange chick feet.
 At this point you should be all done! Expect to lose a few feathers when your little chick puts the costume on, but you should have things pretty darn fluffy, so it will be hard to notice any open areas.
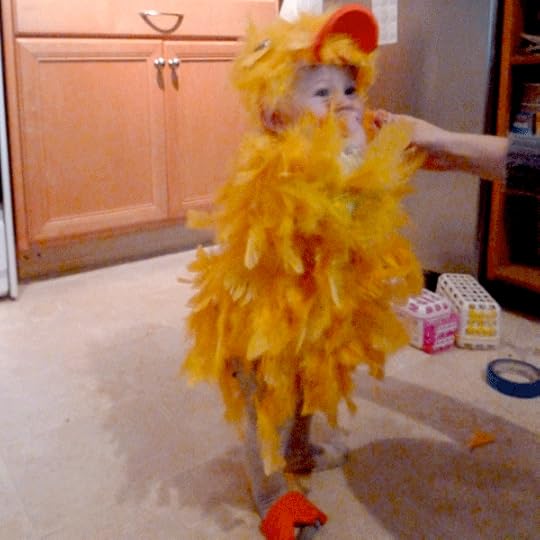
I was putting this together while Juniper was rolling around on the floor playing, so I would guess the whole process would only take a couple hours if you were focusing on it.
 I think the effort was totally worth it and the supplies were less than $10 bucks. I can’t wait to see her flap her little chick wings come Halloween. I would love to hear what you think and what your little ones are dressing up as for the coming holiday!
October 22, 2012
Butternut Squash Soup (for Baby too!)
Butternut squash has to be one of the most versatile vegetables on the planet. It’s great as a main dish, side or even dessert. But one of my favorite ways to enjoy this delicious vegetable is in a hardy soup. Juniper is now old enough to eat winter squash, so I recently made a batch of soup for us and a smaller portion for her.
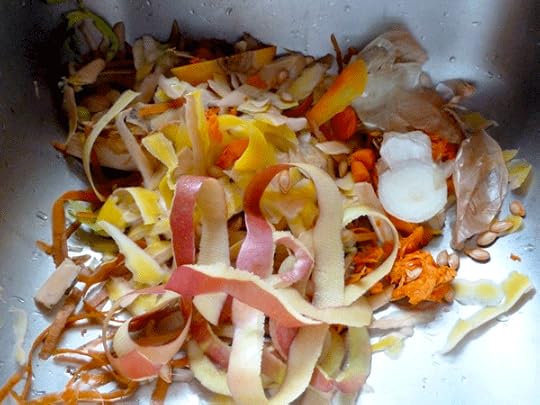
Vegetable scraps from both recipes ready for the compost pile
The beauty of these two recipes is that they can be made at the same time, using almost the same ingredients. I love the idea that she is eating what we eat, so her palate is becoming accustomed early to our style of eating. Growing up, we always ate what our parents were eating and I think that helped prevent us from becoming picky eaters.
Butternut Squash Soup (Baby Version) – adapted from Cooking for Baby, by Lisa Barnes
1 T. oil
1 c. butternut squash, peeled, seeded and chopped (about 1/3-1/4 of a medium squash)
1 c. boiling potatoes, peeled and chopped
1 c. apple, peeled, cored and chopped
1 1/2 c. water
Heat oil over medium-high heat. Add squash, potatoes and apples and cook for about 8-10 minutes.
Add water and bring to a boil. Cover and simmer for about thirty minutes.
Mash to desired consistency. Cool to room temperature and serve.
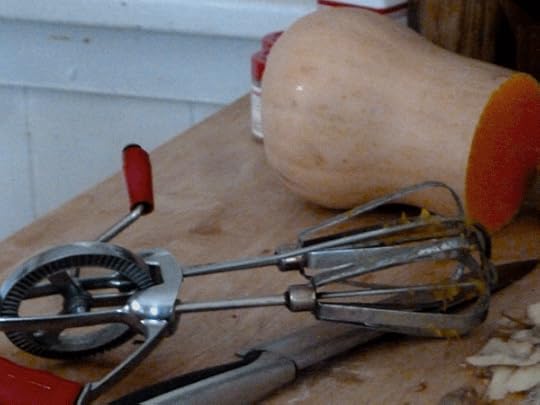
My low-tech hand blender
Baby Juniper only has one tiny tooth, so I mashed her soup up to a rough puree using an old-fashioned hand mixer. The soup freezes well. Portion the cooled soup into ice cube trays or use something fancier to freeze in smaller increments. Once frozen, toss the soup cubes into a ziplock for easier freezer storage. We defrost one cube at a time, as needed. She loved the soup!

Happy soup-eating customer
Butternut Squash Soup (Big People Version) – adapted from Epicurious
2 T. butter or bacon grease
2 celery ribs, chopped
4 carrots, peeled and chopped
1 onion, peeled and chopped
1/4 tsp. cinnamon
4 c. butternut squash, peeled, seeded and chopped (about 2/3-3/4 of a medium squash)
2 c. boiling potatoes, peeled and chopped
2 c. apple, peeled, cored and chopped
2 c. vegetable broth
2 c. water
salt and pepper
Heat bacon grease over low-medium heat. Add celery, carrot and onion and cook for 10 minutes, until softened.
Add all other ingredients and bring to a boil. Simmer, covered, for about twenty minutes.
Mash to desired consistency. Serve warm.
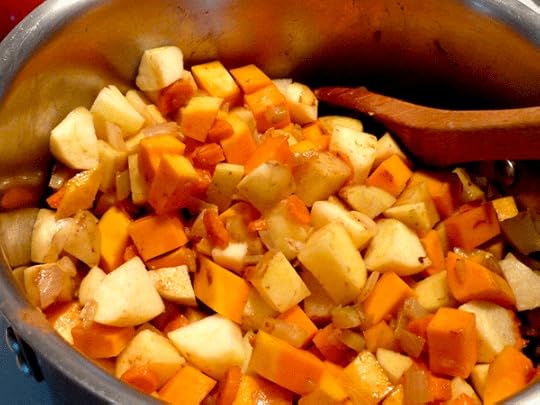
Big People soup version includes onions, celery, carrots and cinnamon
Every time we cook bacon, we save the rendered bacon grease in a little jar. This might sound too indulgent to some folks, but I prefer using it in place of olive oil or butter when I can. It adds a quick depth of flavor to our cooking and reuses something that would otherwise get thrown in the trash. Plus it’s sourced locally, as opposed to our olive oil coming from hundreds, if not thousands, of miles away.
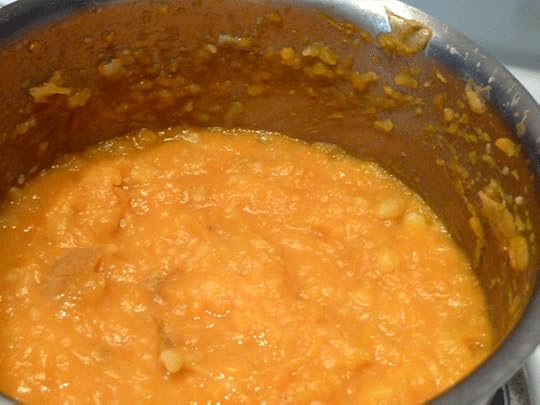
Finished soup!
Baby Juniper’s recipe made four cups of soup, most of which was then frozen in half cup increments. The big people version made enough for 4-6 hearty servings. We all enjoyed this as a main course dinner, along with some crusty bread for the big people. The apples gave the soup a gentle sweetness and the potatoes helped the heartiness factor. Hope you enjoy it as much as we did!
October 17, 2012
Blanching Vegetables
It’s the end of the growing season and all the last fruits of the fair-weather season need to be harvested. Freezing is one of the quickest and simplest food preservation methods – a great option for those of us short on time with lots to preserve. But it’s not just as simple as throwing your garden veggies in a bag in the freezer. Many vegetables need to be blanched first.
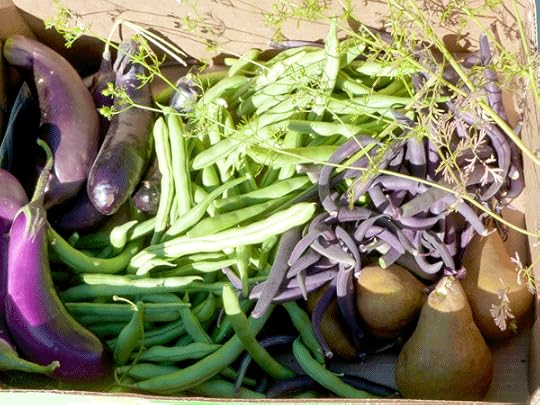
October harvest of eggplants, green beans and pears. Veggies were later frozen.
Blanching will set the color on bright green vegetables and kill off any enzymes that may deteriorate the flavor of your veggies. The process is simple – just toss the vegetables into a pot of boiling water for a given period of time, then promptly remove them and plunge into cold water. That immediately stops them from cooking. Once cool, drain fully before freezing.
A few tips when freezing vegetables:
Clearly label and date the package. Write this in the same place on all your bags, so it’s easy to find when you have that chilly freezer door open later.
Spread the veggies on a cookie sheet and place in the freezer for a couple hours. Once fully frozen, transfer to a freezer bag. This allows the veggies to freeze individually, instead of as one large clump, which makes it easier to use just a little at a time.
Lay the bags flat when you freeze them, so they are easy to stack once frozen.
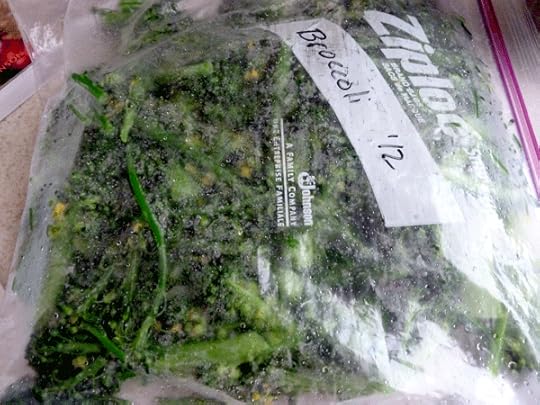
Flat, well-labeled bag of individually frozen broccoli
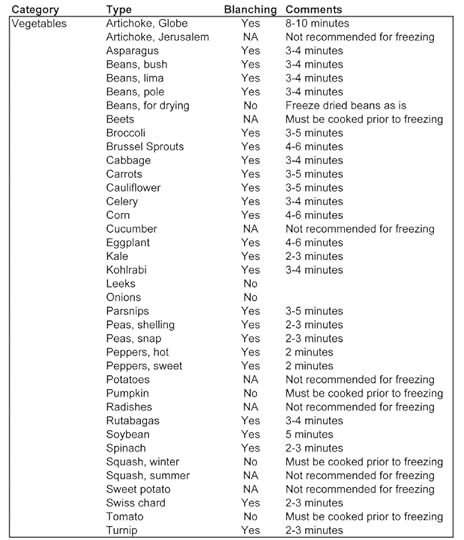
The following chart is a helpful guide on which vegetables need to be blanched prior to freezing and how long they need to be in boiling water. (Note that items marked as NA doesn’t mean you can’t freeze them – it just means I don’t like freezing them. In some cases it changes the texture or taste too much for my preference.)
Freezing vegetables is a fast, easy way to preserve the harvest. I am spending some late nights over the canning pot at this time of year, so anything fast and easy is a most welcome way to stretch our harvest. Are you freezing any goodies this year? Any tips of your own to share?
October 11, 2012
Belated Winter Garden
Finally, the winter garden has been planted – better late than never. Winter vegetables need enough time to get established before cold temperatures roll in. Tender plants will be damaged and killed by frost, while the hardier winter crops will endure. Not sure when your last frost date is? Check the Farmers Almanac to find the frost date closest to your location.
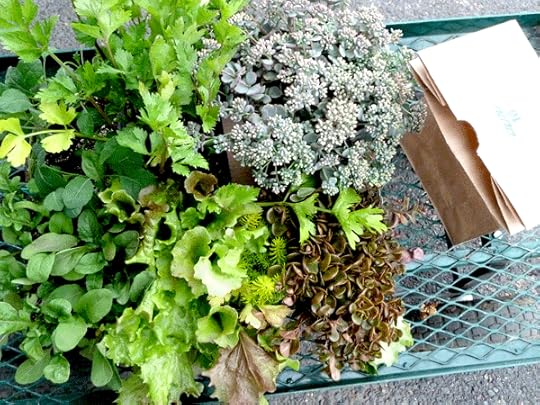
winter vegetables with some hardy, decorative succulents
Our last frost date in Portland, Oregon, is around 10/18. My garden was finally planted a couple weeks ago. I am using row covers to help keep these tender plants warm while they get established. It’s an easy system – just find a way to make hoops over your planting area and securely fasten some greenhouse plastic over them.
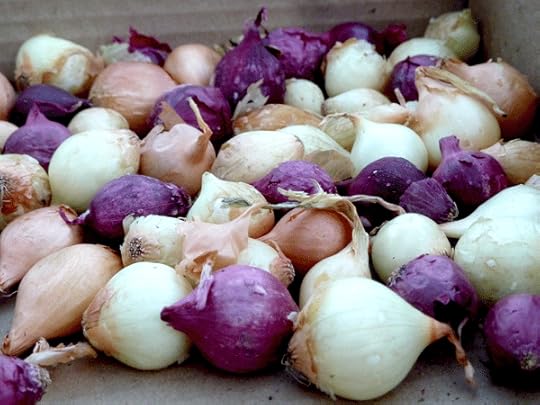
yellow and red winter onions
Greenhouse plastic will hold up well against the elements, but it is expensive. A cheap alternative is contractors plastic. It will last one season, maybe two, but eventually the sun will cause it to crack. Just be sure to throw it away before it breaks down too much, leaving you with flakes of plastic all over your organic garden.
Here is a quick illustration of what our winter garden looks like this year.

Winter vegetable beds
Some plants are hold overs from the summer garden – like our broccoli. I worked around them, carefully turning in compost as I planted vegetable starts, seeds and onions. With the row covers protecting the beds, I will need to continue to water the garden periodically. It’s a good excuse to keep a close eye on the plants, spotting pests and diseases before they take hold.
What is still growing in your garden? Are you braving the winter to grow food, or ready to throw in the towel for the season?
October 4, 2012
Deep Coop Cleaning
The duck and chicken coops get cleaned once a week, but a deep clean a couple times a year will help keep pests and disease at bay. Our weekly cleaning process involves raking out used bedding, cleaning out food and water dishes, refilling grit and oyster shell, and laying down fresh dry bedding. Dirt and grim builds up over time though, so this twice annual deep clean will help your flock stay healthy.
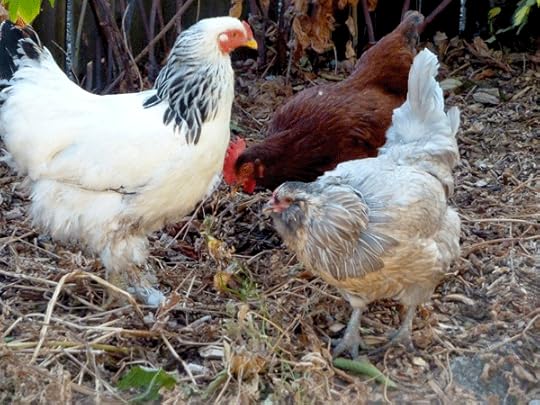 I pick a dry day in the fall and one in the spring for the cleaning. The birds all get to free-range while I go to work. The first step is to remove the bedding and anything moveable (food and water dishes, nesting boxes, etc). Next, hose everything down and scrub the surfaces to loosen any built-up debris.
 After this first part, I let everything air dry for an hour or so. It’s good to get a lot of air circulation into corners of the housing, so I leave all the doors, gates, etc. wide open. I treat the birds to some extra yummy food scraps out in the garden to keep them distracted.
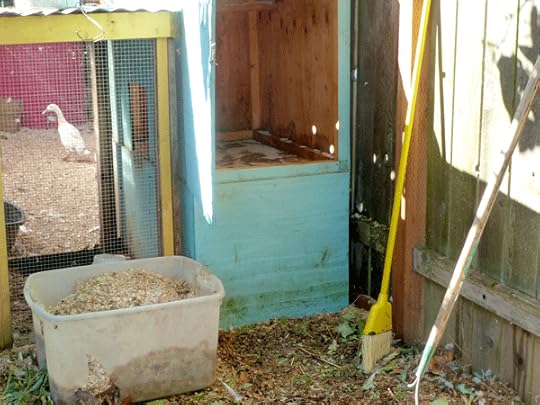
Once dry, I spray and wash everything down with white vinegar. It is a simple, natural germ fighter killing mold and bacteria. I let is seep into the cracks in the walls, floors and into the nesting boxes as well.
Freshly cleaned hen house
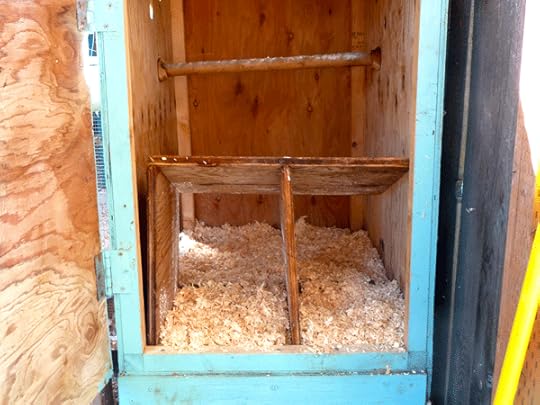
When the vinegar has dried, I replace the food and water dishes back into the coop and lay new bedding down. Supplies are all stocked and the birds can once again return to their cozy coops.
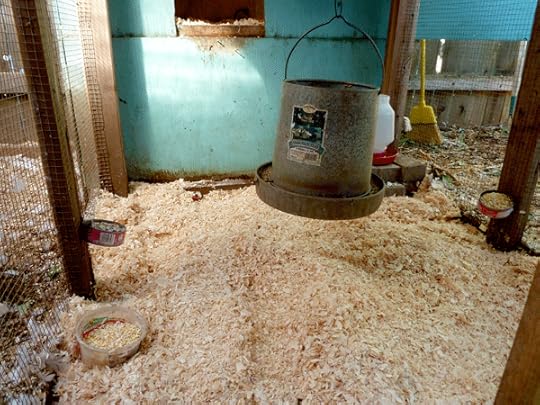
Freshly cleaned chicken coop
It’s a great time of year to do a deep clean on your chicken and duck housing, especially while the weather is still nice. Take this opportunity to check your birds over carefully to make sure they are in top physical health. Winter weather usually keeps us inside longer, which can make it harder to spot problem signs with your flock. Happy cleaning!
October 2, 2012
Happy Birthday to Me
Another year is behind me and I find myself again feeling a little wiser for it. This year I decided to celebrate my birthday by enjoying all of my favorite things – my lovely family, some gorgeous landscapes and u-pick produce. Here is a photo-heavy recap.
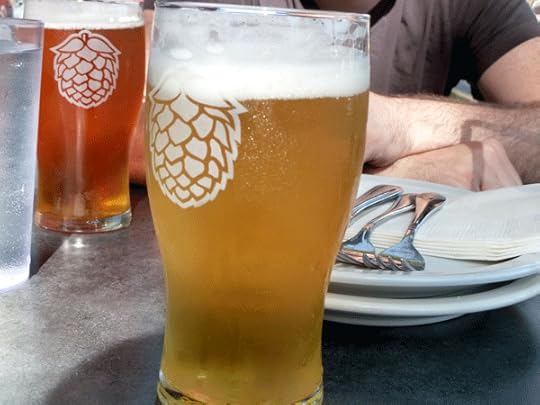 The first stop on my birthday celebration was lunch at Double Mountain Brewery in Hood River. This small town is about an hour from Portland, but feels a million miles away.
 The food was pretty good. The beer was fantastic. We will be back!
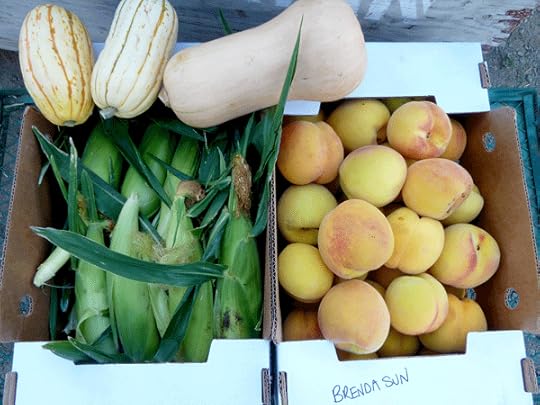
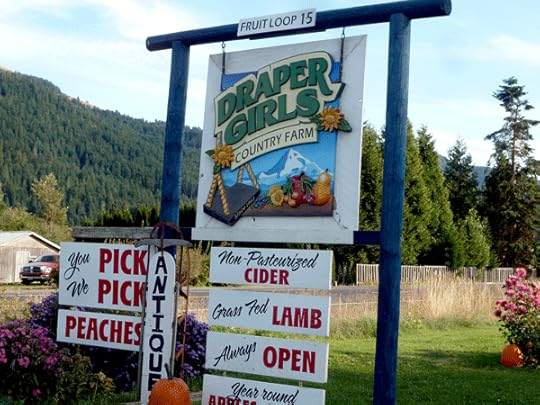 Next stop was Draper Girls Country Farm, which is on the Fruit Loop just outside of Hood River. We meant to hit more than one farm, but they had so many different crops ready for u-pick (apples, pears, plums, peaches, corn, raspberries) that we were content to pick everything in one place.
 I ended up scoring about twenty pounds of huge, juicy peaches for canning. I thought I had already missed the season, but the farm’s higher elevation meant that the peaches were just ripe for picking.
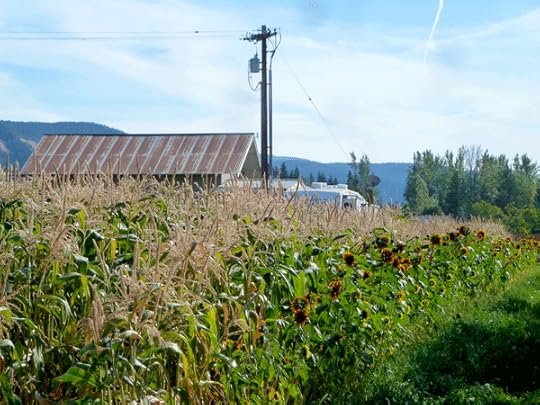 I also stocked up on a huge supply of fresh corn. It has since been blanched and frozen for winter keeping.
 The setting was absolutely gorgeous, with Mt Hood shining in the background. We kept trying to find reasons to stay.
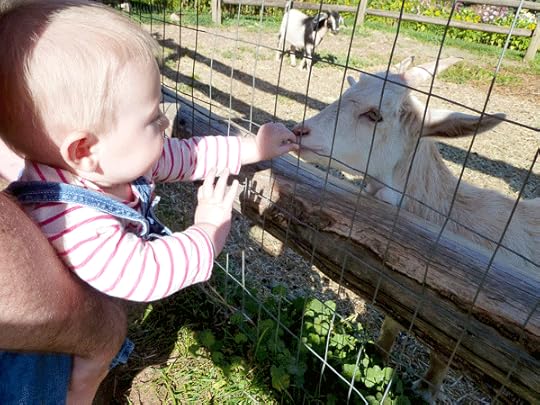 Juniper met her first goat in their petting area. Does it get cuter??
 All in all, we walked away with a wagon full of peaches, corn and some winter squash. I have since been chained to the canning pot at home, but it was all worth it.
 This birthday was a celebration of where I am today. It has been a crazy last few years. This next year holds lots of promise for new beginnings and adventure. Here’s to another year of savoring the simple, sweet life.
September 25, 2012
Tomatoes! Tomatoes! Tomatoes!
Our harvest baskets are bigger than ever this month and we are buried in tomatoes! I am happy to report our later-ripening Brandywines are in full swing. That means we have mounds of Sunburst cherries, San Marzano sauce and fat Brandywines all coming on at once.
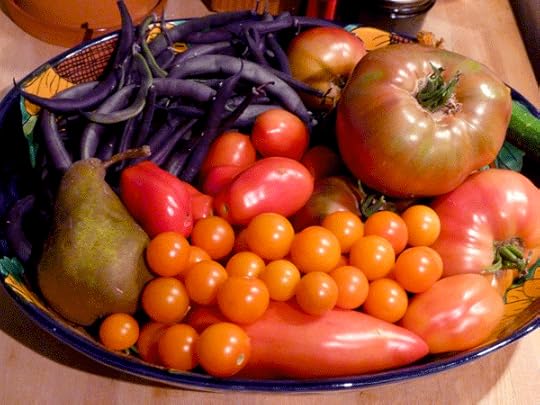
September harvest basket
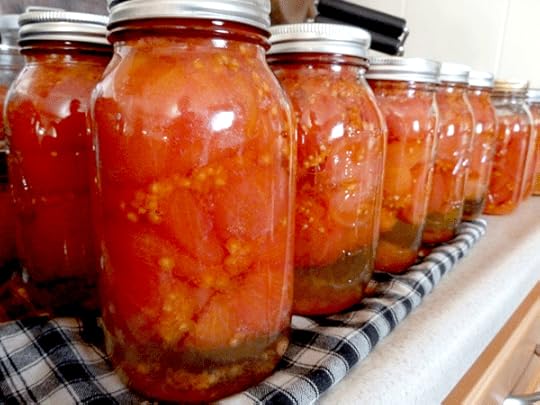
I have been chained to the canning pot, putting up batches and batches of stewed tomatoes. But don’t think I’m hogging them just here in the kitchen. Oh no, there are enough tomatoes for everyone on our little homestead to share.
 The chickens and ducks have been the happy recipients of the leftover bits: skins, cores and any over-ripe areas. Giving them some variety in their meals means tastier eggs, happier birds and saved money on feed. It all makes it way into the compost bin somehow – either putting food scraps in there directly or indirectly through their nitrogen-rich manure. Nothing goes to waste!
 The only one not getting to eat tomatoes is little Junebug – not yet anyway. She’s too young to chomp down on all these ripe tomatoes herself, but come wintertime she will get to enjoy the fruits of our fall labor. For now, she’s incredibly entertained watching mama peel, core, can. She just laughs and laughs at her crazy mama!

Baby Juniper, aka my tomato helper, at six months
I’m almost afraid to harvest in the evenings… More tomatoes! More beans! More broccoli! I can feel it getting colder and the days getting shorter. Are you going to have enough preserved before the first frost arrives?
September 19, 2012
How to Make Ratatouille
Ratatouille is a rustic French dish that captures the best flavors of summer and distills them down in a richly flavored stew. It is the perfect recipe to make at the end of summer when you are harvesting everything at once from the garden.
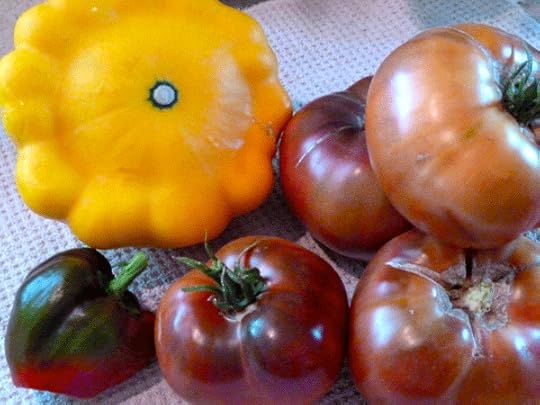
Garden veggies for ratatouille (plus herbs & eggplant, which I had chopped before snapping this pic!)
The recipe I love best is from the Gourmet cookbook and a version of it can be found on the Epicurious site. This recipe is great because you cook each vegetable on it’s own, allowing them to lock in their individual flavors.
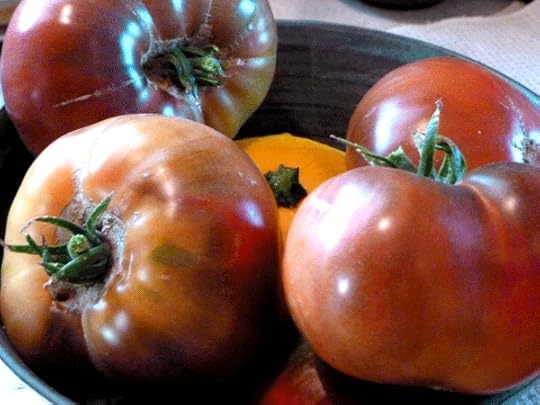
Break out your favorite heirloom veggies for this dish! The flavor from my Brandywine tomatoes really shined in this stew.
Once that initial phase of cooking each veggie on its own, everything simmers together for an hour so the flavors can develop. The finished product is a richly flavored vegetable stew so delicious that you’ll be weak in the knees.
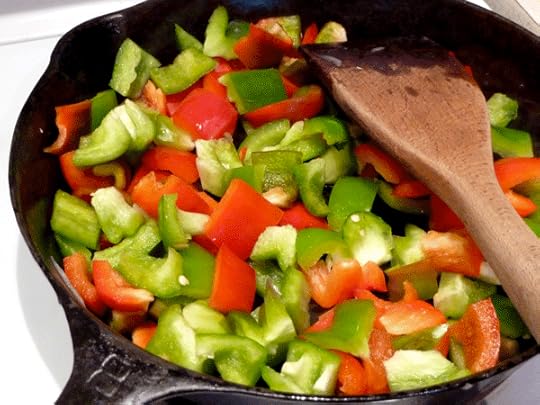
The more color, the better! Use whatever combination of sweet peppers you have on hand.
I modified the recipe a bit, as I always seem to do, based on what I had on hand. The beauty of this recipe is that if you don’t have enough of one thing, add a bit more of another – it doesn’t have to be rigidly followed. When chopping the veggies, try to keep them all a similar size – around 1 inch. Here are the main components:
4-6 large tomatoes, peeled and chopped (I used big Brandywines)
olive oil
1 cup fresh fresh basil
1 cup fresh parsley
10 garlic cloves, smashed and peeled
2-3 lbs eggplant, chopped (I used 5 small ones)
2 yellow onions, sliced
2-3 lbs summer squash, chopped (I used one huge pitty pan)
2-3 bell peppers, chopped (I used an assortment of green & red)
salt
Begin by peeling the tomatoes. Dip them in almost boiling water for about 30 seconds, then plunge into cold water to stop them from cooking. You should be able to peel them easily. If not, throw them back in the hot water for a bit longer. Once peeled, roughly chop them up.
In a stockpot, add tomatoes, garlic, basil, parsley and 1/3 cup of olive oil. Simmer while you work on the rest of the recipe.
Toss eggplant with about 1 T. salt and let it sit in a colander in the sink to drain excess water.
In a large skillet, add 1 T. olive oil, 1 tsp. salt and onion. Cook for 10 minutes. Set aside.
In the same large skillet, add another 1 T. olive oil, 1 tsp. salt and bell peppers. Cook for 10 minutes. Set aside with onions.
Again, add another 1 T. olive oil, 1 tsp. salt and summer squash. Zucchini, yellow crookneck, or pitty pan all work well. Cook for 10 minutes. Set aside with onions and peppers.
Once again, add another 1 T. olive oil, 1 tsp. salt and eggplant. Cook for 10 minutes until it begins to caramelize.
Add cooked onions, peppers, squash and eggplant to the simmering tomato mixture. Give it a good stir to incorporate, cover and let it simmer for an hour.
Thickly slice some crusty bread like a French Batard. Ladle up a big bowl of stew and get ready for your mind to be blown.
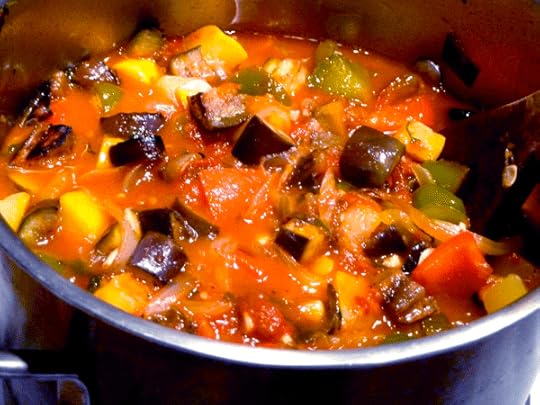
Rustic and delicious Ratatouille
Keep this recipe handy for the wintertime too! Chop, blanch and freeze excess garden veggies like bell peppers, summer squash and eggplant. Pop open a quart of simply canned tomatoes and you’ll be on your way to ratatouille even outside of the summer season. We were licking our bowls clean!
September 13, 2012
Tomatoes for Canning
Every week more and more jars of preserved goodies are added to our cupboard. Canning tomatoes is especially satisfying because I know we will blow through them this winter, as we always do. This year I am putting my efforts toward simply canned tomatoes (click link for recipe!). They are versatile to have in the pantry alongside a few jars of marinara sauce (again, click for recipe!). But what tomatoes are best for canning?

Yellow Pear cherry tomatoes
There are three general categories of tomatoes: sauce, slicer and cherry. We always plant one cherry tomato in our garden so we can use them in salads. Cherry tomato plants tend to be really prolific for us, giving us tons of fruit! However, cherry tomatoes are not the best canning tomato because they are so time consuming to peel the skins from and they have high water content.
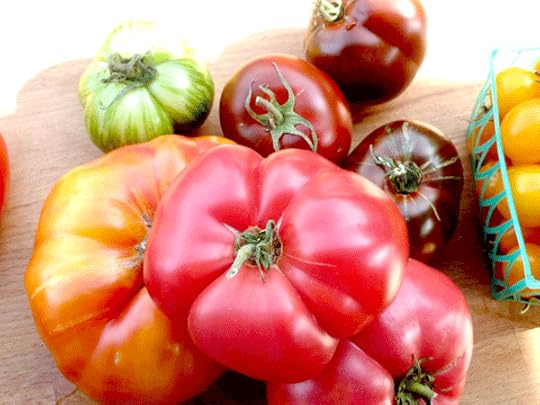
Assortment of heirloom tomatoes – mostly slicers
Slicer tomatoes are big, fat, juicy tomatoes that we all love thickly sliced on a sandwich. They are not the ideal canning tomato because they have a high water content. If you are making your canned tomatoes into a sauce, that means you will need to cook it down a lot more to simmer off some excess water.
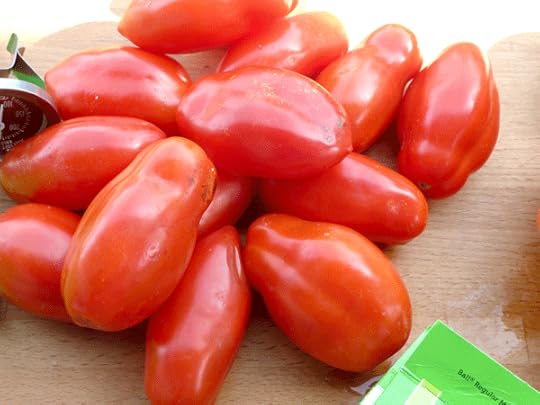
The perfect canning tomato: sauce or paste varieties
Sauce, or sometimes called paste, tomatoes are the best for canning because they have low water content and really meaty flesh. You get lots of concentrated tomato flavor without all the excess liquid. Some of my favorite cultivated varieties include San Marzano, Roma, and Black Plum.
This season I am describing myself as a “scrapper canner”, cobbling together batches to can from multiple sources. I have some gorgeous San Marzano sauce tomatoes I’m preserving a couple times a week from my homestead. In addition, my dad planted about forty (I kid you not!) slicer tomatoes like Early Girl and Big Boy. There will be more water in those jars, so I’ll probably use those in stews and soups more than sauces.
What are you preserving during these last weeks of summer? Have any favorite tomato varieties that you reserve for canning? Tell me about it!


