
Renee Wilkinson's Blog, page 16
July 16, 2013
Environmental Stewardship: My Hidden Agenda
Those cold, drizzly days of winter seem like a distant memory as we soak up summertime in Oregon. I am so much in love with this blissful time of year that I refuse to leave the state between the months of July through September. Instead, summertime is a chance to show off our great state to family and friends visiting from afar.
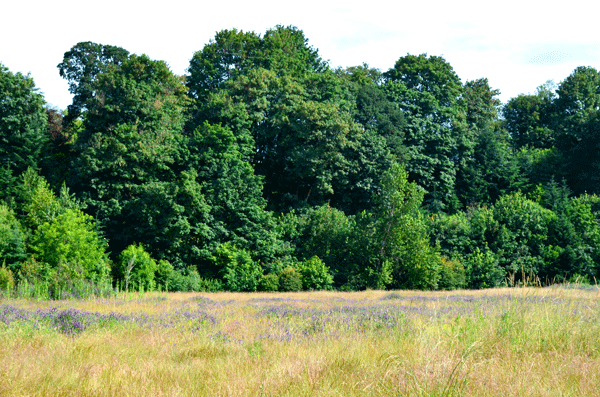
An urban hike through Oaks Bottom Wildlife Refuge
I have to admit that behind this simple desire to spend time with loved ones in landscapes I adore, I have a hidden agenda: to build environmental stewardship. Several times I have tried to explain the merits of an Urban Growth Boundary in protecting agricultural soils or discussed the value of wetlands to native wildlife. But those concepts are complex and difficult for the average person to immediately understand and accept.
My sales pitch for why the UGB is a good thing involves taking a short drive to pick strawberries on a local farm. The out-of-towners make comments like, “Wow, and this place is just 30 minutes outside Portland?” And I can say, “Yes, that’s part of what makes the UGB so great – farmland can stay farmland to grow great food, but still be accessible to city slickers.”
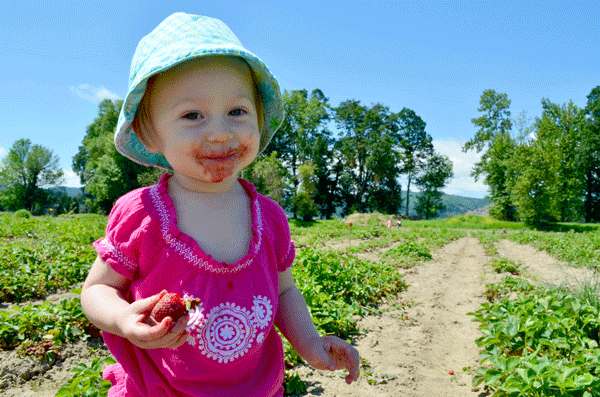
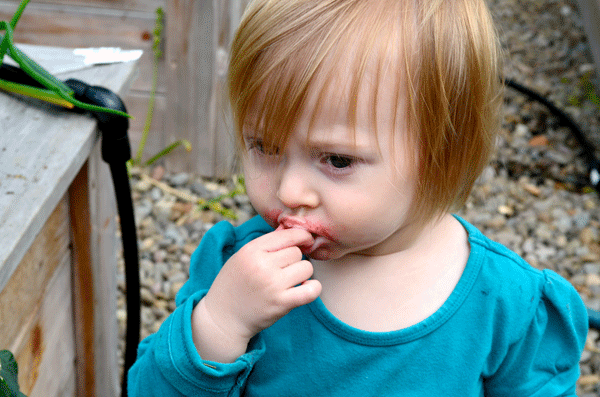
Nothing keeps this baby from her berries
The message doesn’t sink in with everyone. The younger berry-pickers in our party don’t care about the UGB – it’s hard to stand in the way of a little Juniper and her favorite fruit – but even in that case, this little outing might just make an impact in shaping the way she views open spaces.
Oaks Bottom Wildlife Refuge: habitat in the city
Multiple times I have tried to explain the value of a wetland only to be asked, “But isn’t that just basically a mucky swamp?” When we took friends on an urban hike into Oaks Bottom Wildlife Refuge, the value of a wetland in their minds completely shifted. Birds skated along the water, herons hunted for food and we felt collectively honored to see a slice of nature in the middle of the city.
We are only a few weeks in to another summer in paradise. Our list of visitors grows, as do my plans to convert them all into ambassadors back home of preserving sensitive habitats and protecting agricultural soils.


July 10, 2013
Making Plum Chutney
Plum chutney is a sweet-and-tangy spread that is perfect for roasted meats, on sandwiches or as a dipping sauce. I made it last year with a box of Italian plums I picked with my friend Brigitte from a local farm. It has to be hands down one of the best chutney combinations I’ve ever had.
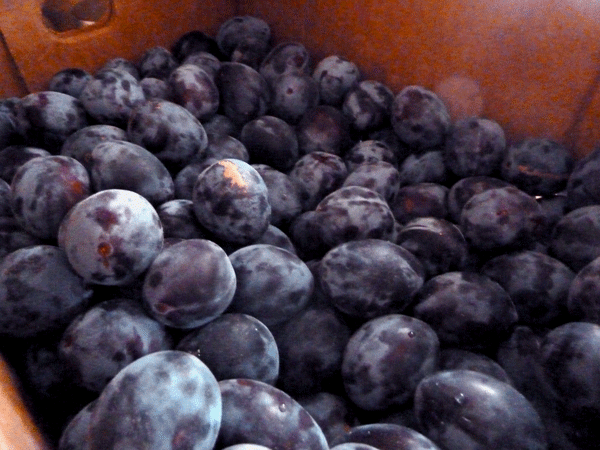
Italian plums from a local u-pick farm
Any old plum will work for this recipe, but I happen to favor Italian plums. I love them so much that I planted one this past year on our homestead. They are great for fresh eating, preserving and drying – making them a good, easy to grow and easy to use fruit for the NW.
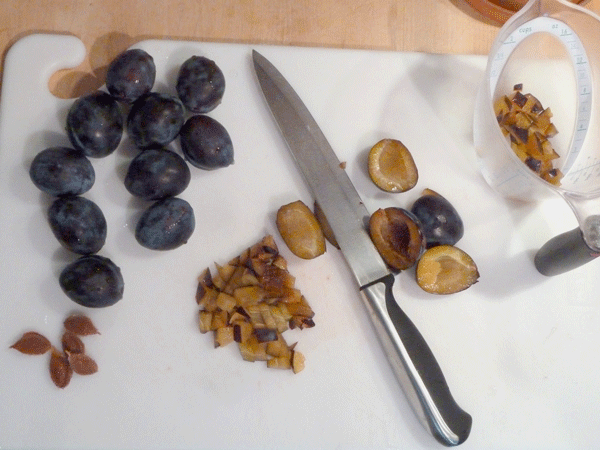
Grab a friend for the chopping – 3 lbs of plums gets a little boring!
This chutney recipe is modified from the book Well Preserved, an excellent and creative food preservation cookbook that focuses on small batches. As is the case with most canning recipes, this one involves lots and lots of chopping. I don’t own a big food processor and I wanted the fruit pieces to stay chunky. So grab a friend and have them help you cut everything up.
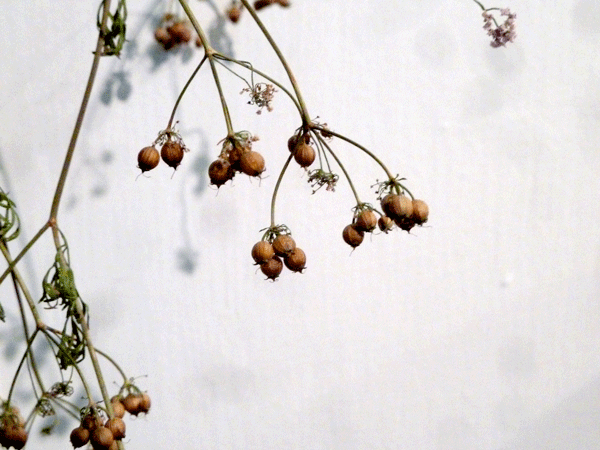
Dried coriander seeds from the garden’s bolted cilantro
I used coriander seeds from some cilantro that had bolted earlier in the season. Just pull the plant and hang it to dry. You can replant those seed heads when the weather cools down or crush them in a mortar and pestle like I did to cook with.
Plum chutney ingredients
Plum Chutney with Cinnamon & Coriander
3 lbs. firm plums, roughly chopped
1 c. Honeycrisp apple, chopped
1 c. white onion, chopped
2 c. brown sugar
1 1/2 c. red wine vinegar
1/2 c. golden raisins
1 T. mustard seed
3 tsp. dried chili flake (add more or less to suit your taste)
2 tsp. salt
2 tsp. cinnamon
2 tsp. coriander seed, crushed
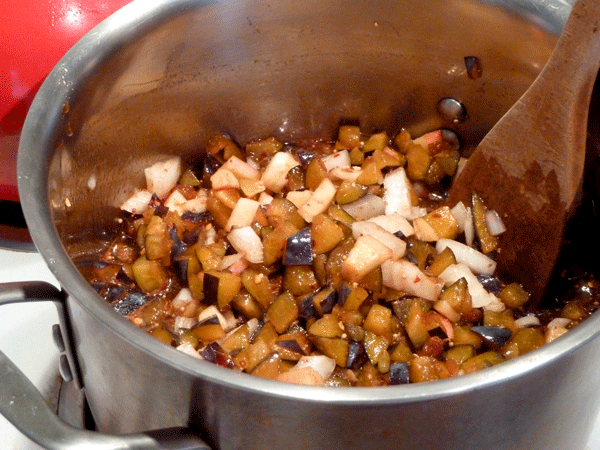
Combine all ingredients into one big stock pot. Bring to a boil over medium-high heat, stirring occasionally.
Once hot, lower heat to medium and stir often to prevent sticking. Simmer for about 45 minutes, or until the mixture is thick enough to stay mounded on a spoon. (You should be drinking wine or a cold beer with a friend during this part.)
Get your canner filled with water and start bringing to a boil about halfway through the chutney cooking time.
Ladle hot mixture into clean, sterilized canning jars leaving about 1/2″ of head space. Wipe the rims clean and adjust the two piece caps. Process the filled jars in a hot water bath for about 10 minutes.
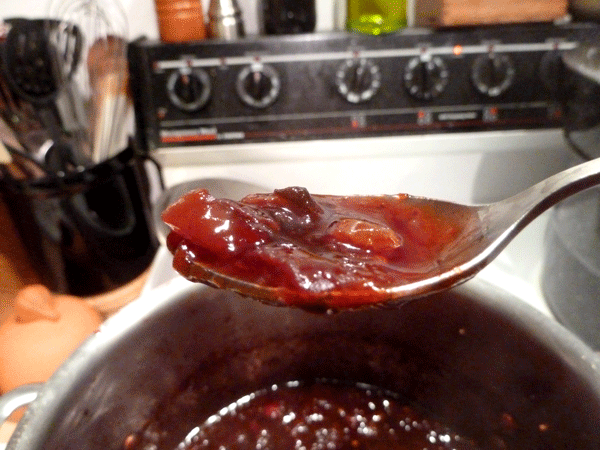
Thickened chutney is ready for the canner when it mounds well on a spoon
That’s it! Pretty simple and straight forward. Again, adjust the seasoning to suit your taste. This recipe has enough acidity from the vinegar that you can feel comfortable increasing or decreasing the spices a bit.

Pint jars for us and half pints for gifts
I canned mine in both pint and half pint jars. We can easily devour a pint of chutney within a couple weeks after opening, while the smaller sized jars are good for gift-giving. Encourage gift receivers to use it as they would cranberry sauce. Enjoy!
July 2, 2013
How to Install Drip Irrigation
It takes some serious juggling to balance modern living with growing a substantial amount of your own food at home. I am no expert juggler, but I have become much more savvy when it comes to simplifying the way I manage our homestead. One of the best ways to simplify your garden time: an automatic drip irrigation system.
 Setting up an automatic drip irrigation system for your vegetable patch ensures your plants get all the water they need at the perfect time of day. Big boxes stores sell drip irrigation kits that can be inexpensive and easy to configure. I choose to install a drip system from scratch, fully customizing it to my garden configuration.
Assembling a drip irrigation system doesn’t have to be time consuming or challenging. You just need some basic garden measurements and a couple hours to set it up. It helped that I have a great local nursery with knowledgeable staff who where there to help me problem-solve when I had questions.
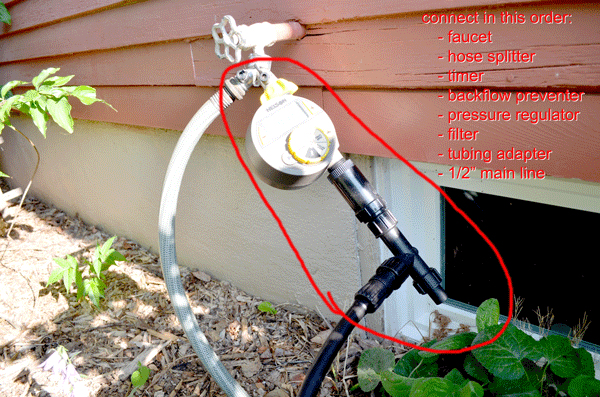
First step: Connect the faucet to your main irrigation line. I used several pieces here to make sure the line stays free of sediment and the water pressure flows correctly. The pieces included a backflow preventer (connect directly to outside faucet), pressure regulator, filter, tubing adapter and then the 1/2″ main line tubing (attached in that same order).
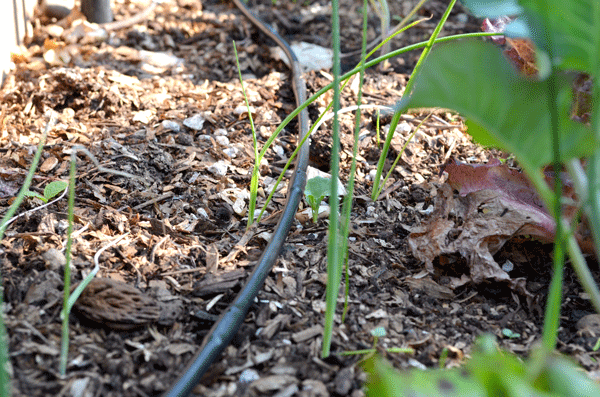
 Second step: Measure your garden area. Although all of our garden is growing food (berry bushes, fruit trees, etc), I’m only interested in an automatic watering system for the areas I intensively grow vegetables – the raised beds and some patches nearby planted out with potatoes, squash, onions & shallots. That equals about 100 square feet of intensive growing space, which I use a 1/4″ dripper line to water.
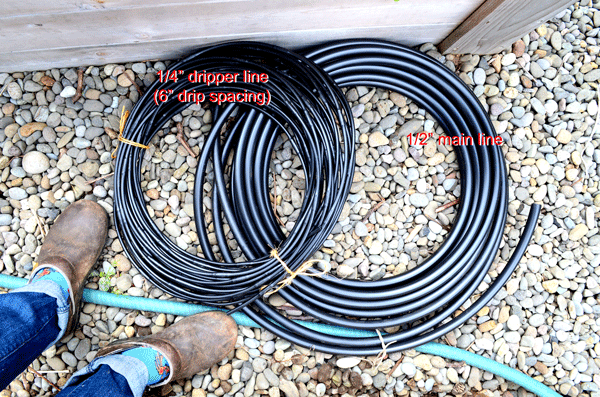 Third step: Make a general plan. Draw out the distance from the most convenient exterior faucet to the raised beds. This is where the “main line” will run, staked down alongside the pathway so no one trips over it. I had about 40′ from the faucet to the raised beds, which I used 1/2″ main line to run water out to.
Forth step: Customize your configuration. I started thinking through each connection of getting that main line to each and every bed. There are lots of different fittings and connectors you can use to make sure your setup makes the turns and splits it needs. Draw it out and talk through it with your local garden nursery to get every piece you need.
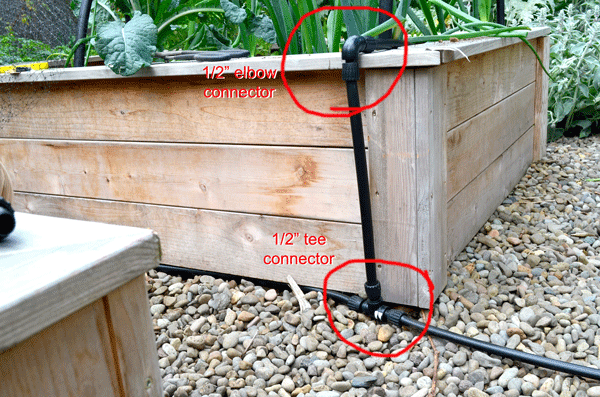
 For my drip system, I used “elbow” fittings so the main line can make 90 degree turns. This helped me get to each of the four beds efficiently without kinking the main line
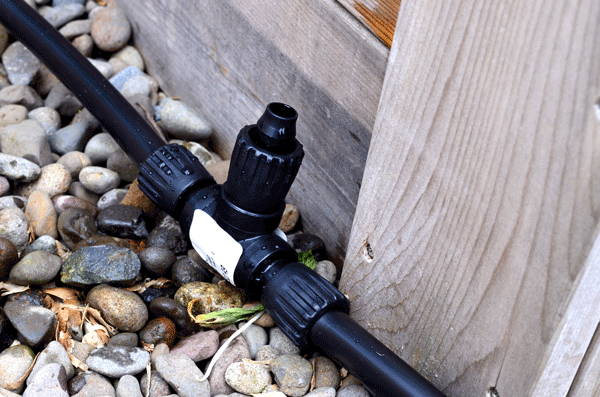 I also used “tee” connectors at alongside each raised bed. That allows me to split the 1/2″ main line off in two directions: one going up into the bed and the other continuing the line onto the next bed.
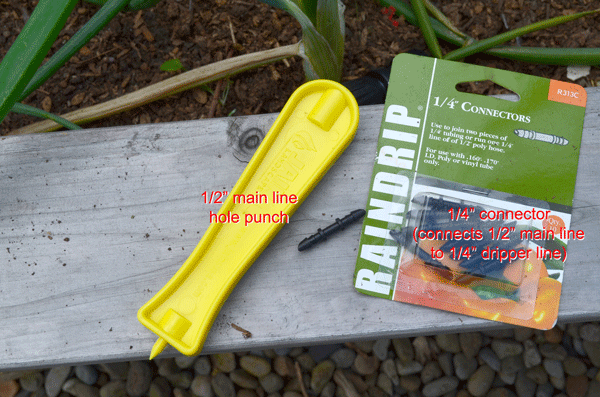
 Inside each bed, I closed off the end of the 1/2″ line with an end cap piece. I then used the main line hole punch to make four holes in the 1/2″ line that was in each bed. I attached 1/4″ connectors into these holes and fitted on the 1/4″ dripper line.
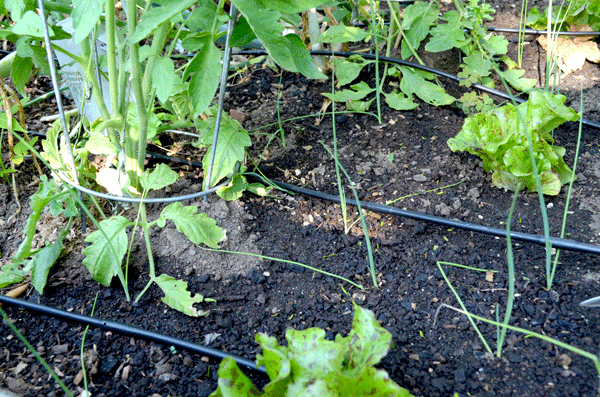
 Since I plant my beds so densely, I used a dripper line that has holes spaced 6″ apart. That should give me thorough and even watering.
 We all know watering your vegetables first thing in the morning is best. It decreases slug issues, powdery mildew disease and water evaporation. But as we’re all hustling to get our days going, it can be really challenging to fit the garden chore into your 7am routine.
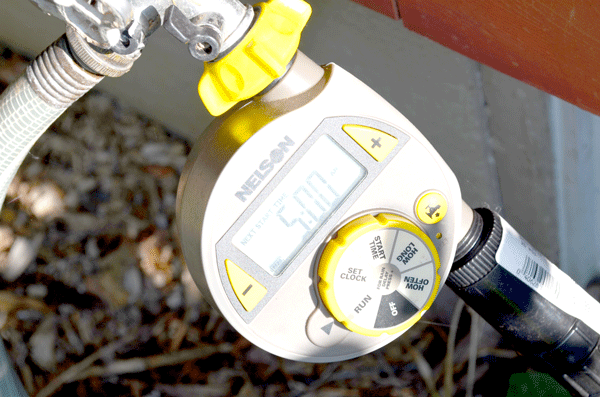 My solution is an automatic timer for the drip irrigation system. It’s super simple, but a bit pricey. For $40 bucks, you can get this handy timer that screws into your 1/2″ main line. I attached mine first to the faucet, then followed with the other pieces in step one. You can set the watering time by day of the week and tell it how long to stay on. With summer in full swing, mine is set to every day. It turns on at 5am for about 30 minutes.
 Overall, this has been a $100 investment that took about an hour to set up. Spending less time watering means more time available to weed, harvest and linger. I’m freed up now on weekday evenings to help Juniper hunt for raspberries and collect produce for dinner. Those are where the memories are made and I’m thankful the drip system is giving me more time to make them.
June 26, 2013
Strawberry-Rhubarb Hand Pie
Don’t you just love June? I’m planning our evening meals based on garden strolls – picking artichokes here and there, clipping rhubarb and gathering berries. It just feels right to eat what gifts our summer garden is giving us right now.

Harvest basket for a June dinner: artichokes for braising and strawberry-rhubarb hand pies for dessert
We are in the thick of berry season on our homestead – happy times indeed. The red currants are dripping with ripe berries. The ever-bearing raspberry canes are bent over with fruit. Juniper always seems to uncover more and more strawberries in the garden.
Juniper devouring berries from the summer garden
What to do with all these berries? Often I freeze or can them, but my latest culinary discovery may put a hold on those plans. I give you…. the hand pie.

Hand pies are the perfect end to these long summer days
What’s a hand pie?
Hand pies are basically mini pies that you can stuff with a couple tablespoons of your favorite pie filling. It’s the perfect size for picnics, afternoon snacks or a light dessert. Thanks to this inspiring post from NPR’s Kitchen Window program, we’ve been enjoying strawberry-rhubarb hand pies on these long June evenings.
Hand pie dough
I was skeptical of their pie dough recipe, so I stuck with my adapted version of Alice Waters’ tart dough from her book The Art of Simple Food. Your favorite flaky pie crust recipe can be easily adapted for hand pies as well. Just roll out the pie dough to 1/4″ thickness and use a bowl about 4″ wide to cut circles in it. Then roll the circles a bit thinner to about 1/8″ thickness.
Cut out your pie dough into 4″ circles, then roll to 1/8″ thickness
When those dough circles are ready to go, place about two tablespoons of filling in the center of the round. Lightly beat one egg, then brush a little along the edges of the dough rounds. Fold the dough rounds over in half, roll the edges to close and press with your finger tips to seal.

Fold each dough round in half over the filling, then seal the edges
Cut a couple slits in each pie for ventilation and transfer to a baking sheet. Lightly beat an egg, then brush over the top of the hand pies. Sprinkle with coarse sugar and bake for about 20 minutes at 375 degrees. They are done when the dough is golden and the filling bubbles out.

Transfer pies to a baking sheet, brush beaten egg over the top and sprinkle with sugar
Hand pie filling
Since we’re up to our necks in strawberries and rhubarb, I simplified the NPR recipe to suit our tastes. I mixed three cups of rhubarb with two cups of strawberries, which is a slightly-sweet combo that makes the rhubarb stand out more. Add two tablespoons of sugar and one teaspoon of cornstarch,
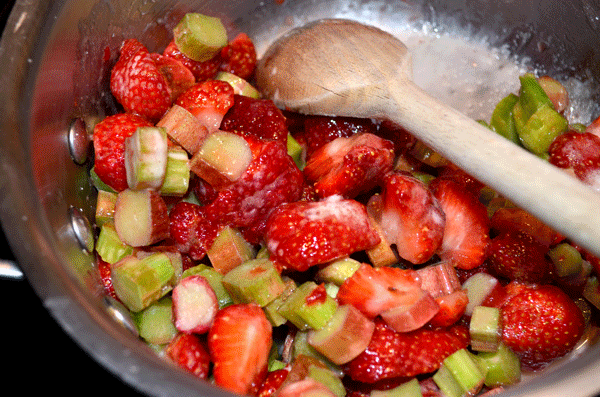
Mixed berries and rhubarb for pie filling
Warm the mixture over medium heat for ten minutes, stirring often, until it has thickened. Remove from heat and let it cool before spooning into the hand pie dough.
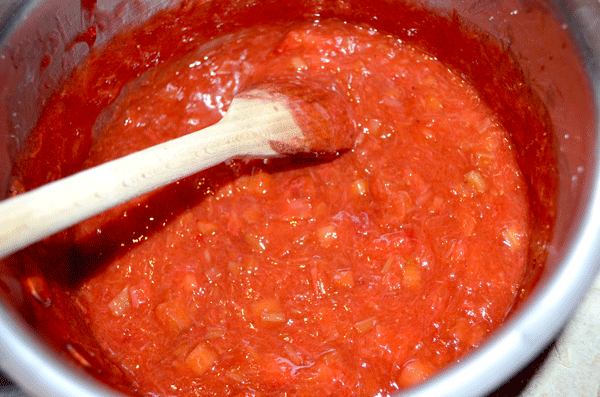
Simmered rhubarb-strawberry hand pie filling
Lots of other combinations will work as well, keeping us stuffed with pie all summer long. I find five cups of fruit is enough to fill twelve pies. Here are some other good combos to try:
Blueberries + peaches + 2 T brown sugar + 1tsp corn starch
Blackberries + raspberries + blueberries + 2 T honey + 1 tsp cornstarch
Apples + blackberries + 2 T sugar + 1 tsp cornstarch (simmer over medium heat for 10 minutes until softened)
 Hand pies have been a fun way to make mini-desserts using whatever fruits are in season from our garden. I’m not sure it’s great for my waistline, but it’s sure a delicious way to savor the summer harvest.
June 18, 2013
Mixing Chicken Flocks
The new pullets are quickly turning into adult chickens. They are close to four months old now and ready to be mixed with our flock of older chickens. Let the abuse begin…
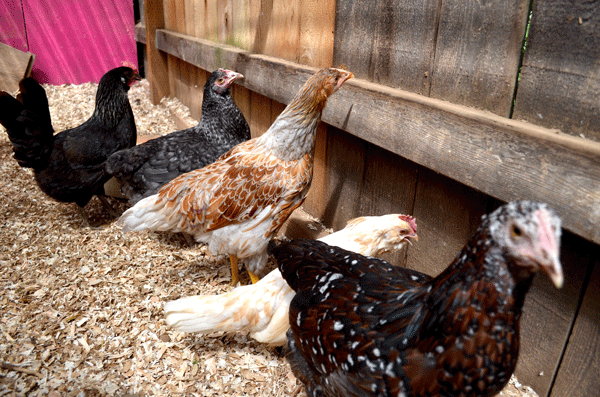
The new pullets are getting introduced to the older, bossy chickens
Chickens have a pecking order. Whoever is on top gets to boss everyone around. And when you mix two different flocks, the chickens have to reorganize themselves to determine where everyone falls in the pecking order. Unfortunately, it is usually a difficult process to watch as the underling chickens get bullied. It’s like a version of sorority hazing, but with feathers and the potential for some blood.
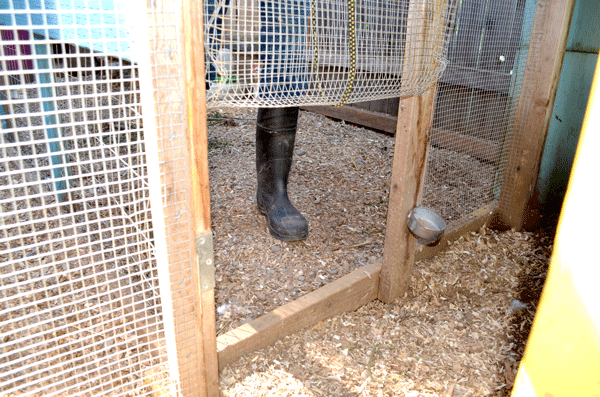
We modified the chicken coops so we can open the runs to each other.
Initially we had the two flocks separated, but they could see each other through a fence. After about a month, we let them have supervised “visits” for a couple hours in a shared area. Now we have joined the two coops into one big area by creating an opening between the coop fencing, so they are all making adjustments to each other.
It’s always easier to introduce multiple chickens, so we have that in our favor. When you introduce just one new chicken to an existing flock, she will bear the brunt of all the abuse. With multiple new chickens, they all get some abuse but hopefully nothing overwhelming.
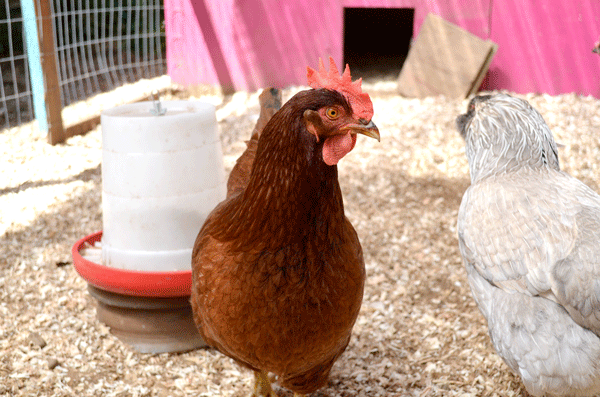
Florence: the self-elected boss of the new, younger flock
In our situation, we have five new girls joining three older girls. Pearl is on top and has actually been the most chill about bossing them around. Florence, on the other hand, is on the bottom of the older flock. She has been the biggest bully to the new girls, probably because she’s desperate to finally boss someone else around for a change.
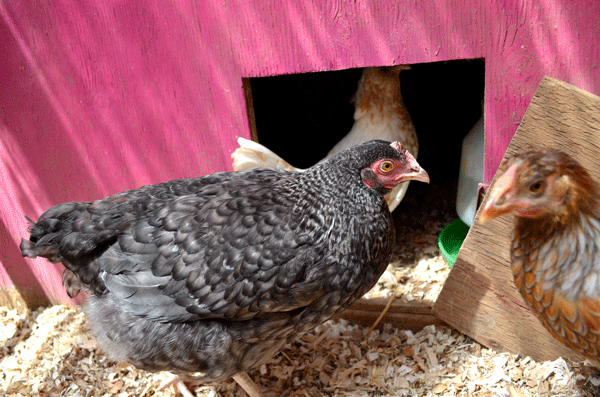
New pullets hanging out close to the hen house, where they can hide from the older, bossy chickens
Chickens will do things like block off access to the food and water, so make sure you have multiple areas for the chickens to get food and water. In the picture above, you will notice a water dish is setup in the actual hen house so the new girls still have access if they get stuck in there. If a chicken gets cornered, she might lose some tail feathers. Our new gals are mostly getting chased around and spending most of their time in one of the two hen houses to avoid the older gals.
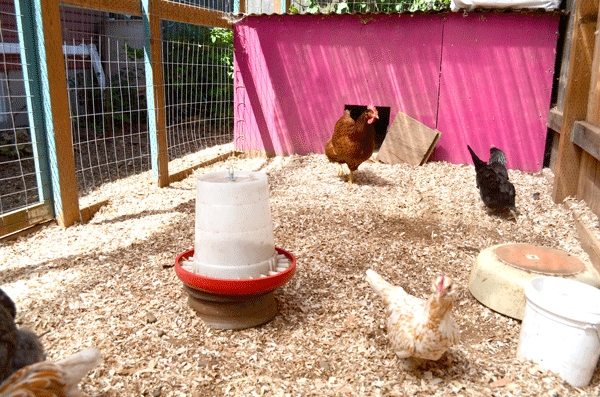
The new pullets getting chased around by the older flock, in this case Florence
Sometimes the pecking can get so bad that someone gets seriously wounded. If that’s the case, separate the injured bird to clean the wound and let it heal. You can also talk to your local feed store about getting this blue substance to put over the wound when it’s closed up. Chickens see the color red, so they’ll continue to peck at a bloody wound. The blue substance disguises that.
Thankfully, no one is getting injured. After two weeks of the hens having full access to each other, things do seem to be slowly calming down. I would expect the transition to take another few weeks, but the worst is over.
June 12, 2013
Battling Flies
Having backyard livestock is a joy, but it’s not all eggs and sunshine. Chickens, ducks and other backyard livestock can attract flies, mice, rats and other undesirable critters. The rodents love the free food, so keeping poultry feed in a hanging feeder off the ground can help. Dealing with flies, however, is a bit harder to control.

Regular cleaning of your chicken coop may help keep some pests away, but flies will likely take hold at some point.
Disclaimer: Don’t read this post while eating your lunch.
Flies love manure and our chicken coop never has a short supply of that. We thoroughly clean the coop once a week, discarding all the bedding and replacing it with clean bedding. But still the flies are attracted to the area. The sight of them swarming along our side yard makes my stomach turn and a few always find their way into the house.
Flies are attracted to manure. Even a “clean” chicken coop doesn’t stay clean for long.
I should note that our poultry area is located really close to our house. There’s something to be said for it being tucked into a back corner – the flies likely won’t bother the house and noise from clucking hens will be quieter. But having their near the house makes egg collection easier, we enjoy watching them from the living room and we can also easily spot trouble in the coop, like water dishes that get tipped over.
There are a few organic ways to deal with flies. First, try sprinkling DE around the coop. That will dry out any fly eggs, helping to contain the population. It’s also a good general practice, as it keeps issues with mites and other pests to a minimum. It can be a good preventative measure, but once flies take hold you will likely need to do more to get the problem under control.

Fly bags will attract the insects with a stinky substance inside. Once in, they stuck and drown.
Since we already use DE regularly, but we’re still having fly issues, we’re using fly traps as well. This non-chemical method lures the flies into a plastic bag that you fill with water, which activates a stinky substance inside they are attracted to. The flies go in and can’t get out. When the bag is filled, you throw it away and start with a new one.
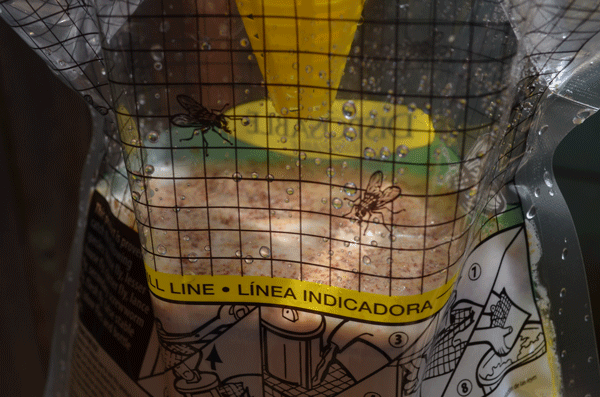
Avoid placing the fly traps near open windows or entrances – it’s stinky!
I hung one in the coop the other day and within a few hours we had customers. You can see in the photo above the top of the water line inside the bag with the stinky beige-colored scent attractor. About an hour later I took the photo below. You can’t see the water line anymore from the layers of flies already stuck in there – gross, gross, gross.
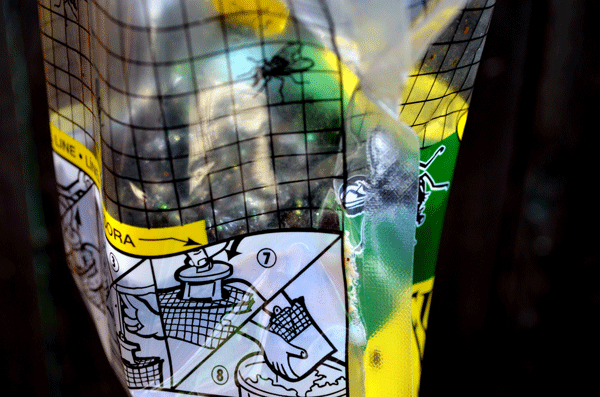
After an hour, the fly trap already captured enough flies to make the water line disappear.
It’s been a few days now and I will spare you the latest photos. The bag is almost full – yikes! The instructions say to throw the whole bag away when it’s filled, and I remember thinking “how in the world could you fill a whole bag with flies?” Three days later, I know. Flies lay so many eggs, so quickly, that it may take a few bags to get the problem back under control. We’re hanging three bags in and near the coop. Less than a week into it, there is a noticeable drop in the number of swarming flies.
Backyard chickens are still a joy to have, but do require quick action when a problem starts to take hold. How about you – do you have backyard livestock? What are the less-than-ideal things that come along with that on your homestead? How have you fixed problems along the way? Tell me about it in the comments below!
June 6, 2013
How to Plant Tomatoes
It is time to get those tomatoes in the ground! I pulled out almost everything in my late spring bed – all the bolted celery, arugula and mature onions – and replaced them with healthy young tomato starts. There are a few things you can do when planting your tomatoes to make them extra happy.
Late spring garden bed with mature onions, bolted celery and bolted arugula
First, dig a hole larger than the tomato you are planting. This will loosen up the soil around the root area, making it just a little easier for your tomato plant to get established. If you have some finished compost laying around, go ahead and stir some in.
Dig a hole larger than the root area of your tomatoes
Next, soften the root ball just a bit. You don’t want to to hack at the roots, but just loosen them up a bit so they are free to start growing around – not around in circles.
As you plant the tomato, bury it a bit. All those little “hairs” along the main stem will turn into roots if you put soil around it. More roots means a more vigorous, healthier plant as those tendrils branch out into the soil to eagerly gather up nutrients. I leave about 4″ of the actual plant above soil, so that can mean over half is actually buried in the soil.
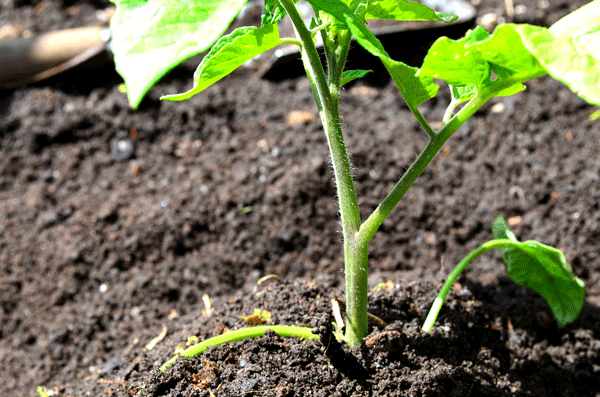
Tiny hairs on the tomato stems can turn into more roots if you bury them when planting
Finally, mound that soil up around the tomato and create a nice moat around each mound. When you water, it will collect around the base of the plant so the tomatoes get a nice, long drink.
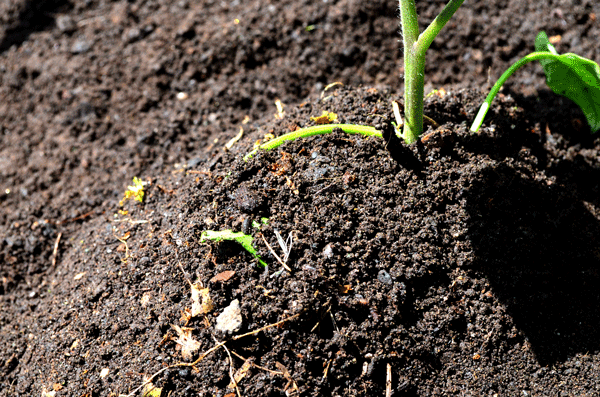
Bury your tomato starts to encourage more root development. Healthy growth and fruit will follow.
When the weather is in the 80′s with no rain, I water my tomatoes well every other day. Blossom end rot is a common problem with tomato growers, which results from inconsistent watering. That could mean you are over watering or just watering them unevenly – like no water for too long, then a short watering, then a long stretch with no water, then too much water. Most of the time, in my experience, people are simply over watering.
I always grow lots of heirlooms, which generally take longer to ripen than hybrids. So last year I swore I would plant just one Early Girl so I could enjoy that tomato goodness before the end of summer. Did I stick to my plan? Nope! I just couldn’t bear to make room for a hybrid when I could have another heirloom.
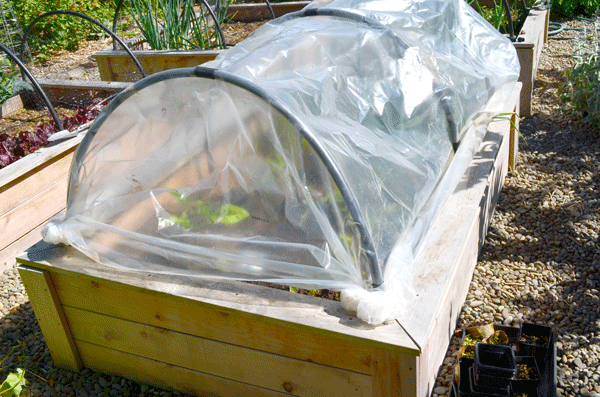
Tomatoes planted in raised beds and covered with greenhouse plastic
This year I experimenting by placing greenhouse plastic over one bed of tomatoes. My goal is to keep them really warm and well watering, hoping that they will grow faster and set flowers sooner. Varieties for the garden this year include:
San Marzano – the best sauce tomato
Kumquat Cherry – new variety for me this year, gorgeous dark leaves
Brandywine – sweet red slicer
Cherokee Purple – purple, rich and intense flavored slicer
Pineapple – huge yellow and orange slicer, best tomato for a thick burger
Black Krim – intense black slicer
Giant Oxheart – lovely pink heart-shaped fruit, good sauce or slicer
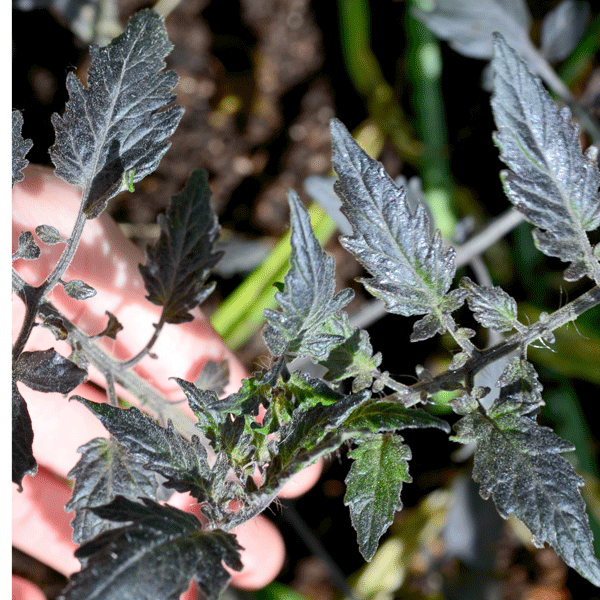
New variety for my ’13 garden: Kumquat Cherry tomato
Is my planting advice too late? Are your tomatoes already in the ground? Tell me which varieties you are growing this year!
June 3, 2013
Three Bin Compost System
That brown stuff my veggies are planted in isn’t “dirt” – it’s “soil”, a substance teeming with life from the millions of microorganisms at work. They give my plants the nutrients they need to thrive. But those veggies are greedy with how many nutrients they need, which means I need to provide them steady supplies of homegrown compost to keep them all happy.
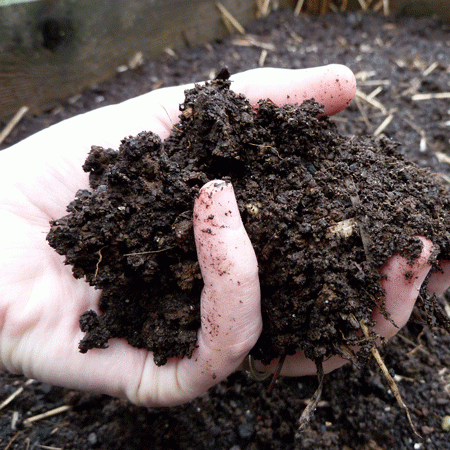
Good veggies need good soil! Compost is key to building that good soil.
That’s not a difficult task for our household. We compost our food scraps, which provides the nitrogen-rich “greens” our compost needs – pretty much all scraps except meat, dairy and oil. The carbon-rich “browns” come from our used chicken bedding, which gets changed out once a week.
Layering used chicken bedding over a layer of garden debris in our compost bin
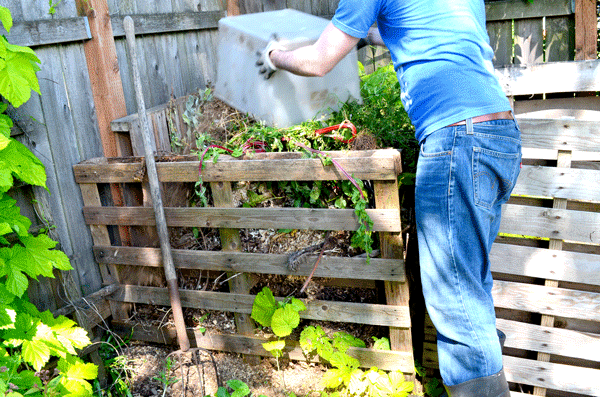
It was many years ago that I learned we can generate a ton of organic waste that can become great compost. We just need the capacity to handle it all. By far, my favorite composting method is the three bin system. It’s super easy to setup, using mostly free materials, and it’s easy to “work” your pile (turning it from time to time and watering it in long dry spells).
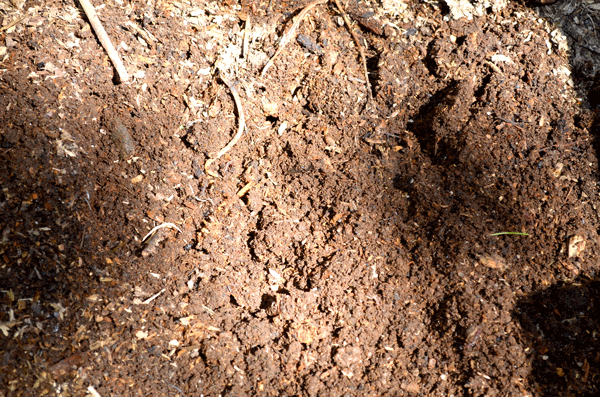
Middle bin with nearly finished compost
The basic concept is that you fill one bin first, layering your greens and browns. Once that bin is full, start filling the next bin over. When that’s full, start filling the final bin. When that’s full, enough time has passed that your first bin should now have finished compost in it, ready for the garden. Harvest that compost and start filling it again. As you go along, you will always have one bin of finished compost, one partly decomposed and one you are filling with fresh materials.

Three bin compost system – setup side by side with a nice wide path in front for easy access to the piles
My favorite way of building a three bin system uses wood pallets, a great option for several reasons. The large gaps between the boards allows air to easily circulation around the pile. All that oxygen keeps the microorganisms in the soil happily working away at decomposing the pile. Pallets are also free and easy to find -can’t beat that price! And finally, they make a great size for your piles. Compost piles around 3′ wide work best – these are just a bit bigger.
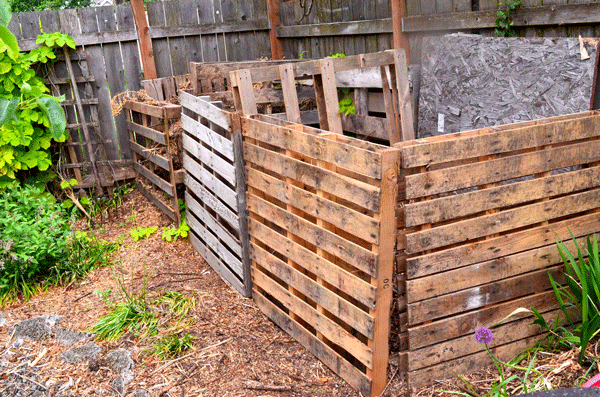
Three bin compost system
I used ten pallets total for this three bin system: three for the back, three for the front, one on each end and two dividers in the middle. Each end is held in place with a simple length of rebar staked into the ground. The exception is on the front pallets, where only one end is staked in place. That way they can swing out like a door when I need to get in to harvest compost or turn the pile.
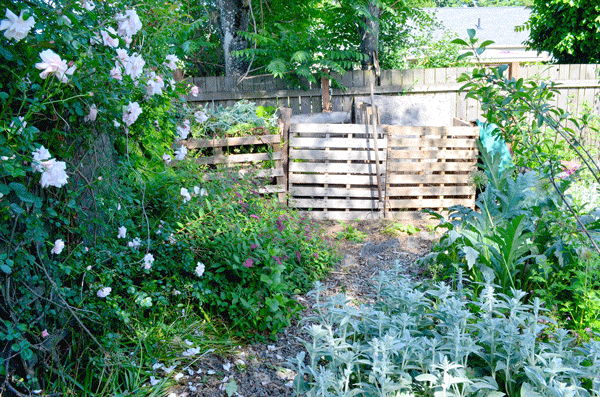
Our three bin compost system tucked into the back corner of the garden
Jay was making fun of me for being so excited about how nice the compost area now looks. I can’t help it. I love my garden so much that I photograph compost… But hey, it saves me a ton of cash by not having to buy new soil each season and my vegetable garden loves it. Not to mention the landfills are a bit smaller without my garbage.
May 28, 2013
How to Use Bantam Eggs
Our new flock has settled in comfortably to life in our city garden. The older chickens are still separated from the younger ones, but that will soon end as we combine the two flocks into one. The young gals are about four months old now, except for the bantam who was fully grown when we got her.
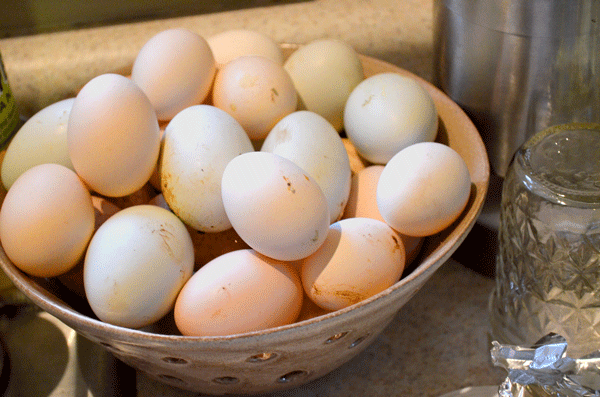
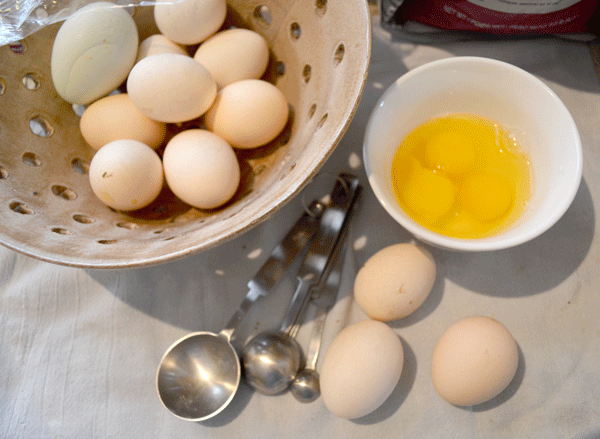
Mix of eggs from standard and bantam chickens
The bantam is officially the most productive layer on the homestead right now. We just got a new oven arrived right as the egg bowl was overflowing with tasty, teeny, adorable eggs. After some experimenting, I’ve adapted to cooking and baking with these little jewels.
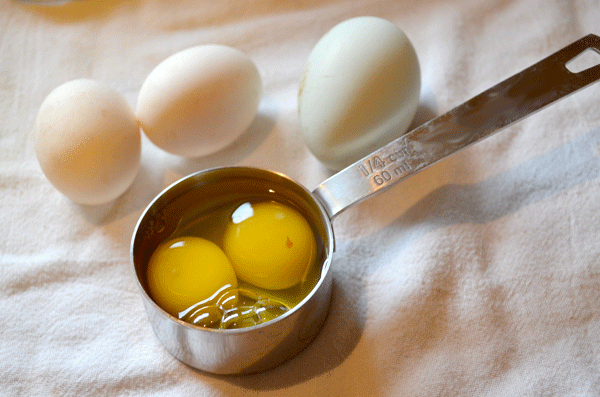
Generally, use two bantam eggs per one large egg
In general, substitute two bantam eggs for one large egg in recipes to err on the side of caution. One large egg equals about 1/4 cup. Two bantam chicken eggs seem to fit that quantity pretty consistently. After experimenting, that rule of thumb holds up well for cookies, pastry crusts and muffins.
Cakes, muffins & breads usually work with 3 bantams eggs per 1 large egg
When I can get away with it, though, I usually throw in about three bantam eggs per one large egg in recipes for cakes and breads. I tested this ratio out when I was baking a chocolate stout cake based on Katie Quinn Davies’ recipe. We never have a shortage of eggs and many recipes and these richer recipes seem just as delicious with a little more egg.
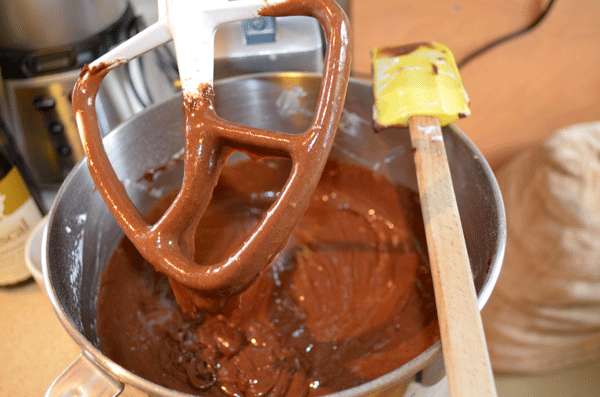
Rich cake batter loaded up with fresh bantam eggs
The cake turned out delicious using the Black Bear XX Stout from Alameda Brewing, a local Portland brewery. The beer helped make the cake moist, but I couldn’t really taste any beer flavor. Hard for other tastes to compete with rich chocolate, which can usually dominate a dish pretty easily. The cake did pair nicely with the rest of the stout though!
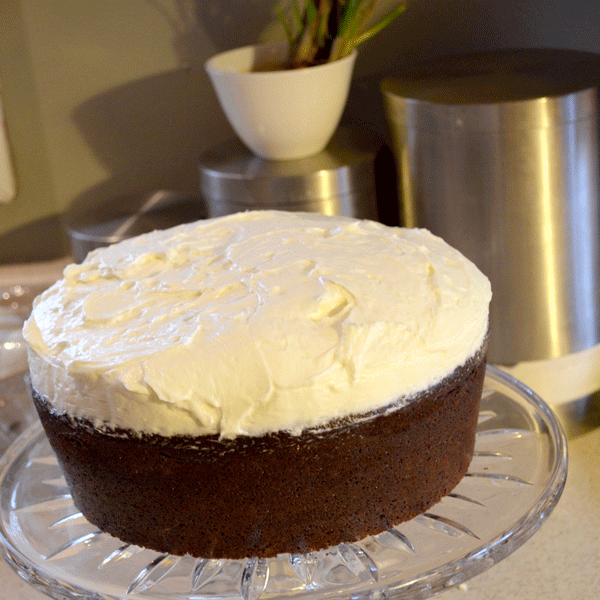
Chocolate stout cake
Adding a bantam chicken to our backyard flock has really been a hoot. She fits in great – bossing the other girls around and being super friendly with Juniper. And we are enjoying the tiny egg gifts she is giving us every morning!
May 20, 2013
From Spring to Summer
I can’t tell you how many people I have heard gushing about the amazingly sunny spring we are enjoying in Portland… How much they love being outside again… How it’s so overdue after a gray winter… Meanwhile, I’m the curmudgeon wishing for showers in the forecast!
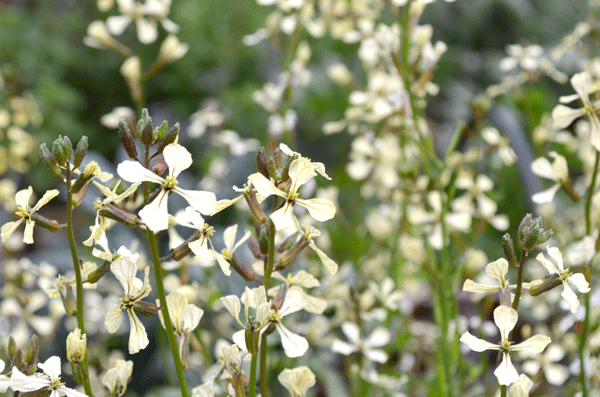
Arugula flowers make a nice spicy addition to a salad
It has turned out to be one of the driest Oregon springs in state history, which is bad news on a few fronts. Less rainfall means increased reliance on irrigating crops and unpredictable harvests for farmers. It might also mean increased wildfires, low stream water levels effecting fish populations and general drought conditions this summer.
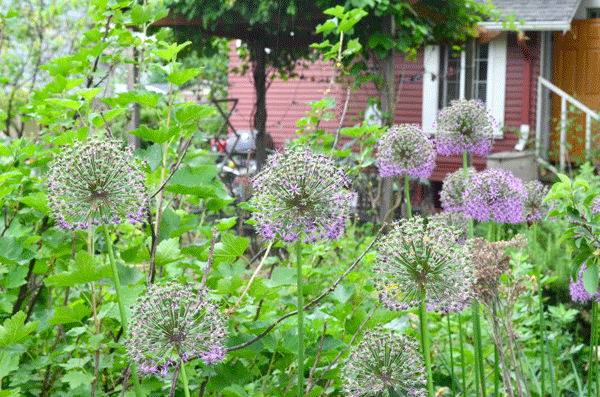
Flowering alliums developing seeds
As a gardener, I am already feeling the effects of the dry spell. My arugula has bolted, making tasty flowers for salad toppings but the leaves are now far too bitter to eat. The celery has already gone to seed, turning the stalks tough and bitter. My gorgeous flowering alliums that light up the garden with their purple globes are already making seed pods and fading.
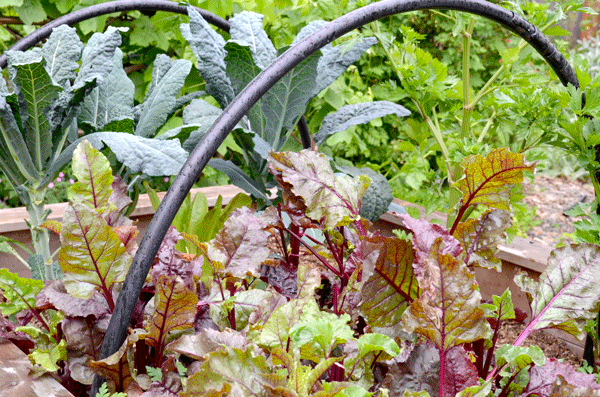
Spring veggie bed: kale, beets and celery
All the spring veggies at this point need to be pulled out, becoming chicken feed. I’m not ready to say goodbye to them all – beets, chard, onions, and salad greens. My summer starts are waiting in the wings to replace them – tomatoes, peppers, squash, beans and more heat-tolerant greens.
Perhaps it’s equal parts dry weather and my unwillingness to move onto the next season already. Spring just passed me by in a blink this year!


![[image error]](http://www.hipchickdigs.com/wp-content/uploads/2013/06/hand-pie-dough-rounds.gif)
![[image error]](http://www.hipchickdigs.com/wp-content/uploads/2013/06/chicken-coop-flies.gif)