
Renee Wilkinson's Blog, page 12
April 13, 2014
April To Do List
April on the homestead means the lilacs are just starting to open up, our fruit trees are flowering and there is enough weeding to keep an small army busy. Here are some things on my homesteading to do list this month:
Weed, weed, weed!
Propagate woody perennials
Transplant groundcovers and small perennials
Direct sow vegetables
Keep the raised beds watered
Restock indoor homestead supplies
 An hour weeding in the spring will save you days of weeding this summer. The ground is still soft enough to tug them out easily and you can get ahead of them since it’s still too early for them to produce seed heads.
Propagating perennials with woody stems, like rosemary and lavender, is easiest in the cool months of spring. The weather is mild and regular rainfall keeps them well-watered. All of this adds up to gentle conditions for new plants to get established. I use usually dip cuttings in water, then in powdered rooting hormone before planting them in good soil.
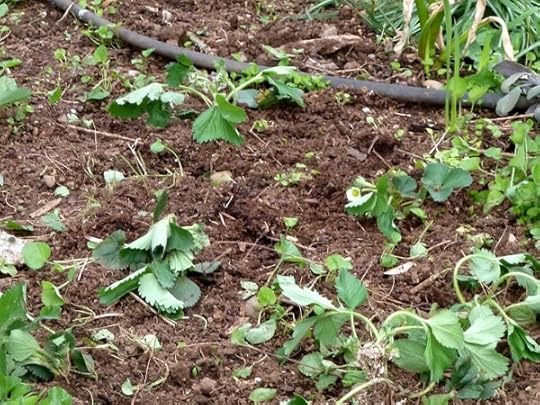
These cool spring days will also be easy on newly transplanted groundcovers and perennials. Our raspberry and strawberries are always trying to produce new plants. To help with crowding, I am digging up the new starts and moving them to emptier holes in the garden. They should still have time to get established before setting fruit in a couple months.
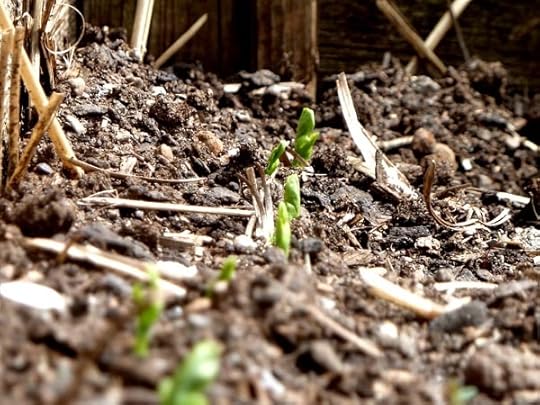
In Portland, we can now direct sow all kinds of great vegetables outside: arugula, beets, broccoli, carrots, cilantro, lettuce, scarlet runner beans and spinach. Keep a close eye on the weather. Some days I need to water these newly planted seeds and other days spring rain will do the job for me.
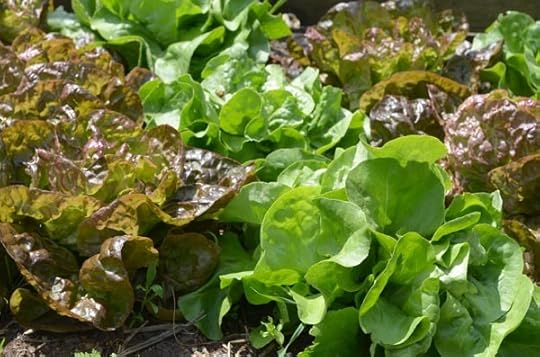
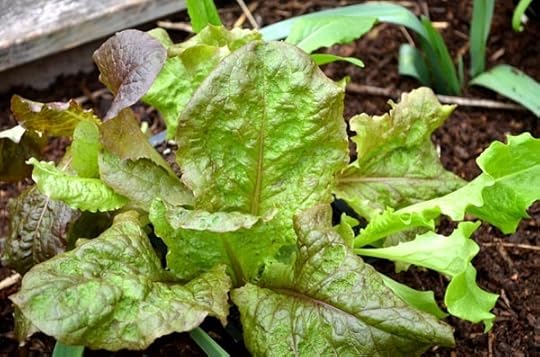
Half of our raised beds are covered with greenhouse plastic to jump start growth. That means I need to water these beds a couple times of a week, since they won’t get rainwater. After a month of coverage, most of our cut-and-come-again crops like lettuces, arugula and chard are ready for harvesting.
Spring is the last chance I’ll have for many months to get caught up on indoor homestead projects. The harvest basket is manageable and there are no buckets of produce to preserve. It’s a great time to stock up on homemade laundry detergent using a recipe from my book, DIY baby care supplies and other practical things.
What is keeping your homestead busy this month? I would love to hear about your projects, both big and small, in the comments below!


April 3, 2014
Yes! Spring!
To my dearly beloved Spring, I say yes! Yes! A thousand times yes!

Welcome to my garden, Spring. I have missed your clean smell after a heavy rain. I have missed the lushness of your flowers. I have longed to see real live tulips once again greeting me after a long day at work.
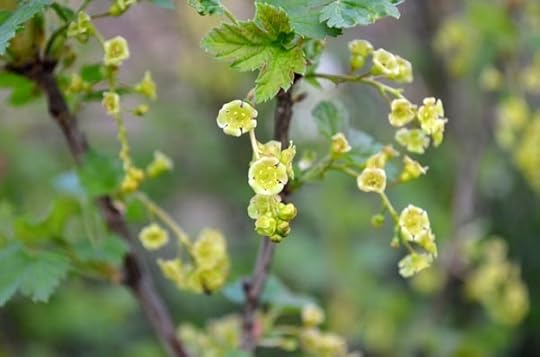
The currants are glowing with yellow flowers that will turn into berries. My rhubarb that dies back in the winter has thick stems and massive leaves already. There are promises of fruit and vegetables abound!
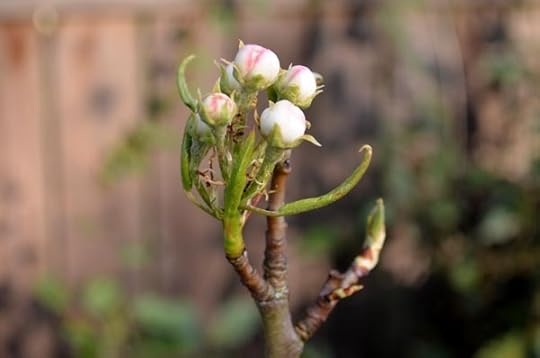
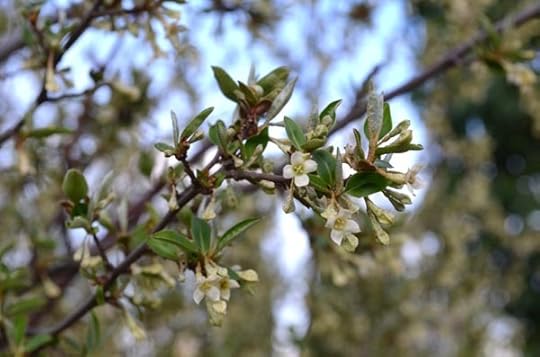
The apple and pear trees are at the brink of blooming. The goumi bushes are covered with white.
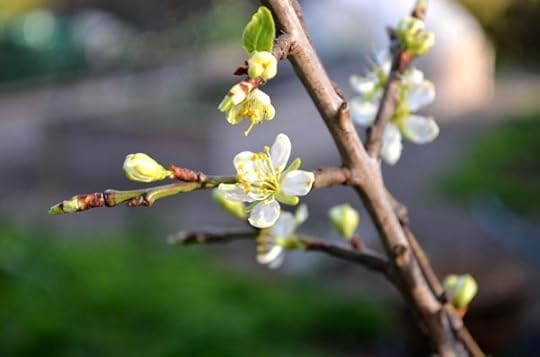
Our plum trees planted just last year are screaming their hearts out with flowers. Our beloved apricot tree has littered pink petals all over the garden.
Every evening stroll seems to offer another new discovery. My list for next year is already growing as I note which groupings of bulbs should be separated, moved further into view or added to.
 Is your garden bursting with life yet? Surely a crocus at least is popping its head up to greet you? I’d love to hear about what sweet spring looks like on your homestead in the comments below!
April 2, 2014
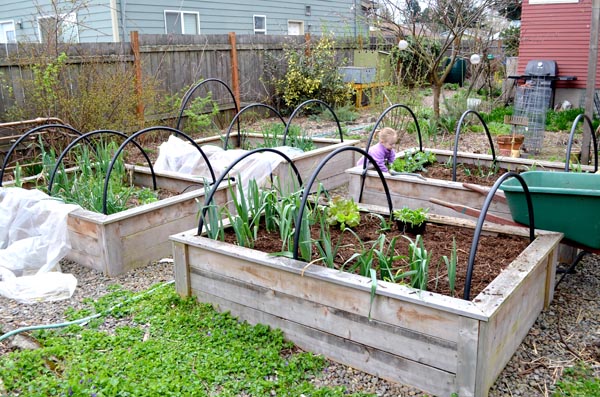
Spring Row Covers
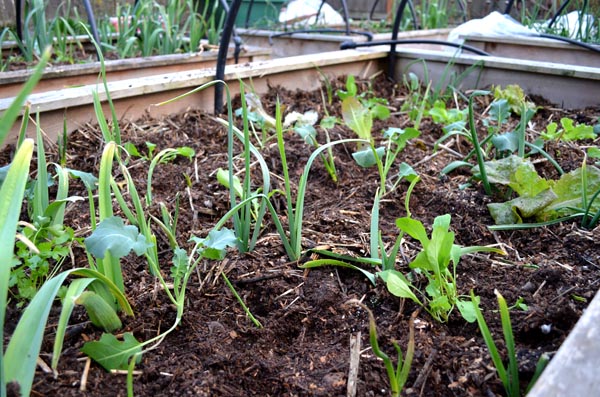
We are in the middle of a cool, wet spring which is very typical for the Pacific Northwest. Although you can plant several crops outside right now (kale, chard, lettuces, broccoli, etc), most vegetables won’t grow too much until the weather warms up. Thankfully, I have a trick for planting my vegetables outside a little earlier than most and encouraging strong growth through our mild spring.
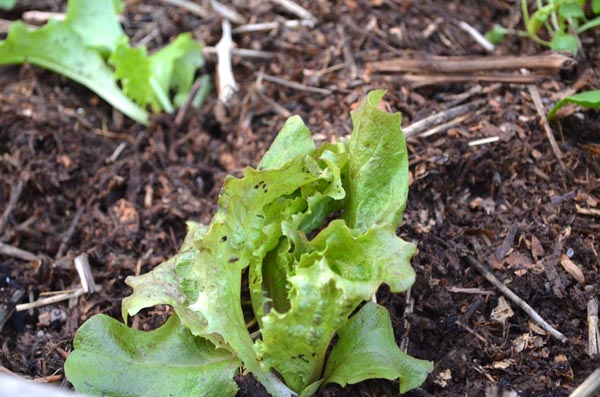
Spring lettuces growing slowly on these damp, cool days
I build simple row covers over my raised beds to keep the soil and plants a little warmer. It will keep them snug enough that they can put on so healthy growth, but it won’t overheat them like row covers would in summertime. I have found that I can even direct sow crops in my raised beds about a month earlier than normal.
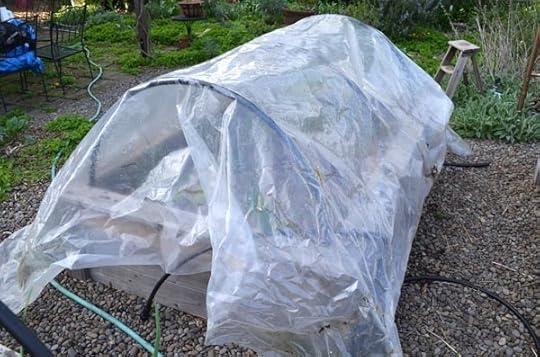
Laying out greenhouse plastic over our raised beds to make row covers
My system for constructing row covers is really easy and inexpensive. In the summertime, I replace the greenhouse plastic with bird netting to keep feathered friends and the occasional cat-looking-for-a-litterbox out of the raised beds.
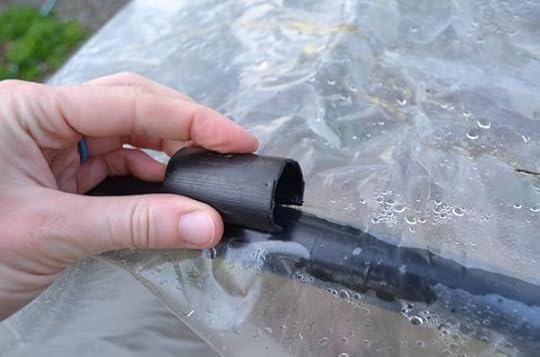
Using PVC pipes, cut vertically, to clip the greenhouse plastic onto the hoops
The row covers over my winter kale has already given this crop a boost. There is lots of new, leafy growth on these plants after just a couple weeks under the covers. My other spring bed of lettuces and broccoli is off to a slow start, so I just finished covering them tonight.
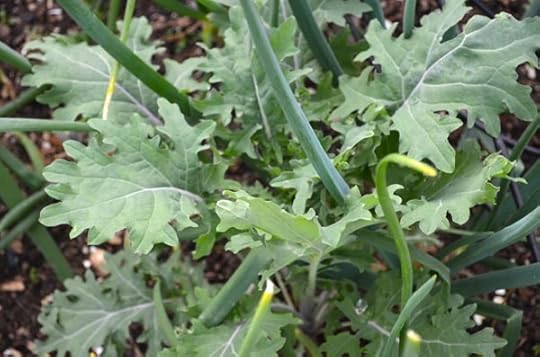
Spring kale with lots of lush, new growth from being under a row cover
The drawback to using row covers is that you’ll need to water the plants, since rainwater won’t be able to get to them. We have so much rain at this time of year that our rain barrels will easily be enough water to give the vegetables a long drink. I’ll try to post an update in a couple weeks about how much new growth is on the spring row covered crops.
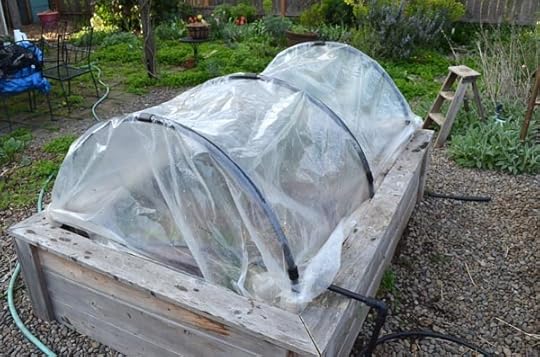
Spring row cover all setup!
How is your spring garden coming along? Are you in sunny San Diego where summertime is a year round treasure? Or in snowy Montana where there are still inches of snow on the ground? I’d love to hear about your spring plans in the comments below.
March 27, 2014
Fritatta Three Ways
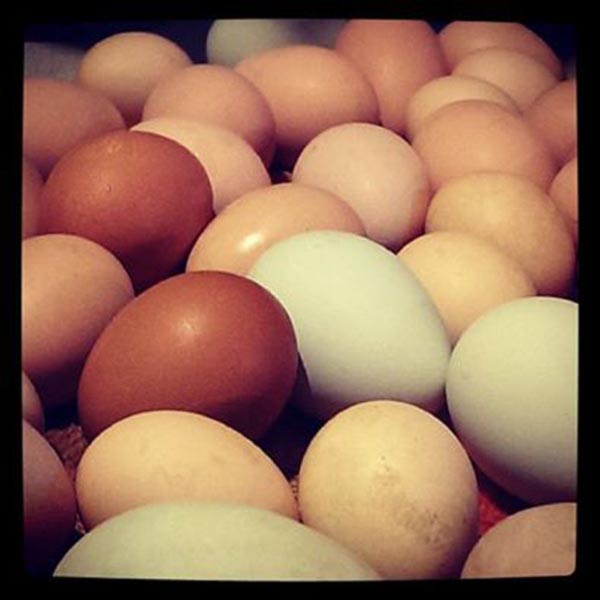
The chickens have announced the arrival of spring with about fifty-thousand eggs. We’re averaging 4-5 eggs a day, which means the pressure is on to eat all those gems up. My favorite go-to recipe for any meal is a delicious frittata using any other ingredients I have on hand.
 I love frittatas because they are quick to make – about fifteen minutes start to finish – and incredibly versatile. I start with a basic frittata recipe, originally based on Alice Water’s version from The Art of Simple Food, and improvise from there. At Juniper’s second birthday I whipped up three variations for a fantastic spring brunch.
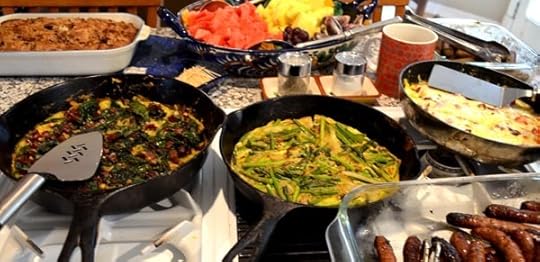
Traditional
Red bell pepper, sliced thick
Sun-dried tomatoes packed in oil, drained
Sweet onion, like Walla Wallas, sliced
Mozzarella cheese, shredded
You know those kids who don’t like to eat anything “green” or those adults who claim they don’t like vegetables? Those guys love this version! The veggies are on the sweet side and the cheese makes you think you’re eating something not-so-healthy. Replace the regular onion with sweet onion, mix in the tomatoes and red peppers in step two and sprinkly the cheese on top right before it goes in the oven.

Spring time
Asparagus, chopped in 2″ pieces
Onions, sliced
Garlic cloves, minced, or spring garlic whips, chopped
This version is about those delicate springtime flavors – fresh asparagus, mild spring onions and mild spring garlic. The eggs are really a backdrop to the star of the show, which is the asparagus. Saute the asparagus in step two for just a couple minutes, as this tastes best when the asparagus is still crisp when the frittata sets at the end.

Super Savory
Swiss chard, stems and leaves separated and chopped
Bacon, cut into 1″ pieces
What is it about the combination of dark, leafy greens and rich, smokey bacon? It’s just a match made in heaven. Cook the bacon until it’s just starting to turn light brown, then set aside. Leave 1-2 T of bacon grease in the pan when you start step one. Mix the bacon into the bowl in step four.

In addition to frittatas, I am taking a couple hard-boiled eggs to work every day as a protein-rich afternoon snack. I’m also working out a regular trade with friends and family – a dozen eggs for garden bulbs, sewing help, vintage treasures.
Is your flock laying yet? How are you working your way through all those eggs? Tell me about it in the comments below!
March 18, 2014
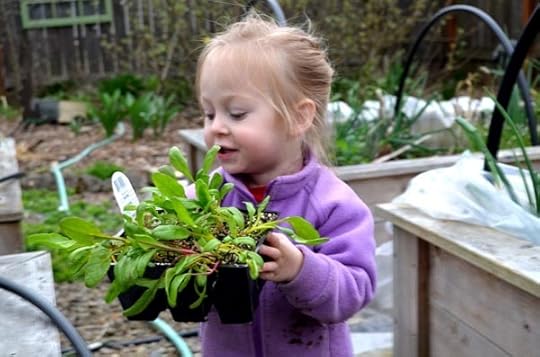
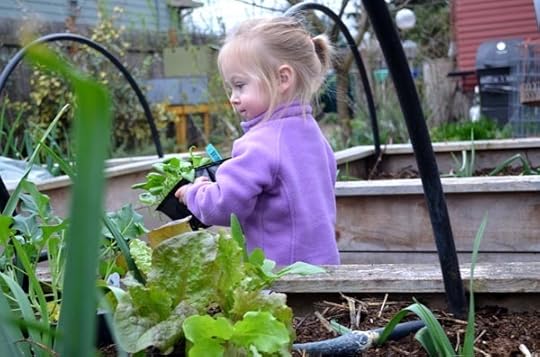
Spring Planting
Spring fever is in full swing and it’s time to get the first round of vegetables into the ground. We recently prepped our garden soil for the season with a thick layer of homemade compost. Juniper and I were both very excited to finally be able to move our vegetable starts into the ground.
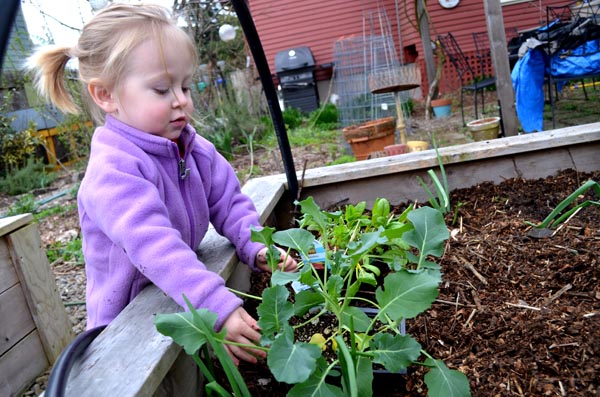
Juniper rearranging the broccoli starts we were planting
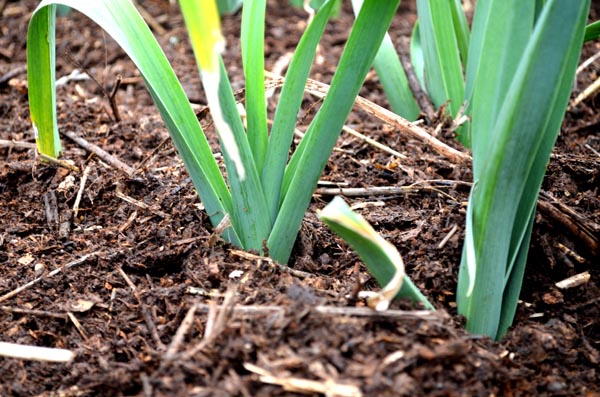
We planted the vegetables we eat most often: spinach, lettuce, arugula, broccoli and swiss chard. Our kale and leeks survived the winter, but the swiss chard was beaten to death from the snow and ice.
My garden helper moving the rainbow swiss chard
We also popped in about fifty Walla Walla sweet onions. The leafy greens need space above ground and the onions need room below. That makes them a good match for companion planting, so they weave in between the crops of “greens” – chard, kale, arugula and lettuces.
Densely planting Walla Walla onions in between broccoli, chard, arugula and lettuces
Juniper loved being my helper and I loved watching her have such a good time. What would childhood be like without learning about growing things or discovering how delicious a lettuce leaf tastes when freshly picked? She’s added a wonderful element of chaos and bliss to our homesteading life.
Red Sails lettuce starts
Next on deck to plant will be crops directly sown outside like potatoes, beets, carrots and celery. The latter plants are best sown in April, but I can plant them now in my raised beds that are covered with hoops of greenhouse plastic. In May, we will transplant all our favorite warm weather crops: tomatoes, eggplant, peppers, beans and squash.
Juniper arranging and rearranging the garden plan.
I’m in no hurry for summertime. I love the spring garden, with it’s bright greens and cool temperatures. Everything seems lush and easy, from the trouble-free tulips to the lush lettuces.
What’s growing on your homestead? Is it still covered in snow, or does your garden show signs of life? Tell me about it in the comments below!
March 16, 2014
Spring Soil Prep
Before you get spring planting fever, take the time to replenish your garden soil first. It’s the best way to ensure you have an excellent harvest this year. Great soil makes a great garden, and it’s something you have to keep cultivating year after year.
My “garden helper” assisting me with adding homemade compost to our raised beds
Vegetables draw lots of nutrients from your soil, which is what makes them so delicious and nutritious. Over time, your garden soil will get depleted of these essential nutrients. In order to keep growing healthy, lush veggies, you have to be “growing” healthy, rich soil (or buying it if you don’t have the time/means to compost at home).
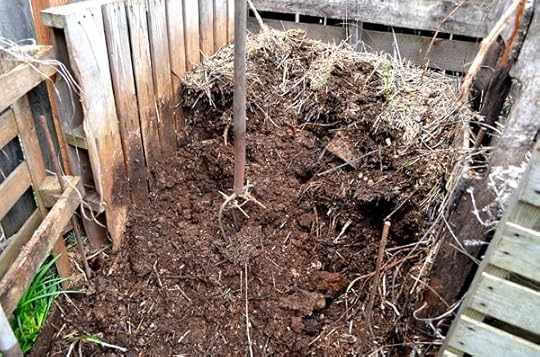
Harvesting “finished” compost from our three bin system
My three bin compost system transforms our kitchen scraps, chicken waste and garden debris into tons of excellent, nutrient-rich finished compost 365 days a year. I know when a pile has become “finished compost” when it is dark and finely textured. It might be warm in the middle of the pile, but no longer hot and steaming (the heat is the result of micro organisms busily at work). There are no large pieces remaining of food waste or garden debris and it will smell rich and earthy.
I add finished compost to my garden soil every time I plant a new crop. You don’t need to till the compost into the soil – I just add mine on top of the existing soil. If you have compacted soil, then some light turning might be a good idea to distribute the added nutrients and break up the compaction.
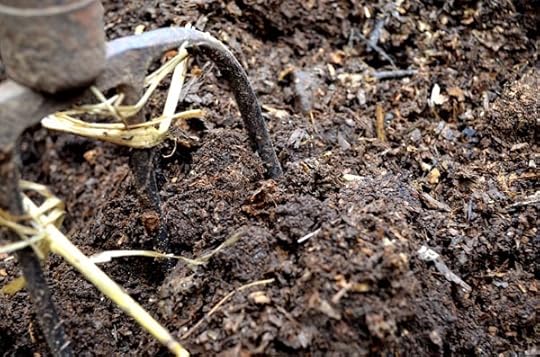
Compost is ready to be used in the garden when it is dark and finely textured.
In the spring, I add an extra thick helping of compost to all of my garden beds – about 4-6″ depending on how much I have ready from my bins. This is the time of year when the beds are the emptiest, which makes it really easy to get a thick, even layer distributed throughout the beds. It’s easy to tuck new compost in between the few winter plants, like leeks, onions and kale.

If you are not composting on your homestead, now is the time to pick up some bags of compost from your local nursery before your spring planting. Chicken manure and mushroom compost are often sold in bags at garden centers and will also be a good source of nutrients for your soil. Any good garden store will be able to point you in the right direction for organic soil amendments.
Garden bed prepped with compost and ready for spring planting.
After the spring garden bed prep, my soil work is not done. I will keep turning in fresh compost with each new crop as the season progresses. The warm-weather crops – like tomatoes, eggplants, peppers and squash – will get planted with a heaping shovelful of compost. This will help them get a great start as their roots begin searching for nutrients.
Are there certain pre-planting rituals you follow on your homestead? Do you opt for homemade compost or do you prefer some other organic method? Have you started planting already? I’d love to hear what is keeping you busy this spring!
March 10, 2014
Let’s Hang Out This Saturday
 Planting season is upon us! There are baby chicks to pick up! Your garden soil needs fresh compost! And I want to meet you!
These are all excellent reasons for you to stop by and say hello to me while I hang out at Wilco’s garden store in Cornelius this Saturday, March 15th. I’ll be there at 1:00pm to sign copies of my book Modern Homestead and swap garden and livestock stories with folks. I would love to see your smiling face and find out what you are planting and raising this spring.
I know myself well enough to understand that spending a couple hours at a farm and feed store during spring planting season is incredibly dangerous. Rumor has it that Wilco has a massive breed selection of spring chicks, so it will take all my strength to not bring home more birds. Clearly the best plan is to pack the car to the brim with veggie starts instead.
If I don’t see you this weekend, I would still love to hear about your spring plans. Anything new you are planning to tackle? Is your homestead going through a growth spurt or just getting started? Tell me about it in the comments below or in person this weekend.
March 6, 2014
Reluctantly Sentimental
I am sad to say that old Florence has passed away. We raised this Rhode Island Red from a baby chick several years ago, she graced the pages of my book and delivered a steady stream of eggs for us through much of her life. She worked hard on our homestead before settling into retirement and will be sorely missed.
Baby Florence
I wrote recently about the infection that took hold of her – something not terribly uncommon in very old chickens who have compromised immune systems. We treated her with antibiotics for about a week and half, twice a day, with no improvement.
If she had made it to this weekend, her antibiotic treatment would have been complete. We would have killed her if she continued to show no improvement. As I mentioned in a recent comment, we would not have eaten her since she had an infection and was also being treated with antibiotics.
Florence and Maude in their glory days
I didn’t think I would be sad. Sure, I fell apart when we our elderly greyhound died of cancer, but farm animals are different. They have rougher lives out in the elements. Chickens are working animals – they give us eggs and we give them safety. It’s more of an agreement between the two parties than it is a bond.
Losing Florence marks the passage of time and perhaps that’s why I find myself reluctantly sentimental. We were wet behind the ears with homesteading when we first picked her out at the feed store. When she stopped laying regularly, we decided not to butcher her, but instead let her live out retirement with us.
It’s not a bad system to butcher older chickens and replace them with younger layers every couple years – in fact, it’s the most practical way to keep chickens in many respects. But we formed an attachment to Florence somewhere between farm animal and beloved pet.
Each flock we raise becomes less and less of an emotional attachment. But it just seems impossible to ever forget those first hens who taught us so much about life on a homestead and what it means to stick with livestock through thick and thin, through snow and ice storms, heat waves and raccoon attacks. Rest in peace sweet Florence. You were a joy to have as part of our homesteading family.
February 24, 2014
Our $85 Geriatric Chicken
Last fall our six-year old hen Maude passed away. It happened quickly – she lost weight and became lethargic in just a couple weeks. We tried nursing her back to health, but she passed away just a couple nights later. Chickens can live to be 7-10 years old, so we thought Maude’s passing was a bit premature.

Six-year old Florence, a Rhode Island Red, happily clucking on the homestead
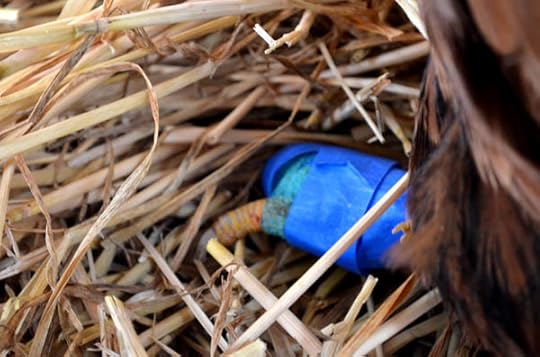
Florence, our Rhode Island Red, is the same age as Maude. She became lame on one leg seemingly overnight. Hoping it was just a sprain, we separated her from the flock to prevent bullying to let it heal. After a couple weeks, she started pecking her leg raw – clearly it was time to intervene.
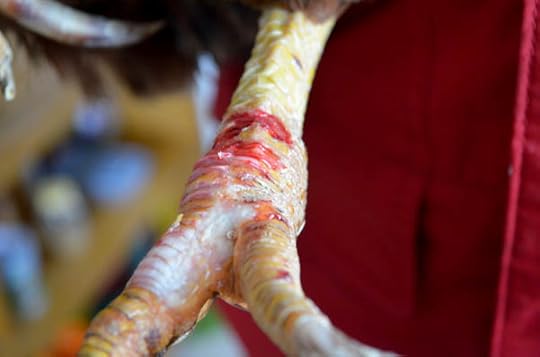
Florence trying to peck off her foot after it went lame.
When you have a trouble hen, you’re left with two options – butcher or treat. Old hens don’t taste very good and I was worried about whether there might be a bigger underlying illness, especially with Maude’s recent passing. We opted to treat her.
First, we cleaned the wound by soaking it in espom salts. Unfortunately this all happened during a snow storm, so clean gauze and painter’s tape was all we had to protect her foot from her own pecking.
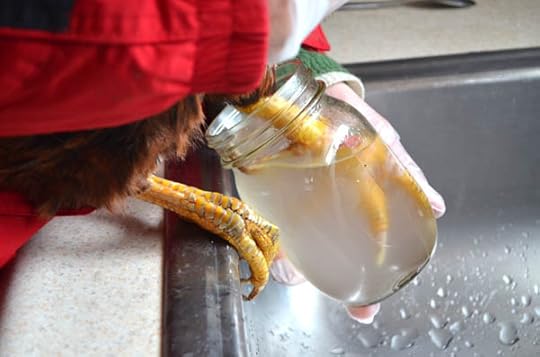
Soaking Florence’s foot in epsom salts to clean it and help with swelling
Then, we called the vet. $85 dollars later, we have some answers.
Florence has an infection in her foot. Apparently there’s not much room for swelling in a chicken foot, so it becomes very painful quickly which is why she suddenly stopped using the leg.
Our chop-shop bandage job of gauze and painter’s tape
It could have started a number of ways. Chickens live in dirty environments, despite our best efforts to keep their coops clean. She could have been scratched by another hen, then the small scrape got infected. Or it could be something even more difficult to prevent, like an arthritic inflamed joint becoming infected – something younger, more robust chickens can fight off, but something an older hen like Florence couldn’t beat.
The solution from the vet is an oral antibiotic that we are administering twice a day for two weeks. If we don’t see improvement, the vet said she may just be too old to bounce back. At that point, we’ll likely butcher and bury her.
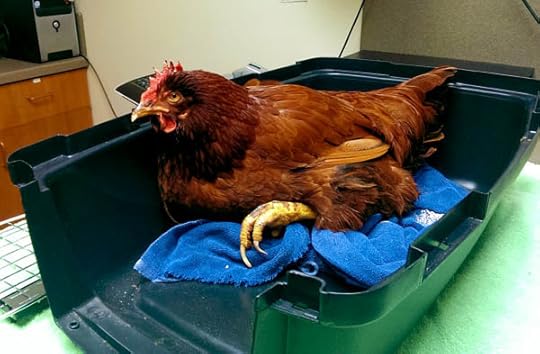
Florence visits the vet
It’s a challenge managing aging members of the backyard flock. The ideal situation is to probably raise new chickens every 1-2 years and butcher the hens older than 3-4 years. As they get older, they become more vulnerable to disease and injury. The vet confided they rarely see hens over three years old in their practice.
We don’t see our chickens as “pets” in the same way we see our indoor cats and dogs as pets. But there is still some sentimentality there. Our nine year old hen Pearl has been with us since our homestead was just sprouting. And Florence was on the inside cover of my book!

Florence gracing the inside cover of my book Modern Homestead (photo credit: the wonderfully talented Isaac Viel)
It will be a sad day when we have to say goodbye to our older hens. In this case, the price was worth paying to know her problem was unavoidable and it’s not contagious. I’ll keep you posted as I think the world needs a bit more information out there on caring for older hens!
February 14, 2014
Winter Wildlife Care
Snow and ice blanketed our fair city, which puts a strain on wildlife as well. Critters expend more energy trying to stay warm and forage for food, when winter doesn’t offer a lot of options.
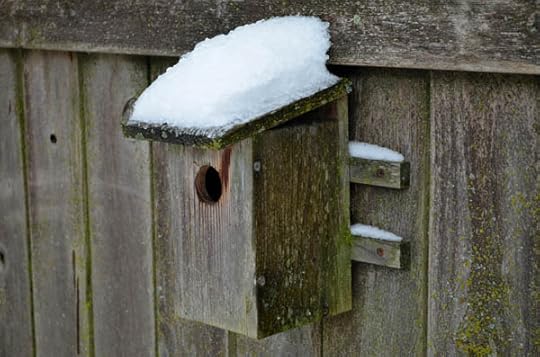
Nesting box, currently unoccupied
Thankfully many neighbors have bird feeders for our local feathered friends, but fresh water can be scarce when the temperatures drop. Birds can conserve water during these times, but providing fresh water on cold days will draw them into your backyard.
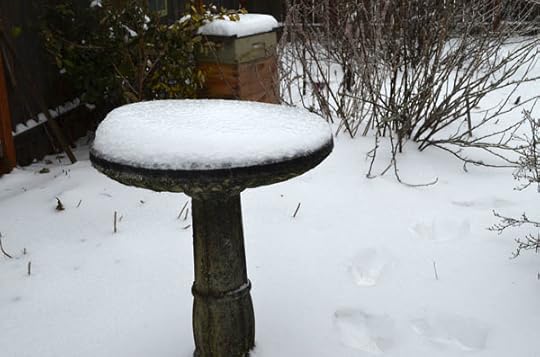
Frozen water means few resources for birds to quench their thirst
After making the mornings rounds to visit the chickens, I spent a little time getting our birdbath into shape for visitors. The first step was digging out the snow and thick coating of ice.
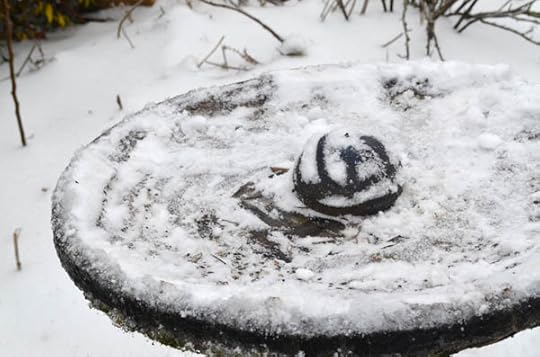
Shoveling off 8″ of snow and ice from the birdbath
I heated some water so it was warm enough to melt the snow, but not too hot to scald thirsty birds.
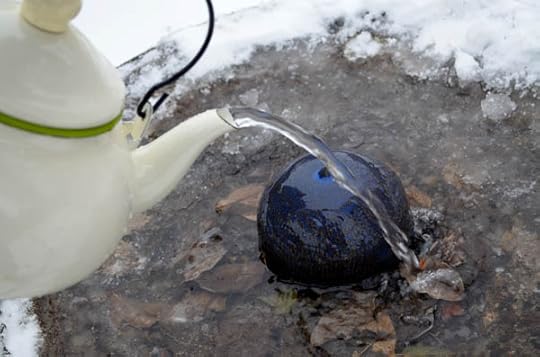
Warm, but not scalding, water for the birds
It takes just a couple minutes, but clean and fresh water can be a very easy way to invite feathered friends into your backyard. Pretty soon there were frequent visitors again to the water source.
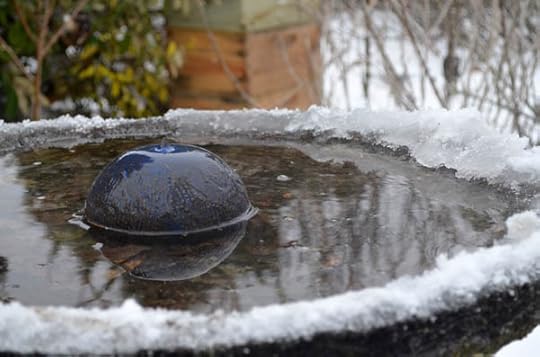
A warm spot for fresh water available for our feathered friends
I, on the other hand, was inside the house sipping my tea, enjoying the wildlife show and feeling far too lazy to grab the camera.


