
Renee Wilkinson's Blog, page 9
December 2, 2014
Garden Installation: Part IV
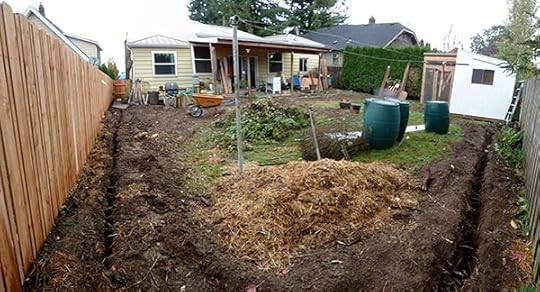
The backyard has taken shape! The concept for the backyard is to create an edible food forest. It’s similar in design to our former homestead – working in layers to add edible ground covers, shrubs, trees and vines – but I added a few new components like a nature-based play area to accommodate our growing family, larger raised beds for dedicated vegetable gardening space and perennial flowers to attract beneficial insects.
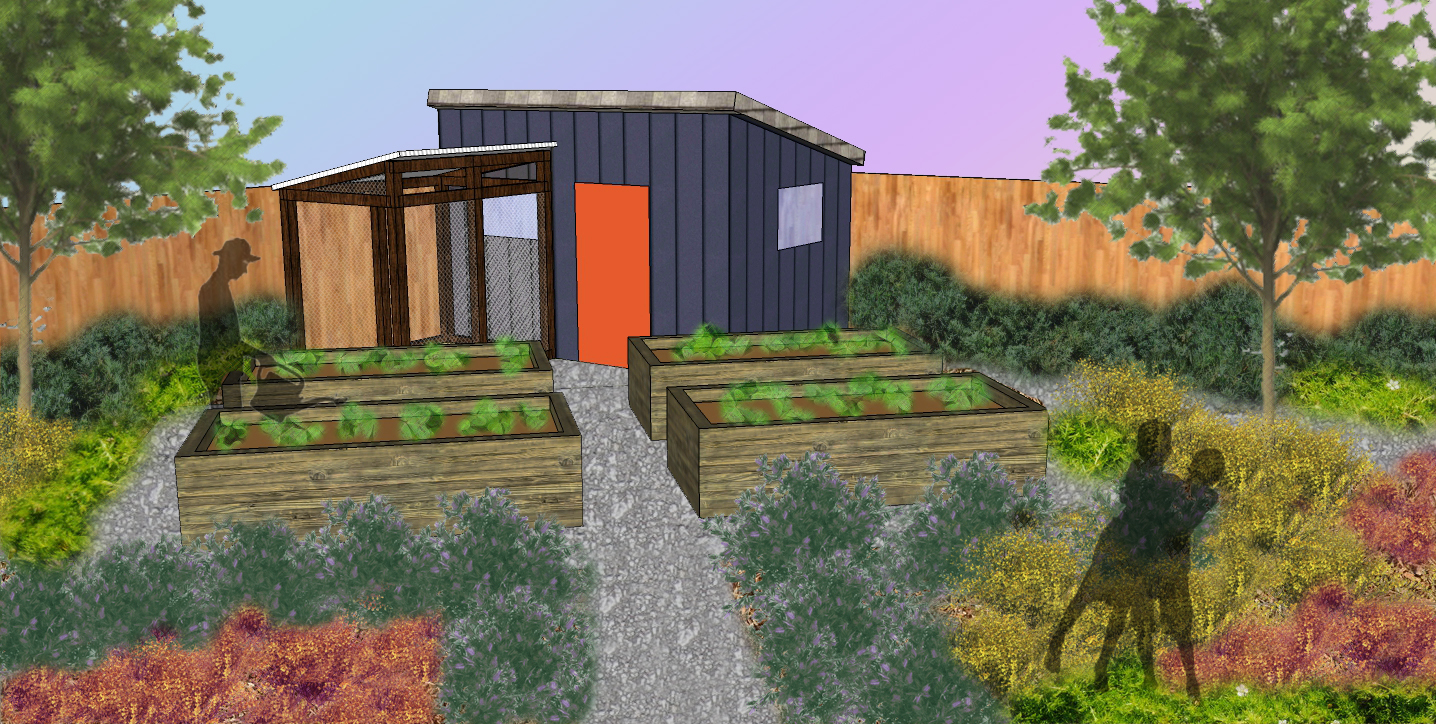
Shed/chicken coop structure, 4′ x 8′ raised beds and a mix of edibles and beneficial insect-attracting perennials.
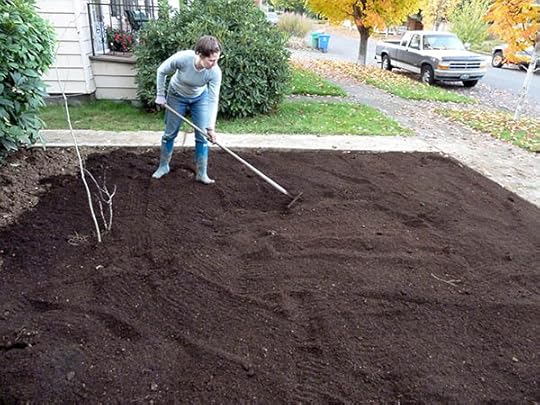
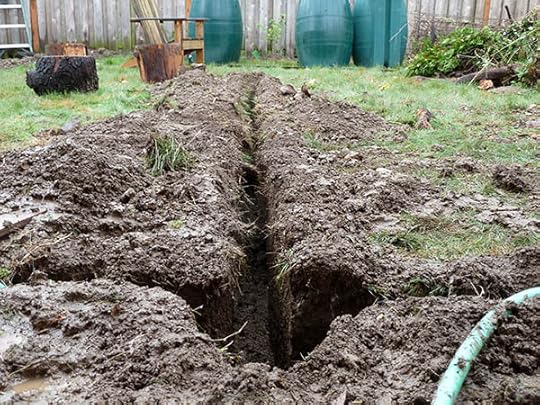
The garden installation was more complicated and time-consuming than originally planned due to my messy sod-cutting job. I cut the sod on a rainy day and the project quickly turned into a major muddy mess. That meant we need to sheet mulch the sloppy job to ensure grass doesn’t come back.
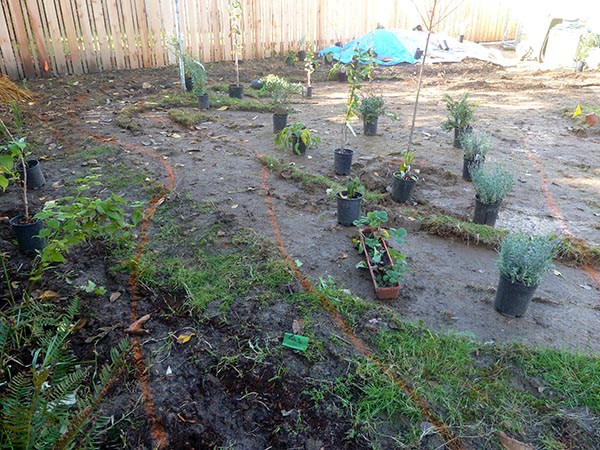 To install the full garden, I needed first to mark the plan on the ground. I used bright orange spray paint to show here the pathway system was. That helped us differentiate between pathways and plant beds. It’s also an excellent way to make minor tweaks to permanent shapes, like your pathways, before everything gets installed. I then placed all the plants – tweaking this one here and nudging that one there.
All the plants were carefully dug into the hard clay soil, softened a bit from the fall rains. Next, we added a layer of composted steer manure to the plant bed areas. That will give them a great nutrient-boost to our formerly neglected soil. It felt like a race to the finish line getting everything in the ground! The first frost greeted us the next morning after the final plants had been installed. Whew!
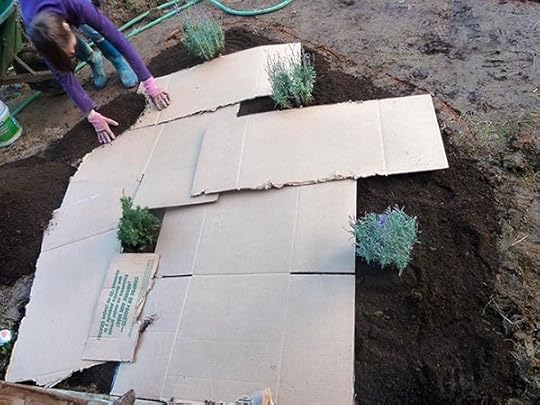
With the dead of winter upon us, we took our time doing the final sheet mulching layers. That process would minimize any grass re-emerging in the spring since my sod cutting left lots of missed spots. To do so, we laid down cardboard and thick layers of newspaper carefully around all the newly installed plants.
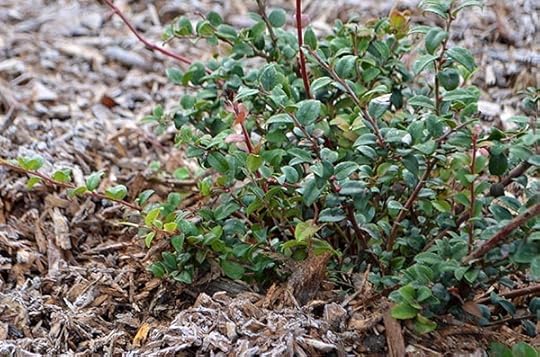
We added a thick layer of wood chips – around 6″ – to the top of the cardboard/newspaper layer. That extra mulch will help insulate the plants over the cold winter and will be great for water retention next summer. As it slowly breaks down over the next few years, the composted remains will help break up our hard, clay soil. Winter rains should compact the wood chip layer to something closer to 3-4″ by spring – just the right thickness for weed suppression.
We are still making decisions on the pathways. We might do temporary paths with leaves or straw until we are ready for a professionally-installed permanent pathway system. We’ll need to figure that out before spring when things will jump back to life.
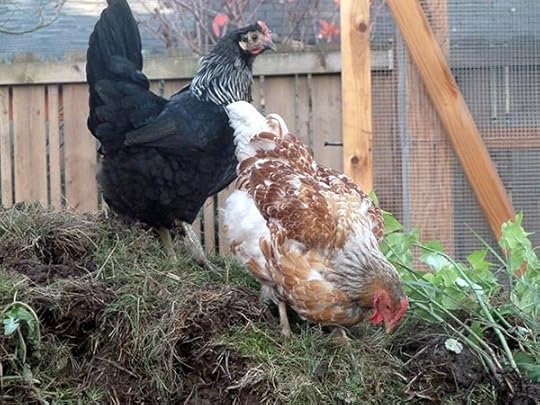
The pile of sod from the front and backyards is right in the middle of where the future raised beds will go. It’s about 4′ high and 6′d wide with some good topsoil attached to the grass roots. We are planning to compost some of it on site and use it to create mounds in Juniper’s nature play area. But we will likely haul the remainder off site to a large-scale composting facility. In the mean time, the chickens are enjoying grazing on top of the mound.
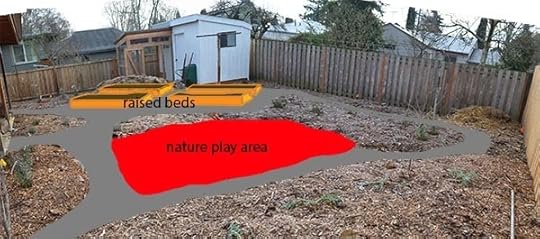
It still feels like a mountain of work ahead of us: installing pathways, building raised beds, bringing in high-quality soil for the beds, constructing the nature-play area. But the biggest, broadest strokes in the garden have been made. It doesn’t look like much now, but come springtime these new plants will be stretching to the sky. I can’t wait to see what an edible jungle this grows into!


November 19, 2014
Garden Installation: Part III
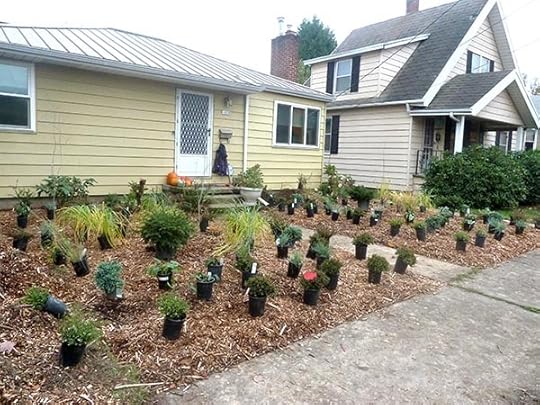
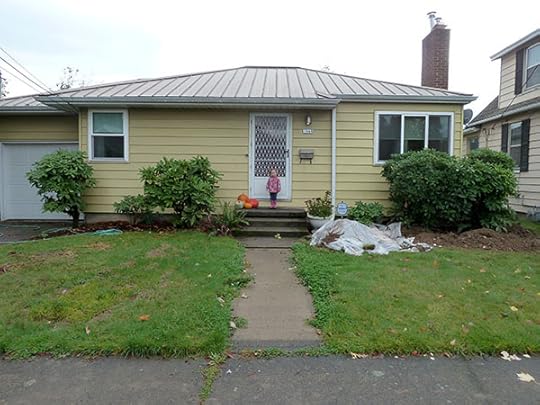
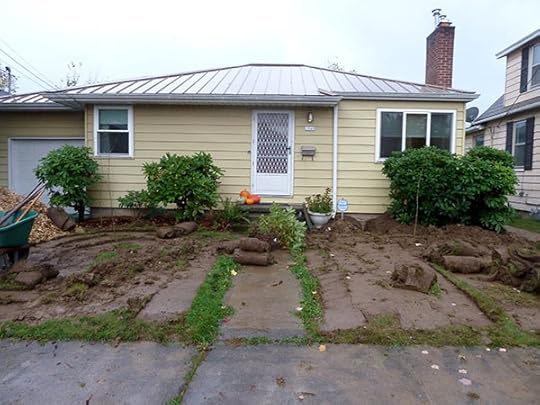
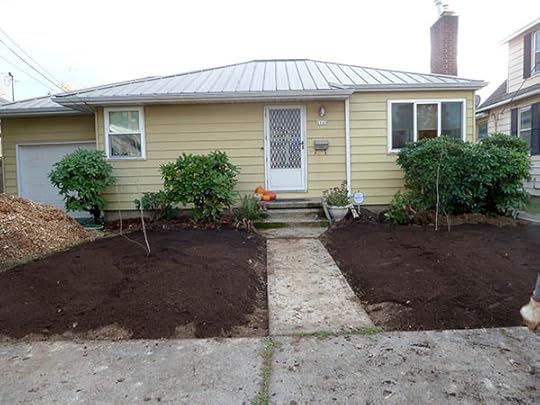
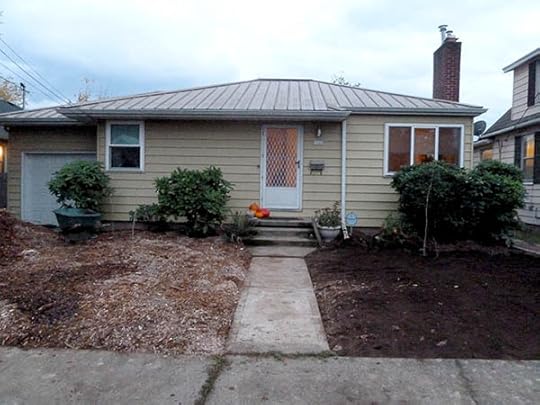
The front yard is officially 100% installed! First came irrigation installation (although not in the front yard), then sod removal and soil prep. Finally, massive plant order arrived from three different nurseries and the first frost of the season was looming on the horizon. As a landscape designer, I think my favorite day of a project has to be plant day.
 First, some designer talk. My overall concept for the front yard was to design an urban meadow. Our neighbors have these magnificent Coast Redwoods, so they have a great urban forest thing going on. I wanted our yard to show the transition from forest to meadow, especially since we have this very flat, 50′s modern bungalow.
[image error]
Front yard rendering: 3-5 years after install
It’s mostly a mix of modern grasses with three young aspen trees, but I worked in some smaller conifers or conifer-like plants to smooth that transition away from the neighboring forest. The backyard will be a food forest, but edibles are only lightly planted in the front.
Plant staging
Once the plants arrived, it was time to stage the plantings. That’s landscape designer talk for setting out all the plants in the places they need to be planted, then standing back, hemmed and hawing, moving this one there, nudging that one over a bit and swapping these ones with those ones. Although a seemingly simple process, it took me a couple hours.
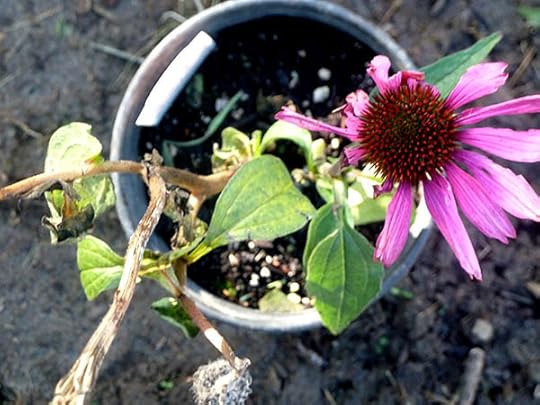
Fading echinacea
The perennial flowers, like Echinacea and Black-Eyed Susan were on their last legs. They are suppose to die back in the winter and are all but invisible now that winter has set in. But some spring, they will shoot back up with vigor.
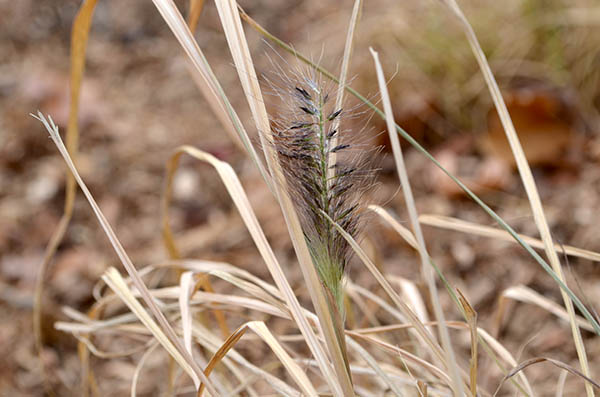
Black Flowering Fountain Grass
Black Flowering Fountain Grass (Pennisetum alopecuroides ‘Moudry’) is one of the three taller grasses I used.
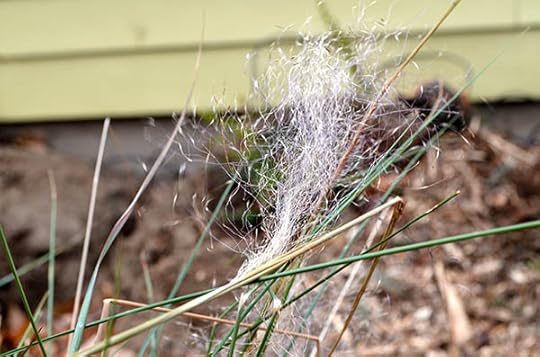
Pink Muhly
Along with Pink Muhly (Muhlenbergia capillaris) which creates these soft, pink-ish plumes above the foliage.
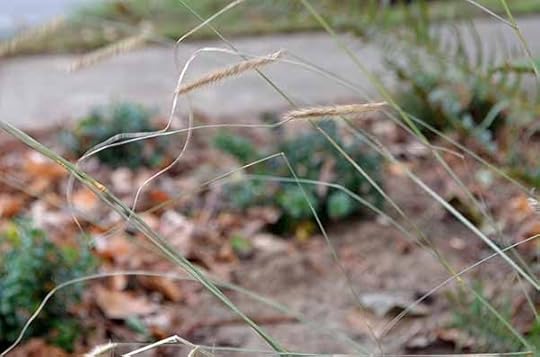
Blonde Ambition Blue Gamma Grass
And Blonde Ambition Blue Gamma Grass (Bouteloua gracilis ‘Blonde Ambition’) has these interesting catkins hanging from the ends of the thin leaves. It whips back and forth in light breezes, making it hard to photograph on this windy morning.
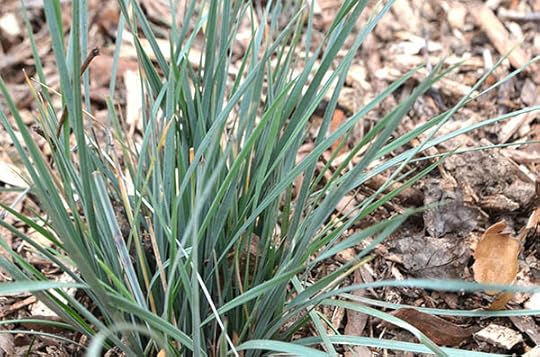
Blue Oat Grass
I used Blue Oat Grass as one of my ground covers – a small evergreen with a nice, blue-green color.
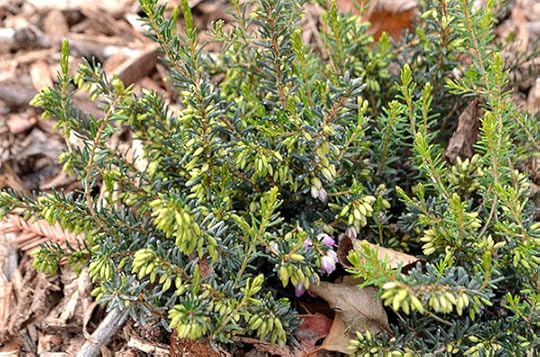
Darley Dale Winter Heather
Plants for that subtle forest-transition-thing included winter flowering heaths and heathers, Nest Spruce (Picea abies ‘Nidiformis’), and Blue Star Juniper (Juniperus squamata ‘Blue Star’).

Lingonberry
I also worked in some broadleaf evergreens, including Evergreen Huckleberry (Vaccinium ovatum) and Lingonberry (Vaccinium vitis-idea) – both tasty edibles.
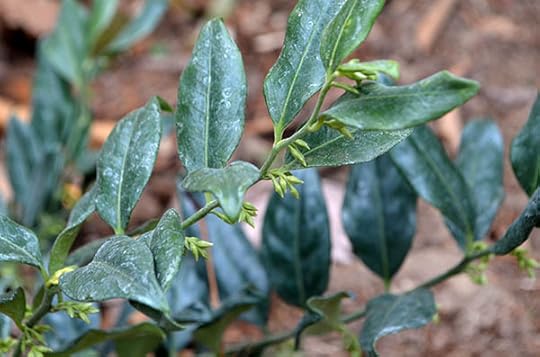
Fragrant Sarcococca – bright green flower buds will open Jan-Feb
And finally, I planted a couple evergreen Fragrant Sarcococca shrubs near the front door. This unassuming, dark green plant has inconspicuous blooms in January-February. They smell incredible fragrant – a treat for us every time we leave the house and come back home.
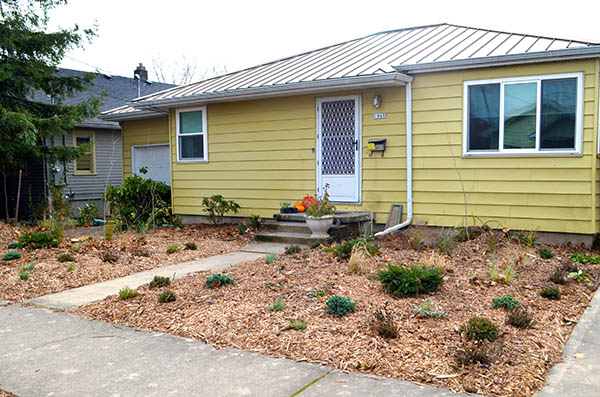
Front yard installed!
I think I planted over a hundred plants, although I’m too tired to go back and count. It looks only lightly planted right now, especially since the perennial flowers have died back. But some spring, there will be lots of lush new growth. I can’t wait to share it with you as the front garden grows in! And stay tuned for more on our backyard plant installation – coming soon!
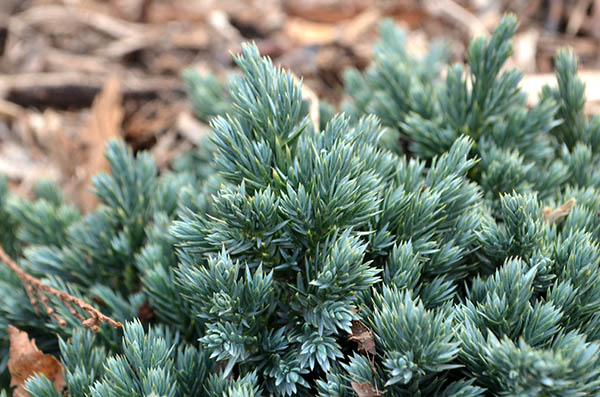
Blue Star Juniper
November 6, 2014
Garden Installation: Part II
With irrigation construction complete, the next phase of our garden installation was site preparation. All that sod had to be removed and it was time to address the soil nutrient and structure needs of our new digs.
Front yard: before
I’m a big fan of taking pictures through all stages of your homestead’s growth. So this is your gratuitous shot of Juniper on our front porch, marking the moment in time when we broke ground.

Juniper the garden helper
I’ll discuss the various methods for removing sod in a post next week, but in this case we chose to remove it with a mechanical sod cutter due to time constraints and the immediate desire to plant the area. (After eight years of growing our former homestead, I’m ready for our new homestead to arrive pronto!) I rented a sod cutter from a local shop and, with the help of my dad, began removing the grass strip by strip.
Front yard: sod removed (mostly)
It was my first time using a sod cutter and I did a pretty crappy job, if I do say so myself. It was pouring rain and we have heavy clay soil, which made the whole process a slippery mess. There were lots of thin strips that I missed and in some areas I didn’t cut deeply enough. We spent the better part of a weekend trimming all those areas.
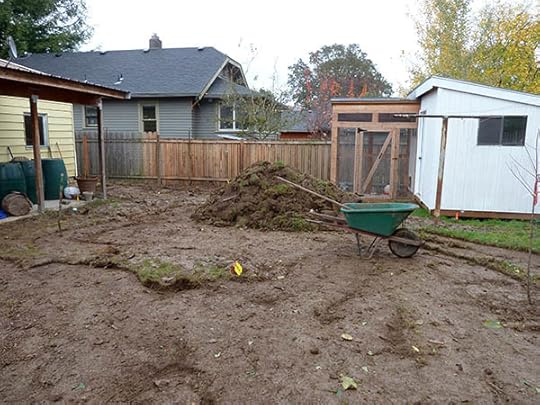
Backyard: sod removed and pile o-sod
We made a massive pile of the cut sod! Thank goodness it’s in the backyard so the neighbors can’t see it… Some of it we will compost and some we will mound up for a play area. I hate to get rid of any of it since there is a lot of valuable topsoil attached to the rots.
Renee leveling soil and spreading manure
With sod removed, it was time to deal with what lays underneath: compacted, heavy clay soil. To help with both nutrient levels and soil structure, I called in the big guns. And by big guns, I mean manure.
Front yard: manure laid evenly
We brought in composted cow manure from Mt Scott Fuel, and the word “composted” is key. Composted, or aged, manure can safely go over your plants without burning them and it’s a lot less stinky than the fresh stuff – a nice bonus for the neighbors. I added enough for all plant beds to have about an inch-thick layer on top of the bare soil. Top dressing the plant areas with manure will provide high nitrogen levels to the soon-to-arrive plants.
Front yard: right side prepped with manure and left side prepped with manure + wood chips
The final step in soil preparation was adding a thick blanket of wood chips over the entire area, which I received from a local arborist for free using ChipDrop. Wood chips are high in carbon, making them slow to break down, and a thick top layer of this mulch will help with weed suppression and water retention. In a couple years, the wood chips and manure will compost further to increase the soil structure of our heavy clay.
Front yard: after soil prep and ready for planting
Many wheelbarrow loads later, we are ready for plant installation – my favorite phase of the construction process! Stay tuned for details on that final part of this series.
November 4, 2014
Garden Installation: Part I
Construction has begun! We are in the muddy process of transforming this little house into a homestead. Everyone’s boots have about five inches of mud under them and our backs are getting a work out. The first phase of most residential landscapes is irrigation installation, which is now complete!
Deep irrigation trenches to bury lateral lines
Our former homestead did not have in-ground irrigation (aka a sprinkler system) and we still got good harvests. Around late July, the garden would start turning yellow and I liked that it reflected the season – dry and hot. I ran a simple, above ground drip-irrigation system out to the raised beds to ensure the vegetables always had regular, deep watering. You can definitely have a productive homestead without a sprinkler system.
Irrigation trenches in the backyard that reach every planting area
This time around, however, I opted for in-ground irrigation because I want to maximize our harvests. Fruit trees can establish deep, extensive root systems to find the water they need, but I suspect berry bushes would have heavier yields with summer irrigation.
To save on cost, we only installed irrigation in the backyard where we have our “edible forest” planned. The front yard is a drought-tolerant “prairie” with gorgeous grasses and tough perennial flowers. We hired a licensed contractor to install the irrigation.
Tools of the trade: it took our licensed contractor a couple days to install irrigation that would have taken us a couple weeks
You could do it yourself, but it’s back breaking work to dig those trenches and you really don’t want to mess up something like irrigation. Leaks, improperly installed valves, controllers, backflow preventers, etc can be a major headache down the road.
The next step is prepping the soil for plant installation. Stay tuned for that update later this week!
October 23, 2014
Fall is Planting Time
Fall is the best time of year for planting trees, shrubs and many perennials – including all those fabulous bulbs and tubers. Mother Nature will keep them watered and comfortable for several months, giving them lots of time to get established. Temperatures are cool and the ground is usually soft from autumn rain. Everything needs to get in the ground before the first frost date, when the ground will harden., which in Portland is around November 15th.
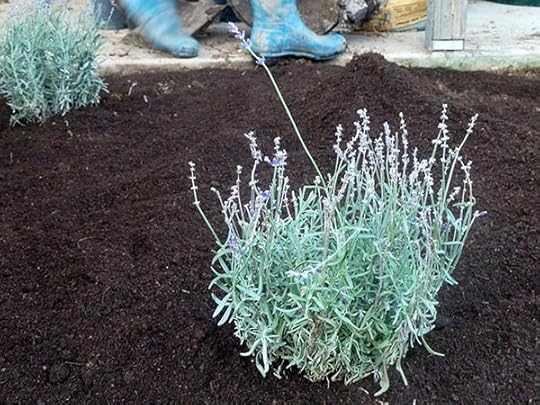
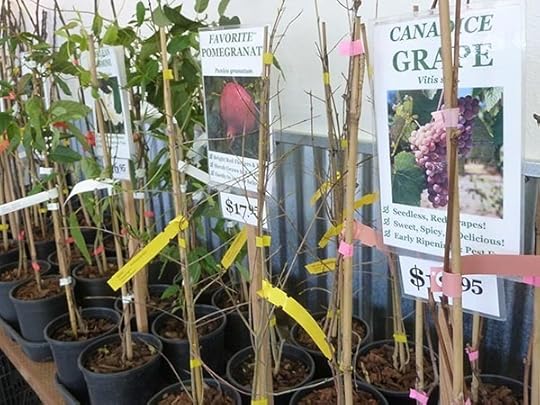
 Plant nurseries often have great deals at this time of year on perennials that are past their showy season. A couple years I ago I loaded up on lavender, black-eyed Susan and echinacea at a great price because their flowers were over. But sure enough, they put on a stunning show the following spring, summer and fall. Your biggest challenge will be finding enough plants, as nurseries may have sold out of certain plants during the peak of the season and held off on reordering until next year.
I have orders in with nurseries for a few different residential projects. I’m excited to share pictures from those projects with the construction wraps up. All of those sites are currently muddy messes! It’s an exciting time for garden transformations.
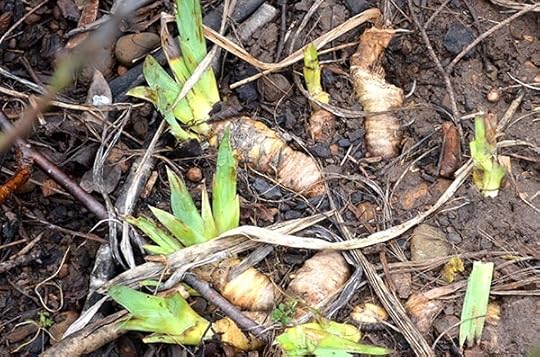
If you already have plants in the ground, think about cutting and dividing your favorite perennials. Bulbs and tubers, like irises and tulips, are super easy to divide and replant. I look for crowded areas, then dig up the whole mass. Gently tease the bulbs apart from each other.
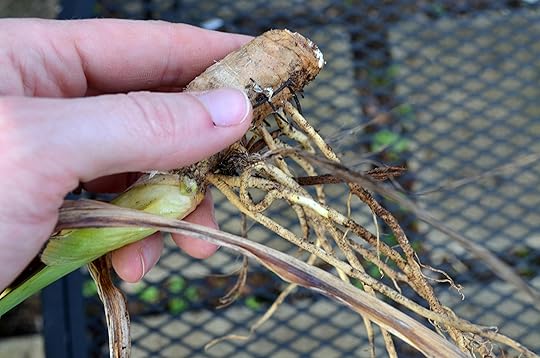
Tubers, like irises, maybe need to be cut apart with sharp snippers. Try to cut apart chunks that still have some healthy roots attached to give them the greatest chance of success.
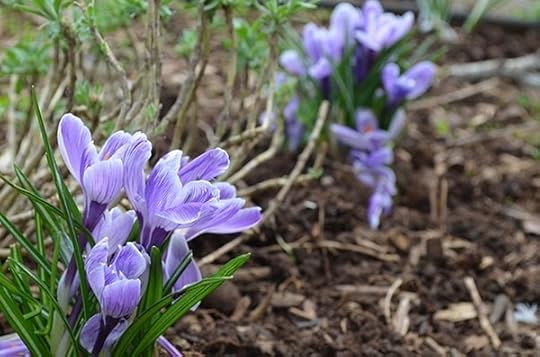
Replant bulbs and tubers in groups in odd-numbered groups, like three or five. I usually plant tiny bulbs like crocuses in groupings of seven or nine. They make a bigger impact when several come up together in early spring.
Do you have some exciting new plants going into the garden this fall? Are you looking for last minute recommendations? Is there already snow on the ground where you live? Tell me about in the comments below!
October 13, 2014
Exploring Nature Play
As a landscape designer, I’m endlessly fascinated with outdoor spaces. How do we make them accommodate our need to grow food? To entertain? To support native wildlife? Rainwater? Beneficial insects? The list goes on. But my latest fascination is all child’s play – or rather, nature-based play.
Nature-based play is an emerging concept in the world of design that encourages open-ended, creative play with natural objects and materials. It gives children the opportunity to learn a bit more about natural world around them. It also allows them to test their own limits and practice using their own judgement. For example, they need to decide “is this rock too big for me to climb?” or “can I jump from this high?”

I recently hiked with my family around Silver Falls State Park in Oregon and thoroughly enjoyed their Nature Play area. The play objects there are on a “park scale” – big and sturdy. But there are so many good seeds here for what you could do in your own space to incorporate some nature-play.
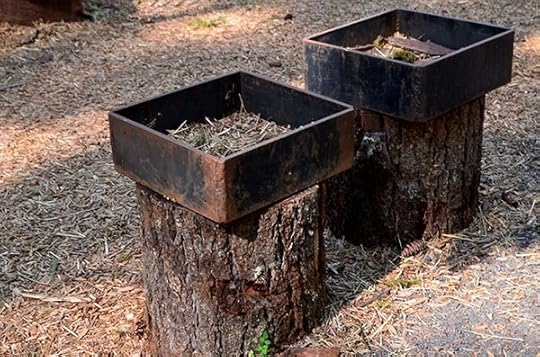
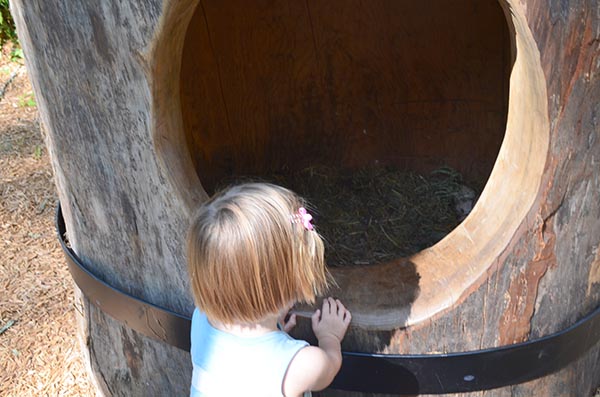
Each area had it’s own theme. In the bird play area, there were metal boxes placed on stumps where kids had been making little “nests” or collecting other found treasures.
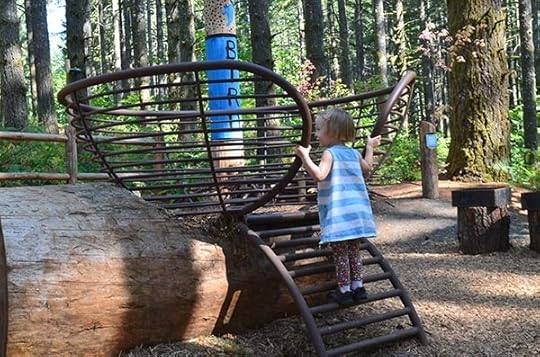
The bird area also featured a very large, metal nest. Much like a treehouse, this could be a real cozy spot for kids to gather.
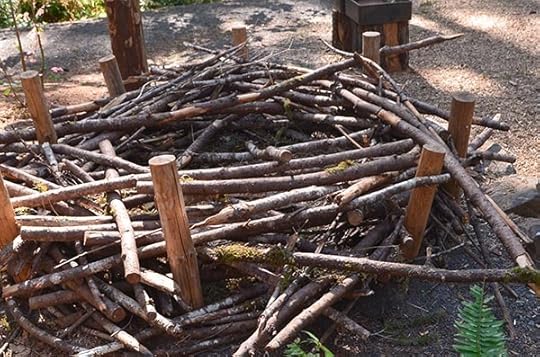
Not only did the park have a metal nest, they have a fun ever-changing nest made with large branches. This is the kind of thing that could fit really well into the backyard. It’s low-low-low cost and children can design it, destroy, and rebuild over and over again.
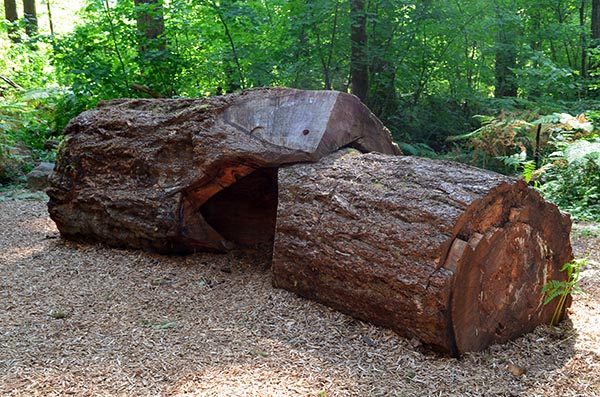
In the bear-themed area, a couple massive logs were hollowed out. Inside was a cozy cave perfect for exploring. We might not all have access to logs this big for our own backyards, but I love the idea of making “hideout” spaces – a place where parents can still supervise from a distance, but kids feel hidden.
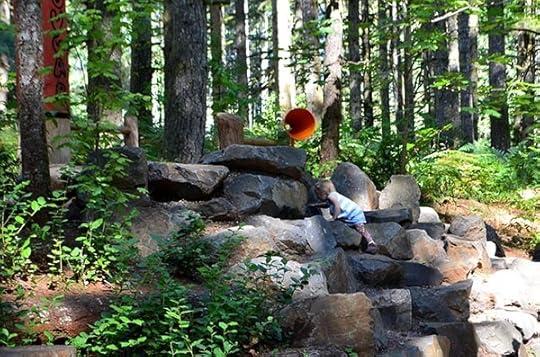
The cougar play area included large boulders that Juniper absolutely loved to climb. All those folks with a sloped backyard take note! Some rocks were big and others were smaller. She very quickly found her way to a route of easy to climb stones.
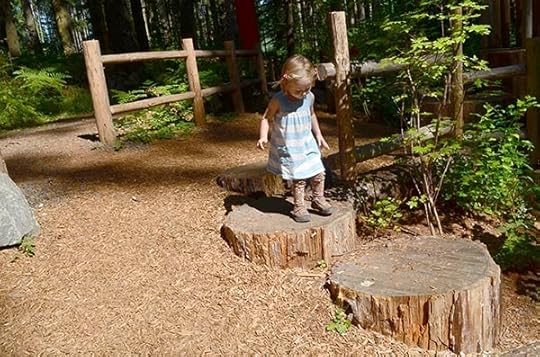
Stumps were cut at varying heights and Juniper used them as a jumping pads – going from one to the other. I was surprised that she showed a good amount of restraint in knowing which ones were okay to jump off and which one she deemed too high to leap from.
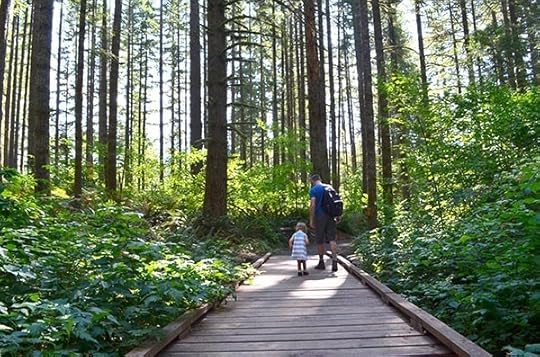
We had a blast along this trail and Juniper wasn’t the only one playing! I found myself climbing through the hollow logs more than once, joining her at the top of the rock pile and sitting with her in the bird’s nest. The designer in me is ignited by the concept of nature-play and I can’t wait to see where this road leads!
Check out the following links to read more about Silver Falls’ Nature Play area. It’s at the north end and there is a sign for it from the main road. It’s near the group camping sites:
Designing the Nature Play Trail
Silver Falls Trail Map (Nature Area not yet marked on the map, but it’s near the Group Camping sites)
Silver Falls State Park (not much info on the Nature Area, but general trail/park descriptions)
October 2, 2014
Preserving Tomatoes
Tomato season is just about to come to a close and I’m just a few pints and quarts away from being okay with that. Here is how I have been busily preserving the tomato harvest this year.
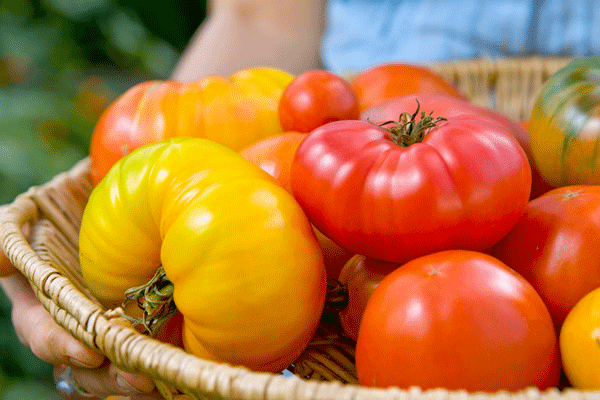
Photo by Issac Viel
First, dry them! You can leave the skins on or off depending on your preference. Sauce tomatoes work best since they are not too watery. If you use slicer tomatoes, remove the seeds and excess water. Use a food dehyrator set to 130-140 degrees and arrange thin slices in a single layer on each sheet. Dry them for about 4-8 hours until they are leathery, but not moist (times vary so much because tomato water content can vary so much based on which variety you are using). You can store them in a plastic bag or glass jar for a couple months at least. I mostly use mine in stews to add some nice flavor depth – beef stew, chicken soup, chili, etc.
 Homemade marinara sauce flies off our cupboard shelf every year – we probably use over twenty quarts a year. It saves a ton of time later in the year when we can pop open a lid and add to freshly cooked pasta and meatballs. We layer it in for lasagnas or spread over pizzas. My recipe has everything but the kitchen sink in it. I usually simmer it for a couple hours so it’s nice and thick, although some folks might prefer it a bit thinner. We can them in quarts since we usually need that much for pasta dishes.
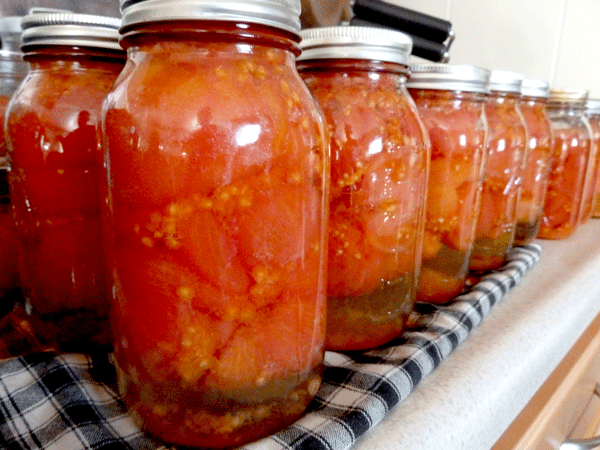 Simply canned tomatoes are probably the easiest and fastest way to can them up (if there is such a thing as a fast canning, that is…). You peel and core them, add a bit of lemon juice, then smoosh them down into the jars until almost full. Use them whenever a recipe calls for diced or whole tomatoes. I find quarts are the most helpful size.
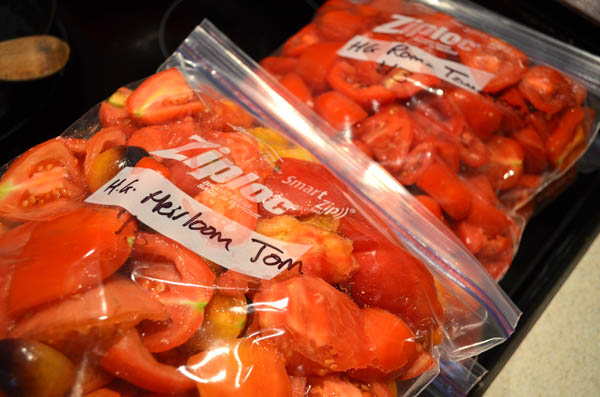 One of the easiest ways to preserve tomatoes is to freeze them. It still works best to core and peel them, but just thrown them into a gallon sized freezer bag and pop into the arctic abyss. I often use these for slow-cooker recipes or homemade tomato soup in the winter.
But after all those ideas, I have saved the best for last: sauce. It wasn’t until a couple years ago that I discovered my deep and undying love for homemade tomato sauce. It puts all that salty, acidic stuff from the store to shame. And it’s super easy to make if you have a slow-cooker.
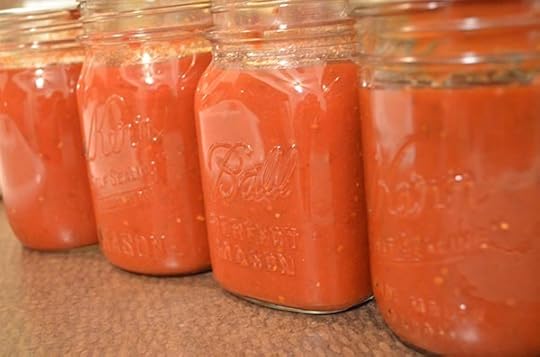
Peel and core the tomatoes like you normally would. Then dump the tomatoes into a slow cooker until you reach the very brim. Cook on high with the lid off overnight (more or less depending on how many tomatoes you have and how watery they are). The excess liquid will evaporate leaving behind a thick, super concentrated tomato-jam-sauce.
I added about a tablespoon of lemon juice per pint, but nothing else – no salt, no seasoning, no nothing. I used this sauce last year for tacos, casseroles, chicken dishes, pizza, everything. I find pints work best as I don’t often use them in dishes where they are the main star, like pasta. For those dishes I use marinara.
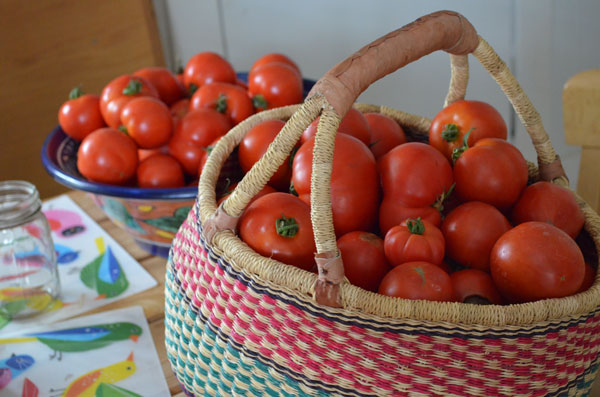
So. many. tomatoes.
Hope this gives you some ideas of new things to try. So much canning and so little time left this season!
September 30, 2014
Preserving Asian Pears
Asian pears are still in season here in the Pacific Northwest and we just can’t get enough of these little gems! I often see two types grown locally – one with a thick, brown skin and one with a thin, yellow-green skin. I prefer the latter as I find the flesh to be softer and sweeter.
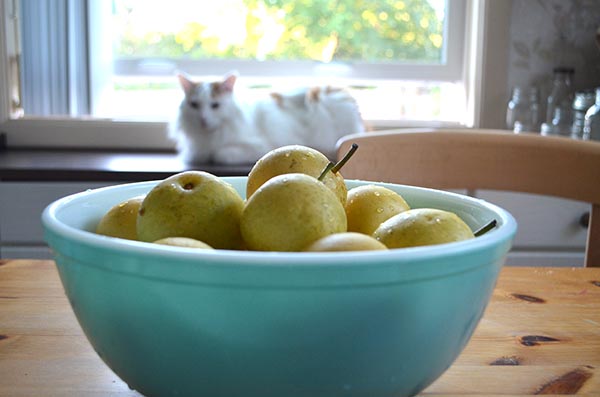
You can do lots of things with asian pears to preserve them. Try canning them up into a delicious chutney (there’s a recipe in my book). You could can them in a simple syrup. You could even freeze them to use in tarts or baked goodies this winter. But my favorite way is super simple and easy: dry them.
Maybe it’s because I am so short on time these days chasing a little one. Or perhaps it’s because my little one gobbles up these dried treats. Whatever the reason, dried asian pears have a sugary sweetness that European pears and apples just can’t beat. Drying them seems to lock in that sweetness, making these pear chips an addictive snack.
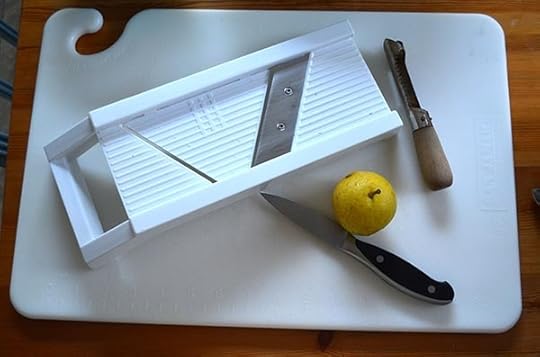
The process is simple for drying. Core the fruit but leave the skins on (which saves a ton of time). Then slice as thin as you possibly can. After a couple years of making these, I invested in a cheap-o mandolin slicer to get them paper thin. It also makes the slicing go super quick. Just watch your fingers – those slicers are sharp!
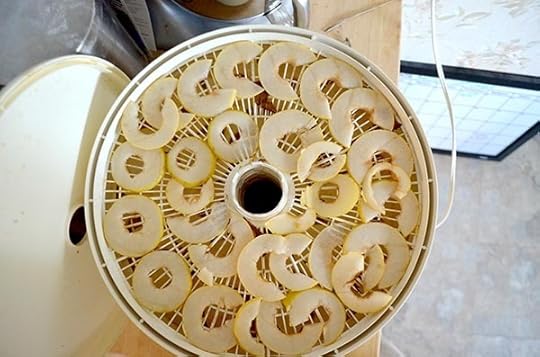
Lay the fruit out in a single layer and turn on your dehydrator to about 130-140 degrees for about 8-10 hours. Check them every thirty minutes toward the end of drying to ensure the right consistency. I often dry them overnight, which is insanely convenient. Maybe my next book should be a guide to being a lazy home preservationist…
 You want the end product to be leathery, but not moist. If you over dry them, they might be more like a chip than regular dried fruit. Store them in a glass jar in a cool dry place. They should keep for about a month, although mine have last longer and tasted fine. Enjoy!
September 23, 2014
Juniper’s New Room
It has been about three months since we moved into our new digs and I can finally say that at least one room looks the way I want it. Everything else – inside and out – is a work in progress and in some degree of construction. But let’s not focus on that overwhelming fact… Look at this cute little kid’s room!

Juniper’s new bed and new bookshelf (look at all those books!)
Juniper’s new room doesn’t get great sunlight, so I wanted to keep the furniture light. I also wanted to strike a balance between new things, old things and farm-y treasures.

Juniper’s mural
First I painted her room in a light grey-green using Water .02 from Yolo Paint, which is an eco-friendly, non toxic paint. Imagine .02 is the trim color and also what I used to paint her wall mural.

Cuddle buddies
Her new big girl twin bed and A-shaped bookshelf came from our friends at Ikea in unfinished pine. Her many stuffed animal friends helped her break in the new bed. I can’t believe how grown up she is getting!
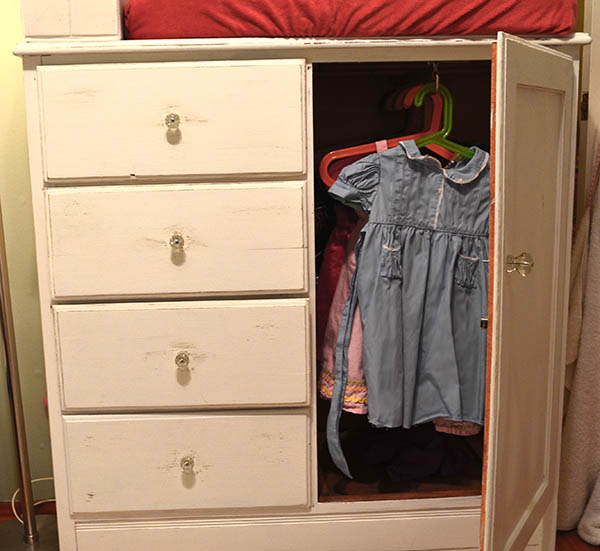
Distressed chifforobe
The chifforobe I wrote about earlier was a thrift store find that I distressed in white. The vintage knobs we added are a fun touch.
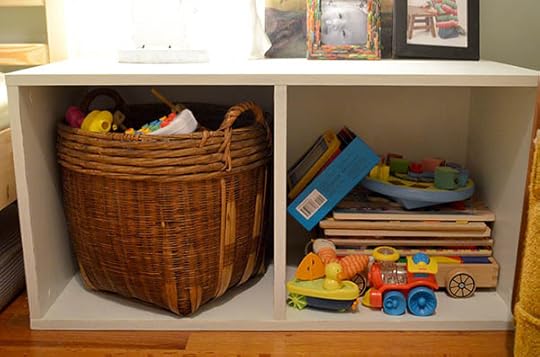
Night stand with cubbies for toy storage
Her new nightstand is a similar story – an old, beat up piece of furniture that I decided to paint instead of get rid of. It has cubbies that are just the perfect size to fit an old harvest basket and some puzzles. Finding toy storage was a fun challenge!

Mixing old and new decorations
My aunt T found this adorable bunny light at a thrift store. It’s a sweet little touch of nature and I like how it ties in with her forest-themed mural.

Former closet turned children’s reading nook
Juniper’s room has a built in closet, which is a lot of wasted square footage in a toddler’s room (all her hang up things fit in her chifforobe). So I decided to convert it into a reading nook instead. I removed the sliding doors and their track, added lots of fluffy pillows and new curtains. It became the perfect spot to hang her old mobile too.

Fun times ahead!
I am happy to report that Juniper’s response to her new room was “Whoa!” She loves it. We love it. And it feels so good to have at least one small area of our house finally feel like home.
September 16, 2014
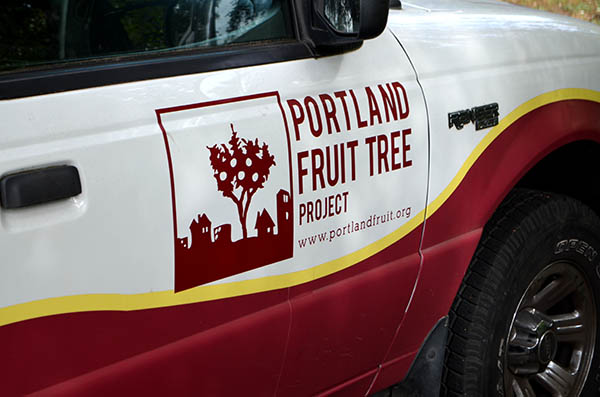
Portland Fruit Tree Project
Since I am gardenless this season after our recent move, I am completely dependent on local farms and generous friends to help fill our harvest basket. I was delighted to discover a local non-profit called the Portland Fruit Tree Project just as harvest season began to roll in, which has kept us up to our eyeballs in fruit.
 This particular organization has been around for several years. They work with local property owners to manage fruit trees that the owners no longer want to care for. They lovingly prune and care for these trees year round to maintain their health and increase their fruit production. The majority of the harvest gets donated to the Oregon Food Bank, but they have plenty to still share with their volunteers.
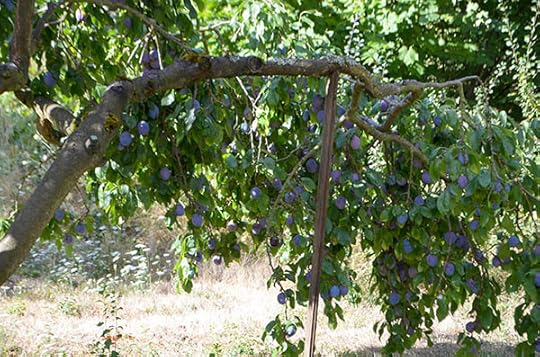
Italian plum bent over with fruit, but supported from the Portland Fruit Tree Project
In exchange for sharing the harvest with you, they ask for donations on a sliding scale of $5-25 bucks. That, plus your couple hours of easy labor, adds up to a smoking deal for a pile of fresh fruit. Typically half of the day’s harvest gets donated to the OFB and the other half gets divided up equally among the volunteers.
Gravenstein apples
You have to sign up in advance to volunteer for a harvest party, but it is SO worth it! You meet at the harvest site, clean up fallen fruit for the compost pile, then collect and sort the ripe fruit from the trees.
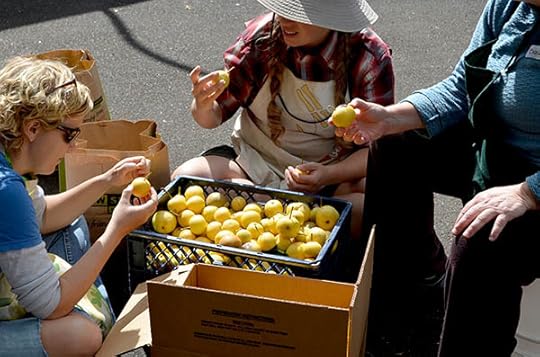
Three former strangers sorting fruit and sharing stories
It was really amazing to watch these perfect strangers all come together for a bigger cause – connecting folks in need to healthy, fresh food. They exchanged stories about their home gardens or favorite canning recipes while sorting the harvested fruit. (The best stuff goes to OFB and we get the slightly blemished fruit.)
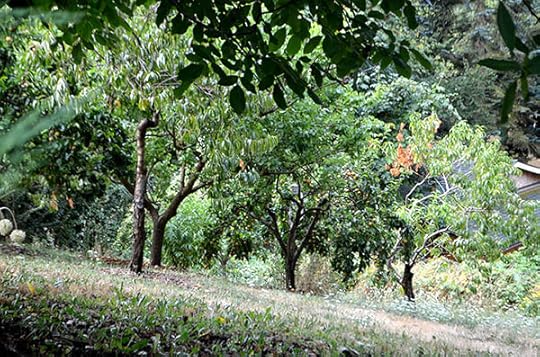
The hillside orchard
The setting was breath-taking both times I’ve harvested with them. The first time it was at this hillside orchard in outer east Portland. I reminded me of the rolling hillsides of Italy – just a much greener version.

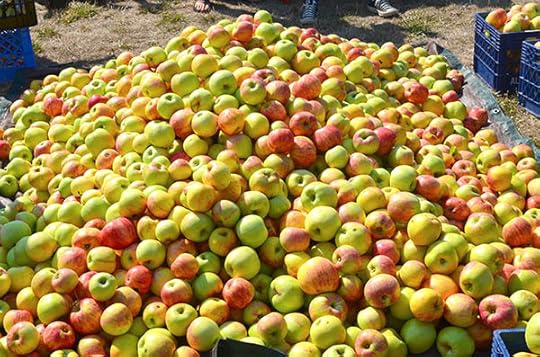
One of a dozen crates of fresh fruit destined for the Oregon Food Bank from the Hillsboro harvest
The next time I volunteered it was more atypical. We met out in Hillsboro at a beautiful orchard – so a very rural setting. The farming family had a bumper crop of Gravenstein apples and Bartlett pears. That day we helped harvest thousands and thousands of pounds of fruit.
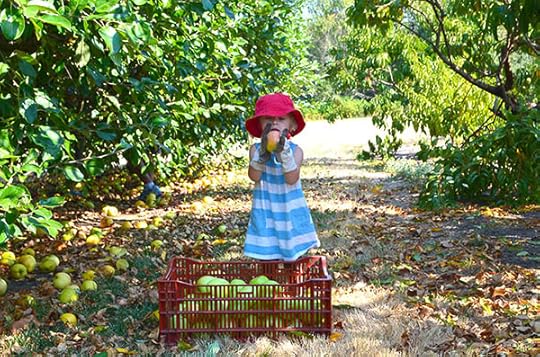
Expert apple taster
It was the first harvest party that I brought Juniper to and she had an absolute ball! It’s quiet a kid-friendly event – busy work, but not hard work. She was so focused on carefully placing fruit in the bins and took their recommendation to taste-test the fruit very seriously. I think we came home with at least a dozen apples that had tiny bite marks on them…

Shhhhh…
When we finished harvesting, we loaded up the car with about fifty pounds of fruit and headed home. She had a quick snack and proceed to completely crash out for the ride home. That girl played HARD. And all in the name of fresh fruit for everyone!


