
Renee Wilkinson's Blog, page 5
September 3, 2015
September Garden Update
The harvest basket is over flowing on our homestead – finally! Squash is meandering through every open corner of the garden. Juniper is still finding ripe strawberries from our everbearing plants that carpet the planting areas. Bees are humming from one echinacea flower head to another. This is the homestead I have been dreaming of since we first set eyes on this home.

Late summer garden
I was hoping the garden would “pop” a little earlier this summer, but alas our poor soil delayed a lot of growth. We still got decent harvests starting late spring through early summer – lots of berries, greens, onions and other cooler crops. I’m eager for late fall to set in so we can lay down heaps of compost to build up the soil quality. We will top if off with fresh wood chips for weed suppression and water retention.
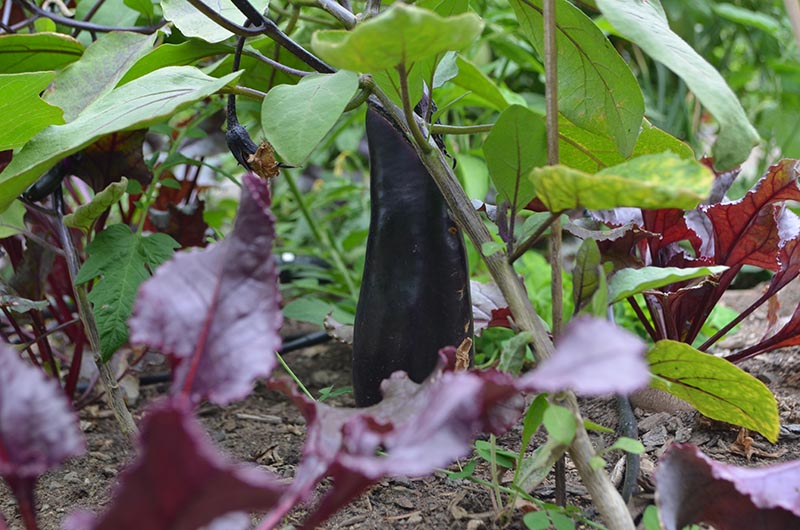
Beets inter-planted between eggplants, heavy with fruit
The hot season crops are in full swing. We are getting lots of summer squash, including these fun white pitty-pans. Our heirloom tomatoes are producing giants! Eggplants and peppers are ready to pick. And I’m hoping our many winter squashes and pumpkins ripen before the first frost.
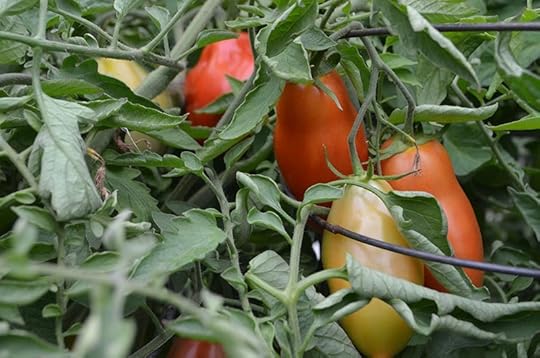
Finally! Tomatoes!
We have plenty of other goodies to stuff our harvest basket with: our second planting of lettuces, beet roots and greens, swiss chard and broccoli. For now we are eating it all fresh, but it’s time to start preserving the excess. I am enjoying the edible jungle while it lasts!
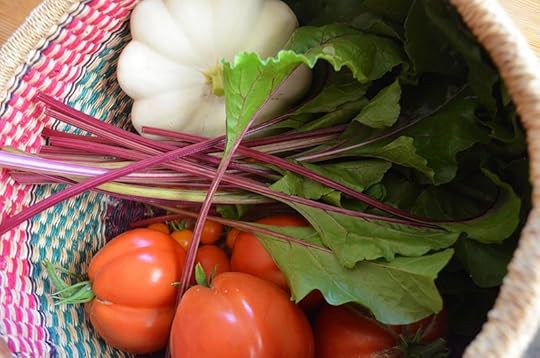
Evening harvest basket: cherry tomatoes, heirloom slicer tomatoes, beet greens and a white pitty pan summer squash
It’s hard to think about growing even more produce when we are already up to our eyeballs with harvesting. But we are overdue for planting the winter garden, which is our big holiday weekend project: carrots, lettuces, arugula, fava beans, kale, garlic, shallots and more. Tell me about your big weekend projects in the comments below!


August 27, 2015
Our Life with PKU
We knew that Baby River was special the moment he entered our lives, but we didn’t know he was extra special until he was six days old. That is the day when we got the call that his newborn screening test came back positive for PKU. Coincidentally, that is exactly how old my now 15-year old nephew Evan was when we got the call that his PKU test came back positive. Talk about déjà vu…

My 15-year old nephew Evan feeding River his bottle of low-pro formula on a recent road trip.
It felt like the earth shook fifteen years ago when my sister got that scary phone call. Evan went into OHSU, our local research hospital, immediately for further testing. We frantically scanned literature on PKU, read the words “mental retardation” and ours heads began to spin. But in the coming days, weeks and months, we learned that Evan wouldn’t become mentally retarded. Instead he would have a normal IQ, development and life span as long as he stuck with a special diet for life.

Juniper shaking up her baby brother’s low-pro formula.
PKU is short for Phenylketonuria, which is a metabolic disorder that prevents protein from breaking down in the body correctly (to put it simply). You can read more about it on the National PKU site. The excess of that unprocessed protein, called phenylalanine, is toxic to the brain and builds up in people with PKU if left untreated. The special diet restricts the amount of protein they consume to levels safe for their bodies. They get all of the protein they need in an already-broken-down-form that their body can use through a special formula drink.
About 1 in 15,000 babies are born with PKU and both parents need to carry the recessive gene for it. Since it’s recessive, that means you don’t have PKU but it lingers there in your massive gene pool. There is no test to determine if you carry that recessive gene, but I assumed I carried it since my sister does. Turns out Jay does as well, which means we have a 25% chance to have a PKU baby together.

Baby River’s tiny feet that we prick the heel of for a blood test weekly. He typically sleeps through it :)
What does this mean for Baby River? It means we alternate between breastmilk and his low-protein formula to keep his PHE levels low. We do weekly blood tests by pricking his heel and sending them off to a state lab to ensure his PHE levels stay in a safe range. He’ll be able to eat unlimited fruits, lots of vegetables, but no high-protein foods like dairy, beans and meat. It means he’ll be the kid at the birthday party who brings his own cupcake, but he’ll be an otherwise normal kid.
We were sad when we learned River has PKU, but we were not devastated. This is a very treatable disorder that allows him to have an otherwise normal life. He’ll get to do all the stuff we have dreamed he will do: climb trees, run around with friends, ride a bike, travel, explore and learn about the natural world. I am so thankful I get to nurse him still and have that sweet bonding time. A very grateful family in town is getting coolers full of excess breastmilk from me that River doesn’t need, but their baby does need.
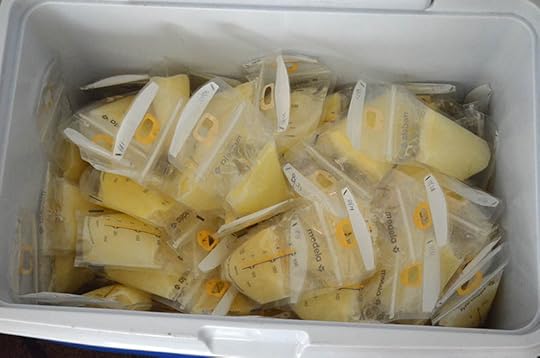
My recent donation of breast milk to a local baby in need
My sister formed a local non-profit organization called Northwest PKU Alliance about a decade ago that organizes an annual PKU Family Camp every August. It’s here in Oregon, but folks travel from around North America for it. I sat on the board for eight years and was in charge of planning the menu for the weekend and getting donations. One year our PKU cook backed out at the last minute and I stepped up to cook all the meals for the PKU campers. I’m no PKU expert, but I know more than the average Joe by a long stretch.
It’s a funny thing to feel unfortunate and overwhelmingly fortunate at the same time. It’s unfortunate that we both ended up carrying that recessive gene. But we feel immensely fortunate that this beautiful soul joined our family – a family that already has a good base of how to cook low-protein food; a family that already grows so many fruits and veggies in our own backyard; a family that can embrace PKU as something that makes him unique rather than a hang up.
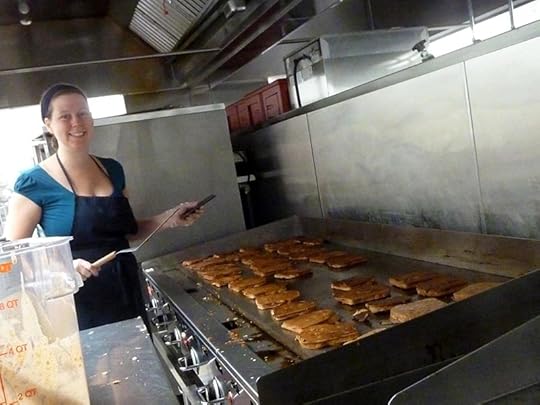
PKU Camp 2012 when I cooked for the PKU campers all weekend. I’m making low-pro french toast for breakfast.
River won’t be eating food for many more months, but when he does I would expect the recipes on this blog to shift a bit. You might see me reference how I make a given recipe, then modify it to be low-protein for River. It’s a subtle change that will likely go unnoticed by most of my readers, but maybe 1 in 15,000 of my readers will appreciate that adaptation.

Our extra special baby River
And maybe 1 in 15,000 readers will have recently gotten a similar phone call when their baby was six days old and take comfort seeing pictures of River playing in our garden, hiking on a family camping trip or eating some of our homegrown produce – just like any other kid. And they’ll be able to see that life with PKU won’t define their child’s life. It will just mean their baby is also extra special.
August 26, 2015
Recipe: Pizza with Fresh Tomatoes
Finally our heirloom tomato plants are ready for harvesting! We are running through our regular list of ways to enjoy fresh tomatoes, but just found one more to add to the mix: homemade pizza topped with fresh tomatoes. Get ready for something delicious and easy.
 I found the pizza dough recipe on AllRecipes.com aptly named “Quick and Easy Pizza Crust“. It requires no rising, which saves a ton of time. Juniper is my sous chef and together it takes us ten minutes to prep. Here is our slightly modified version of the recipe:
Quick + Easy Pizza Dough
2 1/2 tsp. bread yeast, or one package (.25 oz) active dry yeast
1 tsp. sugar
1 c. warm water
2 1/2 c. all purpose flour
1/2 tsp. salt
2 T. olive oil
1 c. marinara sauce and desired toppings (see below)
Preheat oven to 425 degrees. In a large mixing bowl, add yeast and sugar. Add warm water and stir gently to dissolve. Let rest for ten minutes.
Add flour, salt and oil to the yeast mixture. Beat until smooth. (I use the dough hook attachment on my stand-up mixer.) Rest the dough for five minutes.
Roll out dough on a lightly floured surface. Transfer to a lightly oiled pan, top with marinara sauce and bake for 8-10 minutes.
Remove pizza from oven and add desired toppings (see below). Bake an additional 5-7 minutes until the crust is light brown and cheese is melted.

Fresh tomato pizza served with a simple Caprese salad (tomato, mozzarella, basil + olive oil)
To make the Fresh Tomato pizza, we add the following toppings:
2 c. shredded mozzarella cheese
Fresh tomatoes cut into 1/4″ thick slices (or cherry tomatoes cut in half)
Roasted garlic cloves (tossed in olive oil and previously roasted at 300 degrees for 20 minutes)
Cooked chicken chunks (leftovers from a previous meal)
Sliced black olives
Using homegrown tomatoes packs a ton of flavor into the pizza, making it the star topping. I used rich, juicy Brandywine tomatoes picked fresh that morning. Those few minutes in the oven cooked off a lot of the excess tomato water without drying the slices too much. It was a slice of heaven! Try it out and tell me how it goes!
August 18, 2015
Harvesting Onions
I planted two different varieties of onions in early spring along the perimeter of our raised beds: red onions and Walla Walla sweets. You know it’s time to harvest onions when the greens start to die back, which usually happens in late summer. That means the plant is done sending it’s energy from the greens down into the ripening bulb. I just recently pulled almost my entire crop of onions, leaving the ones with upright green growth in the beds to finish ripening.
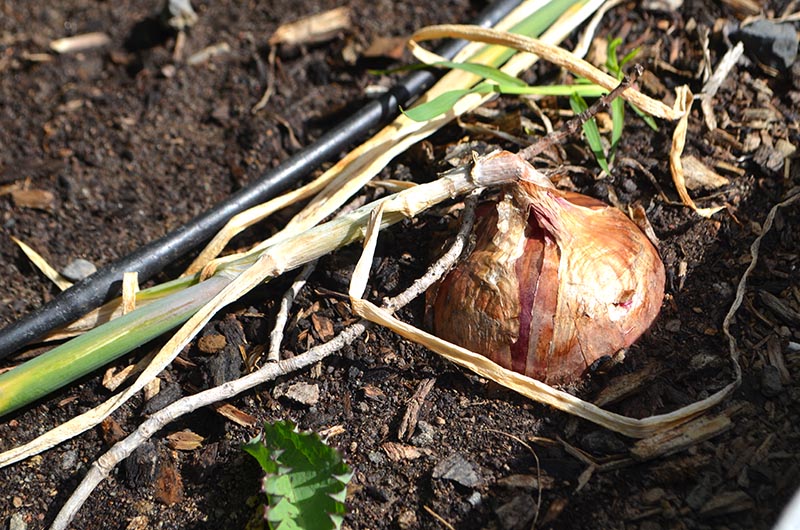
Onions are ready to harvest when their tops fall over and begin to dry
Portland had a strange growing season and my Walla Walla onions suffered the consequence. We had an unusually hot spring that cooled down briefly, then proceeded to heat up again. That brief cool spell confused the Walla Wallas into thinking it was time to go dormant – meaning, they thought it was wintertime. When the heat returned after that cold spell this spring, the onions thought it was next year and bolted.
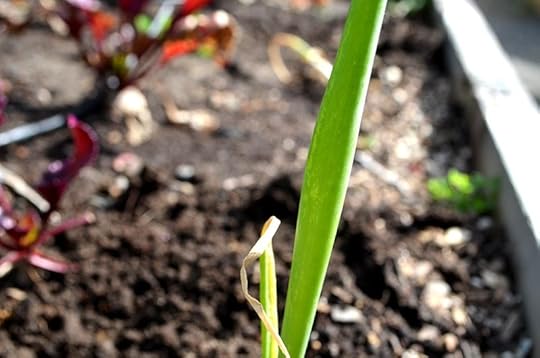
This onion has “bolted”, forming a thick central stalk that will flower
When an onion bolts, it develops a thick middle stalk that flowers to create seed. It’s quite pretty, but the bolting process ruins the bulb. It becomes fibrous and inedible. I left a couple flowering onions in the garden so I can save their seeds for next season. The red onions, however, were more bolt-resistant – not a single one formed a flower stalk.
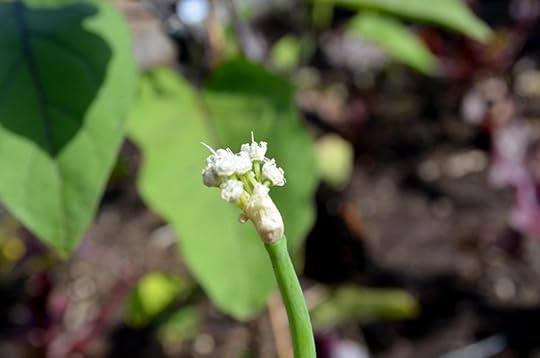
Budding onion flowers on our bolted Walla Walla onions
It’s always fun to grow two varieties of a crop at a time – you learn little lessons like this. Apparently Walla Wallas are more sensitive to bolting than the red onion I grew. I’ll record that in my garden journal so I remember come planting time next year. It doesn’t mean I won’t grow Walla Wallas – it just means I’ll never plant only that onion variety in case we have another year of fluctuating temperatures.
To harvest the onions, I pulled them gently from the soil and rinsed off the excess soil. Walla Wallas are a mild onion, which should be eaten over the next few weeks rather than stored for months. We will eat the few that didn’t bolt by using them on burgers, sandwiches or caramelizing them. Red onions are good for storage, so those plants I will “cure” to keep through winter.
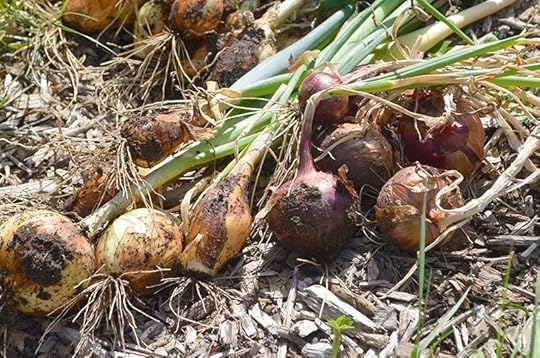
Freshly pulled onions
The onions are now resting out of the sun on a table with good ventilation in a single layer. The red onions will cure there for 2-4 weeks. The best temperature to cure them is quite warm – somewhere around 75-85 degrees with a nice breeze. The Walla Wallas are just there to dry, not cure. So once dry, we will move them inside and start using them up.
Once cured, storage onion leaves, or “necks” will be completely dry. You can braid them together to hang or just trim the necks and store in a container with ventilation holes. A cardboard box with holes, large basket or mesh bag work well. Keep the storage onions somewhere cold (35-40 degrees), dry and out of sunlight for maximum storage life. Mine will be stored in our basement in a makeshift cellar where I keep our excess canned goods. In perfect conditions you can store onions for almost a year, but I will likely use mine in the next six months.
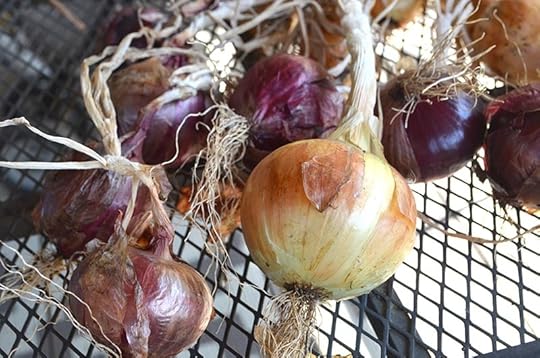
Curing our storage onions
Onions are generally an easy crop to grow and harvest. We use a ton of them throughout the year and it seems like I can never grow enough. I would love to hear whether you make room for them on your homestead, what your favorite varieties are and if you have any tips or tricks to add. Tell me about it in the comments below!
August 5, 2015
Simple Backyard Nature Play
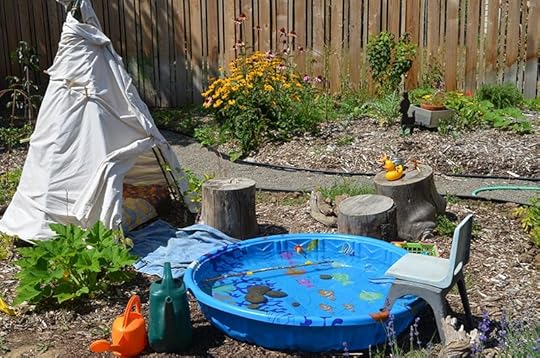
Our homestead garden plan includes a small area reserved for an evolving nature play space for our little ones. We didn’t have a budget to work with, so most the play elements were based on what we had on hand. It’s a flexible space that can change over time as the kids grow and their interests change. That means none of the play elements are permanent or expensive.
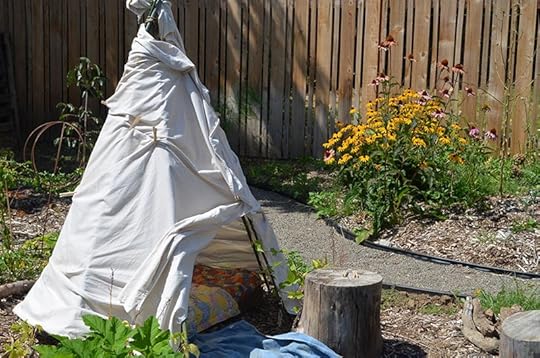
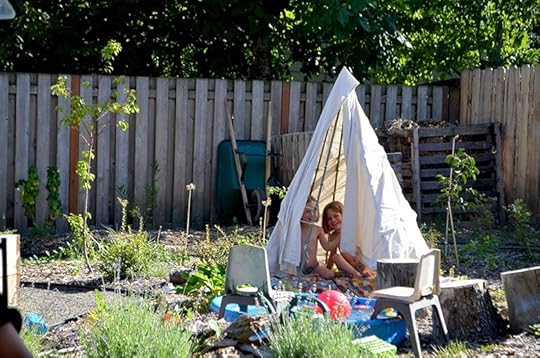
We setup the bean teepee on the edge of the play area, in part to keep the kids from running through the open space into our adjacent planted area. We threw an old sheet over the teepee to create some shade, rolling it up when not in use so the beans can get sun and water. The sheet is held in place with clothes pins – pretty simple!
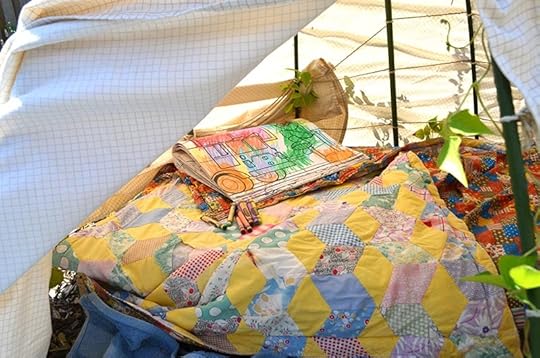
There’s a small pallet inside the teepee with an old quilt on top to make it a cozy sitting area. It’s a favorite hang out for coloring or just giggling with friends.

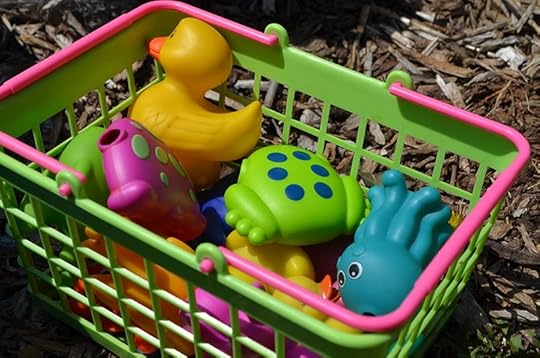
The tree stumps were gathered from a wood pile at our favorite cabin in the high desert. Sometimes these are seats for Juniper and her friends. Other times they are stumps for her to climb. And just the other day they served as platforms to arrange her “bath guys” – the various plastic action figures, ducks and fish we’ve accumulated over time.
In the future, these stumps might get tucked throughout the garden with a low, wide plastic container on top filled with sand or rock. They would make a perfect little fairy garden. (I haven’t gotten around to asking my local hardware store about what non-toxic sealer I should treat them with, but it’s on my to-do list before the fall rains roll in to keep them from rotting.)
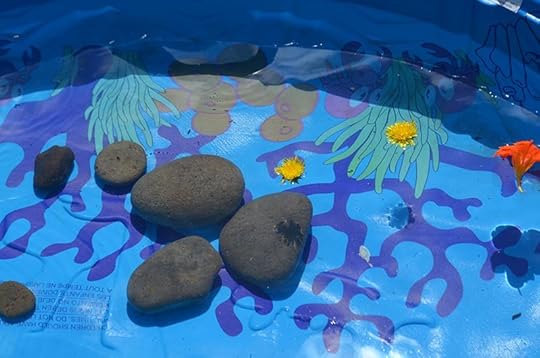
I added a small kiddie pool a few weeks ago to this ever-changing play space for about $8 bucks, which has been a huge hit. There are so many naked-baby (or rather naked-toddler) pool parties going on in our backyard! Juniper adds bath toys, plastic balls, big rocks or floats leaves in the water. When we’re done using the pool, we fill our watering cans from the pool to give our squash and melon plants a big drink of water.
Kids have short attention spans, but putting all of these fairly compact play elements together gives Juniper so many opportunities for open-ended play. She might spend ten minutes in the pool, then run into the teepee to color. Then it’s time to run though the garden searching for berries or collecting rocks and leaves. She’ll add rocks to the pool, then fish them out and arrange them on the stumps. It’s really fun to watch what kind of games and activities she creates from a small, simple play space.
I would love to hear about what your kids love in your backyards! It’s amazing what a little imagination can create in such a small space.
July 29, 2015
Problem-Solver: Sunshine Blueberries
Some of my fondest childhood memories were made among a berry patch. We grew raspberries, blueberries and strawberries on the urban farm where I was raised. Blackberries grew along a neighbor’s fence and we would cut them back just enough to keep them on their property, but within reach when the berries were ripe. In my design work, I have found that berry bushes and small children are perfect companions.
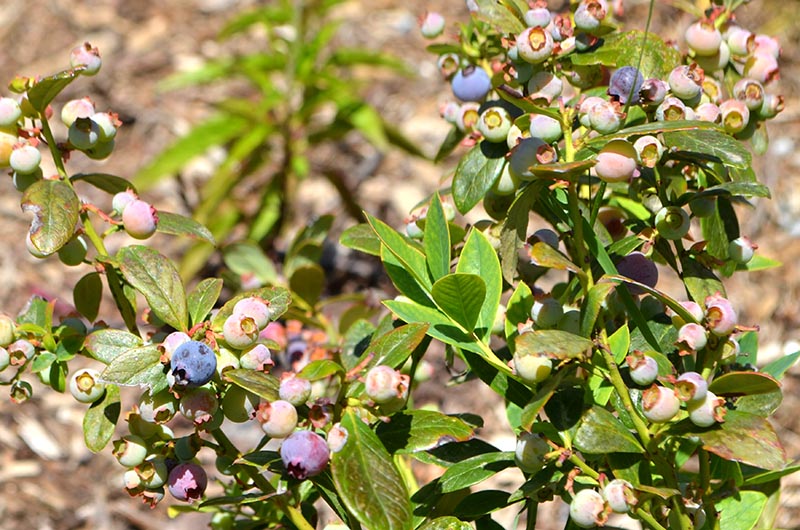
Sunshine Blueberries with a few ripe berries after a month of steady harvesting
It’s no surprise then that our homestead includes lots and lots of berry bushes – raspberries, blueberries, strawberries, huckleberries and currants. But of all the berries we grow, the Sunshine Blueberry has to be one of my favorites and an excellent problem-solver plant for small spaces. This compact variety only gets about 3′ tall and wide once mature and it has been incredibly productive for us. Juniper has been helping me harvest the young plants for a month now and they are still producing fruit!
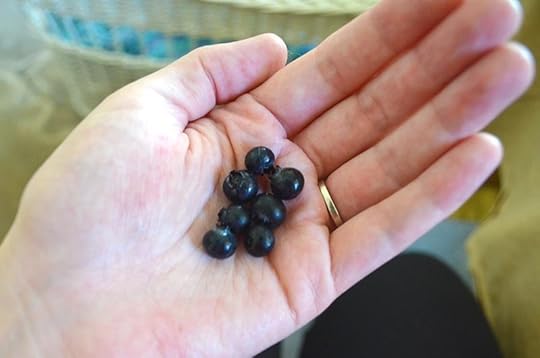
Small sweet berries perfect for baking
The berries are small with a bright, slightly tangy flavor. Folks are often enamored with the huge, juicy blueberry varieties, but they can be watery at times. And I generally prefer the smaller berry size over the huge ones when it comes to baking. They plop nicely into pancakes and compact well into pies. They are technically self-fertile, but you will get a bigger harvest if you plant more than one.
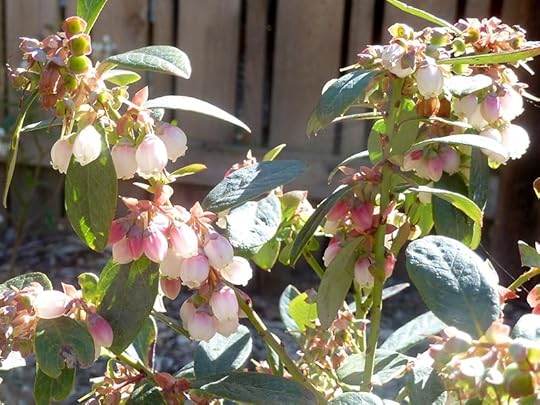
Springtime flowers
In spring, the compact plants were covered with pinkish-white umbel shaped flowers. They are subtle, but plant lovers will appreciate the delicate blossoms. By May the flowers had all turned into bright green berries. I was astonished with how much fruit they were preparing to set, especially considering these were young plants.
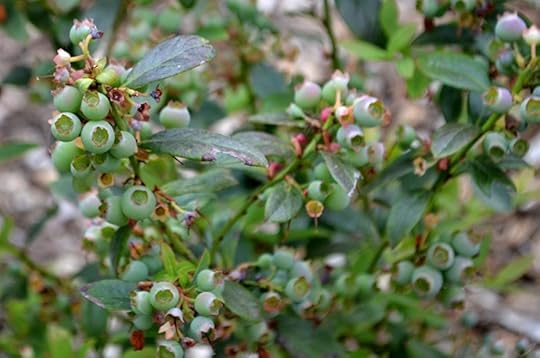
Early fruit set
One of my favorite features of this plant is that it is semi-evergreen in mild winter areas (USDA Zones 5-10). It’s a rookie design mistake to overlook the importance of evergreen structure in the garden – sometimes to the extent where you can’t even tell you have a garden in the winter! We have nine of these planted on our homestead that help provide structure and form to our garden year round.
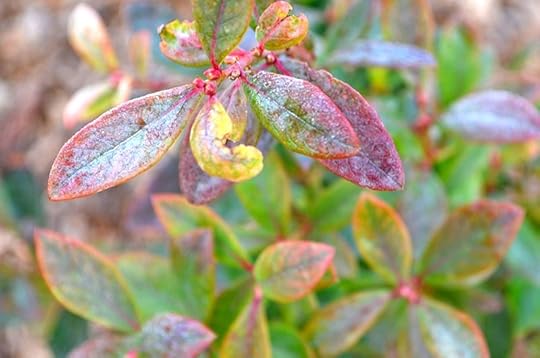
Semi-evergreen leaves persist through winter and take on a reddish hue
It’s a challenge to find a plant like this: evergreen, edible and compact for urban garden spaces. Blueberries also like acidic soil, so these would likely do well under conifers as well. We are in the thick of summer right now, but as we move into fall you might consider sneaking a few of these little gems into your homestead. They will earn their keep with both their fruit and their evergreen beauty!
July 20, 2015
Welcome Baby River
“I think I had better go lie down. I think that may have been a labor contraction…” I was standing in our garden next to the raised beds talking with my Dad about the garden. Contractions had been getting more and more frequent for the last week, but had yet to turn into real, belt-tightening-feeling labor contractions. As a second-time mom, I’m told that’s common to have a lot of “warm up” contractions.
The previous night I slept only a couple of hours. The contractions kept me awake, along with the hard bowling ball in my belly that made lying down uncomfortable. I gave up and enjoyed the stillness of night. I made blueberry pancake batter that Jay could cook up for Juniper in the morning. Then I contacted my acupuncturist, Megan Rose, asking her if she had any availability the next day to see me. I didn’t know how many more sleepless nights I could take since I knew very well how much energy you need for labor.
Megan reassured me that River wouldn’t come unless he too was ready. She did all the major acupuncture points that encourage labor to begin. Lying there quietly with the tiny needles around my body felt like a beautiful ritual – an ancient way of inviting my swelling belly to do its work and let me meet my baby.
It was only two hours later, at 2:00 in the afternoon, that I was standing there next to raised beds talking to my Dad when I felt the first real labor contraction. My Dad gave me a big hug, told me he loved me, and made his exit.
I called my sister to come get Juniper, so she could have her sleepover with her cousin as planned. Jay called our lead midwife, who told him what we expected – let her rest, keep tracking the contractions, and check back in with me as they get longer and closer together. Jay also called my Mom, who we had planned to be with me for labor support just as she was during Juniper’s birth. She’s managing life with cancer, but I know she won’t be with us forever. That made it even more important to me that she was here for this big life event.
Passerby by Luluc played in the background. I was lying on my side in bed while Juniper colored next to me, taking breaks to rub my back or jump on my legs. Soon enough, Juniper was settled with my sister and I could finally fully embrace the labor that was swelling inside me. My contractions were so intense so quickly that I couldn’t escape them.
Jay had been in frequent contact with our midwife since I had clearly skipped early labor altogether. They had told him we could leave for the birth center in 30 minutes, but I soon said, “We need to leave for the birth center right now.” In late labor, the contractions are intense enough that you don’t want to talk anymore. So at this point, anytime I said anything everyone immediately responded.
As I stood up to make my way to car, I could feel there was no longer a concave between my lower belly and my pelvis. It was now a straight line. The baby was descending.
The car was barely stopped in front of the birth center when the back door opened and our assistant midwife put gloved hands on me saying, “Renee, we have to get you out of the car right now.” I had three contractions just on the way from the car to the birthing tub in the Fern Room at Alma Midwifery‘s birth center. I was sweating and the lukewarm water felt hot to me, but I got in anyway. I then grabbed my Mom’s hands, who was sitting on the step outside the tub, and squeezed them through each contraction. Jay was right behind me in the tub. Midwives were moving quietly and swiftly, surrounding me with a sense of comfort and care.
I reached the point in labor where I didn’t think I would make it. I was so tired from so little sleep and so quick and intense a labor. I wrapped my arms around the cool outside of the tub and wondered how many women had come before me to hug that tub for dear life in those rough waves of late labor.
I uttered, “I don’t think I can do this…” and everyone around me said some version of “Yes, you can… You are strong… You can do this…” Kori said, “Honey, you’re already doing it.” I asked the question I was so afraid of hearing the answer to: “How many more pushes??” And my lead midwife gave me the response everyone wants to hear when they ask that question: “Only one or two and he’s coming out.”
I felt him coming out and knew that relief was just on the other side. I looked down and could see him emerging from me into the water. With the final push, I reached down into the water and grabbed my baby as he left my body. I brought him up into my arms as that massive wave of relief washed over me. I sat back with him in my arms, just above the water, and stared at my new love.
I didn’t know it at the time, but baby River was in my arms ten minutes after our car came to a screeching halt outside the birth center. I felt the first contraction at 2pm and was holding him at 7pm. Holy moley.
He was grey in my arms and looked so surprised to be in this entirely new world – like he was just waking up. Kori was right over my shoulder saying, “He’s just fine, Renee. He’s just getting used to this all.” We rubbed his back and I studied his every feature. It was probably only a matter of seconds, but it was like a little eternity waiting for him to fully embrace this new life. And then it happened: he started to cry and his skin changed from grey to pink.

Still in the birthing tub, snuggling my new little love

Studying his every feature

My Mom holding her new grandson

The morning after
The rest of our experience at the birth center was as blissful as we wanted. We ate Lebanese food for dinner from Nicola’s. In the morning, we enjoyed a massive breakfast spread from Utopia Café of pancakes, bacon, corned beef hash and fresh fruit. Everything you eat following birth is pretty much the most amazing tasting meal you’ve ever had.

Juniper and River meeting for the first time
We were discharged late morning, but felt ready to be back in our nest with my little Juniper. It was a magical moment when they met for the first time. This little guy doesn’t know the huge amount of love he’s in for – whether he wants it or not. It’s been a non-stop cuddle and kisses fest. (Here’s the story of Juniper’s birth, in case you’re interested!)
River Edward Wilkinson was born on 7/11 weighing 7/11. It’s amazing how your heart feels so full after your first child. With the second, it just doubles in size instantly. He’s amazing and we’re blissfully settling into our new life as a family of four.

A snapshot of his first week
July 16, 2015
Bedroom Facelift
I’ve started a little trend lately here of taking you on a tour of our house, a year after move-in. Let’s continue to another room we gave a facelift to: our quiet and calm bedroom.
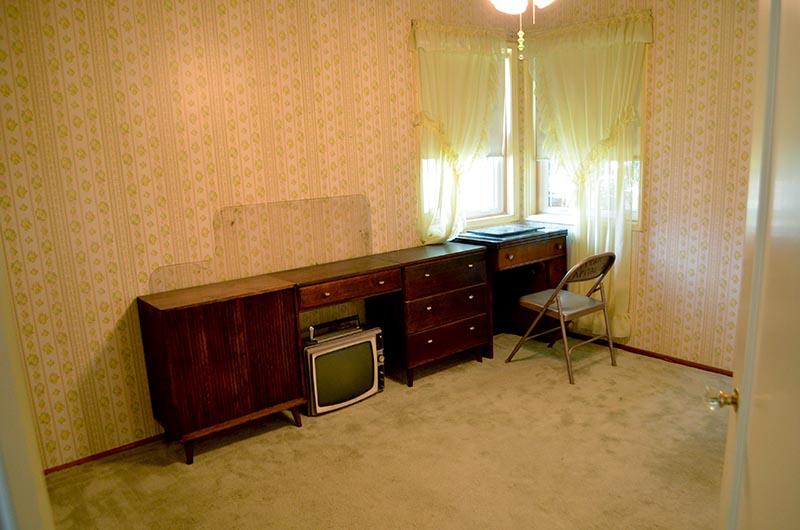
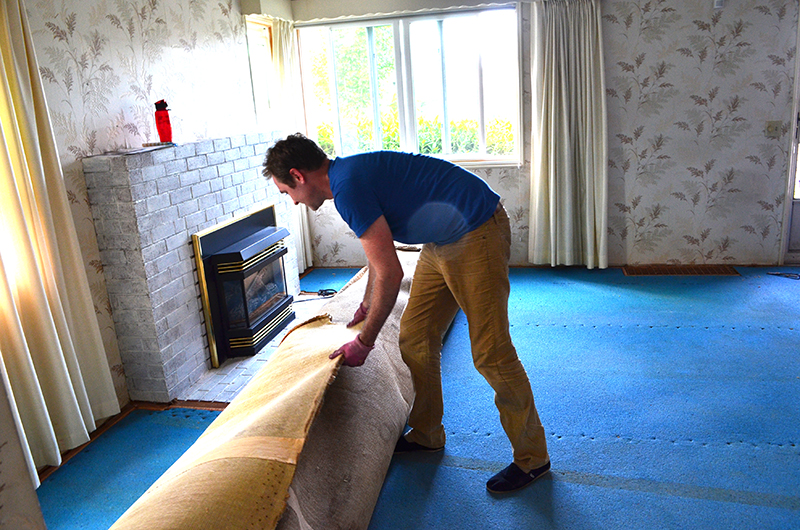
This was less reno and more facelift because everything we did was simple cosmetic changes. The room had a yellow print wallpaper with matching yellow curtains when we bought it, along with a well-used carpet. We remove the carpet to reveal the gorgeous original hardwoods and took down the curtains. Already it felt cleaner and simpler.

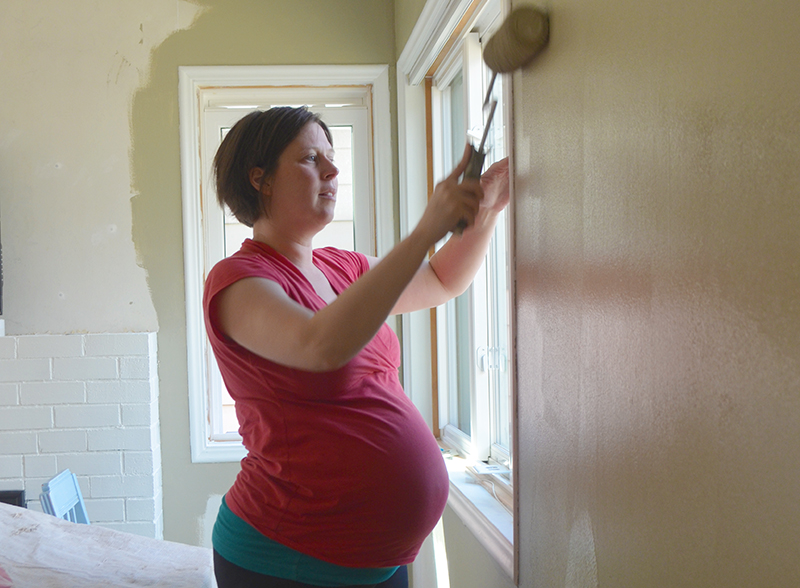
The next step was treating the walls. In any house built in the 1970’s and prior, there will likely be lead-based paint somewhere. I chose to paint over the wallpaper rather than remove it, to reduce any chance of having to expose lead-based paint. In this case, that worked out pretty well because the wallpaper was in good condition. You can still see the seam lines, but it doesn’t bother me too much.
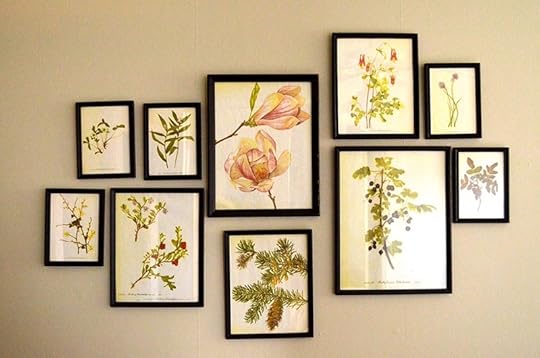
We painted the walls a light grey using Metal .03 from Yolo Paint. The room faces north, so I didn’t want to go too dark. The final color looks almost white, so perhaps a little more color or darker hue would have worked well. But for now, it gives the room a light and clean feel and it shows off the artwork in our room, like these vintage botanical prints I framed a few months back.

I have learned a few tricks living in small spaces. One such trick is to have all of your bedding the same color. That way, when you forget to make the bed, it looks less cluttered than you would think because all the linens just kind of blend together. I have also learned to reign in the color palette for a room to keep the appearance simple. I try to work in textures instead, like using burlap on our DIY headboard, a project from a couple years ago.
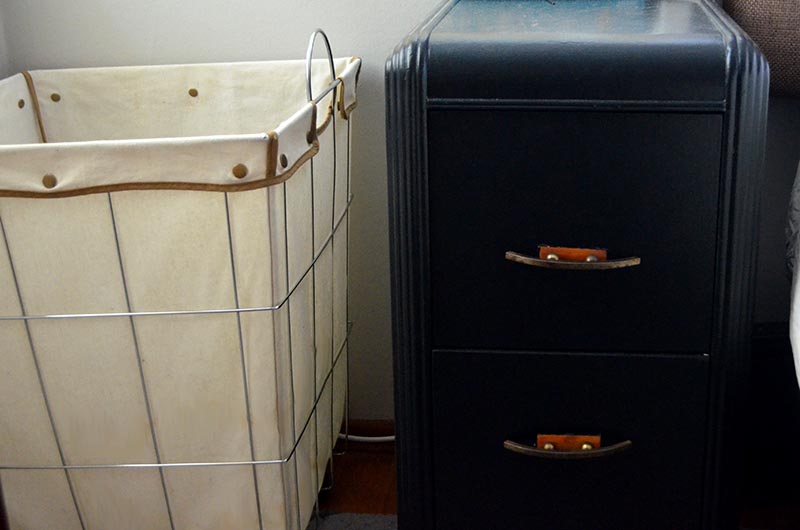
We love filling our house with furniture pieces that seem like they have a story, so the rest of the room is a collection of vintage treasures. The old nightstands we painted a dark grey/almost black, which shows off their well-used handles. Instead of a run-of-the-mill laundry basket, we have this fun metal and canvas bin with brass buttons.
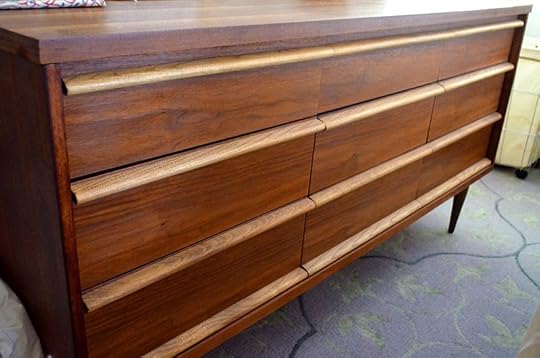 The mid-century dresser fits the era of our house. It’s another way we are using natural textures instead of color in the rooms. And the metal lamp has probably spent many late nights over the years helping tired eyes read a good book.
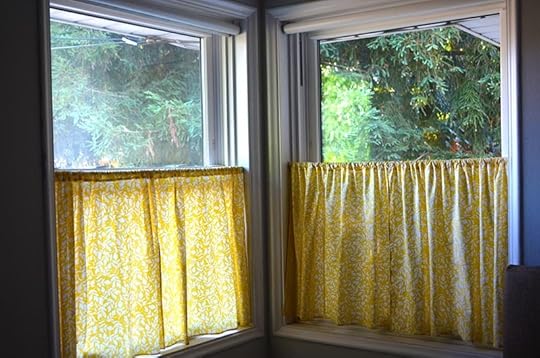
 The room is fairly neutral in color, although there are some very comfy textures in the room. I am trying to work in some colorful accents, like the leaf-patterned yellow curtains my mama helped me make. They give us privacy, add a pop of color and still allow us to admire the great Coastal Redwood trees outside our windows.
We love our new cozy space! It’s calm and neutral, but quietly speaks hints of nature. Hope you’ve enjoyed seeing it too!
July 14, 2015
Living Room Facelift
The mid-century home we bought a year ago had solid bones, but fabulously outdated interior spaces. Every room came with it’s own unique patterned wallpaper and a thick layer of beige carpet. It was hard to imagine we could polish this into a gem, but we took a leap of faith and snapped the house off the market.
Since that time, we have slowly transformed this house into a welcoming homestead. We finished Juniper’s room first. Then came our room. Then came the bathroom remodel. In between these projects, our garden was taking shape as well. But the living room, the heart of our house, took the longest to remodel.
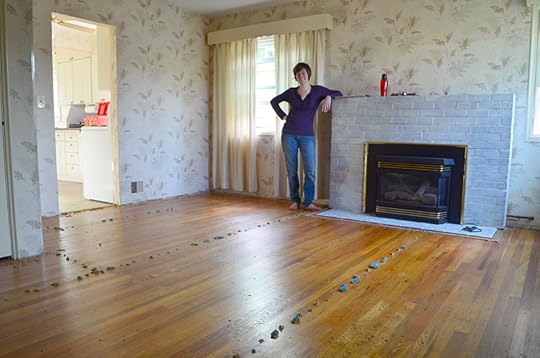
We started by peeling off the carpet immediately after we bought it to reveal some beautiful hardwood floors. I gave the fireplace a facelift a few months ago. But the walls were another story.

Wallpaper had been professionally installed, making it a real pain to scrap off. It was circa 1980 with a fabulously outdated, textured pattern with a foam-like consistency. It could not be penetrated with water or any special wallpaper-removing mixture, but Jay painstakingly made it his mission to remove every little scrap by hand – a process that took several months.
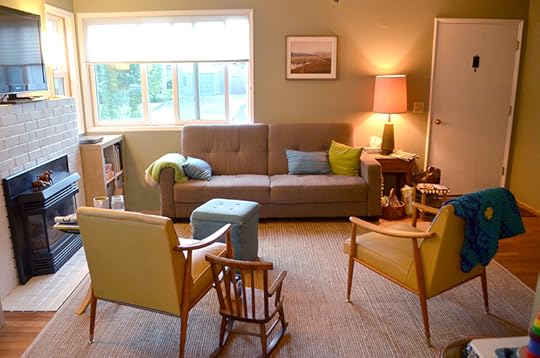
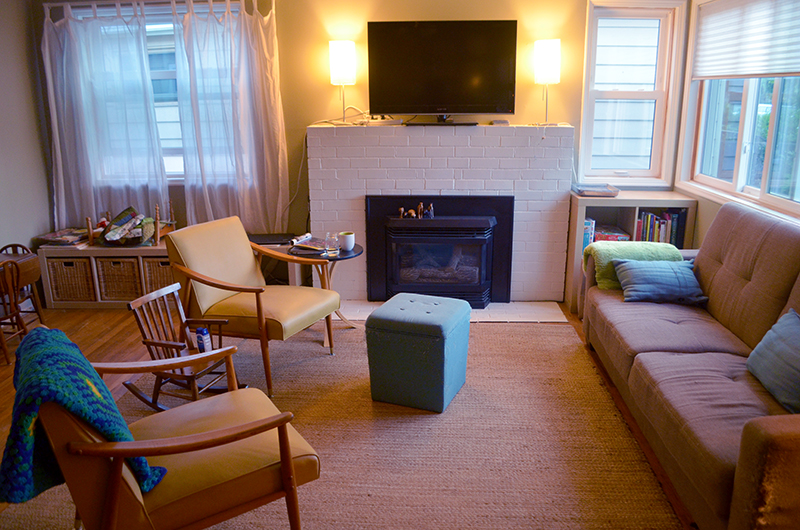
We painted a soothing grey-green using Yolo Paint, an eco-friendly VOC paint, called Nourish .03. I love their suite of nature-inspired colors. The one we choose is richer in hue, but not too dark since our living room faces north. The grey-ness of the color makes the other colors and our artwork in the room pop, but that hint of green creates a natural-feeling space.
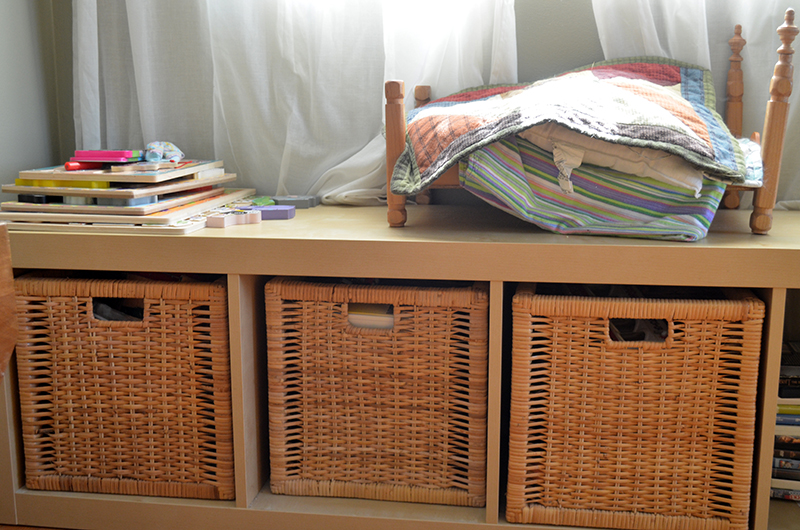
We have tried to be really thoughtful with the furniture, considering we have both little ones and pets. We emphasized natural textures, like the sisal rug and chunky knit accent pillows. We tucked storage into every nook and cranny – using baskets to hide toys and a bright footstool to store blankets.
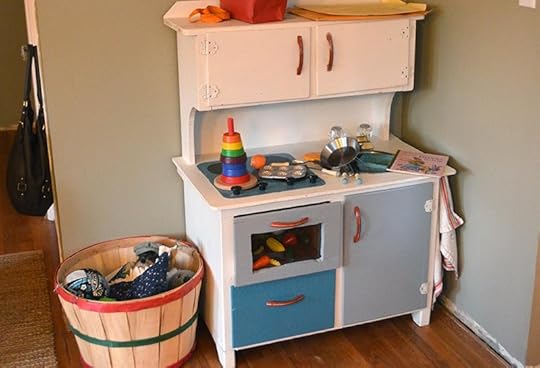
Juniper has great spaces to play – like little stations around the room. Her play kitchen fits nicely into an unused corner. Old fruit baskets store more toys, books and puzzles around the room. They serve double-duty adding homestead accents that are perfect for storing toys. She has lots of space to sprawl out on the floor and, when playtime is over for the day, it’s easy to dump it all back into storage.
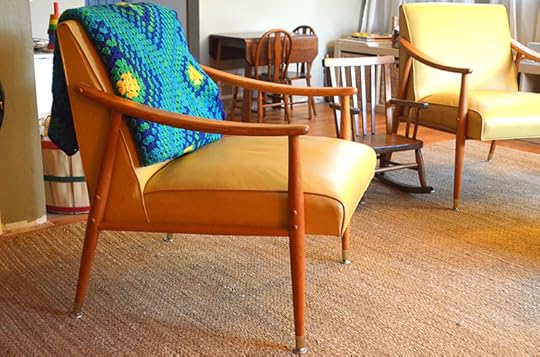
We found these amazing mid-century accent chairs at a local resale shop and choose them for the yellow pop of color and the durable vinyl fabric. The cats don’t scratch them and it’s easy to wipe up spills. Added bonus: their light-weight appearance keeps the room feeling airy since they don’t take up much visual space.
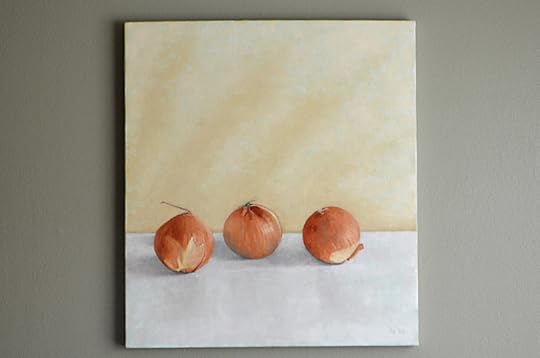
Our artwork just went up a couple weeks ago – the finishing touch that really makes this space feel like home. The walls are now lined with our favorite paintings, like this onion grouping from local artist David Shratter. The entrance wall is too narrow for furniture, but the perfect place for a collection of hand sketches – both portraits of our family and others we’ve collected over the years.

We’re hoping to remodel an unfinished back room over the next year, turning it into a family room. The bulky TV we rarely watch will then move out of our living room, which we can’t wait to do. It’s pet peeve of ours to have TV’s be such a central component of a living room.
In the mean time, the space finally feels like home to us. Everywhere we look our eyes are met with a little piece of our family history – the rocking chair my Nana used as a child 100 years ago, the kid’s dining set my other Grandma used 80 years ago, pictures from trips, the play kitchen I made for Juniper, and some reclaimed farmy accent pieces. All it took was a vision, a little elbow grease and patience to find all the right pieces.
July 9, 2015
Crushed Rock Pathways
Hardscape pathways in the garden can turn an otherwise messy space into a cleanly organized area. It’s one of those garden elements that doesn’t seem as sexy and fun as building a pergola or raised beds, but it will make a major impact in the overall visual appeal of a garden.
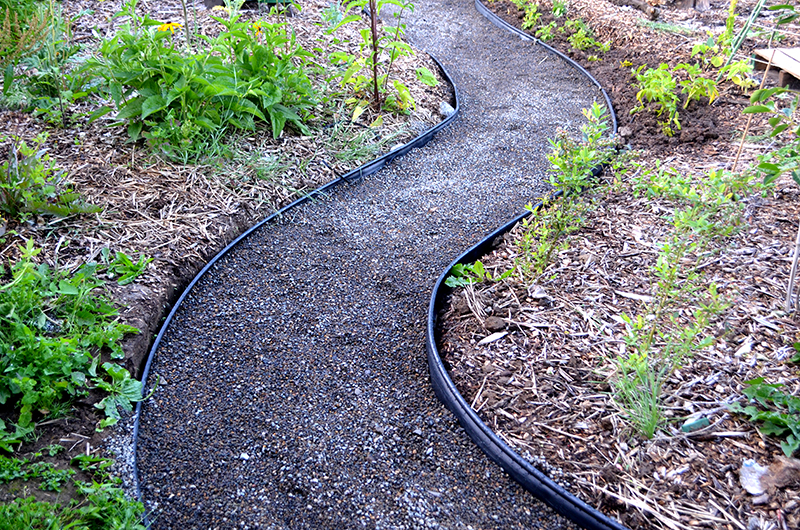
Crushed rock pathways curving through our garden
Over my years of homesteading, I have experimented with many different materials for pathways: wood chips, straw, leaves, various rock. None of those materials made good, long-term pathways. Although cheap to acquire, the soft organic material – wood chips, straw, leaves – will always become an ideal place for weeds. Round rock, like pea gravel and river rock, will shift under foot making it difficult to walk on and weeds eventually find their way into the small gaps between rocks.
It’s been a combination of experience and education that informed what my options should be in this garden, and any client’s garden, when it comes to pathway materials. A masters degree in landscape architecture and years of working as a landscape designer have now honed my list to include the following major options: crushed rock, pavers, natural stone (like flagstone), architectural pavers. That list also reflects the cost range from cheapest (crushed rock) to most expensive (architectural pavers).
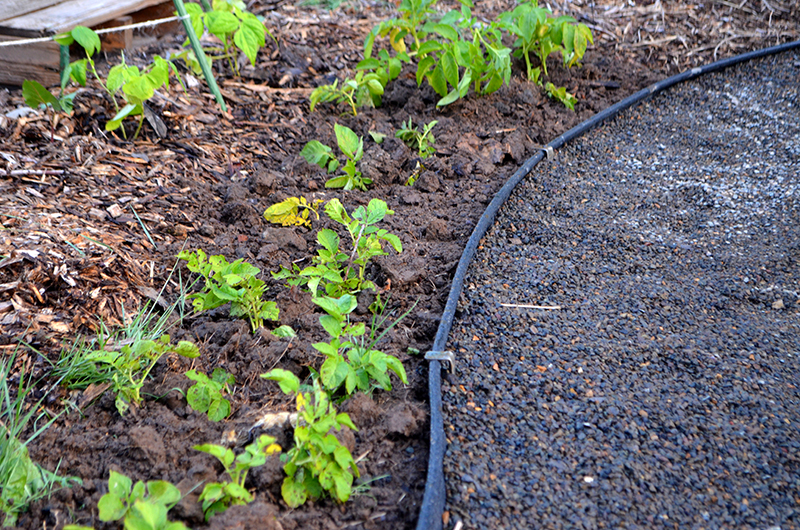
Hardscaping clearly separates planting space from walking space. Pictured here: trench of potatoes growing adjacent to our new paths
Initially I wanted architectural pavers, which look super modern and sleek. The material alone was going to set us back $5,000+, plus the added costs for installation. That was cost prohibitive for our budget. Instead, I decided the pathways would not be a big, standout feature of the garden. I choose crushed rock for it’s visual simplicity and low cost.
The pathways were dug out to about 6″ in depth, then 4″ of compacted quarter minus gravel were poured in. The hard edges of the gravel compact nicely for a walking path and the “fines” (sand) fill in holes to make a strong foundation with no space for weeds to grow. We could have filled the whole thing with gravel, but it’s not the prettiest material to look at.
I choose to top the gravel with 2″ of quarter ten crushed rock. Quarter ten is a smaller rock (about the size of pea gravel) with hard edges, so it still compacts nicely for walking. It has no “fines” giving it a cleaner finished look.
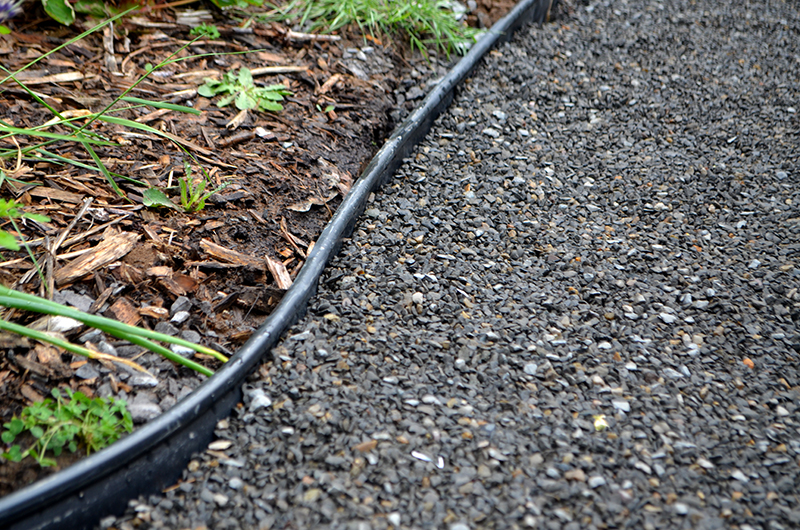
Black plastic snap edging will help separate path from planting beds
We used the run-of-the-mill black plastic snap edges on either side of the pathways. I like that feature the least, but it our budget wasn’t huge so it fit the bill. Typically I always have an edger installed. It keeps the pathways snugly in place so they don’t spread out over time and it adds to the neat appearance. A better option would be 1/4″ steel, which will rust in place taking on a lovely patina. That would have added another $500+ to the project.
I am over the moon with the final install! I spent about $13 per linear foot for 30″ wide paths (wide enough for a wheelbarrow), which includes both materials and install. I wasn’t planning to haul rock and bust clay soil in my third trimester 
The pathways are simple enough to make a nice backdrop to the more important garden features, like the raised beds, Juniper’s teepee, and eventually our lush edible plantings. They make the garden look tidy and organized, even if there are still tons of weeds out in the planting beds. And I love that they clearly define the various spaces within our garden, from the vegetable beds to Juniper’s play area and the perennial edible areas.
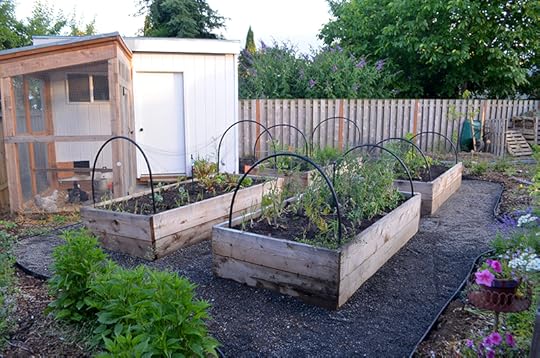
Crushed rock paths creating a neat and tidy appearance in our garden
Best of all, maintenance will be minimal over the years because this was installed the right way. That means more time harvesting and enjoying the garden, and less time pulling weeds! I would love to hear about your garden paths, whether it’s a lesson learned or a favorite material. Tell me about it in the comments below!


