
Renee Wilkinson's Blog, page 4
November 24, 2015
Preserving Chantrelle Mushrooms
This fall I spent more time hunting chantrelle mushrooms in the woods than I spent in our own garden. The combination of foraging for wild food, hiking for hours and simply being outside among torrential rains and giant trees made me feel more than alive at an otherwise sleepy time of year. I ended up with baskets full of mushrooms – more than our family could eat fresh – but thankfully preserving mushrooms is super simple.

Mushrooms drying overnight after being cleaned
I have always been strict about not letting water touch my mushrooms, using a dry cloth instead to brush off any spots of soil. That seems like a fine method for store-bought mushrooms, but when it comes to cleaning freshly picked mushrooms I have changed my tune. There is way too much dirt and forest debris for a dry cloth to handle, unless you want to be there for hours on hand. Also, these mushrooms have been soaking up steady rains for a couple months already, so they are already pretty plump with water.
I don’t submerge them in water, but I do use a wet cloth to clean the harvest. I even ran mine until a light trickle from the faucet while brushing them, which was especially helpful for the really dirty ones. Once clean, set the mushrooms out on a cooling rack so air can circulate all around them. About 24 hours later, they are just dry enough to cook or preserve.
FREEZE ‘EM
The idea of freezing mushrooms sounded really nutty to me at first, but this has become my go-to method of preserving chantrelles. The mushrooms are cooked prior to freezing, so they are all set to eat when you thaw them. I really like being able to throw them directly on a pizza or toss into fresh pasta.

Mushrooms rendering liquid
Cook the chantrelles in a large frying pan with about a tablespoon of butter over medium-high heat. After about five minutes, the mushrooms will render their water and the pan will become really soupy. Keep cooking them for an additional five minutes, until almost all of the water has simmered off. It concentrates the mushroom flavor to let that excess water evaporate off.
Alternatively, you could stop cooking them after they render their liquid. Scoop out the mushrooms, but reserve the liquid. You can freeze that liquid to use later as mushroom stock.
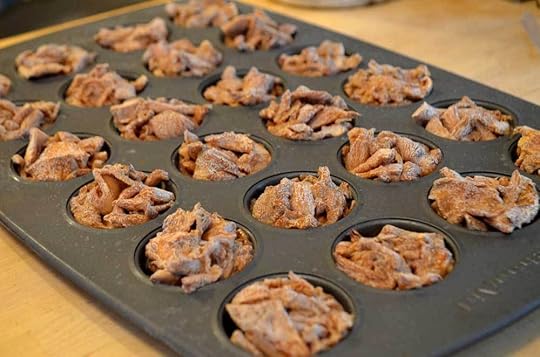
Mushrooms frozen into 1/4 cup increments
Once cool enough to handle, pack the sauteed mushrooms into muffin tins or mini muffin tins. Regular-sized muffin tins equal about 1/2 cup each and the mini muffin tins are about 1/4 cup a piece. Then pop them in the freezer.
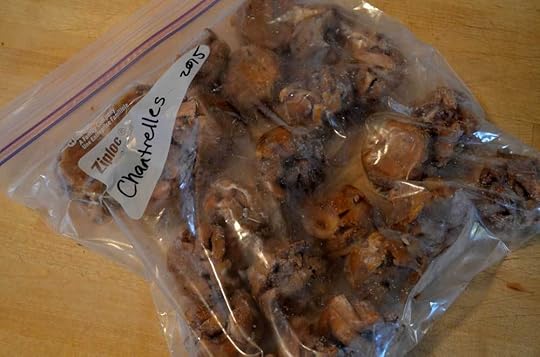
Mushrooms packed for the freezer, individually frozen into 1/4 cup balls
It only takes a few hours for them to harden, but feel free to leave them in overnight. Remove the tins and pop them out of the muffin holes – you might need to loosen the sides with a butter knife to do this. Then toss them all into a gallon freezer bag and put back in the freezer.
Now you have perfectly measured, pre-cooked chantrelle mushrooms ready to go as needed. No wrestling with a large, frozen mushroom brick every time you need a bit for a recipe.
DRY OR NOT DRY?
Many wild mushrooms dry very well, allowing you to add them as needed to soups, stews, casseroles, etc. But I have heard that the delicate flavor of chantrelles can get lost and they become rubbery when reconstituted.
This year I am experimenting with a variation of drying. Instead of drying them in big chunks, I have pulverized the dried mushrooms into a coarse powder. I’m thinking if texture is the issue, this might be a work around. And I’m hoping there is enough flavor there to provide some earthiness to a future nice chicken stew. I’ll let you know how it goes!
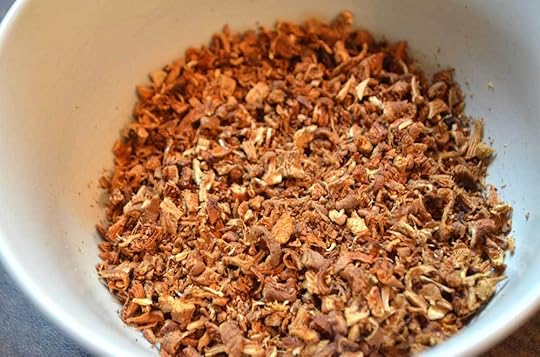
My experimental dried and coarsely pulverized mushrooms
THOUGHTS?
Do you cook with wild mushrooms? Do you have another favored preservation method? I would love to hear about it in the comments below! Likewise, feel free to share what excuses you are finding to get outside and enjoy the wilds on these darker days.


November 17, 2015
Hunting Chanterelles
The end of the garden season signals the beginning of the mushroom season, which certainly takes the edge off of the end-of-season gardening blues. Wild chanterelles begin growing all over the Pacific Northwest in September and continue through November. They are a great “beginner mushroom” because they are very distinct looking, so you can’t confuse them easily with another non-edible mushroom.
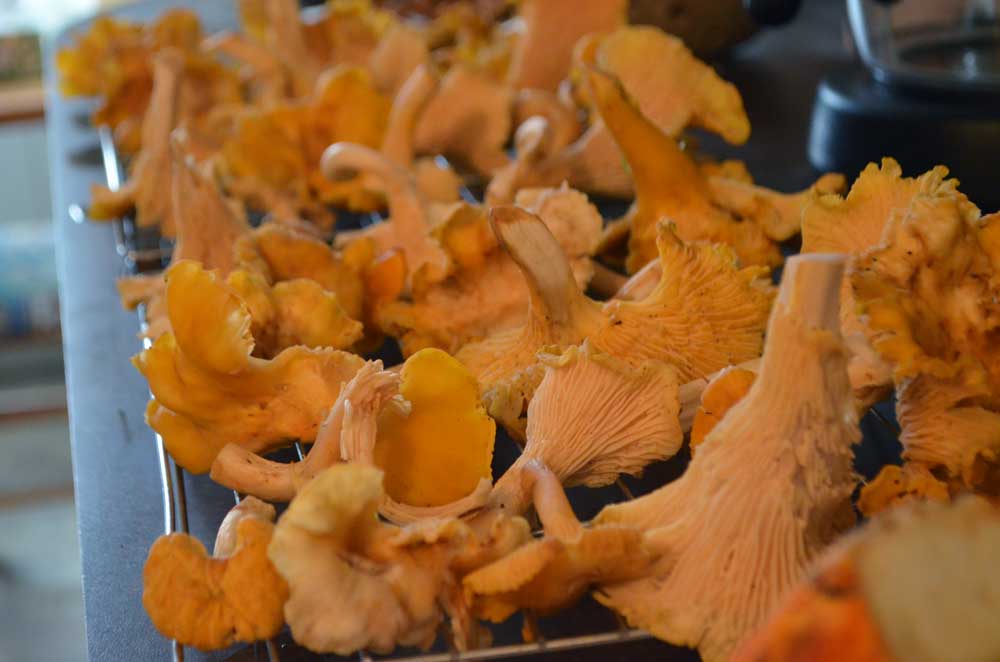
Chanterelles air drying after a wet day of foraging
We have had an unusually dry early fall, but November rains have finally roared in with force. I found some nice, forested areas up near Scappose with thick Doug Firs and gentle slopes. This seems to be the perfect micro-climate for chanterelles in my experience. They like to be moist, but still have good drainage.
Mushroom hunting gear is simple: weather-appropriate clothing, a small knife and a container for the harvest. It has poured on me the last couple weekends when I have been out mushrooming, so I wore knee-high rainboots, rain pants and my winter raincoat. I brought a small paring knife to cut the mushrooms from the ground (more on that later). My sister used a simple five-gallon bucket and I used my big harvest basket. They also make wearable baskets just for mushroom picking. The best container allows air to circulate freely.
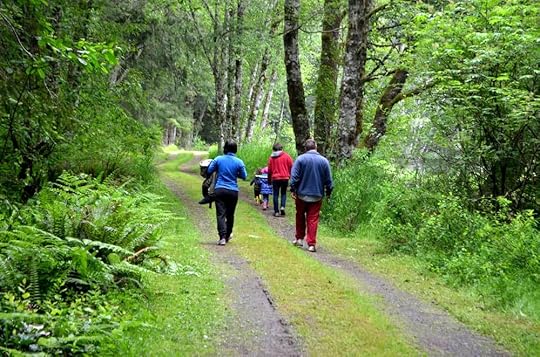
A summer hike tipped me off to some perfect trails for fall mushroom hunting
Cutting versus pulling is an ongoing debate when it comes to chantrelles. It is important to cut other mushrooms, like morels, from the ground in order for them to continue to multiple and produce. Although the evidence is mixed on chanterelles, I cut instead pull the mushroom. It keeps them cleaner to leave the dirty base in the ground and I prefer to do whatever I can to increase mushroom growth for the future.
The best way to learn to identify chanterelles, or any other edible mushroom, is to learn from someone in person. A friend of mine helped me learn the basics and was a great resource for sorting the mushrooms with me after foraging. And remember: when in doubt, throw it out.
Don’t have a mushrooming mentor? Breitenbush Hot Springs hosts an annual Mushroom Gathering, which is a four day workshop that will teach you the basics on foraging. The Oregon Mycological Society also organizes events that can be helpful as well. There are several good books you can read and great online resources, but don’t rely on those resources alone. You really need an expert teaching you in person.
Look for a post coming soon about what I did with my harvest and how to preserve these tasty fall gems!
Hunting Chantrelles
The end of the garden season signals the beginning of the mushroom season, which certainly takes the edge off of the end-of-season gardening blues. Wild chantrelles begin growing all over the Pacific Northwest in September and continue through November. They are a great “beginner mushroom” because they are very distinct looking, so you can’t confuse them easily with another non-edible mushroom.
Chantrelles air drying after a wet day of foraging
We have had an unusually dry early fall, but November rains have finally roared in with force. I found some nice, forested areas up near Scappose with thick Doug Firs and gentle slopes. This seems to be the perfect micro-climate for chantrelles in my experience. They like to be moist, but still have good drainage.
Mushroom hunting gear is simple: weather-appropriate clothing, a small knife and a container for the harvest. It has poured on me the last couple weekends when I have been out mushrooming, so I wore knee-high rainboots, rain pants and my winter raincoat. I brought a small paring knife to cut the mushrooms from the ground (more on that later). My sister used a simple five-gallon bucket and I used my big harvest basket. They also make wearable baskets just for mushroom picking. The best container allows air to circulate freely.
A summer hike tipped me off to some perfect trails for fall mushroom hunting
Cutting versus pulling is an ongoing debate when it comes to chantrelles. It is important to cut other mushrooms, like morels, from the ground in order for them to continue to multiple and produce. Although the evidence is mixed on chantrelles, I cut instead pull the mushroom. It keeps them cleaner to leave the dirty base in the ground and I prefer to do whatever I can to increase mushroom growth for the future.
The best way to learn to identify chantrelles, or any other edible mushroom, is to learn from someone in person. A friend of mine helped me learn the basics and was a great resource for sorting the mushrooms with me after foraging. And remember: when in doubt, throw it out.
Don’t have a mushrooming mentor? Breitenbush Hot Springs hosts an annual Mushroom Gathering, which is a four day workshop that will teach you the basics on foraging. The Oregon Mycological Society also organizes events that can be helpful as well. There are several good books you can read and great online resources, but don’t rely on those resources alone. You really need an expert teaching you in person.
Look for a post coming soon about what I did with my harvest and how to preserve these tasty fall gems!
November 5, 2015
Last Harvest of the Season
After so many years outside cultivating my urban homesteads, I have developed a good sense for temperature. I don’t need to scan the weather report obsessively – I can usually just feel when it’s getting cold enough to threaten frost or warm enough in spring to remove row covers.
Portland has experienced one of the warmest October’s on record, so despite our average first frost date of late October/early November, I haven’t prioritized collecting the final harvest. That is until a couple days ago.
Our harvest for dinner that evening
The morning felt remarkably chilly – cold enough that I wanted the fireplace on – and it just felt a little too brisk during the day. I knew we couldn’t put it off a day longer, so I dropped everything to harvest the last of our warm-season vegetables.
Juniper and I dashed into the shed to grab gloves, clippers, and our biggest harvest basket. It turned out we needed more than just one basket, as we returned several times more for a ramshackle collection of buckets.
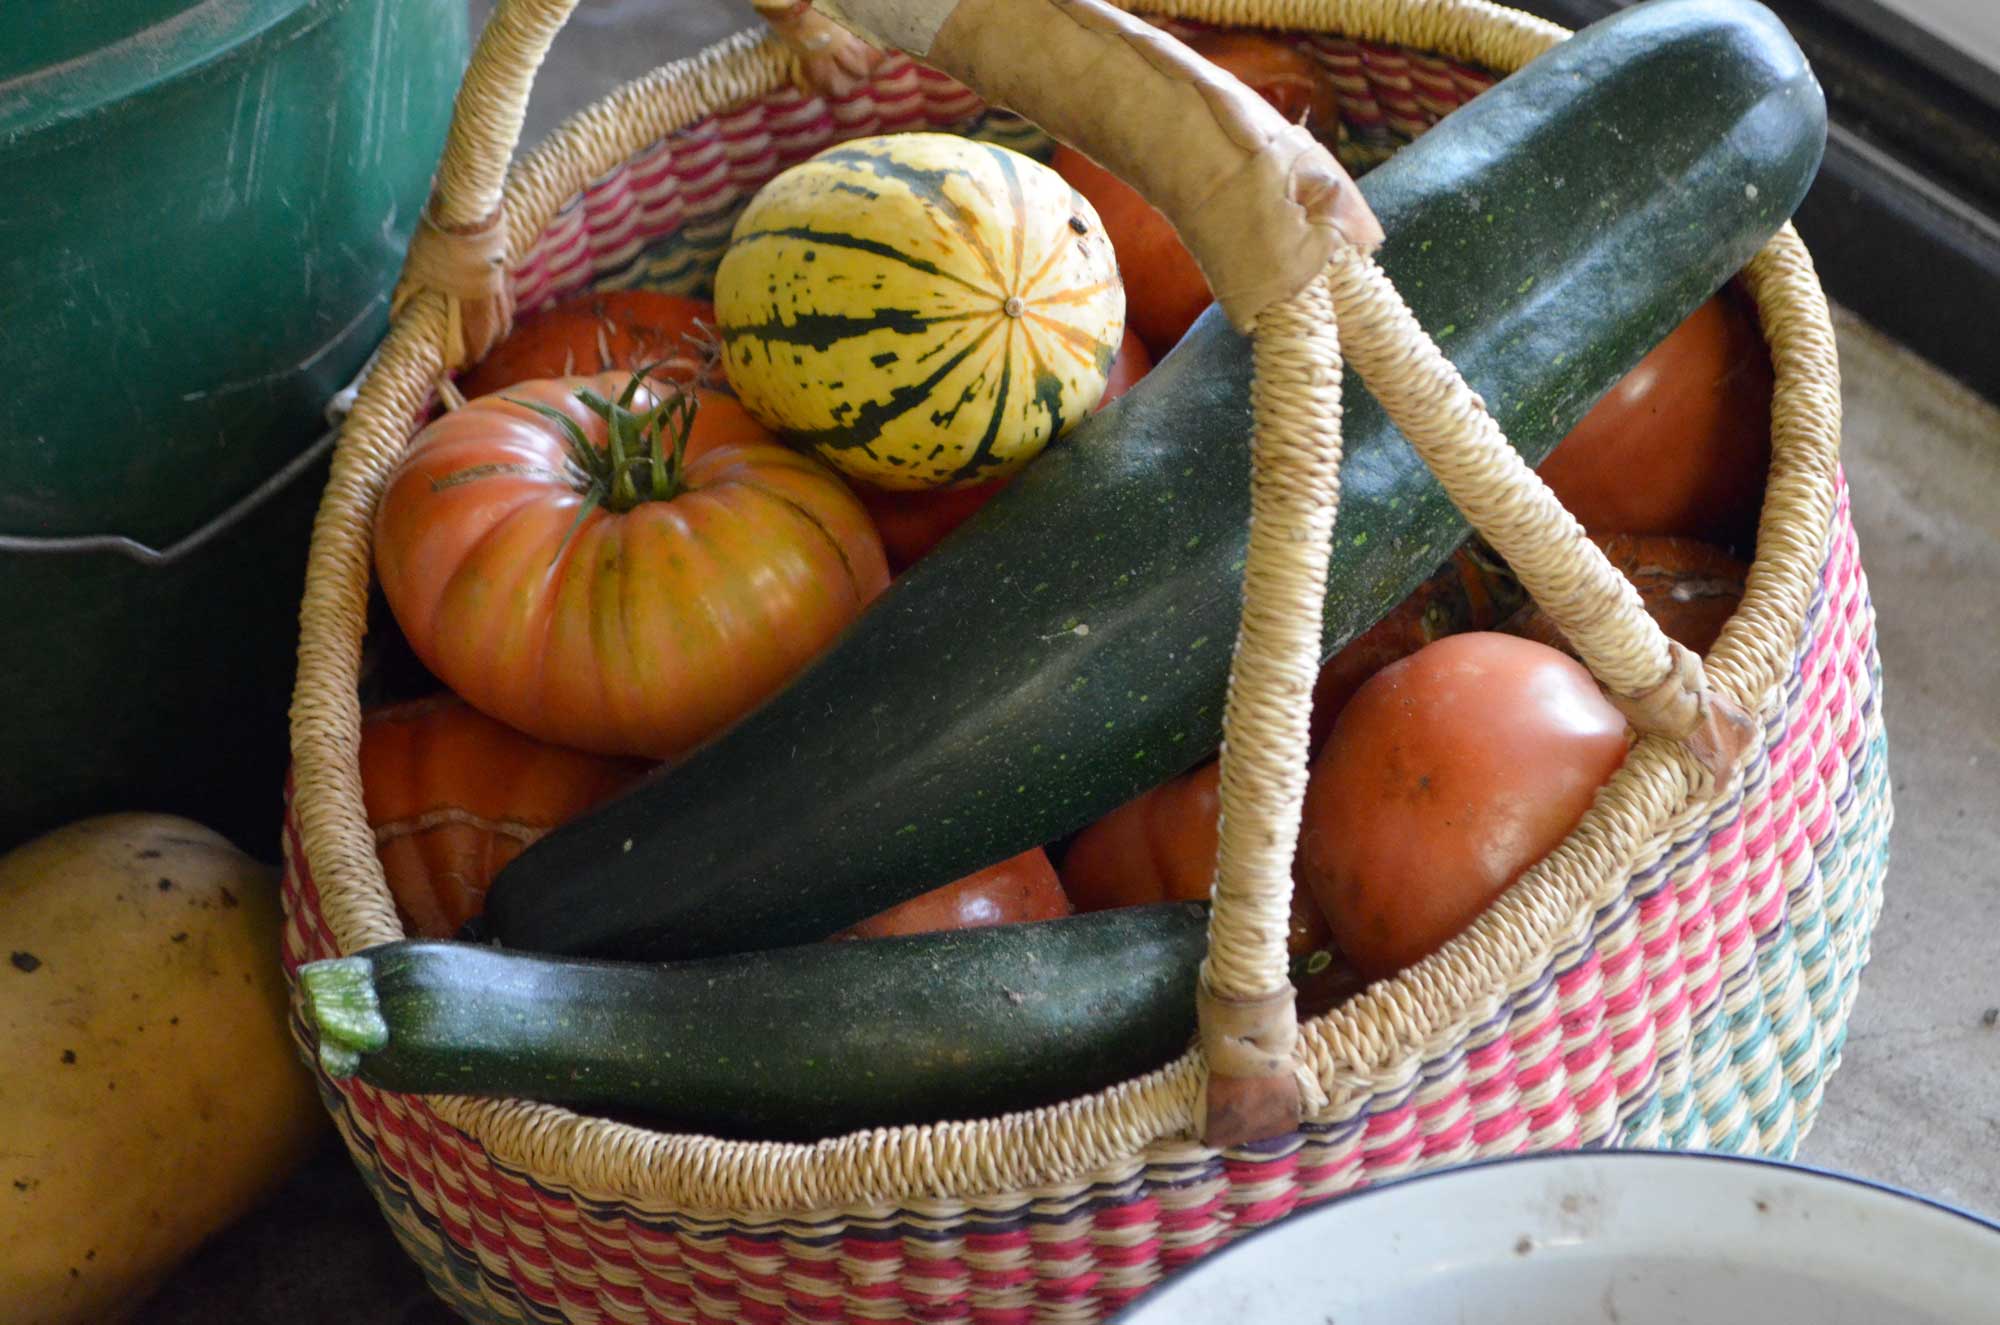
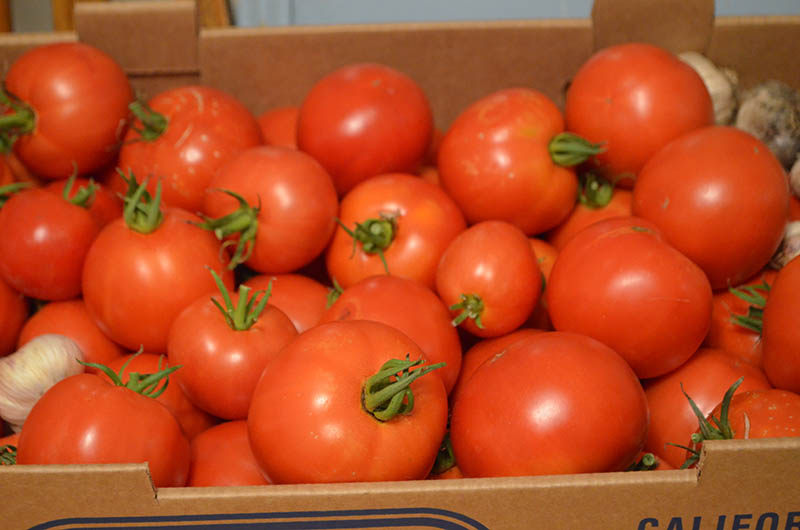
The final tomatoes, zucchini and delicata squash
The late season tomatoes we picked are not great quality. They are less juicy and not quite as sweet as the gems of summer, but we packed them into our basket anyway – about twenty-five pounds of them. I’m planning to cut and dry them for soup and stew starters this winter. I just can’t bring myself to can anymore after putting away dozens, dozens, dozens of canned tomatoes already this fall.
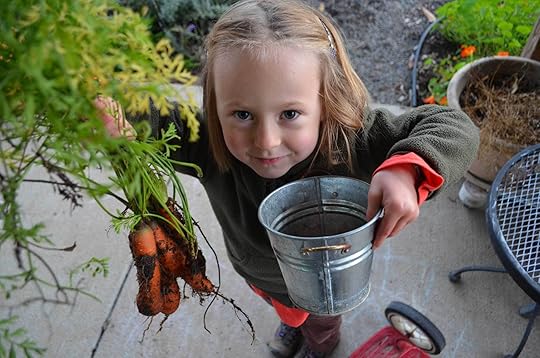
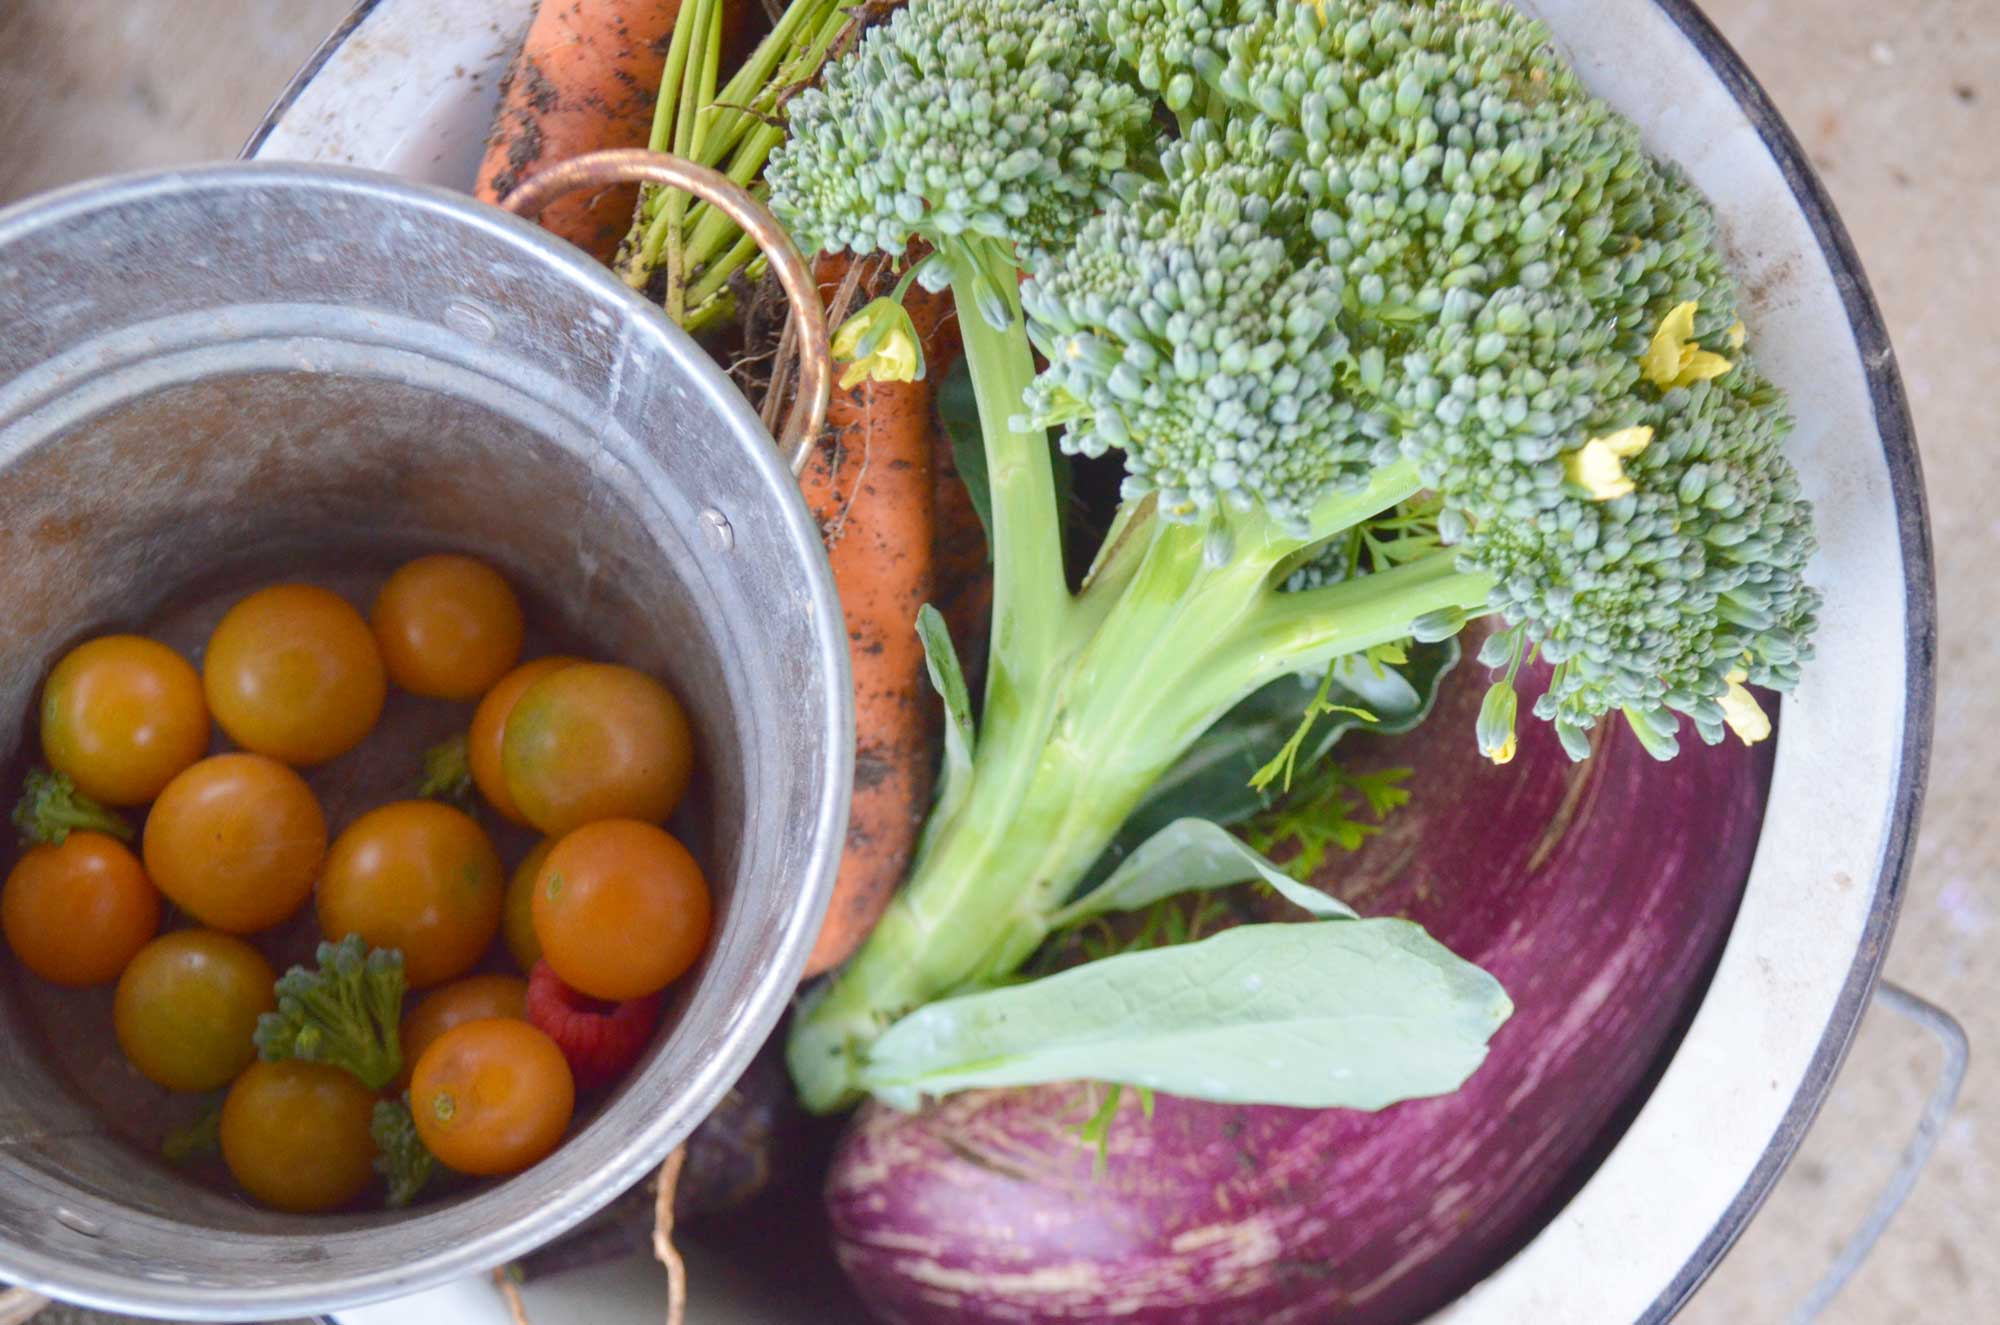
Juniper’s harvest of carrots for dinner and a small pail of cherry tomatoes and raspberries
Juniper cleaned off the final Sungold cherry tomatoes, pulled carrots for our dinner that night and plucked the last of our ever-bearing raspberries. She ate about half of the cherry tomatoes and raspberries, which made me feel a bit sad knowing she won’t be grazing as frequently until late spring. There’s just something about the simplicity of watching her gather and eat from the backyard that I’ll miss during these darker days.
I carefully clipped an entire bucket of ripe, gorgeous eggplants. They don’t keep long after harvest, so we’re eating them everyday for the next week. Tonight it’s Szechwan Eggplant Stir Fry. This weekend it’s Moussaka and Eggplant Cacciatore Sandwiches.
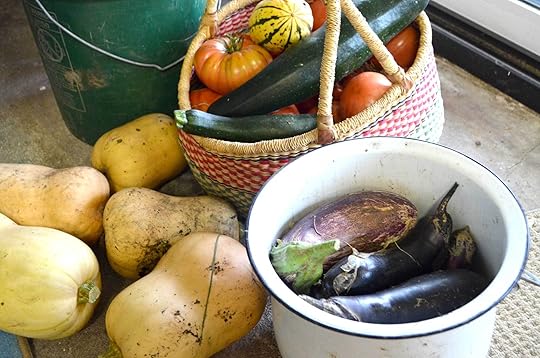
The final haul of the season. Time to get cooking and preserving!
Juniper and I made a game out of hunting for the last of our winter squash. “I found one! I found one!” echoed through the garden as our golden afternoon faded quickly into a dark evening.
Winter crops will yield spinach, arugula, kale, broccoli, chard, fava beans and beets, but I expect those to be light harvests until the temperature warms in spring. The next few months are more for planning and dreaming about next year’s garden. As the saying goes, no garden is as great as next season’s garden. And next season will definitely be spectacular!
October 29, 2015
Pumpkin Recipe Round-Up
I’m that person… the pumpkin muffin, pumpkin scone, pumpkin bread, pumpkin-everything-person. This delicious and versatile squash is the quintessential sign, smell and taste of fall. As our days get shorter and nights get colder, here’s a round up of my favorite pumpkin recipes to keep you warm and well-fed.
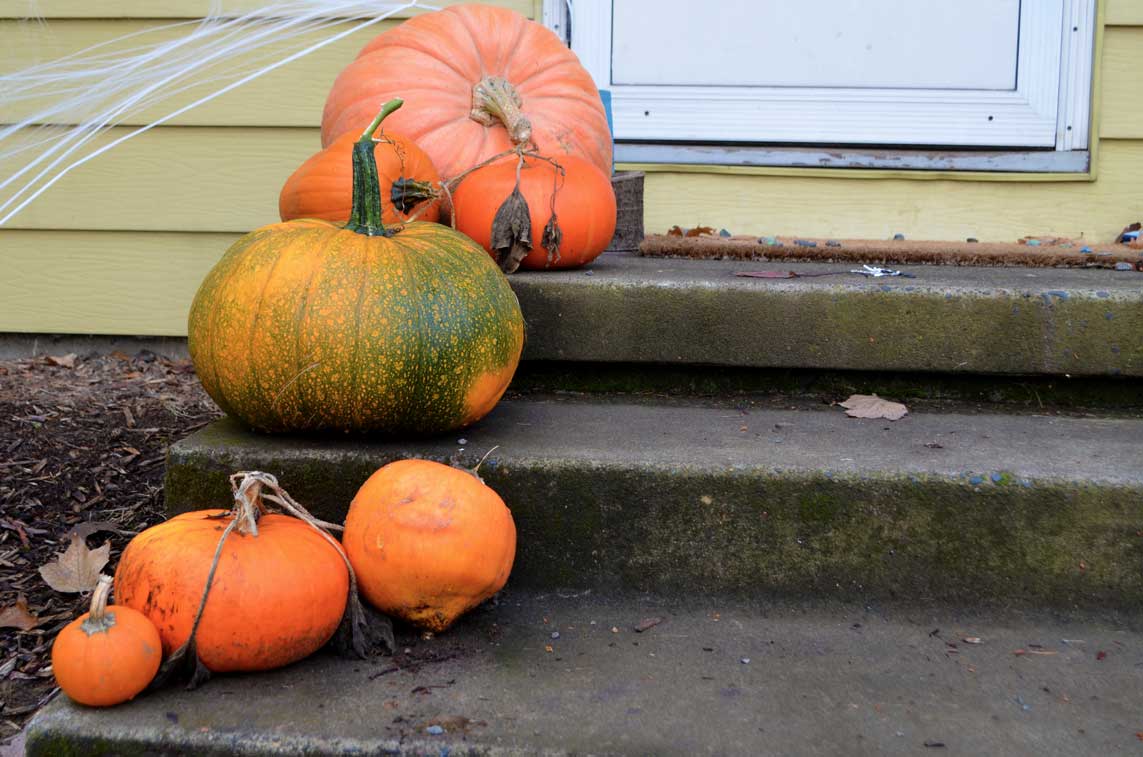
Our harvest porch display. The tasty pumpkins will turn into puree for the winter.
Pumpkins are fun, easy to grow vegetables, but not all are tasty. We grow Cinderella pumpkins, or Rouge vif d’Etampes, because they are as beautiful and as they are delicious. After setting them on the porch for Halloween, I roast a couple to make Pumpkin Puree. Keep it in the freezer and you’ll be set for thanksgiving with plenty to spare.

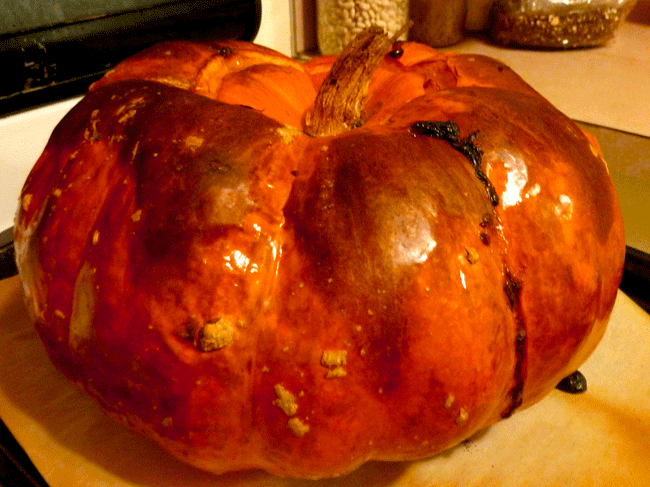
Cinderella pumpkins roasted in the oven
Try freezing the puree in smaller bags of 2-cup increments. Most recipes call for just 1-2 cups at a time. That will save you the hassle of thawing out an over -sized amount. I use homemade pumpkin puree whenever a recipe calls for canned pumpkin.
Delicious stuffed pumpkin
I love serving a Stuffed Pumpkin as a main dish, especially for company. It’s easy, rich-tasting and impressive on the table. It’s also hands-off once it goes in the oven, so you can visit with guests instead of being stuck in the kitchen.
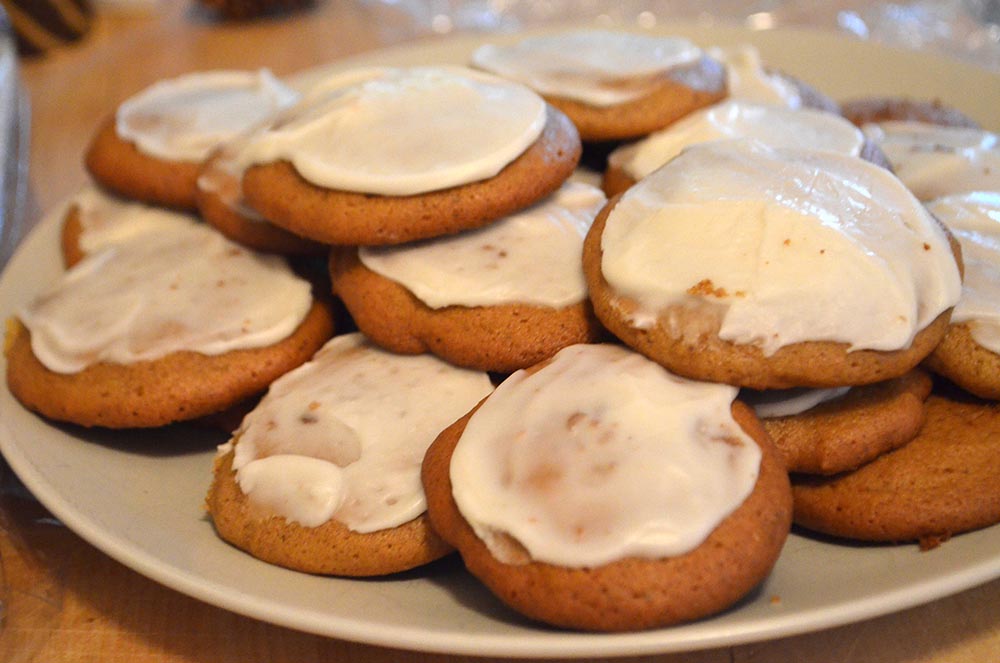
Iced pumpkin cookies
Have you ever made Pumpkin Cookies? These cookies are more bread-like and not overly sweet. The icing sweetens them up, so use as little or as much as yo like. Try substituting maple extract in the icing in place of the vanilla.
Baking with pumpkin is similar to baking with applesauce or zucchini – it makes everything more moist and adds some nice nutrition as well. For example, the pumpkin in these good looking Oatmeal Pumpkin Breakfast Muffin recipe eliminates the need for added oil altogether.
There are lots of other fabulous recipes for pumpkin that go beyond the traditional pumpkin carbs. Delish has a nice collection of recipes that include savory dishes like soup, pizza, pasta and more. Let me know which ones you try and how they turn out. Or do you have some other great ideas for cooking with pumpkin? Tell me about it in the comments below!
October 15, 2015
Last Call for Tomatoes
This weekend or next may be the last call for tomatoes for the season, so break out the canner, freezer bags, dehydrator or whatever you preserving method of choice is. Tomatoes do best with nighttime temperatures above 55 degrees, but overnight temps in Portland are more consistently in the low 50’s at this time of year. Frequent fall rains overwhelm the fruits with moisture, which results in cracked tomatoes. The rain and chill will surely increase by the end of the month.
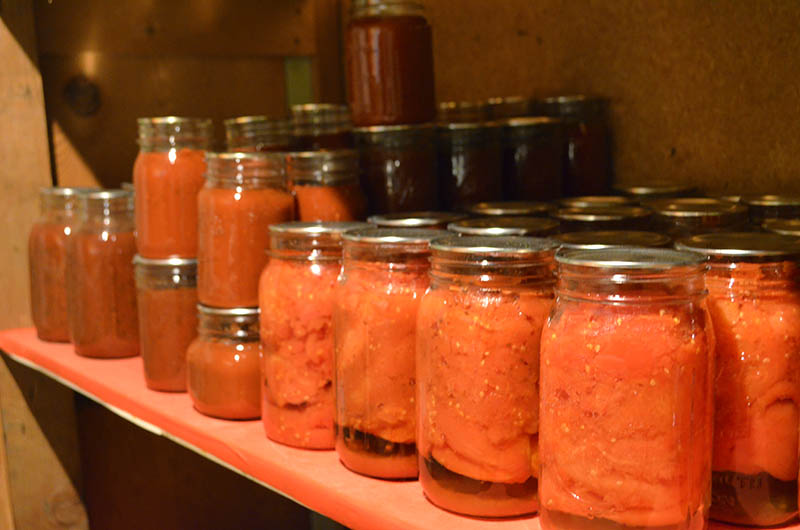
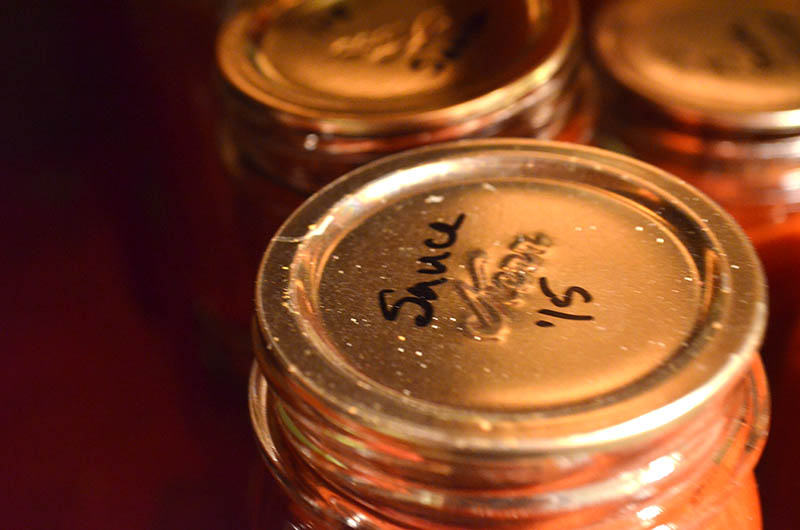
I’ve managed to can the following so far for our family of four:
Tomato paste – frozen in 1/2 cup increments, about 10 cups total (done)
Tomato sauce – 25 pints (done)
Whole canned tomatoes – 20 quarts (could use 15 more)
Marinara sauce – 10 quarts (could use 10 more)
That might seem like a good haul to most folks, but I know it’s not enough to get us to next June. That means I either need to cram one more weekend of canning in before the tomatoes get torn out, swap canned goods with friends or do a shortcut method by freezing them now/canning them later.

When Juniper was little I was in the same predicament – short on time but desperately needing more tomatoes before winter. I blanched and peeled several pounds one weekend. It still required some time, but a lot less than going through the full canning process. I stored the peeled tomatoes in the freezer for several months. In early winter, I put the frozen peeled tomatoes in a stockpot and simmered it down into sauce. I then canned them up so they were ready to use on demand.
You could also just freeze the peeled tomatoes and use them in recipes whole, instead of canned. My freezer is already packed with berries and frozen garden veggies, so I’m not keen on stuffing tomatoes in there too long-term. But it’s certainly faster and easier than canning when you are short on time.

I would love to hear whether you have thrown in the towel for the season or are still in the thick of food preservation! Aside from tomatoes, I have two dehydrators working on apple chips, asian pear rings and fruit leather. The canner seems like a permanent fixture on the stove. But I do long for the winter nights when I can be enjoying some dark beer and not stuck over the preserving pot!
October 13, 2015
My Proud Mama Moment
I had one of those overwhelmingly proud mama moments recently that I have to share. Juniper and I spent the morning of my birthday harvesting fruit for the Portland Fruit Tree Project. They help local fruit tree owners maintain their trees in exchange for donating the fruit to the Oregon Food Bank. If you volunteer for a harvest party, half the fruit goes to the food bank and the other half is shared among to the volunteers.
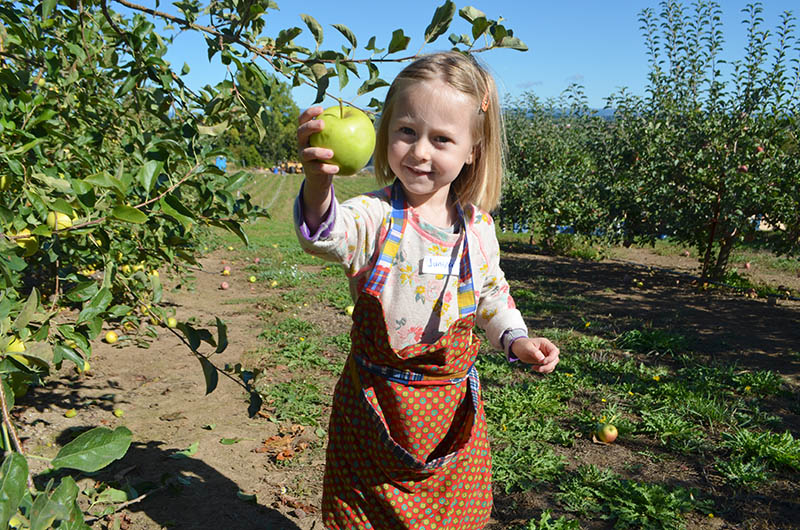
Juniper harvesting Golden Delicious apples using her harvest apron
This particular orchard was in Cornelius, about an hour outside Portland. The fall air was crisp, sky was blue and the dwarf orchard trees were bent over with apples. Juniper and I strapped on our harvest aprons and began picking fruit, along with a dozen other food activists.
I think most volunteers had low expectations for how helpful a three year old would be. But together Juniper and I must have harvested over a dozen milk crates of fruit. Each was whisked away to be weighed and sorted by other volunteers while we kept diligently picking.
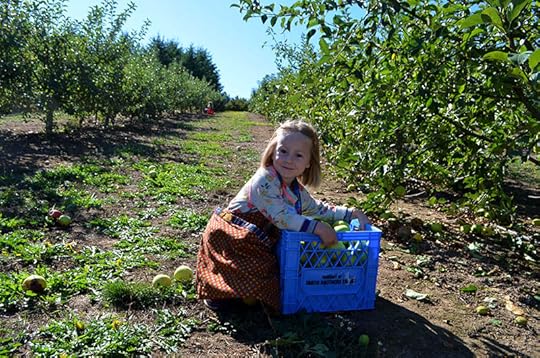
Juniper feeling proud about filling up one of many milk crates with fruit
Juniper was in charge of picking the bottom apples while I did the top ones. We talked about how we would get to keep some of the fruit, but the rest would go to families who need help with groceries. I showed her how the fruit breaks off easiest if you try to turn it upside down on the stem. It usually snaps off, leaving the tree branch in tact. She caught on like a pro.
My apron was often just as full as Juniper’s apron. All those apples she carried had to be almost as much weight as her, yet she was packing them in, then gently emptying them into the crate when she ran out of room.
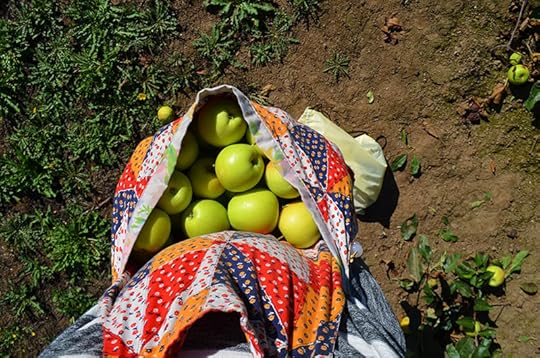
My harvest apron filled with fruit
We haven’t gone out of our way to make Juniper’s life a version of Homestead Apprentice – it has just happened naturally (no pun intended). She goes where we go, does what we do and eats what we eat. She doesn’t love all of it, but she loves most of it. And I can see the signs of an iron-clad work ethic at this tender age already – she’s a helper, a giver and a do-er.
Parenting is hard work and I struggle with wondering whether our choices are the best for our kids – do we work too much/not enough, do we feed them the best food, do they have the right ratio of structured time vs. down time, and the list goes on. But at least for this one morning I didn’t worry a bit. She’s growing up to be the perfect little being I so hoped and wished she would become. And that was quite the unexpected birthday gift.

Juniper sampling the dough for our first apple pie this season
I would love to hear your stories about how you grew up with an appreciation for urban farming and green living. Even better, how do you integrate your little ones into your homesteading lifestyle? Tell me about it in the comments below!
October 1, 2015
Making Perfect Apple Chips
I have always loved drying the fruit harvest and with little kids we consume more of these goodies than ever. It’s a healthy, naturally sweet snack that you can munch away on without worrying about additives. And drying fruit doesn’t require a lot of hands-on time or money. A bulky dehydrator can tuck away in a closet when not needed and they are easy to find second hand. You can also use the stove on a very low heat setting.

Juniper’s favorite fall snack
Currently we are working on batches of apple chips, which are a little different than the more traditional apple rings. Rings are thicker and chewier. Basically, if you try to cut an apple as thin as you can with a kitchen knife, that’s about the right thickness to make chewy rings.
The trick to perfect apple chips is to cut them paper thin so they dry completely through, breaking apart when you bite into them. And the only way to get that paper-thinness is to use a mandolin slicer.
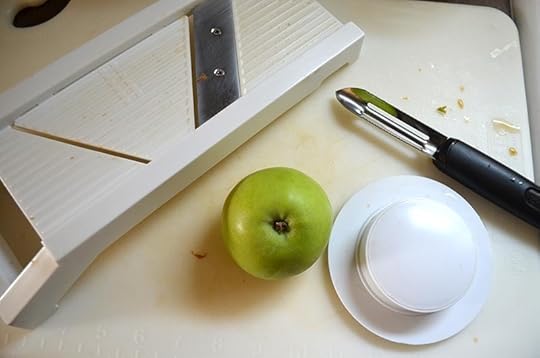
Tricks of the trade: mandolin slicer, apple corer and (not pictured) food dehydrator
Prices for mandolin slicers range from $15-100+ bucks. The more expensive models are made from metal, have adjustable thickness settings and include additional safety features. Mine is a cheap, plastic model that does the trick just fine. It cuts very thin slices and the blade is very sharp.
The biggest drawback to using a mandolin slicer is trying to keep your fingertips in tact. Use a corer to get the center out, leave the fruit unpeeled, then use the food holder as you slice back and forth on the mandolin. That prevents your fingertips from reaching the blade. You will most definitely lose some skin if you aren’t extra, extra careful.
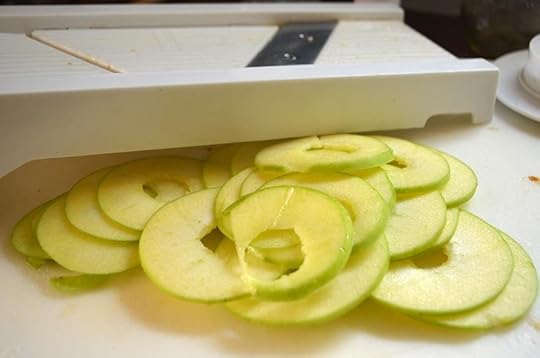
Extra thin apple slices from the mandolin slicer
Use a naturally sweet apple, like Golden Delicious, to make apple chips. The sweetness of the fruit eliminates the need to add sugar. I do not add lemon juice to preserve the color either. It changes the flavor and is an unneeded step. We just slice them up thin and fast, then place in a single layer directly on the dehydrator trays.
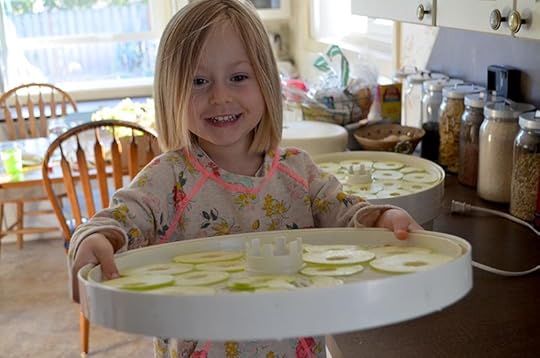
Sous chef Juniper laid out the apples in a single layer. They are now ready to dry!
Dry them at 135 degrees for two hours, then check them for doneness. If they are not completely dry, flip all of the rings. That will get them nice and crispy on both sides. Our chips take about 3-4 hours total to be perfectly crisp.
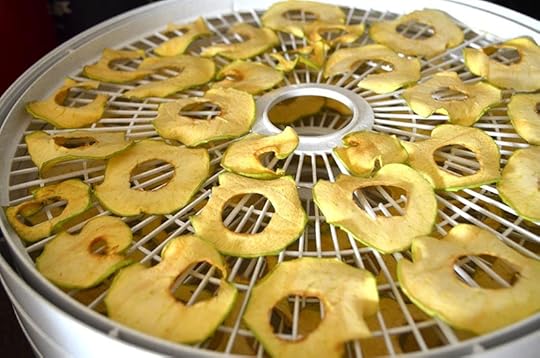
Perfectly thin, crisp and naturally sweet apple chips
Remove the chips from the trays and let them cool fully. They will get a little more crisp once cooled. I then store them in an airtight container on the counter, so we see them easily as we comb the kitchen for snacks. The absence of moisture in the fruit is what prevents mold from forming, so they should last at least six months – often longer. Enjoy!
September 23, 2015
It’s That Time of Year
Fall… the crisp colorful leaves, the brisk mornings, that smell after a fresh rain… And of course, the canner. It’s a permanent fixture on our stove at this time of year while the dehydrator keeps a steady hum on the homestead.
 I have been busy, which is an understatement. Our ten heirloom tomato plants keep the harvest basket overflowing every few days with about 30 pounds of fruit. My dad is sending us home with boxes of tomatoes as often as we’ll take them. It’s wonderful to have a family so rich in green thumbs!
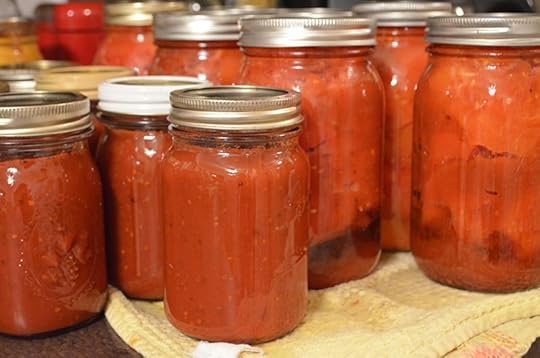 We are stocking the pantry with canned tomato sauce and simple canned tomatoes. We’ve reach our goal of 25 pints of sauce, 20 quarts of marinara and are close to the 40 quarts of simple tomatoes I’m after. That might seem like a ton, but after years and years of canning I know what we use and tomatoes are a necessity.
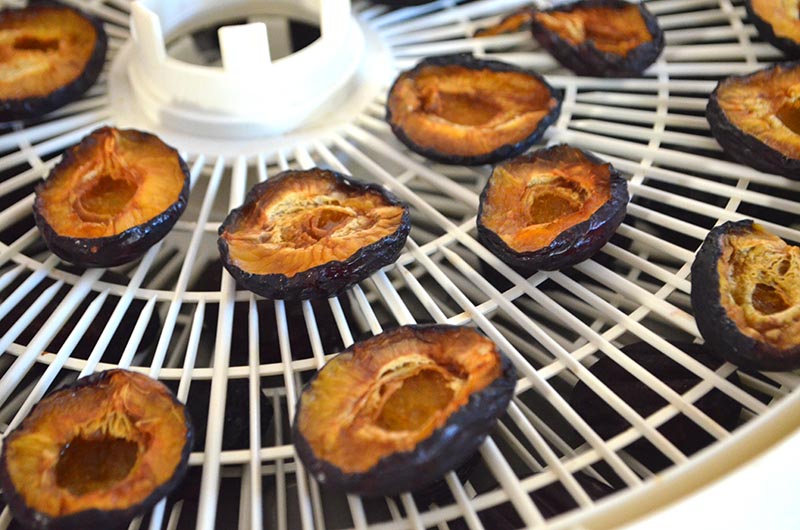 We’ve dried a bumper crop of Italian plums from a generous neighbor. I’m picking apples this weekend with the Portland Fruit Tree Project, which I expect will fill the dehydrator for several days. Dried fruit, fruit leathers and possibly canned jams will soon pack our shelves even fuller.
This just happened. #30poundsoftomatoes
A photo posted by Renee Wilkinson (@hipchickdigs) on Sep 22, 2015 at 5:02pm PDT
If you follow me on Instagram, you’ve been seeing lots of late-night posts from these food preservation adventures! Are you experimenting with new things this harvest season or relying on the tried and true canned classics? I must confess that I’m sticking to the basics this year, but would love to hear your preservation plans in the comments below!
September 11, 2015
Planting the Winter Garden
The harvest basket is reaching the brim and the temperature is suppose to reach 90 degrees today, but believe it or not we are overdue to plant the winter garden! There are lots of vegetables we can grow in our mild winters, but they need enough time to get established before the winter chill sets in. I’ve also got a few tips to share on where to plant the winter garden and how to find room in your crowded beds.
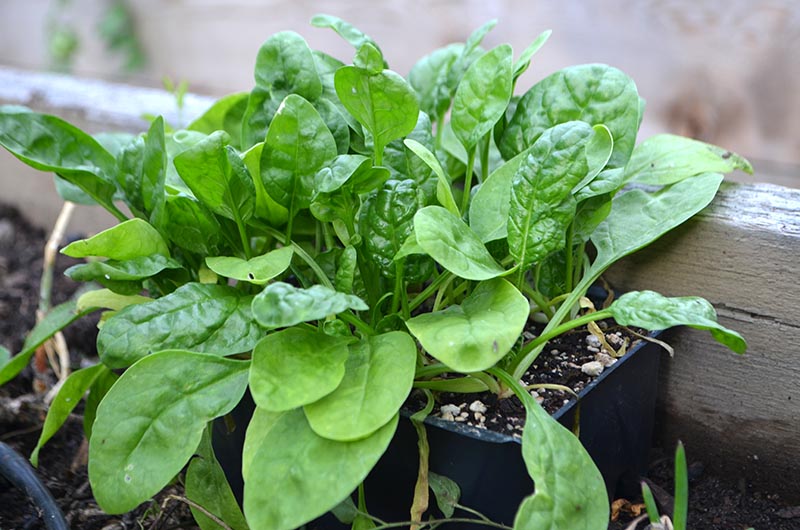
Winter spinach starts
Keep in mind that areas of your garden that currently get full sun might shift in winter. Trees that once shaded spots of your garden might become full sun when the leaves drop. Areas near a fence, house, or other structure might become partial or full shade as the sun casts longer shadows. On our homestead, two of my raised beds become partial shade from the nearby shed/coop stretching it’s shadow over them.
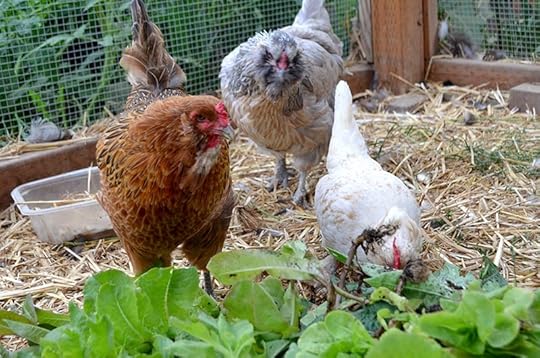
Chickens eating our bolted lettuces
The easiest way to make room for your winter garden is to pull bolted summer crops. All of our lettuces came out of the raised beds and became chicken food. But with most of the garden still in high production, I needed to be more creative to fit all our winter veggie starts.
I trimmed lots of excess leaves off our tomato plants – in part to encourage fruit ripening rather than foliage growth, but also to free up ground space for veggie starts. Kale is tucked in between the towering tomatoes where it will get enough sunlight to get started. I will carefully pull the tomatoes in October, right around the time when the kale is getting big and leafy. The kale will then enjoy full sun all winter long.
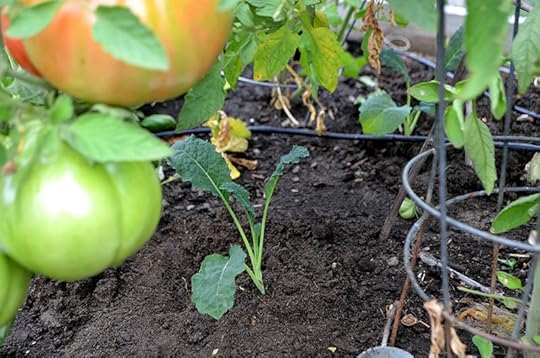
Kale interplanted between tomatoes
Another planting strategy is to time what you harvest with what you need to plant. For example, I have a bed mixed with beets, eggplants and peppers – all ready for harvesting. I planted arugula and spinach in that bed. As they get bigger, the ripe plants around them will move into the harvest basket.
Concentrating on just two of my four beds is efficient in other ways. I only need to cover two beds with greenhouse plastic and can focus my watering on a smaller area. My cover crops will get planted in the remaining two beds, so they won’t be totally bare all winter.
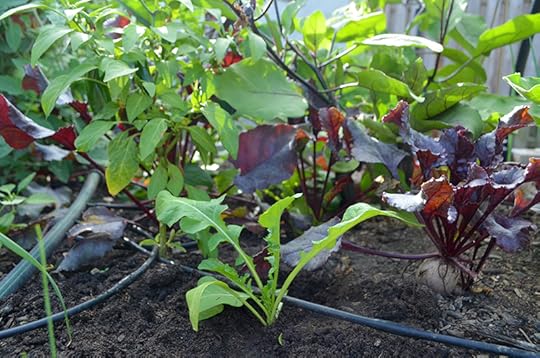
Arugula starts tucked between soon-to-be-harvested-crops like beets, peppers and eggplant
Other fall crops we can still plant now in Portland include garlic, shallots, beets, fava beans and greens. Some will produce a harvest through winter and some will just cling to life, but produce a harvest in early spring when temperatures warm. Look for varieties well-suited for winter specifically, when available. Happy planting!


