
Renee Wilkinson's Blog, page 6
July 7, 2015
How to Freeze Blueberries
When I was growing up, we always had a whole shelf in our freezer devoted to frozen blueberries. Around early July our family of six would visit the same local blueberry farm to u-pick about a hundred pounds of berries. All of us kids ended up with berry-stained hands and bellies full of fruit as we drove home with the car packed with berry crates. My mom froze them to use in pies, blueberry sauce on waffles, muffins and other goodies throughout the year.
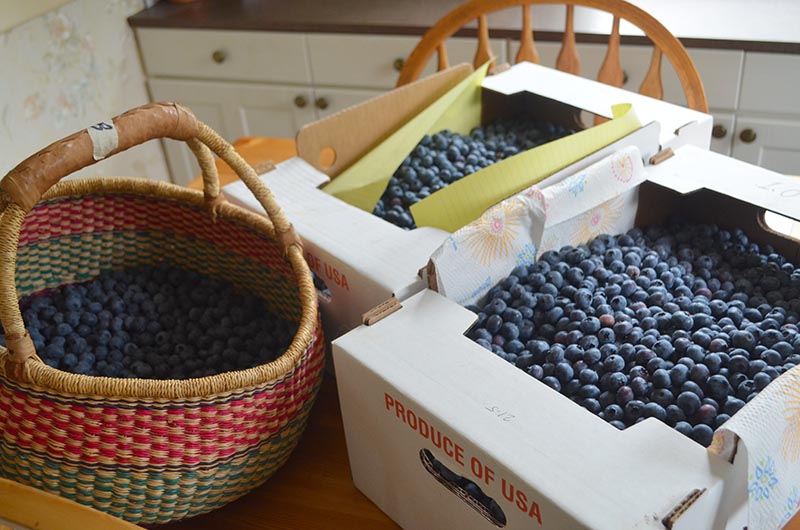
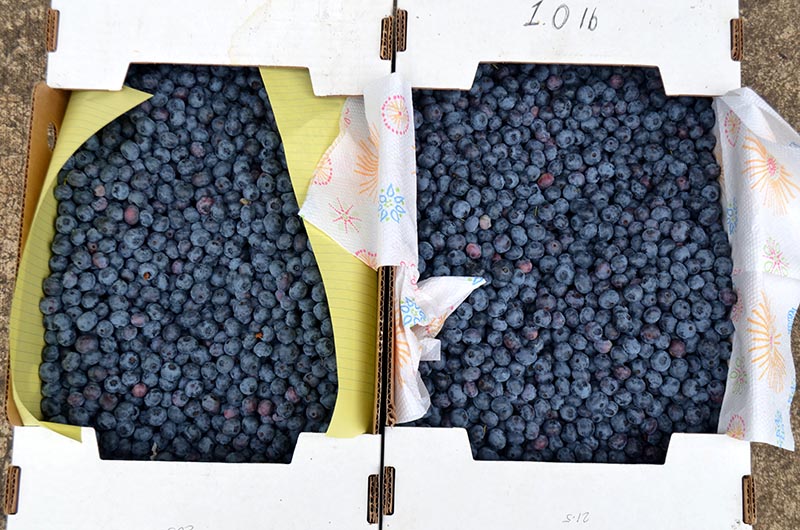
Fifty pounds of u-picked, organic Blue Crop blueberries
Freezing blueberries, or any berry for that matter, is a really easy way to preserve the harvest through winter. It’s fast to pull out just enough for your needs, one cup at a time. Freezing also requires the least amount of prep time compared to other methods of food preservation, like drying and canning. The only catch is having the freezer space big enough to store your haul.
In our case, we inherited an upright freezer that has earned it’s place in our small home. We keep it filled with frozen berries, veggies from the garden, bulk beef when we buy a portion of a cow, and homemade chicken stock. Prior to this house, we had a smaller chest freezer that doubled as counter space and food storage. If you get into the habit of using them, the cost of the appliance earns it’s keep over time.
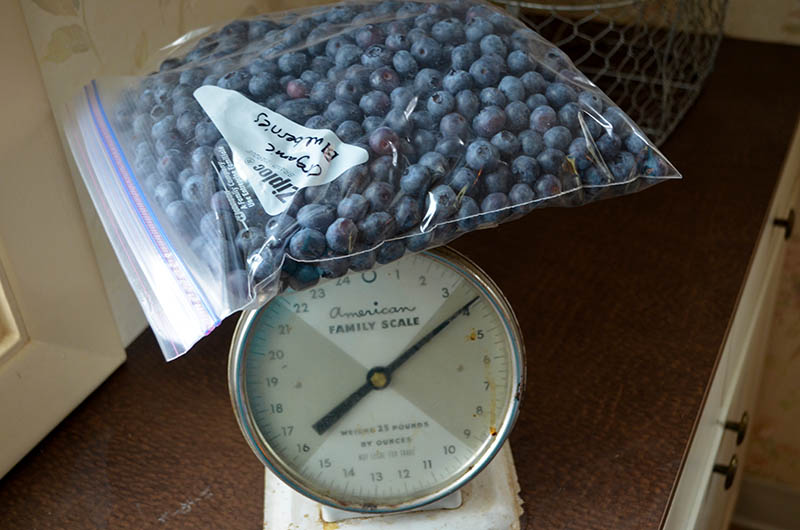
One gallon bag of blueberries weighed an average 3.75 pounds
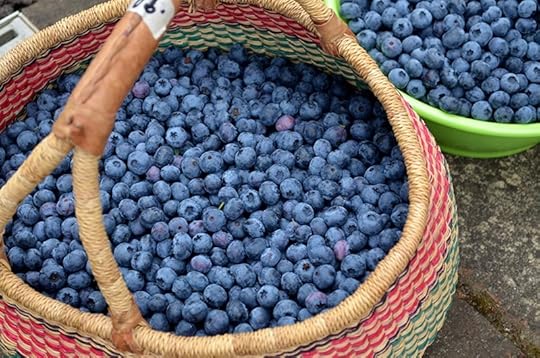
My recent blueberry u-pick excursion yielded fifty pounds of ripe, juicy, organic Blue Crop blueberries to process. They will keep for several days, but I decided to freeze them up quickly since I had the time and Baby #2 hadn’t arrived yet. The whole process took about two hours and I could do it all sitting down. Perfect!
I packed ten cups at a time of fresh blueberries into each one gallon freezer bag – sorting as I packed to pick out any bad or overripe fruit. That equaled about 3.75 pounds of berries per bag on average. Blue Crop blueberries are rather large, so a smaller berry-producing variety might weigh more per freezer bag. Use good quality freezer bags to reduce any freezer burn over time.

Rejected berries because they were either overripe or unripe became a nice treat for the chickens
I didn’t rinse them, as that adds water and encourages the fruit to stick together once frozen. If your berries are dusty, you could rinse and then allow to air dry before packing. Or you could freeze them individually on a cookie sheet. Once frozen, dump them in a bag together and they won’t stick to each other. When you’re dealing with fifty pounds of fruit though, that’s a lot of space, cookie sheets and time.
The fifty pounds of berries yielded thirteen gallon bags of fruit. Twelve of those bags went into the freezer, laying flat so they take up less space and can stack on top of each other. One bag we saved to enjoy fresh and in a delicious pie. They should last at least a year in our upright freezer.
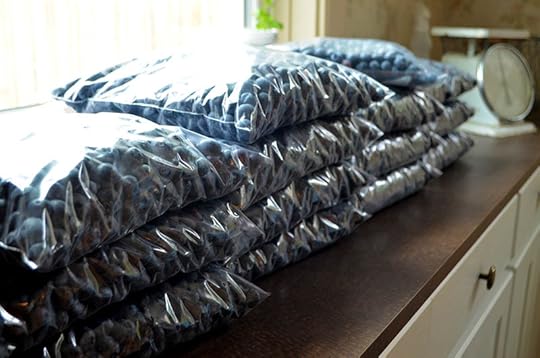
Fifty pounds of blueberries becomes thirteen freezer bags of fruit for the winter
It’s wonderful to be carrying on the tradition my parents began so many years ago. I learned a lot from them on how to get as much as possible from the growing season, and this is one of those lessons. It’s not a big time or money requirement for a reward you can enjoy all year.


July 2, 2015
U-Pick Blueberries
Spending early July u-picking blueberries is a family tradition that goes back as far as I can remember. Growing up, our family of six would all pile into the car and head to the same local family farm to stock up on berries for the year. This year, not even the full pregnant belly of mine could keep me from continuing the tradition.
My friend Denise and I started out really early, at 6:30am, to beat the heat of the day. By 7:00am, we were already in the field filling our baskets. As mine got heavy, I would walk back to the weigh station to transfer my haul into larger cardboard boxes. My goal was fifty pounds of blueberries – enough to fill a shelf of our freezer for winter. With Denise’s help, I was able to bring home all fifty pounds.
Denise had discovered this wonderful farm in SW Portland last year, after calling dozens of local places looking for the best deal on organic blueberries. B&B Blueberry Farm is selling their u-pick berries for $2.00/pound, which is a buck cheaper than you’ll pay for organic almost anywhere else. We called ahead to make sure they were still harvesting, as you should do with pretty much any farm. Most of the more popular u-pick destinations are having to close abruptly to allow for ripening times since they are getting overrun with pickers.
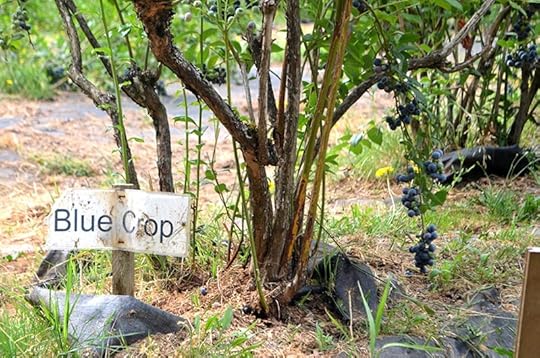
When we picked, they were not open yet on Sundays for the season. The kind owner said we could still come out and just leave a check on the farm stand. We ended up seeing her at the end of our picking and she mentioned they would likely be open for the next three weeks. The farm grows several varieties of berries, but Blue Crop were the ripest and sweetest when we were there.
I couldn’t believe how quiet and peaceful the fields were, especially at this time of year when Portlanders are swarming nearly every berry farm in town. If you head out there, be warned that the signs are not great. Keep the address and GPS handy. You’ll see signs for their neighbor’s blueberry farm, but I don’t believe they are organically grown.

With a new baby due anytime, it felt like this outing was a homesteader’s version of a going-away party. A quiet and cool morning, out before most of the world was dressed for the day, talking with a good friend between berry bushes just felt like the perfect way to close one chapter of life before the next, more frenzied one begins. It’s not the last time you’ll catch me in a local field u-picking, but I can assure you the next time I will be less productive with a new baby in tow.
June 30, 2015
Backyard Update
When we bought our house a year ago, the backyard was a blank slate save a rotting shed and a massive apple tree stump. It looks like a very different space just a year later. Although still a newly planted garden, I am so excited to watch this space grow into an edible jungle over the coming years.
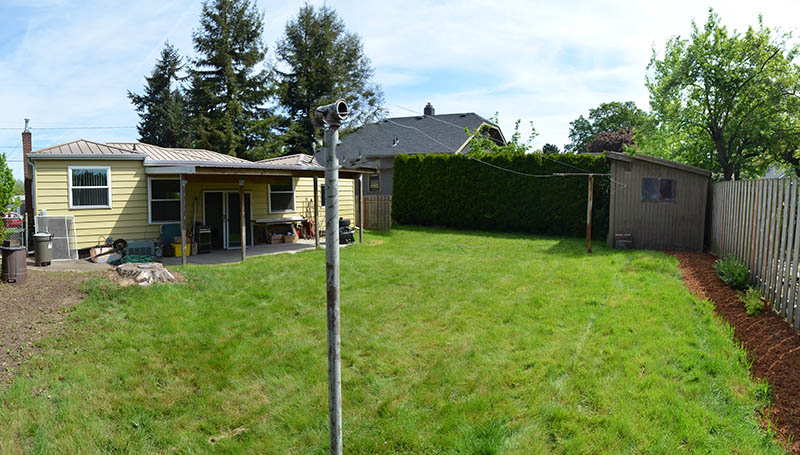
Backyard in May 2014, just after purchase
Phase I of the garden was creating a thoughtful plan that designated the placement of major garden elements: gathering spaces, chicken coop/shed, raised beds, compost area, pathway network. A planting plan followed that listed out all the permanent plantings and where they would best fit into the landscape. This phase was complete late summer last year.
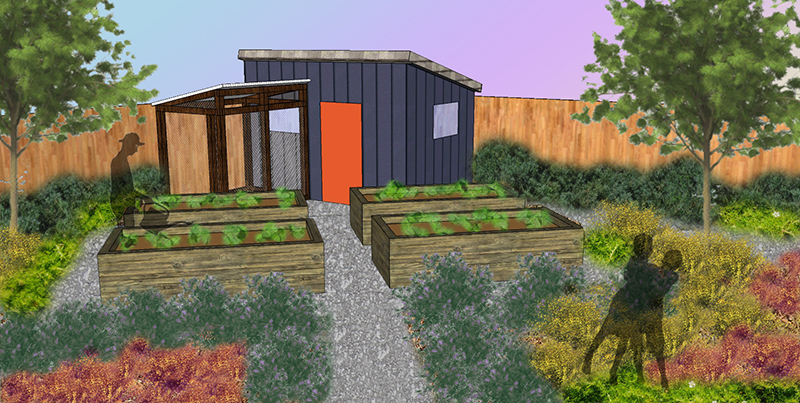
Sketch of the backyard looking toward the future raised beds and coop/shed
Phase II of the garden was installing the early components of the plan: irrigation for the backyard, removing sod, adding manure and mulch, then planting all our new plant friends. This phase was complete just before the first frost fell in late fall. It gave the new plants time to settle in with winter rains before the heat of the growing season set in.
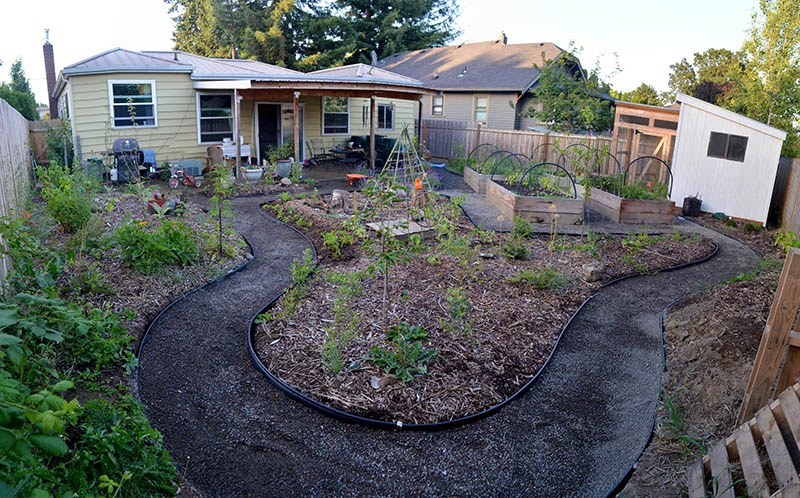
Backyard June 2015 – one year after purchase
We have been saving our pennies and just completed Phase III, which is all about reducing maintenance in the backyard. We added a zone to our irrigation system just for the raised beds, so the veggies get drip irrigation on a regular schedule. We also had crushed rock pathways installed to define garden spaces and reduce maintenance.

June 2015 view at raised bed area and chicken coop/shed
We are so thrilled with the completion of this most recent phase! As soon as the work was complete, we have been spending way more time outside enjoying our garden space. Everything feels really manageable – great timing since our new baby will arrive any day.
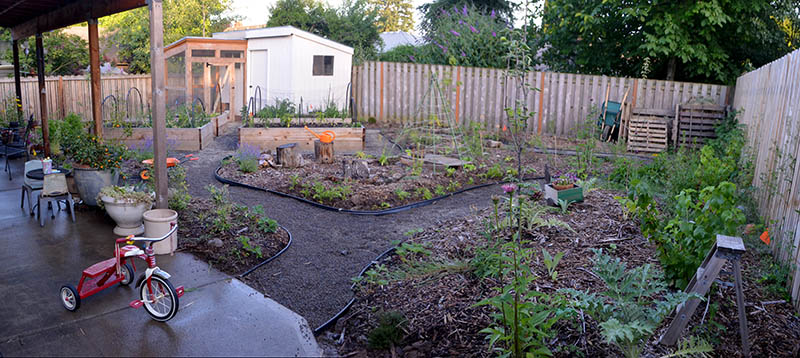
Backyard June 2015 – one year after moving in
Future phases will always be on the horizon, although they will be just about enhancing the space rather than defining it. For now, I really truly FINALLY feel at home in this homestead. It’s a wonderful feeling to get this all in just a year into buying our house. I can’t wait to watch it transform with time and love.
June 23, 2015
June Garden Update
June is bringing lots of dry, hot weather to Portland and the garden is responding! I am now watering everyday, which seems just too early in the season. But on my evening garden strolls I was noticing dry, curled leaves. Our entire garden is filled with berry bushes, fruit trees and vegetables so it’s crucial they get the water they need to set a good harvest.
 I am letting most of our artichokes flower this year instead of harvesting them. They are my favorite vegetable, an easy-to-grow perennial in climates with mild winters and the bees love their purple blossoms when they fully open.
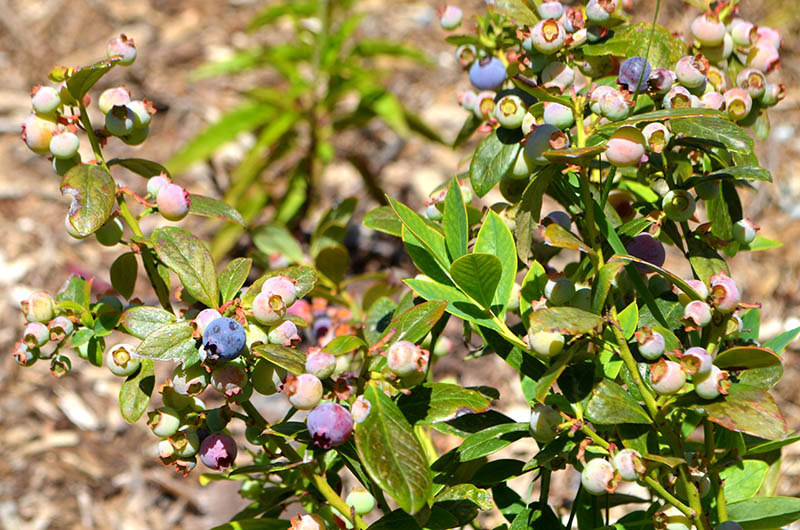
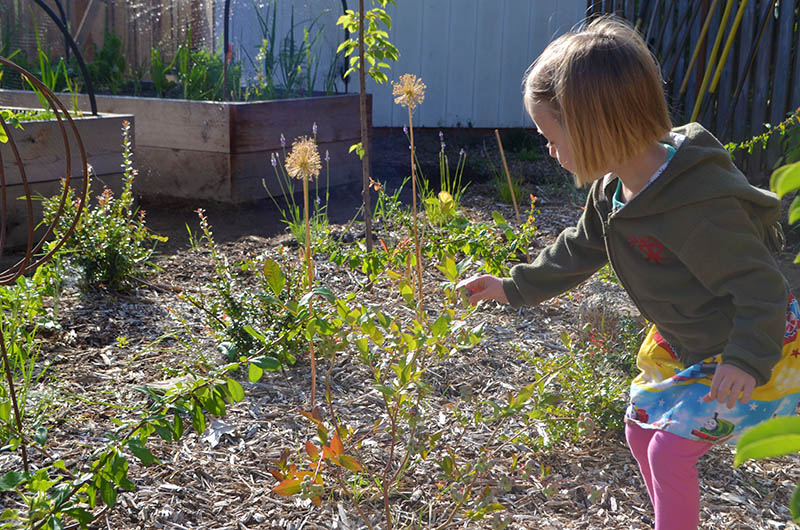 Juniper continues to spend practically every waking moment searching the garden for berries. We currently are harvesting ever-bearing strawberries, ever-bearing raspberries, black currants and blueberries. The plants are still new and small, but there is enough fruit to keep her successfully harvesting.
 Our new baby boy is due around the 4th of July. I told Juniper last winter that he would be here when the blueberries were ready to pick. We’re expecting him any day!
 Our early season crops like spinach have bolted. I think they got in the ground too late to give us much of a harvest, but I will save the seed and replant late summer for a fall and winter crop. Meanwhile, we are harvesting onions, kale, lettuce, swiss chard and beet greens.
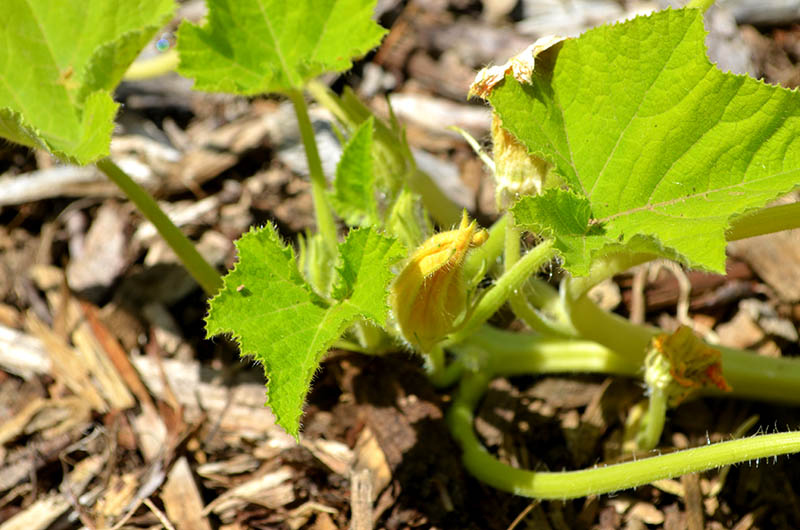 I planted tons of squash and melon seeds all around the garden to fill in empty spots, while we wait for our permanent shrubs to grow in. Unfortunately, very few seeds came up. I am blaming our terrible heavy clay soil. We spent eight years building up great soil at our old homestead, but we’re starting over from scratch on our new homestead and clearly have a long ways to go. The squash I do have are just starting to blossom and I’m looking forward to the first harvest.
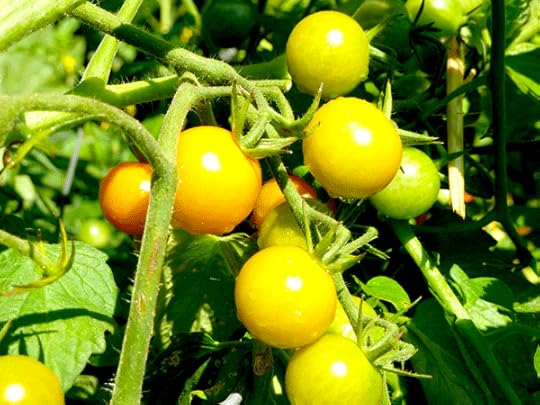
 Our tomato plants are tall and covered with flowers! I always encourage folks to plant their favorite heirlooms, but throw in an Early Girl or other early-ripening variety to get some fruit sooner. I, of course, never seem to take my own advice. So I’ll be waiting another several weeks before I get my first juicy heirloom from the garden.
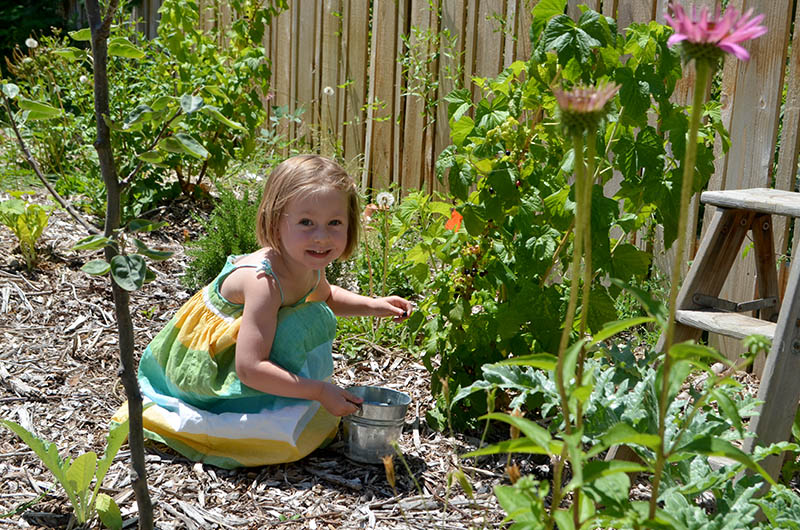 Watching Juniper fall in love with our garden just makes my heart swell with joy. She was out picking black currants for me while I was inside making lunch today. I managed to snap a quick picture of her in action. As eager as I am to start filling the harvest basket, I think I am even more excited to watch her bite into the first ripe cherry tomato, to try a homegrown bell pepper and help me spot all the zucchini we’ll have in a few short weeks.
June 16, 2015
Front Yard Update
It has been a year since we bought our new homestead and about six months since the front garden was installed. Time for an update on how it’s growing and some lessons learned!

The spring flowering alliums have faded, but these summer flowering alliums are just getting started
The concept was to design the front garden as a prairie. Our neighbors have two massive Coast Redwoods in their front yard, which makes for a majestic forested space. I wanted our garden to transition from that forest into prairie – like you would find in the wilds of Oregon. We are not irrigating the front yard long-term, so I focused on tough, drought-tolerant plants and structural grasses.

Mix of structural grasses, like this Blue Oat Grass, and tough perennials, like the Black-Eyed Susan behind it.
We already have a fun mix of grasses using Blonde Ambition Blue Grama Grass (Bouteloua gracilis ‘Blonde Ambition’), Blue Oat Grass (Helictotrichon sempervirens), Pink Muhly (Muhlenbergia capillaris) and Black Flowering Fountain Grass (Pennisetum alopecuroides ‘Moudry’). But we really need more of one type to reinforce the prairie vibe. Hameln Fountain Grass (Pennisetum alopecuroides ‘Hameln’) is one of my favorite basic-but-beautiful plants that I’m planning to add several of. It will weave and repeat throughout the front garden to bolster the prairie feeling.
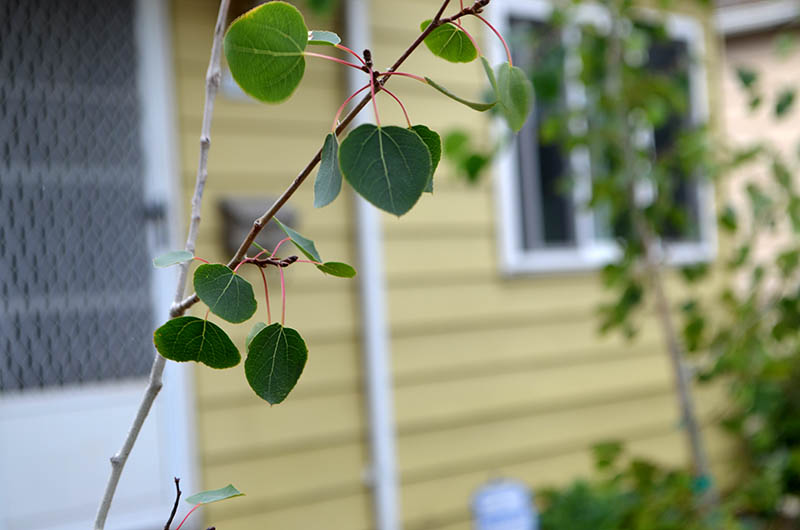
Aspens leaves flutter in the slightest breeze
I included a handful of Quaking Aspen trees (Populus tremuloides) to add some height to the prairie. Our pathways weave between these closely planted trees. I’m hoping it creates a the feeling that you are walking through a grove as they mature. It’s always an excellent idea to plant the large shrubs and trees first, and I’m glad we did. Otherwise the front garden would feel pretty flat.

Black-eyed Susans are a great, tough, drought-tolerant perennial
The front garden accents are looking beautiful! The Black-Eyed Susan (Rudbeckia fulgida var. sullivantii ‘Goldsturm’), Coneflower (Echinacea purpurea ‘Magnus’) and Flowering Allium (Allium giganteum) plants are all happy as can be. The foliage accent/contrasts of Blue-Star Juniper (Juniperus squamata ‘Blue Star’), Berggarten Sage (Salvia officinalis ‘Berggarten’) and Nest Spruce (Picea abies ‘Nidiformis’) are equally happy.

Echinacea flowers just beginning to appear
One lesson learned is that winter heaths and heathers just don’t jive with ornamental grasses. I included them as an experiment to blend some forest-like accents into the prairie. They are nice, low evergreens that bloom in the winter when most plants are dormant. But the effect just makes the space look too jumbled – the prairie design doesn’t read as clear. Those guys will get relocated this fall into the backyard “food forest”.
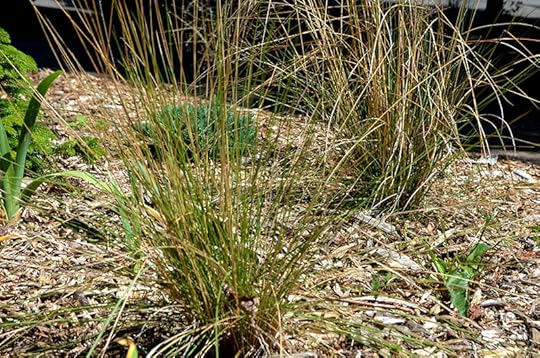
Pink Muhly grasses planted from one gallon containers. In a couple years, they will have doubled or even tripled in size
To save cost, I purchased the smallest plant containers possible and hoped my patience would hold until the new plants grew in. In hindsight, I should have sprung for larger pots for the more substantial grasses and foundational shrubs. The garden looks pretty empty to me, even though I know it will grow in pretty densely over time. But it’s hard to wait 2-3 years for that effect and a few larger plant sizes would have cushioned that feeling.
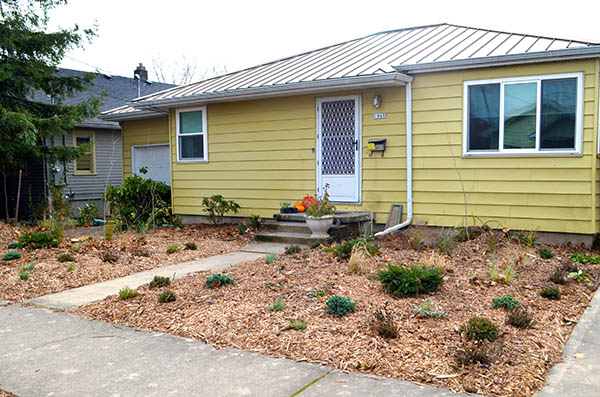
Front yard in the fall of 2014, just after planting
The heaths and heathers will replaced with ground covers Black Mondo Grass (Ophiopogon planiscapus ‘Nigrescens’) and Lemon Coral Sedum (Sedum rupestre). I resisted these initially because it’s a pretty common ground cover combination to pair with ornamental grasses, but it looks great so I’m hopping on the bandwagon.
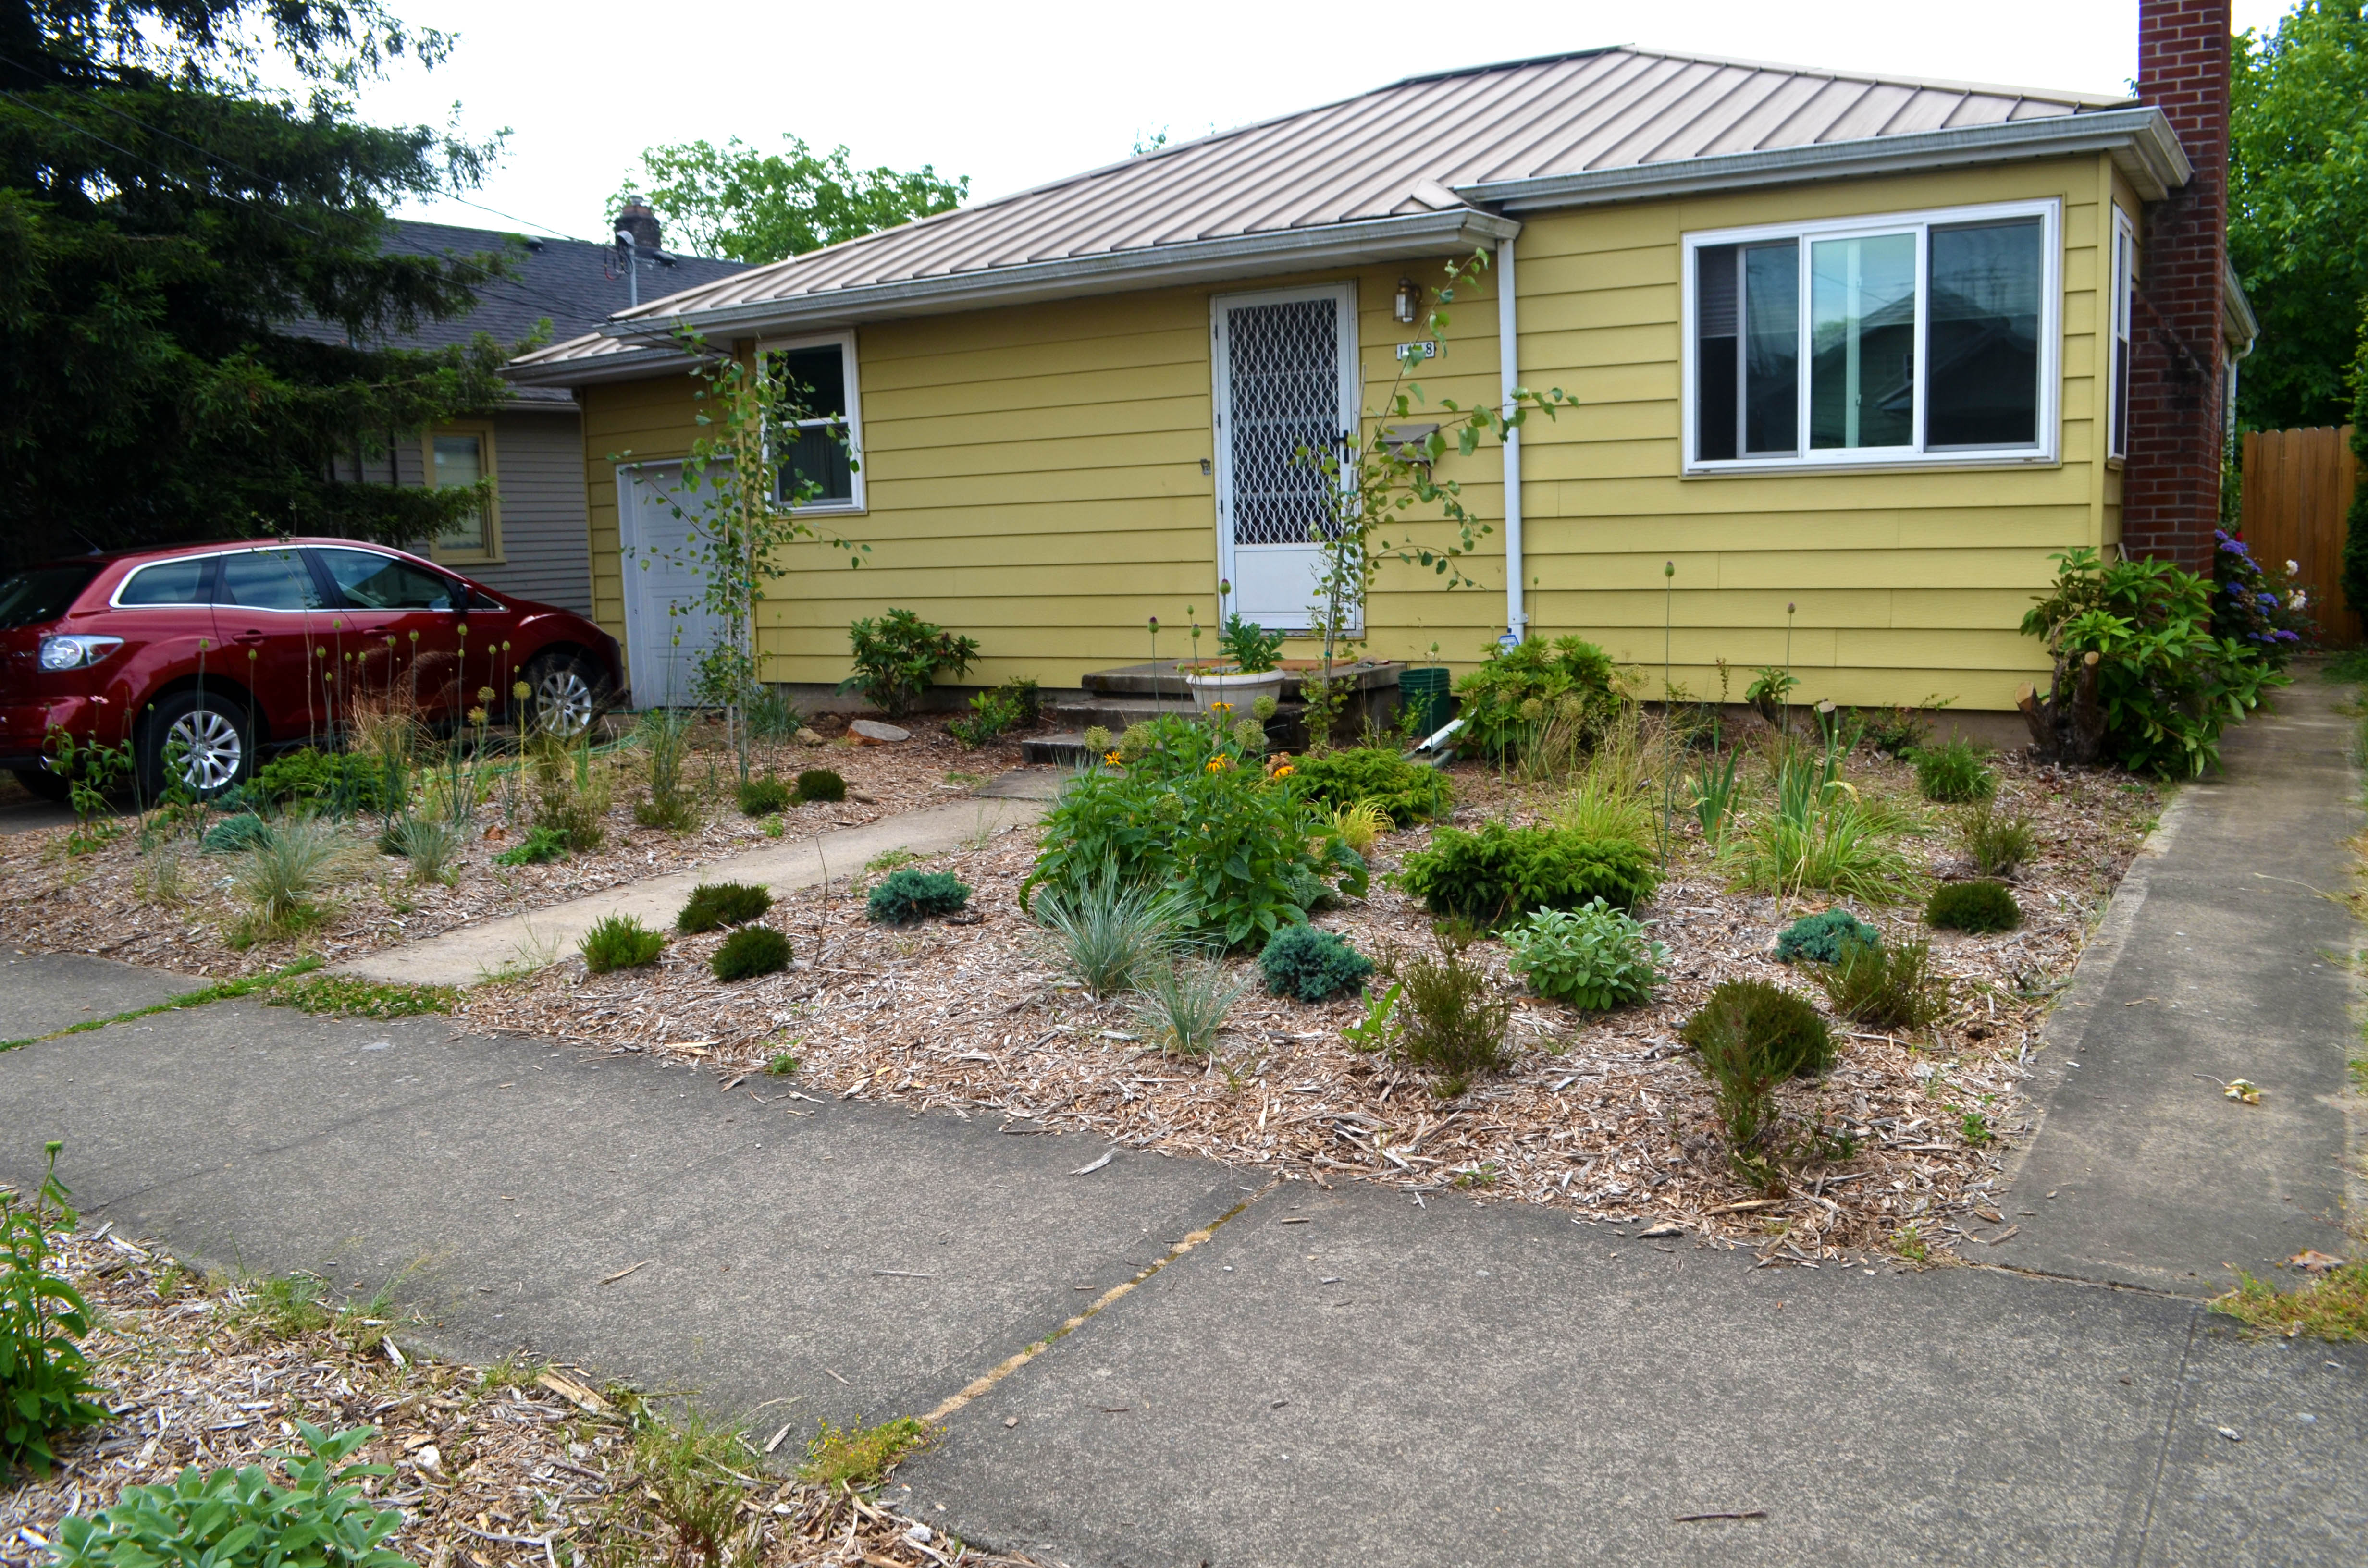
Front yard June 2015. Still far from a mature garden space, but getting bigger every day.
I’m excited to keep sharing the evolution of this space! Stay tuned this fall for an update on how the garden looks with these changes one year from the initial installation.
June 8, 2015
Egg Recipe: German Pancakes
“So many eggs!” I hear that from first-time chicken keepers often at this time of year. All of that waiting for baby chicks to get old enough to lay eggs finally pays off when they are about six months old. With a new flock of 3-4 hens, you can easily go from zero to almost a couple dozen eggs a week. It’s hard to keep up, but one of my favorite recipes makes a big dent in the egg bowl: German pancakes.

The sous chef
This is a recipe originally passed onto me from my sister Anne and one I included in my book Modern Homestead: Grow, Raise, Create. Juniper helps me mix up the ingredients and it makes for a really easy and fast weeknight meal. Our little toddler doesn’t like egg dishes like scrambles and omelettes (yet), but these pancakes pass her picky-eating test.
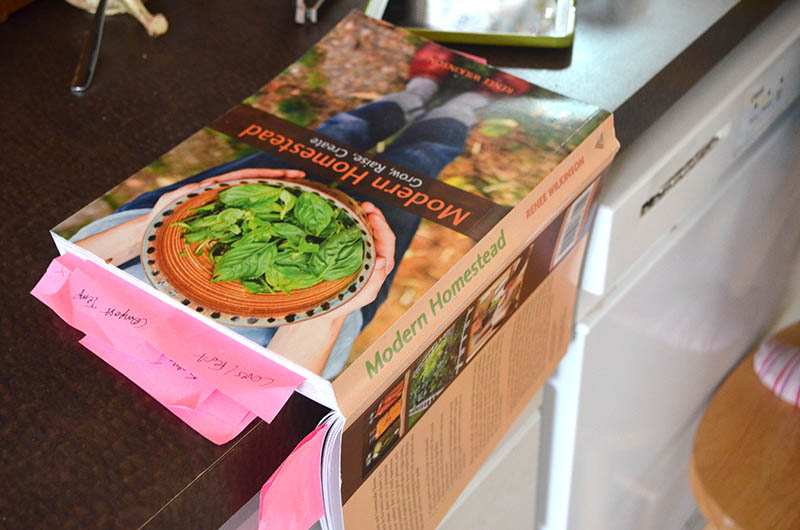
The dog-eared, bookmarked, sticky note copy of my own book Modern Homestead: Grow, Raise, Create
German Pancakes (from Modern Homestead: Grow, Raise, Create)
2 T. butter
six eggs
1 cup milk
1 cup flour
2. T sugar
1/2 tsp. salt
toppings
Preheat the oven to 425 degrees. Use two of your widest pans and melt one tablespoon of butter in each while the oven is warming. Remove the pans when the butter has melted and spread around to coat the bottom and sides.
In a medium bowl, beat the eggs. Add milk and beat to combine. Next add flour, sugar and salt, mixing until no lumps remain.
Pour the egg batter equally among the two pans. Bake in the oven for 15 minutes. Serve immediately while warm with your favorite toppings.

German pancakes fresh from the oven and beginning to deflate
The pancakes will come out of the oven super fluffy, possibly even creeping up the sides of your dish. They “deflate” fairly quickly, but they still taste great as long as they are warm.

Use the widest pans you have, like this 12″ round cast iron pan
For the pans, my sister uses two 13″ x 9″ rectangular baking pans and the pancakes usually puff up the sides. I use my 12″ wide Le Creuset pan along with another 12″ copper saute pan. So rummage through your cupboards and use whatever combination you have that is widest.

Fresh strawberries and powdered sugar to top our summertime pancakes
We happily serve these up for breakfast and dinner equally at our table. I round out the meal with either potato pancakes or maple pork sausages. We use whatever we have on hand for toppings. In the winter, it might be lemons with powdered sugar or homemade blueberry syrup using frozen berries from last season. In summer, it’s all about fresh berries like the strawberries pictured here. Fall usually means gently cooked apples or pears.

German pancakes served with maple pork sausage
Do you have a favorite egg recipe that helps you keep up with the chickens? I would love to hear about it in the comments below! It seems we can never have enough go-to recipes to help us use the harvest from our homestead.
June 3, 2015
Rustic Modern Bathroom Remodel
We bought our small house a year ago – a cosmetic fixer-upper in the Sellwood neighborhood of SE Portland. It’s high time for an update on how we’re turning this 1950’s ranch into a rustic-modern-homestead space. I posted a while back about Juniper’s bedroom facelift, but let’s move on to the smallest room in our house: the bathroom.
DISCLAIMER: I am including links to everything we bought for the remodel, but please note am not getting any kick-back from the manufacturers or stores. The links are just meant to help you source anything you like.
Our bathroom is tiny, but we enjoy the challenge of utilizing every space. The room initially had some spectacular pink swan wallpaper, glass sliding shower doors with bronze accents, a bulky sink cabinet, old fixtures and a vanity. We remove the wallpaper, glass sliding doors and the vanity soon after moving in. I’m sorry to say that we did it so fast that I didn’t even get a picture of the “before” or that fabulous swan wallpaper that will never see the light of day again… But removing those things immediately made the room feel simpler and bigger.
 A major key to homesteading is being efficient with your resources, so we always approach our remodeling projects with energy-efficiency in mind. We chose to replace the older toilet with a high-efficiency dual-flush model from American Standard. Juniper learned which button to push when right off the bat – something I wasn’t sure would come easy to a three year old.
 We also installed this super-cool Kohler toilet seat that glows blue! We have it set to turn on at bedtime and it stays on for 7 hours. It has been really great for middle-of-the-night bathroom visits because you don’t need to turn on any lights to find your way around. That’s been handy for a recently potty-trained toddler and me being incredibly pregnant.
 Along the lines of energy-efficiency, we installed a new and super quiet Panasonic bathroom fan. There was no ventilation before, which is a health and safety issue as mold and mildew always appear in those instances. It’s so quiet that even in our small house you can’t hear when the fan is on. That also makes it easy to forget that you left the fan on, so we included the optional timer that automatically turns it off.
 To save space, we ditched the sink and cabinet. I’m a minimalist when it comes to beauty care – no makeup, no hair dryer, no special products. The new Kohler medicine cabinet is enough for our daily needs and everything else gets placed on a shelf in the linen closet just outside the bathroom. The bulky sink setup was replaced with a modern, Duravit wall-hung sink. We chose a modern Grohe faucet to match the modern sink.
 Getting the sink off the floor meant plenty of room for Juniper’s step stool to tuck underneath. With another baby on the way, room for a step stool in the bathroom will be needed for several more years. There is just enough room to set out the essentials on the sink itself – homemade liquid hand soap (used originally as baby wash, but now just as everyday hand soap) and a fingernail brush to get all that dirt off our hands.
 On the opposite wall where the vanity once was, we installed black, old-fashioned hooks from Ikea to hang our bath towels. Called the SVARTSJÖN hook, these added a rustic feel to a room with pretty modern fixtures (sink, faucet, toilet). The hooks are hung at various heights – two taller ones for me and Jay with two smaller ones for Juniper and the baby-on-the-way. It makes use of an other empty space without feeling cramped.
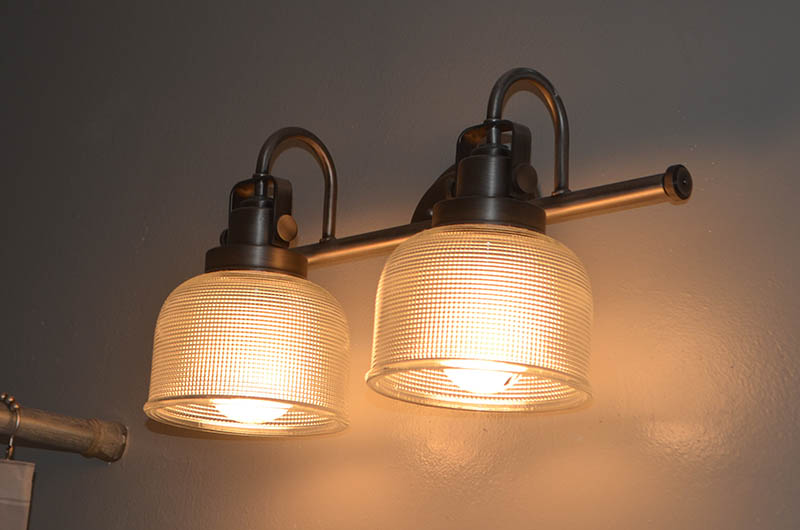 The light fixture is another nod to old-fashioned farmhouse style. We picked an antique nickel finish on this Archie Progress fixture, so it’s not so shiny. The glass has a vintage 1950’s vibe to fit the era as our house. It would be fun to incorporate the other fixtures from this line in our future remodels for continuity.
 We left the original 1950’s tub and you can see the mod-curving shape now that the sink cabinet has been removed. The tree silhouette shower curtain is another small gesture of bringing nature inside around us. The light curtain makes the tub feel less claustrophobic than the former bronze-accented glass sliders.
 The floor ended up being the big feature of the otherwise simple design. I picked Eleganza Patina’s “Cottonwood” porcelain “wood” tile. It has an amazing, aged and weathered look, but since it is tile it can handle bathroom moisture and water spills. It’s not everyone’s cup of tea, but I feel like it balances out the modern fixtures with a strong, rustic character. We bought them in the 4″ x 24″ size from Oregon Tile and Marble.
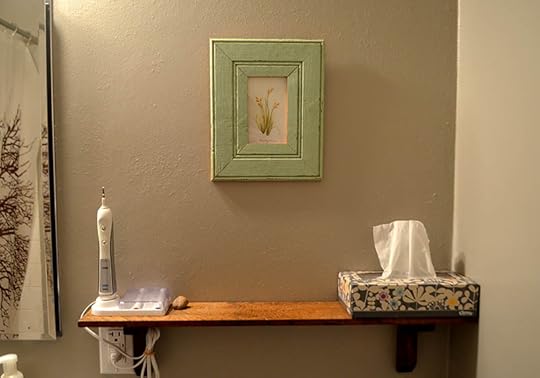 The wall color is Metal .04 from Yolo paint – an eco-friendly paint company with VOC-free paints. It’s a medium gray that makes any color in the room really pop. The floor tile looks really warm, fixtures appear perfectly white, linens look extra cozy and other rustic decor items we added, like the old botanical print I framed a few months ago and the vintage wooden shelf, stand out nicely against the grey backdrop. If you are in Portland, you can buy it at Green Depot.
 All told, the project cost was about $2,500. My contractor installed the fixtures and floor tile while we did demo and finishes. We saved a lot of money (and some character of the home) by leaving the original 1950’s tub. The room feels exactly like we hoped: rustic, modern with some fun natural elements sprinkled in. Hope it gives you some inspiration for your small spaces!
June 1, 2015
First of the Season Berry Picking
I had the pleasure of spending a recent sunny morning at a nearby farm picking berries with my friend Denise and my 3-year old Juniper. It’s been an annual early-June tradition since long before Juniper was born and each year this day marks both the kick-off the u-pick season and also the passage of time.
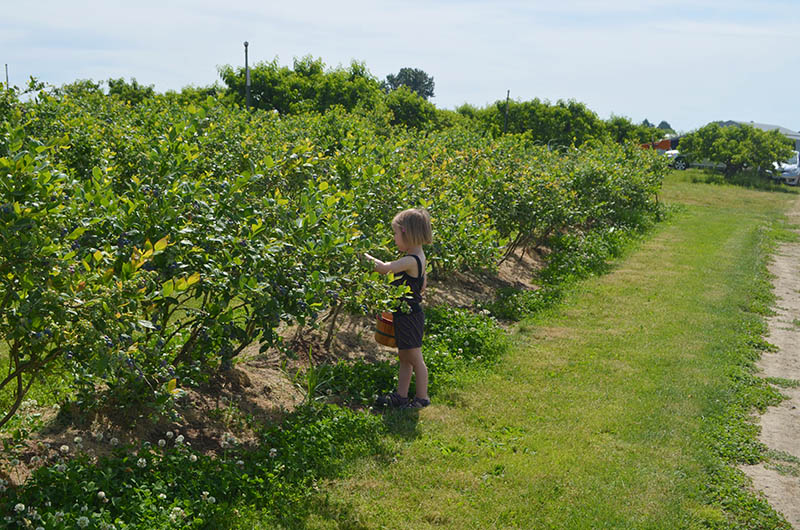
Juniper (age three) picking early season blueberries
I remember when a decade ago nearby Sauvie’s Island was not so crowded. Denise and I would talk about relationships between berry bushes. The baskets would get fuller as we stayed out there for hours picking away. We could blaze through rows in no time.
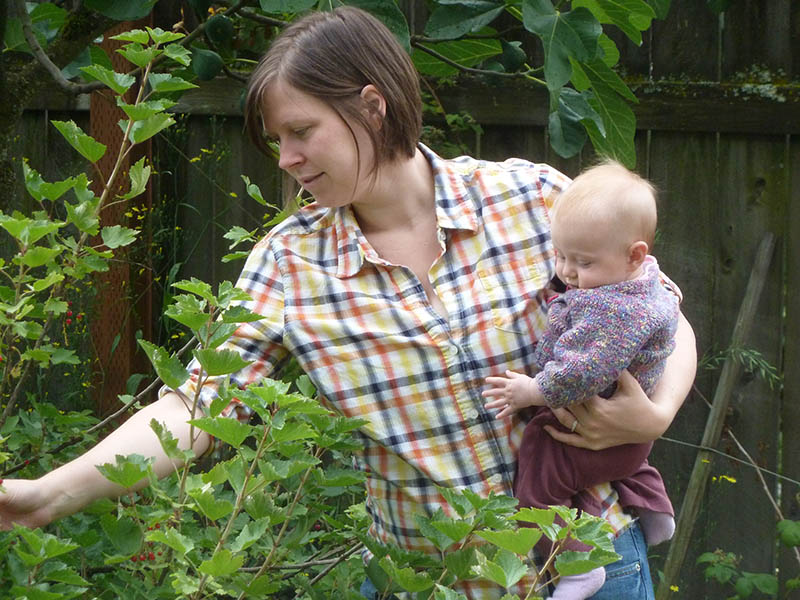
Three-month old Juniper helping me harvest currants
Then Juniper was born and it seemed completely natural to just throw her in our Ergo carrier and hope she napped while I picked. The basket didn’t quite as full quite as fast with her on my back. I would put together a makeshift shade “tent” for her when she didn’t want to be in the carrier anymore or carry her on my hip. Denise and I would talk more about how we were going to preserve the berries and what unusual concoctions we were going to experiment with.

Juniper age one picking strawberries
As soon as Juniper was walking, berry-picking became a favorite seasonal activity for her. I felt a little sheepish checking out at the farm store with my little one covered in berry stains. Clearly berry sampling was no longer so subtle. My preservation plans got a lot simpler: strawberry jam and some for the freezer – nice and easy. Denise and I still talked about relationships, but those conversations happened in two minute increments between Juniper-wrangling.
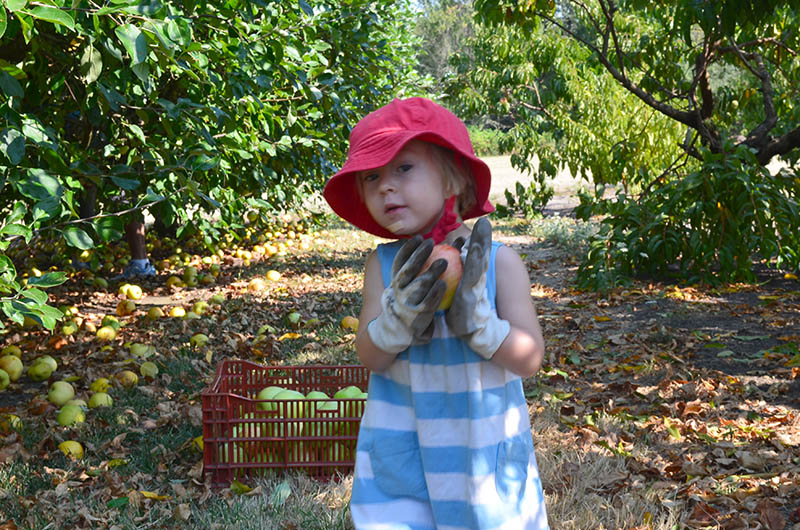
Juniper age two helping me u-pick apples and pears
This year Juniper and I talked about how the berries made a “kuplink, kuplank, kuplunk” sound, like Sal’s berries in the beloved Blueberries for Sal children’s book. I asked her what she was planning to do with her berries, and between her munching she said “Save them for next winter” – just like Sal’s mama says in the book.
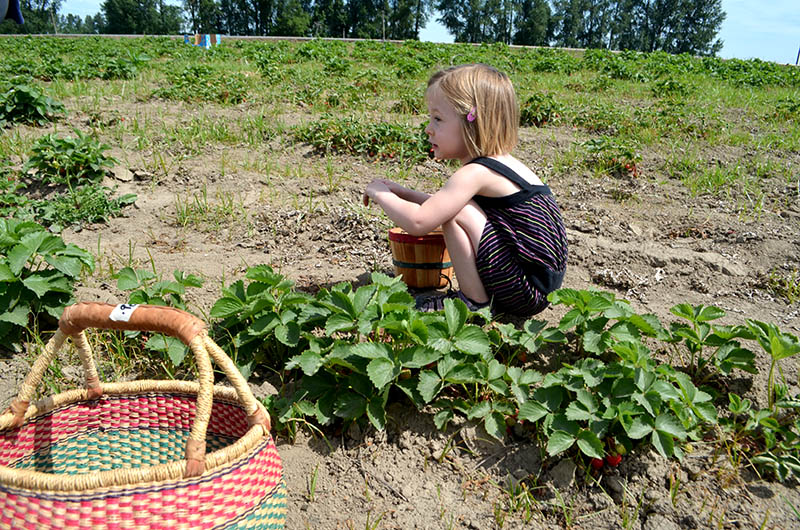
Juniper age three u-picking strawberries
Meanwhile, I did my best to squat over and over again to reach the berries around my nine-month pregnant belly. A woman in the field stopped me to say how impressed she was that I was even out there. (Thank you wonderful stranger!) I picked less than in the past and had no shame buying worker-picked berry crates at the farm stand check out.
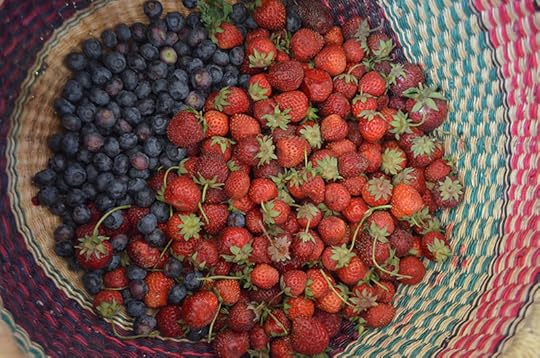
My half basket of u-picked strawberries and early blueberries
Denise remarked how special it is that Juniper is growing up to love the same things we love. And it made me think about how integrated homesteading, in various forms, has been woven into our life. She dashes home from preschool into the backyard to search for ripe berries in our garden – just like I did as a child on our urban farm. It makes me really proud that, even as a toddler, she is a little modern homesteader in the making.
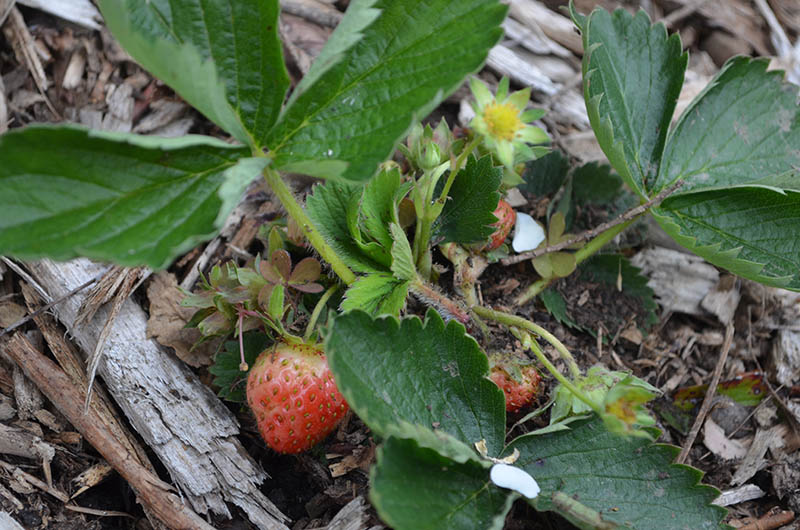
First homegrown strawberries of the season. Quickly gobbled up by Juniper.
Life continues to evolve and having children doesn’t mean giving up on those things I have loved. Instead, it’s meant creative ways of incorporating Juniper into those activities, resetting expectations on how productive I can be (balancing u-picked and worker-picked), and still making time for sharing stories with friends in the field – albeit less often and with more divided attention. It’s not so hard to raise our kids with an attachment to nature, to growing your own food, to supporting local farms when we do those things ourselves. And it’s easier to do when we’ve got some version of it in our own backyard.
May 21, 2015
My Favorite Tomato Varieties
What is it about our love and obsession with tomato varieties? Seed catalogs respond by offering dozens and dozens of varieties to choose from. And plant developers are cultivating new and unusual strains every year to feed our desire to find the next great tomato. My method for choosing tomato varieties focuses on reliability, production, flavor and balance of tomato types.
 Reliability/Production
Reliability and production is key on our homestead for nearly everything. It has to work with our climate and when it comes to tomatoes, that means they need to thrive in the relatively short summer months of the Pacific Northwest. If you live in a hotter climate, you should be looking for varieties that can withstand nearly intolerable heat.
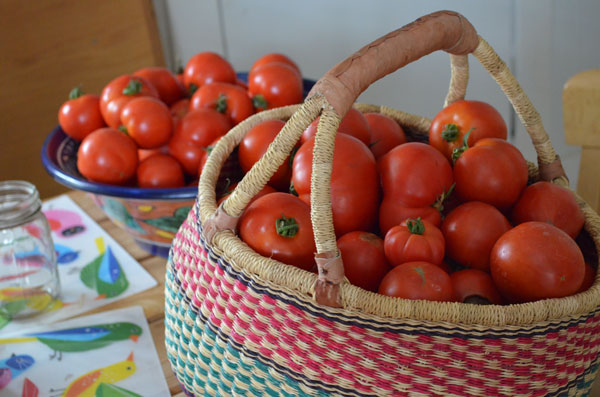
So. many. tomatoes.
Flavor
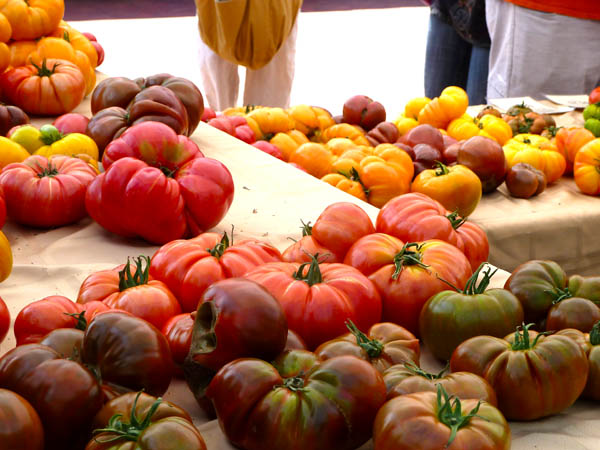
Hybrids will generally beat out heirlooms when it comes to short ripening times and high yields, but that’s where my flavor criteria enters the decision-making process. I find heirlooms to generally have a richer, more intense flavor than hybrids. Americans like sweet things and seed developers have responded by offering many super-sweet hybrid tomatoes. You’ll find them listed with clever names like Might Sweet, Honey Delight, and Supersweet. I’m drawn to meaty, old varieties that offer a deeper and unique flavor profile.
Assortment of heirloom tomatoes – mostly slicers
Tomato Type
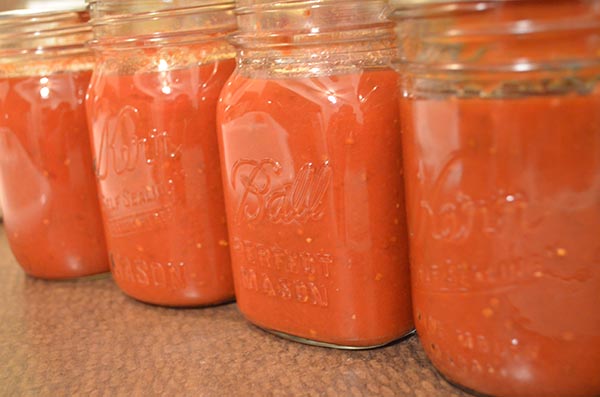
Balance of tomato types is key to think through if you want to maximize how much fruit actually gets used on your homestead. The three general tomato types are sauce/paste, slicer and cherry. Sauce/paste tomatoes have lower water content and meaty fruit. They are ideal for canning because it takes less time to boil them down into a thick sauce, but those meaty walls ensure your sauce will have a strong, rich, tomato flavor. Slicer tomatoes are big guys with high water content, perfect for slicing onto a juicy burger. And cherry tomatoes are fabulous in gardens with children. They are often prolific and sweet, great for fresh eating and kids love stuffing their mouths full of them.
We do an obscene amount of canning, so 80-90% of our tomato plants are sauce/paste varieties. We usually grow a couple types of slicer tomatoes for fresh tomato salads, salsa and general eating. And we always grow one cherry tomato. As our family expands, we may need to increase that. But generally, one cherry tomato plant will produce a ton of fruit that is best for fresh eating. To keep things interesting, I generally try to rotate in a new-to-me variety as well to test it out.
 My Favorites
Sauce/Paste: Hands down, over years of experimentation, nothing compares to San Marzanos. They make a rich, deliciously flavored sauce that we can as simple tomato sauce, marinara, tomato paste, ketchup and more. Other good sauce tomato is Cuore Di Bue. This oxheart-shaped tomato also has delicious flavor and I end up using it just as often in fresh dishes as I do cooked down into sauce.
The perfect canning tomato: sauce or paste varieties
Slicers: The list can go on and on here! I have so many favorites, so I try to rotate through them and include a new one each year for experimentation’s sake. Orange Oxheart is one of my favorites, reminding my of my days working on the Urban Farm where we grew so many of these. They are gorgeous to look at, have few seeds and can weigh almost a pound when ripe. I love them fresh, but they are pretty when made into Simply Canned Tomatoes with red varieties.
Pineapple is fun variety that produces massive fruits – probably the biggest slicer I’ve grown. The fruit is yellow with streaks of yellow and pink. It is juicy and full-flavored. It looks great in salad or thickly sliced on a burger.
Cherokee Purple is an old tried and true variety that has won the hearts of tomato lovers for decades. It’s easy to find as a the simple red variety as well, but I appreciate the dark, purple hint of this fruit. It’s flavor is fantastic anyway you slice it.
Brandywine is an heirloom that dates back to 1885 and has been consistently one of the most popular tomato varieties in America. It develops reddish-pink, huge fruits that can easily weigh over a pound a piece.
Photo by Isaac Viel
Cherry: My favorite cherry tomato variety is Sungold. Some describe it as having a fruity, tropical flavor, but I think of it like biting into sunshine. It pops with bright flavor and has been very productive on our homestead. Other favorites include Chocolate Cherry with a surprisingly complex flavor and the ever-prolific Yellow Pear with it’s unusual shape and insane amount of fruit.
 Your Turn
Okay, now it’s your turn. I want to hear what varieties you can’t live without, which ones you’ve tried and haven’t been so impressed with, and which ones you are growing on your homestead this year. Tell me about it in the comments below!
May 19, 2015
Planting Tomatoes Outside
Everyone seems to have a different rule of thumb on when it’s time to plant their tomatoes outside. Some wait for Mother’s Day. Others swear by the first week of June. One my local growers was even recommending folks in the Portland area move them outside in late-April, due to our unseasonably warm spring. The best rule of thumb is to plant tomatoes outside when nighttime temperatures are consistently 55 degrees or above.

Tomatoes growing under bird netting (to protect them from neighborhood cats) when nighttime temperatures are consistently 55 degrees or above
Moving tomatoes out too early may kill the tender plants, who do not appreciate cold nights. Even if they do survive, their growth and fruit production may be damaged all season from the over-eagerness of transplanting too early.
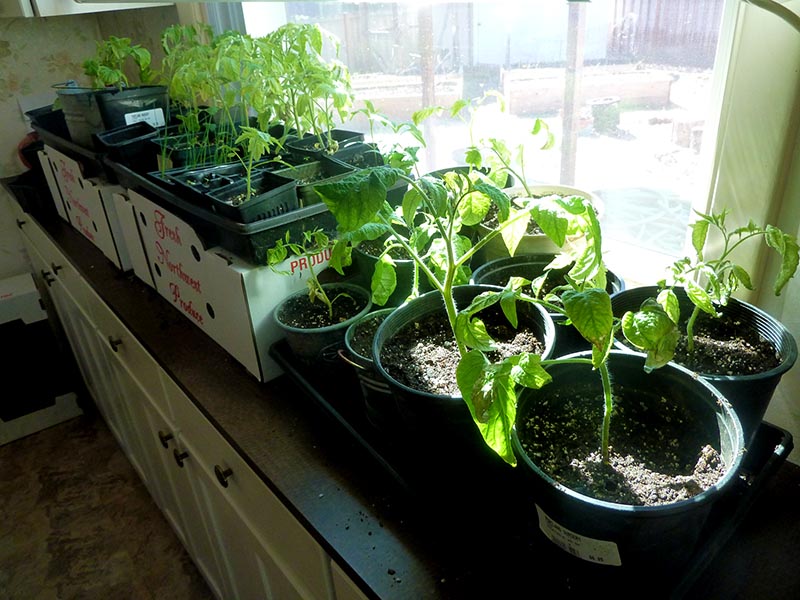
Our crowded tomato jungle
I grew my tomatoes this year from seed and by mid-April the area had turned into a tomato jungle! I felt like I didn’t have much choice, as several were outgrowing their pots and my seed starting mix was getting used up quickly. I decided to move them outside early, but I covered them with greenhouse plastic to protect them from chilly spring temperatures.

Tomatoes covered with greenhouse plastic
Contractor’s plastic is a cheap substitute for greenhouse plastic, which I used many years ago. It eventually cracks and your beautiful, organic garden will get covered with tiny flecks of plastic sheeting – super messy and hard to clean up. If you are interested in extending your growing season, greenhouse plastic is a wise investment from your local nursery store and worth the cost longterm.
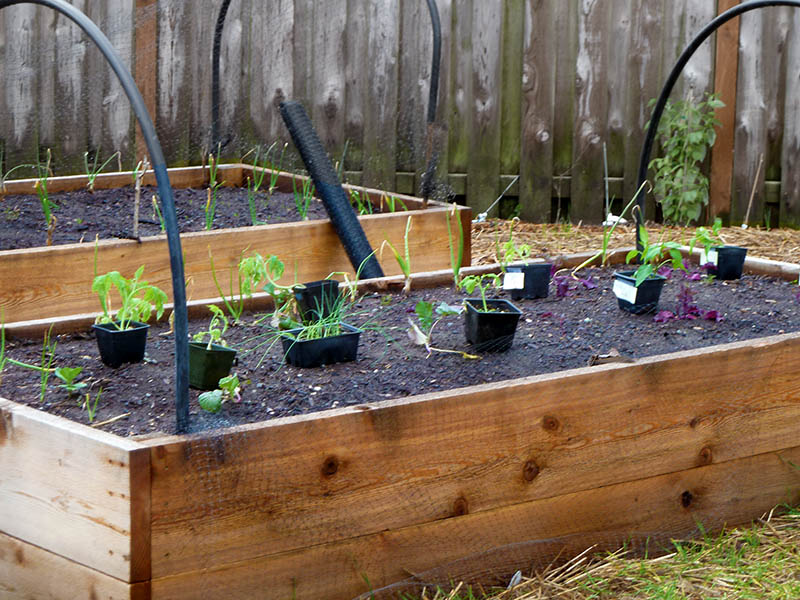
Positioning our plant starts prior to digging them in
Prior to planting, I laid out my tomatoes and various starts among all my raised beds to ensure they each had enough spacing. Although I always start with a solid vegetable garden plan, things shift when it comes to planting. Instead of interplanting the tomatoes with herbs, I ended up with too many beets and planted them in between the tomatoes instead. Tomatoes grow up and beets grow down, so I’m hoping for a nice companion planting combination.
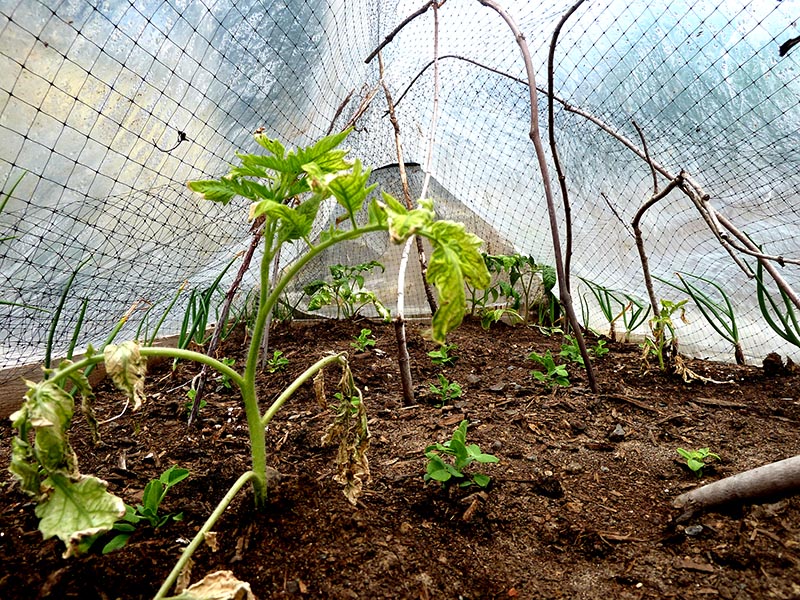
Tomatoes growing under greenhouse plastic to keep them toasty
I followed my usual practice of burying the tomatoes when transplanting. You can find out more about this method in my previous post on How to Plant Tomatoes, but the basic idea is that those little “hairs” on the tomato stems turn into roots if buried in soil. Your tomatoes will be sturdier and more resilient by having a strong, deep root network to get through the summer months.
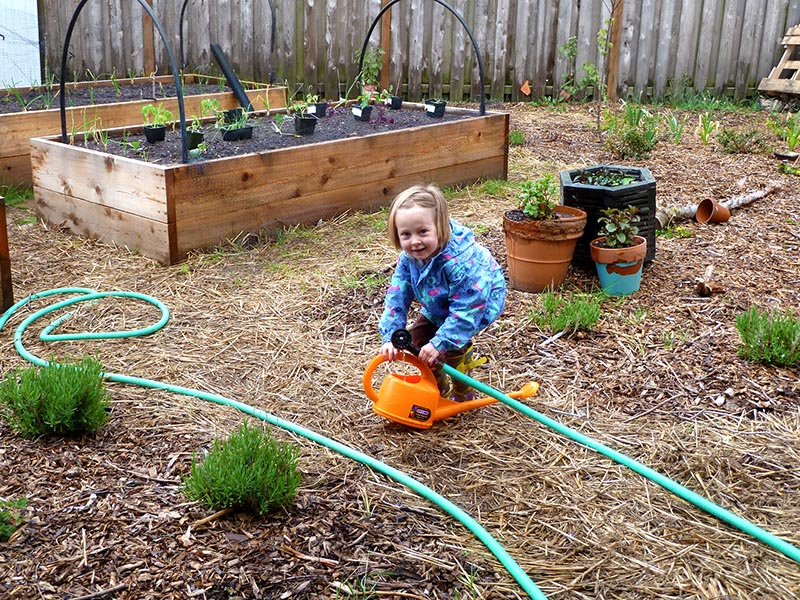
Juniper fills her watering can to water in the new transplants
Juniper, always the garden helper, needed a “job” to do while we were transplanting. She recently got an adorable, small watering can that is the perfect size for her to lift when it’s full of water. Her job was to water the newly transplanted tomatoes. Even if rain is in the forecast, always water your new transplants in well. They will undergo shock even under the best conditions, so pamper them those first few weeks until they get established.
Are your tomatoes in the ground already? Do you have a tried and true ritual on when they get planted outside? I would love to hear about tomatoes on your homestead in the comments below!


