
Renee Wilkinson's Blog, page 11
June 23, 2014
Crooked Coop
We recently moved into our new digs, but it hasn’t quite felt like home without clucking in the backyard. This weekend the chickens made the move to the new homestead too – finally!

The dismantled chicken coop
In a few weeks the chickens will have a nice, permanent chicken coop. But until construction is complete, we needed to construct a temporary home for them using the materials from their coop at our former homestead. It took a full day to dismantle their coop and move to our new place. I had visions of the Beverly Hillbillies running through my head as we pulled the truck into our new neighborhood.

A partially enclosed corner of the garden just perfect for a temporary coop
We found a nice corner of our new garden that was partially enclosed already with the side of the house and some existing fencing. It’s also shaded from afternoon sun, which is great for keeping the girls cool in the summer. It just needed to be retrofitted with additional fencing and a hen house.
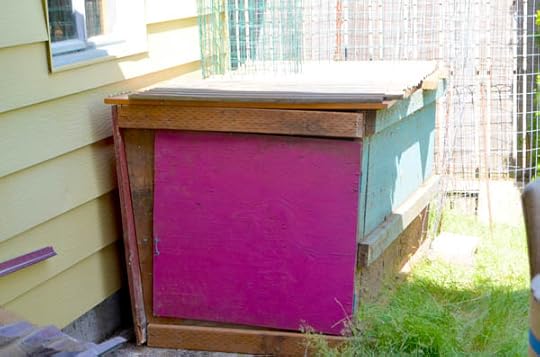
One very crooked hen house
Jay did all the hard work putting it all together. We both had a great laugh at how insanely crooked everything turned out.
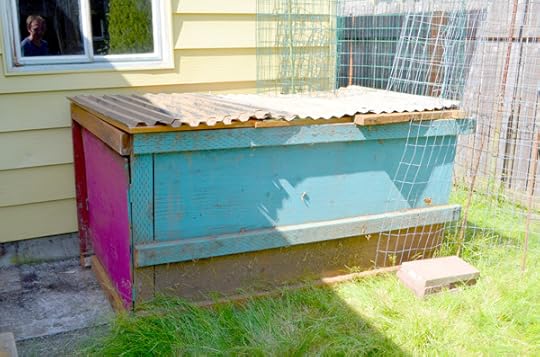
Temporary coop enclosed with fencing
He very readily admits he can’t nail two boards together and I love him for it. Thank goodness the neighbors can’t see over the fence that clearly…
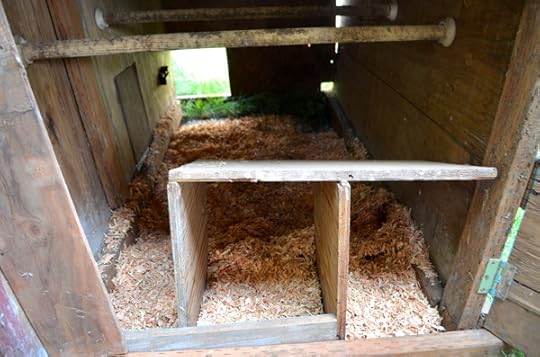
Clean, quiet corner of the hen house to lay eggs
The most important thing about poultry housing is that it keeps them safe. Safe from overheating and safe from predators. They won’t care it boards aren’t straight. Just give them fresh greens, sunshine, clean water and food. They are happy as can be in the their new, temporary digs.
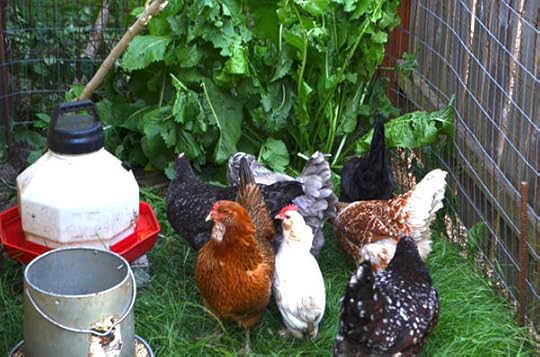
The girls at home in their new digs


June 13, 2014
Edible Groundcovers
I’m excited to begin the design process at our new house and grateful for the blank slate yard that gives us a fresh start. The garden will likely emphasize edibles and I’m compiling a list of favorites. Here are some of my favorites.
Thyme is a tough, evergreen ground cover. Cultivated varieties come in tiny, tight-to-the-ground plants or taller, cascading plants.
Rosemary is great, hardy and evergreen herb. There are several creeping varieties on the market that are drought tolerant. In addition to culinary uses, the bees love the flowers and I love the scent.
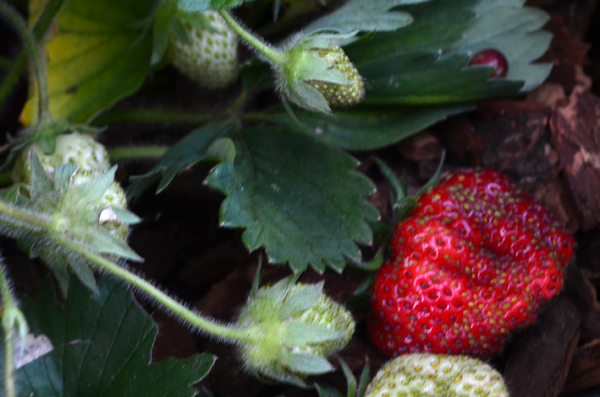
Strawberries are tops on our list – just make sure you contain them. In our garden, I will likely devote a whole flower bed to them so they can take over. Juniper’s favorite summer sport is hunting for ripe berries from our ever-bearing plants.
Potatoes are an easy to grow crop. Spring through summer the plants have lush green foliage with pretty flowers.
The greens die back in late summer, signaling time to harvest.

Sage is evergreen, drought tolerant and comes in gorgeous foliage colors – grey, variegated yellow, variegated white, and purple. They send up purple flower spikes at this time of year.
Did I miss any of your favorites? Tell me about it in the comments below!
June 4, 2014
The Homestead is Moving!
Eight years ago we moved into a little bungalow on a 1/10th of an acre lot in the Brentwood-Darlington neighborhood of SE Portland. We put a lot of elbow grease into polishing this house into a loving home. But the tine has come to start the next chapter with a new homestead.
Our house when we bought it in 2006
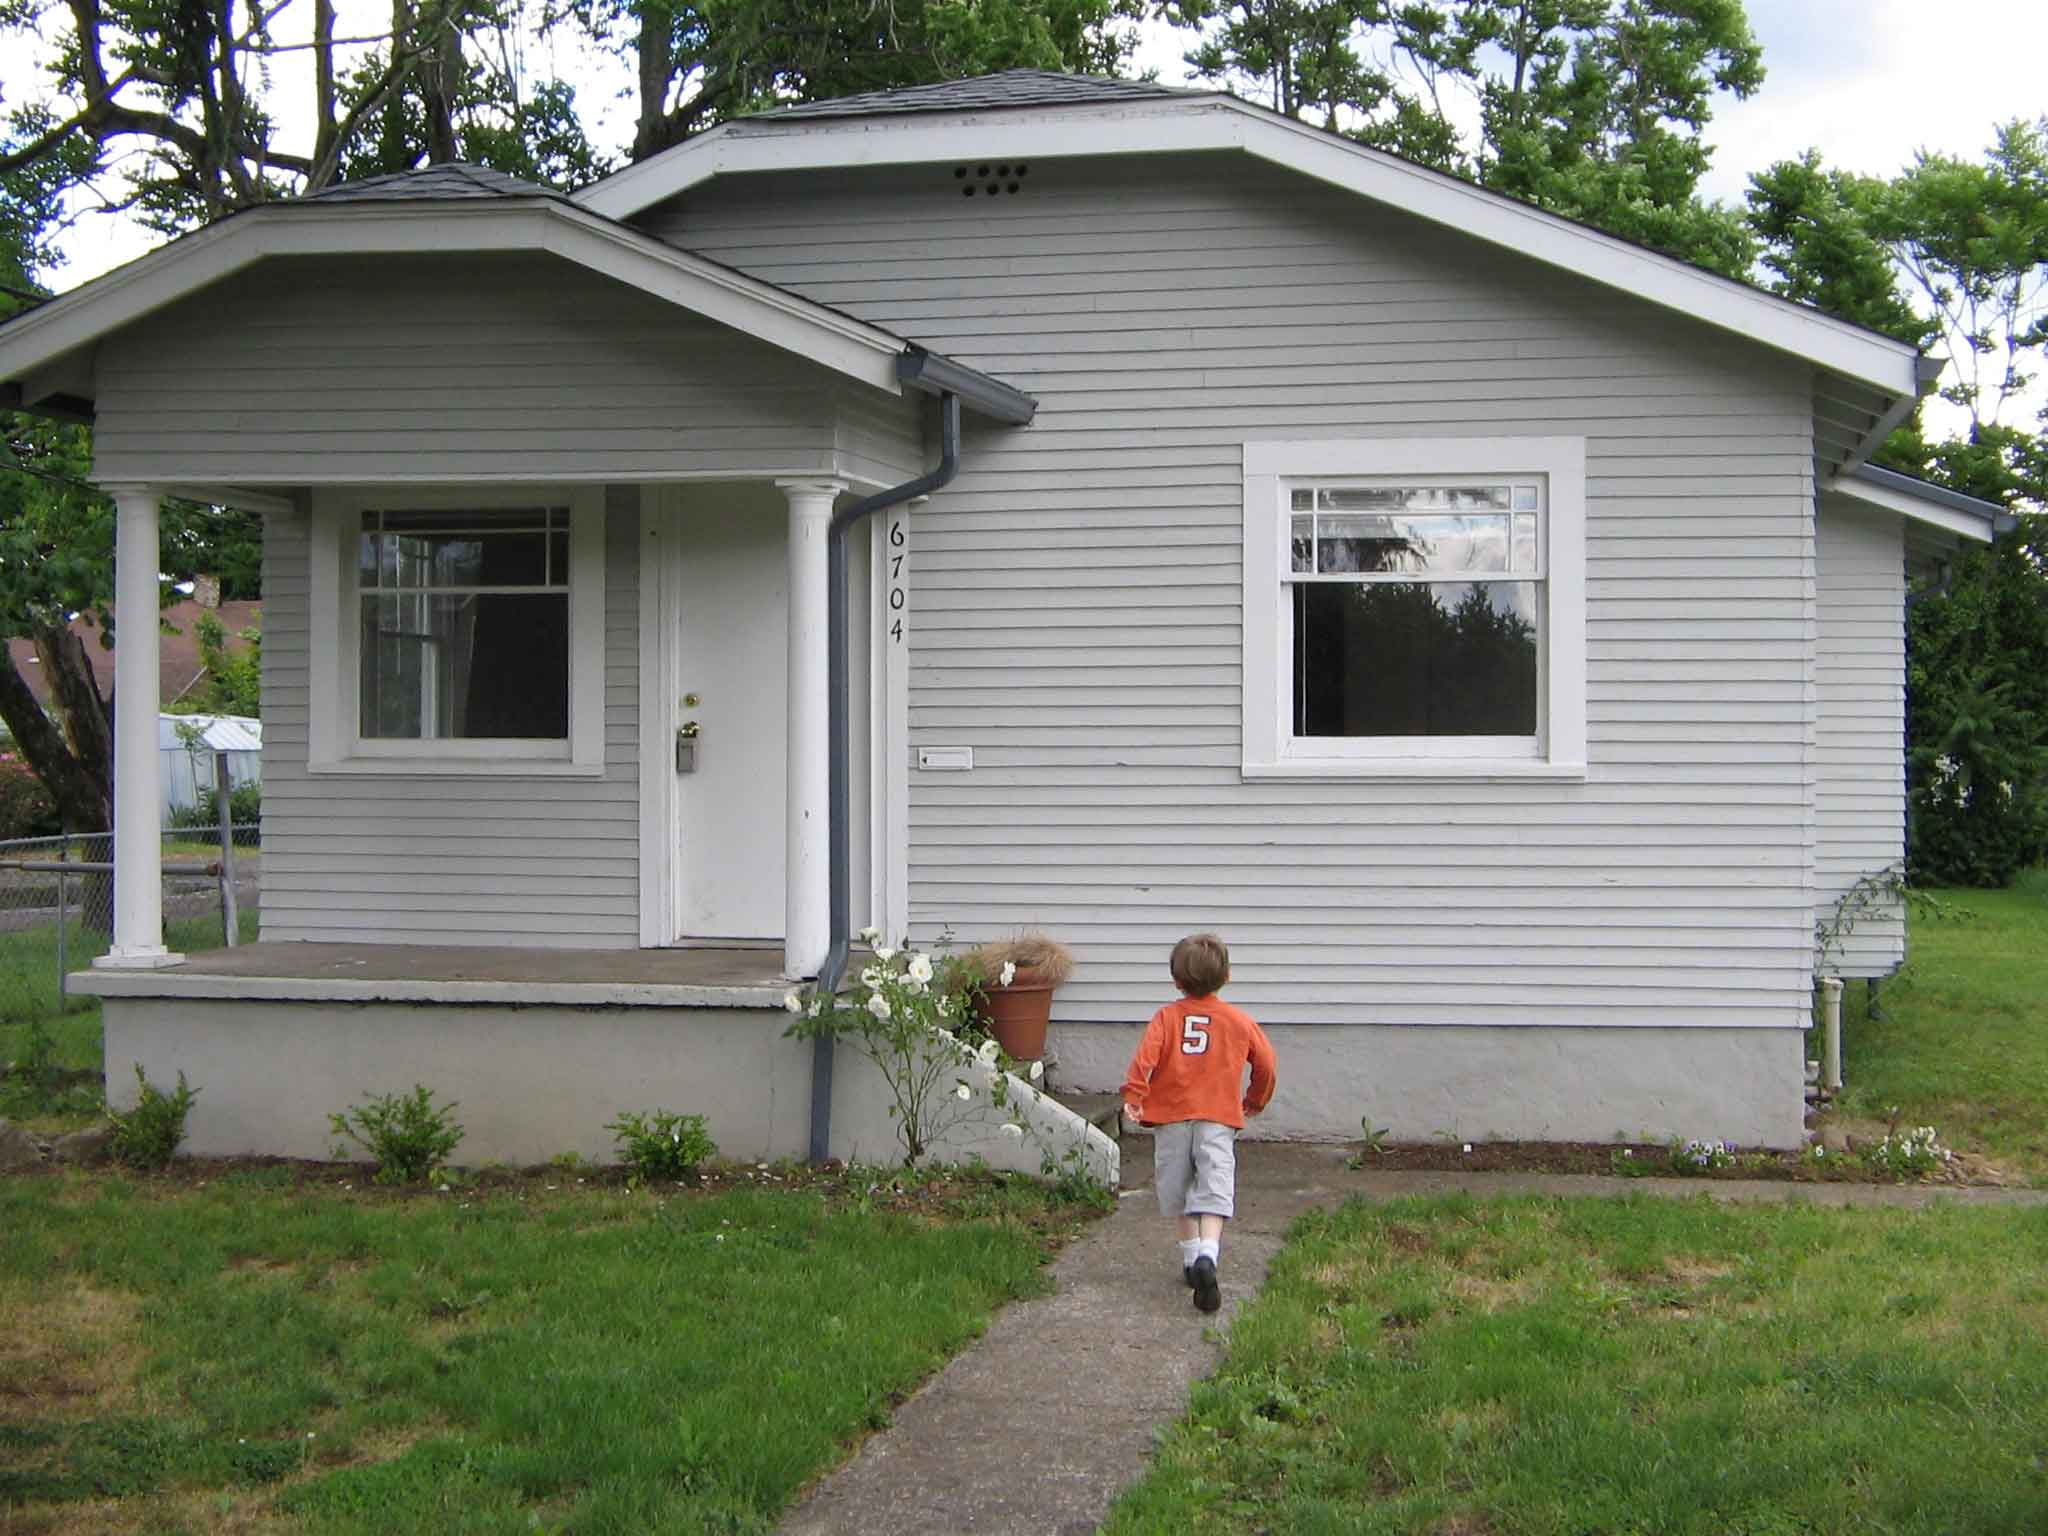
We scored big with our new digs! We found a cozy, 1950s bungalow in our favorite neighborhood of Sellwood-Moreland. It’s a short walk to visit family, eat out, visit the library, go grocery shopping. I’ll have a short bike commute to work. All in all, less time in the car and more time together.

Our house in 2014
But now to answer the biggest question: what’s the yard look like? Another blank slate! A cozy house means a big yard – lots of room for fruit trees, berry bushes and a vegetable patch.
The garden I’m leaving behind
I’ve built, tended and then move away from many gardens over the years. Saying goodbye to this garden is a bit heart-wrenching. But at the same time, I am over the moon about the challenge of starting over. I learned so many lessons on our last homestead and I know this next one will be even more incredible.
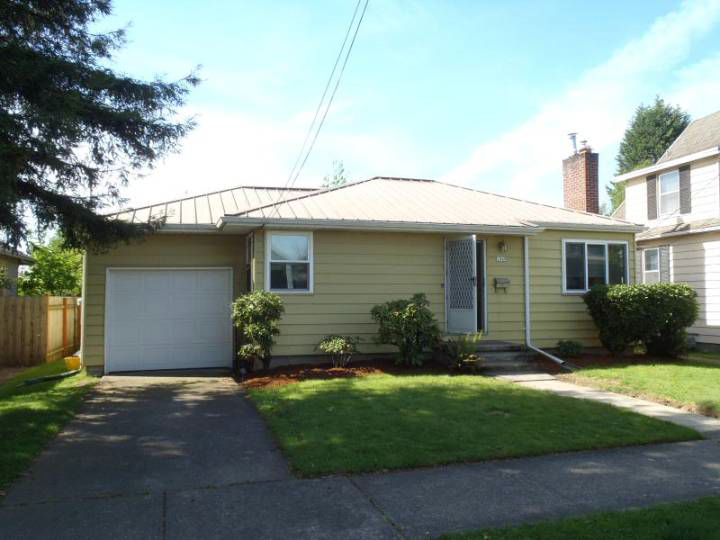
Our new house – ready for transformation into a homestead
So fasten your seat belts friends as we turn another house into a flourishing homestead. It’s going to be a wild ride!
May 27, 2014
May To Do List
It’s that time of year when the garden needs help transitioning from spring to summer. Here is a rundown of my current to-do list for the garden:
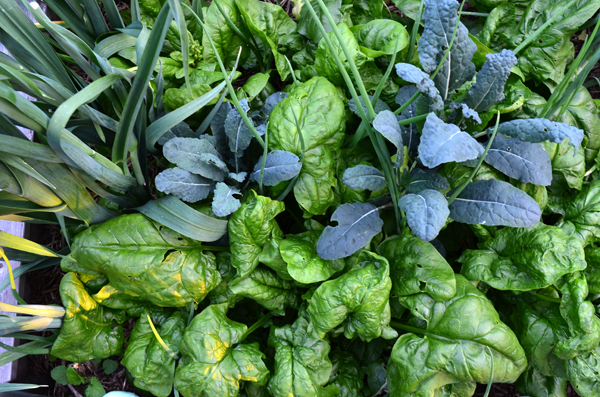
Spring spinach planted between kale. The cool-season spinach is ready to pull and the kale will quickly fill the empty space.
I densely planted the vegetable beds in early spring with the intention of pulling out the cool-weather crops when the temperatures heated up. That will make room for the warm weather plants, which are just now needing the extra space.
We don’t let the chickens free-range in the garden at this time of year – their claws are too destructive to tender plant roots. Instead, we really focus at this time of year on rounding out their diet with plant debris.
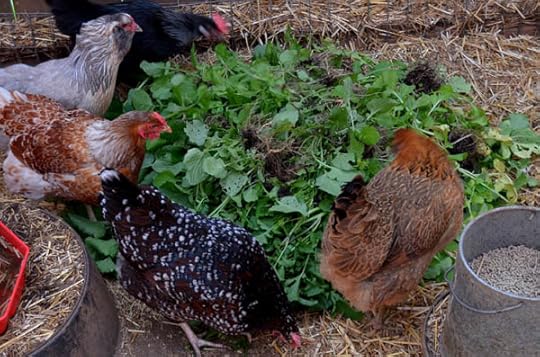
Chickens getting their springtime nutritional supplements in the form of garden debris and bolting spring crops.
I try to attack our compost piles at least every season by turning them. This will energize the microbes in there busily breaking things down. That ensures we have a steady supply of nutrient-rich compost whenever we need it.
The spring bulbs have all finished their show for the year. This is the time of year to tie back the leaves, letting them send energy back down into the plant bulb. When the leaves are brown and dried, you can cut them off entirely.
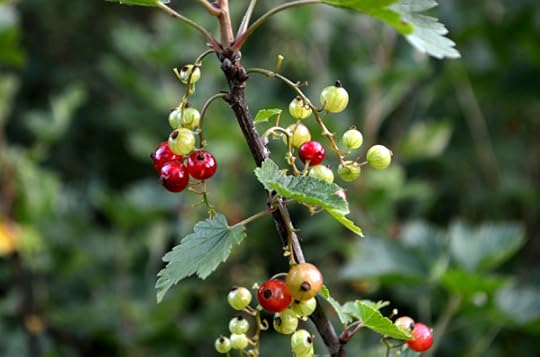
Red currants and juicy strawberries are ready for harvest in late May
Juniper is harvesting strawberries and red currants with me every evening after we get home. It feels good to be harvesting fruits and we may need to even fire up the canner to make some preserves.
It’s a good time of year to spread mulch to help with weed suppression and water retention. The days are cooler and the weeds are a lot smaller than they will be if you do this later in the season.
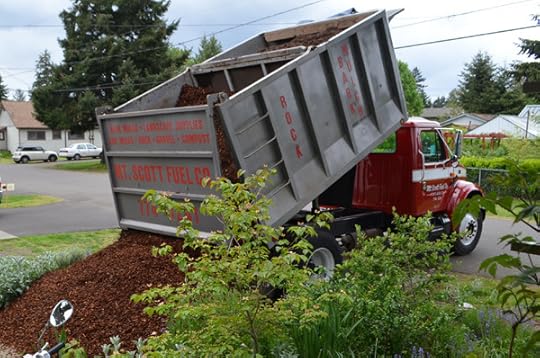
Getting ready to spread springtime mulch
Finally, it’s time to think about reconnecting our drip irrigation system. I can’t say enough good things about how helpful this has been. It was a modest investment to ensure our crops had consistent, even watering.
What is on your gardening to-do list at this time of year? Are you filling your harvest basket with any late spring goodies yet? Tell me about it in the comments below!
May 19, 2014
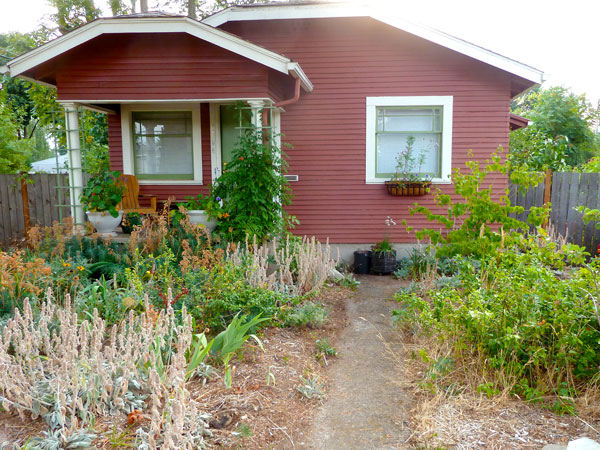
Front Yard – 2014 Update
We’ve lived in our little house for about eight years, but the front yard was the last garden I really put much effort into. In the fall of 2012, I finally took the time to draw up a landscape design. It was based on perennials from the backyard that would be easy to cut and divide, which meant I didn’t need to spend much money on new plants. Here’s a little look back at the garden as it grew in:
It started to wake up in early spring after the winter rains got everything established.
March 2013
By spring, we were getting our first few blooms.
Front yard in May 2013
Summertime made it look more filled in.
Front yard in August 2013
In the fall, the foliage turned more blue-green and some fall leaves put on a show.
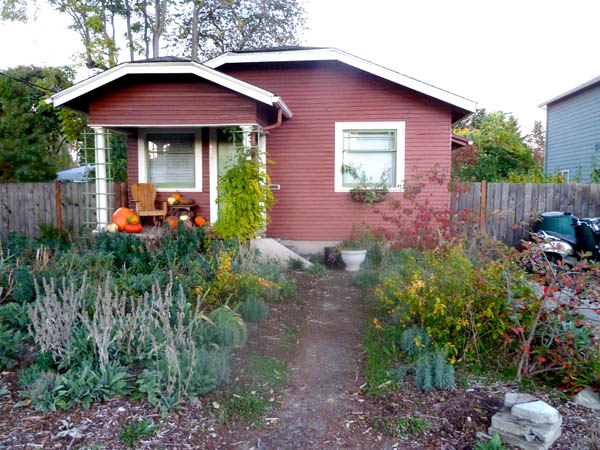
October 2013
Now, about a year and a half after planting, you would think this garden has been here forever.
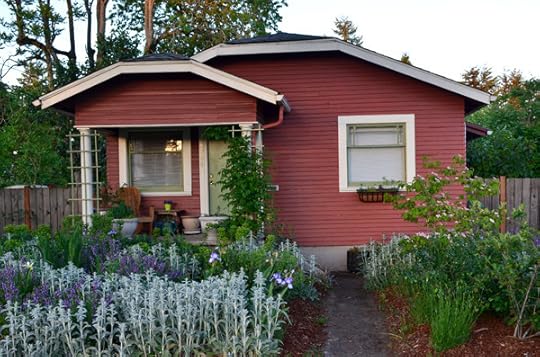
May 2014
The lamb’s ear reminds me of a river, weaving in between tufts of flowering sage and the chartreuse foliage of Euphorbia. The Korean Dogwood is in full pink bloom and the berries on the aronia are just starting to form.
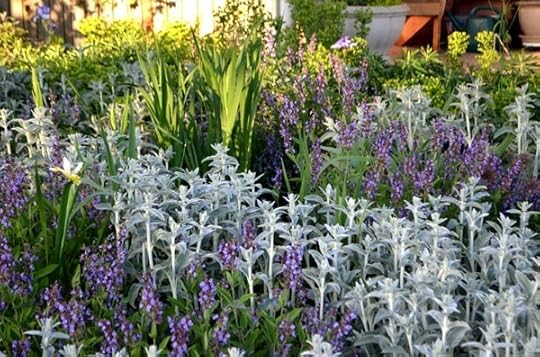
A “river” of lamb’s ear weaving through the front garden. It’s an evergreen, so the river is here all year.
As the purples from springtime crocus and flowering alliums fade, the purples from the irises and sage take their place. Come late summer, lavender will be blooming throughout the garden along with sunny Rudbeckia.
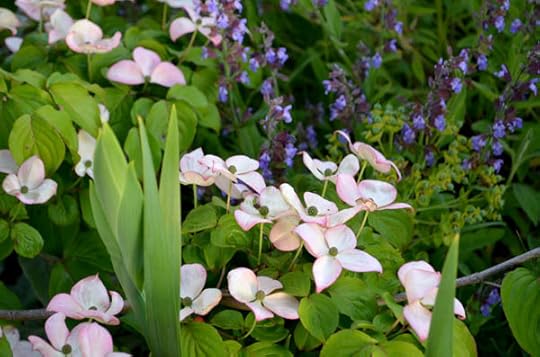
Korean Dogwood (Cornus kousa) blooming with flowering sage underneath and irises about to open
Most of these plants are drought tolerant, which makes the garden low-maintenance. I throw a sprinkler out there once a week through the hottest month, in August, and that’s about it. It’s a treat to meander through the garden every morning on my way to work and a warm welcome home at the end of a long day.
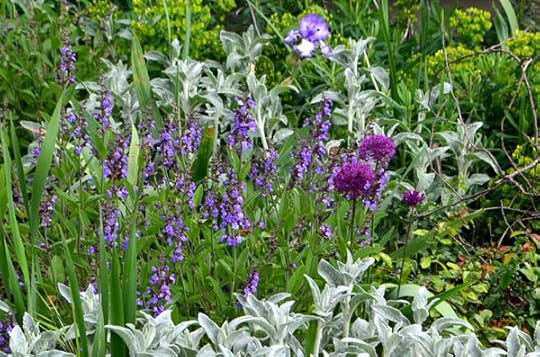
Flowering allium, flowering sage, lamb’s ear and euphorbia
Here are some other posts related to the front garden:
Planting plan and how to cut/divide perennials
Spring 2013 update that talks about more specific plants
Summer 2013 update that talks about the summer bloomers
May 12, 2014
Flowering Perennials for Clay Soil
Clay soil doesn’t have to mean your garden is destined to be anything less than amazing. In fact, there are so many great plant options that I’m doing a whole series this week on flowering perennials, shrubs and trees for clay soil.
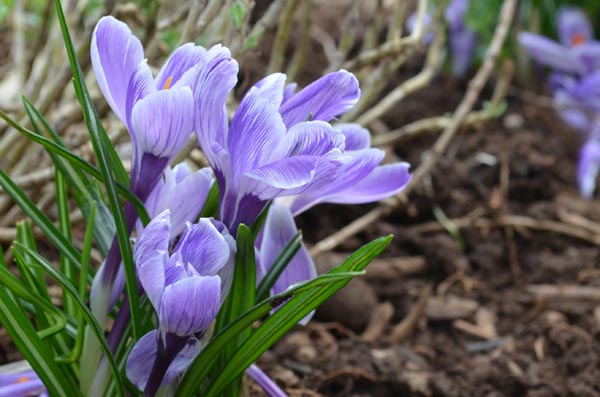
Crocus flowers in February
I wrote a recent post about ways you can improve your clay soil structure by adding organic ingredients like compost, mulch and sand. While that’s an attainable job for your vegetable patch, it can be a major undertaking to tackle the whole garden. Instead, try working with nature and not against it by planting shrub and tree species that will thrive in clay soil.

Springtime daffodil flowers
Starting in springtime, bulbs like daffodils and crocus will happily pop their heads up in clay soil. Divide them in the fall and replant to keep adding spring flowers to your garden.
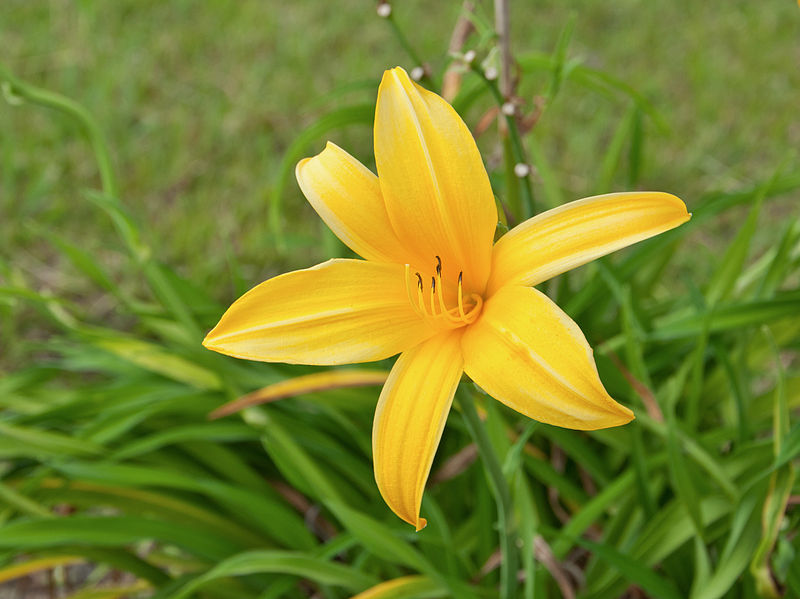
Daylily, Hemerocallis lilioasphodelus. Photo by Paolo Costa Baldi. License: GFDL/CC-BY-SA 3.0
As late spring approaches, Daylilies (Hemerocallis sp.) begin to open up. They tolerant a wide range of soil types and don’t require much water once established. They rebloom all the way through the fall.
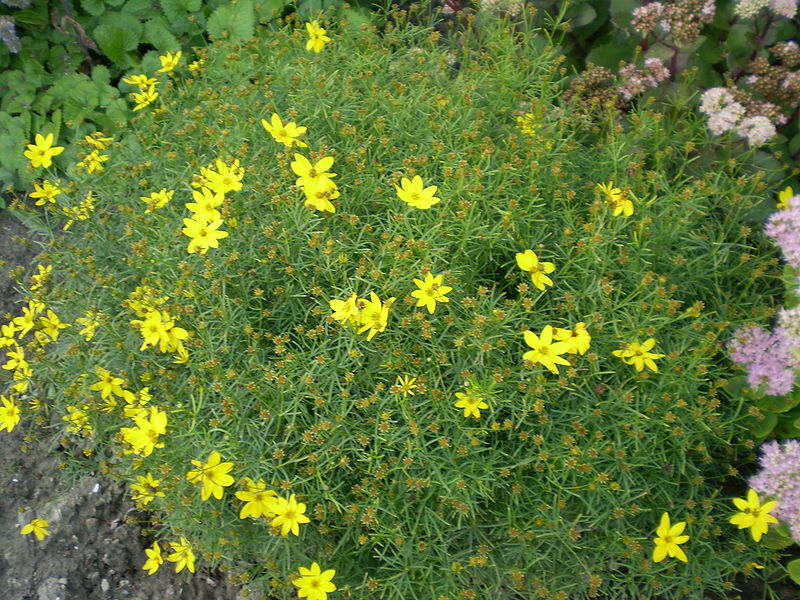
Tickseed, Coreopsis verticillata. Photo by Rob Hille; public domain license
Tickseed is another favorite of mine, especially the Coreopsis verticillata species. This plant is a prolific summertime bloomer of (usually) yellow flowers with fine foliage. Some varieties are great for attracting butterflies and many are drought-tolerant.

Fall asters
Both Daylily and Tickseed look great paired with Asters, another showy flowering perennial that does well in clay soil. The asters in our garden are a bee-magnet. They buzz around happily on masses of purple blossoms from late summer through fall.
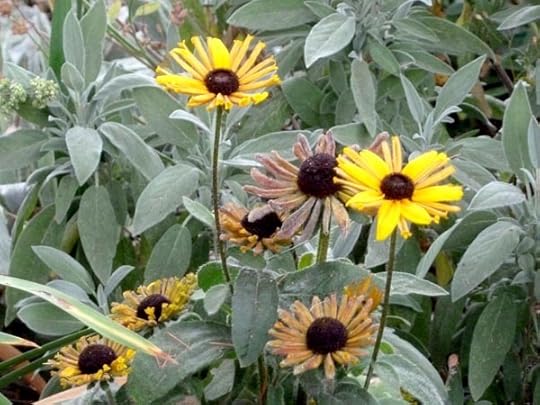
Black-Eyed Susan, Rudbeckia sp.
Both Russian Sage and Black-Eyed Susans tolerate clay soil and look fabulous together in a garden. They both tolerant dry, hot areas in clay soil. The Russian Sage spills piles of light purple flowers in summer and Black-Eyed Susan will reseed to ensure many long seasons of yellow blooms.
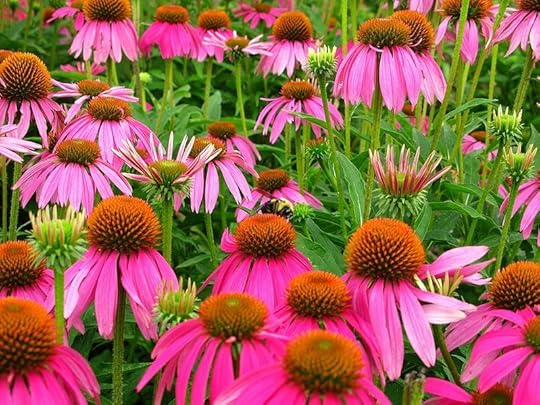
Coneflower, Echinacea purpurea. Photo by H. Zell; License: GFDL/CC-BY-SA 3.0
Who doesn’t love a Coneflower (Echinacea purpurea)? Butterflies love them. Bees love them. If you’re crafty, you can use it for medicinal purposes. Summertime bloom colors are most often purples and pinks, although there are some white and orange varieties out there too.
The list goes on, but this should give you some confidence that clay soil doesn’t have to mean a boring plant palette. If you have some other favorite flowers for clay soil, tell me about it in the comments below! Look for more posts soon about shrubs and trees that do well in clay soil.
April 30, 2014
2014 Vegetable Garden Plan
Every year I draft a garden plan for our four raised beds that will take us from spring into the fall. I try to balance a good crop rotation with companion planting to maximize our space. I am please to report that this year’s plan is ready for sharing!
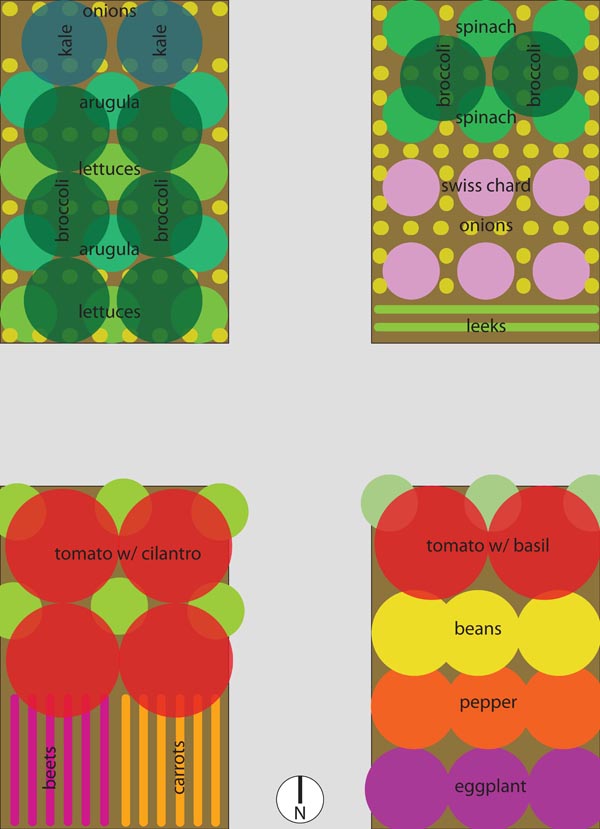
2014 Garden Plan
Companion plants are plants that pair well together because they require different things – either growing space or nutrients. For example, the small yellow dots in this year’s plan are onions. Lots and lots on onions. I tuck them in between leafy greens like lettuces and chard because the greens take up space above soil while the onions take up space below soil. I can fit in more plants that way.
This garden plan includes cool-weather plants that are thriving now and ready for harvesting – spinach, arugula and leeks (from last year). I planted larger plants around them to provide some shade this summer when it gets hot. Typically those cool weather crops will bolt, but I’m hoping to keep them in the garden a bit longer if things like broccoli and kale can shade them.
Densely planted companion vegetables
The beds are not fully planted out yet. Some remaining plants from the winter garden will get pulled in a couple weeks and replaced with the hot summer crops – tomatoes, peppers, and eggplants. I am also planning to tuck plenty of winter and summer squashes outside the beds in open patches throughout the garden.
If you’re looking for more garden plans, check out some from the last few years. I would love to hear what you are planting this year as well!
April 24, 2014
How to Improve Clay Soil
Having good soil structure is crucial for growing a healthy garden, but most of us are not blessed with perfect humus (see pie chart below). Often we’re starting with poor soil structure that we need to keep amending over time to achieve that perfect blend of sand, silt, clay and organic matter.
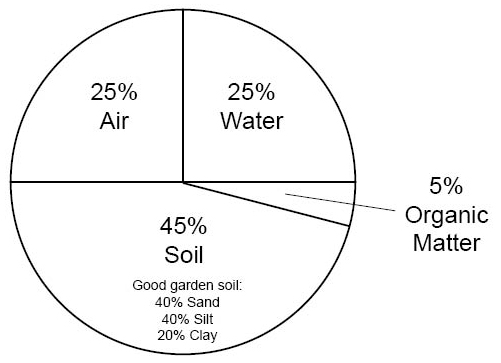
The basic breakdown of good “humus” soil structure
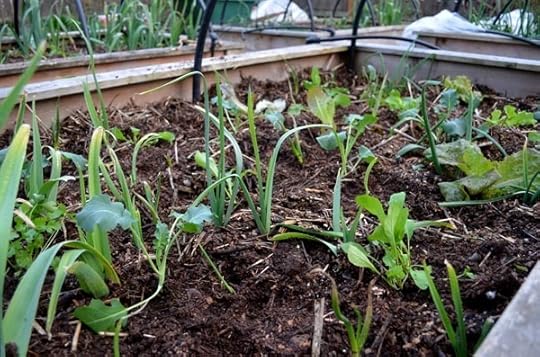
Recently I helped a friend get their garden prepped for the season. They have four raised beds filled with heavy clay soil. That is a challenging environment for vegetables because the soil is so compacted. They have a hard time digging their roots down and there is very little room for water retention. Microbes have a difficult time living in the soil because there are no pockets of oxygen and water for them feed off.

Clay soil does not a happy garden make!
The solution is simple: add compost. Lots and lots of compost. Compost has a great combination of both chunky and fine particles, which will help balance the clay soil into a more ideal structure. It also has a massive load of nutrients that will help keep the vegetables healthy.
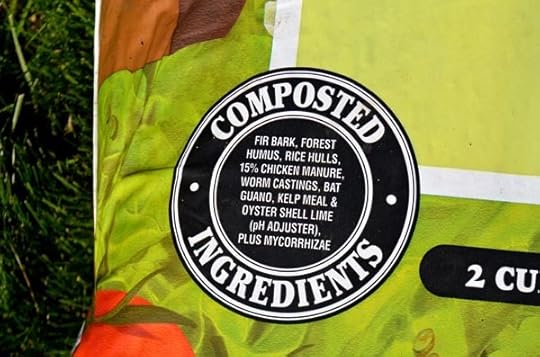
Choose an all-natural fertilizer with a diverse range of ingredients. Your vegetables will thank you for the trace minerals and nutrients.
The fastest way to fix the problem is also the most expensive way: buy a huge load of fully composted organic matter. That can be anything from mushroom compost to manure – ideally a mix of several sources so you get a balanced load of nutrients in the soil. Turn it into the soil, possibly with some sand, and your beds will have great structure.
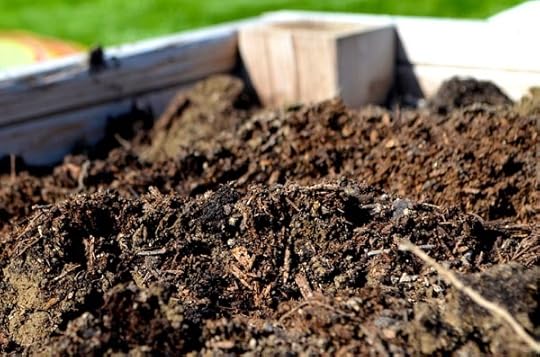
Compost is a great strategy for improving poor soil. It brings in a ton of nutrients, as well as better structure with it’s small and large particles.
The slow way to fix this is the most economical: make your own compost at home from your garden and kitchen scraps. It takes compost piles several months to break down fully and you may still need to add a bag or two of sand to get the right consistency.
For my friend’s garden, we did a compromise of these two options: we bought a few bags of compost for this season and are planning on the long term solution being a home compost system.
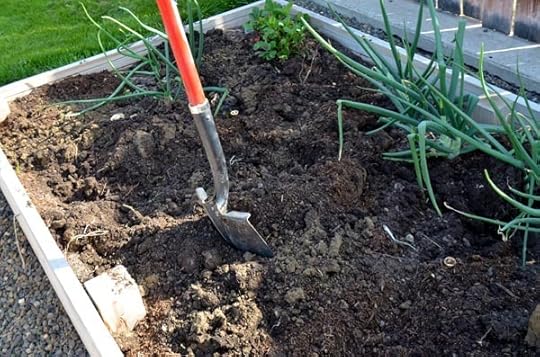
For an immediate effect, turn the compost into poor soil to prep it for planting.
This is where the great workout begins! We attacked the four raised beds with a shovel and began breaking up all that hard clay. We dumped 1-2 bags of compost in each bed, turning it in like we were mixing a big cake.
The benefit of turning the compost into the soil is that the new, organic matter is evenly distributed. Immediately the soil consistency has improved. There are now pockets for air and water retention, plus lots of nutrients for the microbes and spring vegetables to munch on.
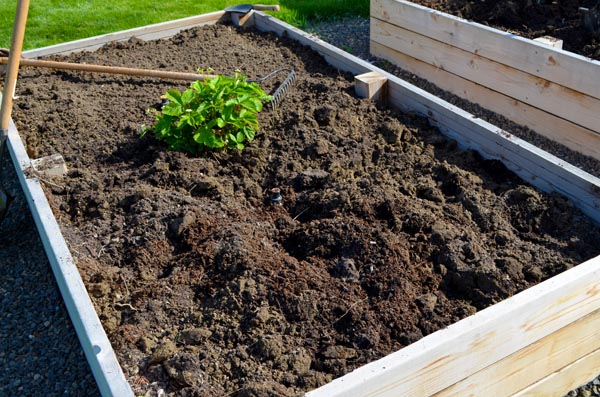
Rake the area smooth prior to planting
The downside of turning the soil this much is that weed seeds that were once buried are now exposed to light, which means there may be more weeds in the garden for the short term.
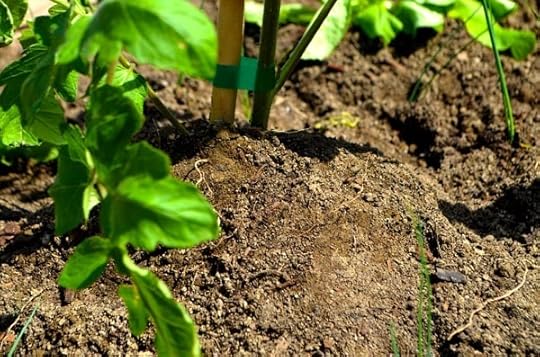
Tomato happily planted in the raised beds
We’ll have to keep adding compost to fully remedy how heavy the soil is, but I’m confident the amount we added is enough to have a really productive garden this season. What kind of soil struggles do you have on your homestead? Have any advice to share on how you’ve dealt with poor soil? Tell me about it in the comments below!
April 16, 2014
DIY Laundry Detergent
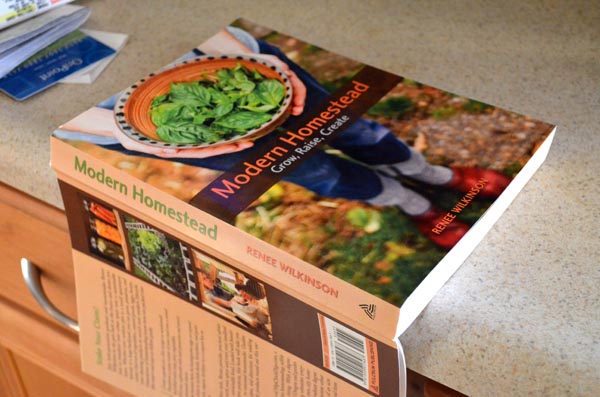
How is it that I have never posted my recipe for homemade laundry detergent? I started making my own homemade laundry detergent about a decade ago, tweaked the process over time, let the recipe evolve and even included it in my book Modern Homestead: Grow, Rasie, Create. It just takes a few simple ingredients and about thirty minutes to make a huge batch.
 Ingredients
1/2 bar of Fels Naptha soap, grated
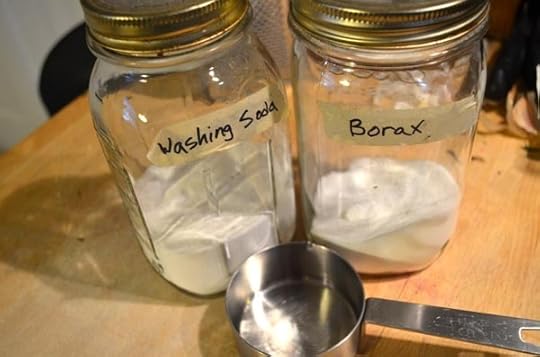
1/2 cup washing soda
1/2 cup borax
hot water
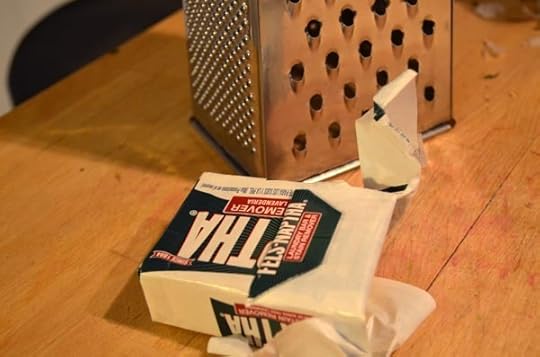
Fels Naptha soap has been around a long time and is found in many DIY cleaner recipes. Most grocery stores carry it in the laundry soap aisle. It’s one of those products you never notice until you’re looking for it.
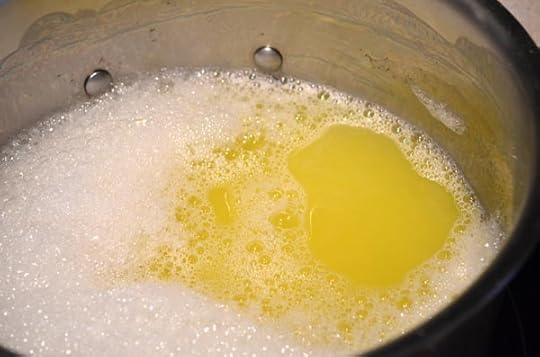
 Heat a half gallon of water on the stove, which is about eight cups. When it’s hot, but not necessarily boiling, add the grated soap. Stir it around until it melts, which usually takes about fives minutes.
When the soap has melted, stir in your powdered ingredients. Both washing soda and borax are found in most grocery stores in the cleaner aisle. Stir the mixture for a couple minutes until dissolved.
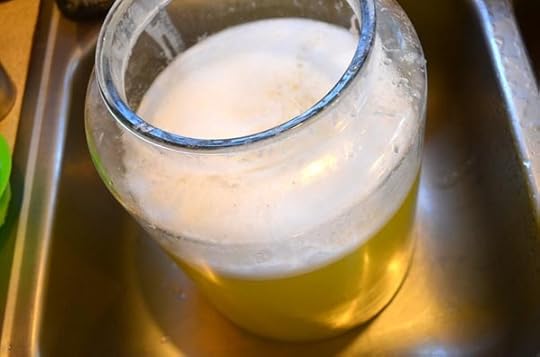
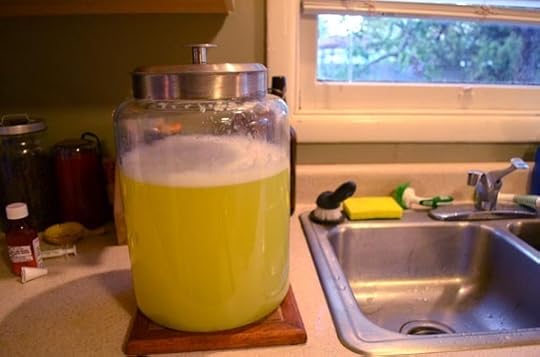
Mix your half gallon of soap with another gallon of hot water, or sixteen cups. I do this over the sink in case I spill and mix it all into a two gallon jug. Give it a good, vigorous stir and let it sit to cool.
I use about a half cup of detergent with each large load of laundry. I used to make this recipe about twice a year when it was just Jay and me, but make it about once every three months now that we have a family.
Making your own green cleaners can be really cost effective – borax, washing soda and Fels Naptha are all super cheap and often found in other green cleaner recipes. I also really enjoy knowing exactly what’s in our home cleaners. They are safe for our little one to be around and are not petroleum-based. It takes a small commitment of time, but is worth the effort.
Do you already make your own green cleaners? Have any other ideas or recipes to share for simplifying your homestead? Tell me about it in the comments below!
How is it that I have never posted my recipe for homemade...
How is it that I have never posted my recipe for homemade laundry detergent? I started making my own homemade laundry detergent about a decade ago, tweaked the process over time, let the recipe evolve and even included it in my book Modern Homestead: Grow, Rasie, Create. It just takes a few simple ingredients and about thirty minutes to make a huge batch.
Ingredients
1/2 bar of Fels Naptha soap, grated
1/2 cup washing soda
1/2 cup borax
hot water
Fels Naptha soap has been around a long time and is found in many DIY cleaner recipes. Most grocery stores carry it in the laundry soap aisle. It’s one of those products you never notice until you’re looking for it.
Heat a half gallon of water on the stove, which is about eight cups. When it’s hot, but not necessarily boiling, add the grated soap. Stir it around until it melts, which usually takes about fives minutes.
When the soap has melted, stir in your powdered ingredients. Both washing soda and borax are found in most grocery stores in the cleaner aisle. Stir the mixture for a couple minutes until dissolved.
Mix your half gallon of soap with another gallon of hot water, or sixteen cups. I do this over the sink in case I spill and mix it all into a two gallon jug. Give it a good, vigorous stir and let it sit to cool.
I use about a half cup of detergent with each large load of laundry. I used to make this recipe about twice a year when it was just Jay and me, but make it about once every three months now that we have a family.
Making your own green cleaners can be really cost effective – borax, washing soda and Fels Naptha are all super cheap and often found in other green cleaner recipes. I also really enjoy knowing exactly what’s in our home cleaners. They are safe for our little one to be around and are not petroleum-based. It takes a small commitment of time, but is worth the effort.
Do you already make your own green cleaners? Have any other ideas or recipes to share for simplifying your homestead? Tell me about it in the comments below!


