
Becca Hillburn's Blog, page 19
February 19, 2018
Mermaid Markers: Watercolor Basics
Mermaid Marker's are Jane Davenport's foray into the world of dyebased watercolor markers. The concept isn't a new one- dye based watercolor markers like Spectrum Aqua (by Spectrum Noir) have been around for awhile. These markers utilize water reactive dye to achieve blending effects- effects you can get from most waterbased markers, including Crayola. What tends to make them special are specialty brush tips that facilitate this blending.
There are two main camps when it comes to these brushes- fiber brush nibs like Spectrum Aqua and Distress Markers, individual nylon bristles like Kuretake Clean Color, Pentel Pocketbrush, and Neopiko 4. The outlier is Ecoline, which features springy foam rubber nibs on their watercolor markers.
I've reviewed many watercolor, waterbased markers on this blog. There's been the bad- Marvy LePlume II, the great- Winsor Newton Watercolor markers (pigment, not dye based, and the only pigment based watercolor markers I've ever seen), and a whole lot in between. There have been markers that take awhile to get used to- Kuretake Clean Color Real Brush, and markers that I never managed to wrangle- Akashiya Sai. There have even been markers I can't afford to review, like the Molotow Aqua, that are forever on my 'someday' list. The Jane Davenport Mermaid Markers are an interesting mix of old ideas repackaged, great ideas rebranded, and frustrating problems that deserve addressing, and I look forward to sharing these with you guys today!
This review of the Jane Davenport Mermaid Markers is part of my Watercolor Basis series, a series of art supply reviews and tutorials designed to get you painting!

Reviews such as this one are made possible thanks to the generosity of my Artnerds on Patreon!
The Stats:
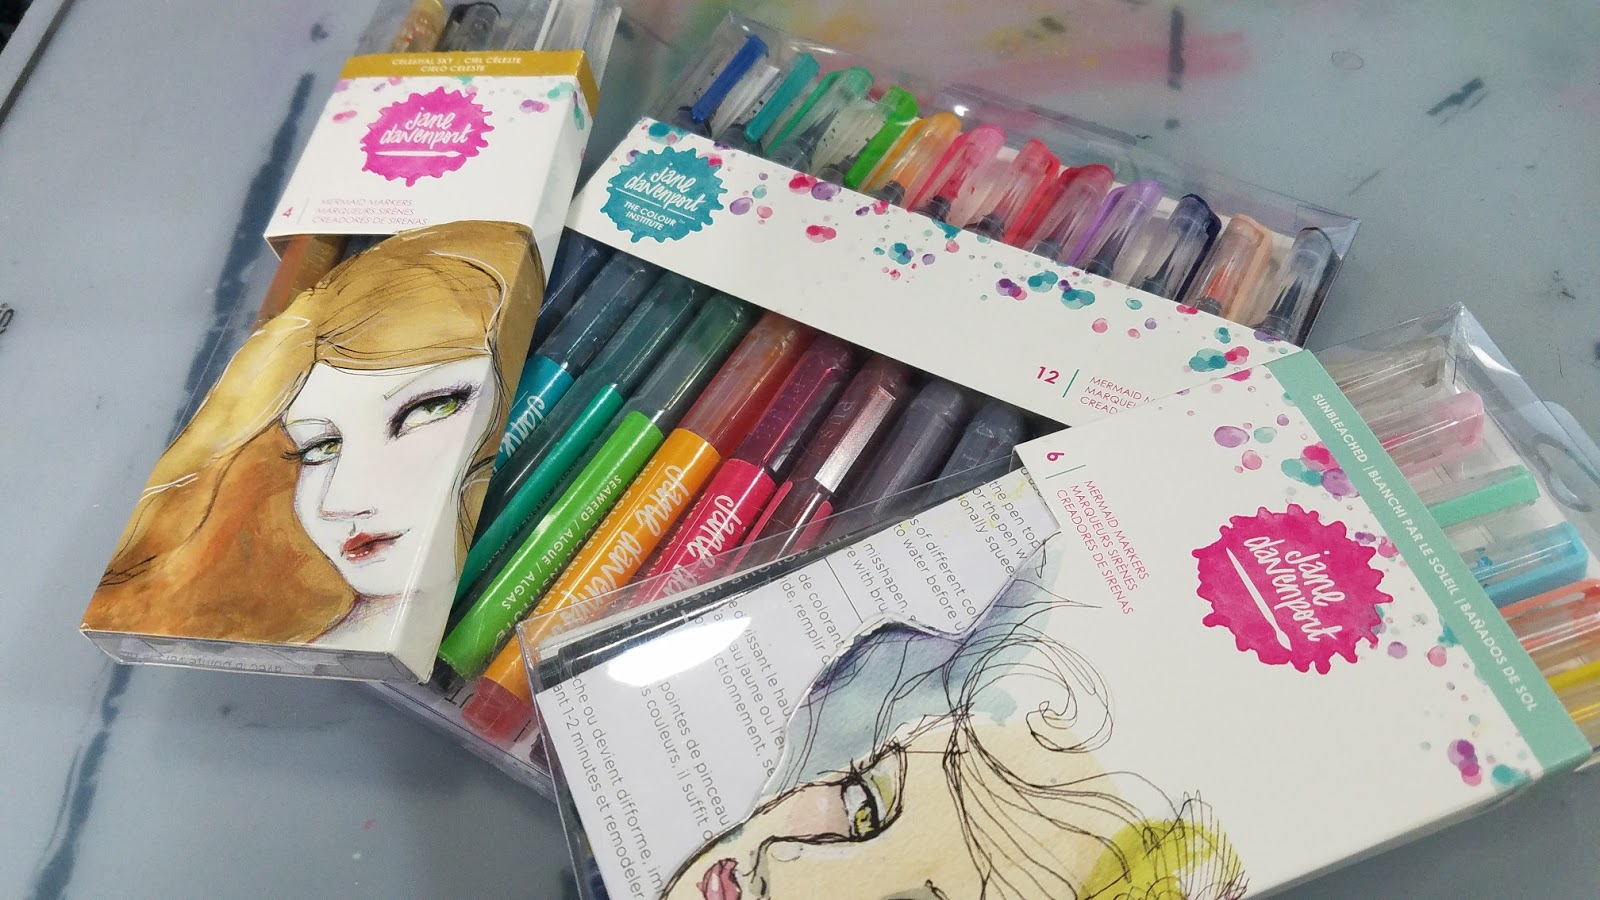
Available in the original 12 colors, plus sets of 6 (Sunbleached, Shipwrecked) and 4 (Shimmering Sky, Celestial Sky)$2.91-$3.96 per marker)Not available openstockCommercial refills not available, but could be refilled with liquid watercolors, or dye based ink once waterbrush has been fully cleaned out32 total colors (full set only seems to be available through Jane Davenport, which tends to be on the pricey side: https://janedavenport.com/shop/suppli... are repurposed waterbrushes filled with dye based inkDye basedHigh water reactiveGiven the nature of dye paints, probably light fugitiveNylon bristle nibsRepurposed waterbrushes
Available Through:Amazon: ($34.98)Michaels: ($41.99 for 12)Jane Davenport's Site: ($47.58)
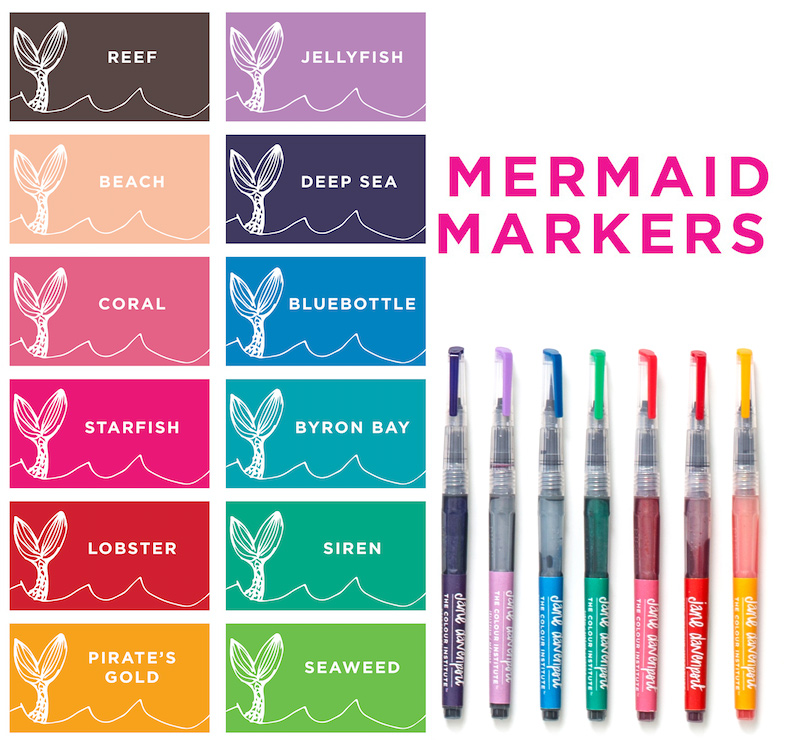
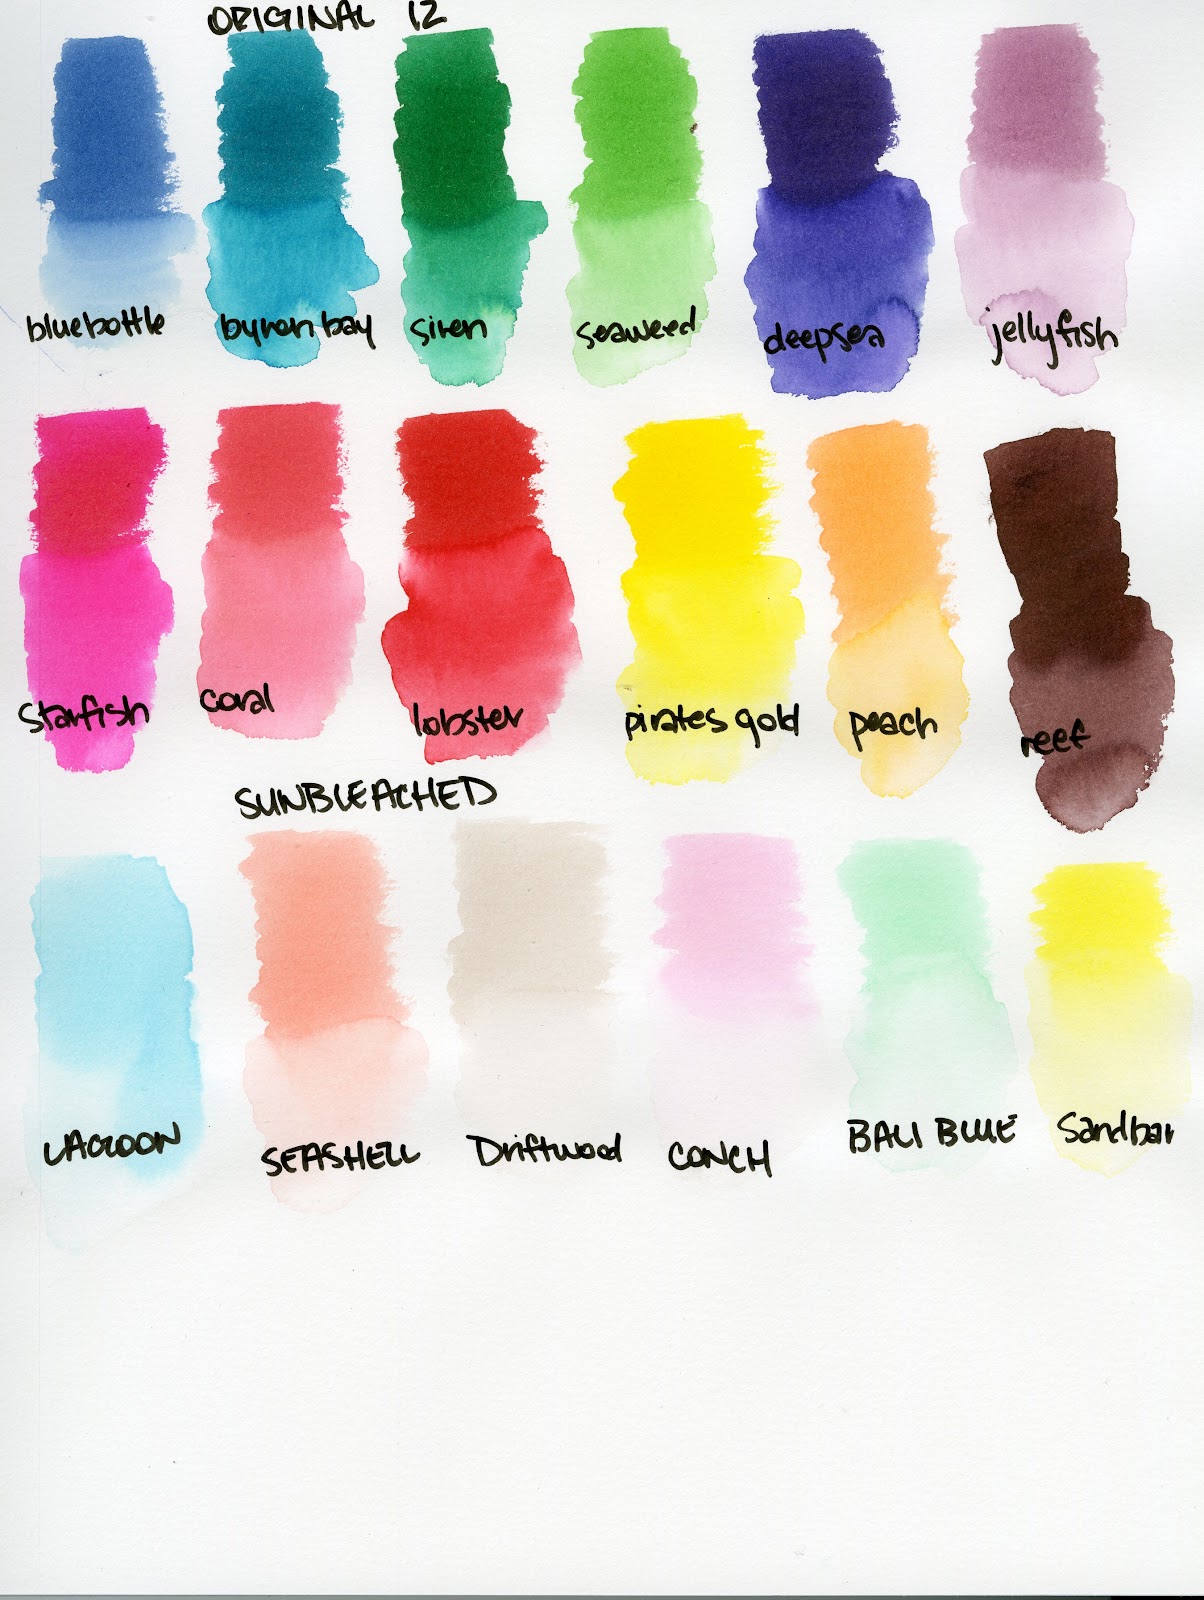
Original Colors
 Source
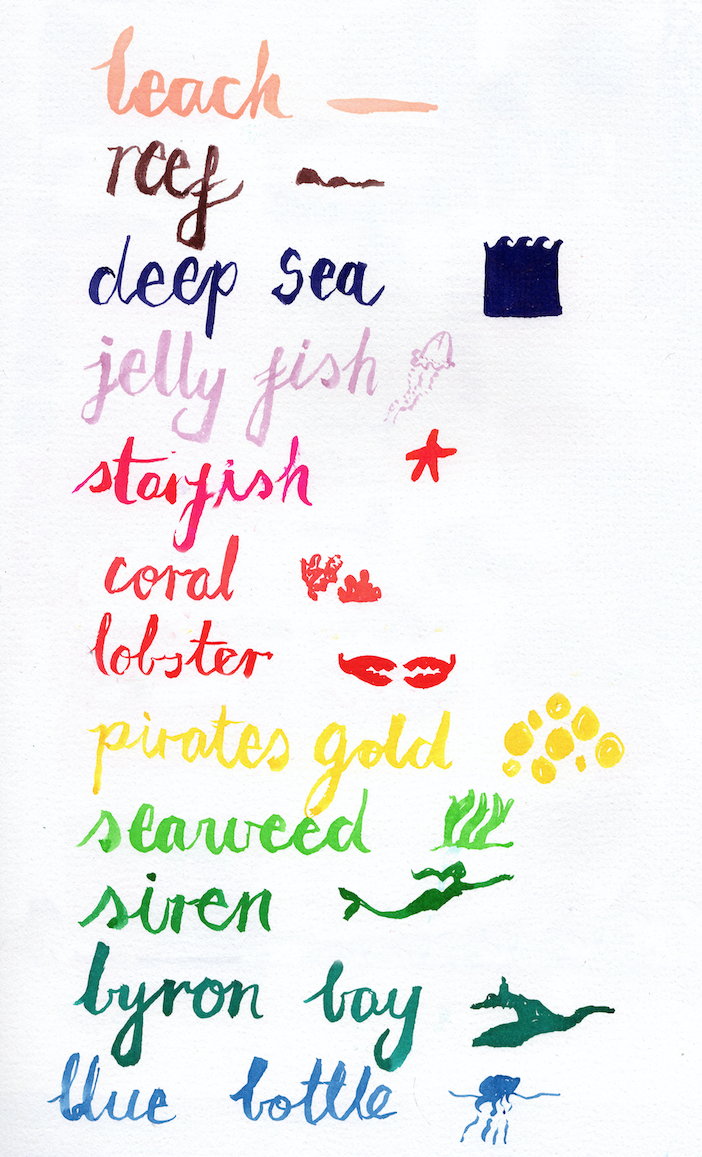 SourceFull set:
 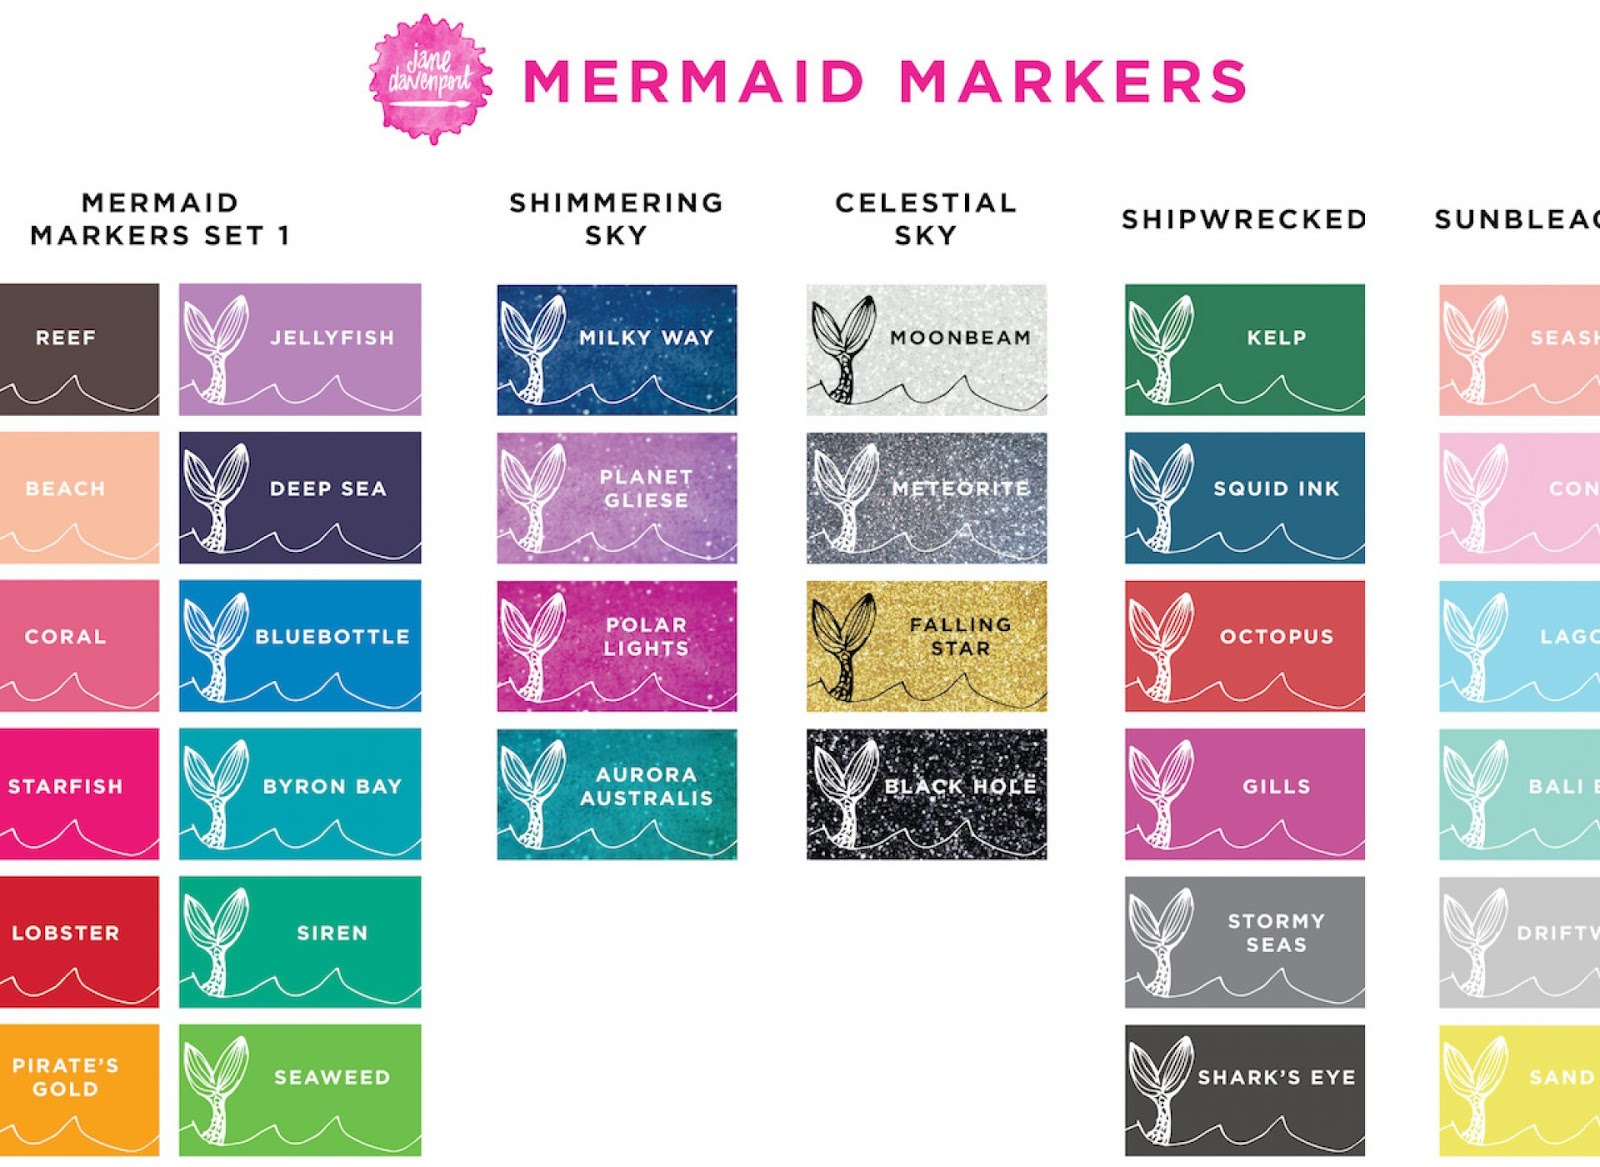 Source
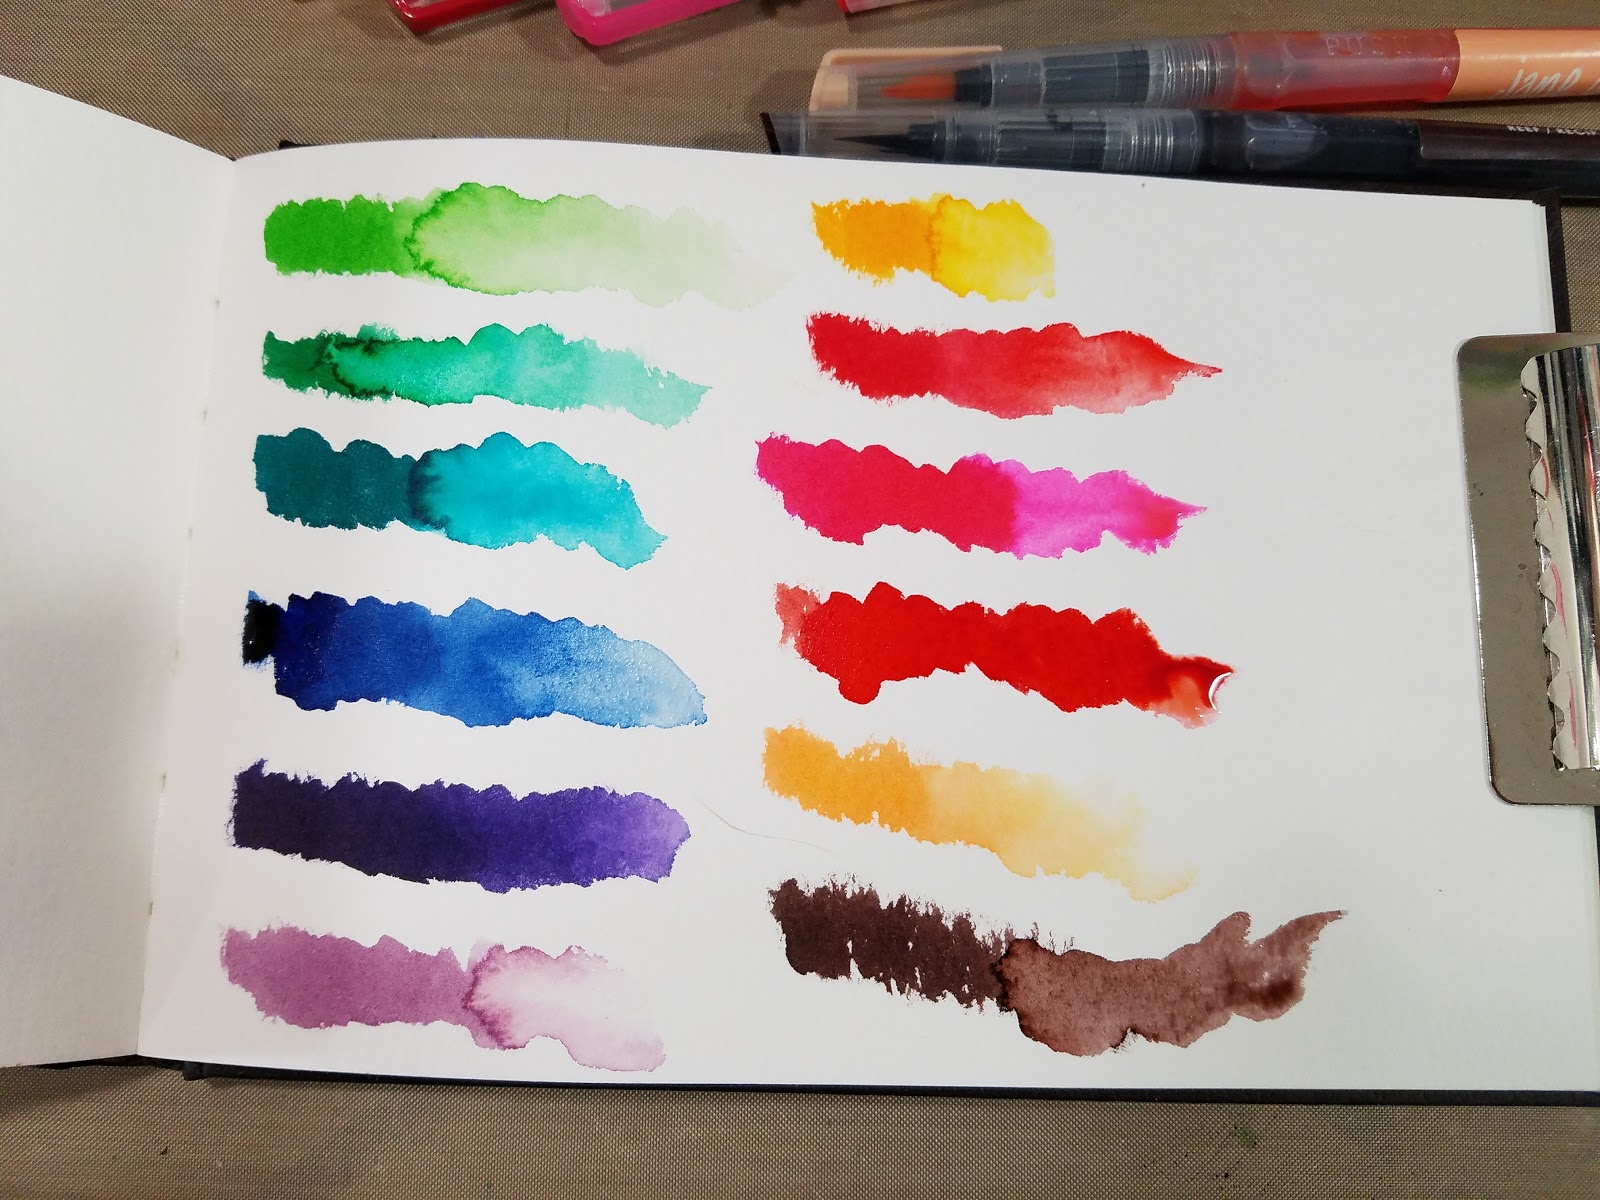
Scanned Swatches- Original 12 and Sunbleached (6)
Mermaid Markers Unbox and Swatch:
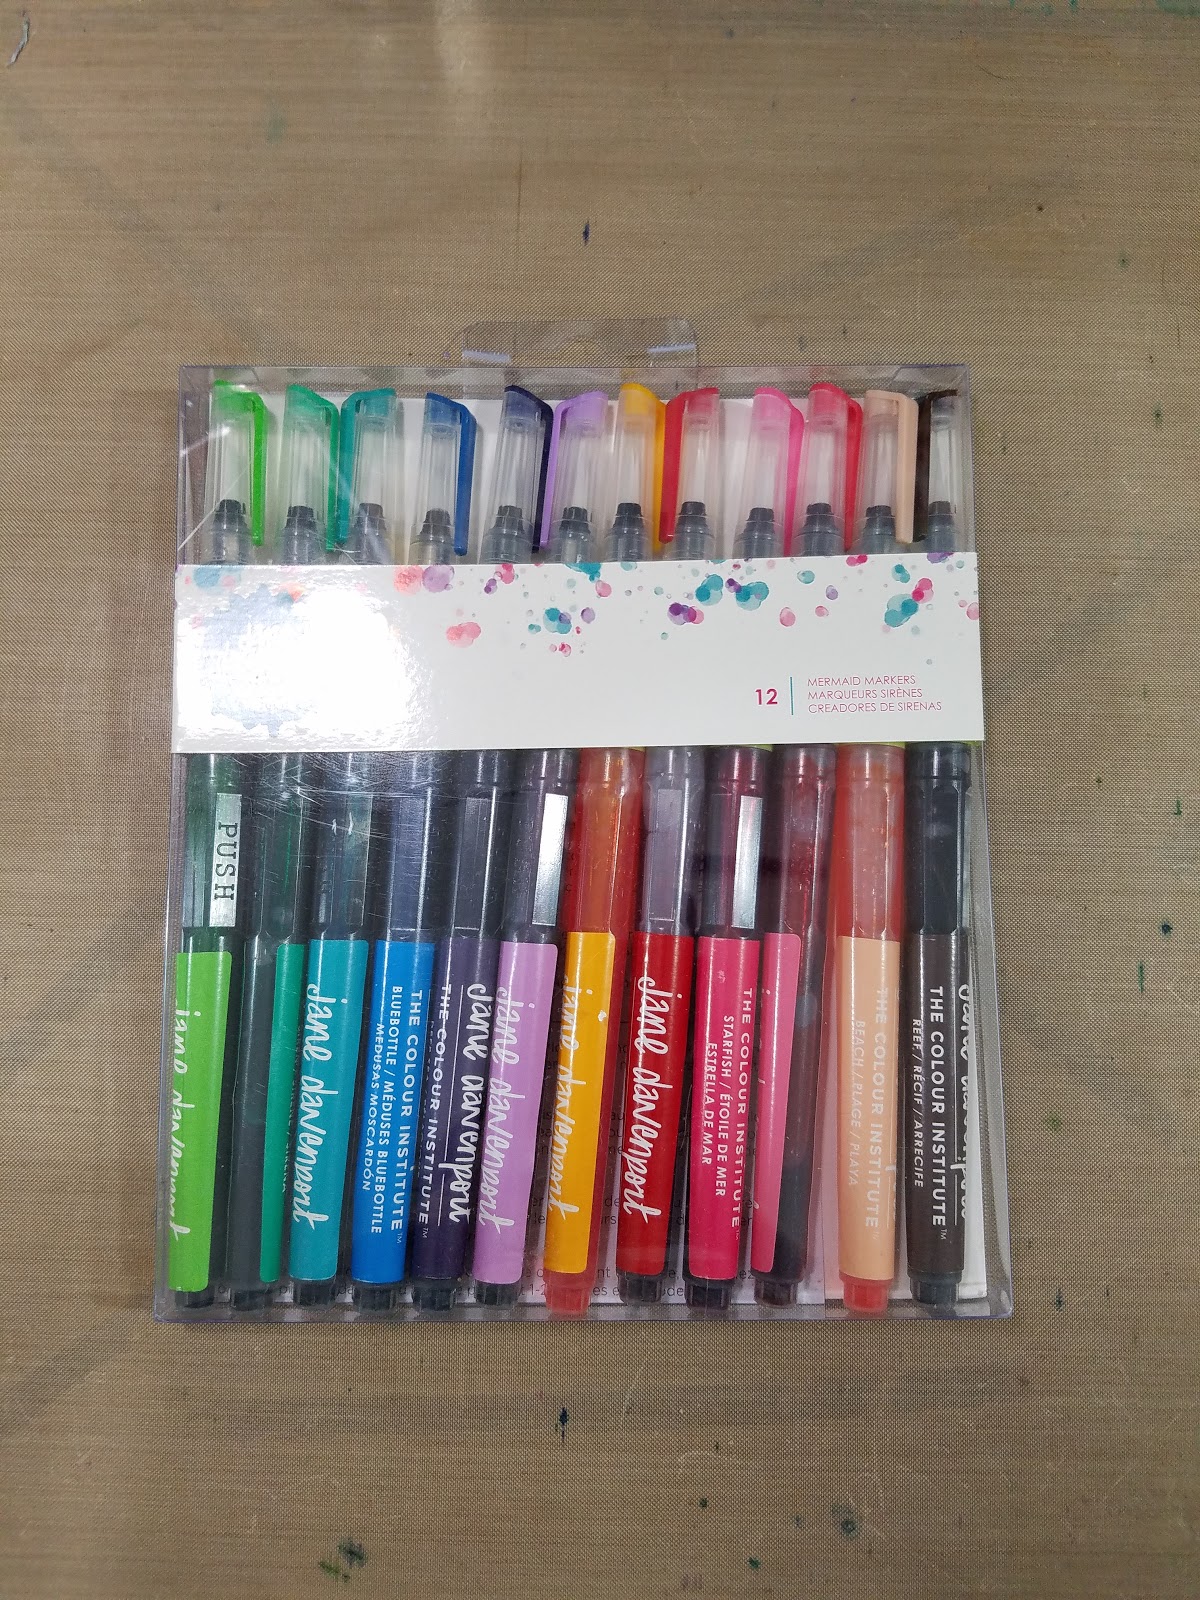
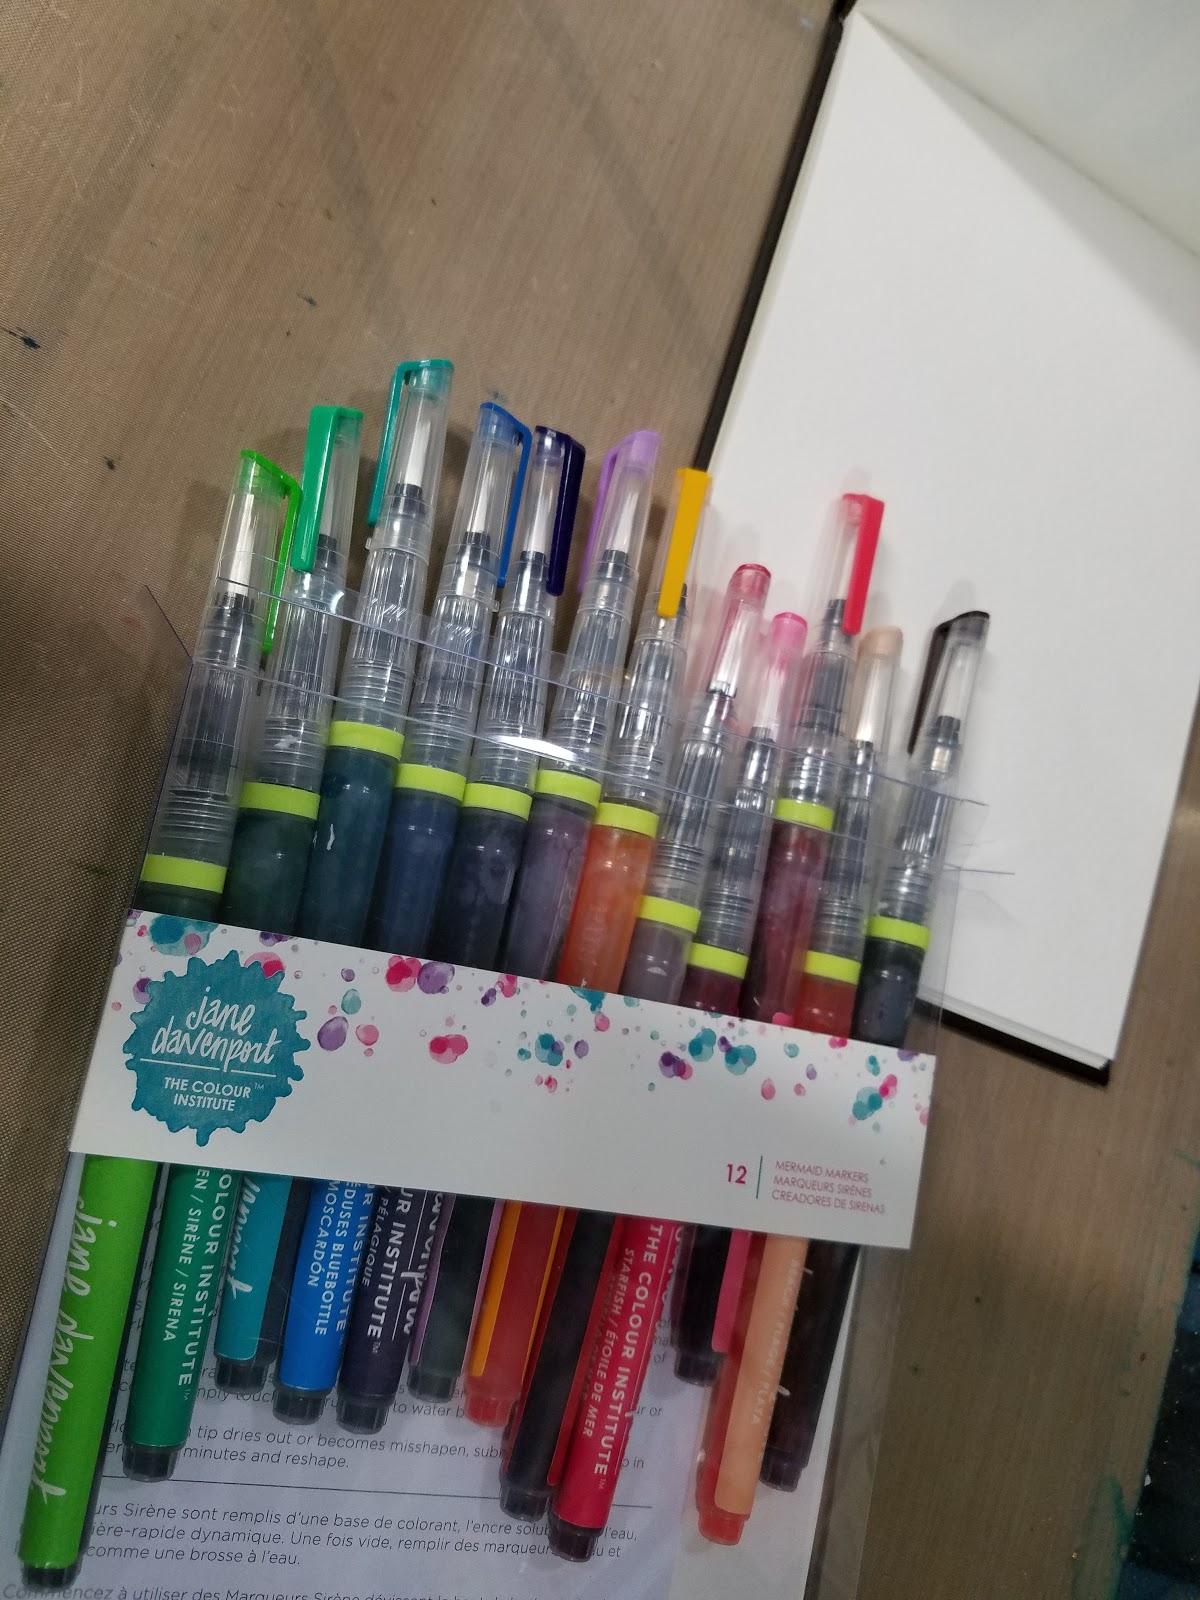
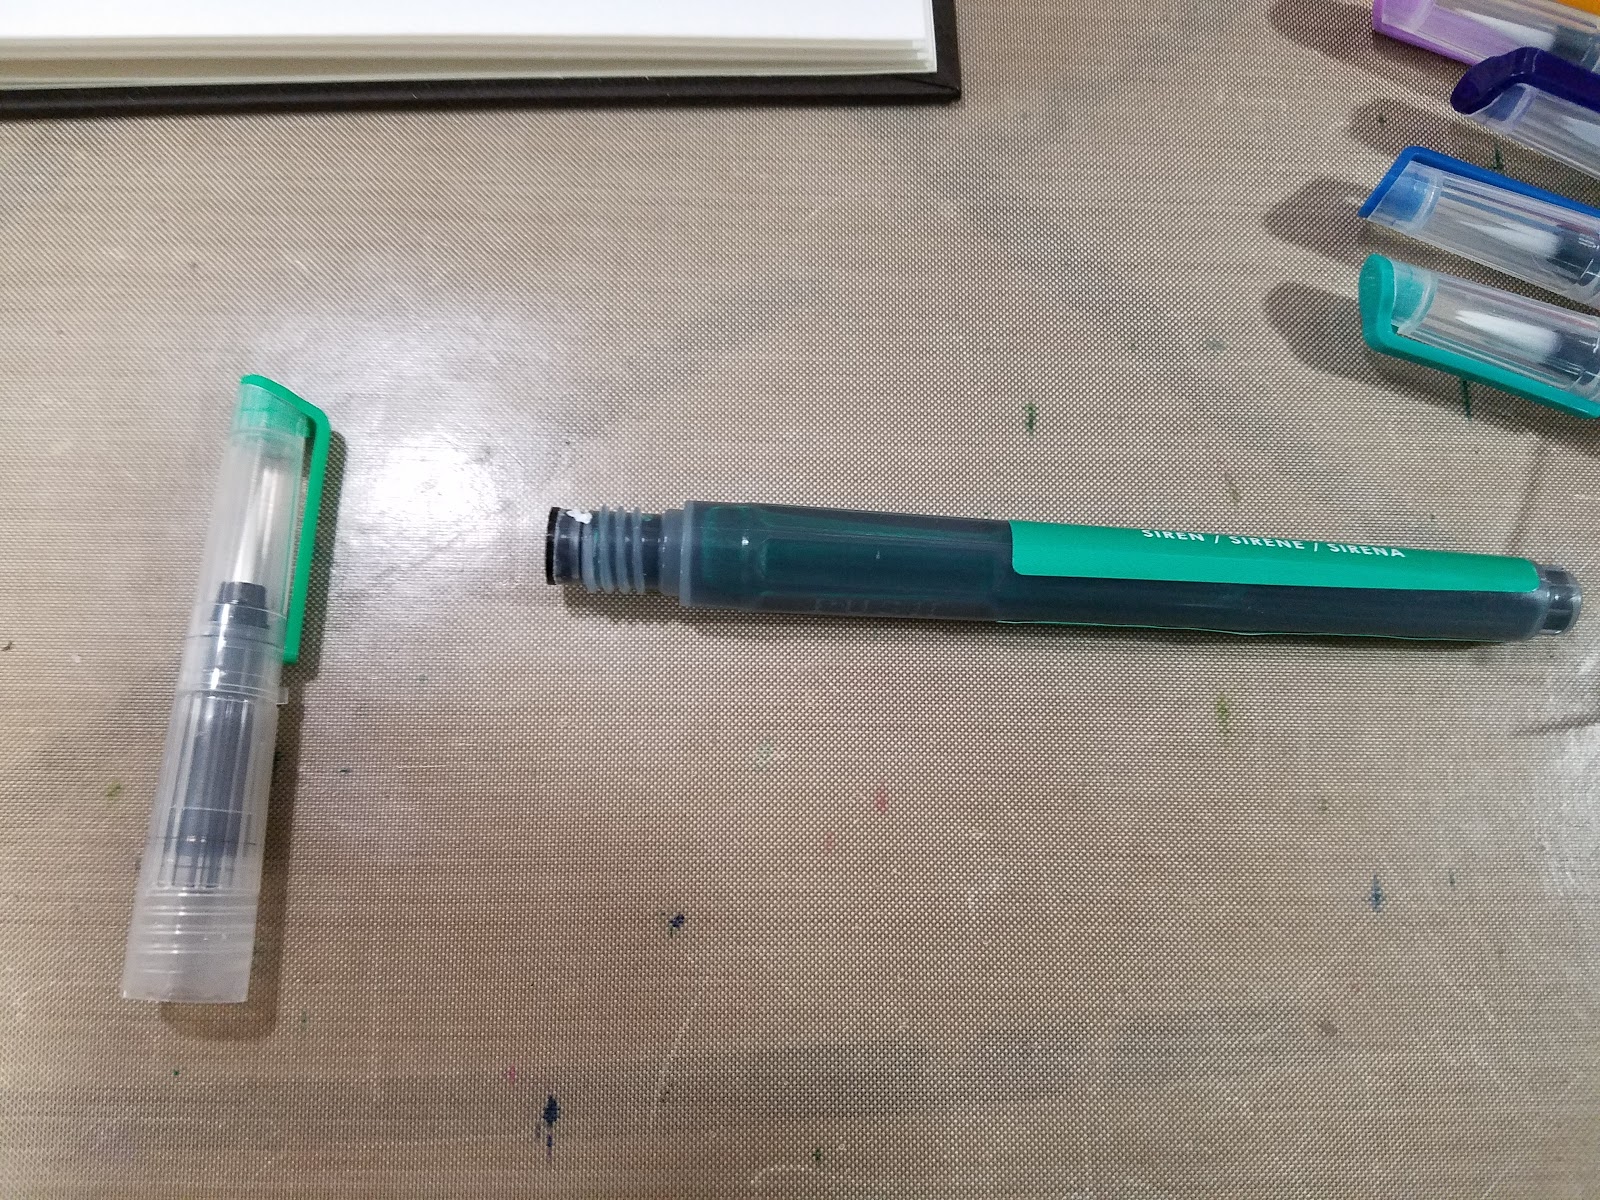
Every Mermaid Marker has a protective ring that prevents the brush nib from accessing the sealed ink inside the belly of the waterbrush. While it takes awhile to get your Mermaid Markers ready for first use, I think the ring (which is commonly included in other dye based waterbrushes such as the Pentel Pocketbrush pens) was a wise inclusion.
Each brush has been prepared for transit with the application of sizing to the bristles. I recommend washing this sizing out at the sink before assembling your markers.
Original 12 Bodies Compared to New Sets:
 Left to right: Celestial Skies, Original 12, Sunbleached
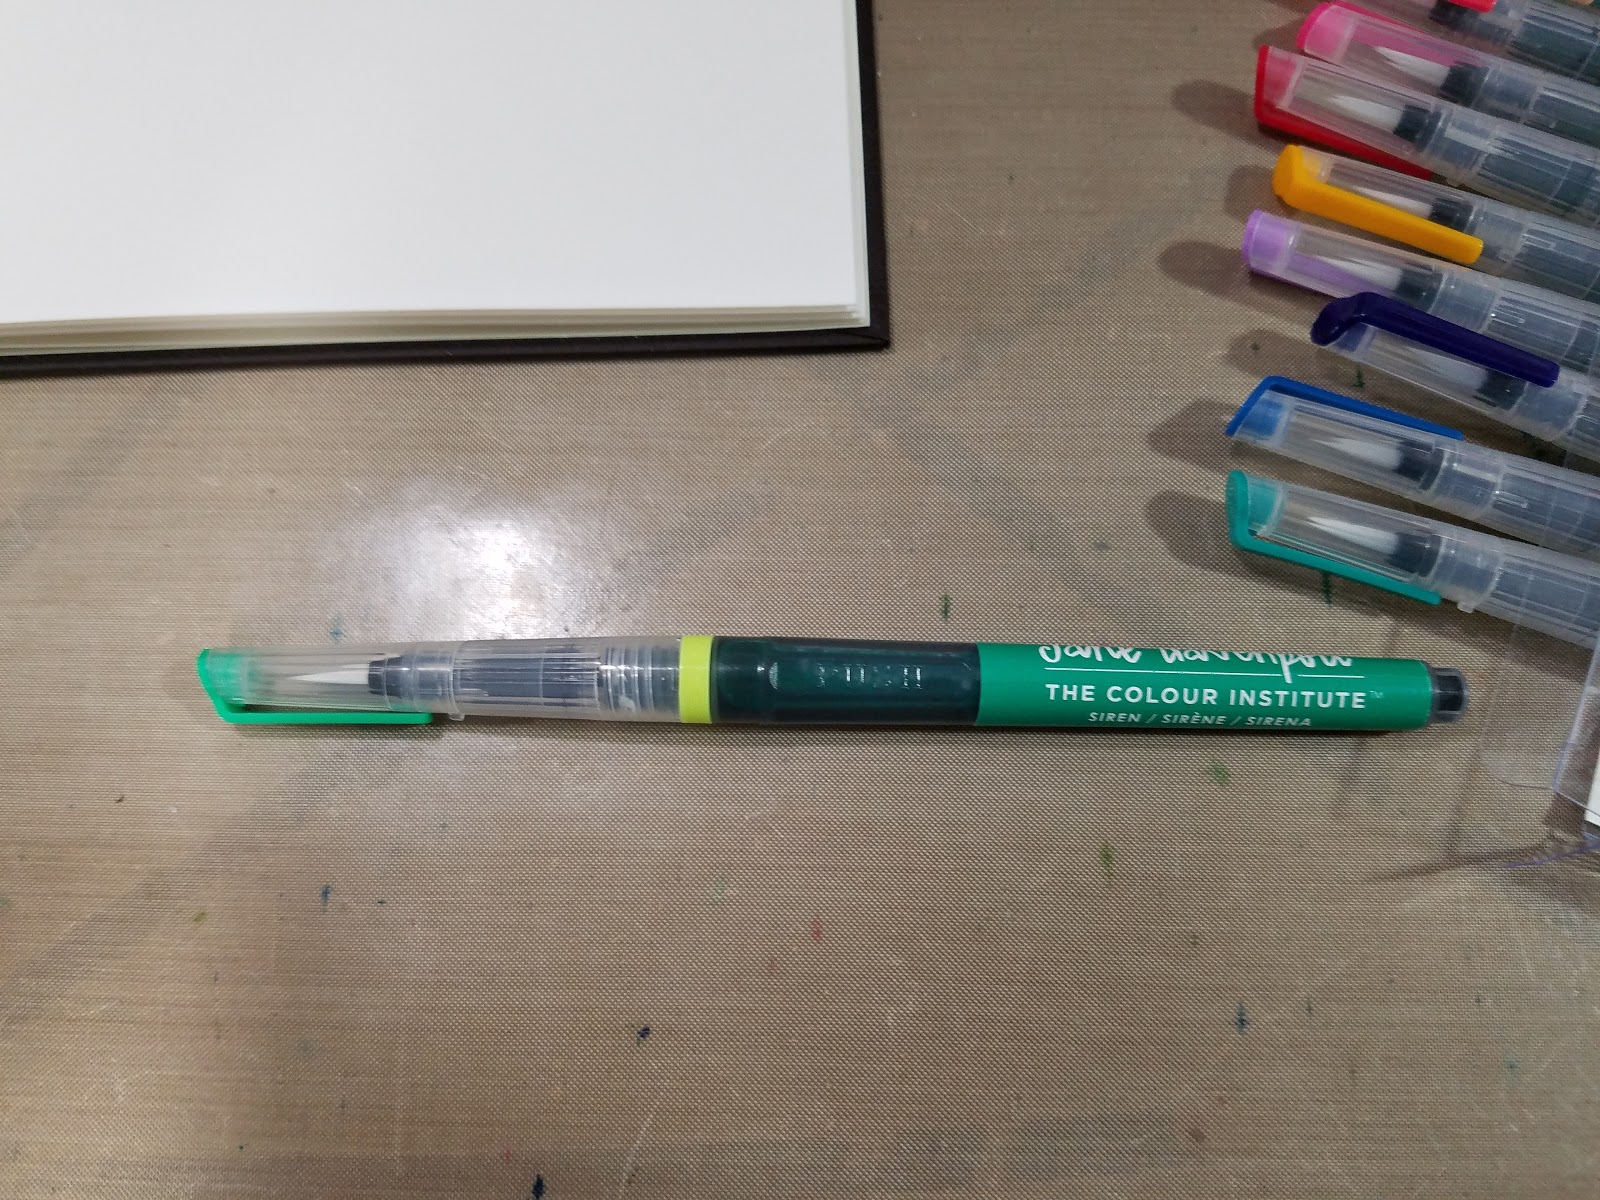
 Top: Siren (original 12)
Lagoon (Sunbleached)
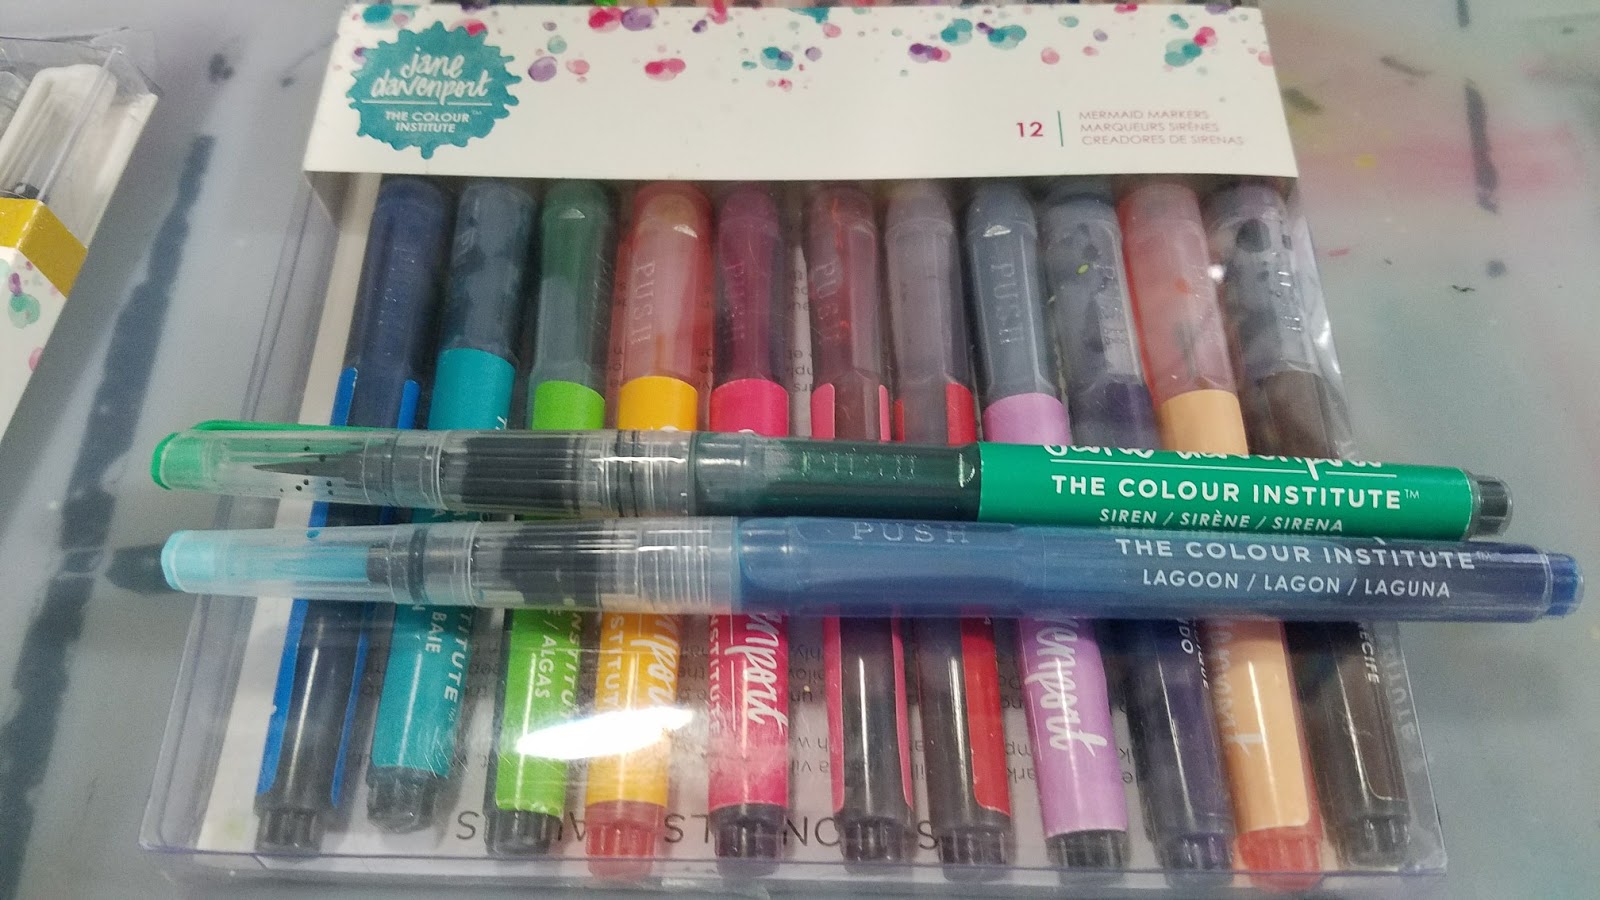
Not too much difference- on the original 12 markers, name and branding is applied with a sticker, and the caps have a color coordinated post. On the newer markers, that info is screened onto the body of the brushpen.
Compared to Similar Markers:
Everything in this demonstration EXCEPT FOR the Winsor and Newton Watercolor Markers are dye based. Winsor and Newton Watercolor Markers are pigment based, and more archival and lightfast.
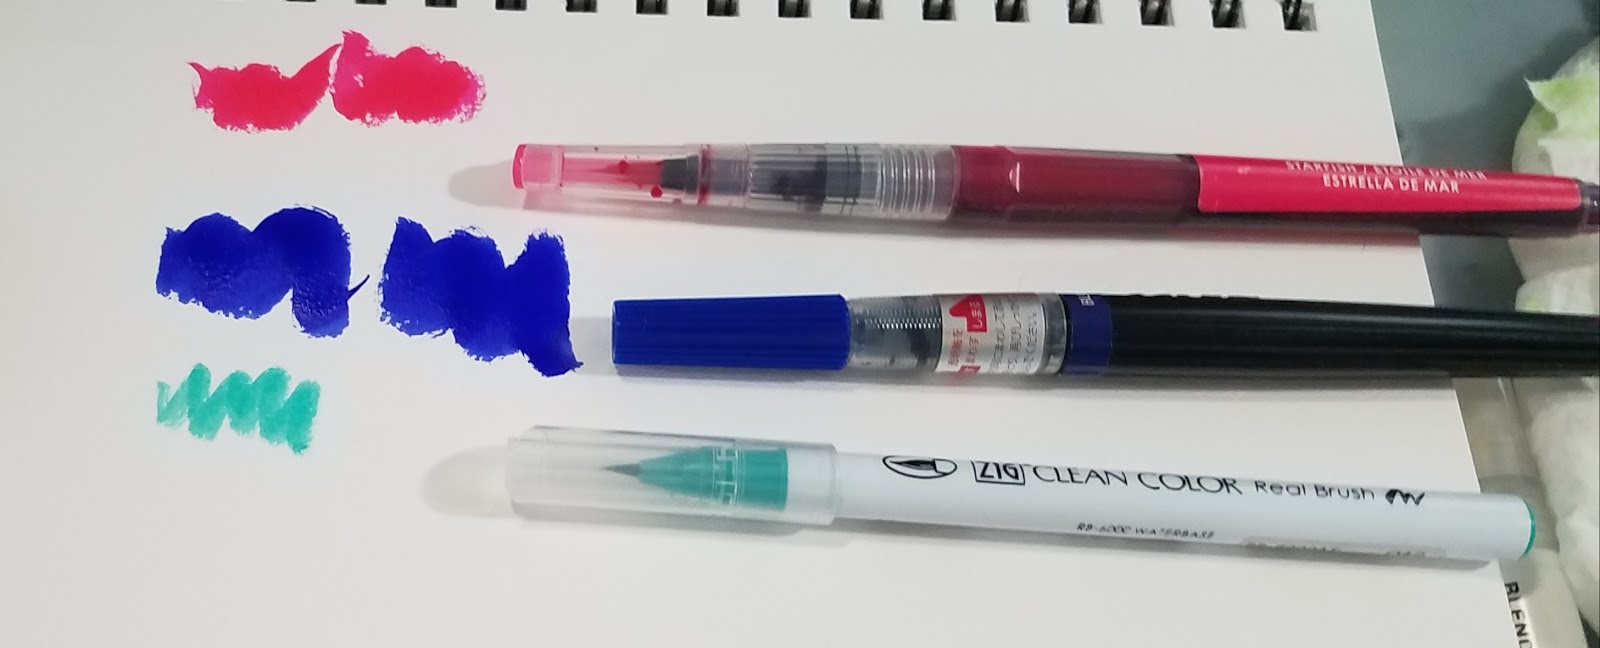
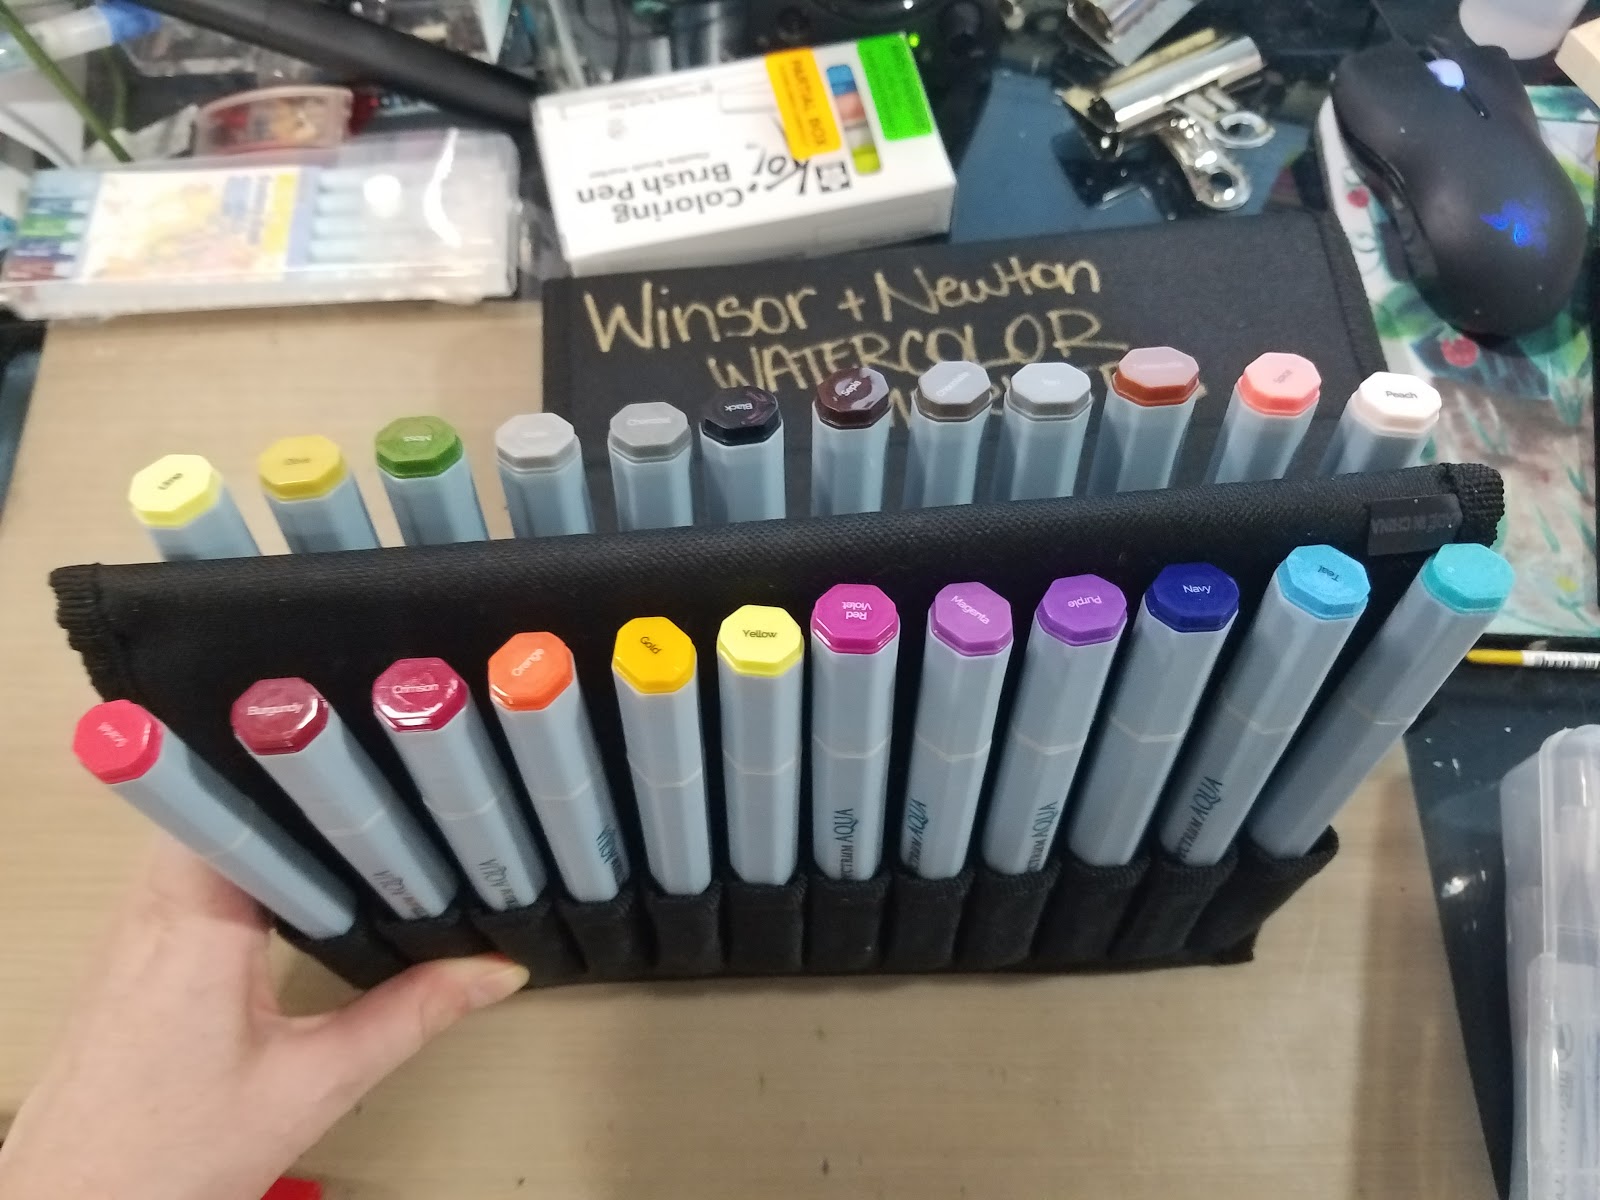
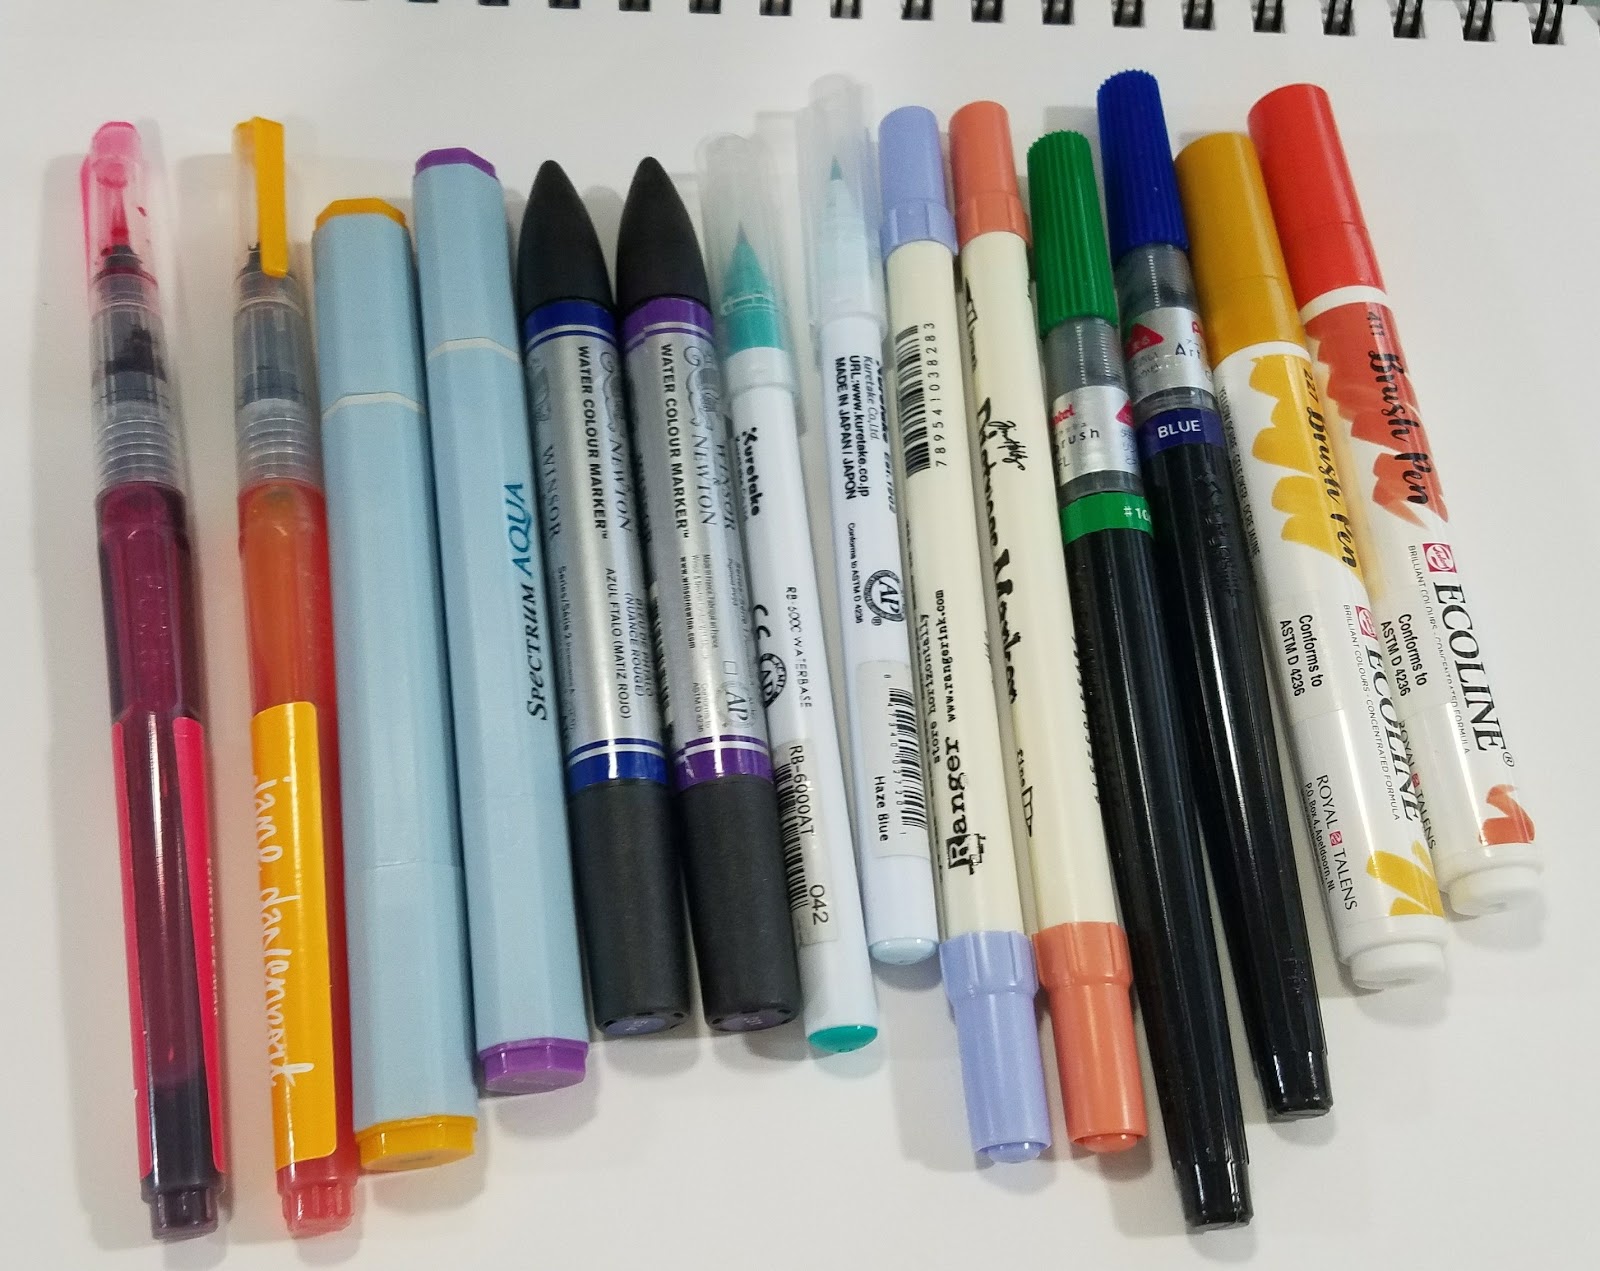 From Left to Right: Mermaid Markers, Spectrum Aqua Markers, Winsor and Newton Watercolor Markers, Kuretake Clean Color Real Brush Markers, Ranger Distress Markers, Pentel Brushpens, Ecoline watercolor markers
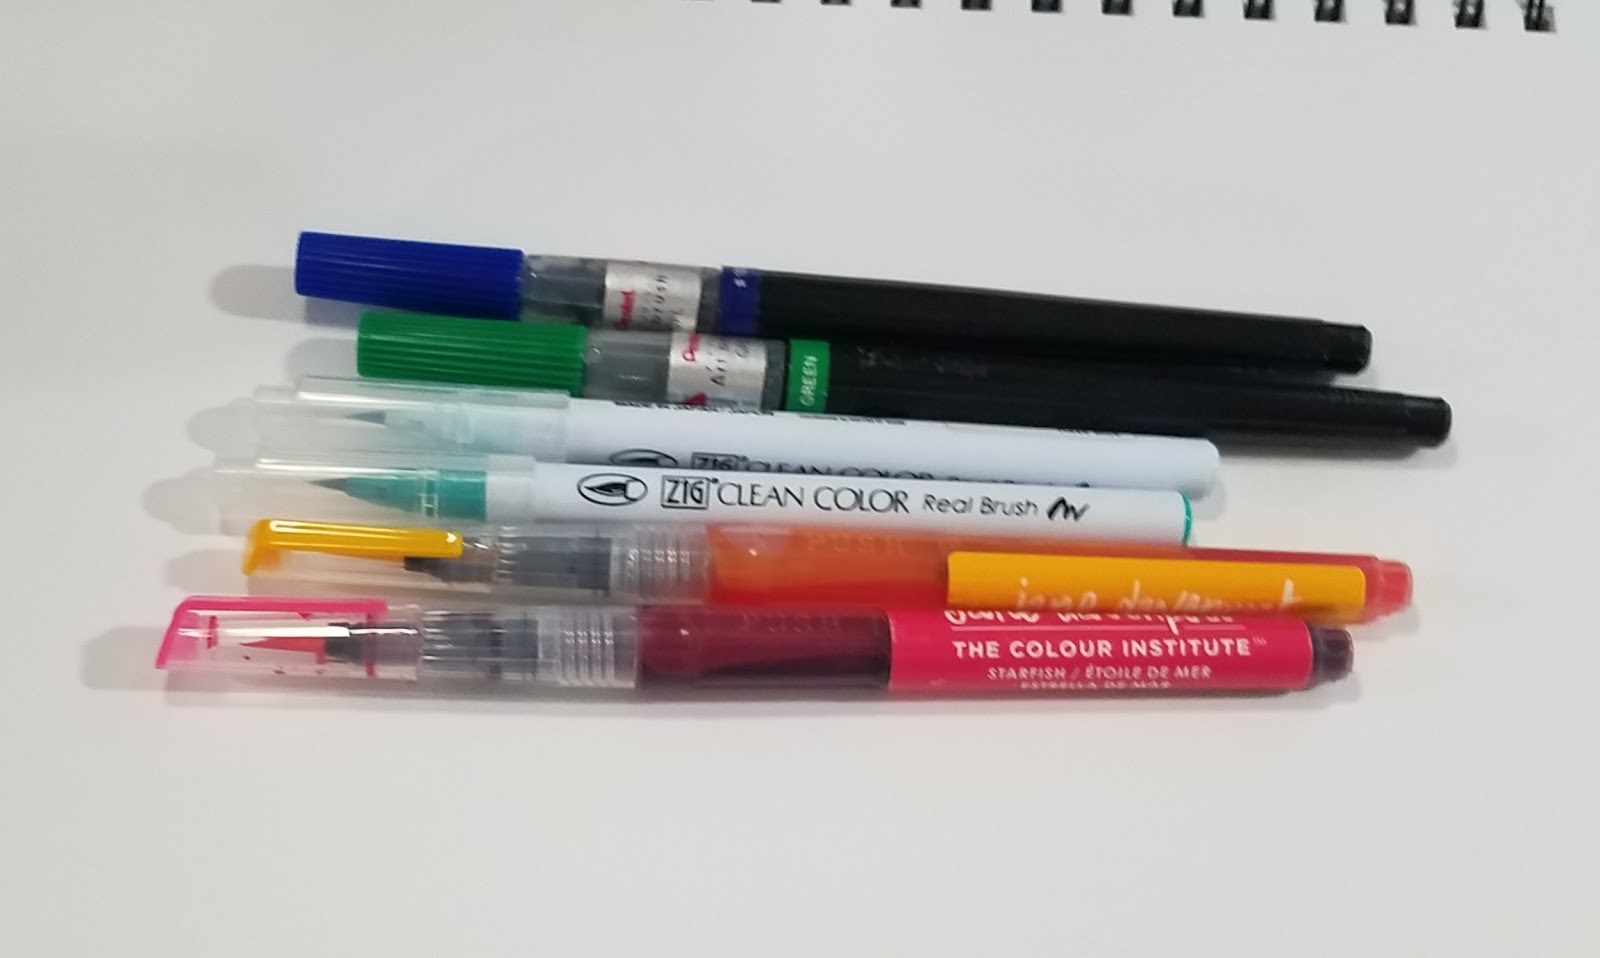 Dye based brushpens
Brushpens Vs Single Unit Nibs
 Brushpens: Jane Davenport Mermaid Markers, Kuretake Clean Color Real Brush Markers, Pentel Pocketbrush
Markers/Single Unit Nibs: Ecoline Watercolor Markers, Spectrum Aqua watercolor markers, Ranger Distress Markers, Winsor and Newton Watercolor Markers
Brushpens denote brushes that utilize multiple nylon bristles to make up the brush, rather than a single unit of compressed fiber or foam rubber.
Single Tip Vs Dual Tip
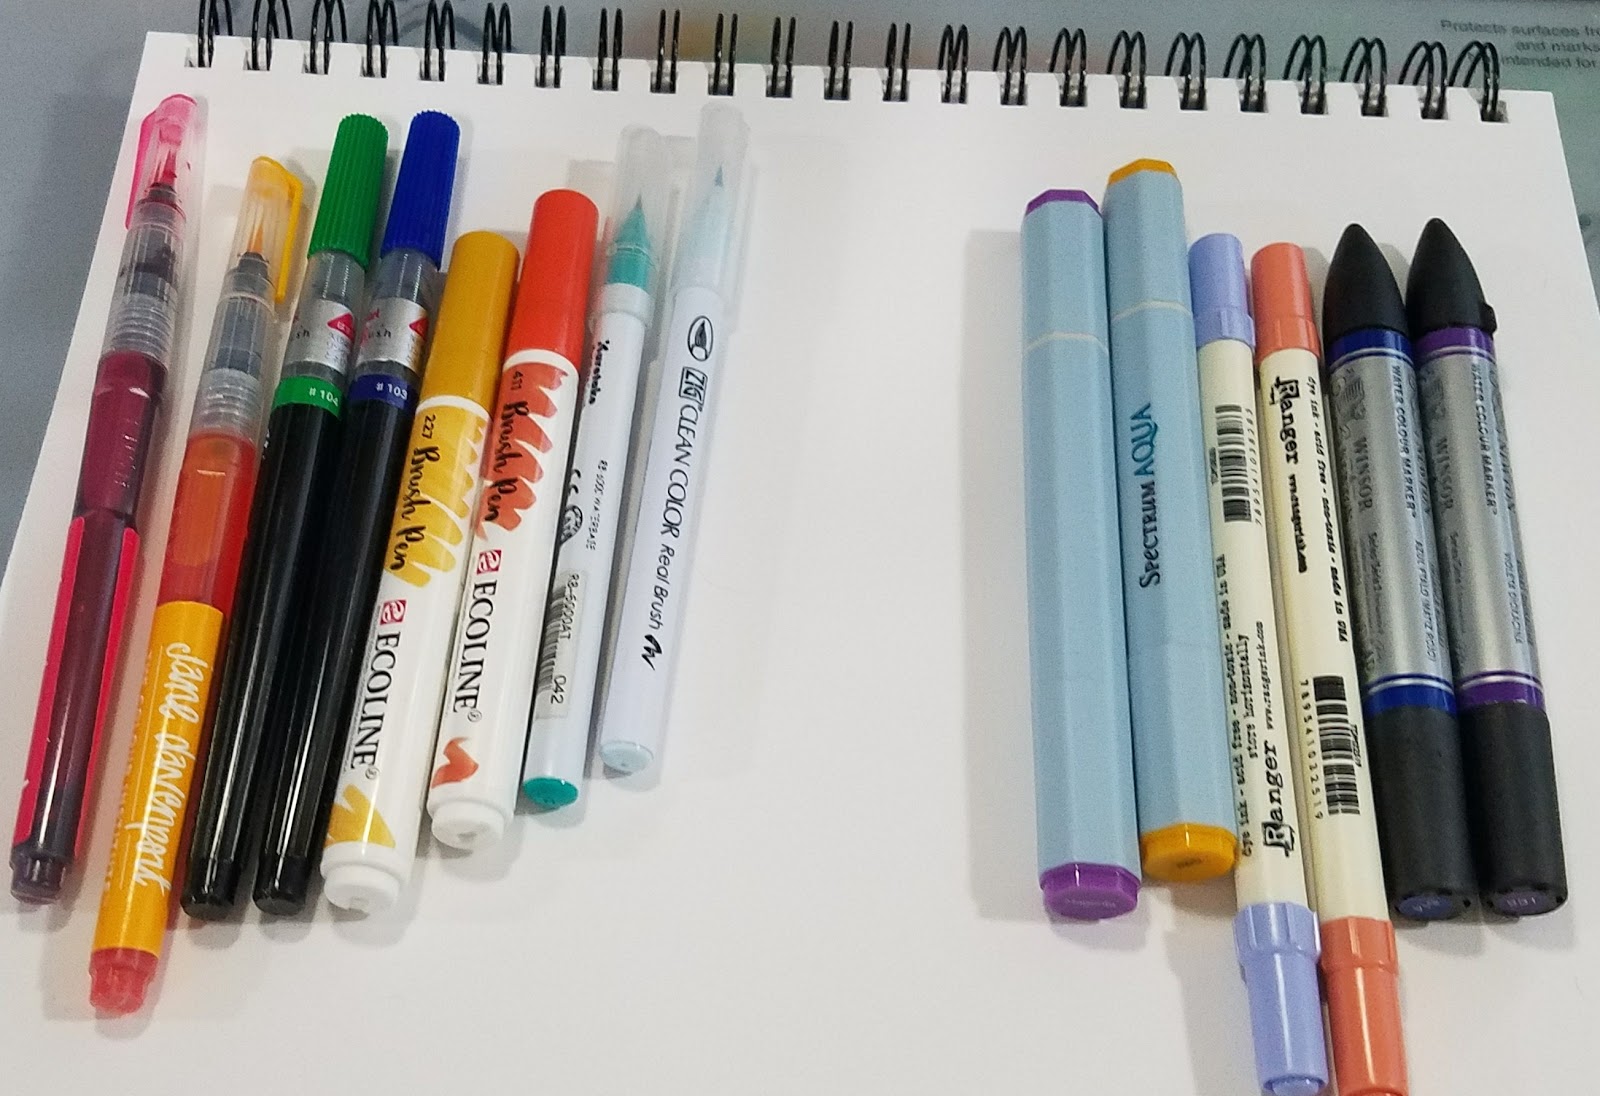 Single Tip: Mermaid Markers, Pentel Brushpens, Ecoline Markers, Kuretake Clean Color Real Brush Markers
Dual Tip: Spectrum Aqua, Ranger Distress Markers, Winsor and Newton watercolor markers
Refillable Vs Non Refillable
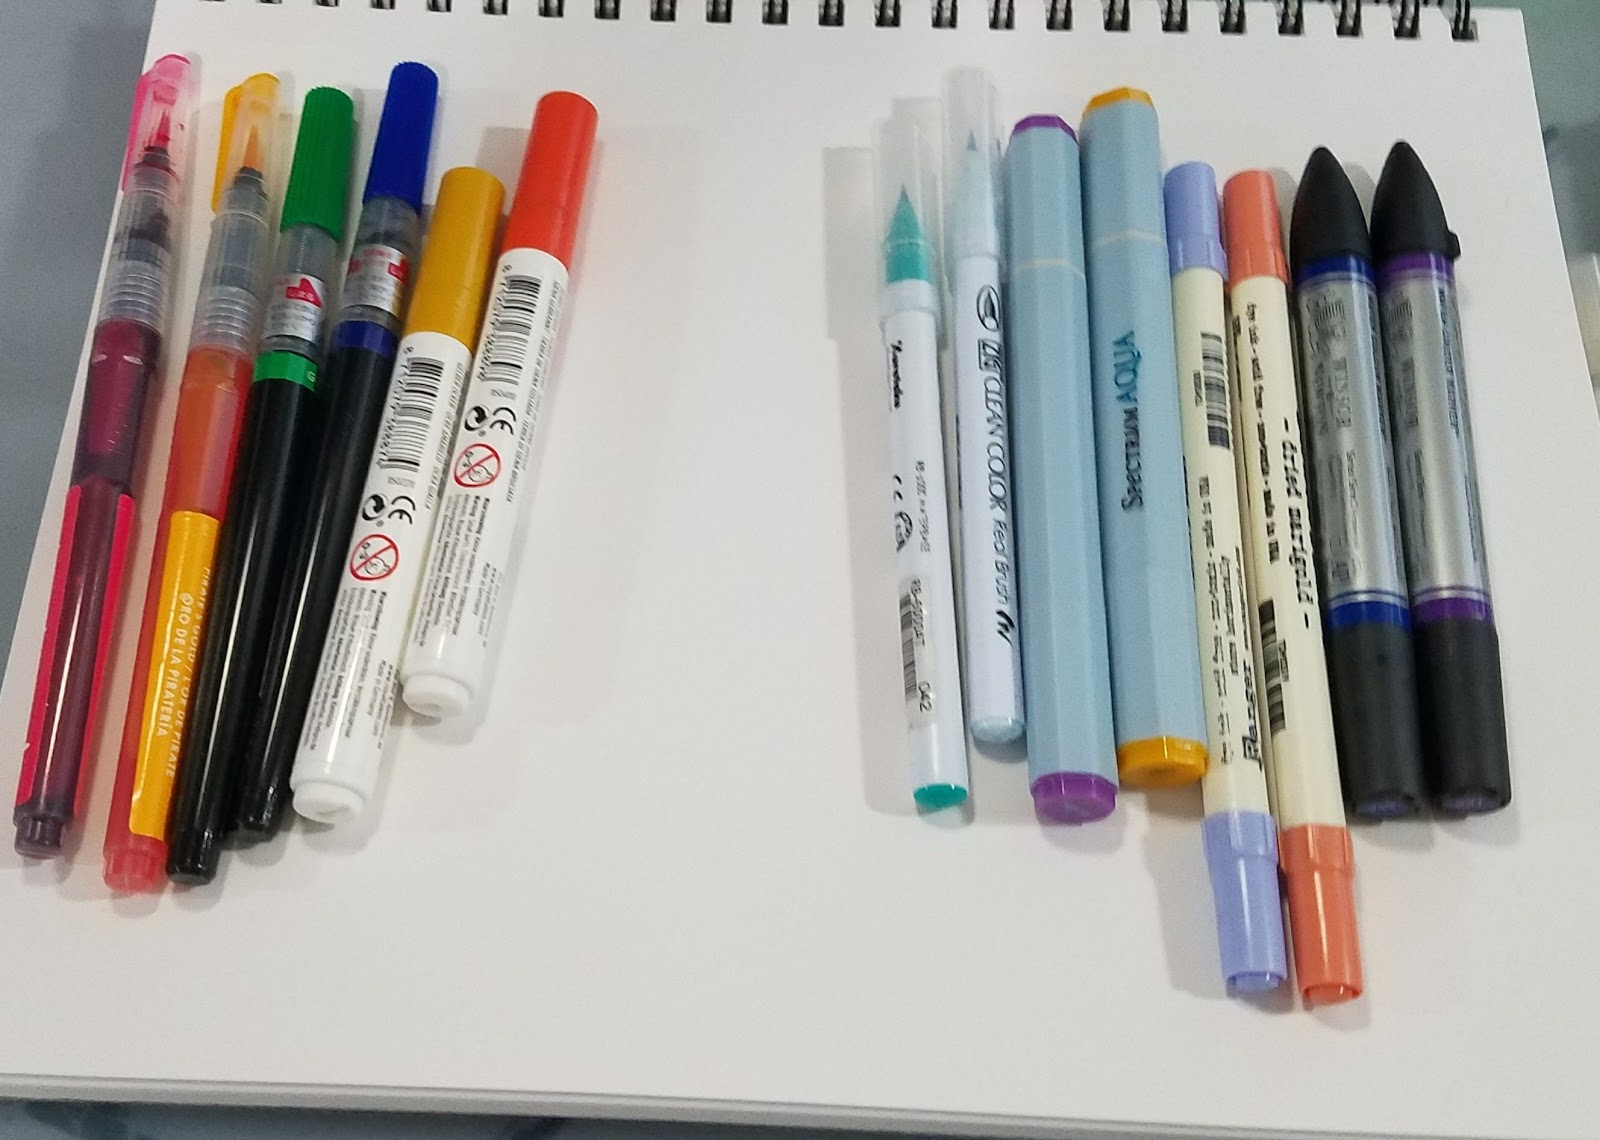 Refillable: Mermaid Markers, Pentel Brushpens, Ecoline Markers
Non Refillable: Kuretake Clean Color Real Brush, Spectrum Aqua, Distress Markers, Winsor and Newton Watercolor markers
Mark Making:
Lineweights:
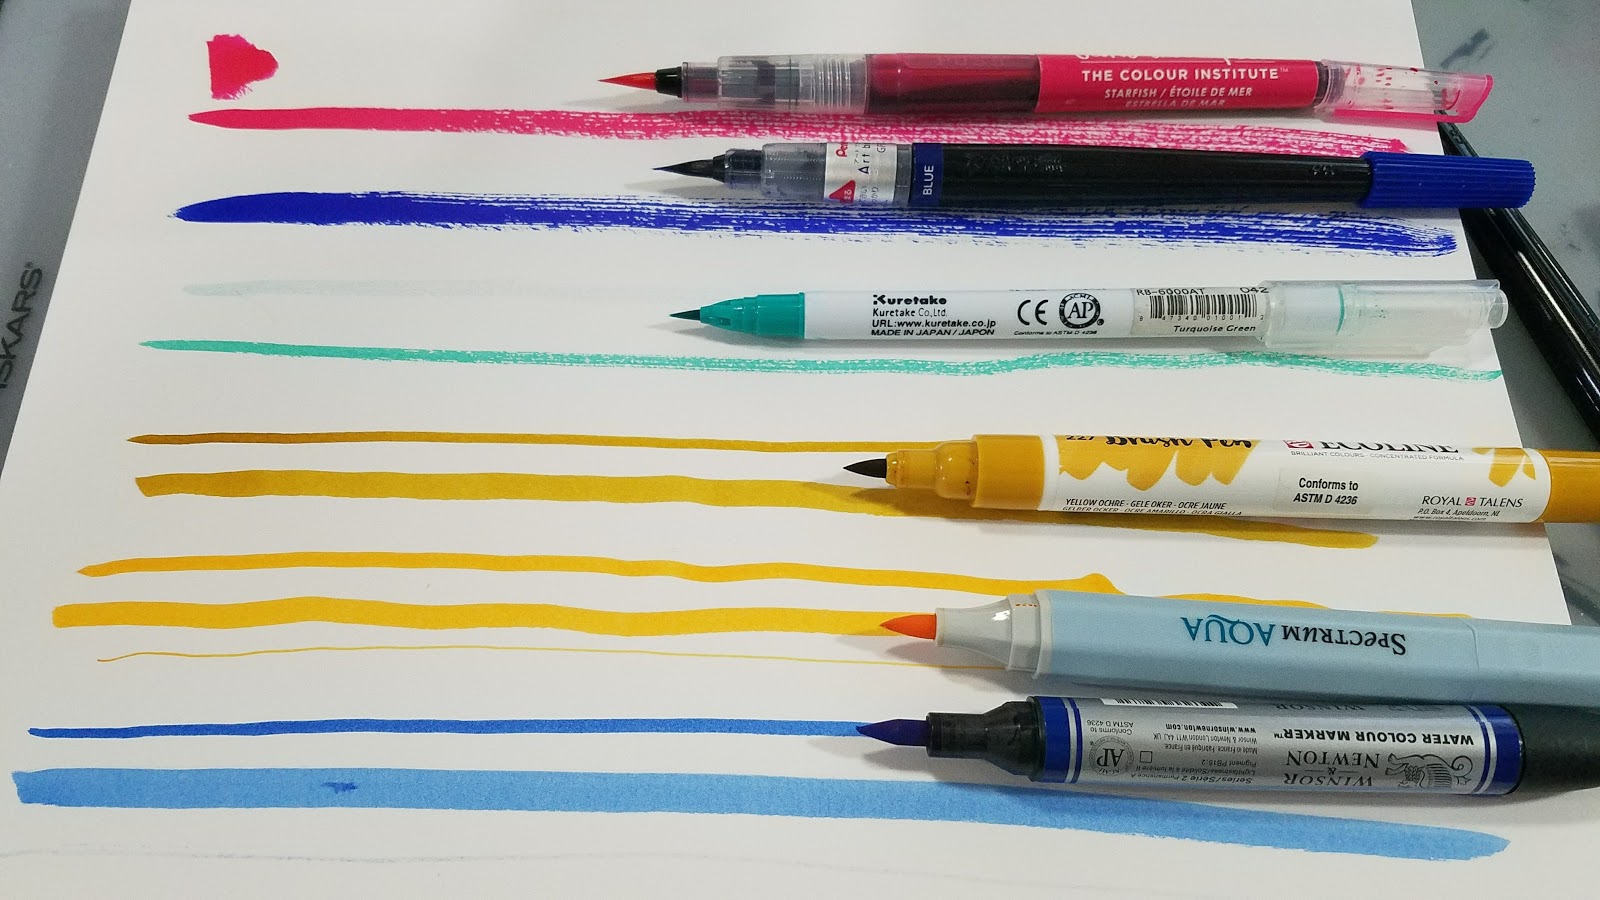
Pressure was applied to achieve heaviest lineweight possible. For the single unit nibs, pressure was applied to the tip, then side to achieve heaviest lineweights.
Blending and Blends
Types of blends:
Water (waterbrush)
Ecoline Blender (glycerin+water)
Color to Color within Brand
 Top: Mermaid Marker Blended out with water
Mermaid Marker blended out with Ecoline Colorless Blender
Mermaid Marker blended with another Mermaid Marker
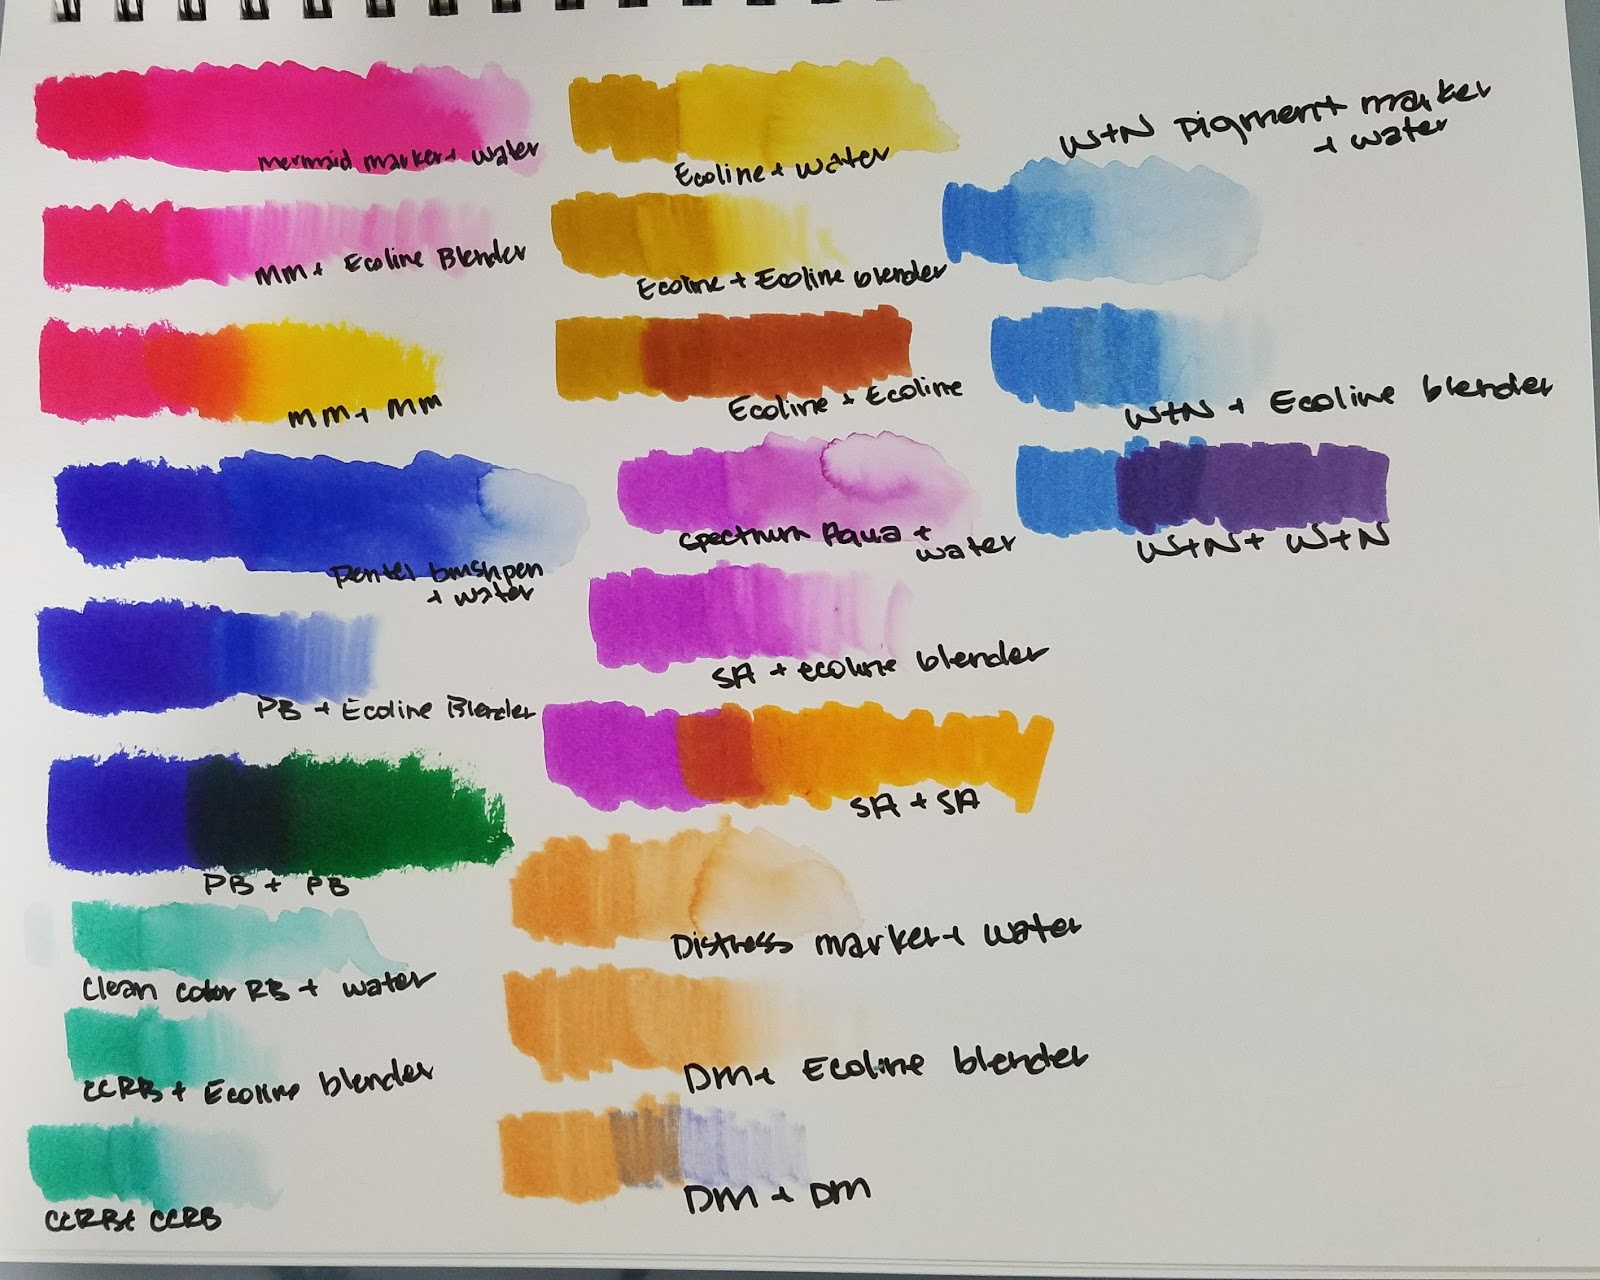 Basic blending chart This test was repeated for every marker show in the above photos. Markers and materials are labeled.
Markers used:
Pentel Brushpens
Kuretake Clean Color Real Brush
Spectrum Aqua
Ecoline Watercolor Markers
Distress Watercolor Markers
Winsor and Newton Watercolor Markers
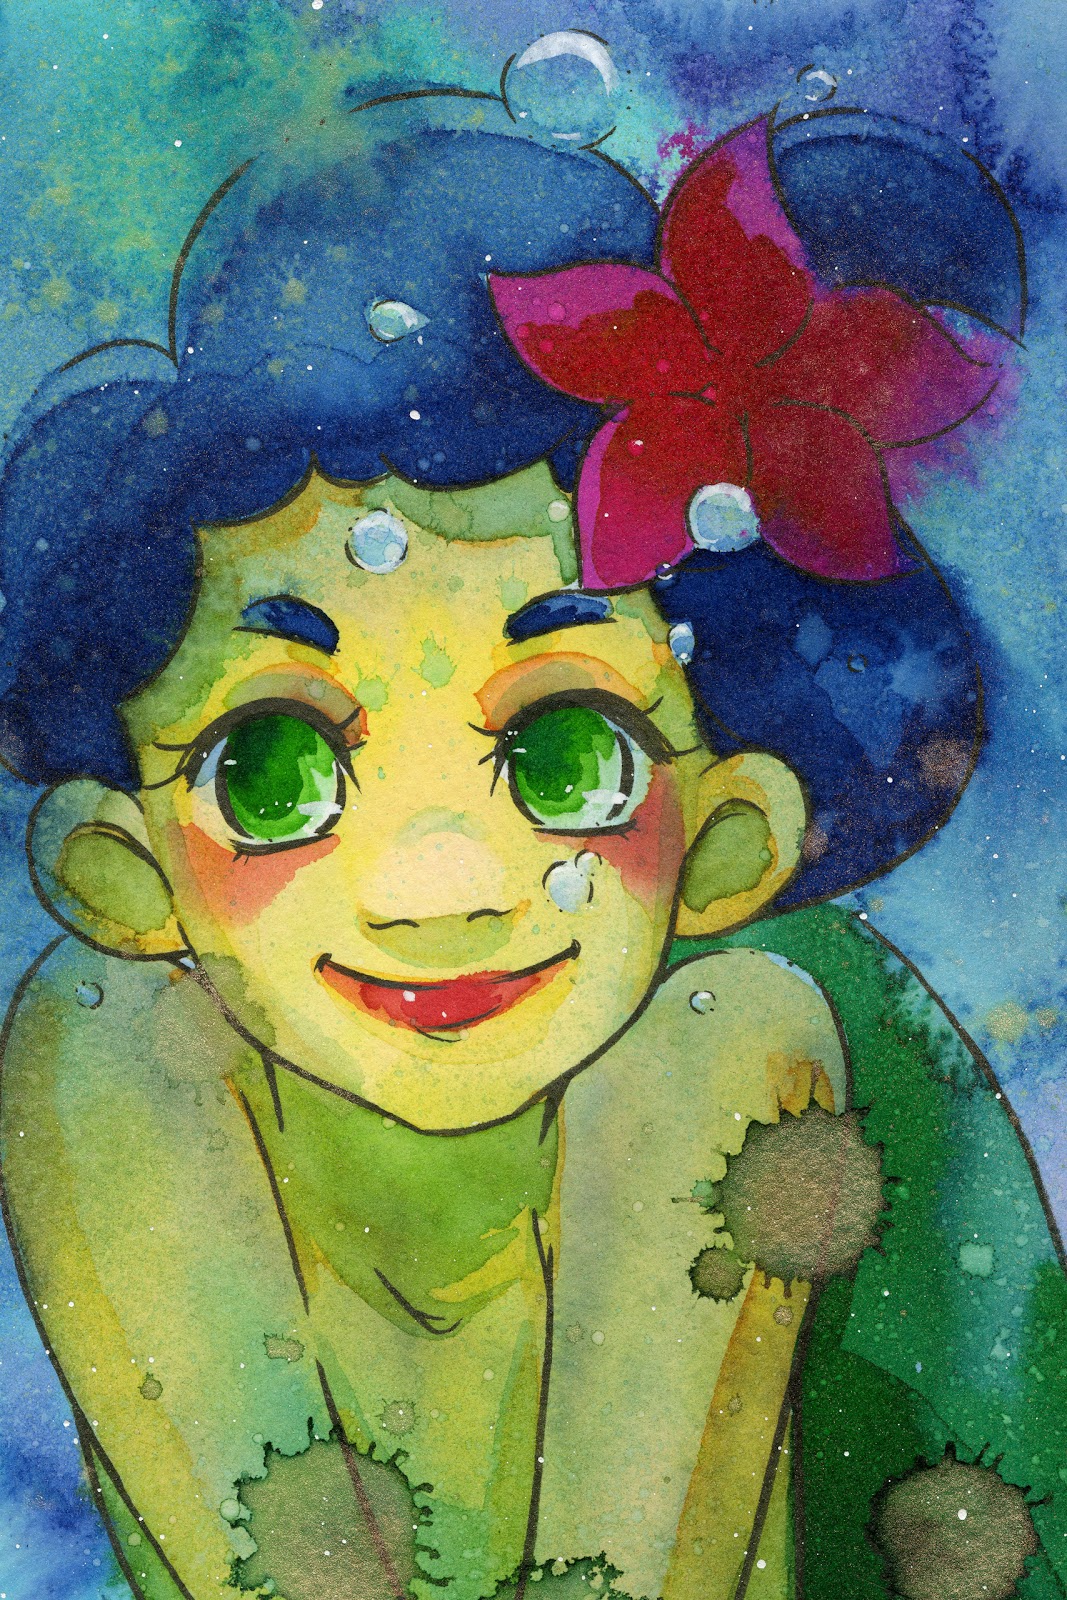
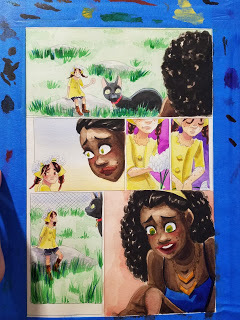
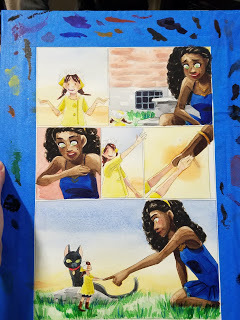
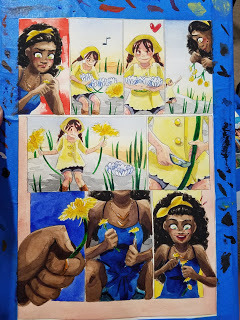
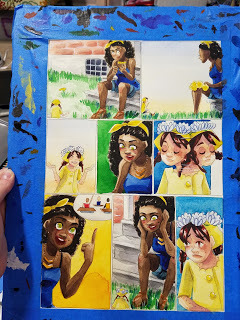
The Field Test:
Mermaid Markers Field Test
Materials Used for this Demonstration:
Strathmore 400 Series Watercolor Paper
Jane Davenport Mermaid Markers (Original 12)
Tattered Angels Glimmer Mist
Sailor Mitsuo Aida Brushpens (for inking)
Blue Painter's Tape
Inkssentials Craft Mat (as palette)
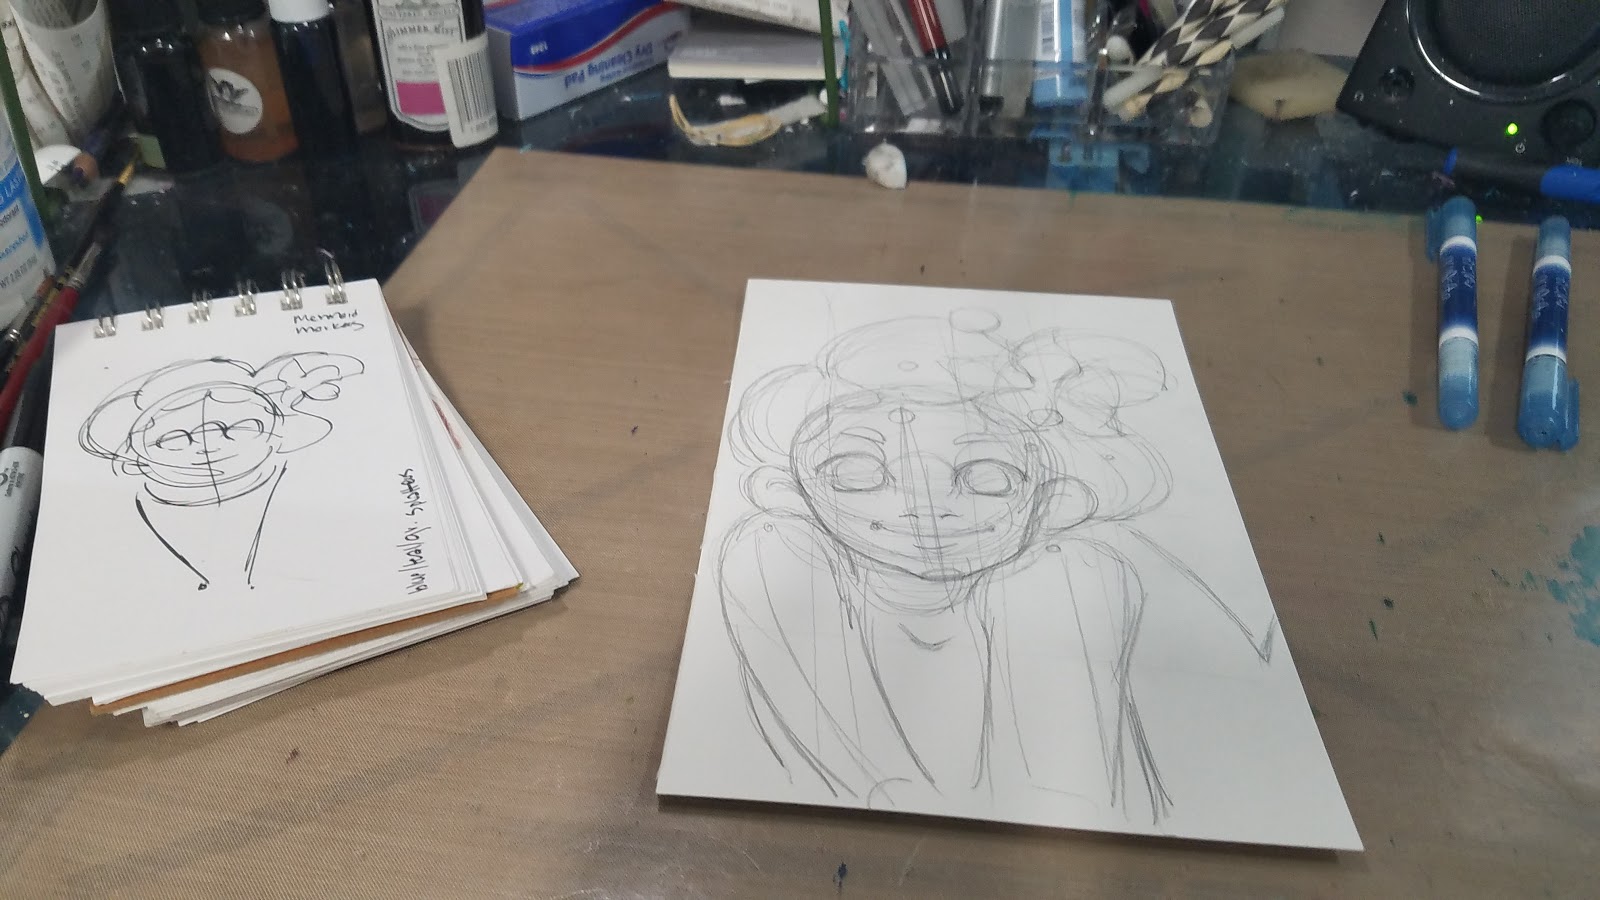
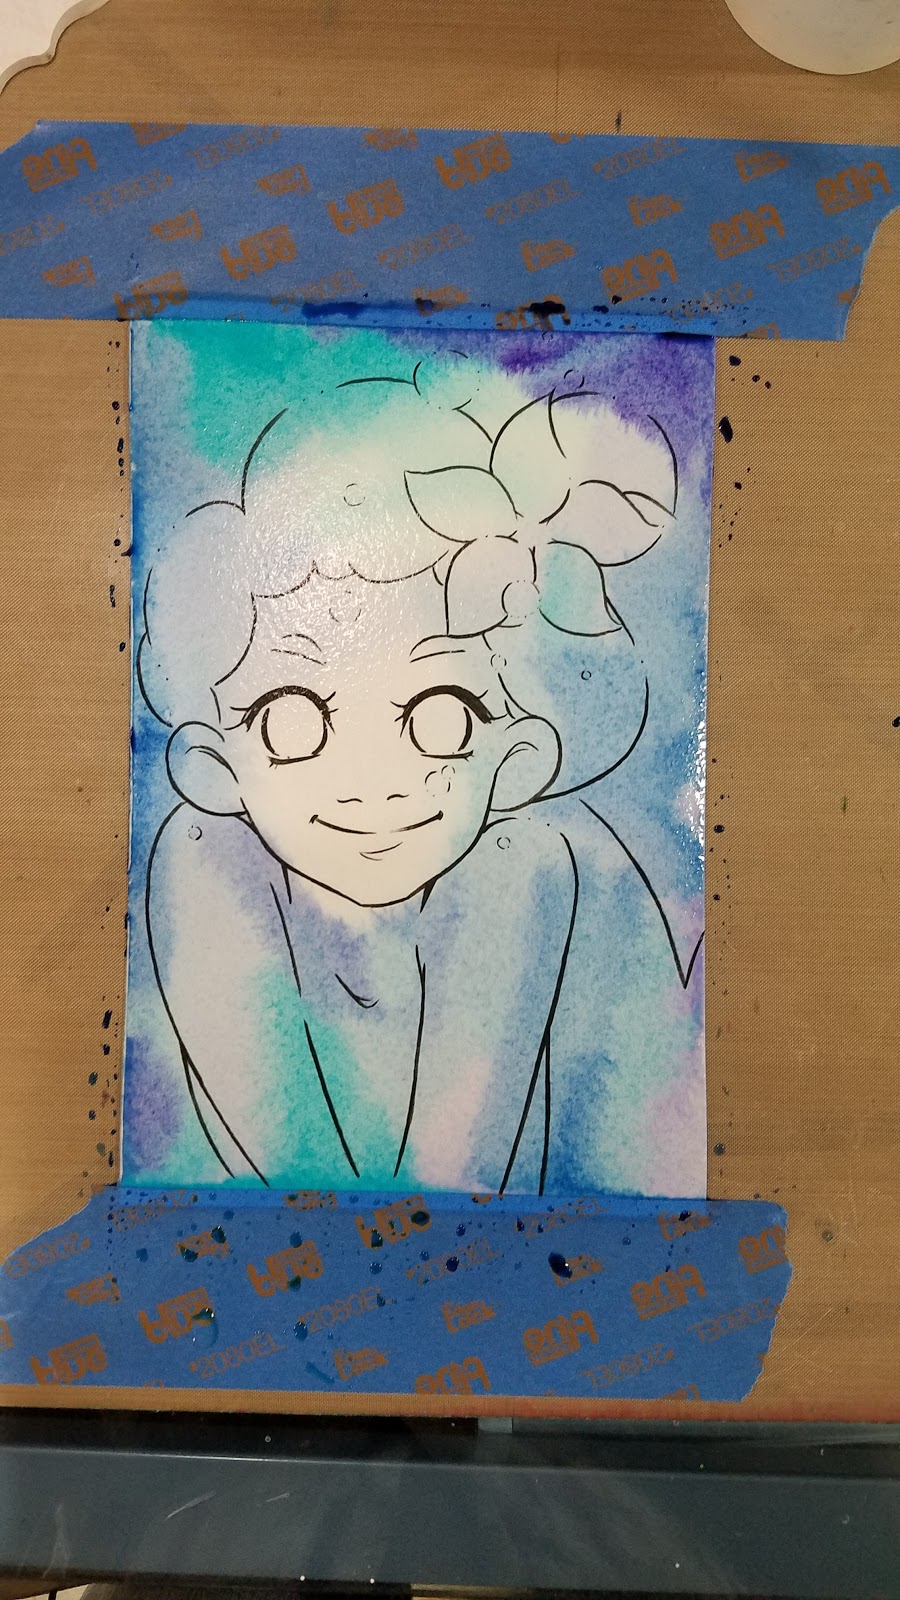
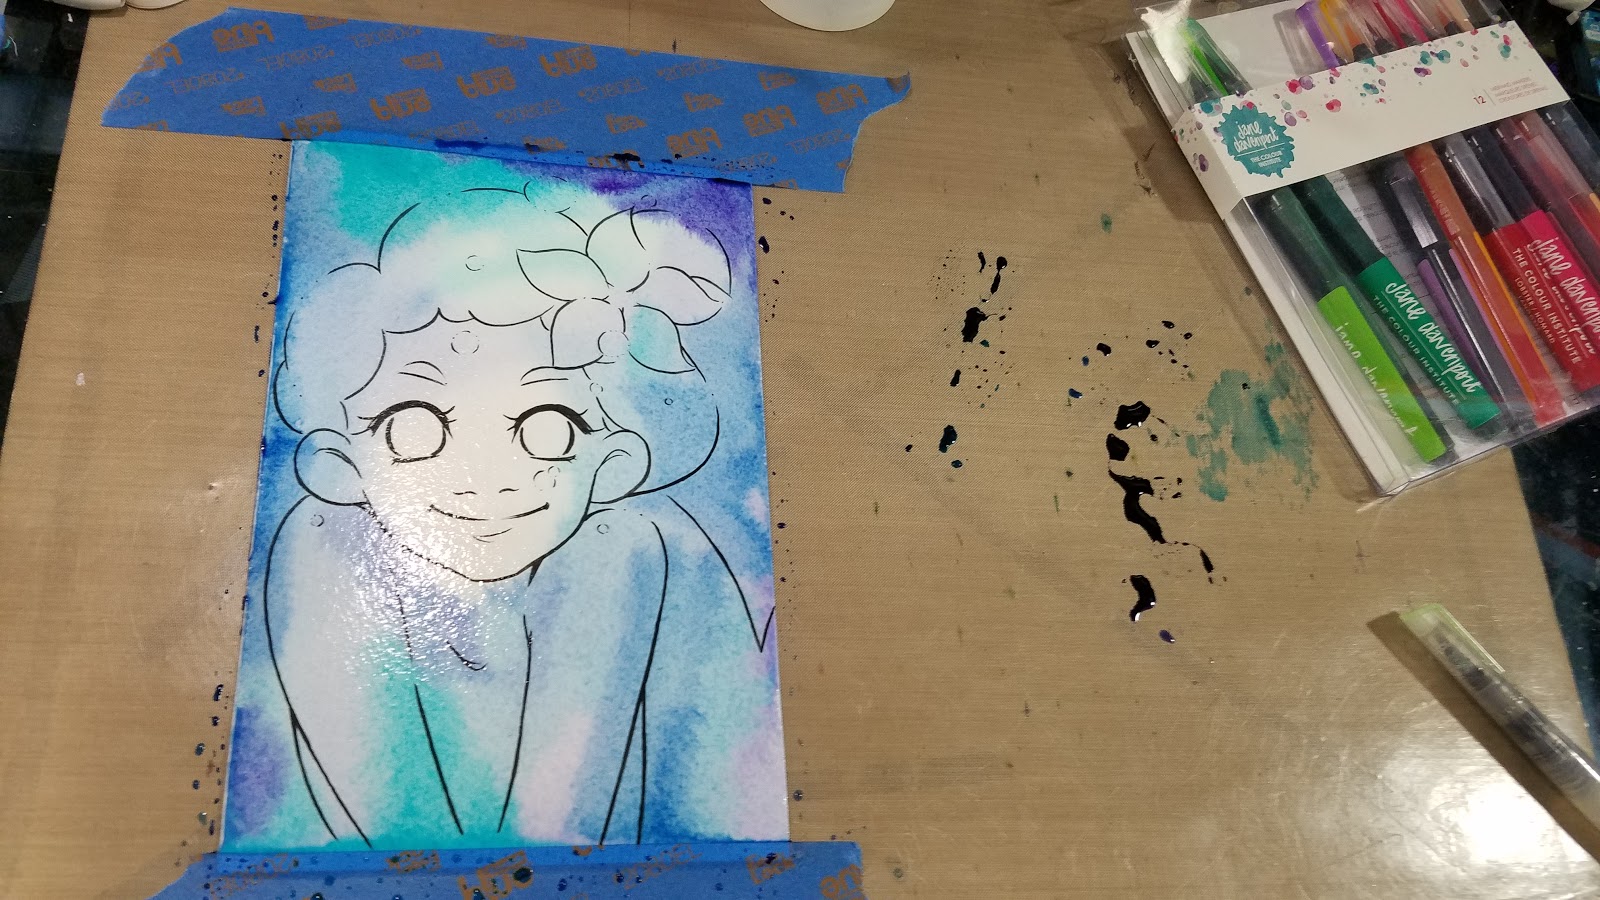


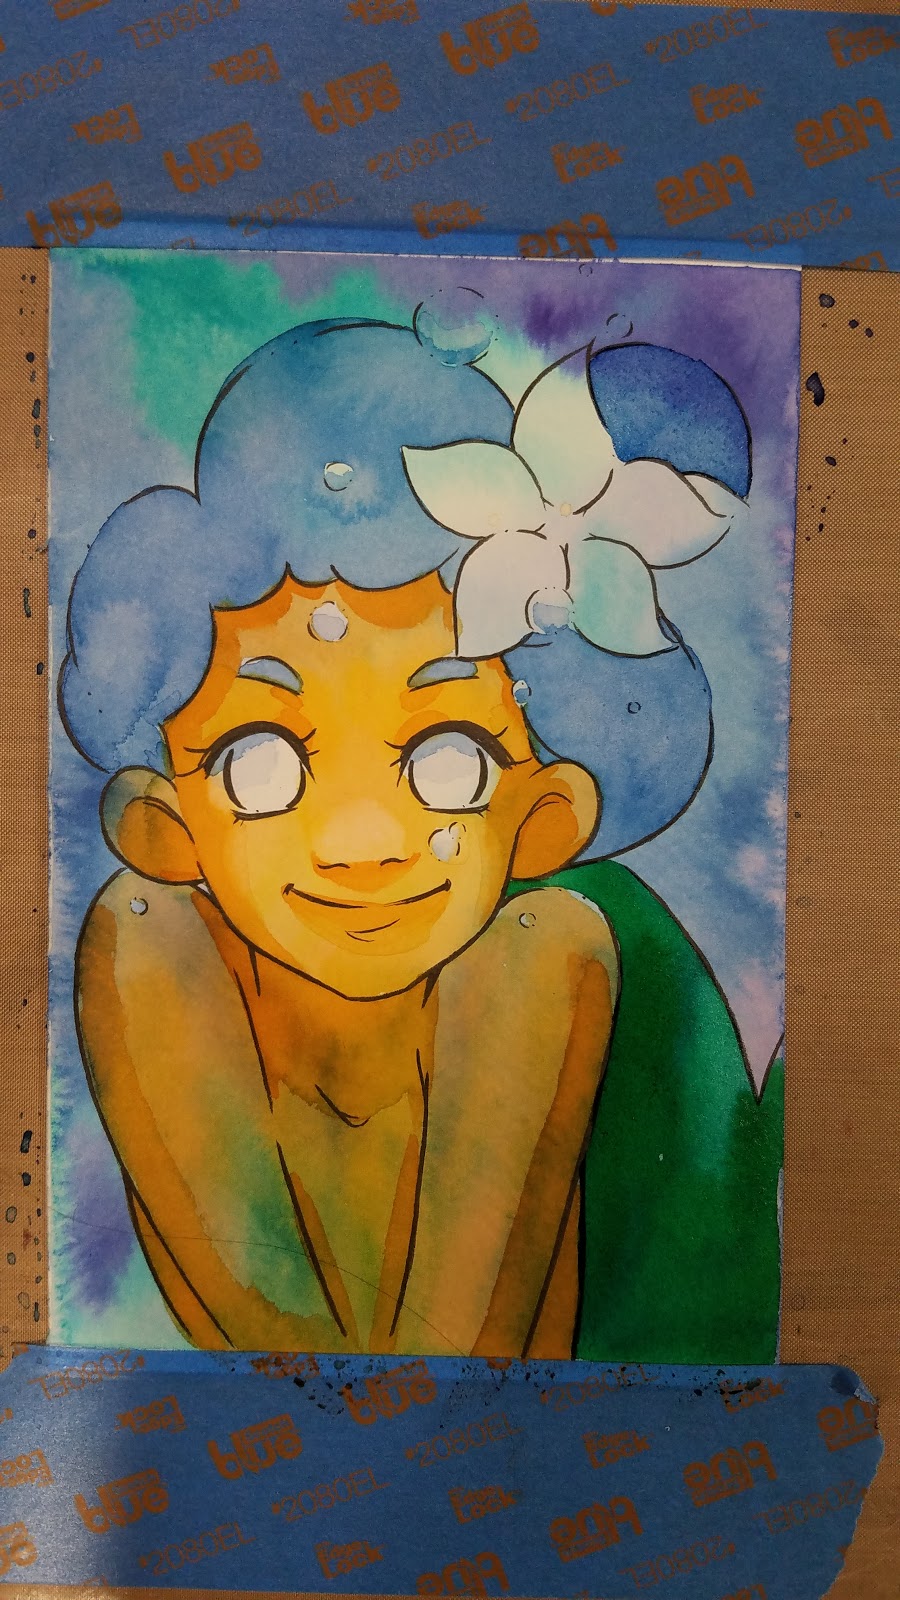


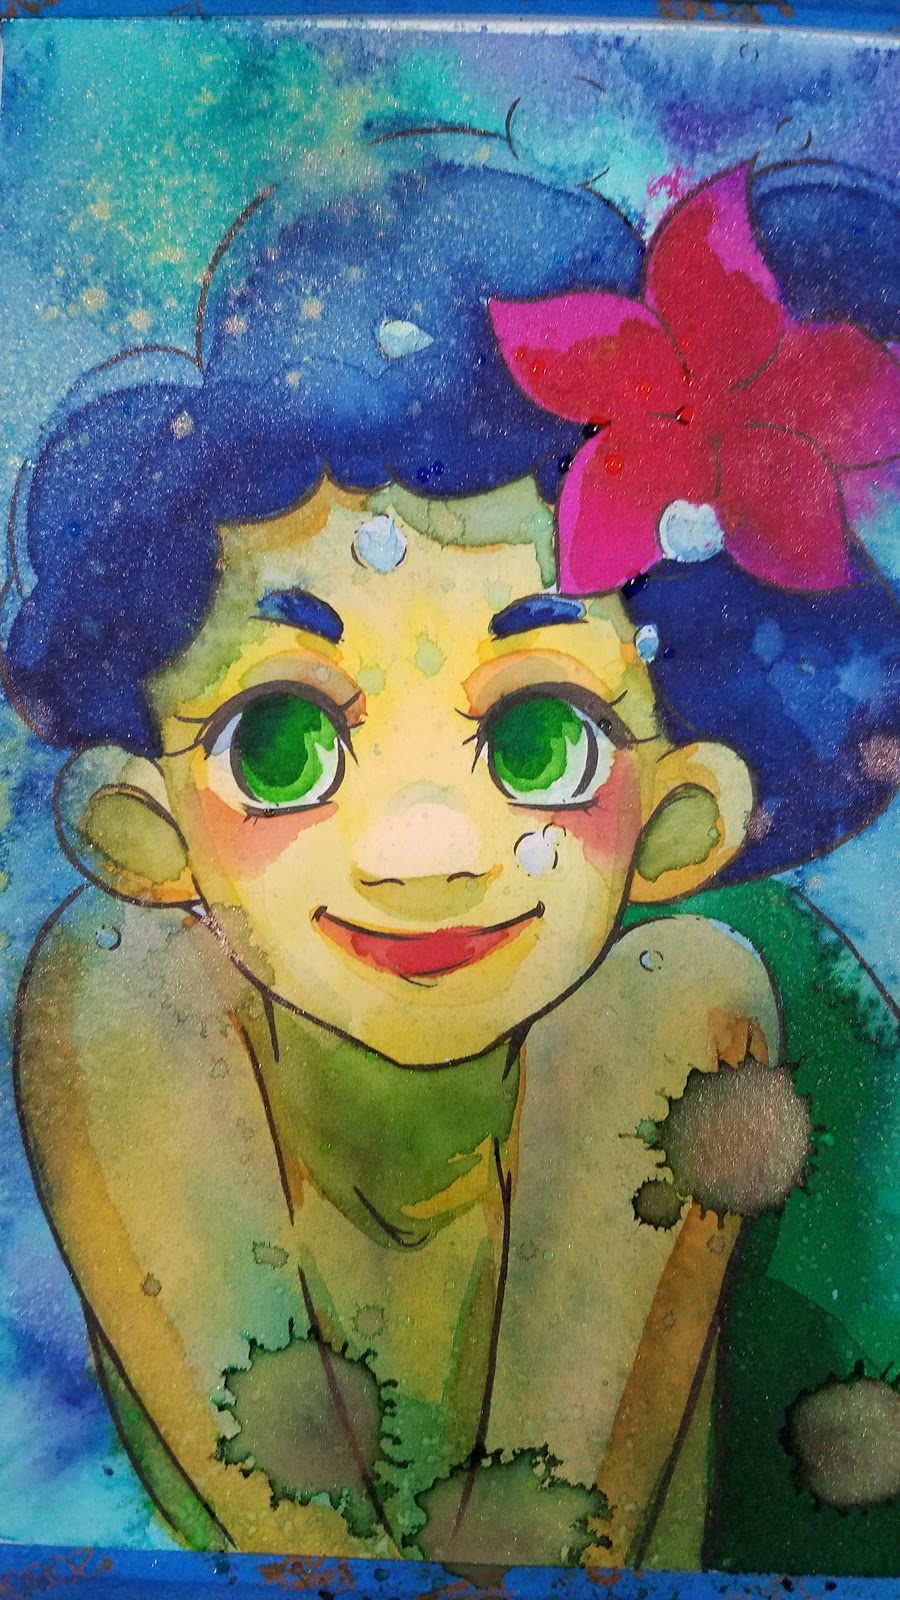
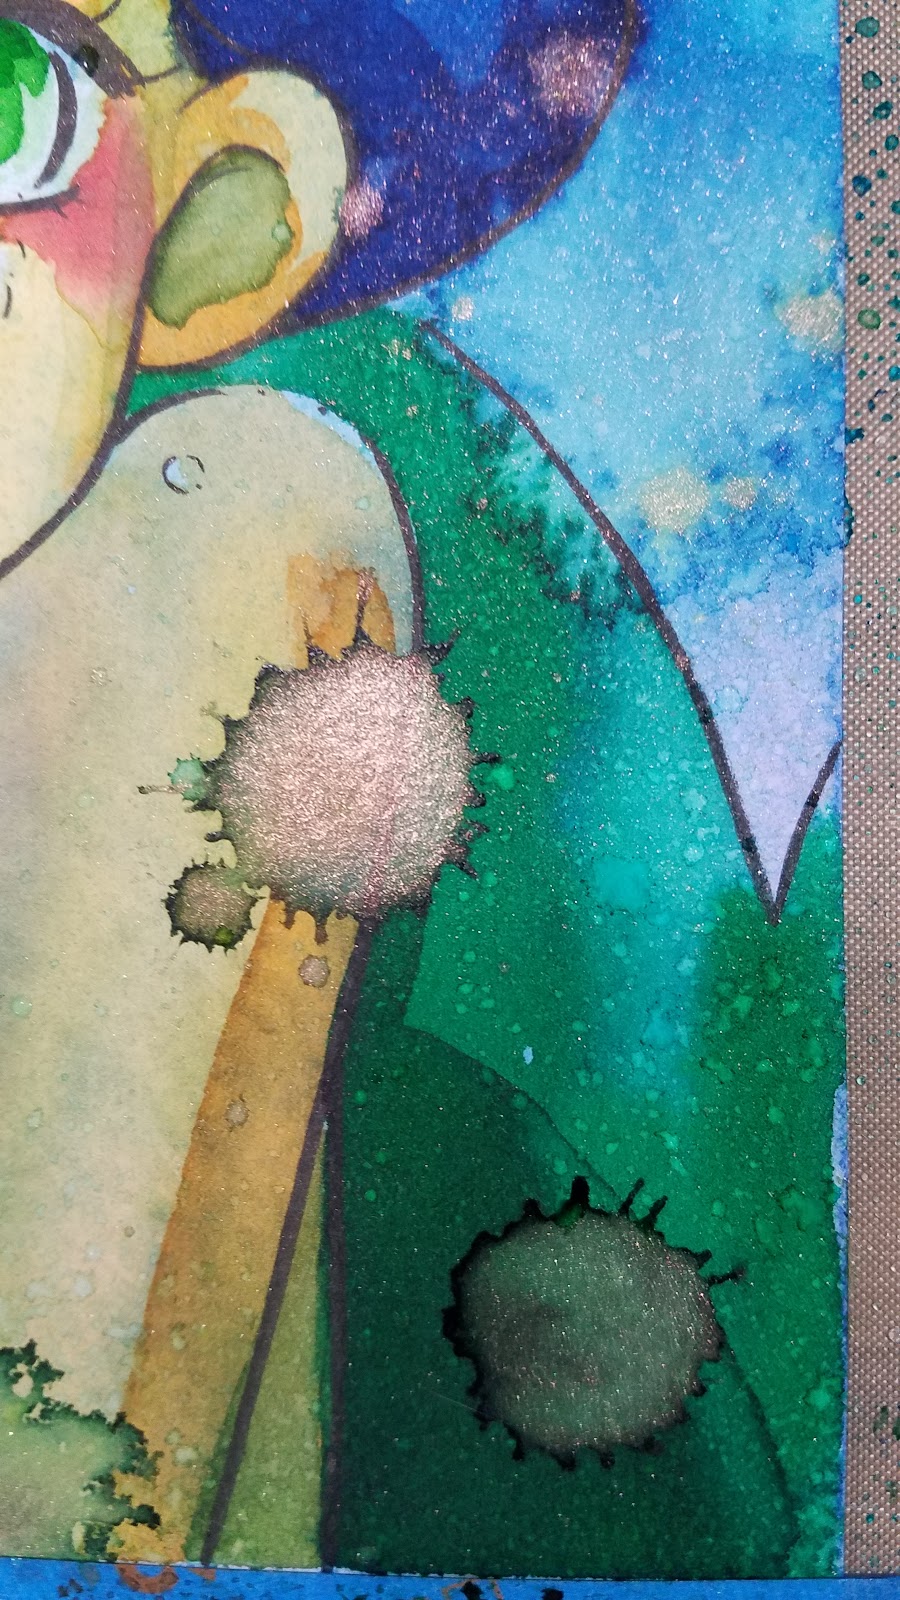
Anything waterbased dripped, sprayed, or applied to Mermaid Markers will reactive the inks. This can be used to your advantage, or very frustrating to control.
More Mermaid Marker Art:
Stream Announcement and Mermaid Markers Timelapse:
The Verdict:
Jane Davenport Mermaid Markers feature a generous inkflow thanks to the waterbrush design, and a large ink reservoir to keep up with that flow. Although the concept of filling waterbrushes with dyes, inks, or paint isn't a novel concept, Mermaid Markers are the first watercolor markers that utilize this concept, and marketed it at the craft market. Predating Mermaid Markers, Pentel's brushpens are available in a wide range of dye based colors, but are not commonly available in the US, and are not marketed as watercolor markers.
These juicy dye based paintbrush markers are also HIGHLY water reactive, which can be fun or frustrating, depending on your playstyle.
One of my original 12 Mermaid Markers, Reef, dried out in brush, although the ink inside was still viable. Taking the pen apart and cleaning the clog helped revive it.
If you're interested in watercolor markers for bright, vibrant floral illustrations or handlettering, these are a wonderful addition to your collection. If you're interested in watercolor markers that will add another layer of dimension to your watercolor works, and can be used mixed media, I recommend skipping these as they're so water reactive they can be difficult to use.
Get Your Own:
Outside Resources and Second Opinions:
Jane Davenport.com - Mermaid Markers
Jane Davenport.com- Mermaid Marker Color Chart
Jane Davenport.com- Swatch Grid
Jane Davenport.com- Mermaid Ink Magic: Marbled Backgrounds- with Ali
Jane Davenport.com- Colour Play
Jane Davenport.com- Cauldron of Color
Jane Davenport MERMAID MARKERS-Swatch Sesh- James Burke
NEW Mermaid Markers by Jane Davenport Mixed Media Review and Demo- thefrugalcrafter
Jane Davenport Mermaid Markers: My Review and Ways to Use Them: CreativelyFree2Bme
5 Techniques to Use with Jane Davenport's Mermaid Markers
Mermaid Markers from Jane Davenport- Craft Test Dummies
Zig Markers Vs Mermaid Markers
Jane Davenport Mermaid Markers| First Impressions- Cindy Guentert Baldo
Mermaid Markers: Keep Calm and Craft On
Jane Davenport Mixed Media- Mermaid Markers- Jane Davenport
Please consider donating to this blog or purchasing from Natto-shop (http://nattosoup.com/shop) if you want me to continue publishing quality content. All materials tested were purchased from my own pocket. Keep on Truckin' Nattosoup is not under any sponsorship.


February 15, 2018
Spectrum Aqua Watercolor Markers: Watercolor Basics

Spectrum Aqua watercolor markers are Crafter's Companion (the creators of Spectrum Noir alcohol markers) foray into waterbased markers. They have since been rebranded and repackaged as Aqua by Spectrum Noir.
The Stats:
48 Available ColorsDual Tipped- fiber brush tip and finepoint tip for detailsDye basedAvailable in sets of 6 or 12, not available openstockNot refillableEssential, Primary, Nature, Floral (12 piece sets)Landscape, Botanicals, Earth, Brights (6 piece sets)$1.60-$2.50 per marker (approx)Compressed fiber brush tipBlendable
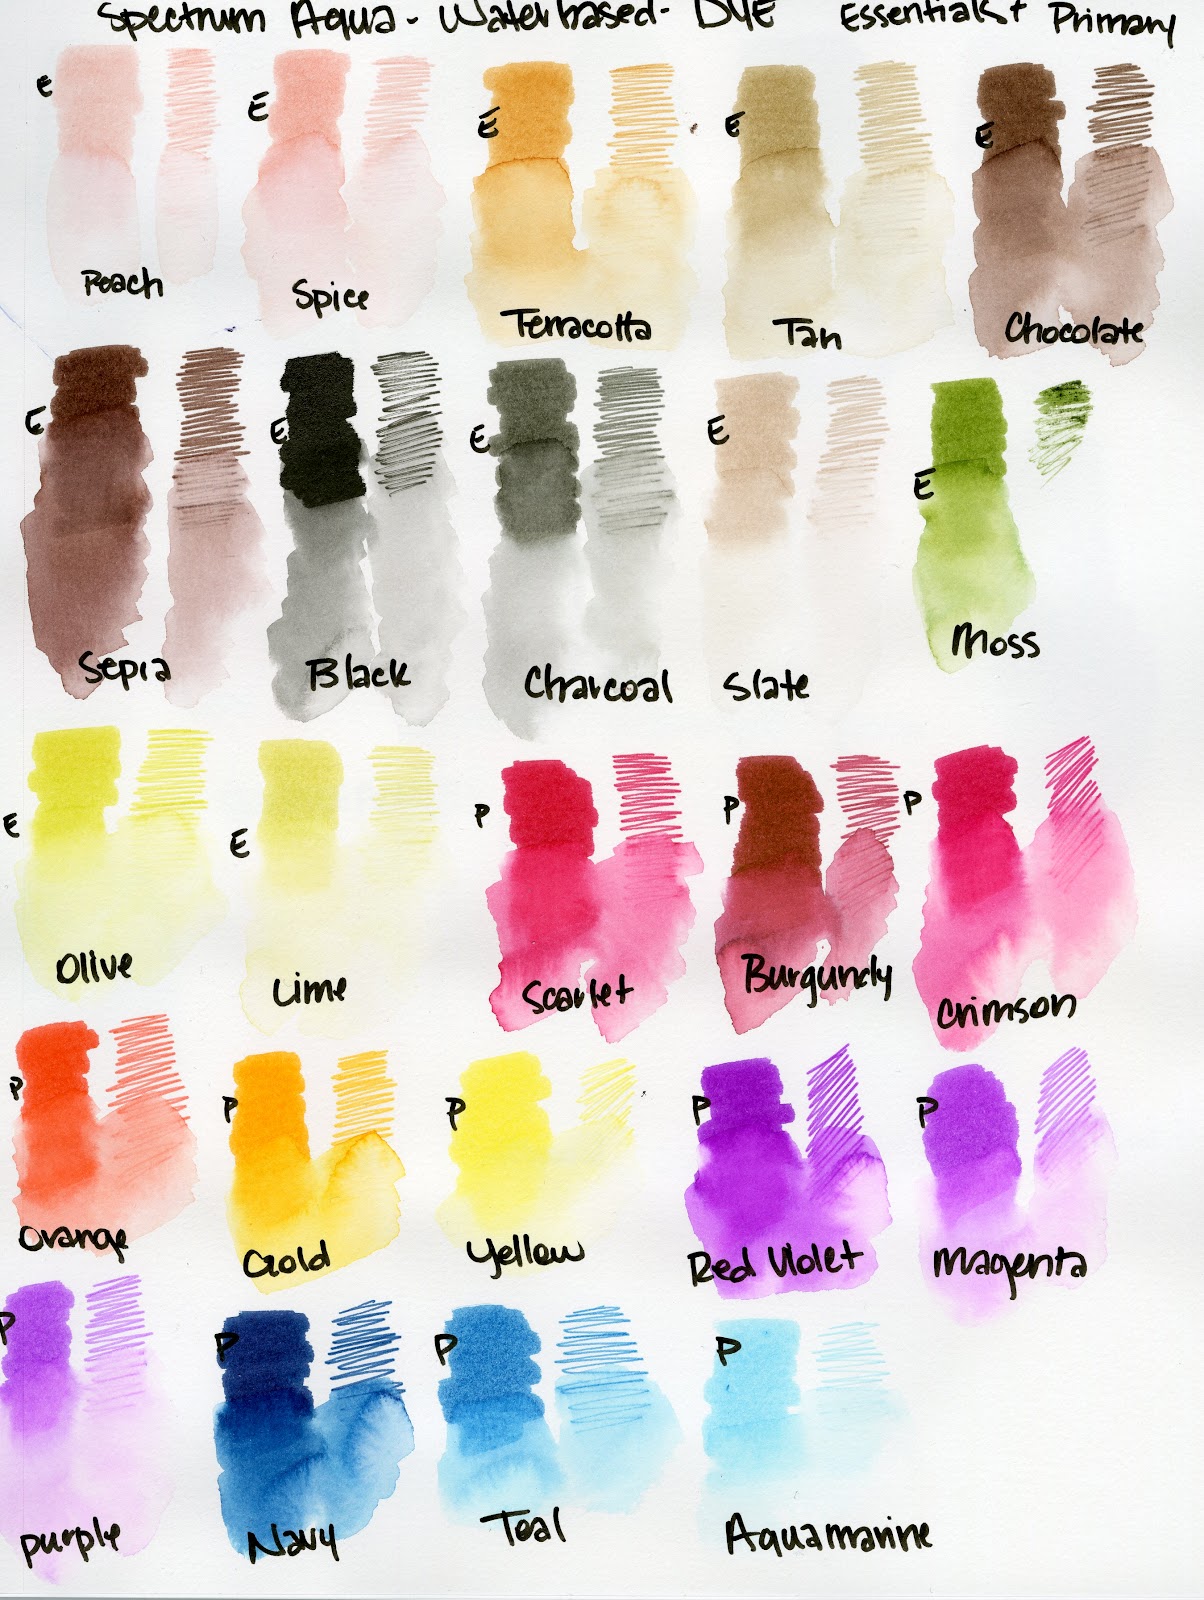
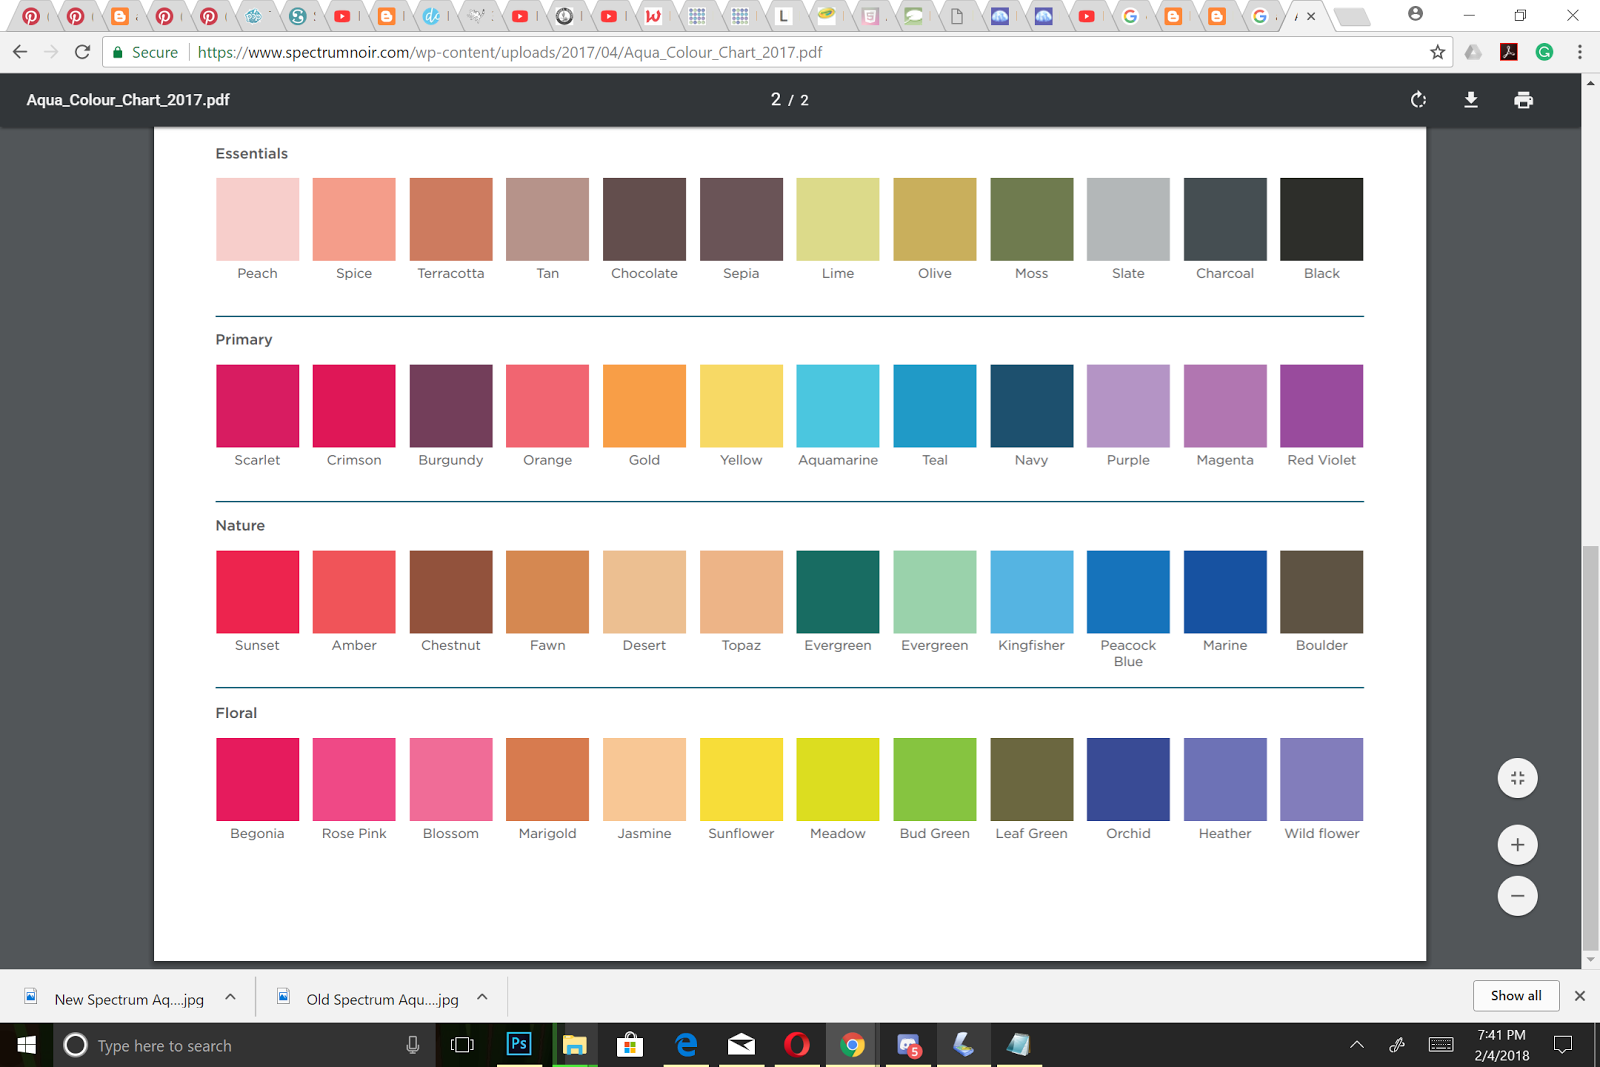 Digital Approximation of Colors and Color Names (sorted by set) Source
Scanned Swatches of Essentials (E) and Primary (P)
Available through:AmazonDickBlick (better price)
The Packaging:
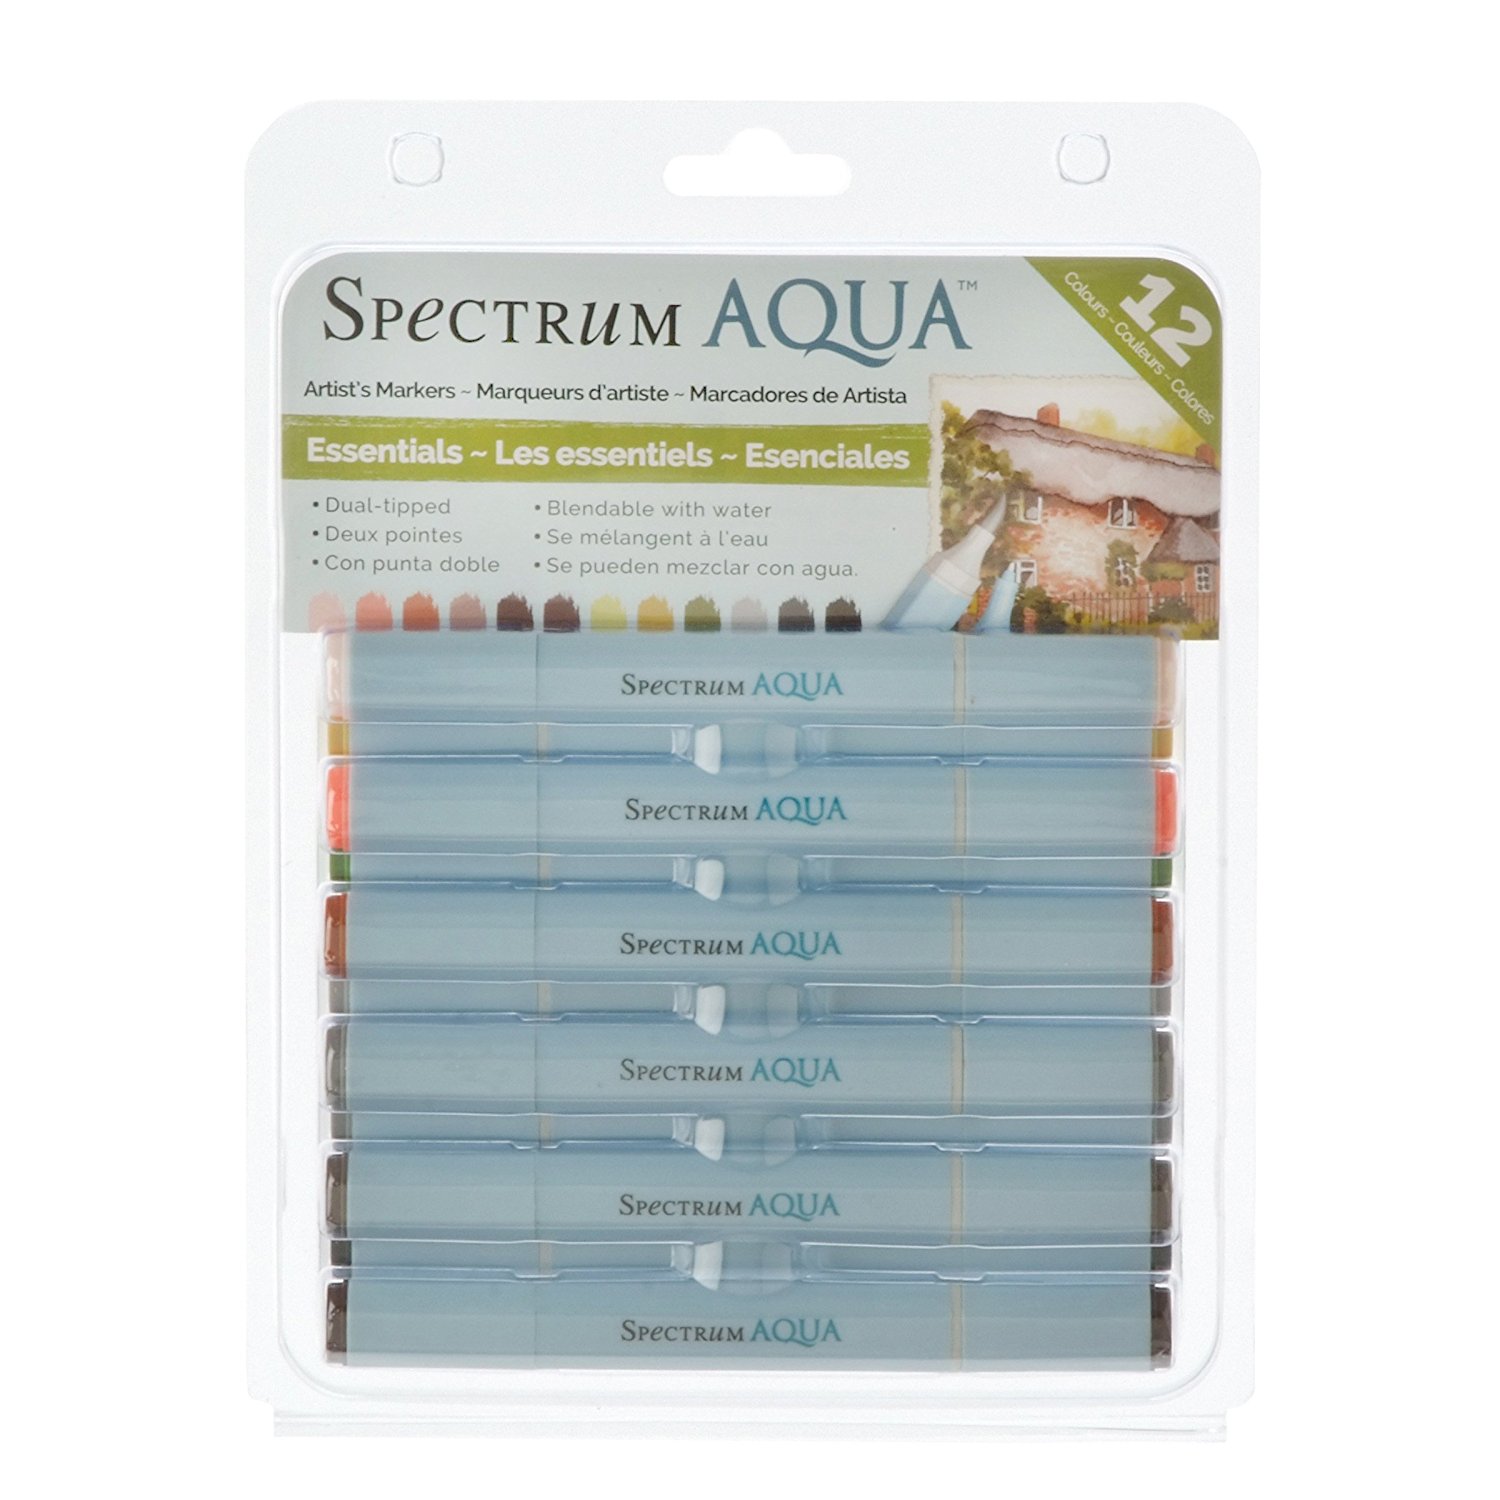 Old Packaging- Source
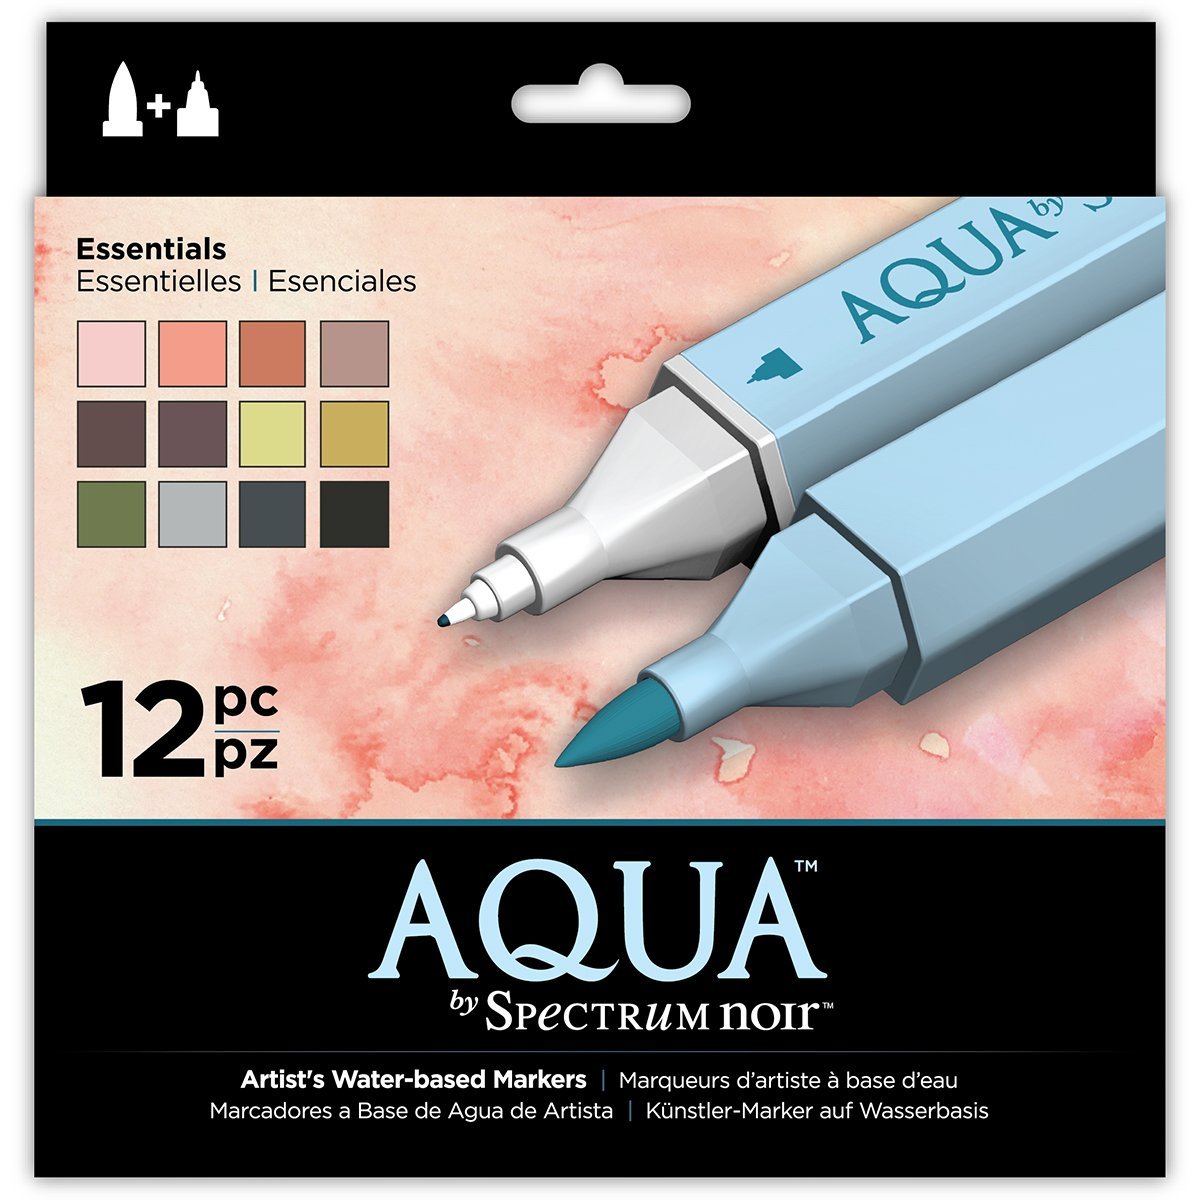 New Packaging- Source
When I purchased my Spectrum Aqua markers, they were only available as clamshell 12 packs. Aqua, by Spectrum Noir (same thing, just rebranded) are now available in cardboard 6 and 12 packs, which makes it a little easier to cherry pick a collection of colors you'll use. Either packaging can be reusable, but I tossed mine in favor of a marker case from Utrecht.
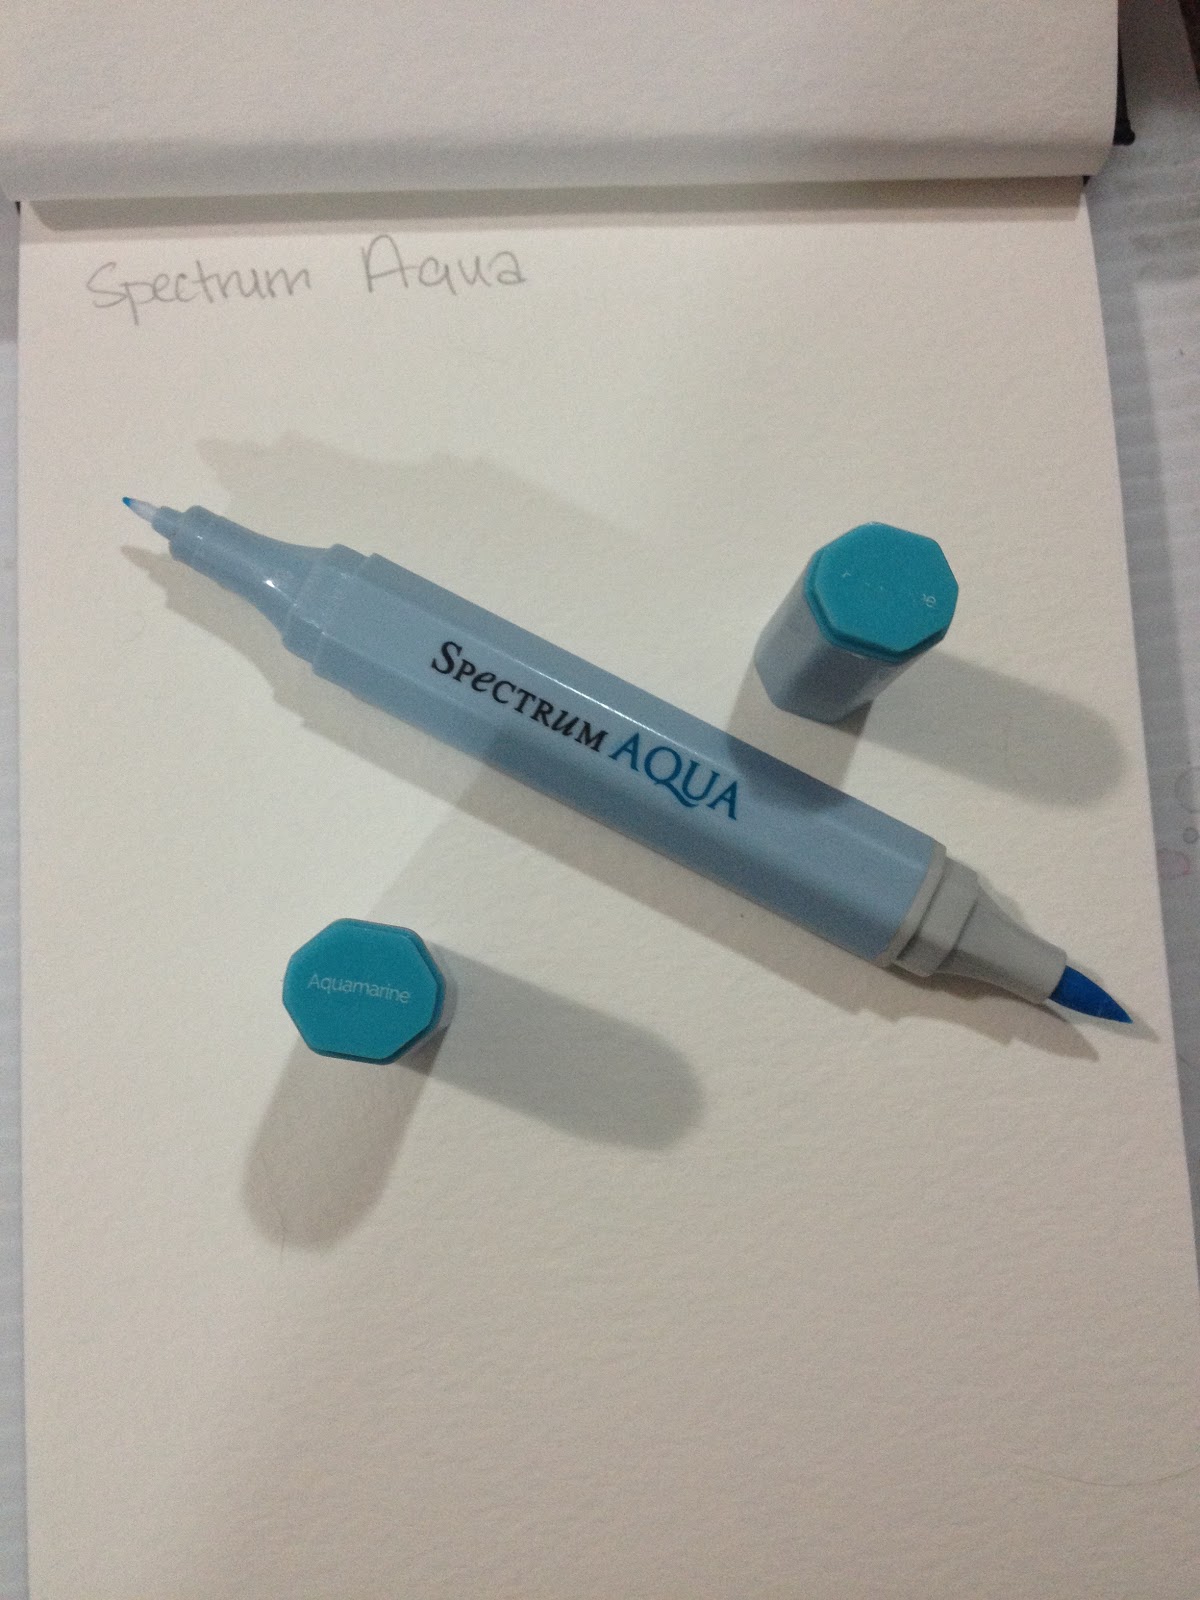
The Markers:
Combination of two sets- Essentials and Primary
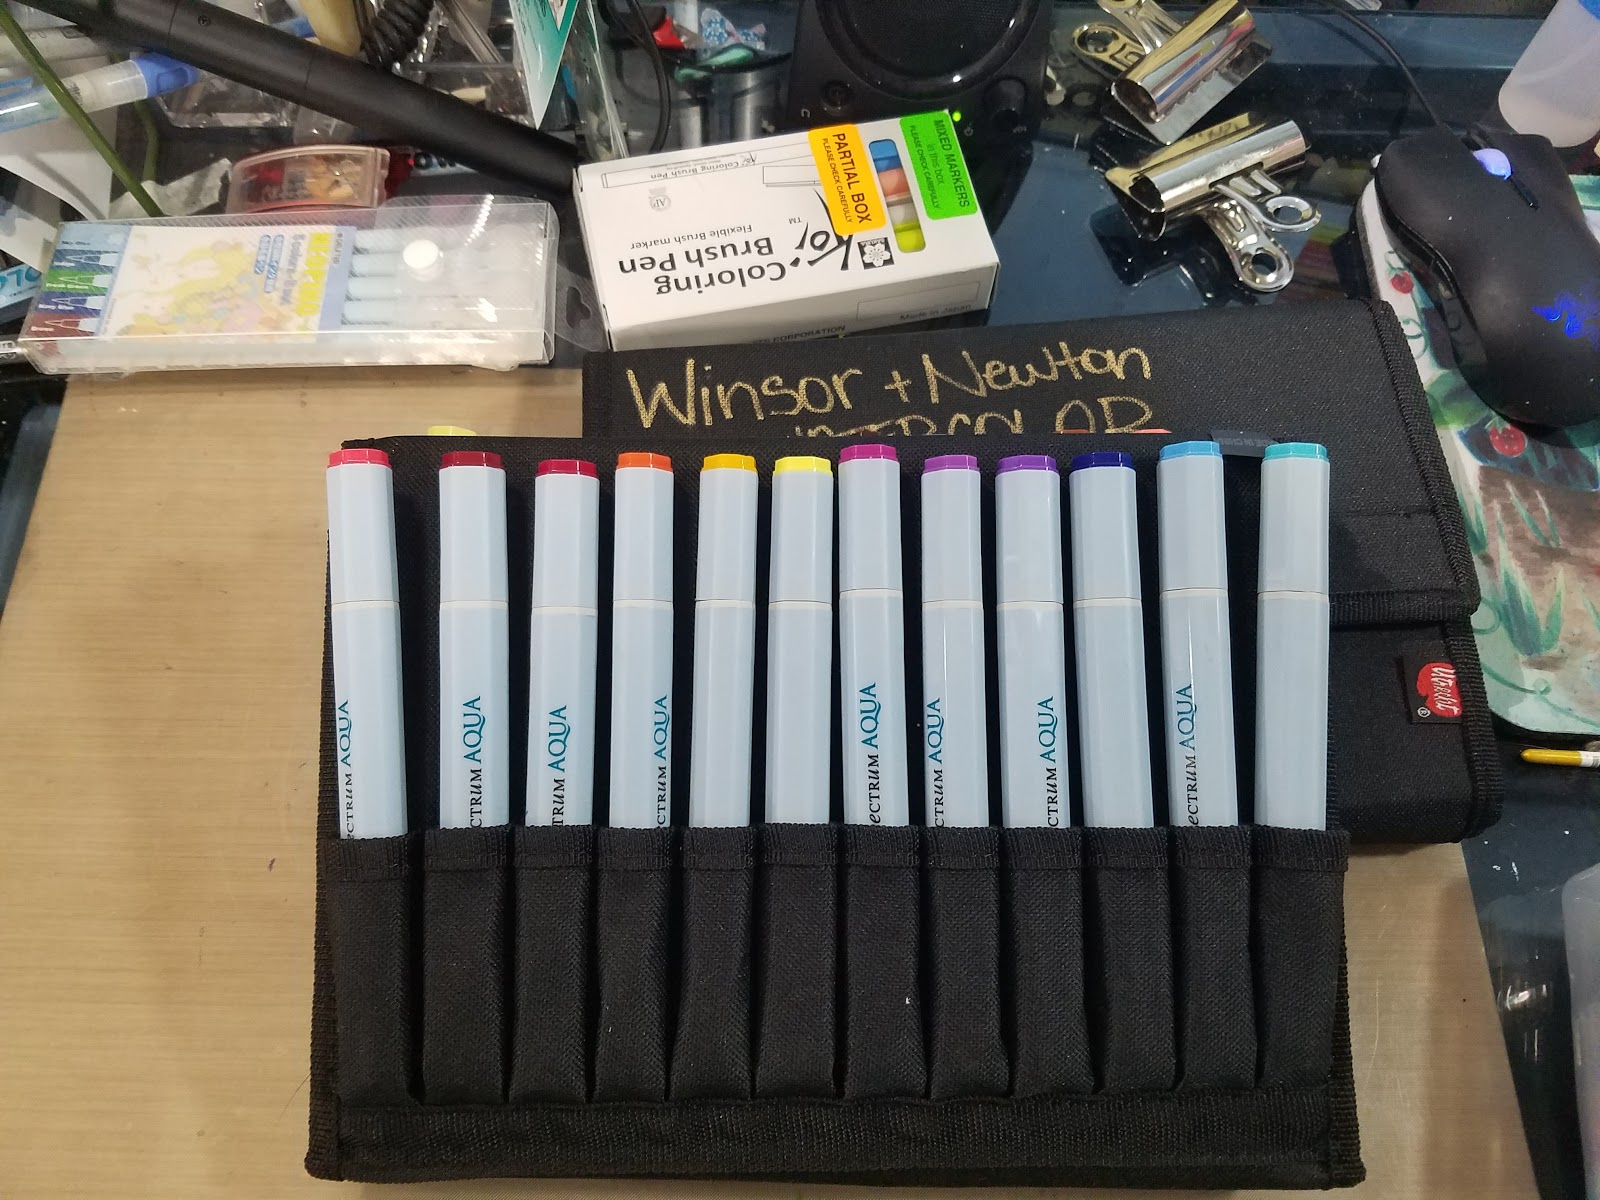
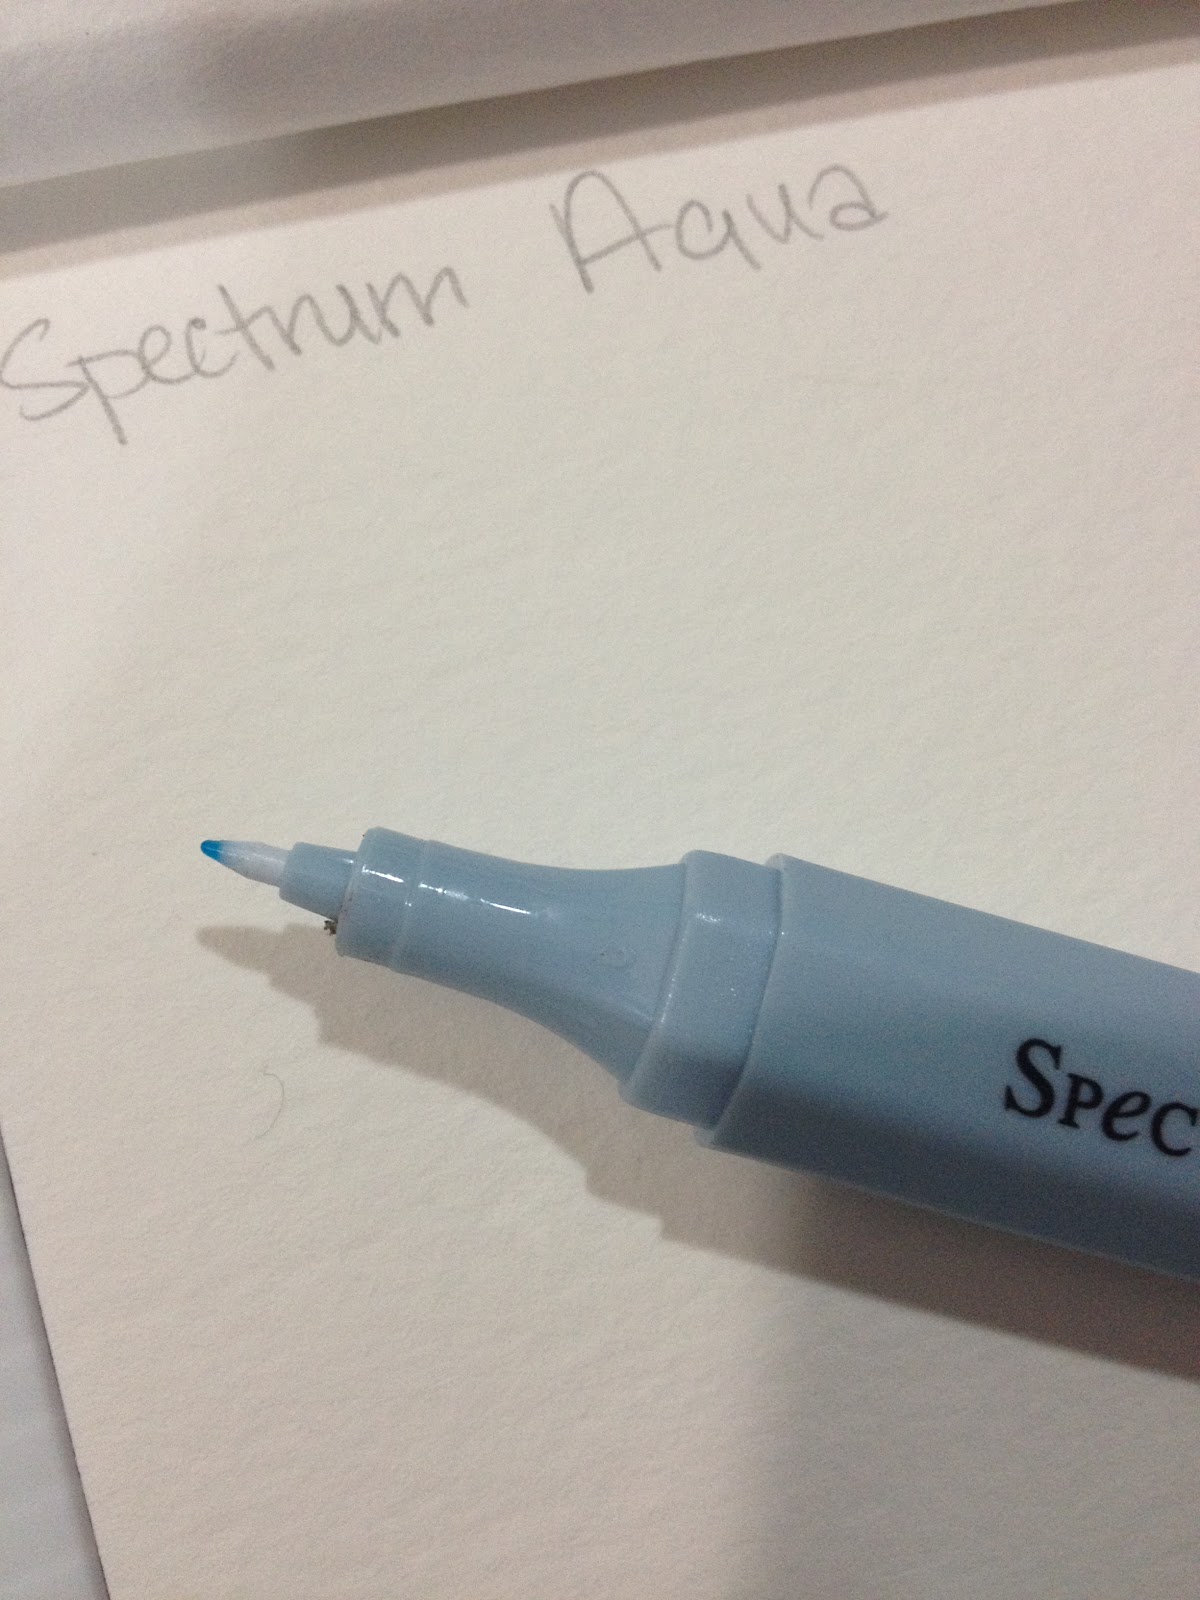
Spectrum Aqua markers are non refillable twin tipped markers which feature a fiber brush nib and a small, plastic fine point nib. The fine point nib is very prone to failure- probably due to dried ink in the tip, but the brush nib is fairly juicy and releases a generous amount of ink. It is somewhat given to fraying, so if you want to do fine details, these may not be the markers for you. The brush end is denoted by a gray band, and the markers are sorted by color names, not names and families. Given that these are part of the Spectrum Noir family, it would be handy if the family for the corresponding Noir marker were included- this might be a feature on the rebranded Aqua markers.
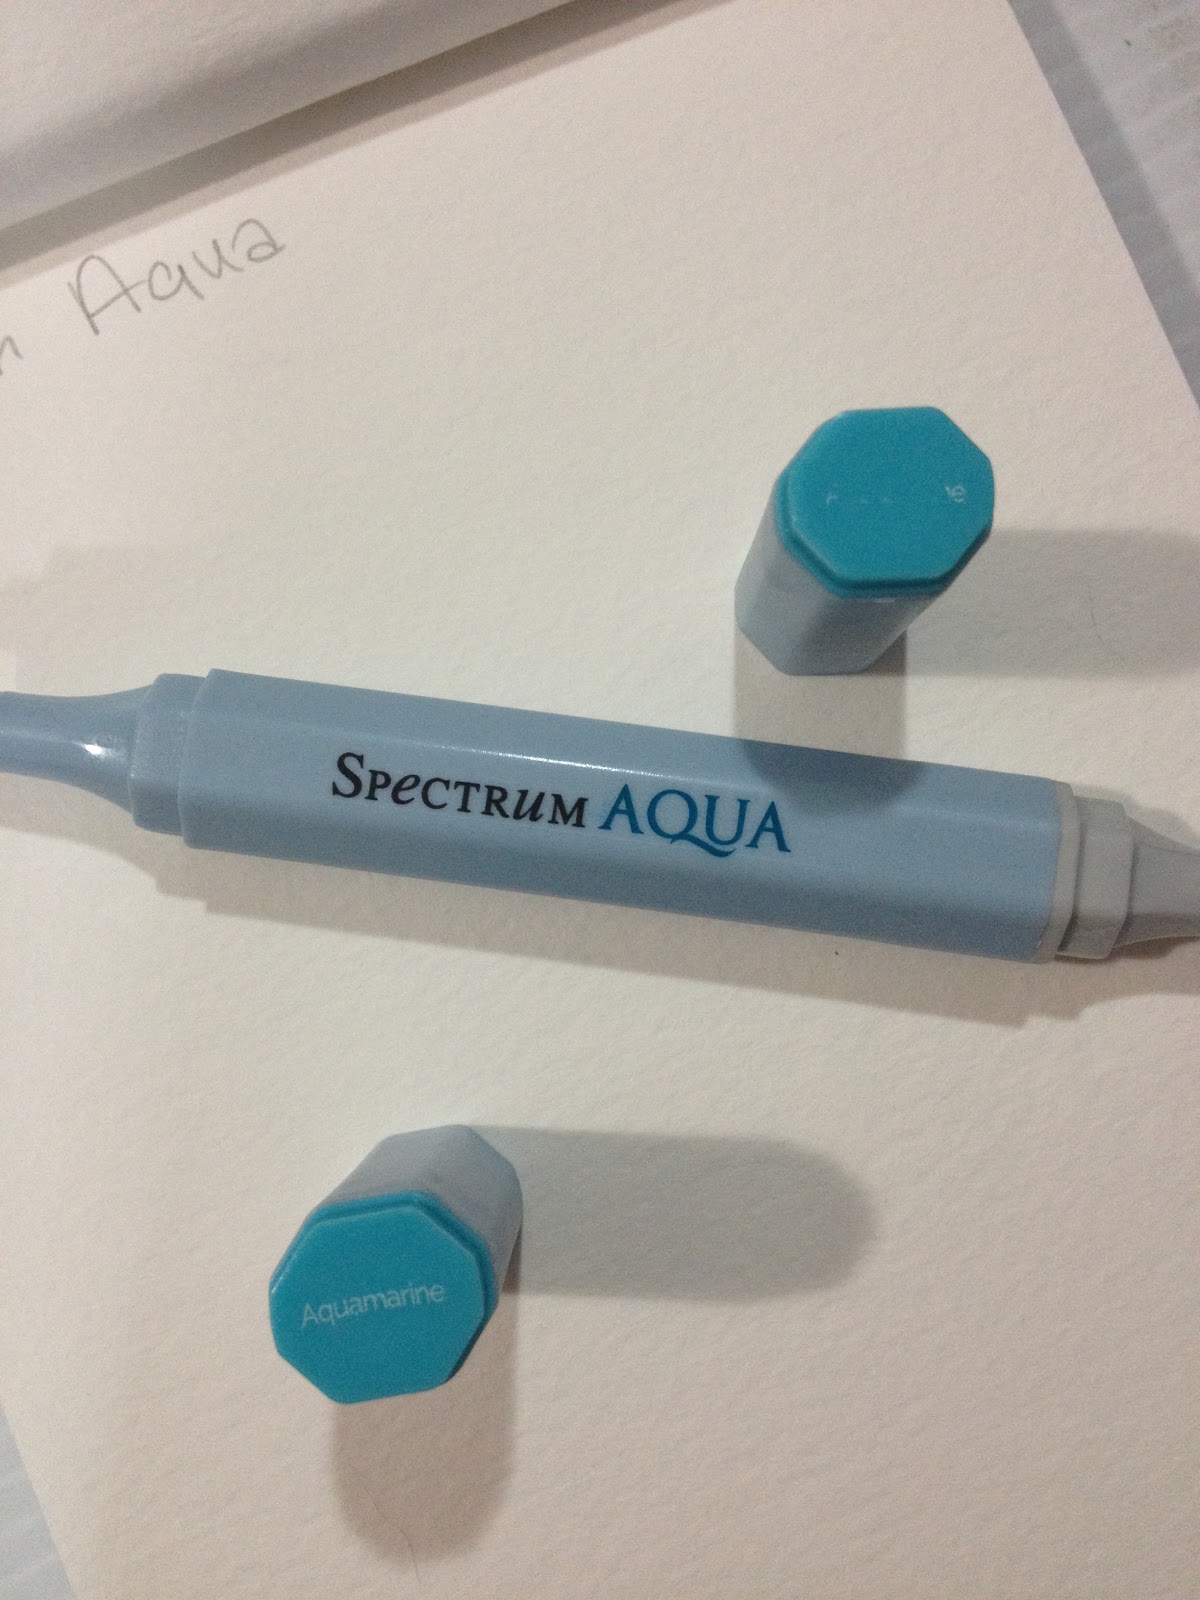
The body screening only covers branding, and does not include the color name.

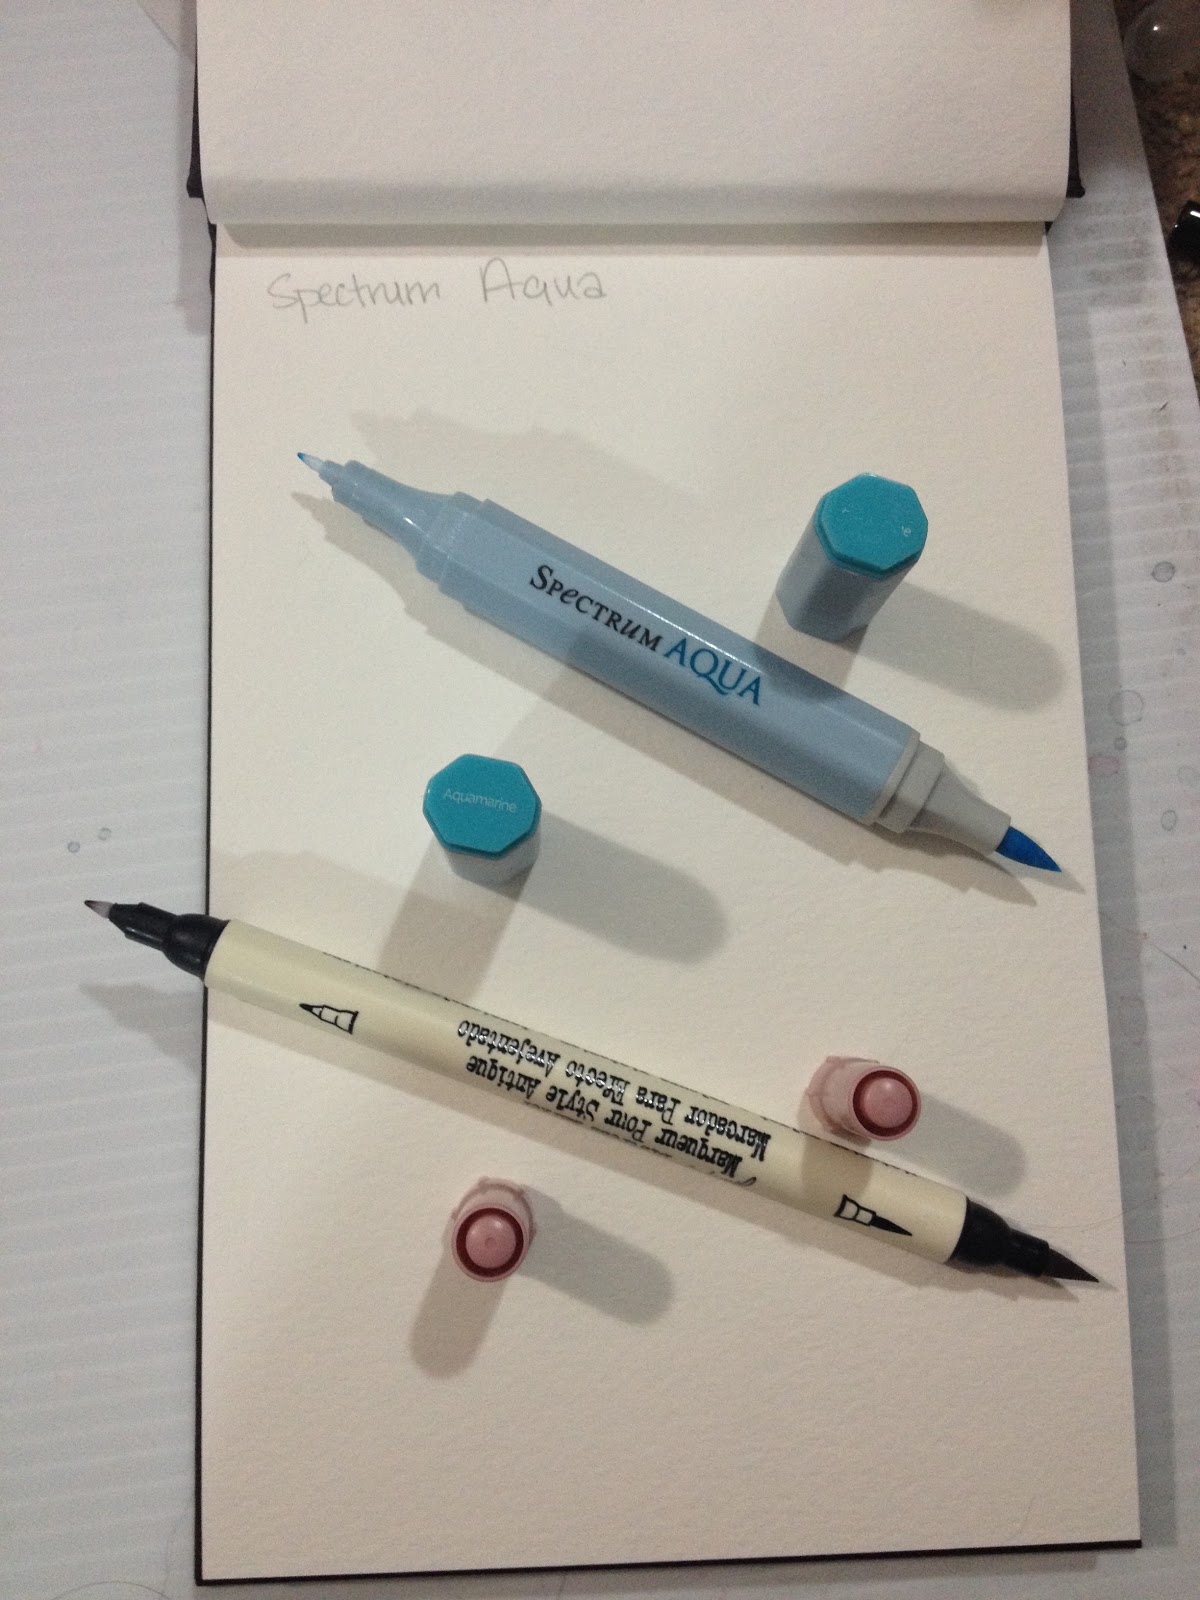 Top: Spectrum Aqua
Bottom: Distress Marker
Spectrum Aqua Review
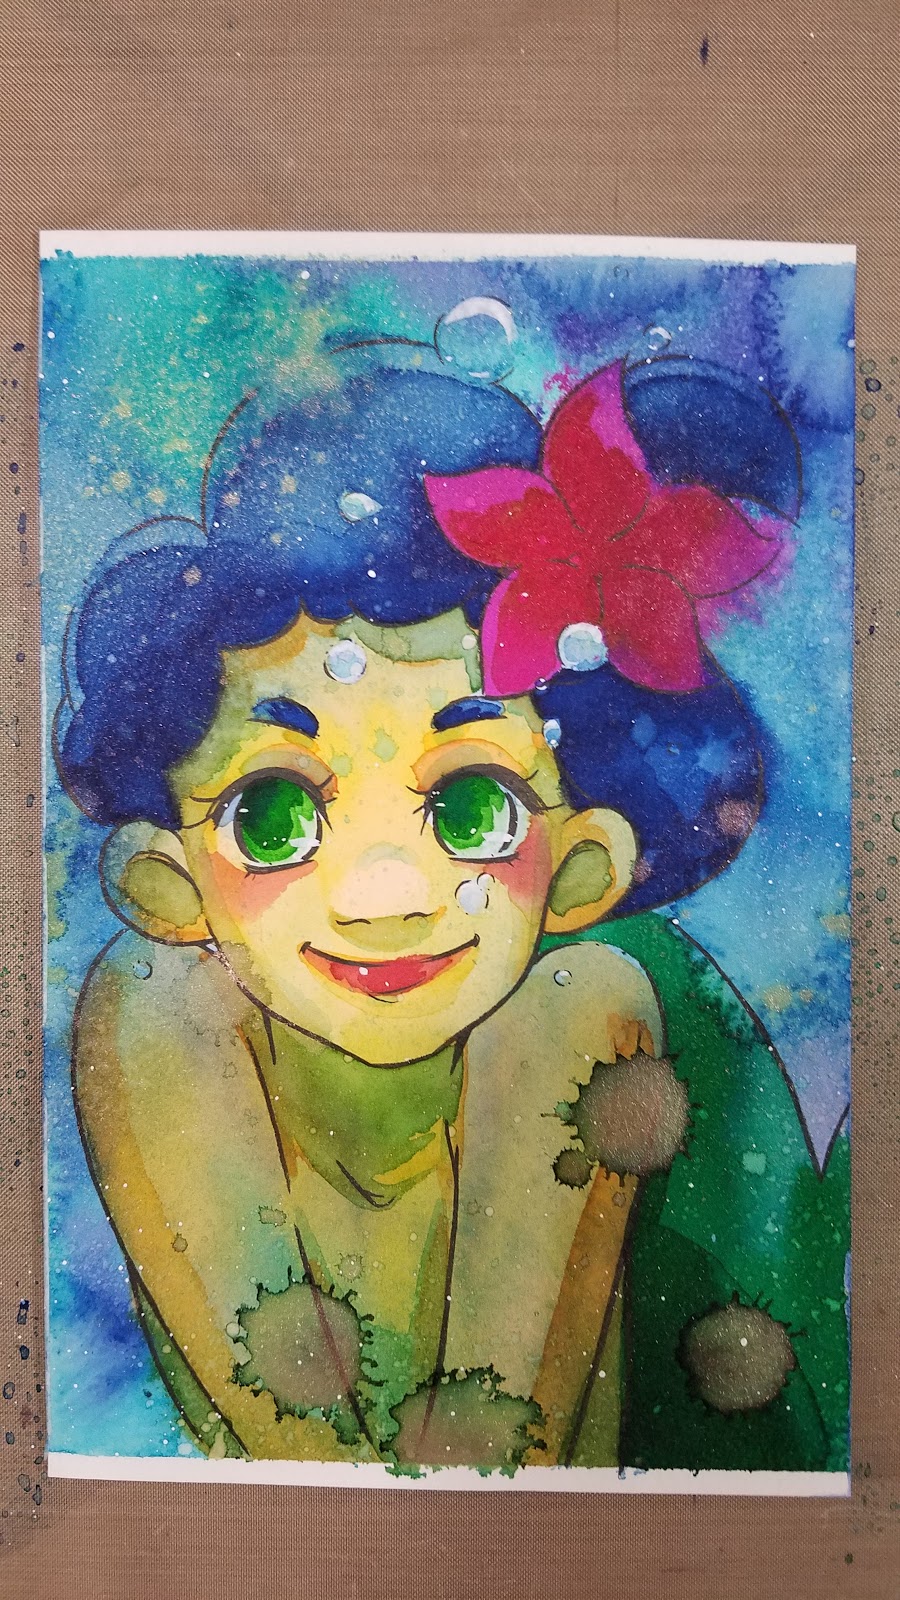
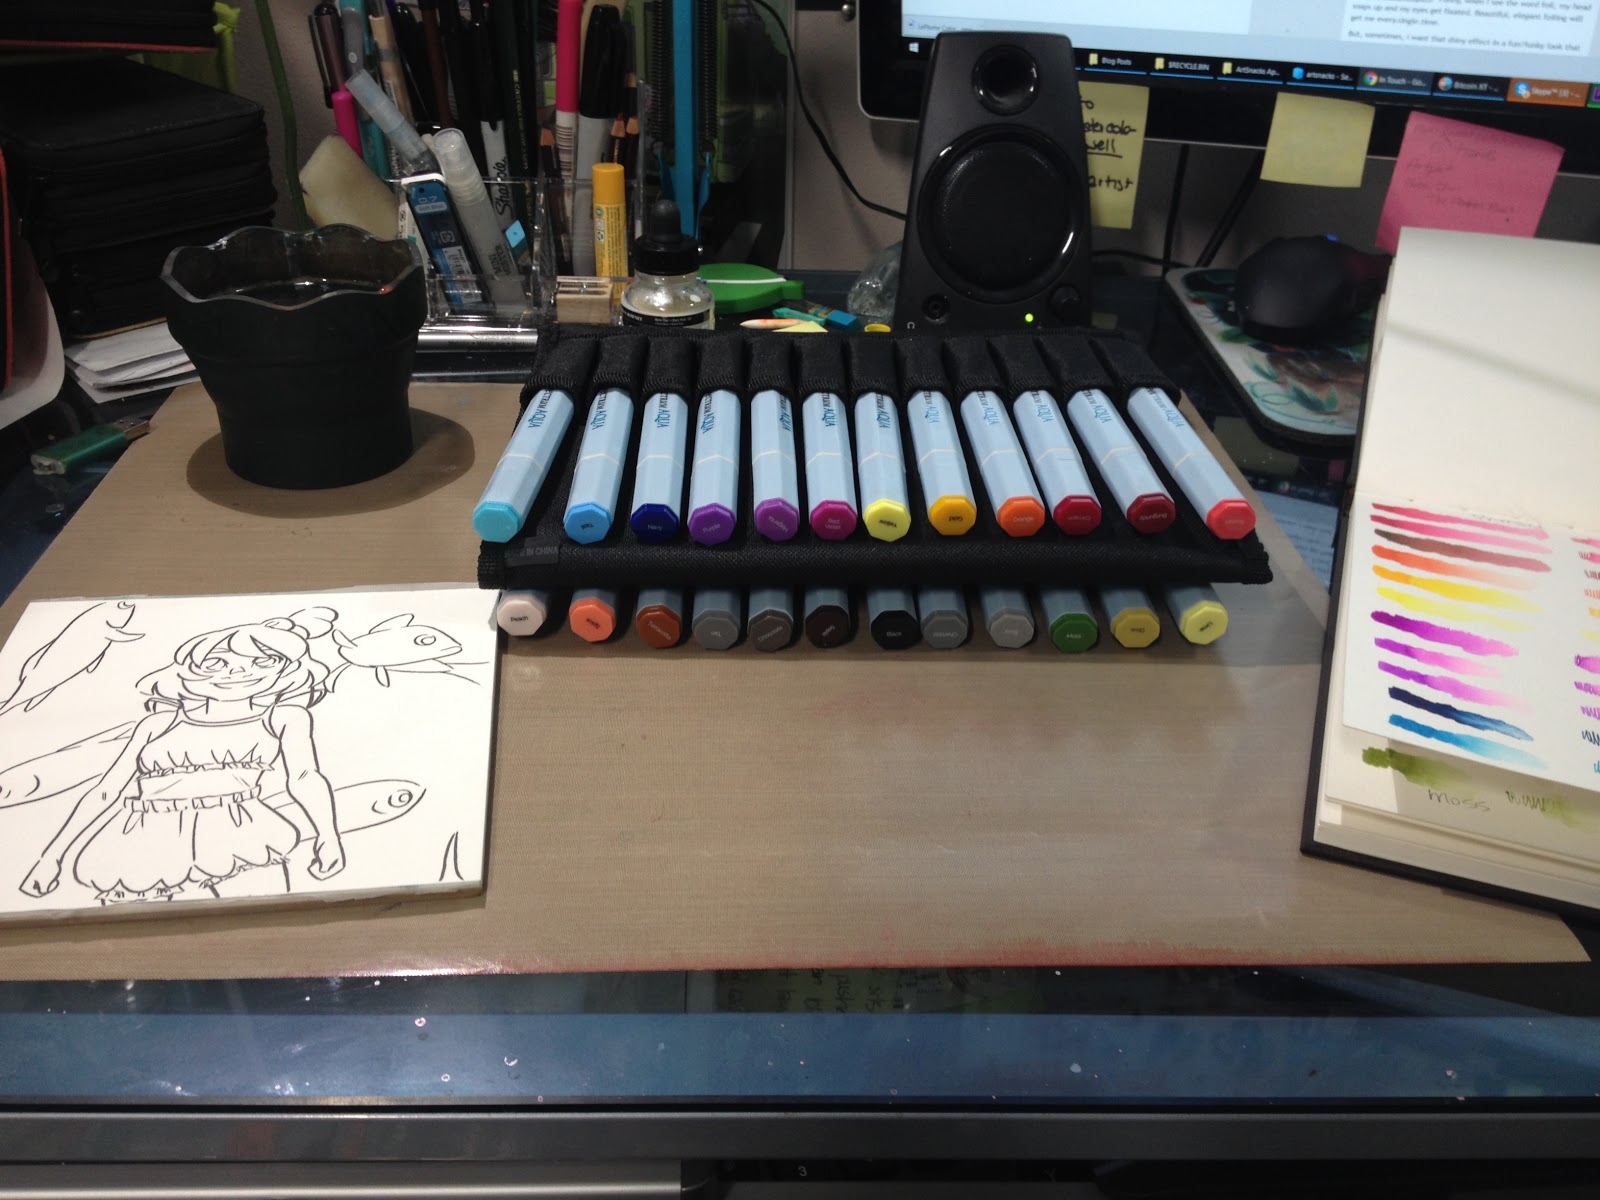
The Field Test
Materials Used:Spectrum Aqua MarkersFluid EZ Block Watercolor PaperSailor Mitsuo Aida brushpen (waterproof)
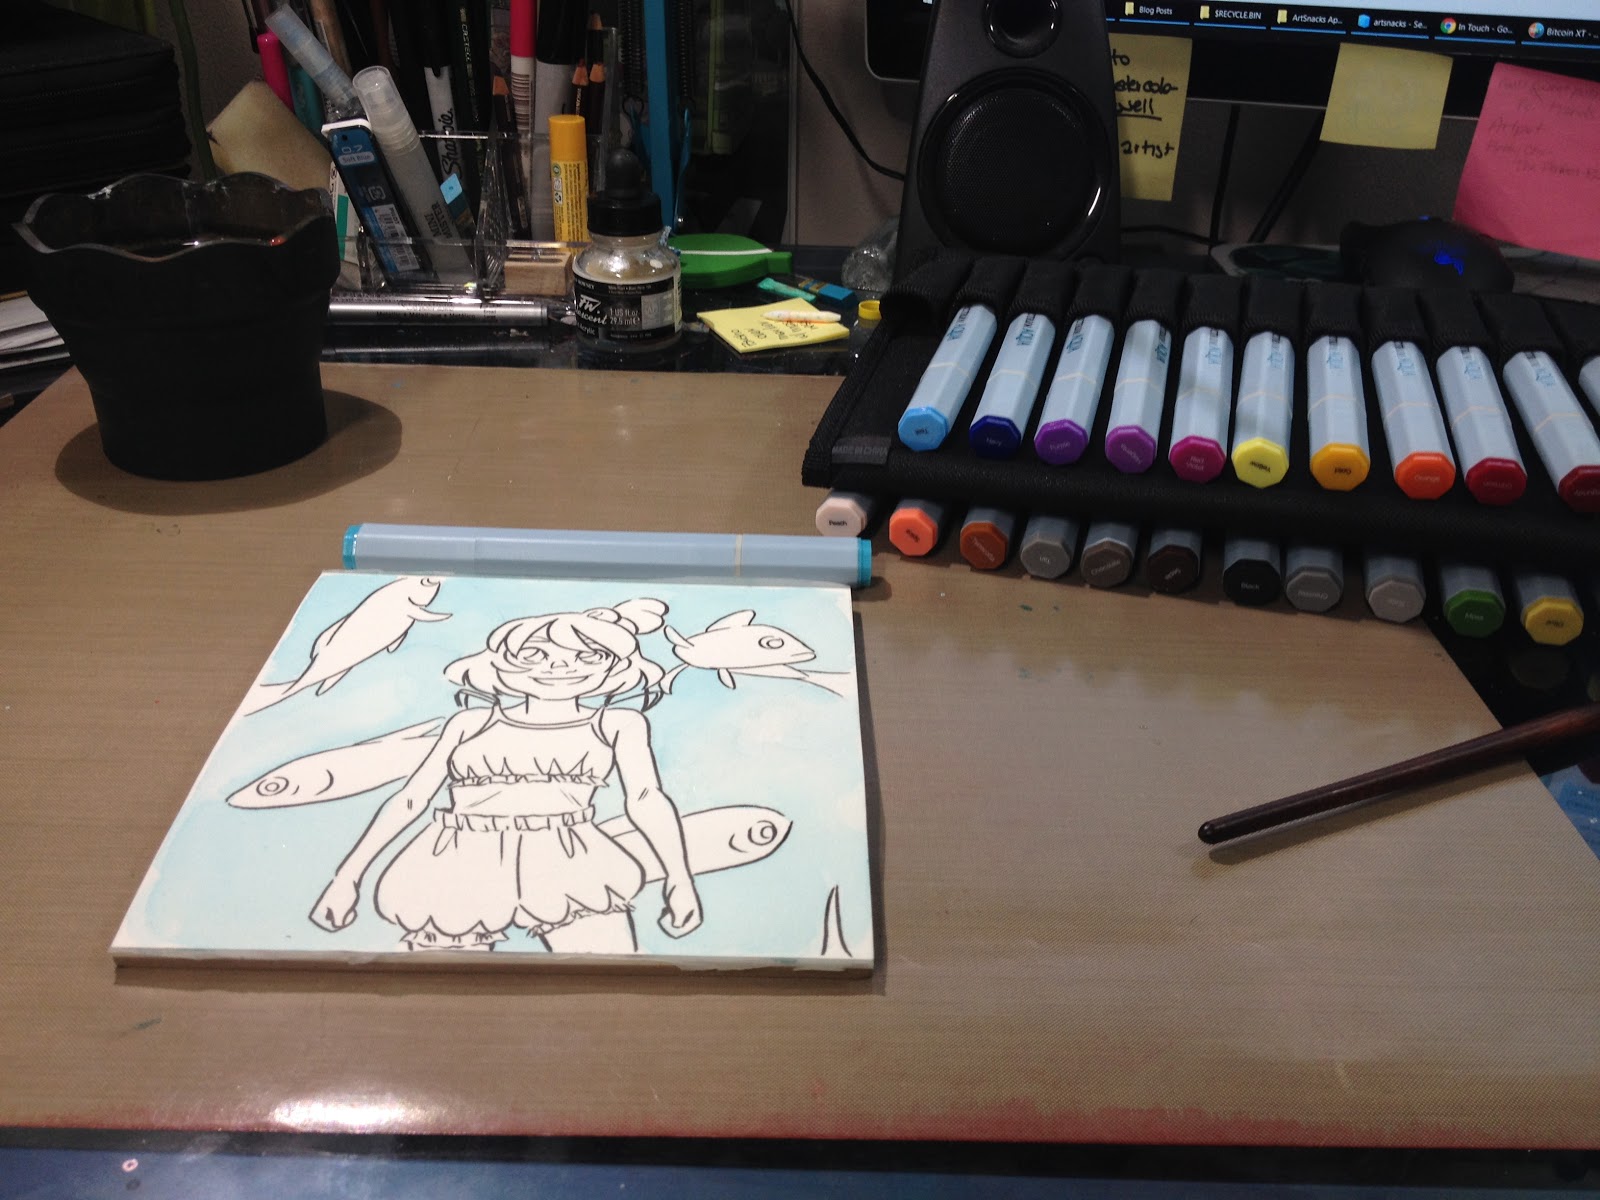
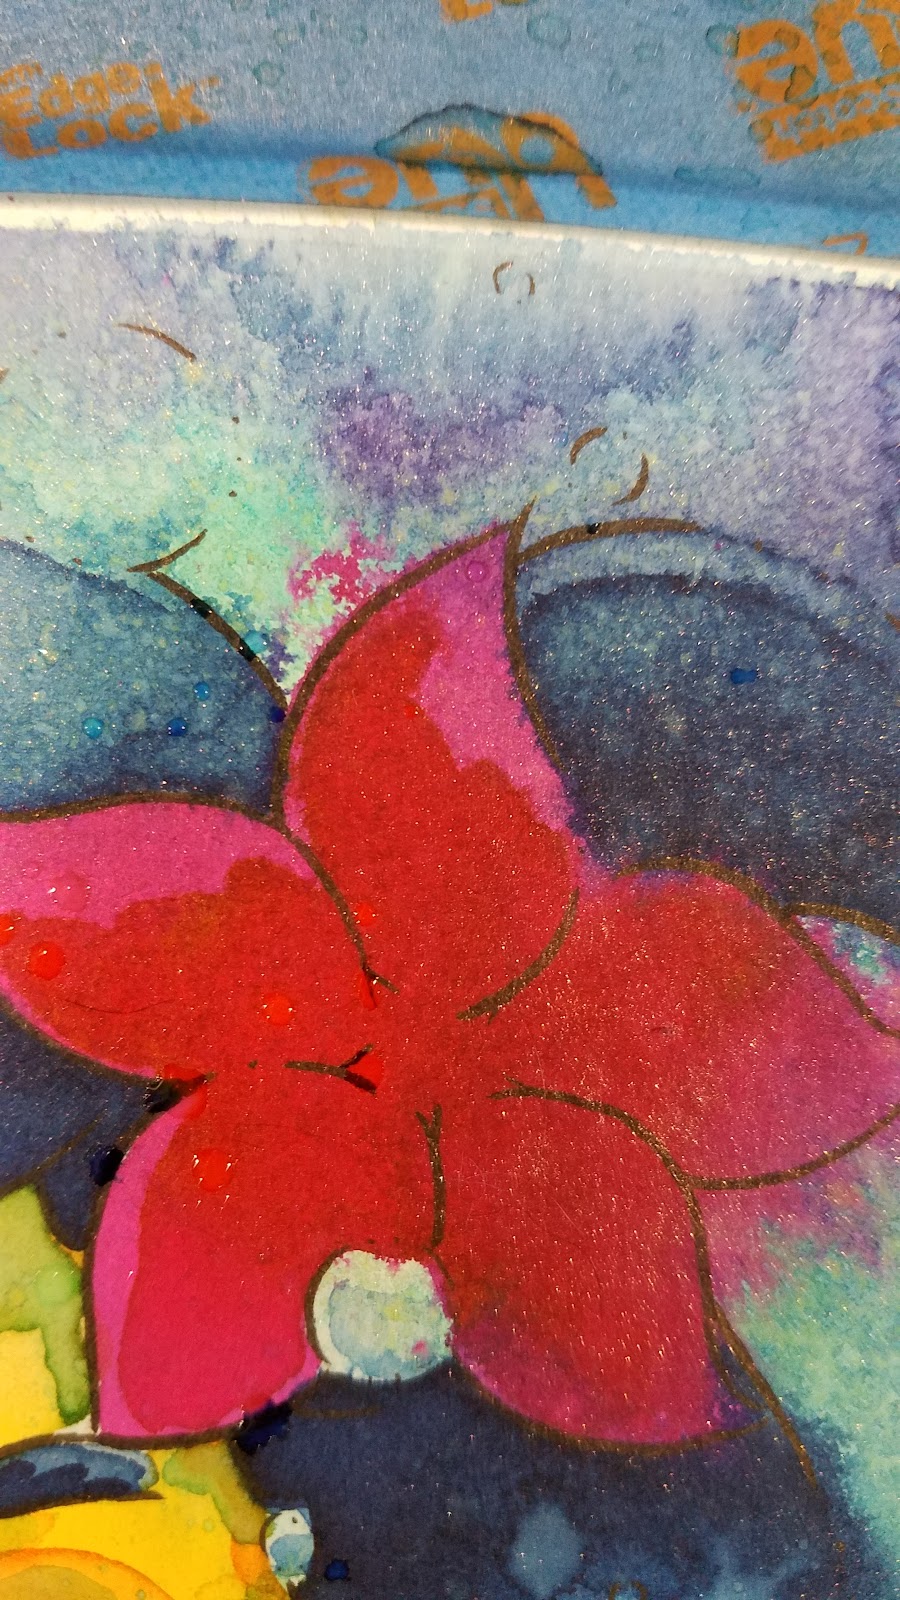
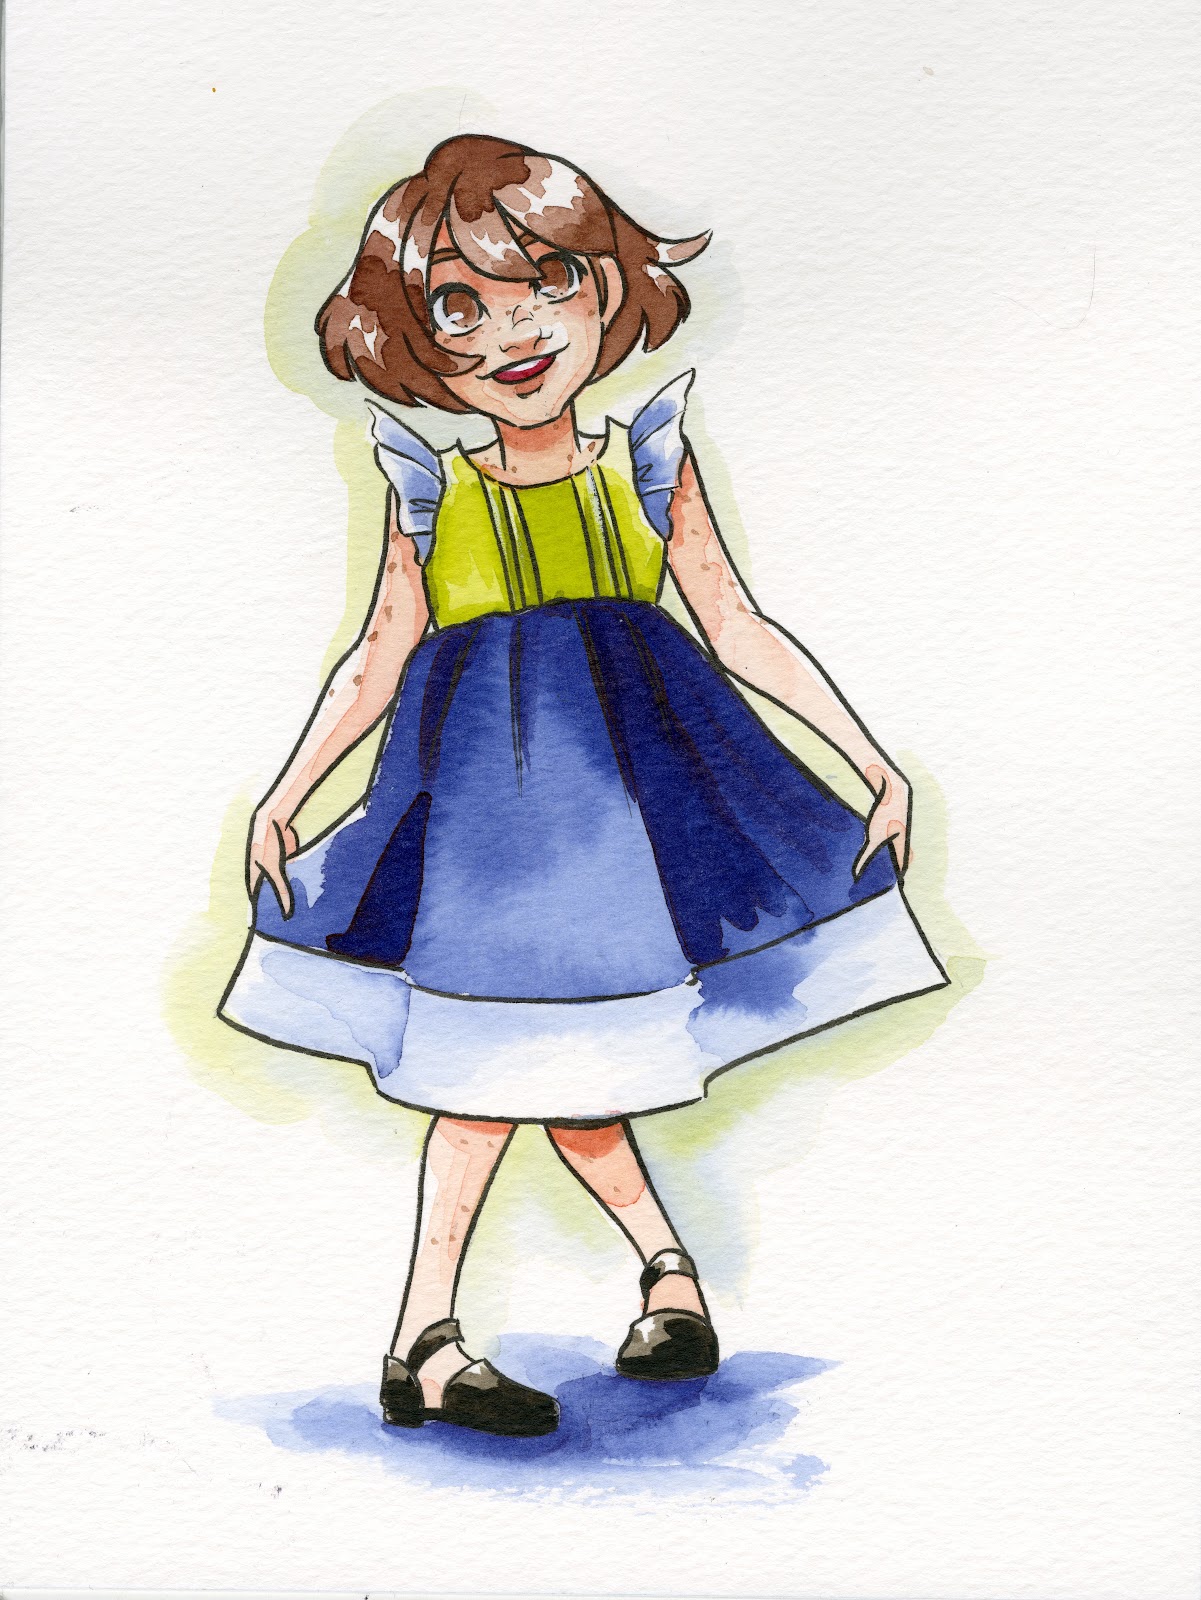
I applied a wash of very watered down turquoise using clean water and a brush to help give an underwater vibe.
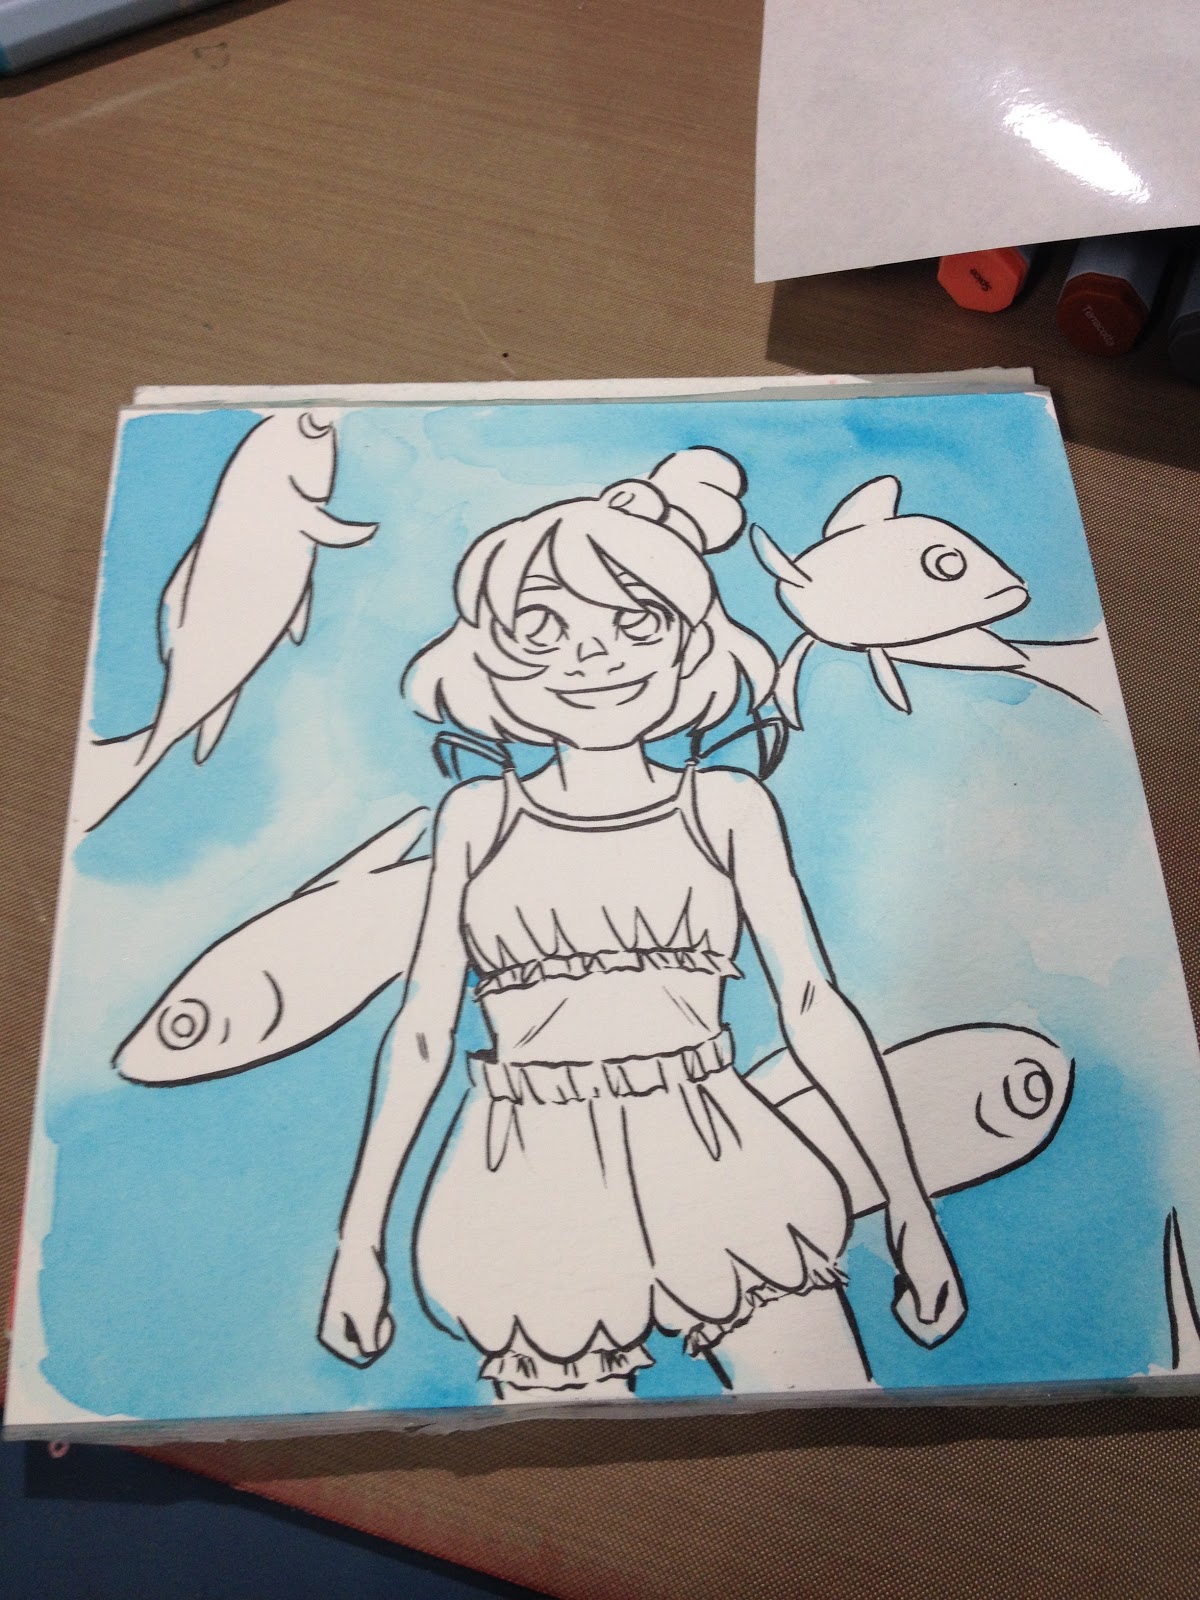
While this was still wet, I dabbed in slightly more saturated turquoise with a brush.
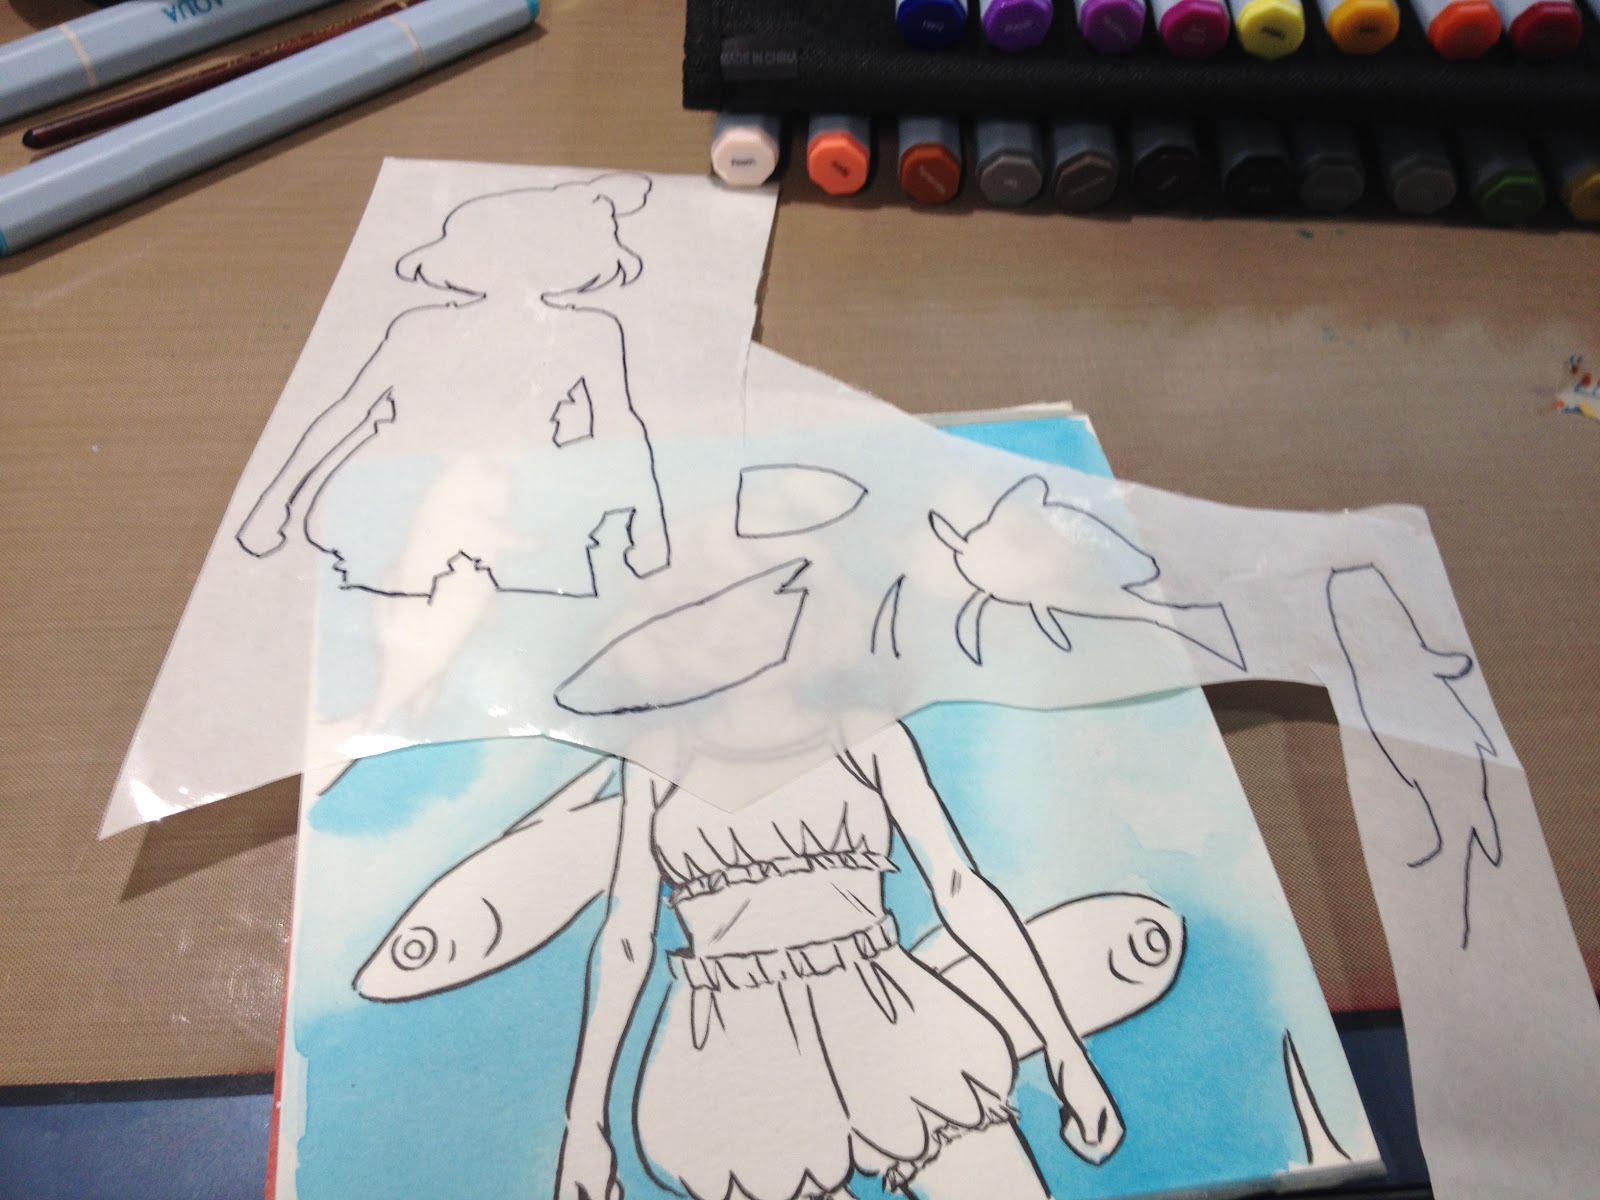
I created a mask for Kara and the goldfish using masking frisket- a technique I've frequently used with alcohol markers.
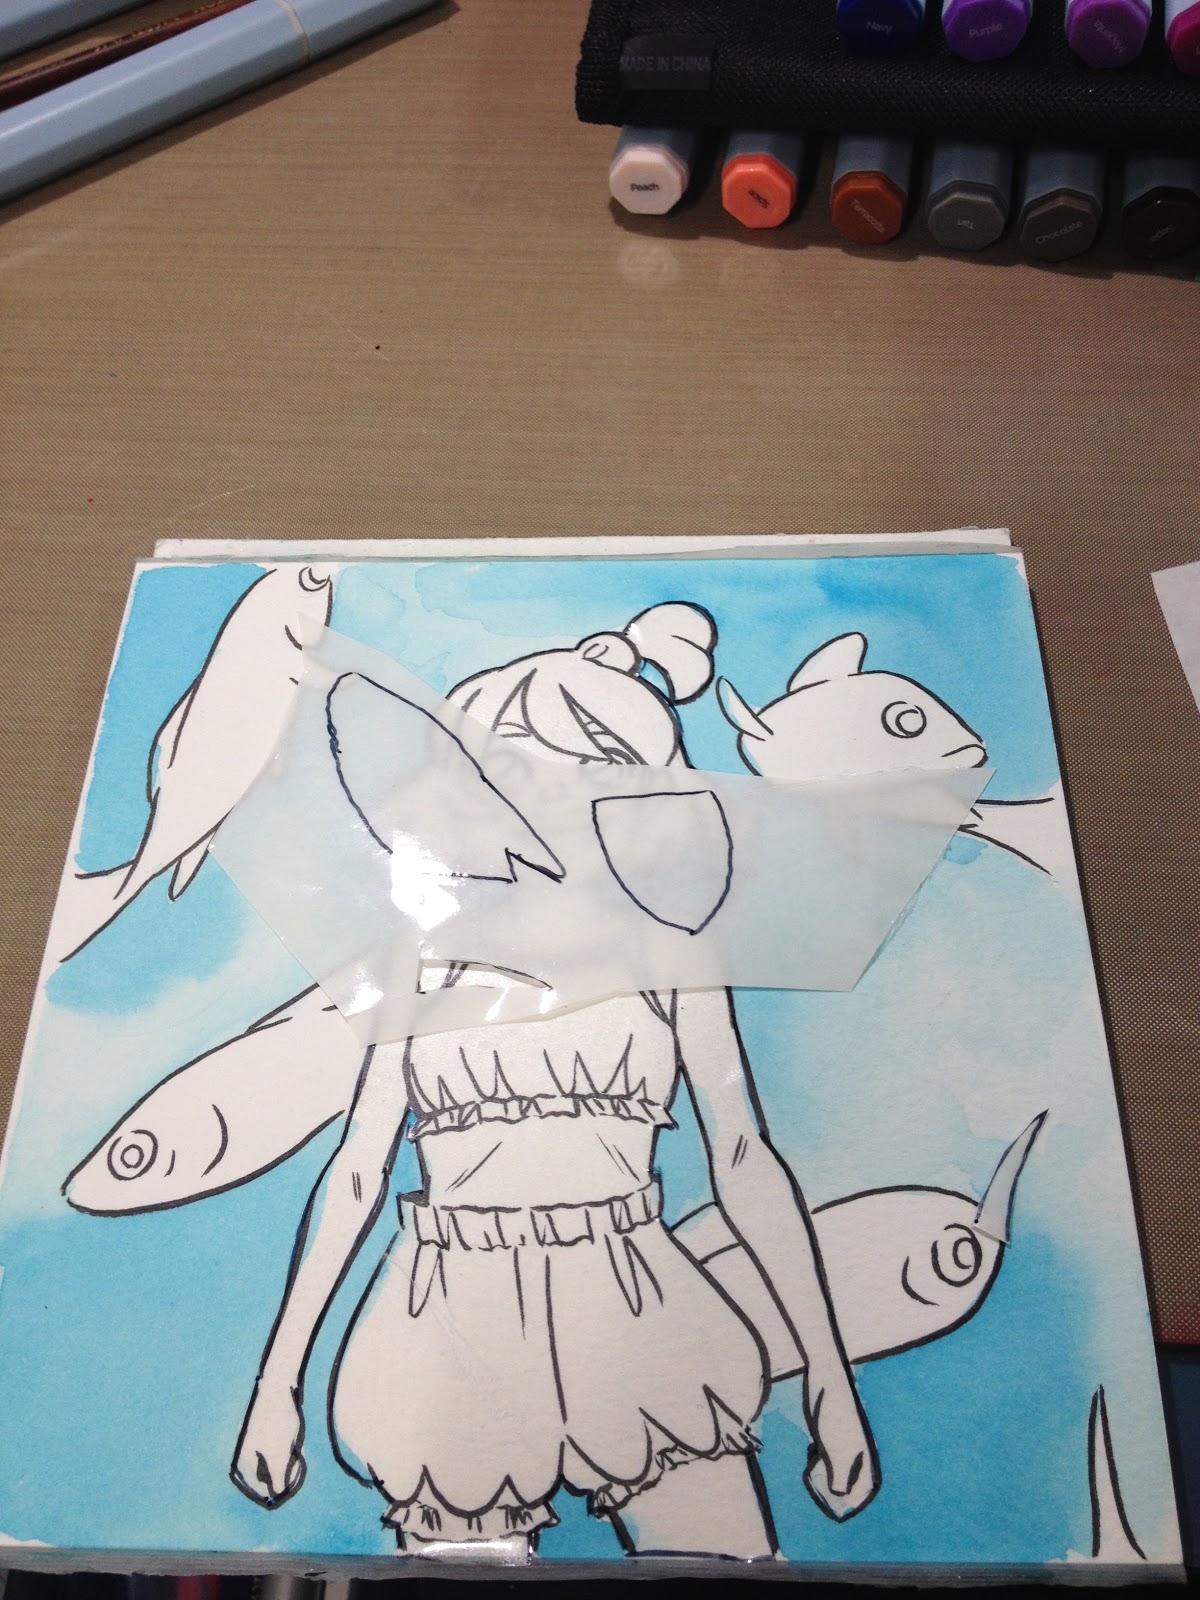

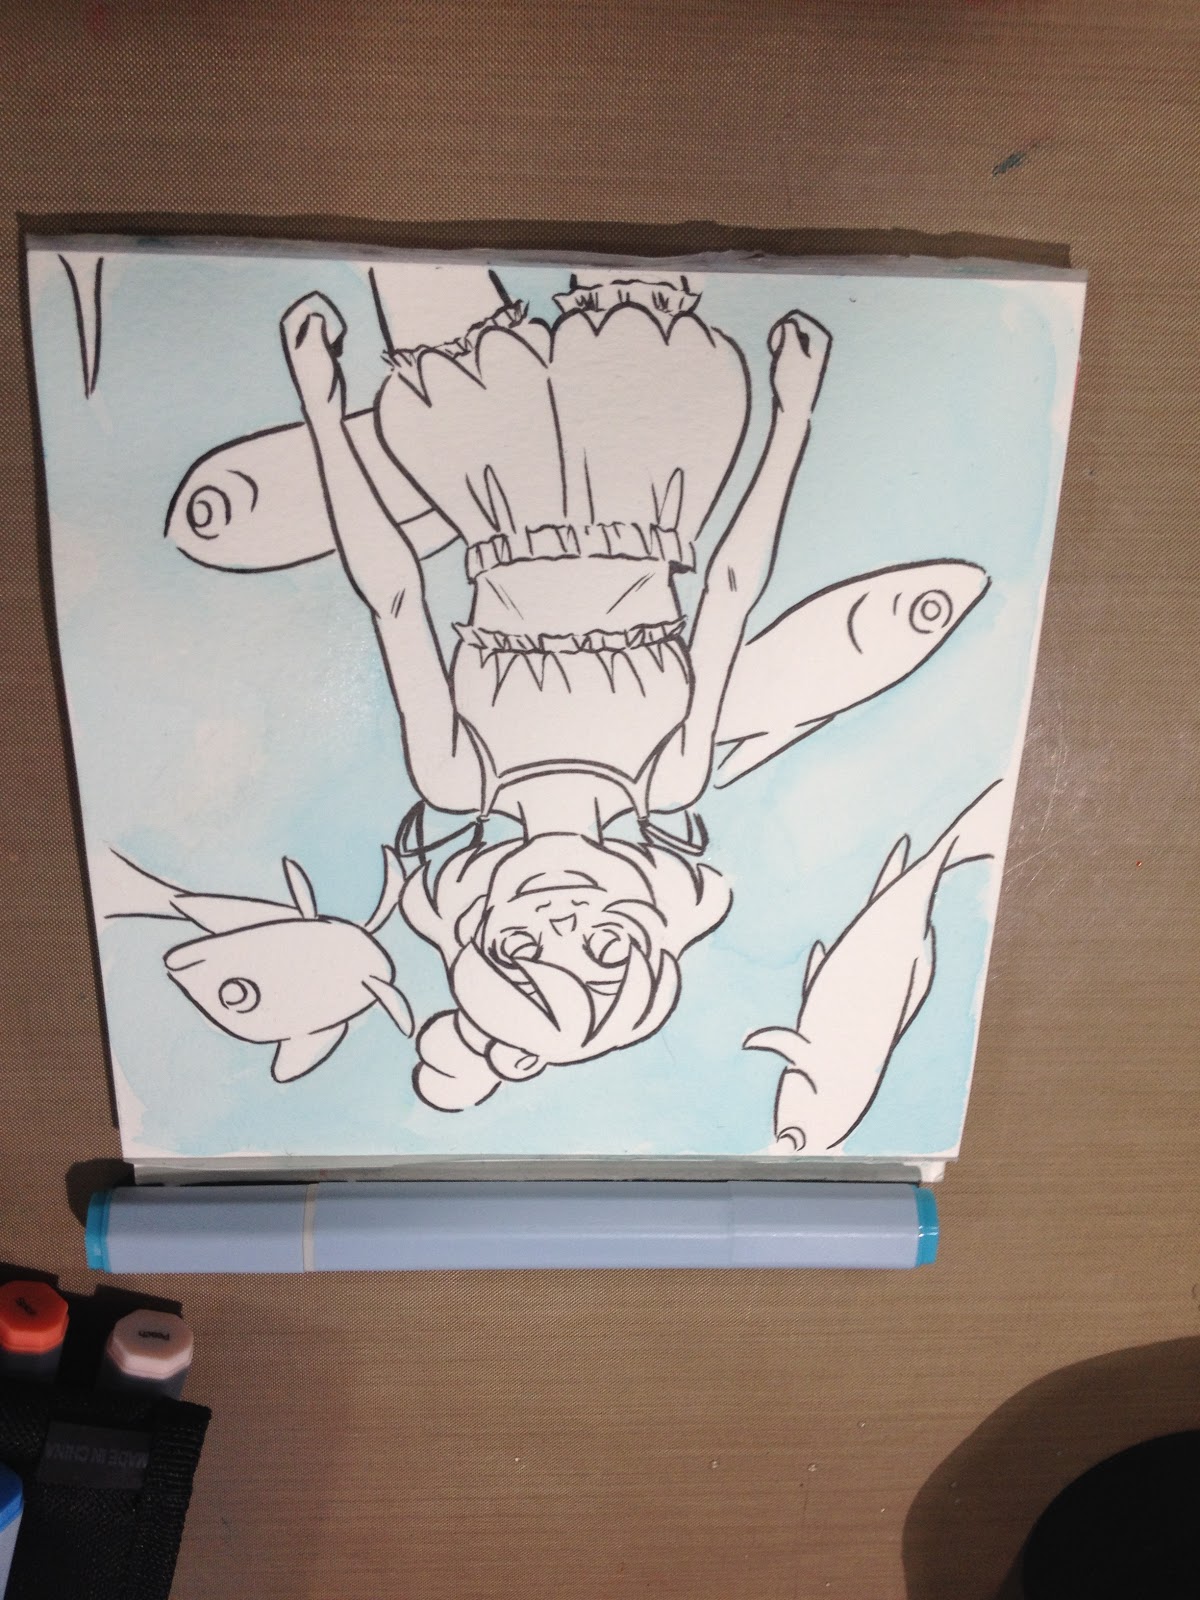
This mask allowed me to flick watered down Turquose and darker blues onto the illustration using a wet synthetic brush.
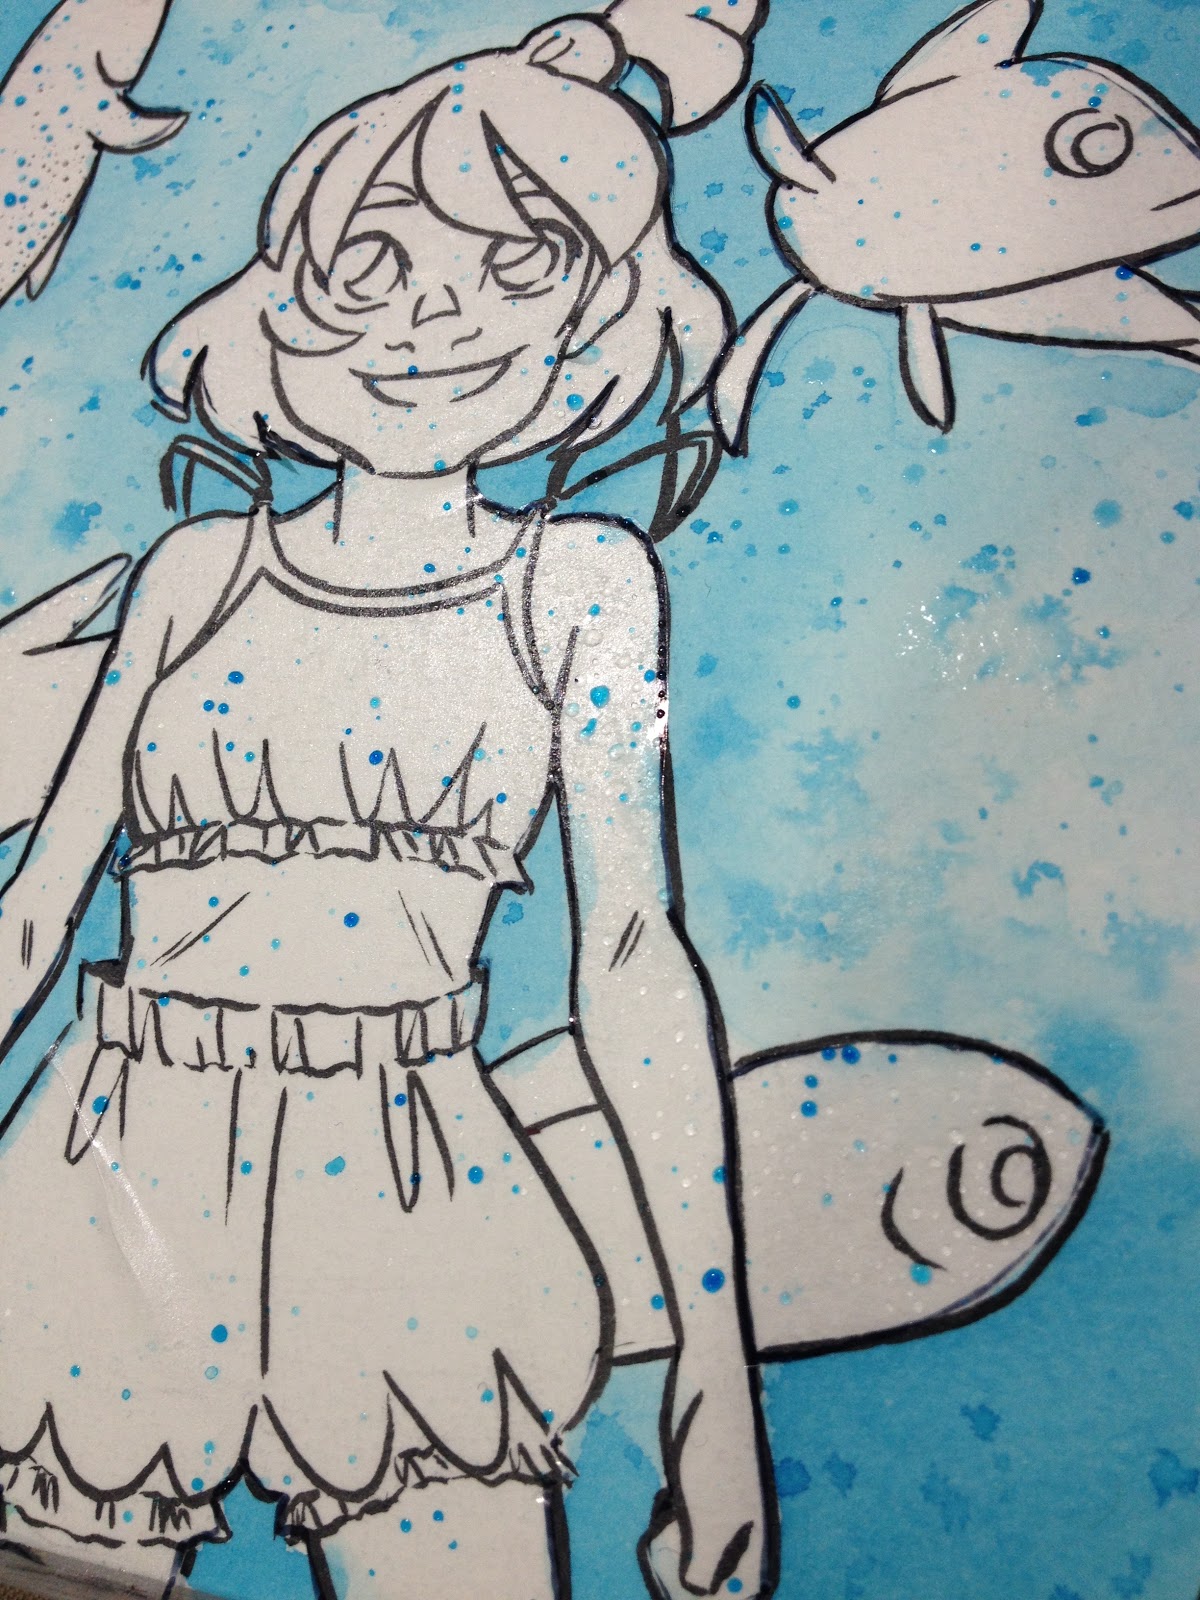


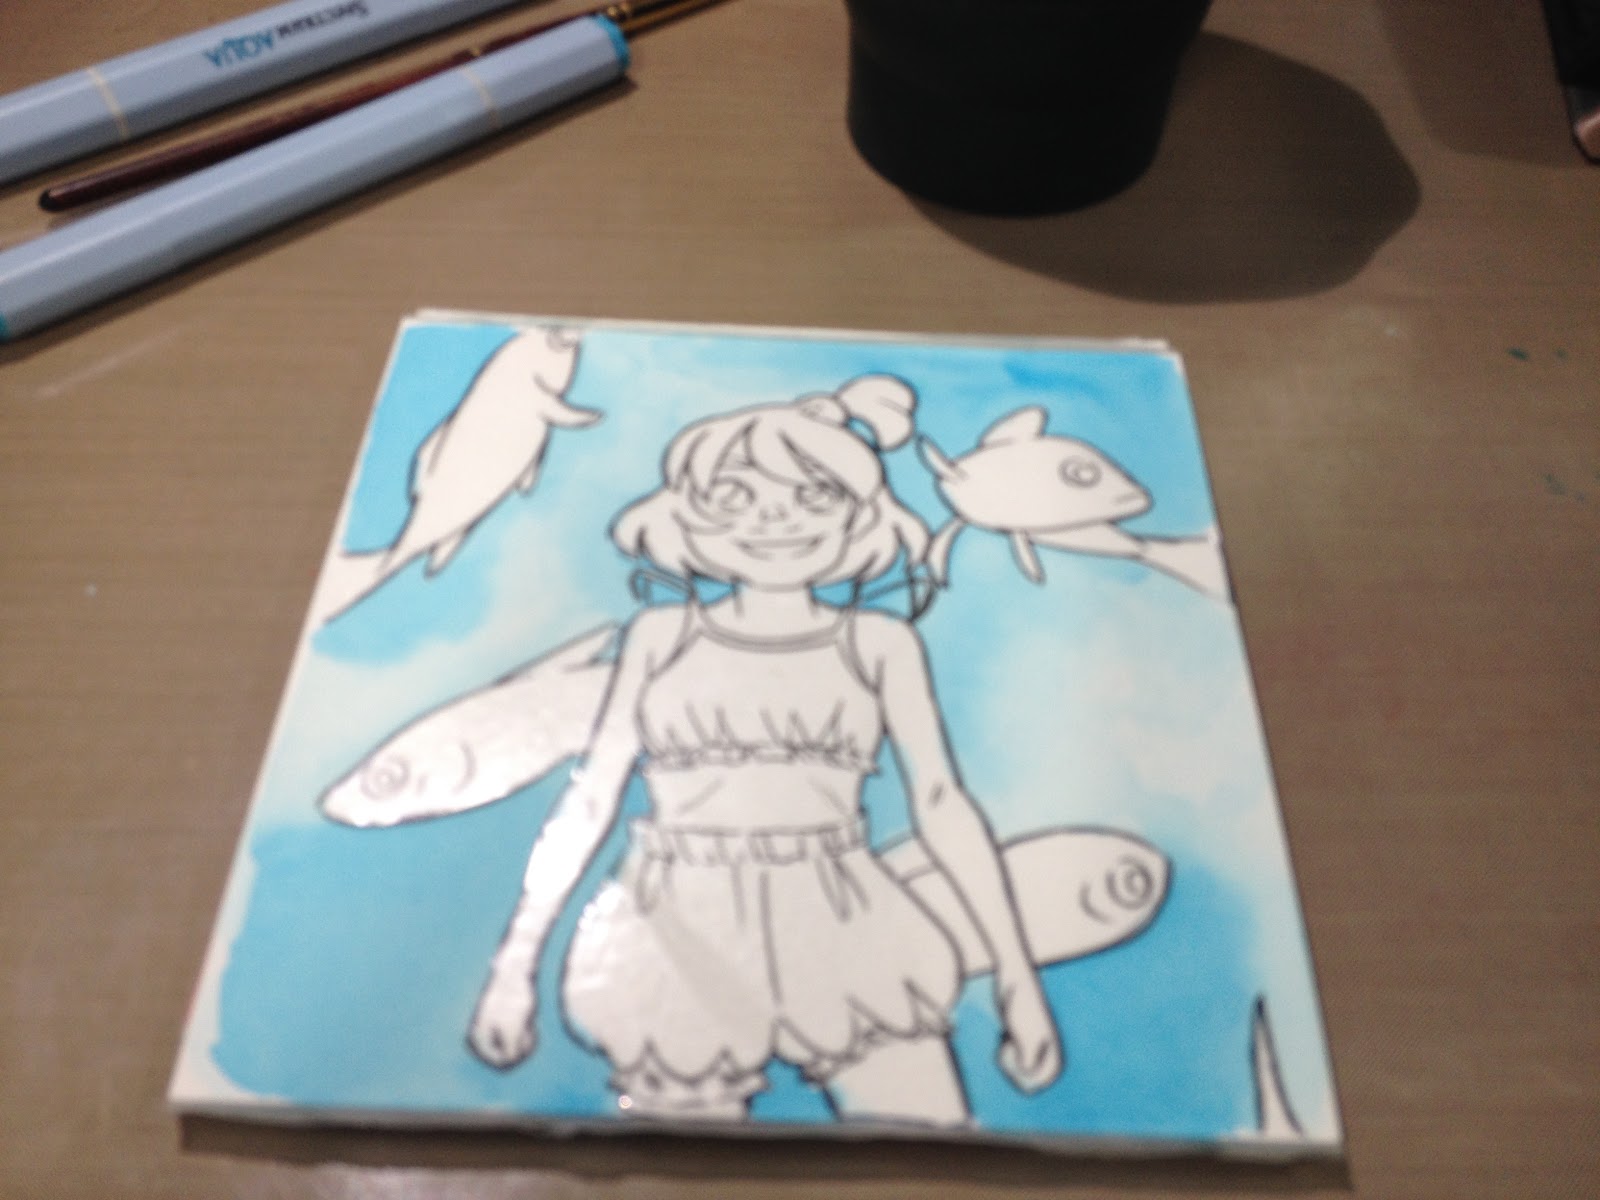
I also splattered Copic Opaque white onto the image to help give it a bubbly look.
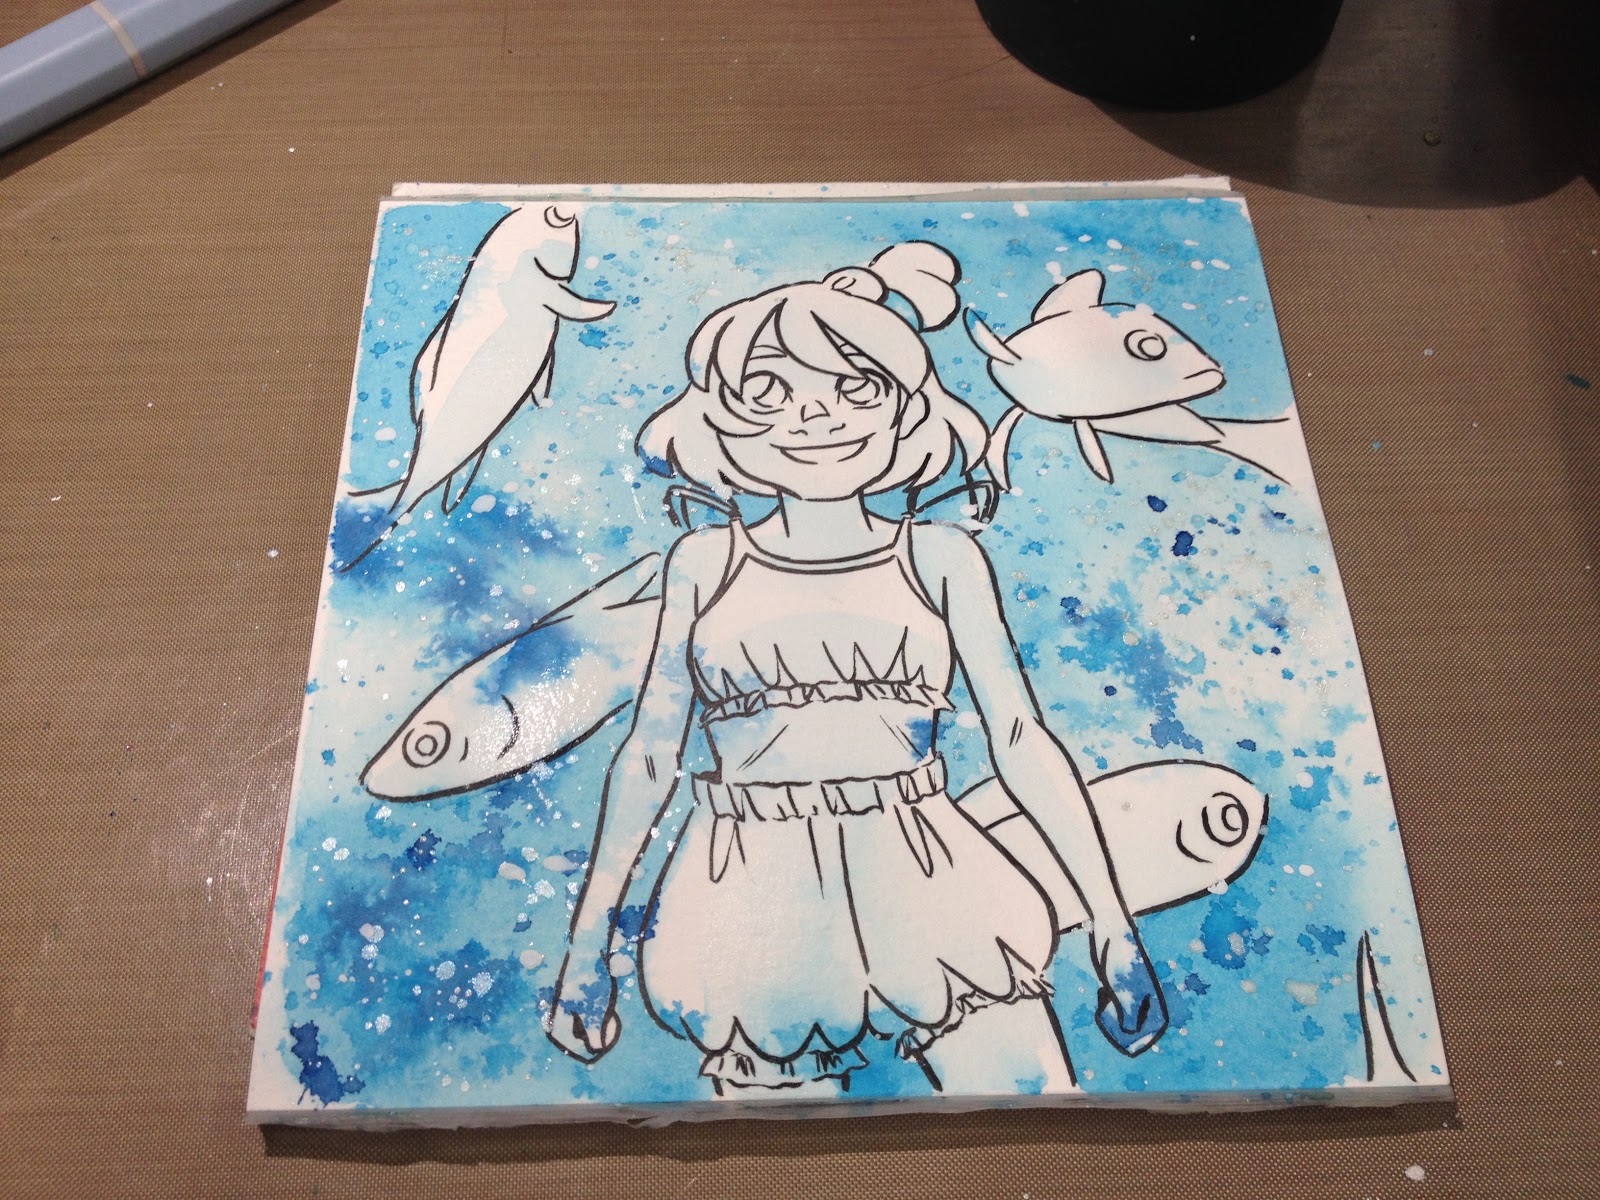
Once the paint had dried, I removed the frisket. Although there was some seepage, it was fairly controlled, and I liked the effect it gave.

From then, I applied the dye based watercolor in light washes- applying it first to my craft mat, then picking it up with a clean, wet brush. I used this to build up color, and only worked directly with the Spectrum Aqua markers when the paper was dry.
Unfortunately, I'm still waiting on the field test video to be edited, so I hope you guys will keep an eye on my Youtube channel for the field test- it's a really fun one and covers a lot of great techniques!
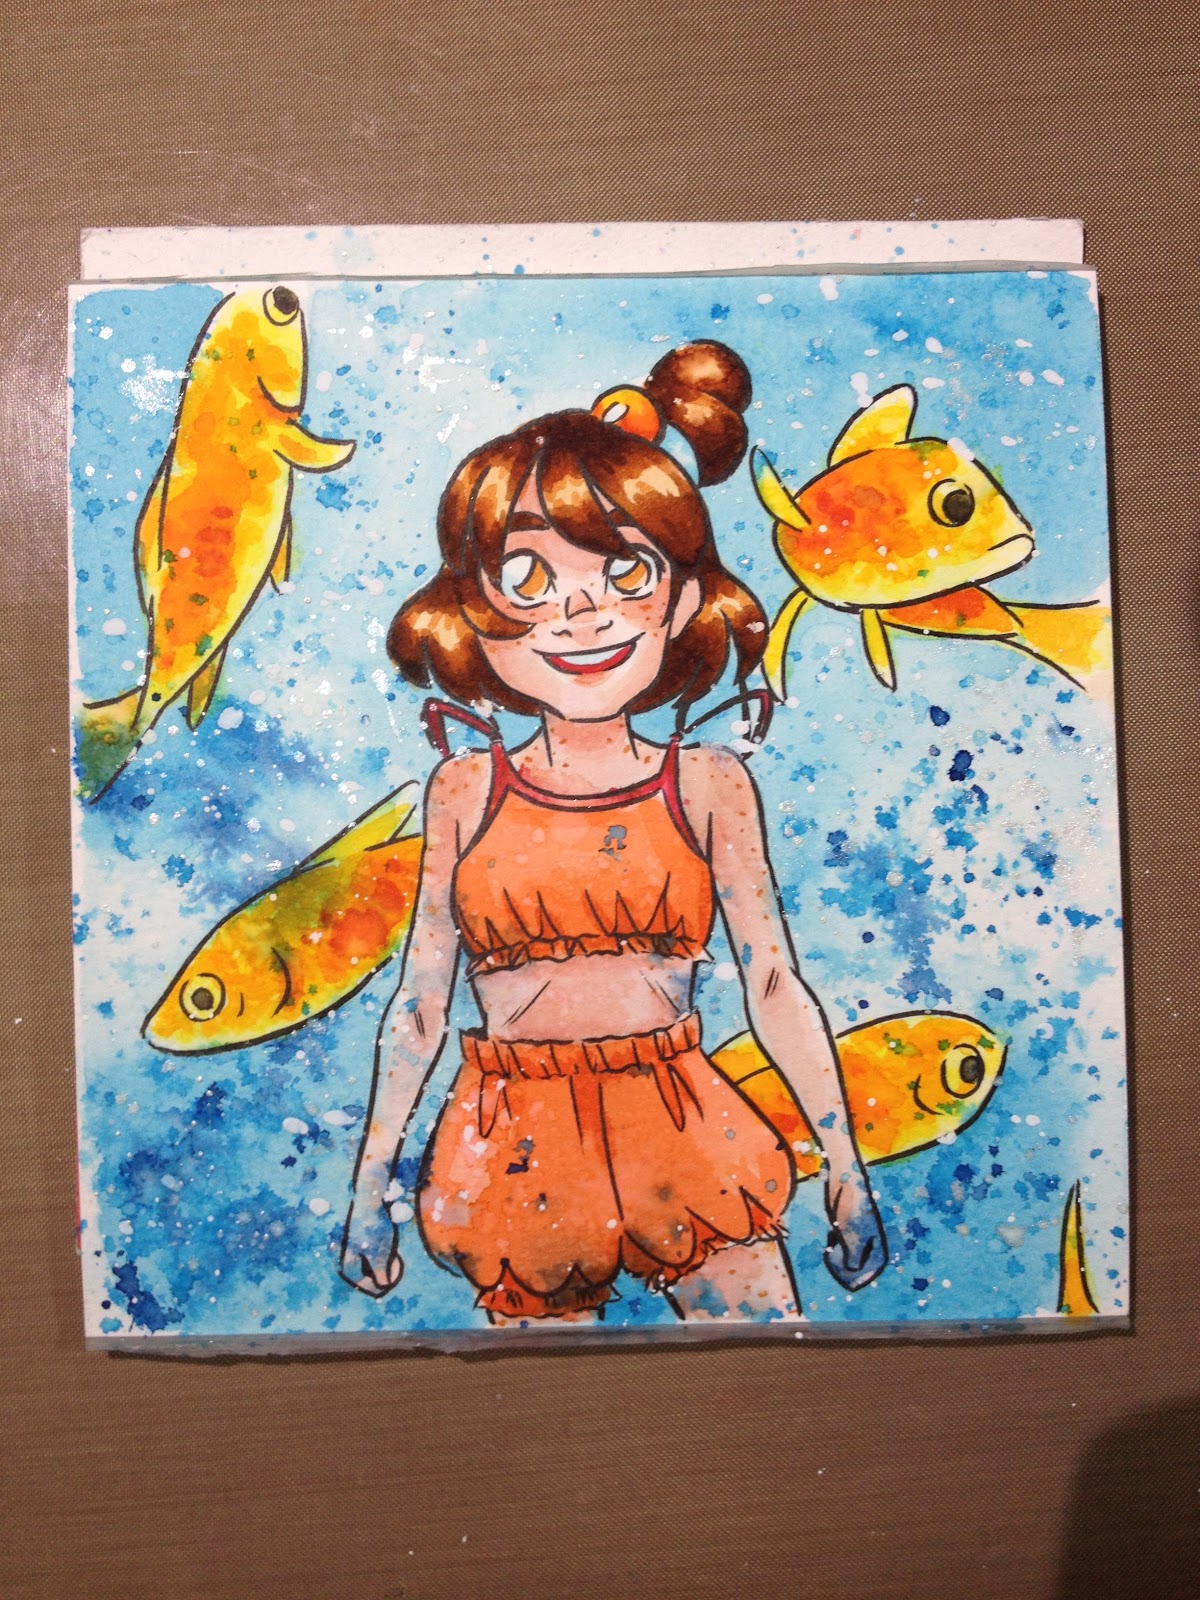

The Verdict:
Spectrum Aqua and Aqua by Spectrum Noir markers are fun, dye based watercolor markers that are fairly water reactive without separating into individual dyes when wet. The fiber brush is easy to work with, and these markers are fairly versatile- they can be used directly or watered down to build up washes of color. If you're interested in an easy to use, low mess option for watercolor effects, the Spectrum Aqua and Aqua by Spectrum Noir markers are a great choice that are commonly available online and at stores such as Michaels.
NOTE:
Even if stored properly (horizontally) at room tempeature, the smaller fine point nib will degrade and dry up over time (about six months of disuse), but the nibs will stay wet and pliant.
Outside Resources and Second Opinions:
Spectrum Noir- Spectrum Aqua Markers
Spectrum Noir- Aqua Watercolour
Aqua by Spectrum Noir Color Chart
The Art Gear Guide- Spectrum Noir Markers
Spectrum Aqua Markers- Review and Demo- Craft Test Dummies
Comparison Video Spectrum Aqua Vs Distress Markers
Zig, Distress, and Spectrum Aqua Markers and Cardstock Comparison
How to Use Spectrum Aqua as Watercolors
Spectrum Aqua: Techniques
Spectrum Noir Aqua Markers Review and Demo
Watercolor Marker Comparison- Wildly Passionate
Please consider donating to this blog or purchasing from Natto-shop (http://nattosoup.com/shop) if you want me to continue publishing quality content. All materials tested were purchased from my own pocket. Keep on Truckin' Nattosoup is not under any sponsorship.

February 12, 2018
7" Kara 1 Year Recap
As of Saturday, my all ages, watercolor comic, 7" Kara, will have been online as a webcomic for a year. It's been a busy year- webcomic collective launches, loads of conventions, 100+ blog posts, hundreds of videos. During that time, I juggled weekly 7" Kara updates, but benefitted from having a substancial buffer- keeping my workload just under crazy, rather than tipping the scales.
In the stream on Saturday, February 10th, I talked a little bit about launching my print comic as a webcomic, but I wanted to go in depth today, and share my experiences with you guys. I want to use this post not to celebrate this accomplishment, but to reflect on the year that passed and share some of the choices that I made during that year.
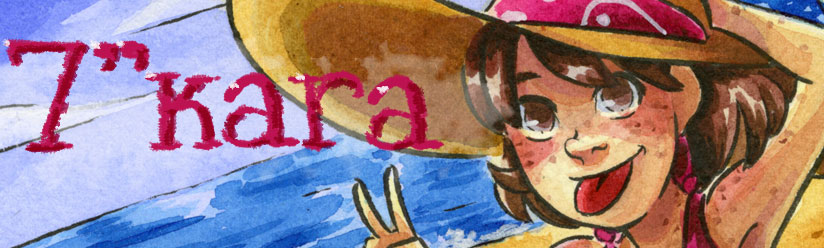
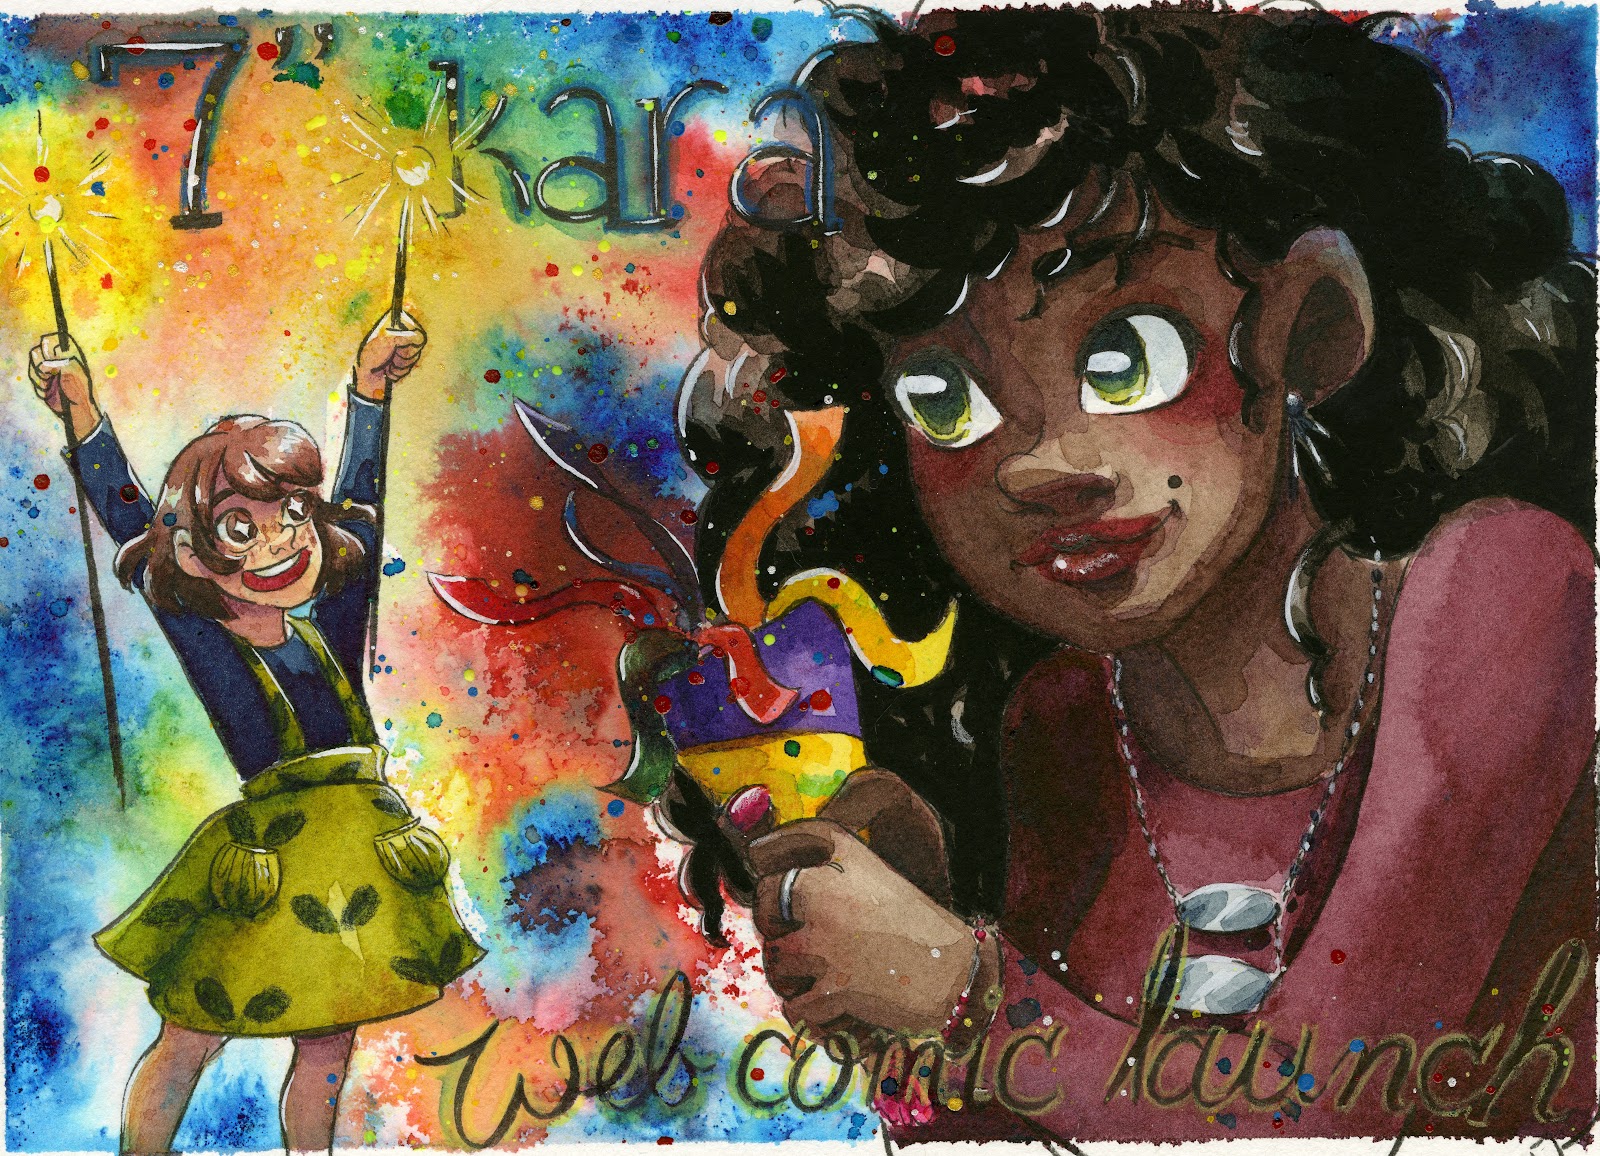
 1 Year Launchiversary Illustration
 1 Year Launchiversary Illustration (voted on by Patrons)
 Early Promotional Launch Image
Launching the Comic:
On February 10th, 2017, 7" Kara went live on two platforms- the Drupal based home site (nattosoup.com, with a redirect from 7inchkara.com) and on Tumblr utilizing the Simple Webcomic theme at 7inchkara.tumblr.com. Although I'd planned on releasing 7" Kara as a webcomic for a long time, this launch was a bit of a rush- with the help of friends, I able to have it up and ready for the Comic Garden launch which was set for February 14th (a two week timespan from notification to completed launch). In order to meet the requirements of the collective, I had to alter my plan for updates- rather than one chapter a month once I'd gotten halfway through the comic, I opted to share one comic page a week, updating on Fridays. Although Comic Garden is long a thing of the past, I opted to keep 7" Kara online and updating, and helped form another webcomic collective, Ink Drop Cafe, to not only serve my comic, but the comics of 13 other artists.
Because I launched ahead of the Comic Garden launch, and because I had to shift focus to help regroup after CG's dissolution, 7" Kara got caught in the fray and never saw the promotion I had hoped for its launch. I'd hoped for a bang (since I'd been working on the comic since 2012, and had already put in years of in-person promotion) but settled for a whimper, and have tried to work promotional efforts for the webcomic into my regular online interactions. My advice to others launching a new webcomic would be - CELEBRATE IT, don't rely on others to promote your launch. You are responsible for your own promotion and success when it comes to a launch.
Launch Efforts:
Webcomic Launch Announcement:
7" Kara Webcomic Announcement Timelapse
This was prepared before the launch and intended to be a large, in-depth tutorial that also promoted the comic itself. Unfortunately, my editing computer absolutely couldn't chew through this file, regardless of what we did, and we finally settled on releasing it as timelapse months later.
I launched 7" Kara with a MASSIVE buffer- over 100 pages of watercolor comic spanning five chapters. I also launched 7" Kara after the print copy of Volume 1 had been in print for three years, and had been available in my online store for the same length of time. I'd shared in-progress images for years
To be blunt, when launching 7" Kara as a webcomic, I'd pulled my punches and didn't really give it my all. I should have made it an event, and promoted the heck out of it- a stream, a giveaway- things that encourage engagement and resharing. Although other artists don't usually throw launch parties for webcomics, 7" Kara is an unsual comic- in print for several years, a solid buffer and a year's worth of updates- that's a huge reason to celebrate!
In the year since, I've learned that if you want something to succeed, you really have to give it your all, and KEEP giving it your all. Even if the reaction is lukewarm, you have to be enthusiastic and upbeat, something I've managed at conventions, but have increasing difficulty feigning online. I should have hyped the launch from the moment we started preparing the sites, but I'd kept quiet, afraid I'd miss my initial deadline. Many webcomic artists are afraid of seeming spammy when promoting their comics, but the general consensus seems to be:
Twice a day on launch day (morning/evening) is totally legitimate and expected on sites like Twitter, where information gets lost.Participate in weekly comic-focused chats like #WebcomicChat (encore is Saturday, new prompts on Sundays), #ComicBookHour (Sundays) and #ComicArtistsUnite- don't just spam your answers, engage other artists for a better resultShare art and process regularly on Twitter, Tumblr, Instagram- any social media where you have a presence and audience
Since launching 7" Kara as a webcomic, I've also launched two complimentary longform blog series- Intro to Comic Craft and Watercolor Basics. Both series heavily feature Kara process and art, and frequently link to the webcomic's main site. Unfortunately, series like this aren't nearly as popular as my alcohol marker posts were, as they seem to appeal to a smaller audience, so this promotion hasn't had the positive effect I'd hoped it would.
I've also edited my Twitter and Instagram profiles to include not only links to Kara, but to this blog and the Youtube channel, so all my content is a little more accessible.
Ink Drop Cafe Launch:
Promotional Efforts:
In April of 2017, Ink Drop Cafe officially launched. Ink Drop Cafe has two main interfaces- our website that promotes member comics and affiliate resources, and our Discord channel, which serves as a hub for a multitude of artists.
You guys have probably seen the Ink Drop Cafe ribbon on a variety of helpful tutorial and overview posts, particularly those in the Intro to Comic Craft series.


The front page features a news section (left) a random member comic (right), and then all member comics below. If you haven't checked out the site yet, I highly recommend you do so!
Ink Drop Cafe members are required to place the IDC member comic rotator in their sidebar. You can see that to the right side of this blog. With every refresh, a new comic is featured. This increases visibility for all member comics, and hopefully helps bring in new readers. Ink Drop Cafe uses their Twitter to engage members of the comic community as a whole, and to promote the works of individual members, also increasing visibility. As a member of Ink Drop Cafe, I also make it a point to boost and reblog members and affiliates regularly- although this is not required, I enjoy using the audience I have to help my fellow members.
To help promote the launch of Ink Drop Cafe, I created a couple pieces of promotional art to draw interest.

These images were used on Twitter, Tumblr, and Instagram to help generate interest and hype for the collective's launch. I also put together an informative introductory post explaining the goals of the collective and introducing the original members:
Ink Drop Cafe Launch Announcement (Blog Post)
Other Promotional Efforts:
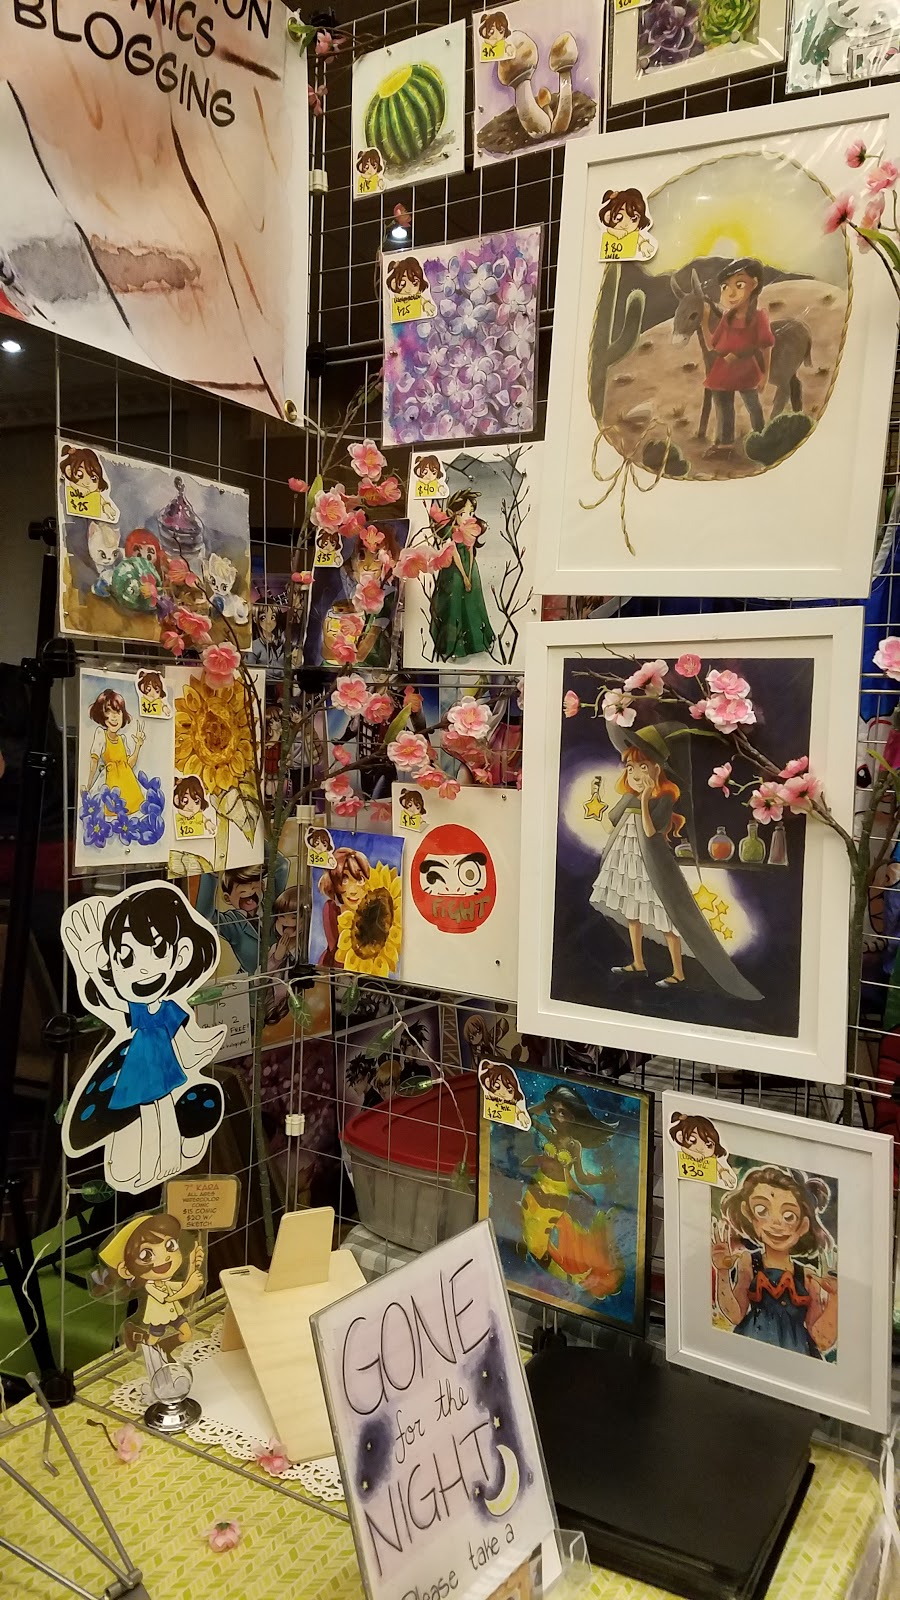
It's been about three years since 7" Kara was collected and published as Volume 1, and during that time, I've tabled at about a dozen conventions a year, had special postcards printed up to advertise the book, and have plugged the print comic countless times. I co-created How to be a Con Artist, began regularly updating my Youtube channel, and improved the quality of this blog drastically. I've pursued professional relationships at shows such as TCAF, ALAC, and A2CAFand joined the Society of Children's Book Writers and Illustrators in 2016. During that time, I've marketed 7" Kara as an all ages comic aimed at children, and have done moderately well with in-person sales.
At conventions, I've found that having a portfolio with original pages out on the table for people to flip through is a great way to get casual observers interested in my work. Even when space is limited, I make sure I have copies of 7" Kara fanned out on the table (usually 3, with a stack beneath the demo book) and the portfolio flipped open. I also sell originals at my table, many of which prominently feature Kara, and I've found that branding myself clearly as a watercolor comic artist has helped increase interest in the books.
Since launching 7" Kara as a webcomic, I've also started handing out 7" Kara promotional stickers and Ink Drop Cafe fliers.
 Literacy related image created for the ALAC 2015 auction, also used as my promotional Volume 1 postcard
All of my convention branding and banners also feature Kara, as its important to me to keep my branding focused and consistent, and introduce opportunities to talk about my work.


Earlier I mentioned that 7" Kara has been the inspiration for long running series such as Intro to Comic Craft and Watercolor Basics, but even when I'm not using comic pages and process for blog content, Kara is usually featured in some way throughout the post. She's frequently the subject for field tests
In October, I did an Inktober-wide worldbuilding event that celebrated and explored the Lilliputian world I'm building for 7" Kara. For every day of Inktober, I developed one Lilliputian skill or class, writing a short explanation to accompany the illustrations. A few of these were recorded and released on Youtube, and the whole was compiled into Lilliputian Living, my Inktober 2017 zine.
Loading...
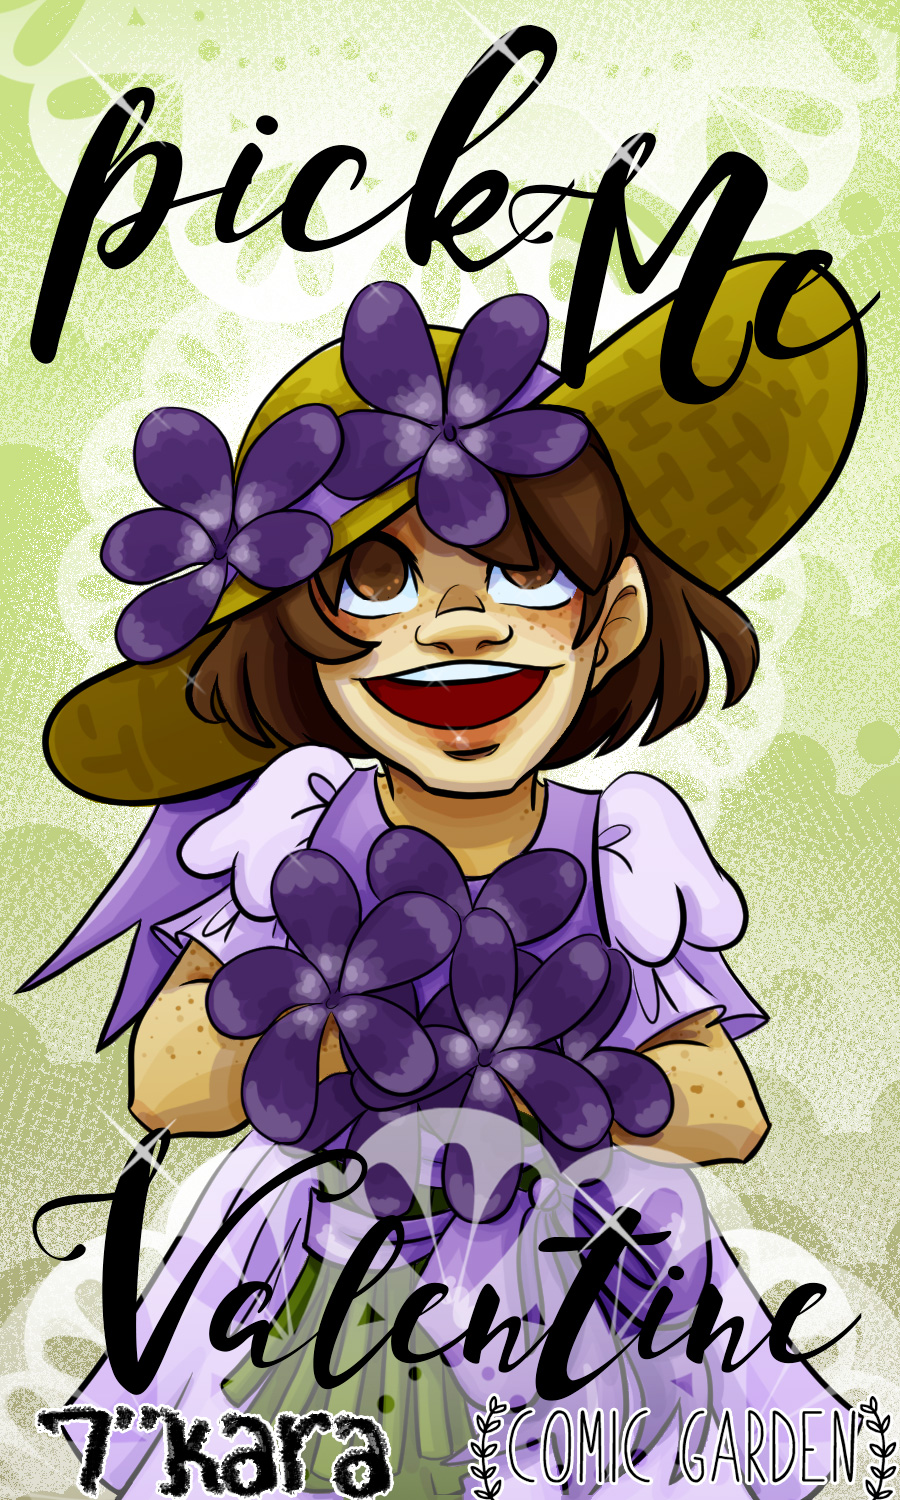
The Kara related branding extends online, where she's prominently featured in the banners for my Twitter and Youtube channel. She's also frequently the inspiration for other promotional items, like the Valentine below.
Having a webcomic to promote has changed my interactions within the webcomic community. Although I've made comics for years, and have been in several anthologies and have worked professionally, it seems I was never really PART of the webcomic community. I existed as a fan and as a supporter, but as anything more, it seems I was invisible. Launching 7" Kara is a lot like reinventing the wheel- having to prove myself to new artists and convince them that my work is worthwhile. My efforts here, at conventions, for How to be a Con Artist, in anthologies, and on Youtube don't count for anything in the realm of webcomics, and this has been a hard lesson to learn.
My interactions with ongoing webcomic community have changed now that I have a webcomic to promote. In the past, I mainly focused on promoting my Youtube channel and this blog, and occasionally mentioned having a comic in print, and really didn't seem to gain much traction. I would pick and choose which topics I participated in, since my experience running a webcomic was nil, and while I am still selective about the topics I participated in, I definitely participated more in all three chats this year.
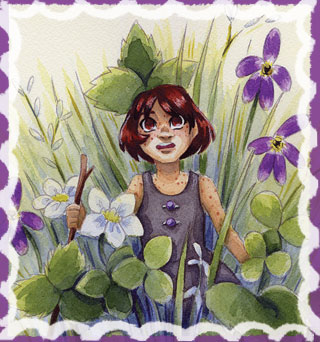
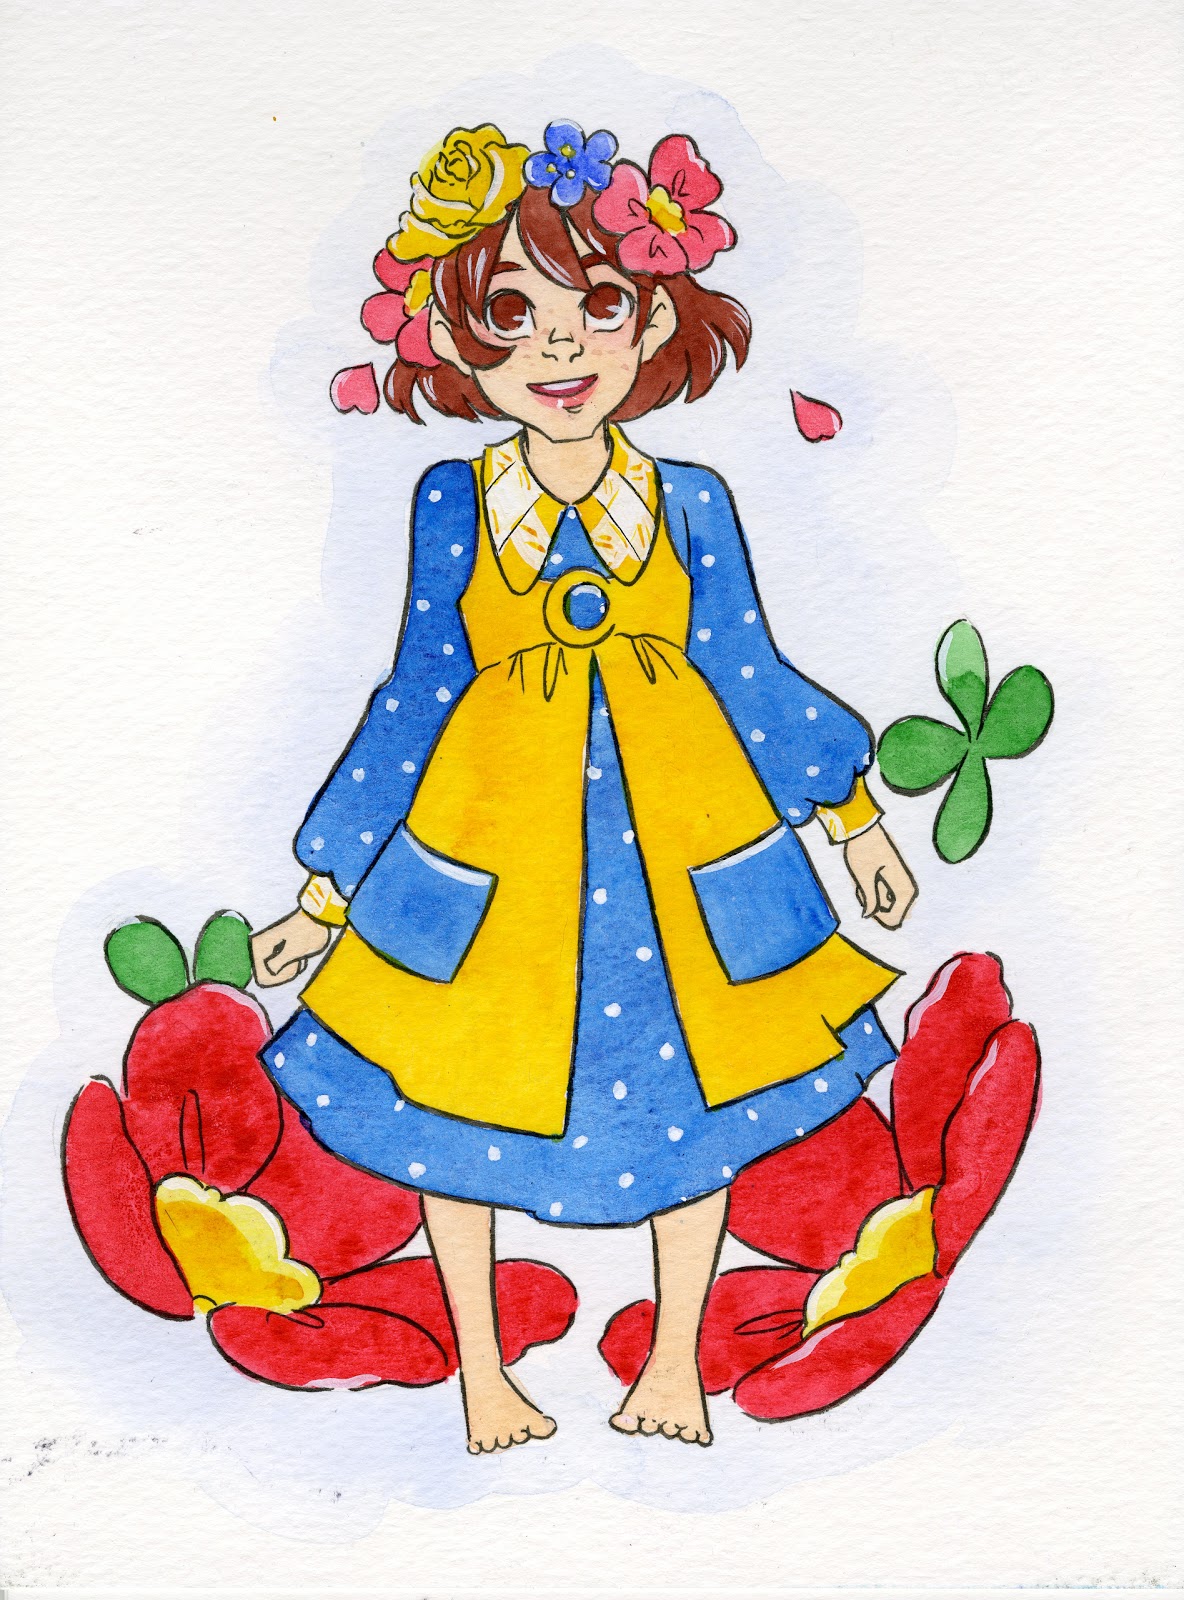
Since I was now actively participating in WebcomicChat, I signed up to do art for them. I was selected to do two illustrations, one for Promoting Your Webcomic, and another for Kidlit Comics.
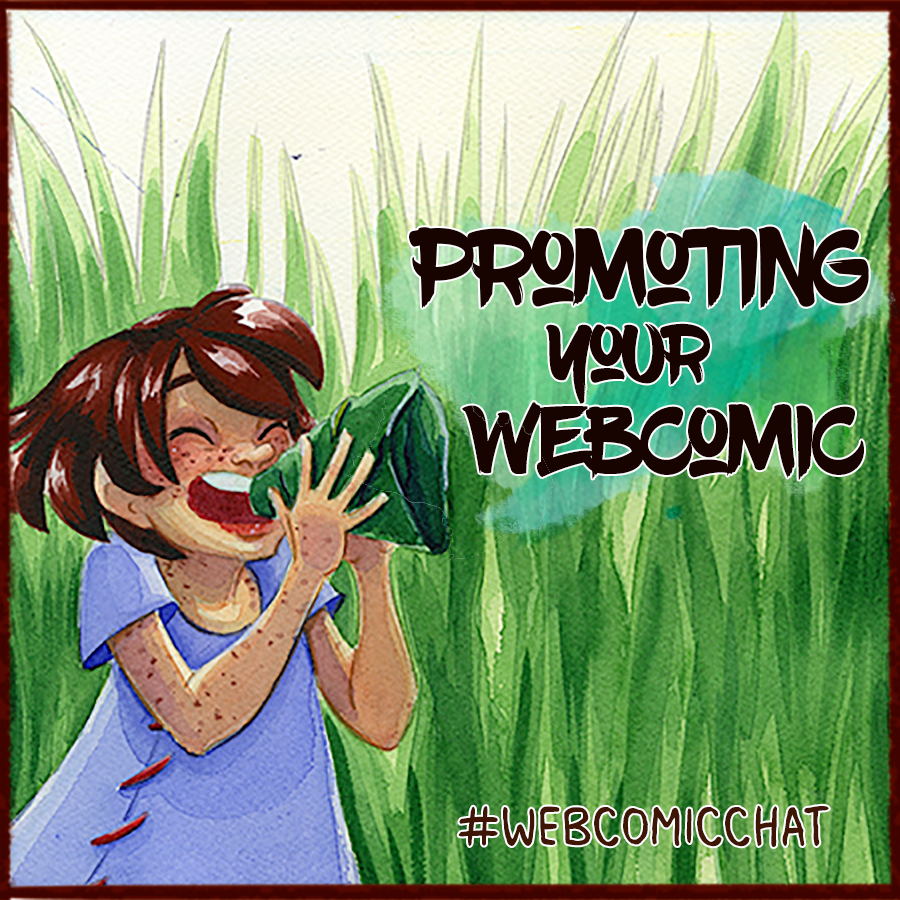
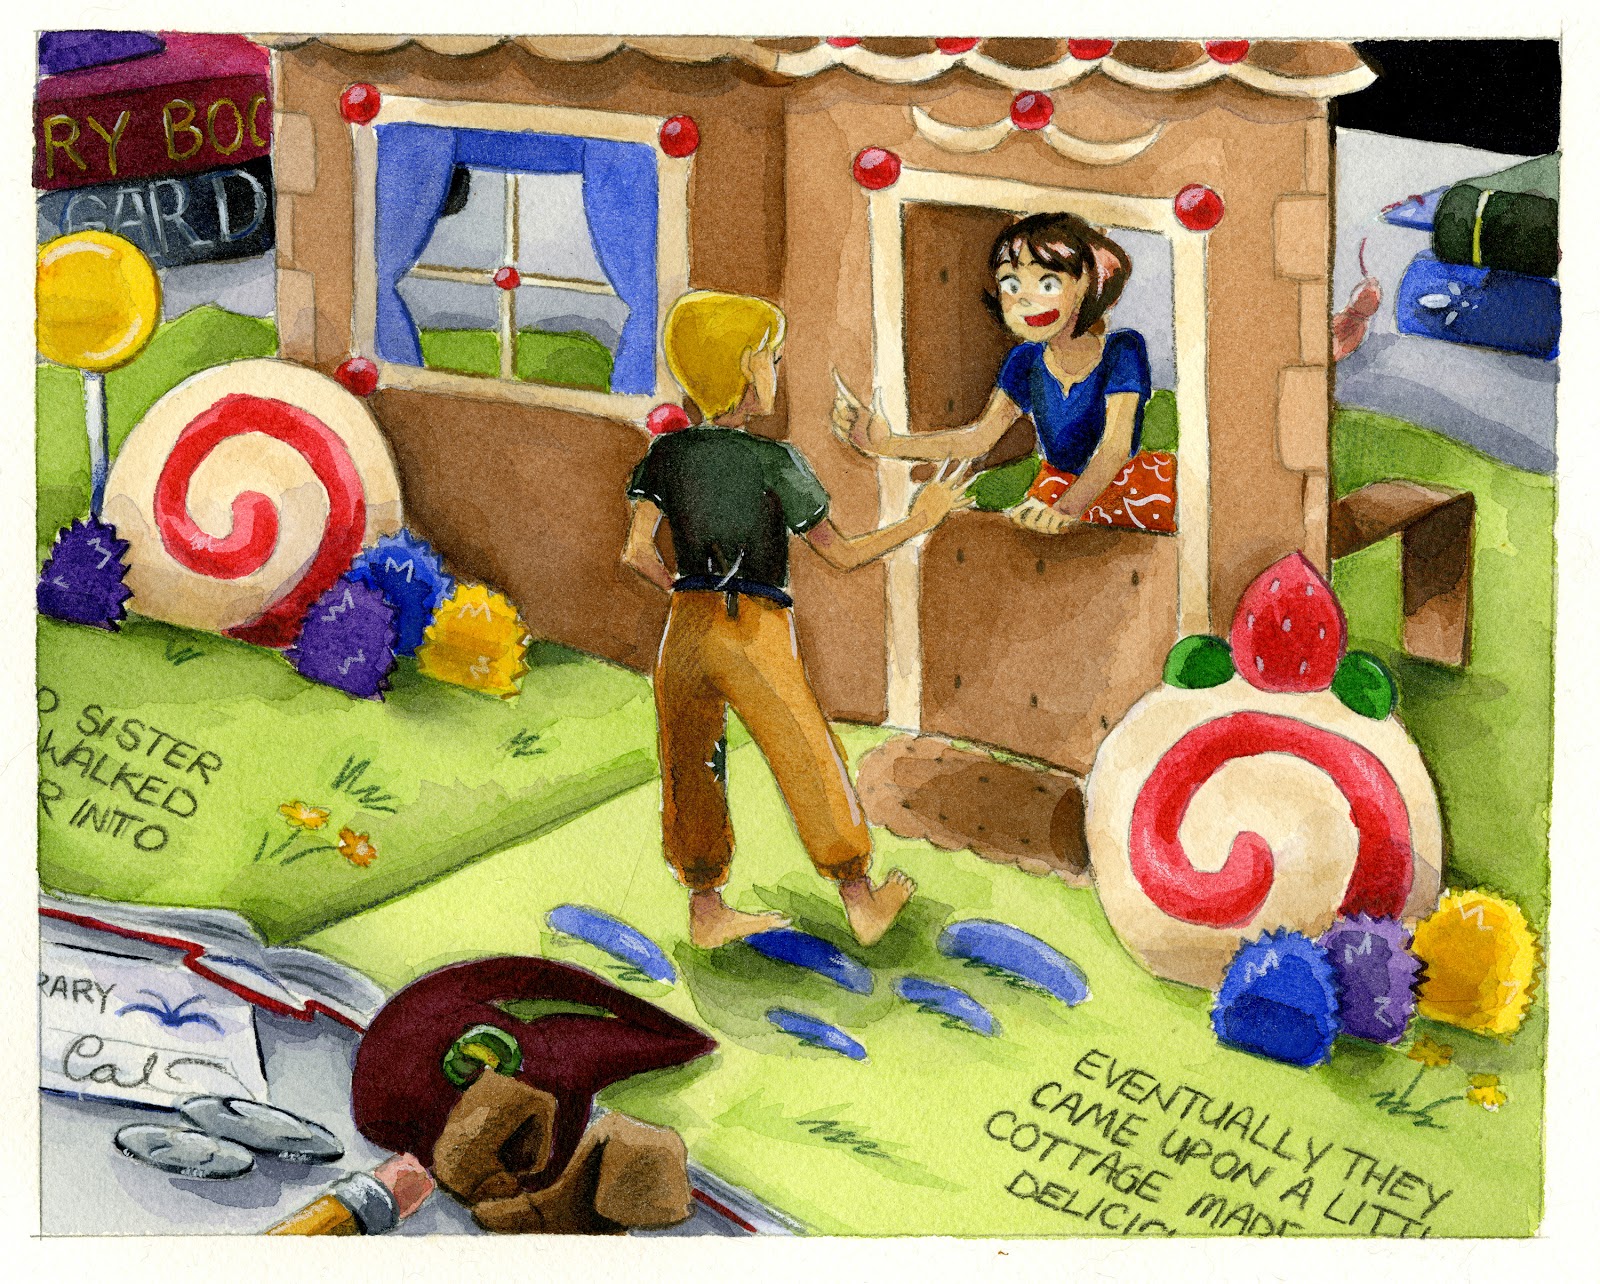
For the first event, I decided to also promote 7" Kara, using her as my subject for this chat. WebcomicChat always credits their volunteer artists, and I'd hoped this might spur some conversations or at least some interest in my comic. While I did enjoy painting this illustration, and am pleased with how it turned out, it did not have quite the effect I had hoped. That's why, when Web Comic Chat asked me for an illustration for Children's Comics, I opted to do something I could use in my portfolio.

Although this illustration didn't have much of a positive effect either, it at least generated a piece for my portfolio that addresses some of my weaker points- drawing boys and including animals in my illustrations.
This year, I also submitted 7" Kara to Comic Tea Party.

Comic Tea Party is an opportunity for comic fans and comic creators to chat about webcomics. Every week, a comic is selected from the signup roster, announced to the public, and then people are given a week to read it before that comic's Comic Tea Party. Creators are highly encouraged to participate in their own chat.
You can read a transcript of the event here.
The Comic Tea Party was a hugely positive, and much needed, experience for me. Many webcomic artists work in a relative vacuum- no comments, no engagement. Even within Ink Drop Cafe, 7" Kara goes mostly unremarked upon, and I'd gotten used to hearing nothing. I'd just assumed that perhaps in the realm of webcomics, gentle, slow paced comics written for all ages just don't have a place. In person, at conventions, my experience is different- people are excited about watercolor, enjoy the fact that I'm creating something different from the norm, and 7" Kara always finds an audience, even if it's a small one. Online, I have often felt like my work has no place, and I've grown reticent to talk about story aspects of my comic.
I took copious notes during the chat, and have started to work some of the suggestions from the Tea Party into the comic. I really enjoyed this experience, and it was one of the first really positive experiences I've had with 7" Kara as a webcomic since the launch.
So this year has been a fairly rough year- a lot of work, a lot of promotion, and not much to show for it. This could be due to a few factors:
Possible Pitfalls and Shortcomings
In all this time, I have not paid for advertising, I have not utilized the free advertising option on TWC or SmackJeeves, and my only mirror is a Tumblr, rather than a Webtoons, or Tapas account. This isn't bragging- it's a confession- these are tactics that have been vital for other creators in building an audience and launching their comic successfully. There's always been a self-sabotaging streak in me, and I never made the time to make or launch effective ads, despite commissioning another artist to write a post on just that.
The rationale behind my reticence towards ads is simple but stupid- I'm terrible at designing attractive banners, let alone attractive ads, and wanted to wait until there was enough archive to keep a reader, and until my design skills had improved enough to attract readers int the first place. There are plenty of great, affordable advertising opportunities available for webcomic artists- Project Wonderful, TWC, and SmackJeeves all have paid and free advertising tiers.
I'd considered mirroring on Tapastic or Webtoons, but Tapastic has gone through so much TOS drama this year that I decided it wasn't worth the effort, even if it means a huge loss of potential audience. Tapastic also changed their recommendation algorithms, which makes it harder to build an audience if you're just starting out. Mirroring on large, already populated sites like Tapastic and Webtoons can greatly increase your potential audience- but should you decide to leave those sites, or try to funnel those readers to your home site, there's a drastic loss in readership.
Fortunately for artists who are interested in self-hosting their comics, Archive Binge offers two of the features that were most appealing (to me) about Tapastic and Webtoons- Readers being able to create lists through a site, search by tags, and Archive Binge keeps your place in your comic automatically.
Read 7" Kara through Archive Binge today!
My Year in Webcomics
All in all, launching 7" Kara this year has been an exercise in endurance and perseverance. The first year for most enterprises is a huge learning experience, and I feel like I've learned quite a bit, although it's mostly trial and error.
This has been such a weird experience for me- sharing pages that are 'dead' for me- having been completed and in print for almost four years, promoting pages that don't reflect my current standard of work, feigning excitement when promotion felt futile. I still love comics, and I still love working on Kara, but having such a large buffer divorces me from genuine update to update excitement, and the progress I share on Twitter and Instagram is so far in advance it's almost irrelevant to the comic itself.
Kara's always had a decent reception as a print comic at conventions, and it's as a physical comic that I feel most confident promoting Kara. A stack of books, a portfolio of the original pages, and engaging interested readers in person is where I'm strongest- I feel like in the multitudes of webcomics crying out for attention, I get lost. This feeling frequently leads to me taking a backseat when I should be rallying my courage, and it's something I hope to work on in the second year of the comic.
A few things I've learned about launching a webcomic, vs promoting a print comic:
So much more work than you originally bargained for. It's more than just maintaining regular updates, which are hard enough, even if you have a buffer.Traditional media comics have special considerations too- its actually a lot harder to make banners and other promotional images on the fly, IN THE STYLE OF THE COMIC. I have a huge library of promotional images, and I still have difficulty making attractive banners that reflect the style of my comic accurately with the materials I have prepared.SO MANY BANNERS. Every site has different size requirements! From TWC (Top Web Comics) to Tapastic, to banners for the collectivbe and its rotators, to Tapastic, to Twitter cards, to Project Wonderful- I end up making banners in every shape and size. And while my banner making skills have improved somewhat, I'm still frustrated by the skill gap between my banners and those of other comic artists, and this is an area I'd like to improve in.
Here are a few of the banners I've created to promote 7" Kara.


Every now and then, just flip through your archive to catch errors.Tumblr, even themes designed for webcomics, aren't particularly mobile friendly, and will require a lot of tweaking to fix.Number one lesson I learned from releasing 7" Kara as a webcomic: Internet things are hard. Even when you've done internet things for decades.
For me, when I launched 7" Kara as a webcomic, it didn't seem to matter that I'd written this blog for almost 10 years. That I'd done video on Youtube for three years. That I co-founded How to be a Con Artist, and was one of two remaining contributors, four years prior. That I'd had 1,500 Twitter followers. When I launched Kara, I had to start all over again. So don't assume your side projects will help promote your comic projects. You really have to treat your webcomic launch like it's your debut, and you will probably have to treat every launch like it's your debut.
Going from print to web has been a challenging, often frustrating experience. I continue to struggle to find my audience and my niche, to find ways to promote my work that are authentic and honest, and to not judge my worth, or the worth of my work, by the reception it gets online. Although webcomics is an open playing field with few gatekeepers, available to anyone with determination, moderate drawing and writing skills, and time to spend, webcomics requires more than just a comic and a warm body behind it for success to happen. I still haven't unlocked the right combination to help my work shine, but I will continue to push and try to find new ways to market and promote my work.
Please consider donating to this blog or purchasing from Natto-shop (http://nattosoup.com/shop) if you want me to continue publishing quality content. All materials tested were purchased from my own pocket. Keep on Truckin' Nattosoup is not under any sponsorship.

February 8, 2018
This Saturday marks the 1 year launch anniversary for 7" ...
This Saturday marks the 1 year launch anniversary for 7" Kara as a webcomic. On Monday, I'm going to share my thoughts and experiences about going from print to web, but today I wanted to invite you guys to celebrate with me!
On Saturday, from 7:00-10:00PM CST, I'm hosting a Livestream on my Youtube channel to celebrate a year completed.

Stream Announcement and Mermaid Markers Video: These are the events I have planned: Giveaway: 2 copies of 7" Kara, Volume 1- one first thing, one last thingBodychan (artists' reference model) giveaway at 8:00PM (NOTE: This Bodychan is from Wish, and is probably a knockoff, but still useful)Talk about my experiences with print comics (vol 1, anthologies) vs my webcomic, it's launch and its receptionTalk about materials used in painting chaptersDraw you or your OC as a Lilliputian- will do at least one, see how that goesChallenge: Micro art challenge using a mini watercolor set, mini paper, and mini color pencil setDemonstrations: Kara, Naomi, and Tanner chibi heads Copic Marker tutorialFlip through Volume 1Flip through Chapter 8
1 Year Anniversary Celebratory Illustration:
Pancake's Pancakes


To celebrate, I asked my Patrons to vote on which illustration they thought sounded cutest, with 'Pancake under a stack of pancakes, Kara freaking out' being the winning prompt. This was a fun illustration to complete, and was painted on Kilimanjaro 300lb cold press watercolor paper.
Happy Anniversary! 7 Inch Kara 1 Year Launch Birthday:
I hope I'll see you guys on Saturday evening, and if you haven't had a chance to read 7" Kara yet, you can do so through the main site, Tumblr, or Archive Binge.
Please consider donating to this blog or purchasing from Natto-shop (http://nattosoup.com/shop) if you want me to continue publishing quality content. All materials tested were purchased from my own pocket. Keep on Truckin' Nattosoup is not under any sponsorship.
February 4, 2018
One Layer Watercolor: Watercolor Basics
Single layer watercolor is a very simple technique that utilizes simplicity and single flat layers of watercolor to add color to lineart. For this technique, we're aiming for a flat wash effect (although utilizing watercolor paints with interesting sedimentation or color separation can also be fun, and well worth exploring).
This post is a part of my Watercolor Basics watercolor course! You can find tons of great watercolor tutorials and inspiration on my Watercolor Basics hubpage, and real time demonstrations of watercolor techniques on my Youtube channel!

Materials:
Watercolors (tubes or half pans- whatever you prefer)
Watercolor Paper (for this tutorial, I'm using Strathmore's Field Watercolor Journal)
Watercolor Palette
Waterproof ink (in this tutorial, I'm using a Sailor Mitsuo Aida brushpen, but I also highly recommend the Sakura Pigma FB brush pen)
White Gouache
Brushes

I begin with an inked lineart that's had plenty of time to cure.
Since this is in an Strathmore Field Watercolor Book, I only really need to secure one end to prevent unnecessary buckling.

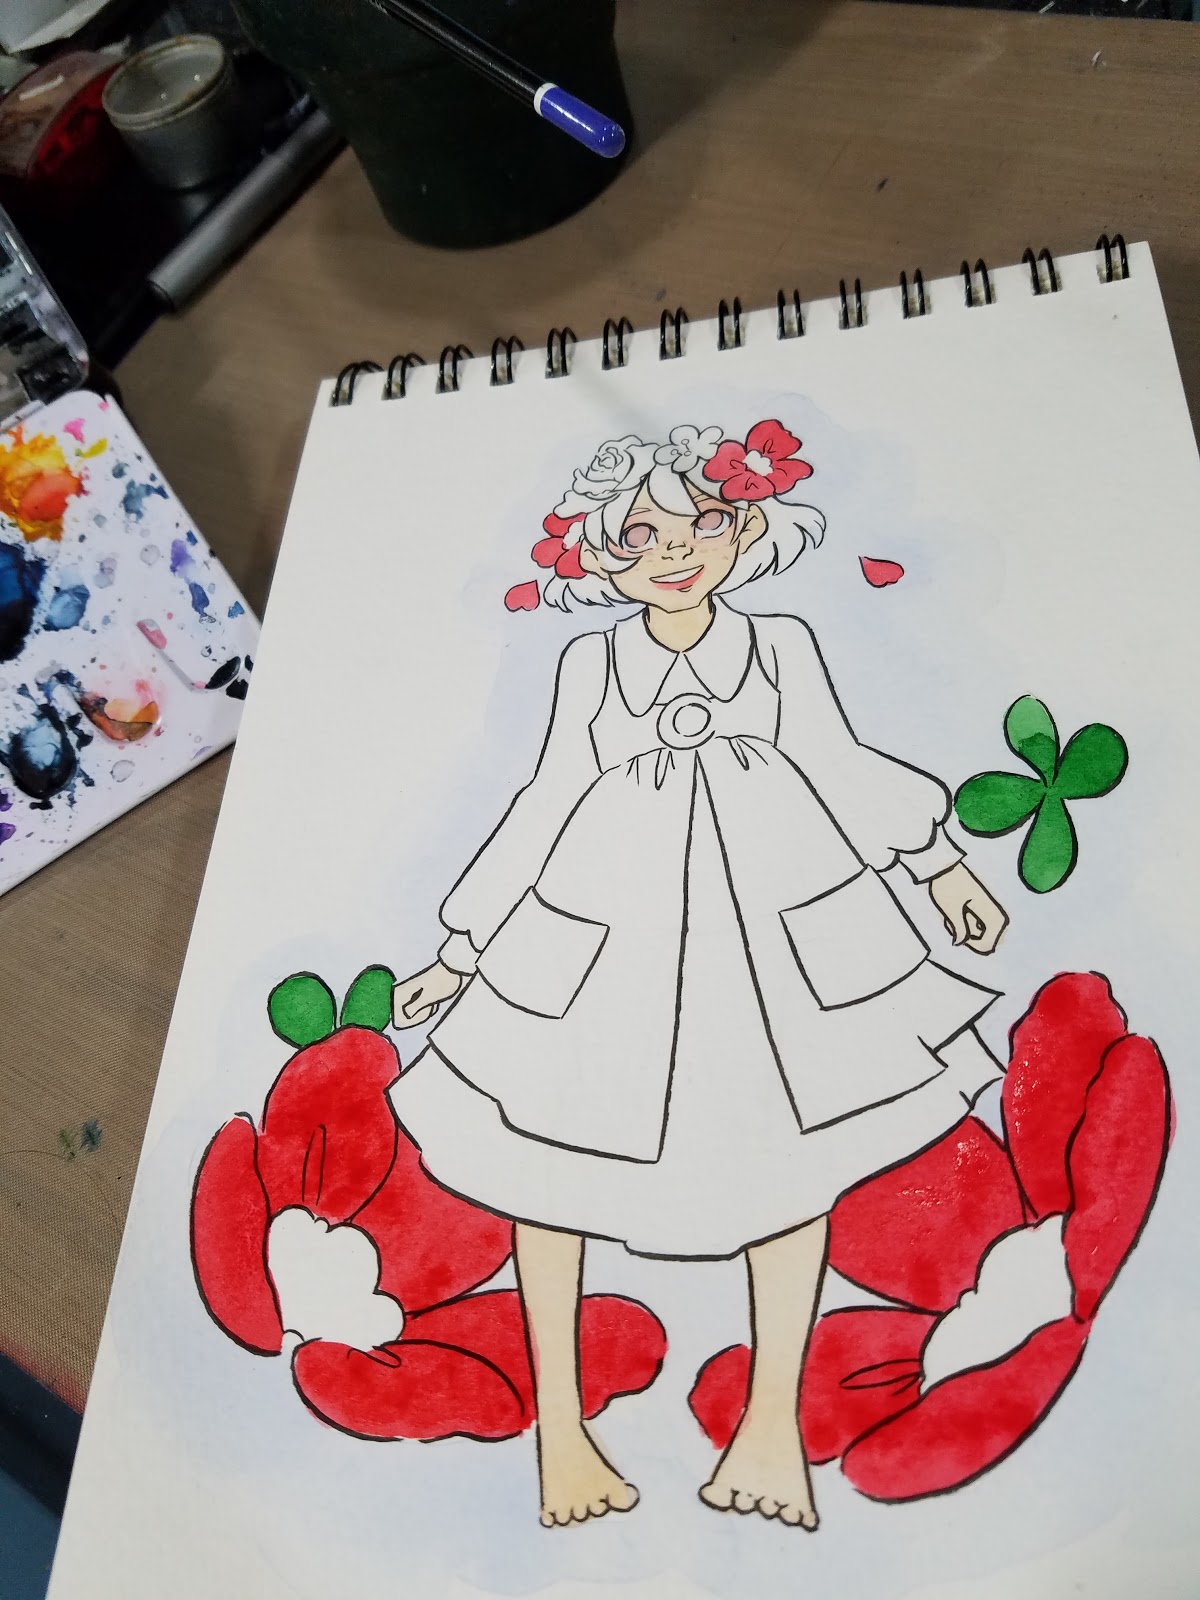
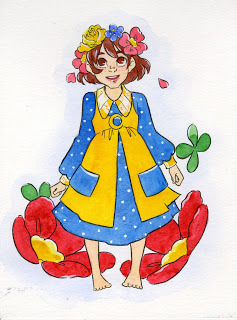
To help 'place' the illustraton on the paper, I apply a very light wash of cerulean blue around the figure and flowers. I allow it to dry fully.

Next I apply a wash of skintone- retrospectively, I should have gone darker with her skintone.

I also apply a light wash of blushtone, and blend it out. Like the skintone, I should have gone darker for better impact.

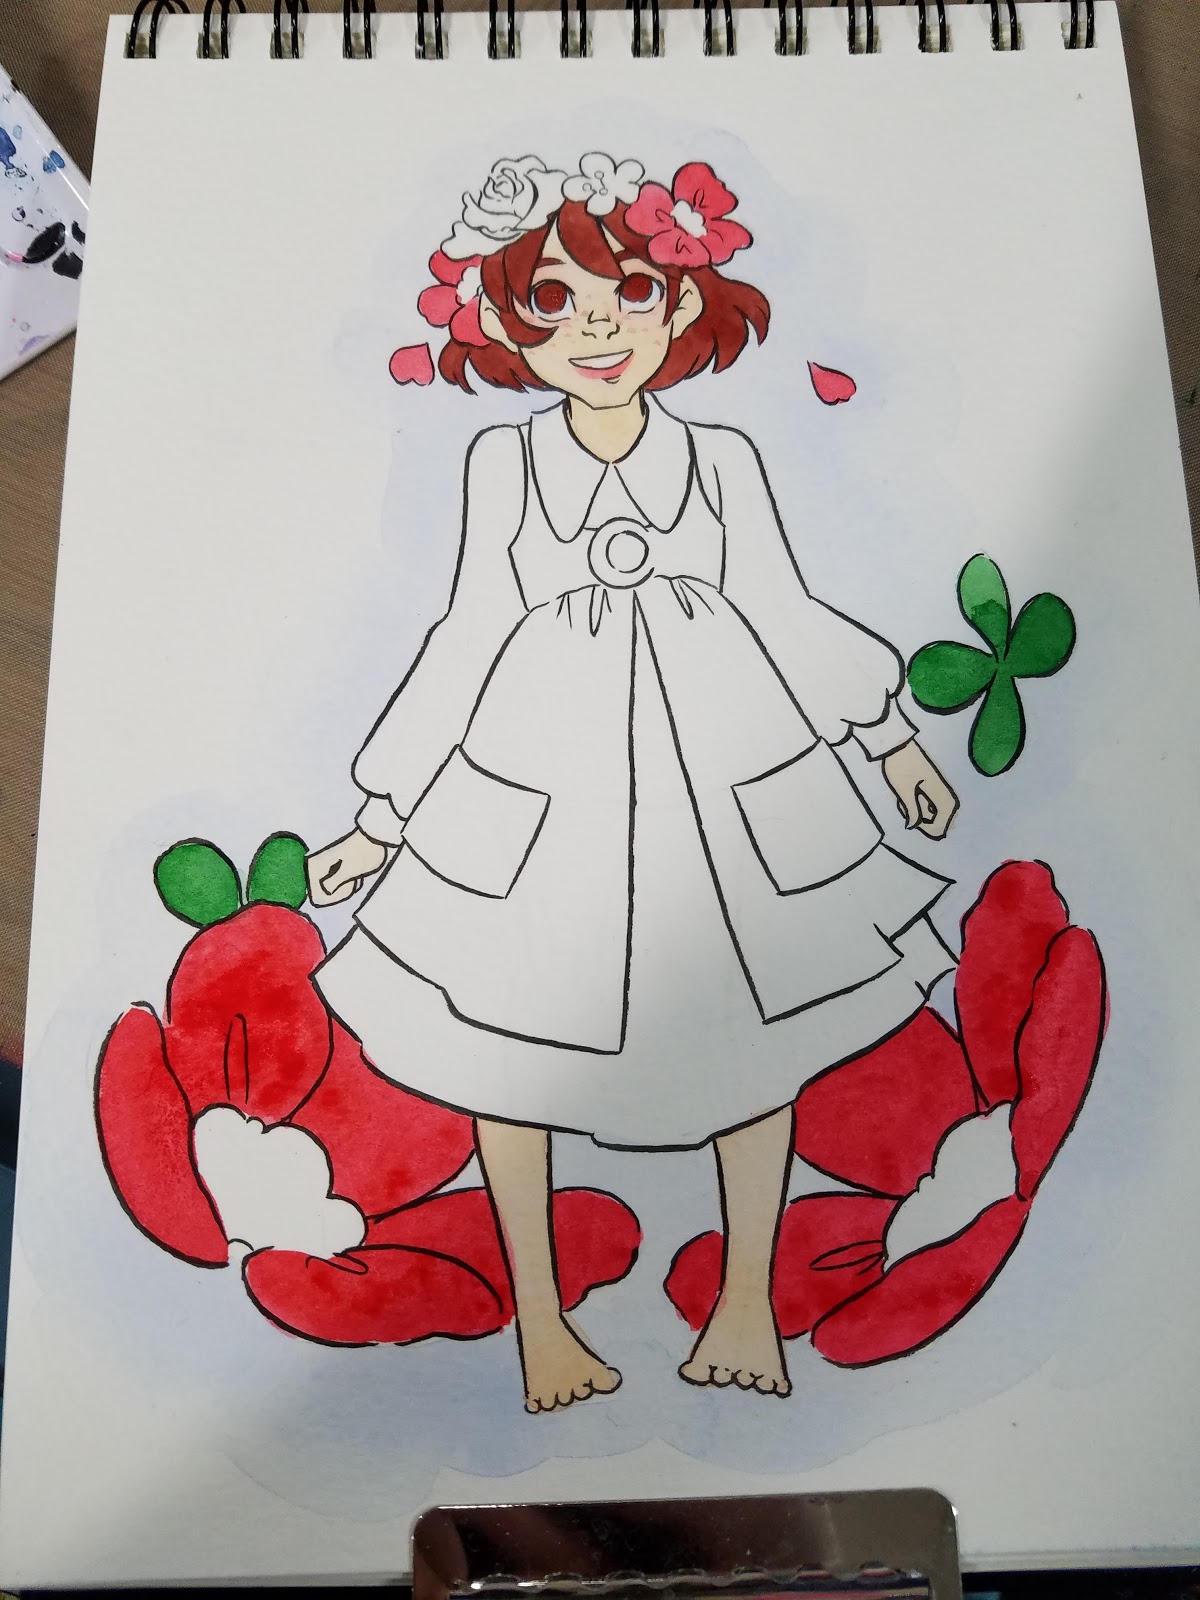
I begin doing solid fills. Since I'm working in one layer, I want this to have as much impact as possible so I go for a limited palette with strong colors- reds, greens, yellows, and blues. To save time, I fill every area of that color at the same time.

I rectify my skintone mistake a bit with the hair and eyes- I initially apply a light color, but select a more saturated tone later on.

The process is relatively straightforward- solid fills, let color dry, then don't touch it (unless it's to apply another solid layer). For someone as nitpicky as me, it's enough to drive me crazy!

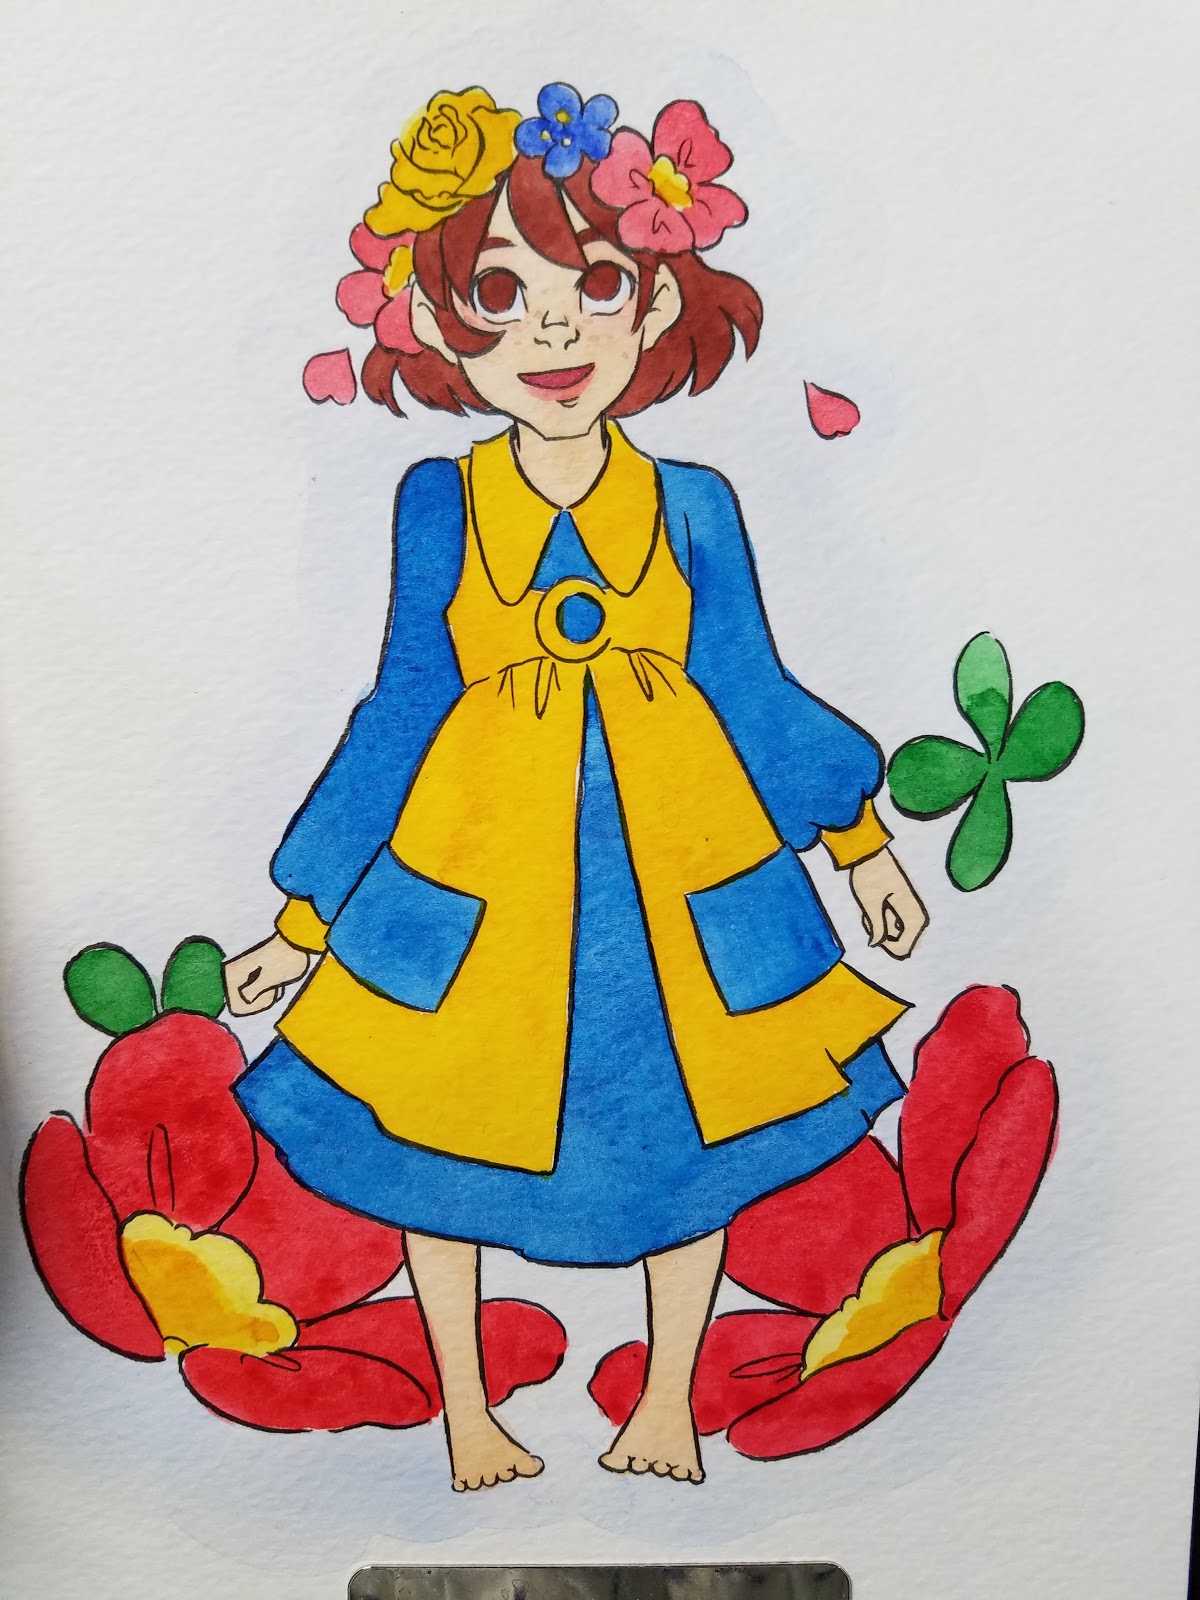

Of course, adding surface detail accents with gouache is totally allowed, and I utilize a little gouache to add some visual interest to Kara's clothing.

For someone who relies on multiple layers to build up color, definition, and contrast, this was a difficult challenge to undertake, but the type of technique utilized by many watercolor comic artists for efficiency. Watercolor is basically used to 'flat' the page and provide local color.
Color is basically applied one 'fill' (or flat wash) at a time, so you're going to want to go with saturated color for impact.
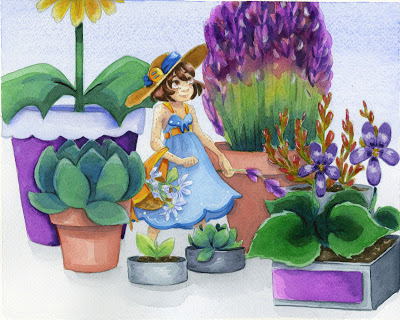
As much as I struggled with this, I'd love to try it on a short comic or a comic spread illustration sometime and see how it holds up! It's always good to push outside our comfort zone (even if that means minimizing), and it would give me more variety for my portfolio.
Like my art? You should check out my kidlit comic, 7" Kara!

7" Kara follows the adventures of Lilliputian Kara as she explores the outside world and seeks big adventure. This watercolor webcomic updates on Fridays, or you can get caught up with the first volume here.
Please consider donating to this blog or purchasing from Natto-shop (http://nattosoup.com/shop) if you want me to continue publishing quality content. All materials tested were purchased from my own pocket. Keep on Truckin' Nattosoup is not under any sponsorship.

February 1, 2018
Pigments and Paints
This post was written with help from Kabocha! It also required a great deal of research, so I highly recommend you browse the Outside Resources section, especially if you find this topic interesting.
When it comes to watercolor, you have two options for generating color- pigments and dyes. Everything else is just binder- gum arabic, aquazol, or even glycerin, or filler- optical brighteners like calcium or talc. Although you can't paint with just pigment and water, pigments and dyes add color to our world in a variety of ways- from dying fabric to glossy paint coats in the automotive industry.
Humans have used pigments since cave paintings- usually accessible earth pigments collected straight from the ground, and dyes came shortly after. While understanding dyes and pigments isn't mandatory for you to enjoy watercolor, understanding your materials can help you plan a course of action and allow you to make the most with the materials you have.
How Paint Is Made- M Graham & Co
How Sennelier l'Aquarelle Water Colours Are Made
Dyes Vs Pigments
The difference has nothing to do with whether or not the product is derived organically.
Basically, pigments coat the object, like a coat of paint on a car (and may stain, may not, depending on the pigment), whereas dyes penetrate the object and stain, like dying fabric.
For watercolor, GENERALLY higher quality watercolor are made from pigments, and student grade, washable watercolor is made from dye. Dye based watercolors are not lightfast or waterfast, and while their water reactivity presents interesting options regarding techniques, you may find it frustrating if you try to use it like you would traditional watercolor. However, dye based watercolors are vivid, clear, and bright, and neons are available which would not be easily available in pigment form.
 Dye based watercolor created using Spectrum Aqua watercolor markers.
 Pigment based watercolor created using Winsor and Newton, Daniel Smith, and Holbein watercolors.
Pigments:
 Single Layer watercolor painted with Holbein, Winsor and Newton, and SoHo watercolor
More simply:
A pigment is simply a colored material that can be added to something else to give it color, but sits on top of the substance it has been adhered to as a coating. A pigment can be used to produce a dye.
Pigments fall into three categories:
Organic
Inorganic
Special
Organic Pigments
Mineral- Obtained from minerals and stones. Inorganic. Clay earth pigments, mineral and semi-precious/precious stone pigments, and metal based pigments fall into this category. Many of these pigments are highly toxic, such as those derived from Cadmium (cad. red, cad, yellow, ect) or lead (Naples Yellow, lead white)
Examples:
Yellow Ochre (earth)
Lapis Lazuli (Ultramarine) (traditionally made from precious Lapis Lazuli)
Lamp black (carbon pigment)
Daniel Smith's Primatek watercolor line is made entirely from minerals specifically selected for beautiful, luminous color.
Science & Art Unite! Daniel Smith Watercolors
Most of these pigments are extremely lightfast.
Biological- Obtained from plants and animals or their byproducts.
Examples:
Tyrian Purple (derived from a mollusc)
Gamboge
Indigo (derived from the wode or indigo plant)
Synthetic Pigments
Obtained by mixing components to make a pigment. Although synthetic pigments have been available in some form for a long time, there was a huge boom in synthetic pigment discovery and production during the Industrial Revolution.
Examples:
Prussian Blue
Ultramarine (post Industrial Revolution)
Quinacridone colors
Source: http://www.danielsmith.com/Item--i-E-...
Synthetic pigments are often used to replace originals that are difficult, dangerous, or inhumane to obtain or use. Examples include Indian Yellow (inhumane), Vermillion (toxic), and Ultramarine (rare).
Interested in a specific pigment, and want to learn more about how it's made? Check this page out! Or learn the history behind an entire color family by clicking here.
For more information on Organic Pigments, Inorganic Pigments, and Synthetic Pigments, and how they can affect your watercolor, check out this wonderful post by Jan Hart for the Daniel Smith blog.
Pigment Properties:
Staining:
Granulating:
In general, mineral, metal, and earth based pigments tend to be granulating, whereas synthetic pigments tend to be staining. This is due to particle size- inorganic pigments tend to have larger particles, synthetics tend to have smaller particles.
Different pigments may have differing individual properties, so experimentation is a great way to get to know your palette!
I want to make my own!
Making Watercolor Paint- Owings Art
Making Your Own Watercolor Paints- P1- Eve Bolt-Bolt's Vault
Making More Watercolor Paints-P2- Eve Bolt-Bolt's Vault
DIY Watercolors-Mosspup
Making Charcoal Paint:
Vivianite Pigment- The Blue Ocher
Making Paints- Equipment&Safety:
So what about Hues?
Hues are replacement colors for pigments that are no longer available, are prohibitively expensive, or are toxic. An example would be cadmium based paints- these are frequently replaced with hues, as cadmium is quite toxic.
Dyes
 Painted with dye based fountain pen ink
In Layman's terms:
Source: https://en.wikipedia.org/wiki/Dye
A dye has low solubility, meaning it will reactivate and mix with an appropriate solvent (this can be something as simple as just water, or as specific as alcohol or other substances). Dyes are usually used for coloring substances, as they stain and bind to fibers and hair.
Dyes are common in inexpensive watercolor products, watercolor markers (excluding the Winsor and Newton Watercolor markers, which are pigments based), waterbased markers, liquid watercolors such as Radiant (excluding Hydrus, which is pigment based), and alcohol markers. They are prone to reactivation when water is reapplied, which is why alcohol markers will blend.
This tendency towards reactivation are why dyes are the preferred choice of colorant in children's grade watercolors. Brands such as Crayola, Cra-Z-Art, and other children's watercolor manufacturors use dyes for washability.
Types of Dyes:
Acid Dyes- Typically used to dye fabrics such as silk, wool, and other protein fibers. Brilliant and colorfast. Acid dyes are known to produce the most vibrant colors.
Basic Dyes- Cationic stains that react with material that has been negatively charged. Available in synthetic form, these are aniline dyes that act as bases. Color base is not water soluble, so base is converted into a salt first. Useful for tinting and brightness.
Direct/Substantive Dying-Adheres to the object being dyed by non-ionic forces. Work best on texiles with high cellulose content, such as cotton.
Mordant Dyes (see Lake Pigments below)- A mordant is a dye fixative, that sets dyes on fabrics. A mordant dye is the same as a lake pigment, and is more color fast than unfixed dyes.
Vat Dyes-Vat dyes are applied in a vat or bucket, and this applies to almost any dye, including acid dyes, direct dyes, and fiber-reactive dyes.
Reactive Dyes-primarily used for tinting textiles, these are a class of highly colored organic substances. These dyes attach to the substrate by a covalent bond, and the dyestuff becomes part of the material. This increases colorfastness.
Disperse Dyes- Synthetic dyes. These dyes are a one of a kind organic substance free of ioning groups. These dyes are less soluble in water and are used to dye synthetic materials. Disperse dyes are non soluble, so a dispersing agent is necessary for dying.
Azoic Dyes- produced by a reaction between the coupling compound (napthol) and a diazo base or salt.
Sulfur Dyes-Cheap, have good wash fastness, easy to apply. Predominantly brown, black, or dark blue, with reds being unknown, but pink and lighter scarlet dyes available. Most commonly used dyes manufactured for cotton dying. Water-insoluble and require a reducing agent to disintergrate.
Organic Dyes
The majority of natural dyes are plant derived.
The Chemistry of Natural Dyes- Bytesize Science
Plants Used for Dye:
Woad- Indigo
Weld- Neon Yellow
Madder-Reds
Brazilwood- Rich reds
Logwood-purples, greys, blacks
Old Fustic-strong dark yellows to peach
Safflower- Reds
Red Cabbage- wide range of color
Mineral Dyes:
Synthetic Dyes:
Man-made dyes, usually stemming from the petrochemical industry, using mineral derived components.
An example of a synthetic dye would be aniline dyes.
Aniline dyes: Aniline is an organic compound mainly used in industrial chemicals. In 1856, the first aniline dye, mauvine was discovered, which lead to the production of other synthetic dyes.
Examples of Aniline Dyes:
mauveine
fushsine
safranine
induline
I want to Make My Own!
Hibiscus Dye, Pigment, & Paint Fail:
DIY Natural Watercolour Paints- Our Raw Beauty:
Onion Skins Natural Dye Tutorial
Natural Dyeing Process- Design Studio 1
Natural Indigo Dyeing and Shibori- Meghan Greenholt
DIY Dyes from your Kitchen and Garden: Magic of Living Color
Hibiscus Dye, Pigment, & Paint Fail:
Making an Azo Dye (and coloring some socks!) | Dyes & Pigments
Examples of dye based watercolor:
Dr PH Martin's Radiant Concentrated Watercolor
Ecoline Watercolor Markers and Liquid watercolors
Blick Liquid Watercolors
Sargent Liquid watercolors
Spectrum Aqua Watercolor markers
Crayola Washable Watercolors
Peerless Watercolors
Brusho
Dyes You Can Make at Home:
Onion skins
Tea
Coffee
Tumeric
Beets
Walnut Husks
Red Cabbage
Read more about the process here.
Color Chromatography
Happens in dyes, not pigments
Play with it at home:
Color Chromatography
Lake Pigments
Lake pigments are manufactured by making a dye into a form that can be turned into a powder or similar substance. Lake pigments are usually made out of organic materials, rather than mineral-based.
Typically not lightfast, given their dye origins
What are Lake Pigments- Nada Makes:
The Chemistry of Natural Dyes- Bytesize Science:
Making a Dye, Lake Pigment, and Paint from Red Cabbage
Organic Lakes to Pigments- Michel Garcia and Yoshiko Wada:
Examples:
Carmine (cochineal)
Indigo
Rose Madder
So can you make faux pigments by mixing dye+chalk, and is this what most cheap watercolor brands do?
Yes, but adding chalk adds problems. Adding chalk dilutes the color in most cases, and can alter the color completely for some dyes.
Process for making most paints from a dye or natural dying substance seems to be:
(When using biological matter, boil or crush to release juices/sap, boil)ConcentrateAllow to add mordant (frequently alum and a little washing powder)StrainAdd remaining sediment to a coffee grinder, grindUse a muller to grate to a micro powder, probably add gum arabic or honey, or glycerin?
Making Acrylic and Oil Paint from Gentian Violet (Crystal Violet)
Outside Resources:
Making a Paint and Pigment out of Cholorphyll
Making Acrylic and Oil Paint from Gentian Violet (Crystal Violet)
How to Make Paint Pigments for Art Projects
Winsor and Newton: Masterclass- Pigment Analysis
Using Herbs as Dye- 18th Century Garden Technique
Wet Canvas- PrimaTek Colors
Daniel Smith Primatek Watercolors- Sandy Allnock
Buy Paints Made with Natural Dyes
Peerless Watercolors
Making Paint out of Colored Chalk- Nada Makes
Alternative Oil Paint Muller-Easy, Cheap, D.I.Y Oil Paint Muller- Nada Makes
Adding Honey and Glycerin to Watercolor Paints
Jan Hart: Why Paints Work The Way They Do, Explaining Organic and Inorganic Pigments
Daniel Smith: Quinacridones Colors
Wikipedia: Society of Dyers and Colourists
Definitions of a Dye and a Pigment
Wikipedia: Lake Pigment
Wikipedia: Pigment
Wikipedia: Dye
Simple Wikipedia: Pigment
Simple Wikipedia: Dye
Primatek Watercolor
Science and Art Unite with Daniel Smith Watercolors
Jacquard Products: Acid Dye
Food Color World: Basic Dyes
Wikipedia: Substantive Dye
Wikipedia: Mordant
Wikipedia: Vat Dye
Dyecolours: Reactive Dyes
Textile Fashion Study: Disperse Dyes
Dyeing with Azoic Dyes
Dying Fiber to Apparel
Wikipedia: Azo Dye
Wikipedia: Sulfer Dye
Mordant Dyes
Wildcolors: Natural Dye Mordants
Wildcolours: Top 3 Dyes
Wildcolors: Tropical Dyes
Wildcolors: Safflower
Painting with Natural Dyes
Pigments
Pigments Colors
Handprint: Pigment
Wet Canvas: Daniel Smith Prima Tek Colors
Pigments Complete Earth and Ocher Set- Unboxing Review and Comparison
Introduction to Earth Pigments
Making Ochre Paints Tip 19
A Story of Blue- Nature Video
Please consider donating to this blog or purchasing from Natto-shop (http://nattosoup.com/shop) if you want me to continue publishing quality content. All materials tested were purchased from my own pocket. Keep on Truckin' Nattosoup is not under any sponsorship.
When it comes to watercolor, you have two options for generating color- pigments and dyes. Everything else is just binder- gum arabic, aquazol, or even glycerin, or filler- optical brighteners like calcium or talc. Although you can't paint with just pigment and water, pigments and dyes add color to our world in a variety of ways- from dying fabric to glossy paint coats in the automotive industry.
Humans have used pigments since cave paintings- usually accessible earth pigments collected straight from the ground, and dyes came shortly after. While understanding dyes and pigments isn't mandatory for you to enjoy watercolor, understanding your materials can help you plan a course of action and allow you to make the most with the materials you have.
Every paint is a mixture of microscopic pigment particles, which provide the paint color, mixed in a liquid paint vehicle that holds the pigment in suspension, allows it to be applied with a brush, then dries to bind it to the support (paper, board or canvas). The vehicle also contains other substances that reduce manufacturing costs, adjust the visual appearance and handling attributes of the paint, and increase its shelf life in the art store.Source: https://www.handprint.com/HP/WCL/pigm...
How Paint Is Made- M Graham & Co
How Sennelier l'Aquarelle Water Colours Are Made
Dyes Vs Pigments
The difference has nothing to do with whether or not the product is derived organically.
A distinction is usually made between a pigment, which is insoluble in its vehicle (resulting in a suspension), and a dye, which either is itself a liquid or is soluble in its vehicle (resulting in a solution). A colorant can act as either a pigment or a dye depending on the vehicle involved. In some cases, a pigment can be manufactured from a dye by precipitating a soluble dye with a metallic salt. The resulting pigment is called a lake pigment. The term biological pigment is used for all colored substances independent of their solubility.[1]Source
Basically, pigments coat the object, like a coat of paint on a car (and may stain, may not, depending on the pigment), whereas dyes penetrate the object and stain, like dying fabric.
Pigment. Pigments are chemical compounds with appealing or useful color attributes and that do not dissolve in water....In contrast, a dye is completely soluble (dissolves) in water, and binds directly with the materials it contacts (though a mediating chemical called a mordant must often be present to make this bond happen).Source: https://www.handprint.com/HP/WCL/pigm...
For watercolor, GENERALLY higher quality watercolor are made from pigments, and student grade, washable watercolor is made from dye. Dye based watercolors are not lightfast or waterfast, and while their water reactivity presents interesting options regarding techniques, you may find it frustrating if you try to use it like you would traditional watercolor. However, dye based watercolors are vivid, clear, and bright, and neons are available which would not be easily available in pigment form.
 Dye based watercolor created using Spectrum Aqua watercolor markers.
 Pigment based watercolor created using Winsor and Newton, Daniel Smith, and Holbein watercolors.
Pigments:
 Single Layer watercolor painted with Holbein, Winsor and Newton, and SoHo watercolor
A pigment is a material that changes the color of reflected or transmitted light as the result of wavelength-selective absorption. This physical process differs from fluorescence, phosphorescence, and other forms of luminescence, in which a material emits light.Source: https://en.wikipedia.org/wiki/Pigment
More simply:
A pigment is something that is added to something else to give it color. Natural pigments can come from just about anything. Pigments can be made from animals, plants, rocks and minerals or even the ground itself, for example clay plus salts. Pigments can also be created by people.Source: https://simple.wikipedia.org/wiki/Pig...
A pigment is simply a colored material that can be added to something else to give it color, but sits on top of the substance it has been adhered to as a coating. A pigment can be used to produce a dye.
Pigments fall into three categories:
Organic
Inorganic
Special
Organic Pigments
Mineral- Obtained from minerals and stones. Inorganic. Clay earth pigments, mineral and semi-precious/precious stone pigments, and metal based pigments fall into this category. Many of these pigments are highly toxic, such as those derived from Cadmium (cad. red, cad, yellow, ect) or lead (Naples Yellow, lead white)
Examples:
Yellow Ochre (earth)
Lapis Lazuli (Ultramarine) (traditionally made from precious Lapis Lazuli)
Lamp black (carbon pigment)
Daniel Smith's Primatek watercolor line is made entirely from minerals specifically selected for beautiful, luminous color.
Science & Art Unite! Daniel Smith Watercolors
Most of these pigments are extremely lightfast.
Biological- Obtained from plants and animals or their byproducts.
Examples:
Tyrian Purple (derived from a mollusc)
Gamboge
Indigo (derived from the wode or indigo plant)
Synthetic Pigments
Obtained by mixing components to make a pigment. Although synthetic pigments have been available in some form for a long time, there was a huge boom in synthetic pigment discovery and production during the Industrial Revolution.
Examples:
Prussian Blue
Ultramarine (post Industrial Revolution)
Quinacridone colors
No other colors have both the intensity and transparency of the quinacridone family. They are synthetic organic pigments, created in the world's most advanced color laboratories. Minuscule pigment particles are exceptionally uniform in size and shape, which translates to unfailing behavior in the paint.
Source: http://www.danielsmith.com/Item--i-E-...
Synthetic pigments are often used to replace originals that are difficult, dangerous, or inhumane to obtain or use. Examples include Indian Yellow (inhumane), Vermillion (toxic), and Ultramarine (rare).
Interested in a specific pigment, and want to learn more about how it's made? Check this page out! Or learn the history behind an entire color family by clicking here.
For more information on Organic Pigments, Inorganic Pigments, and Synthetic Pigments, and how they can affect your watercolor, check out this wonderful post by Jan Hart for the Daniel Smith blog.
Pigment Properties:
Staining:
Granulating:
In general, mineral, metal, and earth based pigments tend to be granulating, whereas synthetic pigments tend to be staining. This is due to particle size- inorganic pigments tend to have larger particles, synthetics tend to have smaller particles.
Different pigments may have differing individual properties, so experimentation is a great way to get to know your palette!
I want to make my own!
Making Watercolor Paint- Owings Art
Making Your Own Watercolor Paints- P1- Eve Bolt-Bolt's Vault
Making More Watercolor Paints-P2- Eve Bolt-Bolt's Vault
DIY Watercolors-Mosspup
Making Charcoal Paint:
Vivianite Pigment- The Blue Ocher
Making Paints- Equipment&Safety:
So what about Hues?
Hues are replacement colors for pigments that are no longer available, are prohibitively expensive, or are toxic. An example would be cadmium based paints- these are frequently replaced with hues, as cadmium is quite toxic.
Dyes
 Painted with dye based fountain pen ink
A dye is a colored substance that has an affinity to the substrate to which it is being applied. The dye is generally applied in an aqueous solution, and may require a mordant to improve the fastness of the dye on the fiber.[1]Source: https://en.wikipedia.org/wiki/Dye
In Layman's terms:
Dyes are usually soluble in water whereas pigments are insoluble. Some dyes can be rendered insoluble with the addition of salt to produce a lake pigment.
Source: https://en.wikipedia.org/wiki/Dye
Dye is a substance used to color materials. It is often used to color the fabric used to make clothing. It has low solubility. A pigment won't do this because it won't stick to the fibers of the fabric and color them. A dye can be natural, usually made from plant material such as berries, or artificial, meaning that it is made by humans from chemicals such as petrochemicals.Source: https://simple.wikipedia.org/wiki/Dye
A dye has low solubility, meaning it will reactivate and mix with an appropriate solvent (this can be something as simple as just water, or as specific as alcohol or other substances). Dyes are usually used for coloring substances, as they stain and bind to fibers and hair.
Dyes are common in inexpensive watercolor products, watercolor markers (excluding the Winsor and Newton Watercolor markers, which are pigments based), waterbased markers, liquid watercolors such as Radiant (excluding Hydrus, which is pigment based), and alcohol markers. They are prone to reactivation when water is reapplied, which is why alcohol markers will blend.
This tendency towards reactivation are why dyes are the preferred choice of colorant in children's grade watercolors. Brands such as Crayola, Cra-Z-Art, and other children's watercolor manufacturors use dyes for washability.
Types of Dyes:
Acid Dyes- Typically used to dye fabrics such as silk, wool, and other protein fibers. Brilliant and colorfast. Acid dyes are known to produce the most vibrant colors.
Basic Dyes- Cationic stains that react with material that has been negatively charged. Available in synthetic form, these are aniline dyes that act as bases. Color base is not water soluble, so base is converted into a salt first. Useful for tinting and brightness.
Direct/Substantive Dying-Adheres to the object being dyed by non-ionic forces. Work best on texiles with high cellulose content, such as cotton.
Mordant Dyes (see Lake Pigments below)- A mordant is a dye fixative, that sets dyes on fabrics. A mordant dye is the same as a lake pigment, and is more color fast than unfixed dyes.
Vat Dyes-Vat dyes are applied in a vat or bucket, and this applies to almost any dye, including acid dyes, direct dyes, and fiber-reactive dyes.
Reactive Dyes-primarily used for tinting textiles, these are a class of highly colored organic substances. These dyes attach to the substrate by a covalent bond, and the dyestuff becomes part of the material. This increases colorfastness.
Disperse Dyes- Synthetic dyes. These dyes are a one of a kind organic substance free of ioning groups. These dyes are less soluble in water and are used to dye synthetic materials. Disperse dyes are non soluble, so a dispersing agent is necessary for dying.
Azoic Dyes- produced by a reaction between the coupling compound (napthol) and a diazo base or salt.
Sulfur Dyes-Cheap, have good wash fastness, easy to apply. Predominantly brown, black, or dark blue, with reds being unknown, but pink and lighter scarlet dyes available. Most commonly used dyes manufactured for cotton dying. Water-insoluble and require a reducing agent to disintergrate.
Organic Dyes
The majority of natural dyes are plant derived.
The Chemistry of Natural Dyes- Bytesize Science
Plants Used for Dye:
Woad- Indigo
Weld- Neon Yellow
Madder-Reds
Brazilwood- Rich reds
Logwood-purples, greys, blacks
Old Fustic-strong dark yellows to peach
Safflower- Reds
Red Cabbage- wide range of color
Mineral Dyes:
Synthetic Dyes:
Man-made dyes, usually stemming from the petrochemical industry, using mineral derived components.
An example of a synthetic dye would be aniline dyes.
Aniline dyes: Aniline is an organic compound mainly used in industrial chemicals. In 1856, the first aniline dye, mauvine was discovered, which lead to the production of other synthetic dyes.
Examples of Aniline Dyes:
mauveine
fushsine
safranine
induline
I want to Make My Own!
Hibiscus Dye, Pigment, & Paint Fail:
DIY Natural Watercolour Paints- Our Raw Beauty:
Onion Skins Natural Dye Tutorial
Natural Dyeing Process- Design Studio 1
Natural Indigo Dyeing and Shibori- Meghan Greenholt
DIY Dyes from your Kitchen and Garden: Magic of Living Color
Hibiscus Dye, Pigment, & Paint Fail:
Making an Azo Dye (and coloring some socks!) | Dyes & Pigments
Examples of dye based watercolor:
Dr PH Martin's Radiant Concentrated Watercolor
Ecoline Watercolor Markers and Liquid watercolors
Blick Liquid Watercolors
Sargent Liquid watercolors
Spectrum Aqua Watercolor markers
Crayola Washable Watercolors
Peerless Watercolors
Brusho
Dyes You Can Make at Home:
Onion skins
Tea
Coffee
Tumeric
Beets
Walnut Husks
Red Cabbage
Read more about the process here.
Color Chromatography
Happens in dyes, not pigments
Play with it at home:
Color Chromatography
Lake Pigments
A lake pigment is a pigment manufactured by precipitating a dye with an inert binder, or "mordant", usually a metallic salt. Unlike vermilion, ultramarine, and other pigments made from ground minerals, lake pigments are organicSource: https://en.wikipedia.org/wiki/Lake_pi...
Lake pigments are manufactured by making a dye into a form that can be turned into a powder or similar substance. Lake pigments are usually made out of organic materials, rather than mineral-based.
Typically not lightfast, given their dye origins
What are Lake Pigments- Nada Makes:
The Chemistry of Natural Dyes- Bytesize Science:
Making a Dye, Lake Pigment, and Paint from Red Cabbage
Organic Lakes to Pigments- Michel Garcia and Yoshiko Wada:
Examples:
Carmine (cochineal)
Indigo
Rose Madder
So can you make faux pigments by mixing dye+chalk, and is this what most cheap watercolor brands do?
Yes, but adding chalk adds problems. Adding chalk dilutes the color in most cases, and can alter the color completely for some dyes.
Process for making most paints from a dye or natural dying substance seems to be:
(When using biological matter, boil or crush to release juices/sap, boil)ConcentrateAllow to add mordant (frequently alum and a little washing powder)StrainAdd remaining sediment to a coffee grinder, grindUse a muller to grate to a micro powder, probably add gum arabic or honey, or glycerin?
Making Acrylic and Oil Paint from Gentian Violet (Crystal Violet)
Outside Resources:
Making a Paint and Pigment out of Cholorphyll
Making Acrylic and Oil Paint from Gentian Violet (Crystal Violet)
How to Make Paint Pigments for Art Projects
Winsor and Newton: Masterclass- Pigment Analysis
Using Herbs as Dye- 18th Century Garden Technique
Wet Canvas- PrimaTek Colors
Daniel Smith Primatek Watercolors- Sandy Allnock
Buy Paints Made with Natural Dyes
Peerless Watercolors
Making Paint out of Colored Chalk- Nada Makes
Alternative Oil Paint Muller-Easy, Cheap, D.I.Y Oil Paint Muller- Nada Makes
Adding Honey and Glycerin to Watercolor Paints
Jan Hart: Why Paints Work The Way They Do, Explaining Organic and Inorganic Pigments
Daniel Smith: Quinacridones Colors
Wikipedia: Society of Dyers and Colourists
Definitions of a Dye and a Pigment
Wikipedia: Lake Pigment
Wikipedia: Pigment
Wikipedia: Dye
Simple Wikipedia: Pigment
Simple Wikipedia: Dye
Primatek Watercolor
Science and Art Unite with Daniel Smith Watercolors
Jacquard Products: Acid Dye
Food Color World: Basic Dyes
Wikipedia: Substantive Dye
Wikipedia: Mordant
Wikipedia: Vat Dye
Dyecolours: Reactive Dyes
Textile Fashion Study: Disperse Dyes
Dyeing with Azoic Dyes
Dying Fiber to Apparel
Wikipedia: Azo Dye
Wikipedia: Sulfer Dye
Mordant Dyes
Wildcolors: Natural Dye Mordants
Wildcolours: Top 3 Dyes
Wildcolors: Tropical Dyes
Wildcolors: Safflower
Painting with Natural Dyes
Pigments
Pigments Colors
Handprint: Pigment
Wet Canvas: Daniel Smith Prima Tek Colors
Pigments Complete Earth and Ocher Set- Unboxing Review and Comparison
Introduction to Earth Pigments
Making Ochre Paints Tip 19
A Story of Blue- Nature Video
Please consider donating to this blog or purchasing from Natto-shop (http://nattosoup.com/shop) if you want me to continue publishing quality content. All materials tested were purchased from my own pocket. Keep on Truckin' Nattosoup is not under any sponsorship.
January 29, 2018
Painting Pages in Batch: Watercolor Basics
You guys have probably seen me mention batch painting numerous times on the blog, on my Twitter, and on my Youtube channel. Batch painting allows me to handle repetitive or time consuming tasks for several pages at one time- tasks such as stretching, toning, and blocking in color are all a little easier in the long run when handled in batch. Batch painting also allows for color consistency across a scene- I can mix up plenty of color and utilize it across several pages.
To be honest, every stage of 7" Kara is handled in batch, which is unusual for a webcomic, but not unusual for print comics. Working in batch allows me to stay consistent and organized, and helps me stay focused. If you're interested in other parts of my comic process, please check out my Intro to Comic Craft series here on the blog.
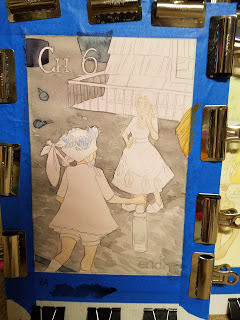
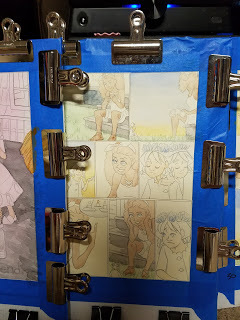
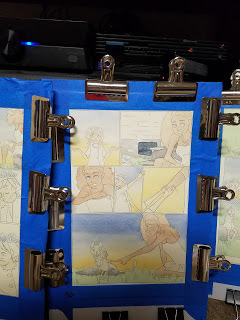
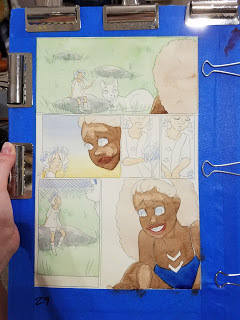
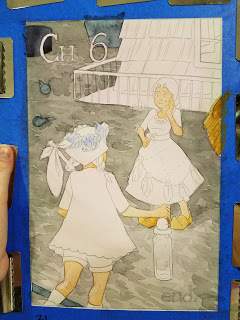
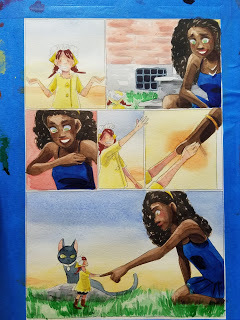
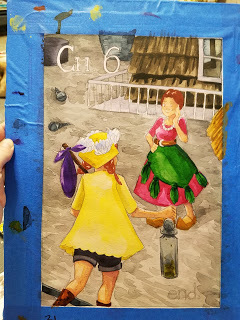
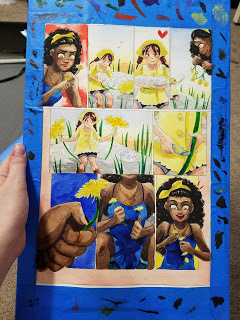
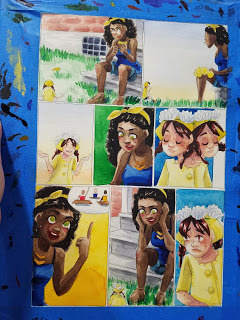
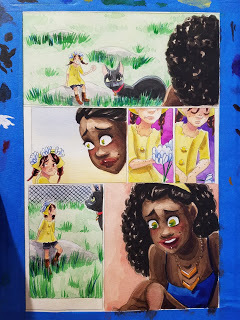
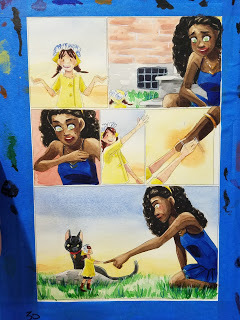
Speaking of 7" Kara, all the pages shown in this tutorial are from Chapter 6 of 7" Kara! I'm hustling to get Volume 2 completed, but you can read Volume 1, for free as a webcomic! Fan of print? Order Volume 1 from the Natto-shop, or pick it up at any convention listed in the sidebar!
I already have a Few other posts about working in batch that you might find helpful!
In Introduction to Working in Batch
Working in Batch: Trimming Paper To Size
Working in Batch: Construction for Icons
Working in Batch: Securing Your Paper
Comic Process Outline:
Script Entire Chapter- Check out the tutorial
Thumbnail Chapter Check out the tutorials One Two
Scan Thumbnails
Break Up Into Individual Pages, Turn into Bluelines
Print Blueline Roughs Check out the Tutorial
Rough Chapter- Check out the Tutorials One Two
Scan Roughs- Check out the Tutorial
Correct Roughs
Turn Into Bluelines- Check out the tutorial
Print onto Watercolor Paper- Check out the Tutorial
Pencil Chapter- Check out the Tutorial
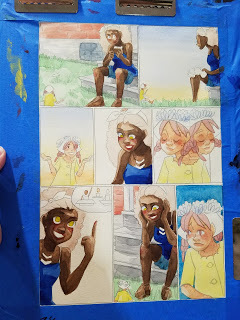
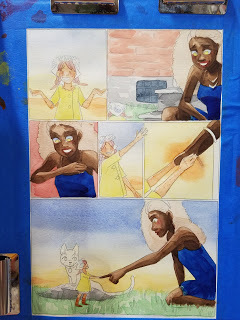
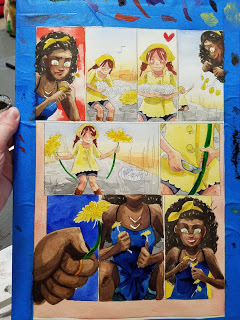
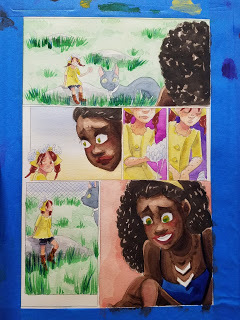
Painting the Comic:
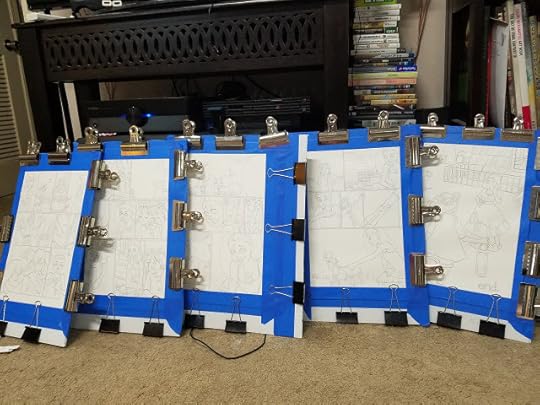
Batches are usually 2-6 pages, depending on the scene. Painting multiple pages at a time allows me to work more efficiently, and saves time- which is important when you're working on a huge longform project like a watercolor comic.
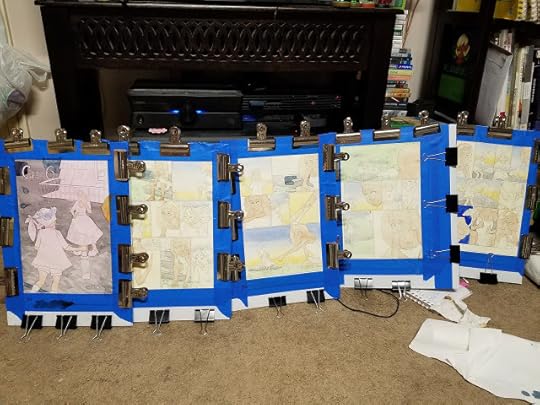
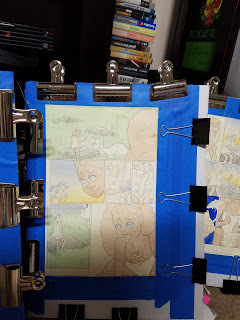
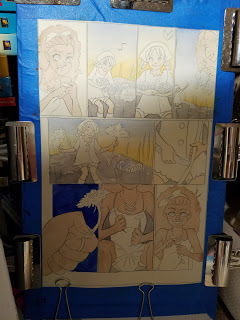
Pages are stretched onto white corrogated plastic (Gatorboard or chloroplast) with 3M Blue crepe masking tape. They are secured to the board using bulldog and binder clips, to help prevent buckling.
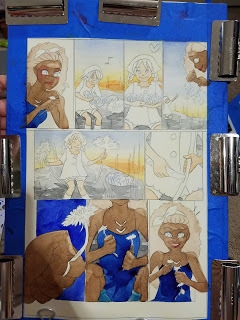
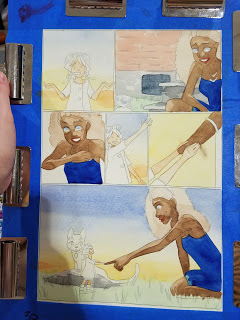
Colors are mixed en masse in daisy palettes, and all areas with that color are filled in before progressing to another color or stage. Textures and details are developed similarly. Unles a page is significantly different from the others in that batch (such as a cover or an endcap) no one page is finished before the others. Progress is slow, but fairly steady and predictable.
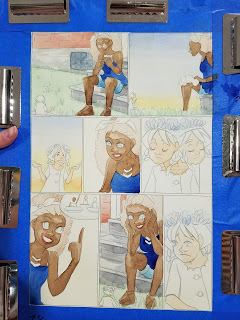
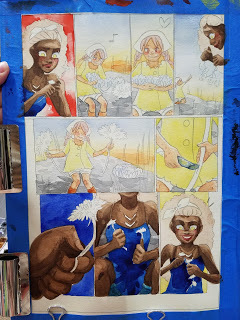
Once all the colors have been blocked in, textured, and shaded- when the majority of the page is complete, then detailing can begin. This is done in batch too- outlines are tightened, colors are used at full saturation, the watercolor pencils come out, and finally white accents are added.
After this has dried, all pages are removed from their gatorboards and stored in a portfolio.
Watercolor Painting On the Floor
Tools For Working In Batch:
Deep Welled PalettesDaisy PalettesBulldog and Binder ClipsGator BoardLow Tack Blue TapeSpray bottle of waterTwo water cupsPaper TowelsVariety of brushesPlenty of Space
Once Pages are on the Stretchers:
All toning and washes are completed in batchRendering and shadows are built up in batchDetails are added in batch
Blocking In Color:
Developing Color and Tone:
Rendering Skingones:


Adding Detail:

Tightening Up Detail:
Final Passes for Detail, Adding Highlights, Using Color Pencils:

Once entire chapter is painted:
Chapter is scanned
Chapter is corrected
Chapter is bordered
Chapter is lettered
This tutorial is part of my Watercolor Basics series, a series of watercolor tutorials designed to get more artists creating watercolor comics. If you enjoyed this post, please do me a favor and recommend it publicly to any friend who might appreciate it- your word of mouth is important to the growth of this blog! Share it on Twitter, Tumblr, Facebook, or Pinterest and give me a leg up!

This series spans my Youtube and this blog, to try to cover every aspect of watercolor for illustration and comics. From tutorials, to reviews, to micro demonstrations, if there's ever a topic I've missed, please feel free to send me an email or Tweet at me.

And if you like what I do, please consider supporting my work by joining the Artnerd community on Patreon.

Funds from my Patreon are used to commission guest writers for guest posts, to purchase supplies, and purchase some of the equipment necessary for providing free art educational content. My Artnerds get a new Early Access video almost every day, as well as access to backer exclusive goodies like comics and art resources. Support starts at just $1 a month, and every dollar helps!
Please consider donating to this blog or purchasing from Natto-shop (http://nattosoup.com/shop) if you want me to continue publishing quality content. All materials tested were purchased from my own pocket. Keep on Truckin' Nattosoup is not under any sponsorship.
To be honest, every stage of 7" Kara is handled in batch, which is unusual for a webcomic, but not unusual for print comics. Working in batch allows me to stay consistent and organized, and helps me stay focused. If you're interested in other parts of my comic process, please check out my Intro to Comic Craft series here on the blog.

Speaking of 7" Kara, all the pages shown in this tutorial are from Chapter 6 of 7" Kara! I'm hustling to get Volume 2 completed, but you can read Volume 1, for free as a webcomic! Fan of print? Order Volume 1 from the Natto-shop, or pick it up at any convention listed in the sidebar!
I already have a Few other posts about working in batch that you might find helpful!
In Introduction to Working in Batch
Working in Batch: Trimming Paper To Size
Working in Batch: Construction for Icons
Working in Batch: Securing Your Paper
Comic Process Outline:
Script Entire Chapter- Check out the tutorial
Thumbnail Chapter Check out the tutorials One Two
Scan Thumbnails
Break Up Into Individual Pages, Turn into Bluelines
Print Blueline Roughs Check out the Tutorial
Rough Chapter- Check out the Tutorials One Two
Scan Roughs- Check out the Tutorial
Correct Roughs
Turn Into Bluelines- Check out the tutorial
Print onto Watercolor Paper- Check out the Tutorial
Pencil Chapter- Check out the Tutorial
Painting the Comic:
Batches are usually 2-6 pages, depending on the scene. Painting multiple pages at a time allows me to work more efficiently, and saves time- which is important when you're working on a huge longform project like a watercolor comic.
Pages are stretched onto white corrogated plastic (Gatorboard or chloroplast) with 3M Blue crepe masking tape. They are secured to the board using bulldog and binder clips, to help prevent buckling.
Colors are mixed en masse in daisy palettes, and all areas with that color are filled in before progressing to another color or stage. Textures and details are developed similarly. Unles a page is significantly different from the others in that batch (such as a cover or an endcap) no one page is finished before the others. Progress is slow, but fairly steady and predictable.
Once all the colors have been blocked in, textured, and shaded- when the majority of the page is complete, then detailing can begin. This is done in batch too- outlines are tightened, colors are used at full saturation, the watercolor pencils come out, and finally white accents are added.
After this has dried, all pages are removed from their gatorboards and stored in a portfolio.
Watercolor Painting On the Floor
Tools For Working In Batch:
Deep Welled PalettesDaisy PalettesBulldog and Binder ClipsGator BoardLow Tack Blue TapeSpray bottle of waterTwo water cupsPaper TowelsVariety of brushesPlenty of Space


Once Pages are on the Stretchers:
All toning and washes are completed in batchRendering and shadows are built up in batchDetails are added in batch
Blocking In Color:


Developing Color and Tone:


Rendering Skingones:


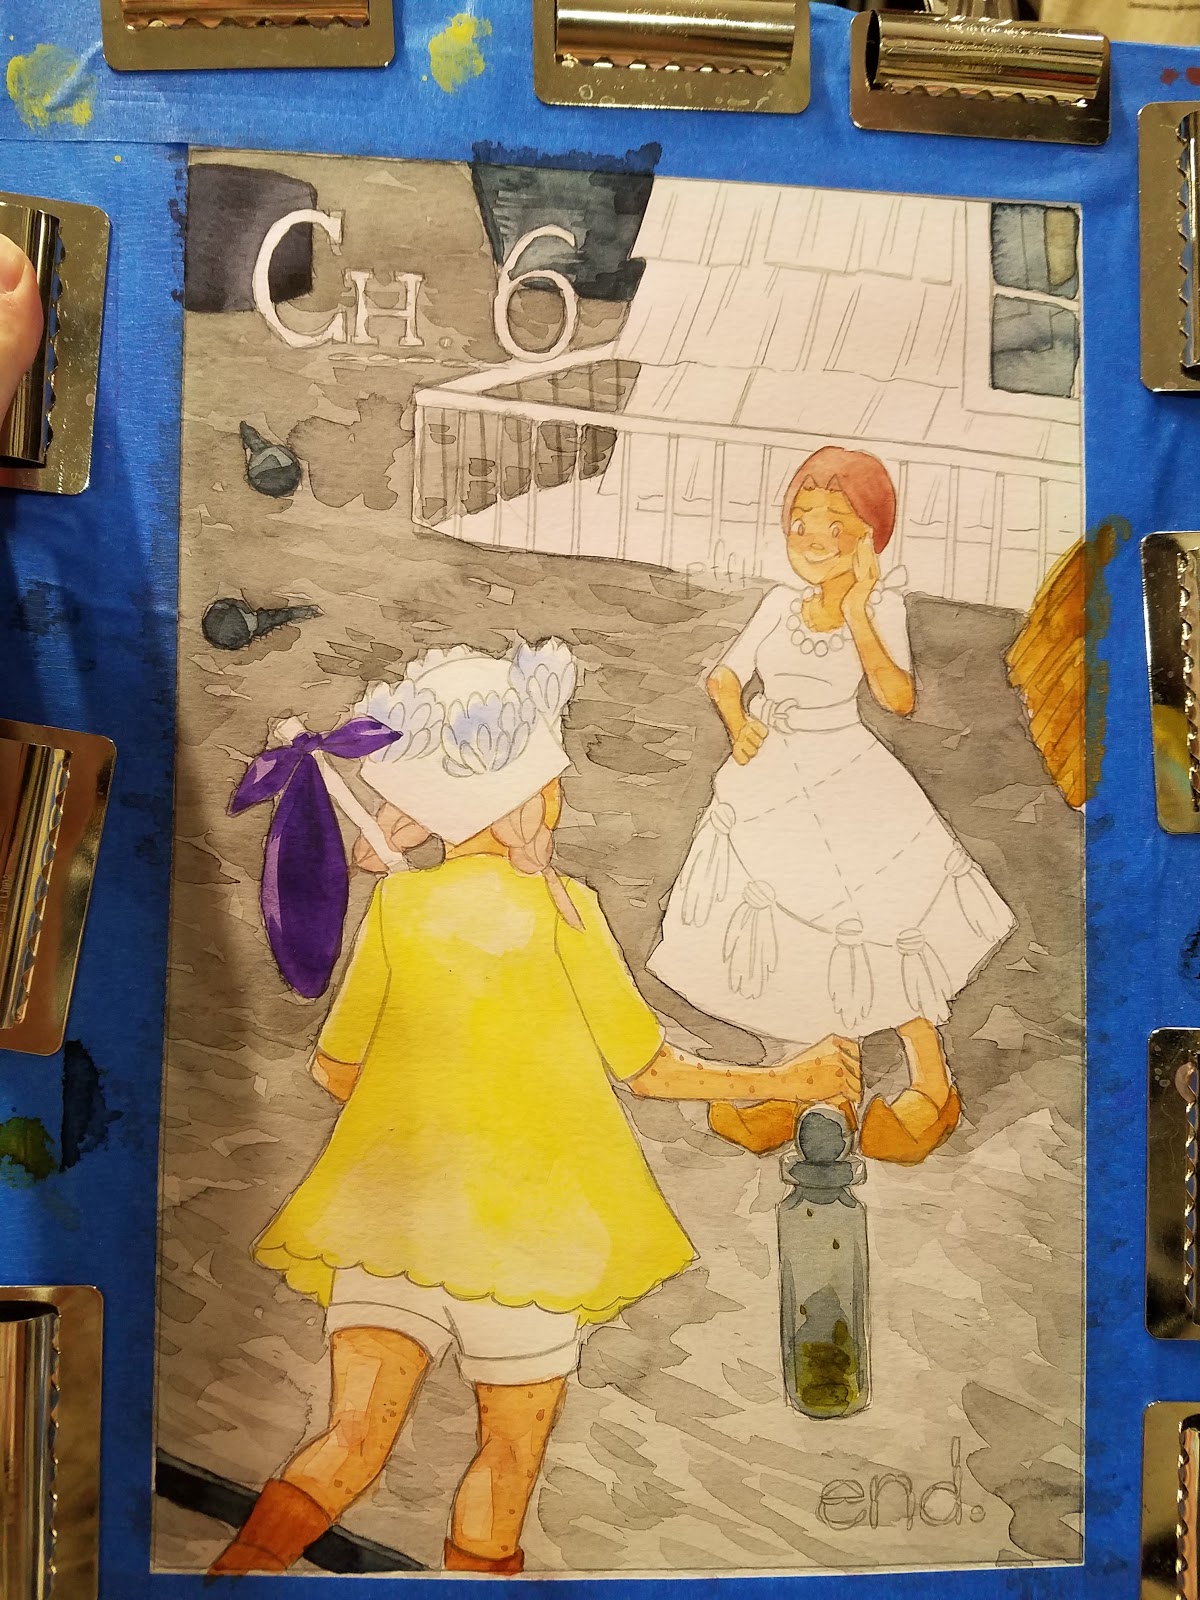
Adding Detail:

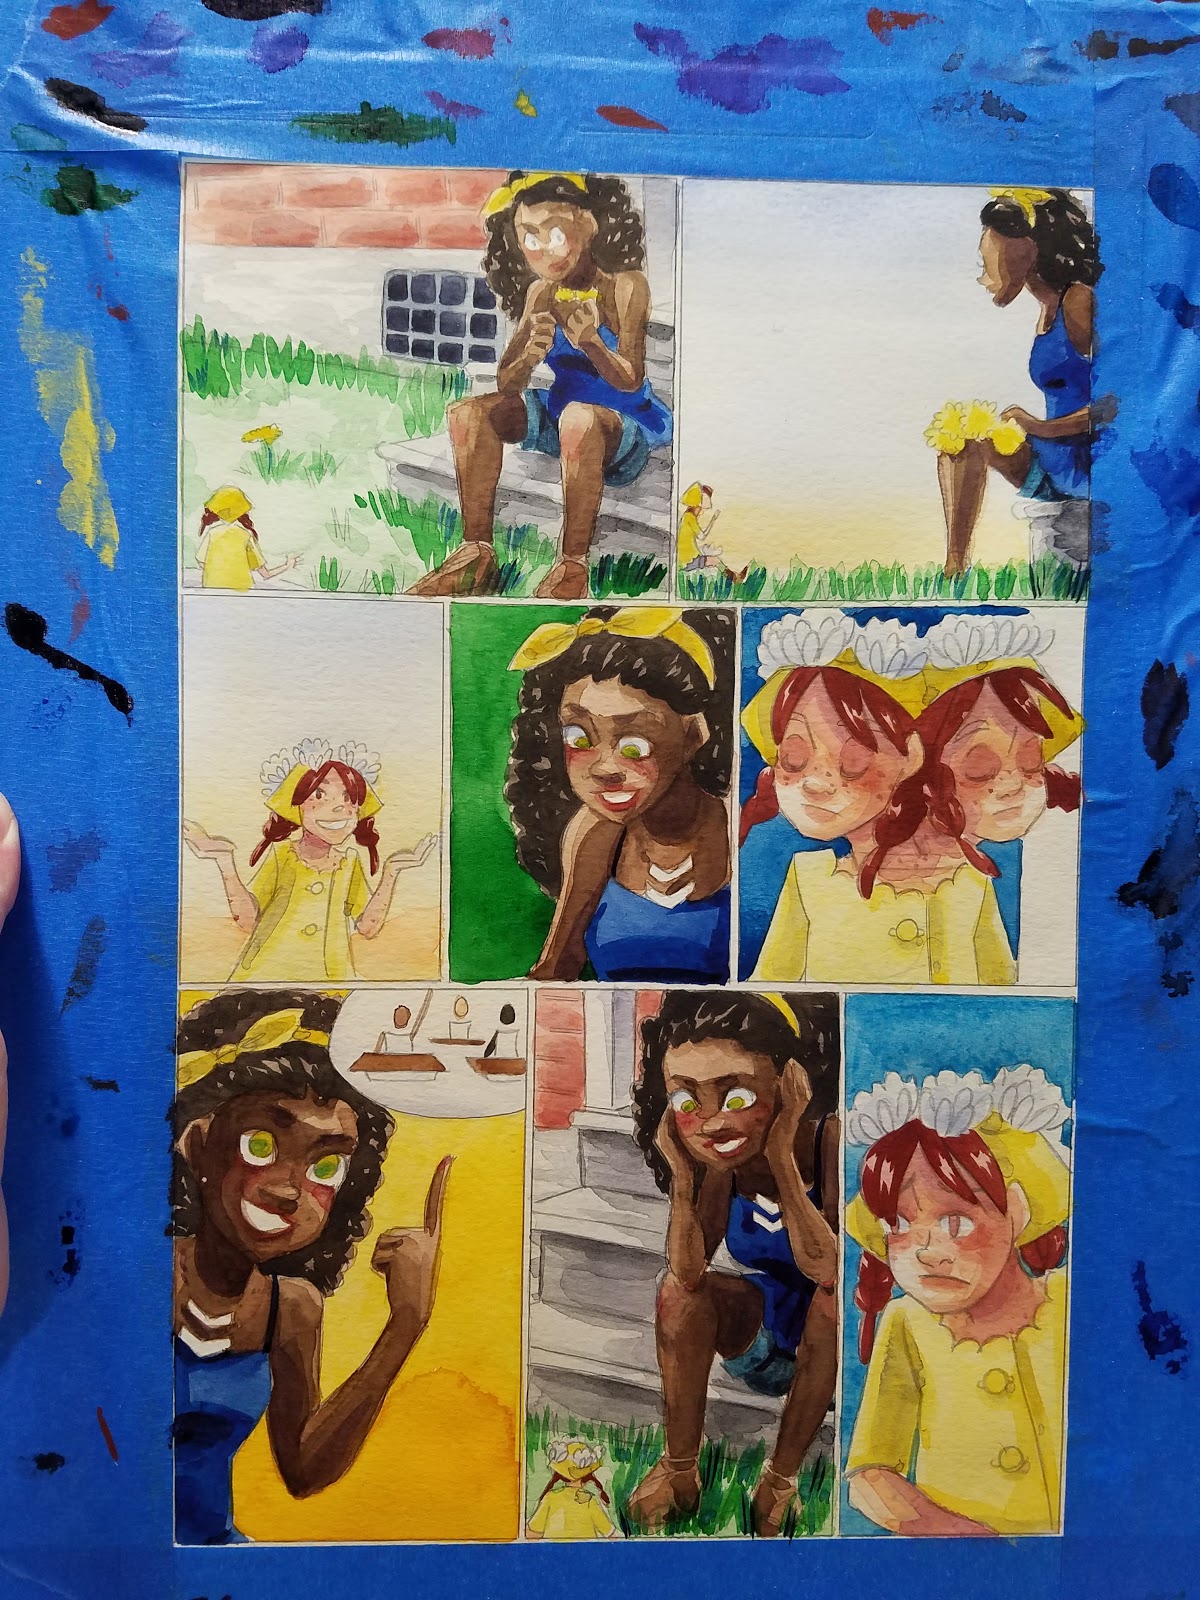


Tightening Up Detail:


Final Passes for Detail, Adding Highlights, Using Color Pencils:


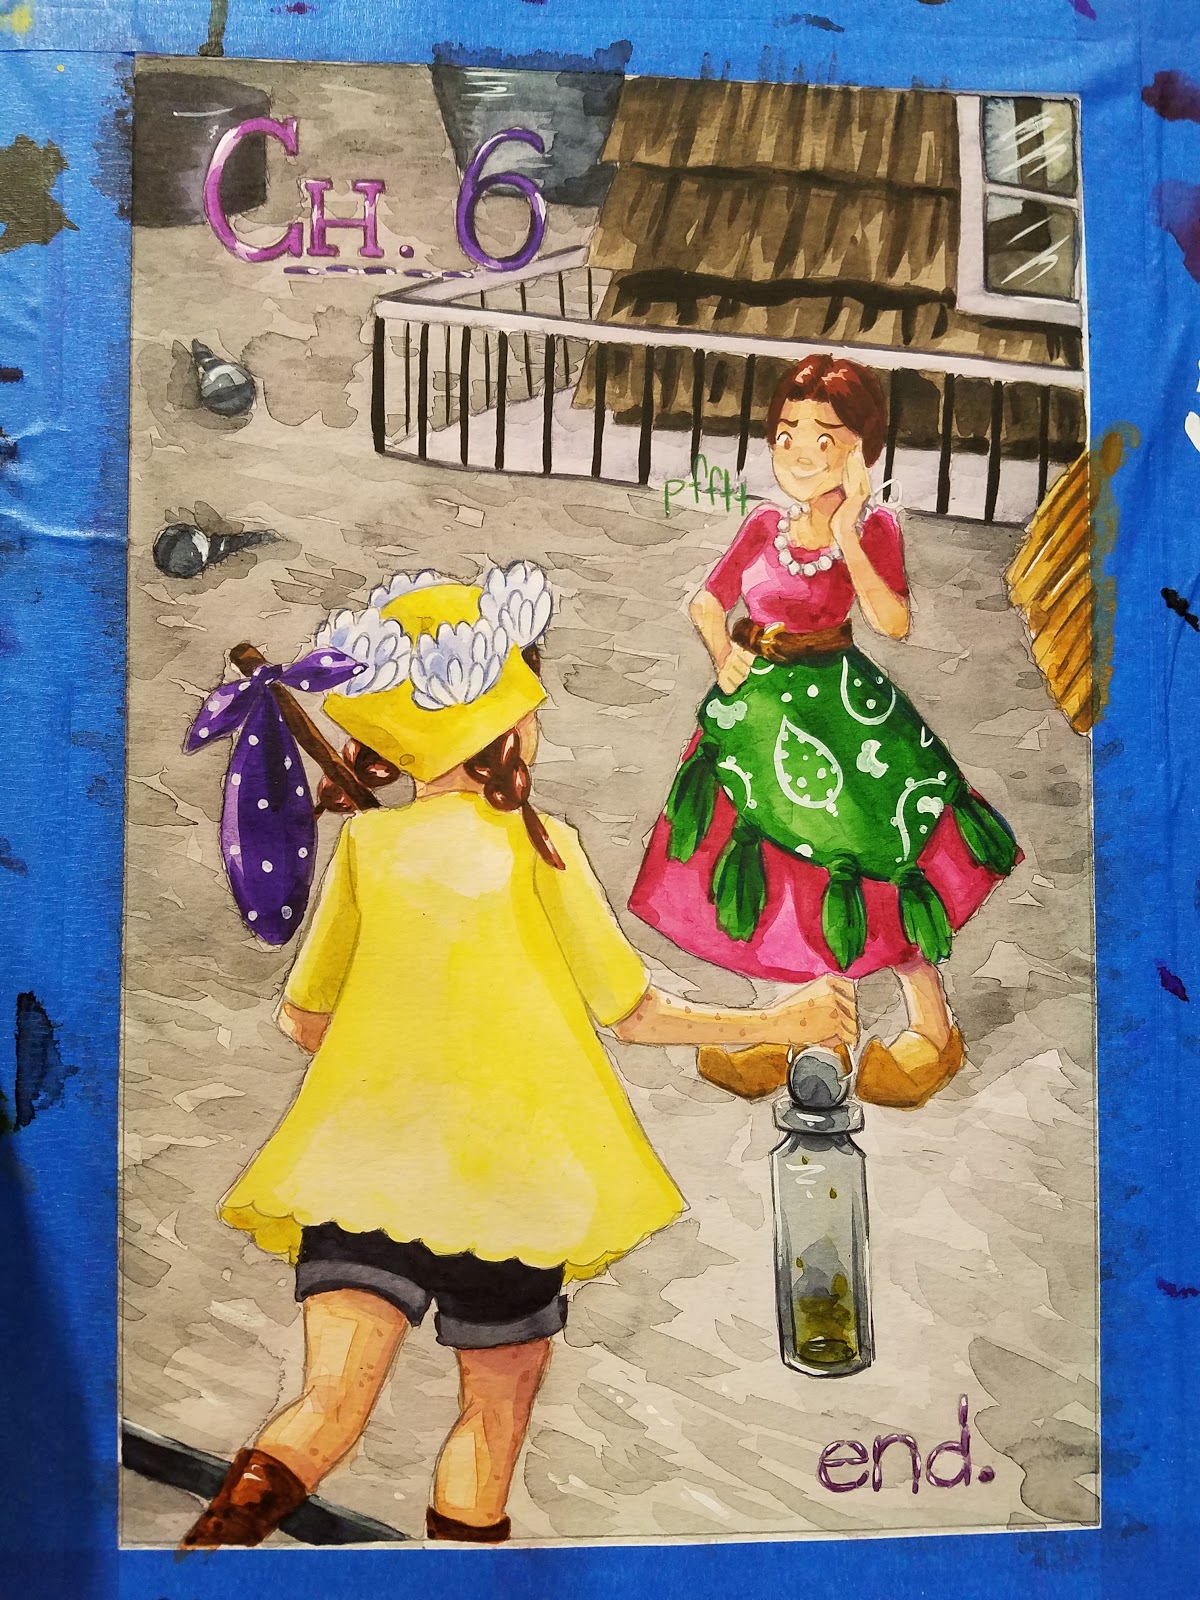
Once entire chapter is painted:
Chapter is scanned
Chapter is corrected
Chapter is bordered
Chapter is lettered
This tutorial is part of my Watercolor Basics series, a series of watercolor tutorials designed to get more artists creating watercolor comics. If you enjoyed this post, please do me a favor and recommend it publicly to any friend who might appreciate it- your word of mouth is important to the growth of this blog! Share it on Twitter, Tumblr, Facebook, or Pinterest and give me a leg up!

This series spans my Youtube and this blog, to try to cover every aspect of watercolor for illustration and comics. From tutorials, to reviews, to micro demonstrations, if there's ever a topic I've missed, please feel free to send me an email or Tweet at me.

And if you like what I do, please consider supporting my work by joining the Artnerd community on Patreon.

Funds from my Patreon are used to commission guest writers for guest posts, to purchase supplies, and purchase some of the equipment necessary for providing free art educational content. My Artnerds get a new Early Access video almost every day, as well as access to backer exclusive goodies like comics and art resources. Support starts at just $1 a month, and every dollar helps!
Please consider donating to this blog or purchasing from Natto-shop (http://nattosoup.com/shop) if you want me to continue publishing quality content. All materials tested were purchased from my own pocket. Keep on Truckin' Nattosoup is not under any sponsorship.
January 25, 2018
Toning Pages and Panels: Watercolor Basics
Today we're taking a look at one of my most used watercolor techniques- washes and tones! I prep every single 7" Kara page with either panel specific washes and tones, or page unifying all over washes or tones. Tones are one of the first steps taken on every page and give me an opportunity to influence the color for the entire page, or just a single panel.
This post is part of my Watercolor Basics Series!
This series of tutorials and reviews spans this blog as well as my Youtube Channel.

My Watercolor Basics course is designed to get you guys painting! I start at the very beginning (papers, paints, and brushes) and walk you through every step. Video tutorials help demonstrate techniques in real time, and timelapses provide inspiration and motivation to keep you painting.
All this is based on my experience painting 7" Kara, my watercolor webcomic!
7" Kara is a charming all ages watercolor comic that follows the adventures of diminutive Kara as she explores the outside world and makes some huge friendships. 7" Kara updates with a new page every Friday!
Speaking of 7" Kara, every single page of 7" Kara sees either an all over wash of color, or individual panel washes.
Toning Your Pages and Toning Your Panels:
Toning is simply watercolor washes, or glazes, and may include:
Flat washes
Graduated washes
Wet into wet techniques
Glazing
Reasons to tone:
Set mood in individual panel
Set overall mood on page/scene
Establish Shadows and Underglazes that might not otherwise be possible or feasible
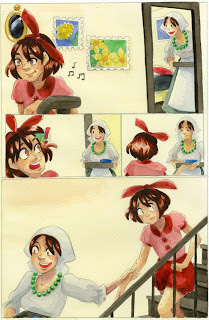 A bright, warm yellow underglaze helps establish this scene as 'morning'
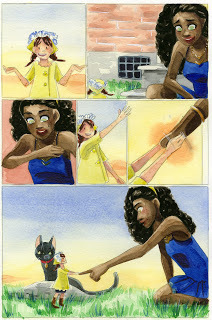 Single panel toning doesn't reflect the background, but does reflect the mood- such as the warm pink panel on the lefthand side, or the aura around the handshake on the left.
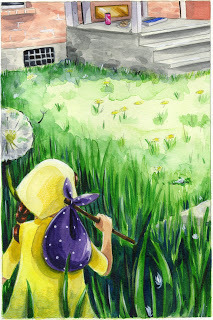
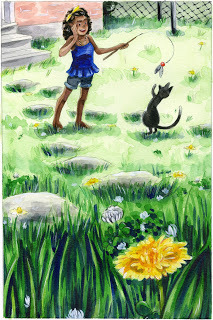 This spread has blue green undertones (most noticable on Kara, bottom left hand corner) that wouldn't be feasible as a glaze once the yellow was completed.
Entire Page Washes Vs Individual Panel Washes
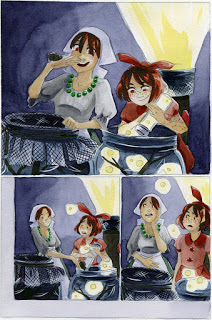
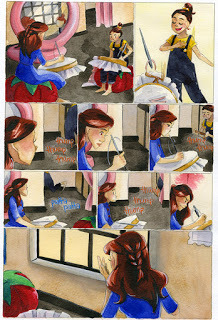
Left: Entire Page Toning to Set Scene Right: Individual Panel Toning to Set Mood
Entire page washes unify the entire page, and can be useful if you're working with a gamut of disparate colors.
Individual Panel washes can help establish environment, help with intense mood lighting and shadow, or help convey a specific emotion that may differ from the rest of the page.
Although the effect may seem overwhelming at the beginning, as the page comes together, it will start to make visual and narrative sense.
Toning Panels Demonstration:
Developement of Pages
These are selected pages from Chapter 7. Each photo was taken at the end of the day, or at the end of a specific stage.


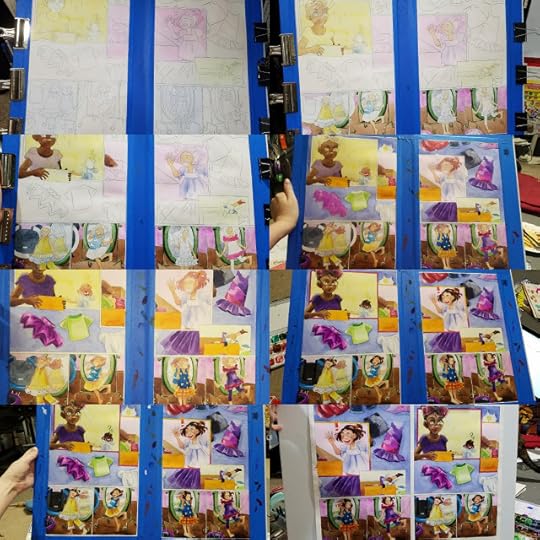
Panel Specific Washes:
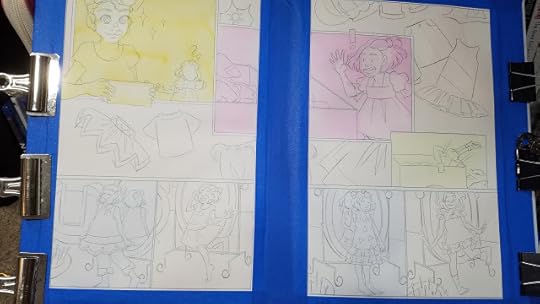
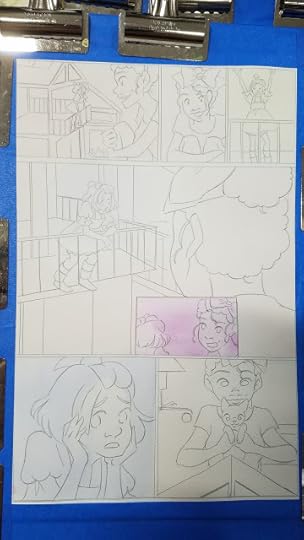
As you can see, as the panels develop, the initial tone ceases to be distracting, but still influences the overall panel.
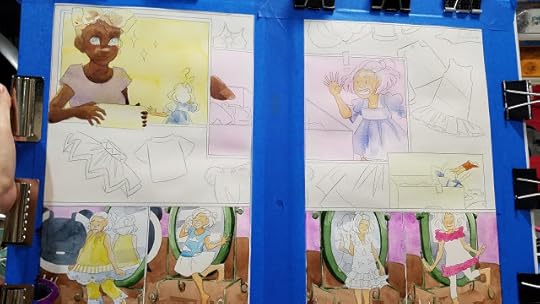
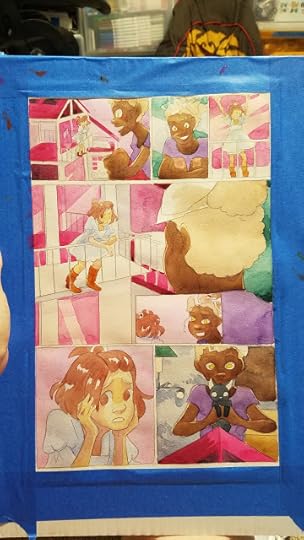
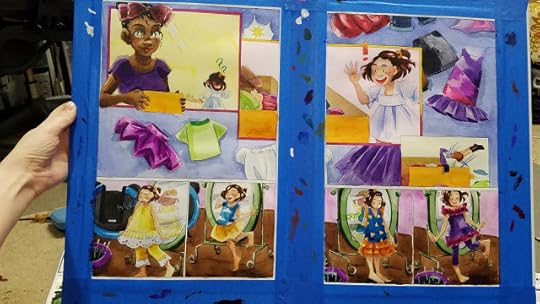
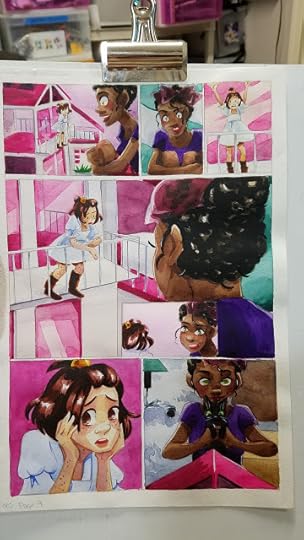
Once the pages are complete, the tones are almost indistinguishable but add a subtle color shift to individual panels.
Panel Specific Undertoning:
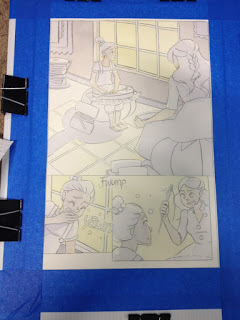

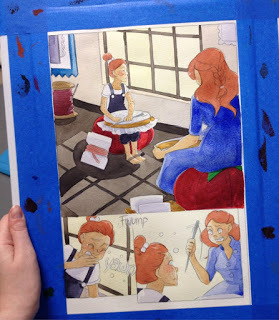
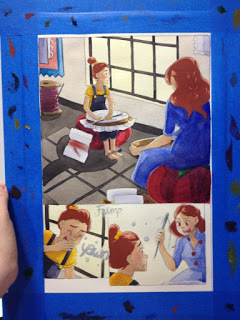
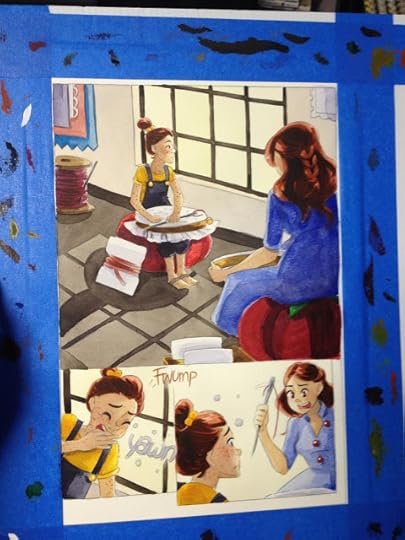
In this instance, early underglazes were used to help establish shadow that would influence later colors. This could not be applied as a glaze on top, because it would reactivate prior layers and cause muddiness.
Entire Page Washes:

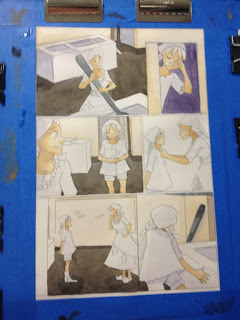
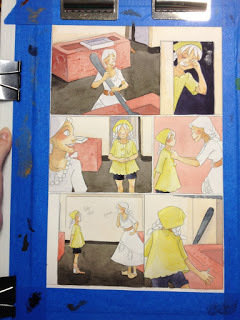
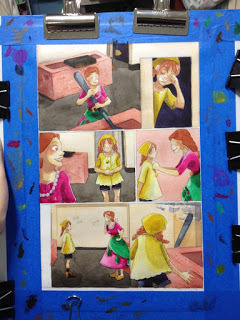

In this instance, a combination of entire page washes and single color undertones help unite all the panels on this page, and help convey a feeling of very early morning.
Useful techniques washes and toning:
Flat Washes:
The workhorse of page and panel toning.
Basic Flat Wash:
Exampls:
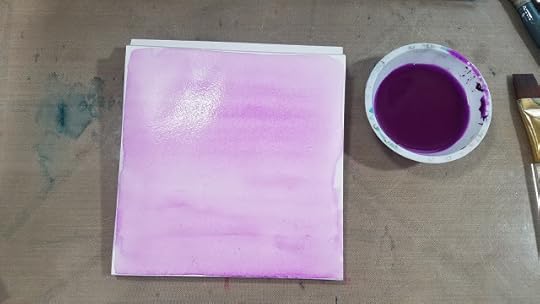
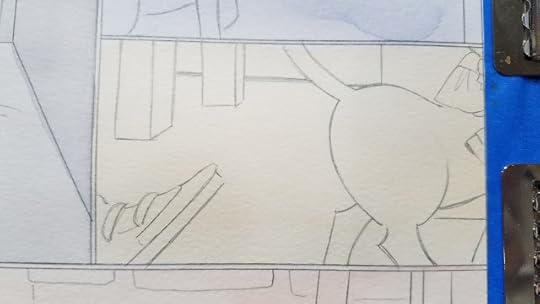
Graduated Washes:
Single Color:
Graduated Wash (Two Ways) Tutorial:
Examples:
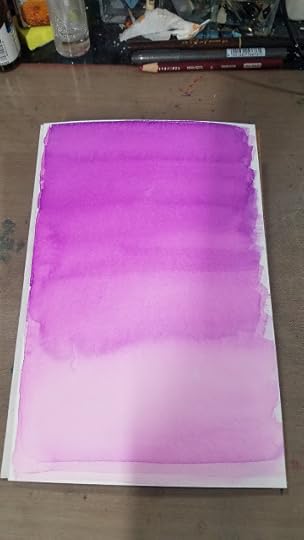
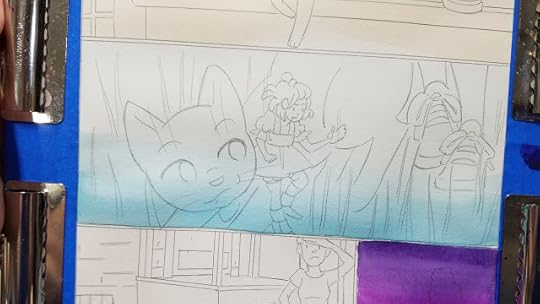
Multiple Color:
Multi Color Graduated Wash Tutorial:
Examples:
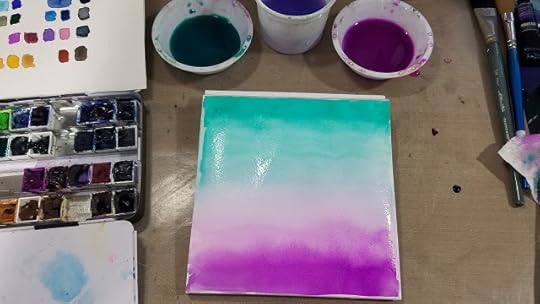
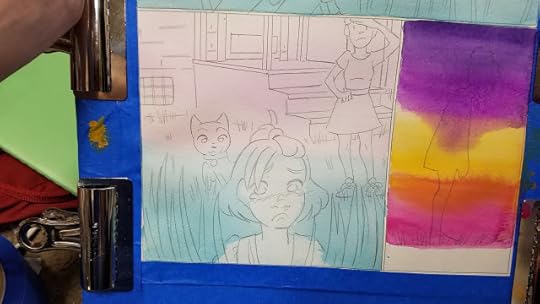
Variations on Graduated Washes:
Sky:
Watercolor Sky Tutorial:
Sunset:
Painting A Sunset- Watercolor Tutorial:
Examples:
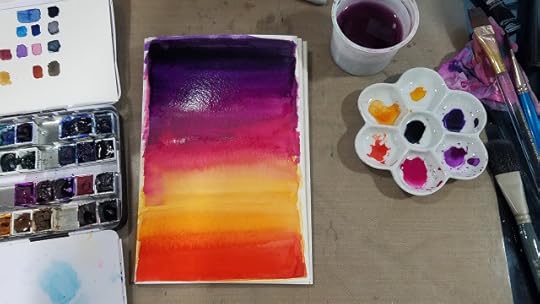

Lifting Color Mini Demonstration
Quick Wet into Wet Watercolor Techniques
Applying a Mask:
Materials Used:Winsor and Newton Masking FluidSynthetic BrushCup Clean WaterOld Masters Brush SoapMasking Fluid Pick UpWinsor and Newton Masking Fluid And Qor Watercolor Demonstration:

When applying a mask, I've found I have the best results when I use a synthetic brush that's been thorougly coated with brush soap. If you don't have brush soap handy, handsoap will work- you basically want to prevent the masking fluid from permeating the bristles. In natural hair brushes, masking fluid can ruin a good brush, so either use a ratty old brush, or a brush that's cheap enough that you don't feel bad tossing and replacing it should it get ruined.
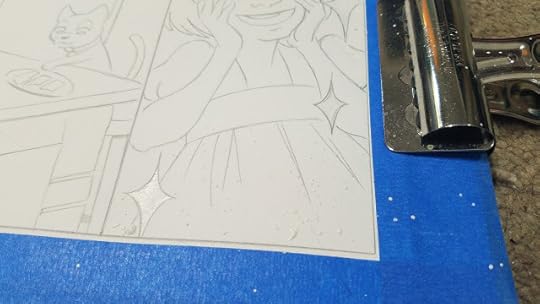
You can also use masking fluid to create random speckles of white. Prepare your brush as above, dip into your masking fluid, then gently tap your brush.

Some masking fluids have a colorant added to make them visible, but I've had issues with them staining the paper, so I prefer my masking fluid untinted.
Lifting a Too Dark Wash:
This technique is used to lift out Clouds in the Sky tutorial:
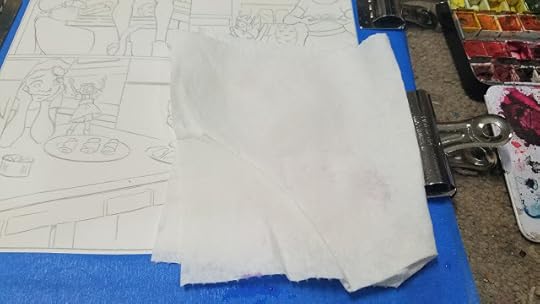
While watercolor is still wet, gently apply a paper towel or clean rag to the area you want to lift. If you'd like to add a texture, you can use a textured paper towel, terry cloth towel, or a sponge. Apply firm pressure, then remove.

Toning and Underglazing in a Single Panel:
In this panel, I really wanted to push a sparkly, shoujo effect to demonstrate Kara's delight. Areas I wanted to reserve have already been masked off with masking fluid, and the initial layer of tone has already been applied.
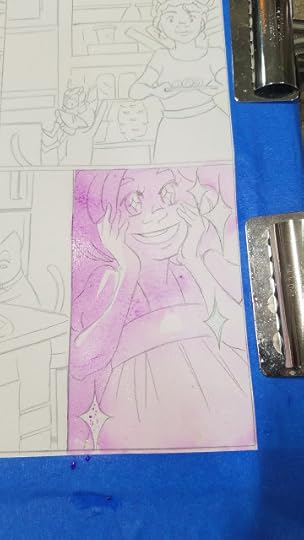
I block in the shadows using the same color I initially toned with.
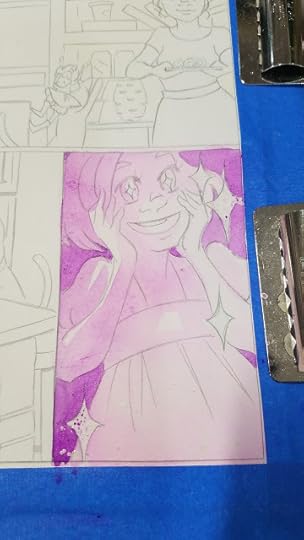
Once dry, I go in again, darker some shadows a bit more (like beneath the neck) and darken the background).
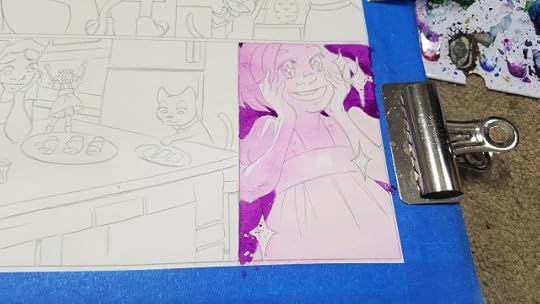
Once that has dried, I decide to paint the background in masstone SoHo Permanent Mauve, so the difference between toning and background is more pronounced.
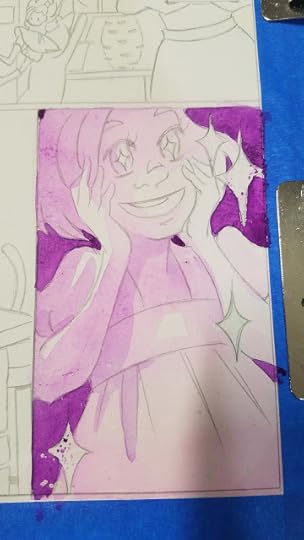
Finished panel.
I hope you found this overview of washes and toning pages and panels to be helpful and informative. If you enjoyed this post, please check out my other posts in my Watercolor Basics series, and please spread the word! If you ever have any questions, or need to see something demonstrated in depth, don't hesitate to email or Tweet me.
Posts like this are only made possible through the generosity of my Artnerds on Patreon.

Artnerds see early access videos, weekly Newsletters, and backer exclusives like free comics and art assets. Their financial support enables me to purchase supplies for review, and their emotional support enables me to devote the time necessary to maintaining this blog and providing art educational resources free of charge. Their help is hugely invaluable, and I would love it if you considered joining their ranks.
Please consider donating to this blog or purchasing from Natto-shop (http://nattosoup.com/shop) if you want me to continue publishing quality content. All materials tested were purchased from my own pocket. Keep on Truckin' Nattosoup is not under any sponsorship.
This post is part of my Watercolor Basics Series!

This series of tutorials and reviews spans this blog as well as my Youtube Channel.

My Watercolor Basics course is designed to get you guys painting! I start at the very beginning (papers, paints, and brushes) and walk you through every step. Video tutorials help demonstrate techniques in real time, and timelapses provide inspiration and motivation to keep you painting.
All this is based on my experience painting 7" Kara, my watercolor webcomic!

7" Kara is a charming all ages watercolor comic that follows the adventures of diminutive Kara as she explores the outside world and makes some huge friendships. 7" Kara updates with a new page every Friday!
Speaking of 7" Kara, every single page of 7" Kara sees either an all over wash of color, or individual panel washes.
Toning Your Pages and Toning Your Panels:
Toning is simply watercolor washes, or glazes, and may include:
Flat washes
Graduated washes
Wet into wet techniques
Glazing
Reasons to tone:
Set mood in individual panel
Set overall mood on page/scene
Establish Shadows and Underglazes that might not otherwise be possible or feasible
 A bright, warm yellow underglaze helps establish this scene as 'morning'
 Single panel toning doesn't reflect the background, but does reflect the mood- such as the warm pink panel on the lefthand side, or the aura around the handshake on the left.
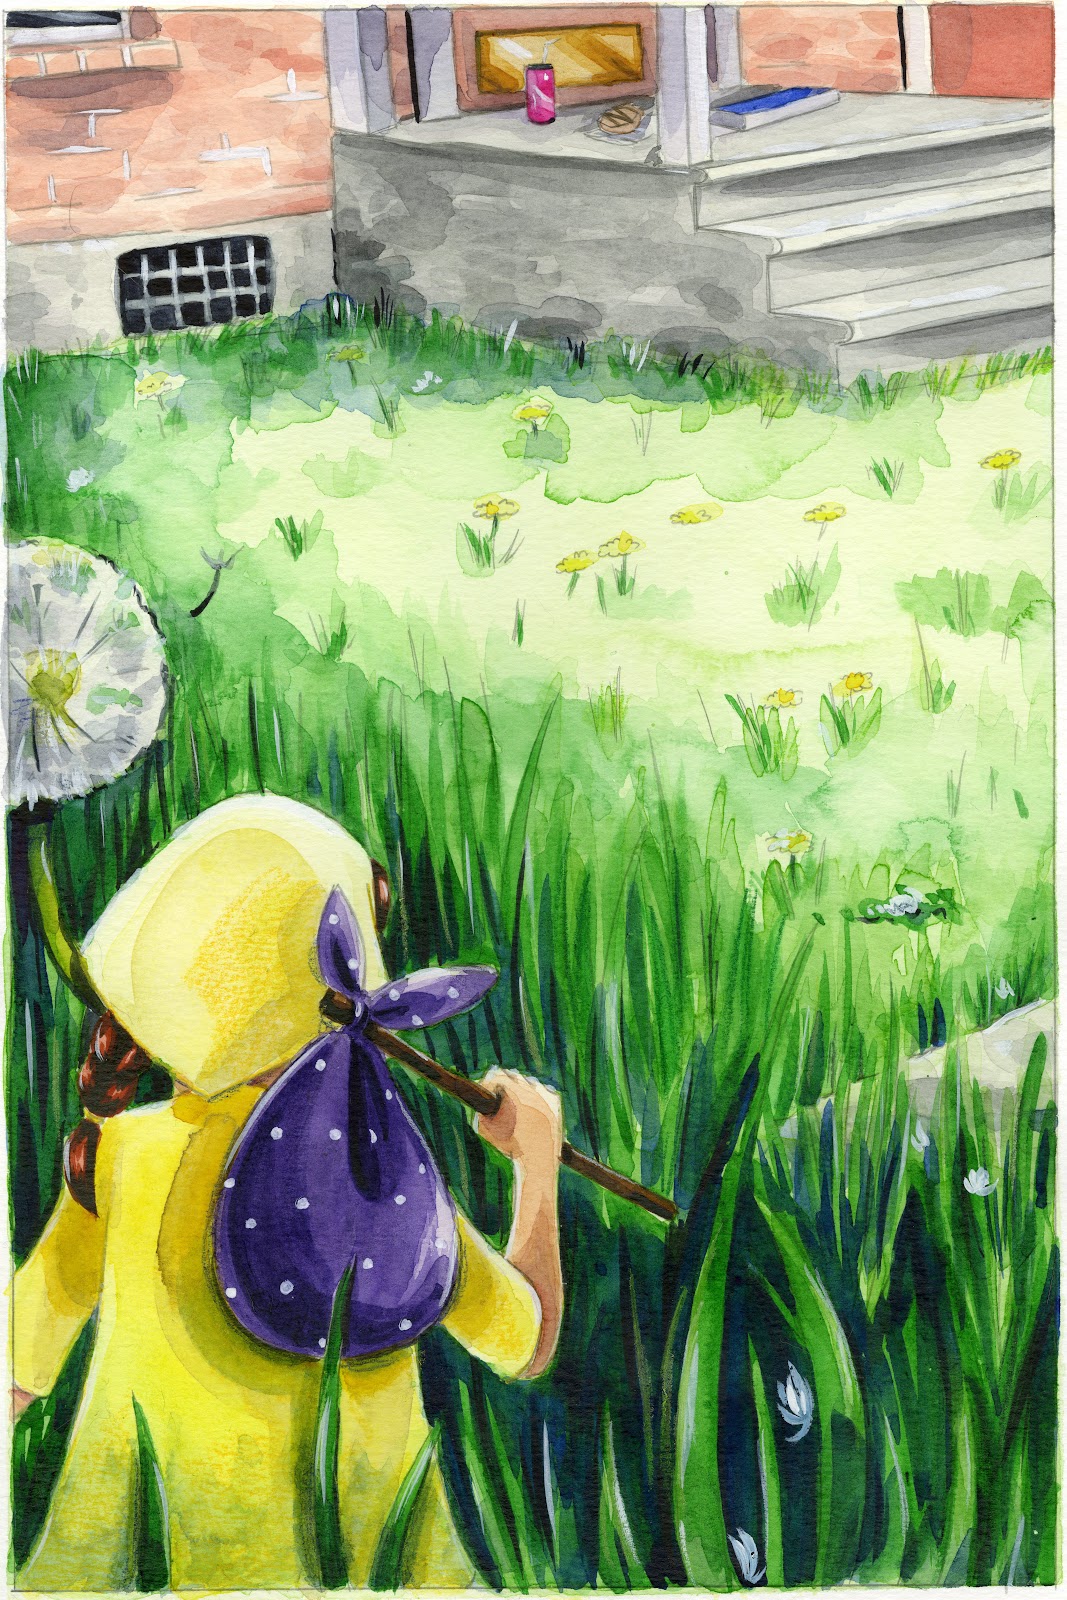
 This spread has blue green undertones (most noticable on Kara, bottom left hand corner) that wouldn't be feasible as a glaze once the yellow was completed.
Entire Page Washes Vs Individual Panel Washes


Left: Entire Page Toning to Set Scene Right: Individual Panel Toning to Set Mood
Entire page washes unify the entire page, and can be useful if you're working with a gamut of disparate colors.
Individual Panel washes can help establish environment, help with intense mood lighting and shadow, or help convey a specific emotion that may differ from the rest of the page.
Although the effect may seem overwhelming at the beginning, as the page comes together, it will start to make visual and narrative sense.
Toning Panels Demonstration:
Developement of Pages
These are selected pages from Chapter 7. Each photo was taken at the end of the day, or at the end of a specific stage.
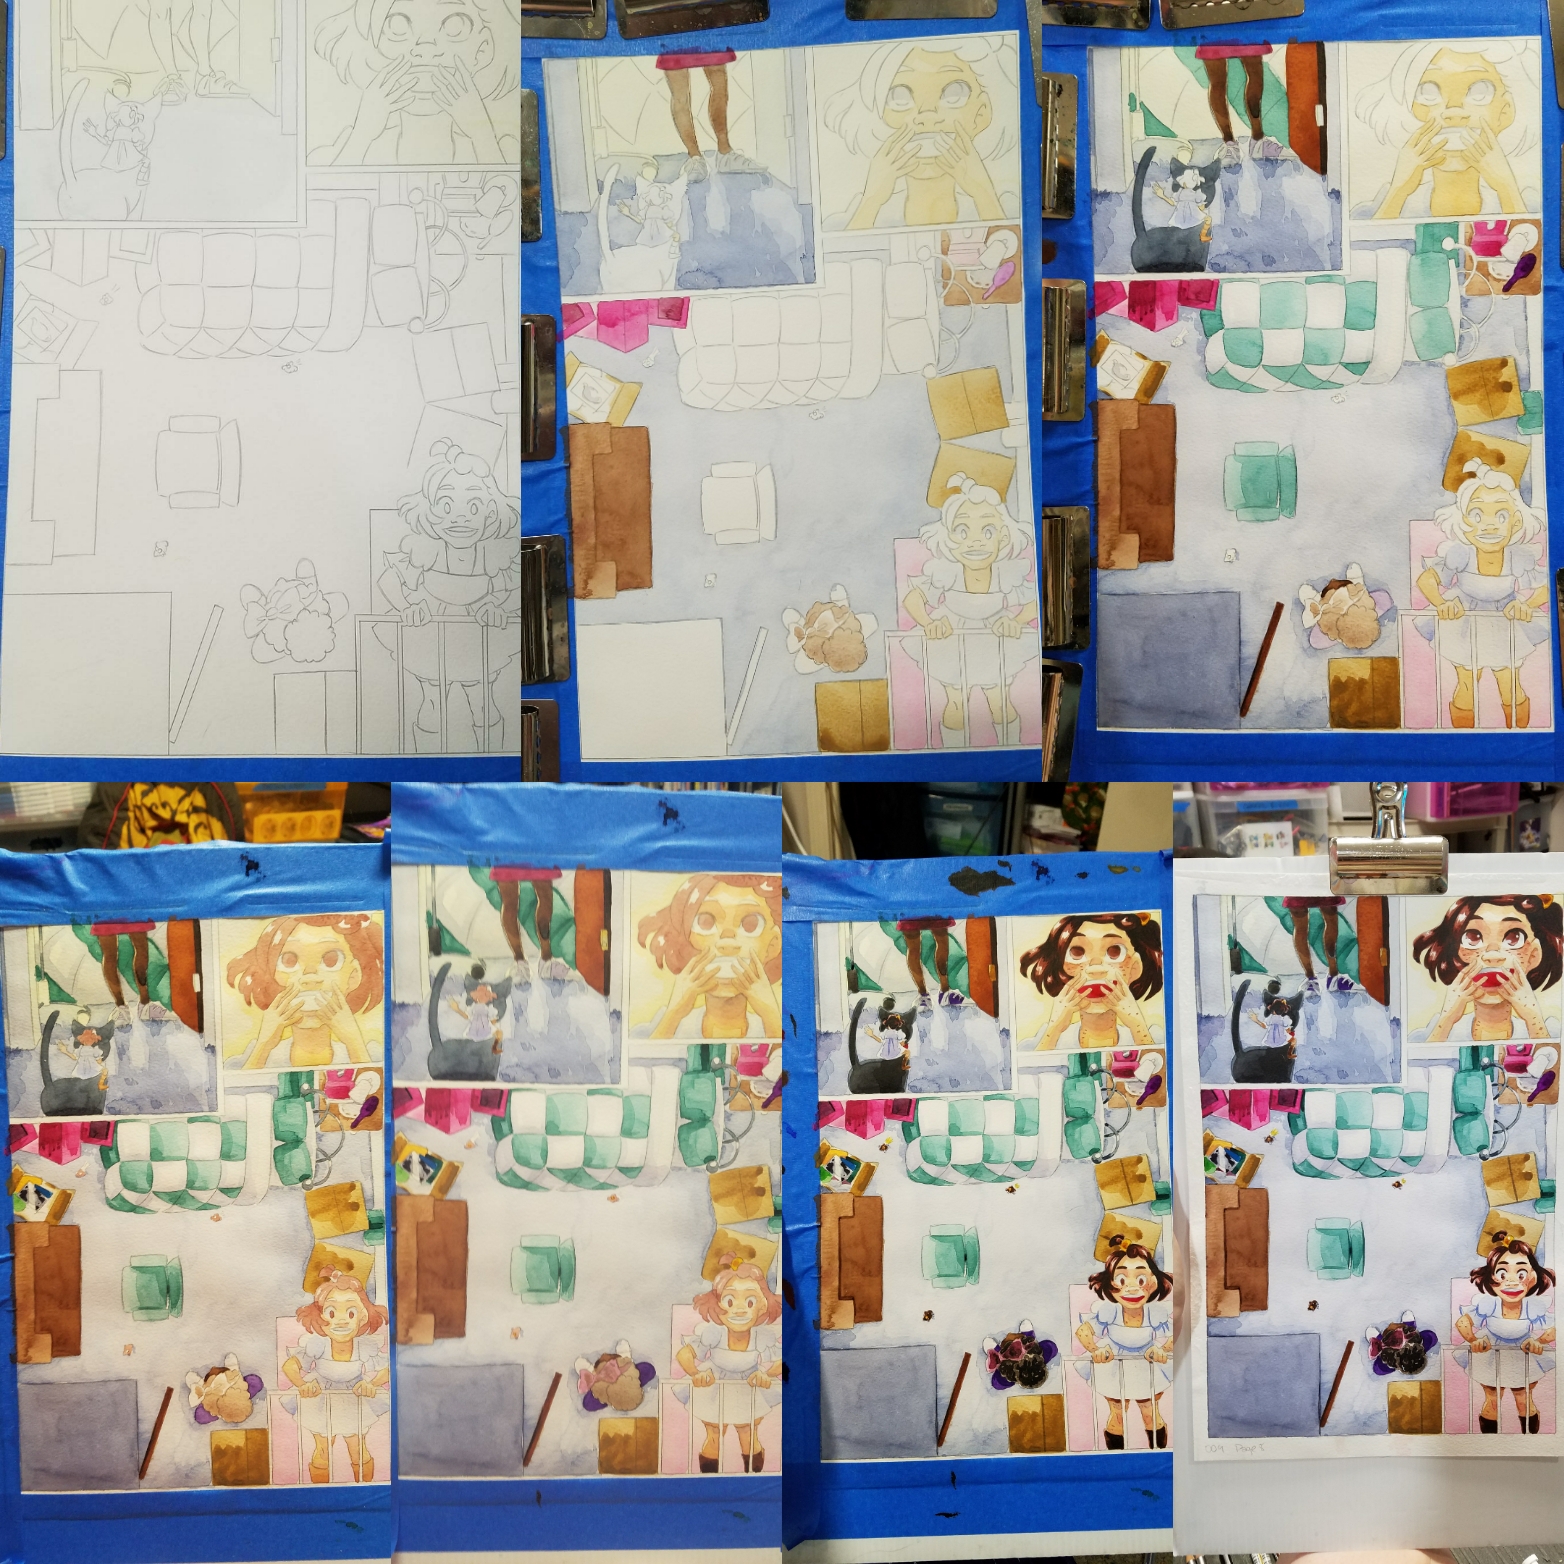
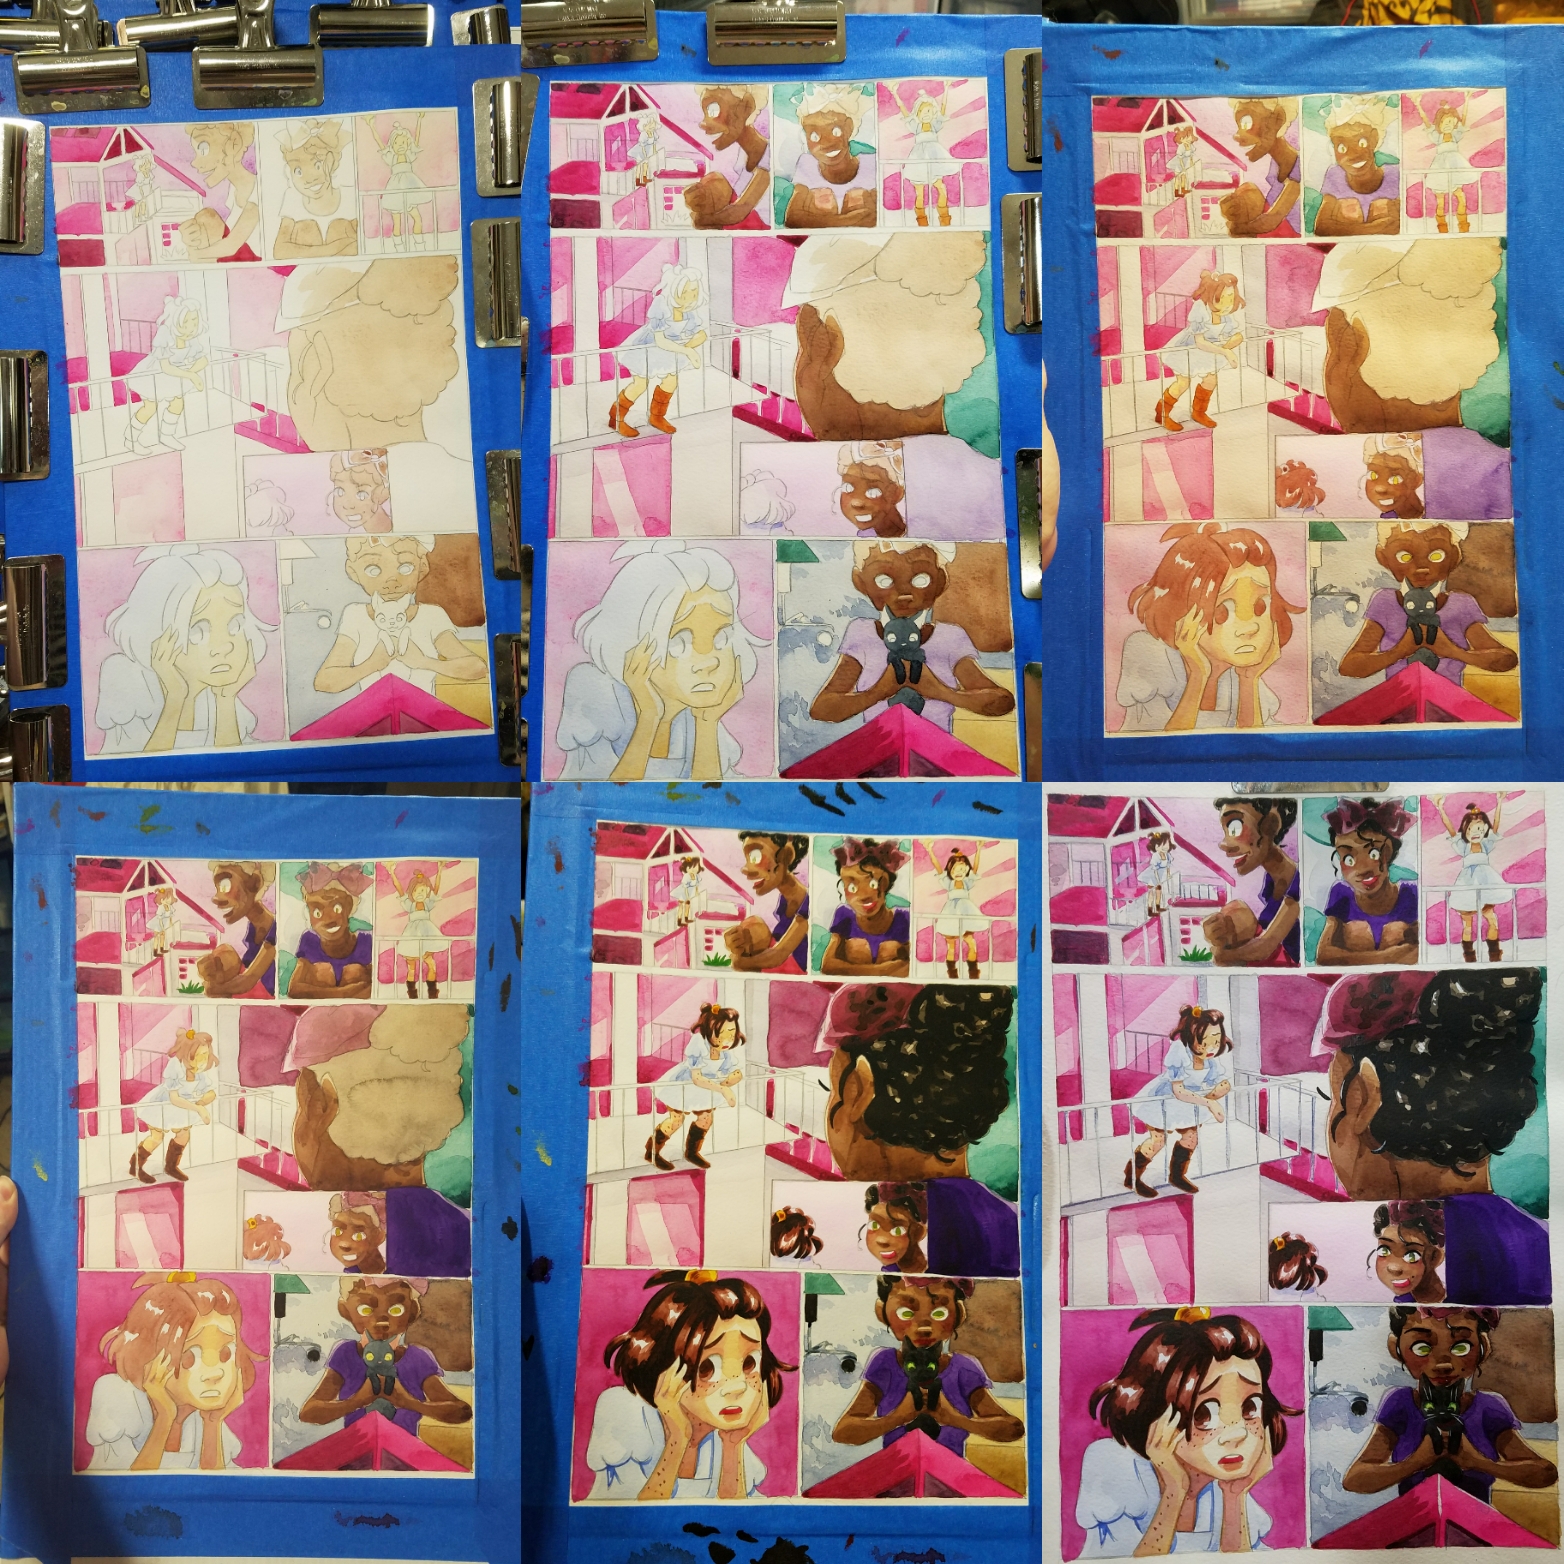

Panel Specific Washes:


As you can see, as the panels develop, the initial tone ceases to be distracting, but still influences the overall panel.


Once the pages are complete, the tones are almost indistinguishable but add a subtle color shift to individual panels.
Panel Specific Undertoning:

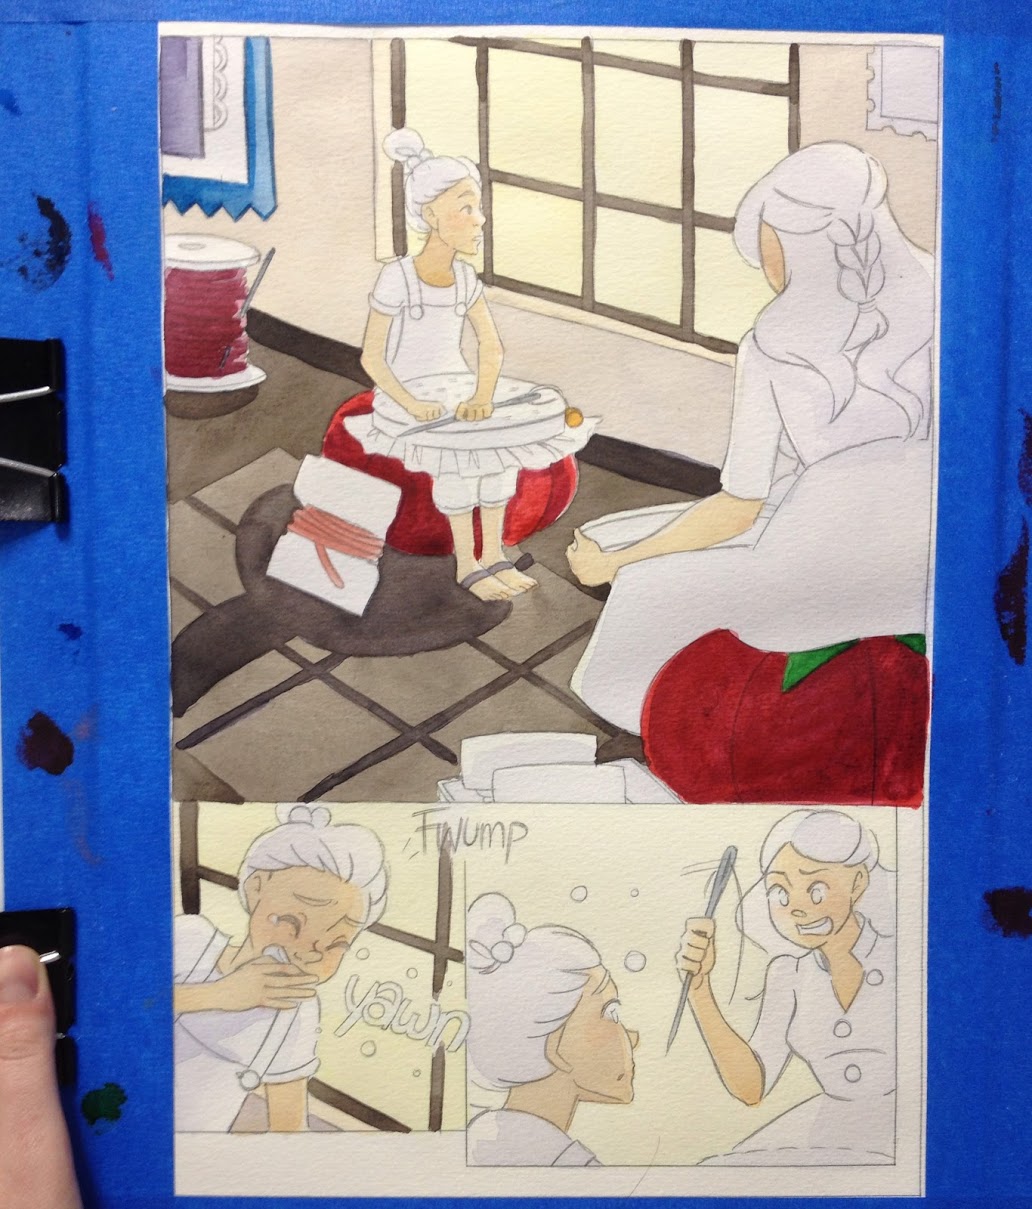


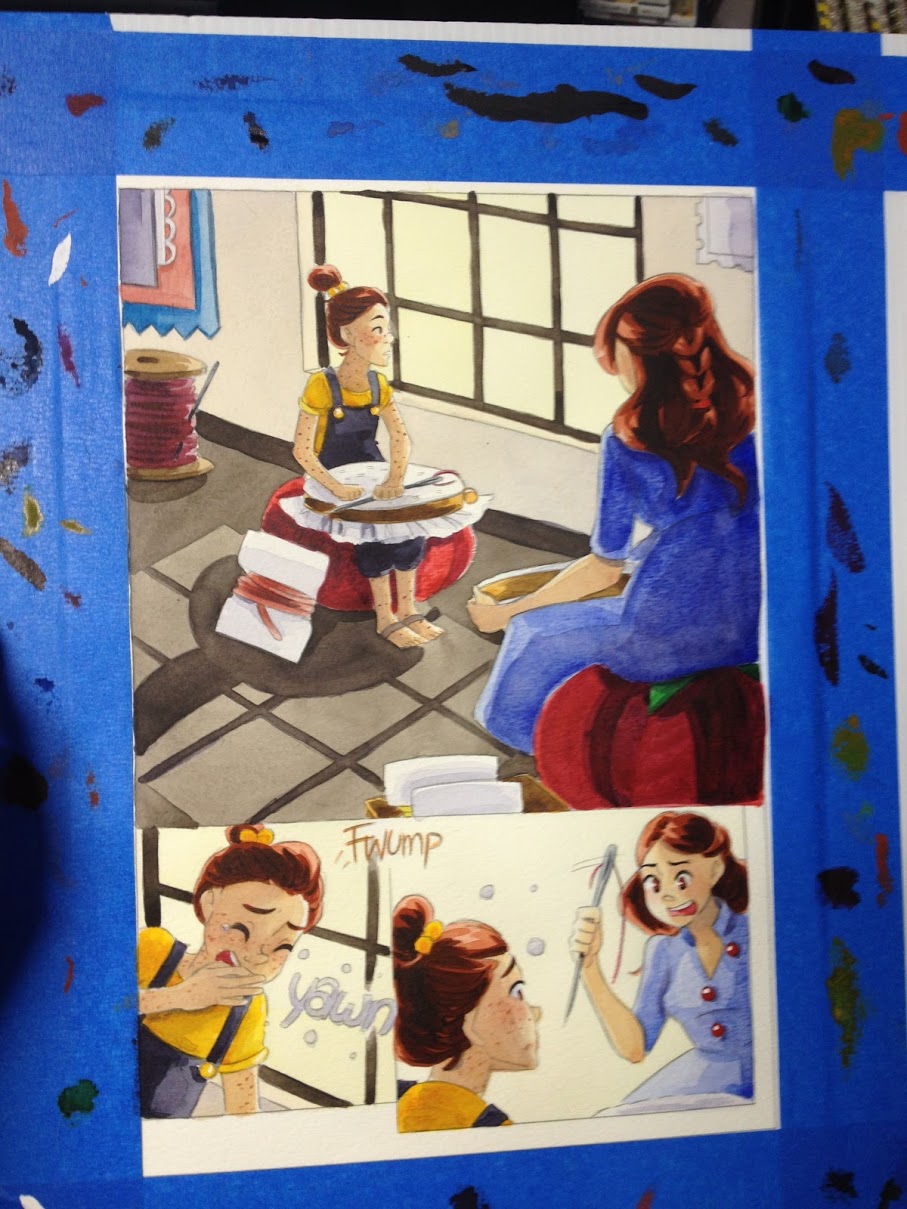
In this instance, early underglazes were used to help establish shadow that would influence later colors. This could not be applied as a glaze on top, because it would reactivate prior layers and cause muddiness.
Entire Page Washes:
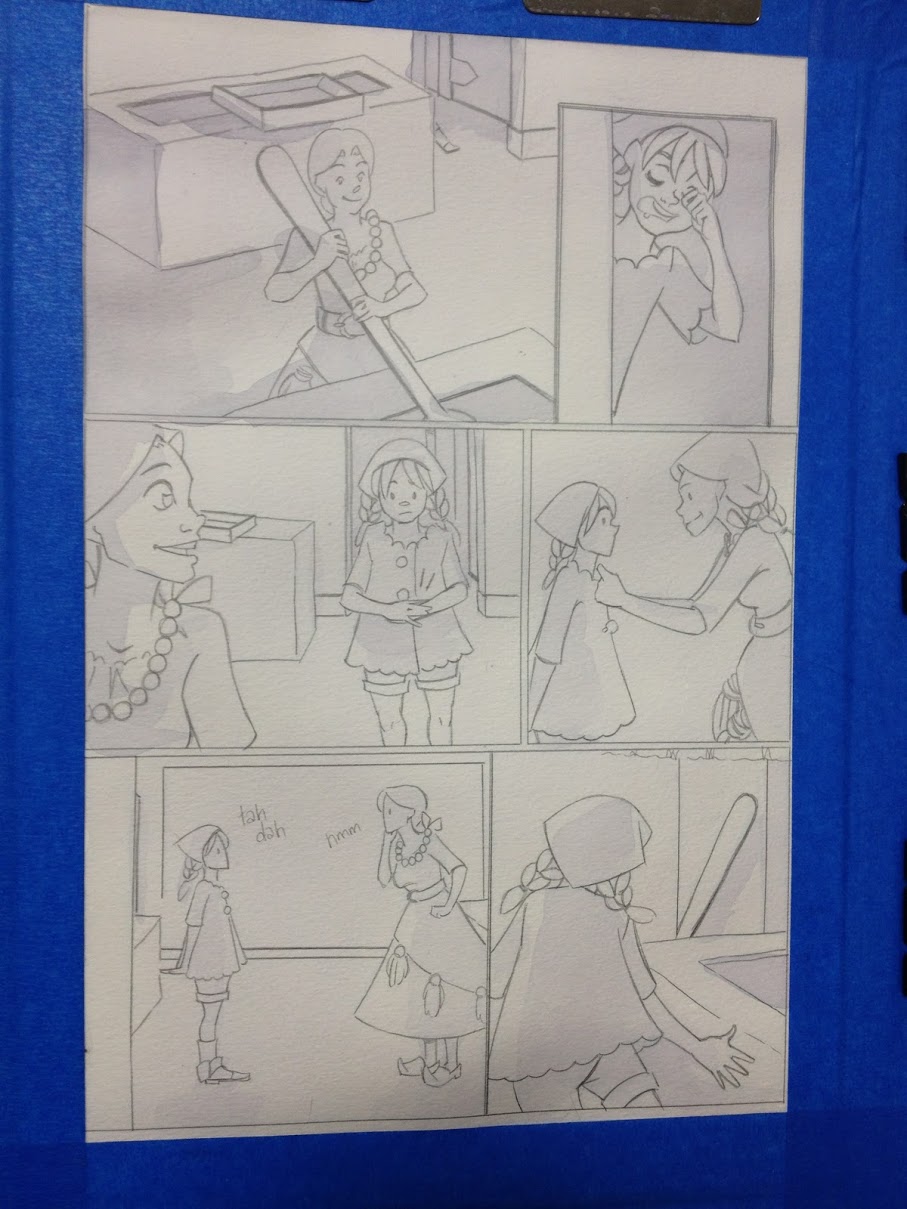

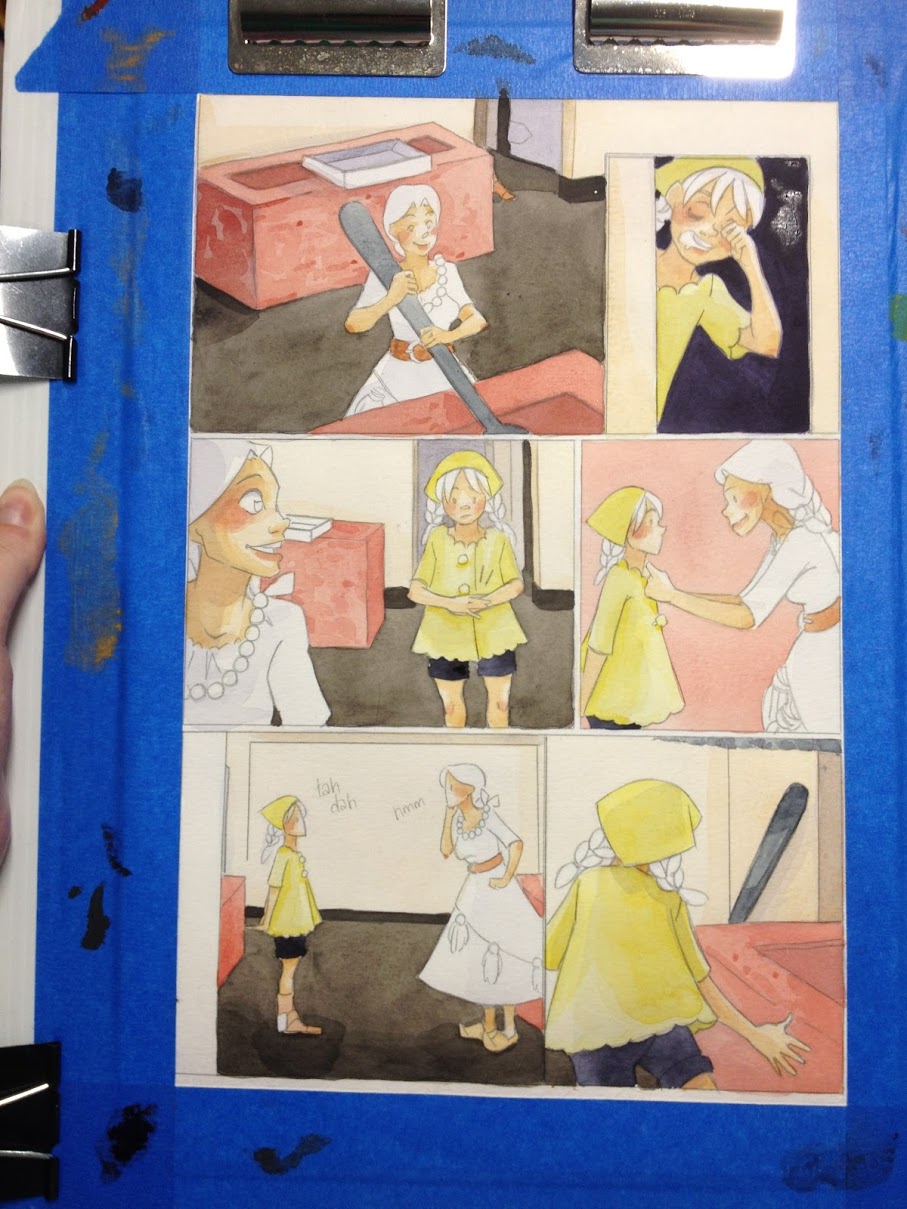

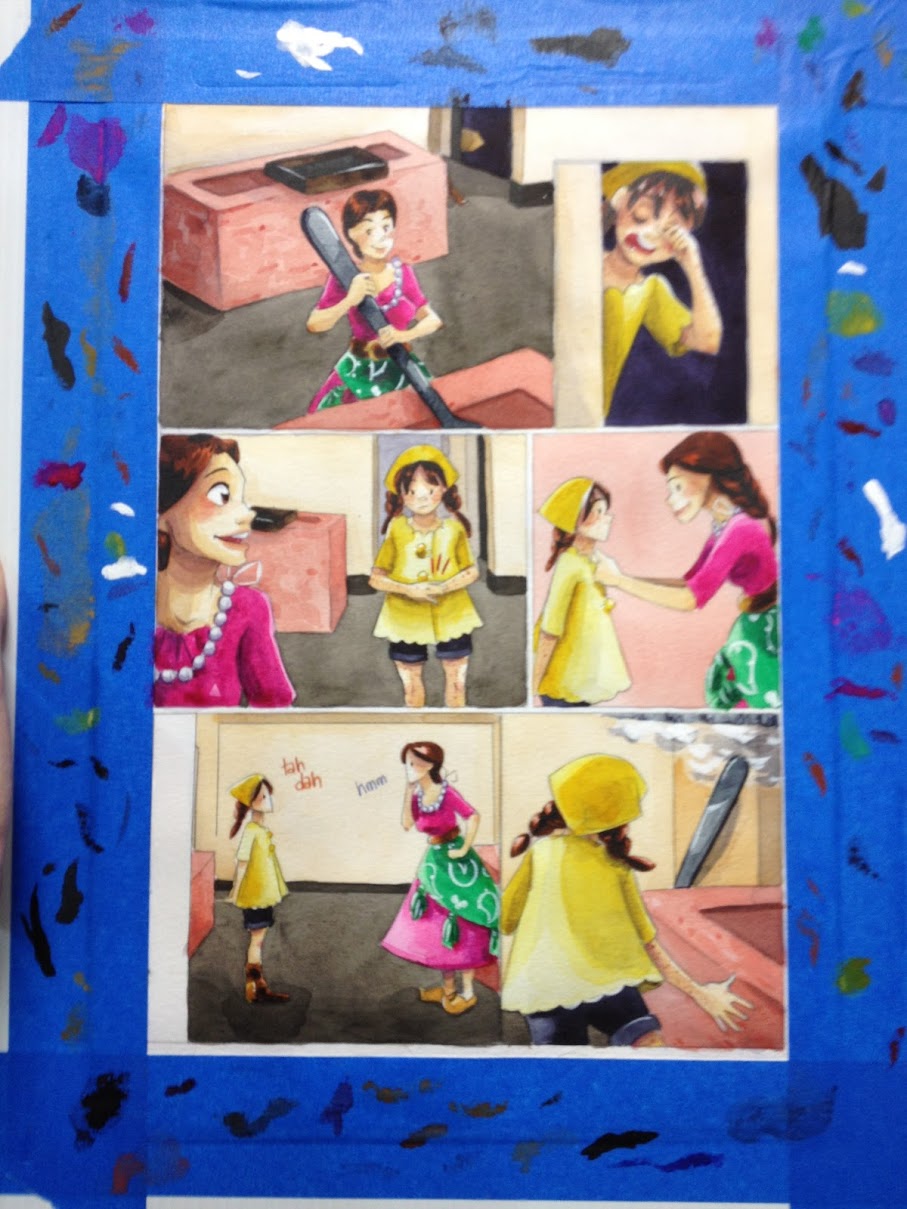
In this instance, a combination of entire page washes and single color undertones help unite all the panels on this page, and help convey a feeling of very early morning.
Useful techniques washes and toning:
Flat Washes:
The workhorse of page and panel toning.
Basic Flat Wash:
Exampls:

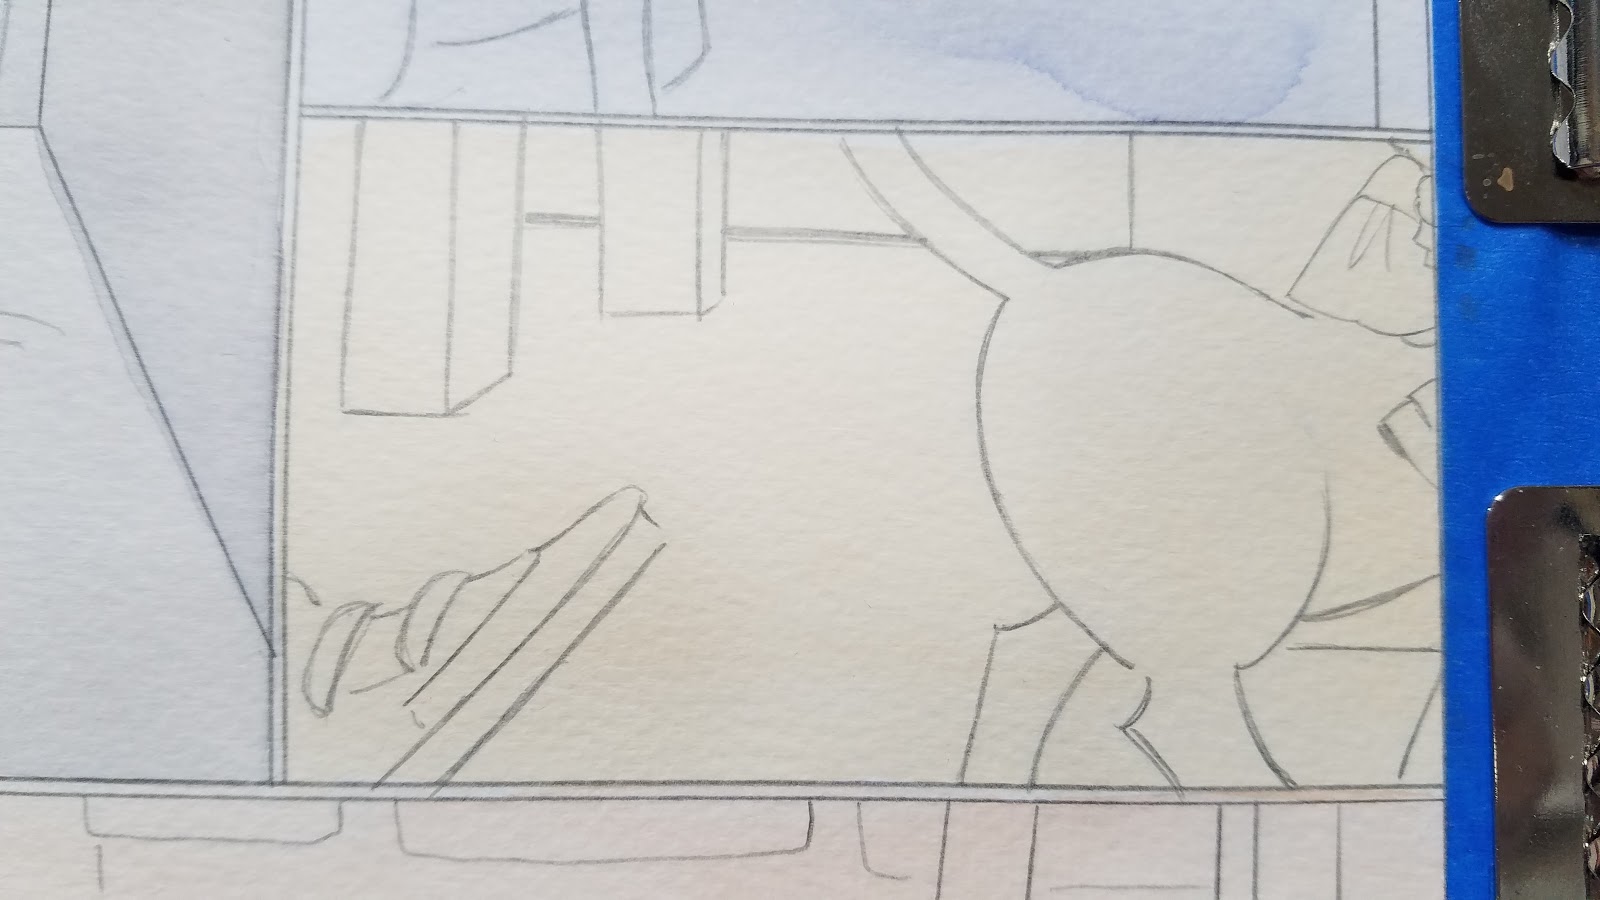
Graduated Washes:
Single Color:
Graduated Wash (Two Ways) Tutorial:
Examples:
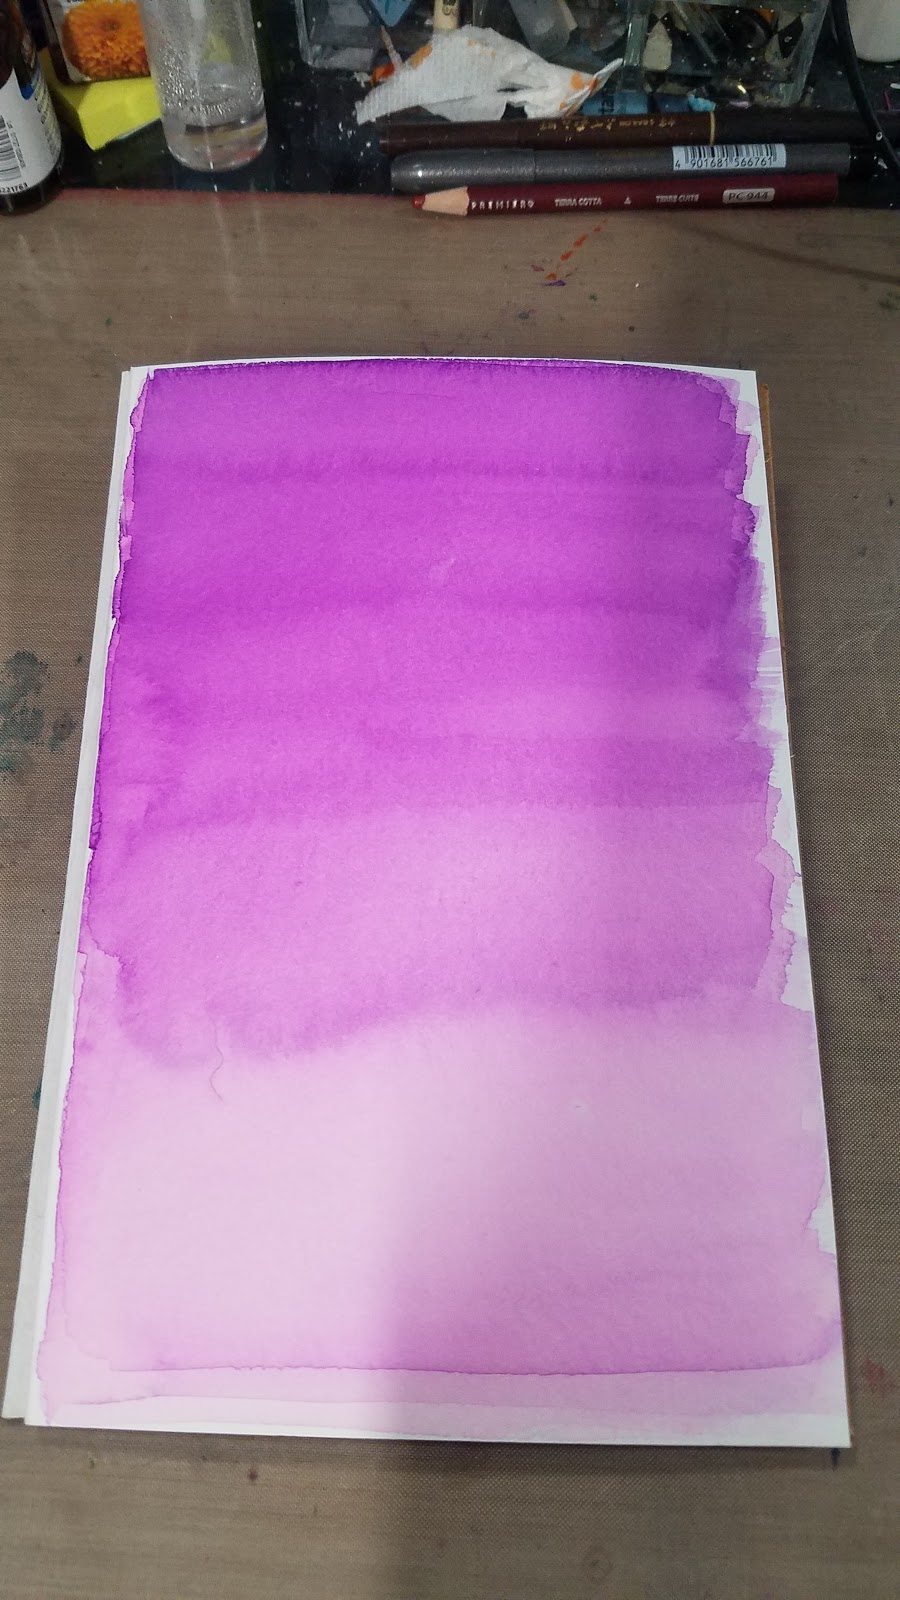

Multiple Color:
Multi Color Graduated Wash Tutorial:
Examples:


Variations on Graduated Washes:
Sky:
Watercolor Sky Tutorial:
Sunset:
Painting A Sunset- Watercolor Tutorial:
Examples:
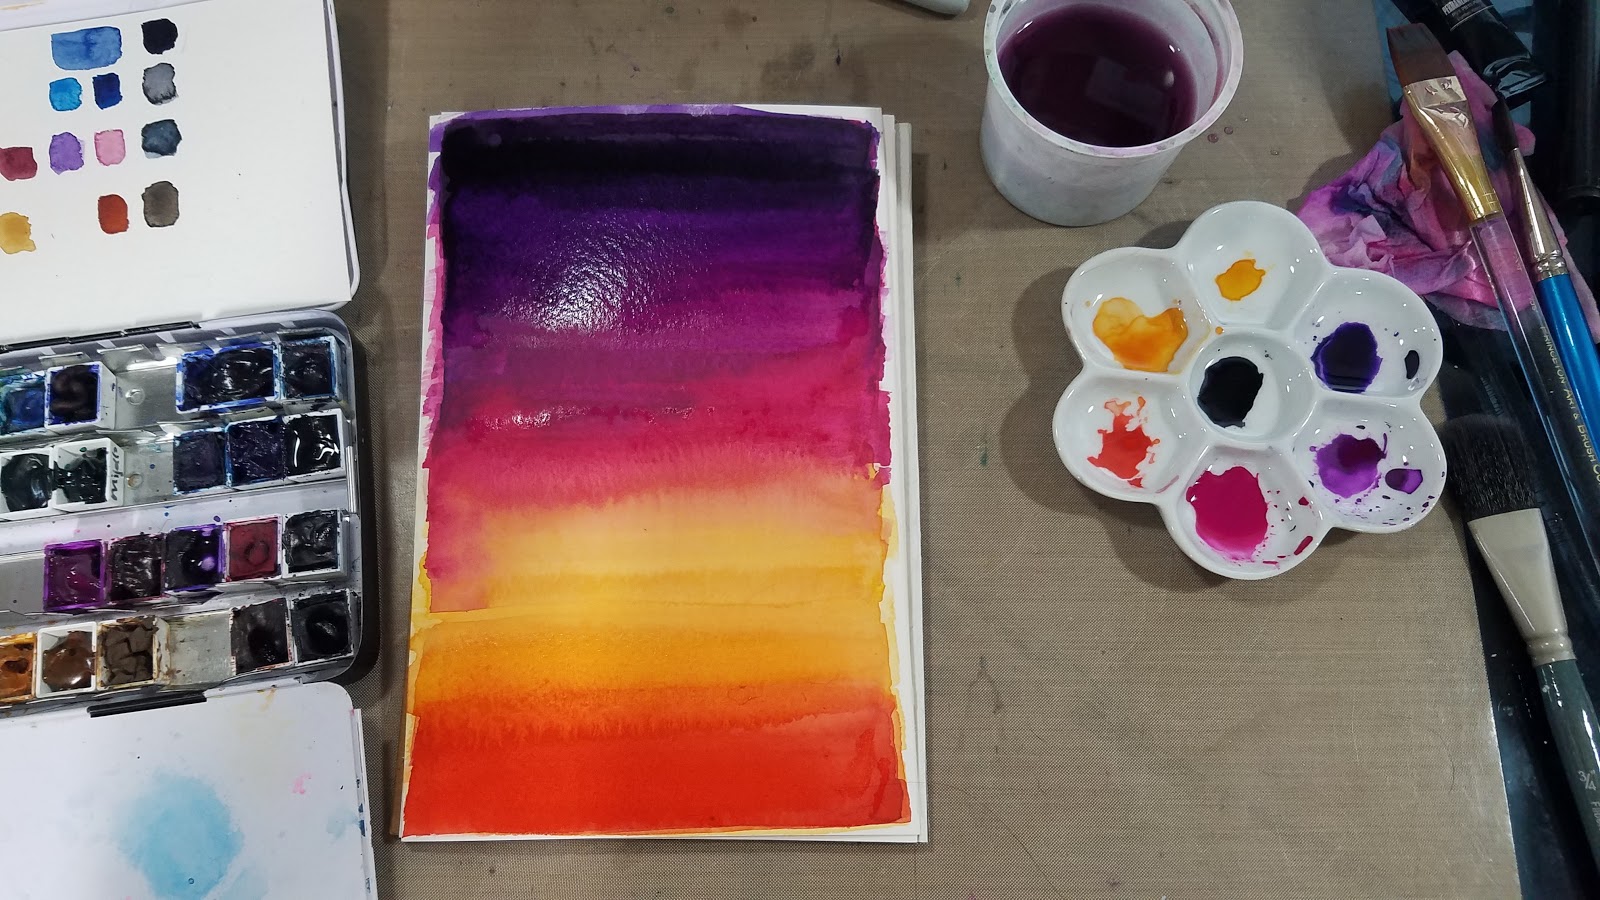
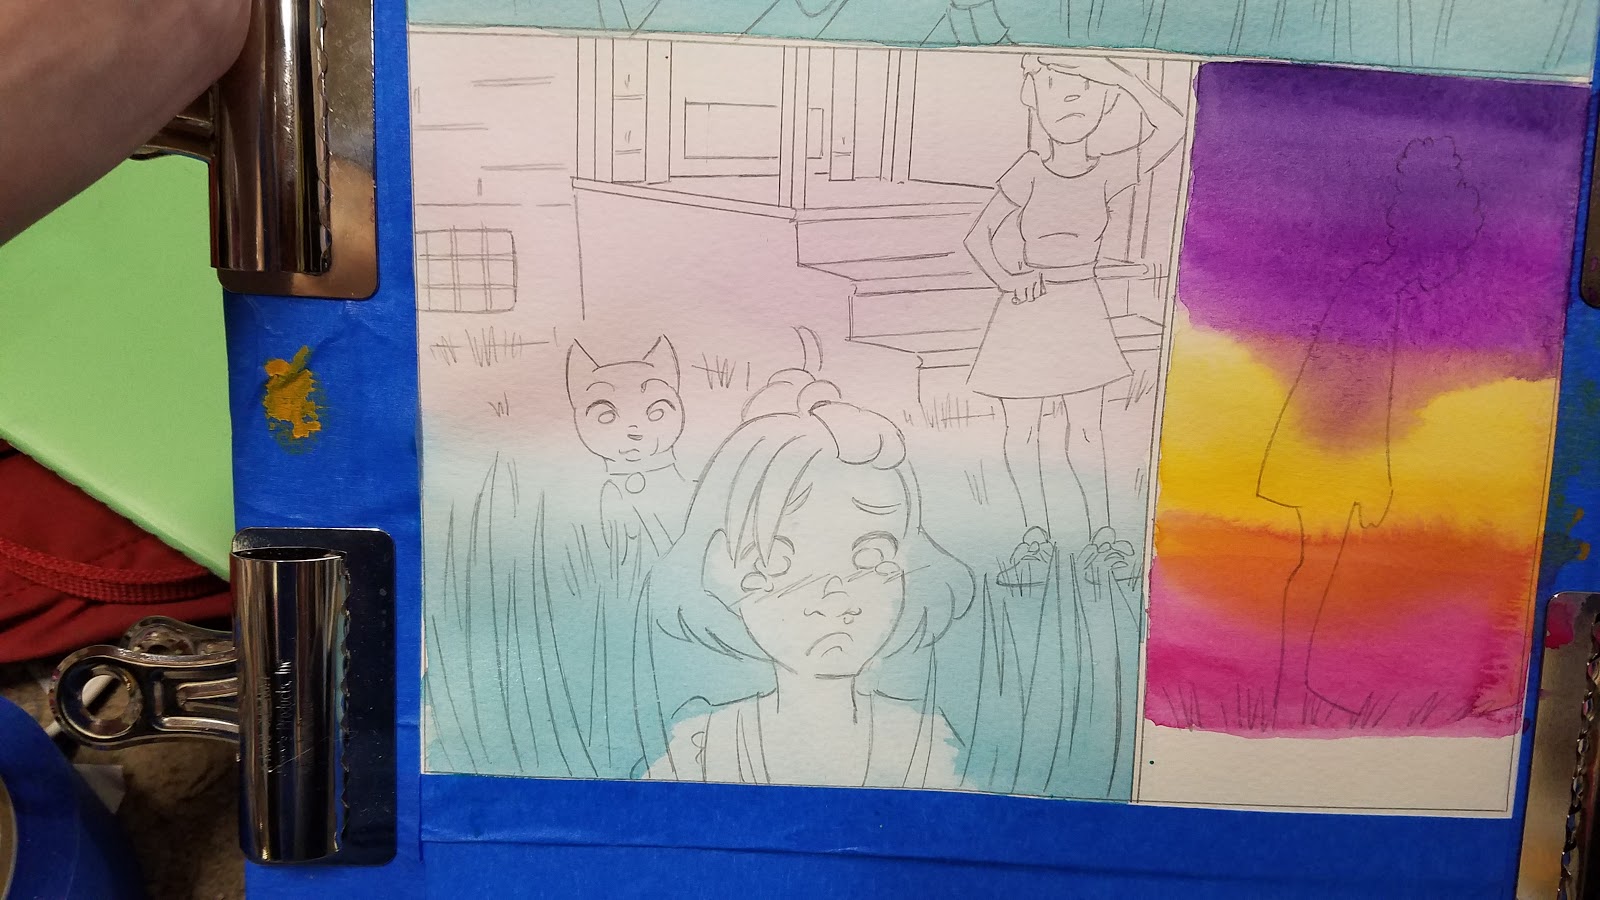
Lifting Color Mini Demonstration
Quick Wet into Wet Watercolor Techniques
Applying a Mask:
Materials Used:Winsor and Newton Masking FluidSynthetic BrushCup Clean WaterOld Masters Brush SoapMasking Fluid Pick UpWinsor and Newton Masking Fluid And Qor Watercolor Demonstration:
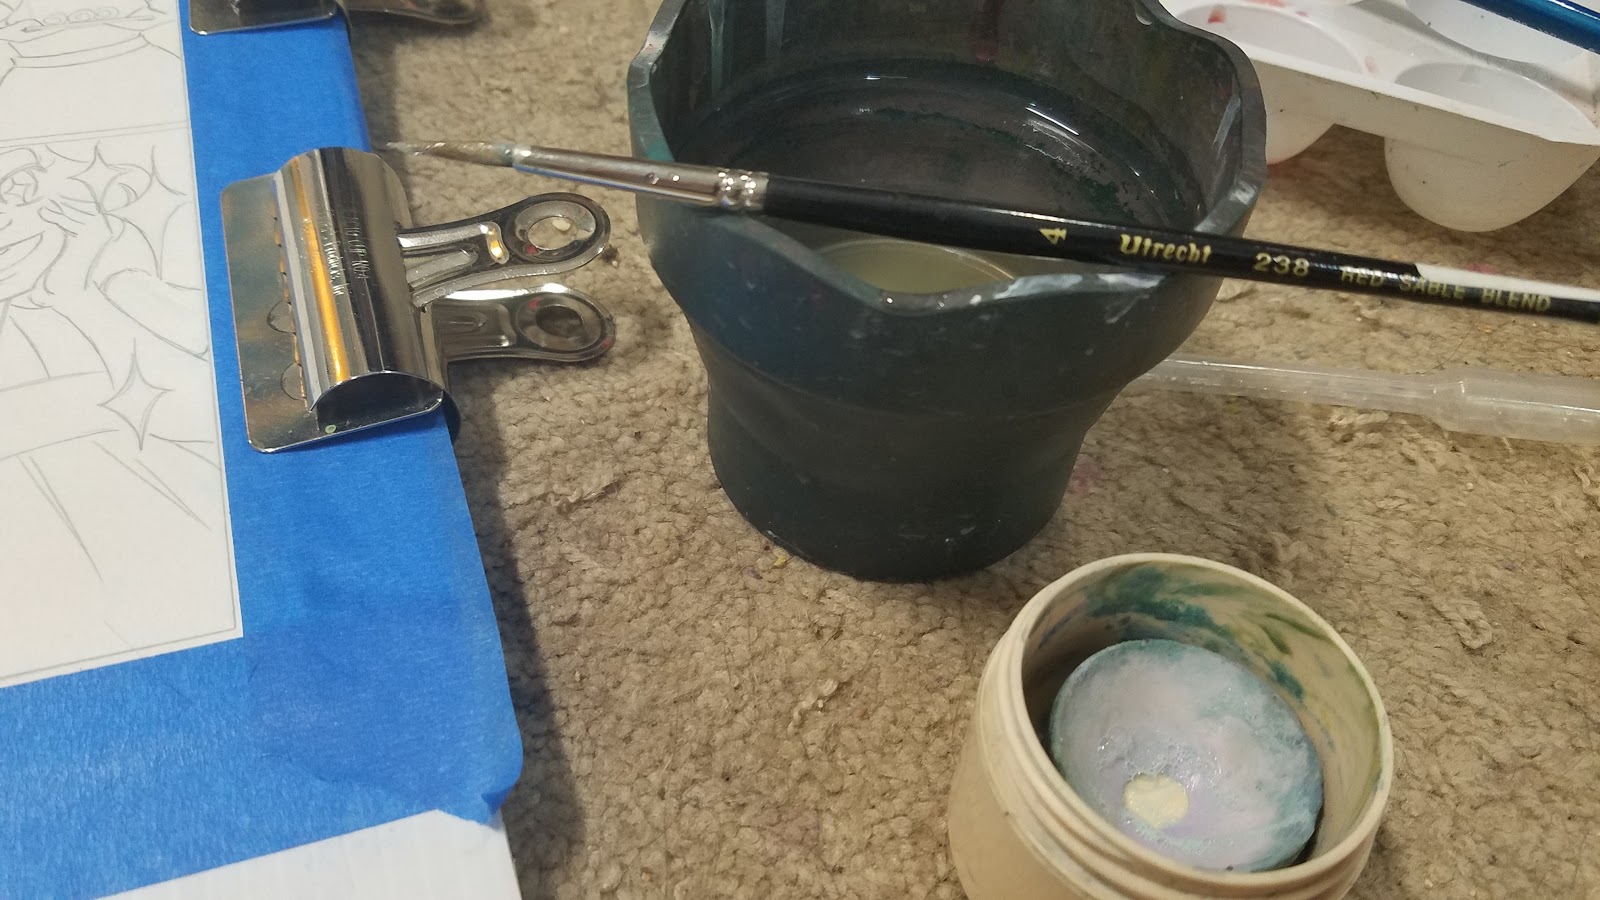
When applying a mask, I've found I have the best results when I use a synthetic brush that's been thorougly coated with brush soap. If you don't have brush soap handy, handsoap will work- you basically want to prevent the masking fluid from permeating the bristles. In natural hair brushes, masking fluid can ruin a good brush, so either use a ratty old brush, or a brush that's cheap enough that you don't feel bad tossing and replacing it should it get ruined.

You can also use masking fluid to create random speckles of white. Prepare your brush as above, dip into your masking fluid, then gently tap your brush.
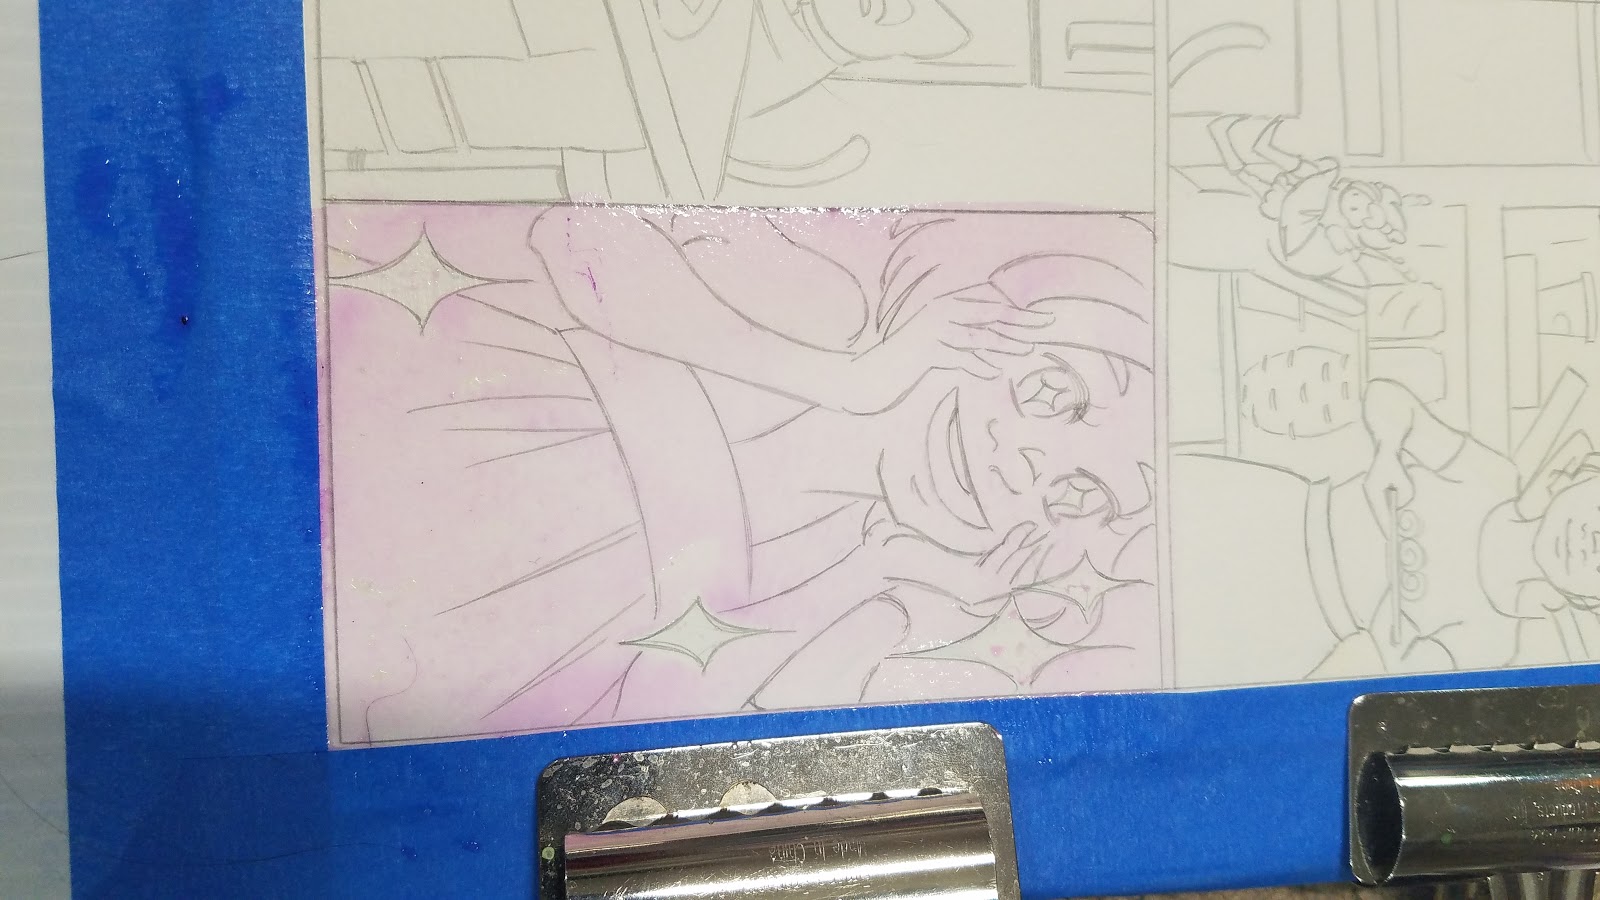
Some masking fluids have a colorant added to make them visible, but I've had issues with them staining the paper, so I prefer my masking fluid untinted.
Lifting a Too Dark Wash:
This technique is used to lift out Clouds in the Sky tutorial:

While watercolor is still wet, gently apply a paper towel or clean rag to the area you want to lift. If you'd like to add a texture, you can use a textured paper towel, terry cloth towel, or a sponge. Apply firm pressure, then remove.
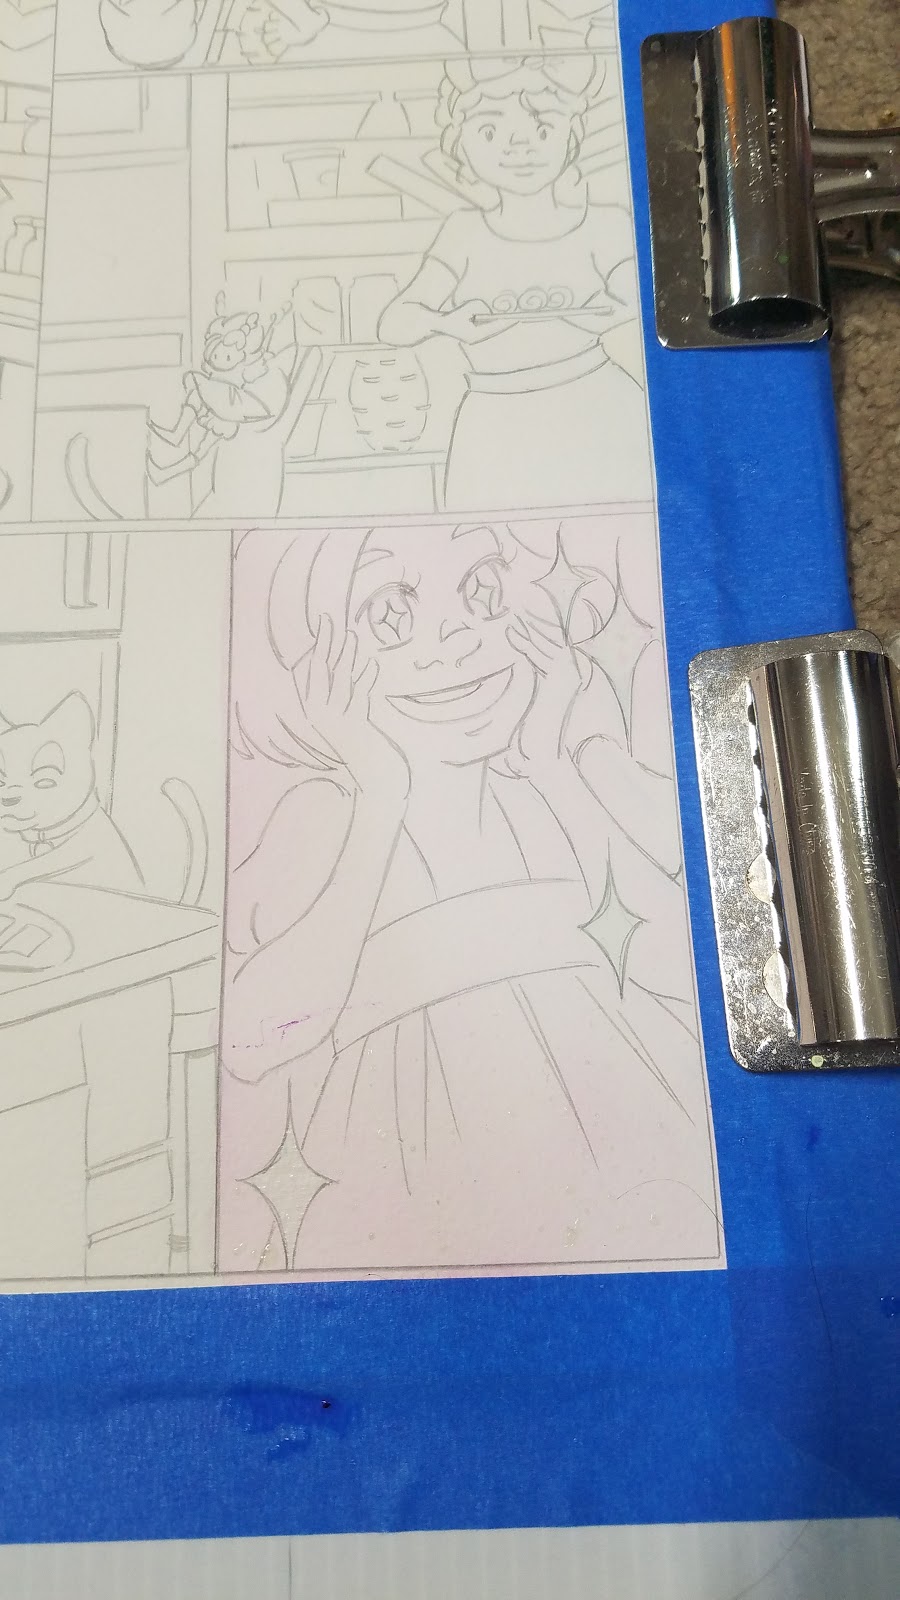
Toning and Underglazing in a Single Panel:
In this panel, I really wanted to push a sparkly, shoujo effect to demonstrate Kara's delight. Areas I wanted to reserve have already been masked off with masking fluid, and the initial layer of tone has already been applied.

I block in the shadows using the same color I initially toned with.

Once dry, I go in again, darker some shadows a bit more (like beneath the neck) and darken the background).

Once that has dried, I decide to paint the background in masstone SoHo Permanent Mauve, so the difference between toning and background is more pronounced.

Finished panel.
I hope you found this overview of washes and toning pages and panels to be helpful and informative. If you enjoyed this post, please check out my other posts in my Watercolor Basics series, and please spread the word! If you ever have any questions, or need to see something demonstrated in depth, don't hesitate to email or Tweet me.
Posts like this are only made possible through the generosity of my Artnerds on Patreon.

Artnerds see early access videos, weekly Newsletters, and backer exclusives like free comics and art assets. Their financial support enables me to purchase supplies for review, and their emotional support enables me to devote the time necessary to maintaining this blog and providing art educational resources free of charge. Their help is hugely invaluable, and I would love it if you considered joining their ranks.
Please consider donating to this blog or purchasing from Natto-shop (http://nattosoup.com/shop) if you want me to continue publishing quality content. All materials tested were purchased from my own pocket. Keep on Truckin' Nattosoup is not under any sponsorship.
January 22, 2018
Painting Your Comics: Watercolor Basics
At this point, my Watercolor Basics series intersects with my Intro to Comic Craft: Step by Step series. If you've followed along with Intro to Comic Craft, you should have comic roughs ready to either print out and ink, or print out and paint. And if you've been following along with Watercolor Basics, you should have your images converted to bluelines, and know the paper settings for printing on watercolor paper at home (link), and have your pages penciled (link). You should also know how to stretch your watercolor comic pages.
You should also have completed a few standalone watercolor illustrations using the steps covered in the Step by Step portion of Watercolor Basics. I high recommend practicing before you dive into pages- watercolor gets easier with practice!
If you've done these things, you're definitely ready to start painting your own watercolor comics!
This post is part of my ongoing Watercolor Basics series! If you're interested in learning how to watercolor, or watercoloring your comic pages, you've come to the right place! For step by step tutorials on just about everything, check out the Watercolor Basics hubpage. If you'd like a more detailed demonstration or tutorial on a topic that's already been covered, please feel free to email me.

The Watercolor Basics series is made possible thanks to the generosity of my Artnerds on Patreon. To help support the work I do, please consider joining the Artnerd community, and gain early access to videos, backer exclusive process work and comics, and more!
Watercolor Comic Page Order of Operations:
PrintPencilStretchTone and UnderglazeBlock in- Background, large elementsBlock in- Characters, smaller elementsDevelop skin by adding layers of same or similar tint and saturationAdd blushDevelop shadow colors on skinBegin tightening detail- blocking in smaller objects, adding textureAdd shadow using same colorAdd shadow using complimentary or neutral tintWork with opaque colors, colors that muddy when glazes are addedAdd in fine detail using a small brush- eyelashes, final layers of hairAdd in detail using color pencils, watercolor pencilsAdd in white highlights
The pages used in this post are from Chapters 6 and 7 of my watercolor comic, 7" Kara. You can read Volume 1, which includes chapters 1 through 4 at 7inchkara.com.
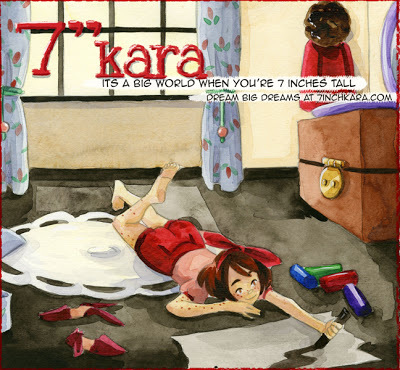
Some Stats about 7" Kara
Paper used:
Canson Montval 11x14 watercolor paper, 140lb. 12 sheets per pad
Paints used:
Custom palette of Winsor & Newton, Holbein, Daniel Smith, and SoHo watercolors
Brushes Used:
Creative Mark Rhapsody Rounds-0-4
Cotman wash brushes
Mimik 1" Filbert
Larger rounds- Mimik, Neptune, Halcyon (6-10)
For Stretching:
3M Blue Painter's Tape
White Gatorboard
Viva Papertowels
Pages completed:
Volume 1:
Chapter 1: 12
Chapter 2: 24
Chapter 3: 12
Chapter 4: 14
Volume 2:
Chapter 5 24 pages
Chapter 6 32 pages
Chapter 7: 34 pages
Total Pages Painted: 152 Kara pages
I paint my comic pages in batches- anywhere from two to six pages per batch, and batches usually constitute a scene. This requires a huge amount of space, so I paint on the floor, sitting on an anti-fatigue mat. Sets of pages take anywhere from three to six days to complete. Once pages are finished, I scan them with a large format scanner, color correct in Photoshop, and complete my comic pages digitally (corrections, borders, lettering, and word balloons).
Watercolor Comic Painting: 7" Kara Chapter 6:
Painting Pages- Working on a Double Page Comic Spread
Watercolor Painting on the Floor
Chapter 7- A Week of Watercolor
Tips for Painting Comic Pages in Batch:
Taking daily photos of progress really helps to remind you that you ARE making progressContrast is key, especially for comic pages that can end up busyWork from big to small- big fields of flat color to progressively more detailed areas. I save tight details like eyes and adding white for last.Convenience colors are exactly that- a huge convenience! Pre-mixed colors will save you time and paint for frequently used colors.Regularly wash and condition your natural hair brushes to keep them in top shape. I recommend Old Master's brush soap, occasionally conditioning with inexpensive human hair conditioner.Watercolor comic pages require a lot of time, so if you want to do a watercolor webcomic, I recommend having a hefty buffer if you wish to update regularly.
Process Photos from Chapter 6
To follow my comic creation progress, I highly recommend you check me out on Instagram! I regularly share comic painting progress, as well as process and progress from other illustrations I'm working on!
Over the next few weeks, I'm going to cover a few techniques and tricks that are particularly useful for painting watercolor comic pages, so if that's something that's interesting to you, let me know!
Please consider donating to this blog or purchasing from Natto-shop (http://nattosoup.com/shop) if you want me to continue publishing quality content. All materials tested were purchased from my own pocket. Keep on Truckin' Nattosoup is not under any sponsorship.
You should also have completed a few standalone watercolor illustrations using the steps covered in the Step by Step portion of Watercolor Basics. I high recommend practicing before you dive into pages- watercolor gets easier with practice!
If you've done these things, you're definitely ready to start painting your own watercolor comics!

This post is part of my ongoing Watercolor Basics series! If you're interested in learning how to watercolor, or watercoloring your comic pages, you've come to the right place! For step by step tutorials on just about everything, check out the Watercolor Basics hubpage. If you'd like a more detailed demonstration or tutorial on a topic that's already been covered, please feel free to email me.

The Watercolor Basics series is made possible thanks to the generosity of my Artnerds on Patreon. To help support the work I do, please consider joining the Artnerd community, and gain early access to videos, backer exclusive process work and comics, and more!
Watercolor Comic Page Order of Operations:
PrintPencilStretchTone and UnderglazeBlock in- Background, large elementsBlock in- Characters, smaller elementsDevelop skin by adding layers of same or similar tint and saturationAdd blushDevelop shadow colors on skinBegin tightening detail- blocking in smaller objects, adding textureAdd shadow using same colorAdd shadow using complimentary or neutral tintWork with opaque colors, colors that muddy when glazes are addedAdd in fine detail using a small brush- eyelashes, final layers of hairAdd in detail using color pencils, watercolor pencilsAdd in white highlights
The pages used in this post are from Chapters 6 and 7 of my watercolor comic, 7" Kara. You can read Volume 1, which includes chapters 1 through 4 at 7inchkara.com.

Some Stats about 7" Kara
Paper used:
Canson Montval 11x14 watercolor paper, 140lb. 12 sheets per pad
Paints used:
Custom palette of Winsor & Newton, Holbein, Daniel Smith, and SoHo watercolors
Brushes Used:
Creative Mark Rhapsody Rounds-0-4
Cotman wash brushes
Mimik 1" Filbert
Larger rounds- Mimik, Neptune, Halcyon (6-10)
For Stretching:
3M Blue Painter's Tape
White Gatorboard
Viva Papertowels
Pages completed:
Volume 1:
Chapter 1: 12
Chapter 2: 24
Chapter 3: 12
Chapter 4: 14
Volume 2:
Chapter 5 24 pages
Chapter 6 32 pages
Chapter 7: 34 pages
Total Pages Painted: 152 Kara pages
I paint my comic pages in batches- anywhere from two to six pages per batch, and batches usually constitute a scene. This requires a huge amount of space, so I paint on the floor, sitting on an anti-fatigue mat. Sets of pages take anywhere from three to six days to complete. Once pages are finished, I scan them with a large format scanner, color correct in Photoshop, and complete my comic pages digitally (corrections, borders, lettering, and word balloons).
Watercolor Comic Painting: 7" Kara Chapter 6:
Painting Pages- Working on a Double Page Comic Spread
Watercolor Painting on the Floor
Chapter 7- A Week of Watercolor
Tips for Painting Comic Pages in Batch:
Taking daily photos of progress really helps to remind you that you ARE making progressContrast is key, especially for comic pages that can end up busyWork from big to small- big fields of flat color to progressively more detailed areas. I save tight details like eyes and adding white for last.Convenience colors are exactly that- a huge convenience! Pre-mixed colors will save you time and paint for frequently used colors.Regularly wash and condition your natural hair brushes to keep them in top shape. I recommend Old Master's brush soap, occasionally conditioning with inexpensive human hair conditioner.Watercolor comic pages require a lot of time, so if you want to do a watercolor webcomic, I recommend having a hefty buffer if you wish to update regularly.
Process Photos from Chapter 6
To follow my comic creation progress, I highly recommend you check me out on Instagram! I regularly share comic painting progress, as well as process and progress from other illustrations I'm working on!
Over the next few weeks, I'm going to cover a few techniques and tricks that are particularly useful for painting watercolor comic pages, so if that's something that's interesting to you, let me know!
Please consider donating to this blog or purchasing from Natto-shop (http://nattosoup.com/shop) if you want me to continue publishing quality content. All materials tested were purchased from my own pocket. Keep on Truckin' Nattosoup is not under any sponsorship.
January 18, 2018
Inking for Watercolor: Watercolor Basics
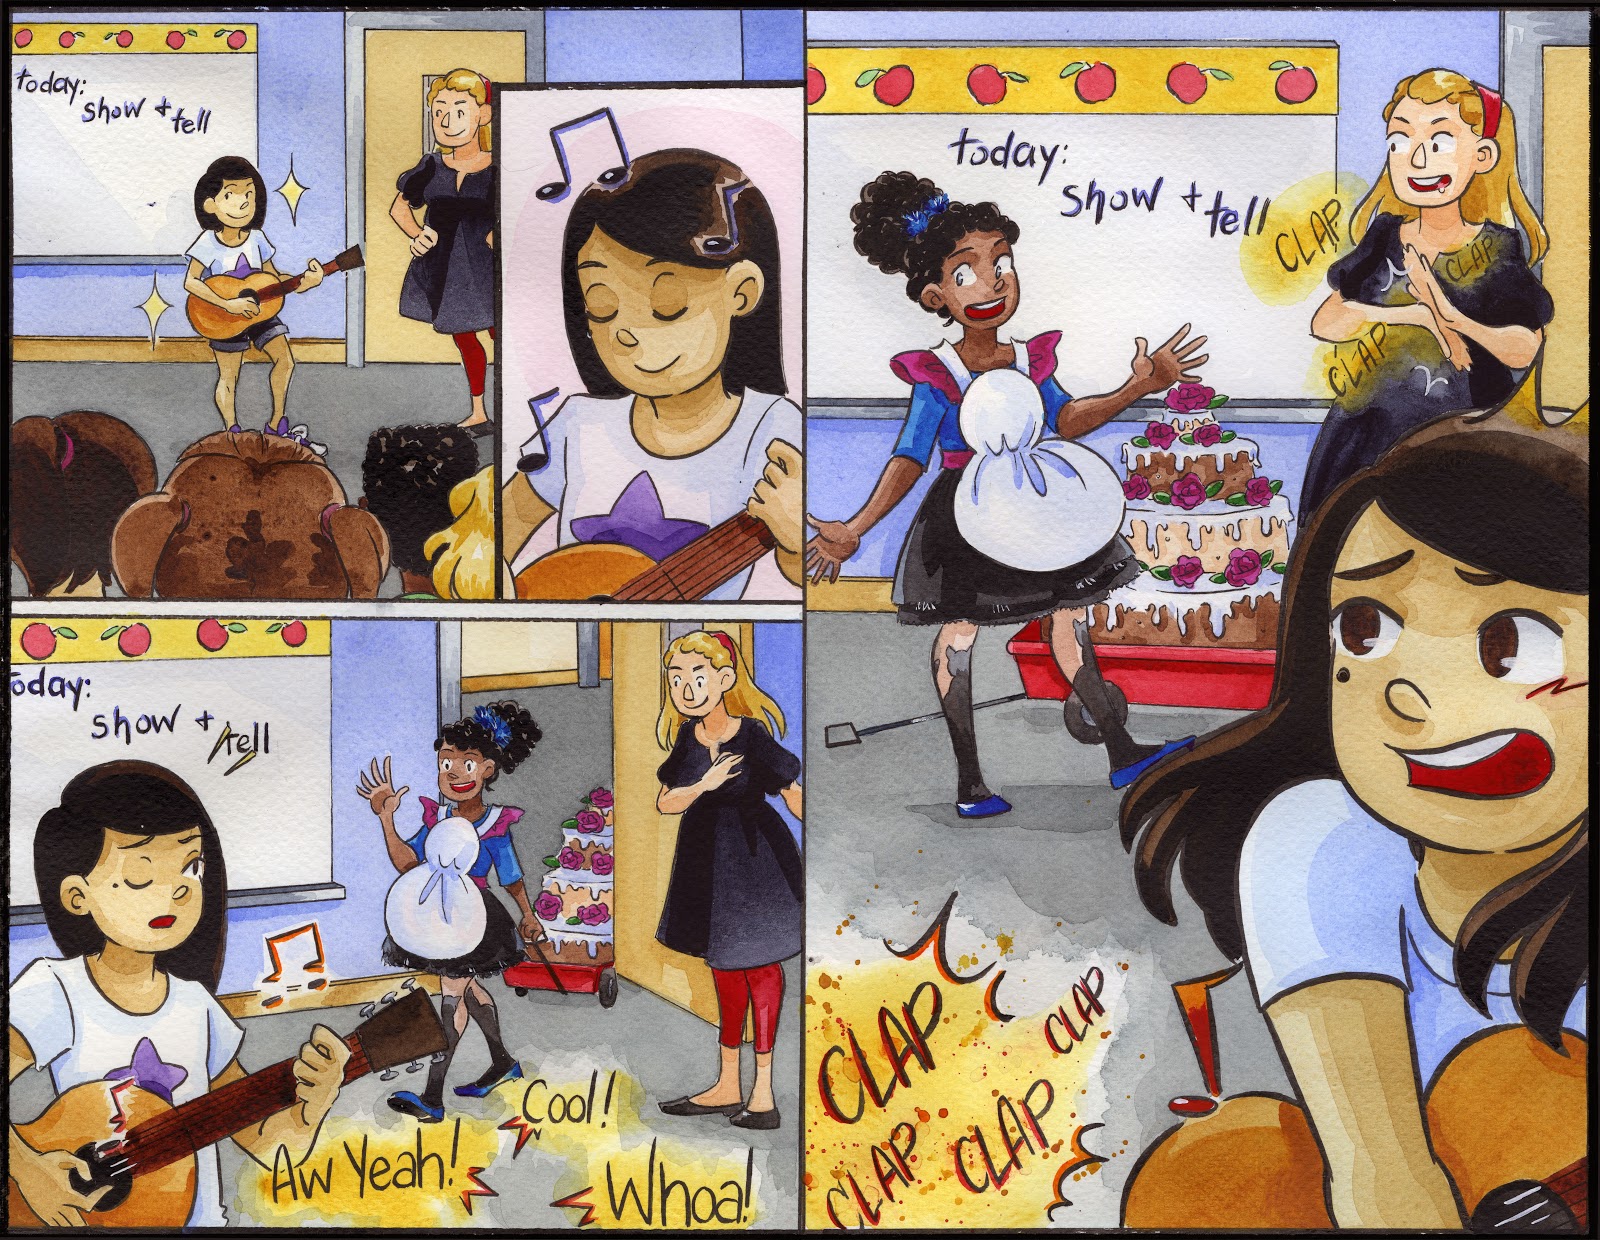 Kidlit comic submission for SCBWI Midsouth's September 2018 Conference
In our Watercolor Basics series, we recently went over penciling your bluelines to prepare them for watercolor. But maybe you want an illustration that's a little more graphic, or perhaps you want to use a simple watercolor style, and know that inking your lineart will help tie it together. Or maybe you don't yet have access to a printer for your bluelines, and know inking will give you the leeway you need to develop your sketch. Regardless of the reason, inked watercolor pieces can be beautiful, easy to read from a distance, and distinctive, and work well for comics.
This post is part of my ongoing Watercolor Basics series, a free watercolor course designed to help you feel confident learning to paint.
If you enjoyed this post, please check out my other videos and posts in the series, and make sure you tell your friends! Content like this is only made possible thanks to the generosity of my Artnerds on Patreon. Their generosity and support allows me to continue writing tutorials for the public to enjoy.

Inking your comic can be done after the pencils stage, used as an accent on a completed watercolor illustration. In this tutorial, I'm going to show you how to ink your watercolor illustration or watercolor comic page before painting, as this allows you to scan your lineart and play around with that using other rendering methods.
To begin this tutorial, you're going to need a scanned sketch or illustration ready to print, or pre-printed bluelines.
 Digital corrections on traditional roughs. Once these have been converted to bluelines and resized, this will be ready for print.
Print Your Bluelines on Watercolor Paper
For a tutorail on how to do this, please check out this wonderful post!
Pencil as Needed
These pencils do not need to be as tight or as detailed as you would pencil for watercolor comic pages that wouldn't be inked, but now is a great opportunity to correct any mistakes still in your bluelines
Swinging From the Branches: Inking My 2018 Christmas Card
Ink with a Waterproof Ink
Brush inking tutorial
Inking a comic, start to finish
 Scanned inks from illustration
Allow Inks to Cure for 24 Hours
Erase Pencils
Tips for Erasing Pencils After Inking:
Begin Painting!
 Kidlit comic submission for SCBWI Midsouth's September 2018 Conference
Waterproof Inks:
Pens for Watercolor and Markers at HobbyLobby:
Brushpens:
Sailor Mitsuo Aida
Sakura Pigma FB, MB, BB
Pitt Pens
Technical Pens:
Copic Multiliners
Sakura of America Microns
Sakura of America Pigma Graphic
Calligraphy Pens:
(Great for lettering borders)
Sakura Pigma Graphic 1mm, 2mm, 3mm
Sakura Calligrapher Pens
ek Tools Calligraphy Pens
Liquid Inks:
Shellac Based India Ink such as Dr PH Martin's Bombay Inks
Acrylic Inks such as FW or Liquitex Ink!
Example Illustrations
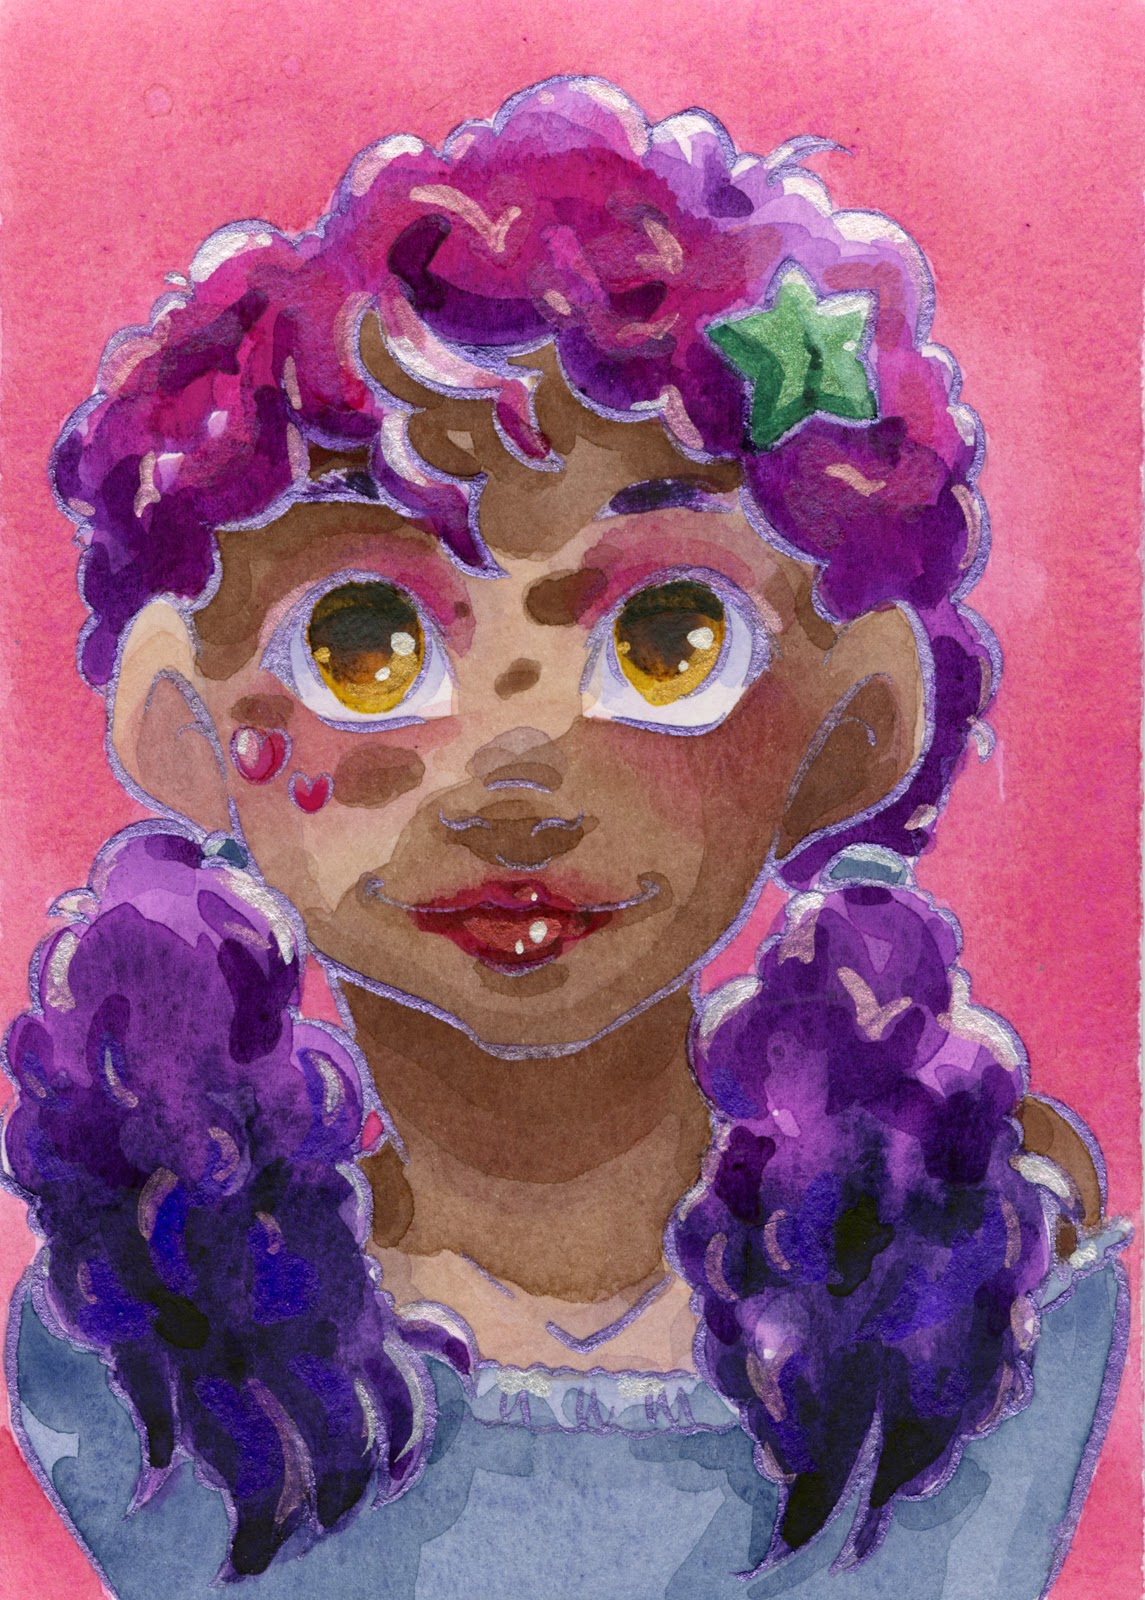 Inked with FW Pearlescent Acrylic Ink
 Inked with FW Pearlescent Acrylic Ink
 Inked with the Sailor Mitsuo Aida and Sakura Pigma FB
 Illustration inked with a Sailor Mitsuo Aida and Sakura Pigma FB
 Watercolor illustration inked with a Sailor Mitsuo Aida
 Watercolor illustration inked with a Sailor Mitsuo Aida
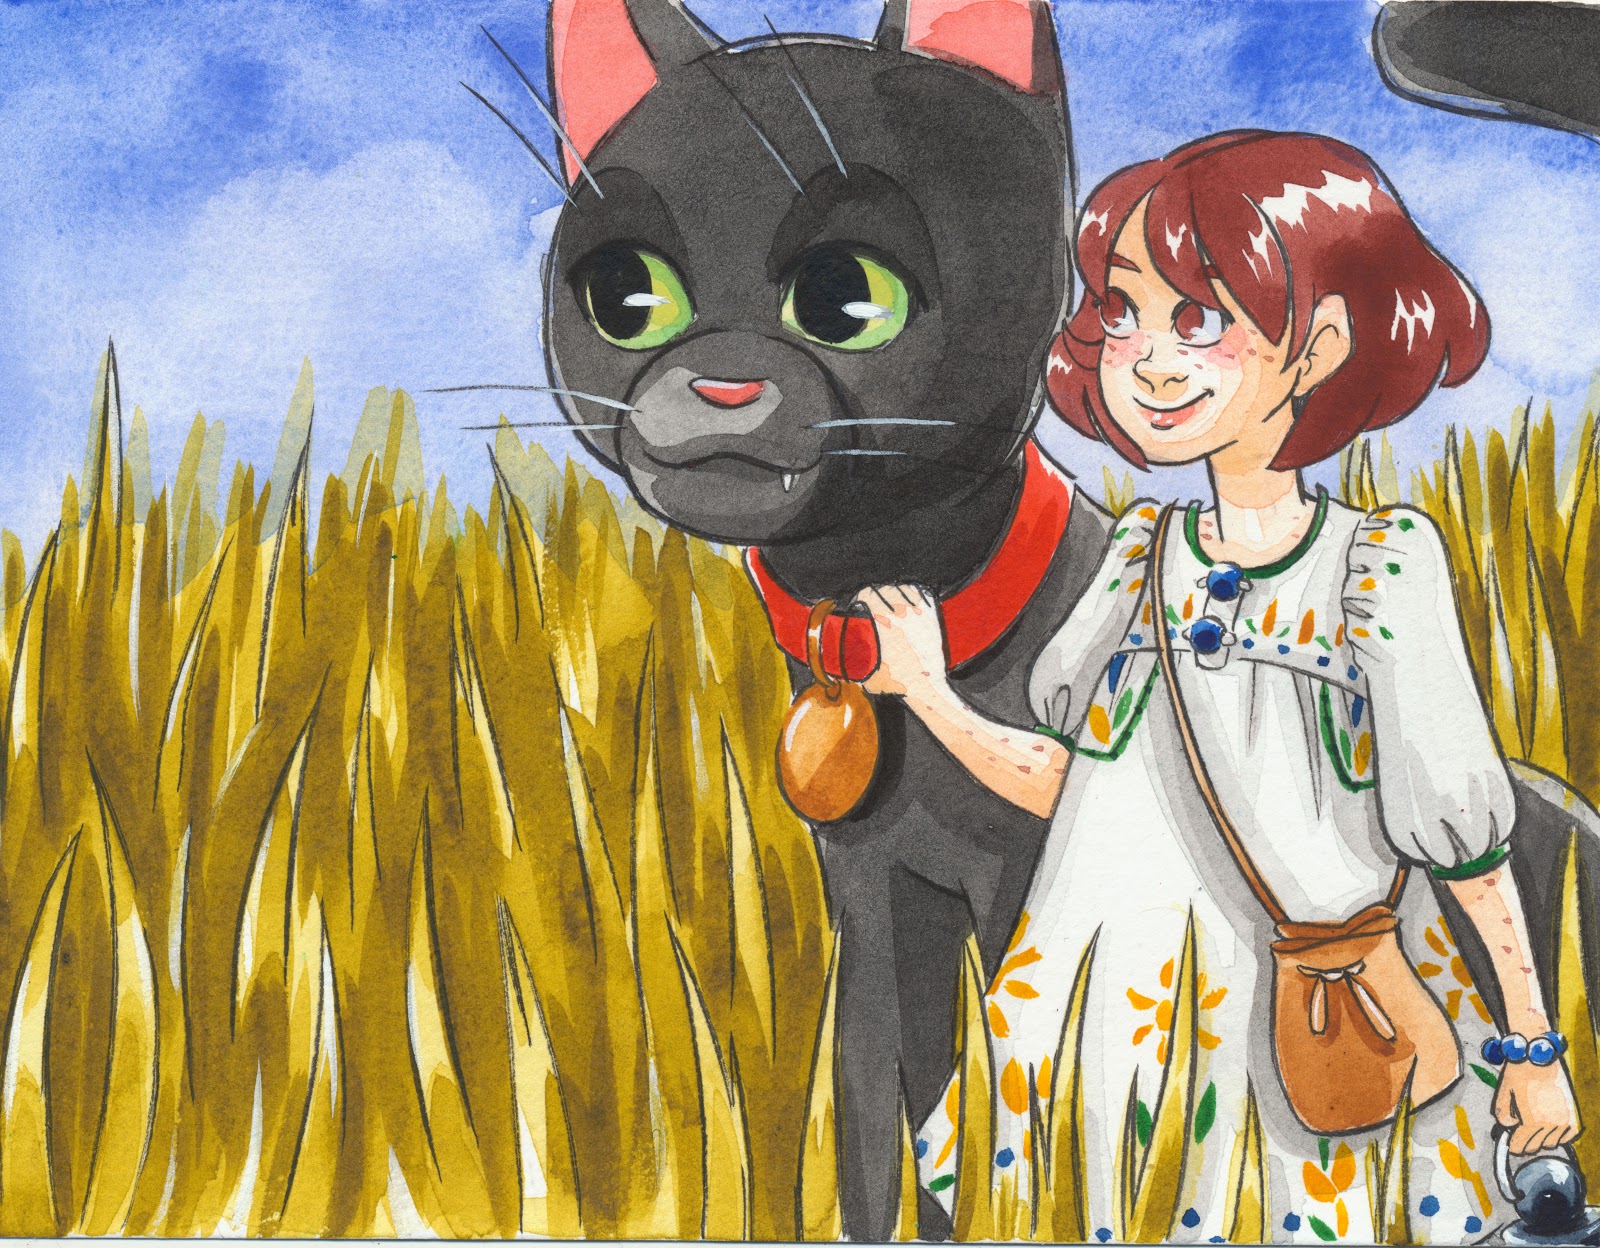 Watercolor Illustration inked with a Sailor Mitsuo Aida
Inspiration:
Watercolor Commission for Kabocha
7" Kara Webcomic Announcement Timelapse
In the Tall Grass Timelapse:
Kara Colorburst
Please consider donating to this blog or purchasing from Natto-shop (http://nattosoup.com/shop) if you want me to continue publishing quality content. All materials tested were purchased from my own pocket. Keep on Truckin' Nattosoup is not under any sponsorship.


