
Becca Hillburn's Blog, page 15
July 5, 2018
The Cause of Many A Muddy Water-Optical Brighteners and Watercolor
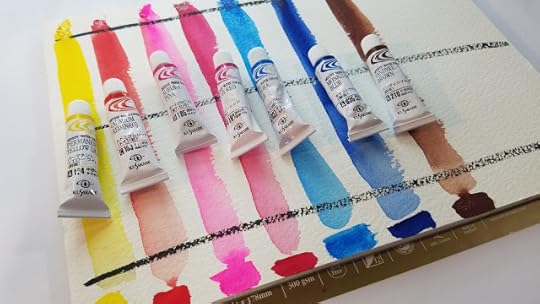
 Pebeo watercolors. Manufactured in China, purchased on Wish.Muddy paintings, despite using high-quality papers and brushes. A weird white coating on colors that initially seemed so vibrant in the pan. Colors lift, or refuse to layer, or paintings lack contrast, despite careful planning. It's frustrating isn't it? You might even blame yourself. But before you get too upset, consider that it might be the paints you're using.
Optical brighteners are frequently added to papers and paints to make colors more vivid, bright, appealing. They're added to printer paper for better, more vibrant prints, they're added to watercolors to entice you to buy with a beautiful rainbow of color. But what's great for sales is rarely great for art, and optical brighteners may be fighting your painting every step of the way.
What are they used for in watercolor:
Papers
Paints
What are optical brighteners:
For Paint
"Optical brighteners are designed to brighten colors or mask yellowing in lacquers, paints, inks, plastics, photo-processing solutions and fibers. They work via a fluorescent mechanism, absorbing light in the UV spectrum and emitting it in the blue range of the visible spectrum, resulting in a brighter, fresher appearance. "
Source
NOTE: Some high quality watercolors do have semi-transparent, semi-opaque, and opaque properties.
Tube watercolors are made of about eight different components- water, dispersant, extender, humectant, plasticizer, binder, pigment, and the brightener (referred to in this post as optical brighteners). The brightener contains white or transparent crystals that lighten the color value to increase the chroma of dried paint, making it appear more saturated and intense. The proportions of these components vary from brand to brand. (https://www.handprint.com/HP/WCL/pigm...) Pigment load in a tube of paint also varies- some colors such as dioxazine violet have to be diluted for the chroma to be noticeable.
10%-20%- Strongly tinted pigments such as dioxazine violet, alizarin crimson, and phthalocyanines
20%-30%- Prussian blues, carbon blacks, red iron oxides, yellow quinacridones and other synthetic organic pigments
30%-40%- Yellow iron oxides, viridian, ultramarine blue, and violet, fine-grained cobalt pigments
40%-50%- weakly tinting colors such as cadmium yellow, cobalt violet, and burnt yellow and red oxides
50% and higher for cadmium orange, manganese violet and blue, cadmium red
Some brands may add one or more light refracting substances to brighten the color, traditionally including alumina trihydrate, micronized barium sulfate, and titanium dioxide, but there are more effective alternatives available. Generally, the particle size and gravity are close to the pigment used in the color, so they do not separate out.
Too much brightener can leave a white or sparkly appearance to dried paint and can compromise the light-fastness or permanence of color.
(source)
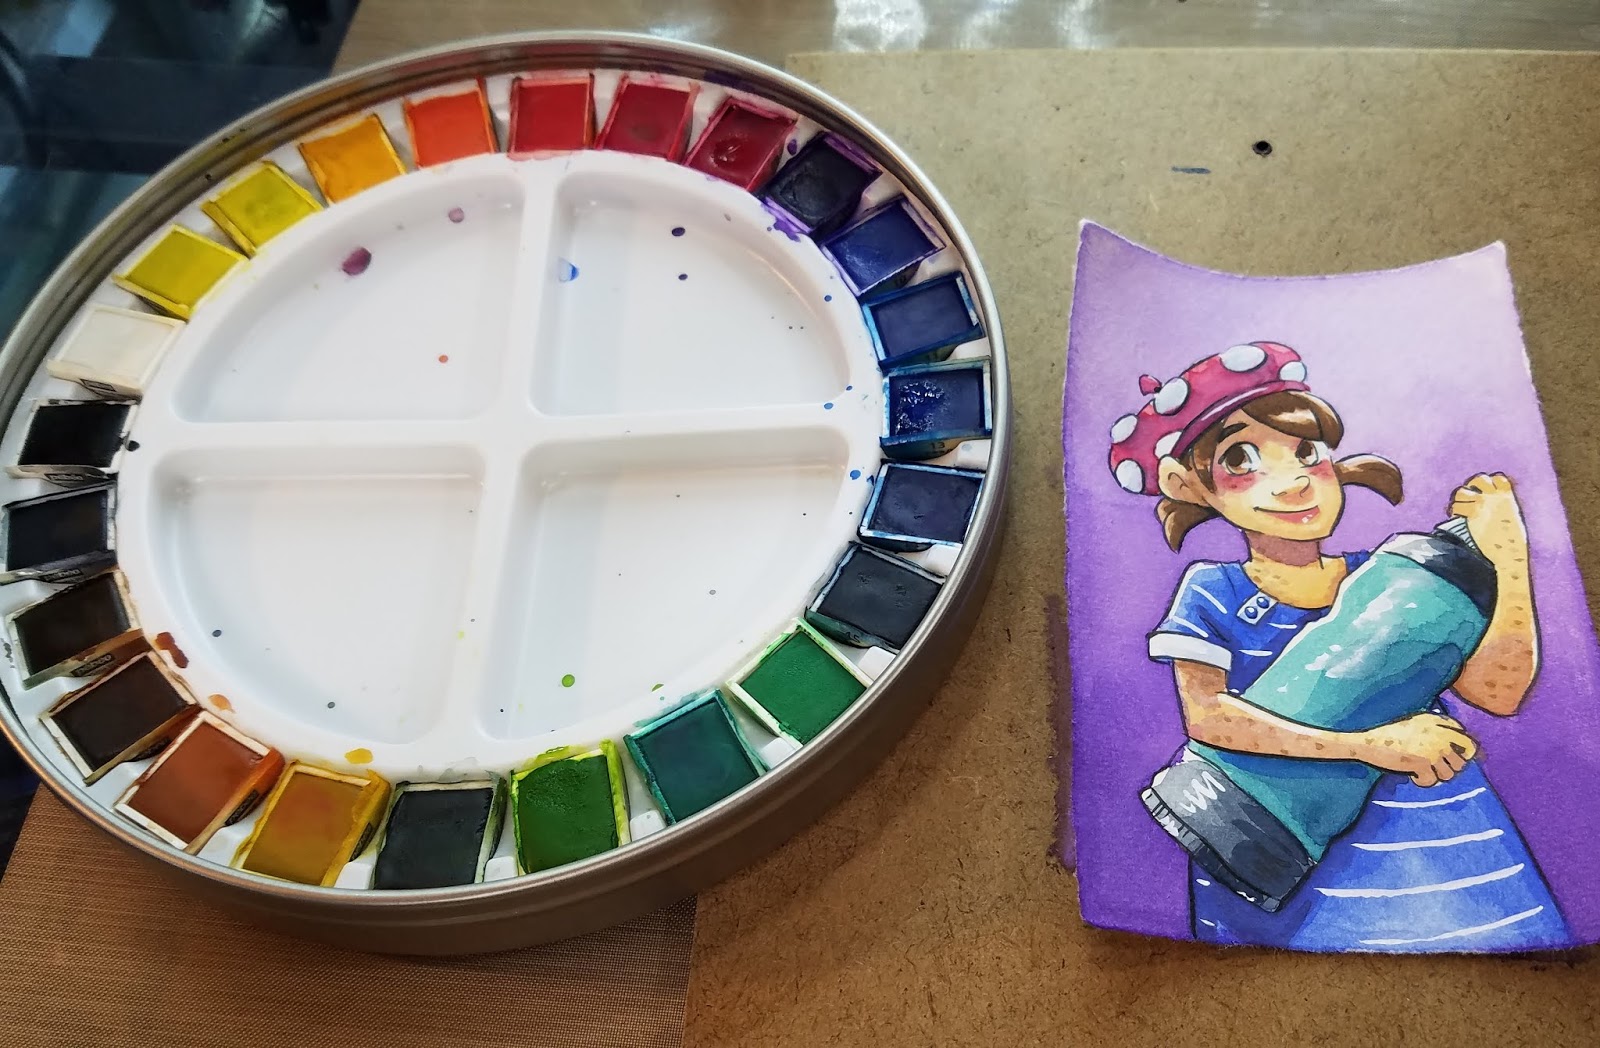
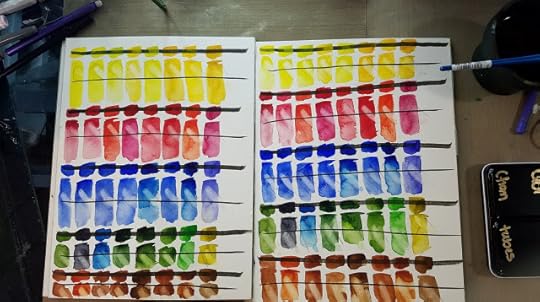
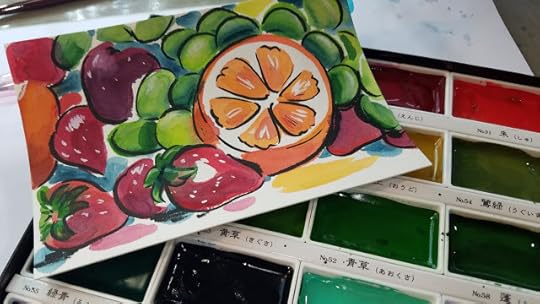
Full shade is the pigment appearance when 100% of the light hitting the the paint hits a pigment particle and is either absorbed or reflected. We often see the full shade of our watercolors when we use half pans- the paint in the pain represents the full shade (source). In higher quality watercolors, the full shade of many colors is dark and unappealing, in cheaper watercolors that utilize optical brighteners, all shades are vivid and appealing in the pan.
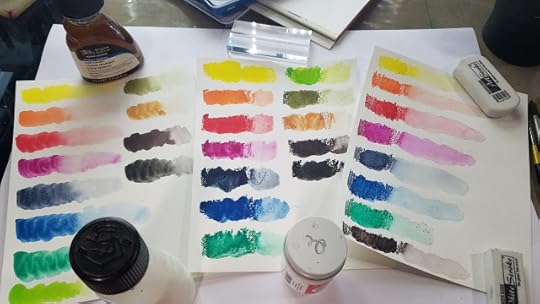
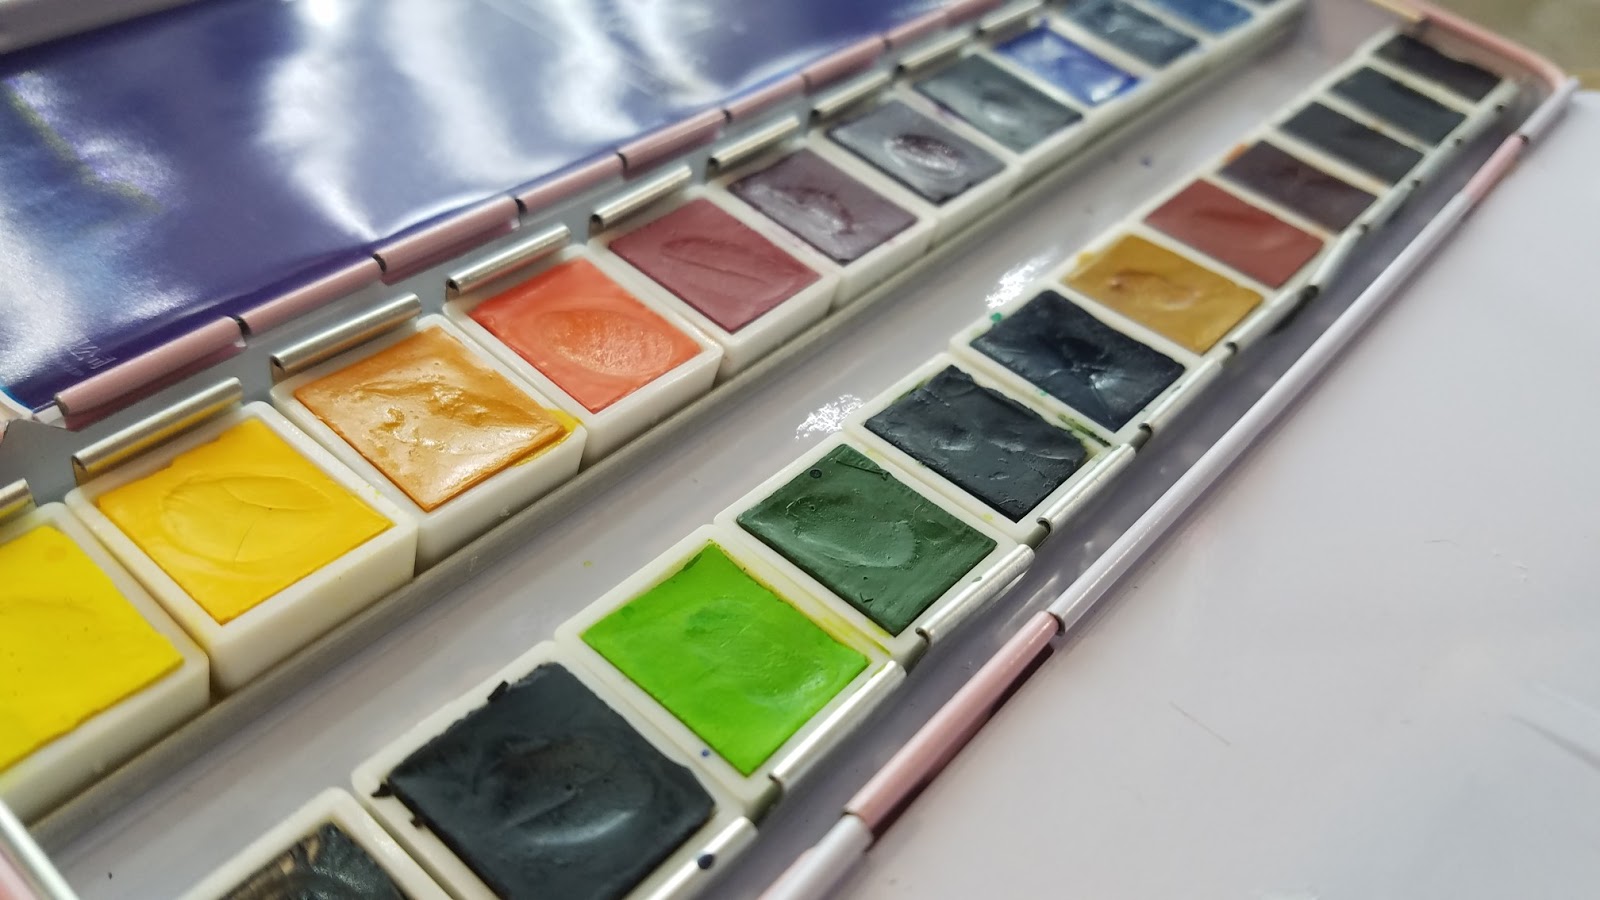 Paul Reuben's watercolors. Manufactured in China. Purchased on Wish.In both the Paul Reuben's and Pebeo palettes, note how bright ALL colors appear, even darker colors. This is due to optical brighteners making the full shade appear more vibrant.
For Paper
"Optical brighteners are additives that are used in paper manufacturing to increase the perceived “whiteness” of the paper. Their use results in a whiter and brighter appearance, which can be desirable for many paper types."
For papers, bright white papers, such as natural white, are considered optically dead, and remain consistently white under different lighting conditions. However, papers that contain optical brighteners will shift depending on the light source, so if you're scanning your originals, you want to avoid papers that use optical brighteners.
Source
 Crayola Washable watercolors
Why are optical brighteners bad?
Optical brighteners aren't always an issue, and may even provide properties you enjoy. Many artists use lower grade watercolors, full of optical brighteners, to make beautiful artwork- although Instagram shots may be deceptive. Inexpensive watercolors may appear beautiful and vibrant when wet, only to dry dull and chalky.
 Lukas Studio Aquarelle WatercolorsDry chalkyDifficult to control colorMay contribute to fading/reduce lightfastnessMay lift up as layers are addedColor can visibly shift under various light sourcesChange the working properties of the paintMay dry faster than other watercolors, which leaves less time for wet into wet techniquesOften dry patchyDifficult to build up tone and shade- everything appears the same intensity
 Prima Marketing- The Classics
How To Spot Optical Brighteners In Paints
Typically used in inexpensive pan, half pan, and cake watercolors.
 Alex watercolors- $1 for the set
Even the dark colors are vivid, easy to 'read' at a glanceDry appearance with no gloss or sheen (no glycerin)Muddy wash water quicklySediment out quickly when mixedLeave a white, chalky residue at the bottom of mixing pans and water cupsCake up on your brush when grabbing colorOcclude your lineart when dry, giving it a muddy appearance, reducing contrast Less visual 'bounce', colors lack translucency on the paperUsually priced too good to be true
 Jerry Q watercolors, purchased from Amazon
Brands That Use Optical Brighteners
Many Student grade watercolor sets use optical brighteners to make colors more vivid and appealing in store.
 Alex watercolor swatches
Children's or Toy-Grade:
Artist Loft watercolors
Alex watercolors
Crayola Washable Watercolors
Student Grade Watercolors:
Cotman
Lukas Studio
Sakura Koi (pans)
Pebeo
Paul Reubens
Jerry Q
Bianyo
 Jerry Q watercolors
  Tiger (a European version of Dollar Tree) watercolors
 What can you do?
Adjust how you handle your paints- fewer layers rather than more.
Avoid glazes.
Limit how much water you use when mixing colors, as colors are already weak
Work with an inked lineart- the slight border it provides will help prevent feathering and bleeding into dry areas
Avoid temperamental papers- try to avoid cellulose papers, or stick to Fluid EZ block or Canson Montval
Adjust your expectations- introduce color pencils or watercolor pencils for detailed stages
Change wash water out frequently- it dirties faster with cheap paints
Optical Brighteners and Solutions to the Problems They Pose:
Artist Loft Watercolor Field Test
Jerry Q Unbox and Swatch:
Jerry Q Watercolor Field Test:
Lukas Watercolor Set Unbox and Swatch:
Bianyo Watercolor Teaser:
Prima Watercolor Confections: The Classics: The Classics:
Prima Watercolor Confections: The Classics: Field Test:
Tiger Watercolor Swatch Test:
Pieces Created from Products that Use Optical Brighteners:
 Bianyo
Issues: Colors were fairly chalky and opaqueObscured lineart
 Lukas Studio Aquarelle
Issues:Colors mixed poorlyDark colors weren't dark enough- dried somewhat chalkyColors were annoying to mix, caked up on brushDid not handle like watercolor OR gouache, annoying to work with
 Crayola Washable Watercolors
Issues:Just about everything. Watercolors were gummyTended to cake up on brushTended to cake up on paperGlycerin sheen to finished pieceLike painting with soapDifficult to blend out, difficult to layer, left a resist that prevented later layers from drying evenly.
 Van Gogh Watercolors
Issues:Tendency to become muddyProne to reactivation
 Cotman Watercolors
Issues:Annoying to mixColors settle out of solution quickly, have to frequently remixLimited saturation
Sources:
Optical Brighteners- Strathmore
Preventative Care of Art on Paper for Artists
BASF
Handprint: How Watercolor Paints are Made
The Material Attributes of Paints
Please consider donating to this blog or purchasing from Natto-shop (http://nattosoup.com/shop) if you want me to continue publishing quality content. All materials tested were purchased from my own pocket. Keep on Truckin' Nattosoup is not under any sponsorship.


July 2, 2018
Guestpost: RebelVampire: Selecting and Using Fonts for Webcomics
Selecting and Using Fonts for Webcomics
Despite it seeming simple, lettering for webcomics is surprisingly elusive. For many, it boils down to a simple lack of knowledge, both in the resources that are available and how to use the tools. Even looking up a tutorial can get confusing, since technical jargon like “kerning” and “leading” are prevalent. Especially for newcomers to webcomics, it’s all a bit overwhelming.
However, it definitely doesn’t need to be some grandiose obstacle. In fact, a lot of lettering expertise comes down to one simple matter: knowing how to select and use a font. Your font choice alone can make a world of difference for your webcomic, so it’s an important matter to consider. To make the process easier, though, today I will walk you through my tips for selecting your font, and some of the basics on how to use them!

Where to Get Fonts:
First off, let’s tackle the biggest question any beginner has: where can you even get fonts? Of course, there are your system fonts that come standard on any computer regardless of operating system. However, these are inadvisable to use for two reasons: legality and a lack of character. Fortunately, there are a ton of websites that have free fonts! You can check out some of my favorites below:
Font Squirrel - My go-to site, as the tags make it very easy to find a font with a particular theme.
Google Fonts - A fantastic collection, particularly if you need a font you can easily embed into a website as well.
1001 Free Fonts - A standard site with an intense amount of fonts; just make sure to check the licenses.
DaFont - Another one of the standard ones.
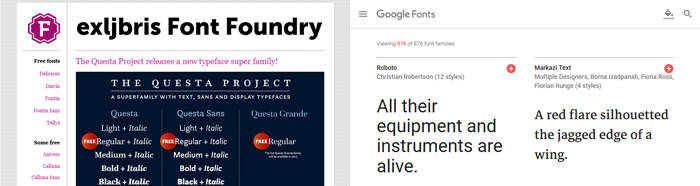
exljbris Font Foundry - One of my favorite font creator’s site.
Note: Always make sure you’re protected from viruses when downloading things from the internet!

Considerations for Choosing and Using Your Font:
Below I have laid out a few choice things you should consider, both while picking your font and using it. These matters will play a role in both aspects, so bear them in mind!
Legality- ALWAYS make sure that your font has the appropriate license for your use. Generally, you’ll want something that is free for commercial use (usually things that are listed as Public Domain, SIL Open Font License, or CC0 Creative Commons). The majority of fonts you can download from reputable sites come with .txt files that have this information. Remember, just because you can download the font for free, doesn’t mean it is actually free to use commercially!
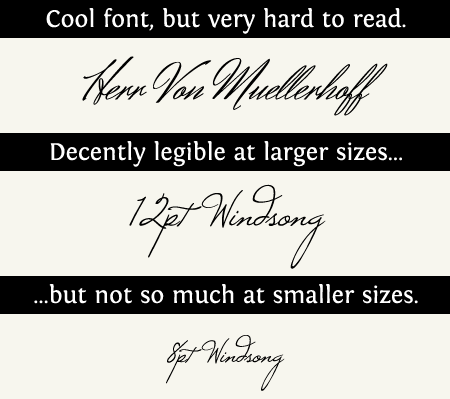
Readability- Readability matters more than anything else about a font. If readers can’t read the text, they can’t really read the webcomic. Make sure that you get a font that has a crisp and clear style. Yet, also keep in mind what size you’ll be doing the font at, as not all fonts are readable at smaller sizes. Rule of thumb: if it takes you more than a few seconds to read, it’s probably not a good font.
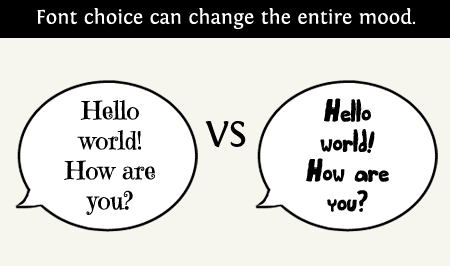
Theme- While you can go with a “comic” font, you can also choose a font that suits the theme of your comic. You can use a more angular font for a science fiction comic, a more script like font for something fantasy, and so on. A theme appropriate font can add a lot of character.
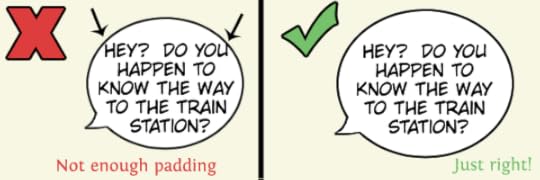
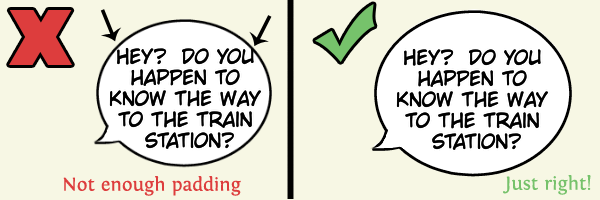
Padding- This consideration applies more to the using part of your font. Your text should have padding and not touch the edges of your narrative boxes or dialogue bubbles. Some fonts are a little unwieldy for this, so it can often affect choice as well. Bear it in mind and experiment to make sure you can keep some padding for a professional, readable look.
Using Your Font:
Once you have your font chosen, you’re ready to use it. However, there are a few nifty things you can do with a font to give it a slightly different aesthetic than its standard appearance. Since this involves some technical jargon, I’ll walk you through what the jargon means and what it actually does.
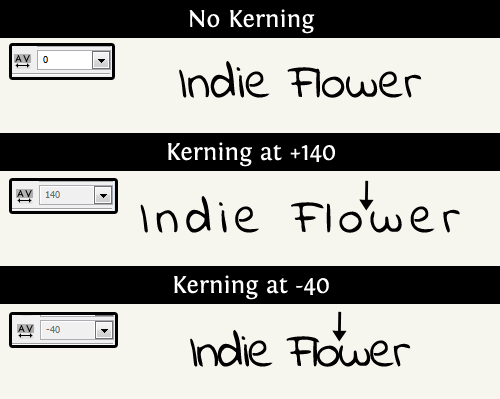
Kerning- Kerning refers to the space between the characters of your font. The more kerning you add, the more space there is between every letter. You can also go into negative values to bring the letters super close together.
Leading- Leading refers to the space between lines of text. Like kerning, the more leading you add, the more space there is.

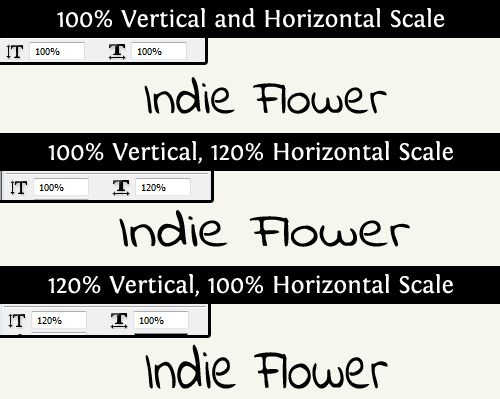
Scale- Scaling refers to how much extra width or height the text takes up than is standard. Unlike kerning and leading, scaling doesn’t add extra space. Instead, it deforms the text.
To summarize, you can do wonders for your webcomic just by choosing a great font and learning how to adjust it to whatever suits your fancy. Text has just as much of an aesthetic presence as your images, and it can truly give your webcomic its own unique character. As webcomics are also half about the story being told, it’s also kind of important people are able to read the text smoothly. Whatever the case, don’t be afraid to experiment and show your own unique voice via fonts!
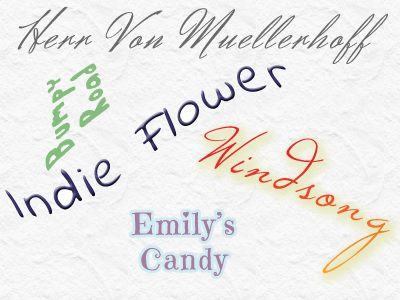
Fonts Used in Examples:Herr Von MuellerhoffWindsong Emily's CandyBumpy RoadIndie Flower
If you’d like to stay up to date with me, you can check out my stuff via the links below~!Twitter: https://twitter.com/RebelVampireBlog: https://rebelofalltrades.wordpress.com/
Website: https://rebelvampire.weebly.com/
Please consider donating to this blog or purchasing from Natto-shop (http://nattosoup.com/shop) if you want me to continue publishing quality content. All materials tested were purchased from my own pocket. Keep on Truckin' Nattosoup is not under any sponsorship.
Despite it seeming simple, lettering for webcomics is surprisingly elusive. For many, it boils down to a simple lack of knowledge, both in the resources that are available and how to use the tools. Even looking up a tutorial can get confusing, since technical jargon like “kerning” and “leading” are prevalent. Especially for newcomers to webcomics, it’s all a bit overwhelming.
However, it definitely doesn’t need to be some grandiose obstacle. In fact, a lot of lettering expertise comes down to one simple matter: knowing how to select and use a font. Your font choice alone can make a world of difference for your webcomic, so it’s an important matter to consider. To make the process easier, though, today I will walk you through my tips for selecting your font, and some of the basics on how to use them!
Where to Get Fonts:
First off, let’s tackle the biggest question any beginner has: where can you even get fonts? Of course, there are your system fonts that come standard on any computer regardless of operating system. However, these are inadvisable to use for two reasons: legality and a lack of character. Fortunately, there are a ton of websites that have free fonts! You can check out some of my favorites below:
Font Squirrel - My go-to site, as the tags make it very easy to find a font with a particular theme.
Google Fonts - A fantastic collection, particularly if you need a font you can easily embed into a website as well.
1001 Free Fonts - A standard site with an intense amount of fonts; just make sure to check the licenses.
DaFont - Another one of the standard ones.
exljbris Font Foundry - One of my favorite font creator’s site.
Note: Always make sure you’re protected from viruses when downloading things from the internet!
Considerations for Choosing and Using Your Font:
Below I have laid out a few choice things you should consider, both while picking your font and using it. These matters will play a role in both aspects, so bear them in mind!
Legality- ALWAYS make sure that your font has the appropriate license for your use. Generally, you’ll want something that is free for commercial use (usually things that are listed as Public Domain, SIL Open Font License, or CC0 Creative Commons). The majority of fonts you can download from reputable sites come with .txt files that have this information. Remember, just because you can download the font for free, doesn’t mean it is actually free to use commercially!
Readability- Readability matters more than anything else about a font. If readers can’t read the text, they can’t really read the webcomic. Make sure that you get a font that has a crisp and clear style. Yet, also keep in mind what size you’ll be doing the font at, as not all fonts are readable at smaller sizes. Rule of thumb: if it takes you more than a few seconds to read, it’s probably not a good font.

Theme- While you can go with a “comic” font, you can also choose a font that suits the theme of your comic. You can use a more angular font for a science fiction comic, a more script like font for something fantasy, and so on. A theme appropriate font can add a lot of character.

Padding- This consideration applies more to the using part of your font. Your text should have padding and not touch the edges of your narrative boxes or dialogue bubbles. Some fonts are a little unwieldy for this, so it can often affect choice as well. Bear it in mind and experiment to make sure you can keep some padding for a professional, readable look.
Using Your Font:
Once you have your font chosen, you’re ready to use it. However, there are a few nifty things you can do with a font to give it a slightly different aesthetic than its standard appearance. Since this involves some technical jargon, I’ll walk you through what the jargon means and what it actually does.
Kerning- Kerning refers to the space between the characters of your font. The more kerning you add, the more space there is between every letter. You can also go into negative values to bring the letters super close together.

Leading- Leading refers to the space between lines of text. Like kerning, the more leading you add, the more space there is.

Scale- Scaling refers to how much extra width or height the text takes up than is standard. Unlike kerning and leading, scaling doesn’t add extra space. Instead, it deforms the text.

To summarize, you can do wonders for your webcomic just by choosing a great font and learning how to adjust it to whatever suits your fancy. Text has just as much of an aesthetic presence as your images, and it can truly give your webcomic its own unique character. As webcomics are also half about the story being told, it’s also kind of important people are able to read the text smoothly. Whatever the case, don’t be afraid to experiment and show your own unique voice via fonts!
Fonts Used in Examples:Herr Von MuellerhoffWindsong Emily's CandyBumpy RoadIndie Flower
If you’d like to stay up to date with me, you can check out my stuff via the links below~!Twitter: https://twitter.com/RebelVampireBlog: https://rebelofalltrades.wordpress.com/
Website: https://rebelvampire.weebly.com/
Please consider donating to this blog or purchasing from Natto-shop (http://nattosoup.com/shop) if you want me to continue publishing quality content. All materials tested were purchased from my own pocket. Keep on Truckin' Nattosoup is not under any sponsorship.
June 28, 2018
Guest Post: Mede Colvin and 3 Rules for Effective Dialogue
Hello! My name is Mede Colvin and I'm the writer behind the deepwater Southern horror-fantasy comic The Human Atlas, which I do in collaboration with my friend Nintala. I'm not going to say a lot about what I am or what I do... you didn't click on this post for that!

What I'm going to talk about concerns dialogue and how to write it effectively and impactfully. Dialogue is one of the most important parts of a comic: it is the main way that a story advances and explains itself and it is the main way for readers to glean information about what's going on. There are comics out there that do not have any spoken lines or even lines at all, but those comics instead rely on extremely strong visuals to tell their story. Most comics will have dialogue in some form or other. You can sometimes get away with weak visuals, but dialogue is make-or-break material, and weak, ineffective dialogue can utterly kill a comic.
When writing dialogue, I try to follow three main rules:
1. Have almost every line convey some kind of information about the speaker or the situation.
Occasional filler lines are okay, in the same way that beat panels are okay! However, unless you're writing a particularly peaceful scene or a pure slice-of-life comic, lack of direction in the dialogue can leave the reader lost. As with all things, there is a balance; sometimes characters do indeed ramble out of nervousness and things like that. But if it gets to the point that reading your word bubbles is like reading a book, shorten them.
2. Keep your characters' dialogue as concise as possible.
This is closely related to the first rule. Unless you're writing a specific kind of character or trying to write a humorous scene where a character rambles, don't have your characters say in a hundred words what they could say in ten. Try your hardest to keep your bubbles around four or five lines long or less. Remember that comics are a visual medium. We’ve all been told to “show, not tell” when writing, and even though “showing” is the default in comics, this is still valid advice. You’re not writing a book! Walls of text tend to kill pacing and momentum and often leave readers feeling like they're reading a novel instead of a comic.
3. Make it so you can tell every character apart just from their dialogue.
The reader should be able to tell which character is speaking at all times, even without visuals! A lot of characters can talk in a similar manner especially if they're from the same background, but if most of your characters sound exactly like each other, then that's something to fix. A good way to test this is to mentally take out the comic's visuals; by focusing solely on what's in the word bubbles, you should be able to tell at a glance who is speaking. If you can't take enough of a step back at your own work to be objective, have a friend be the judge. If you are the creator and you have access to the comic's raw files, you can even go one step further by hiding the art layer(s) and keeping the word bubbles. Can you still say for sure who's who?

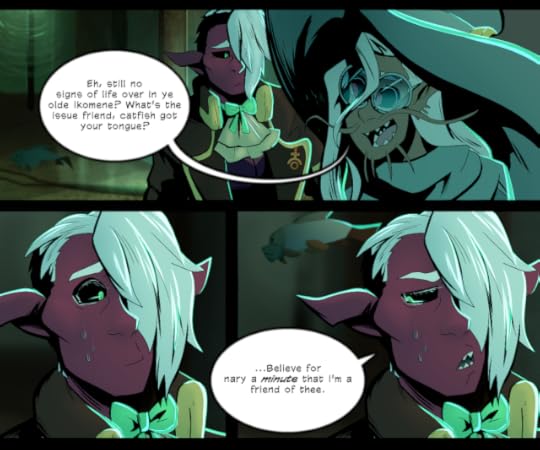
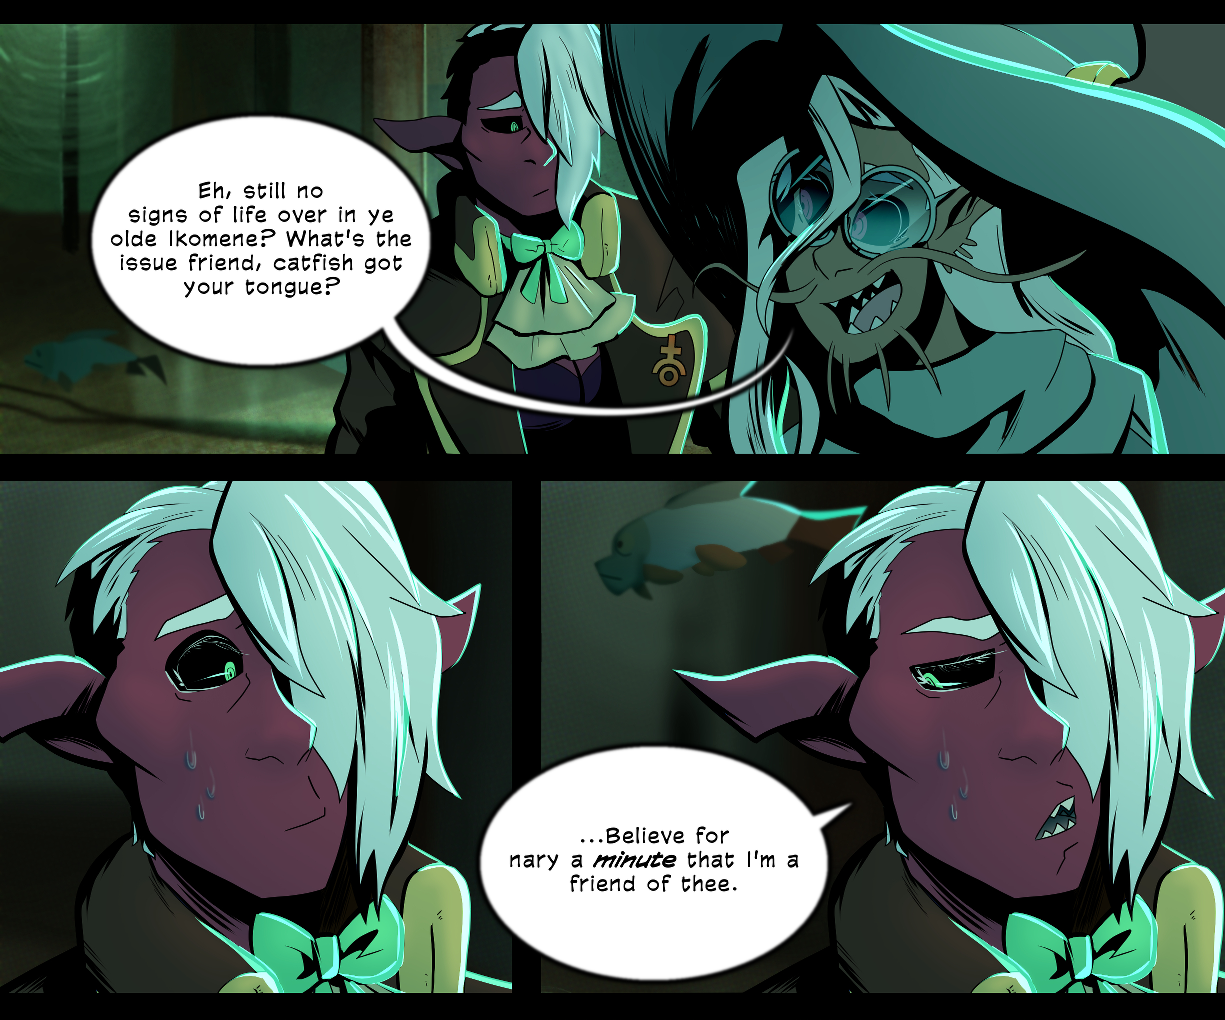
Above is a snippet of The Human Atlas, featuring the characters Iko (the mulberry-colored one with mint green eyes) and Filore (the russet-colored one with glasses and liseran purple eyes). It showcases my approach to writing dialogue, and I'll go over how it demonstrates each of my three rules.
1. Have almost every line convey some kind of information about the speaker or the situation.
This is a fairly slice-of-life-esque scene, but if you analyze each of the characters' lines, they tell you a lot of information about the characters themselves. Iko and Filore are both members of the same fishlike humanoid species: undines. Their dialogue, however, sets them worlds apart. And in just these three sentences, many conclusions about these two characters can be drawn.
Iko's one line seems scolding and extremely strict, hinting at her nature as a reserved but easily provoked character who is insistent upon her own boundaries. Filore calls her "friend" and Iko's very quick to inform her: "we're not." Her use of the archaic terms "nary" and "thee" further paints her as quite old-fashioned, if not even a little bit pompous.
Meanwhile, Filore combines Iko's name with the ancient Greek word "ecumene" - an obscure pun that many readers will find borderline incomprehensible - suggesting great intelligence but a lack of care as to whether or not people understand her. She's irreverent and playfully antagonistic but not quite mean: she very subtly jabs at Iko's formal dialect with "ye olde" before immediately softening the blow by calling her "friend." And her fish-themed riff on the phrase "cat got your tongue" also suggests that she is not above silliness.
2. Keep your characters' dialogue as concise as possible.
There's not really much to say here, both characters' bubbles are fairly concise and accomplish what they need to. Now Iko's bubble is only one sentence long, but Filore's actually seems like it's breaking this rule! It's actually not, and let me explain why.
She could easily have just selected either one of the two sentences she currently says, and dropped the other one. But shortening the line would have risked sacrificing the presence and communication of Filore's character. As stated above, you can infer from her lines that she is a whimsical, wise-cracking type, talking a little more than usual to fill the void of Iko's silence, and this is something that may have been lost if Filore's bubble was downsized.
I want to emphasize that these rules are not strict. Don’t be afraid to occasionally bend them for effect, like I did here.
3. Make it so you can tell every character apart just from their dialogue.
This blends in with the first point somewhat. There are many, many ways to have characters stand out from each other when it comes to dialogue: dialect, speech patterns, brevity or lack thereof, verbal tics and filler words, repetition, and everything else. Most differences tend to be very subtle, but part of the reason why I chose this particular segment from my comic is because these two characters' speech patterns are different in very obvious and extreme ways. Just from a glance at the dialogue, you should be able to form a very good image of these characters' personalities and how different they are from each other. Even if you take the visuals out of the picture!
And that's it! Just like with dialogue, I believe the best columns are short and concise. These three rules are by no means set in stone, but they've helped me improve my writing and I hope they help you as well. And if you've gotten particularly good results out of these, don't be afraid to show them to me - I'd like to see how my advice has helped you!
Personal twitter: http://twitter.com/PaladinTaimWebcomic twitter: http://twitter.com/THAcomicWebcomic website: http://thehumanatlas.com/Email addresses: greatephara(at)gmail.com (general shit-shooting)
paladintaim(at)gmail.com (writing and music-related business inquiries)
Please consider donating to this blog or purchasing from Natto-shop (http://nattosoup.com/shop) if you want me to continue publishing quality content. All materials tested were purchased from my own pocket. Keep on Truckin' Nattosoup is not under any sponsorship.

What I'm going to talk about concerns dialogue and how to write it effectively and impactfully. Dialogue is one of the most important parts of a comic: it is the main way that a story advances and explains itself and it is the main way for readers to glean information about what's going on. There are comics out there that do not have any spoken lines or even lines at all, but those comics instead rely on extremely strong visuals to tell their story. Most comics will have dialogue in some form or other. You can sometimes get away with weak visuals, but dialogue is make-or-break material, and weak, ineffective dialogue can utterly kill a comic.
When writing dialogue, I try to follow three main rules:
1. Have almost every line convey some kind of information about the speaker or the situation.
Occasional filler lines are okay, in the same way that beat panels are okay! However, unless you're writing a particularly peaceful scene or a pure slice-of-life comic, lack of direction in the dialogue can leave the reader lost. As with all things, there is a balance; sometimes characters do indeed ramble out of nervousness and things like that. But if it gets to the point that reading your word bubbles is like reading a book, shorten them.
2. Keep your characters' dialogue as concise as possible.
This is closely related to the first rule. Unless you're writing a specific kind of character or trying to write a humorous scene where a character rambles, don't have your characters say in a hundred words what they could say in ten. Try your hardest to keep your bubbles around four or five lines long or less. Remember that comics are a visual medium. We’ve all been told to “show, not tell” when writing, and even though “showing” is the default in comics, this is still valid advice. You’re not writing a book! Walls of text tend to kill pacing and momentum and often leave readers feeling like they're reading a novel instead of a comic.
3. Make it so you can tell every character apart just from their dialogue.
The reader should be able to tell which character is speaking at all times, even without visuals! A lot of characters can talk in a similar manner especially if they're from the same background, but if most of your characters sound exactly like each other, then that's something to fix. A good way to test this is to mentally take out the comic's visuals; by focusing solely on what's in the word bubbles, you should be able to tell at a glance who is speaking. If you can't take enough of a step back at your own work to be objective, have a friend be the judge. If you are the creator and you have access to the comic's raw files, you can even go one step further by hiding the art layer(s) and keeping the word bubbles. Can you still say for sure who's who?

Above is a snippet of The Human Atlas, featuring the characters Iko (the mulberry-colored one with mint green eyes) and Filore (the russet-colored one with glasses and liseran purple eyes). It showcases my approach to writing dialogue, and I'll go over how it demonstrates each of my three rules.
1. Have almost every line convey some kind of information about the speaker or the situation.
This is a fairly slice-of-life-esque scene, but if you analyze each of the characters' lines, they tell you a lot of information about the characters themselves. Iko and Filore are both members of the same fishlike humanoid species: undines. Their dialogue, however, sets them worlds apart. And in just these three sentences, many conclusions about these two characters can be drawn.
Iko's one line seems scolding and extremely strict, hinting at her nature as a reserved but easily provoked character who is insistent upon her own boundaries. Filore calls her "friend" and Iko's very quick to inform her: "we're not." Her use of the archaic terms "nary" and "thee" further paints her as quite old-fashioned, if not even a little bit pompous.
Meanwhile, Filore combines Iko's name with the ancient Greek word "ecumene" - an obscure pun that many readers will find borderline incomprehensible - suggesting great intelligence but a lack of care as to whether or not people understand her. She's irreverent and playfully antagonistic but not quite mean: she very subtly jabs at Iko's formal dialect with "ye olde" before immediately softening the blow by calling her "friend." And her fish-themed riff on the phrase "cat got your tongue" also suggests that she is not above silliness.
2. Keep your characters' dialogue as concise as possible.
There's not really much to say here, both characters' bubbles are fairly concise and accomplish what they need to. Now Iko's bubble is only one sentence long, but Filore's actually seems like it's breaking this rule! It's actually not, and let me explain why.
She could easily have just selected either one of the two sentences she currently says, and dropped the other one. But shortening the line would have risked sacrificing the presence and communication of Filore's character. As stated above, you can infer from her lines that she is a whimsical, wise-cracking type, talking a little more than usual to fill the void of Iko's silence, and this is something that may have been lost if Filore's bubble was downsized.
I want to emphasize that these rules are not strict. Don’t be afraid to occasionally bend them for effect, like I did here.
3. Make it so you can tell every character apart just from their dialogue.
This blends in with the first point somewhat. There are many, many ways to have characters stand out from each other when it comes to dialogue: dialect, speech patterns, brevity or lack thereof, verbal tics and filler words, repetition, and everything else. Most differences tend to be very subtle, but part of the reason why I chose this particular segment from my comic is because these two characters' speech patterns are different in very obvious and extreme ways. Just from a glance at the dialogue, you should be able to form a very good image of these characters' personalities and how different they are from each other. Even if you take the visuals out of the picture!
And that's it! Just like with dialogue, I believe the best columns are short and concise. These three rules are by no means set in stone, but they've helped me improve my writing and I hope they help you as well. And if you've gotten particularly good results out of these, don't be afraid to show them to me - I'd like to see how my advice has helped you!
Personal twitter: http://twitter.com/PaladinTaimWebcomic twitter: http://twitter.com/THAcomicWebcomic website: http://thehumanatlas.com/Email addresses: greatephara(at)gmail.com (general shit-shooting)
paladintaim(at)gmail.com (writing and music-related business inquiries)
Please consider donating to this blog or purchasing from Natto-shop (http://nattosoup.com/shop) if you want me to continue publishing quality content. All materials tested were purchased from my own pocket. Keep on Truckin' Nattosoup is not under any sponsorship.
Guest Post: Mede Colvin and 3 Rules for Effective Dialogue
Hello! My name is Mede Colvin and I'm the writer behind the deepwater Southern horror-fantasy comic The Human Atlas, which I do in collaboration with my friend Nintala. I'm not going to say a lot about what I am or what I do... you didn't click on this post for that!
What I'm going to talk about concerns dialogue and how to write it effectively and impactfully. Dialogue is one of the most important parts of a comic: it is the main way that a story advances and explains itself and it is the main way for readers to glean information about what's going on. There are comics out there that do not have any spoken lines or even lines at all, but those comics instead rely on extremely strong visuals to tell their story. Most comics will have dialogue in some form or other. You can sometimes get away with weak visuals, but dialogue is make-or-break material, and weak, ineffective dialogue can utterly kill a comic.
When writing dialogue, I try to follow three main rules:
1. Have almost every line convey some kind of information about the speaker or the situation.
Occasional filler lines are okay, in the same way that beat panels are okay! However, unless you're writing a particularly peaceful scene or a pure slice-of-life comic, lack of direction in the dialogue can leave the reader lost. As with all things, there is a balance; sometimes characters do indeed ramble out of nervousness and things like that. But if it gets to the point that reading your word bubbles is like reading a book, shorten them.
2. Keep your characters' dialogue as concise as possible.
This is closely related to the first rule. Unless you're writing a specific kind of character or trying to write a humorous scene where a character rambles, don't have your characters say in a hundred words what they could say in ten. Try your hardest to keep your bubbles around four or five lines long or less. Remember that comics are a visual medium. We’ve all been told to “show, not tell” when writing, and even though “showing” is the default in comics, this is still valid advice. You’re not writing a book! Walls of text tend to kill pacing and momentum and often leave readers feeling like they're reading a novel instead of a comic.
3. Make it so you can tell every character apart just from their dialogue.
The reader should be able to tell which character is speaking at all times, even without visuals! A lot of characters can talk in a similar manner especially if they're from the same background, but if most of your characters sound exactly like each other, then that's something to fix. A good way to test this is to mentally take out the comic's visuals; by focusing solely on what's in the word bubbles, you should be able to tell at a glance who is speaking. If you can't take enough of a step back at your own work to be objective, have a friend be the judge. If you are the creator and you have access to the comic's raw files, you can even go one step further by hiding the art layer(s) and keeping the word bubbles. Can you still say for sure who's who?
Above is a snippet of The Human Atlas, featuring the characters Iko (the mulberry-colored one with mint green eyes) and Filore (the russet-colored one with glasses and liseran purple eyes). It showcases my approach to writing dialogue, and I'll go over how it demonstrates each of my three rules.
1. Have almost every line convey some kind of information about the speaker or the situation.
This is a fairly slice-of-life-esque scene, but if you analyze each of the characters' lines, they tell you a lot of information about the characters themselves. Iko and Filore are both members of the same fishlike humanoid species: undines. Their dialogue, however, sets them worlds apart. And in just these three sentences, many conclusions about these two characters can be drawn.
Iko's one line seems scolding and extremely strict, hinting at her nature as a reserved but easily provoked character who is insistent upon her own boundaries. Filore calls her "friend" and Iko's very quick to inform her: "we're not." Her use of the archaic terms "nary" and "thee" further paints her as quite old-fashioned, if not even a little bit pompous.
Meanwhile, Filore combines Iko's name with the ancient Greek word "ecumene" - an obscure pun that many readers will find borderline incomprehensible - suggesting great intelligence but a lack of care as to whether or not people understand her. She's irreverent and playfully antagonistic but not quite mean: she very subtly jabs at Iko's formal dialect with "ye olde" before immediately softening the blow by calling her "friend." And her fish-themed riff on the phrase "cat got your tongue" also suggests that she is not above silliness.
2. Keep your characters' dialogue as concise as possible.
There's not really much to say here, both characters' bubbles are fairly concise and accomplish what they need to. Now Iko's bubble is only one sentence long, but Filore's actually seems like it's breaking this rule! It's actually not, and let me explain why.
She could easily have just selected either one of the two sentences she currently says, and dropped the other one. But shortening the line would have risked sacrificing the presence and communication of Filore's character. As stated above, you can infer from her lines that she is a whimsical, wise-cracking type, talking a little more than usual to fill the void of Iko's silence, and this is something that may have been lost if Filore's bubble was downsized.
I want to emphasize that these rules are not strict. Don’t be afraid to occasionally bend them for effect, like I did here.
3. Make it so you can tell every character apart just from their dialogue.
This blends in with the first point somewhat. There are many, many ways to have characters stand out from each other when it comes to dialogue: dialect, speech patterns, brevity or lack thereof, verbal tics and filler words, repetition, and everything else. Most differences tend to be very subtle, but part of the reason why I chose this particular segment from my comic is because these two characters' speech patterns are different in very obvious and extreme ways. Just from a glance at the dialogue, you should be able to form a very good image of these characters' personalities and how different they are from each other. Even if you take the visuals out of the picture!
And that's it! Just like with dialogue, I believe the best columns are short and concise. These three rules are by no means set in stone, but they've helped me improve my writing and I hope they help you as well. And if you've gotten particularly good results out of these, don't be afraid to show them to me - I'd like to see how my advice has helped you!
Personal twitter: http://twitter.com/PaladinTaimWebcomic twitter: http://twitter.com/THAcomicWebcomic website: http://thehumanatlas.com/Email addresses: greatephara(at)gmail.com (general shit-shooting) paladintaim(at)gmail.com (writing and music-related business inquiries)
Please consider donating to this blog or purchasing from Natto-shop (http://nattosoup.com/shop) if you want me to continue publishing quality content. All materials tested were purchased from my own pocket. Keep on Truckin' Nattosoup is not under any sponsorship.
June 27, 2018
Watercolor Palette Comparison for Beginners by Aisazia Creations
I apologize for the lack of update on Monday, but I hope this amazing guest post by the phenomenal Aisazia will help make up for it!
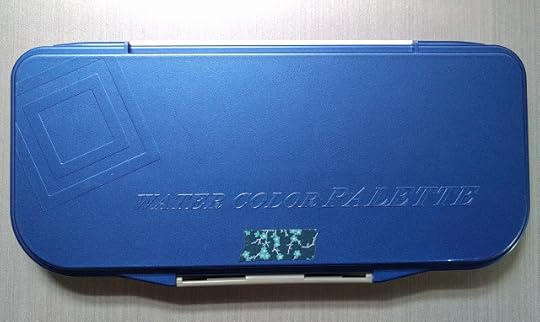 ● Lightweight (this is great if weight is an issue if you travel a lot)● Affordable (for about $10 or less you can get a nice plastic palette)● Lots of wells (there are slanted well options if you don't want to damage your brushes)● Lots of plastic palette options available
Cons:● Color staining (if you use staining watercolors, it might be hard to mix true colors unless you dedicate a certain part of your palette for that color but the stain can be removed with a white eraser)● May crack under pressure (so if you stuff your palette in your bag, you might want to handle it with more care)● Can't remove or swap colors easily without using up all the paint in the well first but not an issue if you already know your favorite colors

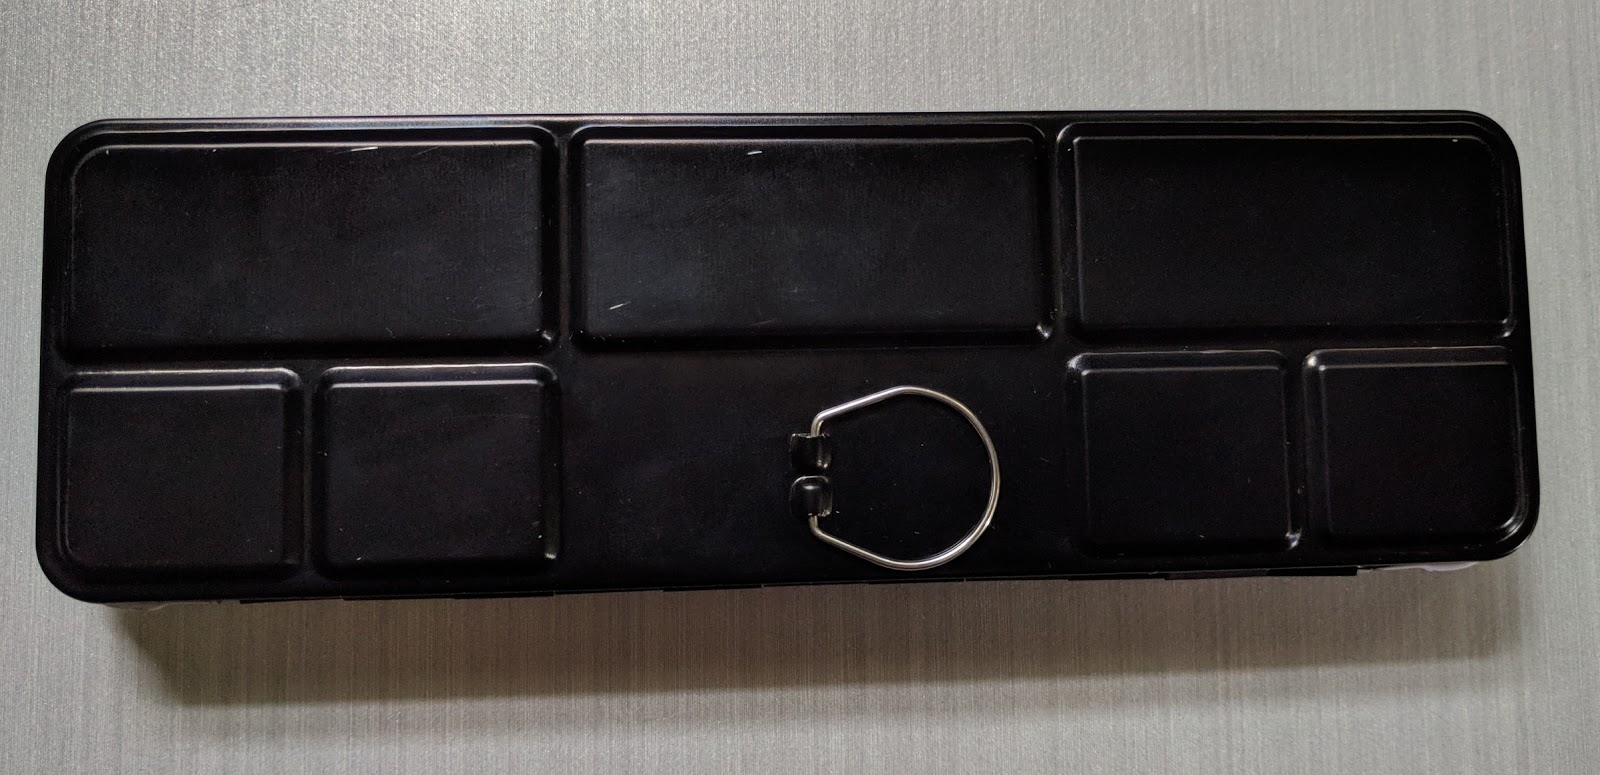
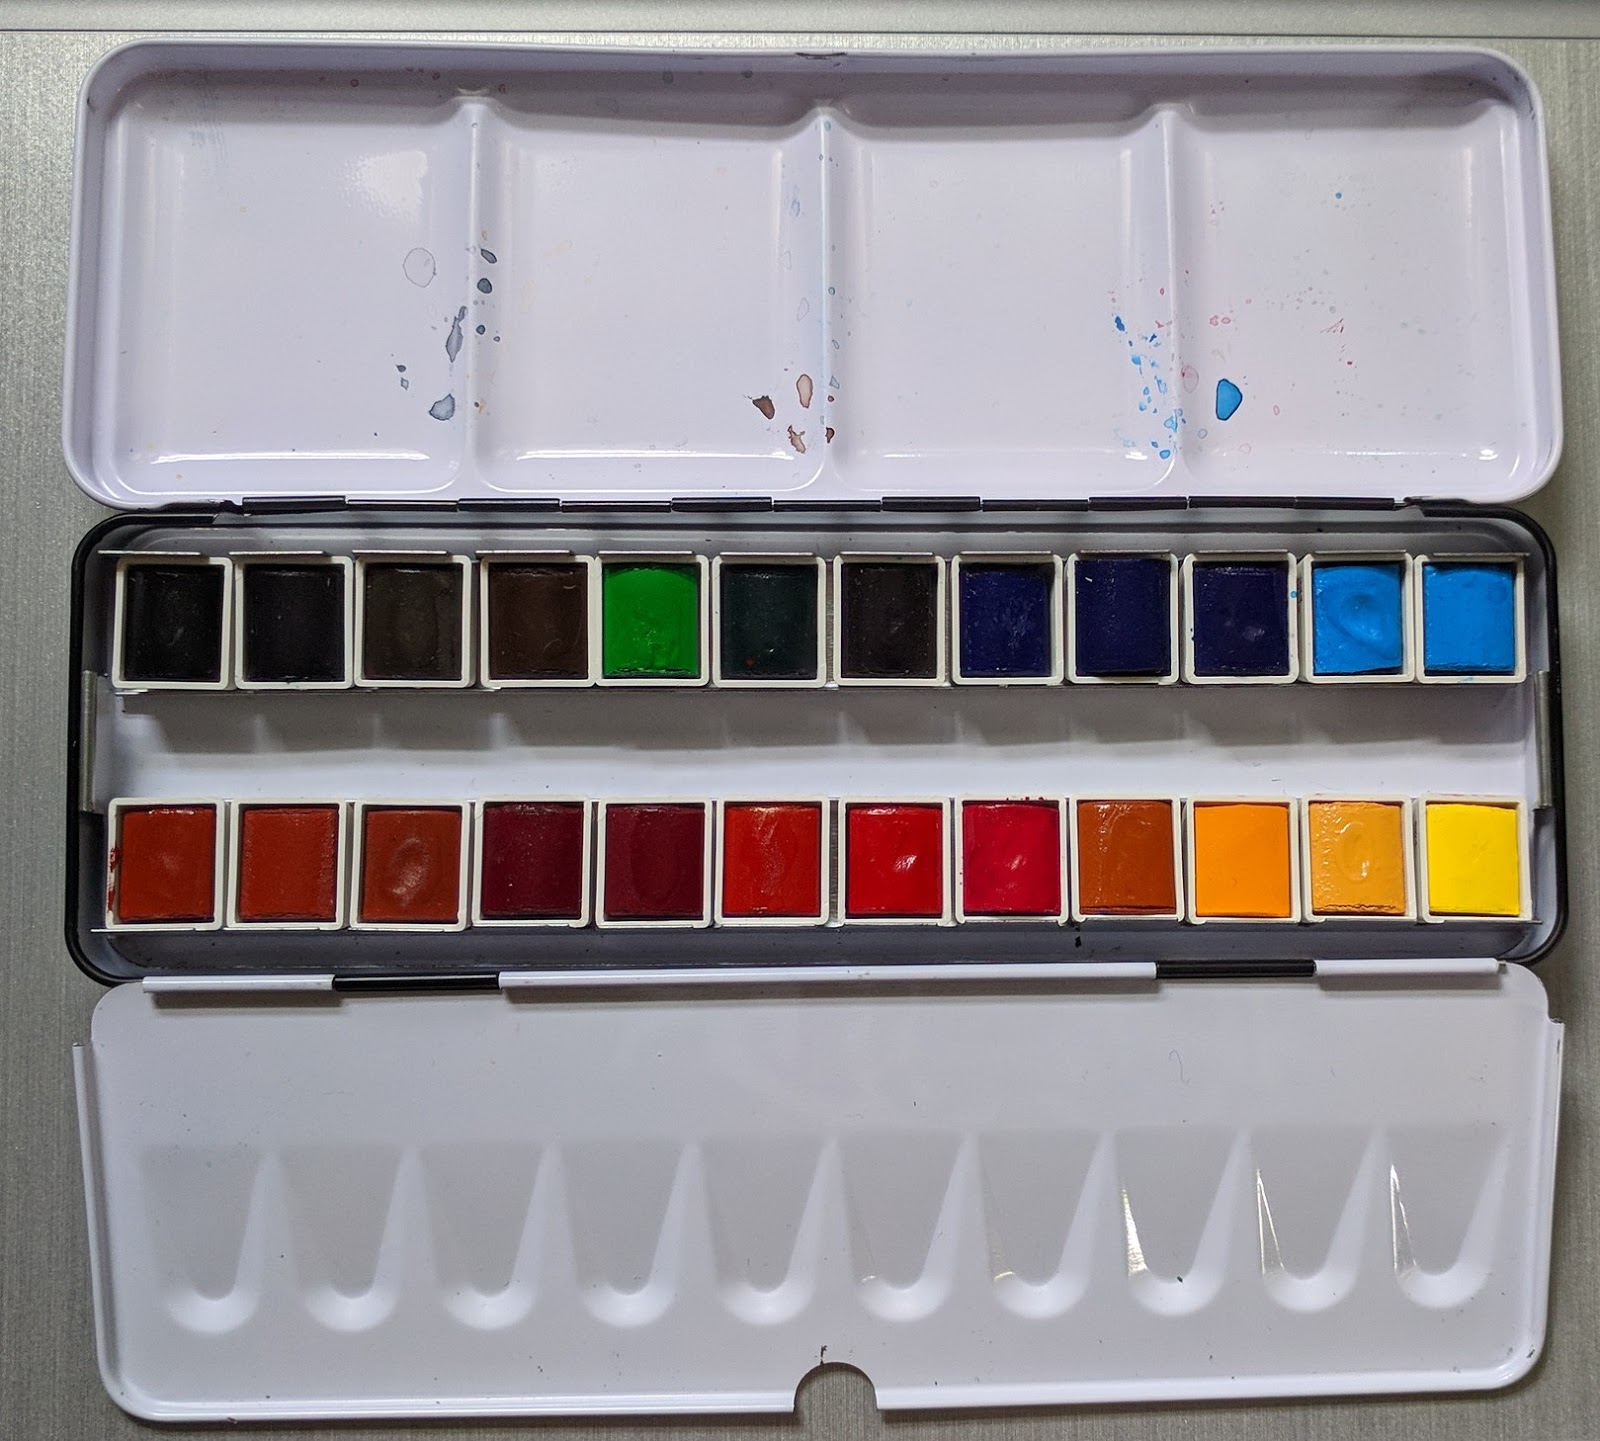
Pros:● Appears to be more sturdy but can dent and get scratched● Has a thumb ring to stabilize holding the palette (typically has a ring at the bottom for you to hold if you like to paint in the open),● Removable/customize-able paint pans (you can easily swap your pans on a whim, for example if you like half pans or full pans or want to change a color)● You can add more pans if you remove the metal interior pan holder● More costly (However, I've seen some empty metal palette being sold online for about $12 but the quality is hit or miss)
Cons:● Palettes are a bit heavier (if weight is an issue)● Metal can rust (if you're a messy painter and get water and paint all over the place, it could increase the chance of it rusting)● Metal palettes aren't customize-able in terms of exterior size (they all seem to be either rectangular or square)
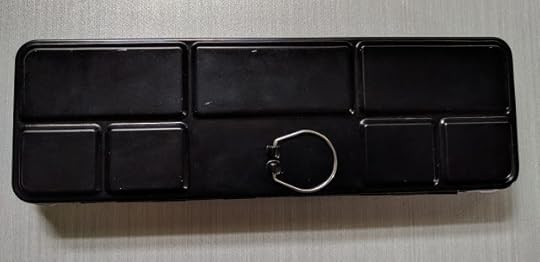

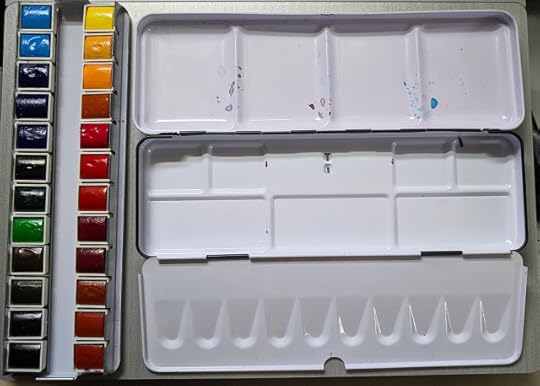
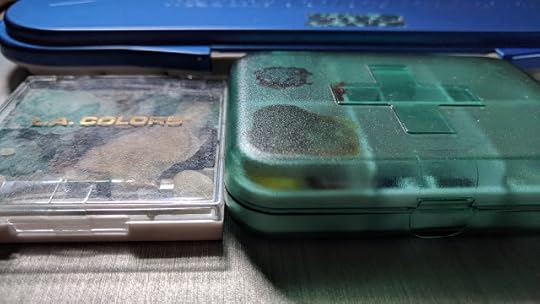
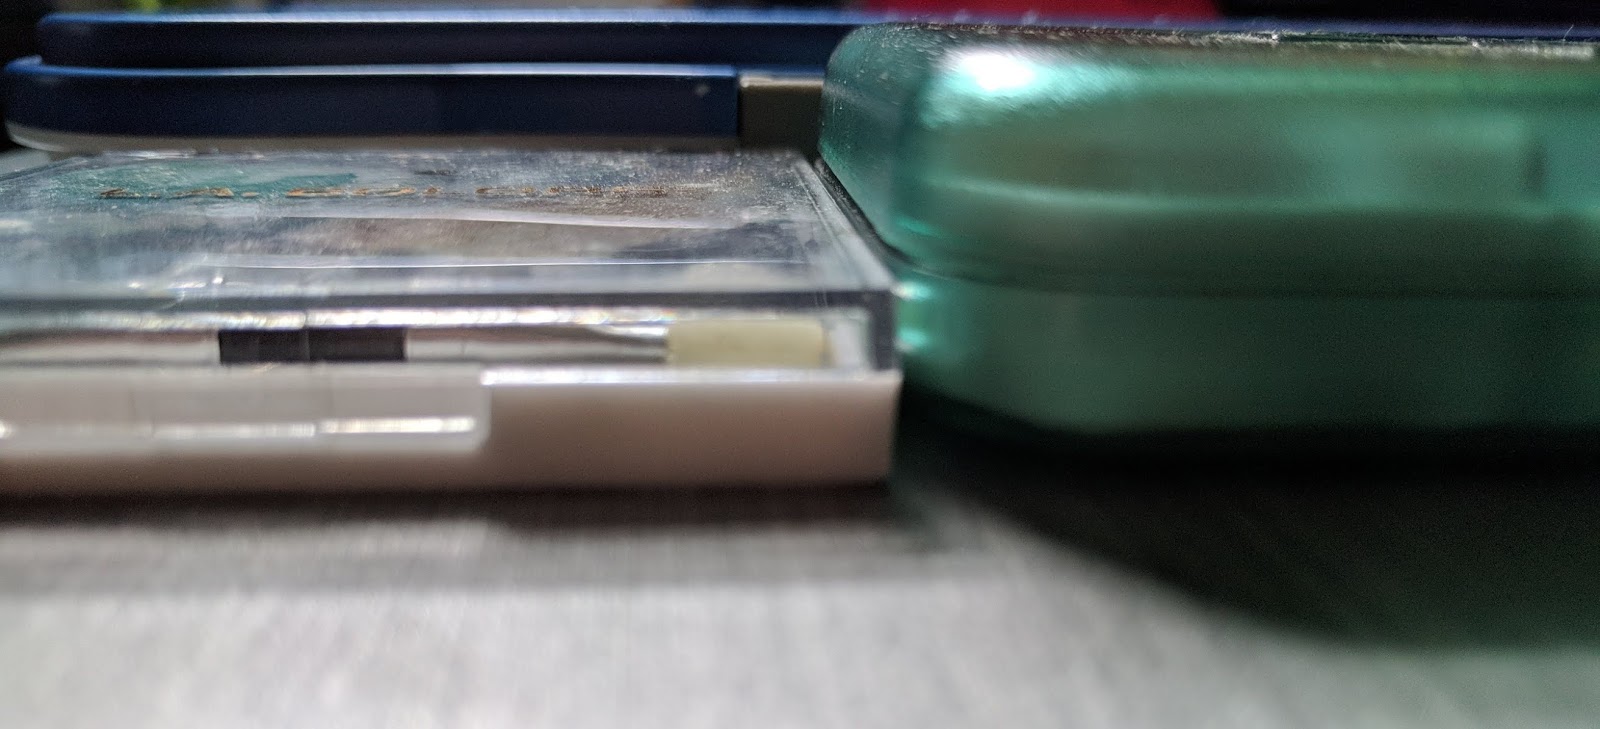
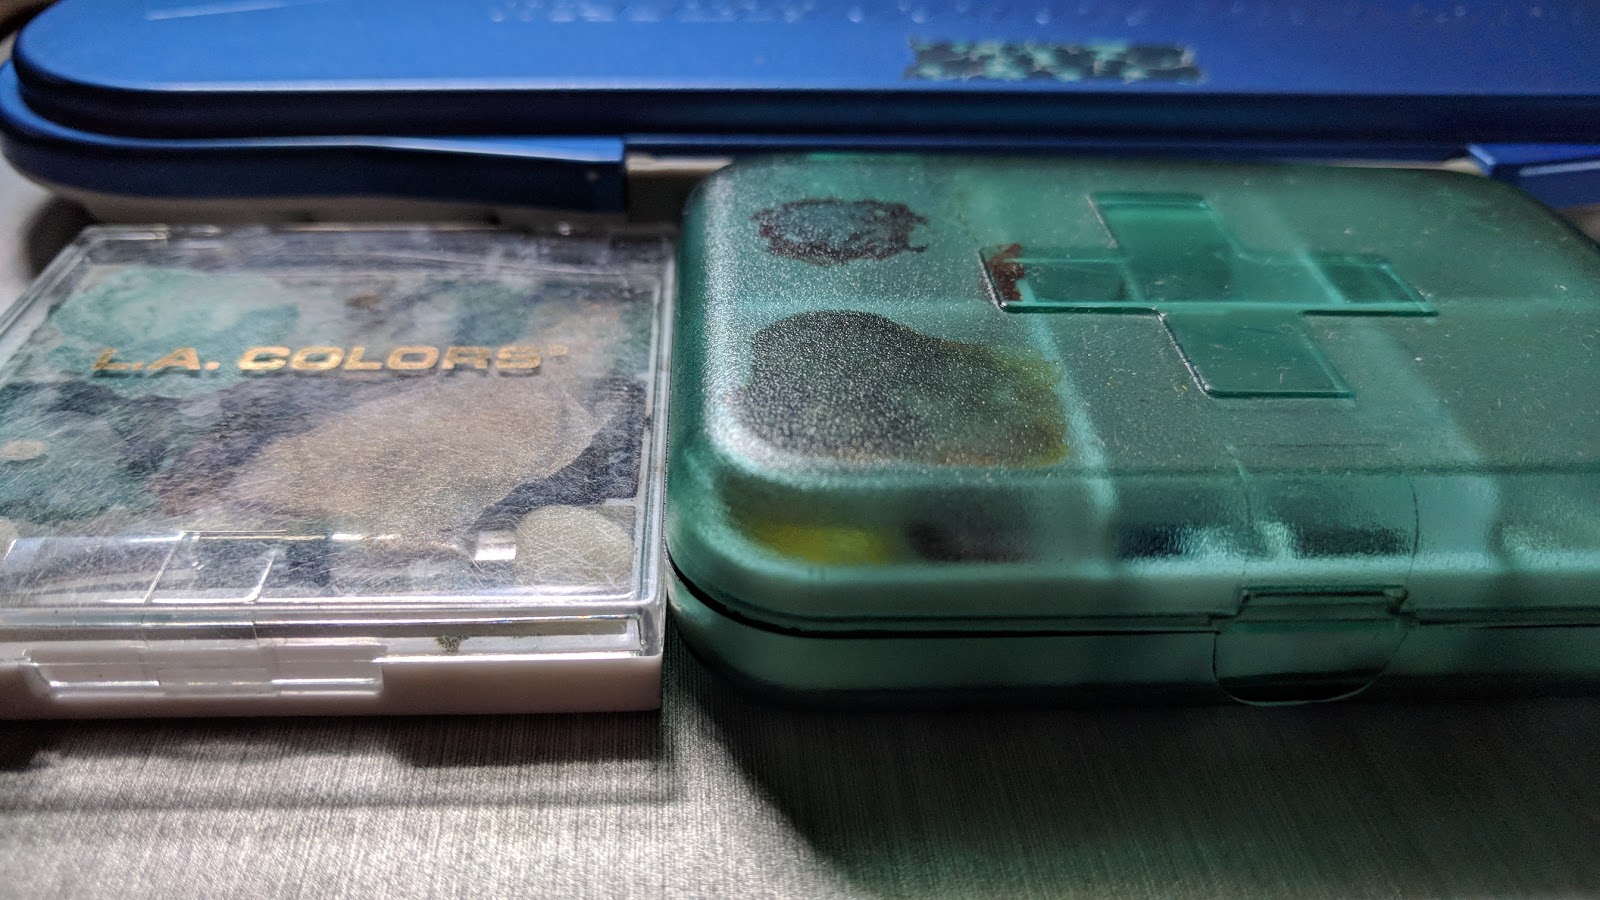
I know there are Ceramic and Porcelainpalettes but as I've not used it myself and I don't feel they are travel friendly, I've opted to not include it in this comparison but I've heard positive things about it if you have a studio space to include it.There are many custom-made palettes which look amazing but I don't have the funds to purchase any of them, but as with all tools, they are an investment if you see one you like. Disclaimer: I do not claim to be the originators of these following ideas, these are ones I've seen during my research but the pictured palettes are all my own. You can compare the thickness of the various palettes below. The thinnest is the make up palette so would make a nice travel palette.
I realized I preferred plastic palettes for their weight, price, and accessibility. If you prefer metal palettes then these DIY options might be more of a challenge. You might have to spray paint it with a water-resistant coating to prevent it from rusting.
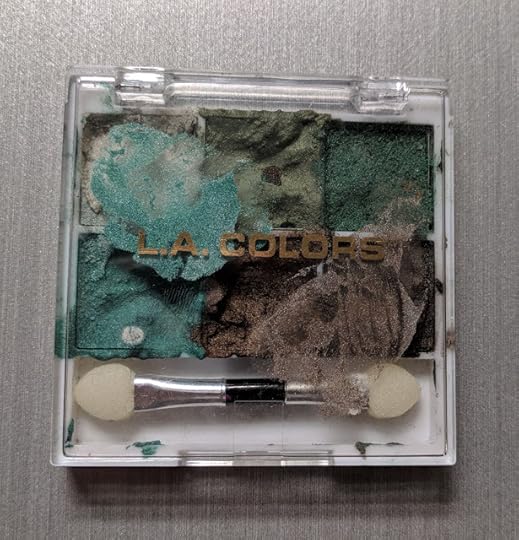
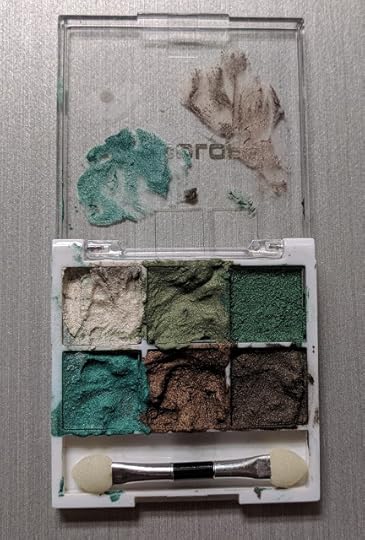
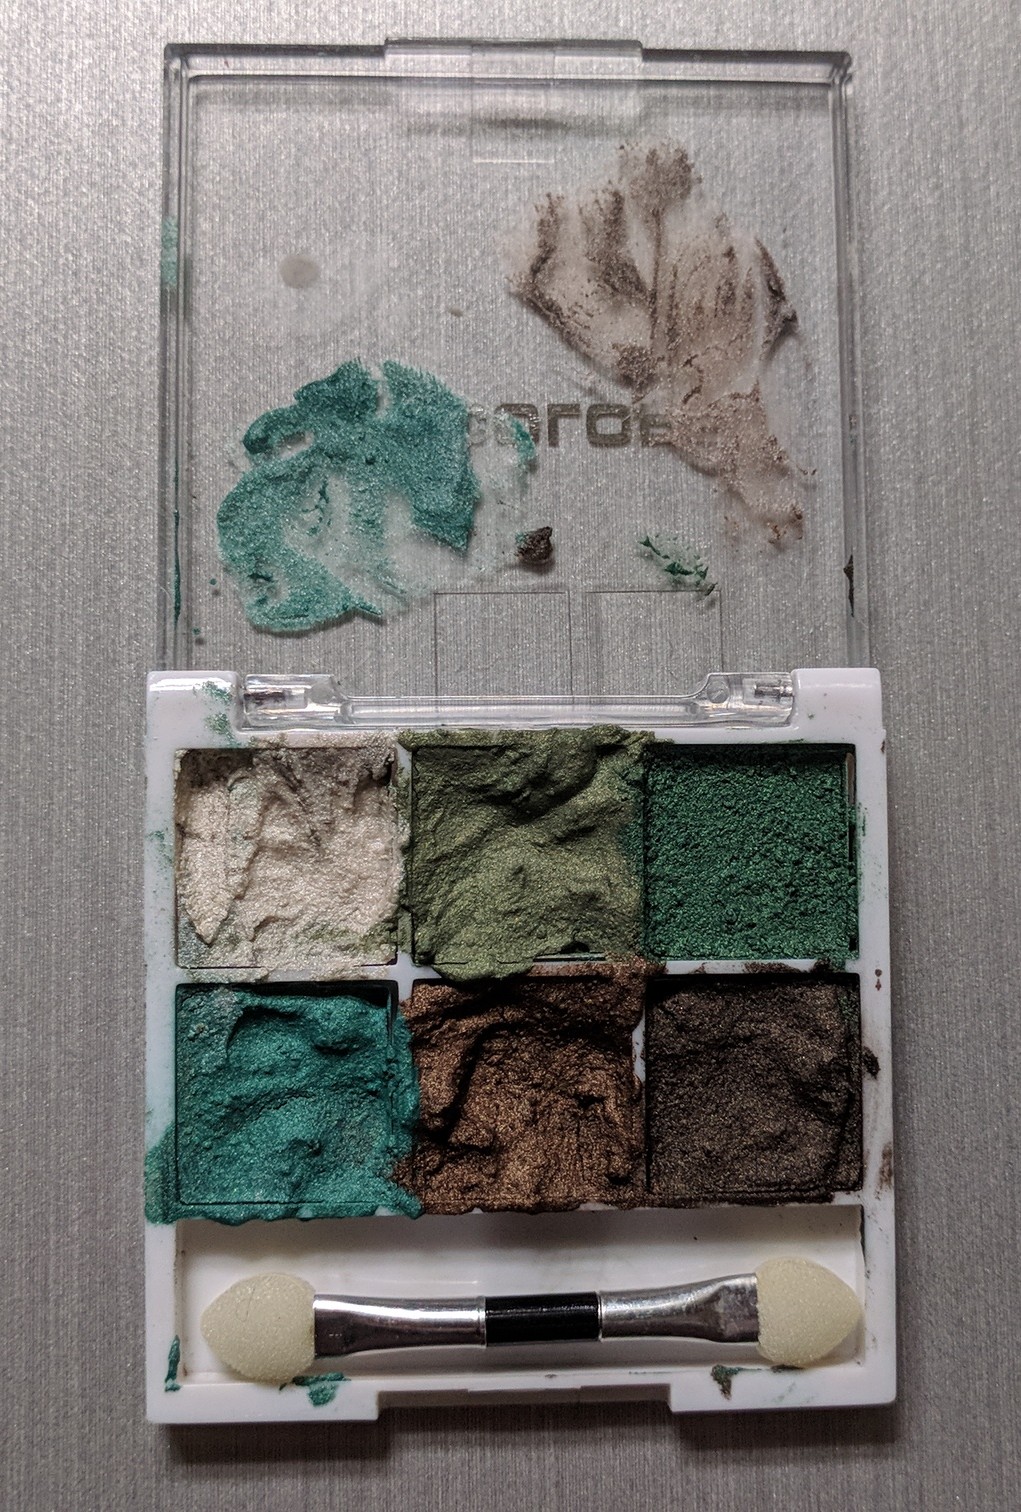
Some ladies and fellas buy make up palettes, primarily the eye shadow palettes where I could get one from my local dollar store (Come on, how great of a deal is that?). Those are conveniently separated by wells (can range in the number of wells so make sure you get one that holds enough paint colors for you) so all you need to do is use up your make up, which you're going to do anyways, right? Then when it's all done, if there is metal at the bottom of the wells, spray it down with white water-resistant spray paint. Then add your watercolor paints of choice. Voila! Instant watercolor palette! Mixing space may be small but it works. It's super lightweight and compact.
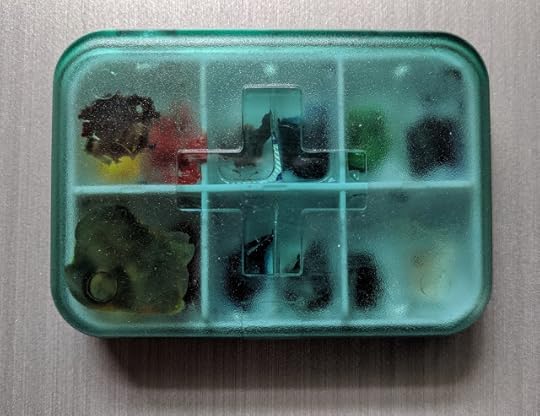
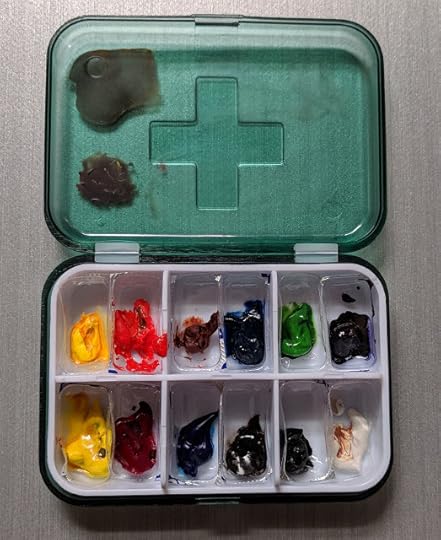
I've seen a few options for the interior wells:You can buy empty pans and fill it with your favorite paints and add magnets or poster tack to keep the pans steady in the tin and you can still swap them outEmpty plastic gum containers can be used as wells but it might be a challenge to find ones that fit the tin well but if you chew a lot of gum you'll have plenty of optionsPlastic bottle caps are easy to find as wells but they leave empty spaces in your paletteBaking clay in the tin and shaping the wells to the size you want is fun and creative but might add more weight to the palette. You wouldn't be able to change colors as easily.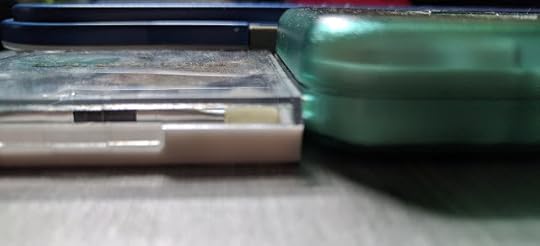
There are plenty of customized watercolor options available on Etsy if you have the funds but honestly you don't need a lot to make your own palette.
Before you go, I want to leave you with a friendly reminder that a watercolor palette is a tool, much like the brush and paint. It doesn't make you a better painter but it makes it easier for you to access the colors you love and most of all it gets you excited to get started to paint!
While it's nice to want to use the palettes a popular artist uses or even what the old artists used, it still doesn't change the fact that you need to use these tools to learn and grow. You may eventually outgrow your current palette but at least you'll understand the little quirks you like to use in your tools that make you happy and excited to use them.
That's all the tips I have for you for now! What are your thoughts? Do you have any advice to share with our fellow beginner watercolorists? Share them in the comments below!
About Aisazia CreationsI’m a solo creative from the Midwest who is multi-passionate about design, stories, and technology. I can usually be found either sketching, illustrating, watercoloring, writing, reading, or front-end web designing and development. If I’m not doing any of those, then I can be found thinking about it as I binge watch TV shows or scroll through social media.
More fun tidbits: Lover of all dogs. Gluten free sweet loving Celiac. Loves sleeping and staying at home yet still wants to travel the world.
Feel free to connect with me!Website - aisaziacreations.com Email - aisaziacreations@gmail.comTwitter - Twitter.com/Aisazia Twitter (author) - Twitter.com/he_anev Instagram - Instagram.com/Aisazia Tumblr - aisazia.Tumblr.comBlog - aisaziacreations.com/blog Shop - aisaziacreations.com/shop
Please consider donating to this blog or purchasing from Natto-shop (http://nattosoup.com/shop) if you want me to continue publishing quality content. All materials tested were purchased from my own pocket. Keep on Truckin' Nattosoup is not under any sponsorship.
 ● Lightweight (this is great if weight is an issue if you travel a lot)● Affordable (for about $10 or less you can get a nice plastic palette)● Lots of wells (there are slanted well options if you don't want to damage your brushes)● Lots of plastic palette options available
Cons:● Color staining (if you use staining watercolors, it might be hard to mix true colors unless you dedicate a certain part of your palette for that color but the stain can be removed with a white eraser)● May crack under pressure (so if you stuff your palette in your bag, you might want to handle it with more care)● Can't remove or swap colors easily without using up all the paint in the well first but not an issue if you already know your favorite colors
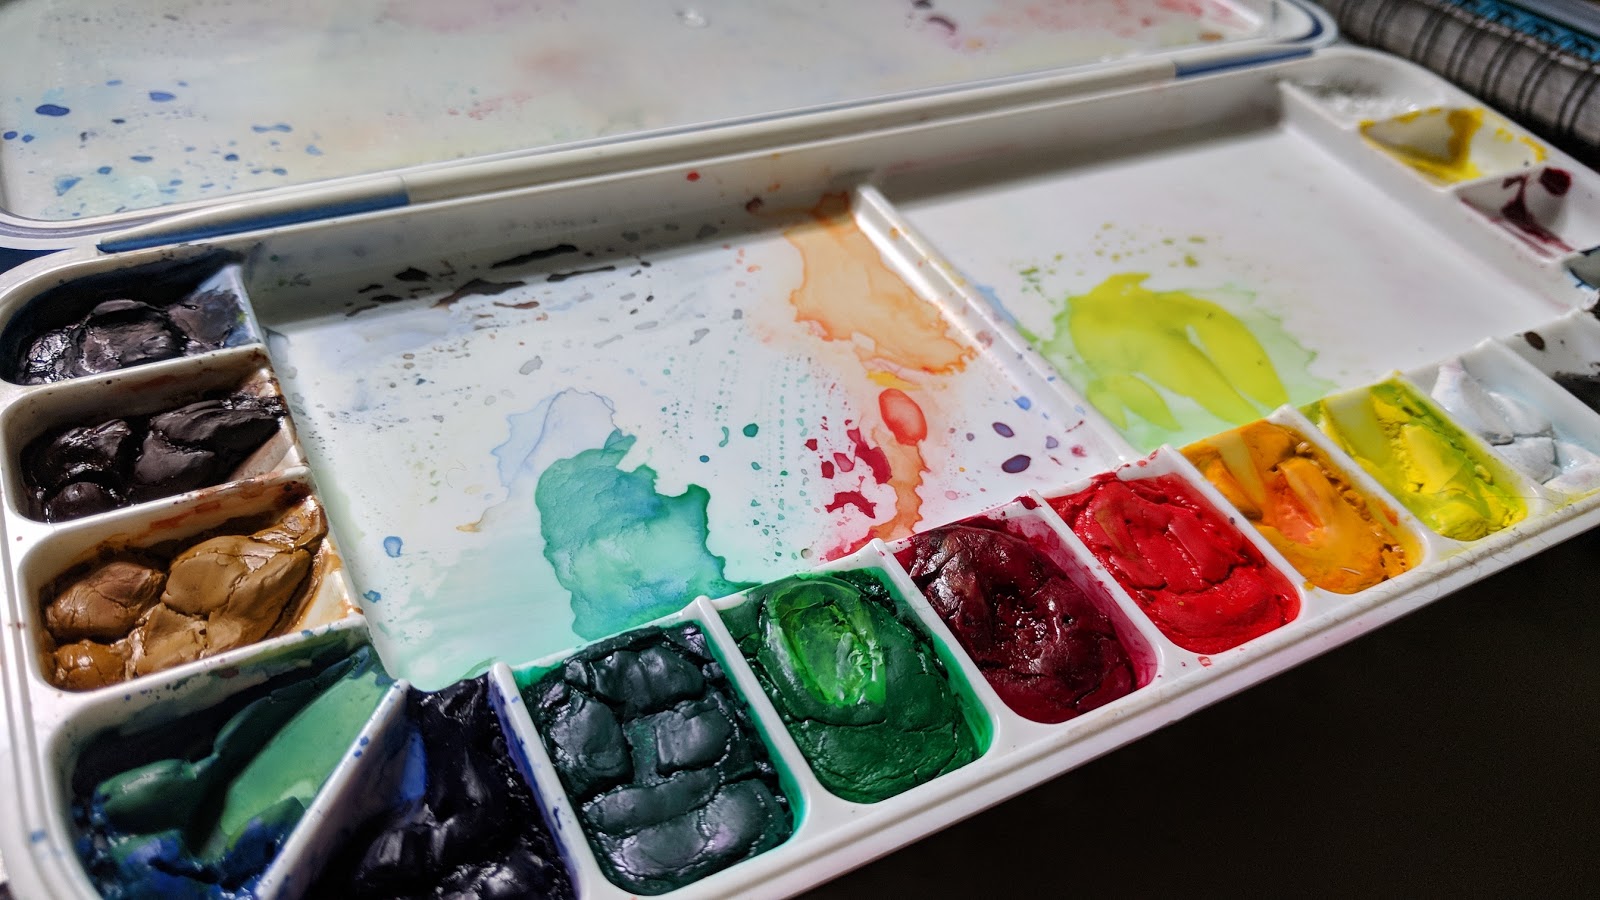
Pros:● Appears to be more sturdy but can dent and get scratched● Has a thumb ring to stabilize holding the palette (typically has a ring at the bottom for you to hold if you like to paint in the open),● Removable/customize-able paint pans (you can easily swap your pans on a whim, for example if you like half pans or full pans or want to change a color)● You can add more pans if you remove the metal interior pan holder● More costly (However, I've seen some empty metal palette being sold online for about $12 but the quality is hit or miss)
Cons:● Palettes are a bit heavier (if weight is an issue)● Metal can rust (if you're a messy painter and get water and paint all over the place, it could increase the chance of it rusting)● Metal palettes aren't customize-able in terms of exterior size (they all seem to be either rectangular or square)
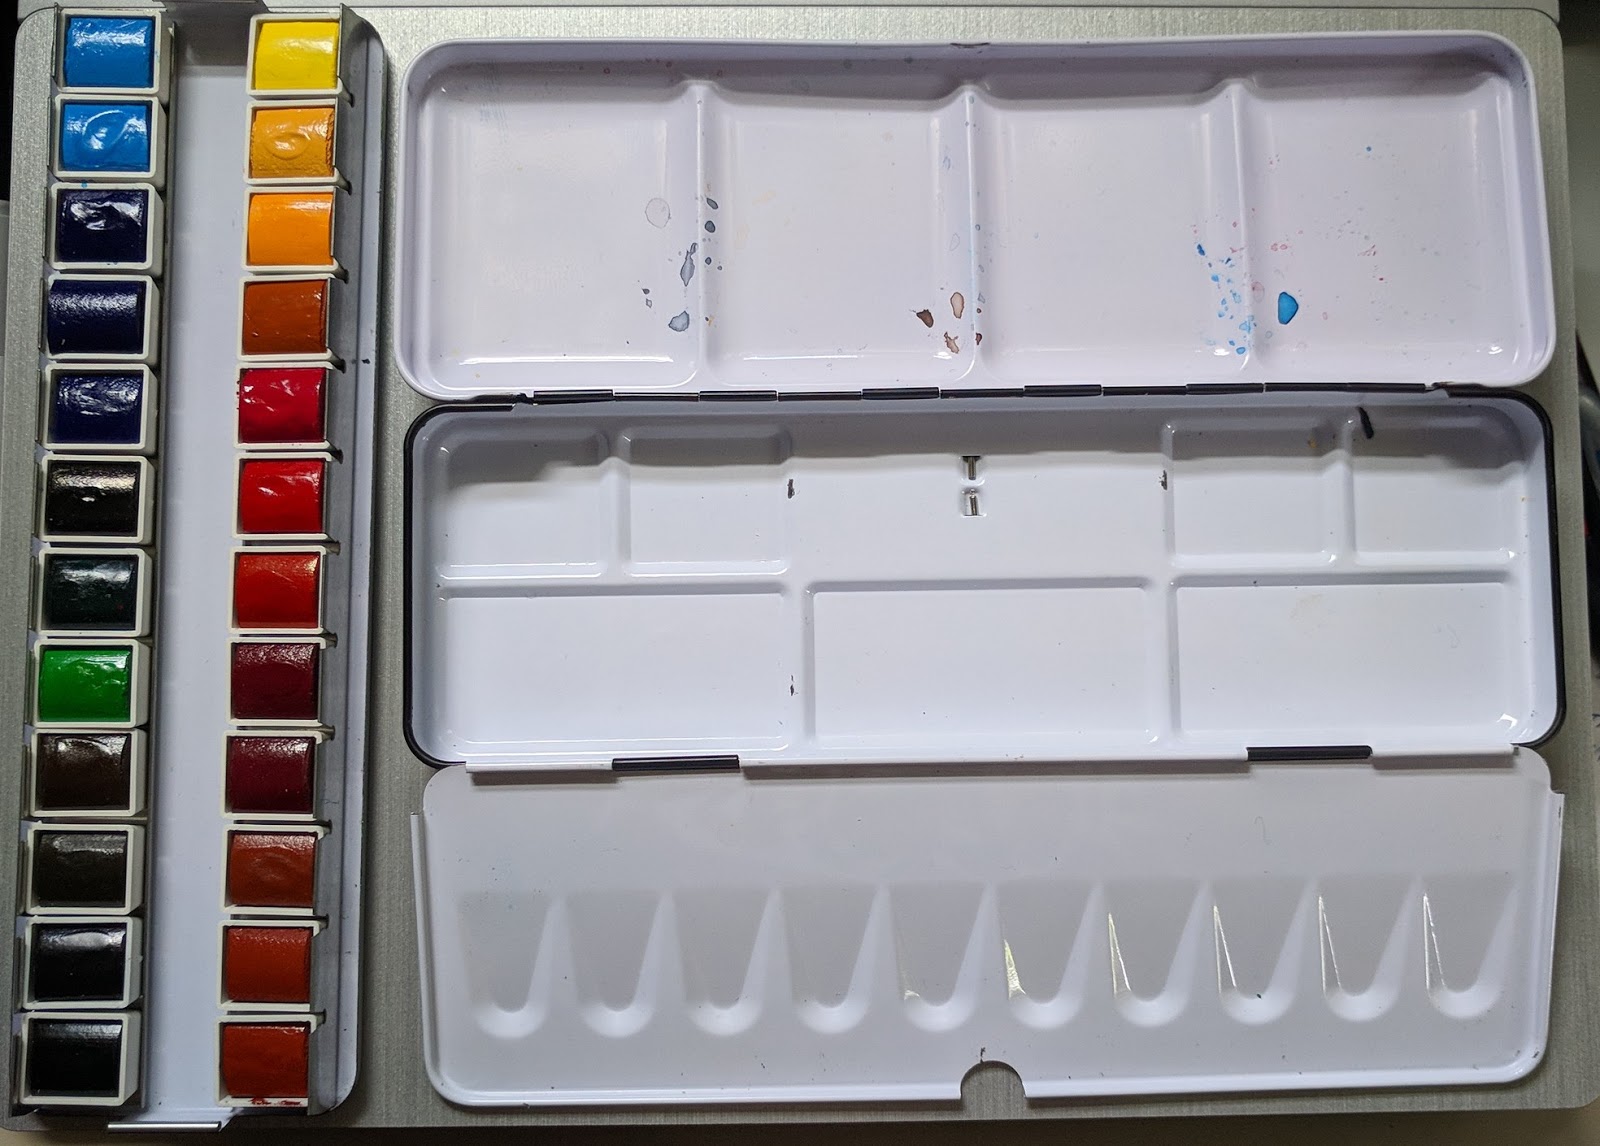
I know there are Ceramic and Porcelainpalettes but as I've not used it myself and I don't feel they are travel friendly, I've opted to not include it in this comparison but I've heard positive things about it if you have a studio space to include it.There are many custom-made palettes which look amazing but I don't have the funds to purchase any of them, but as with all tools, they are an investment if you see one you like. Disclaimer: I do not claim to be the originators of these following ideas, these are ones I've seen during my research but the pictured palettes are all my own. You can compare the thickness of the various palettes below. The thinnest is the make up palette so would make a nice travel palette.
I realized I preferred plastic palettes for their weight, price, and accessibility. If you prefer metal palettes then these DIY options might be more of a challenge. You might have to spray paint it with a water-resistant coating to prevent it from rusting.
Some ladies and fellas buy make up palettes, primarily the eye shadow palettes where I could get one from my local dollar store (Come on, how great of a deal is that?). Those are conveniently separated by wells (can range in the number of wells so make sure you get one that holds enough paint colors for you) so all you need to do is use up your make up, which you're going to do anyways, right? Then when it's all done, if there is metal at the bottom of the wells, spray it down with white water-resistant spray paint. Then add your watercolor paints of choice. Voila! Instant watercolor palette! Mixing space may be small but it works. It's super lightweight and compact.


I've seen a few options for the interior wells:You can buy empty pans and fill it with your favorite paints and add magnets or poster tack to keep the pans steady in the tin and you can still swap them outEmpty plastic gum containers can be used as wells but it might be a challenge to find ones that fit the tin well but if you chew a lot of gum you'll have plenty of optionsPlastic bottle caps are easy to find as wells but they leave empty spaces in your paletteBaking clay in the tin and shaping the wells to the size you want is fun and creative but might add more weight to the palette. You wouldn't be able to change colors as easily.
There are plenty of customized watercolor options available on Etsy if you have the funds but honestly you don't need a lot to make your own palette.
Before you go, I want to leave you with a friendly reminder that a watercolor palette is a tool, much like the brush and paint. It doesn't make you a better painter but it makes it easier for you to access the colors you love and most of all it gets you excited to get started to paint!
While it's nice to want to use the palettes a popular artist uses or even what the old artists used, it still doesn't change the fact that you need to use these tools to learn and grow. You may eventually outgrow your current palette but at least you'll understand the little quirks you like to use in your tools that make you happy and excited to use them.
That's all the tips I have for you for now! What are your thoughts? Do you have any advice to share with our fellow beginner watercolorists? Share them in the comments below!
About Aisazia CreationsI’m a solo creative from the Midwest who is multi-passionate about design, stories, and technology. I can usually be found either sketching, illustrating, watercoloring, writing, reading, or front-end web designing and development. If I’m not doing any of those, then I can be found thinking about it as I binge watch TV shows or scroll through social media.
More fun tidbits: Lover of all dogs. Gluten free sweet loving Celiac. Loves sleeping and staying at home yet still wants to travel the world.
Feel free to connect with me!Website - aisaziacreations.com Email - aisaziacreations@gmail.comTwitter - Twitter.com/Aisazia Twitter (author) - Twitter.com/he_anev Instagram - Instagram.com/Aisazia Tumblr - aisazia.Tumblr.comBlog - aisaziacreations.com/blog Shop - aisaziacreations.com/shop
Please consider donating to this blog or purchasing from Natto-shop (http://nattosoup.com/shop) if you want me to continue publishing quality content. All materials tested were purchased from my own pocket. Keep on Truckin' Nattosoup is not under any sponsorship.
June 21, 2018
ALAAC Convention Announcement
This weekend, I'm going to be at the American Librarian Association's Annual Conference! If you're interested in seeing how this show fares for me, please keep an eye out for my upcoming ALAAC recap on Youtube.
I'll Have:
Copies of 7" Kara Volume 1
Preview Pages from 7" Kara Volume 2
Commissions
Original art
Wooden Charms
Handpainted Wooden Charms
Stickers
Miniprints
Lilliputian Living (zine)
Favorite Fictional Femmes (zine)
31 Days Under the Waves (zine)
Sketchbooks
1001 Knights Sets and Vol 3 (Wisdom)
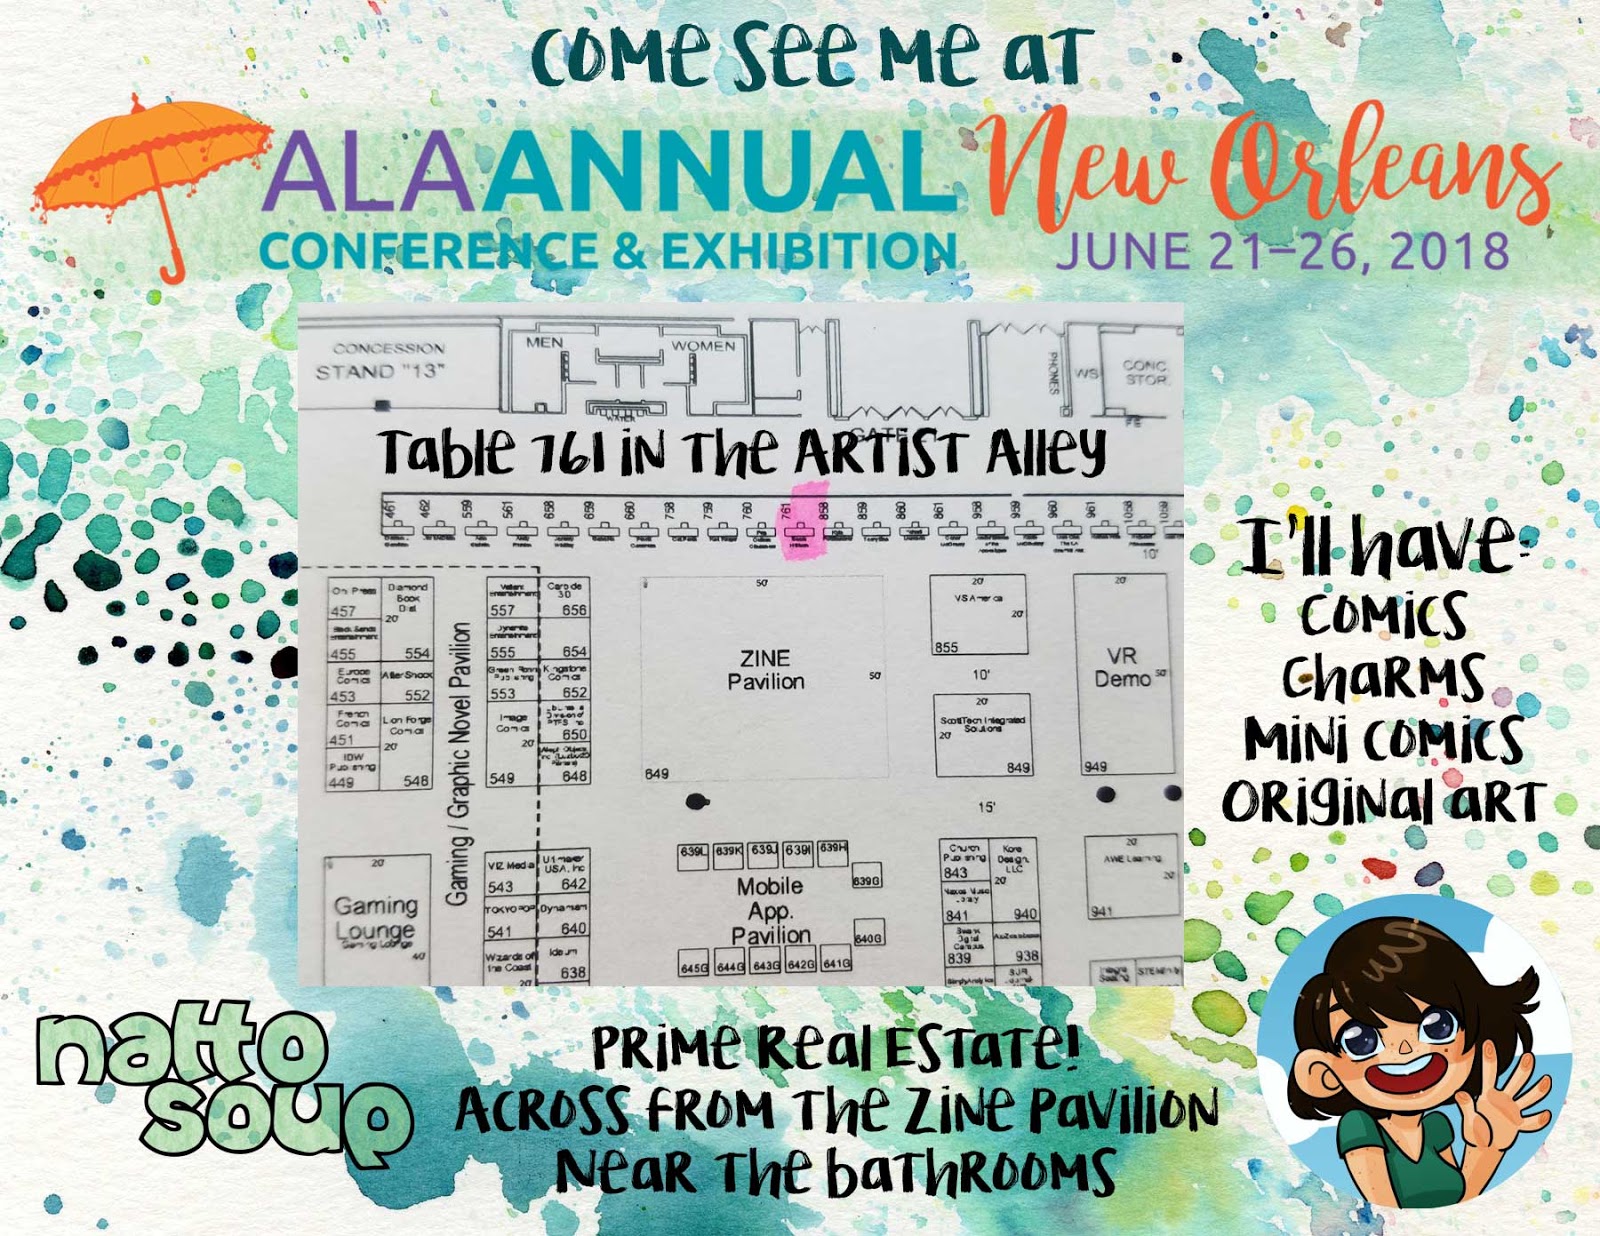
You can find me at table 761 in the Artist Alley, right by the bathrooms and across from the Zine Pavilion.
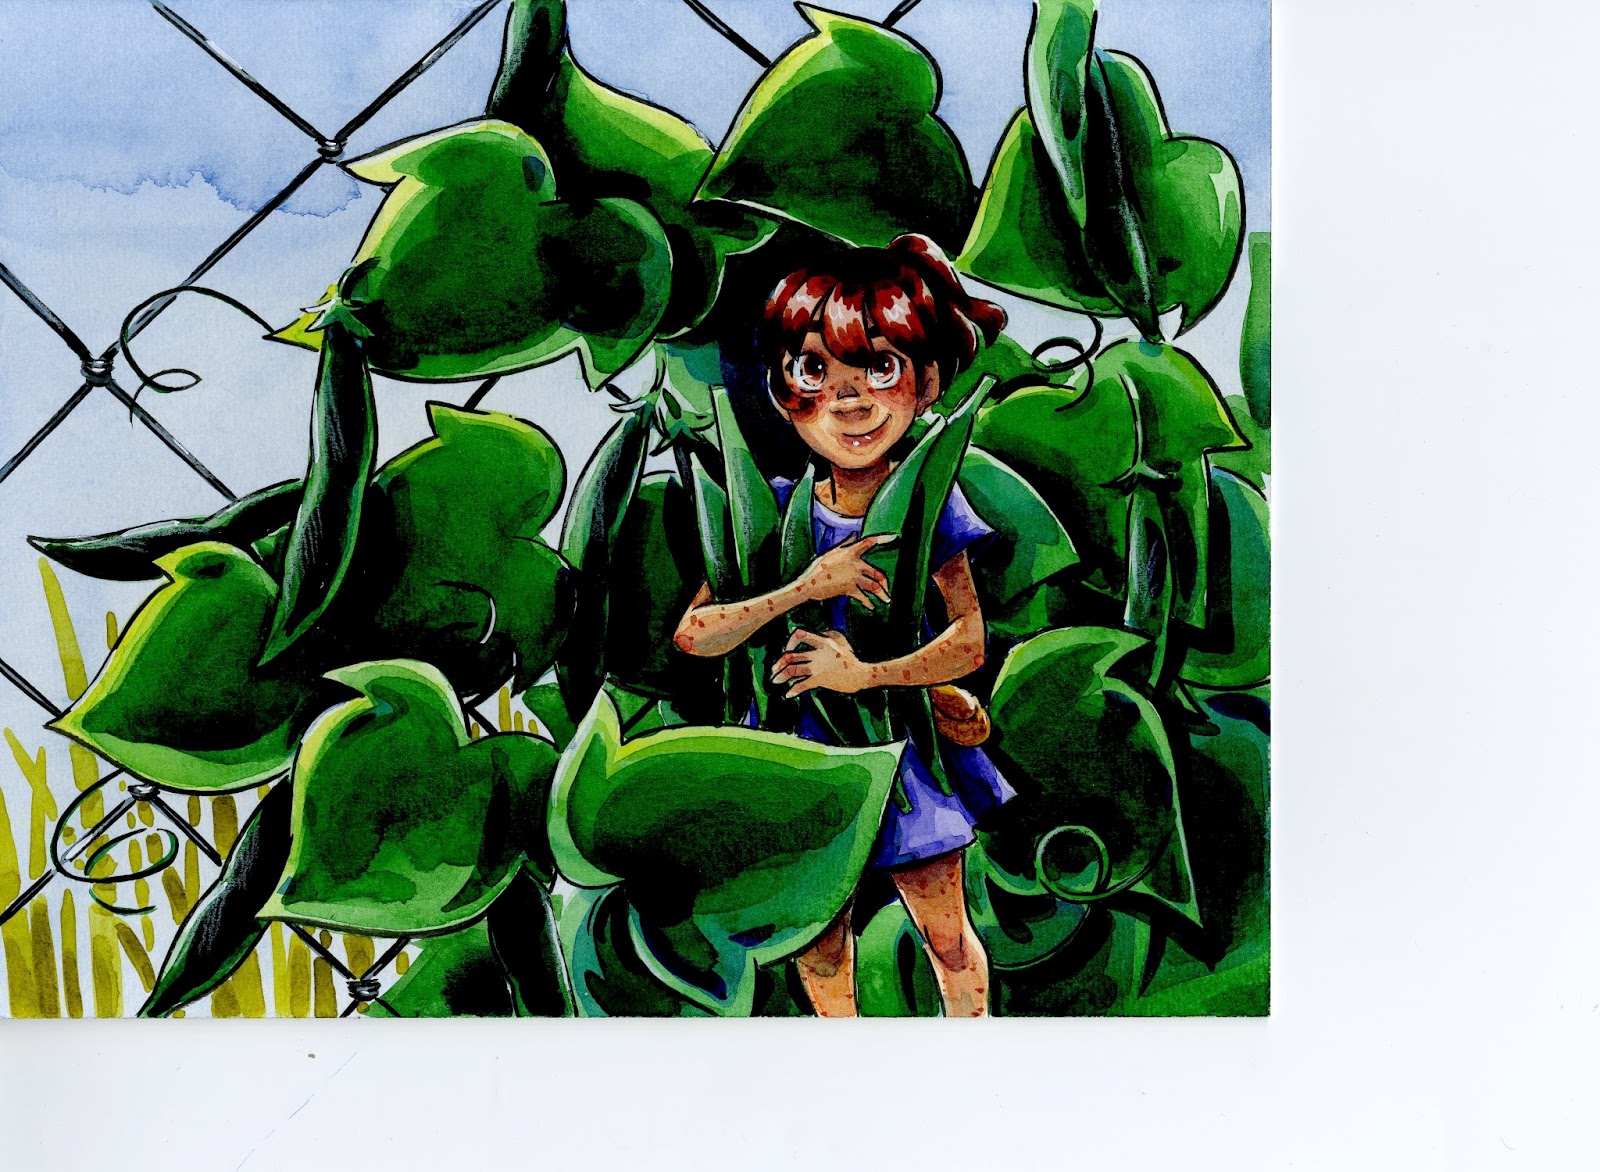
 Look for this illustration in the ALAAC Art Auction!
Other illustrations for sale:


This isn't my first experience with ALAAC! I tabled at ALAAC in 2015, when it was in San Francisco. This was my first time tabling at ALAAC, and I have to admit, I was hugely overwhelmed, and feel I misspent my time in how I prepared for the show. It was a comedy of errors, from a missed flight due to TSA lines, to running through San Francisco carrying 50 pounds of comics on my back, to near tears in the ALAAC convention center lobby, to an amazing dinner with comic senpai, to finding out firsthand that the American Library system had changed how libraries can acquire books, and I was SOL for that ALAAC.
I'd like to think I've learned a lot since then, matured as a person, and possibly formulated a gameplan. This year, I'm tabling in my hometown (New Orleans, Louisiana) selling a kidlit graphic novel to a library system that's seen a massive attitude adjustment in favor of comics thanks to the hard work of many Valkyries, selling a kidlit graphic novel set IN Louisiana, a state that historically doesn't have much for kids who want to read stories set at home, and focusing not so much on sales, but on promoting the book and making it clear that it serves certain needs and has everything necessary for a library to acquire copies.
So cross your fingers and toes for me this weekend- hopefully ALAAC will go well!
Please consider donating to this blog or purchasing from Natto-shop (http://nattosoup.com/shop) if you want me to continue publishing quality content. All materials tested were purchased from my own pocket. Keep on Truckin' Nattosoup is not under any sponsorship.

June 14, 2018
Watercolor Swatching
Over the past few months, I've tested several brands of professional, artist quality watercolors in an attempt to find an affordable alternative to Winsor and Newton semi moist half pans. My findings have been interesting, and a little surprising, and I hope you'll join me on Youtube to see the results.
Because I use watercolor for comics and illustration, I think my needs are a little different from your average watercolorist, and I test based on my needs. For some types of watercolor, such as Chinese watercolor, or gansai watercolor, knowing the origin and intended use helps me determine whether these watercolors will suit my painting needs.
 Kuretake Gansai Tambi Swatch
Brands I Have Tested:
Daniel Smith
M Graham
Sennelier
Turner
MozArt Komorebi
Holbein
Mijello Mission Gold
Shin Han Professional Watercolor
Kusakabe
Da Vinci
Winsor and Newton
Kuretake Gansai Tambi
Kissho Gansai
Kuretaken Shin Gansai
Caran D'Ache Studio Gouache
Caran D'Ache Fancolor
Derwent Inktense Sticks
Cotman
 Da Vinci Mud Test
All this testing means I have swatched A LOT of watercolor. And I think I've found a method that gives me the gist of the information I'm looking for.
What I Test For:
OpacitySedimentLiftingGradiation/washesConsistent performance from tube to panBrilliance after drying
I also swatch out of spite. If your company makes big promises (Most Brilliant Watercolor! Only Semi Moist Half Pans to Reconstitute Well! Colors are Most Translucent) I will specifically test those promises out.
 St Petersburg White Nights Mud Test
My Swatch Process:
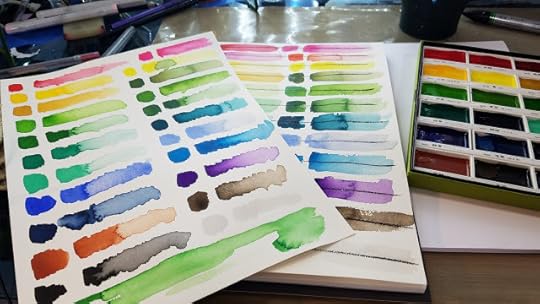
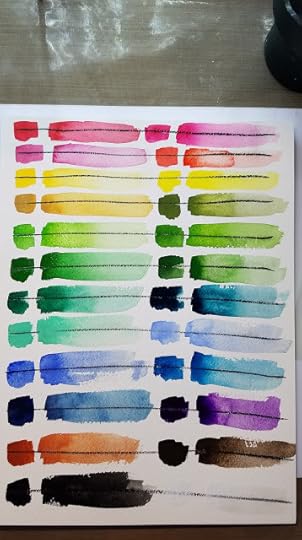
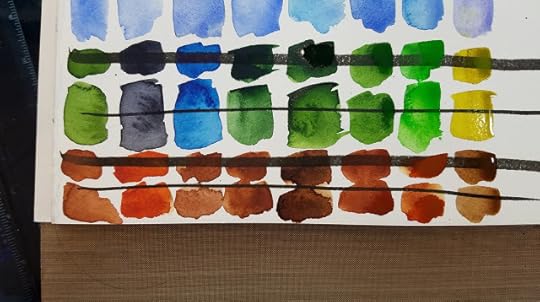
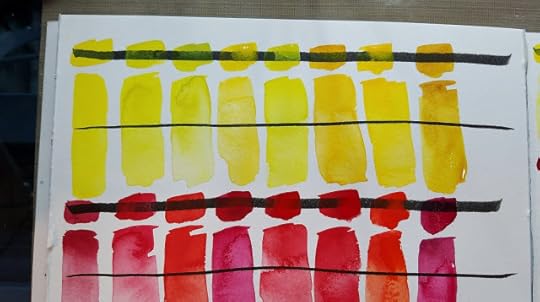
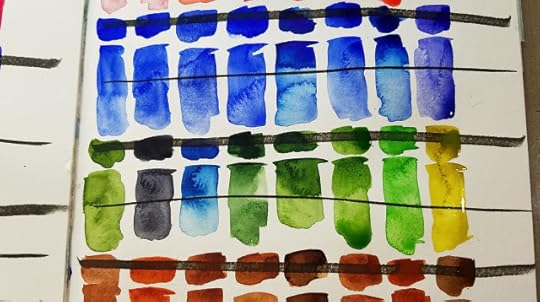
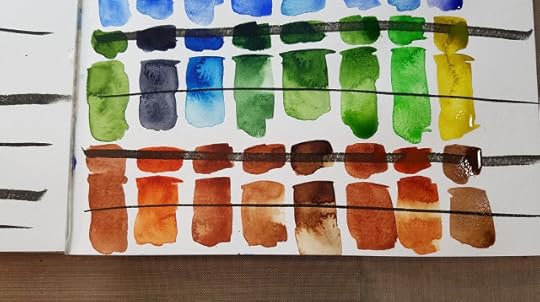
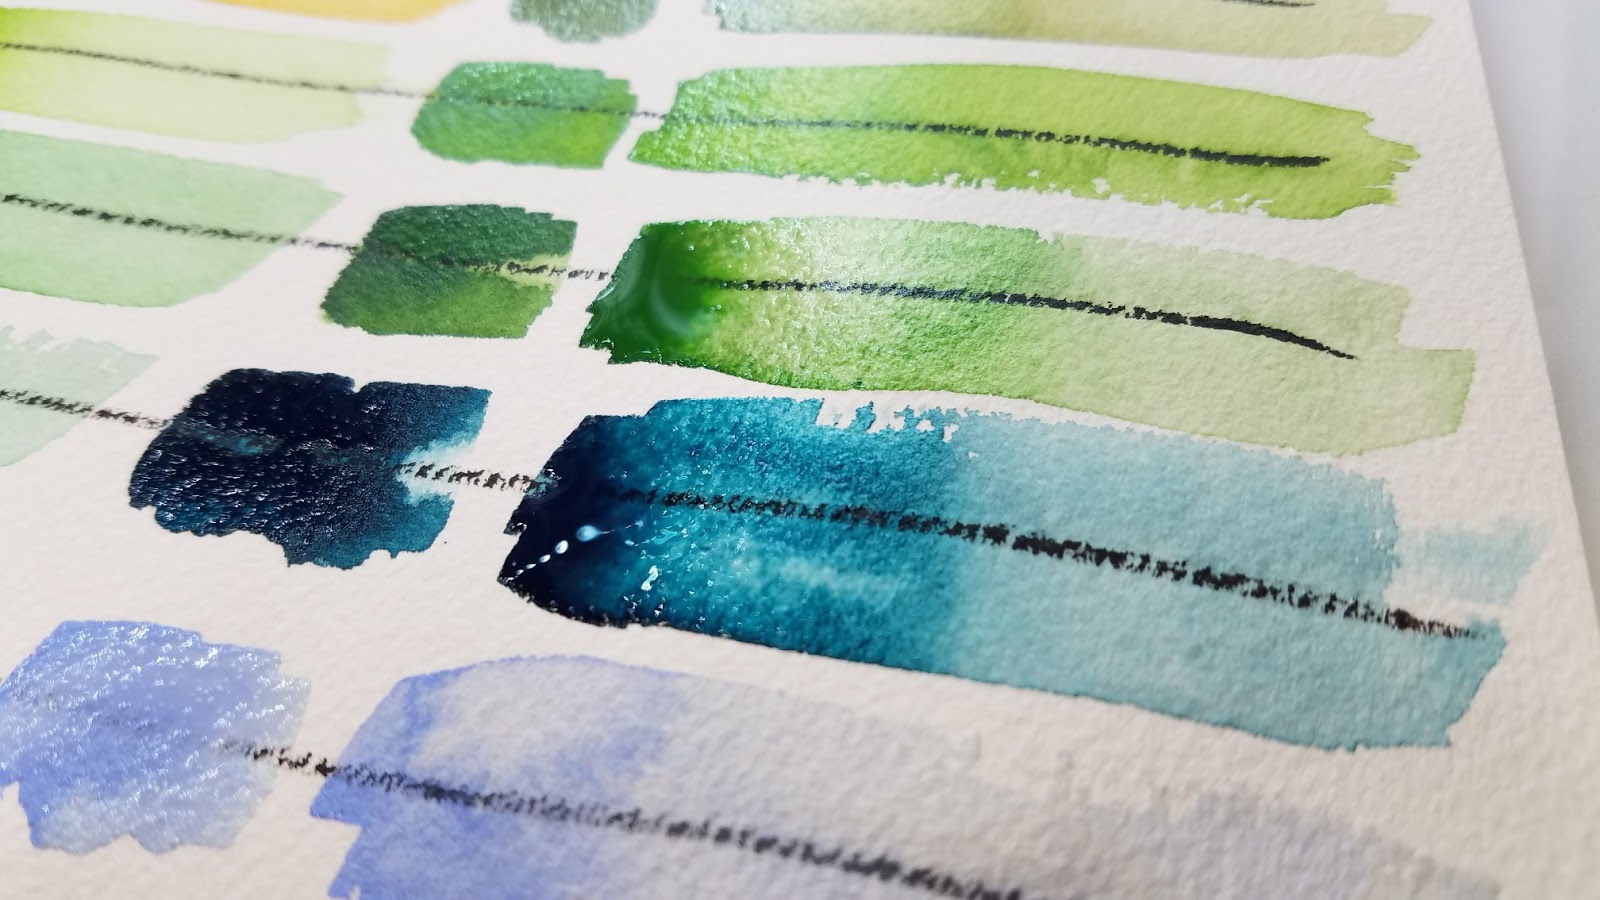
Draw 3 lines using pigment black ink on paper of choice- this will provide a test for opacity. Allow to cure 5-10 minutes, so it won't run and muddy the paint.Apply masstone (solid, saturated color) to top line.At top of second line, begin graduated wash swatch. This will help test for granulation, color shift, saturationAllow to dry before judging.
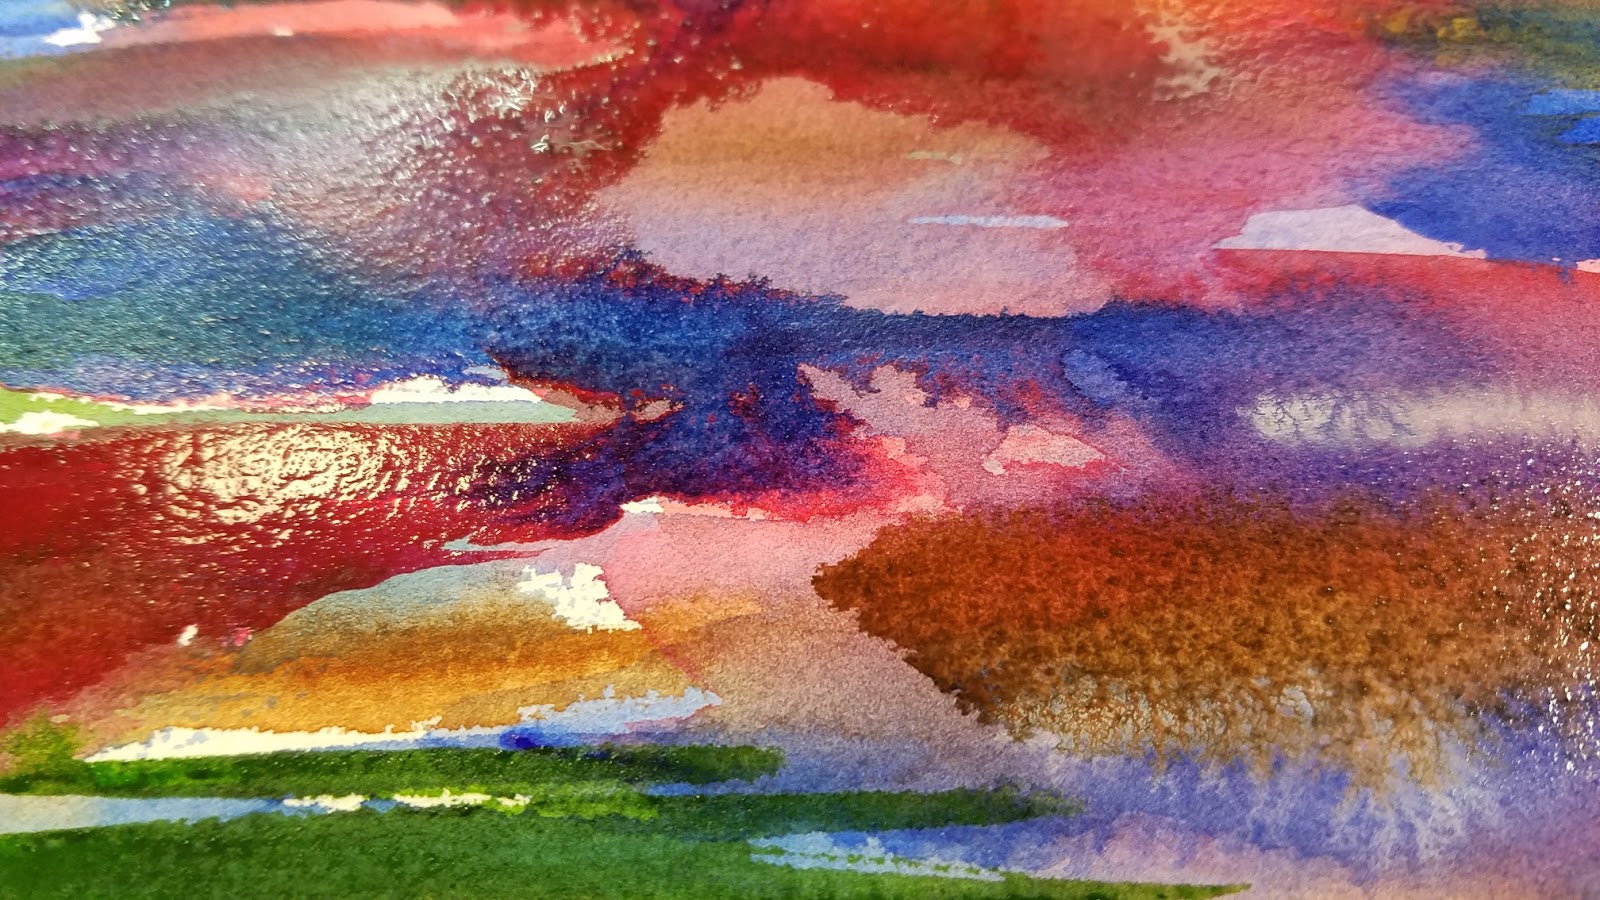
Mud test:
Can apply lines of black pigment ink to paper. Allow to dry.Wet into Wet- Layer on a myriad of colors, both transparent and opaque. Allow to dry fully, or at least dry to the touch. Can still be cool. Put on another layer. Allow that layer to dry- judge color vibrancy, how well colors layer, translucency, lift up and displacement. Apply third layer. If colors are still vivid and brilliant when dry, these watercolors will probably not turn to mud in an illustration.
Individual Brand Swatching:
Da Vinci
 Da Vinci Swatch Test
 Da Vinci Opacity Test
Mud Test


Kuretake Gansai Tambi
 Kuretake Gansai Tambi Swatches

 Kuretake Gansai Tambi Opacity Test
Kissho Gansai
 Kissho Gansai Swatches
 Kissho Gansai Opacity Swatches
Kusakabe
 Kusakabe Swatches

Derwent Inktense Blocks and Color Pencils
 Derwent Inktense Block Swatches

White Nights:
 White Nights Mud Test and Swatches
 White Nights Mud Test
Multi Brand Swatches:
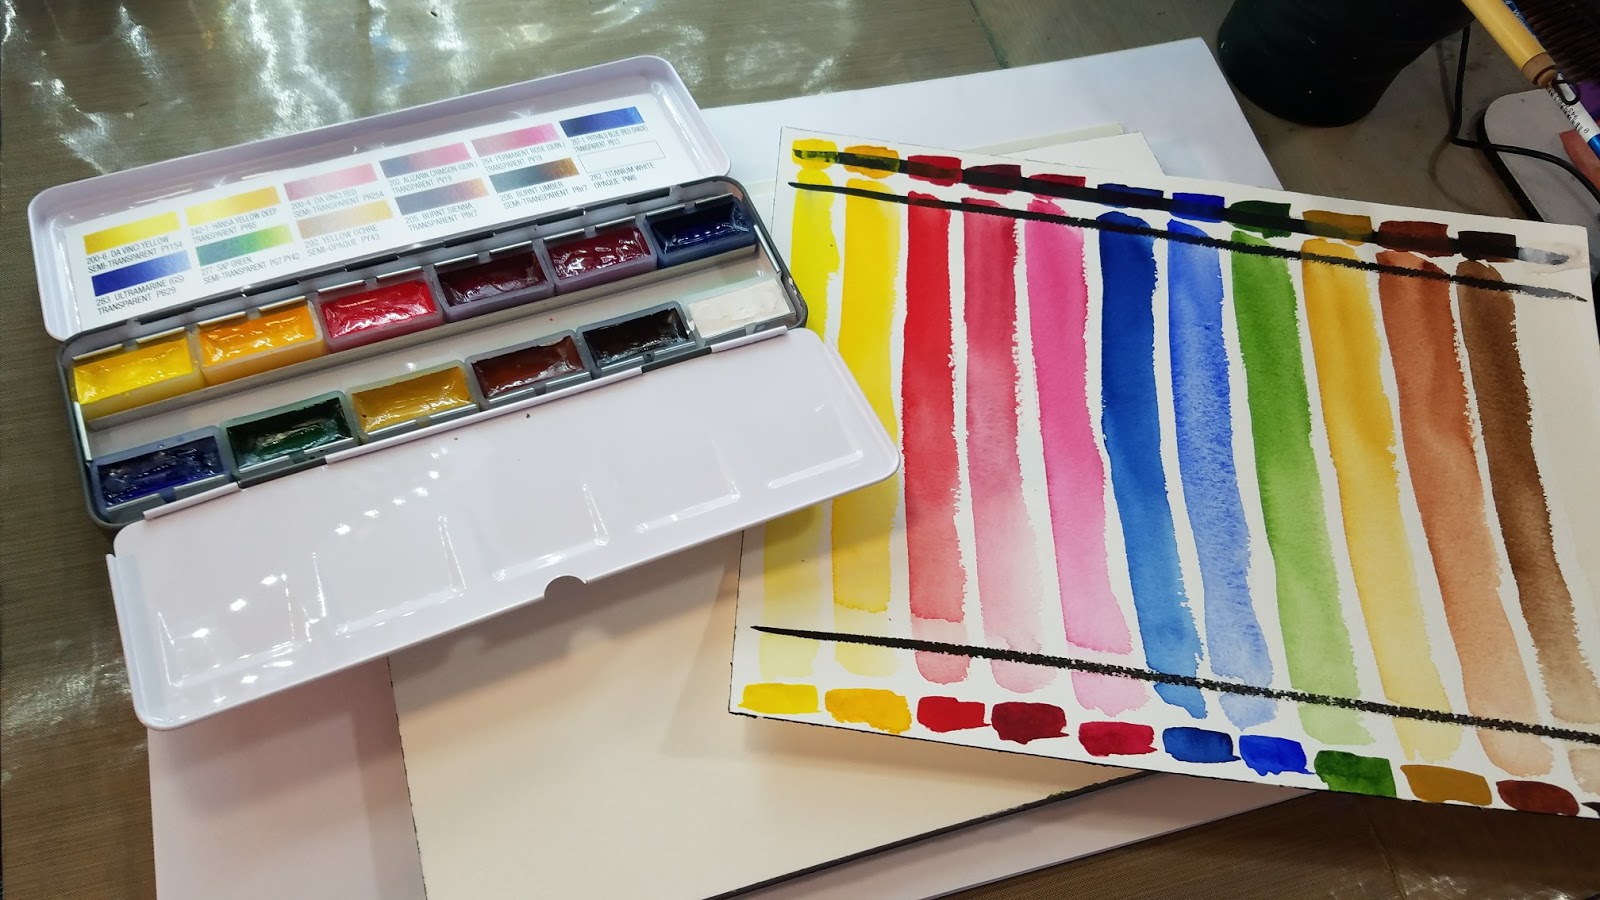
Awhile back, a Winsor and Newton rep at the local Hands on Creativity claimed that only Winsor and Newton semi moist half pans are truly designed to reconstitute with water. Since then, I've made sure to test my tube watercolors as tubes and dried half pans- as I prefer to work from pans. I have found his claim unsubstantiated by experience. I now swatch tube watercolors straight from the tube, as well as from dried half pans. Generally, most brands reconstitute quite well, although some colors (particularly Daniel Smith) are best when fresh.
Tube Tests:

 From Left to Right: M Graham, St Petersburg White Nights, Sennelier, Qor, Daniel Smith, Holbein HWC, Mijello Mission Gold
 Swatches from Left to Right: M Graham, White Nights, Qor, Mijello, Holbein,
This was part of the M Graham Unbox and Swatch. M Graham makes big claims about having the most brilliant, true to life, saturated watercolors on the market, due to their honey binder. I wanted to see if this was true, so I tested seven professional watercolor brands against M Graham, in both tube and half pan format.
Colors Tested:
M Graham
White Nights
Qor (uses Aquazol)
Mijello Mission Gold
Holbein
Daniel Smith
Sennelier (also honey based)
Half Pan Tests:
 Swatches from Pan Dried watercolors, from left to right: M Graham, White Nights, Qor, Mijello, Holbein, Daniel Smith, Sennelier
Same paints tested above, but in dried half pan form. Tests were conducted on Blick Premiere cotton rag watercolor paper.
I Swatch On:
Cellulose Papers:
Canson Bulk Watercolor Paper
Canson XL Mixed Media Paper
Fluid EZ Block
Cotton Rag Papers:
Blick Premiere
Fluid 100
Arches
For some brands, I will test on both cellulose papers and cotton rag papers, as I frequently use both in my work, preferring Montval (cellulose) for 7" Kara pages, and cotton rag (various brands) for my standalone illustrations. Many artists say the paper is the foundation of the paper, and while I feel paper contributes strongly to the success of techniques, I also feel knowing which paints are suited best for which papers can help make any painting a success.
Cotton Rag Vs Cellulose
Fluid 100 VS Fluid EZ Block

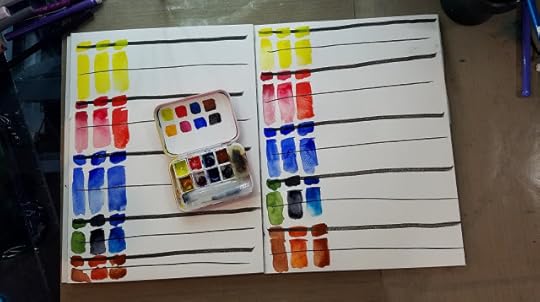
Setting Up The Swatch Sheet
 Left: Fluid 100 Cotton Rag Watercolor Paper. Right: Fluid EZ Block Cellulose Paper
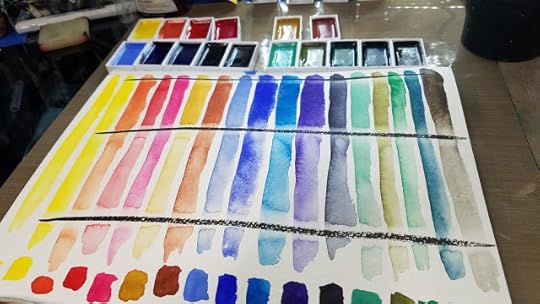
I apply a series of lines (alternating thick and thin, five of each total) going down the page. These represent the color families that I will swatch today.
For this swatch test, I'm swatching based on the families represented in the M Graham Test set- a warm yellow, a coolish red, Ultramarine Blue, Sap/cool green, and burnt umber, when available. Not every set has the same color palette, so I'm not testing for color similarity, just testing how each brand handles on these two papers.

 Brand 1: M Graham, from half pans.

Brand 2: Sennelier, from half pans.
Brand 3: Daniel Smith, from half pans.

Brand 7: St Petersburg White Nights, whole pans.

Brand 8: Mijello Mission Gold, from half pans.
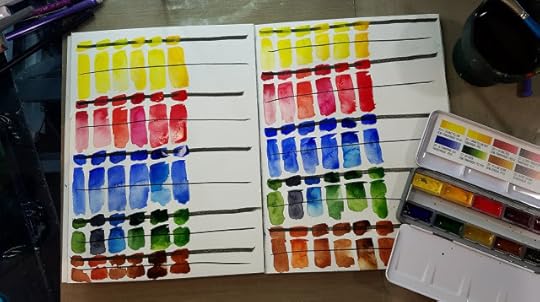
Brand 9: Da Vinci, from whole pans.

From Left to Right: M Graham, Sennelier, Daniel Smith, White Nights, Mijello Mission Gold, Da Vinci, Holbein HWC, Qor (from half pans)
Cotton Rag Swatches Close Up:
 M Graham, Sennelier, Daniel Smith, White Nights, Mijello Mission Gold, Da Vinci, Holbein HWC, Qor (from half pans)
 M Graham, Sennelier, Daniel Smith, White Nights, Mijello Mission Gold, Da Vinci, Holbein HWC, Qor (from half pans)
 M Graham, Sennelier, Daniel Smith, White Nights, Mijello Mission Gold, Da Vinci, Holbein HWC, Qor (from half pans)
 M Graham, Sennelier, Daniel Smith, White Nights, Mijello Mission Gold, Da Vinci, Holbein HWC, Qor (from half pans)
Cellulose Swatches Close Up:
 M Graham, Sennelier, Daniel Smith, White Nights, Mijello Mission Gold, Da Vinci, Holbein HWC, Qor (from half pans)
 M Graham, Sennelier, Daniel Smith, White Nights, Mijello Mission Gold, Da Vinci, Holbein HWC, Qor (from half pans)
 M Graham, Sennelier, Daniel Smith, White Nights, Mijello Mission Gold, Da Vinci, Holbein HWC, Qor (from half pans)
 M Graham, Sennelier, Daniel Smith, White Nights, Mijello Mission Gold, Da Vinci, Holbein HWC, Qor (from half pans)
Lift Test:
In this test, I use a damp synthetic brush with fairly stiff fibers to 'scrub' out a portion of the dried watercolor swatch.
 M Graham, Sennelier, Daniel Smith, White Nights, Mijello Mission Gold, Da Vinci, Holbein HWC, Qor (from half pans)
Field Tests
There's so much that swatching can't tell me about watercolors, which is why I value fieldtests. Field tests are a real world demonstration, utilizing subject matter and techniques I frequently use, to determine if a watercolor product is right for me. Swatches are often brilliant, dazzling, full color, and deceptive, promising things the watercolors cannot do in my standard style.
Da Vinci Test/Demonstration:

Derwent Inktense Watercolor Test (2nd Try)
Fancolor Field Test 1 and 2:

Kuretake Gansai Tambi Etegami Test
Qor Watercolor Fieldtest
Studio Gouache Gouache Fieldtest
I hope you found this swatching explanation and demonstration helpful! If you haven't yet, please take a moment to check out my other tutorials reviews, and demonstrations in my Watercolor Basics series! Demonstrations like this are made possible thanks to my Artnerd community on Patreon.
Please consider donating to this blog or purchasing from Natto-shop (http://nattosoup.com/shop) if you want me to continue publishing quality content. All materials tested were purchased from my own pocket. Keep on Truckin' Nattosoup is not under any sponsorship.
Because I use watercolor for comics and illustration, I think my needs are a little different from your average watercolorist, and I test based on my needs. For some types of watercolor, such as Chinese watercolor, or gansai watercolor, knowing the origin and intended use helps me determine whether these watercolors will suit my painting needs.
 Kuretake Gansai Tambi Swatch
Brands I Have Tested:
Daniel Smith
M Graham
Sennelier
Turner
MozArt Komorebi
Holbein
Mijello Mission Gold
Shin Han Professional Watercolor
Kusakabe
Da Vinci
Winsor and Newton
Kuretake Gansai Tambi
Kissho Gansai
Kuretaken Shin Gansai
Caran D'Ache Studio Gouache
Caran D'Ache Fancolor
Derwent Inktense Sticks
Cotman
 Da Vinci Mud Test
All this testing means I have swatched A LOT of watercolor. And I think I've found a method that gives me the gist of the information I'm looking for.
What I Test For:
OpacitySedimentLiftingGradiation/washesConsistent performance from tube to panBrilliance after drying
I also swatch out of spite. If your company makes big promises (Most Brilliant Watercolor! Only Semi Moist Half Pans to Reconstitute Well! Colors are Most Translucent) I will specifically test those promises out.
 St Petersburg White Nights Mud Test
My Swatch Process:
Draw 3 lines using pigment black ink on paper of choice- this will provide a test for opacity. Allow to cure 5-10 minutes, so it won't run and muddy the paint.Apply masstone (solid, saturated color) to top line.At top of second line, begin graduated wash swatch. This will help test for granulation, color shift, saturationAllow to dry before judging.
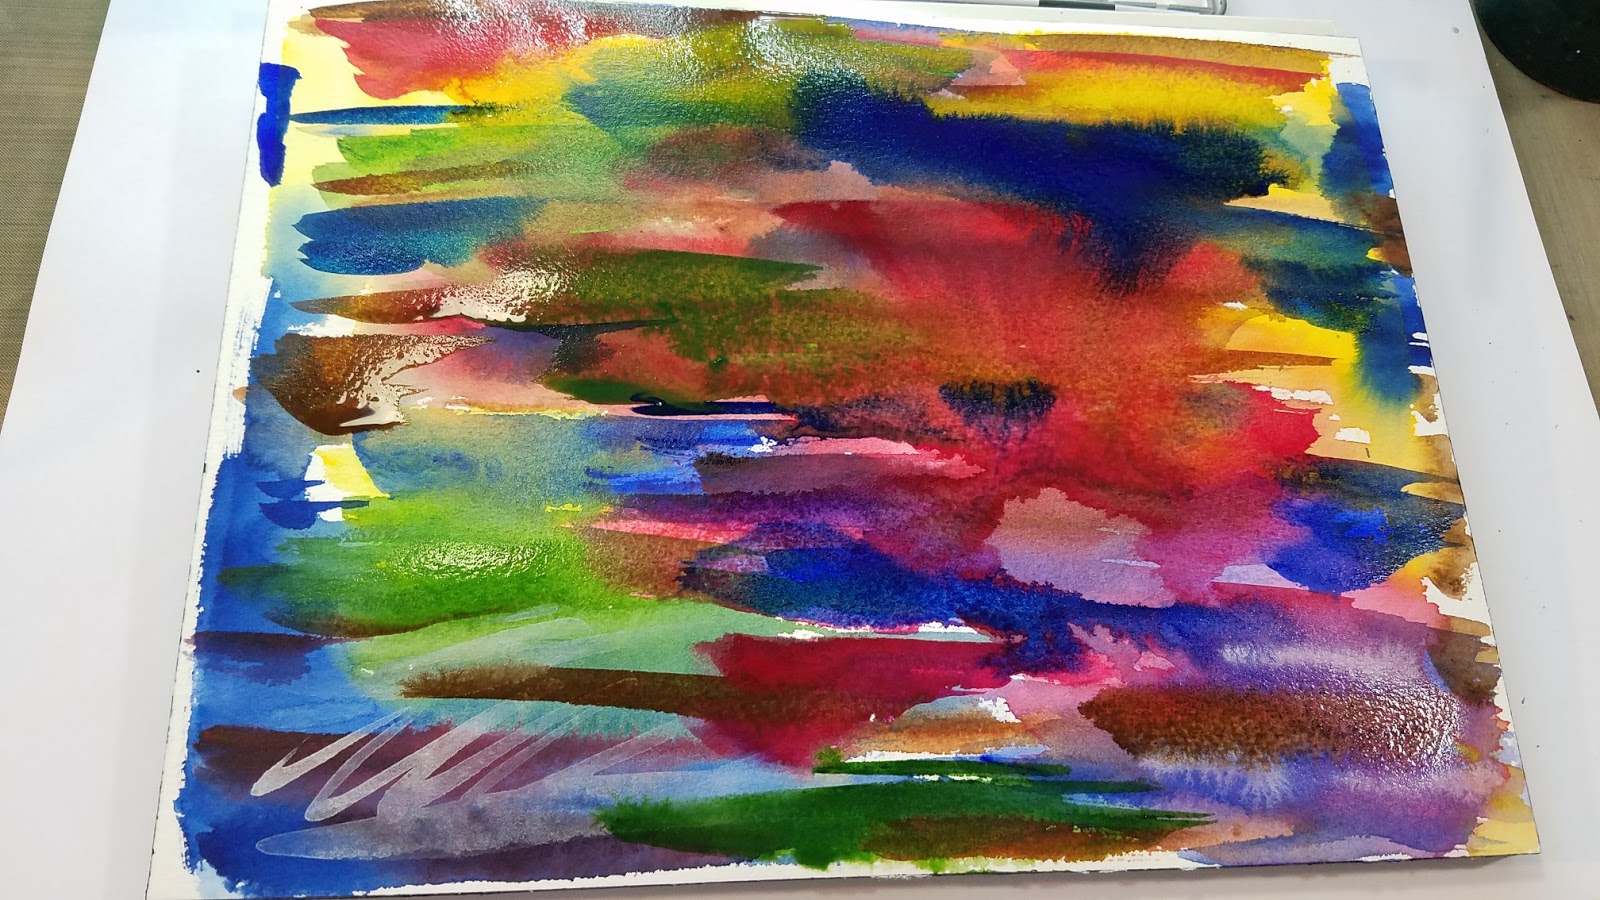
Mud test:
Can apply lines of black pigment ink to paper. Allow to dry.Wet into Wet- Layer on a myriad of colors, both transparent and opaque. Allow to dry fully, or at least dry to the touch. Can still be cool. Put on another layer. Allow that layer to dry- judge color vibrancy, how well colors layer, translucency, lift up and displacement. Apply third layer. If colors are still vivid and brilliant when dry, these watercolors will probably not turn to mud in an illustration.
Individual Brand Swatching:
Da Vinci
 Da Vinci Swatch Test
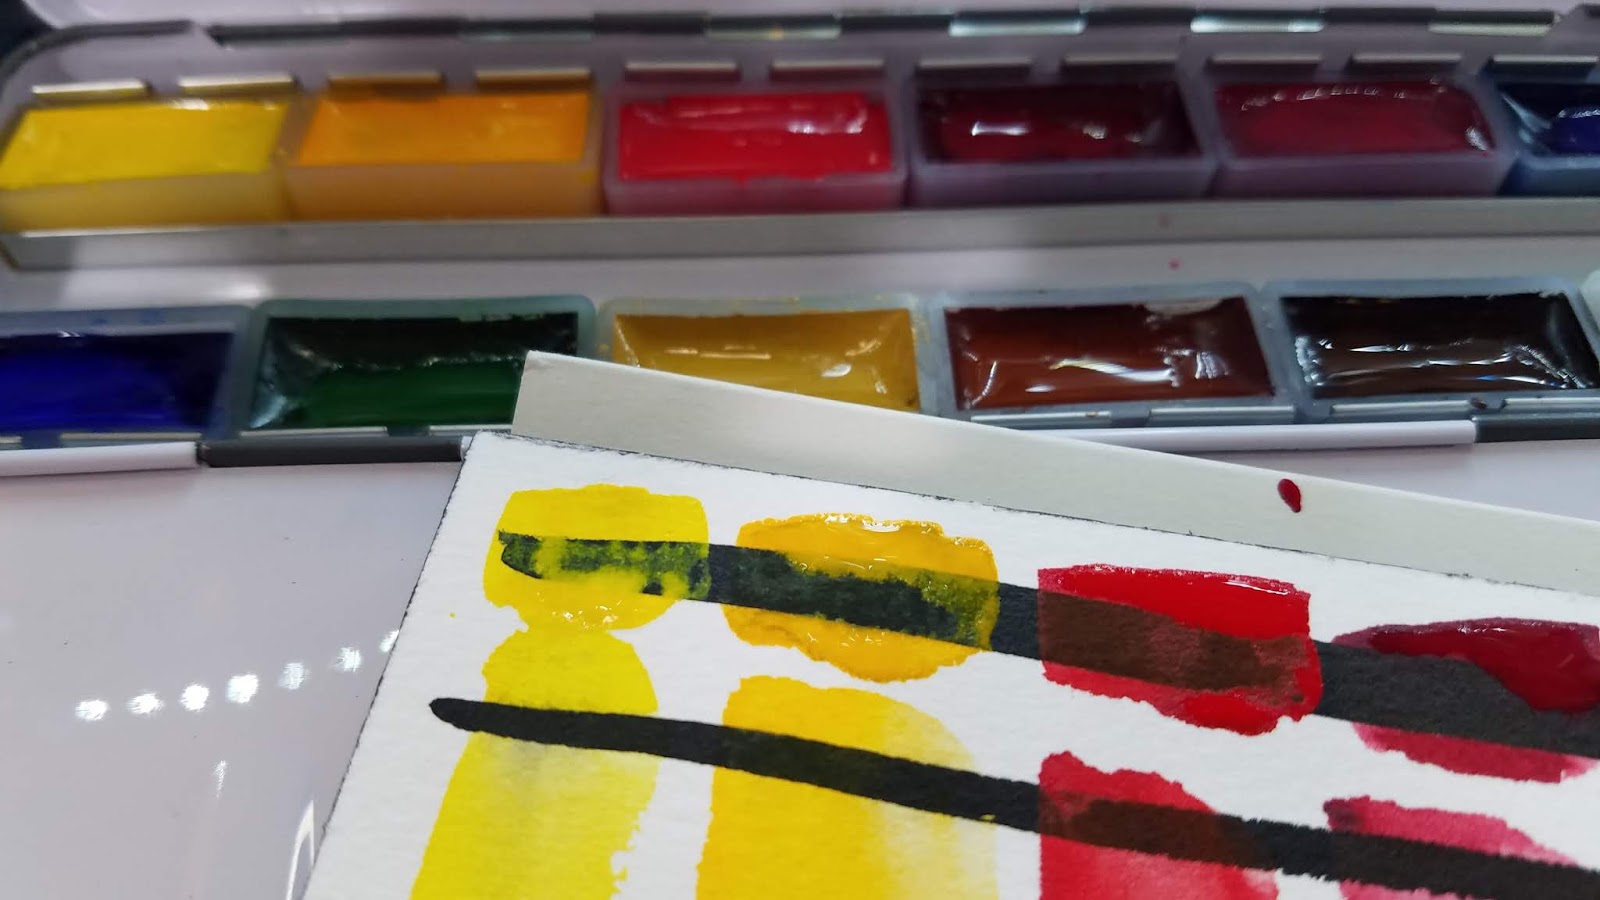 Da Vinci Opacity Test
Mud Test
Kuretake Gansai Tambi
 Kuretake Gansai Tambi Swatches
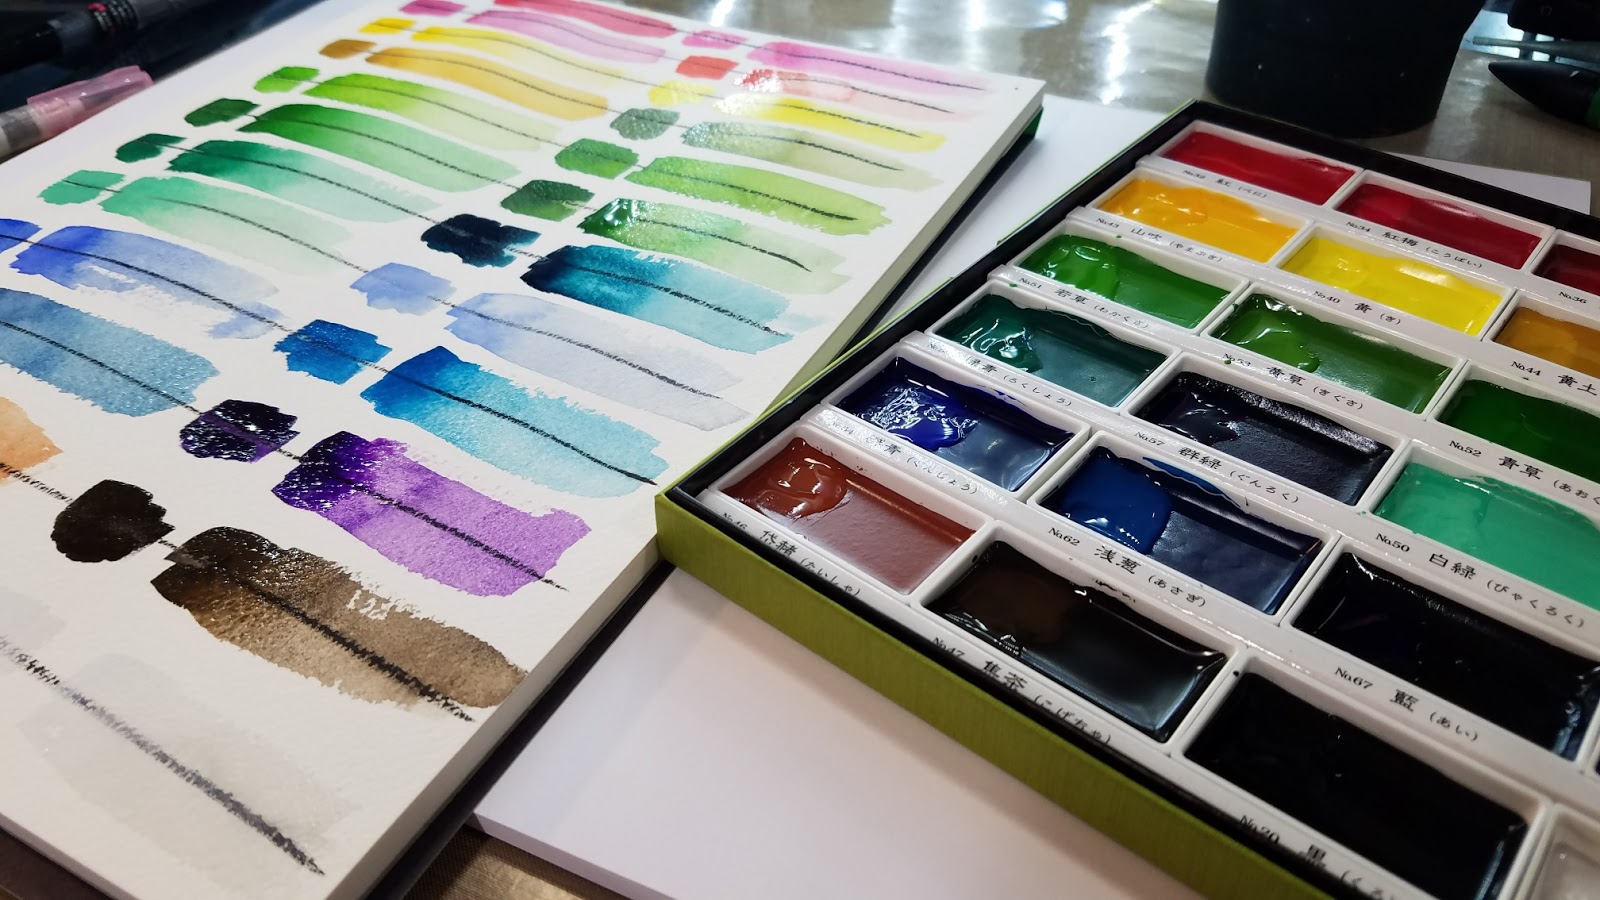
 Kuretake Gansai Tambi Opacity Test
Kissho Gansai
 Kissho Gansai Swatches
 Kissho Gansai Opacity Swatches
Kusakabe
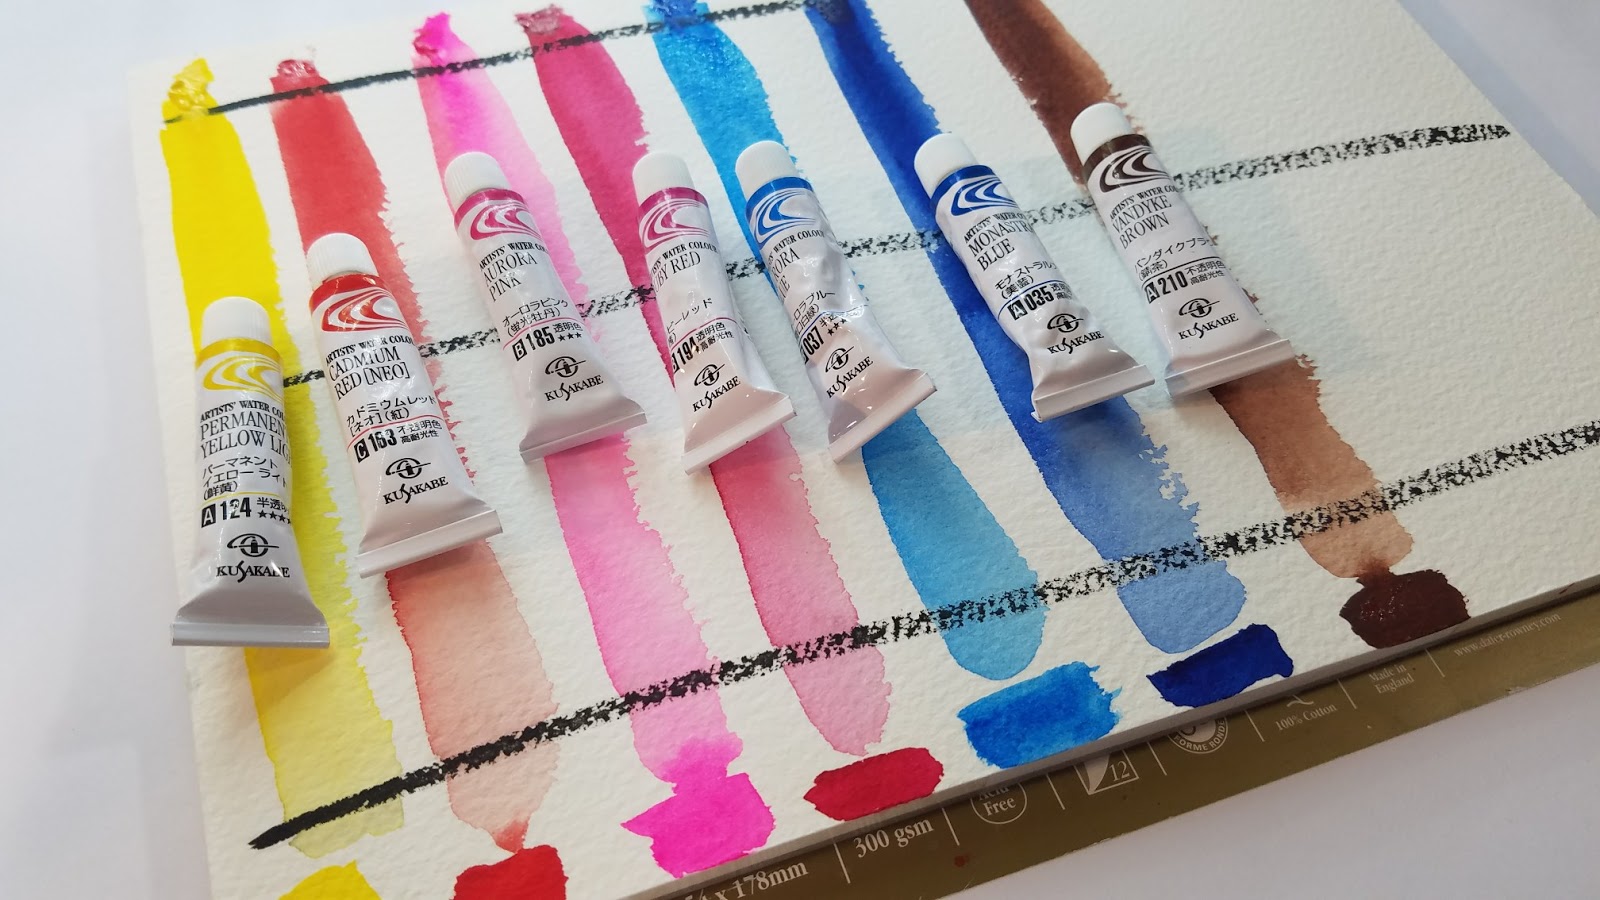 Kusakabe Swatches
Derwent Inktense Blocks and Color Pencils
 Derwent Inktense Block Swatches
White Nights:
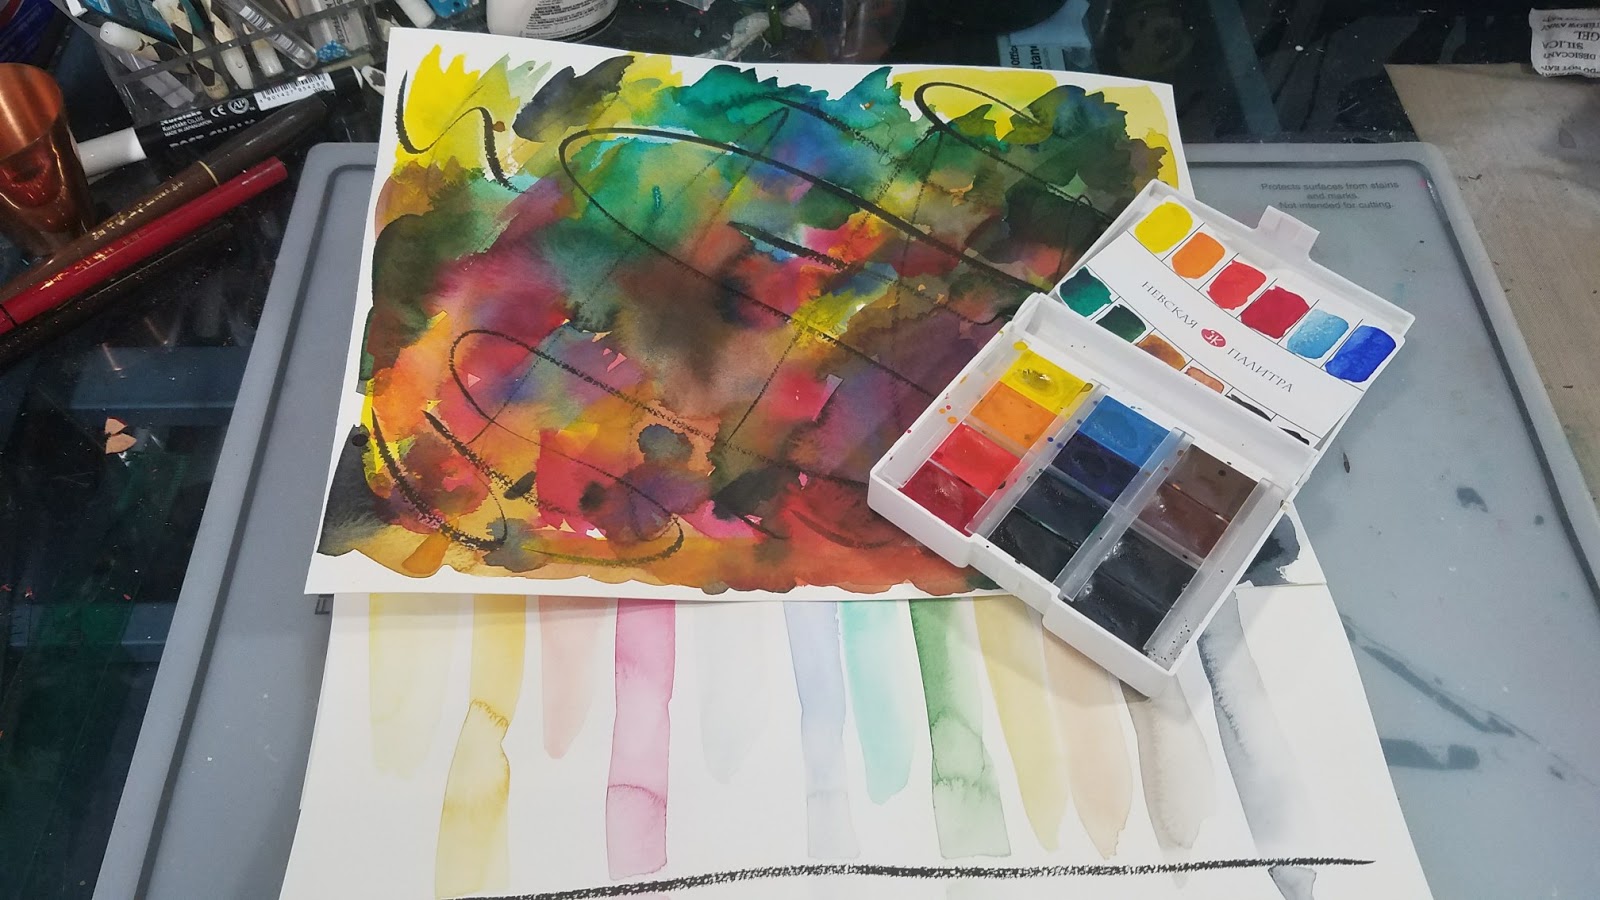 White Nights Mud Test and Swatches
 White Nights Mud Test
Multi Brand Swatches:
Awhile back, a Winsor and Newton rep at the local Hands on Creativity claimed that only Winsor and Newton semi moist half pans are truly designed to reconstitute with water. Since then, I've made sure to test my tube watercolors as tubes and dried half pans- as I prefer to work from pans. I have found his claim unsubstantiated by experience. I now swatch tube watercolors straight from the tube, as well as from dried half pans. Generally, most brands reconstitute quite well, although some colors (particularly Daniel Smith) are best when fresh.
Tube Tests:
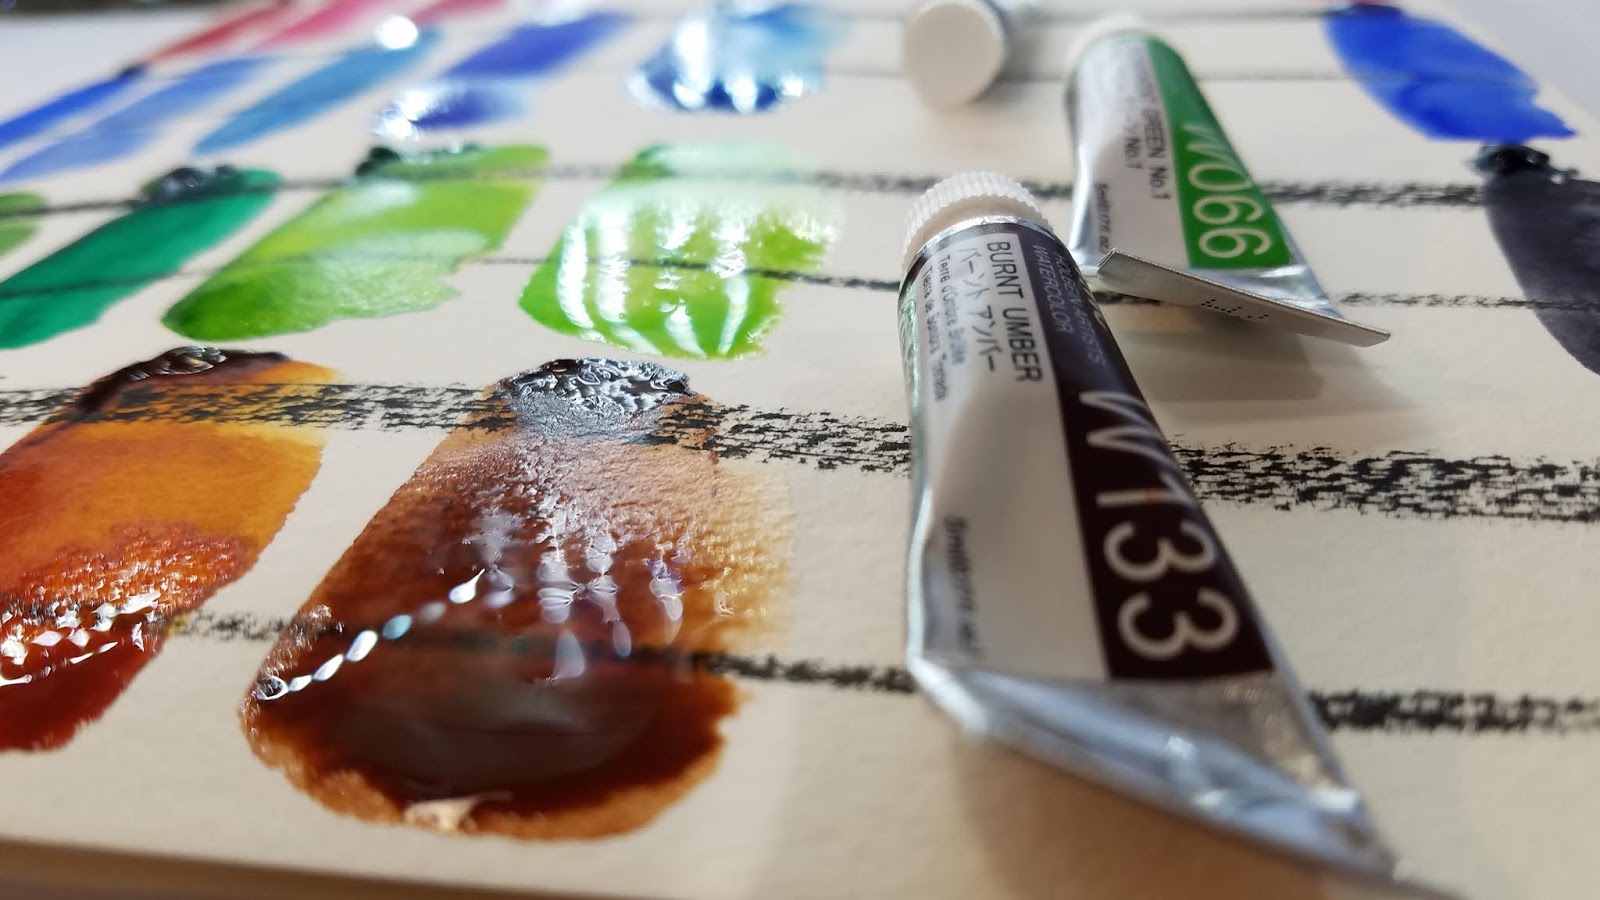
 From Left to Right: M Graham, St Petersburg White Nights, Sennelier, Qor, Daniel Smith, Holbein HWC, Mijello Mission Gold
 Swatches from Left to Right: M Graham, White Nights, Qor, Mijello, Holbein,
 This was part of the M Graham Unbox and Swatch. M Graham makes big claims about having the most brilliant, true to life, saturated watercolors on the market, due to their honey binder. I wanted to see if this was true, so I tested seven professional watercolor brands against M Graham, in both tube and half pan format.
Colors Tested:
M Graham
White Nights
Qor (uses Aquazol)
Mijello Mission Gold
Holbein
Daniel Smith
Sennelier (also honey based)
Half Pan Tests:
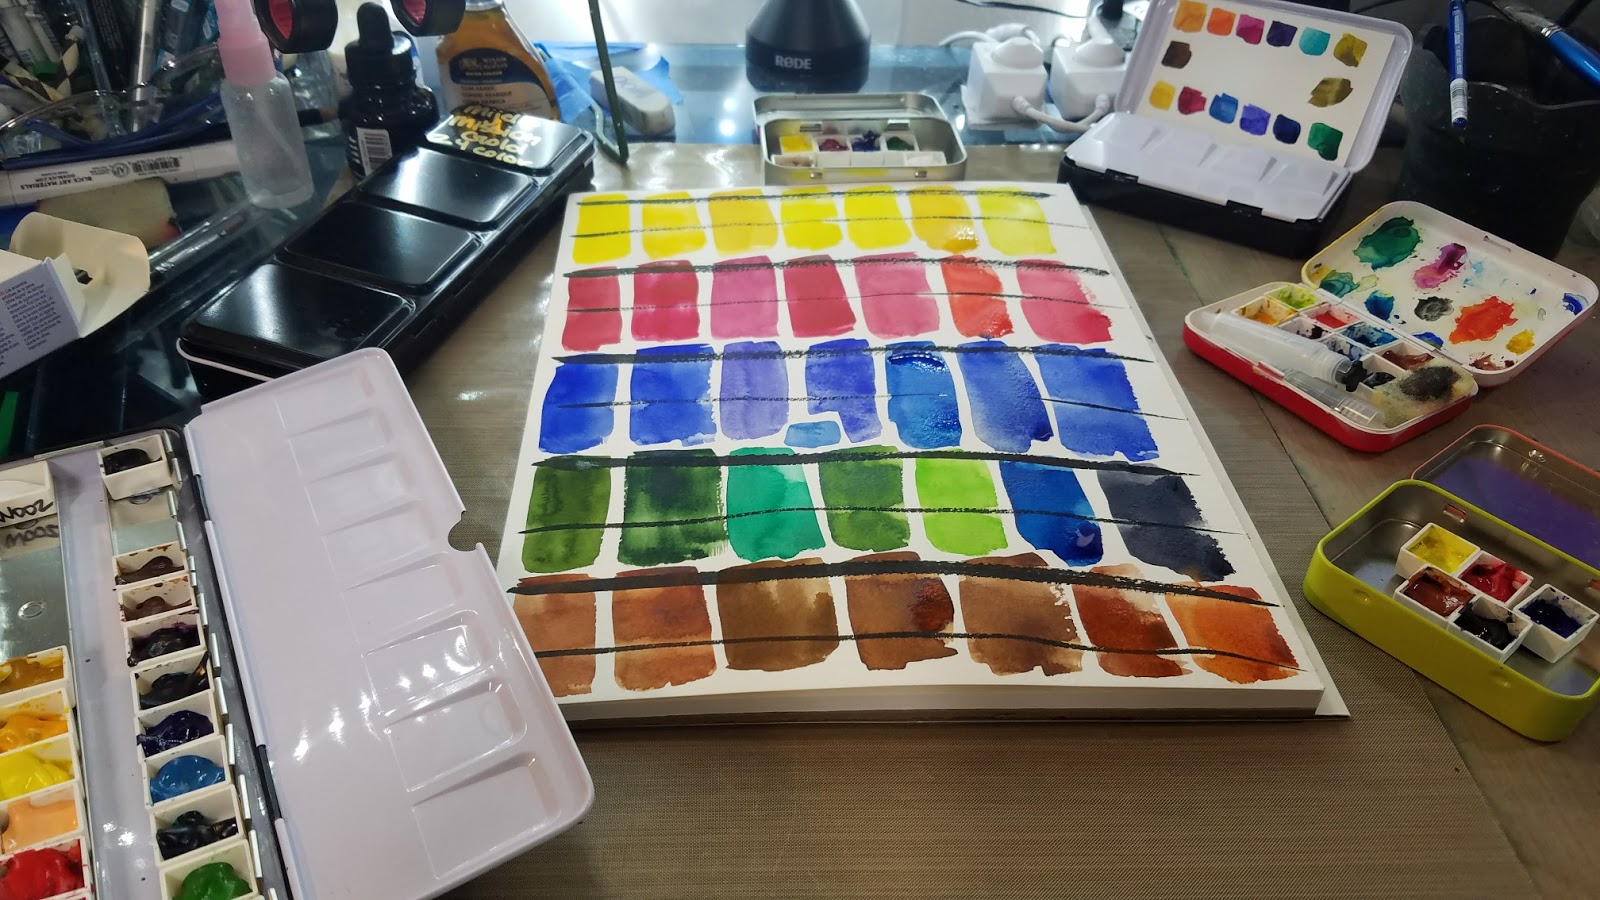 Swatches from Pan Dried watercolors, from left to right: M Graham, White Nights, Qor, Mijello, Holbein, Daniel Smith, Sennelier
Same paints tested above, but in dried half pan form. Tests were conducted on Blick Premiere cotton rag watercolor paper.
I Swatch On:
Cellulose Papers:
Canson Bulk Watercolor Paper
Canson XL Mixed Media Paper
Fluid EZ Block
Cotton Rag Papers:
Blick Premiere
Fluid 100
Arches
For some brands, I will test on both cellulose papers and cotton rag papers, as I frequently use both in my work, preferring Montval (cellulose) for 7" Kara pages, and cotton rag (various brands) for my standalone illustrations. Many artists say the paper is the foundation of the paper, and while I feel paper contributes strongly to the success of techniques, I also feel knowing which paints are suited best for which papers can help make any painting a success.
Cotton Rag Vs Cellulose
Fluid 100 VS Fluid EZ Block
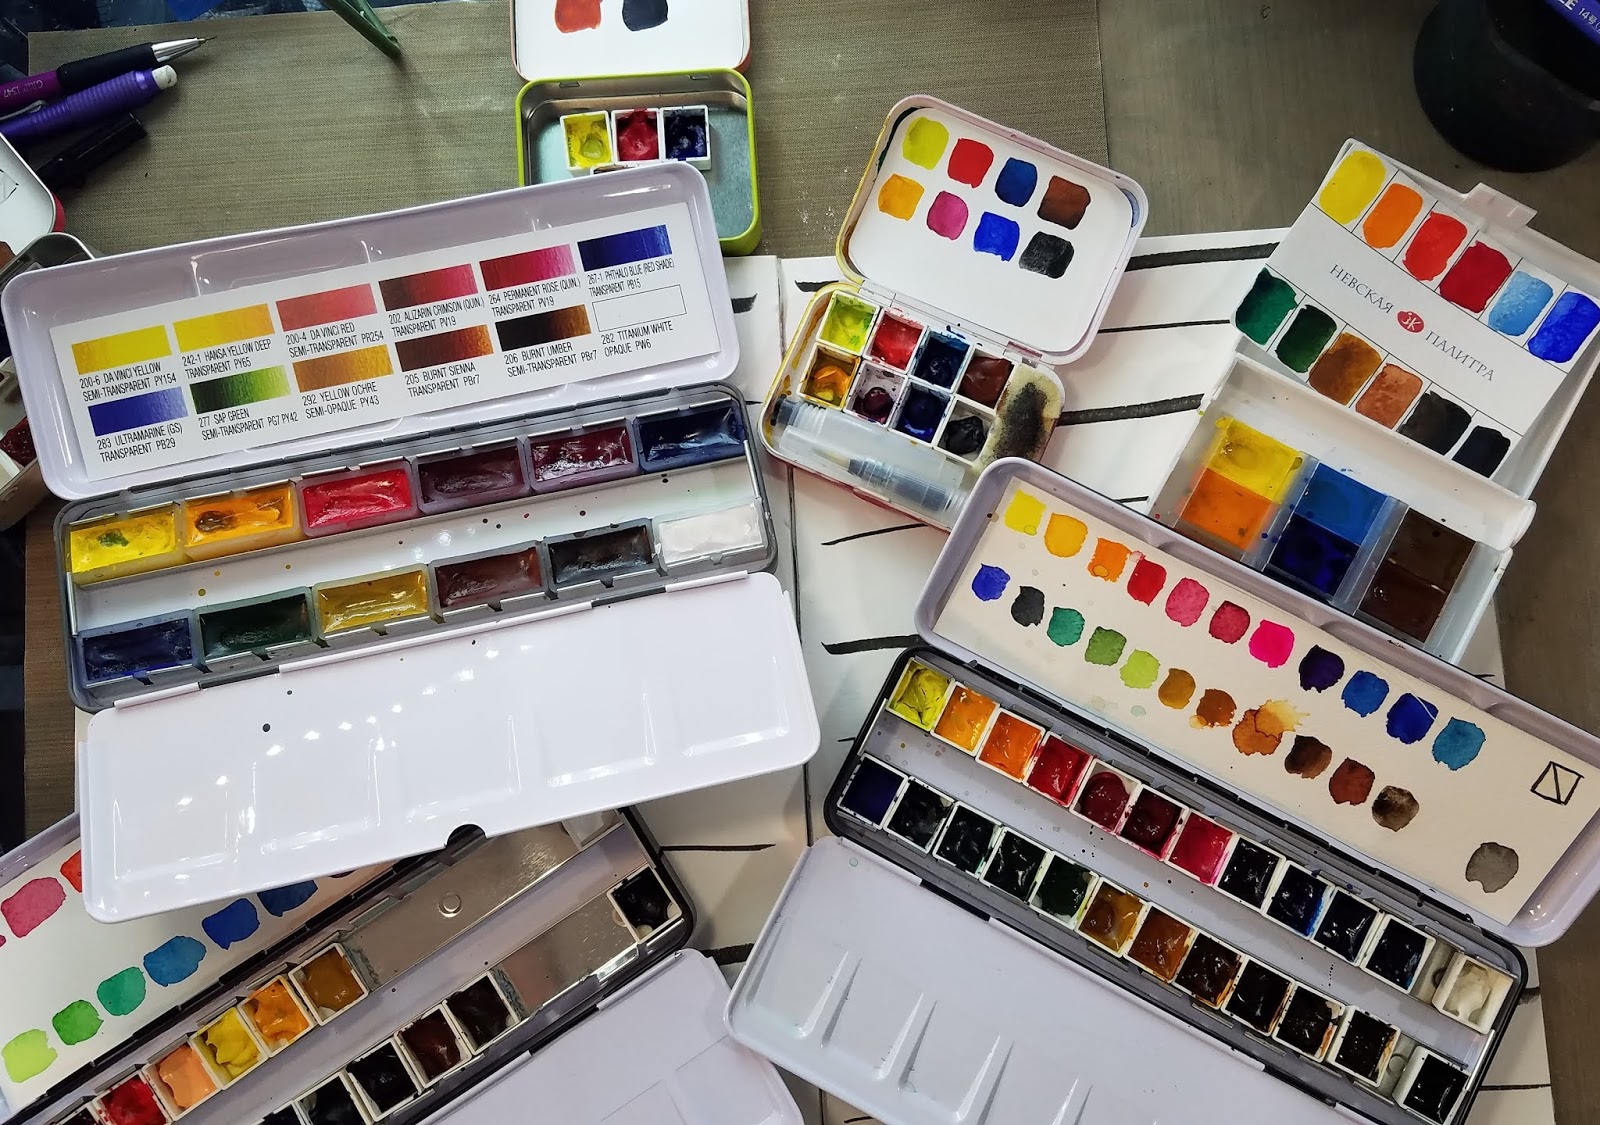
Setting Up The Swatch Sheet
 Left: Fluid 100 Cotton Rag Watercolor Paper. Right: Fluid EZ Block Cellulose Paper
I apply a series of lines (alternating thick and thin, five of each total) going down the page. These represent the color families that I will swatch today.
For this swatch test, I'm swatching based on the families represented in the M Graham Test set- a warm yellow, a coolish red, Ultramarine Blue, Sap/cool green, and burnt umber, when available. Not every set has the same color palette, so I'm not testing for color similarity, just testing how each brand handles on these two papers.
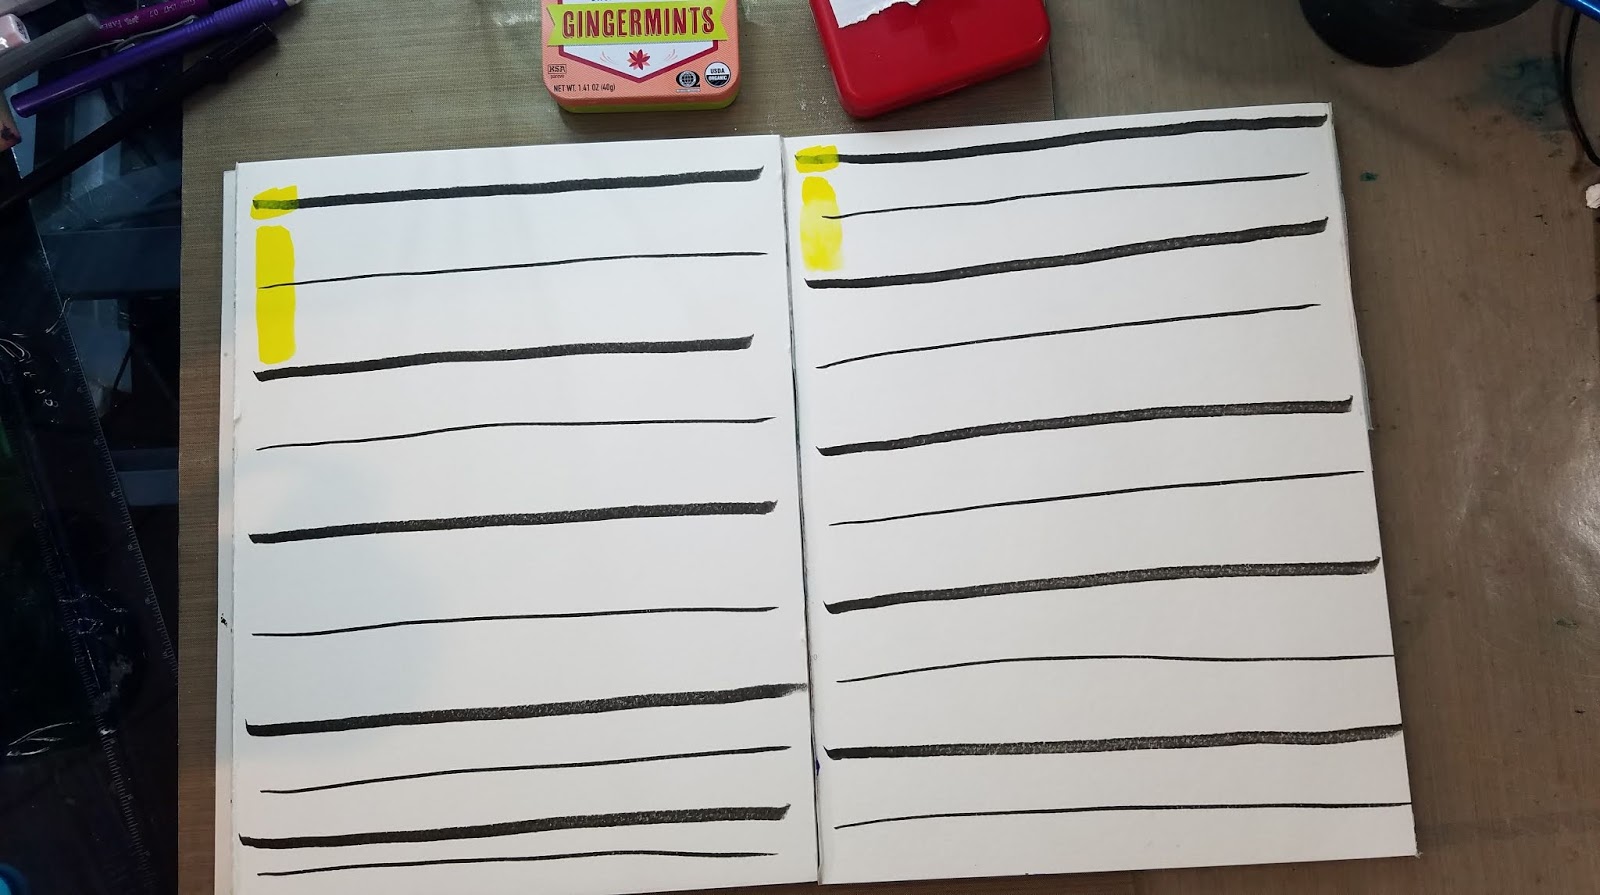
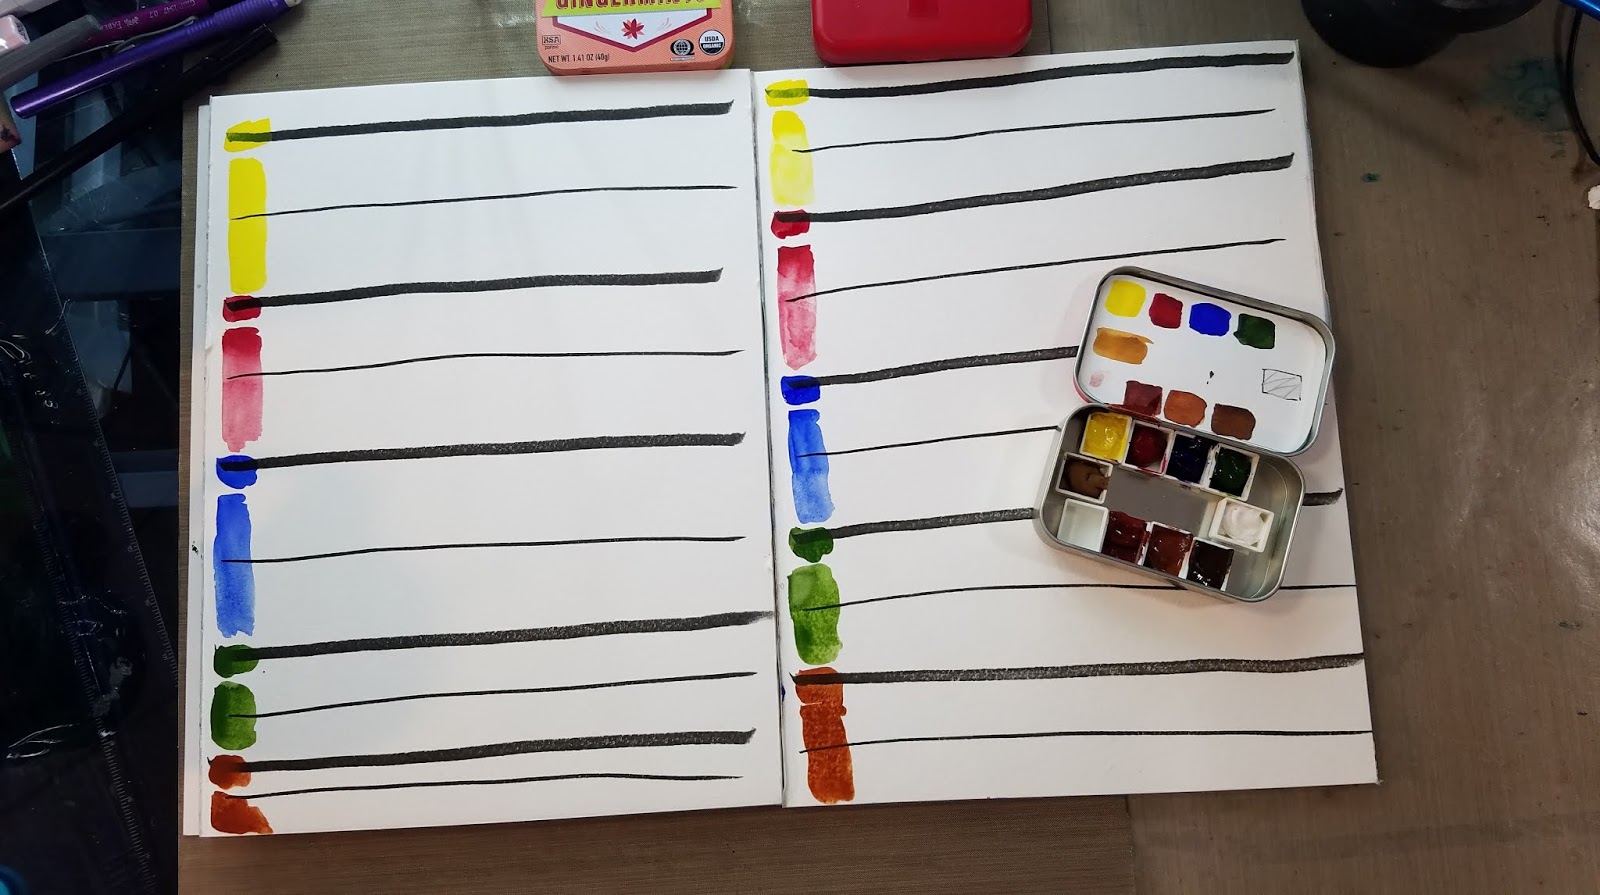 Brand 1: M Graham, from half pans.
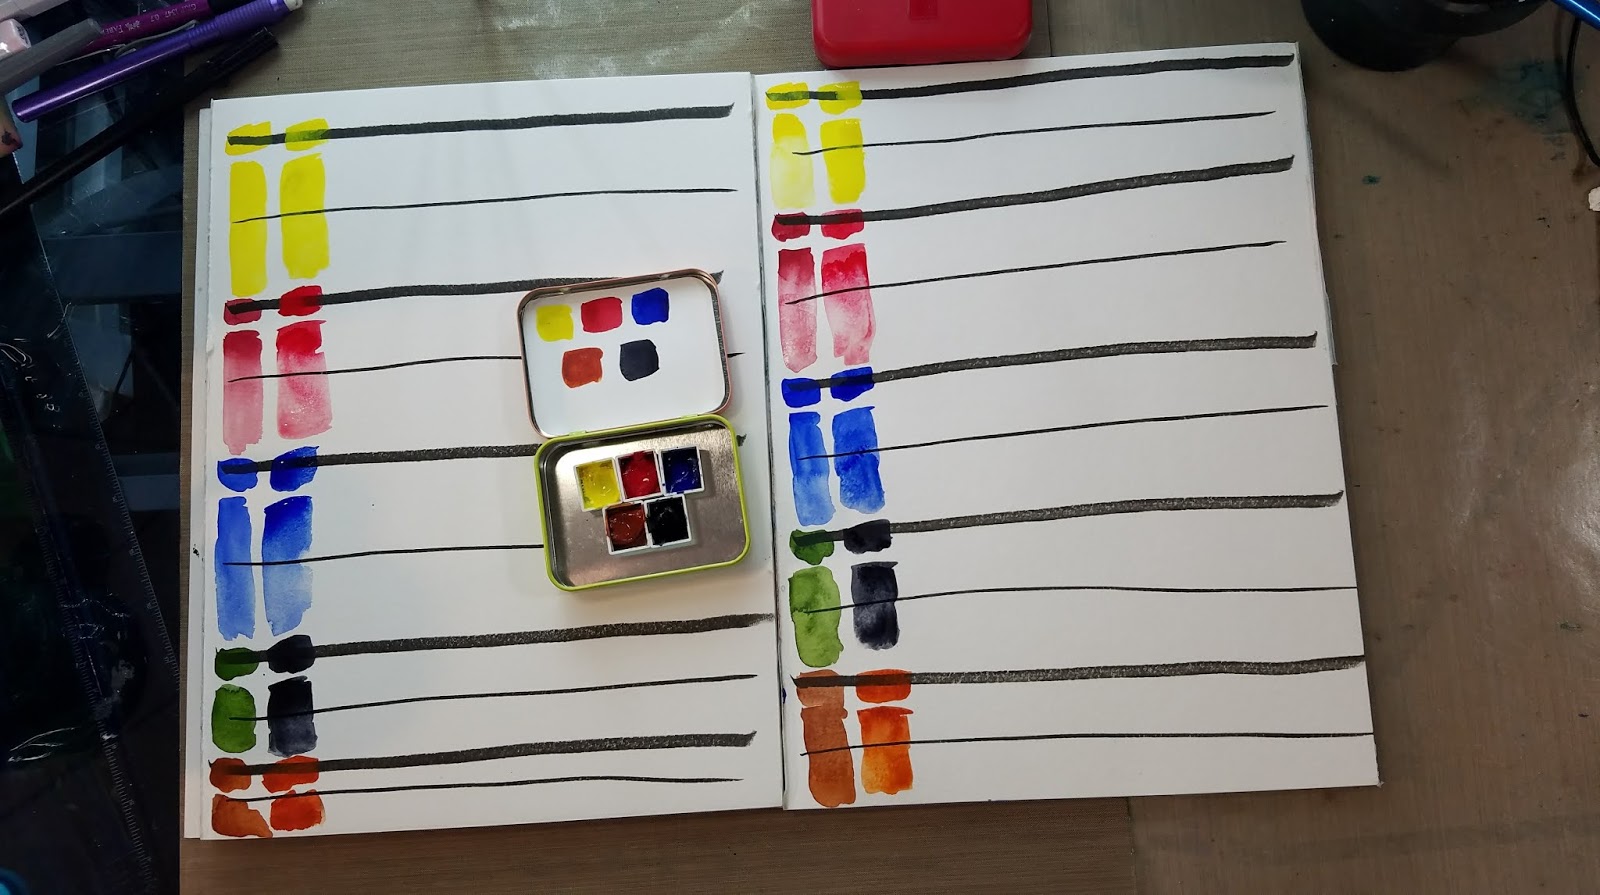
Brand 2: Sennelier, from half pans.

Brand 3: Daniel Smith, from half pans.
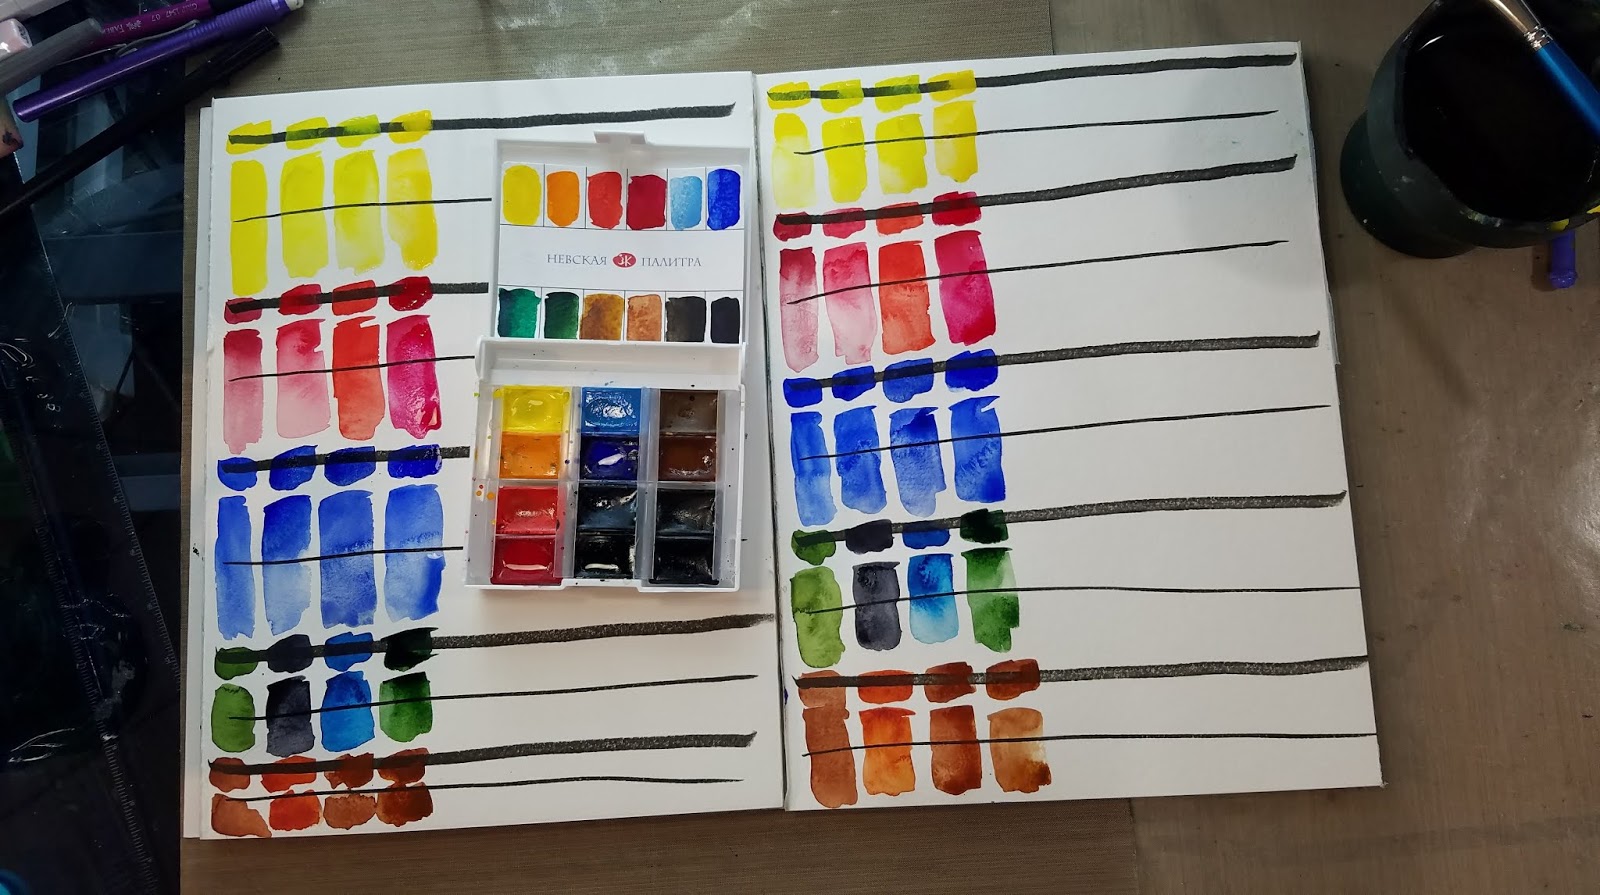
Brand 7: St Petersburg White Nights, whole pans.
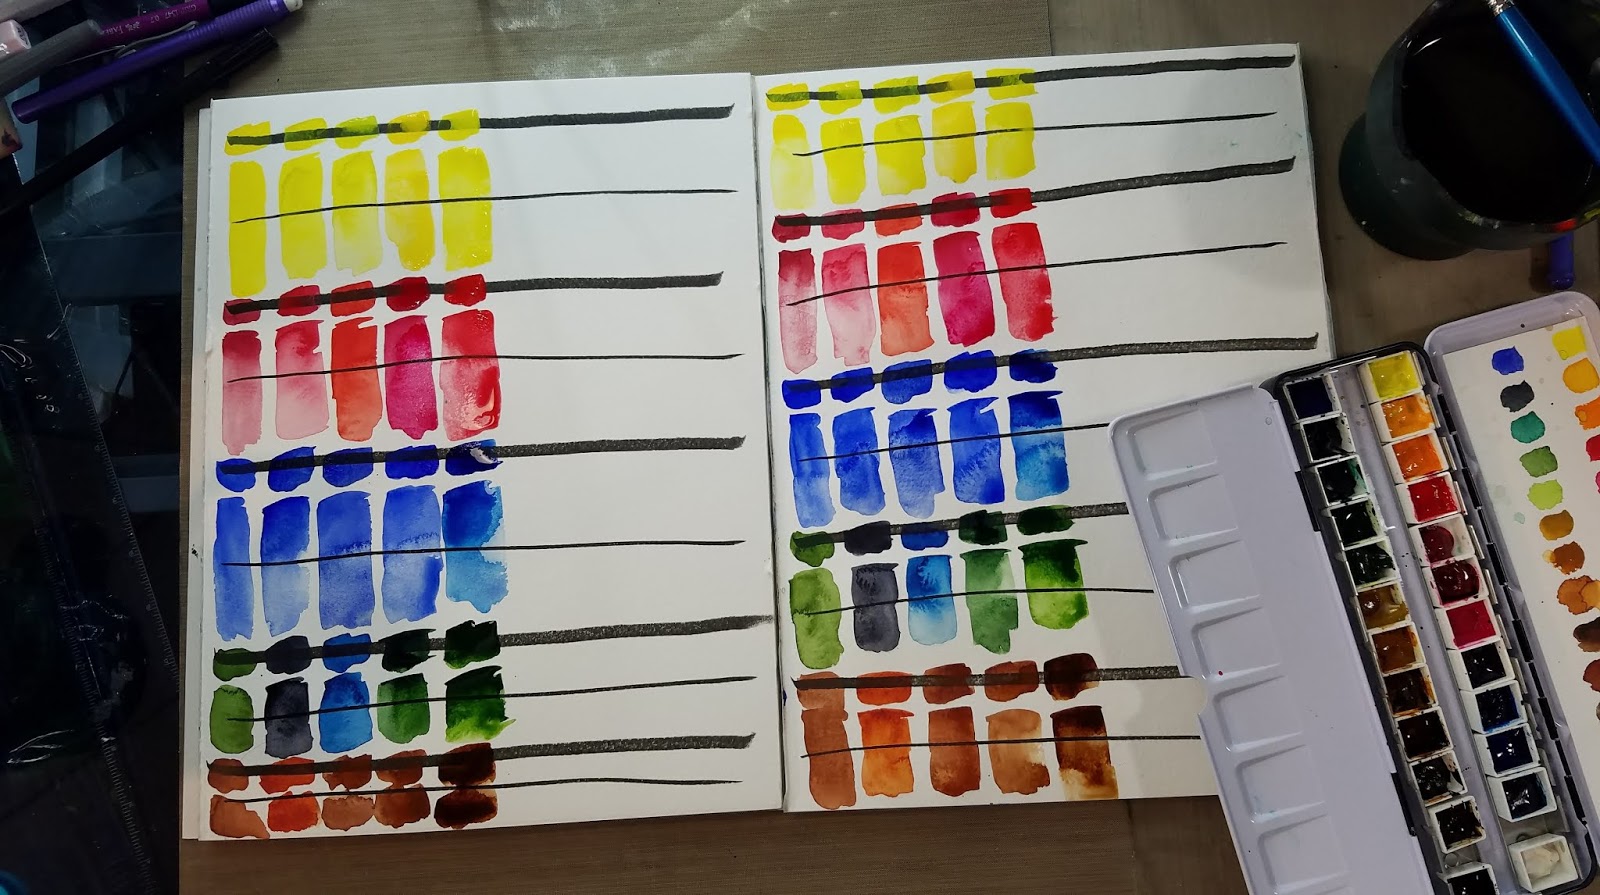
Brand 8: Mijello Mission Gold, from half pans.
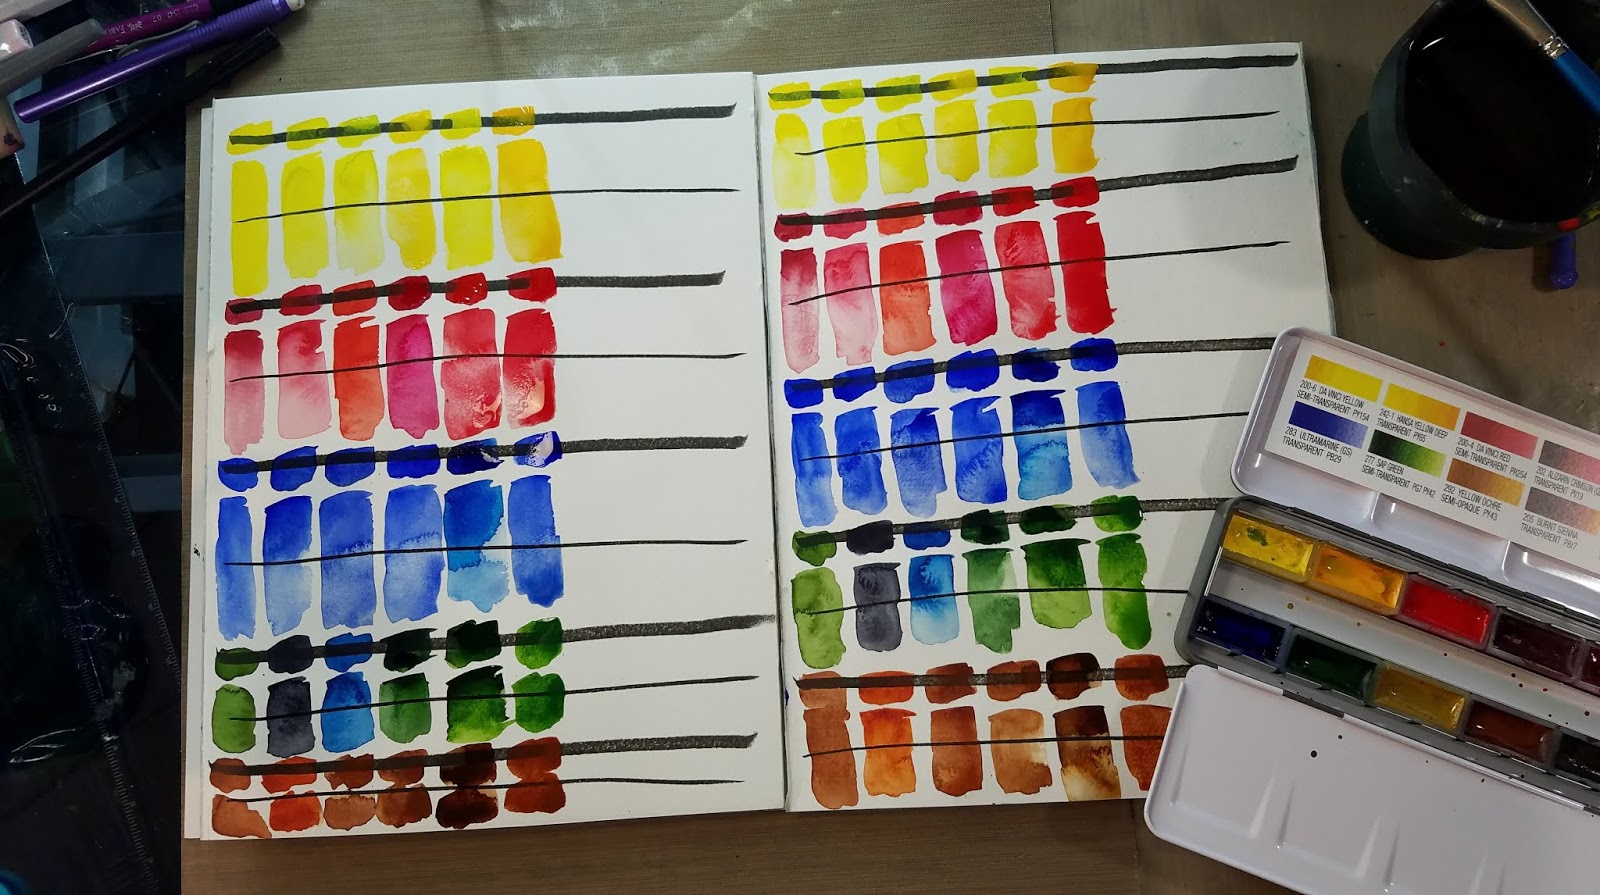
Brand 9: Da Vinci, from whole pans.
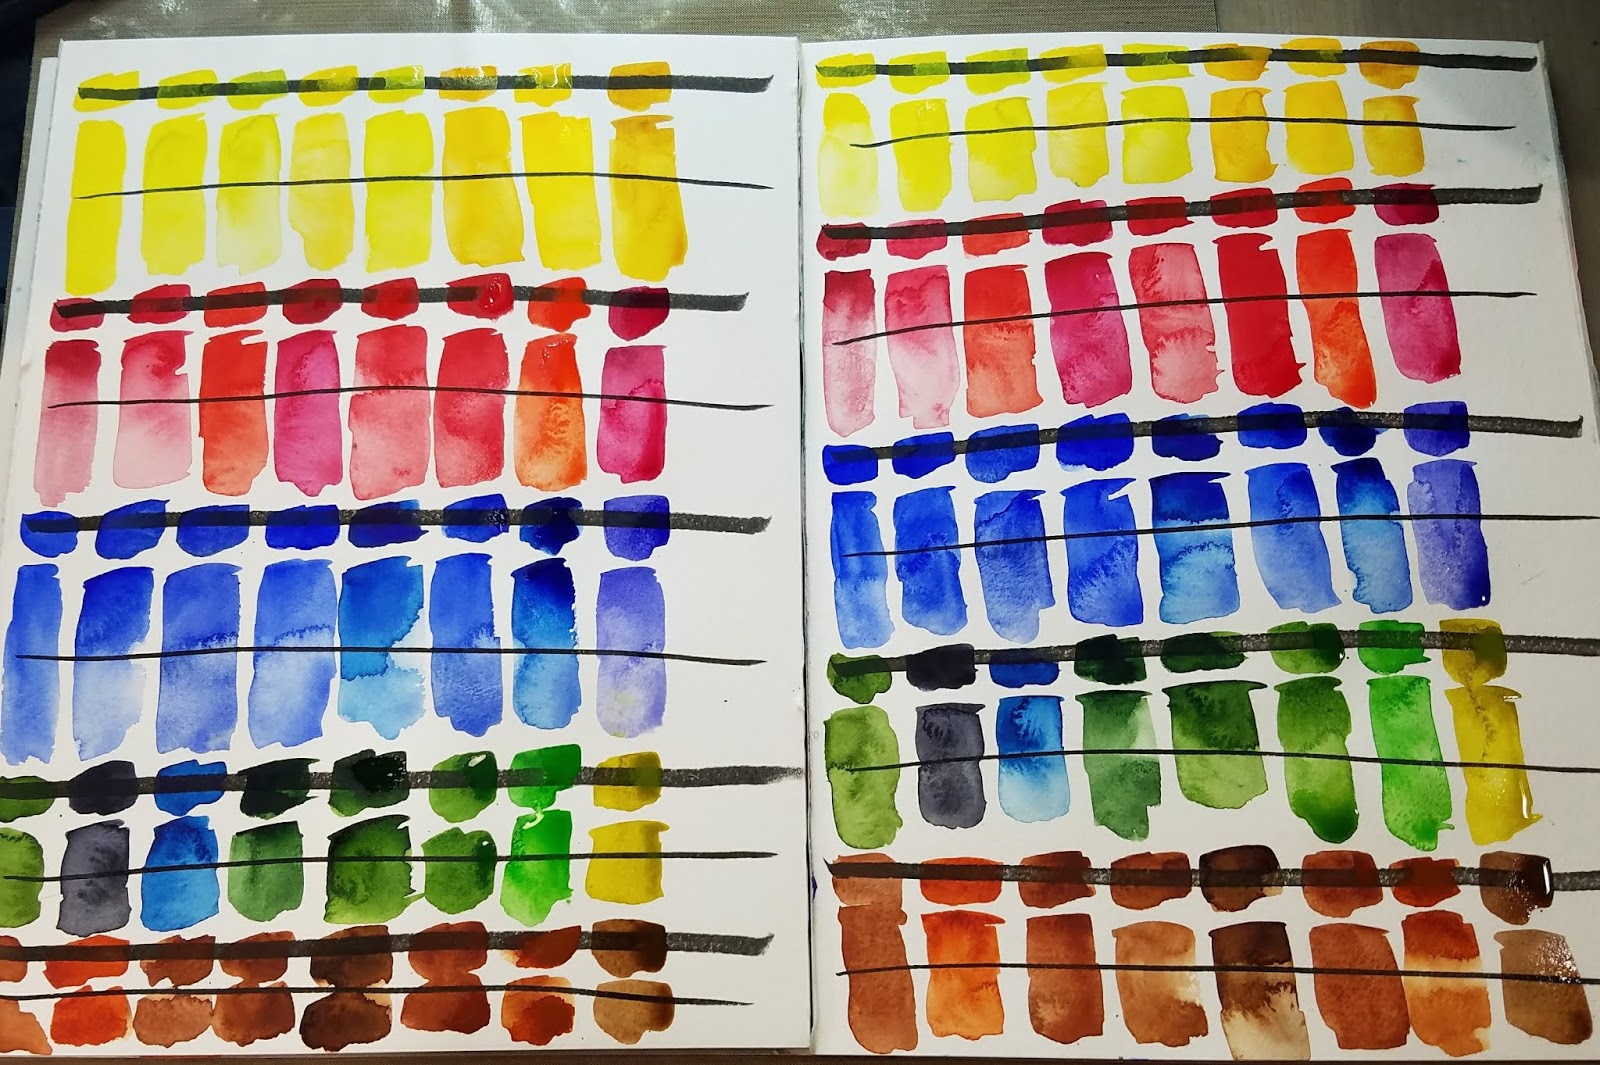
From Left to Right: M Graham, Sennelier, Daniel Smith, White Nights, Mijello Mission Gold, Da Vinci, Holbein HWC, Qor (from half pans)
Cotton Rag Swatches Close Up:
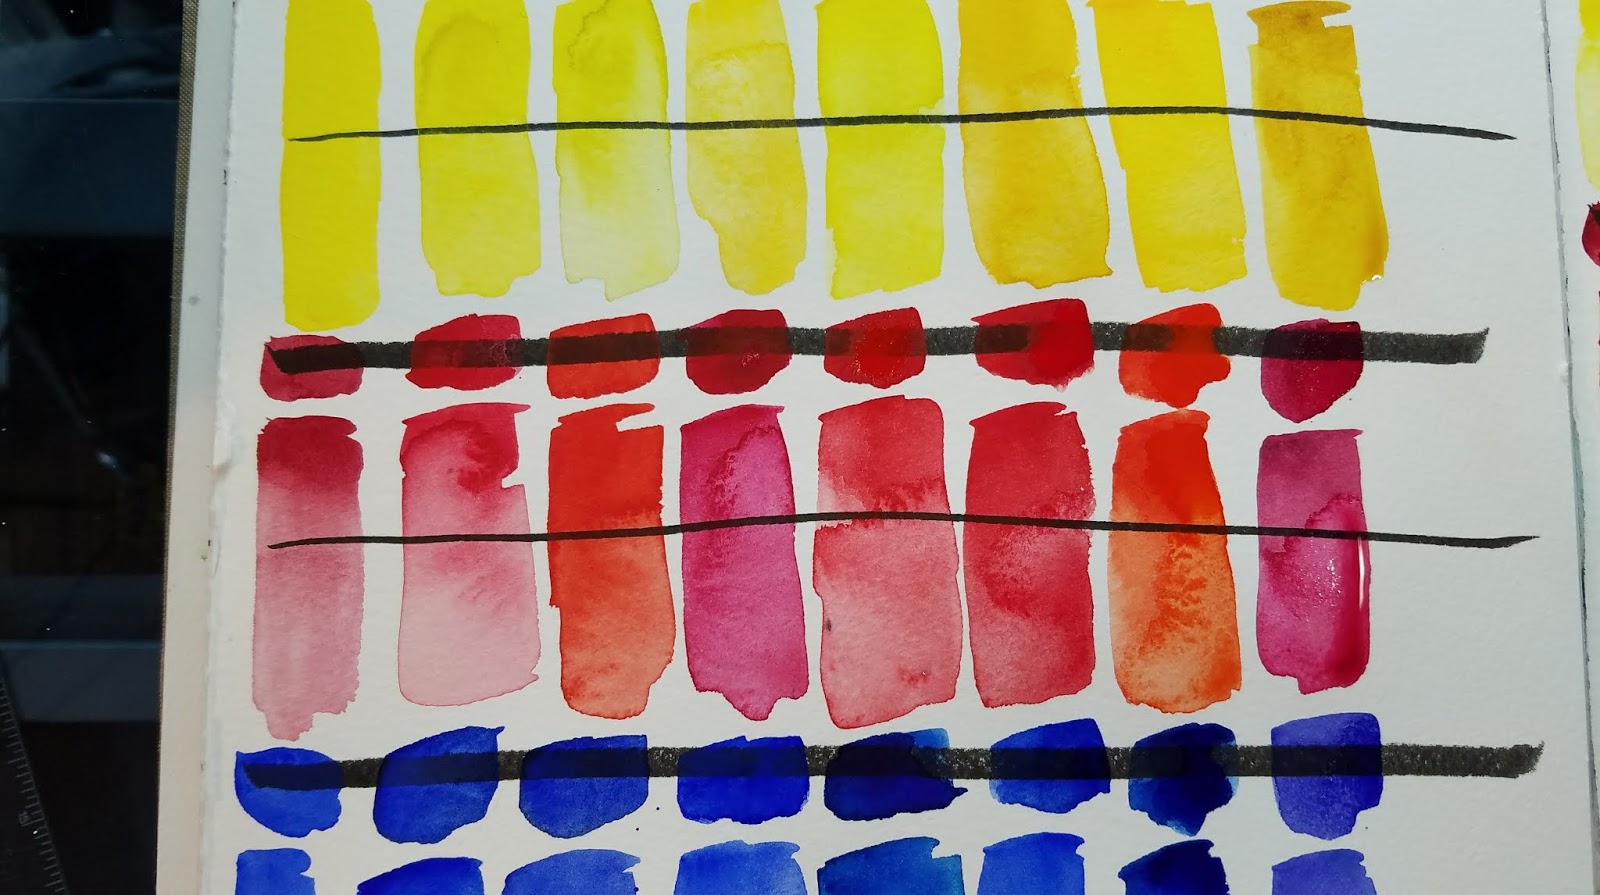 M Graham, Sennelier, Daniel Smith, White Nights, Mijello Mission Gold, Da Vinci, Holbein HWC, Qor (from half pans)
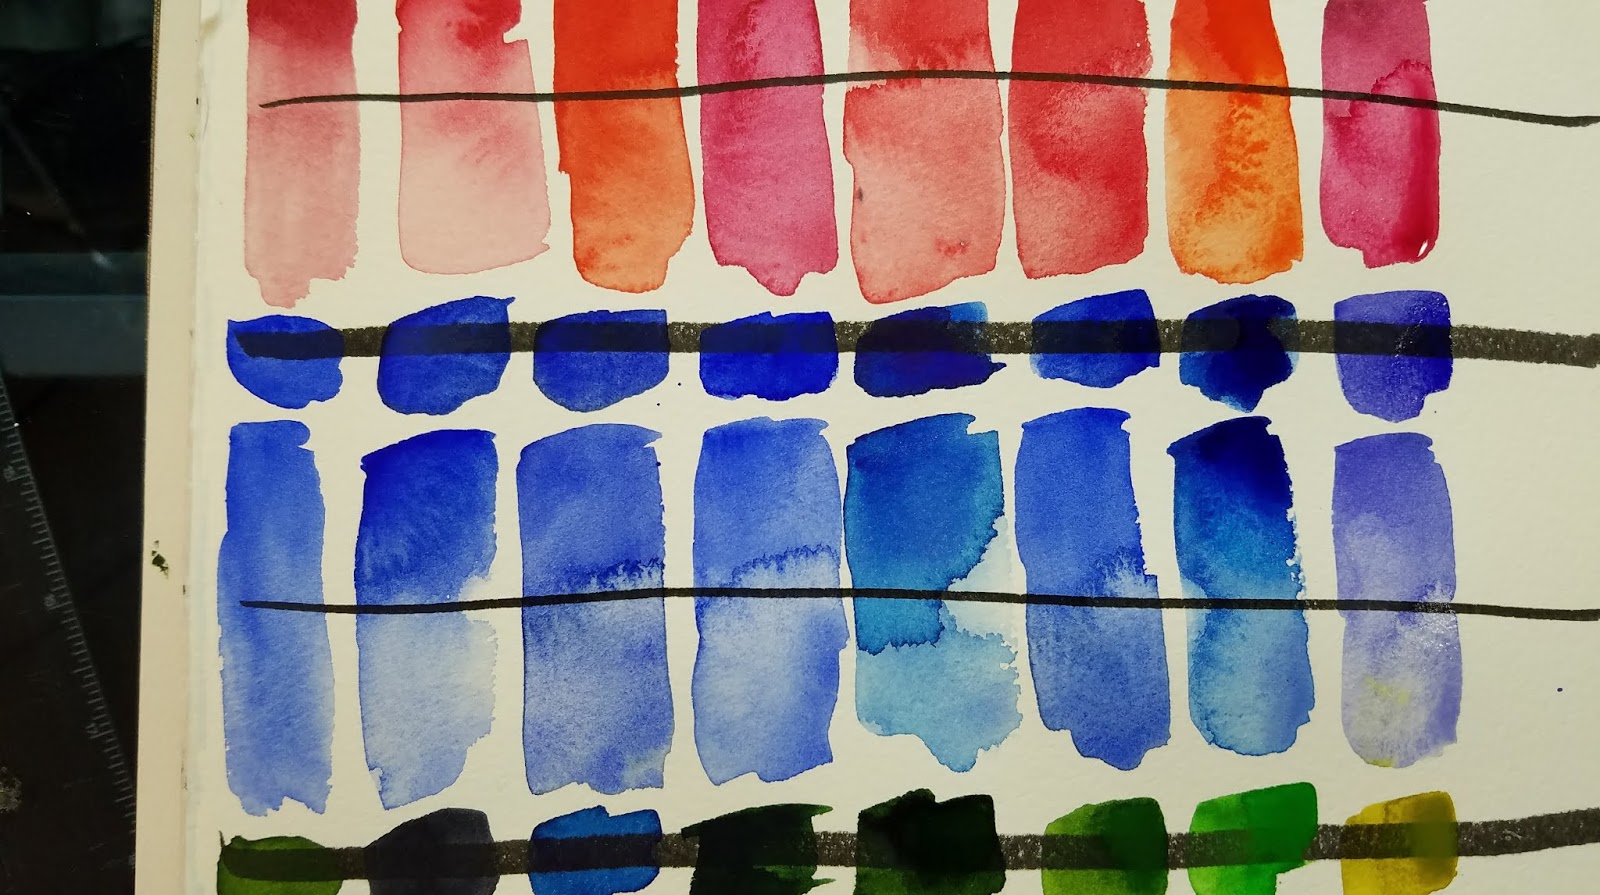 M Graham, Sennelier, Daniel Smith, White Nights, Mijello Mission Gold, Da Vinci, Holbein HWC, Qor (from half pans)
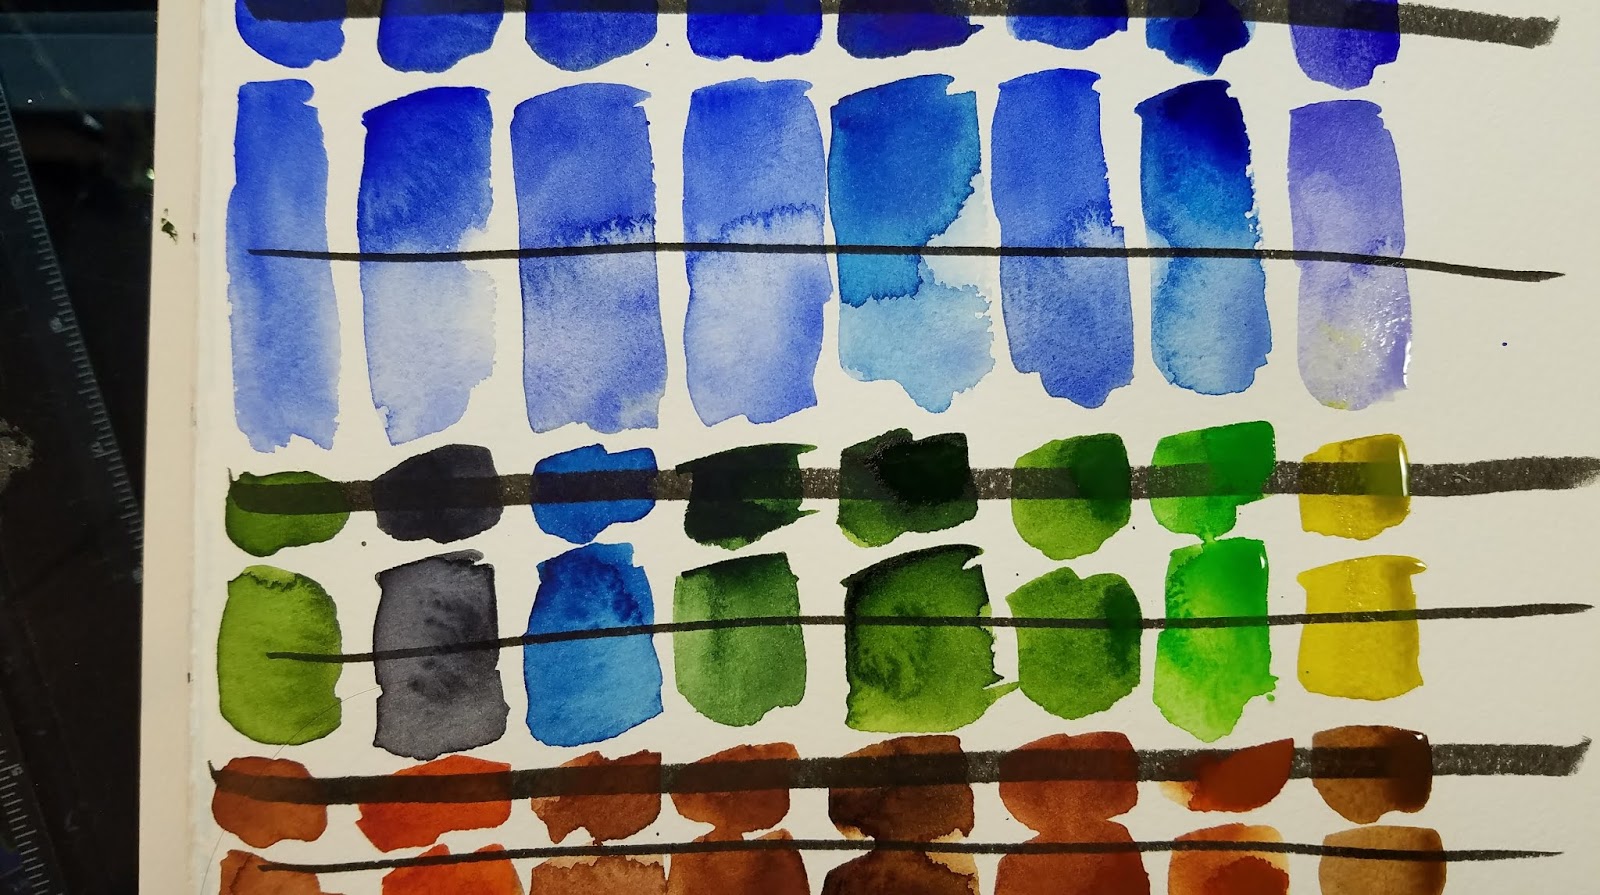 M Graham, Sennelier, Daniel Smith, White Nights, Mijello Mission Gold, Da Vinci, Holbein HWC, Qor (from half pans)
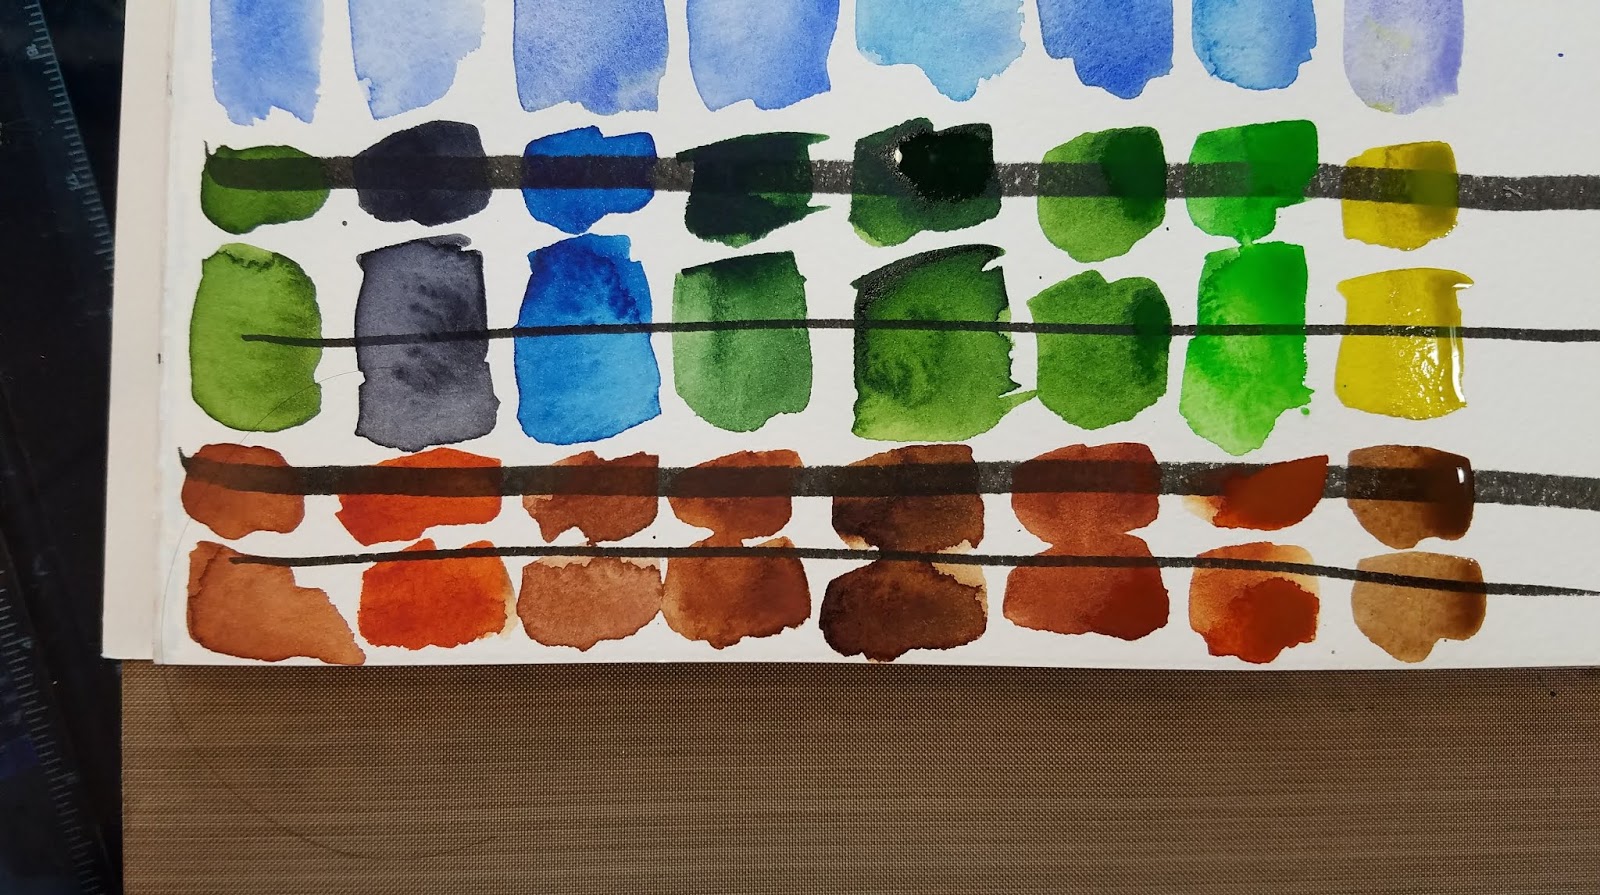 M Graham, Sennelier, Daniel Smith, White Nights, Mijello Mission Gold, Da Vinci, Holbein HWC, Qor (from half pans)
Cellulose Swatches Close Up:
 M Graham, Sennelier, Daniel Smith, White Nights, Mijello Mission Gold, Da Vinci, Holbein HWC, Qor (from half pans)
 M Graham, Sennelier, Daniel Smith, White Nights, Mijello Mission Gold, Da Vinci, Holbein HWC, Qor (from half pans)
 M Graham, Sennelier, Daniel Smith, White Nights, Mijello Mission Gold, Da Vinci, Holbein HWC, Qor (from half pans)
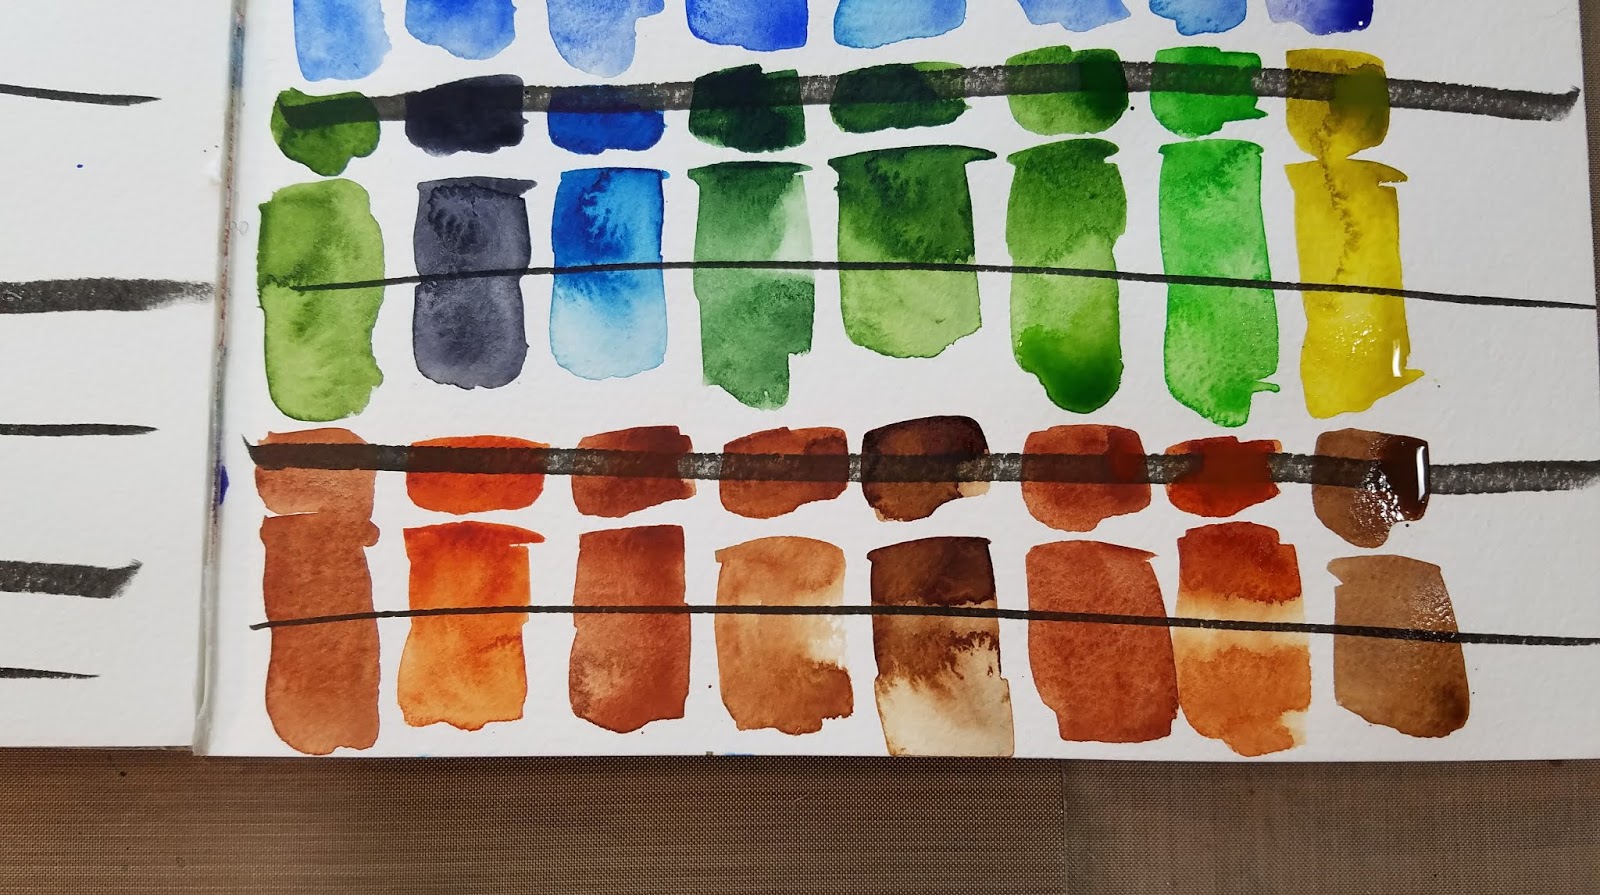 M Graham, Sennelier, Daniel Smith, White Nights, Mijello Mission Gold, Da Vinci, Holbein HWC, Qor (from half pans)
Lift Test:
In this test, I use a damp synthetic brush with fairly stiff fibers to 'scrub' out a portion of the dried watercolor swatch.
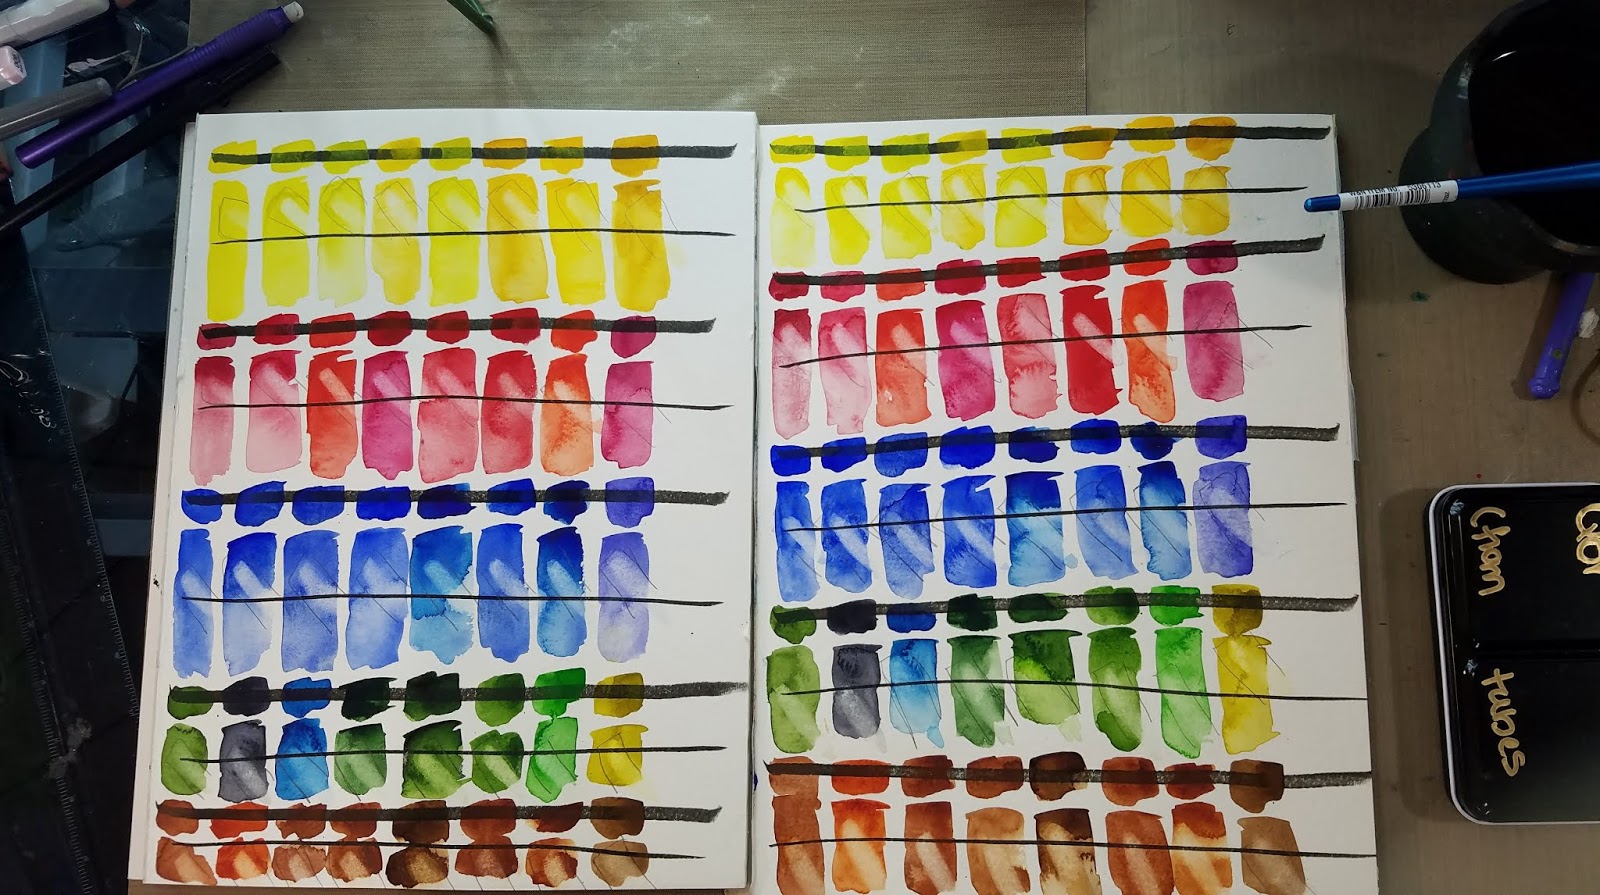 M Graham, Sennelier, Daniel Smith, White Nights, Mijello Mission Gold, Da Vinci, Holbein HWC, Qor (from half pans)
Field Tests
There's so much that swatching can't tell me about watercolors, which is why I value fieldtests. Field tests are a real world demonstration, utilizing subject matter and techniques I frequently use, to determine if a watercolor product is right for me. Swatches are often brilliant, dazzling, full color, and deceptive, promising things the watercolors cannot do in my standard style.
Da Vinci Test/Demonstration:
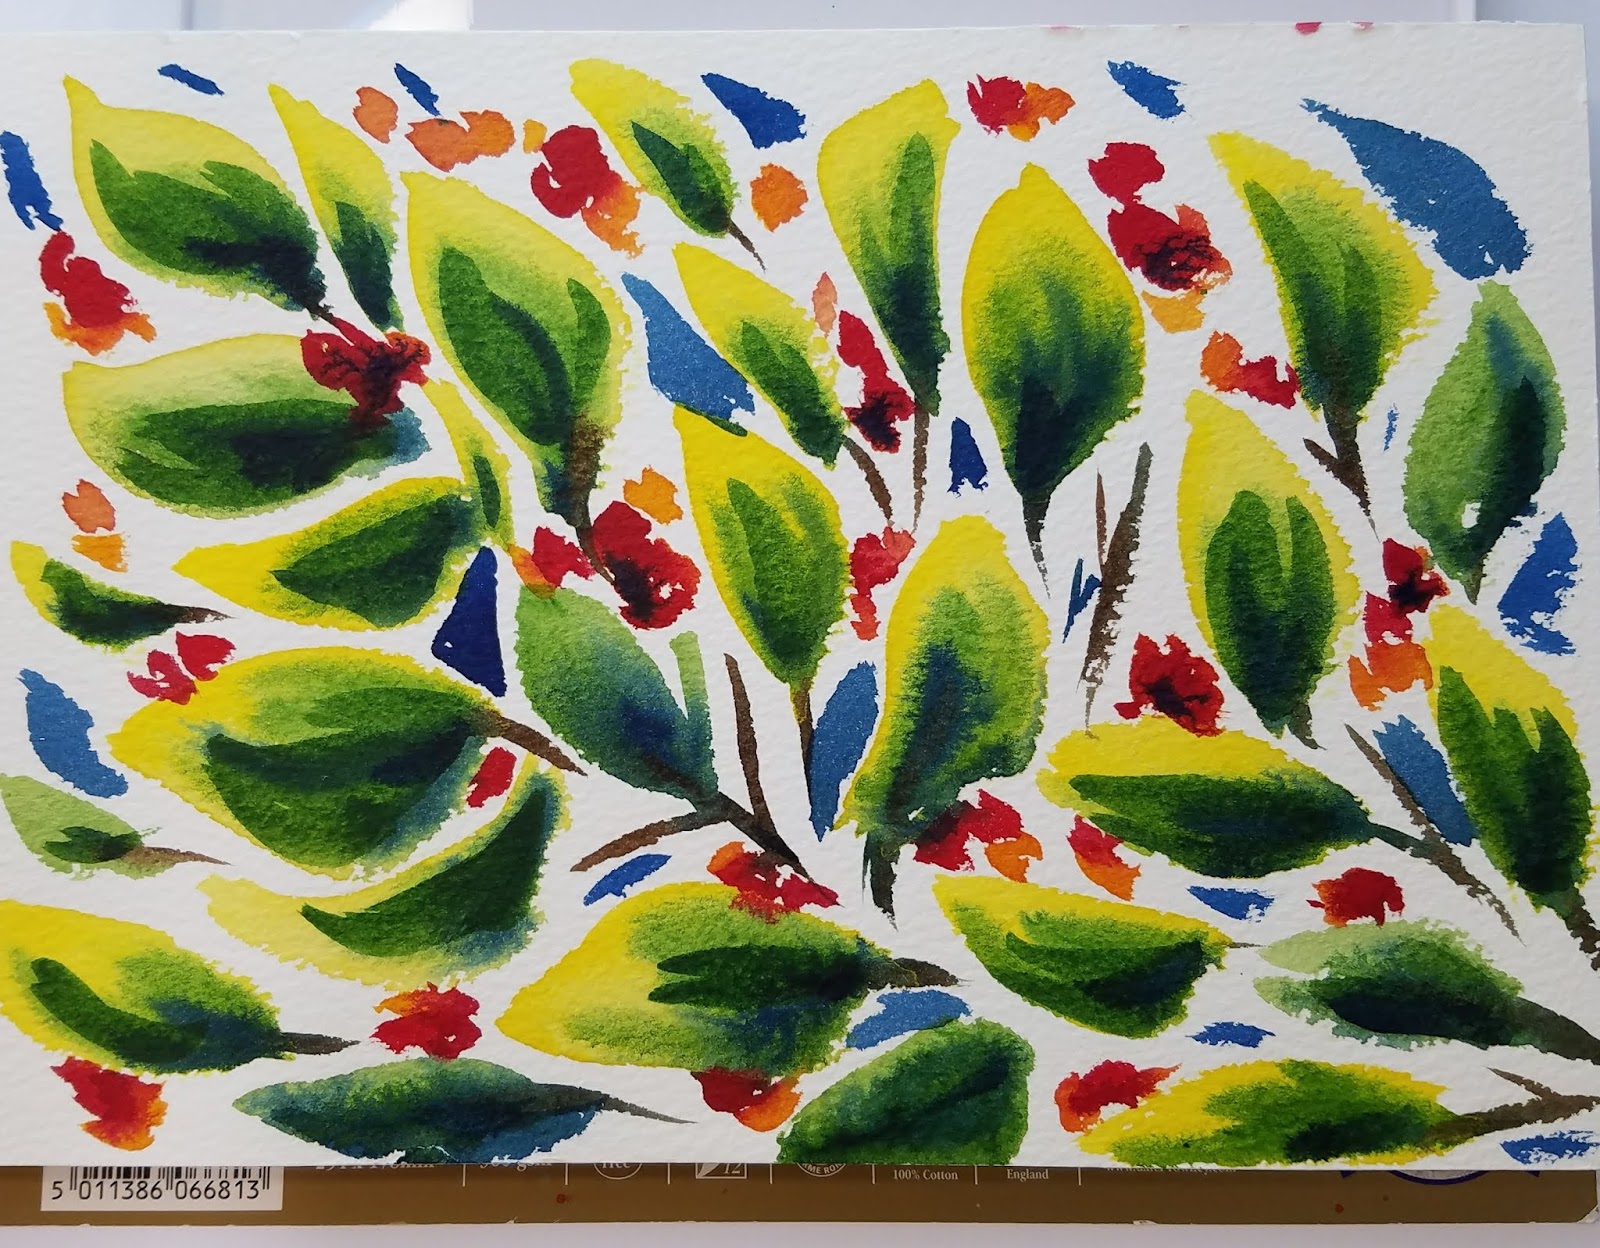
Derwent Inktense Watercolor Test (2nd Try)
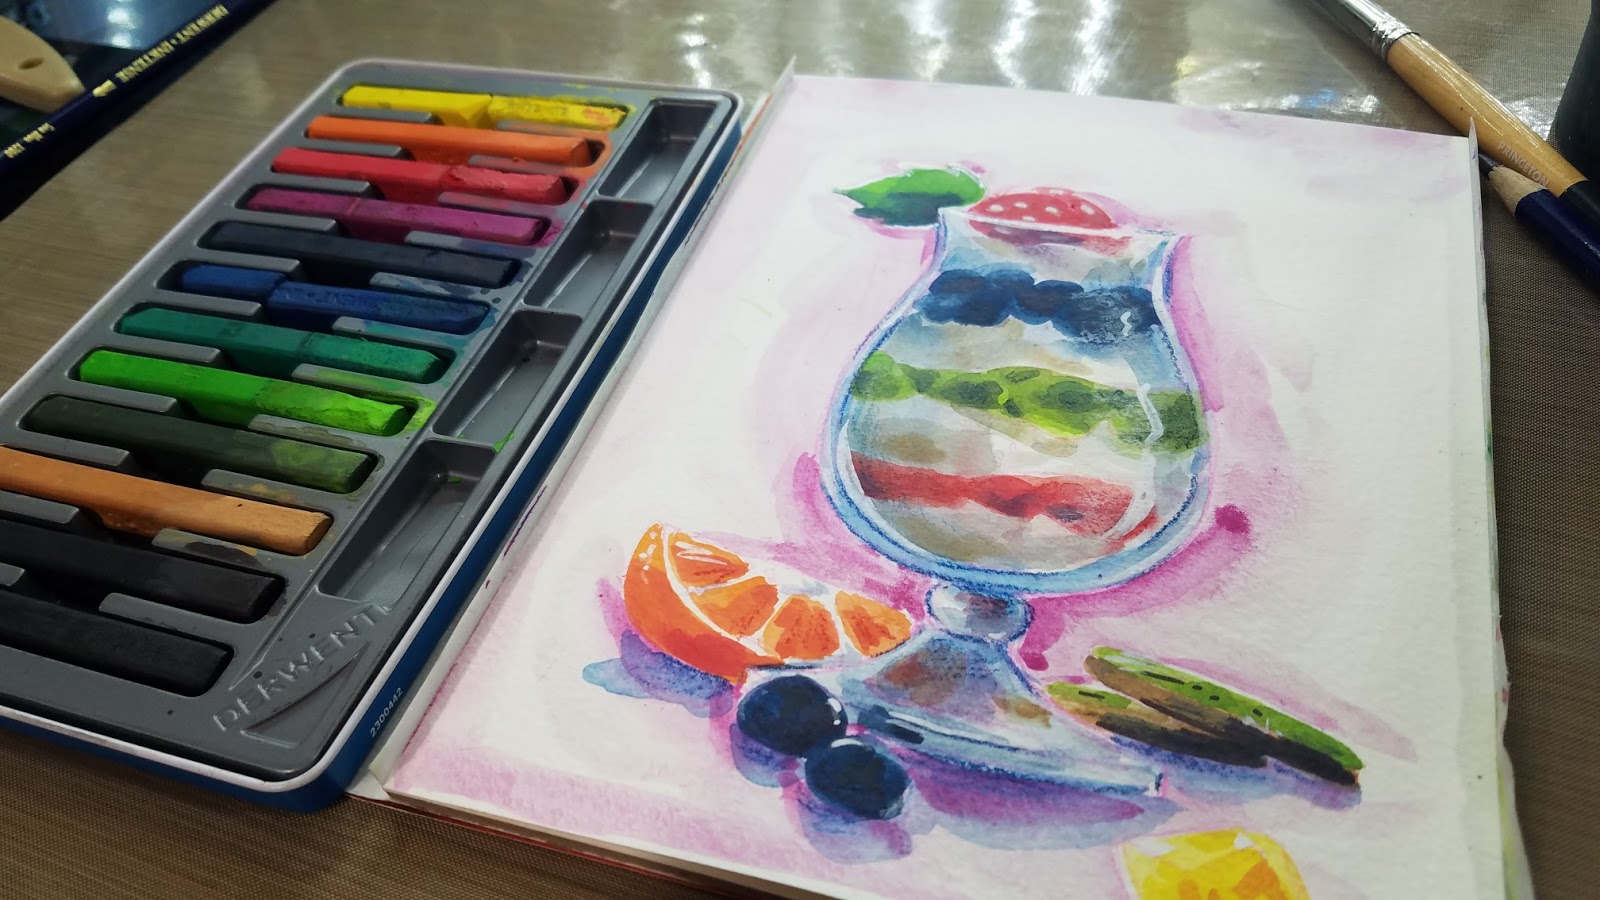
Fancolor Field Test 1 and 2:
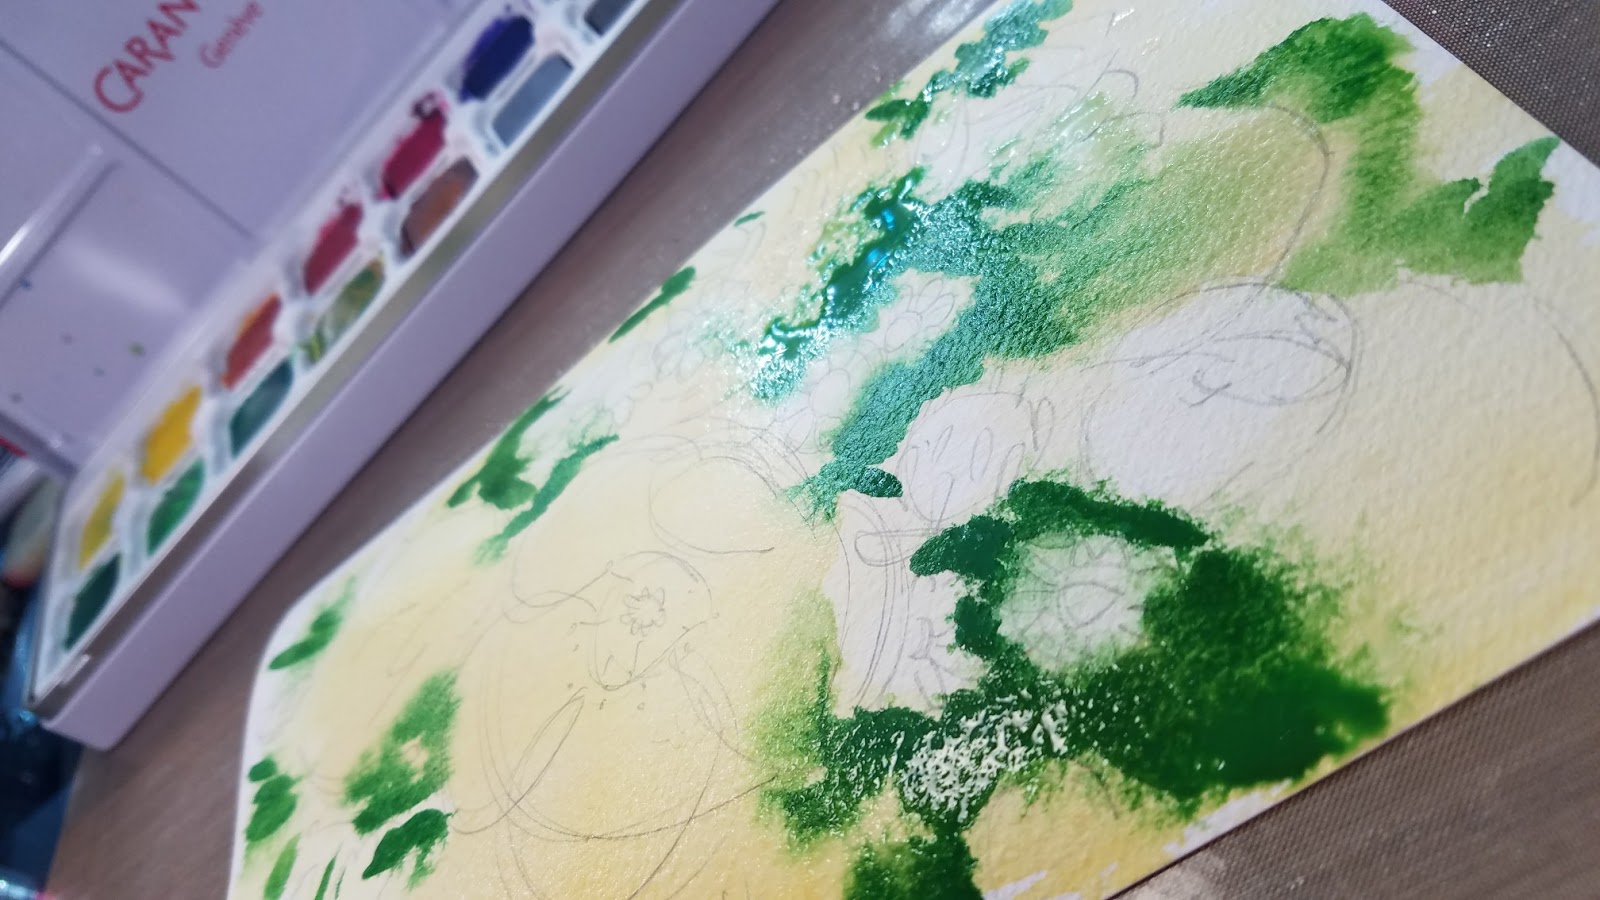


Kuretake Gansai Tambi Etegami Test
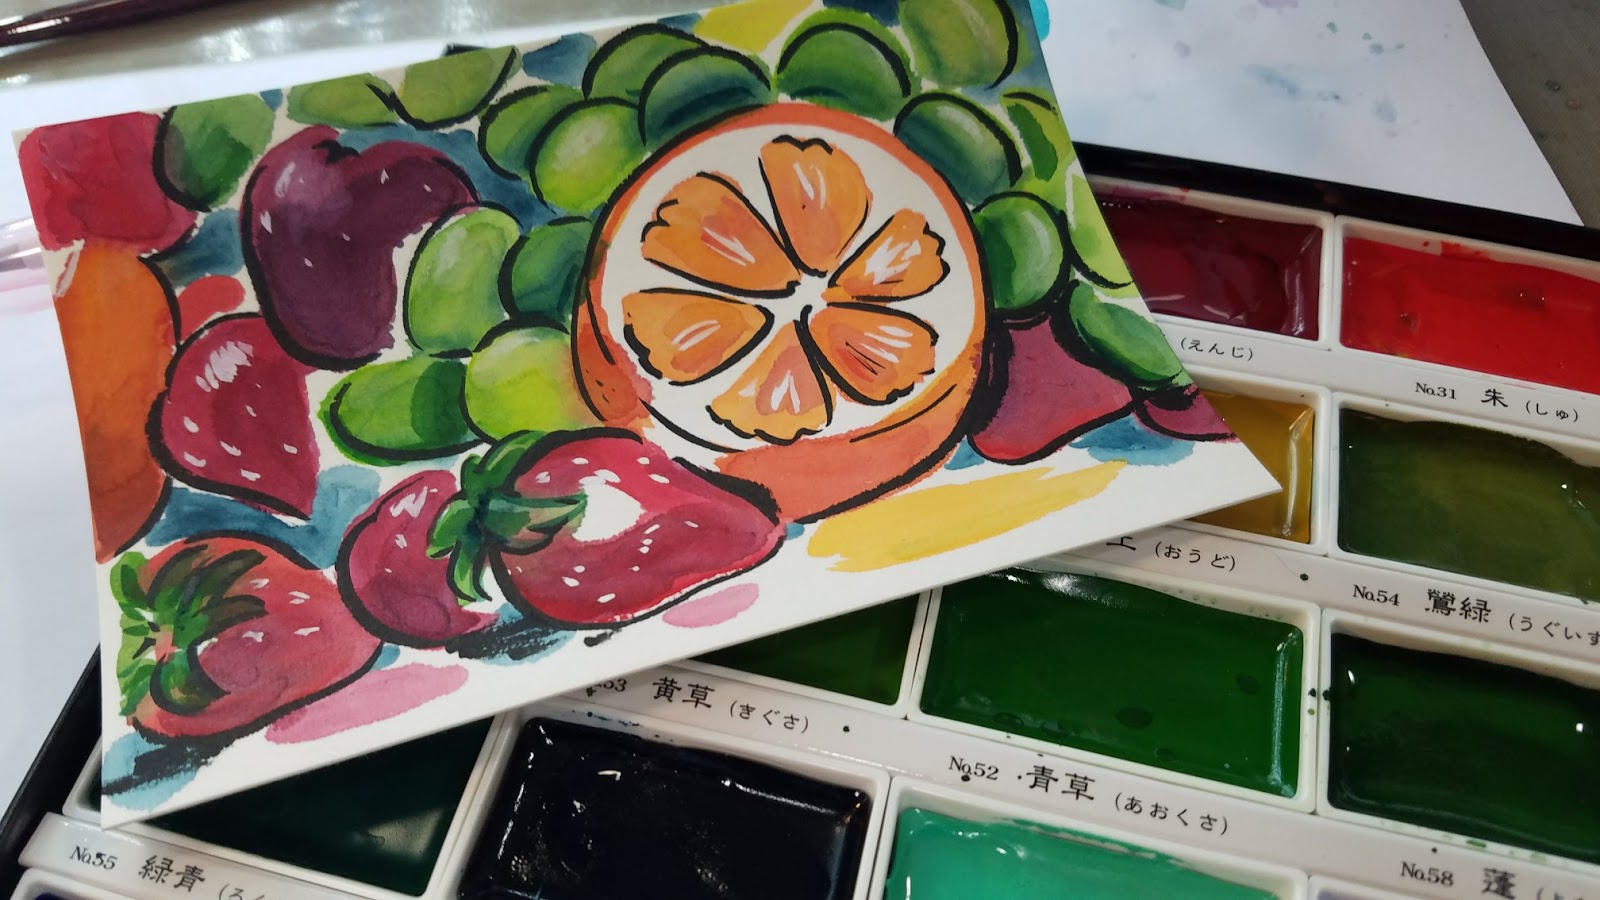
Qor Watercolor Fieldtest
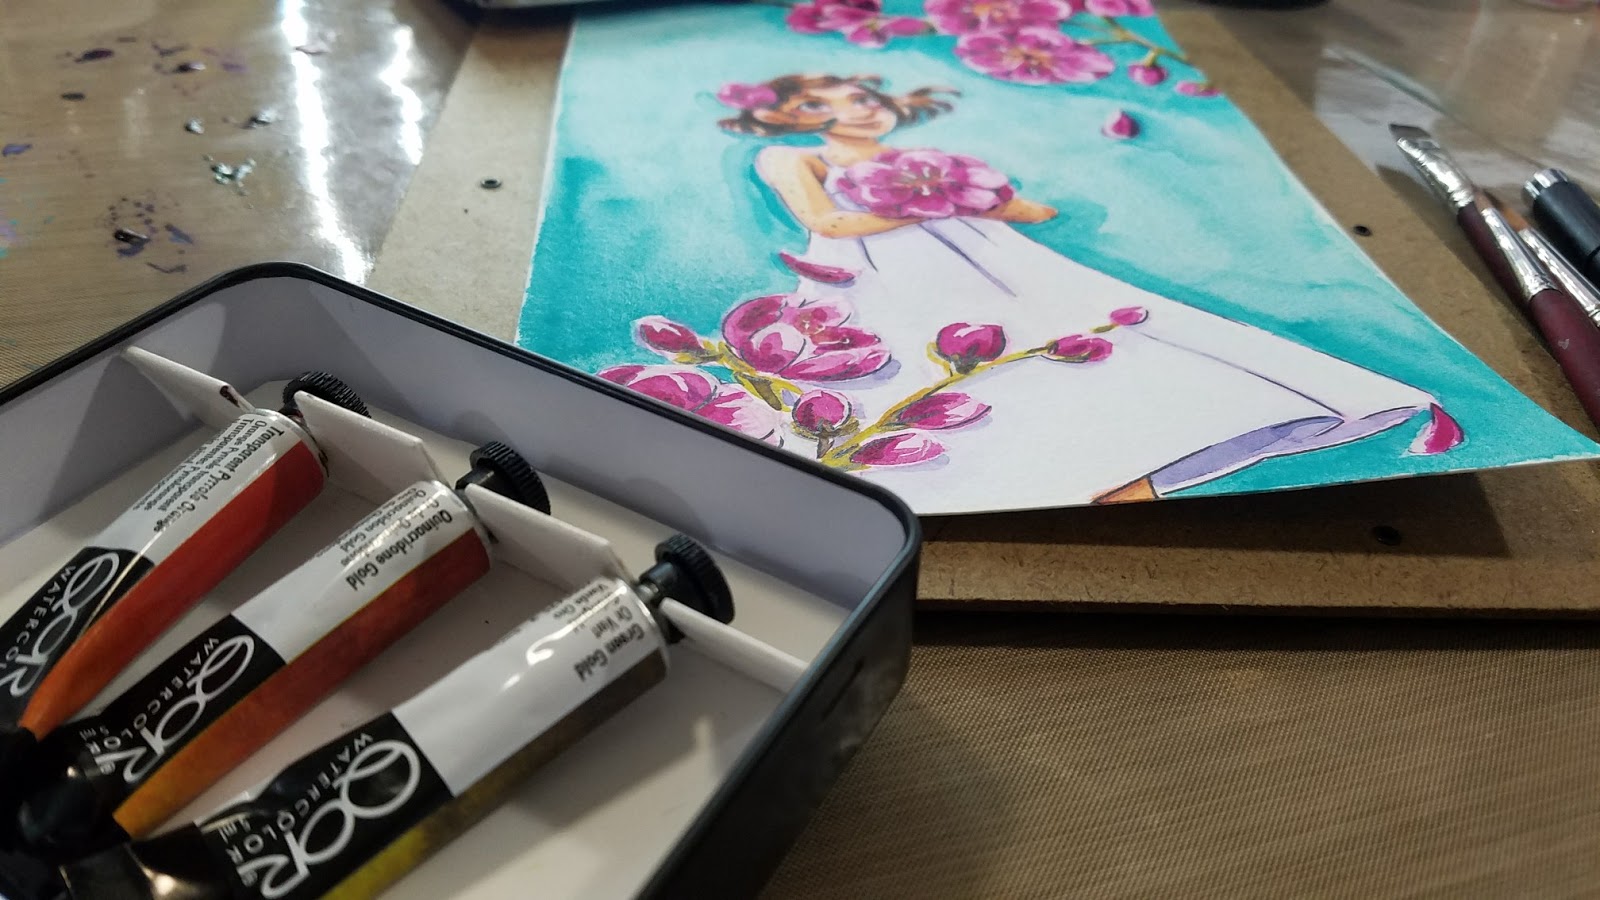

Studio Gouache Gouache Fieldtest
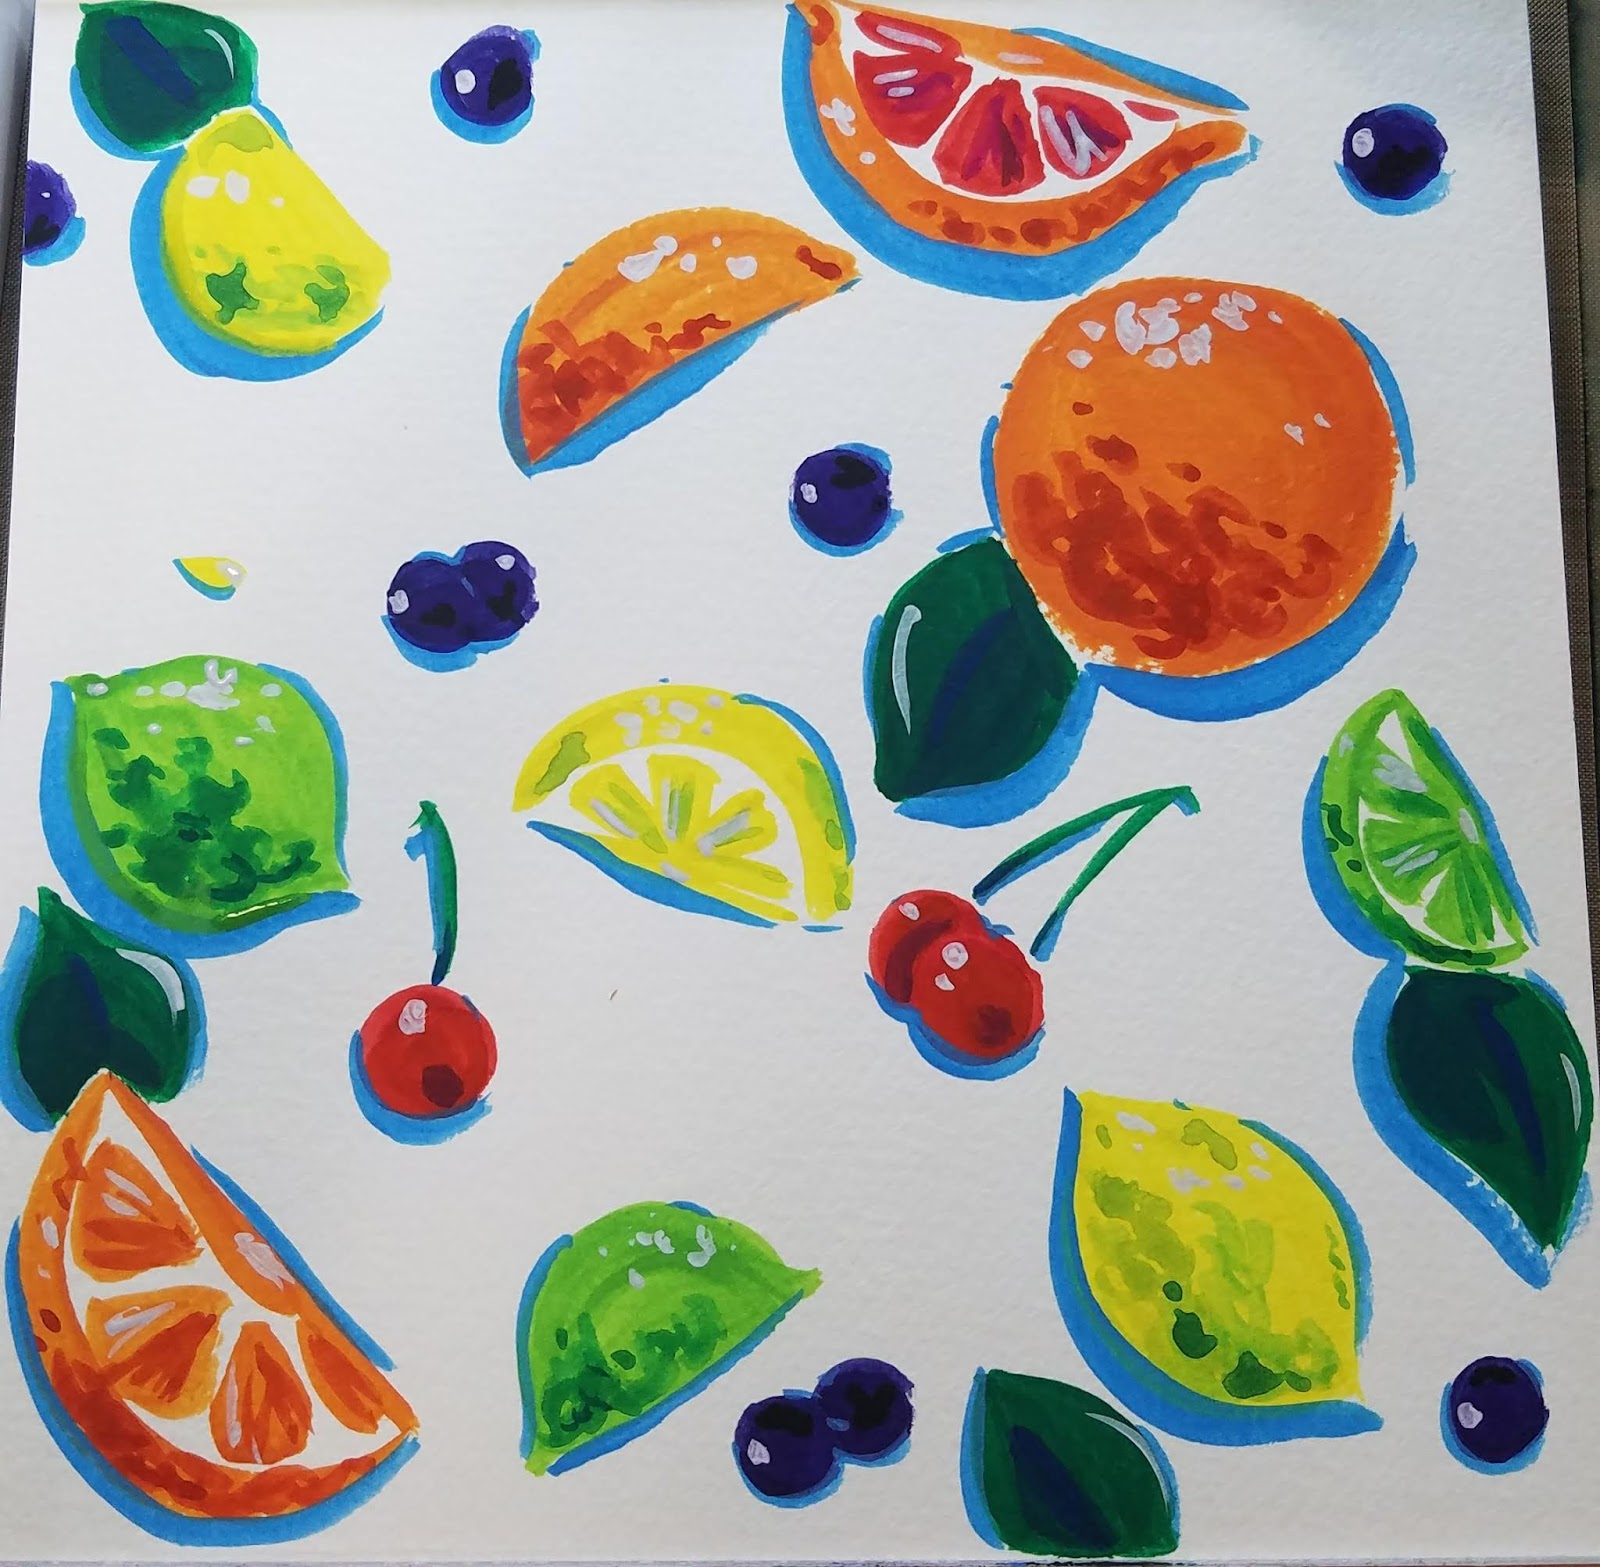
I hope you found this swatching explanation and demonstration helpful! If you haven't yet, please take a moment to check out my other tutorials reviews, and demonstrations in my Watercolor Basics series! Demonstrations like this are made possible thanks to my Artnerd community on Patreon.
Please consider donating to this blog or purchasing from Natto-shop (http://nattosoup.com/shop) if you want me to continue publishing quality content. All materials tested were purchased from my own pocket. Keep on Truckin' Nattosoup is not under any sponsorship.
June 11, 2018
Tips and Advice for Networking: Conventions and Webcomics
Networking can be difficult for artists. Many are shy, a bit reclusive, and may not feel comfortable shouting about their work online. The term 'shameless self-promotion' starts with shameless, and many artists feel self-conscious about sharing their work and engaging other artists. Some may feel like they're 'bothering' other artists when they chat online, so not only will they not share their work, but they won't engage other artists even as an admirer.
I'm here to tell you that all of that is bunk! You've worked hard, and you deserve to show it off. Building an audience is a long-game process, one that takes time and care, but it can be done. Today I share some of my tips for networking with other artists, and I hope you'll respond with tips of your own.CONVENTION SPECIFIC:
Check out who’s tabling at your upcoming shows, check out their social media profiles, and engage with their work in an organic, honest way. Once you’ve done a bit of that, you can introduce yourself and mention that you’ll be at the con as well and would love to meet in person.Introduce yourself to your table neighbors at -on.Organize convention dinners- this can be really laid back and simple, like ‘a bunch of us were going to eat at the hotel restaurant at 7 and chat, would you like to join us?’ to something organized ahead of time, with a room reserved.If you’re staying at the hotel, organize room parties (this is great for events like SPX, which are comic specific)AANI has opportunities for room sharing and organizing events, so if you aren’t a member, consider joining.Create convention announcements, and share to social media in the weeks leading up to the show. When possible, include the map and mark your placement.Change your Twitter handle to reflect the convention and table placement of the next show you're tabling at MTAC 2018 Convention announcement, shared to my Twitter, Instagram, Tumblr, and Facebook page.
SOCIAL MEDIA:

Twitter promo images for updates- these are an eyecatch, the body of the Tweet would contain the linkTwitter has been my main avenue for meeting and networking with other artists. Participating in organized hashtag events such as #KidlitArt or #WebcomicChat, and engaging other artists on their responses in addition to sharing your own is a great way to start befriending other artists. You can check out the Ink Drop Cafe calendar of events if you’re looking for ideas.But on any social media service, this will work most of the time:
Talk to artists whose work you admire, as well as artist’s who’s drive or work ethic you admire. Don’t just talk to the popular super artists, talk to everyone. Be friendly, engaging, and open, and lavish on the honest compliments. This is a fantastic way to break the ice, and to get other artists to check out your work and engage you in return.Creating attractiv, engaging announcement visuals that will catch the eye and include relevant informationBe persistent!TWITTER:
 Promo image for WebComicChat for their Promoting Your Comic chatParticipate in community events when relevant- #VisibleWomen , #WebcomicWednesday , #kidlitart, #MerMay , #Inktober , and tag your art and materials - #watercolor #ClipStudioPaint when it makes senseIf you have a large following, but poor engagement, ask your followers questions about what they enjoy, or what they're working on. @DaisyEin has an excellent regular feature where artists share their work and support one another.Host polls to help spur follower engagement.Set a pinned tweet with links to your important sites and four good examples of your art so people can find your work quickly and easilyMake sure you Tweet webcomic update days, and include the hashtag #webcomicINSTAGRAM:
Create Stories and from those, Highlighted Stories. I use mine to highlight ongoing reviews and projects, such as swatching M Graham watercolors and MerMay.Try to update regularly, especially during the dayGo through the search feature and favorite art you genuinely likePlay around with relevant hashtags, and if you're doing an event, make sure you tag it, as well as the city it's located inIF YOU HAVE A WEBCOMIC
 Comic Tea Party promo
Join a collective or form your own with friends/peers. Boost each other’s work.Join a webcomic focused Discord channel, like Ink Drop Cafe to talk shop.Participate in Twitter chats aimed at comic artists. Right now, there's plenty of them- #ComicArtistsUnite, #Webcomicchat, #WeHeartComics Attend conventions and commission portraits of your characters from other artists- this is a fantastic way to break the ice with established artists, and hopefully they will share their completed art (with a link to your account) on social media. This is not a surefire thing, so only commission artists if you legitimately want portraits of your characters. You can also share their completed art to your social media account and tag them, there's a high chance they'll reblog it.Table at conventions and chat up everyone who comes by- business cards and webcomic promotional items are a good takeaway for those who are interested but not ready to buySign up for Comic Tea Party, a Discord based webcomic book club! Make sure you promote your CTP event ahead of time, so readers can join in!
NOTE: I've seen a lot of artists complaining about how Discord isn't the right fit for them. Discord isn't really social media- it's a chat platform- and for others to be engaged in your work, you have to engage them on their terms first. You will have poor results if you just dump your art and run. If you pick one or two channels, and frequent them, you'll find friendships develop.In the end, it’s really about having conversations with others, not just plugging your own work all the time. Show genuine interest in the work of others, and show excitement for what you’re working on. Think of networking as making friends, and don’t limit yourself to people who create the same sort of work you do. Some of my best friends/contacts are 3D artists and jewelry makers- they have a lot of great insight!OTHER RESOURCES:Social Media for Webcomics: IntroductionSocial Media for Webcomics: TwitterSocial Media for Webcomics: InstagramSocial Media for Webcomics: YoutubeNetworking
Please consider donating to this blog or purchasing from Natto-shop (http://nattosoup.com/shop) if you want me to continue publishing quality content. All materials tested were purchased from my own pocket. Keep on Truckin' Nattosoup is not under any sponsorship.
I'm here to tell you that all of that is bunk! You've worked hard, and you deserve to show it off. Building an audience is a long-game process, one that takes time and care, but it can be done. Today I share some of my tips for networking with other artists, and I hope you'll respond with tips of your own.CONVENTION SPECIFIC:
Check out who’s tabling at your upcoming shows, check out their social media profiles, and engage with their work in an organic, honest way. Once you’ve done a bit of that, you can introduce yourself and mention that you’ll be at the con as well and would love to meet in person.Introduce yourself to your table neighbors at -on.Organize convention dinners- this can be really laid back and simple, like ‘a bunch of us were going to eat at the hotel restaurant at 7 and chat, would you like to join us?’ to something organized ahead of time, with a room reserved.If you’re staying at the hotel, organize room parties (this is great for events like SPX, which are comic specific)AANI has opportunities for room sharing and organizing events, so if you aren’t a member, consider joining.Create convention announcements, and share to social media in the weeks leading up to the show. When possible, include the map and mark your placement.Change your Twitter handle to reflect the convention and table placement of the next show you're tabling at
 MTAC 2018 Convention announcement, shared to my Twitter, Instagram, Tumblr, and Facebook page.
SOCIAL MEDIA:


Twitter promo images for updates- these are an eyecatch, the body of the Tweet would contain the linkTwitter has been my main avenue for meeting and networking with other artists. Participating in organized hashtag events such as #KidlitArt or #WebcomicChat, and engaging other artists on their responses in addition to sharing your own is a great way to start befriending other artists. You can check out the Ink Drop Cafe calendar of events if you’re looking for ideas.But on any social media service, this will work most of the time:
Talk to artists whose work you admire, as well as artist’s who’s drive or work ethic you admire. Don’t just talk to the popular super artists, talk to everyone. Be friendly, engaging, and open, and lavish on the honest compliments. This is a fantastic way to break the ice, and to get other artists to check out your work and engage you in return.Creating attractiv, engaging announcement visuals that will catch the eye and include relevant informationBe persistent!TWITTER:
 Promo image for WebComicChat for their Promoting Your Comic chatParticipate in community events when relevant- #VisibleWomen , #WebcomicWednesday , #kidlitart, #MerMay , #Inktober , and tag your art and materials - #watercolor #ClipStudioPaint when it makes senseIf you have a large following, but poor engagement, ask your followers questions about what they enjoy, or what they're working on. @DaisyEin has an excellent regular feature where artists share their work and support one another.Host polls to help spur follower engagement.Set a pinned tweet with links to your important sites and four good examples of your art so people can find your work quickly and easilyMake sure you Tweet webcomic update days, and include the hashtag #webcomicINSTAGRAM:
Create Stories and from those, Highlighted Stories. I use mine to highlight ongoing reviews and projects, such as swatching M Graham watercolors and MerMay.Try to update regularly, especially during the dayGo through the search feature and favorite art you genuinely likePlay around with relevant hashtags, and if you're doing an event, make sure you tag it, as well as the city it's located inIF YOU HAVE A WEBCOMIC
 Comic Tea Party promo
Join a collective or form your own with friends/peers. Boost each other’s work.Join a webcomic focused Discord channel, like Ink Drop Cafe to talk shop.Participate in Twitter chats aimed at comic artists. Right now, there's plenty of them- #ComicArtistsUnite, #Webcomicchat, #WeHeartComics Attend conventions and commission portraits of your characters from other artists- this is a fantastic way to break the ice with established artists, and hopefully they will share their completed art (with a link to your account) on social media. This is not a surefire thing, so only commission artists if you legitimately want portraits of your characters. You can also share their completed art to your social media account and tag them, there's a high chance they'll reblog it.Table at conventions and chat up everyone who comes by- business cards and webcomic promotional items are a good takeaway for those who are interested but not ready to buySign up for Comic Tea Party, a Discord based webcomic book club! Make sure you promote your CTP event ahead of time, so readers can join in!
NOTE: I've seen a lot of artists complaining about how Discord isn't the right fit for them. Discord isn't really social media- it's a chat platform- and for others to be engaged in your work, you have to engage them on their terms first. You will have poor results if you just dump your art and run. If you pick one or two channels, and frequent them, you'll find friendships develop.In the end, it’s really about having conversations with others, not just plugging your own work all the time. Show genuine interest in the work of others, and show excitement for what you’re working on. Think of networking as making friends, and don’t limit yourself to people who create the same sort of work you do. Some of my best friends/contacts are 3D artists and jewelry makers- they have a lot of great insight!OTHER RESOURCES:Social Media for Webcomics: IntroductionSocial Media for Webcomics: TwitterSocial Media for Webcomics: InstagramSocial Media for Webcomics: YoutubeNetworking
Please consider donating to this blog or purchasing from Natto-shop (http://nattosoup.com/shop) if you want me to continue publishing quality content. All materials tested were purchased from my own pocket. Keep on Truckin' Nattosoup is not under any sponsorship.
June 7, 2018
Roles and Responsibilities for Self Employed Artists
As a self-employed artist and freelancer, I wear a lot of hats. Below are a few of my responsibilities, divided into major categories.
What does it mean to be a self-employed freelancer, what are your responsibilities:
Maintaining and updating a professional portfolio of art and illustration (can view it here:Maintaining a clean, professional, and engaging social media presence on Twitter and Instagram, as that's how most illustrators are found for projects.Responding to inquiries, providing accurate quotes regarding price and timelines, creating draft sketches.Creating and delivering artwork in a timely manner, based on timeline.Accepting critique and feedback, and making necessary changes.
What does it mean to be aself-employed online art educator?
Creating content on a regular basis, according to a predetermined schedule.Researching, drafting, and writing reviews, tutorials, and demonstrations for an online blog, viewable here: nattosoup.blogspot.comResearching, drafting, and conducting tutorials and demonstrations for a Youtube channel, viewable here: youtube.com/nattosoupSoliciting and responding to volunteer and paid presentation and workshop opportunities at libraries, schools, and conventions.Creating presentations and workshops that include a Powerpoint and demonstration portion for libraries, schools, and conventions.Keeping the audience engaged, answering questions, and creating an atmosphere of positivity for creating art.Needs to be a positive rolemodel, both online and off.
What does it mean to be a Self Published Comic Artist
Planning, editing, executing, and promoting content.Researching printers, budgeting, formatting files correctly, requesting proofs, and finding storage for books.Generating and conducting salesBooking promotional appearances such as book talksGetting books into local bookstoresGetting books into local libraries
If a webcomic:
Responsible for FREQUENT promotion of comicResponsible for site maintanenceResponsible for updates and maintaining scheduleResponsible for maintaining a buffer of pagesResponsible for convention and promotional eventsResponsible for advertising
What does it mean to be a Convention Artist
Product research, design, and sourcing.
Product inventory and storage
Demographic market research
Table layout and design for optimal sales from core demographic
Booking travel, hotel, making food arrangements or hiring an assistant
Booking and promoting con appearances
Customer service and customer satisfaction
Responsible for post con fulfillpost-conh as custom orders
Please consider donating to this blog or purchasing from Natto-shop (http://nattosoup.com/shop) if you want me to continue publishing quality content. All materials tested were purchased from my own pocket. Keep on Truckin' Nattosoup is not under any sponsorship.
June 4, 2018
Monetizing Your Free to Read Webcomic in a Gift Economy
This is an interesting topic, and one well worth exploring in depth. Unfortunately, given the nature of blogs and blogging, it's a bit too long for me to share it here. For the full essay, please click here!
What is a Gift Economy?
A gift economy, gift culture, or gift exchange is a mode of exchange where valuables are not traded or sold, but rather given without an explicit agreement for immediate or future rewards.[1] This contrasts with a barter economy or a market economy, where goods and services are primarily exchanged for value received. Social norms and custom govern gift exchange. Gifts are not given in an explicit exchange of goods or services for money or some other commodity.[2]According to anthropologists Maurice Bloch and Jonathan Parry, it is the unsettled relationship between market and non-market exchange that attracts the most attention. Gift economies are said, by some,[7] to build communities, and that the market serves as an acid on those relationships.[8]Source
In peer and user-generated production, community recognition supersedes economic incentives. User-based creativity thrives on the idea of “playful enjoyment,” rather than economic incentives. .Source
Usually, gift economies function in real world settings- a physical exchange from one person or group to another. Favors accrued over time create debt and the return of favors or gifts, and it's this exchange that keeps the gift economy functioning.
The gift economy model also applies to pretty much anything online that has been created for enjoyment- fanfiction, webcomics, Let's Plays and playthroughs, blogs, and podcasts. Unfortunately in such an economy, the introduction of market practices, such as requesting money or financial support in return for consumption often meets resistance if not outright upset, and it can be difficult to make ends meet without income to help support the project.
It's like how everyone uses Wikipedia, but nobody wants to donate to their yearly operating costs.
Generally, the payment in a gift economy is through building up social currency.
Pitfalls and Challenges Of Monetizing In This Economy:
From Roman amicitia to the medieval and Renaissance belief that “scientia donum dei est, unde vendi non potest,” creativity has been repeatedly construed as a gift.Giancarlo F. Frosio, Users’ Patronage: the Return of the Gift in the “Crowd Society”, MICH. ST. L. REV. (forthcoming, April 2016) (PDF Download Available).Source
Monetizing Your Free to Consume Projects
Monetizing Tutorials, Reviews, and Knowledge in Written or Video FormatIf you make what you do look too easy, you'll have a harder time monetizing your content.
There is an assumption that for something to be worth paying for, it has to be so good that people idolize the skill of the creator. Therefore, there is significant challenge in finding ways to monetize content aimed at leveling the playing field- teaching others how to to draw, paint, or play as well as you can. This is because you're bringing what you do down to the level of the average reader, decreasing scarcity and making the information (and resulting work) less valuable-i.e. 'anyone can do it'
Unique Issues for Monetizing Tutorials and Reviews:
Site isn't optimized for mobileReaders Use AdblockersReaders are reluctant to share your information with their friendsReaders never comment/no input or engagementCost of keeping up with demand- buying materialsBuilding a large enough audienceBuilding an engaged audienceFinding ways to engage the audience/invite audience participationCreating a valuable product while still making it easy to understand Building reader trustEndorsement from respectable sources Social media shuffling and hiding posts from people who actively want to see our contentDifficult to convince a financially broke audience that they can afford to part with a monthly donation in order to help keep your resource afloat
Ways to Combat this:Carefully woo and reward individuals who believe in the value of what you have to offerFind an outside sponsor who benefits from say, selling paper or paints based on the reviewer's recommendations who can sponsor posts and tutorialsFind an outside sponsor willing to send products for review, cutting product costsUnfortunately, there's a catch 22, you need to be popular and somewhat respected to attract sponsors. You need to be able to demonstrate that your good word can move goods.
Your Options:So you need to be so good that everyone respects you, or become everyone's friend so that they trust your recommendation. How do you do this in a system that is constantly in flux?
Monetizing Webcomics
Unique Issues for Monetizing Webcomics:
Site isn't optimized for mobile- difficult to keep up Readers use adblockersReaders read comic on scanlation sitesReaders never comment/no input or engagementDifficulty building readerbaseReaders start the comic, then drop it- can't keep track of all the comics they readReaders do not buy print copies or back KickstarterFinding time to make the additional content necessary to make a Patreon worthwhile
Options for Monetizing Your Webcomic
Sometimes it seems like the only options webcomic artists have for monetization are:
Trot out a sob story and shake the tin cup (My cat is sick/I need to see the dr for this weird lump ect)Be impossibly good/popular and make money from Tapastic tips and ad revenuePut the best stuff behind a paywallGet picked up by a publisherOutside sponsor or patronPaying job in an outside industry
The burden seems to be on the creator to make MORE content that can be shared with financial supporters, as hiding once free content behind a paywall is generally unacceptable.
Popular options for monetization include:
Putting Concept art up for PatronsReleasing monthly sketchbooks for PatronsSharing Process with PatronsPatron-exclusive streamsUpping your output to additional days during the weekEarly access to chaptersCommission tiersRafflesCon merch tiers
While you may be serious about comics, and webcomics specifically, it may be best to view it as a hobby while you build up your reputation or try to attract your next paying client.
Monetizing Community Resources that Rely on Community ParticipationPossibly the most difficult of all, because without their unpaid contributions and engagement, the product would not exist or have value at all.Examples would be Twitter comics community chats like Comic Artists Unite (#comicartistsunite) and Webcomic Chat (#webcomicchat).
Unique Challenges for Monetizing Web Communities
Much of the value is based on the contributing participants- not necessarily on a core group of admin or creatorsMay be difficult to prove 'work' has been invested in such a community- would need concrete examplesCommunity is also very interested in how their collective money is spent on improving the communityNeed to prove how this community benefits the whole, and how monetizing this community benefits the participants
In all of these instances, we have the burden of:Placing Value on the IntangibleExperiencesKnowledgeCommunity standingNetwork
How do you cash in on that social currency?When you launch something- like a book, a kickstarter, a NEW project, you can probably cash in on that social currency by asking for promotion and signal boosting. It has to be a new project though- people don’t seem keen on promoting the same ol same ol project you’ve been working on for years.
Show Your HumanityOnline interactions make it easy for us to lose our humanity- both as content creators and as an audienceRespond to CommentsHost pollsAsk reader/watcher engagement questions and follow upShare tidbits about your lifeTalk to people about their experiences and preferencesUse informal languageMake jokes- especially community relevant jokesRelax and utilize emojiShare photos from your life- from walks, your pets, your workspaceAllow yourself to make mistakesApologize when you hurt others or make mistakes
Basically, create an authentic experience.
So what are your experiences dealing with the gift economy? Have you found a solution to monetizing your free to consume work? Send me an email and tell me about it!
Establish Connections and Trust and Find Ways To Reward Those Who Support Your Work
Outside Resources and Recommended Reading:Patronage-the Return of the Gift in the Crowd Society On Business: Gift EconomyEmbedded Wav Files of Coins Rattling in a Paper Cup1000 True FansPodcasts and Convergent Digital Media, pt 2-'Audiences'Why You Need to Give It Away To Be a Successful CreativeFandom and Money (essay)Wikipedia: Gift Economy Wikipedia: Social Currency
Please consider donating to this blog or purchasing from Natto-shop (http://nattosoup.com/shop) if you want me to continue publishing quality content. All materials tested were purchased from my own pocket. Keep on Truckin' Nattosoup is not under any sponsorship.


