
Becca Hillburn's Blog, page 11
December 17, 2018
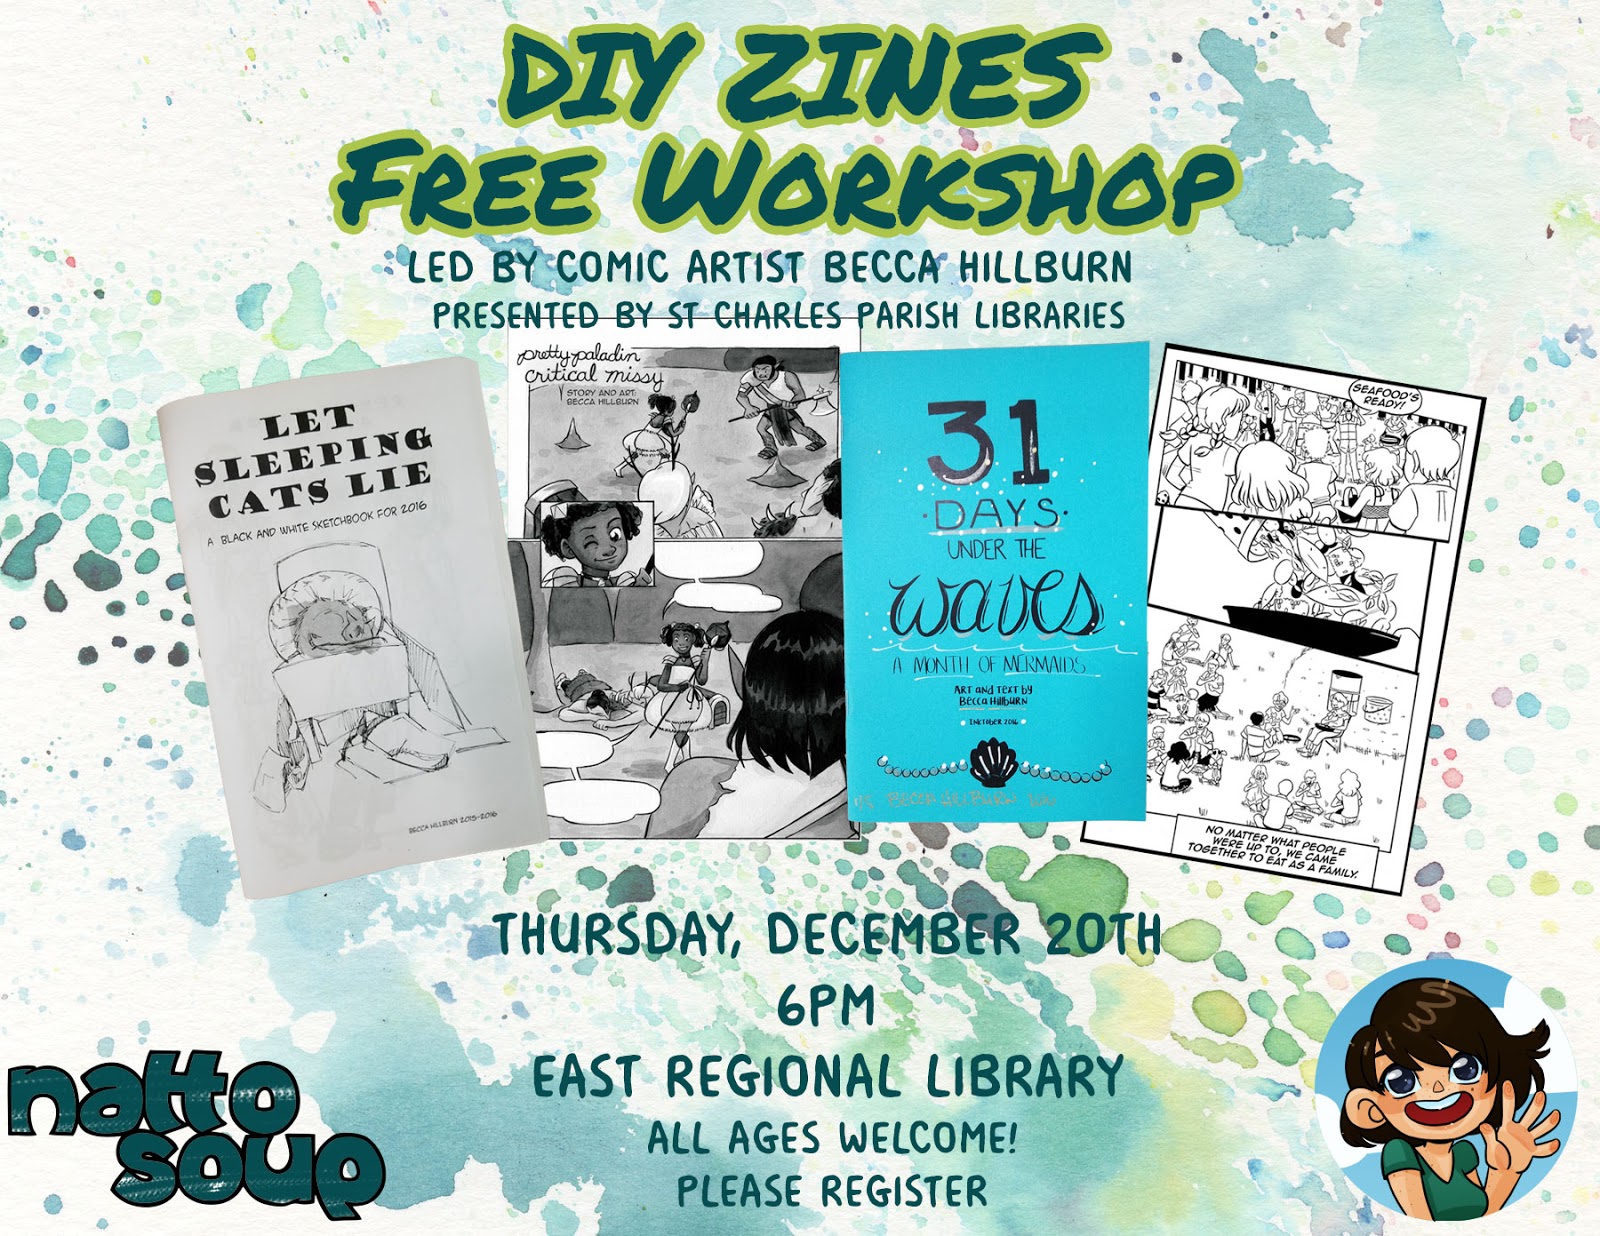
Comic Workshops in Louisiana
While I'm visiting family in Louisiana for Christmas, I have the opportunity to present three comic-focused workshops thanks to the generosity and hosting of St Charles Parish Libraries.

DIY Zines
East Regional Library
160 W Campus Dr, Destrehan, LA 70047
We're going to cover the basics of zines- small handmade books that can include everything from family recipes to mini comics. Flip through a selection of zines to spark your inspiration, then prepare to learn all about the zine making process!
Thursday, December 20th, 6PM
What are Zines?
Check out just a few of the wide variety of zines you can make here!

Making Comics: How to Write Comics
West Regional Library
105 Lakewood Dr, Luling, LA 70070
You'll learn the basics of planning your first comic project. From concept to script to thumbnails, Becca will walk you through the process, sharing examples to inspire. If you've got a project you've wanted to start, bring it!
Friday, December 21st, 2PM

Making Comics: How to Ink Comics
Paradis Branch
307 Audubon St, Paradis, LA 70080
You'll learn how to traditionally ink your comics and illustrations! We're going to cover everything from the basics of technical pens to inking with brush and nibs. Feel free to bring your own comic to work on, or play around with the paper we've provided.
Friday, December 28th, 2PM
On a personal note, I grew up in St. Charles Parish (in Luling, Louisiana, a small town barely on the map), and it's such a delight to see a positive change in attitude as the old guard retires and a new guard takes up the charge. From a library system that once had no idea where to even shelve a comic, let alone carry any, to a system that now has a generous selection of comics and manga, it's such a pleasure to see St Charles Parish grow, and it's amazing to be able to help offer the sort of education and opportunities I dreamed of as a teen. Earlier this year, I made it a point to fly back and attend Destrehan's first comic con, and I really hope that in the future, I can be a part of St Charles Parish's growth.
To register, or for more information, please check out the St. Charles Parish Library website: https://www.myscpl.org/node/212
Please consider donating to this blog or purchasing from Natto-shop (http://nattosoup.com/shop) if you want me to continue publishing quality content. All materials tested were purchased from my own pocket. Keep on Truckin' Nattosoup is not under any sponsorship.


December 3, 2018
2018 Holiday Watercolor Gift Guide

Give yourself a little something this year! I know my readers deserve a little treat, and will enjoy everything on this curated list of watercolor favorites! This year's gift guide is for you-new watercolor supplies or old tricks we've overlooked that can really make a difference. Recommendations are based on some of my favorite products of 2018, or inspired by my favorite new techniques, and are inspired by my Artnerds on Patreon!
Not a watercolor artist? Stick around- my comic artist gift guide is in the works!

November 22, 2018
2018 Gratitudes
I believe it's important to occasionally take stock and show gratitude for the gifts we've been given, and the kindnesses others have shown us. Thanksgiving can be a great time to do this, but unfortunately for those of us who suffer from SAD, it can be difficult to see the silver lining when the grey clouds of winter have closed in. So I'm going to keep my list of gratitudes short but sweet- these are all things I'm intensely grateful for this year.

This Year, I'm Grateful For:
Nashville Community Ed allowing me the opportunity to teach a comics class in the Nashville area. And then allowing me ANOTHER opportunity starting in January. It's a pleasure to hone my comic teaching skills, and it's wonderful to be allowed the room to continue to learn and develop these skills, and I hope I'm able to inspire an appreciation of comics in my students.
My mom's support, particularly her teaching advice. Without her wisdom and experience, my first year teaching adults would be even more difficult and confusing.
Joseph's support, particularly when it comes to helping out at conventions, but also for just letting me vent constantly.
My younger brother discovering a love of volunteer firefighting, as it's opened doors for him and given him a passion for helping others.
Customers who are interested in, and excited by, my comic work. Their interest fires me up to continue work on 7" Kara, and to hurry to get Volume 2 out.
My wonderful Artnerds. Their support and encouragement are the inspiration and motivation for me to continue my art education work online.
Librarians who are willing to give me an opportunity to teach comics to their patrons.
Small library comic conventions filled with patrons who genuinely love books and are legitimately interested in comics, particularly comics for kids.
ALAAC and the opportunities that came from tabling at ALAAC.
Friends and family who check in to see how I'm doing, who share a laugh when levity is needed, and provide a shoulder to cry on when times are tough.
Please consider donating to this blog or purchasing from Natto-shop (http://nattosoup.com/shop) if you want me to continue publishing quality content. All materials tested were purchased from my own pocket. Keep on Truckin' Nattosoup is not under any sponsorship.
November 19, 2018
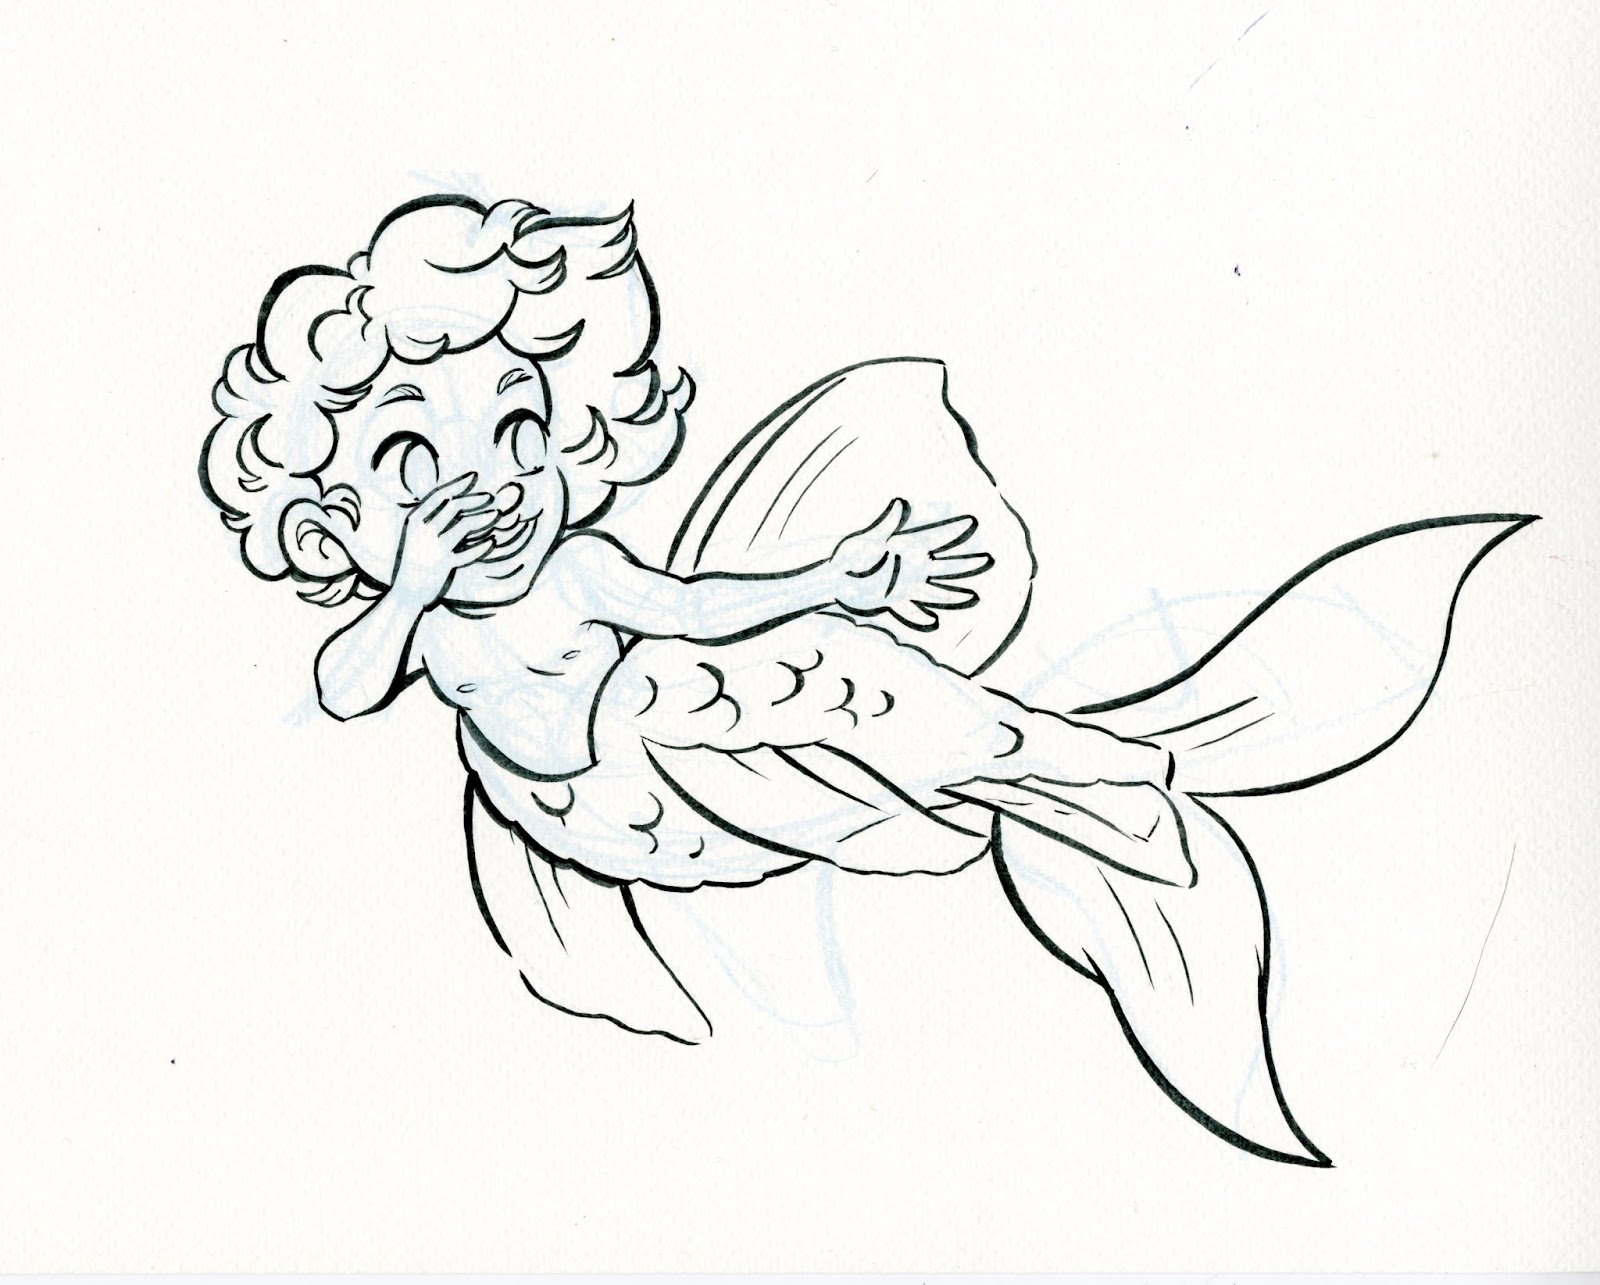
Mermay Merbaes
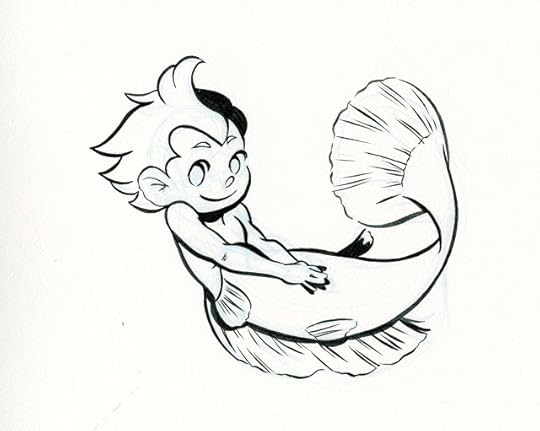
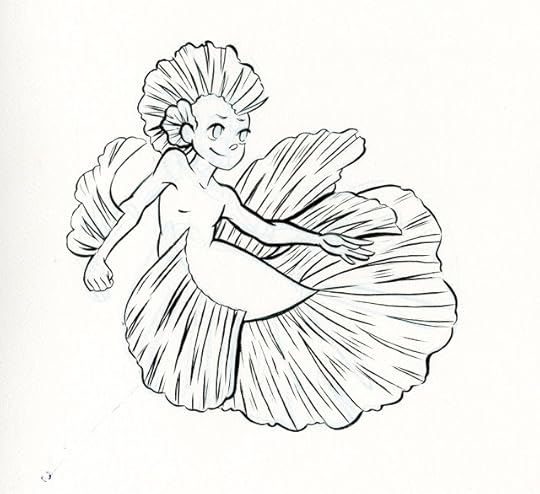
Why yes, I know it's November, NOT May. These were initially sketched during Mermay, inked during June, and scanned in November. What's the reason for this belated erase and scan-athon? I want to compile my little merbabies into a zine!
Eventually, I want to watercolor each and every one. Some of my Artnerds have requested these as coloring sheets, so once I have these cleaned up in black and white, I'm going to make that available through Gumroad and on my Patreon.
These mermaids are all based on freshwater aquarium animals- mostly fish, but there's a few amphibabes in the mix too!
Materials Used:Fabriano Studio Watercolor PaperNon Photo Blue Printed BluelinesFW Acrylic Ink- Payne's GreyDinky DipsCreative Mark Rhapsody Sable Brush Size 4
 Goldfish
 Sunset Platy
 Borgras Bigittae
 Neon tetra
 Black Molly
 Beta Fish
 Bala Shark
 Red Minion Longfin Serpae Tetra
 Cherry Barb
 Fancy Guppy
 Nothobrachius Killifish
 Mosquitofish
 Red Tailed Shark
 Koi
Koi
 Axolotl
 American Bullfrog Tadpole
 Fire Bellied Newt
These were inked traditionally, and if you're looking to relax, I highly suggest watching the timelapse videos for these!
Day 1: Goldfish
Day 2: Sunset Platy:
Day 3: Boraras Brigittae:
Day 6: Beta Fish:
Day 7: Bala Shark:
Day 8: Red Minion Longfin Serpae Tetra:
Day 9: Cherry Barb:
Day 10: Fancy Guppy:
Day 11: Killifish:
Day 12: Mosquitofish:
For more inking timelapses, tutorials, and demonstrations, please check out my Youtube Channel!
Please consider donating to this blog or purchasing from Natto-shop (http://nattosoup.com/shop) if you want me to continue publishing quality content. All materials tested were purchased from my own pocket. Keep on Truckin' Nattosoup is not under any sponsorship.
Eventually, I want to watercolor each and every one. Some of my Artnerds have requested these as coloring sheets, so once I have these cleaned up in black and white, I'm going to make that available through Gumroad and on my Patreon.
These mermaids are all based on freshwater aquarium animals- mostly fish, but there's a few amphibabes in the mix too!
Materials Used:Fabriano Studio Watercolor PaperNon Photo Blue Printed BluelinesFW Acrylic Ink- Payne's GreyDinky DipsCreative Mark Rhapsody Sable Brush Size 4
 Goldfish
 Sunset Platy
 Borgras Bigittae
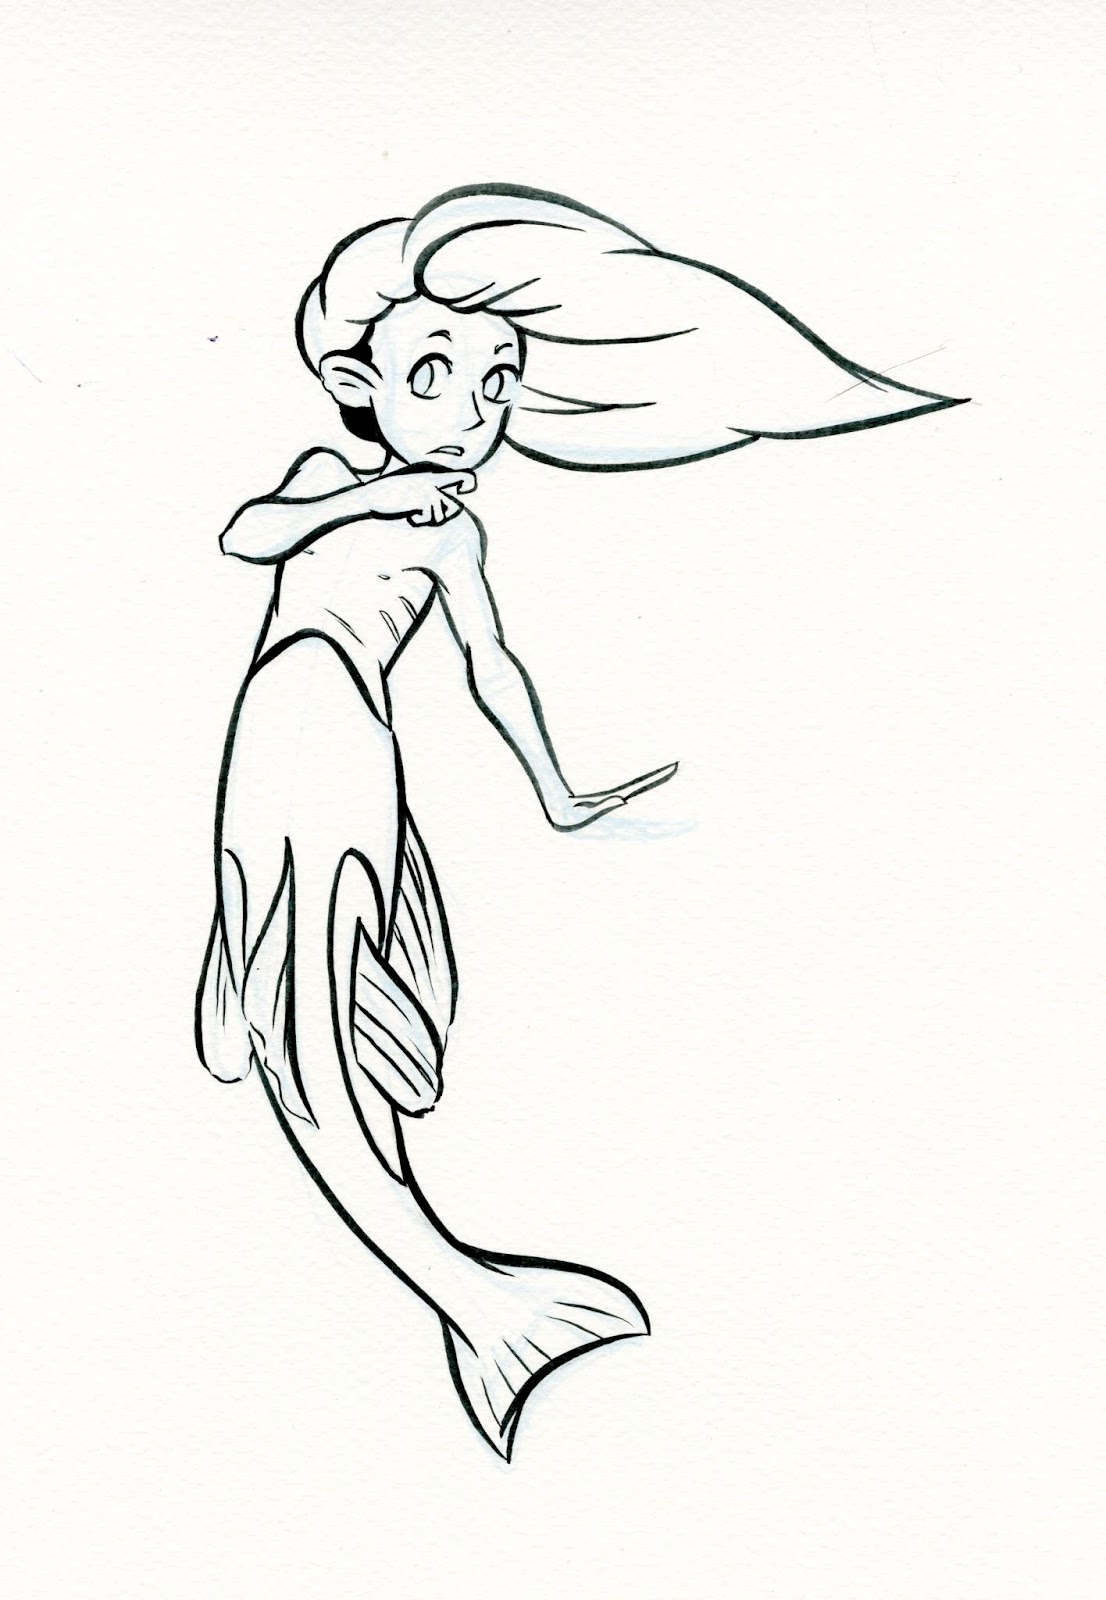 Neon tetra
 Black Molly
 Beta Fish
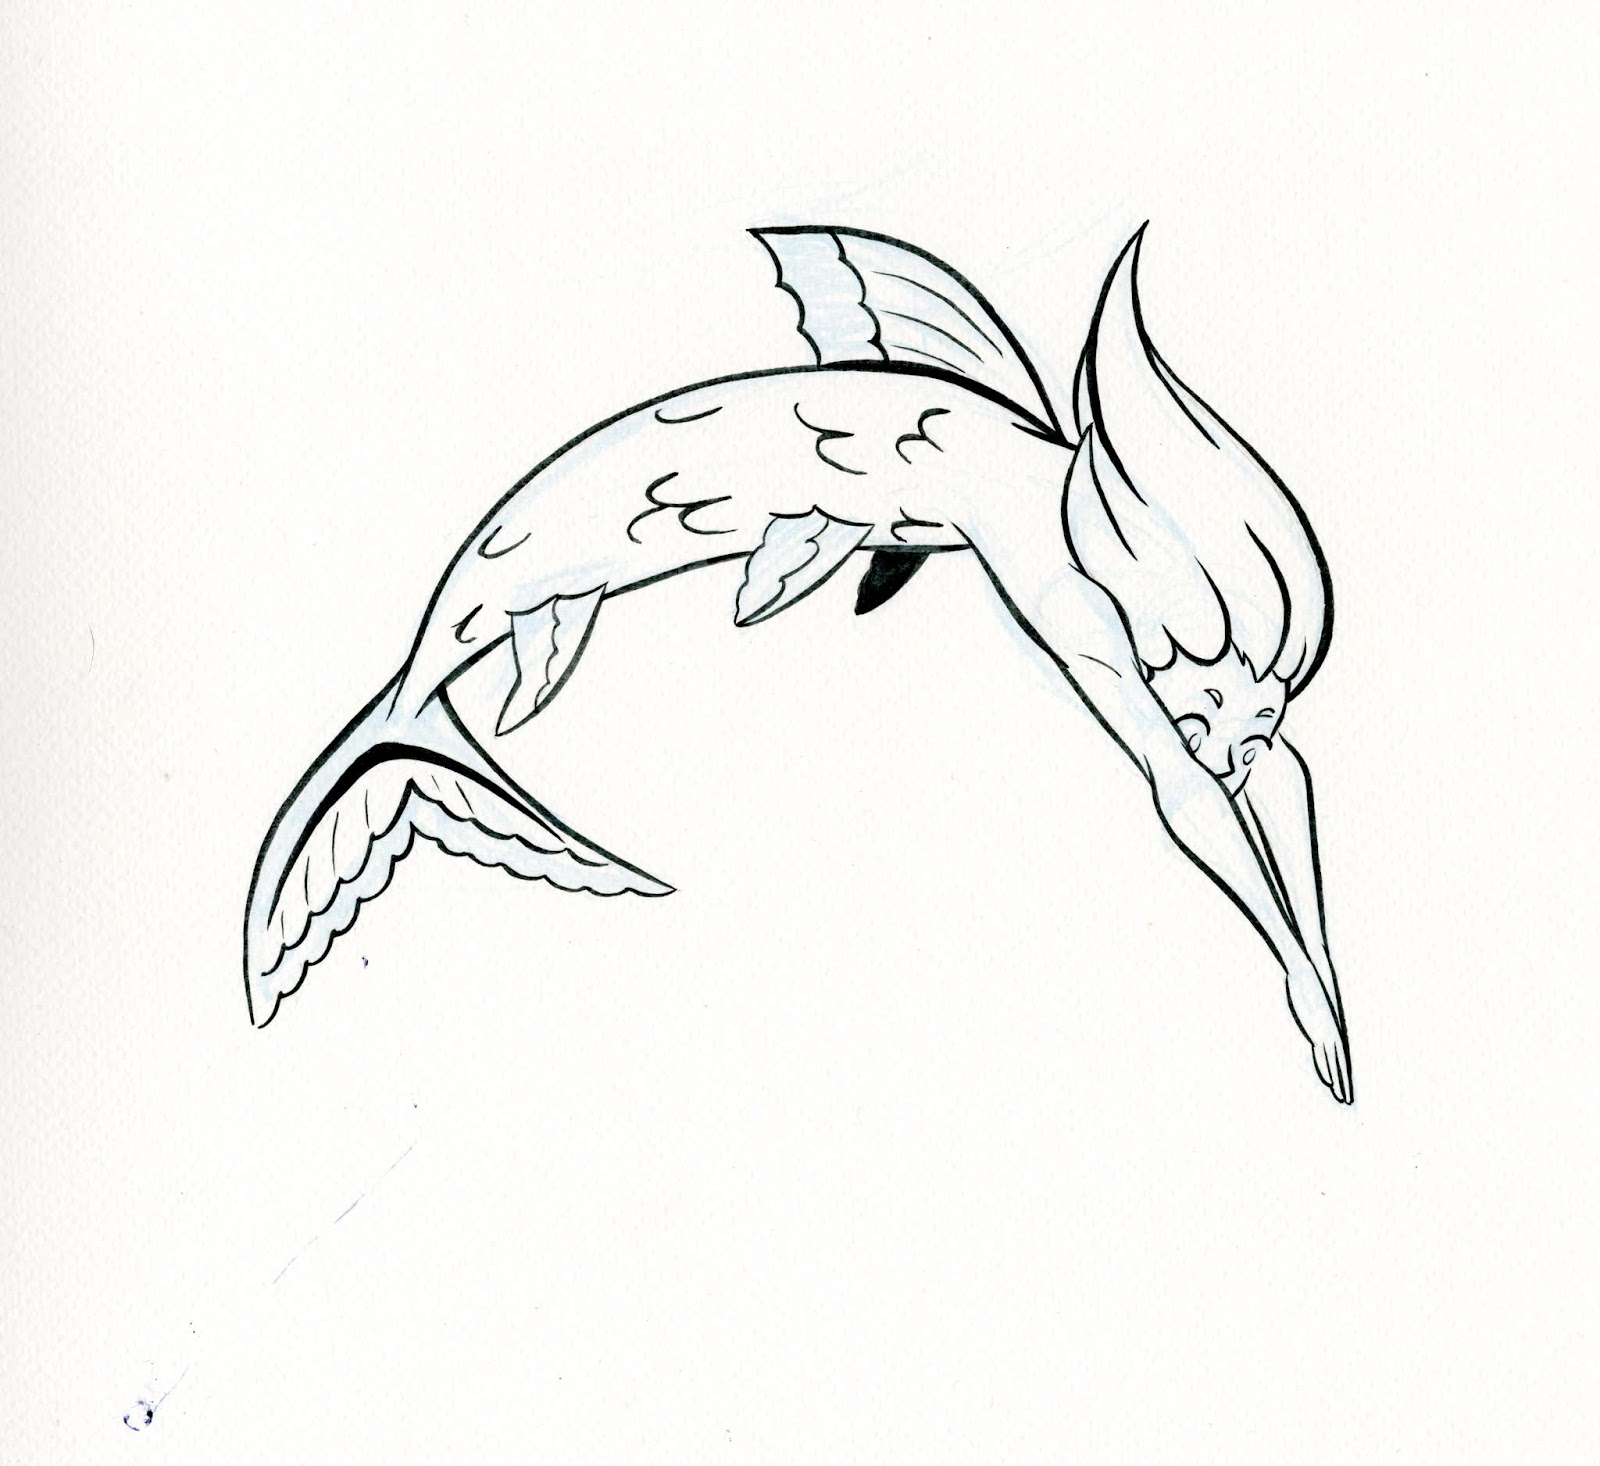 Bala Shark
 Red Minion Longfin Serpae Tetra
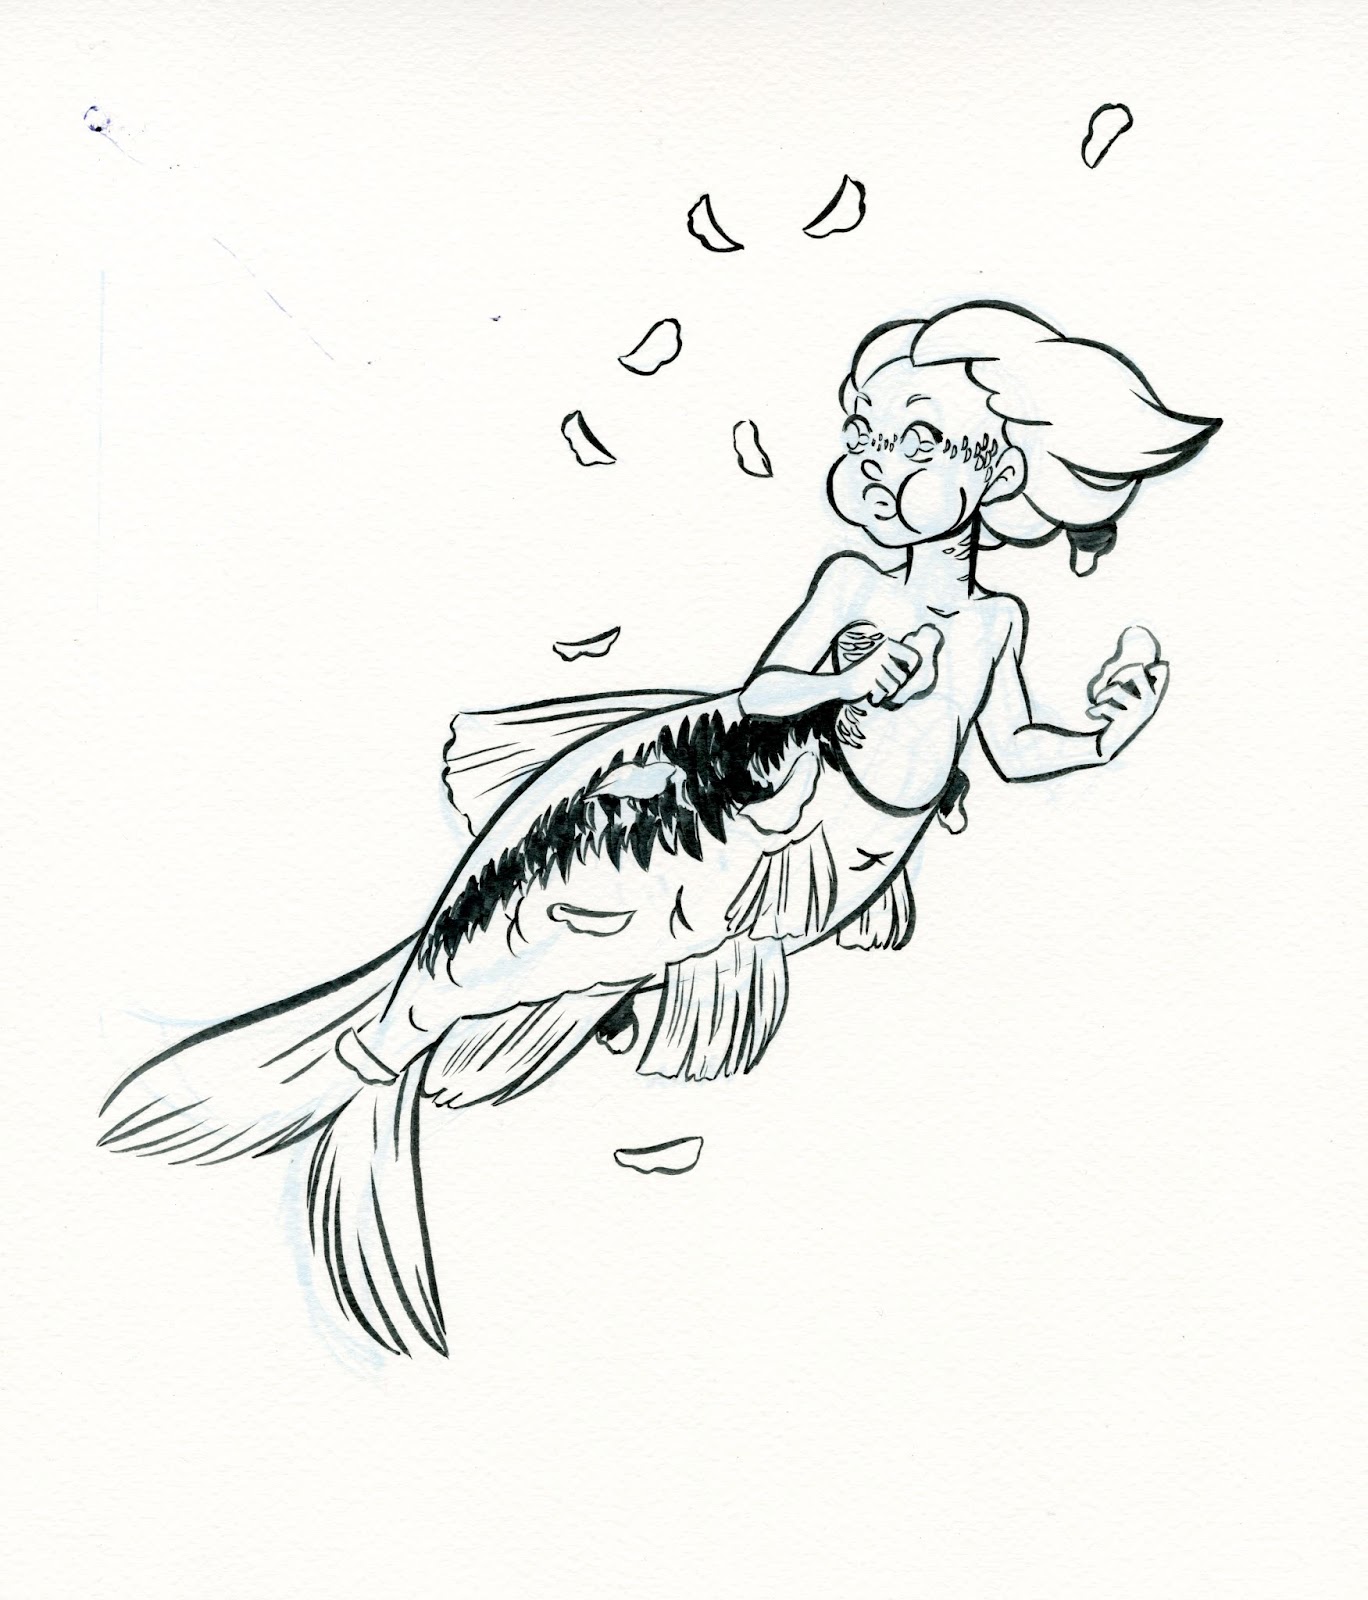 Cherry Barb
 Fancy Guppy
 Nothobrachius Killifish
 Mosquitofish
 Red Tailed Shark
 Koi
Koi Axolotl
 American Bullfrog Tadpole
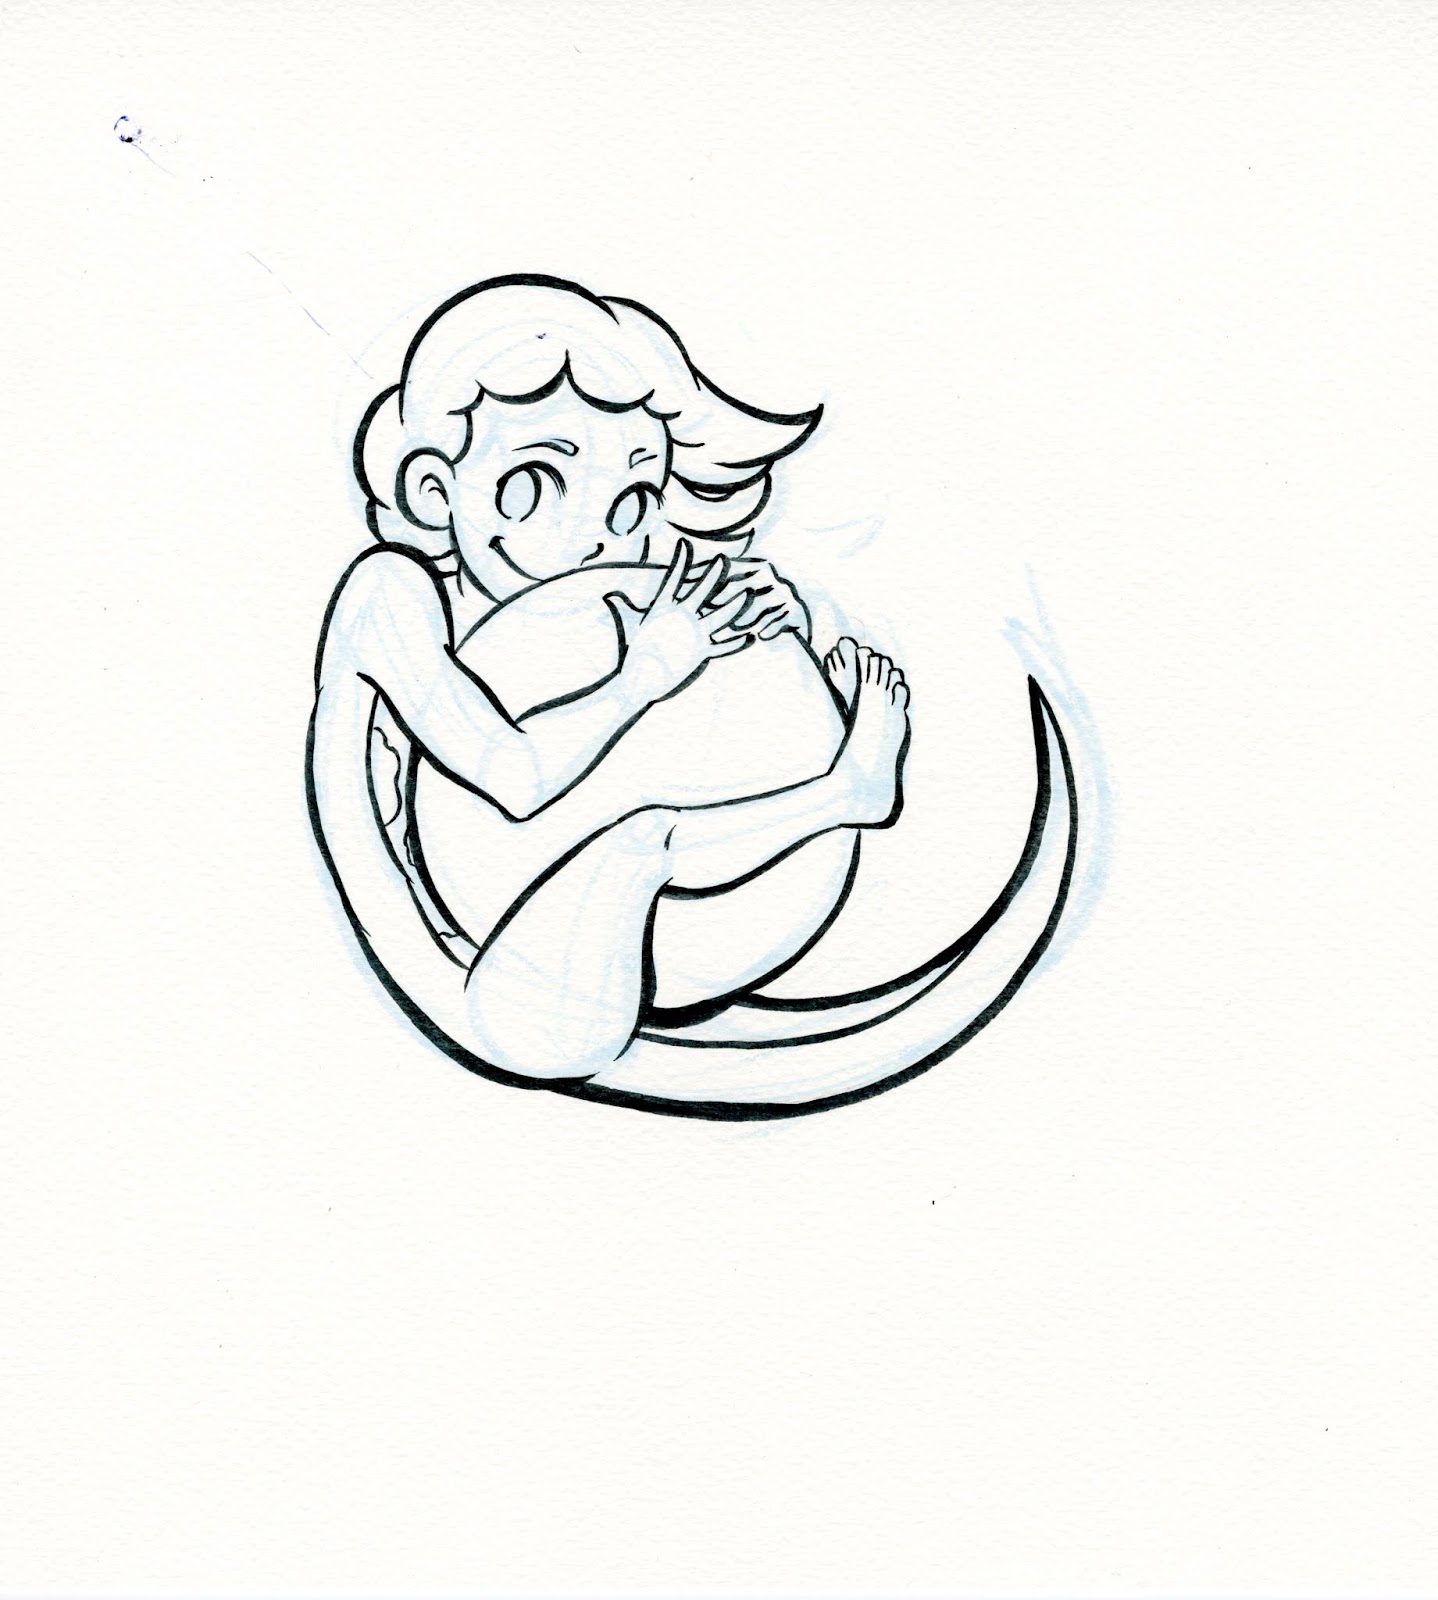 Fire Bellied Newt
These were inked traditionally, and if you're looking to relax, I highly suggest watching the timelapse videos for these!
Day 1: Goldfish
Day 2: Sunset Platy:
Day 3: Boraras Brigittae:
Day 6: Beta Fish:
Day 7: Bala Shark:
Day 8: Red Minion Longfin Serpae Tetra:
Day 9: Cherry Barb:
Day 10: Fancy Guppy:
Day 11: Killifish:
Day 12: Mosquitofish:
For more inking timelapses, tutorials, and demonstrations, please check out my Youtube Channel!
Please consider donating to this blog or purchasing from Natto-shop (http://nattosoup.com/shop) if you want me to continue publishing quality content. All materials tested were purchased from my own pocket. Keep on Truckin' Nattosoup is not under any sponsorship.
November 15, 2018
Intro to Comic Craft: Considerations For Planning A Comic Project
Start Small:
For those new to comics as a medium, I suggest exploring your ideas as a short comic first, before diving into your epic. 8 page self contained mini, 4koma strips, whatever format you want to play around with, but get to know your characters first. From there, I suggest narrowing it down to just ONE idea, ONE audience, you really want to create for (and yes, you count as an audience), and then write a synopsis of your story. Before you begin actively working on it, you should know how it it ends- that'll help you figure out how to get there, and give you a concrete ending to work towards.
Know Your Medium:
From there, how you break down the comic work is up to you and your preferences, as well as your intended format. Do you want a print comic? A webcomic? Do you want to have a huge buffer before you begin sharing it because you work a dayjob? Knowing your limitations, and what you want the end result to be, will help you plan your comic project from the get go.
Even the differences between hosting the comic yourself, and sharing it to Webtoons or Tapastic will mean different formats. Platforms such as Tapas and Webtoons prefer vertical scrolling comics, self hosted comics traditionally display one page at a time, with forward and back buttons for navigations. Webcomics and comics for print have different pacing- even how frequently you update your webcomic will effect how you plan. Webcomics, when consumed by an up to date audience, are read one page at a time, one update at a time, whereas print comics are consumed as an entire issue (24 pages) or as a trade (24+ pages). In terms of pacing, this can mean the difference between a cliffhanger every 10 pages or so, or on every page.
Digital art, traditional art, watercolor, inks- your medium of choice will affect your process, as well as your timeline. Only you can determine which media is right for your project, and I recommend trying a variety before settling on one. Over time, digital art may prove more economical- you invest in a new computer once every half decade, whereas with traditional media, you're currently investing in new materials. However, working traditionally means you can possibly sell your finished originals to collectors.
Writing and Planning:
In terms of writing there are loads of ways to plot your story- some people prefer to write by the seat of their pants, some prefer to have it plotted out. Some want to work within the three act structure, and use the hero's journey as a format, some want to write slice of life gag strips- all of those have different writing considerations. One of my favorite methods for planning a story is utilizing a beat sheet to keep action and story moving along smoothly.
I find it helpful to start with a synopsis of my story- a beginning, a middle, and an end, and script around that. Knowing where I want my story to go helps me get it there.
Know Your Artist:
If you're writing for someone else, or if future you has a bad memory, I've found that a tight script, that includes shot choices and stage directions, works best for me and the types of comics I create, but every creator differs, and it's best to know what works for your artist (even if you're the artist- be honest with yourself). A lot of comic creators have a loose outline, and do their best storytelling in thumbnails.
Know Your Audience:
Writing for kids is very different from writing for adults, or even for teenagers. Knowing your audience will help you decide how to best tell, and present your story.
Show, Don't Tell (but sometimes explain)
Instead of relying on walls of text and verbal exposition, try to show your characters going through it, or better yet, dealing with the consequences.
When dealing with cultural comics, exposition dumps can be important, because you're explaining a culture to an audience that's unfamiliar with it. so a cultural comic, even if it's fictional, has an element of non fiction- a real culture that people care about
The Exception:
When creating a new world, you need to get your audience to care about that setting or at least the characters, before you try to dump a lot of worldbuilding information. In this case, worldbuilding should be integrated into the fabric of the comic whenever possible.
Great ways to dump exposition:
Bonus 4Koma strips
Character Q&A pages
Bonus art
A story/concept bible
Practice Makes Perfect:
I did the math last night, and my first five comics (and all but the very first had 100+ pages finished art and lettering) never saw any real audience outside my tight knit friend group. I did a strip comic, a gag a day comic, a 4 koma, and two sequential story comics just because I loved the medium and wanted to participate in it, but wasn't comfortable sharing and didn't have a community to share TO. Even when I was ready to start sharing my art, I did so in a very limited form- several short, 10 page comics (Ahoy, Foiled, Momotaro) and anthology pitches.
Although my work is still far from perfect, putting the time in, making comic pages, and practicing comics as a storytelling platform has allowed me to improve my craft. The more comics I make, and the more types of comics I experiment with, the better I'll be able to express my ideas in a comic format. The only way you can get better at making comics is to MAKE COMICS.
Please consider donating to this blog or purchasing from Natto-shop (http://nattosoup.com/shop) if you want me to continue publishing quality content. All materials tested were purchased from my own pocket. Keep on Truckin' Nattosoup is not under any sponsorship.
November 12, 2018
Inktober 2018- Rough Scans
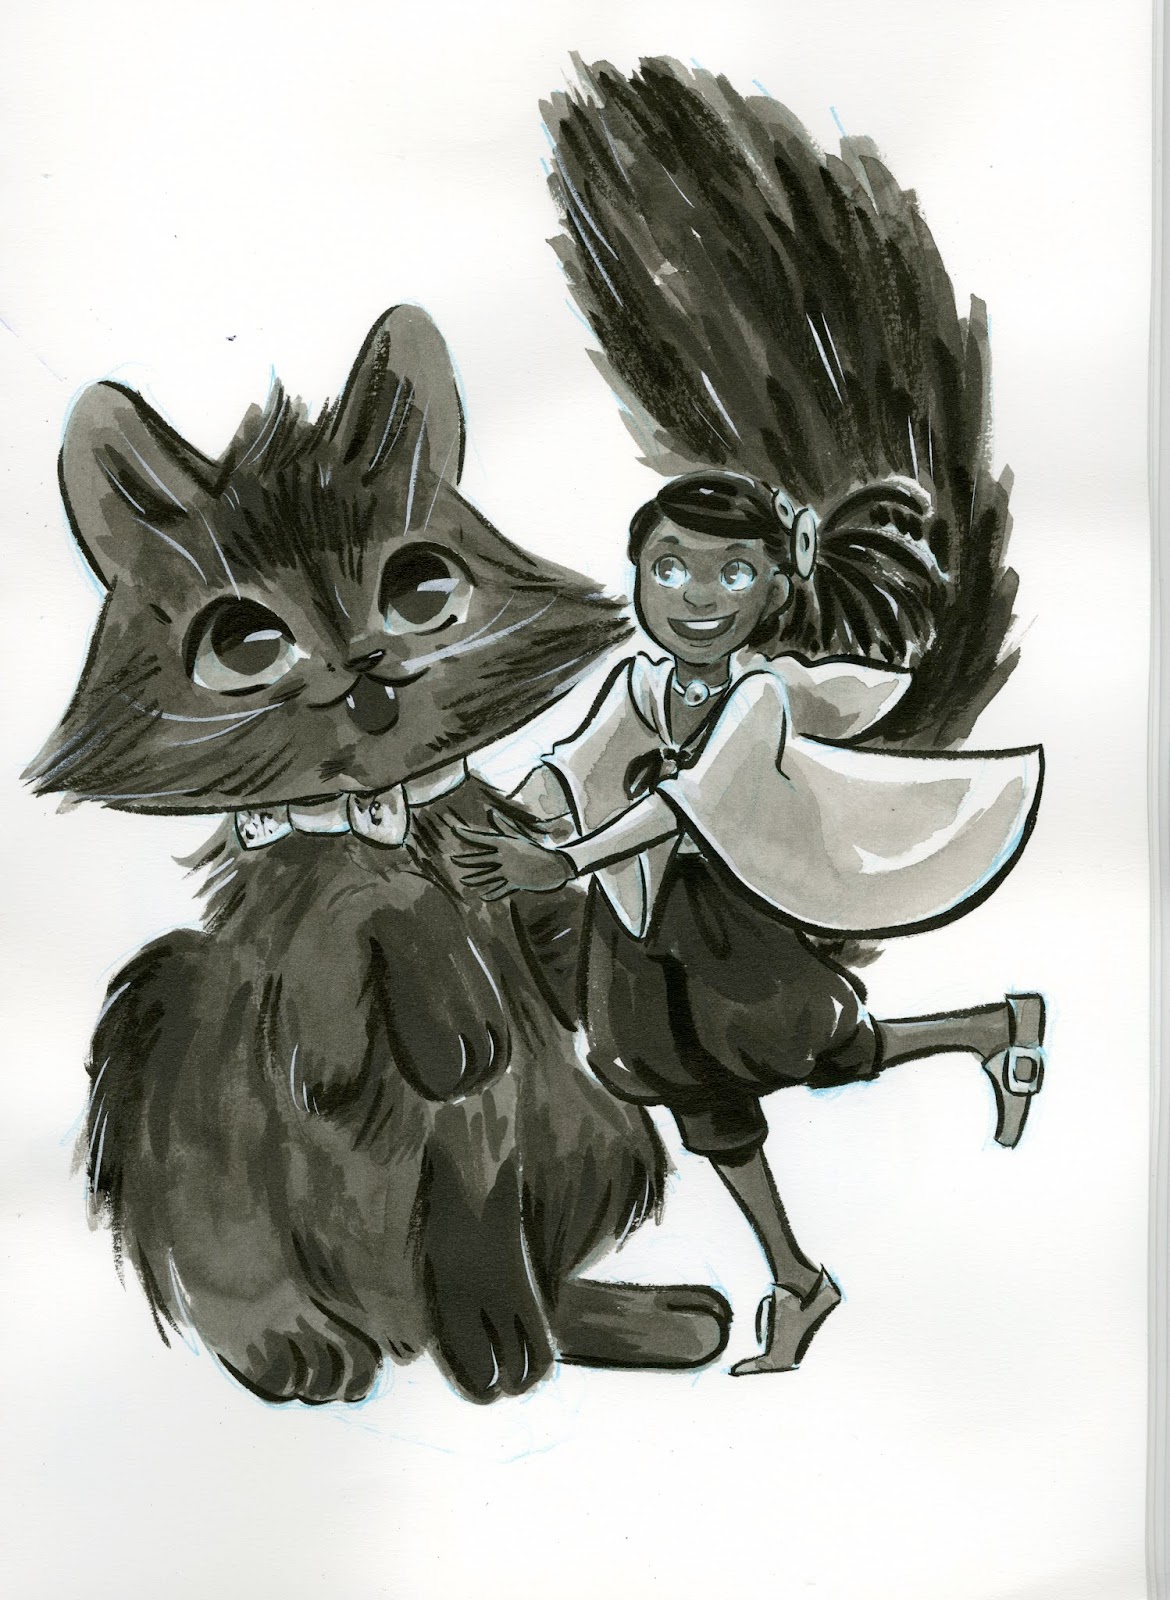
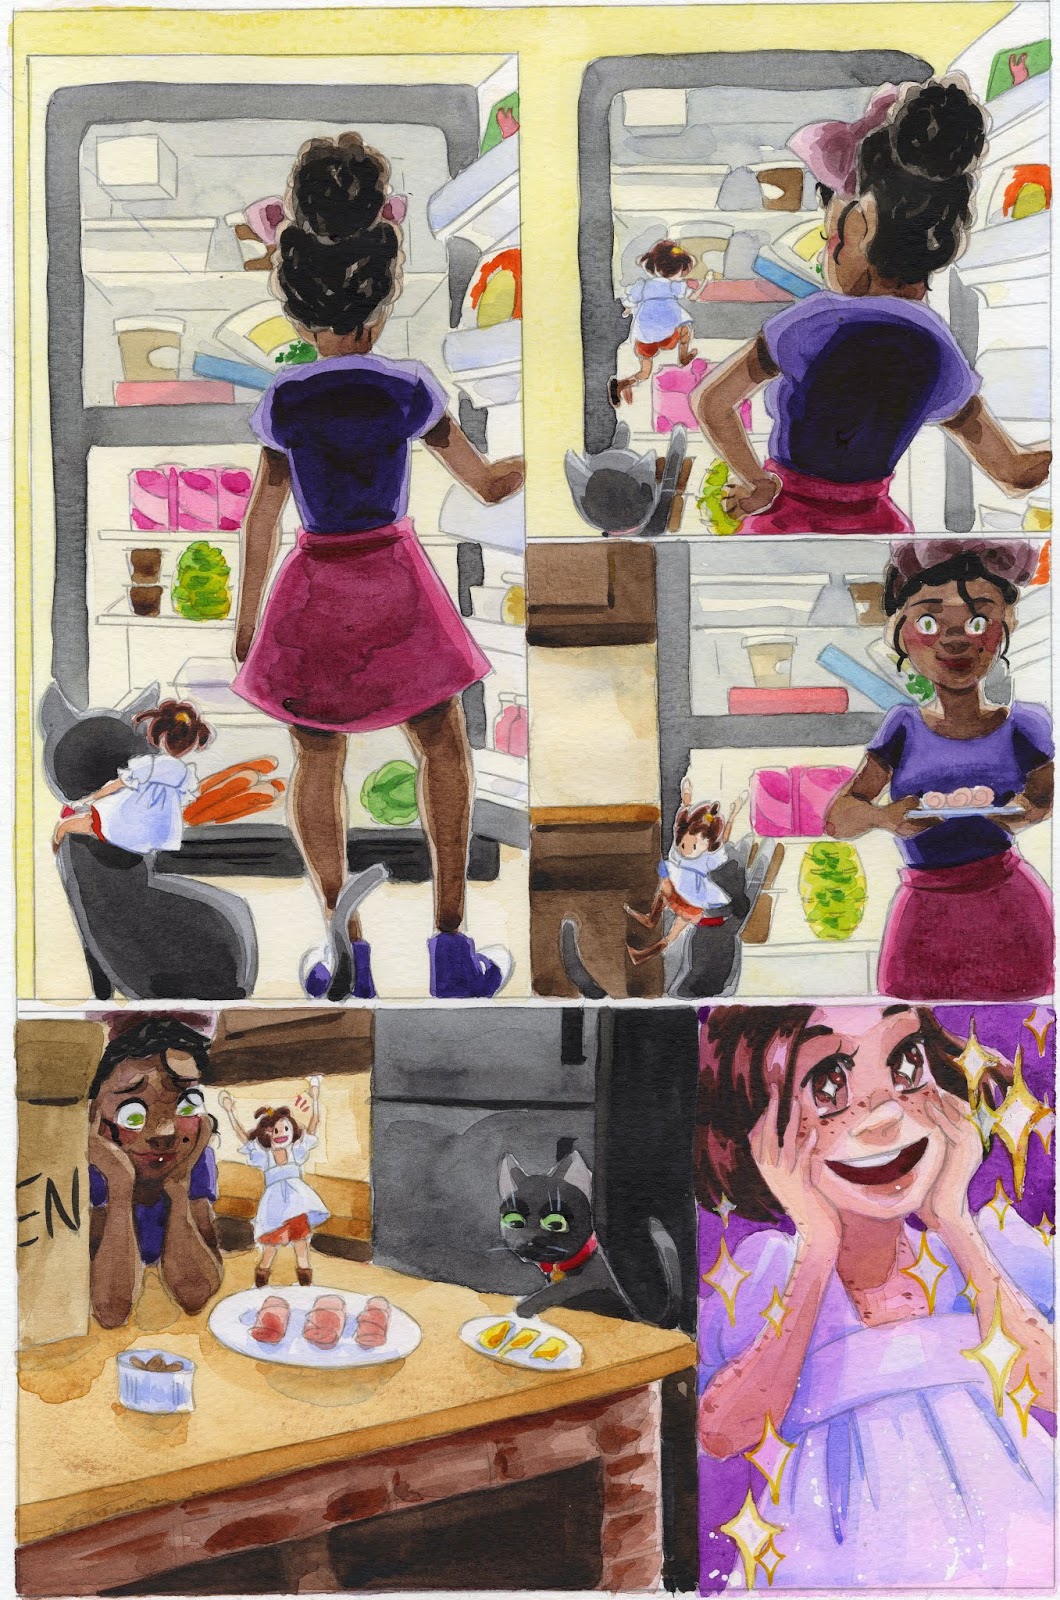
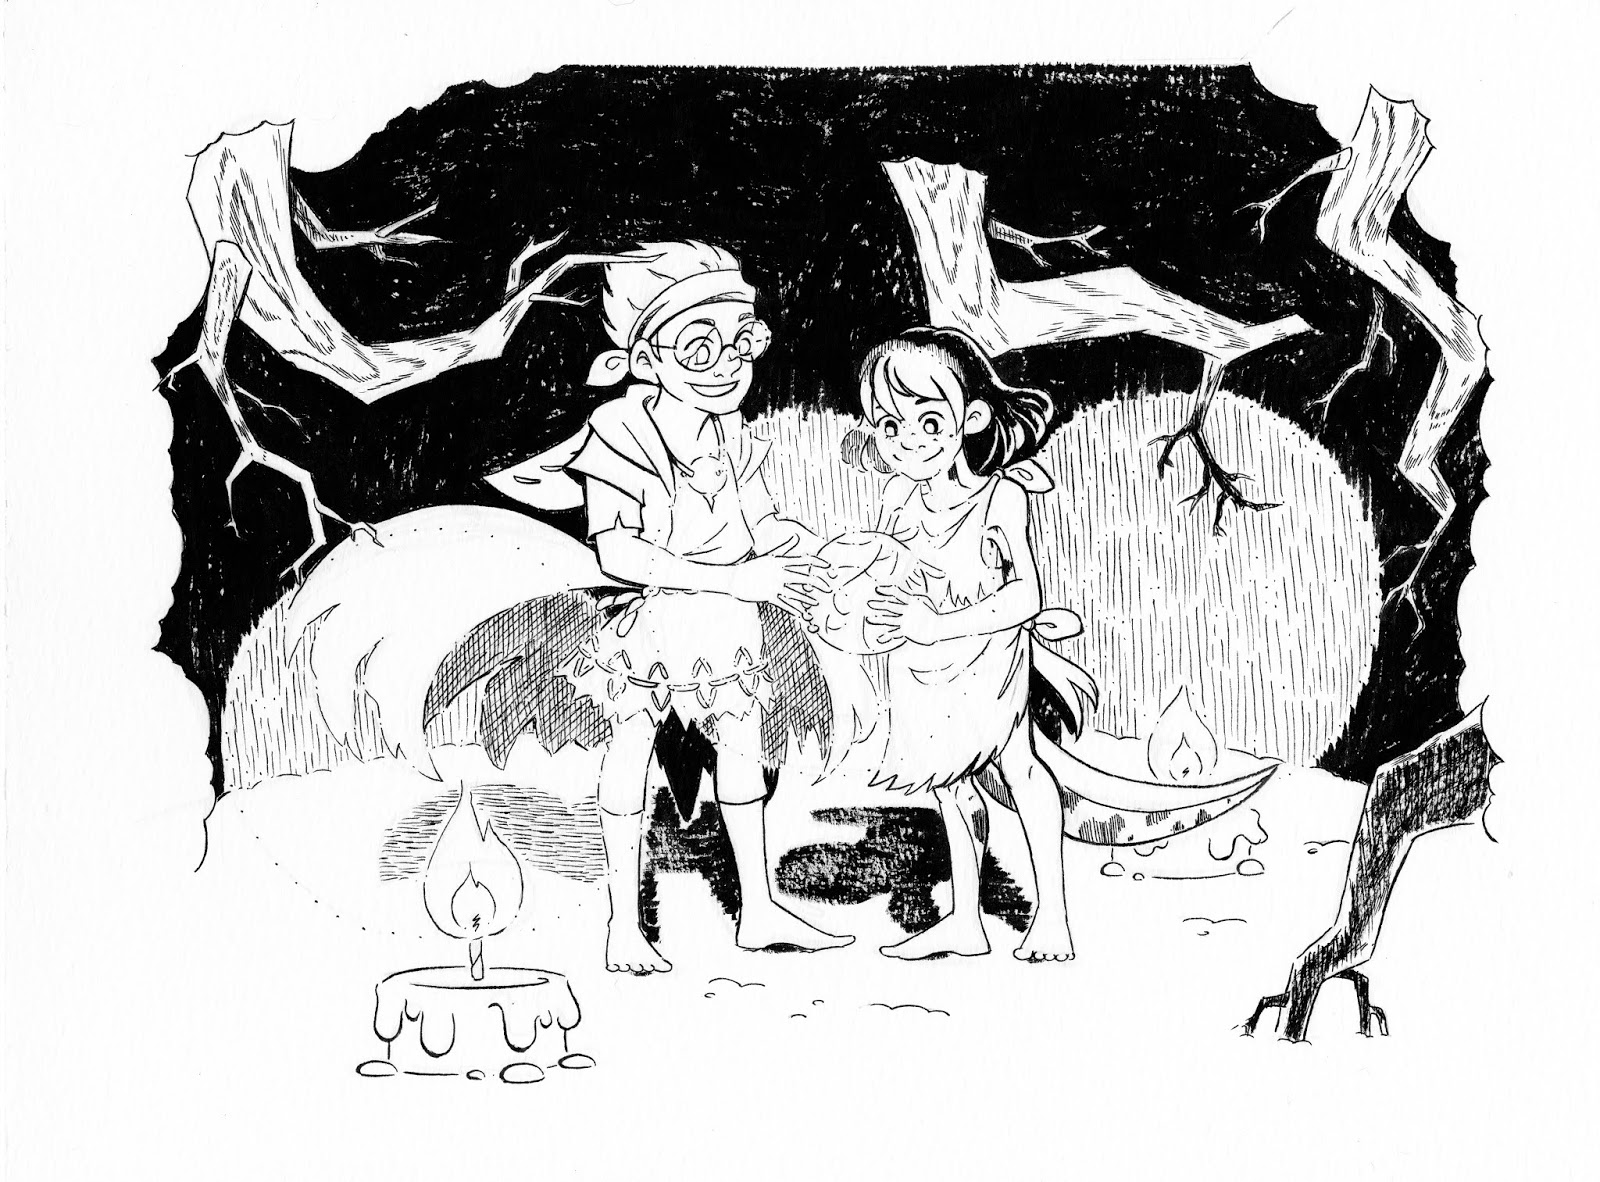
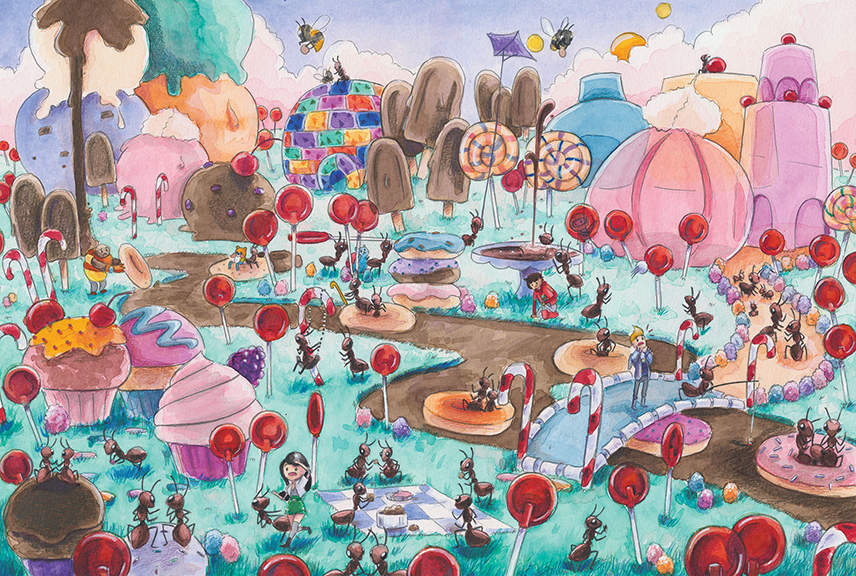
This year, I decided to expand on last year's Lilliputian Living, 31 worldbuilding prompts for the world of 7" Kara. Last year, I explored different Lilliputian professions, this year I explored different types of Lilliputian lifestyle and pets.
This year, I opted to expand my horizons a bit by doing 31 days of inkwash. Since I knew I'd be doing a bit of traveling in October, I tried to prepare travel friendly inkwash materials.
Inktober Prep:
For the full worldbuilding prompts, please check out my Instagram, or keep an eye out for my upcoming Inktober 2018 zine, Lilliputian Living Volume 2.
Types of Lilliputians:
House: Villager:
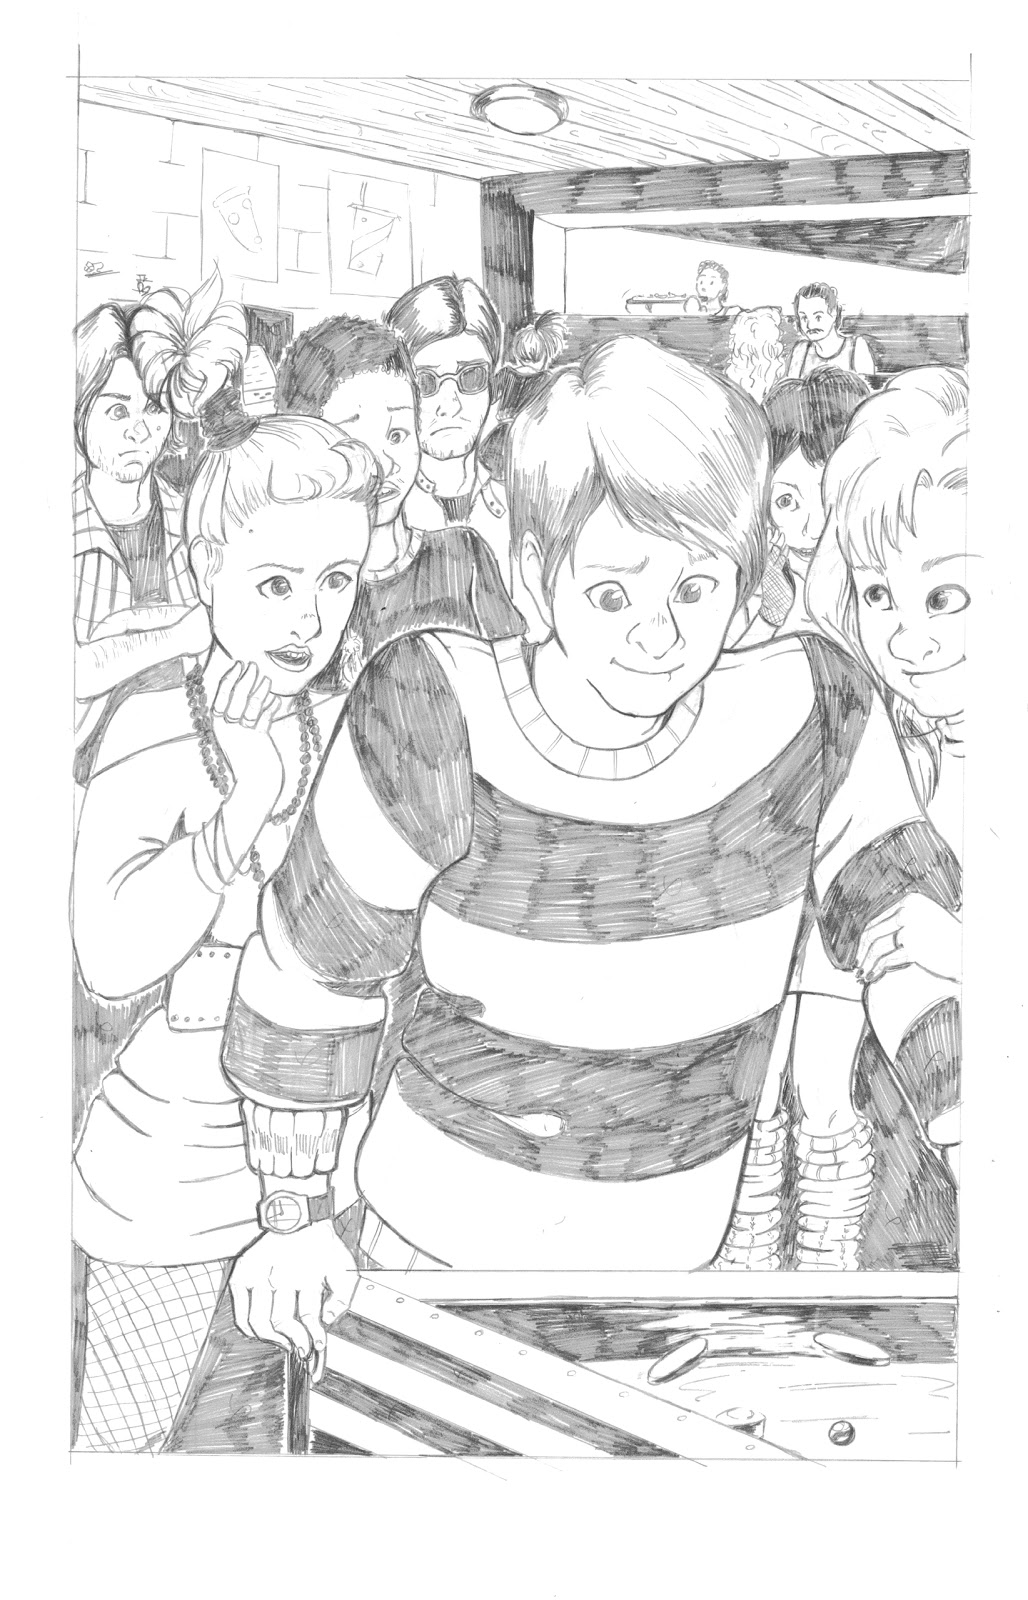
 Towny:
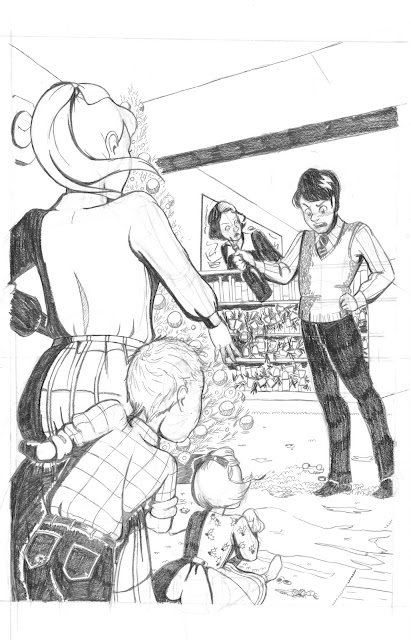
 Mall:
Mall:
 Traditionalist:
 Nomadic:

Mall Lilliputians:
Toy Store:

Pet Store:

Ice Cream Parlor:
 Pretzel Stand:

Craft Store:
 Stationery Store:
 Flower Shop:
 Candy Store:
 Hair Salon:

Families:
House:
 Towny:
 Mall:
Mall:
 Traditionalist:
 Villager:

Pets:
Chipmunk:

Kitten:
 Squirrel:
 Toad:
Toad:
 Gecko:
 Bees:
Bees:
 Sparrow:

Seasons:
Autumn:
 Winter:
 Spring:
 Summer:

Bonus:
Halloween

Inkwash Demo and Inky Ramblings: Inktober Day 1:
Completed Inktober 2018 Sketchbook Flip:
In the end, this method of inkwash is not one I would recommend, and I found completing 31 days (plus a bonus) to be a challenge not quite worth the outcome. I'm glad I did finish, and found it to be a learning opportunity, if also an exercise in frustration, but I wouldn't repeat Inktober using these methods.
Please consider donating to this blog or purchasing from Natto-shop (http://nattosoup.com/shop) if you want me to continue publishing quality content. All materials tested were purchased from my own pocket. Keep on Truckin' Nattosoup is not under any sponsorship.
This year, I opted to expand my horizons a bit by doing 31 days of inkwash. Since I knew I'd be doing a bit of traveling in October, I tried to prepare travel friendly inkwash materials.
Inktober Prep:
For the full worldbuilding prompts, please check out my Instagram, or keep an eye out for my upcoming Inktober 2018 zine, Lilliputian Living Volume 2.
Types of Lilliputians:
House:
 Villager:
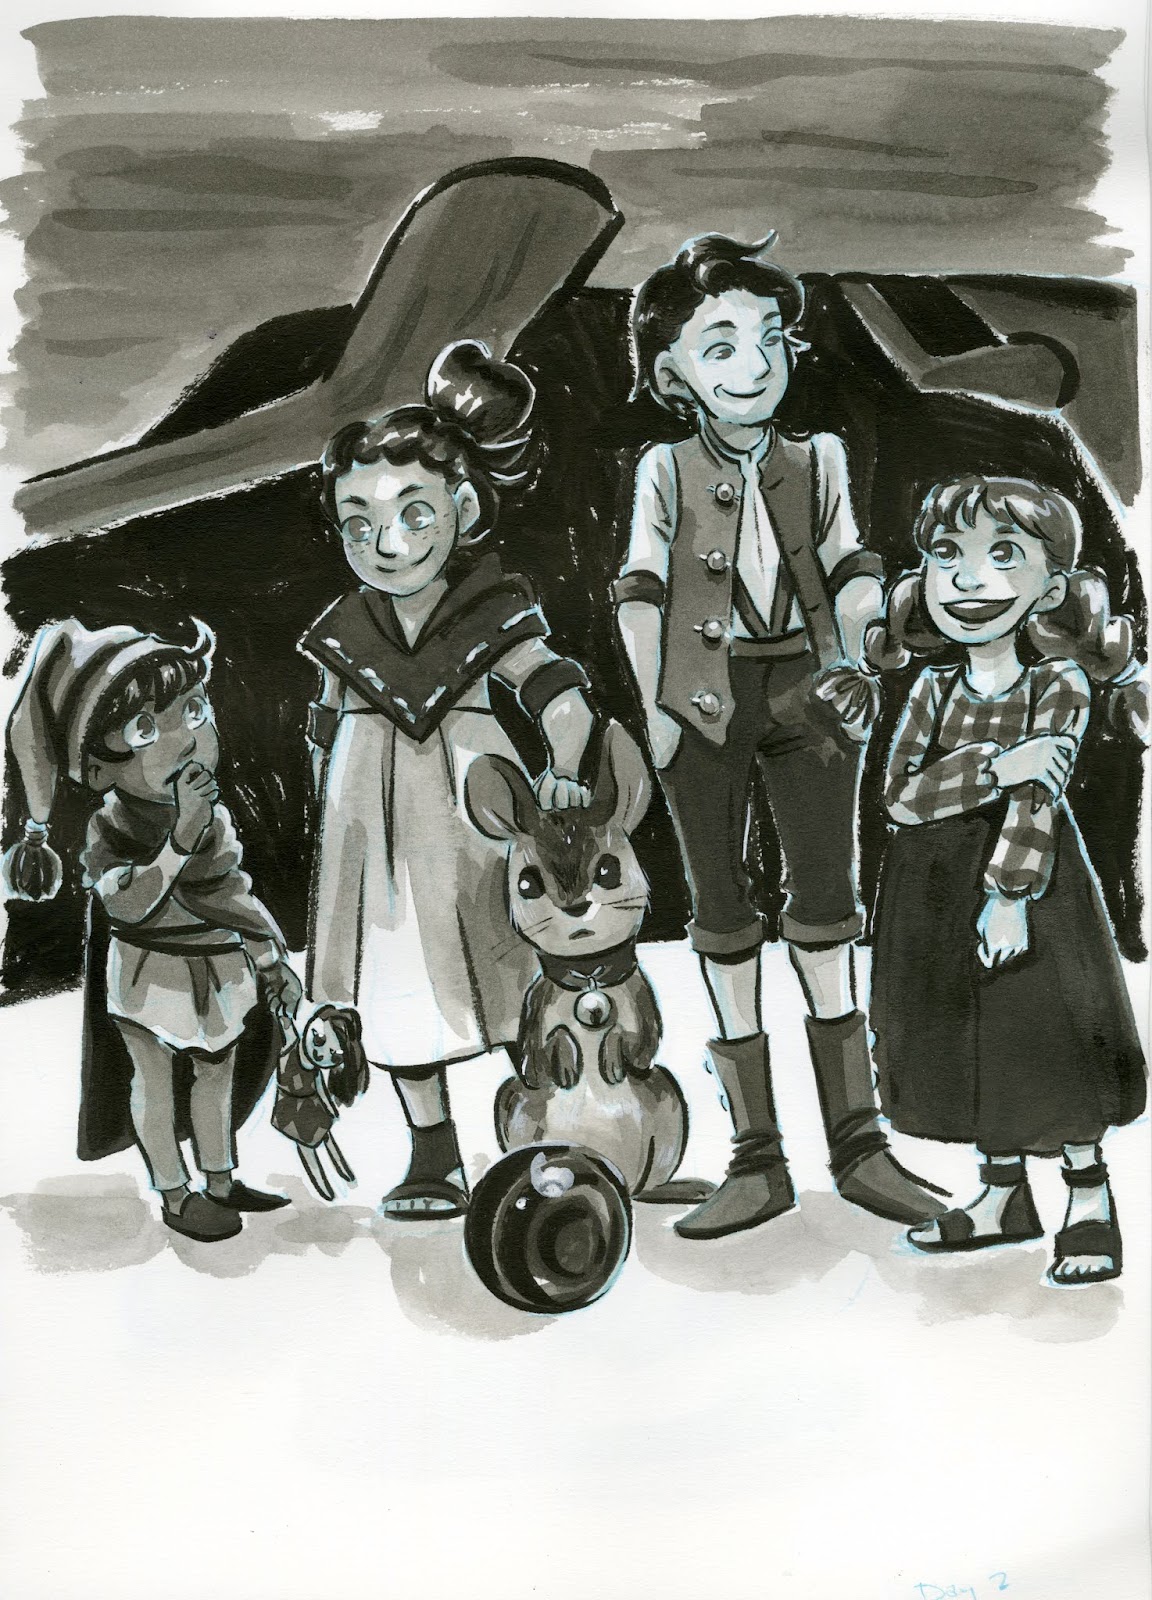 Towny:
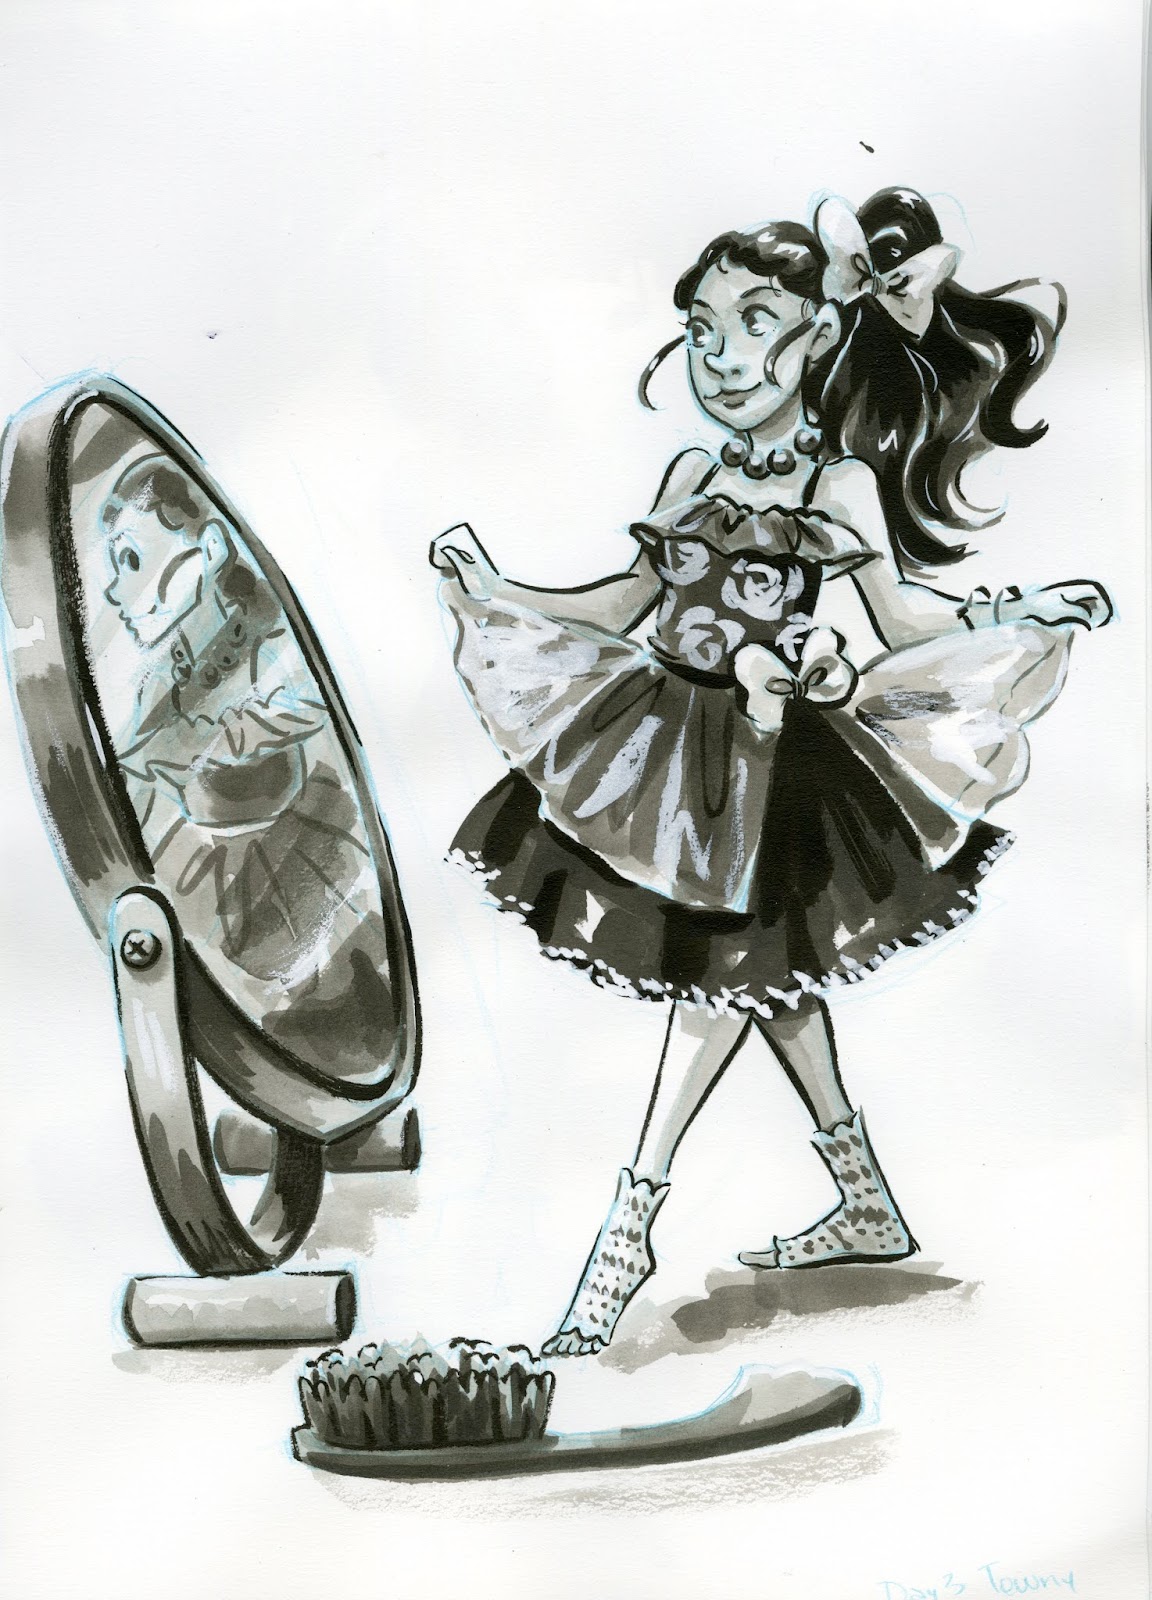 Mall:
Mall: Traditionalist:
 Nomadic:
Mall Lilliputians:
Toy Store:

Pet Store:

Ice Cream Parlor:
 Pretzel Stand:
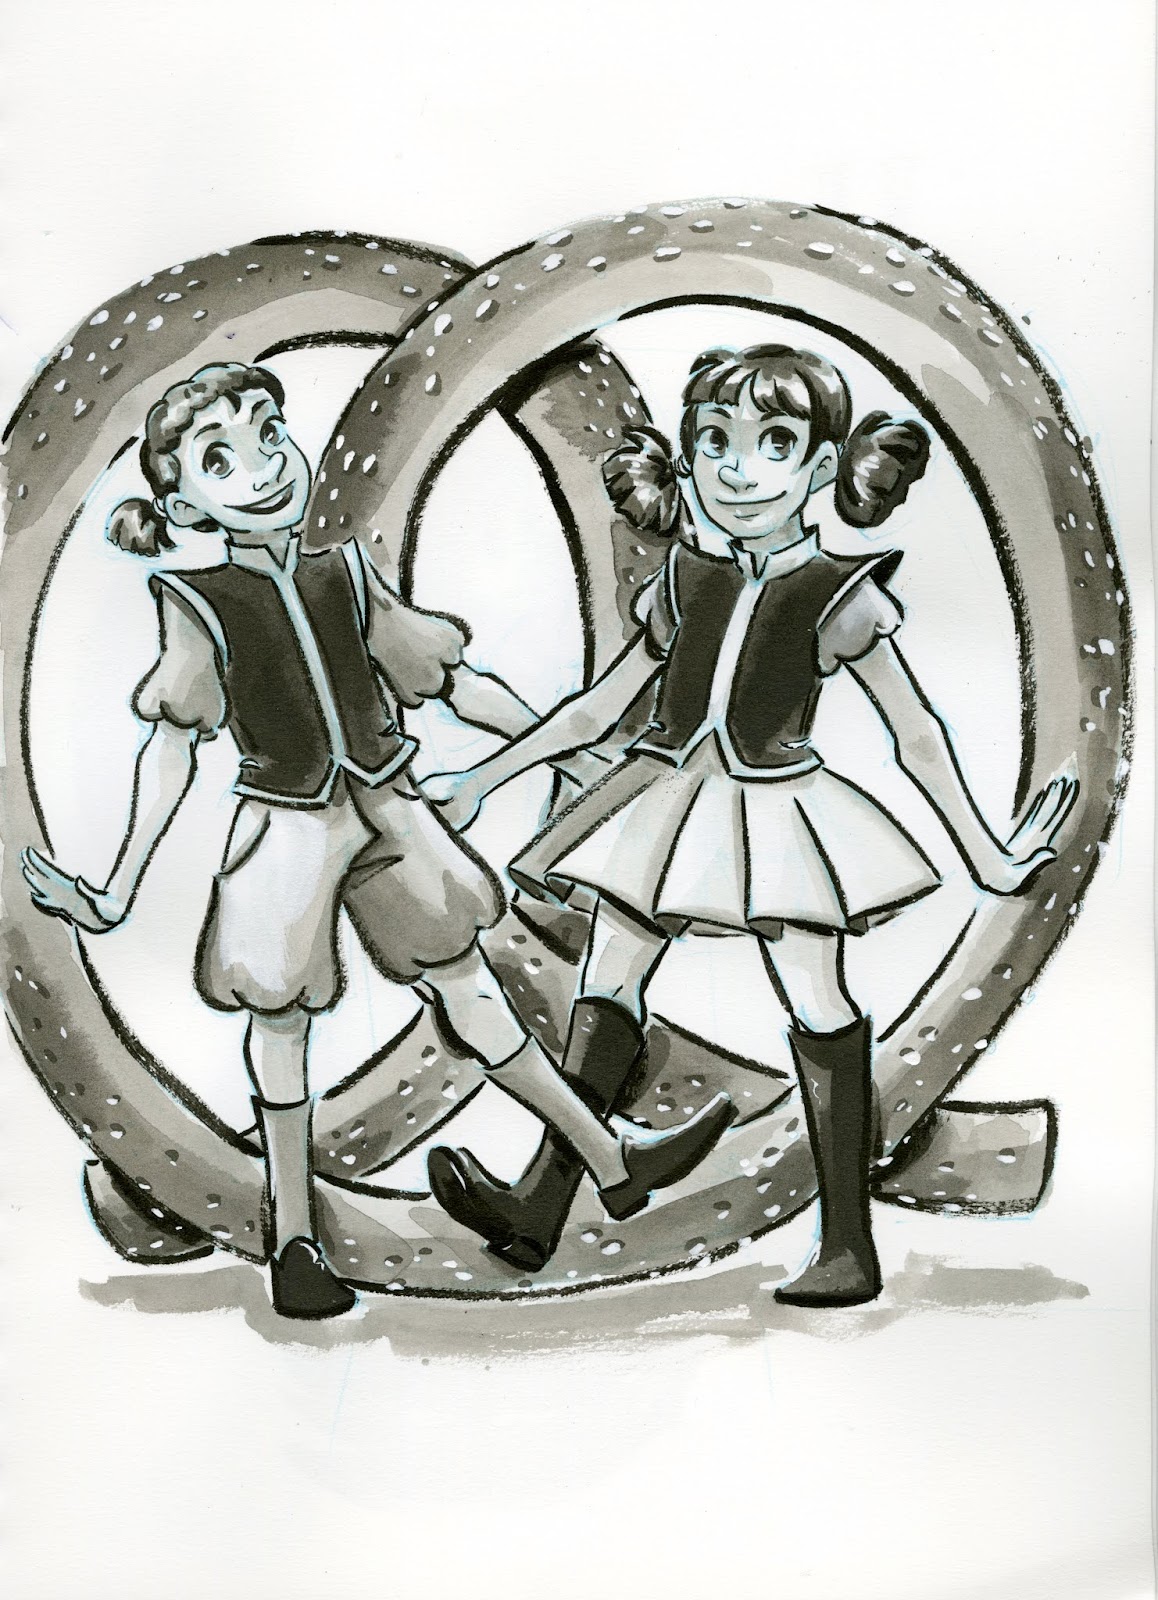
Craft Store:
 Stationery Store:
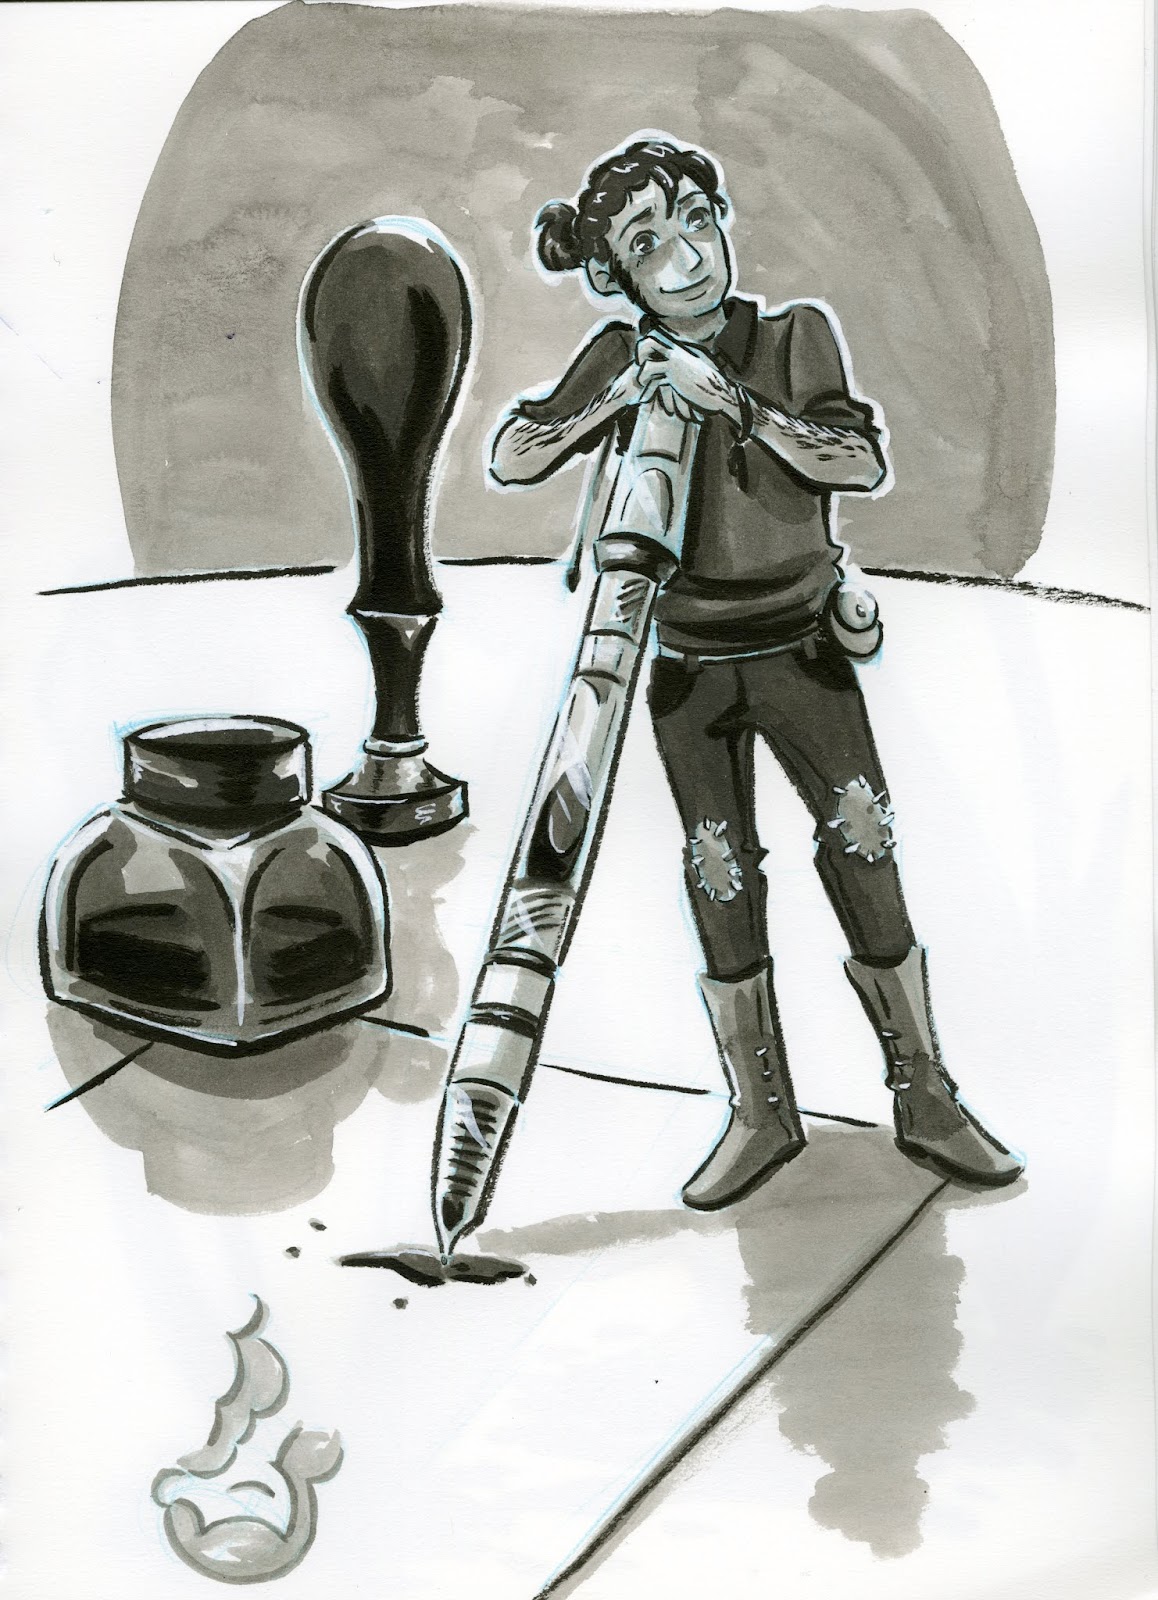 Flower Shop:
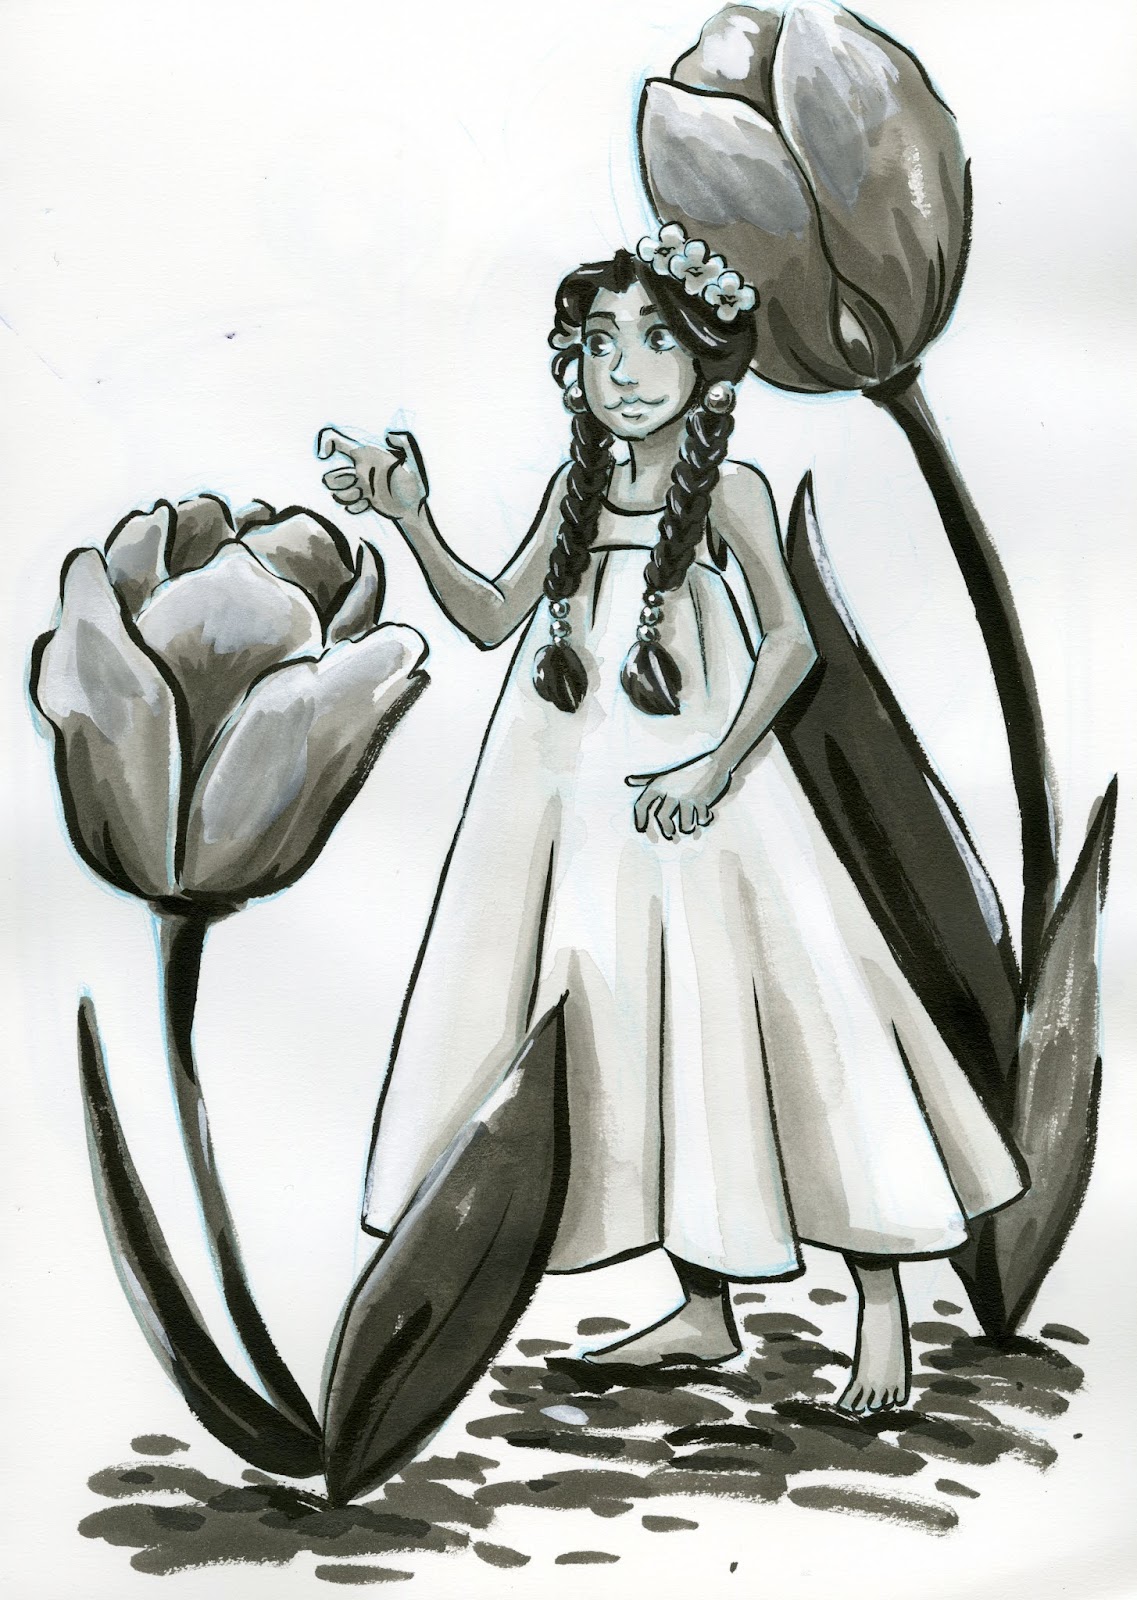 Candy Store:
 Hair Salon:
Families:
House:
 Towny:
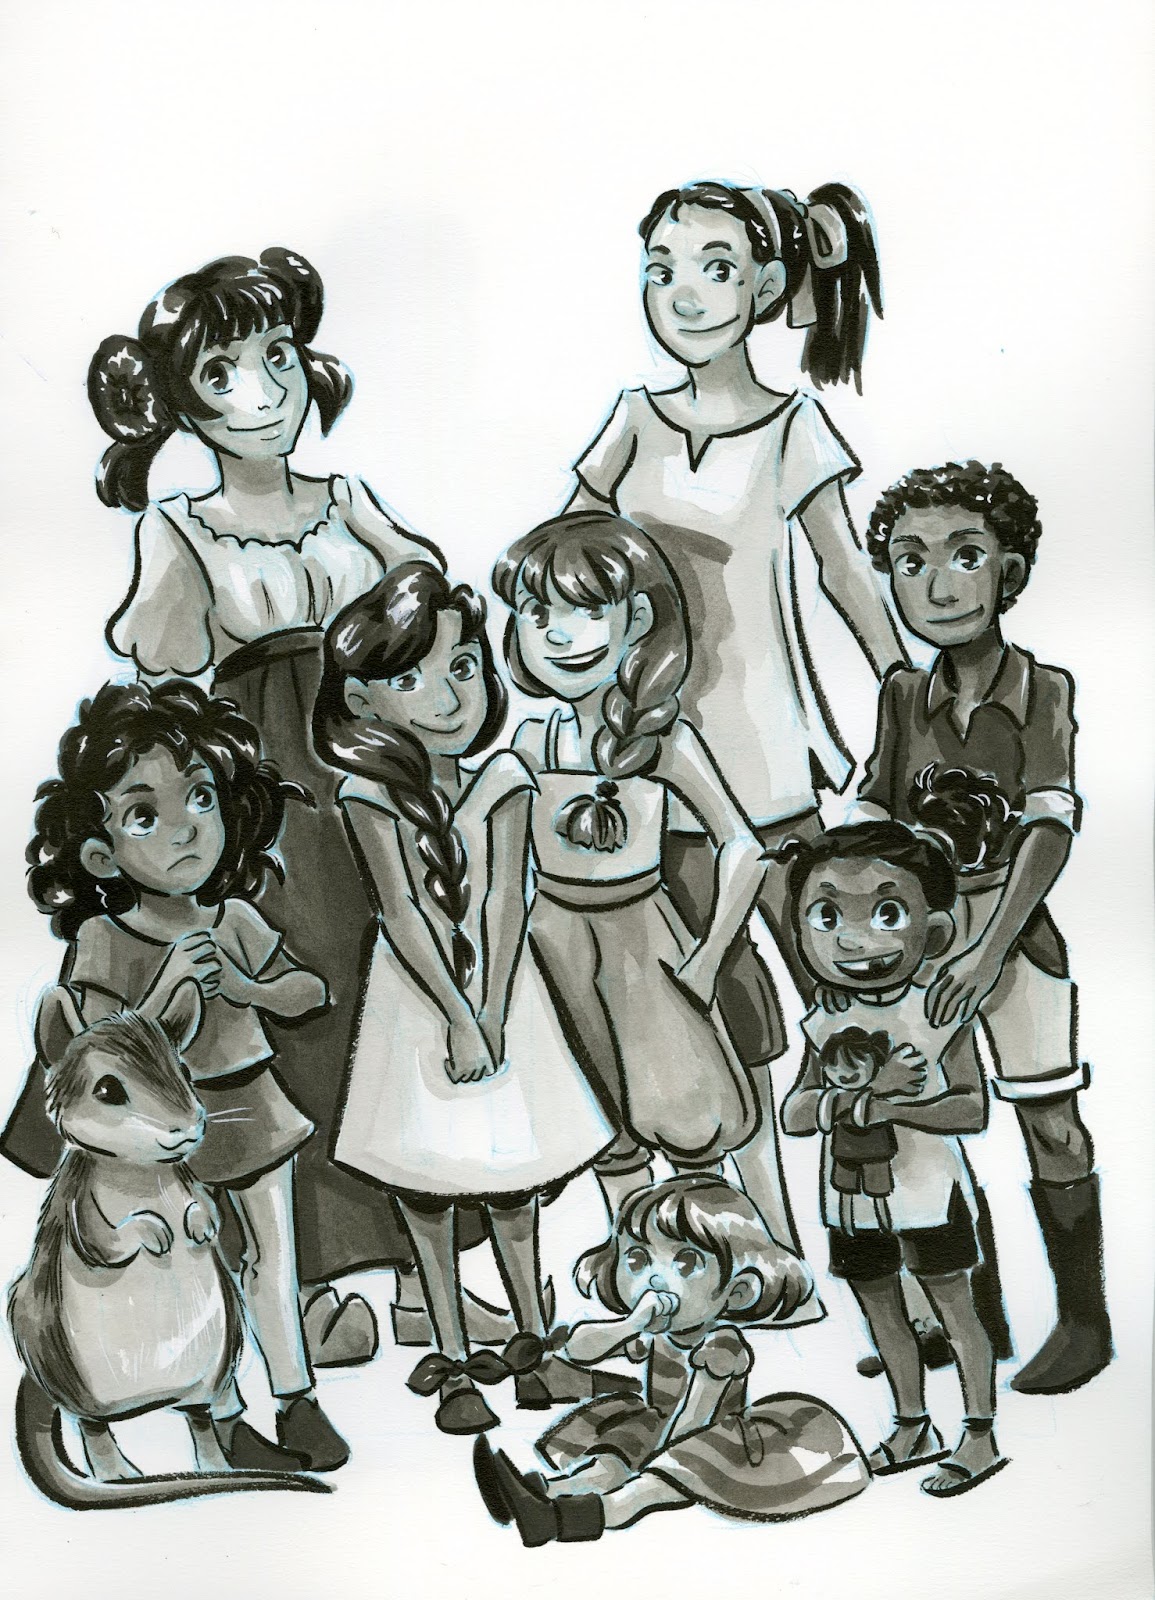 Mall:
Mall: Traditionalist:
 Villager:
Pets:
Chipmunk:

Kitten:
 Squirrel:
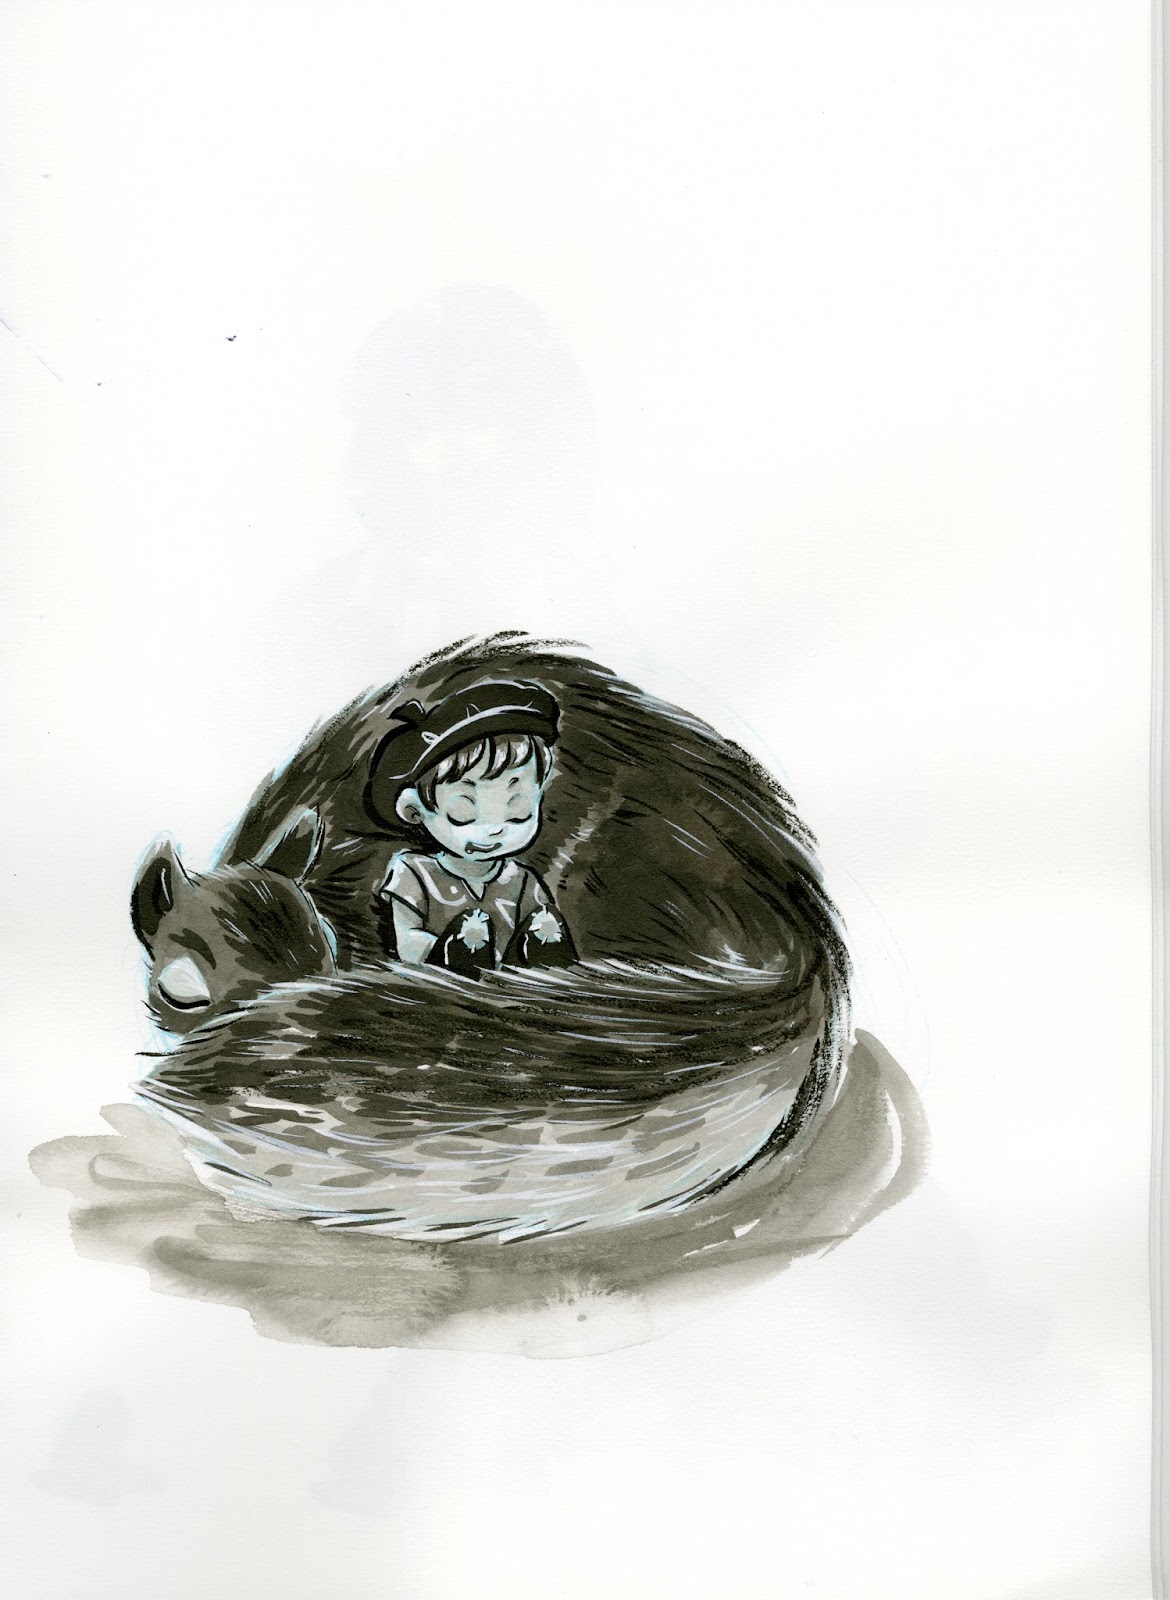 Toad:
Toad: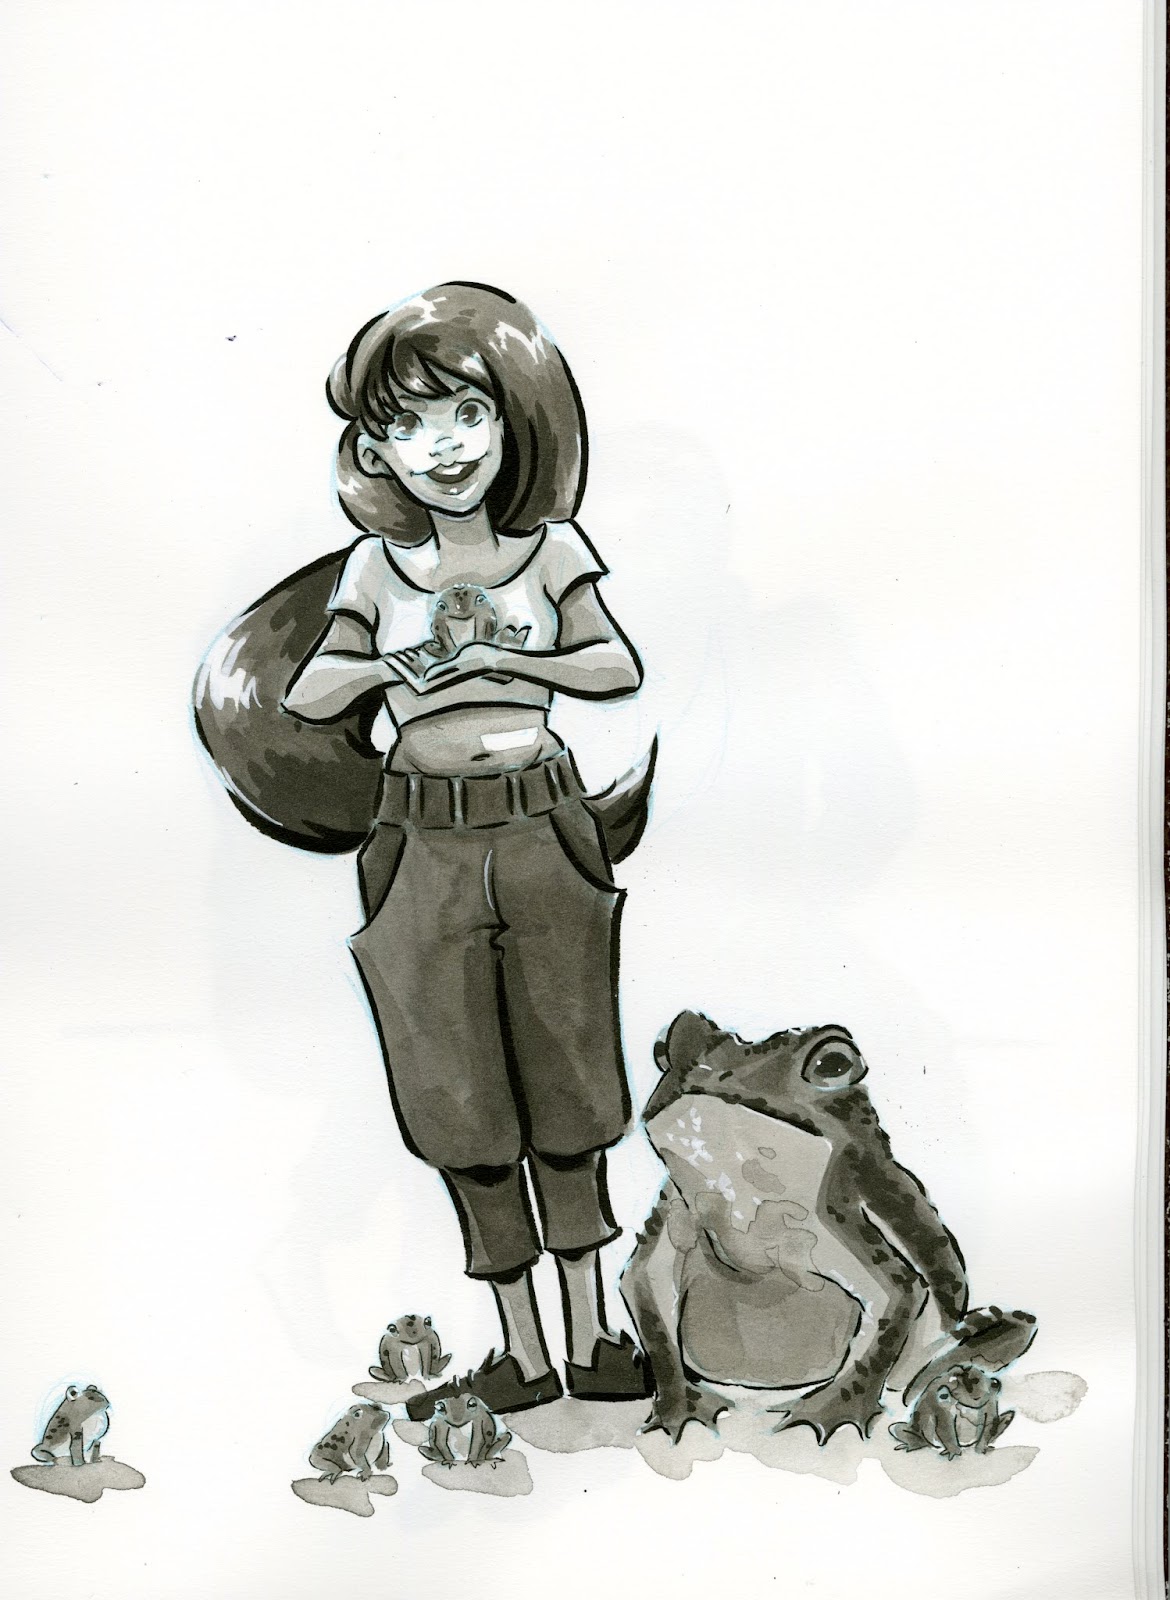 Gecko:
 Bees:
Bees: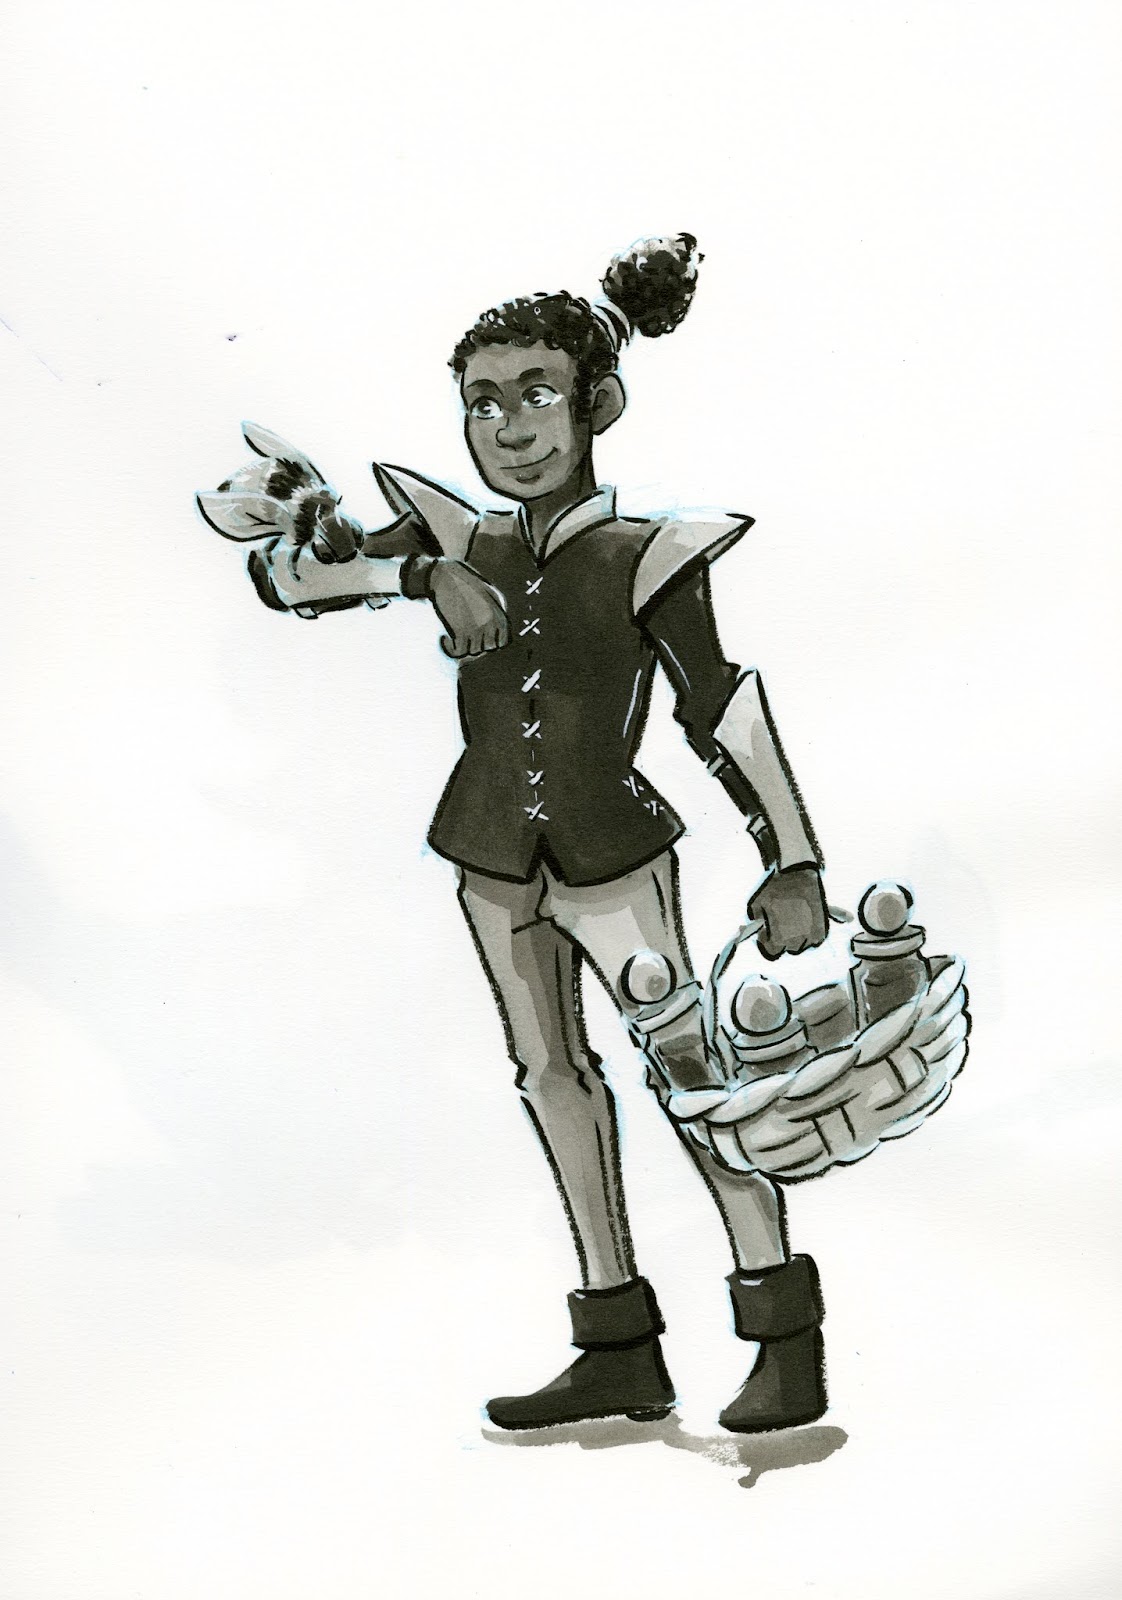 Sparrow:
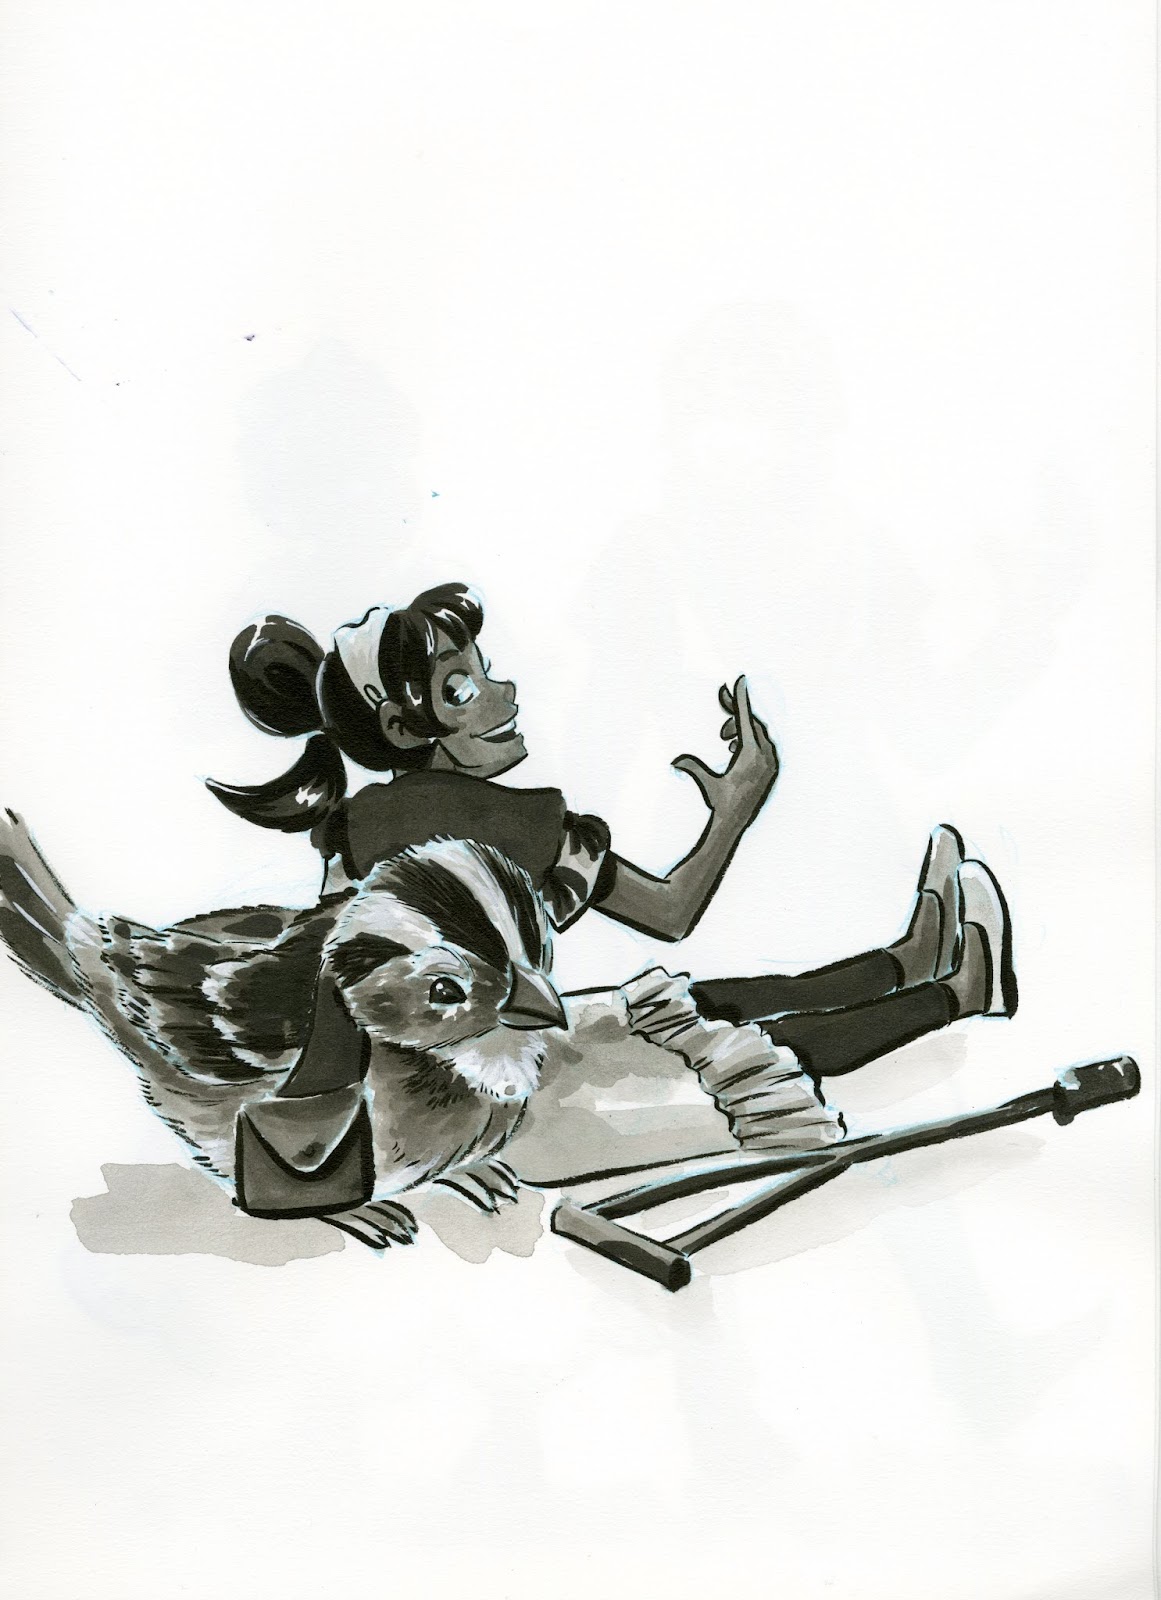
Seasons:
Autumn:
 Winter:
 Spring:
 Summer:
Bonus:
Halloween
Inkwash Demo and Inky Ramblings: Inktober Day 1:
Completed Inktober 2018 Sketchbook Flip:
In the end, this method of inkwash is not one I would recommend, and I found completing 31 days (plus a bonus) to be a challenge not quite worth the outcome. I'm glad I did finish, and found it to be a learning opportunity, if also an exercise in frustration, but I wouldn't repeat Inktober using these methods.
Please consider donating to this blog or purchasing from Natto-shop (http://nattosoup.com/shop) if you want me to continue publishing quality content. All materials tested were purchased from my own pocket. Keep on Truckin' Nattosoup is not under any sponsorship.
November 8, 2018
Intro to Comic Craft: Linear Perspective for Believable Environments
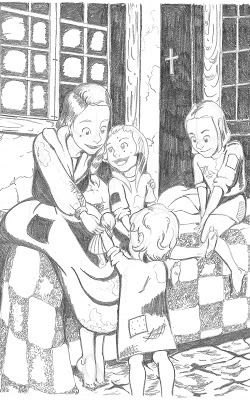
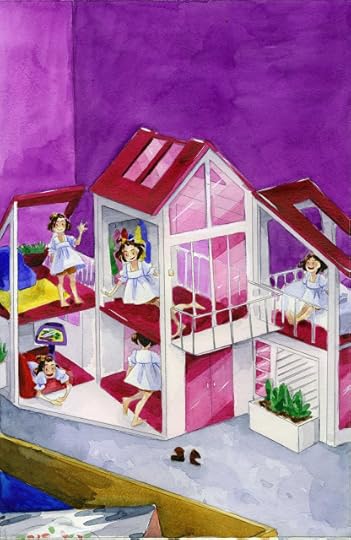
Back in March of 2017, I first touched on the roughs stage in my Intro to Comic Craft series. In that post, I introduced roughs as the stage between thumbnails and pencils/inks, an opportunity to tighten up acting, facial expressions, and scenery. I mentioned that one could skip roughs, particularly if their thumbnails are tight, or their work is cartoony or gestural. In a follow-up post, Environment in Roughs I touch on the concept of comic environments, comic worldbuilding as a character worthy of development and attention. In that post, I use the worldbuilding I've done for 7" Kara- designing Kara's home, the shed, the yard, Naomi's home- worldbuilding that is experienced through very different sets of eyes- Kara's 7" tall, and Naomi's 5'5". In order to accurately portray these environments from both perspectives, I utilize linear perspective to create semi-realistic environments. In that post, I also introduce the concept of linear perspective, but in a fairly rudimentary way. Today, I'm going to expand on that with more examples and helpful resources for those interested in using linear perspective in their comics.
I had a lot of difficulties learning the basics of perspective. It was demonstrated, quickly and poorly, in my Drawing Fundamentals class, using the age-old chestnut of boxes in perspective. It wasn't until I found Andrew Loomis's Successful Drawing, and then augmented that with a little pamphlet on perspective purchased at Michaels, now lost to the sands of time, that it started to click. For me, I needed more than just a single class introduction to perspective, I needed someone to walk me through every step.
 Spring 2009For my undergraduate senior project, a 20 page comic, I began tentatively using 1 point perspective to give my backgrounds depth.
The uses of linear perspective were really driven home during my first semester at SCAD, in Tom Lyle's drawing intensive. I was relying heavily on one point perspective for backgrounds at the time, but his class really forced me to practice 2 and 3 point perspectives. Extremely uncomfortable at first, the repeated practice helped make 2 point perspective second nature, so I highly recommend that if you decide to learn 2 point perspective, you practice it frequently until you understand it well.
 Fall 2010
 Fall 2010
 Fall 2010
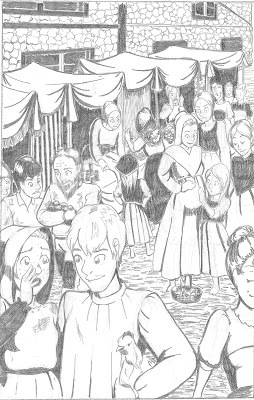
 Fall 2010This class required us to do 4 11"x17" illustrations every two weeks. These illustrations were done without the aid of non-photo blue, nor the aid of multiple steps of revision- those concepts were introduced the next semester- I remember these assignments really kicking my butt, time and self esteem-wise, but I think if I were to revisit it now as a challenge, the thumbnail and roughs process would make for a quicker turnaround, and a stronger product. These were some of my first illustrations that utilized a 2 point perspective grid, and I tried to challenge myself to leave my comfort zone each time, drawing group scenes and in perspective texture.
Looking back, it might be fun to redraw these, using the same grids, but fixing the faces and clothes.
As rough as the art is in the above examples, the backgrounds are consistent with the art, and are fairly believable spaces. You don't have to be an expert for linear perspective to improve your illustration.
 Spring 2017I still set up my perspective by hand, a task that is tedious and frustrating. I wouldn't do it if I didn't find the end result worthwhile, but I will admit that there are digital tools (such as the perspective grid tools in Manga Studio/Clip Studio Paint) that can make this task much easier. There are even printable templates, as well as plastic templates you can slip under your panels, to aid in this task. So take what you need from this post, and alter it to suit your comic's needs. Maybe you need very simple backgrounds- the world isn't important, the character interactions are. Maybe you need elaborate natural scenes- then perspective isn't quite as necessary, but it certainly helps. Or perhaps you want to draw something superheroic and set in a city- then you certainly need to be familiar with 2 and 3 point perspective to accomplish breathtaking city sweeps and vistas.
Materials I Use in This Process:
Thumbnail page blown up, converted to non photo blue, and printed on printer paperScrap printer paperLow tack tape such as washi tape or blue painters tape12" clear acrylic ruler24" rulerNon photo blue leadGraphite pencil (B or softer)Erasers of various types
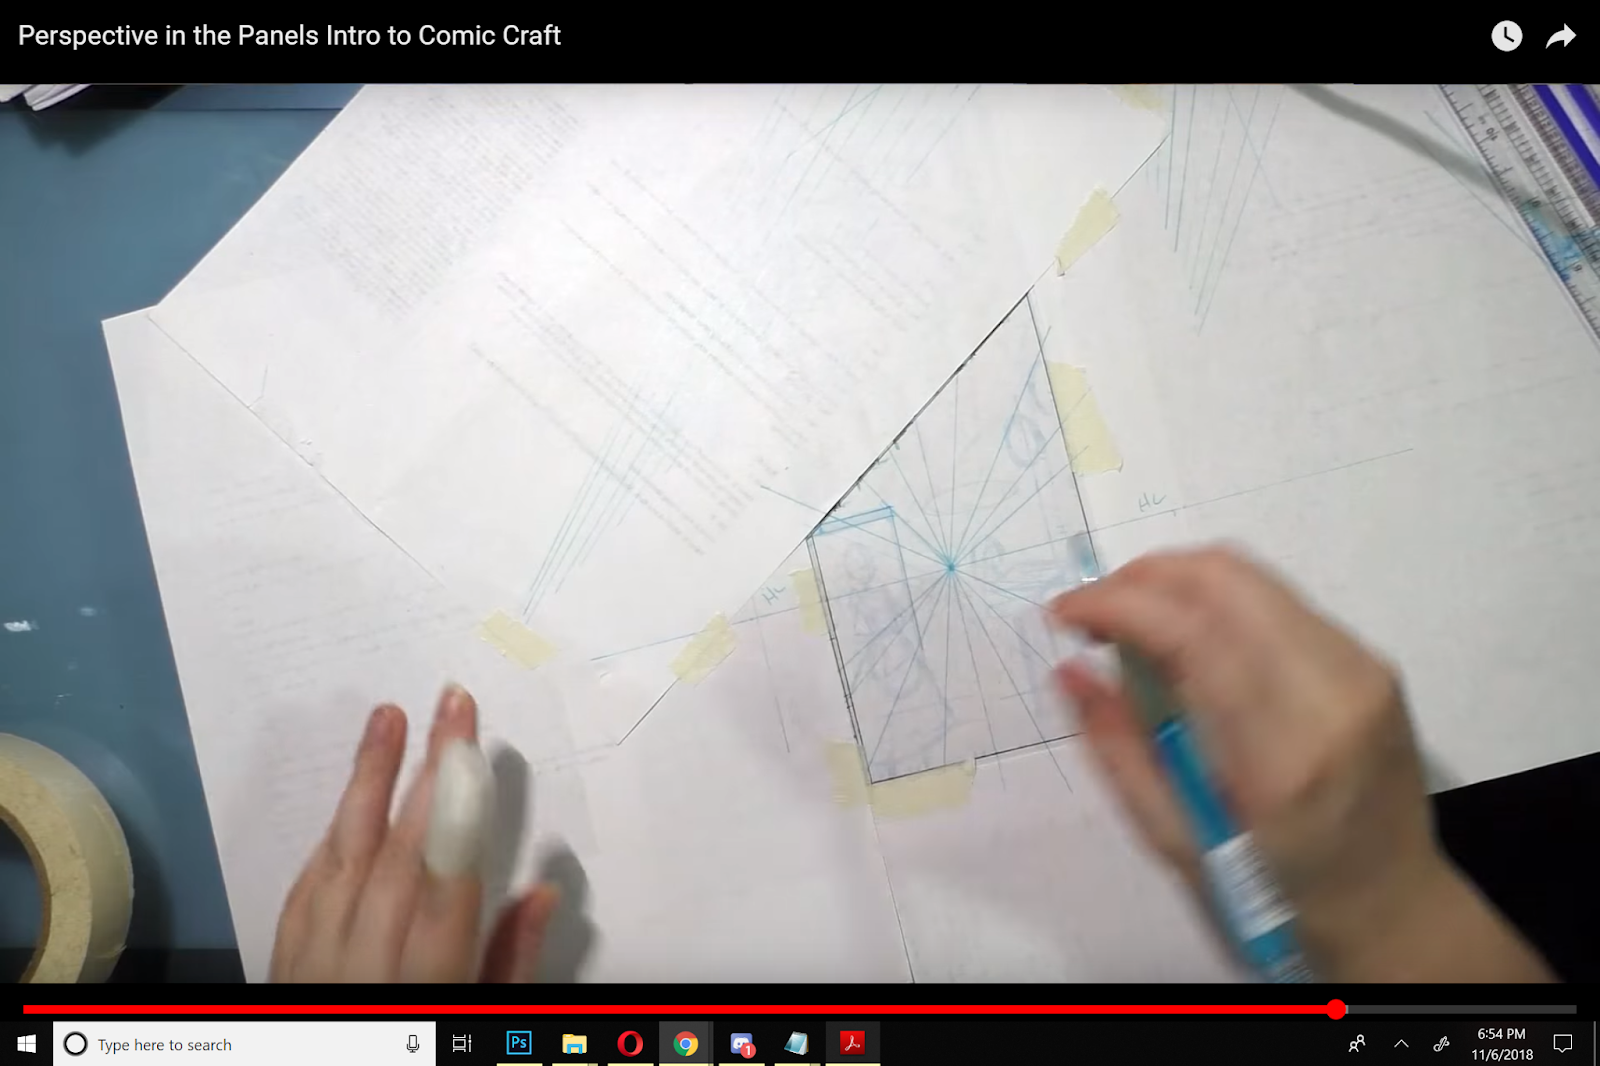
Setting Up My Workspace:
To create perspective grids for my comics, I need A LOT of room to work. Ideally, I am working at a table or drafting table, and can really spread out.
Intro to Comic Craft: You Need Perspective: Perspective In the Panels: Intro to Comic Craft:

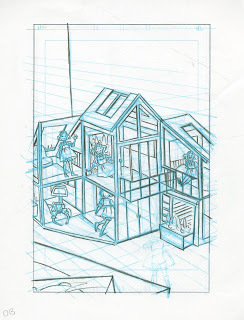
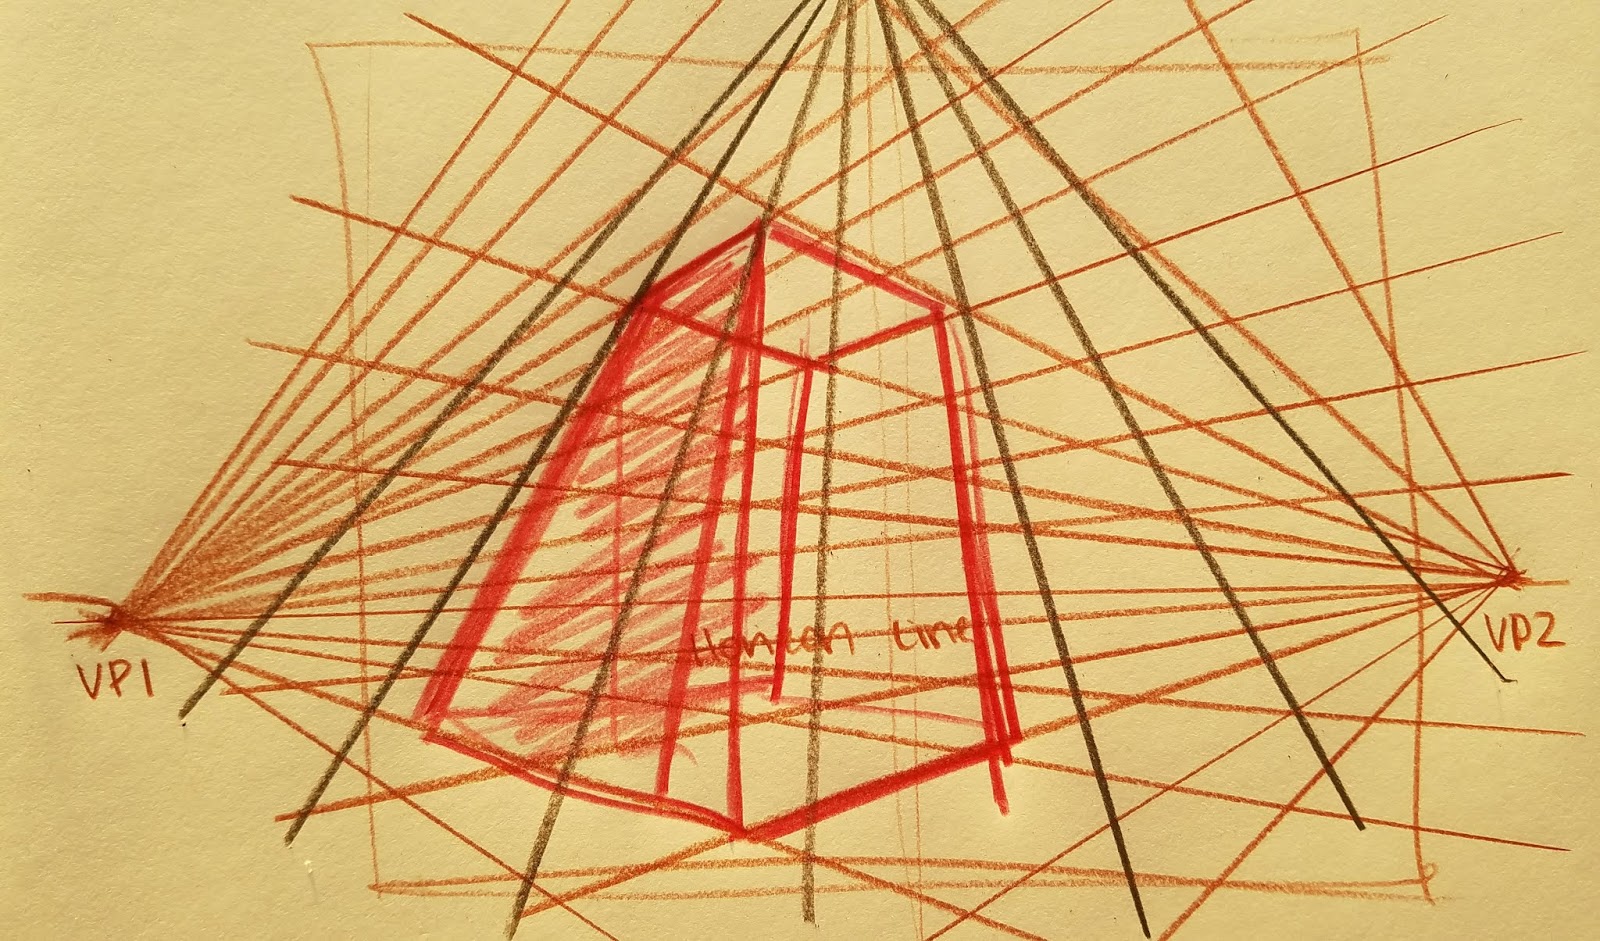
The criss-cross of faint blue lines represents my perspective grids, drawn individually to suit the needs of the panel. Sometimes I use one point (the easiest grid to grasp, but somewhat boring for the viewer), but frequently I use two point to better capture the environment. For a comic like 7" Kara, where scale and size play important roles, showing the environment plays a vital part of my storytelling. While the environments aren't groundbreaking to the reader, they're a whole new world for tiny Kara, and I want the reader to experience some of the wonder that Kara feels as she explores her new environment. As the story progresses, I will introduce 3 point perspective shots, as well as birds eye and worms eye views, to create a sense of unease and tension.
Using grids should be considered a tool, a technique, an aid that helps you create comics, not an obstacle. I do think learning how to use this tool is worthwhile, but many comic artists successfully create comics with believable backgrounds without using linear perspective.
Linear Perspective
Perspective Grid
Source
Horizon Line
Source
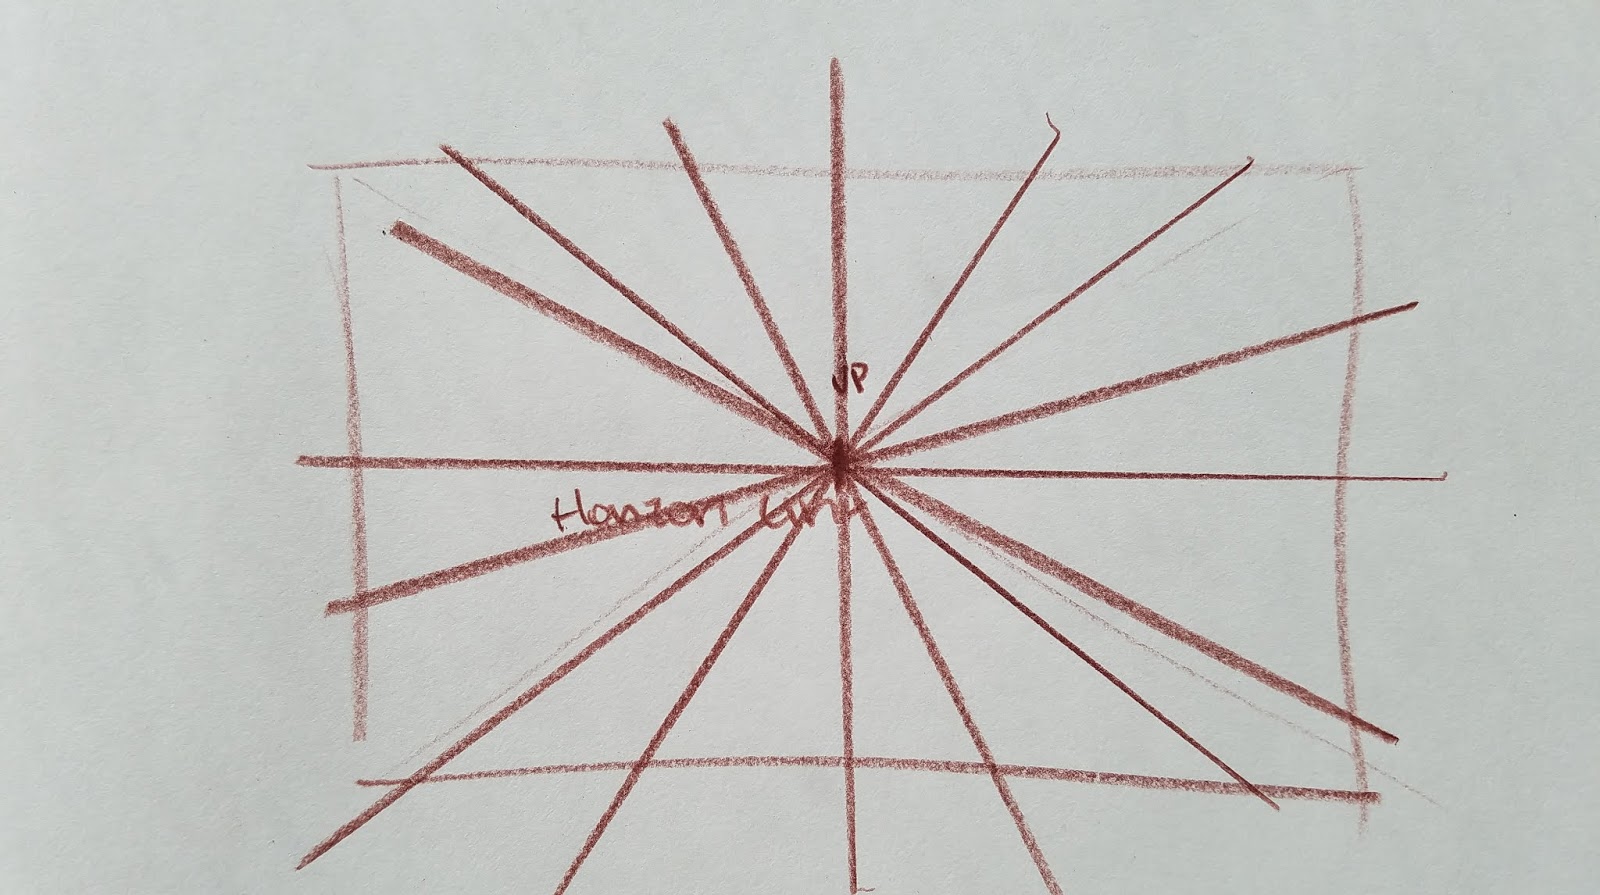
Vanishing Points:
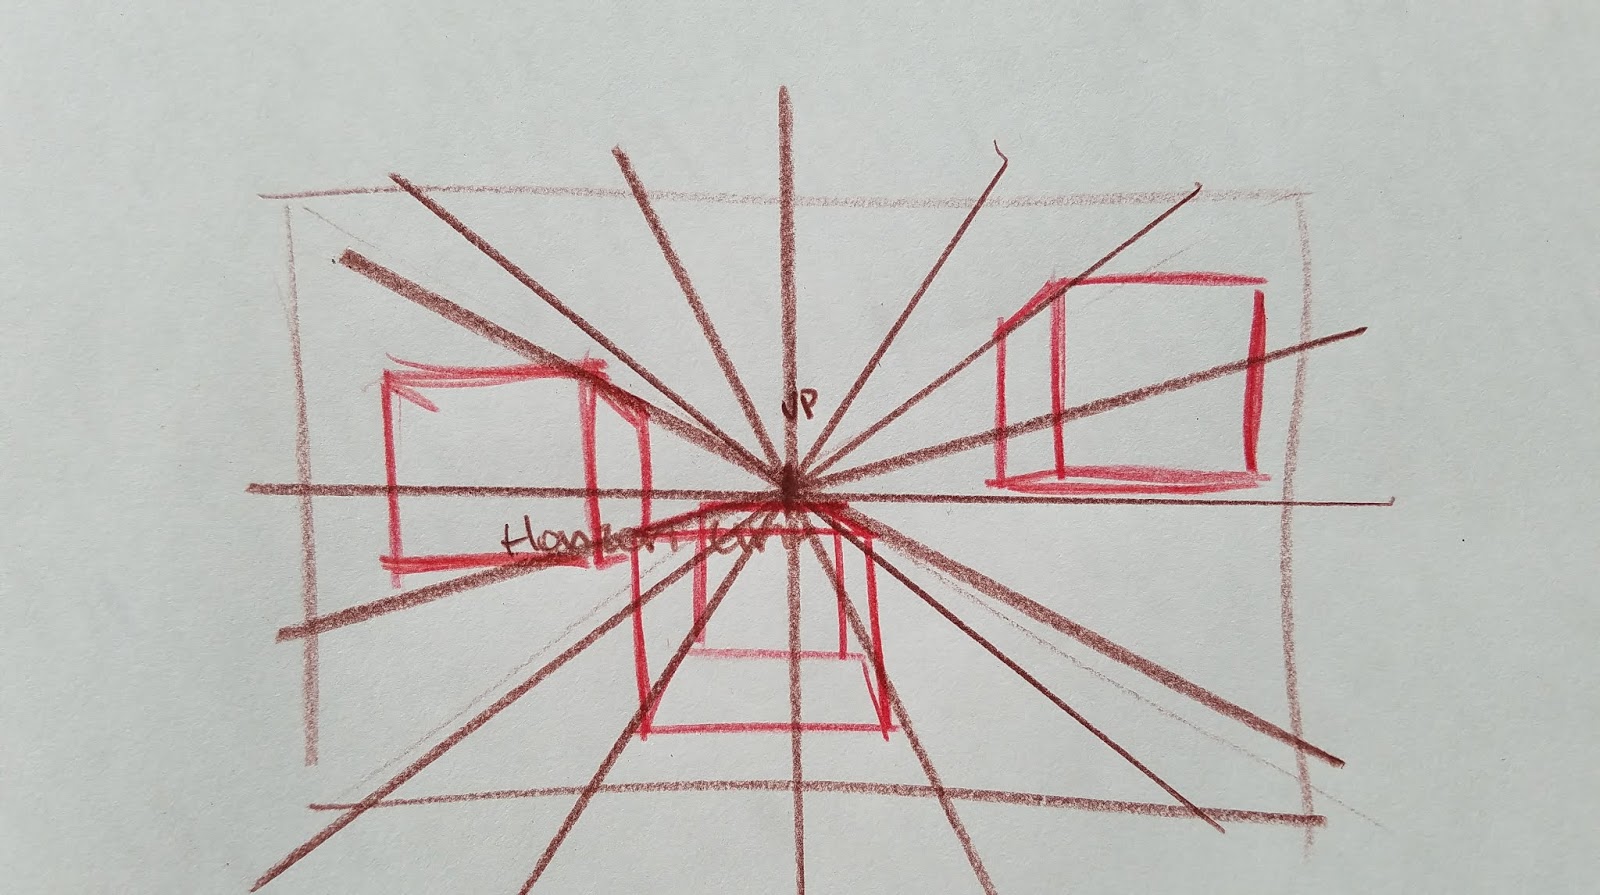
One Point Perspective:


Source
Note: Some artists try to fudge one point with the vanishing point way off to the side. For one point, the vanishing point should be in the middle of the picture plane, or near the middle, as that's the only way all points would converge towards a single point.
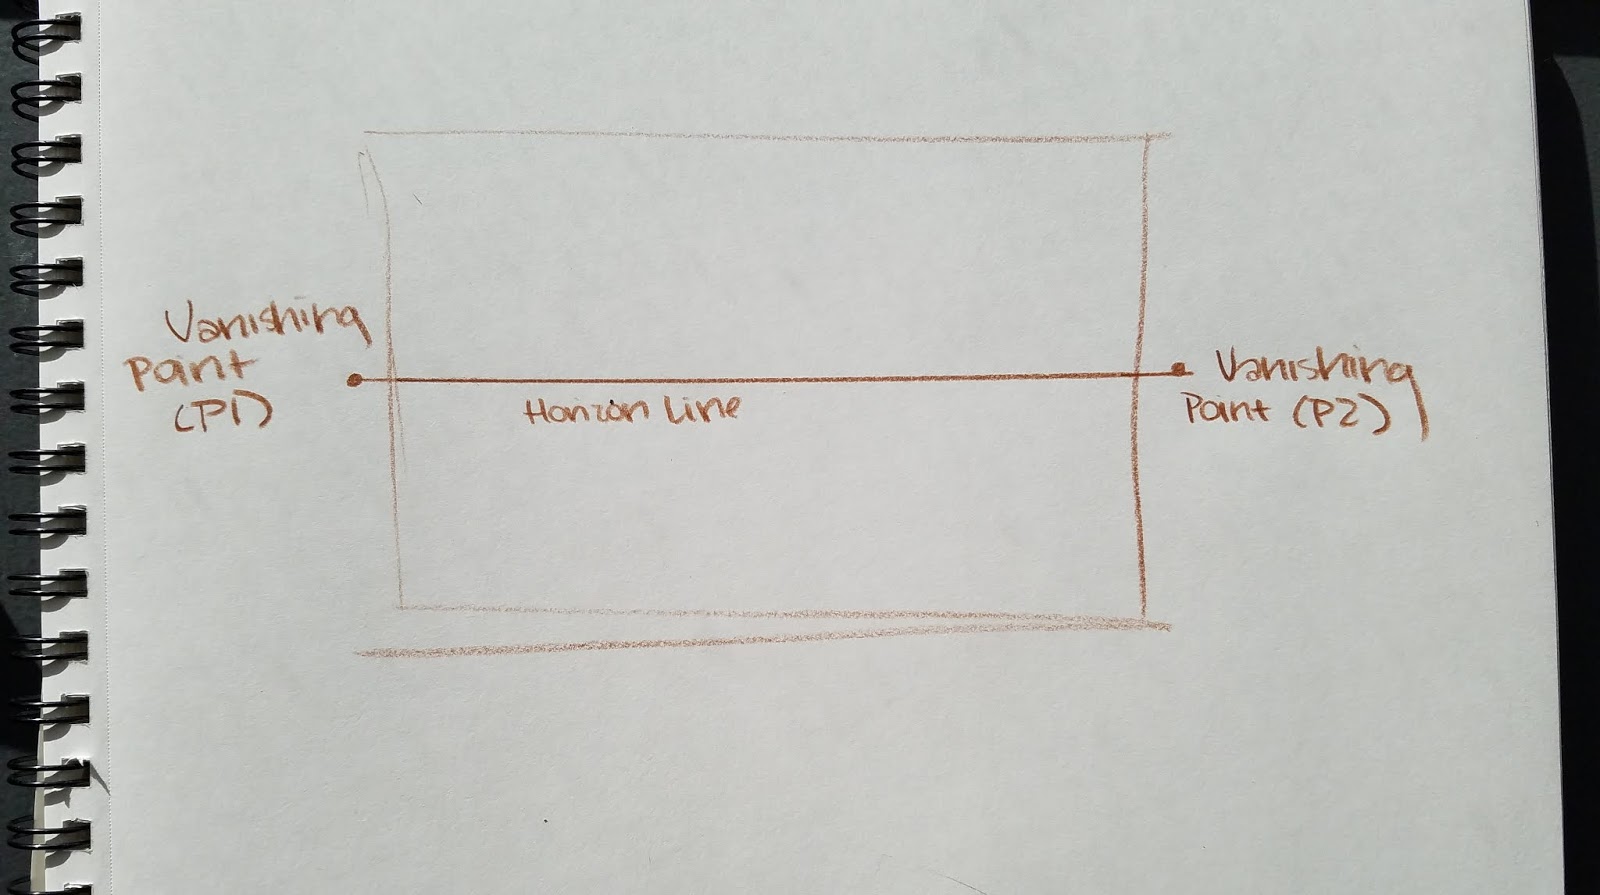
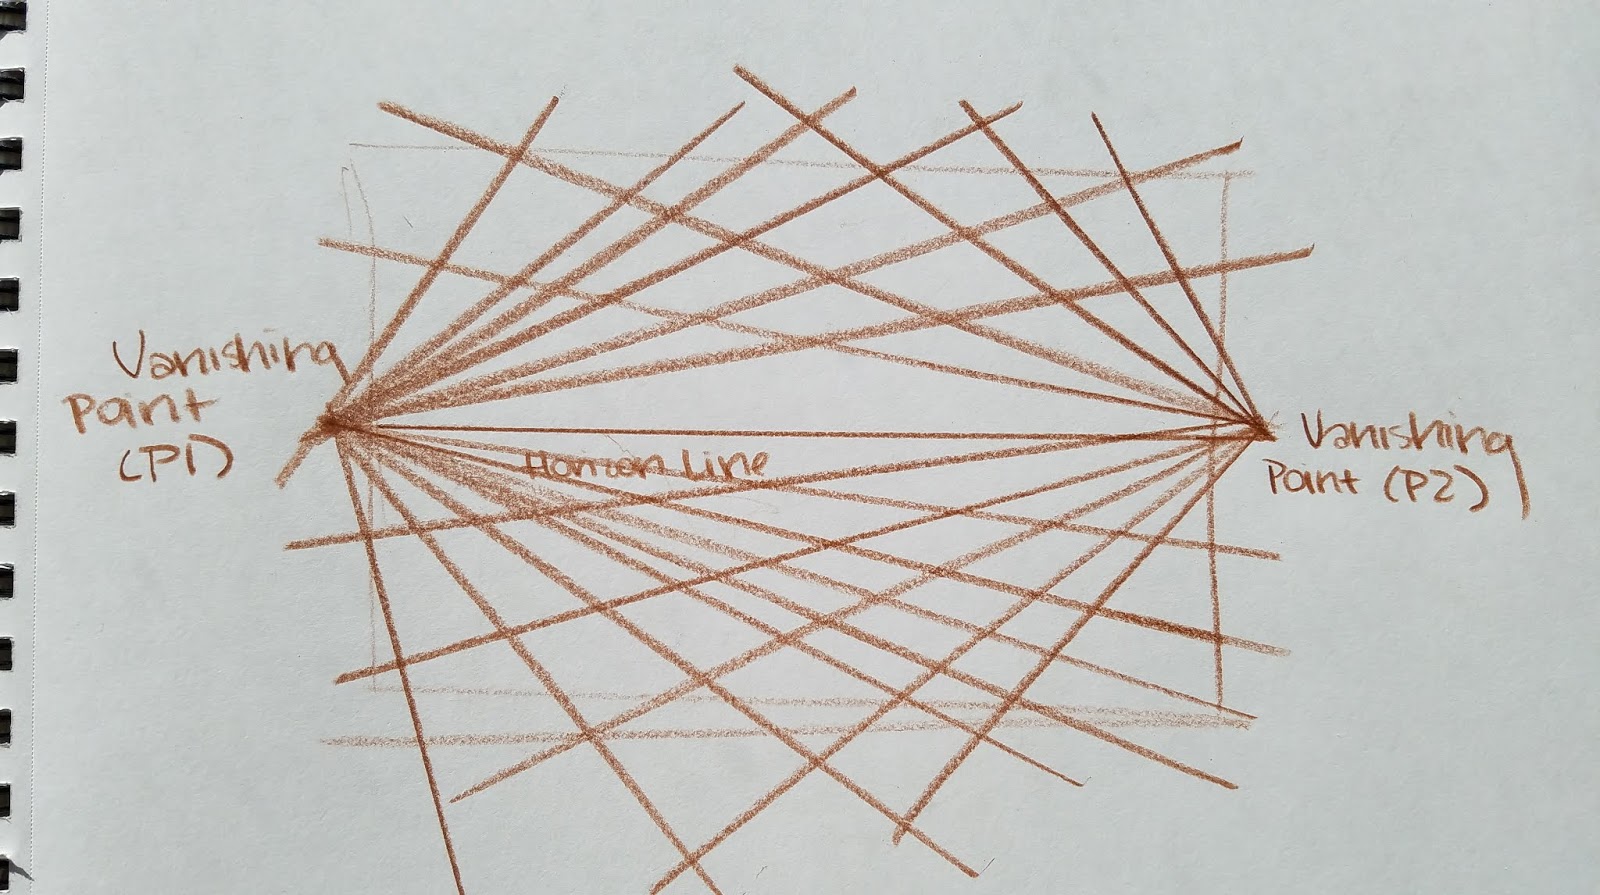
Two Point Perspective:


Definition of two-point perspective
"...only the vertical edges of rectangular objects are parallel to the picture plane..."Source
Three or More Point Perspective:


Source
Isometric Projection
Source
Often used in top down videogames, in architectural plans, and for product designs.
Creating Perspective Grids by Hand:
Note: These are screencaps grabbed from my Perspective in the Panels video. If you learn best from observing, you should just watch that.
PANEL 1- Two Point Perspective
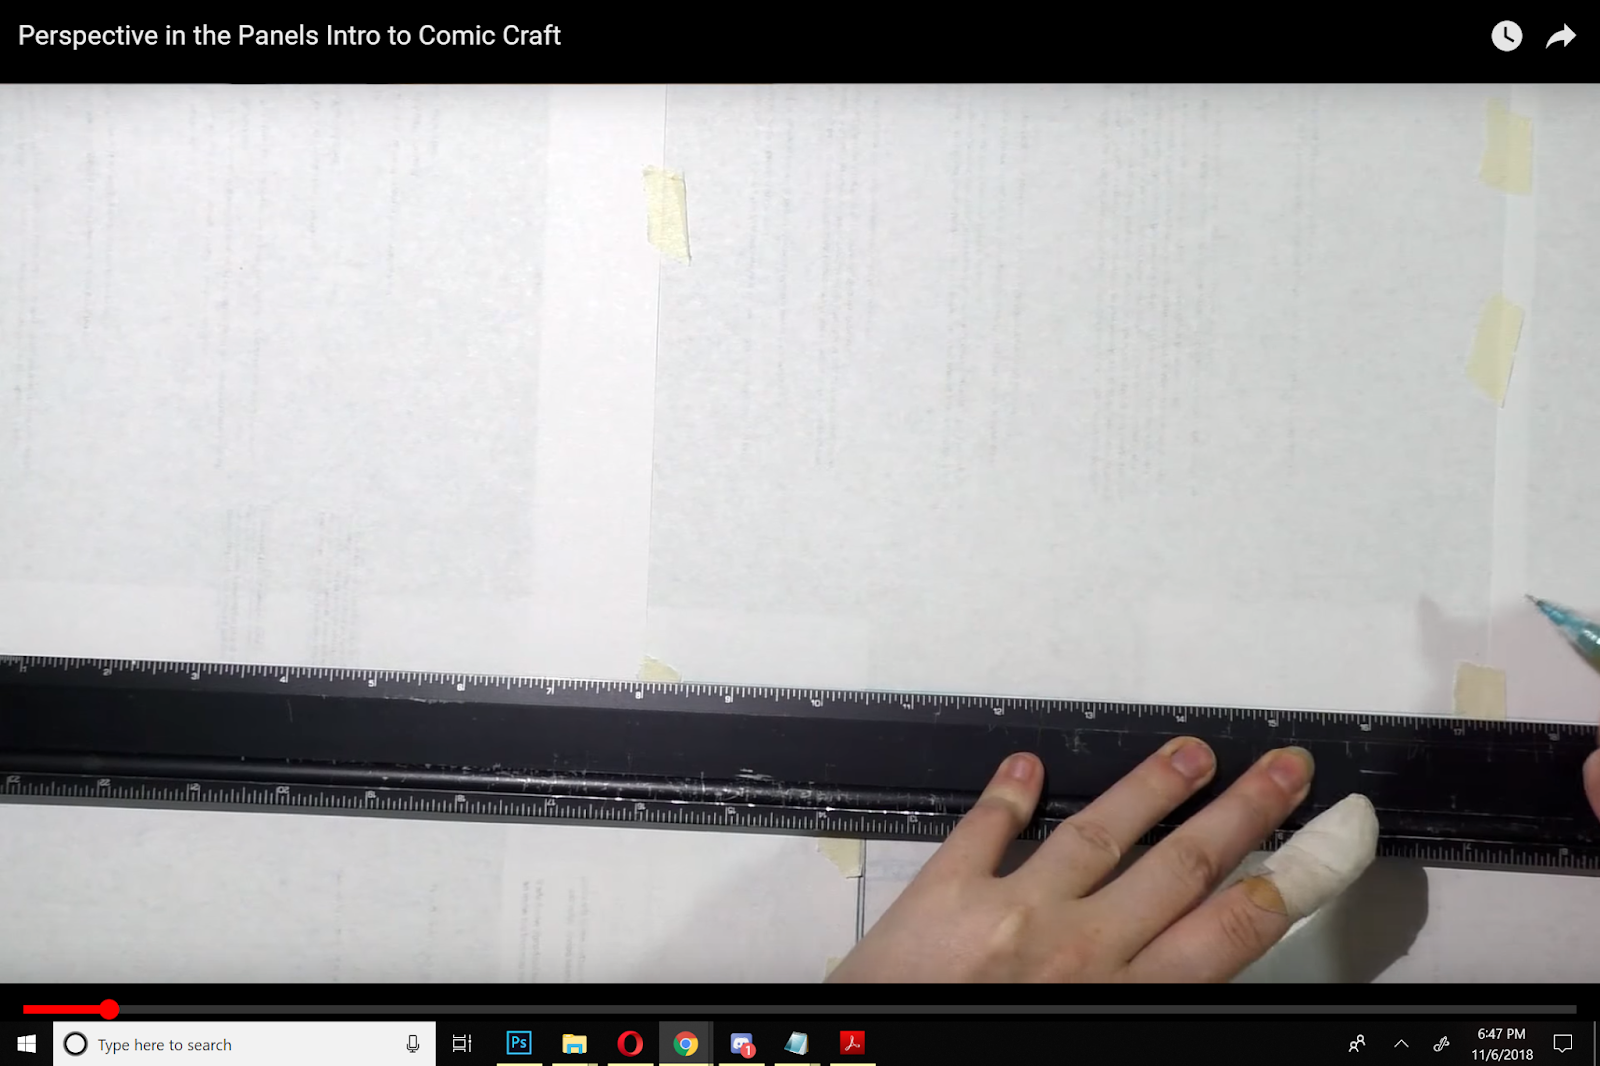
Step 1: Tape scrap paper to the four borders of your panel.

Step 2: Based on your thumbnail, determine where your horizon line should be.
How I do it:
I do tight thumbnails that include background and basic shot choices because I'm often quite accurate with estimating my perspective in small scale. So to determine my accurate horizon line, I will line my ruler up with the background lines (like say floorboards)- one from each side, and put a mark where the lines from each side would cross. That's usually a decent place to start for a horizon line.
Note: If you would like to see this demonstrated, shoot me an email!
This isn't surefire- sometimes I'll start doing my grids, realize they're all wrong, and have to erase the whole thing.
Step 3: Draw your horizon line

Step 4: Determine Where Your Vanishing Points Will Go
Using a similar technqiue as described in finding where my horizon line will go, I select a mid panel background line (such as a picture frame border), and extend it towards my horizon line. I may do this a couple more times, and average out which point will work best for the panel.
If you'd like to see this demonstrated, please email me!
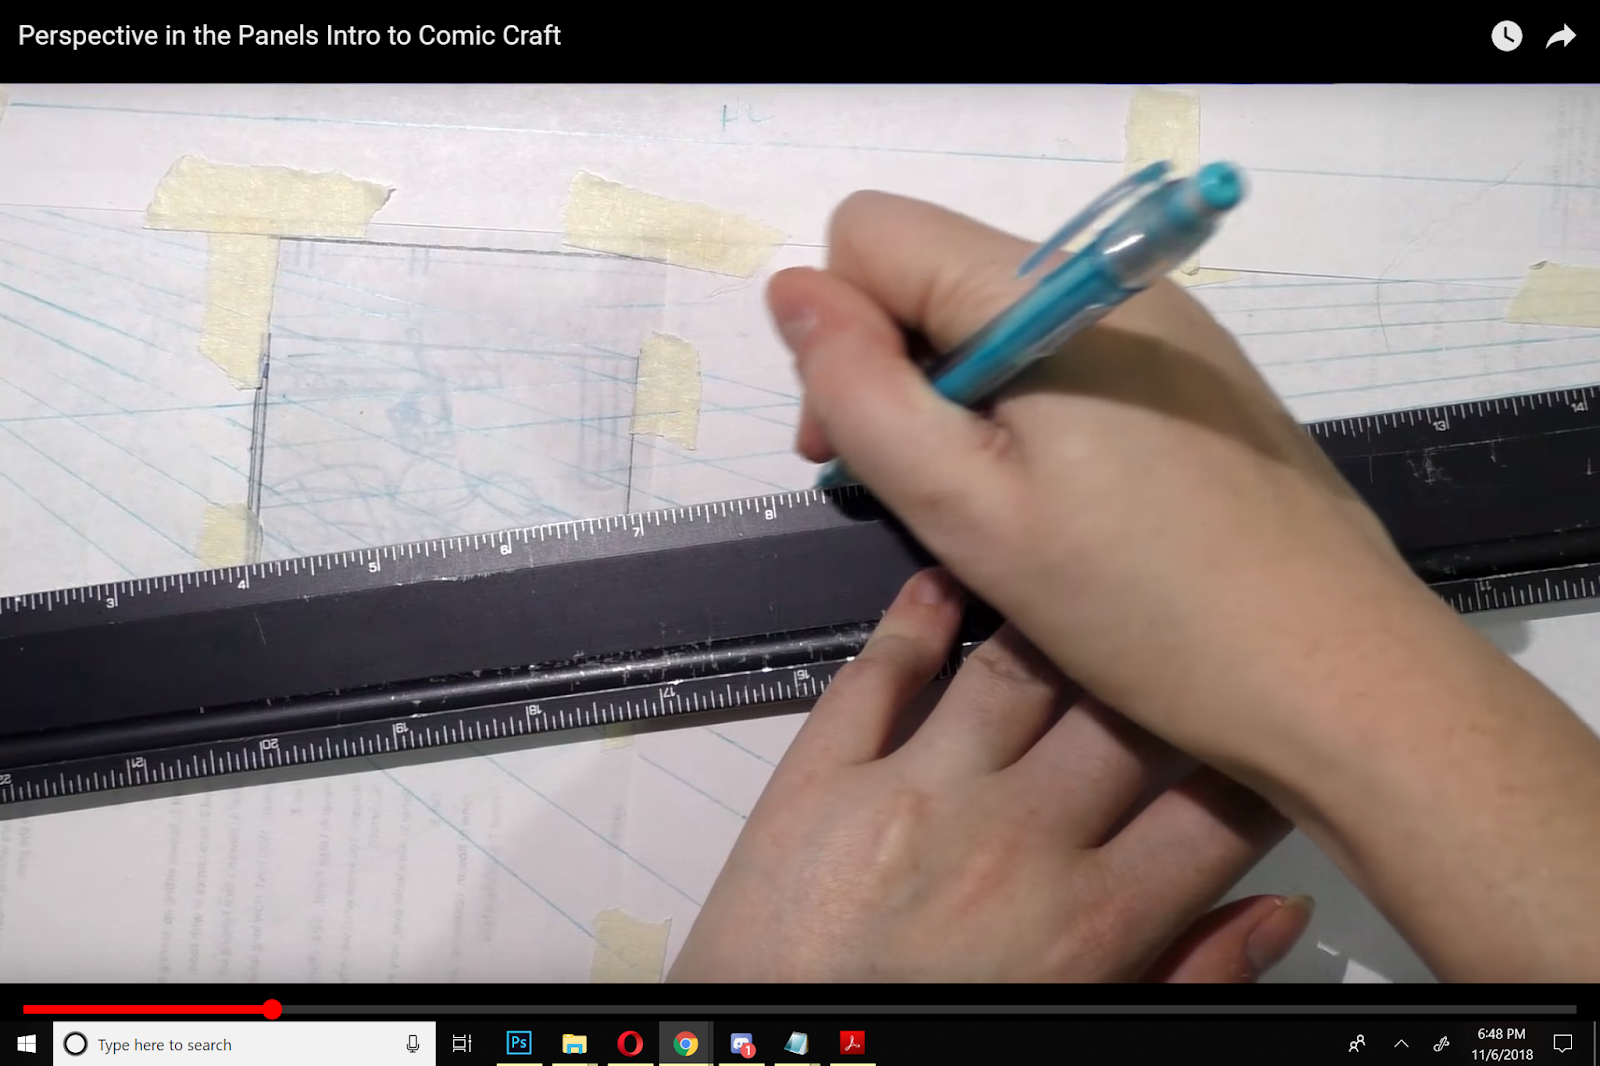
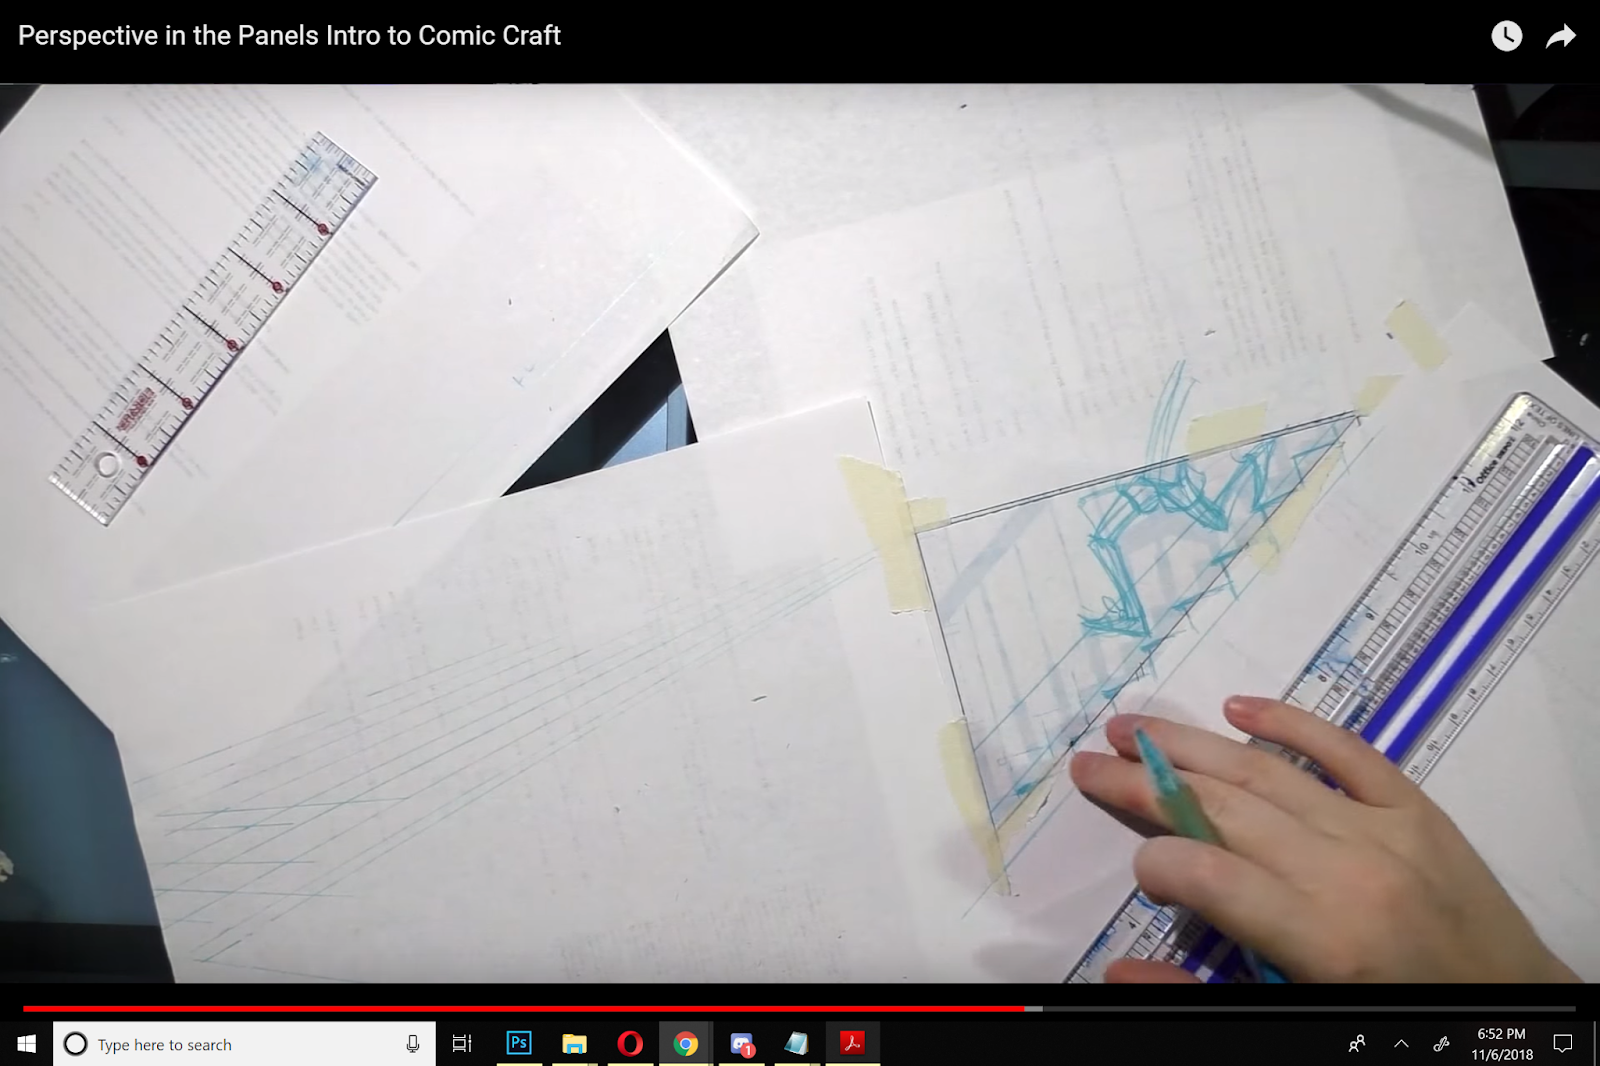
Step 5: Begin Creating Your Perspective Grid
Draw lines radiating from your vanishing points


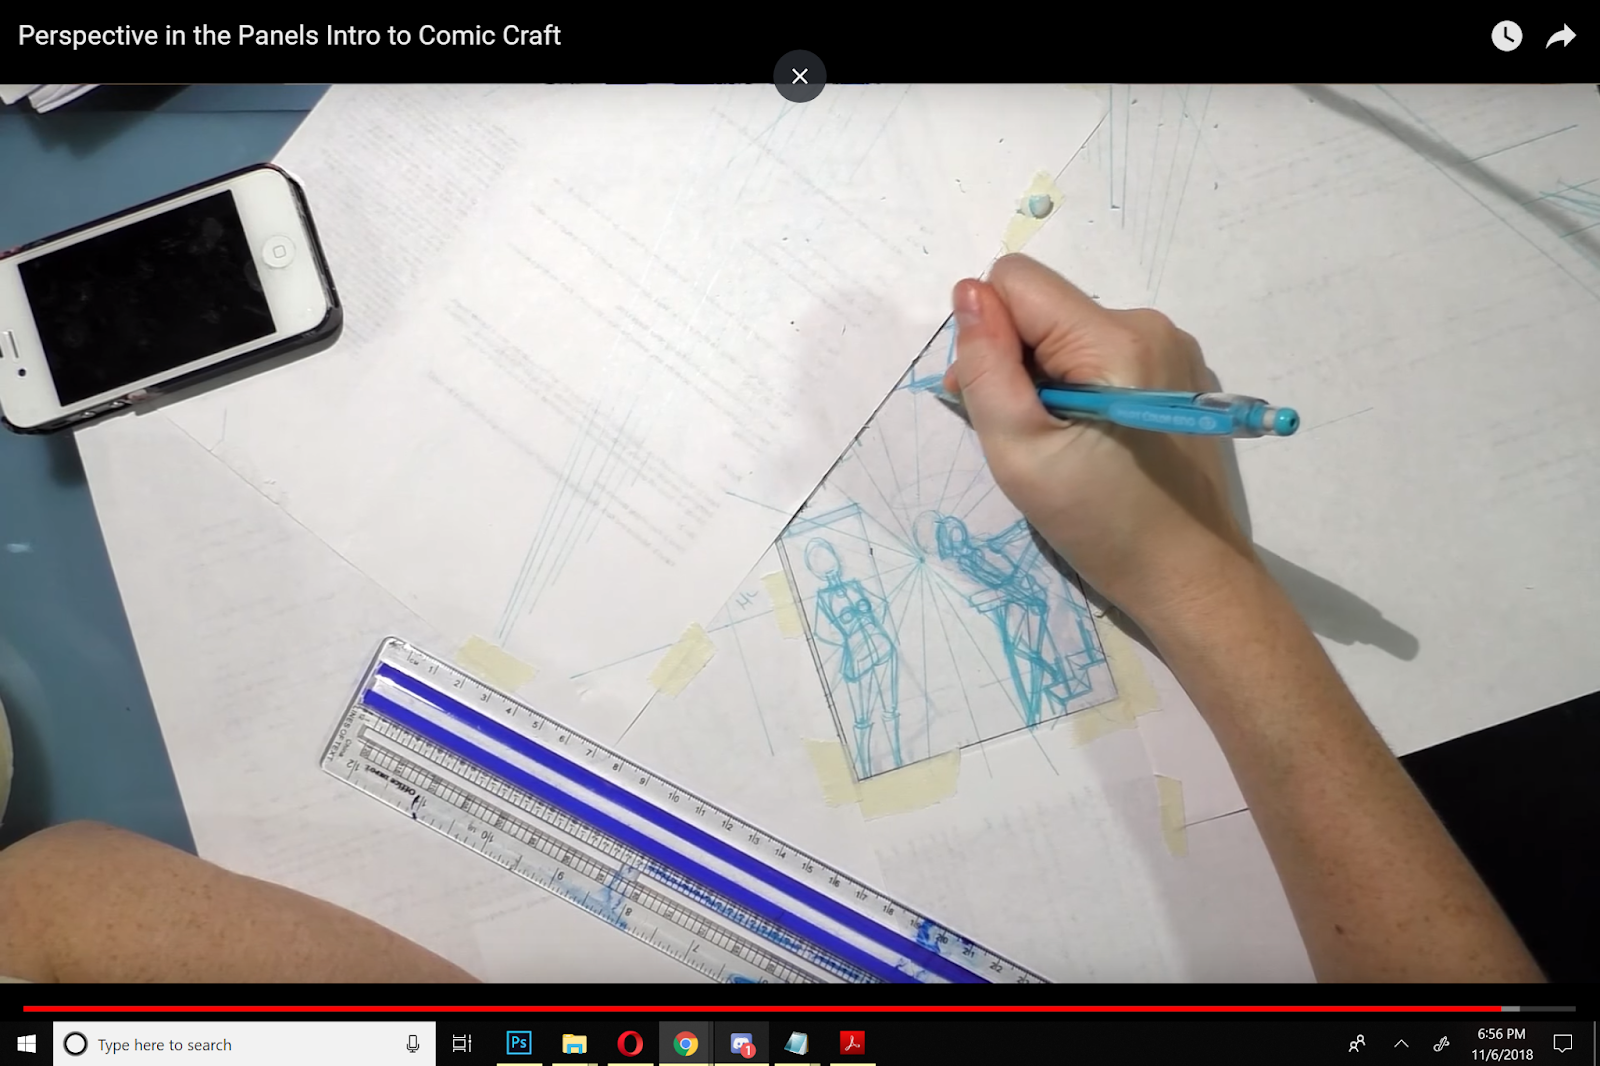
Step 6: Begin Fleshing Out Your Panels, Using the Grid as Your Guide
This is the stage that probably benefits most from demonstration. How you choose to approach it is up to you, and will change as you gain experience. I usually prefer to start by fleshing out the characters, then fleshing out the background, working from foreground to background, as this results in the least amount of erasing. If you're interested in learning how to stage characters in proportion, Andrew Loomis' Successful Drawing covers this in detail. As with perspective, these are techniques that may take some time to get the hang of, so practice is recommended!
Once I've drawn in my characters, using constructive figure drawing to construct them accurately, I begin drawing in the background, using the perspective grid as my guide. When drawing backgrounds, it's helpful to work from staged reference if accuracy is your goal- many artists even recreate their comic environments using 3D programs like Google Sketchup to make it easier to draw later on.
For a step by step video of this, please email me.


Step 7: Tightening Up Your Forms in Graphite


PANEL 2- Flat Silhouette
Step 1: Tape off your edges

Step 2: Sketch in your character

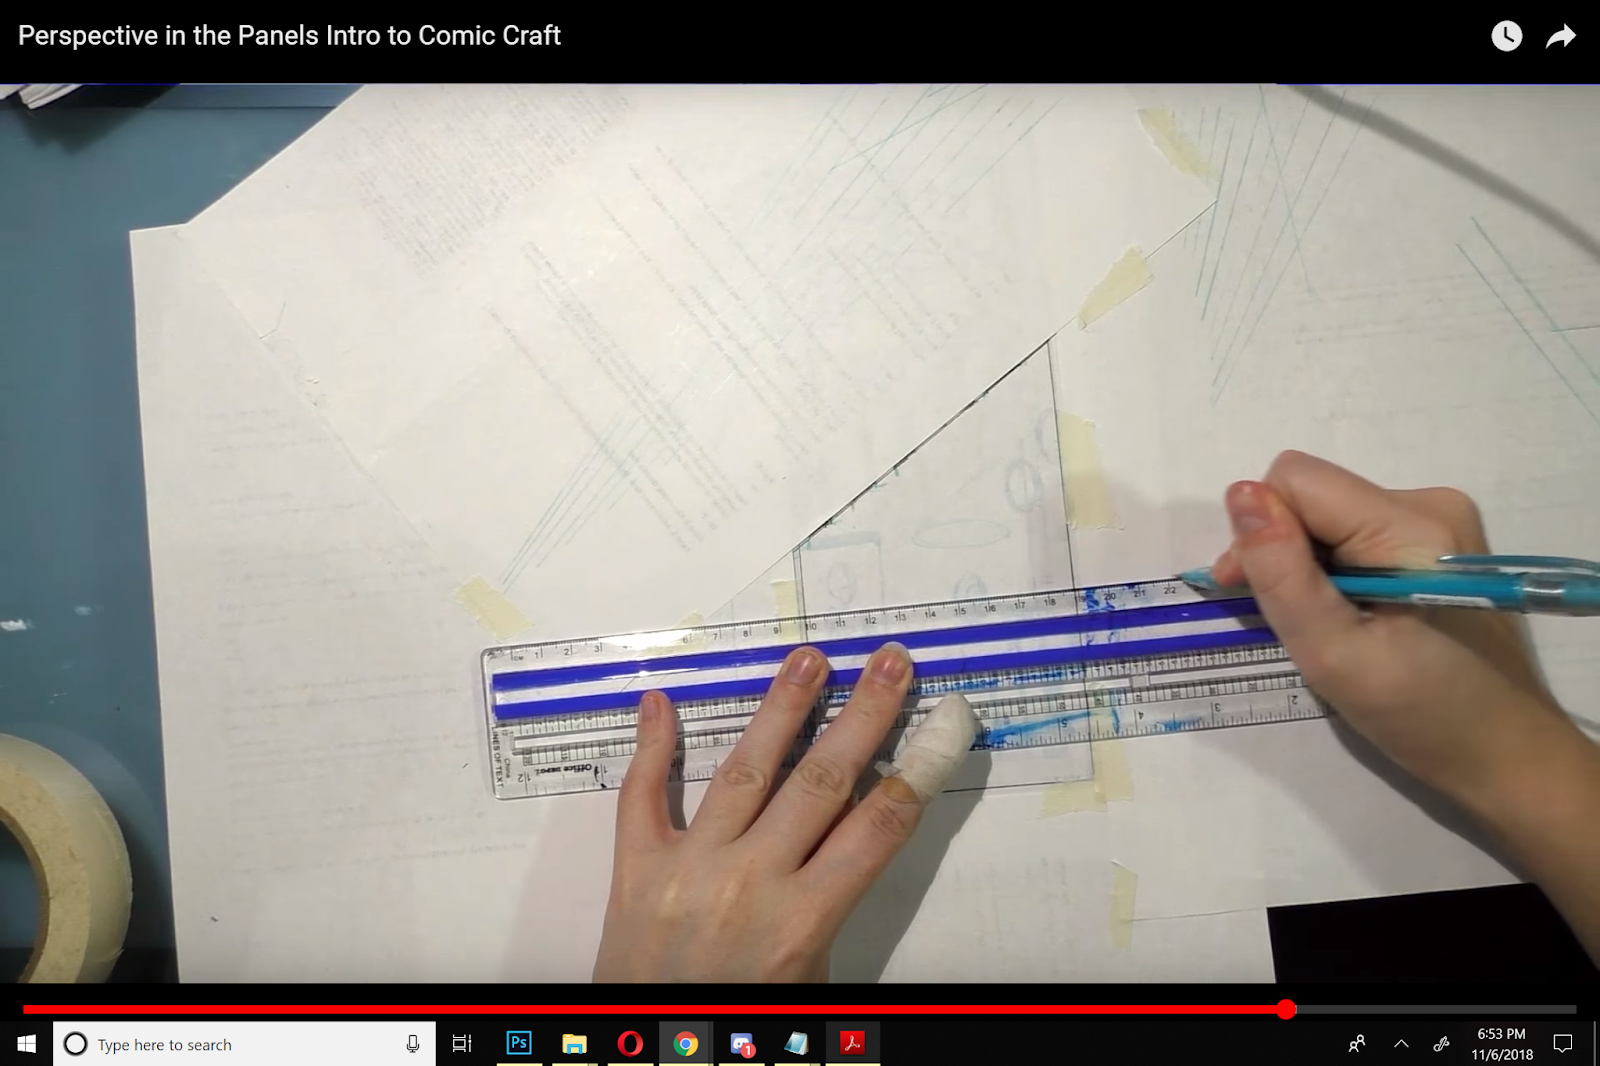
Step 3: With a ruler, tighten up your straight edges

Step 4: Pencil and tighten with graphite

Step 5: Remove Paper

PANEL 3- One Point Perspective
Step 1: Tape off your edges with scrap paper and masking tape
Step 2: With a ruler, determine your horizon line.
For this shot, it's about mid panel

Step 3: Determine your vanishing point.
For One Point Perspective, it's usually the middle of the panel
Step 4: Begin drawing lines radiating away from the Vanishing Point


Step 5: Begin blocking in your figures


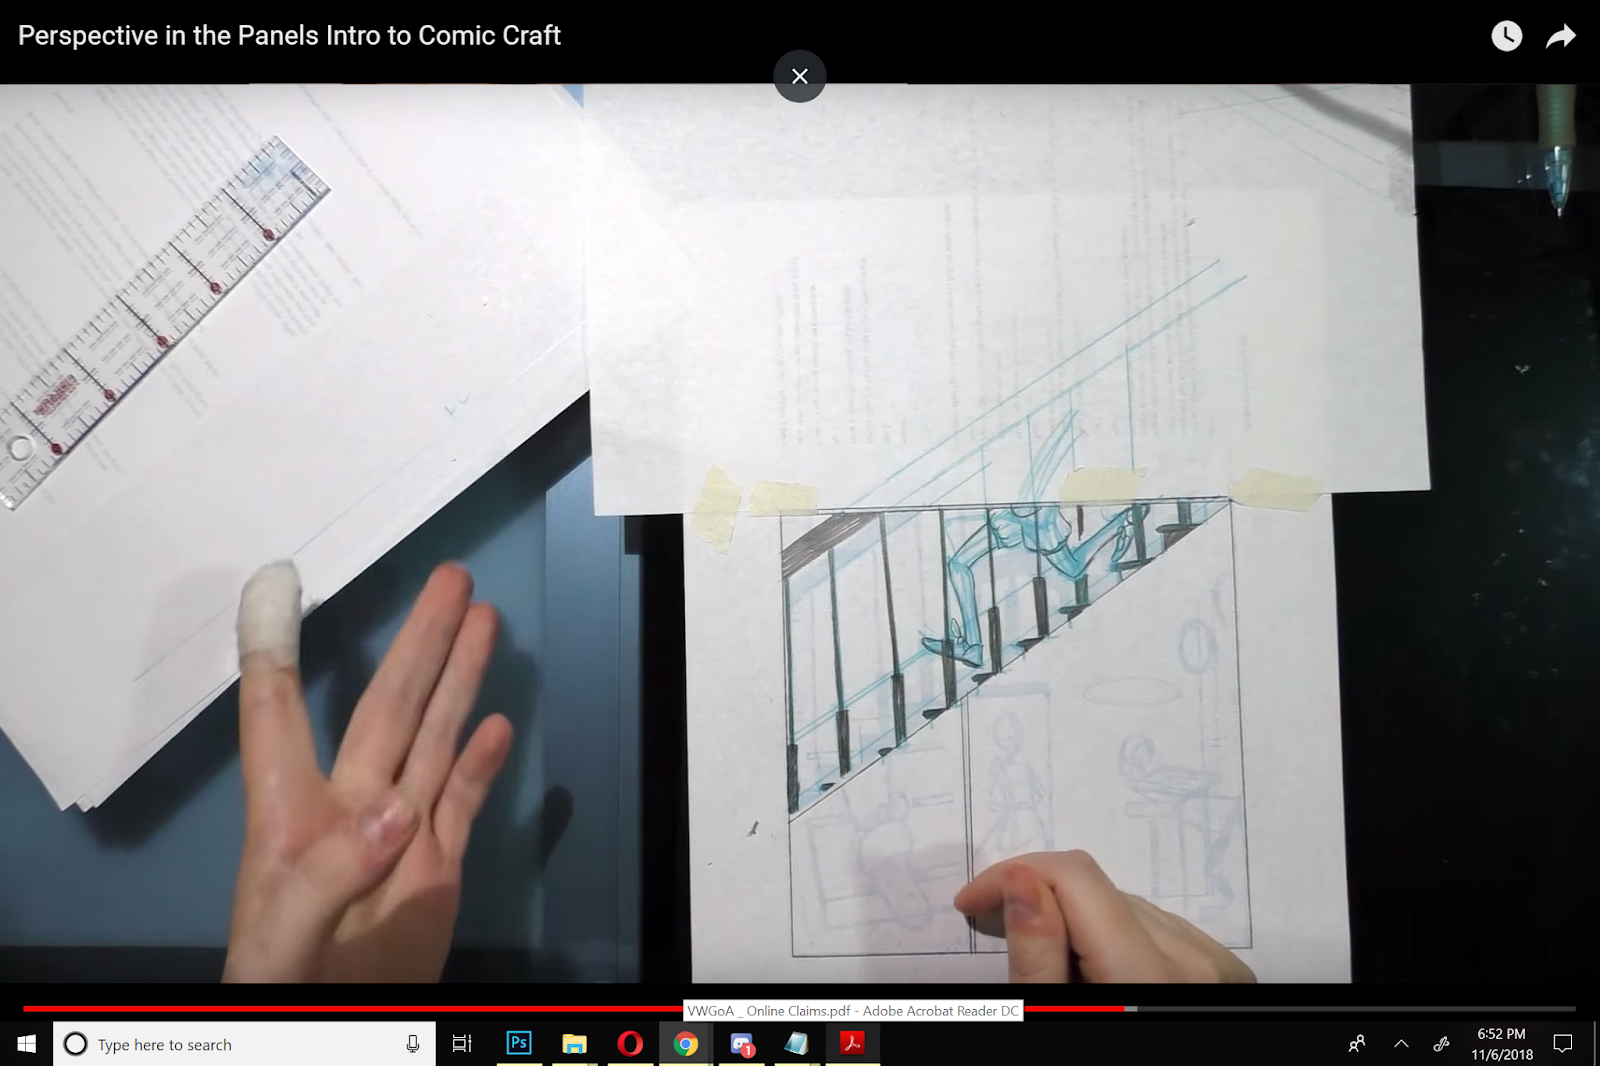
If necessary, pull up reference. In the below example, I have staged a shot of me falling down the stairs but catching myself, so I have good reference for Kara's pose in this panel.


Step 6: Tighten Up with Graphite
Step 7: Remove Paper

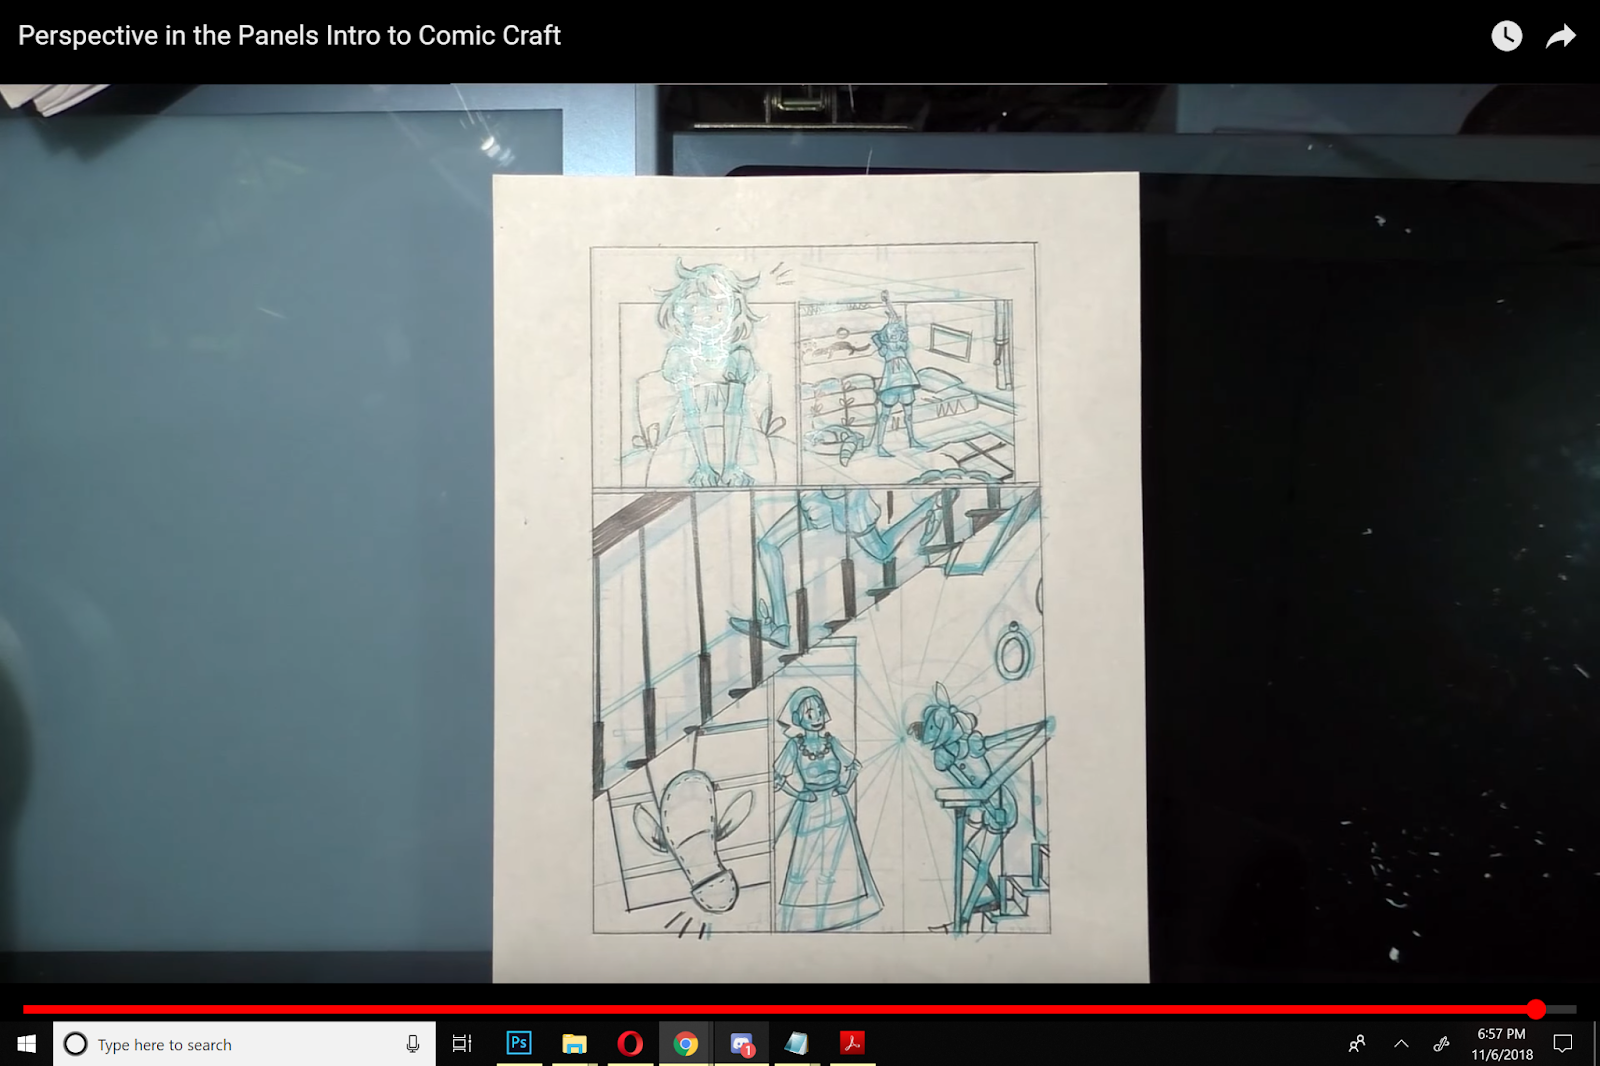
Et voila! Another page completed!
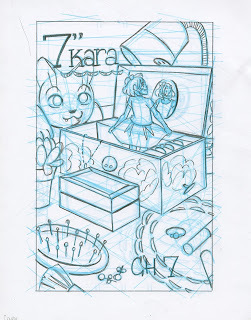
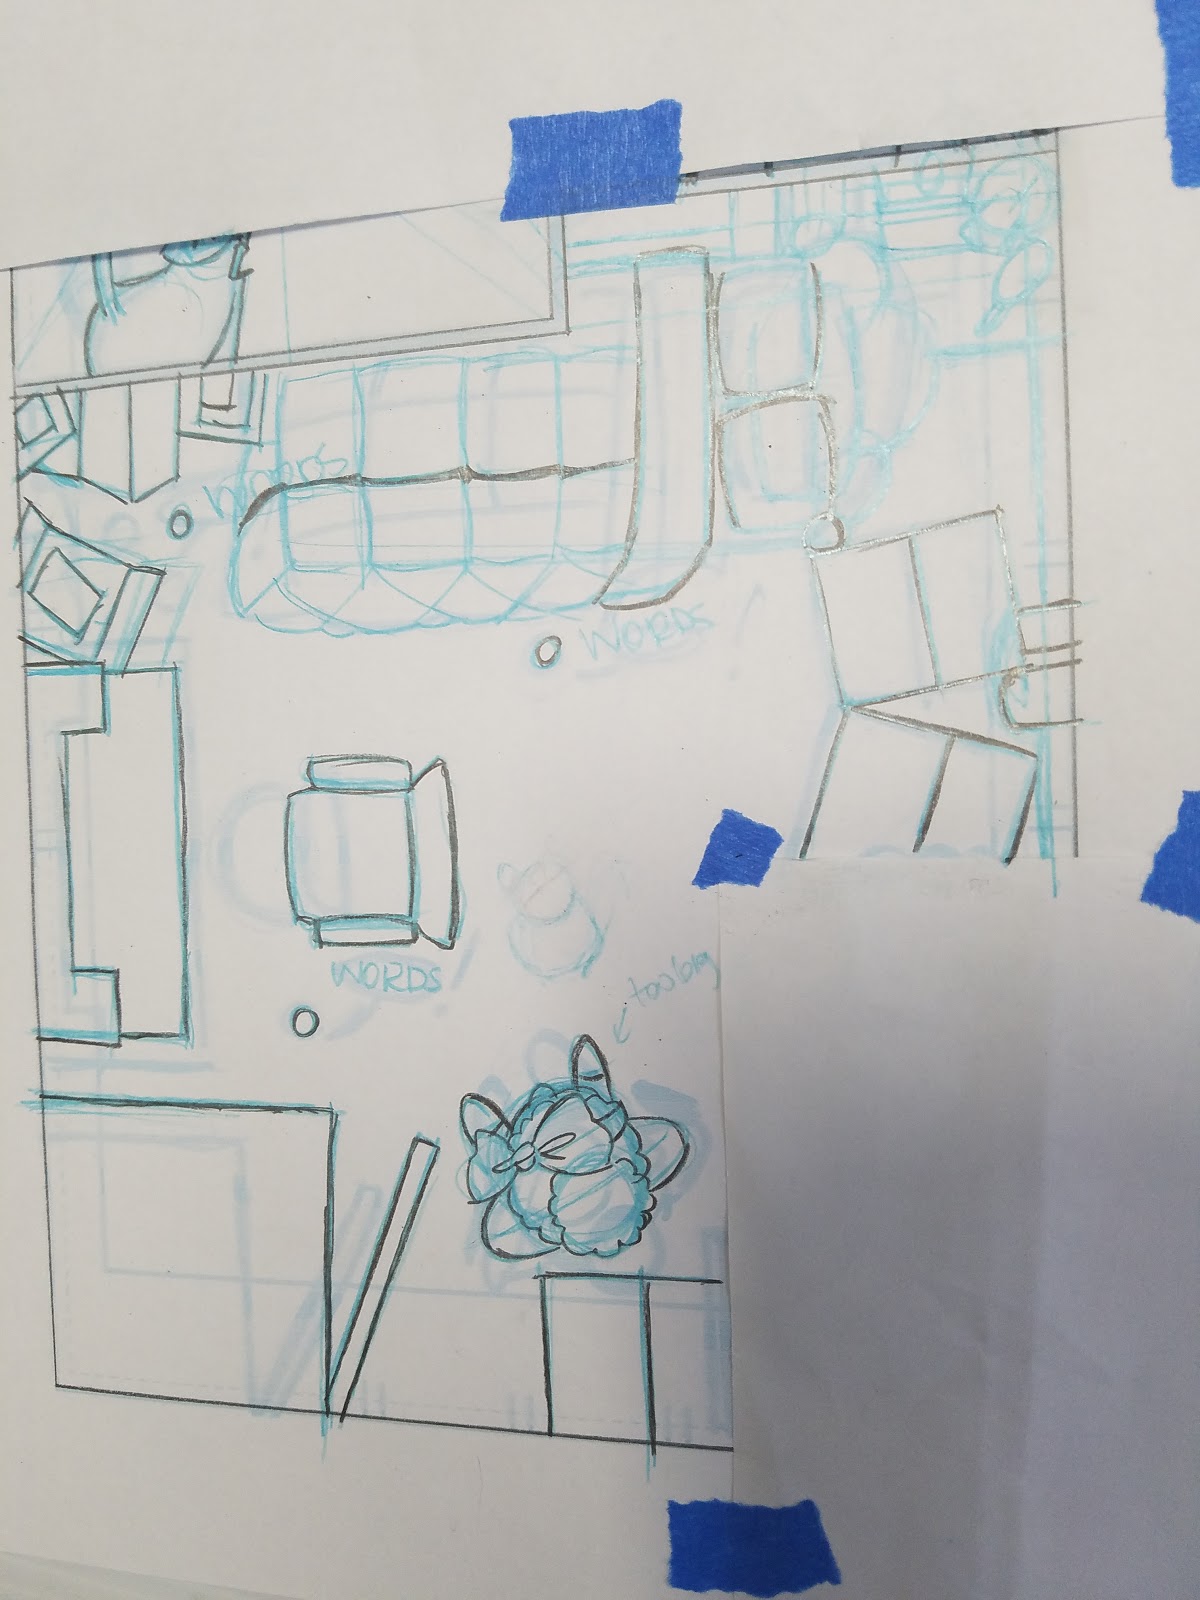
For a simple map view like the example below, you may not need to use perspective grids. If you were- you could go complicated and use 3 point perspective (great for birds eye view of cityscapes), or very simple with 1 point perspective. I opted to freehand it.
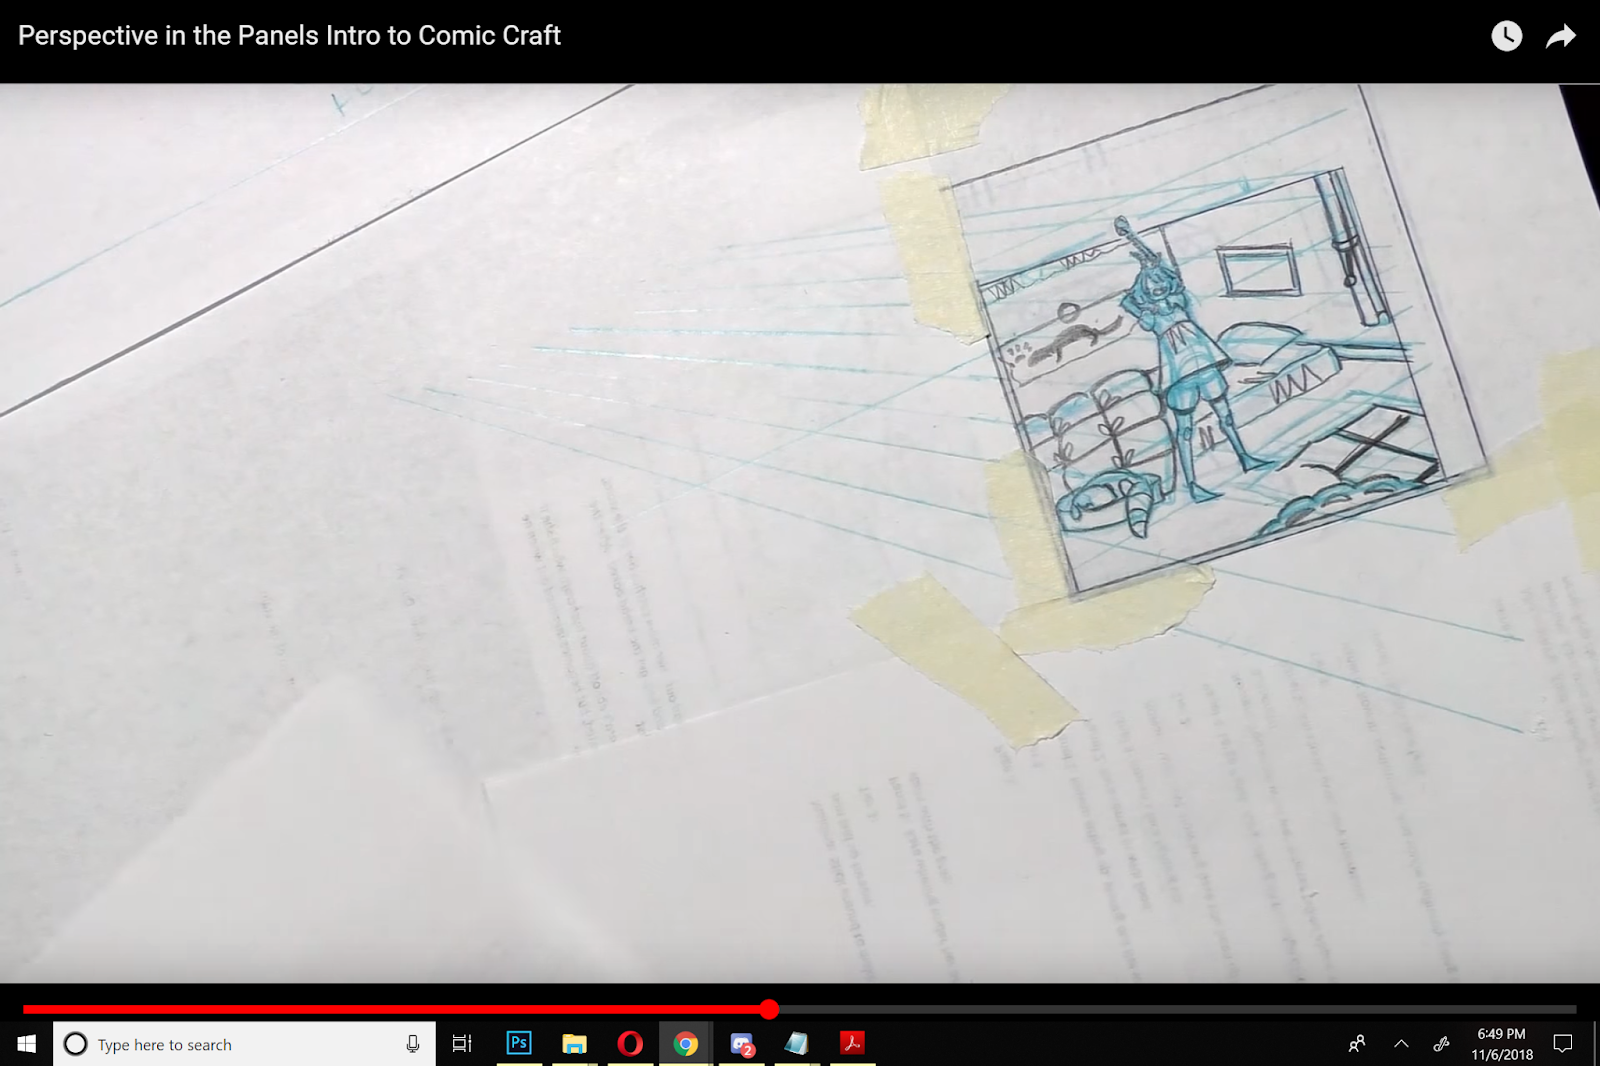
[image error] Printed bluelines. Additional paper has been taped on to mask and protect finished areas.
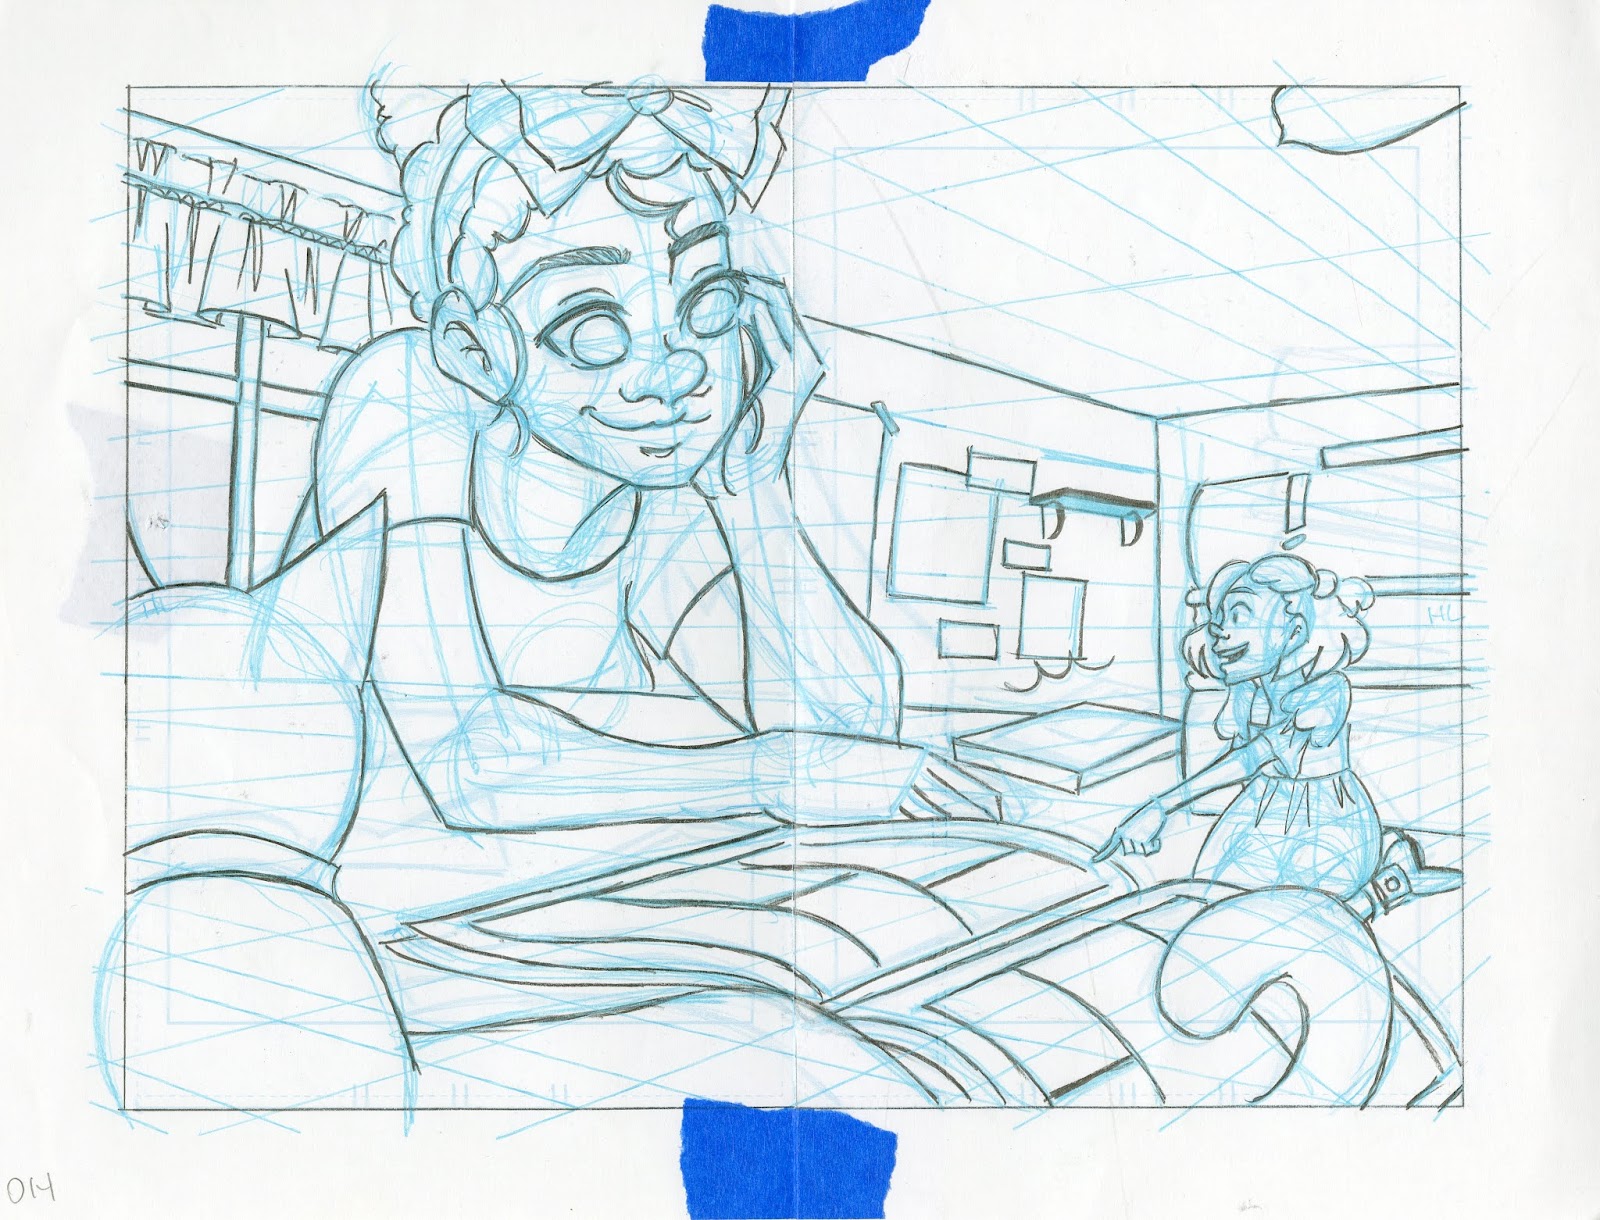
 Non photo blue sketching to tighten up the thumbnail
 Going over the bluelines with graphite, for the final sketch
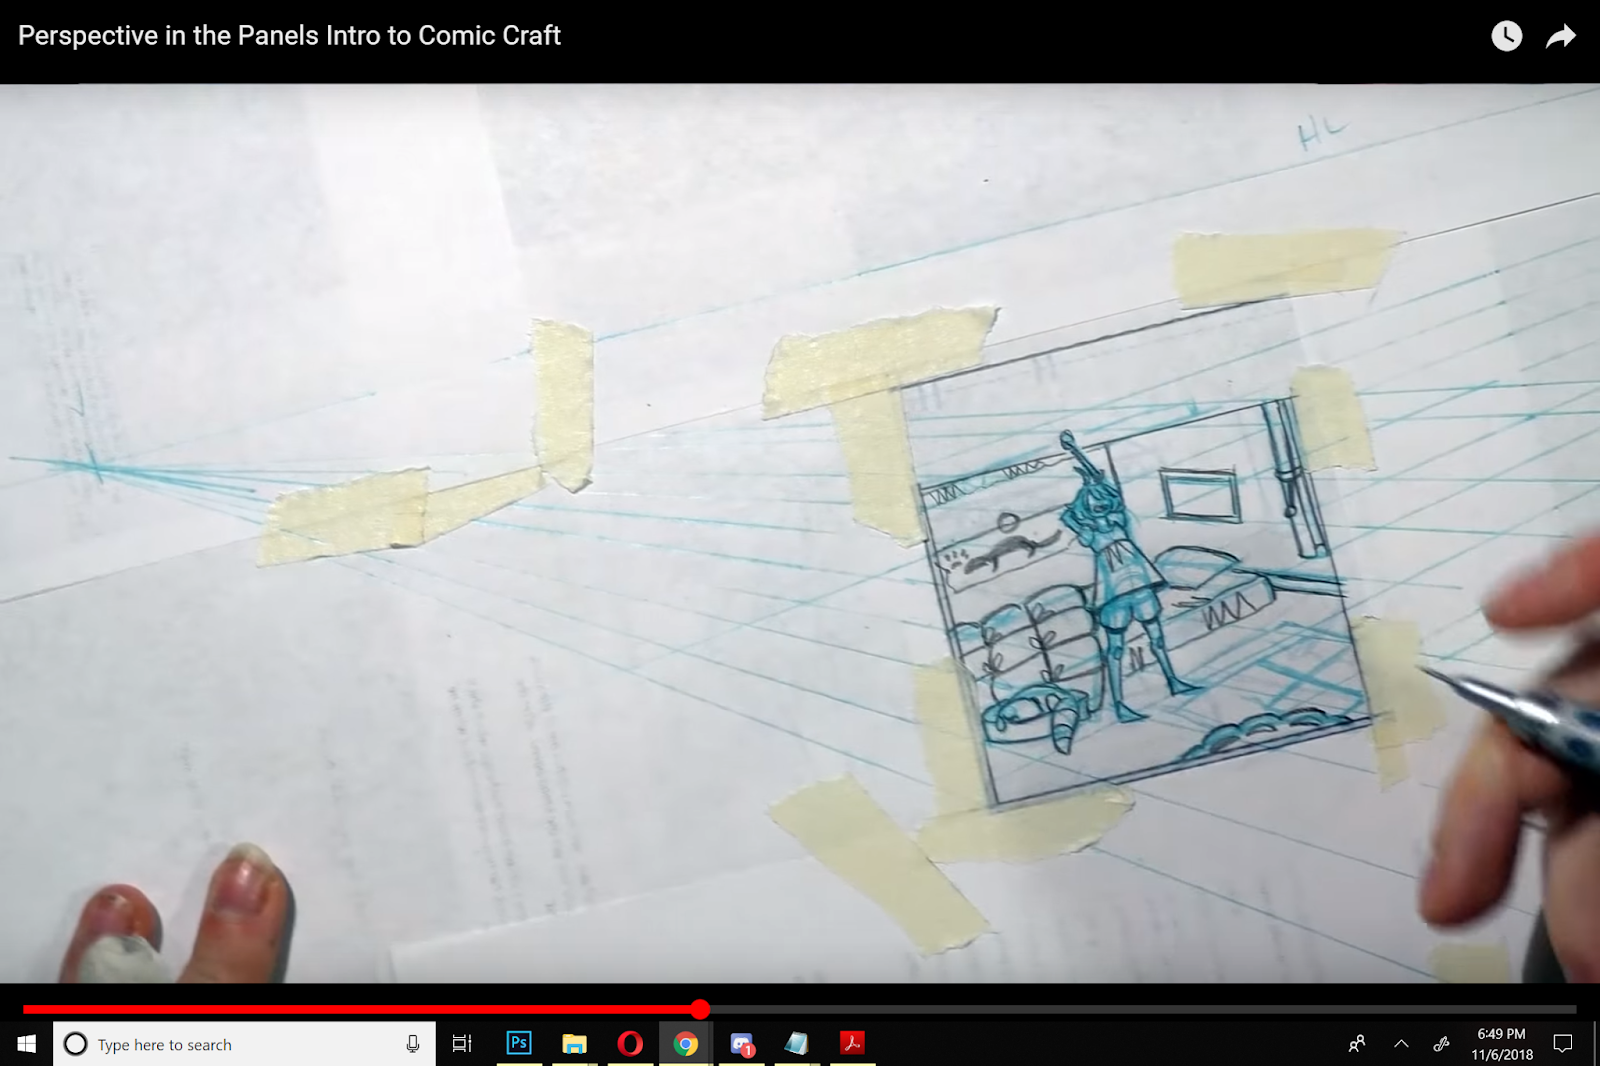
 A panel that has been taped off. Additional paper is taped around the 4 sides of the panel, to create enough room for me to lay down a perspective grid. Since w are looking down at the desktop in this image, the horizon line is high- above the panel.
Demonstrations:
Traditional Media:
Intro to Comic Craft: You Need PerspectivePerspective in the Panels: Intro to Comic CraftOne Point Perspective: Improvement HellImprovement Hell Challenge- 2 Point Perspective
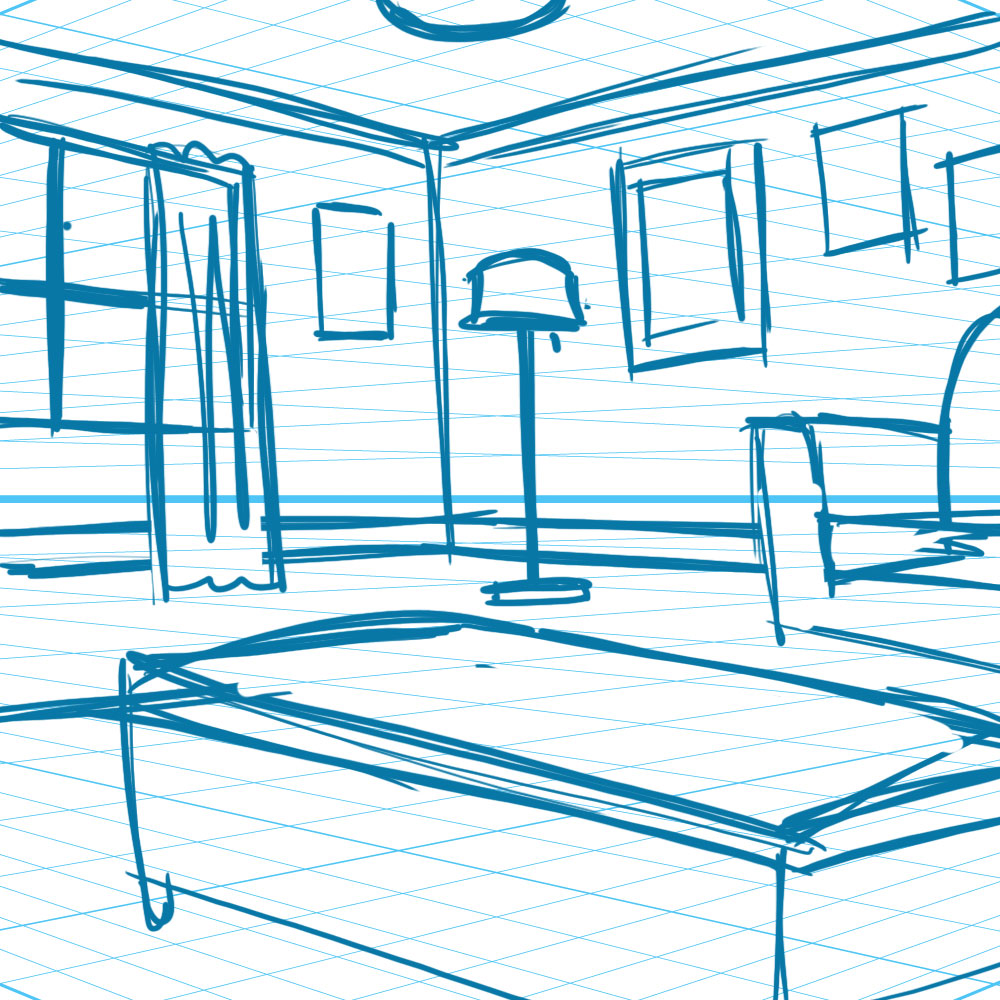
Digital Media:A recent discovery, Miconi's perspective brushes for Photoshop are a quick and easy way to slap down a perspective grid, perfect for sketching environments, doing mockups, or tightening up existing sketches. You can see these used in this post (the sketchy blueline drawings), and I plan on utilizing them often from here on out.
Prior to this, I kept my use of digital perspective grids to a minimum, which is why most of the links to Digital Media demonstrations will be outside links.
PHOTOSHOP:
Create Perspective Grids in Photoshop: 2 Quick and Easy Ways
Perspective Grid in Photoshop
How to Use the Vanishing Point Tool in Photoshop
Perspective Grid Tool in Adobe Photoshop Sketch
Photoshop Perspective Grid Brushes
ILLUSTRATOR:
Define Perspective Grids
Illustrator in 60 Seconds: The Perspective Grid
CLIP STUDIO PAINT/MANGA STUDIO
Manga Studio Grids: Manga Studio 5 and 5EX Tutorials: Perspective Rulers
How to 'Perspective' Manga Studion 5EX- Scribbles with Jonathan
Perspective for Comics: Google Sketchup Demo
PROCREATE
Perspective Grids
KRITA
Perspective Grid Tool
In Finished Art:
One Point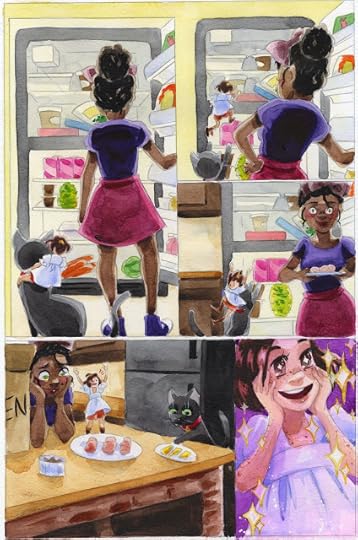


Two Point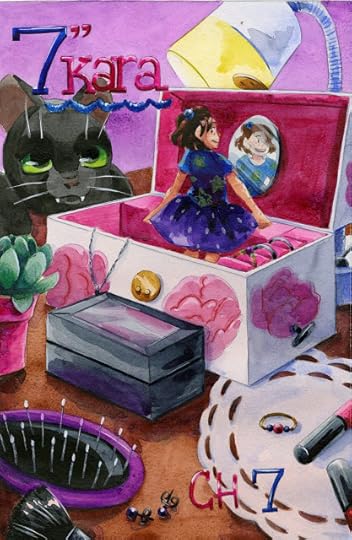

Isometric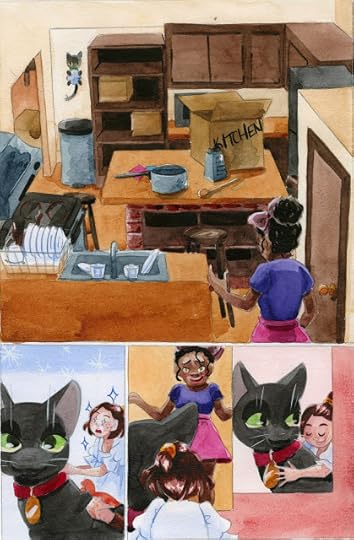

There are other tools at an artist's disposal for creating believable, inhabitable environments and backgrounds in their comics and illustrations. Many artists utilize Google's free SketchUp tool to create mock ups of environments that they can rotate, or zoom in to. Clip Studio Paint has perspective grid tools, and there are tons of downloadable grids that artists can use as templates.
Outside Resources and More Information:
What is a Vanishing Point in ArtWhat is one, two, and three point perspectiveHow the Horizon Line Controls Perspective in ArtWhat is a Vanishing Point in Art
One Point Perspective:
One Point Perspective Drawing: The Ultimate GuideWikipedia: Perspective (graphical)Artyfactory-Perspective Drawing-One Point PerspectiveHello Artsy: Beginner's Guide to One Point Perspective DrawingOne Point PerspectiveHow One Point Linear Perspective Works
Two Point Perspective:
Two Point Perspective
Three Point Perspective:
Bill Martin's Guide to Drawing: Three Point Perspective
The Basics of Three Point Perspective
Three or More Points of Perspective:
Understanding 6 Point Perspective New Perspective Systems
Digital Drawing Tools:
Photoshop Perspective Grid Brushes
Printable perspective grid templates:Printable Paper- Perspective GridFree Perspective GridsAyal Pinkus: Experiments in Comics: Perspective Grid Generator
Recommended Reading
David Chelsea's Perspective Books:
Perspective! for Comic Book Artists: How to Achieve a Professional Look in Your ArtworkExtreme Perspective! For Artists
Perspective in Action: Creative Exercises for Depicting Spatial
Representation from the Renaissance to the Digital Age
Andrew Loomis' Successful Drawing
Please consider donating to this blog or purchasing from Natto-shop (http://nattosoup.com/shop) if you want me to continue publishing quality content. All materials tested were purchased from my own pocket. Keep on Truckin' Nattosoup is not under any sponsorship.
I had a lot of difficulties learning the basics of perspective. It was demonstrated, quickly and poorly, in my Drawing Fundamentals class, using the age-old chestnut of boxes in perspective. It wasn't until I found Andrew Loomis's Successful Drawing, and then augmented that with a little pamphlet on perspective purchased at Michaels, now lost to the sands of time, that it started to click. For me, I needed more than just a single class introduction to perspective, I needed someone to walk me through every step.
 Spring 2009For my undergraduate senior project, a 20 page comic, I began tentatively using 1 point perspective to give my backgrounds depth.
The uses of linear perspective were really driven home during my first semester at SCAD, in Tom Lyle's drawing intensive. I was relying heavily on one point perspective for backgrounds at the time, but his class really forced me to practice 2 and 3 point perspectives. Extremely uncomfortable at first, the repeated practice helped make 2 point perspective second nature, so I highly recommend that if you decide to learn 2 point perspective, you practice it frequently until you understand it well.
 Fall 2010
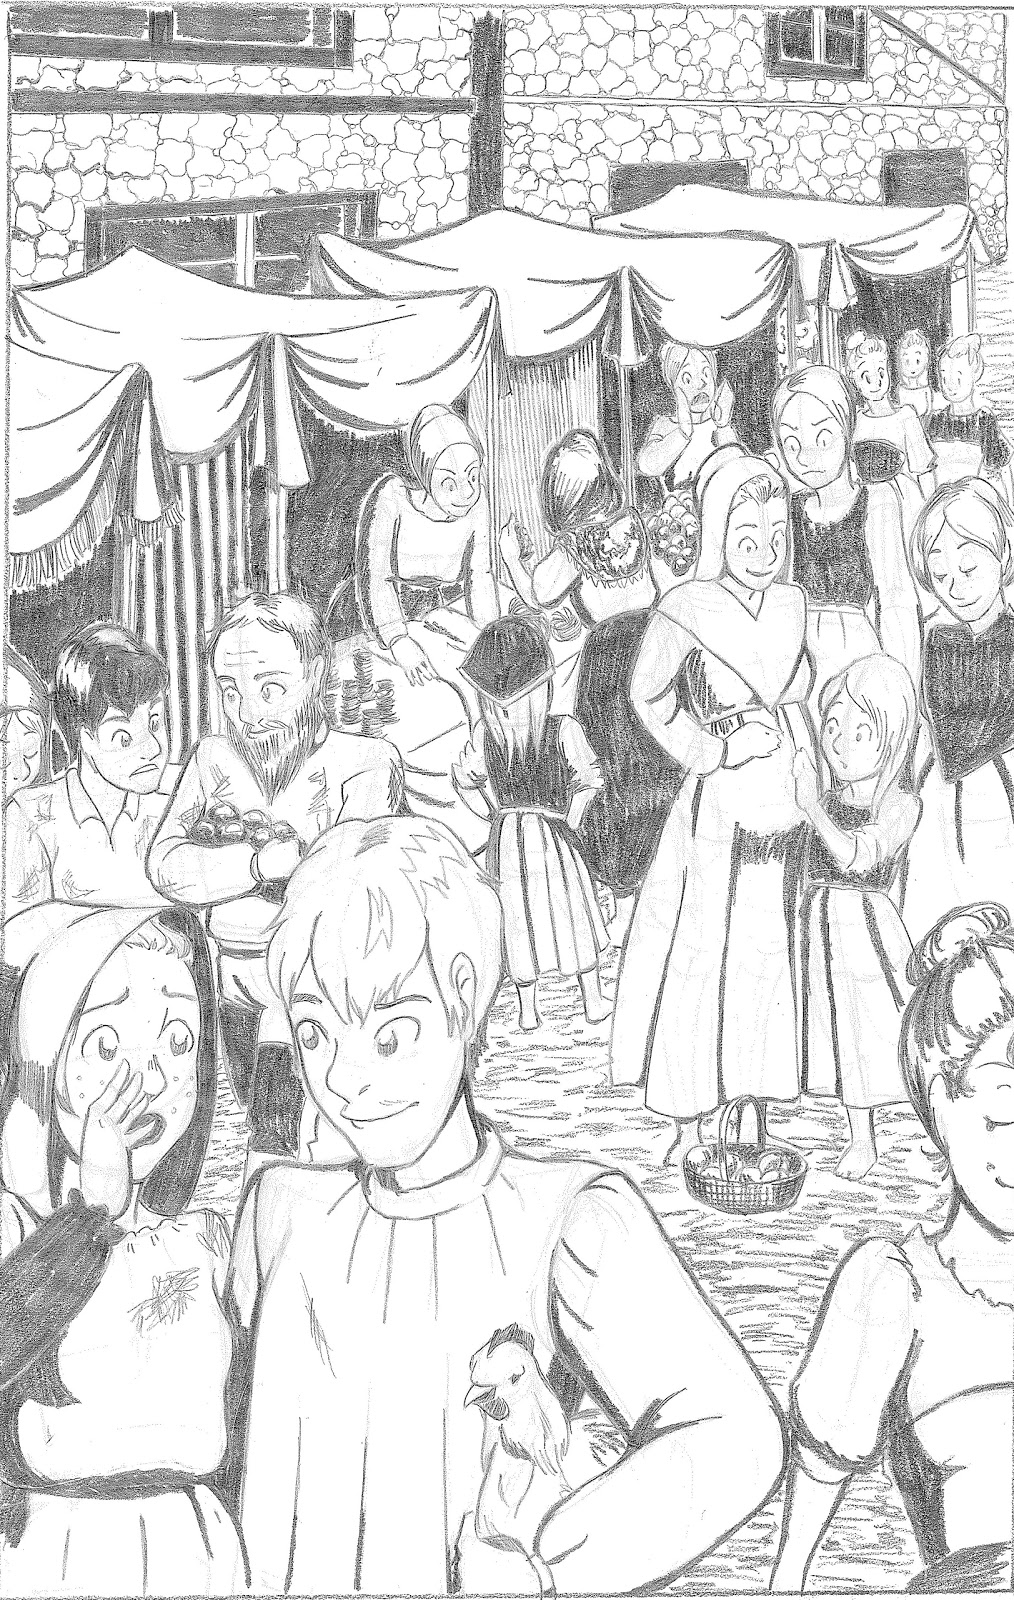 Fall 2010
 Fall 2010
 Fall 2010This class required us to do 4 11"x17" illustrations every two weeks. These illustrations were done without the aid of non-photo blue, nor the aid of multiple steps of revision- those concepts were introduced the next semester- I remember these assignments really kicking my butt, time and self esteem-wise, but I think if I were to revisit it now as a challenge, the thumbnail and roughs process would make for a quicker turnaround, and a stronger product. These were some of my first illustrations that utilized a 2 point perspective grid, and I tried to challenge myself to leave my comfort zone each time, drawing group scenes and in perspective texture.
Looking back, it might be fun to redraw these, using the same grids, but fixing the faces and clothes.
As rough as the art is in the above examples, the backgrounds are consistent with the art, and are fairly believable spaces. You don't have to be an expert for linear perspective to improve your illustration.
 Spring 2017I still set up my perspective by hand, a task that is tedious and frustrating. I wouldn't do it if I didn't find the end result worthwhile, but I will admit that there are digital tools (such as the perspective grid tools in Manga Studio/Clip Studio Paint) that can make this task much easier. There are even printable templates, as well as plastic templates you can slip under your panels, to aid in this task. So take what you need from this post, and alter it to suit your comic's needs. Maybe you need very simple backgrounds- the world isn't important, the character interactions are. Maybe you need elaborate natural scenes- then perspective isn't quite as necessary, but it certainly helps. Or perhaps you want to draw something superheroic and set in a city- then you certainly need to be familiar with 2 and 3 point perspective to accomplish breathtaking city sweeps and vistas.
Materials I Use in This Process:
Thumbnail page blown up, converted to non photo blue, and printed on printer paperScrap printer paperLow tack tape such as washi tape or blue painters tape12" clear acrylic ruler24" rulerNon photo blue leadGraphite pencil (B or softer)Erasers of various types
Setting Up My Workspace:
To create perspective grids for my comics, I need A LOT of room to work. Ideally, I am working at a table or drafting table, and can really spread out.
Intro to Comic Craft: You Need Perspective: Perspective In the Panels: Intro to Comic Craft:


The criss-cross of faint blue lines represents my perspective grids, drawn individually to suit the needs of the panel. Sometimes I use one point (the easiest grid to grasp, but somewhat boring for the viewer), but frequently I use two point to better capture the environment. For a comic like 7" Kara, where scale and size play important roles, showing the environment plays a vital part of my storytelling. While the environments aren't groundbreaking to the reader, they're a whole new world for tiny Kara, and I want the reader to experience some of the wonder that Kara feels as she explores her new environment. As the story progresses, I will introduce 3 point perspective shots, as well as birds eye and worms eye views, to create a sense of unease and tension.
Using grids should be considered a tool, a technique, an aid that helps you create comics, not an obstacle. I do think learning how to use this tool is worthwhile, but many comic artists successfully create comics with believable backgrounds without using linear perspective.
Linear Perspective
a type of perspective used by artists in which the relative size, shape, and position of objects are determined by drawn or imagined lines converging at a point on the horizon.Source
Perspective Grid
'perspective grid. A network of lines, drawn or superimposed on a photograph, to represent the perspective of a systematic network of lines on the ground or datum plane.'
Source
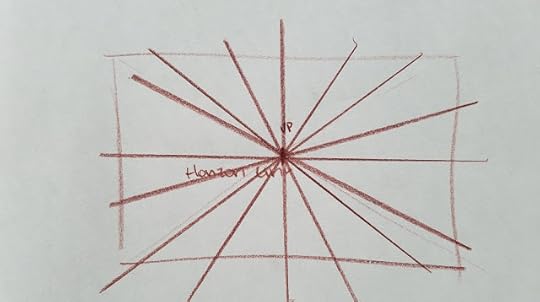
Horizon Line
The terms “horizon line” and “eye level” are often used synonymously. Horizon line/eye level refer to a physical/visual boundary where sky separates from land or water. It is the actual height of the viewer's eyes when looking at an object, interior scene, or an exterior scene.
Source
Vanishing Points:
the point at which receding parallel lines viewed in perspective appear to converge.Source
In a linear perspective drawing, the vanishing point is the spot on the horizon line to which the receding parallel lines diminish. It is what allows us to create drawings, paintings, and photographs that have a three-dimensional look.Source
One Point Perspective:


One point perspective is a drawing method that shows how things appear to get smaller as they get further away, converging towards a single 'vanishing point' on the horizon line.
Source
Note: Some artists try to fudge one point with the vanishing point way off to the side. For one point, the vanishing point should be in the middle of the picture plane, or near the middle, as that's the only way all points would converge towards a single point.
"...whole sides of an object-and therefore horizontal and vertical edges-are parallel to the picture plane..."Source
Two Point Perspective:
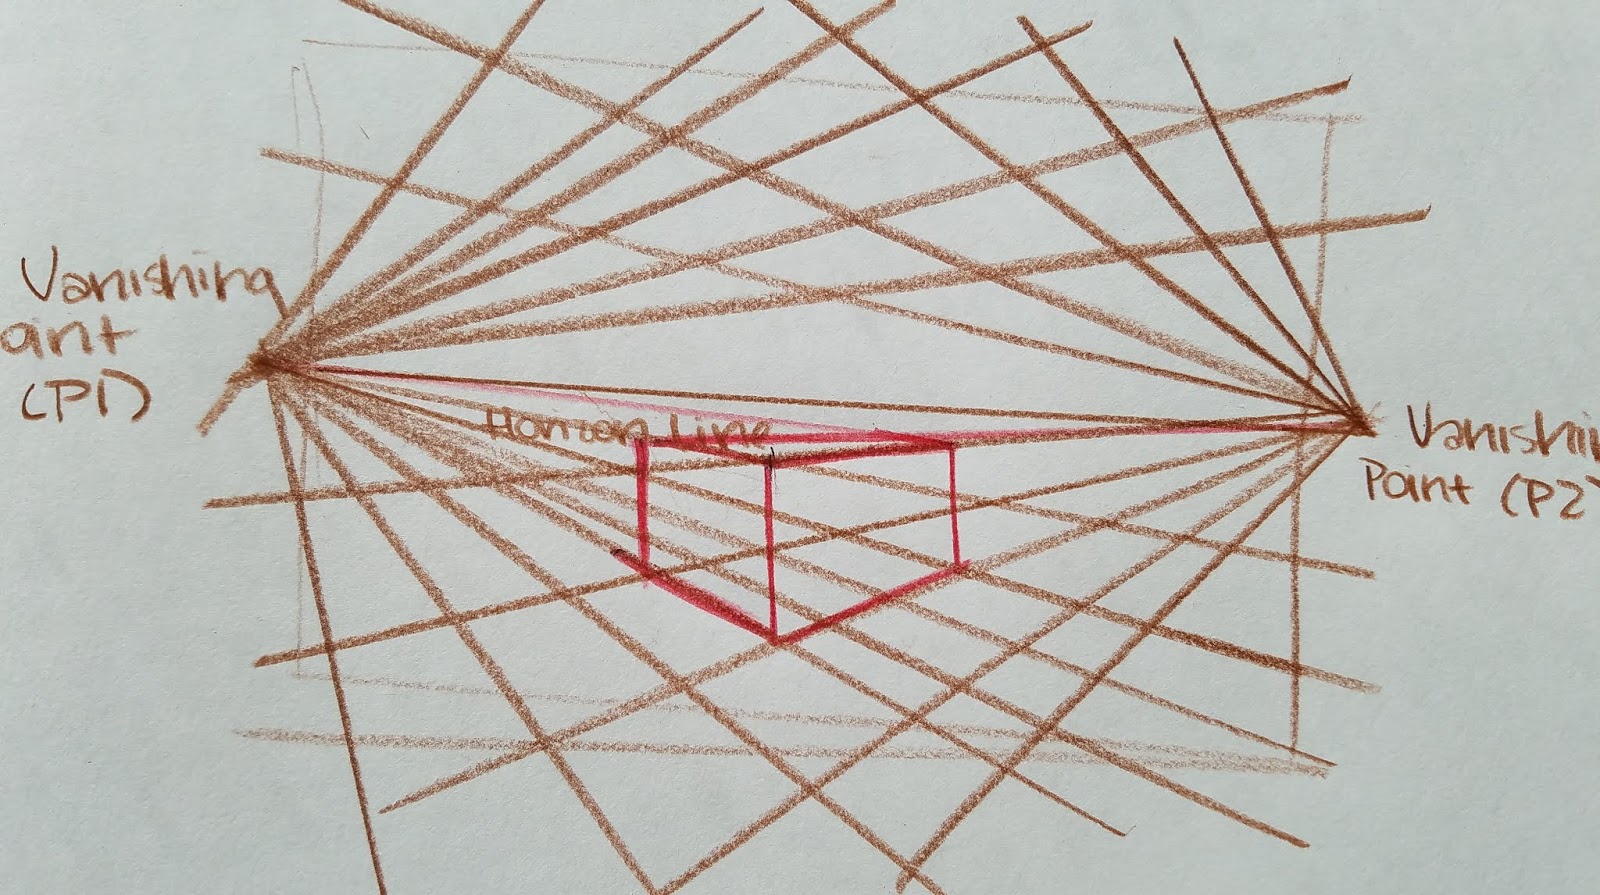
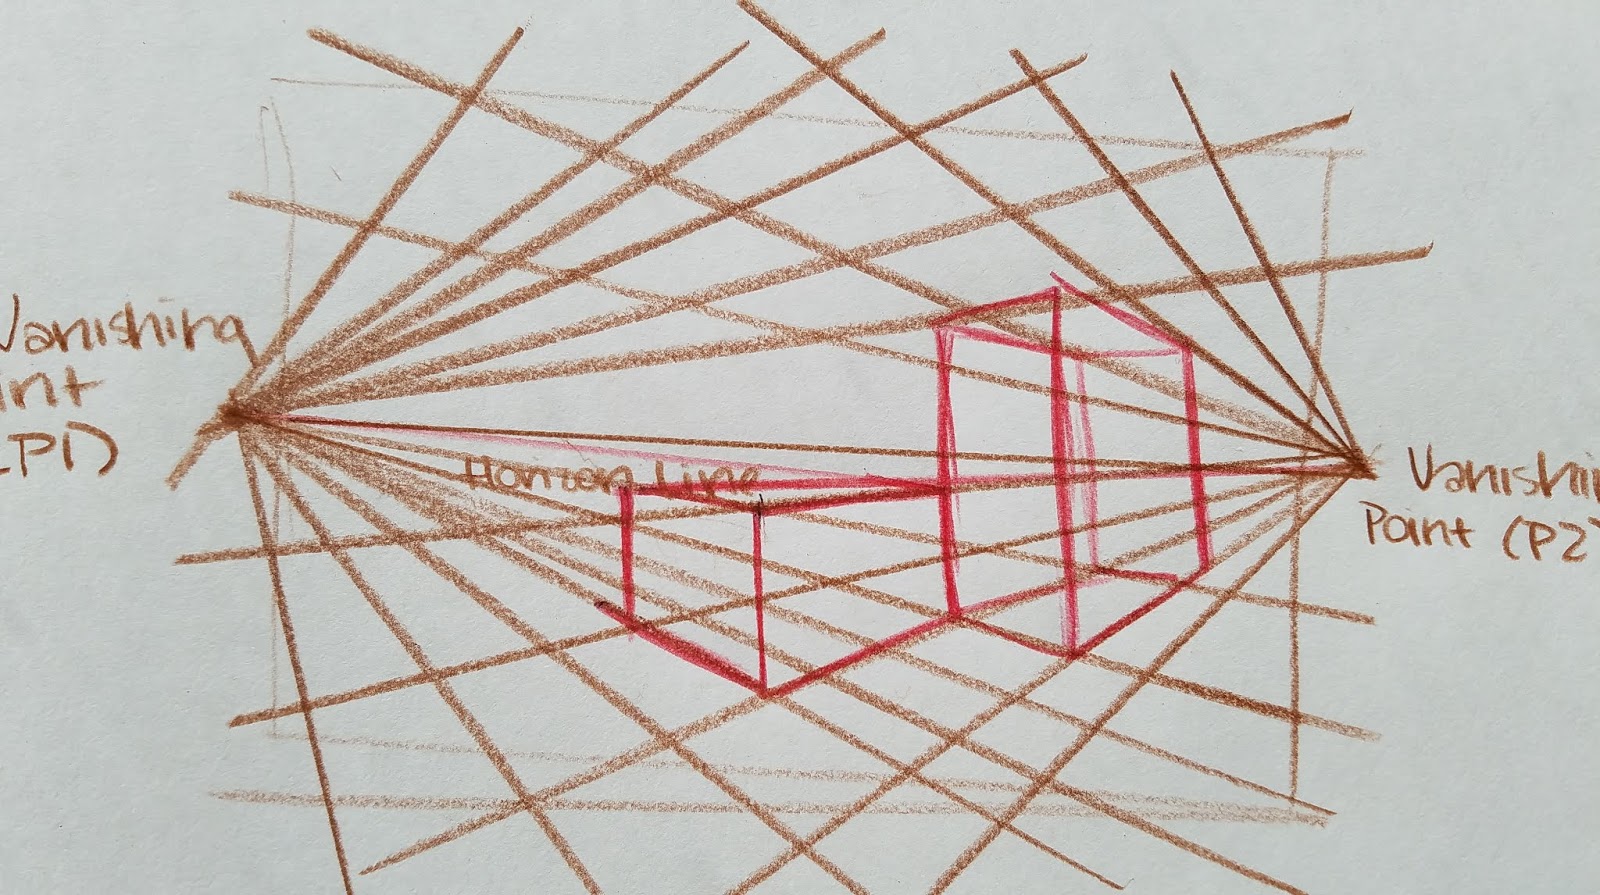

Definition of two-point perspective
linear perspective in which parallel lines along the width and depth of an object are represented as meeting at two separate points on the horizon…Source
"...only the vertical edges of rectangular objects are parallel to the picture plane..."Source
Three or More Point Perspective:

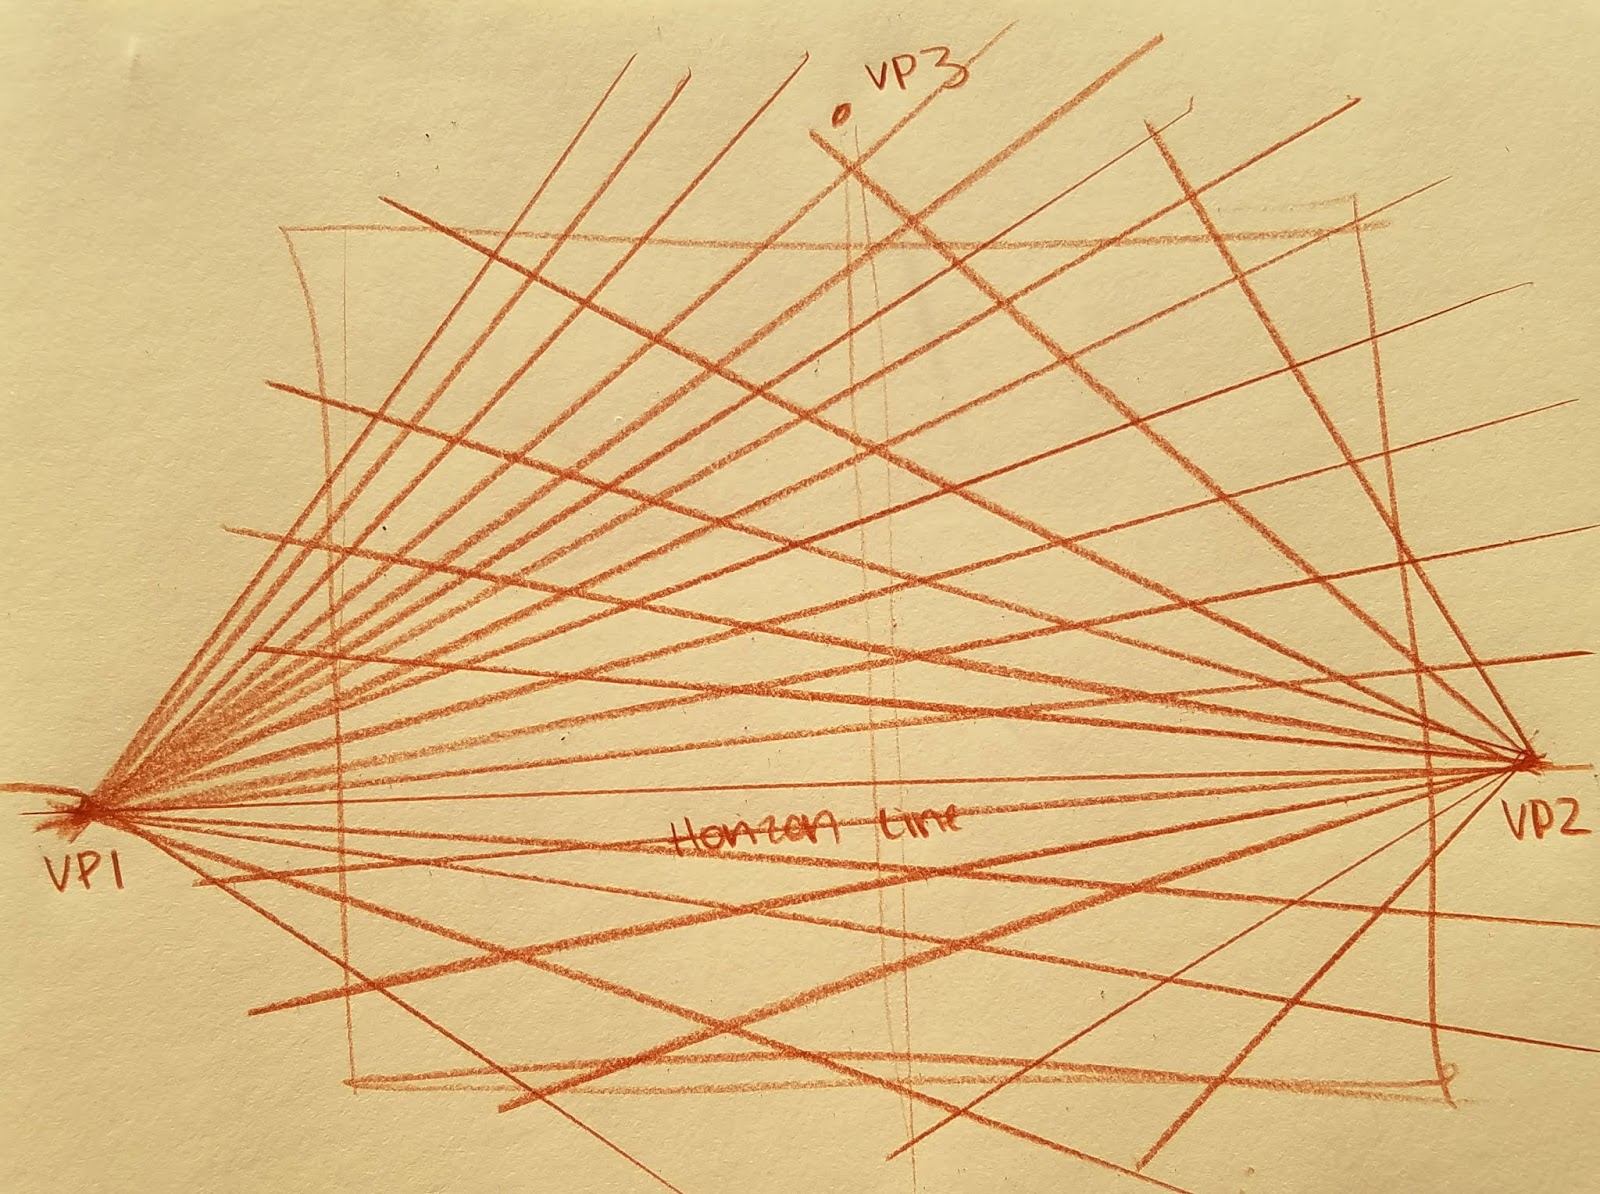

Definition of three-point perspective. : linear perspective in which parallel lines along the width of an object meet at two separate points on the horizon and vertical lines on the object meet at a point on the perpendicular bisector of the horizon line.Source
"...vertical edges are drawn to a vanishing point above or below the horizon. In three-point perspective there are no truly parallel lines in your drawing."
Source
Isometric Projection

Isometric projection is a method for visually representing three-dimensional objects in two dimensions in technical and engineering drawings. It is an axonometric projection in which the three coordinate axes appear equally foreshortened and the angle between any two of them is 120 degrees.
Source
Often used in top down videogames, in architectural plans, and for product designs.
Creating Perspective Grids by Hand:
Note: These are screencaps grabbed from my Perspective in the Panels video. If you learn best from observing, you should just watch that.
PANEL 1- Two Point Perspective
Step 1: Tape scrap paper to the four borders of your panel.

Step 2: Based on your thumbnail, determine where your horizon line should be.
How I do it:
I do tight thumbnails that include background and basic shot choices because I'm often quite accurate with estimating my perspective in small scale. So to determine my accurate horizon line, I will line my ruler up with the background lines (like say floorboards)- one from each side, and put a mark where the lines from each side would cross. That's usually a decent place to start for a horizon line.
Note: If you would like to see this demonstrated, shoot me an email!
This isn't surefire- sometimes I'll start doing my grids, realize they're all wrong, and have to erase the whole thing.
Step 3: Draw your horizon line
Step 4: Determine Where Your Vanishing Points Will Go
Using a similar technqiue as described in finding where my horizon line will go, I select a mid panel background line (such as a picture frame border), and extend it towards my horizon line. I may do this a couple more times, and average out which point will work best for the panel.
If you'd like to see this demonstrated, please email me!
Step 5: Begin Creating Your Perspective Grid
Draw lines radiating from your vanishing points


Step 6: Begin Fleshing Out Your Panels, Using the Grid as Your Guide
This is the stage that probably benefits most from demonstration. How you choose to approach it is up to you, and will change as you gain experience. I usually prefer to start by fleshing out the characters, then fleshing out the background, working from foreground to background, as this results in the least amount of erasing. If you're interested in learning how to stage characters in proportion, Andrew Loomis' Successful Drawing covers this in detail. As with perspective, these are techniques that may take some time to get the hang of, so practice is recommended!
Once I've drawn in my characters, using constructive figure drawing to construct them accurately, I begin drawing in the background, using the perspective grid as my guide. When drawing backgrounds, it's helpful to work from staged reference if accuracy is your goal- many artists even recreate their comic environments using 3D programs like Google Sketchup to make it easier to draw later on.
For a step by step video of this, please email me.


Step 7: Tightening Up Your Forms in Graphite

PANEL 2- Flat Silhouette
Step 1: Tape off your edges

Step 2: Sketch in your character

Step 3: With a ruler, tighten up your straight edges
Step 4: Pencil and tighten with graphite
Step 5: Remove Paper

PANEL 3- One Point Perspective
Step 1: Tape off your edges with scrap paper and masking tape
Step 2: With a ruler, determine your horizon line.
For this shot, it's about mid panel
Step 3: Determine your vanishing point.
For One Point Perspective, it's usually the middle of the panel
Step 4: Begin drawing lines radiating away from the Vanishing Point

Step 5: Begin blocking in your figures


If necessary, pull up reference. In the below example, I have staged a shot of me falling down the stairs but catching myself, so I have good reference for Kara's pose in this panel.

Step 6: Tighten Up with Graphite
Step 7: Remove Paper
Et voila! Another page completed!
For a simple map view like the example below, you may not need to use perspective grids. If you were- you could go complicated and use 3 point perspective (great for birds eye view of cityscapes), or very simple with 1 point perspective. I opted to freehand it.
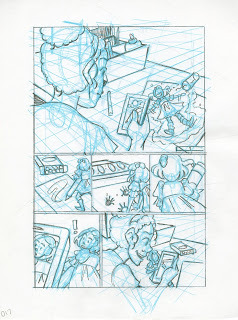
[image error] Printed bluelines. Additional paper has been taped on to mask and protect finished areas.
 Non photo blue sketching to tighten up the thumbnail
 Going over the bluelines with graphite, for the final sketch
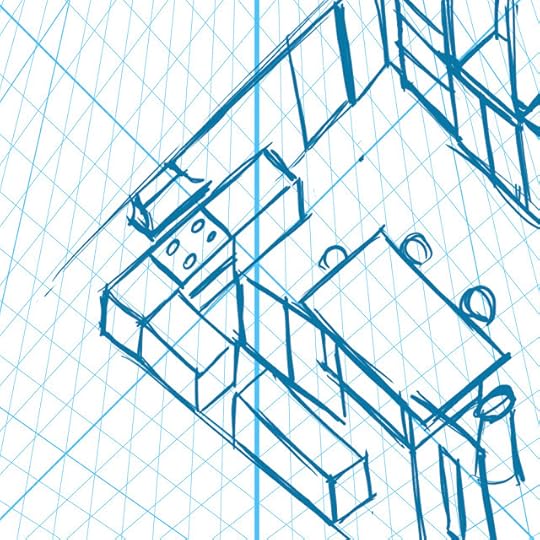
 A panel that has been taped off. Additional paper is taped around the 4 sides of the panel, to create enough room for me to lay down a perspective grid. Since w are looking down at the desktop in this image, the horizon line is high- above the panel.
Demonstrations:
Traditional Media:
Intro to Comic Craft: You Need PerspectivePerspective in the Panels: Intro to Comic CraftOne Point Perspective: Improvement HellImprovement Hell Challenge- 2 Point Perspective
Digital Media:A recent discovery, Miconi's perspective brushes for Photoshop are a quick and easy way to slap down a perspective grid, perfect for sketching environments, doing mockups, or tightening up existing sketches. You can see these used in this post (the sketchy blueline drawings), and I plan on utilizing them often from here on out.
Prior to this, I kept my use of digital perspective grids to a minimum, which is why most of the links to Digital Media demonstrations will be outside links.
PHOTOSHOP:
Create Perspective Grids in Photoshop: 2 Quick and Easy Ways
Perspective Grid in Photoshop
How to Use the Vanishing Point Tool in Photoshop
Perspective Grid Tool in Adobe Photoshop Sketch
Photoshop Perspective Grid Brushes
ILLUSTRATOR:
Define Perspective Grids
Illustrator in 60 Seconds: The Perspective Grid
CLIP STUDIO PAINT/MANGA STUDIO
Manga Studio Grids: Manga Studio 5 and 5EX Tutorials: Perspective Rulers
How to 'Perspective' Manga Studion 5EX- Scribbles with Jonathan
Perspective for Comics: Google Sketchup Demo
PROCREATE
Perspective Grids
KRITA
Perspective Grid Tool
In Finished Art:
One Point


Two Point


Isometric


There are other tools at an artist's disposal for creating believable, inhabitable environments and backgrounds in their comics and illustrations. Many artists utilize Google's free SketchUp tool to create mock ups of environments that they can rotate, or zoom in to. Clip Studio Paint has perspective grid tools, and there are tons of downloadable grids that artists can use as templates.
Outside Resources and More Information:
What is a Vanishing Point in ArtWhat is one, two, and three point perspectiveHow the Horizon Line Controls Perspective in ArtWhat is a Vanishing Point in Art
One Point Perspective:
One Point Perspective Drawing: The Ultimate GuideWikipedia: Perspective (graphical)Artyfactory-Perspective Drawing-One Point PerspectiveHello Artsy: Beginner's Guide to One Point Perspective DrawingOne Point PerspectiveHow One Point Linear Perspective Works
Two Point Perspective:
Two Point Perspective
Three Point Perspective:
Bill Martin's Guide to Drawing: Three Point Perspective
The Basics of Three Point Perspective
Three or More Points of Perspective:
Understanding 6 Point Perspective New Perspective Systems
Digital Drawing Tools:
Photoshop Perspective Grid Brushes
Printable perspective grid templates:Printable Paper- Perspective GridFree Perspective GridsAyal Pinkus: Experiments in Comics: Perspective Grid Generator
Recommended Reading
David Chelsea's Perspective Books:
Perspective! for Comic Book Artists: How to Achieve a Professional Look in Your ArtworkExtreme Perspective! For Artists
Perspective in Action: Creative Exercises for Depicting Spatial
Representation from the Renaissance to the Digital Age
Andrew Loomis' Successful Drawing
Please consider donating to this blog or purchasing from Natto-shop (http://nattosoup.com/shop) if you want me to continue publishing quality content. All materials tested were purchased from my own pocket. Keep on Truckin' Nattosoup is not under any sponsorship.
November 1, 2018
When Good Shows Go Bad: Dealing with Inclement Weather
Handmade and Bound Con Recap
I ended up catching a really nasty cold after doing Handmade and Bound. I think most of the damage was done Friday. It's not that I didn't prepare for the cold at all, it's that the cold didn't adhere to that day's weather forecast, and I'd forgotten that sitting all day in the cold, in the shade (even on a beautifully bright day) is much different from being in the sun, in partial sun, or being able to walk around. By Saturday, I knew not to trust the weather forecast, and brought a blanket and an compression glove, but no hat or scarf. By Sunday, I had a scarf, but the weather warmed up enough that it wasn't quiiite necessary. It would've been almost pleasant, if it hadn't rained the entire day.
Heat. Cold. Damp. Even lighting conditions can play a huge role in not only how your sales weekend goes, but in how you feel emotionally and physically.
With outdoor shows, keep in mind that you're going to be out in the elements all day- an hour stretch, moving, is one thing, but sitting beneath a tent on a cold day can really be taxing. A one day show, like the Nashville Cherry Blossom Festival, can be bad enough when the weather turns ugly, but it really becomes a slog when you have multiple days of inclement or harsh weather. Also remember that weather forecasts aren't perfect by far- you try to prep, but you may still be caught unprepared. Keeping some of these items in your car, just in case, can prove quite beneficial.
Any Weather
Drink plenty of water
Bring snacks
Dress in layers- often the day starts off cool and dewy and heats up fast
Consider investing in a tent- owning rather than renting can help save money in the long run
These are a great place to start:
Amazon Basics Pop Up Canopy Tent-10'x10'HomGarden 10'x10' Outdoor White Gazebo Tent with SidewallsEzyFast Elegant Pop Up Beach Shelter
Heat
Rest ice, or ice cold bottled water, against your wrists, back of neck, or hold it in your palms
Dress in layers, so as the day heats up, you can remove layers to adjust your comfort
Make sure your table is in a shady spot, or bring umbrellas to create your own shade
Wear a brimmed hat and sunglasses
Take breaks to cool down
Take breaks to eat
Bring disposable ice packs to keep your food and drinks cold
Stay hydrated!
Cold
Invest in either disposable hand/body warmers, rechargeable, or both
Dress in layers- wear fleece lined leggings or UnderArmor, warm, fluffy socks, bring hat, scarf, and gloves
Bring a small lap blanket
Drink hot beverages
Take breaks to eat- you'll need your energy!
Wet
Lay Visqueen (plastic lining) or a tarp beneath your table if you store stock under the table.
Carry all goods in plastic containers with lids on when not accessing goods- Dollartree has a decent, inexpensive selection, and Sterilite is an inexpensive option available in a variety of sizes
Invest in a wheeled, locking, plastic storage trunk to store merchandise safely
Stanley 50 Gallon Mobile Chest: https://amzn.to/2R8QSYGJ Terence Thompson Large Wheeled Storage Trunk: https://amzn.to/2Sd1s2nContico Storage Locker, 23 Gallon Storage Locker: https://amzn.to/2RfKvmPSterilite Footlocker: https://amzn.to/2CYtWbX (pack of 2)Remington Heavy Duty Weathertight Storage Trunk: https://www.academy.com/shop/pdp/remi... Storage Locker: https://www.academy.com/shop/pdp/plan... in side walls for your tent, or stretch tarps across the open walls
Consider an abbreviated setup
Dark
Purchase inexpensive, battery powered LED lights either from DollarTree or Amazon.
I happen to really like these:
Stick On Tap Light: https://amzn.to/2D609y0Touch Activated Stick On Lights: https://amzn.to/2CFZUIMWhite LED Party Lights for Paper Lanterns: https://amzn.to/2CD4vLXString Lights, Indoor/Outdoor, Battery Operated: https://amzn.to/2D4OJu9
Other Experiences with Wild Weather:
Torrential Rain
Cherry Blossom Festival Recap (2018)
Cherry Blossom Festival Recap (2017)
Dark:
Firefly Artisan Fair
Don't let weather completely deter you from outside events- many of my best shows are outside. Outdoor events attract families, and if the weather's cooperating, people are often in a laid back, congenial mood.
Please consider donating to this blog or purchasing from Natto-shop (http://nattosoup.com/shop) if you want me to continue publishing quality content. All materials tested were purchased from my own pocket. Keep on Truckin' Nattosoup is not under any sponsorship.
October 22, 2018
Blick Studio Brush Markers Update
Blick Studio Brush Refills
For those of you not yet familiar with the wonderful Blick Studio Brush markers, a fantastic, affordable Copic dupe that are now refillable, allow me to catch you up to speed!
 Original Blick Studio Brush marker test, when my collection was limited to just 10 test markers, mostly skintones.
Blick Studio Brush Markers are part of Blick's store brand, which includes a variety of art supplies. Originally only available in bullet nib and chisel (Blick Studio Marker), Blick Studio Brush Markers came out in 2015, and quickly became my favorite non-Copic alcohol marker. You can check out my Original Blick Studio Brush marker review - since then, my collection of Blick Studio Brush Markers has increased greatly.
Blick Studio Brush Markers are available in 95 colors, plus a colorless blender. They feature removable brush and chisel nibs (although no replacements available yet) which are similar to the Copic Superbrush nibs- dense foam rubber capable of delivering and blending color smoothly, without abrading the nib or tearing up the paper surface. These markers utilize color names, as well as a color family system to help you select the colors you need for blending. These markers are now refillable.
Sets are available in 6, 12, 24, 48, and 96 colors, or you can purchase the entire line openstock, starting at $2.98. Blick offers mix and match bulk discounts, and the price drops to $2.68 a marker as soon as you have six markers in your cart.
$2.98 each through DickBlick
Refills are available in 95 colors, and are $3.99 each through Dickblick.
Copic Sketch Markers are available in 360 colors, feature removable and replaceable chisel and brush nibs (as well as a system of compatible nibs to suit your needs), and are refillable. For me, the selling point is the foam rubber Supernib, which is capable of delivering broad strokes or subtle lines, and allows me to do delicate blends, and these are the markers I compare all other alcohol markers to.
$5.24 each through DickBlick
Copic Ciao markers are the younger sibling to Copic Sketch Markers. Smaller bodied, these markers are refillable, and have the same Superbrush nibs as Copic Sketch Markers. These were released a few years after Copic Sketch Markers, and never got the attention they deserved as an affordable introduction to Copic markers. Available in 144 colors, Ciaos are available openstock or in sets of 12, 24, 36, or 72.
$3.59 each through DickBlick
Copic Various Ink Refills work for all markers made by Copic, and are $5.23 through DickBlick
Blick Studio Brush markers feature a body very similar to Copic Sketch Markers, and are compatible not only with Copic markers, but with Copic marker systems and accessories. Kabocha covers that in her wonderful guest post Will It Work? Testing Blick Studio Brush markers in the Copic ABS .
I've integrated Blick Studio Brush markers seamlessly into my existing Copic marker collection. They're about the same size, and perform as well, so there's no need to store them seperately. At this point, most marker pieces I create are a mix of Copic, Prismacolor, and Blick Studio Brush markers.


All of the above alcohol marker pieces were created using a mix of Copic Sketch markers, Blick Studio Brush Markers, and Prismacolor markers.
More Alcohol Marker Resources:
Marker Guides and Recommendations
The lists and overviews below are my recommended alcohol markers. I go over how the markers differ from one another, usecases for each brand, and even recommended colors to get you started! I really recommend you read the Intermediate Marker Gift Guide (the second gift guide listed) as I also talk about great accessories and tools for marker artists, and you may find a new favorite!
List of Top 5 Alcohol Markers
Alcohol marker gift guide with color recommendations for those just starting their alcohol marker collection.
Follow up alcohol marker gift guide for intermediate alcohol marker uses, with loads of great accessory recommendations to really take your marker collection to the next level.
Alcohol Marker Tutorials:
Most of these tutorials use a combination of Blick, Prismacolor, and Copic markers, although a few use the alcohol ink refills (or Jacquard Pinata/Ranger Adirondack alcohol inks)
More than Just Copics: Expanding Your Alcohol Marker Collection
Covers ways to add to your existing marker collection, as well as organization
Using Brusho Watercolors with Alcohol Markers
Covers masking with frisket, mixed media with markers and watercolor, and a Brusho demonstration
How to Use Masking Frisket with Markers
Spray techniques, masking frisket
How to Mask Copic Wide Markers for Backgrounds
Copic Wide demonstration, masking, marker techniques
Spray Inks and Lace Blick and Copic Marker Tutorial
Covers masking with masking frisket, alcohol ink sprays, and Blick and Copic Markers
Giving Style to Your Characters with Colored Leads
Covers using colored leads with alcohol markers to create 'lineless' illustrations
Lineless Copic Marker Tutorial:
Using colored leads for sketching, rendering with alcohol marker
Creating Patterns Using Copic Markers and Washi Tape
Creative pattern making, creating surface designs
Sweet Unicorn Marker Timelapse
Covers overblending, colored leads, working with a limited palette, and inking with gel pens.
Dark Skintones with Alcohol Markers Tutorial
Covers rendering darker skintones using alcohol inks
Skintones and Skies in Alcohol Marker
Sky rendering techniques, as well as darker skintones
Beautiful Beads with Marker Timelapse
Darker skintones in alcohol marker, overblending, colored leads, limited palette, and inking with gel pens
Quick Colored Lead and Copic Tutorial
Covers monotone illustration
Going to Japan! Osaka Kyoto Tokyo
Timelapse announces trip to Japan, demonstrates multi-tone alcohol marker technique
Drawing a Succulent with Colored Leads and Copics
Alcohol marker tutorial for rendering beautiful succulents using alcohol markers and colored leads.
Creating a Spring Succulent with Copic Markers Tutorial
Alcohol markers, inks, and watercolor tutorial
Kara in the Flowers Marker Tutorial
Masking, spray techniques, creating a gradient blend, foliage, painting flowers, alcohol markers
Alcohol Misters in the Copic Jungle
Alcohol misters, splatter techniques, alcohol markers
Cutest Gryphon Ever Copic Tutorial
Drawing and markering anthros, colored leads, mixed media
Light Up the Dark Marker Timelapse
Glow techniques, alcohol marker rendering
Liquid Gold! Using Metallic Alcohol Inks in my Art
Metallic alcohol inks, marker rendering, spray techniques
Star Light, Star Bright Marker Timelapse
Marker techniques on cheaper paper, filling in background
80's Night Alcohol Marker Timelapse
Marker techniques on cheaper paper, using gel pens for inking
Disclaimer: I am not an employee of DickBlick, nor was I compensated for this post. I happen to REALLY enjoy Blick Studio Brush Markers, and think more artists should give them a try. All markers mentioned in this post have been purchased out of pocket, for personal use or for review.
Please consider donating to this blog or purchasing from Natto-shop (http://nattosoup.com/shop) if you want me to continue publishing quality content. All materials tested were purchased from my own pocket. Keep on Truckin' Nattosoup is not under any sponsorship.
For those of you not yet familiar with the wonderful Blick Studio Brush markers, a fantastic, affordable Copic dupe that are now refillable, allow me to catch you up to speed!
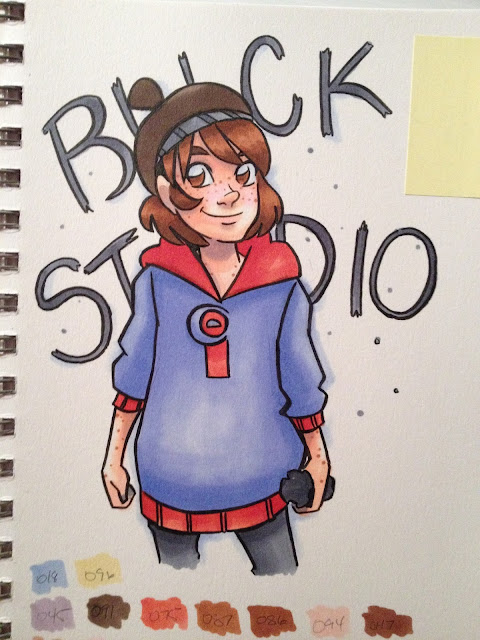 Original Blick Studio Brush marker test, when my collection was limited to just 10 test markers, mostly skintones.
Blick Studio Brush Markers are part of Blick's store brand, which includes a variety of art supplies. Originally only available in bullet nib and chisel (Blick Studio Marker), Blick Studio Brush Markers came out in 2015, and quickly became my favorite non-Copic alcohol marker. You can check out my Original Blick Studio Brush marker review - since then, my collection of Blick Studio Brush Markers has increased greatly.
Blick Studio Brush Markers are available in 95 colors, plus a colorless blender. They feature removable brush and chisel nibs (although no replacements available yet) which are similar to the Copic Superbrush nibs- dense foam rubber capable of delivering and blending color smoothly, without abrading the nib or tearing up the paper surface. These markers utilize color names, as well as a color family system to help you select the colors you need for blending. These markers are now refillable.
Sets are available in 6, 12, 24, 48, and 96 colors, or you can purchase the entire line openstock, starting at $2.98. Blick offers mix and match bulk discounts, and the price drops to $2.68 a marker as soon as you have six markers in your cart.
$2.98 each through DickBlick
Refills are available in 95 colors, and are $3.99 each through Dickblick.
Copic Sketch Markers are available in 360 colors, feature removable and replaceable chisel and brush nibs (as well as a system of compatible nibs to suit your needs), and are refillable. For me, the selling point is the foam rubber Supernib, which is capable of delivering broad strokes or subtle lines, and allows me to do delicate blends, and these are the markers I compare all other alcohol markers to.
$5.24 each through DickBlick
Copic Ciao markers are the younger sibling to Copic Sketch Markers. Smaller bodied, these markers are refillable, and have the same Superbrush nibs as Copic Sketch Markers. These were released a few years after Copic Sketch Markers, and never got the attention they deserved as an affordable introduction to Copic markers. Available in 144 colors, Ciaos are available openstock or in sets of 12, 24, 36, or 72.
$3.59 each through DickBlick
Copic Various Ink Refills work for all markers made by Copic, and are $5.23 through DickBlick
Blick Studio Brush markers feature a body very similar to Copic Sketch Markers, and are compatible not only with Copic markers, but with Copic marker systems and accessories. Kabocha covers that in her wonderful guest post Will It Work? Testing Blick Studio Brush markers in the Copic ABS .
I've integrated Blick Studio Brush markers seamlessly into my existing Copic marker collection. They're about the same size, and perform as well, so there's no need to store them seperately. At this point, most marker pieces I create are a mix of Copic, Prismacolor, and Blick Studio Brush markers.


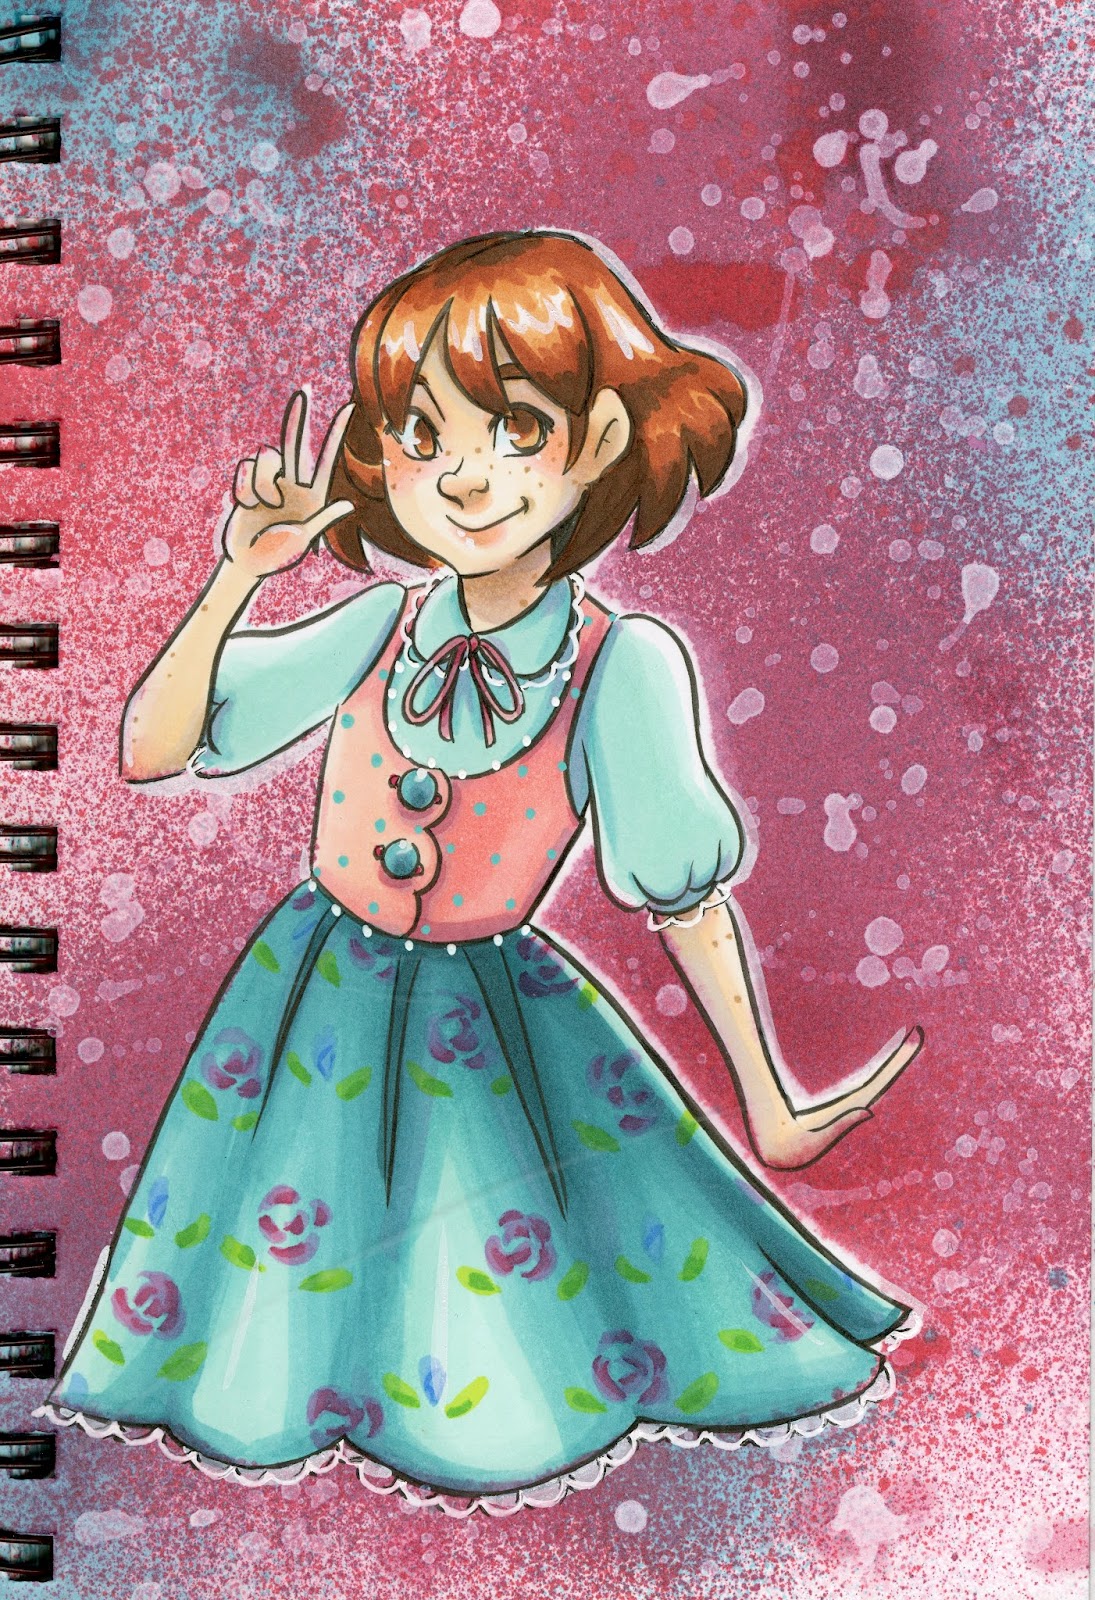


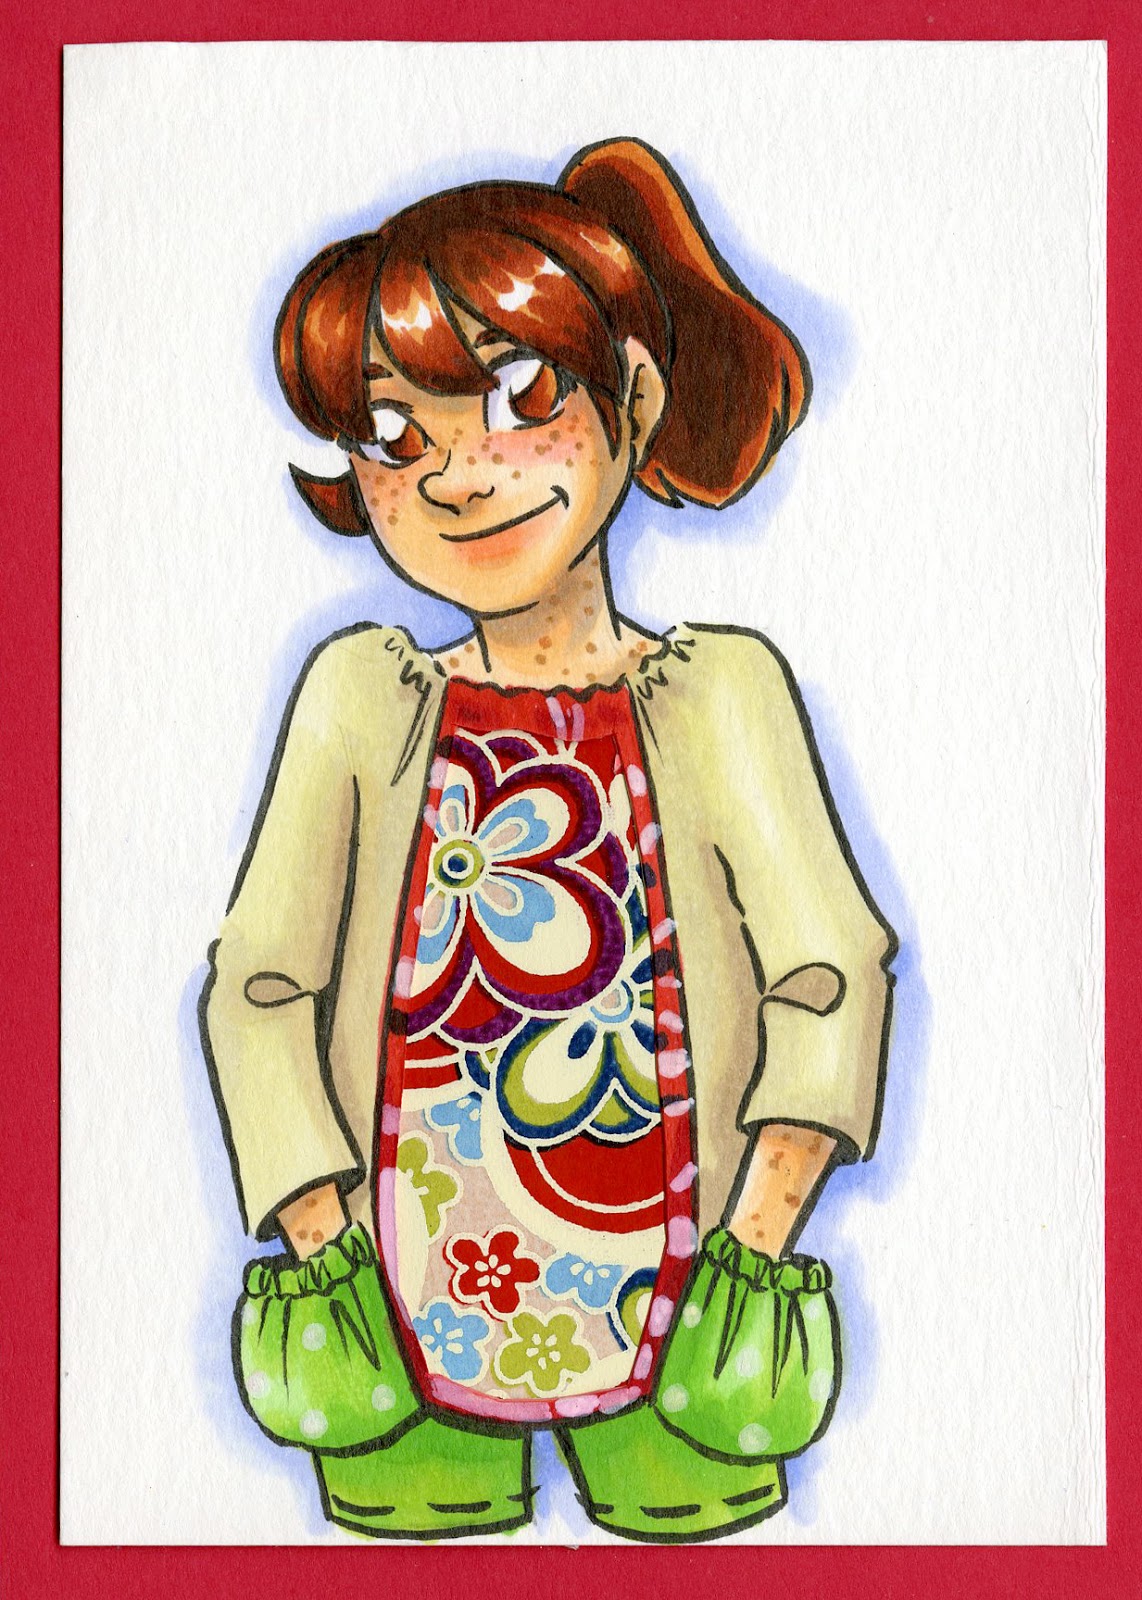
All of the above alcohol marker pieces were created using a mix of Copic Sketch markers, Blick Studio Brush Markers, and Prismacolor markers.
More Alcohol Marker Resources:
Marker Guides and Recommendations
The lists and overviews below are my recommended alcohol markers. I go over how the markers differ from one another, usecases for each brand, and even recommended colors to get you started! I really recommend you read the Intermediate Marker Gift Guide (the second gift guide listed) as I also talk about great accessories and tools for marker artists, and you may find a new favorite!
List of Top 5 Alcohol Markers
Alcohol marker gift guide with color recommendations for those just starting their alcohol marker collection.
Follow up alcohol marker gift guide for intermediate alcohol marker uses, with loads of great accessory recommendations to really take your marker collection to the next level.
Alcohol Marker Tutorials:
Most of these tutorials use a combination of Blick, Prismacolor, and Copic markers, although a few use the alcohol ink refills (or Jacquard Pinata/Ranger Adirondack alcohol inks)
More than Just Copics: Expanding Your Alcohol Marker Collection
Covers ways to add to your existing marker collection, as well as organization
Using Brusho Watercolors with Alcohol Markers
Covers masking with frisket, mixed media with markers and watercolor, and a Brusho demonstration
How to Use Masking Frisket with Markers
Spray techniques, masking frisket
How to Mask Copic Wide Markers for Backgrounds
Copic Wide demonstration, masking, marker techniques
Spray Inks and Lace Blick and Copic Marker Tutorial
Covers masking with masking frisket, alcohol ink sprays, and Blick and Copic Markers
Giving Style to Your Characters with Colored Leads
Covers using colored leads with alcohol markers to create 'lineless' illustrations
Lineless Copic Marker Tutorial:
Using colored leads for sketching, rendering with alcohol marker
Creating Patterns Using Copic Markers and Washi Tape
Creative pattern making, creating surface designs
Sweet Unicorn Marker Timelapse
Covers overblending, colored leads, working with a limited palette, and inking with gel pens.
Dark Skintones with Alcohol Markers Tutorial
Covers rendering darker skintones using alcohol inks
Skintones and Skies in Alcohol Marker
Sky rendering techniques, as well as darker skintones
Beautiful Beads with Marker Timelapse
Darker skintones in alcohol marker, overblending, colored leads, limited palette, and inking with gel pens
Quick Colored Lead and Copic Tutorial
Covers monotone illustration
Going to Japan! Osaka Kyoto Tokyo
Timelapse announces trip to Japan, demonstrates multi-tone alcohol marker technique
Drawing a Succulent with Colored Leads and Copics
Alcohol marker tutorial for rendering beautiful succulents using alcohol markers and colored leads.
Creating a Spring Succulent with Copic Markers Tutorial
Alcohol markers, inks, and watercolor tutorial
Kara in the Flowers Marker Tutorial
Masking, spray techniques, creating a gradient blend, foliage, painting flowers, alcohol markers
Alcohol Misters in the Copic Jungle
Alcohol misters, splatter techniques, alcohol markers
Cutest Gryphon Ever Copic Tutorial
Drawing and markering anthros, colored leads, mixed media
Light Up the Dark Marker Timelapse
Glow techniques, alcohol marker rendering
Liquid Gold! Using Metallic Alcohol Inks in my Art
Metallic alcohol inks, marker rendering, spray techniques
Star Light, Star Bright Marker Timelapse
Marker techniques on cheaper paper, filling in background
80's Night Alcohol Marker Timelapse
Marker techniques on cheaper paper, using gel pens for inking
Disclaimer: I am not an employee of DickBlick, nor was I compensated for this post. I happen to REALLY enjoy Blick Studio Brush Markers, and think more artists should give them a try. All markers mentioned in this post have been purchased out of pocket, for personal use or for review.
Please consider donating to this blog or purchasing from Natto-shop (http://nattosoup.com/shop) if you want me to continue publishing quality content. All materials tested were purchased from my own pocket. Keep on Truckin' Nattosoup is not under any sponsorship.
October 18, 2018
Making Comics and Zines in Nashville!
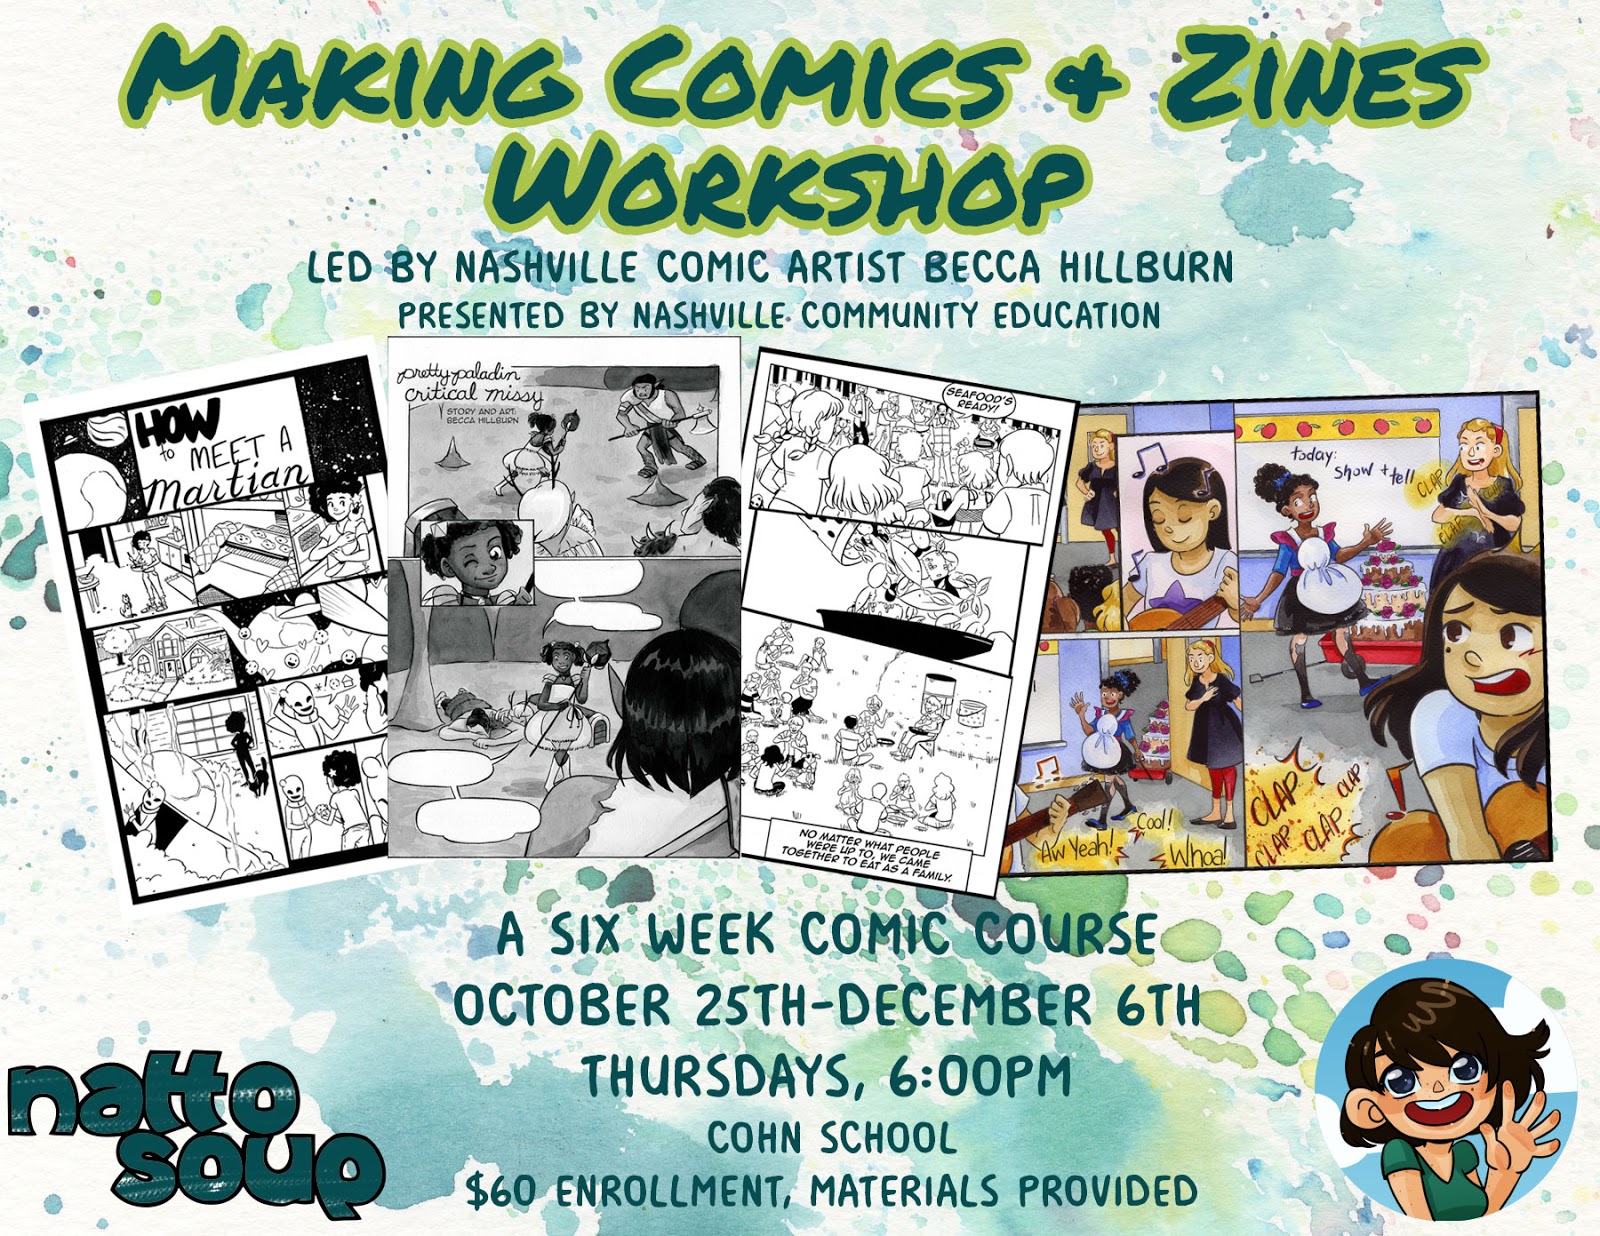
I'm really excited to be able to offer a six week comic class aimed at anyone 18+ through Nashville Community Ed. It's only $60 for all six classes, and each class is 6-9PM on Thursdays at the Cohn School. Classes begin October 25th and continue until December 6th, taking a break Thanksgiving week.
I want to cover as much as I can during this class, so I've also created a lot of supplemental materials to help students who wish to use this class as an opportunity to learn or to practice drawing. However, for students who aren't interested in art, zines are a perfect opportunity to create a book of family recipes, a collection of favorite poems, a selection of short stories, or to assemble scans of childrens' art with short blurbs. At the end of our class, we're going to have a zine and mini comic exchange, and I'm going to take responsibility for getting everyone's comics and zines printed.
This class is my first long-term opportunity to teach adult students here in Nashville. I've taught panels and workshops across the country, and taught elementary, middle, and college students while in Savannah, but this is the first chance I've had to teach my favorite subject-comics- to adults who wish to learn! For those interested in really diving into comics, or those who are already making comics, this class is a perfect opportunity to hone skills in a friendly environment, to get feedback from others who also love comics, and to learn some new skills! I plan on covering story plotting and structure, script writing, character design, thumbnailing and perspective, basic human anatomy, inking with a brush, nib, or brush pen, and even lettering! And since comics is such a deep topic, I have created loads of outside resources to help students who want to continue their studies outside of class.
I hold an MFA in comics from SCAD, have almost a decade of experience teaching comics in classes, workshops, panels, over Youtube, and through my blog, have made comics for over two decades, and have work in nearly a dozen anthologies. I've self published the first volume of my watercolor comic, self distributed it, released it as a webcomic, and am working on finishing up the second volume for a Kickstarter release, and make new zines every year as part of my Inktober project.
I really hope to use this class as a springboard to help create the foundation for a coherent comic community here in Nashville- a group of folks who connect and can help one another grow and develop.
You can sign up through Nashville's NEC panel
October 25th-December 6th
6:00PM-8:00PM on Thursdays
The Cohn School
4805 Park Ave, Nashville, TN 37209
$60 for all 6 classes, materials provided
End with a zine/minicomic exchange
My class begins next week, and I've been participating in Inktober despite a particularly busy schedule because I want to use the resulting illustrations as part of my zine demonstrations. I'm both excited and a bit nervous- the class materials list has been submitted, the supplies have been ordered, and I've tried to promote the class at a variety of Nashville events to generate interest.
It seems like there'll be a decent turnout- not quite the full class I hoped for and feared, but not entirely empty either. As of writing this, there are seven empty seats in a class that maxes out at 25 students. I've taught before, but this feels different- not just in scope (I'm entirely responsible for six weeks of content, and responsible for making sure my students 'graduate' satisfied with the course), but in the fact that several of my students have already expressed concern about the drawing portions. While no one will be required to draw, and I fully intend to bring in zines that feature not only a wide array of art from various skill levels, but also zines that cover a variety of topics, I hope those students will cool sharing time and space with my students who wish to learn comic craft.
I'm going to be learning a lot this semester- in many ways, teaching kids, teens, and undergrads is a bit easier, as so many of them carry an unfailing self confidence, a slight bit of hubris that makes them eager to try new things. Many adults have lost that, and while I'm excellent at encouraging people one on one, I'm not sure I'll be as effective delivering those same lines to an entire class. Hopefully I'll learn some new tricks.
I'm sharing this because originally, this blog was formed to not only teach, but to share experiences. To give others perspective, and allow them to benefit from my mistakes, missteps, and few and far between triumphs. So while I want to appear confident, because in the end, I do know what I'm doing, I also want to be honest, and admit that of course there's a little doubt, a little anxiety, a lot of unknown.
One of the ways I deal with this anxiety is through offloading- removing as much pressure from myself during my teaching hours by creating as many tutorials as I can. This means I don't have to hit the nail squarely on the head for every student during class time, it increases my opportunities for successfully conveying information. It also means I can hopefully cover more information- teaching drawing skills takes A LOT of time, and should be a class unto itself, but hopefully I can provide that information, teach those skills to those who wish to learn, without putting undue pressure on those who do not or cannot. This is a voluntary class, a class students take for fun, and I want them to enjoy it.
I'm grateful for this opportunity. Nashville hasn't been fallow ground for me- there's interest from the public, but little from institutions. What interest there is is generally in the form of unpaid, uncompensated work, and when I've mentioned payment, most ghost fast. I understand that budgets are tight, but most employers hiring visual artists aren't interested in the volunteer work you've done, they're interested in the PAID work you've done, and I've given plenty away for free over the years. Nashville Community Ed is willing to split the student fee with me-$30 per student- which will allow me to purchase additional materials we may need, and possibly even cover paying Chris, my editor, to edit the additional video. It isn't much, but it's enough to say I worked for Nashville Community Ed and was paid for my time.
If you're interested in me sharing my teaching experiences here, please consider shooting me an email to encourage me to do so! My comments section is broken, so unfortunately I can't see comments sent to me. By sharing my teaching experiences, I don't mean the materials- I do plan on recording and sharing the intro portions of my classes, for those of you who would like to take the class, but don't live in the Nashville area. When I say sharing my experiences, I mean sharing what I've actually learned while teaching, and advice for other artists interested in teaching.
Please consider donating to this blog or purchasing from Natto-shop (http://nattosoup.com/shop) if you want me to continue publishing quality content. All materials tested were purchased from my own pocket. Keep on Truckin' Nattosoup is not under any sponsorship.


![[image error]](https://3.bp.blogspot.com/-dWuuRKZuYC8/WKyjzmKsAoI/AAAAAAABQKw/PgS6HBIOjXIqR-Unl8eZXrObXGVsFSgCACLcB/s640/20170220_140301.jpg)