
Becca Hillburn's Blog, page 14
August 9, 2018
How You'll Know It's Time To Pull The Plug on Conventions
I always said I would stop doing conventions by 30. I figured that was plenty of time to build an audience, to prove I'm capable of fulfilling promises, to earn a little money, to pay my dues. From twenty-five to thirty, five years of doing seven to ten conventions a year, of varying sizes, should be enough, and by thirty, I would have a publishing deal, right? Or at least, steady work.
I turned 32 in March. This year, I've done at least five shows, haven't been home longer than four days in two months, and honestly, this is me trying to cut back. I did MTAC in March, Imaginacon in May, ALAAC in June, Destrehan Comic Con and Mechacon in July. I've gone from Nashville to New Orleans to Nashville to New Orleans and back again, and spend what little downtime I have trying to play catch up on my real life.
Some years, I do a show a month during the summer months. Some years, I do a show a week during the summer, and a show a month the rest of the year. I've done conventions across the US, from SPX to APE, from Otakon to Anime Expo. I've met thousands of people, filled hundreds of commissions. I've sold hundreds of books, and have led dozens of workshops. I've even celebrated the four year anniversary of How to Be a Con Artist. And looking back, I have very little to show for my time.
I never wanted conventions to become my full-time job. But somewhere in 2015, I became increasingly reliant on them. My freelance dried up. Anthology gigs became more competitive. I had a self-published book out, and I justified living on the road as promoting the comic. I needed the money, and I thought doing more conventions would help me impress art directors looking to hire. I thought putting myself out there would help me find a more permanent job.
Anime conventions, at least on the East Coast, and certainly in the South, do not lead to paying job opportunities.
But the money was decent. I was at the $1.5k a show range, for larger shows, and as long as I drove and did room shares, the profits were equitable with the work.
Until my convention partners moved away, and I stopped making the drive. I started flying for shows and paying family to help assist- which is never the price of one person, but the price of three for the work of one. And by 2016, convention profits had massively dipped, while the price of everything continued to rise.
The money just wasn't right, but I blamed myself. Just not drawing the right things. Just not advertising enough. If I just tried harder and hit upon the right combination, things were sure to look up.
So I continued doing conventions and continued to feel more run down and confused. I took on more commissions than I wanted to handle, topping out at 40 mail-in's in 2017. This took me six months to complete and completely wrecked my Volume 2 schedule. And the money was gone in a flash- vet bills, car insurance, the cost to attend a friend's wedding more than consumed what I'd sold- there was nothing for savings.
But some losses hit harder than financial woes. And some sacrifices sting for years to come.
Constantly chasing my own tail, skipping out on sleep, self-care, and self-worth, took a toll on my mental health. Conventions have a way of making odd ducks feel never quite good enough, and years of this grind hit me hard in 2016. I spiraled into depression hard, and it manifested not only with suicidal ideation (I just wanted to not exist) but constantly fantasizing about being anyone else but Becca Hillburn/Nattosoup. I tried to scramble for a better work situation- sending out portfolios to literary agents (most of whom were not interested in handling graphic novels at that time and were certainly not interested in representing my art style), filling out job applications for anything in Nashville that might be suitable. Unfortunately, the self-employed, convention artist, customer service rep life doesn't leave much of a traceable work history, and when filling out applications online, you may find it difficult to get callbacks for even entry-level CSR positions. Who knew working yourself to the bone could leave you with no real work history?
I often think about all I have missed out on, living on the road. Weddings. Birthdays. Anniversaries. I missed my own 9 year anniversary this year, because I was in Louisiana, miserable at Mechacon. When you're young, you think its ok to miss one or two- there'll be plenty more to come, but they add up. I have only spent four of the nine anniversaries I've shared with Joseph actually WITH Joseph- most were spent with strangers at conventions, trying to make a sale. And as I prepare to move on to the next phase of my life, I absolutely refuse to do this to a child.
To an extent, I even feel conventions have been antithetical to my goals. It's hard to paint comic pages when you're in and out of your home studio, hard to prioritize time when you're always distracted, stressed out, tired, and just trying to get your life back together. Travel for conventions is disruptive, and living paycheck to paycheck via small commissions makes it impossible to plan for larger things. For a time, too long a time, I thought conventions were necessary- I lack the online presence and personality to really make a name for myself- but now I know I'm just another nameless vendor, a pencil for hire indistinguishable from the other pencils for hire. The time spent at conventions would have been better spent on comic pages- at least I would have something to show for it.
And in a way, that's ok. It's disappointing to have sunk so many years into chasing an audience that never materialized, into chasing a dollar that never paid rent, but this realization gives me permission to stop. I've done my time, and if conventions don't help me pursue my goals OR pay my rent, it's time to stop.
Most longterm convention artists speak only fondly of their experiences, at least in public. They talk about the friends they've made, the lifelong customers they've impressed, maybe the audience they've built. They joke about the bad cons, and are quietly proud of the good, but rarely do they caution other artists not to follow in their footsteps. Why should they- we equate ability with financial success in this industry, and if you admit that conventions aren't worthwhile, that the con life isn't fulfilling, other artists immediately assume you're doing something, maybe everything, wrong. After all, if you were any good, you'd be making bank, right?
For younger artists to admit that perhaps this life holds unexpected quirks, deep disappointments, and often financial failure means to admit they don't have control over every aspect of their career. TO acknowledge that audience can be fickle, the economy can be against you, and that you might have every skill someone could possibly want, and still be found lacking, is to admit that the odds ar against them. And few artists really want to face the odds, especially not young, inexperienced artists who don't even know what the odds are. It's easier to just assume the artist who admits failure and defeat IS a failure- is lacking in every way you aren't- so you can pursue your dreams with the necessary hubris.
But I at least want to put out a warning- that eventually the convention life loses it's freshness, becomes wearisome, and you really need to have something else planned or prepared for that time. There's a reason you see few older women selling art at anime conventions, and it's not because they quit drawing. It's because the convention life wears you out, eats you up, uses you, and if you can't keep it in moderation, it will eventually force you to quit.
This isn't the death warrant on conventions, as much as it sounds like a damning condemnation. As long as I'm self-published, conventions are the best method for promoting and selling my book to new readers. It's only a warning that conventions will not solve your artistic woes longterm- it's not a permanent solution to a bad situation. Conventions might help sell your books, but they won't make it easy to draw them. Conventions might help you meet new people, but its no easier to grow an audience through conventions than it is to grow one online. And conventions might be work, but the opportunities that seem to appear at the show often wither quickly afterwards. Basically, consider conventions as a tool, not as a solution, and don't become reliant on the income.
Please consider donating to this blog or purchasing from Natto-shop (http://nattosoup.com/shop) if you want me to continue publishing quality content. All materials tested were purchased from my own pocket. Keep on Truckin' Nattosoup is not under any sponsorship.


August 6, 2018
Advice for Planning Your First Comic
Keep the scope limited- tell a short story, rather than your grand epic- the goal is to practice and become comfortable telling stories within the comic medium. If you have to do something with your grand epic, pick a short, self-contained story with simple backgrounds and actions to cut your teeth on.Plan for 1-10 pages, and keep in mind that the difference between a one-page self-contained story, and a ten page self-contained story can be huge!Write what you know. Work from life! Tell your own story, retell a story you know well, or tell the story of a loved one.If you're illustrating your own comic, keep the cast smaller- it's easier to design and illustrateOn that note, keep the backgrounds humble. Many find nature settings to be easier to draw, as accuracy isn't as important.Simplify your dialogue! Many beginners start with silent comics- this way you only have to worry about the plot and the illustrations, not dialogue or lettering.Spend time getting to know your characters- sketching them out, designing their outfits ahead of time, getting into their heads so you understand their personalities. Once you know your characters, the story often writes itself!Revision is important! So give yourself as many opportunities (stages, phases) to revise as possible. Working page to page removes revision opportunities, and while you're a developing artist finding a voice, you're going to need room to grow.Be patient with yourself- even pros make mistakes.Research scriptwriting methods- beat sheets, synopsis, plotform- and find one that works for the story you want to tell. This may mean trying ALL of the above methods to plan various comics, but when you find something that works, you'll know!Take notes on your own work so you can grow and improve. What worked for you? What didn't work?Congratulate yourself on each stage finished! Every step is a milestone when you're just starting out, so take the time to acknowledge the work you've done.Find or create a critique group of people you trust to help you hone your work.Don't take mistakes personally- after all, you're still learning! We're all still learning! Mistakes mean you've taken a risk.Don't take failure personally either- in order to fail, you had to take a risk and try something new, and this means growth.It's easier to re-write and revise than it is to write, so just get those ideas down! Brainstorm and give yourself options.Read a variety of short stories and short comics to see how other creators frame their work within limitations.
Please consider donating to this blog or purchasing from Natto-shop (http://nattosoup.com/shop) if you want me to continue publishing quality content. All materials tested were purchased from my own pocket. Keep on Truckin' Nattosoup is not under any sponsorship.

August 2, 2018
Nashville Community Education Comic Course

This Saturday, I'm going to be outside the Cohn School, under my big blue tent, singing the gospel of comics and comic craft to all who will listen. This is because Nashville Community Education is hosting an Open House for all of their community ed instructors, as an opportunity for potential students to get a feel for the instructors and classes.
You can register at the Open House, or online (after August 4th) at nashville.gov/ce
The Open House will be held just outside the Cohn School (where many of the community ed classes will be taking place)- just look for the tents!
The Address:
4805 Park Ave, Nashville, TN 37209
If you've always wanted to take a comics course and live in the Nashville area, this is a great opportunity for you!
"Learn how to create mini-comics, zines, and how to plan and plot a long form comic! In this class, we're going to cover the basics of comic construction, go over planning and scripting, and cover basic drawing techniques and skills to help students feel confident in making comics. Once the basics are down, we're going to talk about those finishing touches- inking your comic, coloring your comic, scanning it, and creating a mini or zine to exchange with other artists. No drawing skills necessary, just an interest in comics or sequential storytelling! Class will end the semester with a zine/minicomic exchange."
October 25th- December 6thTuesdays and Thursdays, 6:00PM-8:00PMHeld at the Cohn School
I'm so excited for this opportunity because it will be the first time I've led a multi-class course on comic-craft to a live audience. All materials will be provided by Nashville Community Education, and I plan on creating supplemental materials to augment the class and help students continue their studies even after our time together.
Please consider donating to this blog or purchasing from Natto-shop (http://nattosoup.com/shop) if you want me to continue publishing quality content. All materials tested were purchased from my own pocket. Keep on Truckin' Nattosoup is not under any sponsorship.

July 26, 2018
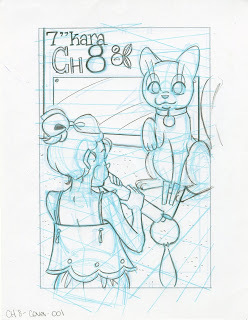
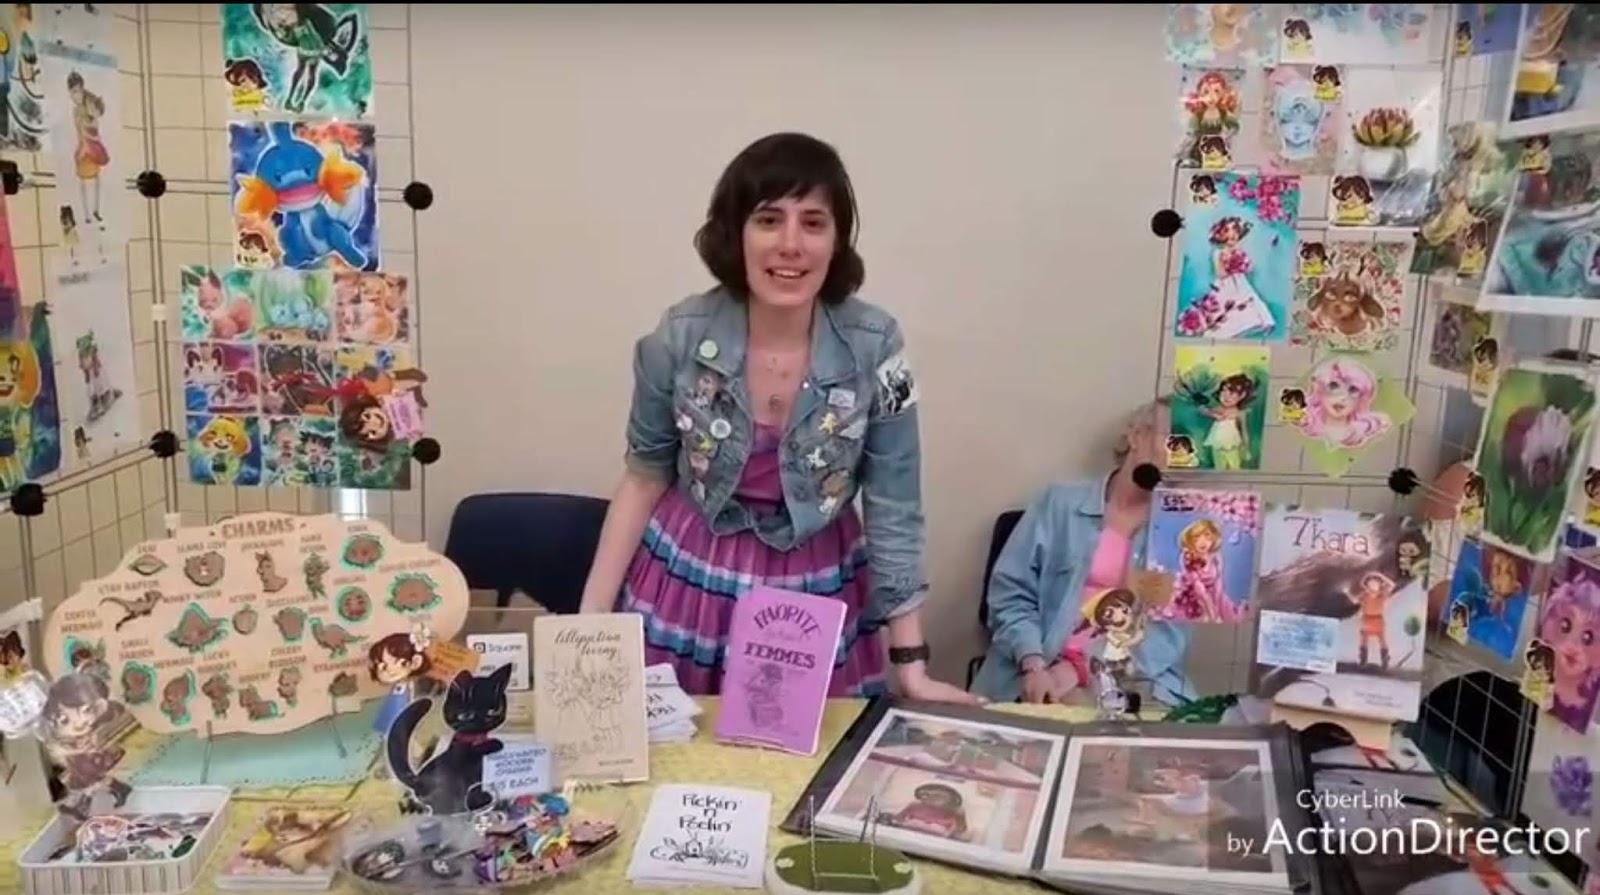
Mechacon 2018 Announcement
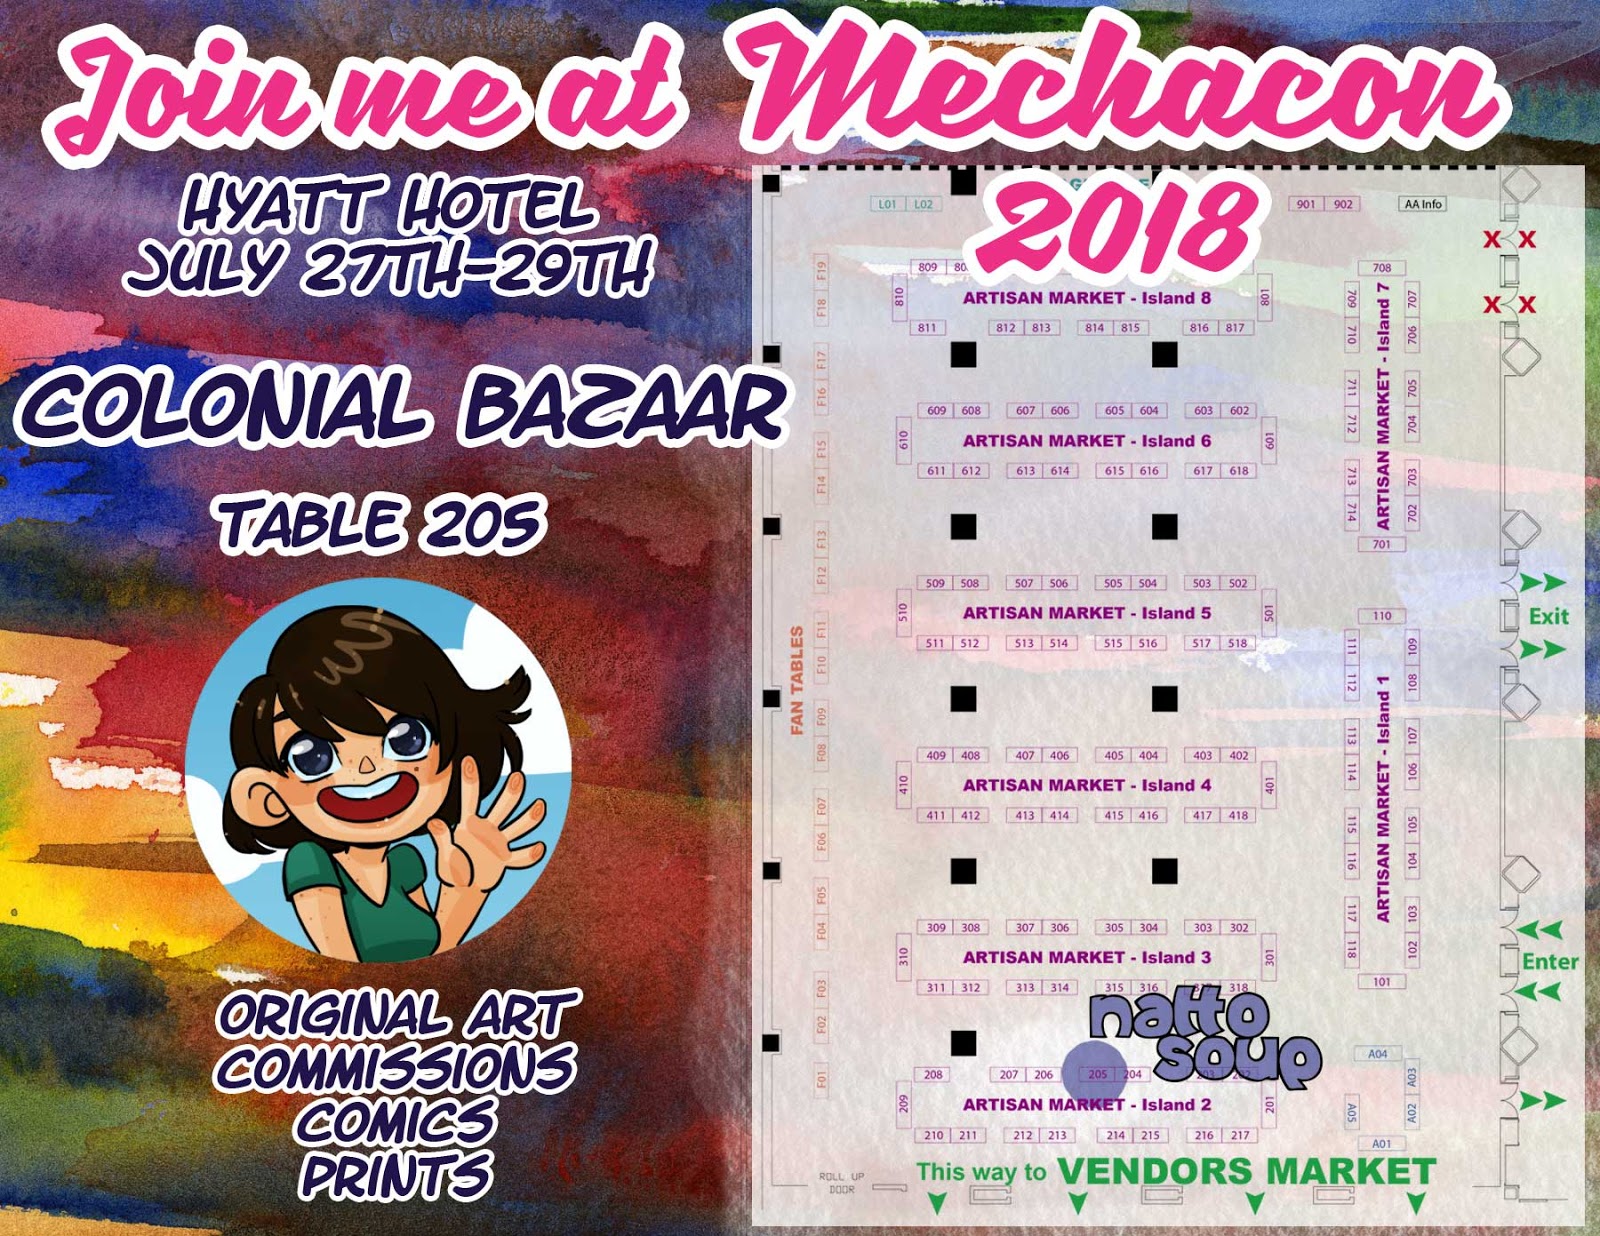
This weekend, I'm going to be set up at Mechacon's Colonial Bazaar (artist alley) as part of their Artisan Market. I'm going to have all sorts of goodies for sale, including
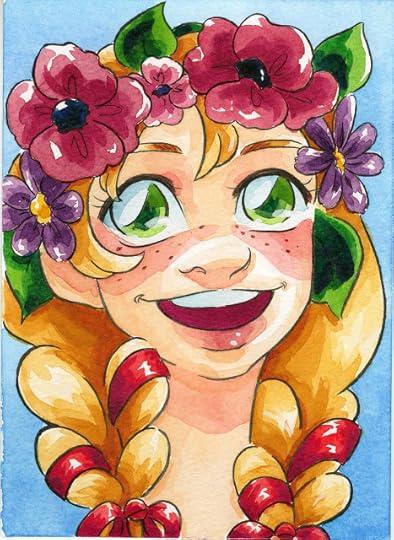
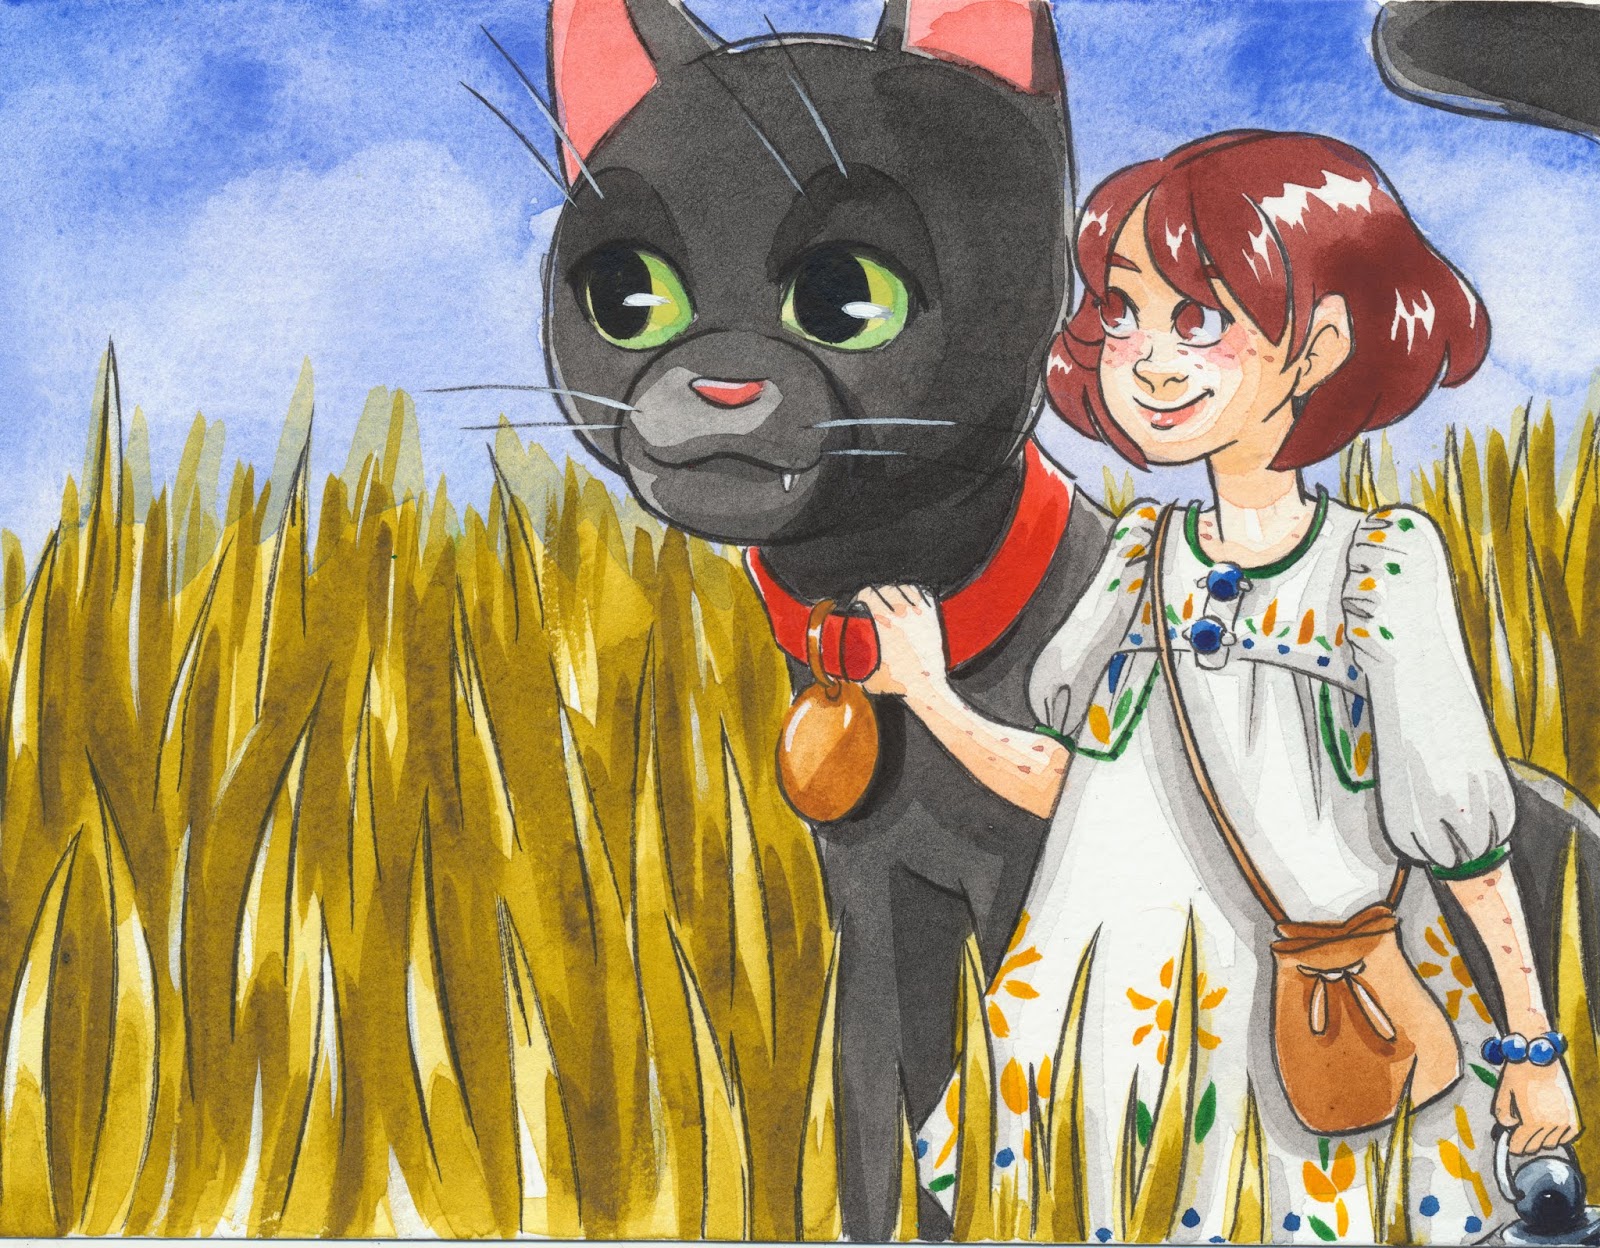
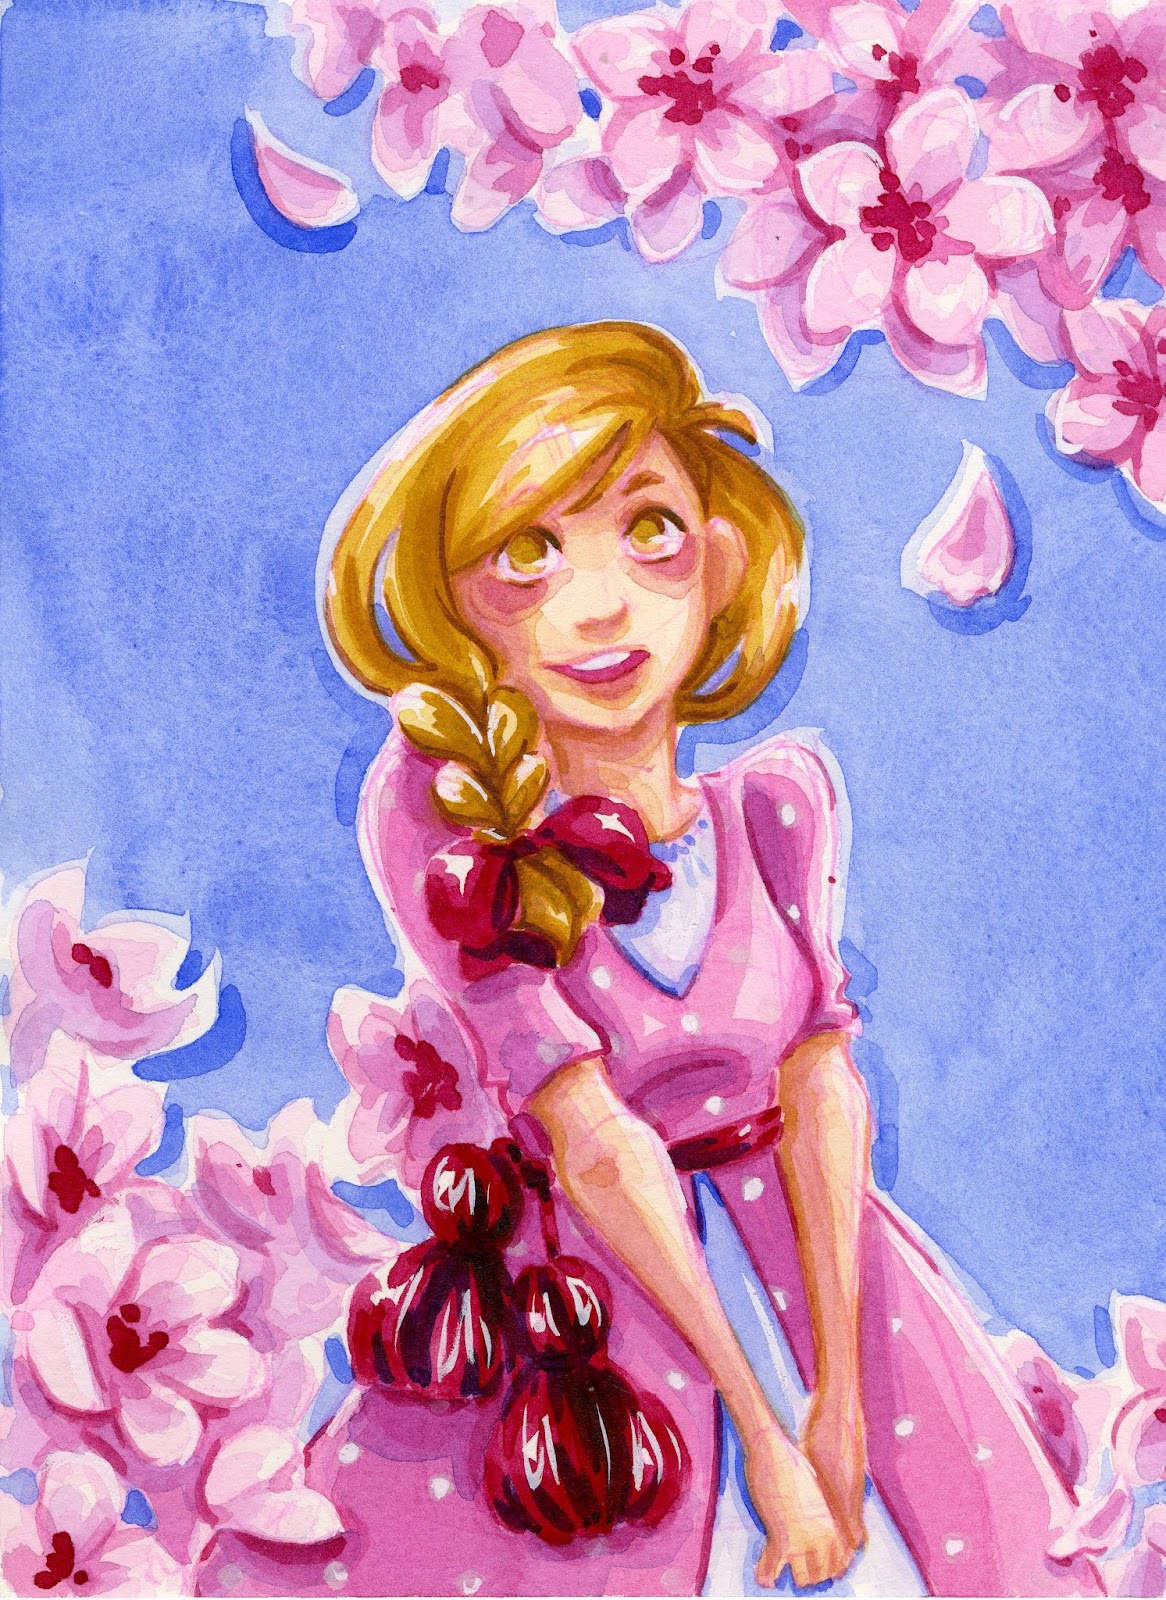
7" Kara, my watercolor, all ages comicVarious minicomics, including Lilliputian Living, Favorite Fictional Femmes, and Cicada SummerHandpainted wooden charms and laser cut wooden charmsStickers and miniprintsCommissionsMini Watercolors
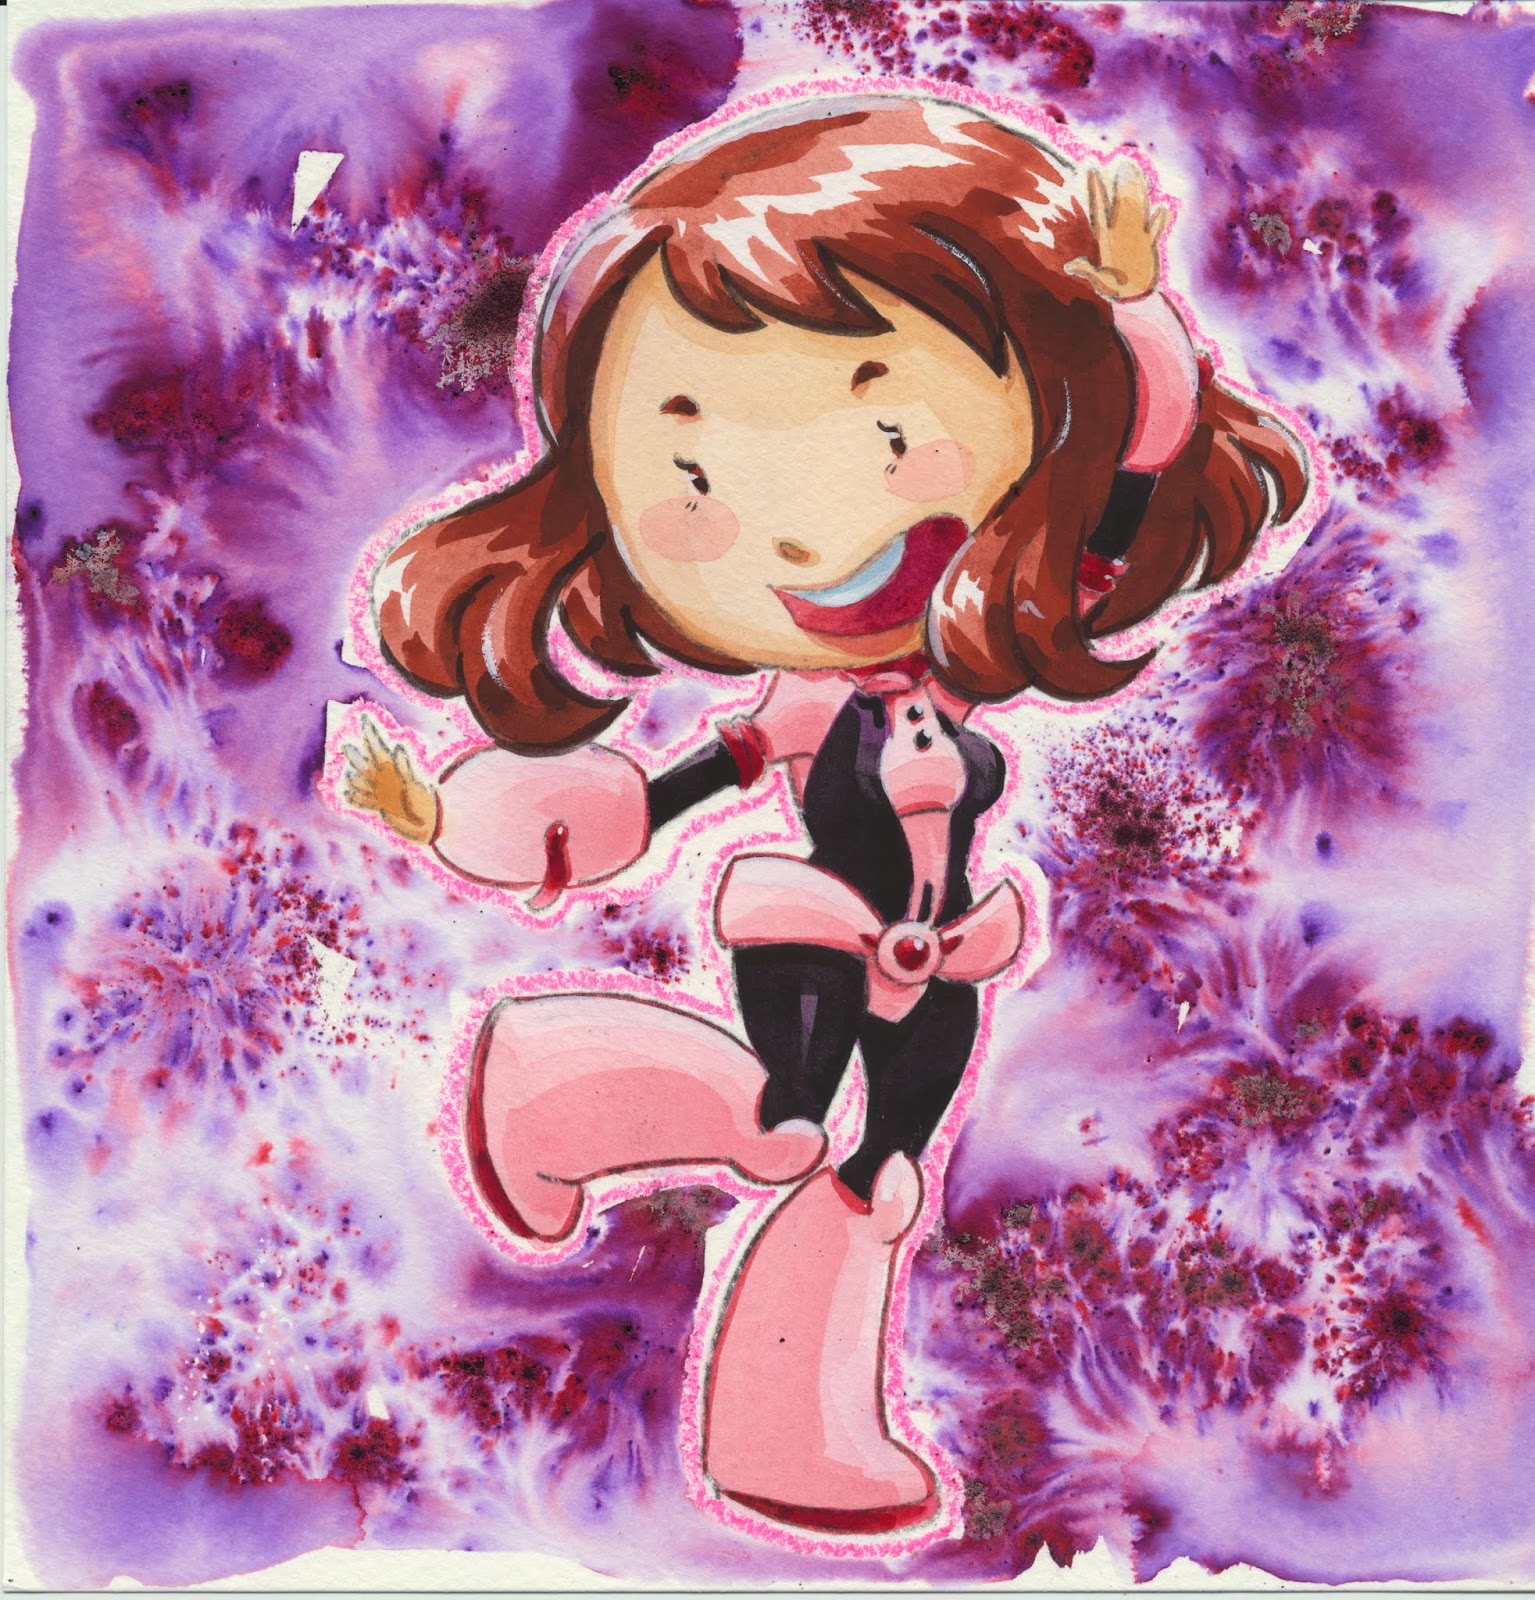
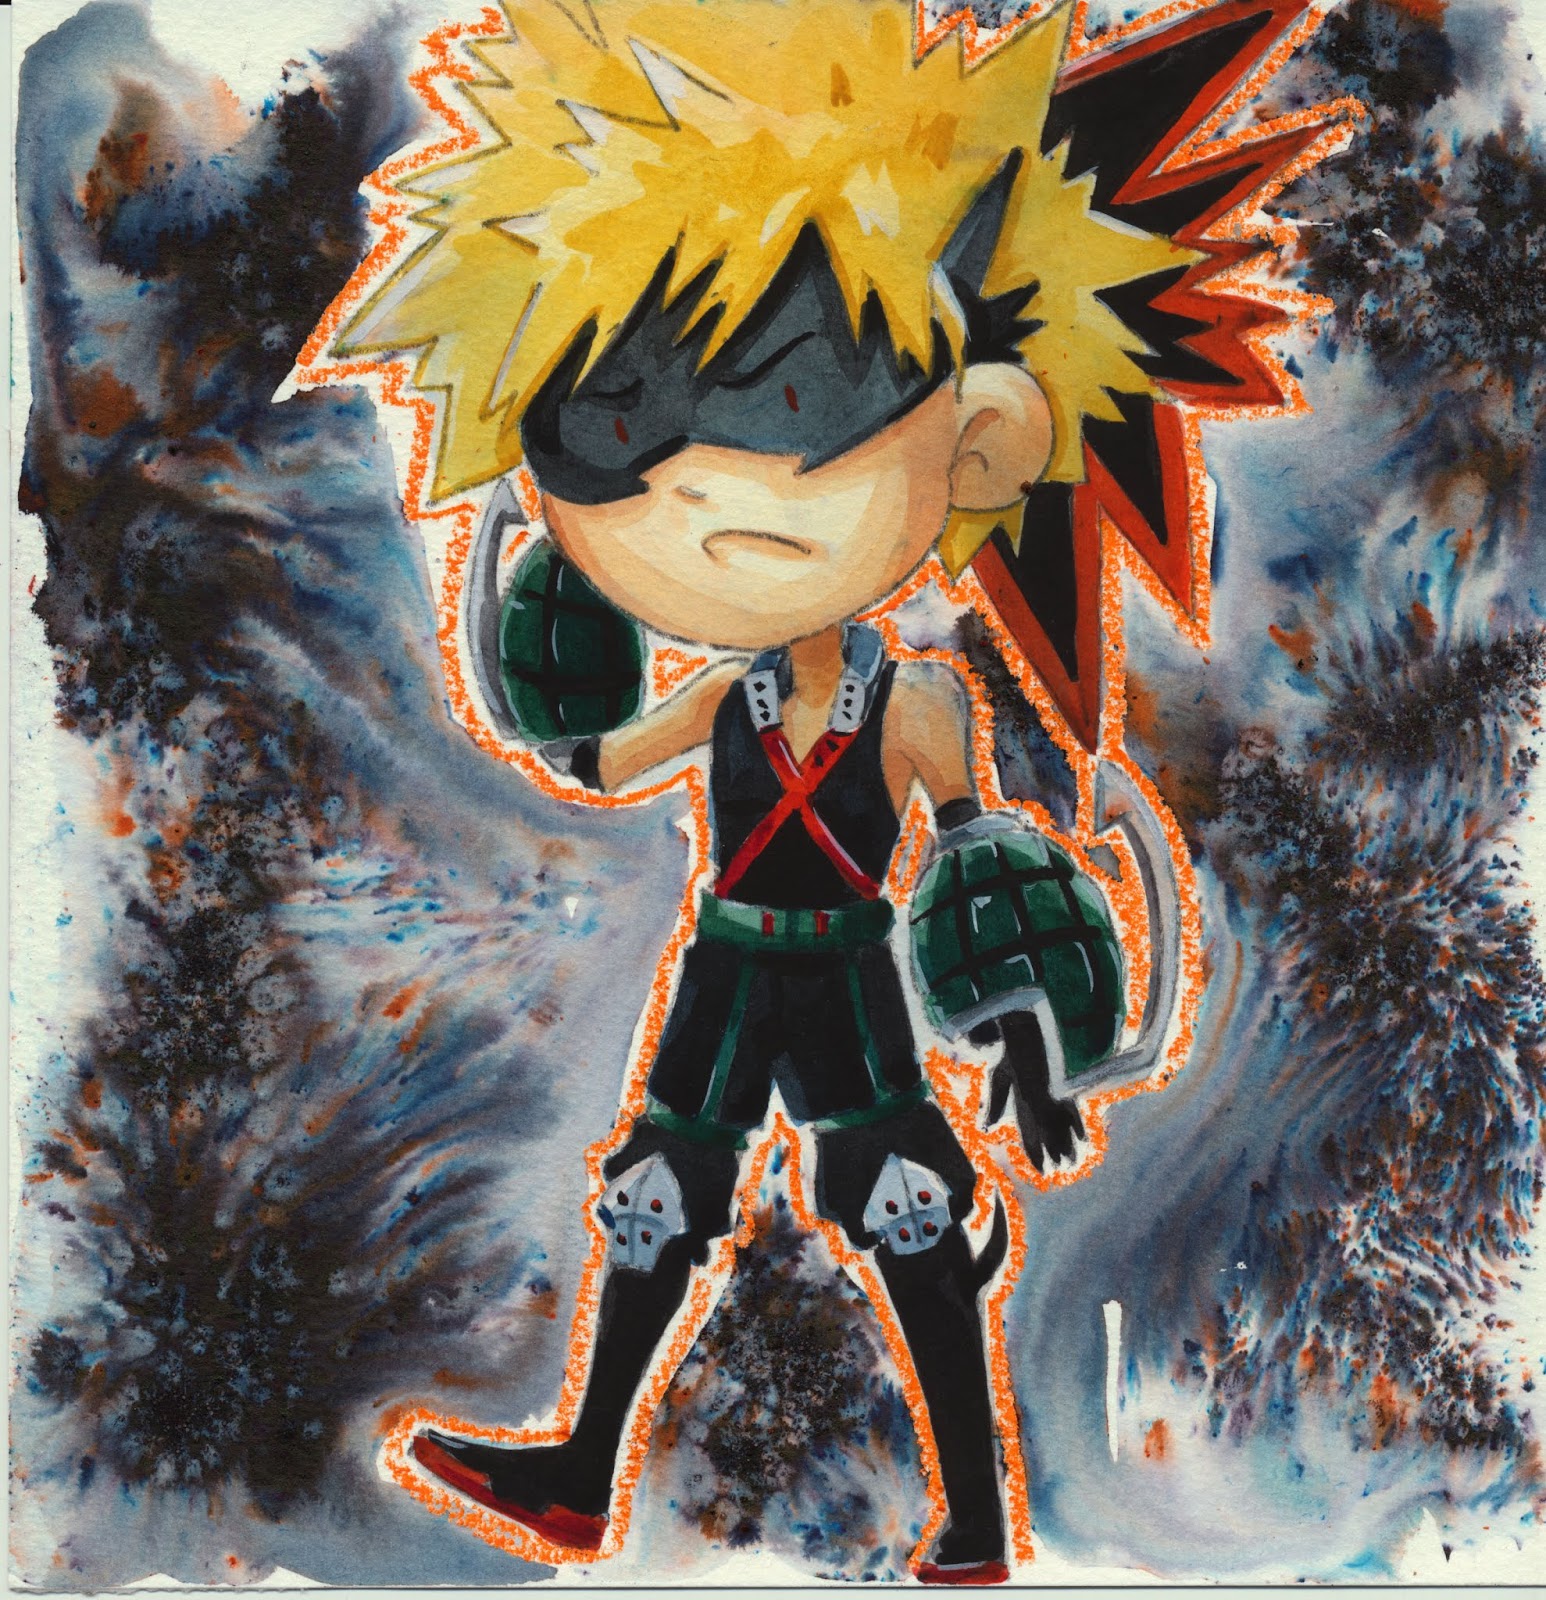
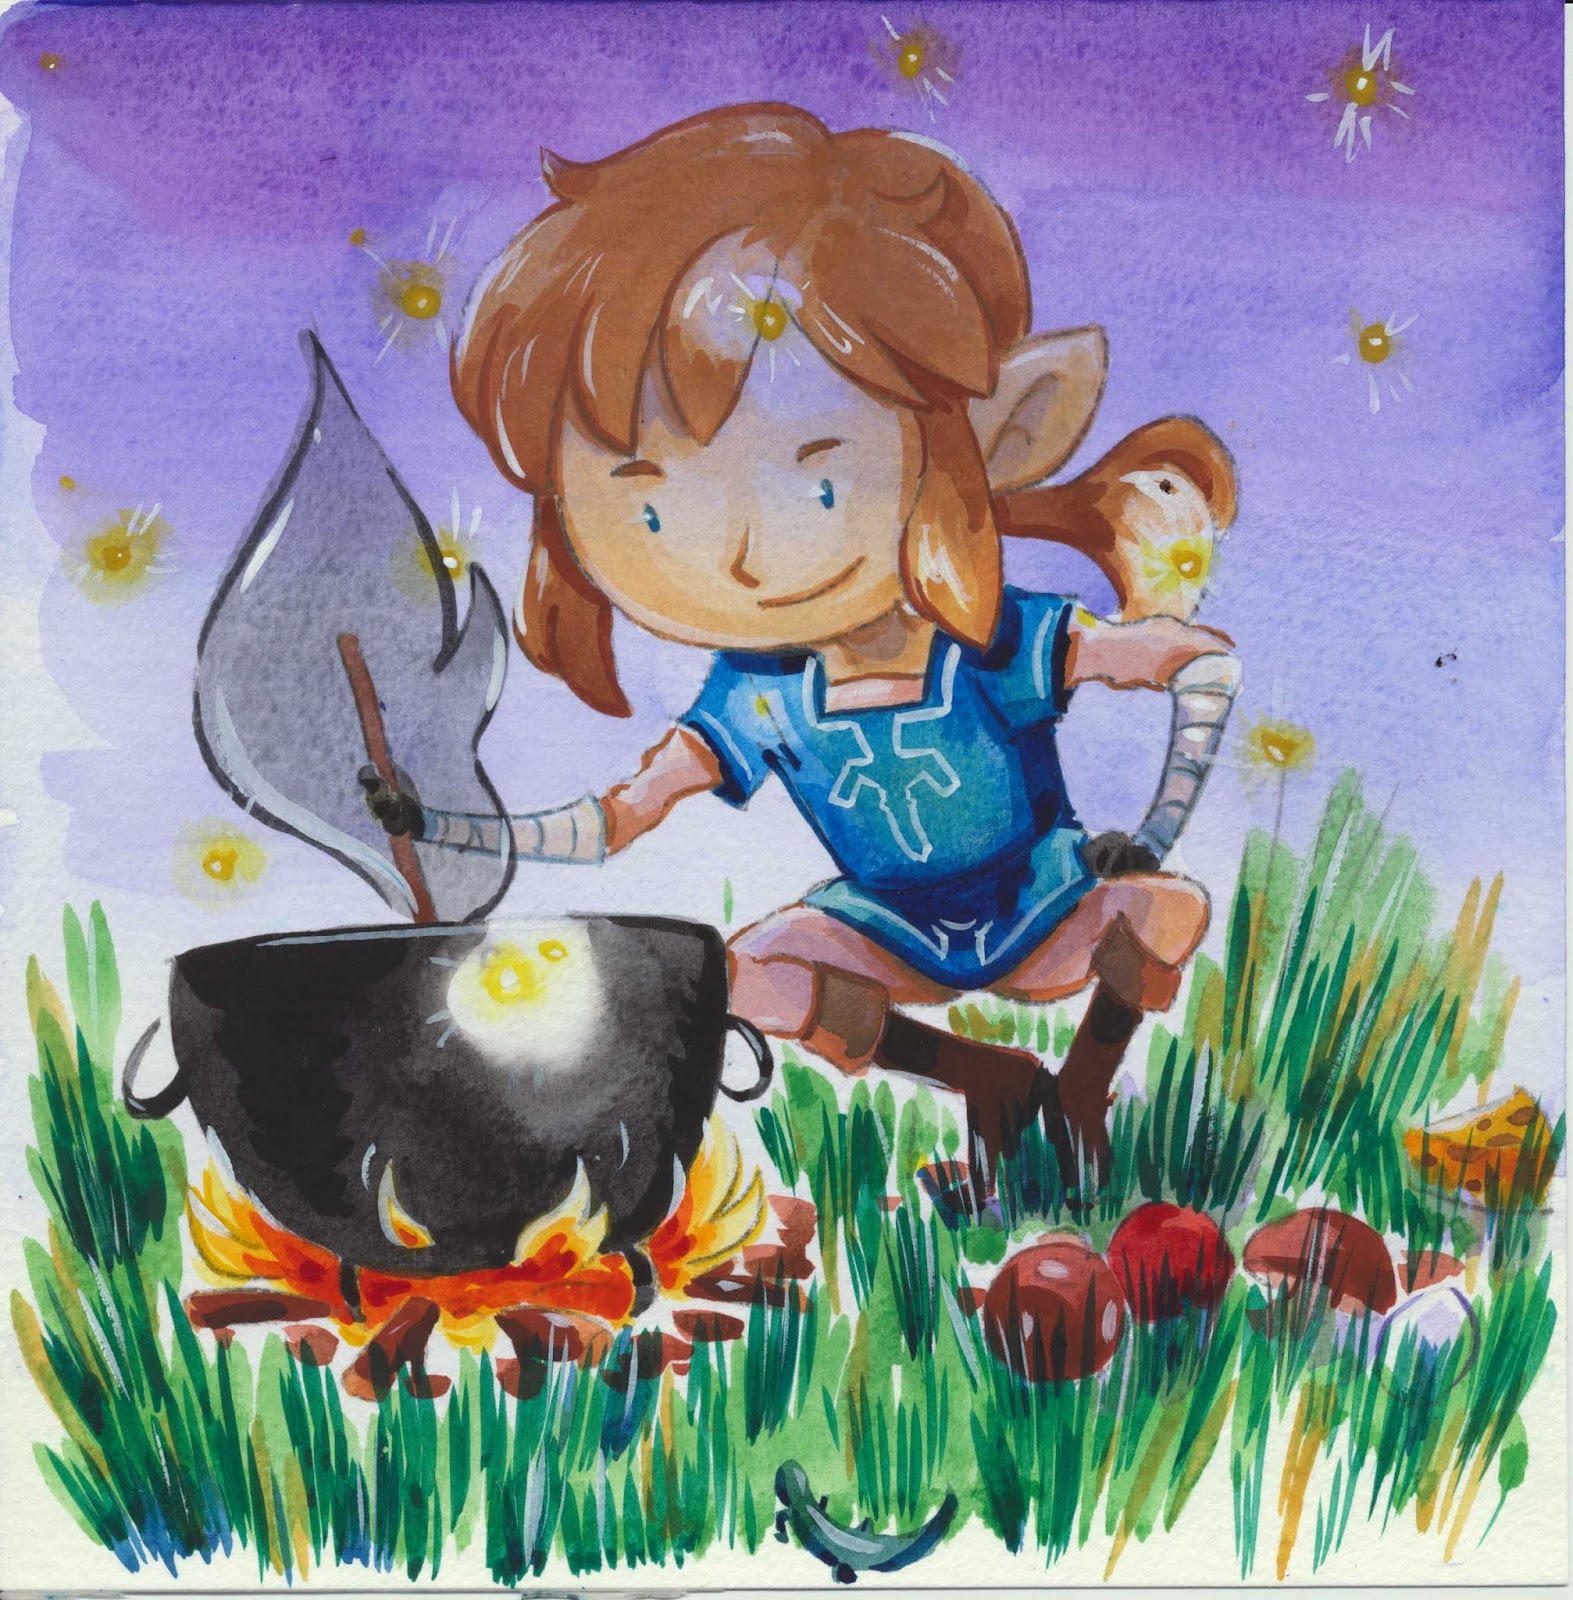
New Watercolors for Mechacon


Other Goodies to Check Out:
Laser Cut Wooden Charms

Original Comics

Cute Accessories
Handpainted Charms

Please consider donating to this blog or purchasing from Natto-shop (http://nattosoup.com/shop) if you want me to continue publishing quality content. All materials tested were purchased from my own pocket. Keep on Truckin' Nattosoup is not under any sponsorship.

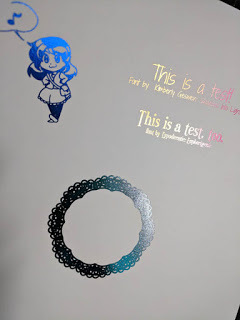
July 23, 2018
Foiling with a Laminator
Kabocha here again!
So, first things first: What’s fusing foil?
Basically, it’s kind of a foil overlay you can bind to paper using an adhesive. Usually that adhesive is toner, but of course, you can use glues and specialty adhesives with a heat gun.
This may be sold in craft stores as Deco foil or Thermal foil.
In this post, we’ll be going over a quick tutorial of using this material to add foil to a printed illustration.
Table of ContentsMaterials
Procedure
Further Testing & Ideas
FAQ
Further Reading
Materials You NeedThermal Foil
Therm-o-Web Deco Foil, Minc, and other brands should be fine. For the purposes of this tutorial, I’m using Minc, but only because it was on sale.
I'm aware of ColorFoils' offerings and tutorials, however, I have not yet had a chance to use their product. If you're curious, you can find them online.
Laminator
The AmazonBasics Laminator is sufficient and approaches an appropriate temperature for basic foiling in my experience.
Toner Printer
The Printer I use is a Brother HL-3170CDW -- but I would strongly suggest using a monochrome toner printer for foiling illustrations.
Smooth Cardstock
My go-to at the moment (because it was on sale for like, super cheap) is Recollections' Cardstock, which you can find at Michaels.
Washi Tape
You're going to need to hold the foil against the paper somehow and prevent it from crinkling up too much in the heat.
Basically, anything low-tack and not made of cellophane ought to do.
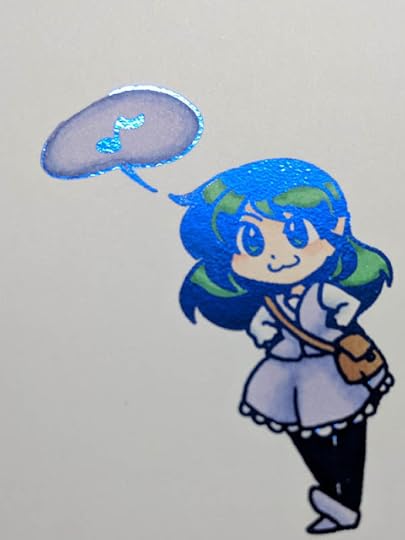
ProcedureHave your image ready to print. For this test, I created an image with a couple of text areas, an illustration (with thick lines) and one of my free Photoshop brushes.
Everything was done at 300DPI, and fits easily on to an 8.5 x 11 sheet of paper.
Print your image. If you're using cardstock, you may need to manually-feed it through your printer. Get your toner foil handy!
If your paper curls up, no worries! You can also set your printer to do less curling in some cases in the printer settings.
Cut out your chunks of foil. Your foil should be slightly larger than the image you're laying it over.
Lay down your foil. Make sure to do this with the colored side facing up!! If you're using pigment foil (rather than metallics), the matte side should be down.

Tape down your foil! Yes, tape it down so it's very flat. You may need to uncurl your paper, or hold it down to do so.
Turn on your Laminator, and let it warm up. When it's ready to go, the "Ready" light will shine green. I usually leave mine on the 5ml setting.
Feed your paper through the laminator. If you have a transfer folder, use that. If not, eh, just run the paper through. Sometimes I'll fold a sheet of printer paper to sit on top of the transfer foil, but... It's not necessary.
Once your paper finishes through the laminator, peel off your foil sheets and tape! Your image should be foiled and ready!
If you find areas need cleaned up, you can use a VERY, VERY low tack post-it note to pick up bits that aren't stuck to toner.
If you're feeling particularly fancy, you can use alcohol markers to color in your illustration.
Further Testing and IdeasThere are still several things left to test, ut fall outside the scope of this post.
First and foremost -- it is rumored that you can print over the foiling, so if you, say, produced a color illustration, you should be able to print around the area where you did not foil. Care would likely be necessary when running the paper through the printer, and minor offsets can occur. Therefore, it would likely be recommended to expand the size of the area you are foiling to cover any potential offset, but keep the "blank" area in your color image the original size.
Finer temperature control on a better laminator would likely yield better results, as would working with a printer which had finer control over the toner output. Darker prints on a toner printer produces more "glue" and would likely work better.
Other materials, such as the application fluids sold with Minc and Deco foil, as well as toner pens, are frequently available. I have not yet tested how these are used, or if they are meant to be used in the laminator, or simply using a heat gun.
Glue can also be used, with varying results. A small glue pen can provide a level of precision for small details, but can be troublesome as you will need to gently press on the foil to ensure it is consistently stuck to the glue. This often results in smudging, which may be an undesired result.
I need to experiment further with pigment foil for a comparison to the metallic foil used here. At the moment, I have Minc's white foil, but its reliability is questionable in comparison to the metallics. Pigment foil may require a darker coat of toner. On my printer, this may require setting the print quality to "fine" when going through the properties dialog in Photoshop.
Another technique of applying foil using a toner printer exists -- however, I don't like to do it. It does not appear to harm the printer, but it is wasteful of toner.
FAQ:Why not the Minc machine thing?
Costs a lot more than the AmazonBasics laminator. You want me to recommend it? Buy it for me, and I'll test and document it.
The Minc machine costs $50 (usually closer to $70 with coupon at my local stores) compared to the AmazonBasics Laminator, which I got for $20-something.
Why don't you use transfer folders?
¯\_(ツ)_/¯ I live dangerously.
Why toner?
Toner is “fused” to the paper it’s printed on using heat. A laminator will re-melt the toner and make it sticky enough for the foil to adhere to.
You could use glue or other adhesives, but if you’re looking to mass produce illustrations to foil, toner is the way to go. (Also, do NOT use inkjet ink. It just won't work, and you will cry.)
Why monochrome?
It’s a waste of toner to use color - when it comes to heating things, up, color toner melts just the same as black toner.
Why smooth or coated cardstock?
The foil won't apply evenly. The toner settles in divots on the paper's surface and well. Then you get an uneven and speckly sort of appearance. If that's what you want, that's fine though!
Further ReadingTransfer Foil to Paper With a Laser Printer
Color Foils: Techniques
How to Foil: Live More Worry Less Metallic Gold Wall Print
Foil Tech Q∓A
Please consider donating to this blog or purchasing from Natto-shop (http://nattosoup.com/shop) if you want me to continue publishing quality content. All materials tested were purchased from my own pocket. Keep on Truckin' Nattosoup is not under any sponsorship.
So, first things first: What’s fusing foil?
Basically, it’s kind of a foil overlay you can bind to paper using an adhesive. Usually that adhesive is toner, but of course, you can use glues and specialty adhesives with a heat gun.
This may be sold in craft stores as Deco foil or Thermal foil.
In this post, we’ll be going over a quick tutorial of using this material to add foil to a printed illustration.
Table of ContentsMaterials
Procedure
Further Testing & Ideas
FAQ
Further Reading
Materials You NeedThermal Foil
Therm-o-Web Deco Foil, Minc, and other brands should be fine. For the purposes of this tutorial, I’m using Minc, but only because it was on sale.
I'm aware of ColorFoils' offerings and tutorials, however, I have not yet had a chance to use their product. If you're curious, you can find them online.
Laminator
The AmazonBasics Laminator is sufficient and approaches an appropriate temperature for basic foiling in my experience.
Toner Printer
The Printer I use is a Brother HL-3170CDW -- but I would strongly suggest using a monochrome toner printer for foiling illustrations.
Smooth Cardstock
My go-to at the moment (because it was on sale for like, super cheap) is Recollections' Cardstock, which you can find at Michaels.
Washi Tape
You're going to need to hold the foil against the paper somehow and prevent it from crinkling up too much in the heat.
Basically, anything low-tack and not made of cellophane ought to do.
ProcedureHave your image ready to print. For this test, I created an image with a couple of text areas, an illustration (with thick lines) and one of my free Photoshop brushes.
Everything was done at 300DPI, and fits easily on to an 8.5 x 11 sheet of paper.
Print your image. If you're using cardstock, you may need to manually-feed it through your printer. Get your toner foil handy!
If your paper curls up, no worries! You can also set your printer to do less curling in some cases in the printer settings.
Cut out your chunks of foil. Your foil should be slightly larger than the image you're laying it over.
Lay down your foil. Make sure to do this with the colored side facing up!! If you're using pigment foil (rather than metallics), the matte side should be down.
Tape down your foil! Yes, tape it down so it's very flat. You may need to uncurl your paper, or hold it down to do so.
Turn on your Laminator, and let it warm up. When it's ready to go, the "Ready" light will shine green. I usually leave mine on the 5ml setting.
Feed your paper through the laminator. If you have a transfer folder, use that. If not, eh, just run the paper through. Sometimes I'll fold a sheet of printer paper to sit on top of the transfer foil, but... It's not necessary.
Once your paper finishes through the laminator, peel off your foil sheets and tape! Your image should be foiled and ready!
If you find areas need cleaned up, you can use a VERY, VERY low tack post-it note to pick up bits that aren't stuck to toner.
If you're feeling particularly fancy, you can use alcohol markers to color in your illustration.
Further Testing and IdeasThere are still several things left to test, ut fall outside the scope of this post.
First and foremost -- it is rumored that you can print over the foiling, so if you, say, produced a color illustration, you should be able to print around the area where you did not foil. Care would likely be necessary when running the paper through the printer, and minor offsets can occur. Therefore, it would likely be recommended to expand the size of the area you are foiling to cover any potential offset, but keep the "blank" area in your color image the original size.
Finer temperature control on a better laminator would likely yield better results, as would working with a printer which had finer control over the toner output. Darker prints on a toner printer produces more "glue" and would likely work better.
Other materials, such as the application fluids sold with Minc and Deco foil, as well as toner pens, are frequently available. I have not yet tested how these are used, or if they are meant to be used in the laminator, or simply using a heat gun.
Glue can also be used, with varying results. A small glue pen can provide a level of precision for small details, but can be troublesome as you will need to gently press on the foil to ensure it is consistently stuck to the glue. This often results in smudging, which may be an undesired result.
I need to experiment further with pigment foil for a comparison to the metallic foil used here. At the moment, I have Minc's white foil, but its reliability is questionable in comparison to the metallics. Pigment foil may require a darker coat of toner. On my printer, this may require setting the print quality to "fine" when going through the properties dialog in Photoshop.
Another technique of applying foil using a toner printer exists -- however, I don't like to do it. It does not appear to harm the printer, but it is wasteful of toner.
FAQ:Why not the Minc machine thing?
Costs a lot more than the AmazonBasics laminator. You want me to recommend it? Buy it for me, and I'll test and document it.
The Minc machine costs $50 (usually closer to $70 with coupon at my local stores) compared to the AmazonBasics Laminator, which I got for $20-something.
Why don't you use transfer folders?
¯\_(ツ)_/¯ I live dangerously.
Why toner?
Toner is “fused” to the paper it’s printed on using heat. A laminator will re-melt the toner and make it sticky enough for the foil to adhere to.
You could use glue or other adhesives, but if you’re looking to mass produce illustrations to foil, toner is the way to go. (Also, do NOT use inkjet ink. It just won't work, and you will cry.)
Why monochrome?
It’s a waste of toner to use color - when it comes to heating things, up, color toner melts just the same as black toner.
Why smooth or coated cardstock?
The foil won't apply evenly. The toner settles in divots on the paper's surface and well. Then you get an uneven and speckly sort of appearance. If that's what you want, that's fine though!
Further ReadingTransfer Foil to Paper With a Laser Printer
Color Foils: Techniques
How to Foil: Live More Worry Less Metallic Gold Wall Print
Foil Tech Q∓A
Please consider donating to this blog or purchasing from Natto-shop (http://nattosoup.com/shop) if you want me to continue publishing quality content. All materials tested were purchased from my own pocket. Keep on Truckin' Nattosoup is not under any sponsorship.
July 19, 2018
Advice For Tabling At Nashville Conventions
A Caveat: There's a plethora of convention opportunities in the Greater Nashville area. I haven't tabled at any of the horror or sci-fi conventions, nor am I eligible to table with TACA given the nature of my work (comics are not considered fine art in Nashville). I also have not shown in any of the competitions, as none accept comic art as a submission. So there may be opportunities available to you that are closed to me.
I moved to Nashville in 2013, after graduating from SCAD. I was eager to begin my professional life and felt like Nashville had a lot to offer. Although Nashville was not a place of opportunity for me or my art, many of the shows in the Nashville area proved otherwise. During my time in Nashville, I have found the attendees of most shows to be friendly, warm, chatty, and very interested in the comics I have to offer. It's exciting to engage an audience who are open to what you have to offer and seem to believe in the work you're doing, and are eager to learn more about the process. I have done shows all over the country, from San Jose to New Orleans, but feel that the attendees of the anime cons in Nashville are the most excited about my work.
I am a co founder of the convention resource How to be a Con Artist and frequently share con recaps to my Youtube channel.
Who am I?
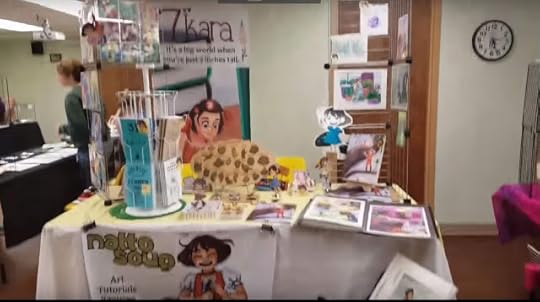
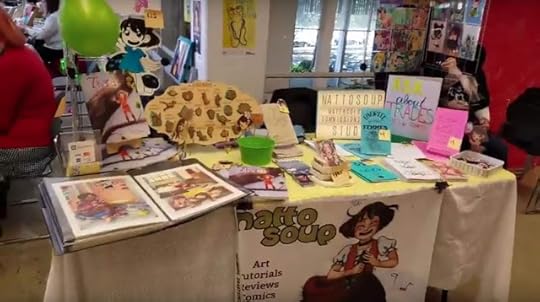
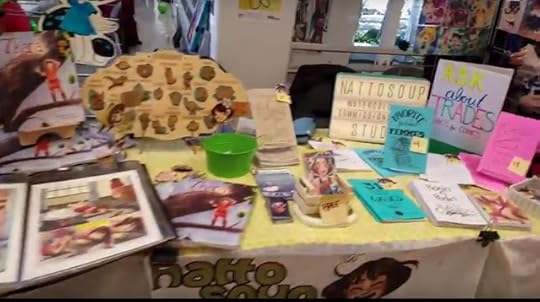
A kidlit/YA comic artist with a manga-influenced style. I work in bright colors both digitally and in traditional media. My table has some fanart but is also full of original art, original designs, comics, and minicomics. I am very involved in the local convention scene, and have produced several workshops and panels for the greater Nashville area. I am energetic, engaging, and love talking about comics with anyone interested.
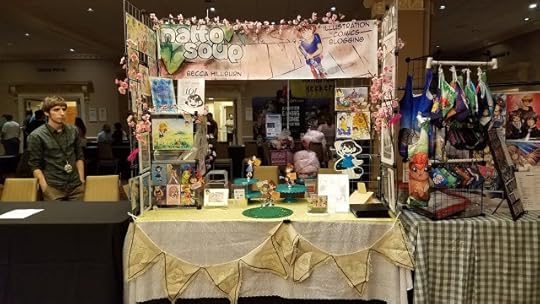
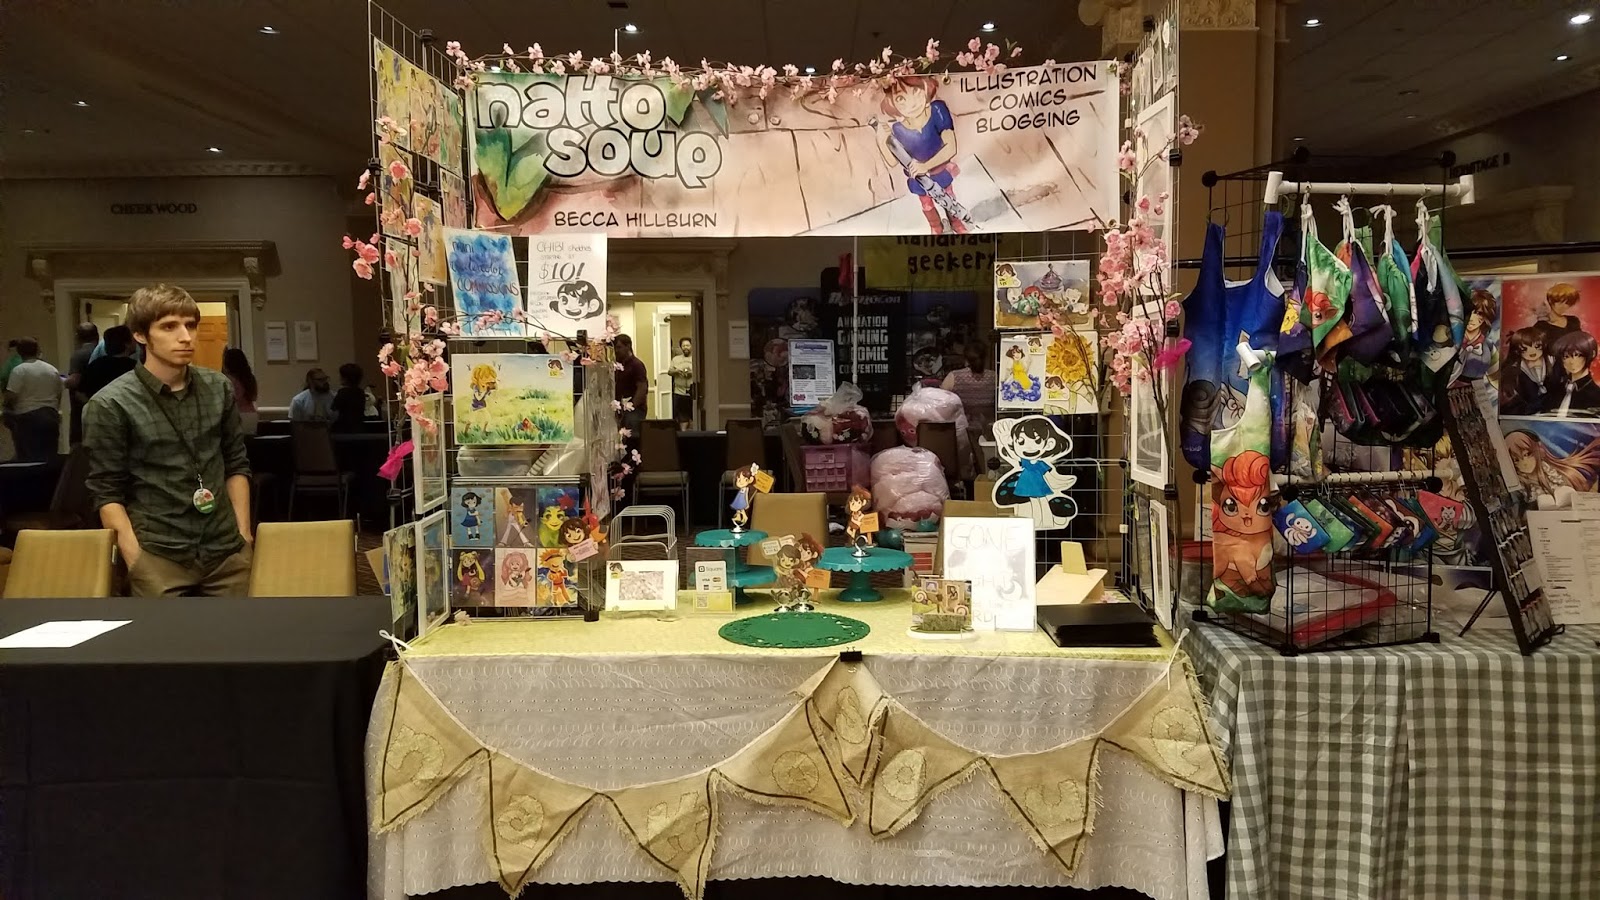
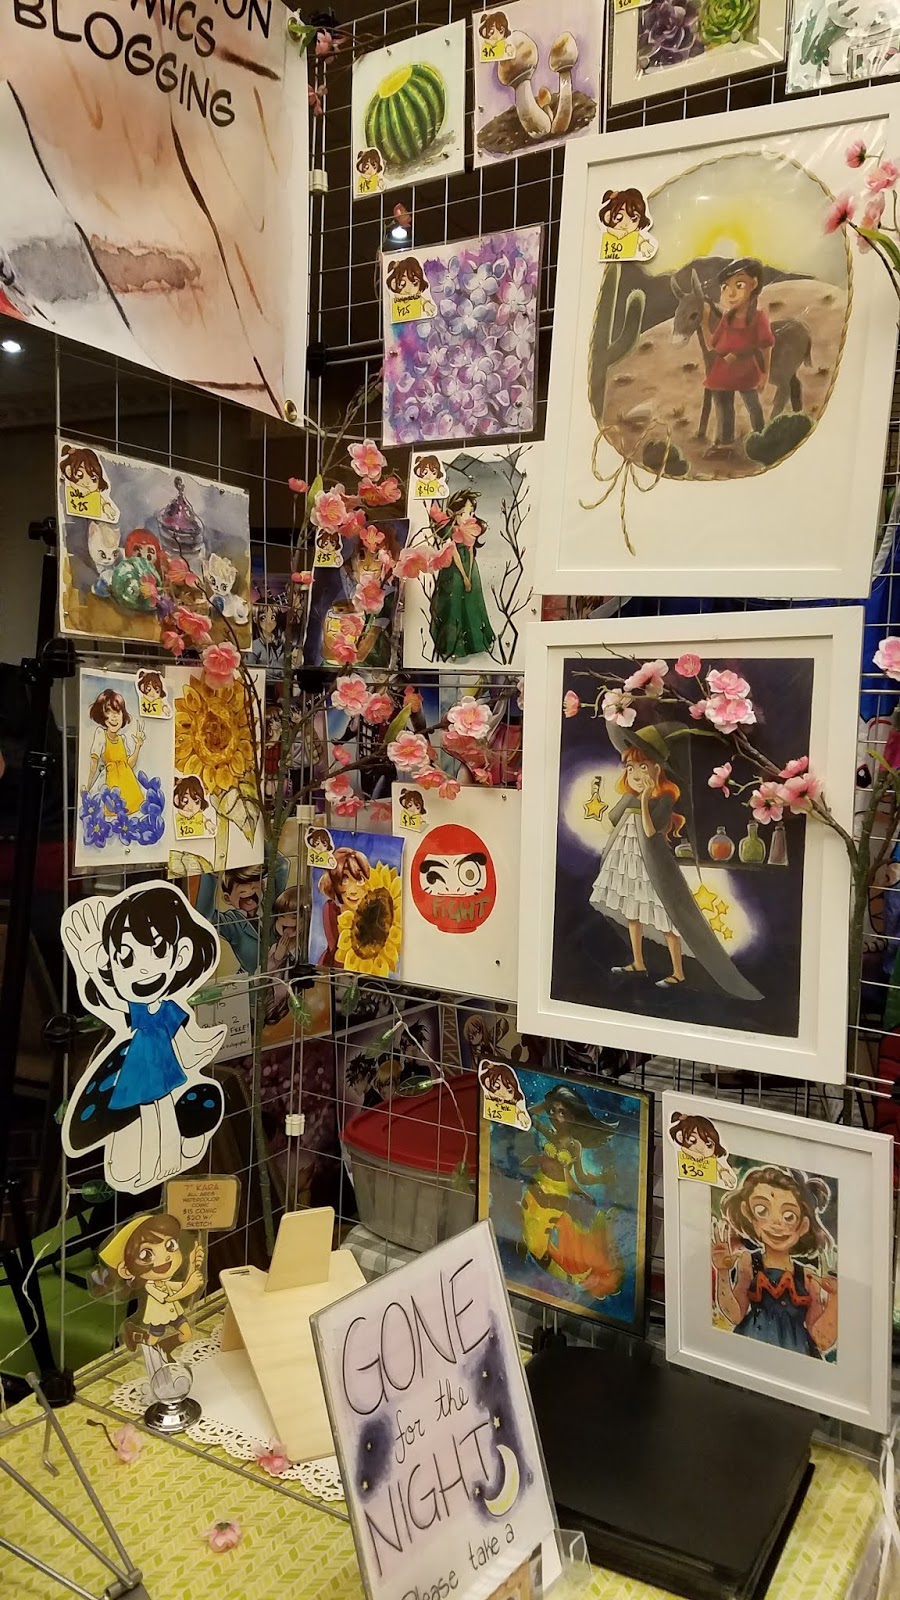
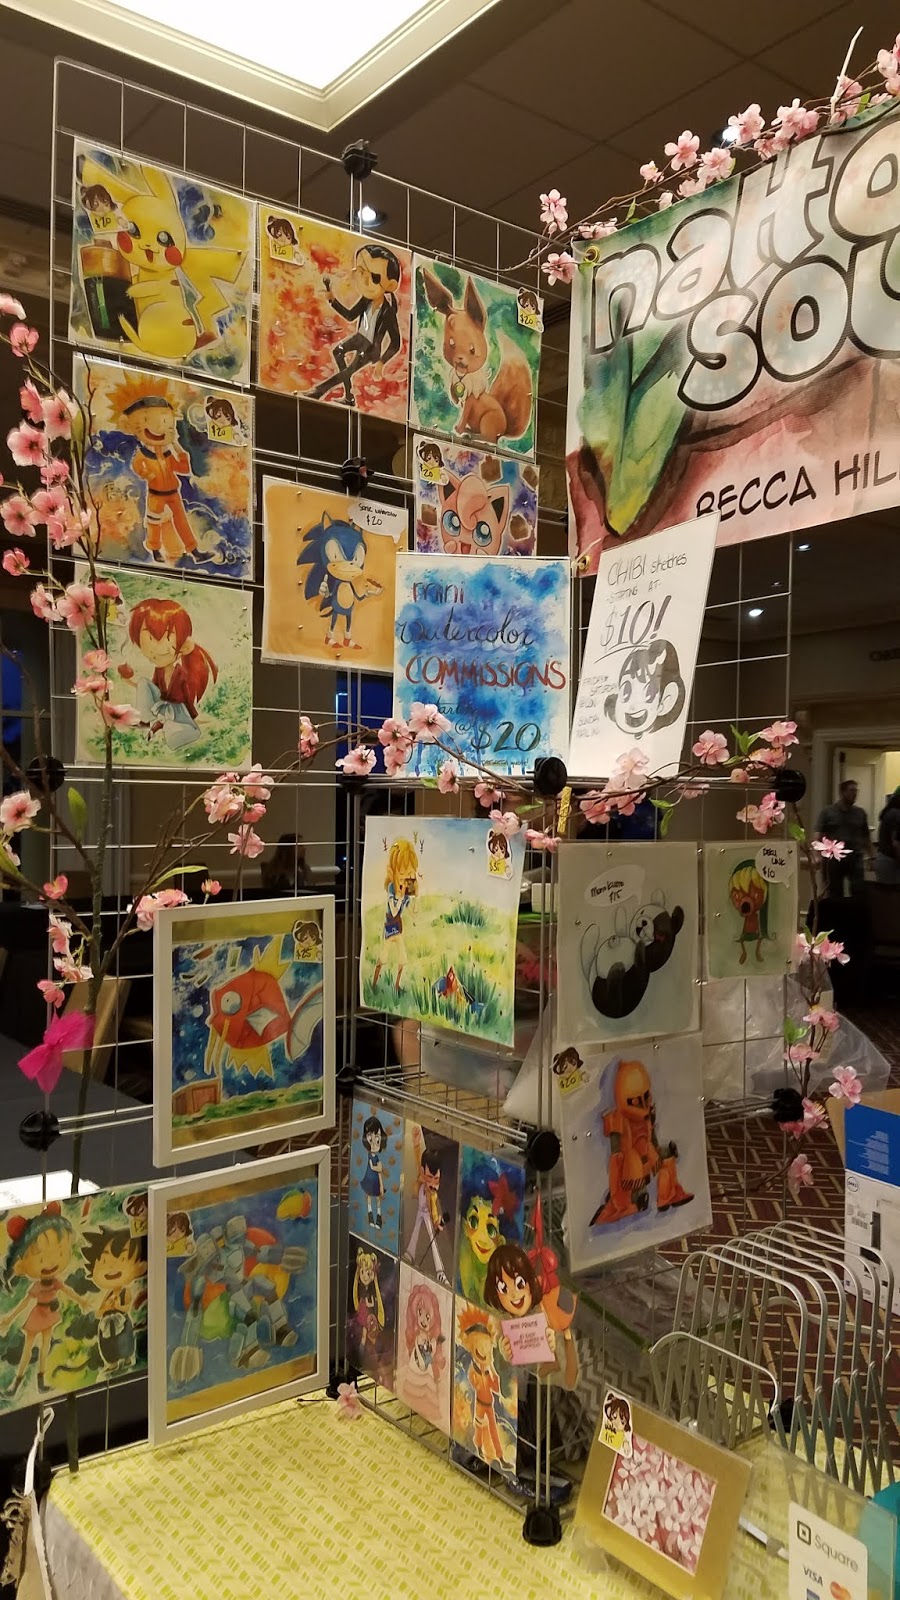
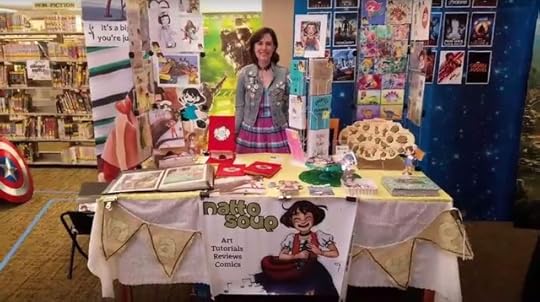
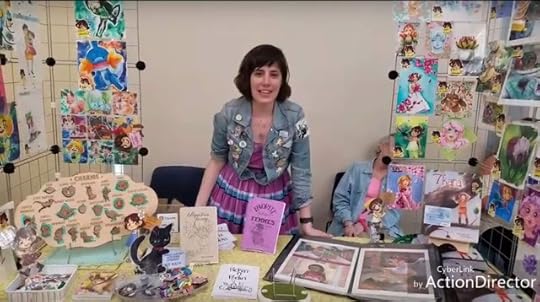
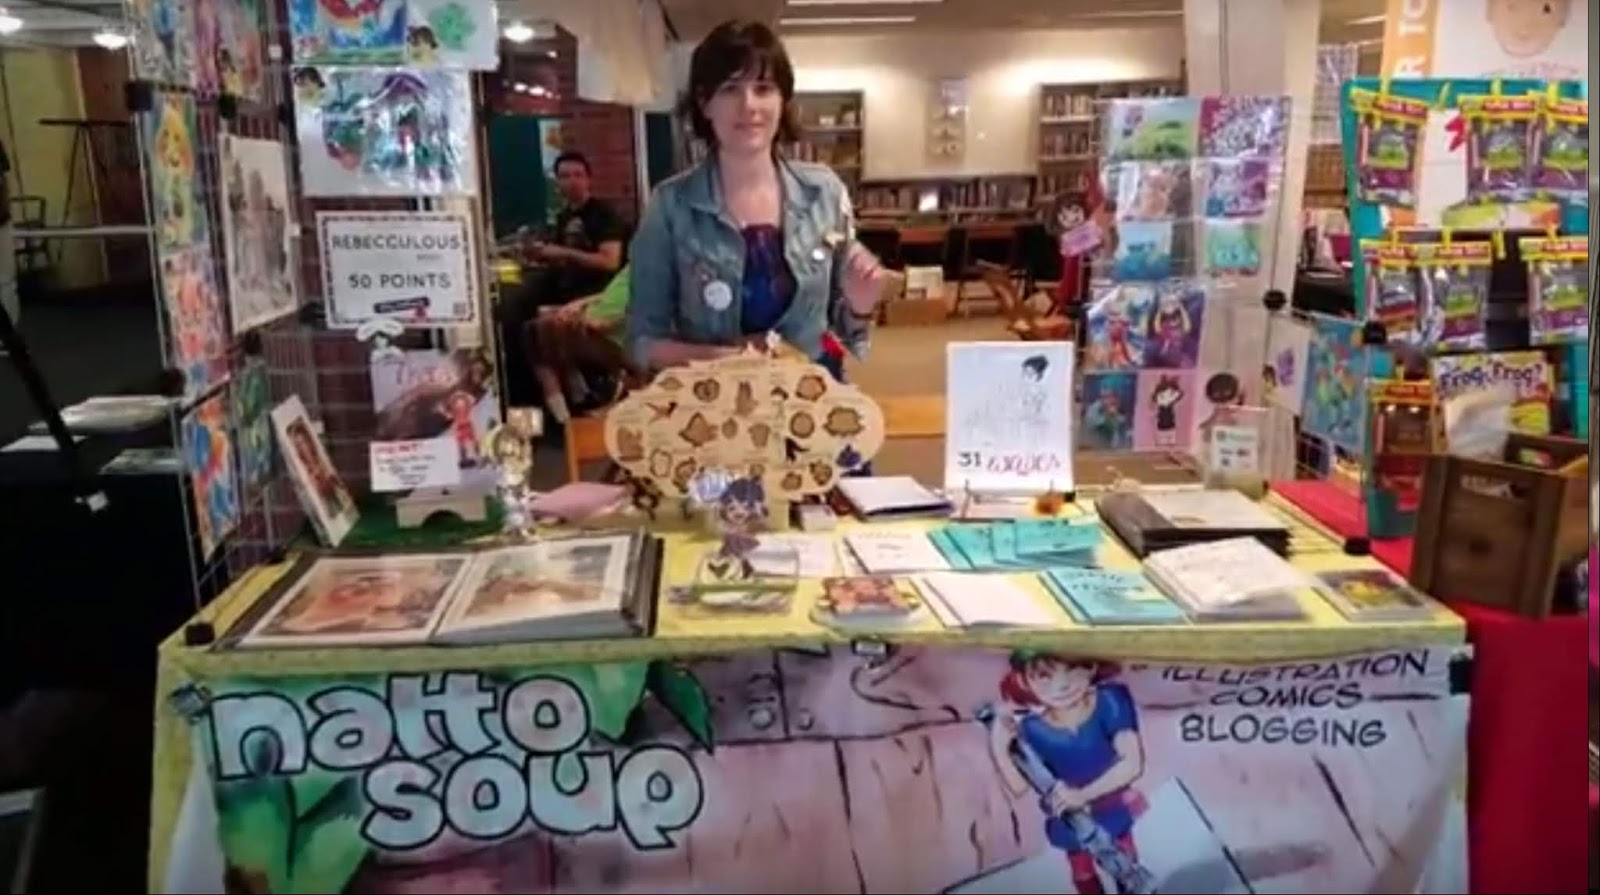
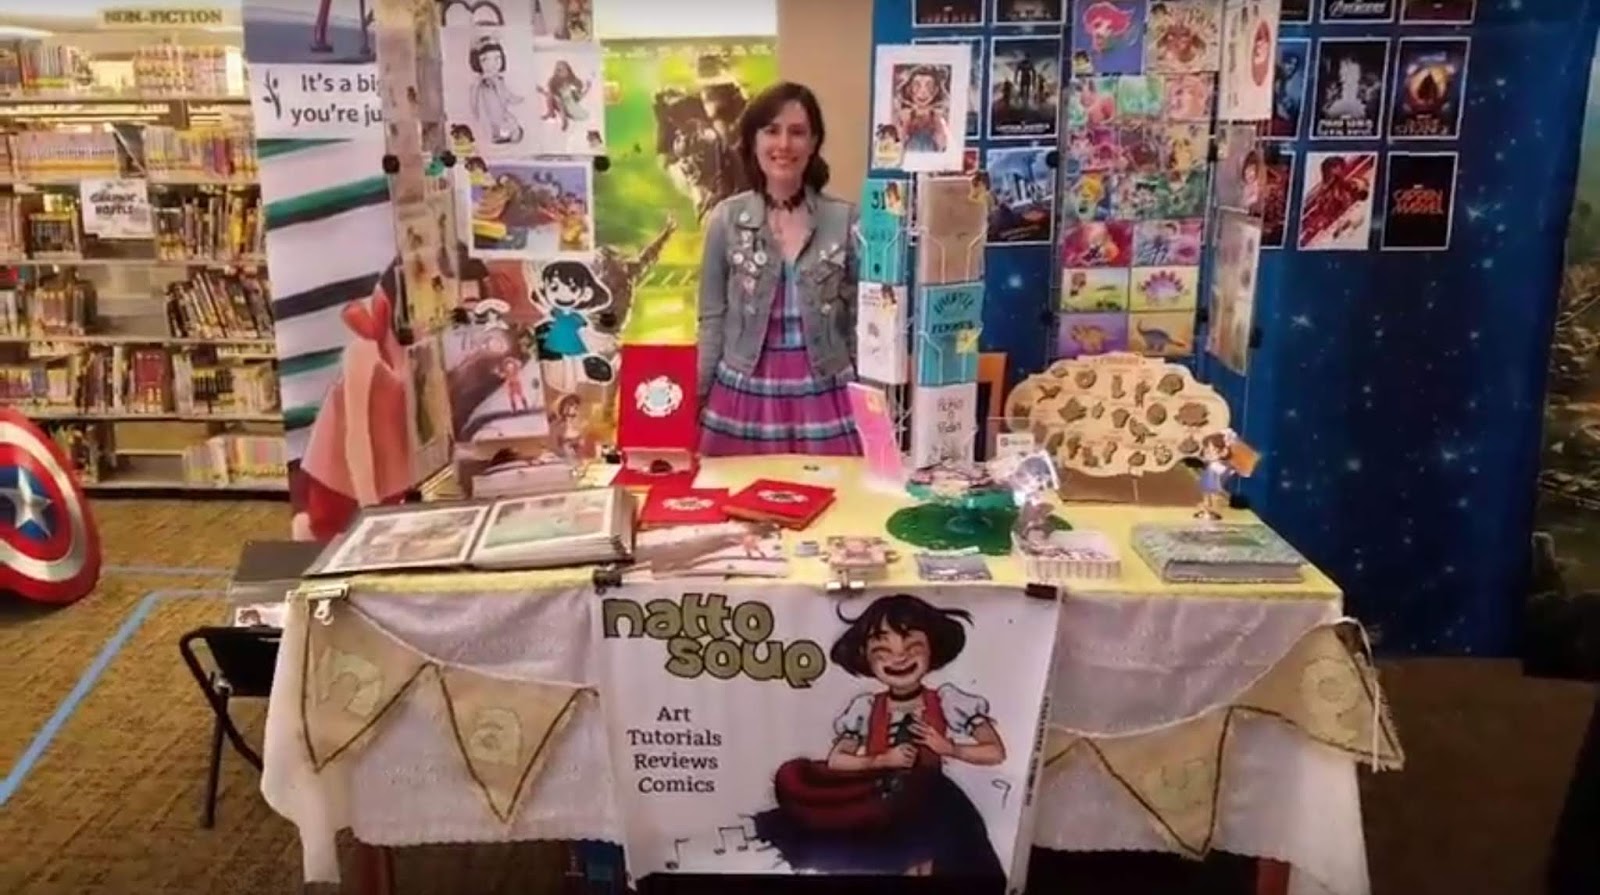
My tables are attractive, inviting, and designed to provide a pleasant experience. I describe my table as 'happy picnic'. I utilize bright, happy greens, eyelit lace, handmade elements, and lots of pastels. I also use lights to help draw the eye.
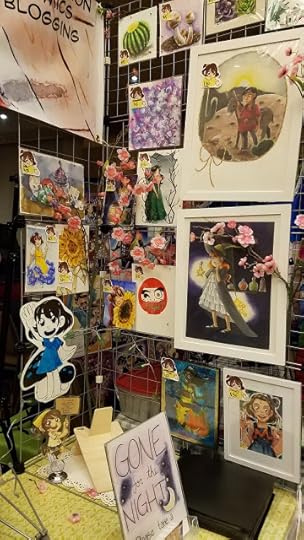

My table uses wire mesh grids, S hooks, photo frames, and magnets to display original art. My signs have been designed to not only display prices but serve as a bit of promotion for my comic, 7" Kara. I have various organizers on the table, from file holders (to hold finished commissions) to pie plates and small shelves, and I try to keep the table as hands-on as possible. I utilize organized zones to make content easier to parse.
Conventions I Have Tabled At (Nashville area):
MTAC (anime)
GMX (geeky media)
Akaicon (anime)
Free Comic Book Day (comics)
Cherry Blossom Festival (family event, outdoor)
Handmade and Bound (books and bookmaking)
Firefly Artisan Fair (outdoor, craft fair)
Taigacon (anime)
Nashville Comic And Toy Day (geeky media)
Putnam County Library Con (comics)
Imaginacon (Gallatin) (comics)
Note: Nashville does not have a coherent comic-making scene so solidarity and support can be hard to find at times. I also refuse to do Wizard-run comic shows.
At all of these shows save for Taigacon, the attendees were upbeat, excited to be there, and eager to engage with the work I produced. I tend to give away a lot of business and postcards as well as promotional stickers for my webcomics, and free copies of Pickin' N Peelin, a short minicomic. The response at-con is great, but the follow up is generally pretty terrible, even from people who purchased mail in commissions. I find this to be about the same for shows across the country.
How Do I Find Out About Local Cons?
Convention Scene
Talking to Other Artists- Ask what shows they've got lined up, make friends, and then ask what shows they would recommend
Talking to Patrons at Shows- kids, teens, and parents generally have some idea of other shows happening. Talking to librarians and teachers, and expressing an interest in workshops has opened up doors to further small conventions
How to be a Con Artist- This isn't where I find out about shows, but I do share my con recaps there, if you're interested in learning more about a particular Nashville area show.
If you're in the Nashville area, you should check out my Youtube channel- I post con recaps for all the shows I attend, including local cons, where I discuss demographics, what sells, and what the artist alley looks like.
Who is my Demographic?
Online: 18-34 year old women, by an overwhelming margin (but this reflects the blog, my Twitter, and my Youtube channel, rather than the comics I make)
At Cons:
Anime Cons: Primarily teenage girls, although a lot of younger boys enjoy my comic as well.
Library Cons: Primarily parents with younger kids.
Where Do I Find Them?
I find much of my audience at anime conventions such as MTAC or Akaicon, as well as at the Cherry Blossom Festival. I've had some success at Handmade and Bound, although that can be hit or miss, as that show is primarily bookbinders. I've had a fair amount of success selling books at library shows such as Imaginacon (Gallatin) and the Putnam County Library's convention.
What Do I Sell/What Sells for Me?
7" Kara (all ages friendly watercolor comic book)
Minicomics (all ages friendly, themed)
Laser cute wooden charms
Handpainted wooden charms
Stickers
Miniprints (original art and fanart)
Original art (watercolor and alcohol marker)
Commissions
By far, my biggest seller in Nashville is commissions. I find Nashville to be an avid art community that is underserved by government art projects or public school art classes. Copies of 7" Kara, as well as wooden charms, sell well too.
What Works?
Be friendly and approachable- Nashvillians love to chat
Design your table the way you would design your art- make sure your books are up and visible, utilize clear, attractive signage, and sell more than just books! A variety of products appeal to the Nashville area
It takes awhile to build a fanbase, so do several shows in this area, and try to consistently
If you're tabling at MTAC, do your research! Many of the artists in that alley have tabled at numerous shows, and know how to catch the audience's attention. Design your table to go up, rather than just a flat tablespace.
Con Recaps:
Handmade and Bound 2016: https://www.youtube.com/watch?v=Kgk88L_AAXI
MTAC 2017: https://www.youtube.com/watch?v=cXH4nAxtWok
MTAC 2018: https://www.youtube.com/watch?v=CcwBzAlsk4s
Free Comic Book Day 2017: https://www.youtube.com/watch?v=eTz2XV-JUno&list=PL_pXBtCqjKy8TmSnznUAgSPluqBQxIulk&index=7
Cherry Blossom Festival 2017: https://www.youtube.com/watch?v=YzoGgerJoMM&t=2s
Cherry Blossom Festival 2018: https://www.youtube.com/watch?v=RdLcK49xqZk&t=338s
PCL CCAF 2017: https://www.youtube.com/watch?v=ZsVqsDPbjMI&t=19s
Imaginacon 2018: https://www.youtube.com/watch?v=6JjKMO5rvKw&list=PL_pXBtCqjKy8TmSnznUAgSPluqBQxIulk&index=23
Firefly Artisan Fair 2018: https://www.youtube.com/watch?v=0n3gjZSk_mY
Please consider donating to this blog or purchasing from Natto-shop (http://nattosoup.com/shop) if you want me to continue publishing quality content. All materials tested were purchased from my own pocket. Keep on Truckin' Nattosoup is not under any sponsorship.
I moved to Nashville in 2013, after graduating from SCAD. I was eager to begin my professional life and felt like Nashville had a lot to offer. Although Nashville was not a place of opportunity for me or my art, many of the shows in the Nashville area proved otherwise. During my time in Nashville, I have found the attendees of most shows to be friendly, warm, chatty, and very interested in the comics I have to offer. It's exciting to engage an audience who are open to what you have to offer and seem to believe in the work you're doing, and are eager to learn more about the process. I have done shows all over the country, from San Jose to New Orleans, but feel that the attendees of the anime cons in Nashville are the most excited about my work.
I am a co founder of the convention resource How to be a Con Artist and frequently share con recaps to my Youtube channel.
Who am I?
A kidlit/YA comic artist with a manga-influenced style. I work in bright colors both digitally and in traditional media. My table has some fanart but is also full of original art, original designs, comics, and minicomics. I am very involved in the local convention scene, and have produced several workshops and panels for the greater Nashville area. I am energetic, engaging, and love talking about comics with anyone interested.
My tables are attractive, inviting, and designed to provide a pleasant experience. I describe my table as 'happy picnic'. I utilize bright, happy greens, eyelit lace, handmade elements, and lots of pastels. I also use lights to help draw the eye.
My table uses wire mesh grids, S hooks, photo frames, and magnets to display original art. My signs have been designed to not only display prices but serve as a bit of promotion for my comic, 7" Kara. I have various organizers on the table, from file holders (to hold finished commissions) to pie plates and small shelves, and I try to keep the table as hands-on as possible. I utilize organized zones to make content easier to parse.
Conventions I Have Tabled At (Nashville area):
MTAC (anime)
GMX (geeky media)
Akaicon (anime)
Free Comic Book Day (comics)
Cherry Blossom Festival (family event, outdoor)
Handmade and Bound (books and bookmaking)
Firefly Artisan Fair (outdoor, craft fair)
Taigacon (anime)
Nashville Comic And Toy Day (geeky media)
Putnam County Library Con (comics)
Imaginacon (Gallatin) (comics)
Note: Nashville does not have a coherent comic-making scene so solidarity and support can be hard to find at times. I also refuse to do Wizard-run comic shows.
At all of these shows save for Taigacon, the attendees were upbeat, excited to be there, and eager to engage with the work I produced. I tend to give away a lot of business and postcards as well as promotional stickers for my webcomics, and free copies of Pickin' N Peelin, a short minicomic. The response at-con is great, but the follow up is generally pretty terrible, even from people who purchased mail in commissions. I find this to be about the same for shows across the country.
How Do I Find Out About Local Cons?
Convention Scene
Talking to Other Artists- Ask what shows they've got lined up, make friends, and then ask what shows they would recommend
Talking to Patrons at Shows- kids, teens, and parents generally have some idea of other shows happening. Talking to librarians and teachers, and expressing an interest in workshops has opened up doors to further small conventions
How to be a Con Artist- This isn't where I find out about shows, but I do share my con recaps there, if you're interested in learning more about a particular Nashville area show.
If you're in the Nashville area, you should check out my Youtube channel- I post con recaps for all the shows I attend, including local cons, where I discuss demographics, what sells, and what the artist alley looks like.
Who is my Demographic?
Online: 18-34 year old women, by an overwhelming margin (but this reflects the blog, my Twitter, and my Youtube channel, rather than the comics I make)
At Cons:
Anime Cons: Primarily teenage girls, although a lot of younger boys enjoy my comic as well.
Library Cons: Primarily parents with younger kids.
Where Do I Find Them?
I find much of my audience at anime conventions such as MTAC or Akaicon, as well as at the Cherry Blossom Festival. I've had some success at Handmade and Bound, although that can be hit or miss, as that show is primarily bookbinders. I've had a fair amount of success selling books at library shows such as Imaginacon (Gallatin) and the Putnam County Library's convention.
What Do I Sell/What Sells for Me?
7" Kara (all ages friendly watercolor comic book)
Minicomics (all ages friendly, themed)
Laser cute wooden charms
Handpainted wooden charms
Stickers
Miniprints (original art and fanart)
Original art (watercolor and alcohol marker)
Commissions
By far, my biggest seller in Nashville is commissions. I find Nashville to be an avid art community that is underserved by government art projects or public school art classes. Copies of 7" Kara, as well as wooden charms, sell well too.
What Works?
Be friendly and approachable- Nashvillians love to chat
Design your table the way you would design your art- make sure your books are up and visible, utilize clear, attractive signage, and sell more than just books! A variety of products appeal to the Nashville area
It takes awhile to build a fanbase, so do several shows in this area, and try to consistently
If you're tabling at MTAC, do your research! Many of the artists in that alley have tabled at numerous shows, and know how to catch the audience's attention. Design your table to go up, rather than just a flat tablespace.
Con Recaps:
Handmade and Bound 2016: https://www.youtube.com/watch?v=Kgk88L_AAXI
MTAC 2017: https://www.youtube.com/watch?v=cXH4nAxtWok
MTAC 2018: https://www.youtube.com/watch?v=CcwBzAlsk4s
Free Comic Book Day 2017: https://www.youtube.com/watch?v=eTz2XV-JUno&list=PL_pXBtCqjKy8TmSnznUAgSPluqBQxIulk&index=7
Cherry Blossom Festival 2017: https://www.youtube.com/watch?v=YzoGgerJoMM&t=2s
Cherry Blossom Festival 2018: https://www.youtube.com/watch?v=RdLcK49xqZk&t=338s
PCL CCAF 2017: https://www.youtube.com/watch?v=ZsVqsDPbjMI&t=19s
Imaginacon 2018: https://www.youtube.com/watch?v=6JjKMO5rvKw&list=PL_pXBtCqjKy8TmSnznUAgSPluqBQxIulk&index=23
Firefly Artisan Fair 2018: https://www.youtube.com/watch?v=0n3gjZSk_mY
Please consider donating to this blog or purchasing from Natto-shop (http://nattosoup.com/shop) if you want me to continue publishing quality content. All materials tested were purchased from my own pocket. Keep on Truckin' Nattosoup is not under any sponsorship.
July 16, 2018
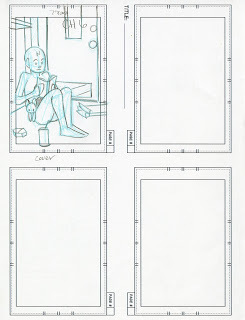
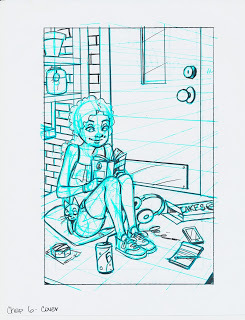
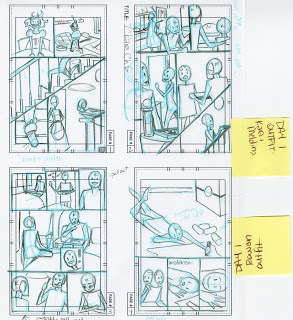
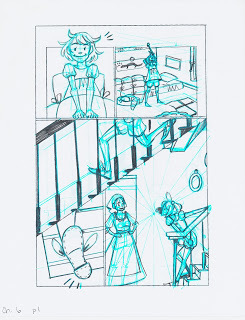
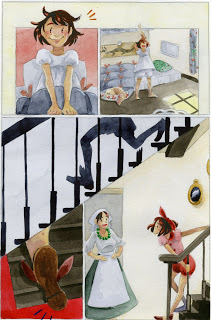
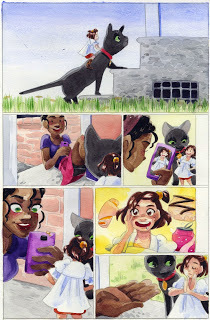
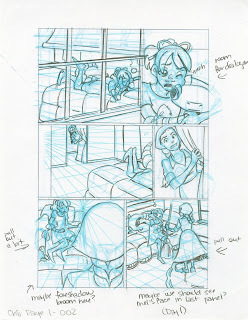
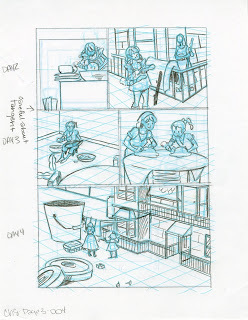
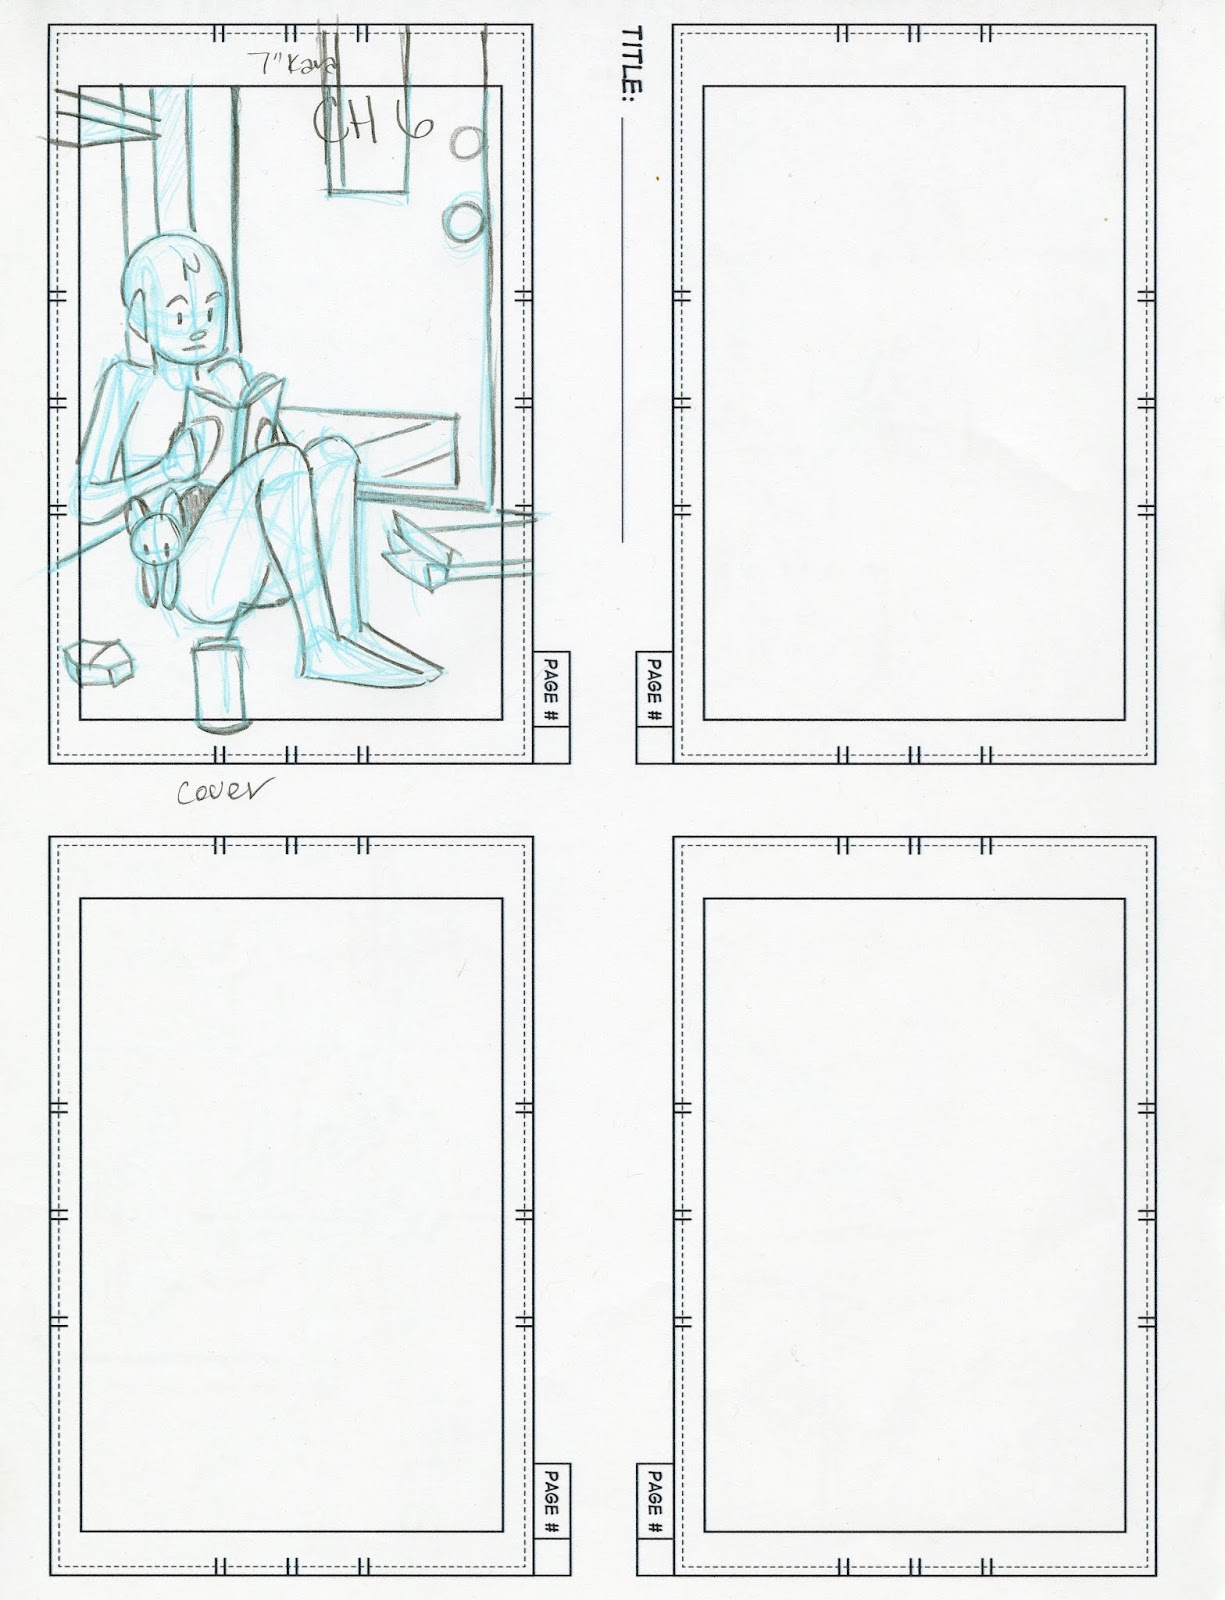
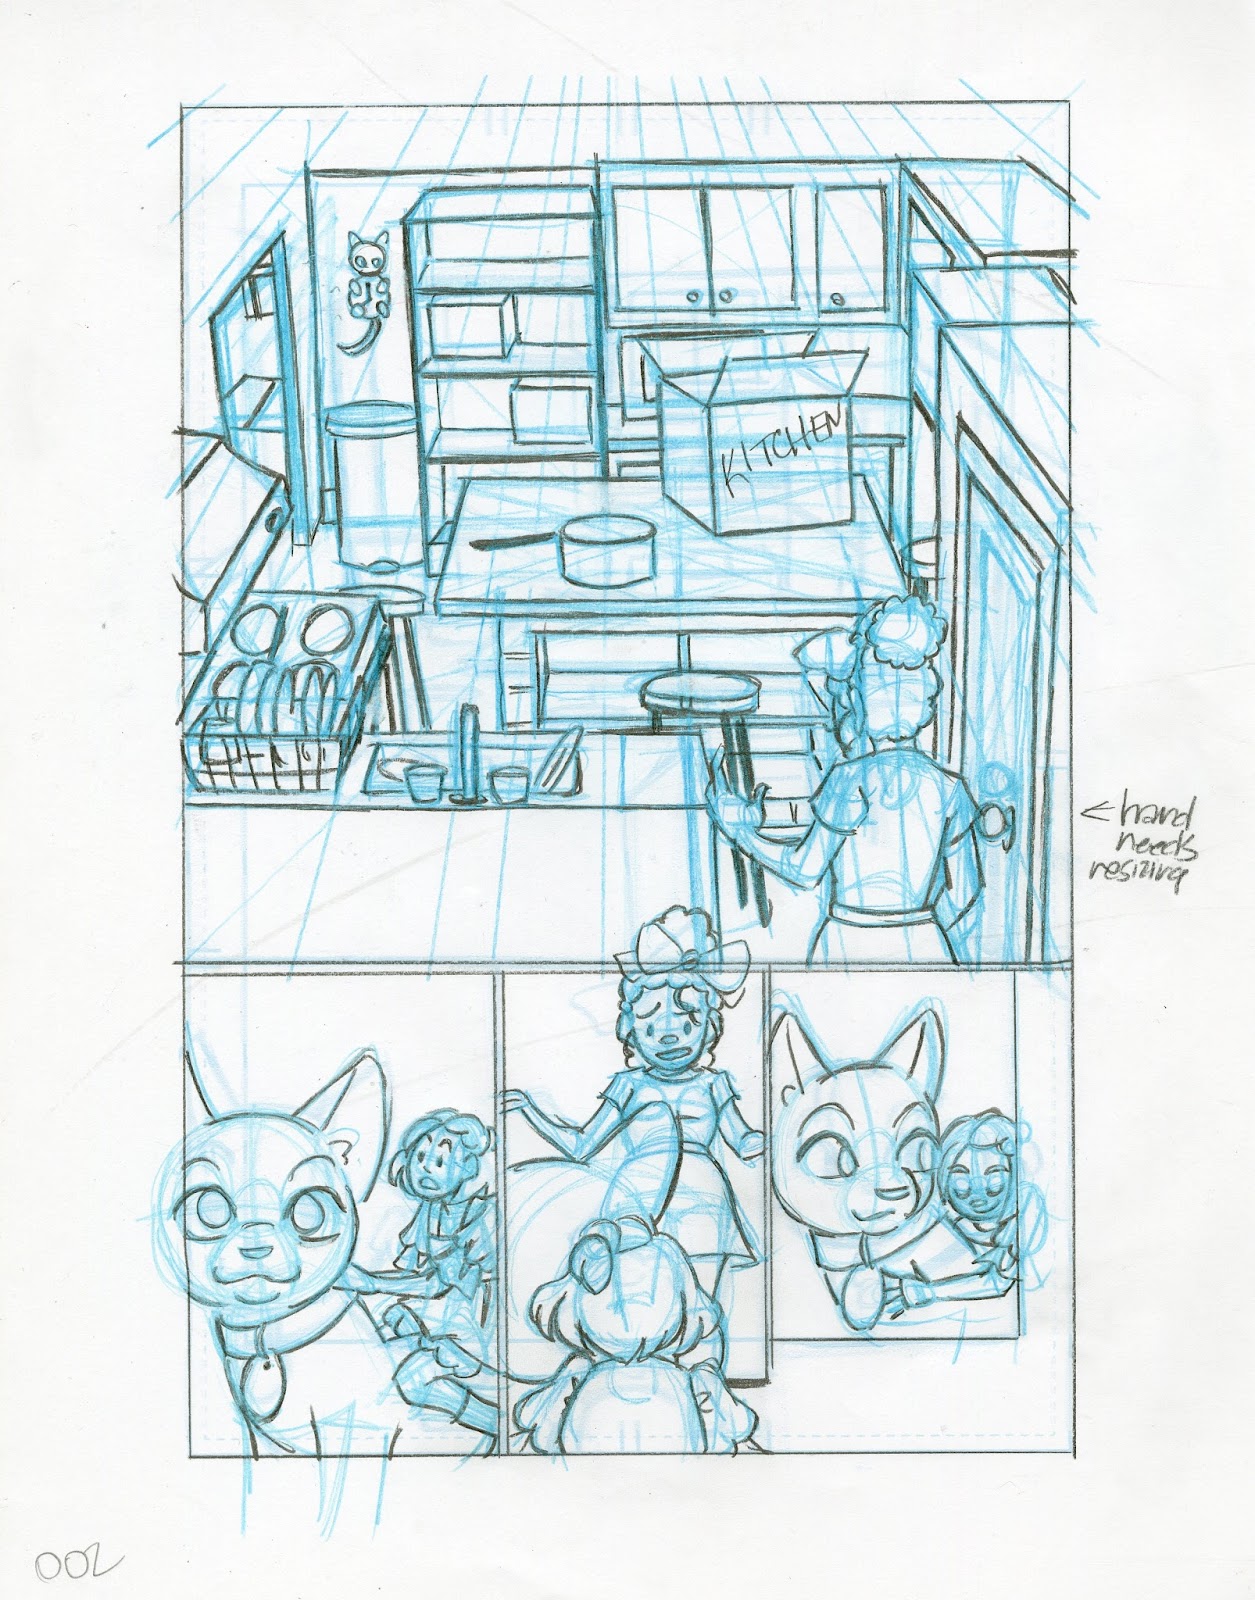
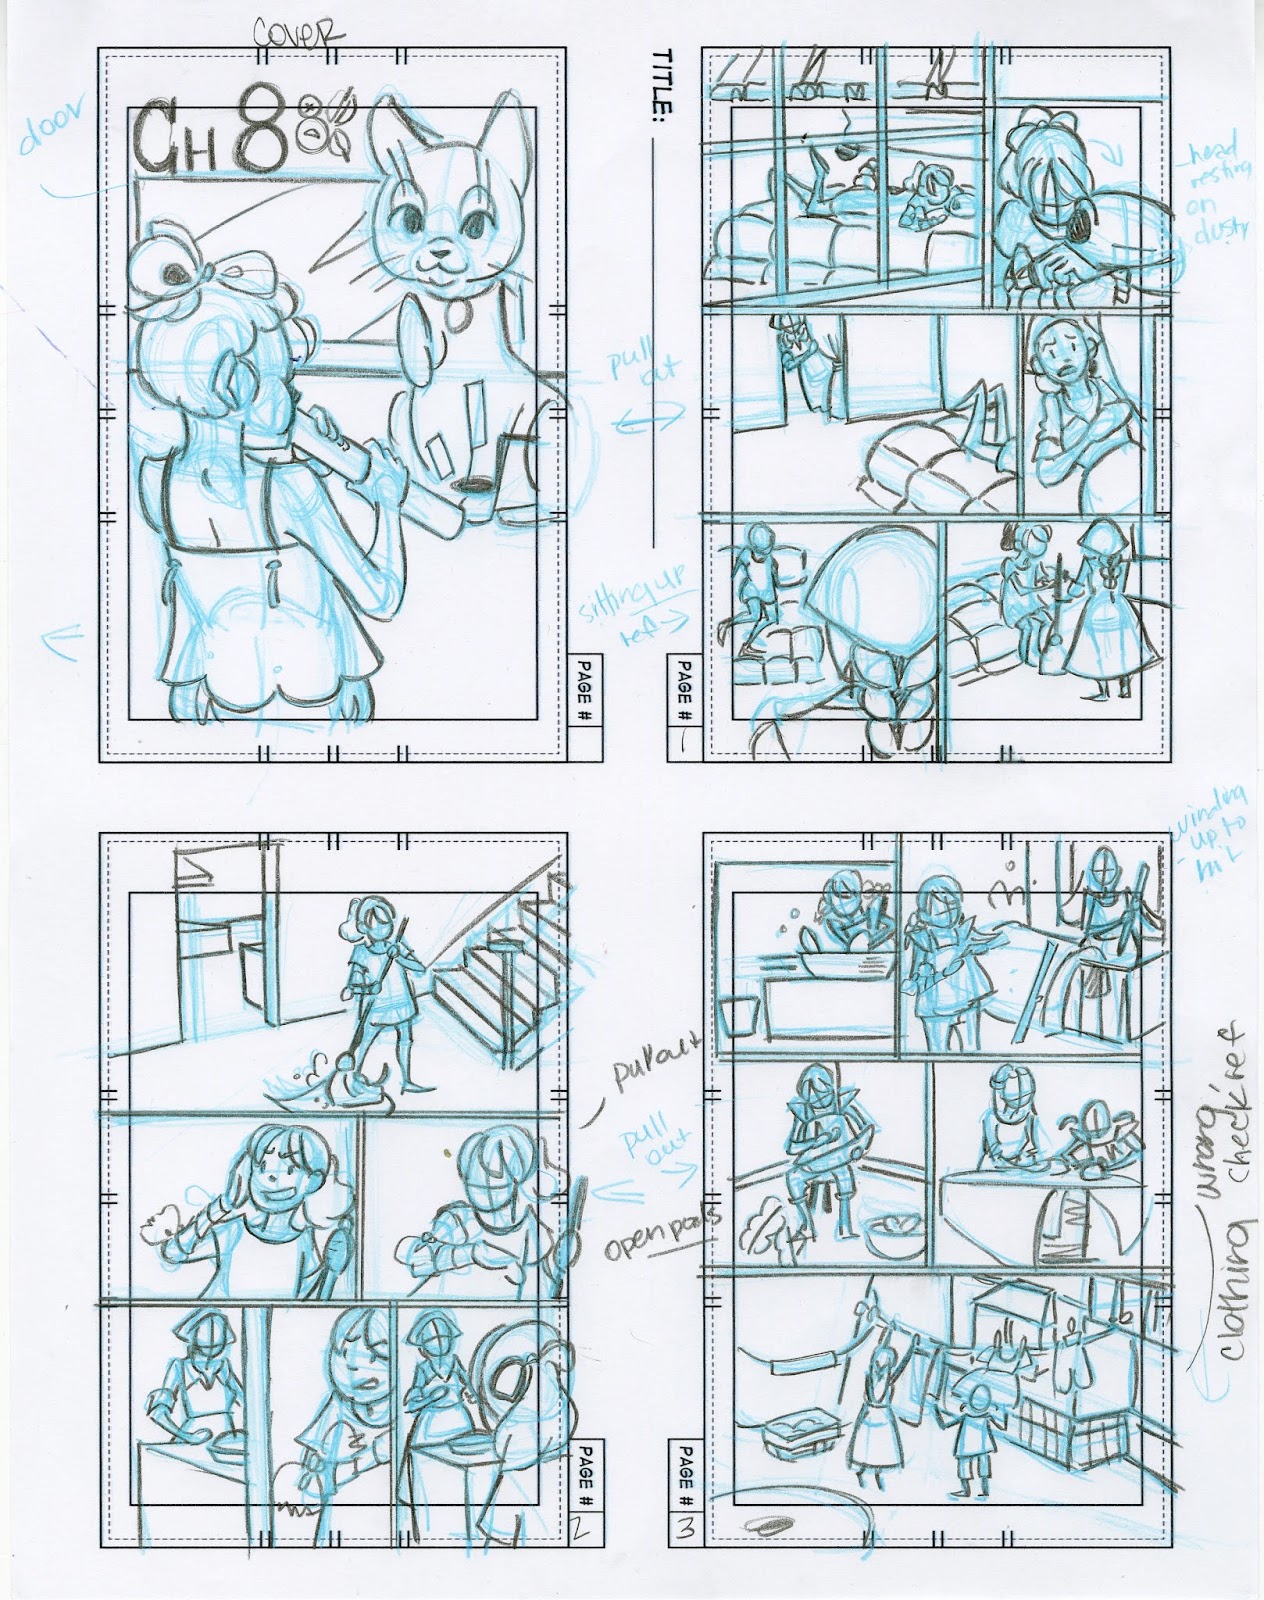
Thumbnails Vs Roughs Vs Finished Pages- Watching Art Develop
It's always interesting to see how comic pages develop. Every artist has a unique process, and sometimes that process varies from project to project.
I've discussed my own comic process in depth in the Intro to Comic Craft series. This post isn't an in-depth exploration of my watercolor comic process, that is covered extensively in Watercolor Basics. Rather it's a brief overview of how pages develop and change throughout the process.
I think younger artists don't always realize to what extent comic pages evolve during the comic creation process. Pages should evolve and develop as the creator spends more time with the story, and sometimes significant revisions occur between stages. For artists who enjoy working with editors or beta readers, these natural opportunities for critique are an ideal place to make necessary changes and seem to work best for those who work in batch. Working in batch gives proofreaders a chance to consume the whole chapter in one go and present meaningful critique and suggestions that don't just reflect the needs of the page, but the needs of the chapter.
My Comic Craft Stages:
Thumbnails
Scan
Roughs
Scan
Corrections
Print non-photo blue bluelines
Pencil bluelines, make further adjustments
Watercolor
Color pencil details and gouache
Scan
Digital color correction for accuracy
Digital borders with a digital color pencil brush
Digital Lettering with a custom font
Word balloons utilizing watercolor paper scans and the digital color pencil brush
So today I'm going to share a bit of my comic process, sharing the stages side by side so you can see how it develops over time. I've also included some videos where I flip through stages such as script and layouts and discuss development in a bit more detail.
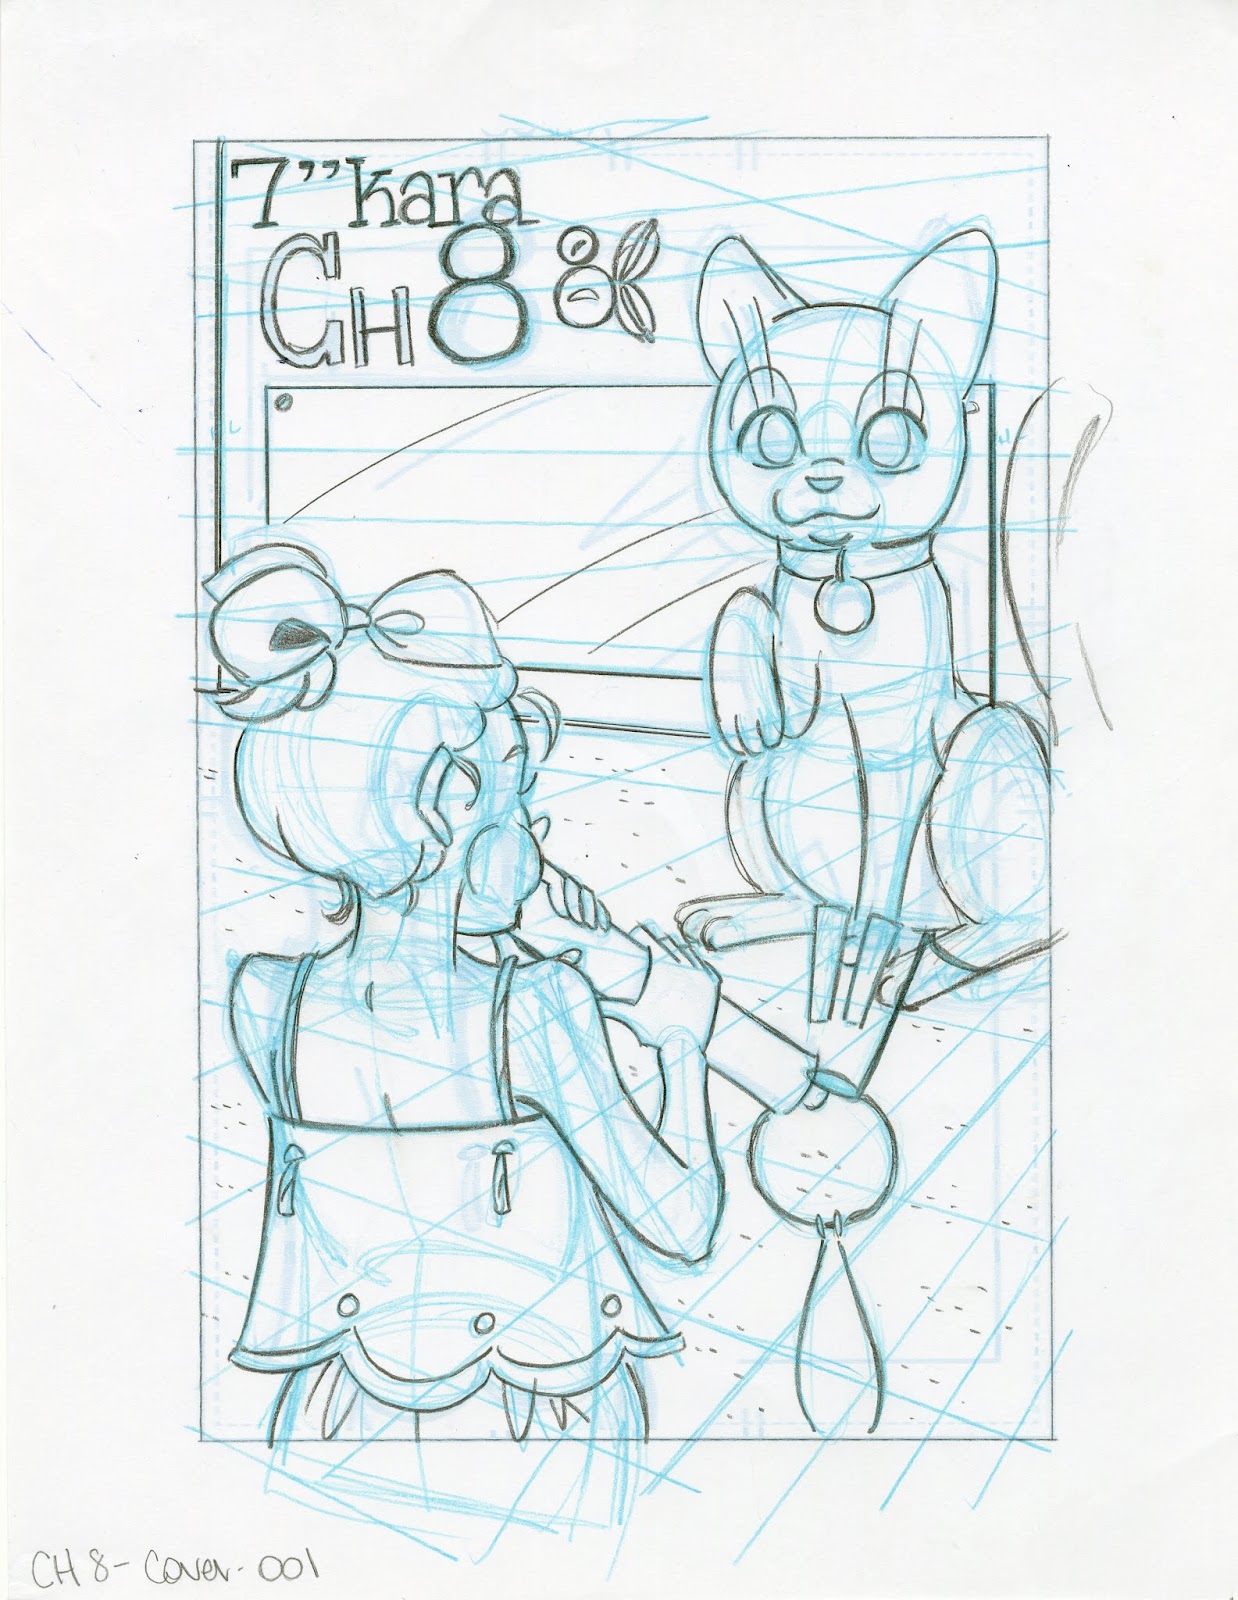
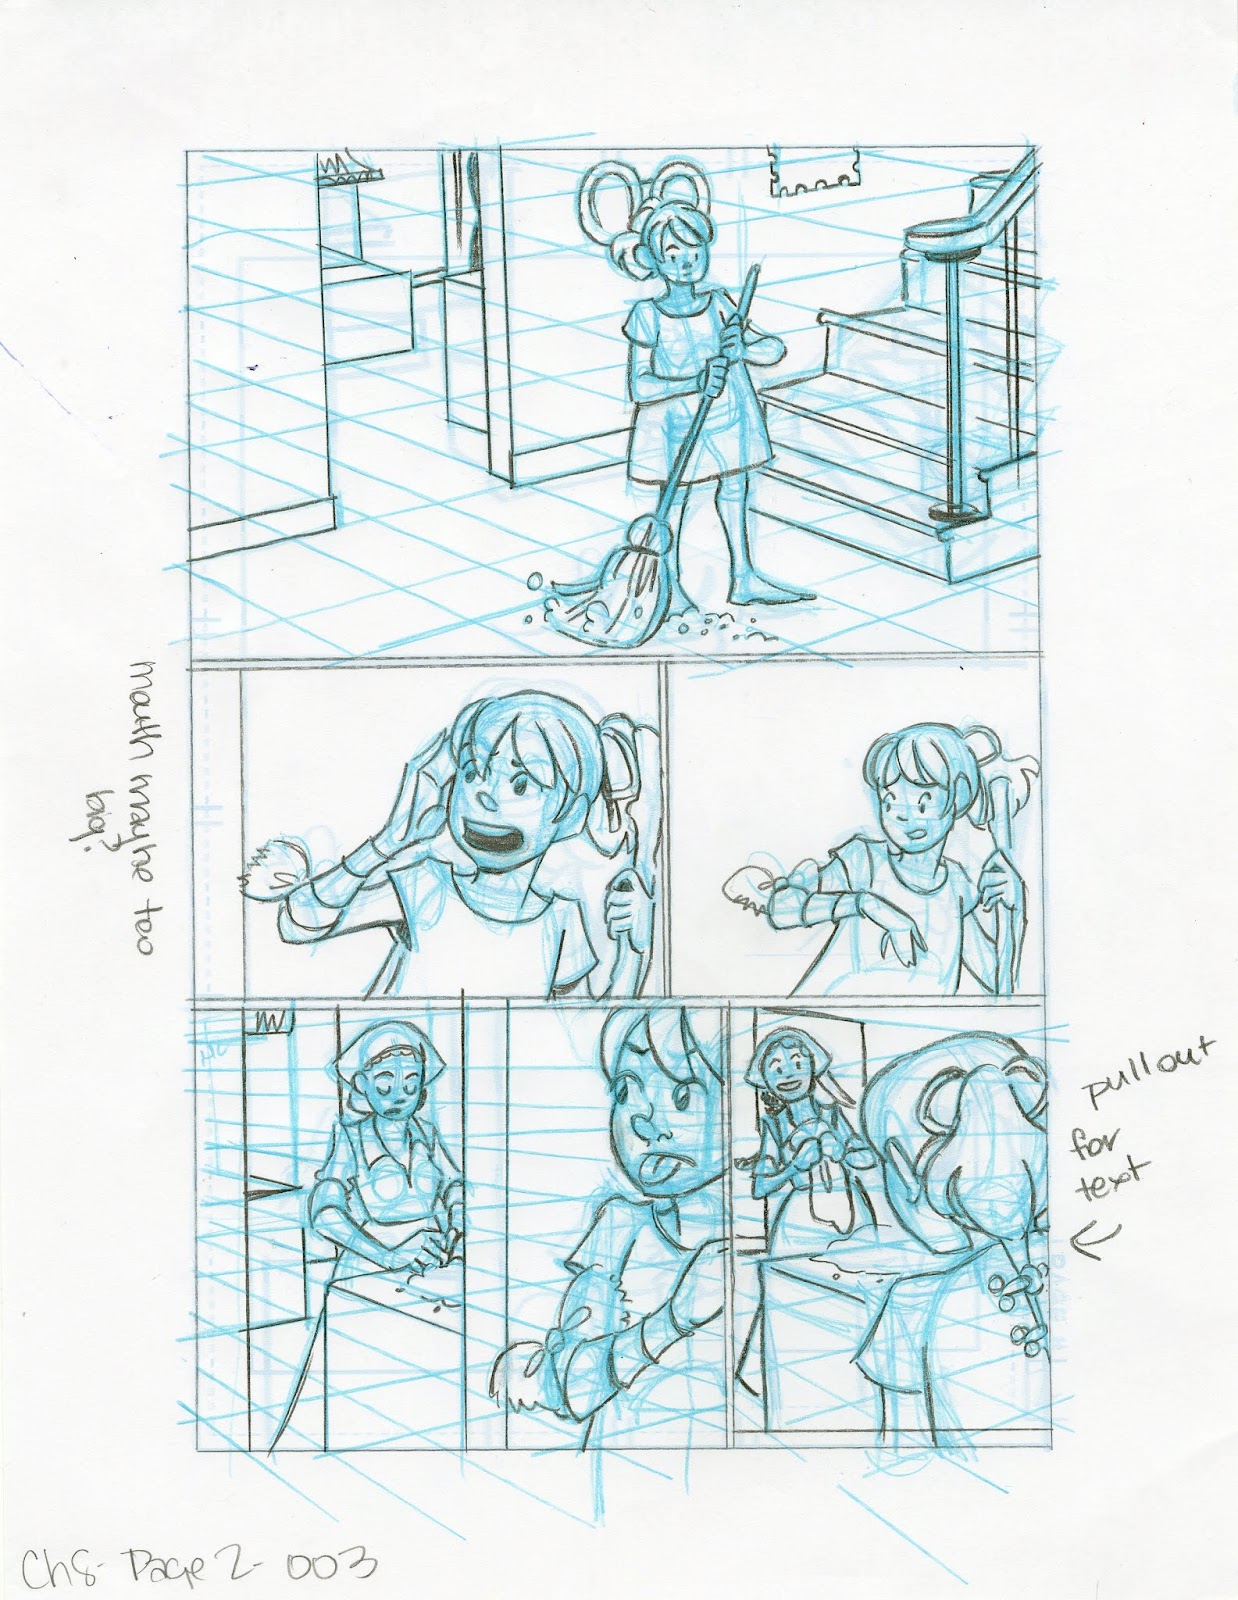
Chapter 6

Chapter 7

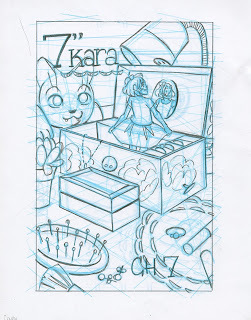

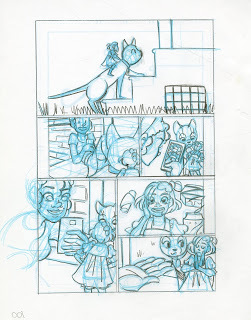
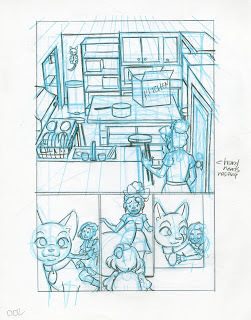
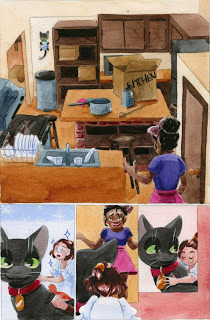
Comic Development Process- 7" Kara Chapter 7 Flip
Chapter 8:


I've discussed my own comic process in depth in the Intro to Comic Craft series. This post isn't an in-depth exploration of my watercolor comic process, that is covered extensively in Watercolor Basics. Rather it's a brief overview of how pages develop and change throughout the process.
I think younger artists don't always realize to what extent comic pages evolve during the comic creation process. Pages should evolve and develop as the creator spends more time with the story, and sometimes significant revisions occur between stages. For artists who enjoy working with editors or beta readers, these natural opportunities for critique are an ideal place to make necessary changes and seem to work best for those who work in batch. Working in batch gives proofreaders a chance to consume the whole chapter in one go and present meaningful critique and suggestions that don't just reflect the needs of the page, but the needs of the chapter.
My Comic Craft Stages:
Thumbnails
Scan
Roughs
Scan
Corrections
Print non-photo blue bluelines
Pencil bluelines, make further adjustments
Watercolor
Color pencil details and gouache
Scan
Digital color correction for accuracy
Digital borders with a digital color pencil brush
Digital Lettering with a custom font
Word balloons utilizing watercolor paper scans and the digital color pencil brush
So today I'm going to share a bit of my comic process, sharing the stages side by side so you can see how it develops over time. I've also included some videos where I flip through stages such as script and layouts and discuss development in a bit more detail.
Chapter 6


Chapter 7


Comic Development Process- 7" Kara Chapter 7 Flip
Chapter 8:


July 13, 2018
Budget Watercolor Recommendations
It's World Watercolor Month and to celebrate, I wanted to recommend some of my favorite inexpensive watercolors to help get you guys painting! These are all products I regularly use, or have reviewed, and can recommend, and are great for practicing skills. When applicable, I've linked the reviews, if you're interested in more information.
All of these supplies perform well, can be personally recommended, and are quite affordable. They aren't always the best available, and some may prove a false economy as your skills progress, so keep in mind that as your skills develop, you should consider investing in nicer watercolors.
Other Watercolor Gift Guides:
For Young Artists 9-13
Watercolor Gift Guide- Michael's Craft Store
Paper:Canson Montval (cellulose based)- $8.45 for 10"x15" (review) Fluid EZ Block (cellulose based)- $3.82 (4"X6")-$30.68 (18"x24") Blick Premiere Cotton-Rag Watercolor Paper (cotton rag)- $14.25 (7"x10")-$52.33 (18"x24")
Fluid 100 Cottonrag paper (cottonrag)-$4.48-$57.19 (review)
Cheap Joe's Kilimanjaro (cottonrag)-$21.69-$29.39 (pads) (review)
I really recommend you try painting on at least one cellulose paper and one cotton rag paper, because the two handle fairly differently. Cellulose tends to be much cheaper than cotton rag, but can't handle many of the techniques that cotton rag excels at. Experimenting with both will help you decide which to focus funds on.
 Canson Montval
 Fluid EZ Block
 Blick Premiere
 Fluid 100
 Cheap Joe's Kilimanjaro
Paints:
Pan Watercolors:
Yarka Student Set - $10.08 (review) MozArt Komorebi Watercolors- $26.99 (review)
Kuretake Gansai Tambi Watercolors-$13.30 (12 color)-$30.21 (36 color) (review)
The Yarka Student Set is a children's grade watercolor set that packs a punch. It utilizes pigments rather than the dyes found in children's watercolors and can be a great, affordable option for watercolorists who want an effective but inexpensive option. Prang watercolors are also quite affordable and perform well, although not as well as Yarka Student watercolors.
Komorebi and Kuretake Gansai Tambi watercolors are both Japanese watercolors and may handle a little differently from Western watercolors, but I heartily recommend either.
Generally, you want to avoid inexpensive watercolors that utilize optical brighteners to create brilliant, inexpensive colors. So if it looks too tempting to resist, and the price is too good to say no, you should probably walk away, or Google around for reviews.
 Komorebi Watercolor Set on Fluid 100 Paper
 Yarka Children's Set on Fabriano Medeovalis
 Kuretake Gansai Tambi on Arches watercolor paperTube Watercolors:
In the long run, tube watercolors are generally a bit more economical than their pan and half pan counterparts. I find I can get about three half pan refills from a 15ml tube of watercolor, some brands deliver more. I recommend test and mixing sets as they're an inexpensive way to get high-quality watercolors. Although you can mix almost any color you need with just ten colors, you may opt to add pre-mixed convenience colors as necessary.
Recommended Starter Colors
Cool Yellow
Warm Yellow
Cool Red
Warm Red
Cool Blue
Warm Blue
Black
Burnt Sienna
You may also want a yellow ochre and a tube of white gouache.
Daniel Smith Essential Six- $32.07 (review)
Sennelier Test Set-$12.89 (review)
M Graham Basics- $37.30 (review)
Holbein HWC 5ml tubes set of 12-$24.30 (review)
 Daniel Smith Essential Six
 Holbein HWC
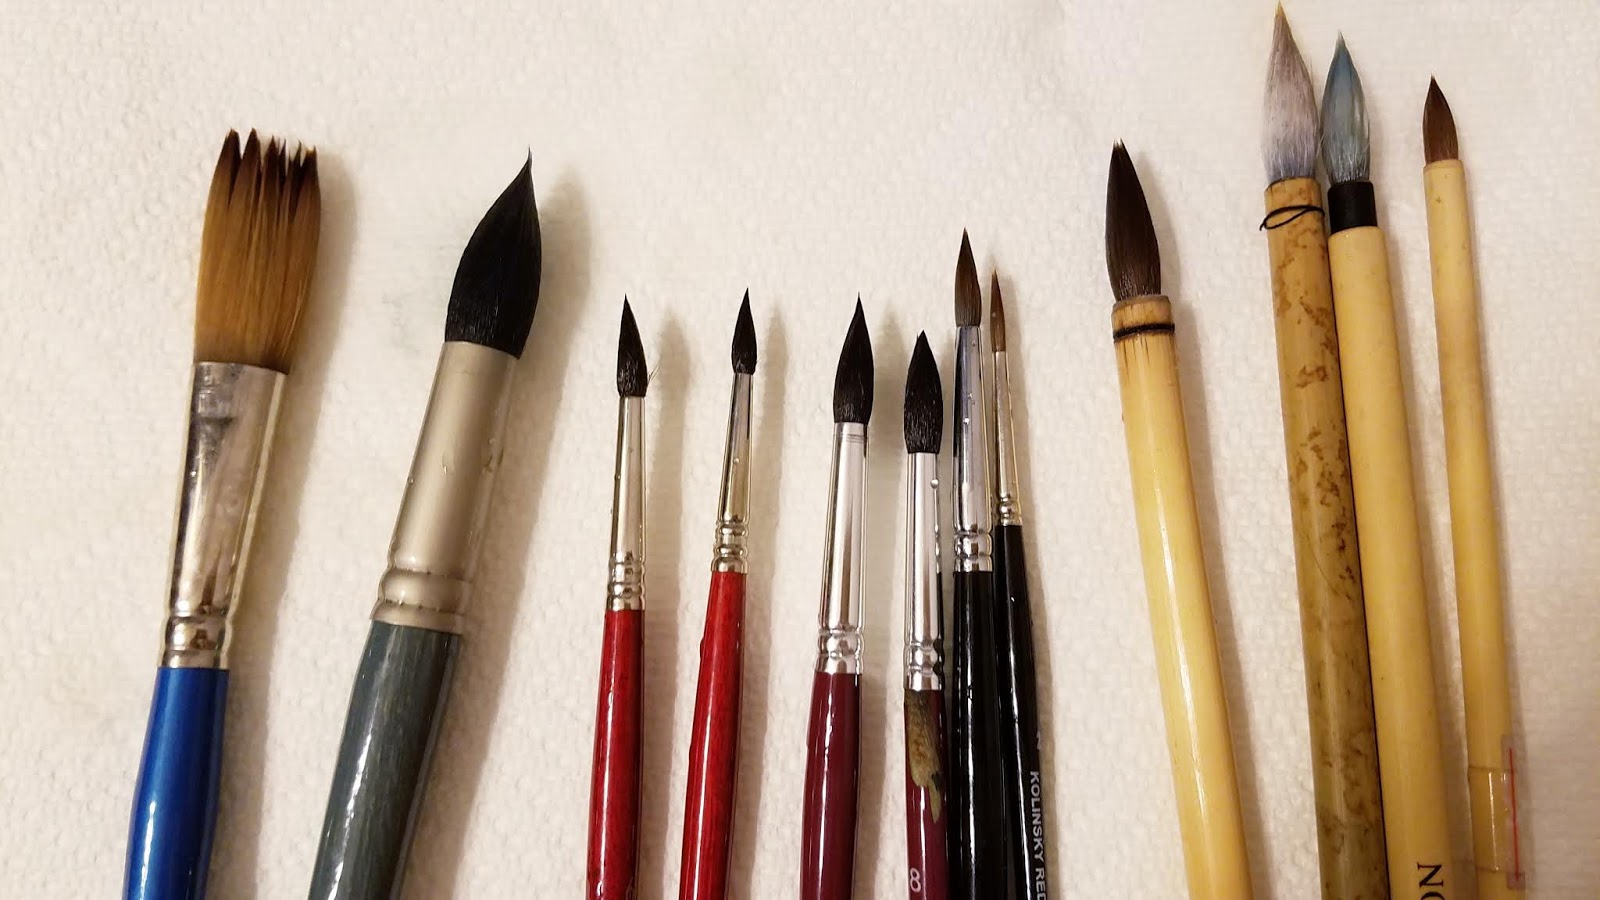
Brushes:Creative Mark Mimik (black/faux squirrel) (synthetic)-$1.25-$27.99 Creative Mark Rhapsody (Kolinsky sable)-$9.49-$239.99
Creative Mark Squirrel Brushes (squirrel)-$.99-$7.99
Blick Master Squirrel Brushes-$5.59-$86.06 Cotman Mop (synthetic)-$6.22-7.76
Sumi brushes:
Weasel
Wolf
Goat
$2.47-$51.39
Hake Brush
 Left to Right: Cotman Mop, Creative Mark Mimik, Blick Master Squirrel, Blick Master Squirrel, Creative Mark Squirrel, Creative Mark Squirrel, Creative Mark Rhapsody, Utrecht Red Sable, Wolf Sumi Brush, Goat Sumi Brush, Goat Sumi Brush, Weasel Sumi BrushI personally recommend a mix of synthetic and natural fiber brushes in any watercolorist's collection, as both can serve valuable purposes. For artists on a budget, I recommend reserving the nicer natural hair brushes such as Kolinsky for just one or two brushes and using squirrel or sumi brushes for the rest of your natural brush needs. A nice brush is an investment and will last for years if well cared for.
Depending on the size of your paintings, I recommend:
Kolinsky Sable brushes Round Size 4, Size 5
Squirrel Round- Size 4, 6
Synthetic- Round Size 8 and larger
Synthetic- Round Size 1 and smaller (details)
Accessories:Disposable cups Paper Towels Salt
Wax Crayons or candles
Blue painter's tape or white masking tape Large Binder or Bulldog Clips
Chipboard backing from used sketchbooks
Half and whole pans or plastic bottle caps
Altoids tins or other small boxes
Inexpensive baby shampoo (for cleaning)
Inexpensive hair conditioner (to occasionally condition your brushes)
Outside Resources and Second Opinions:
Yarka Student Watercolors-Unbox and SwatchCheap Art Supplies from Amazo! MozArt Komorebi Unbox and SwatchColorful Succulents- MozArt Komorebi Etegami FieldtestFluid 100 Watercolor Paper Field TestYa Betta Swatch Yaself- Swatching Demo- Fluid 100 and Fluid EZ Block
Perfecting a Travel Watercolor Palette
Prepping New Watercolor Brushes for First Use
Please consider donating to this blog or purchasing from Natto-shop (http://nattosoup.com/shop) if you want me to continue publishing quality content. All materials tested were purchased from my own pocket. Keep on Truckin' Nattosoup is not under any sponsorship.
All of these supplies perform well, can be personally recommended, and are quite affordable. They aren't always the best available, and some may prove a false economy as your skills progress, so keep in mind that as your skills develop, you should consider investing in nicer watercolors.
Other Watercolor Gift Guides:
For Young Artists 9-13
Watercolor Gift Guide- Michael's Craft Store
Paper:Canson Montval (cellulose based)- $8.45 for 10"x15" (review) Fluid EZ Block (cellulose based)- $3.82 (4"X6")-$30.68 (18"x24") Blick Premiere Cotton-Rag Watercolor Paper (cotton rag)- $14.25 (7"x10")-$52.33 (18"x24")
Fluid 100 Cottonrag paper (cottonrag)-$4.48-$57.19 (review)
Cheap Joe's Kilimanjaro (cottonrag)-$21.69-$29.39 (pads) (review)
I really recommend you try painting on at least one cellulose paper and one cotton rag paper, because the two handle fairly differently. Cellulose tends to be much cheaper than cotton rag, but can't handle many of the techniques that cotton rag excels at. Experimenting with both will help you decide which to focus funds on.
 Canson Montval
 Fluid EZ Block
 Blick Premiere
 Fluid 100
 Cheap Joe's Kilimanjaro
Paints:
Pan Watercolors:
Yarka Student Set - $10.08 (review) MozArt Komorebi Watercolors- $26.99 (review)
Kuretake Gansai Tambi Watercolors-$13.30 (12 color)-$30.21 (36 color) (review)
The Yarka Student Set is a children's grade watercolor set that packs a punch. It utilizes pigments rather than the dyes found in children's watercolors and can be a great, affordable option for watercolorists who want an effective but inexpensive option. Prang watercolors are also quite affordable and perform well, although not as well as Yarka Student watercolors.
Komorebi and Kuretake Gansai Tambi watercolors are both Japanese watercolors and may handle a little differently from Western watercolors, but I heartily recommend either.
Generally, you want to avoid inexpensive watercolors that utilize optical brighteners to create brilliant, inexpensive colors. So if it looks too tempting to resist, and the price is too good to say no, you should probably walk away, or Google around for reviews.
 Komorebi Watercolor Set on Fluid 100 Paper
 Yarka Children's Set on Fabriano Medeovalis
 Kuretake Gansai Tambi on Arches watercolor paperTube Watercolors:
In the long run, tube watercolors are generally a bit more economical than their pan and half pan counterparts. I find I can get about three half pan refills from a 15ml tube of watercolor, some brands deliver more. I recommend test and mixing sets as they're an inexpensive way to get high-quality watercolors. Although you can mix almost any color you need with just ten colors, you may opt to add pre-mixed convenience colors as necessary.
Recommended Starter Colors
Cool Yellow
Warm Yellow
Cool Red
Warm Red
Cool Blue
Warm Blue
Black
Burnt Sienna
You may also want a yellow ochre and a tube of white gouache.
Daniel Smith Essential Six- $32.07 (review)
Sennelier Test Set-$12.89 (review)
M Graham Basics- $37.30 (review)
Holbein HWC 5ml tubes set of 12-$24.30 (review)
 Daniel Smith Essential Six
 Holbein HWC
Brushes:Creative Mark Mimik (black/faux squirrel) (synthetic)-$1.25-$27.99 Creative Mark Rhapsody (Kolinsky sable)-$9.49-$239.99
Creative Mark Squirrel Brushes (squirrel)-$.99-$7.99
Blick Master Squirrel Brushes-$5.59-$86.06 Cotman Mop (synthetic)-$6.22-7.76
Sumi brushes:
Weasel
Wolf
Goat
$2.47-$51.39
Hake Brush
 Left to Right: Cotman Mop, Creative Mark Mimik, Blick Master Squirrel, Blick Master Squirrel, Creative Mark Squirrel, Creative Mark Squirrel, Creative Mark Rhapsody, Utrecht Red Sable, Wolf Sumi Brush, Goat Sumi Brush, Goat Sumi Brush, Weasel Sumi BrushI personally recommend a mix of synthetic and natural fiber brushes in any watercolorist's collection, as both can serve valuable purposes. For artists on a budget, I recommend reserving the nicer natural hair brushes such as Kolinsky for just one or two brushes and using squirrel or sumi brushes for the rest of your natural brush needs. A nice brush is an investment and will last for years if well cared for.
Depending on the size of your paintings, I recommend:
Kolinsky Sable brushes Round Size 4, Size 5
Squirrel Round- Size 4, 6
Synthetic- Round Size 8 and larger
Synthetic- Round Size 1 and smaller (details)
Accessories:Disposable cups Paper Towels Salt
Wax Crayons or candles
Blue painter's tape or white masking tape Large Binder or Bulldog Clips
Chipboard backing from used sketchbooks
Half and whole pans or plastic bottle caps
Altoids tins or other small boxes
Inexpensive baby shampoo (for cleaning)
Inexpensive hair conditioner (to occasionally condition your brushes)
Outside Resources and Second Opinions:
Yarka Student Watercolors-Unbox and SwatchCheap Art Supplies from Amazo! MozArt Komorebi Unbox and SwatchColorful Succulents- MozArt Komorebi Etegami FieldtestFluid 100 Watercolor Paper Field TestYa Betta Swatch Yaself- Swatching Demo- Fluid 100 and Fluid EZ Block
Perfecting a Travel Watercolor Palette
Prepping New Watercolor Brushes for First Use
Please consider donating to this blog or purchasing from Natto-shop (http://nattosoup.com/shop) if you want me to continue publishing quality content. All materials tested were purchased from my own pocket. Keep on Truckin' Nattosoup is not under any sponsorship.
July 9, 2018
Tips for Finding and Tabling at Library Hosted Conventions
Why Table at Library Cons?
I've really grown to enjoy tabling at small, local library shows. It's a great laid back way to earn extra income on a Saturday and has proven a fantastic way for me to sell copies of 7" Kara to an audience interested in children's comics. Library cons are often free (or very inexpensive!) to table at, free for the public to attend, and are a low stress tabling opportunity for artists and self-published creators. If you're a comic creator who prefers to sell comics over other types of merchandise, library conventions are a perfect way to attract a literature-loving audience, and can be a wonderful first convention opportunity for newer artists.
For me, library conventions offer another bonus- I get to meet and chat with librarians who are interested in children's books and children's comics. I get to serve as an advocate not only for my own work, but for other kidlit creators who deserve recognition but may not have the opportunity to make such connections.
Pros:
Shorter hours
Less of a financial commitment- tables, admission, and parking are usually free
Great for first time tabling artists
A mix of people from a variety of backgrounds
More laid back
Cons:
Generally smaller shows
Often not well promoted outside the library
Usually only last one day
How I Find Out About Library Cons:
Talking to attendees at other area shows- as what shows they're attending this year
Talk to other artists- at what conventions they have lined up
Check out local art stores, local coffee shops for fliers
Ask around!
Demographic:
Mostly families with small children, older adults, teens with a Saturday to kill
Tips for Tabling At Library Cons:
Don't expect to make a lot of money
Have items at a variety of price points- $1 and up
Have stuff for kids
Have a few freebies-mini comics, stickers, business cards, ect
Have stuff to trade
Make friends with the librarians
Be patient! Con staff is usually volunteer, or librarians who do have other duties
Bring a smaller setup than you would at anime cons
Can be great for networking
Keep in mind:
Usually free to the public
Often free tables for artists
Great as a first con opportunity
Low risk
Great for audience building in your local area
Example setups:
 A2CAF
A2CAF
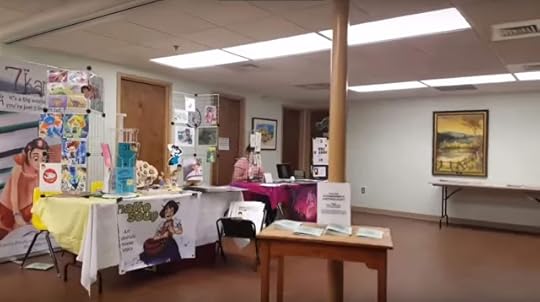 Putman County Library Indie Comic Con, 2017
 NOCAZfest 2017
 Imaginacon
 Destrehan Comic ConWant help? I'm available for table consultation-$55 per table design!
A Few Library Con Recaps:
A2CAF
2017:
NOCAZfest
2017 Recap
Imaginacon
PCL CCAF
Destrehan Comic Con
Please consider donating to this blog or purchasing from Natto-shop (http://nattosoup.com/shop) if you want me to continue publishing quality content. All materials tested were purchased from my own pocket. Keep on Truckin' Nattosoup is not under any sponsorship.
I've really grown to enjoy tabling at small, local library shows. It's a great laid back way to earn extra income on a Saturday and has proven a fantastic way for me to sell copies of 7" Kara to an audience interested in children's comics. Library cons are often free (or very inexpensive!) to table at, free for the public to attend, and are a low stress tabling opportunity for artists and self-published creators. If you're a comic creator who prefers to sell comics over other types of merchandise, library conventions are a perfect way to attract a literature-loving audience, and can be a wonderful first convention opportunity for newer artists.
For me, library conventions offer another bonus- I get to meet and chat with librarians who are interested in children's books and children's comics. I get to serve as an advocate not only for my own work, but for other kidlit creators who deserve recognition but may not have the opportunity to make such connections.
Pros:
Shorter hours
Less of a financial commitment- tables, admission, and parking are usually free
Great for first time tabling artists
A mix of people from a variety of backgrounds
More laid back
Cons:
Generally smaller shows
Often not well promoted outside the library
Usually only last one day
How I Find Out About Library Cons:
Talking to attendees at other area shows- as what shows they're attending this year
Talk to other artists- at what conventions they have lined up
Check out local art stores, local coffee shops for fliers
Ask around!
Demographic:
Mostly families with small children, older adults, teens with a Saturday to kill
Tips for Tabling At Library Cons:
Don't expect to make a lot of money
Have items at a variety of price points- $1 and up
Have stuff for kids
Have a few freebies-mini comics, stickers, business cards, ect
Have stuff to trade
Make friends with the librarians
Be patient! Con staff is usually volunteer, or librarians who do have other duties
Bring a smaller setup than you would at anime cons
Can be great for networking
Keep in mind:
Usually free to the public
Often free tables for artists
Great as a first con opportunity
Low risk
Great for audience building in your local area
Example setups:
 A2CAF
A2CAF Putman County Library Indie Comic Con, 2017
 NOCAZfest 2017
 Imaginacon
 Destrehan Comic ConWant help? I'm available for table consultation-$55 per table design!
A Few Library Con Recaps:
A2CAF
2017:
NOCAZfest
2017 Recap
Imaginacon
PCL CCAF
Destrehan Comic Con
Please consider donating to this blog or purchasing from Natto-shop (http://nattosoup.com/shop) if you want me to continue publishing quality content. All materials tested were purchased from my own pocket. Keep on Truckin' Nattosoup is not under any sponsorship.
July 6, 2018
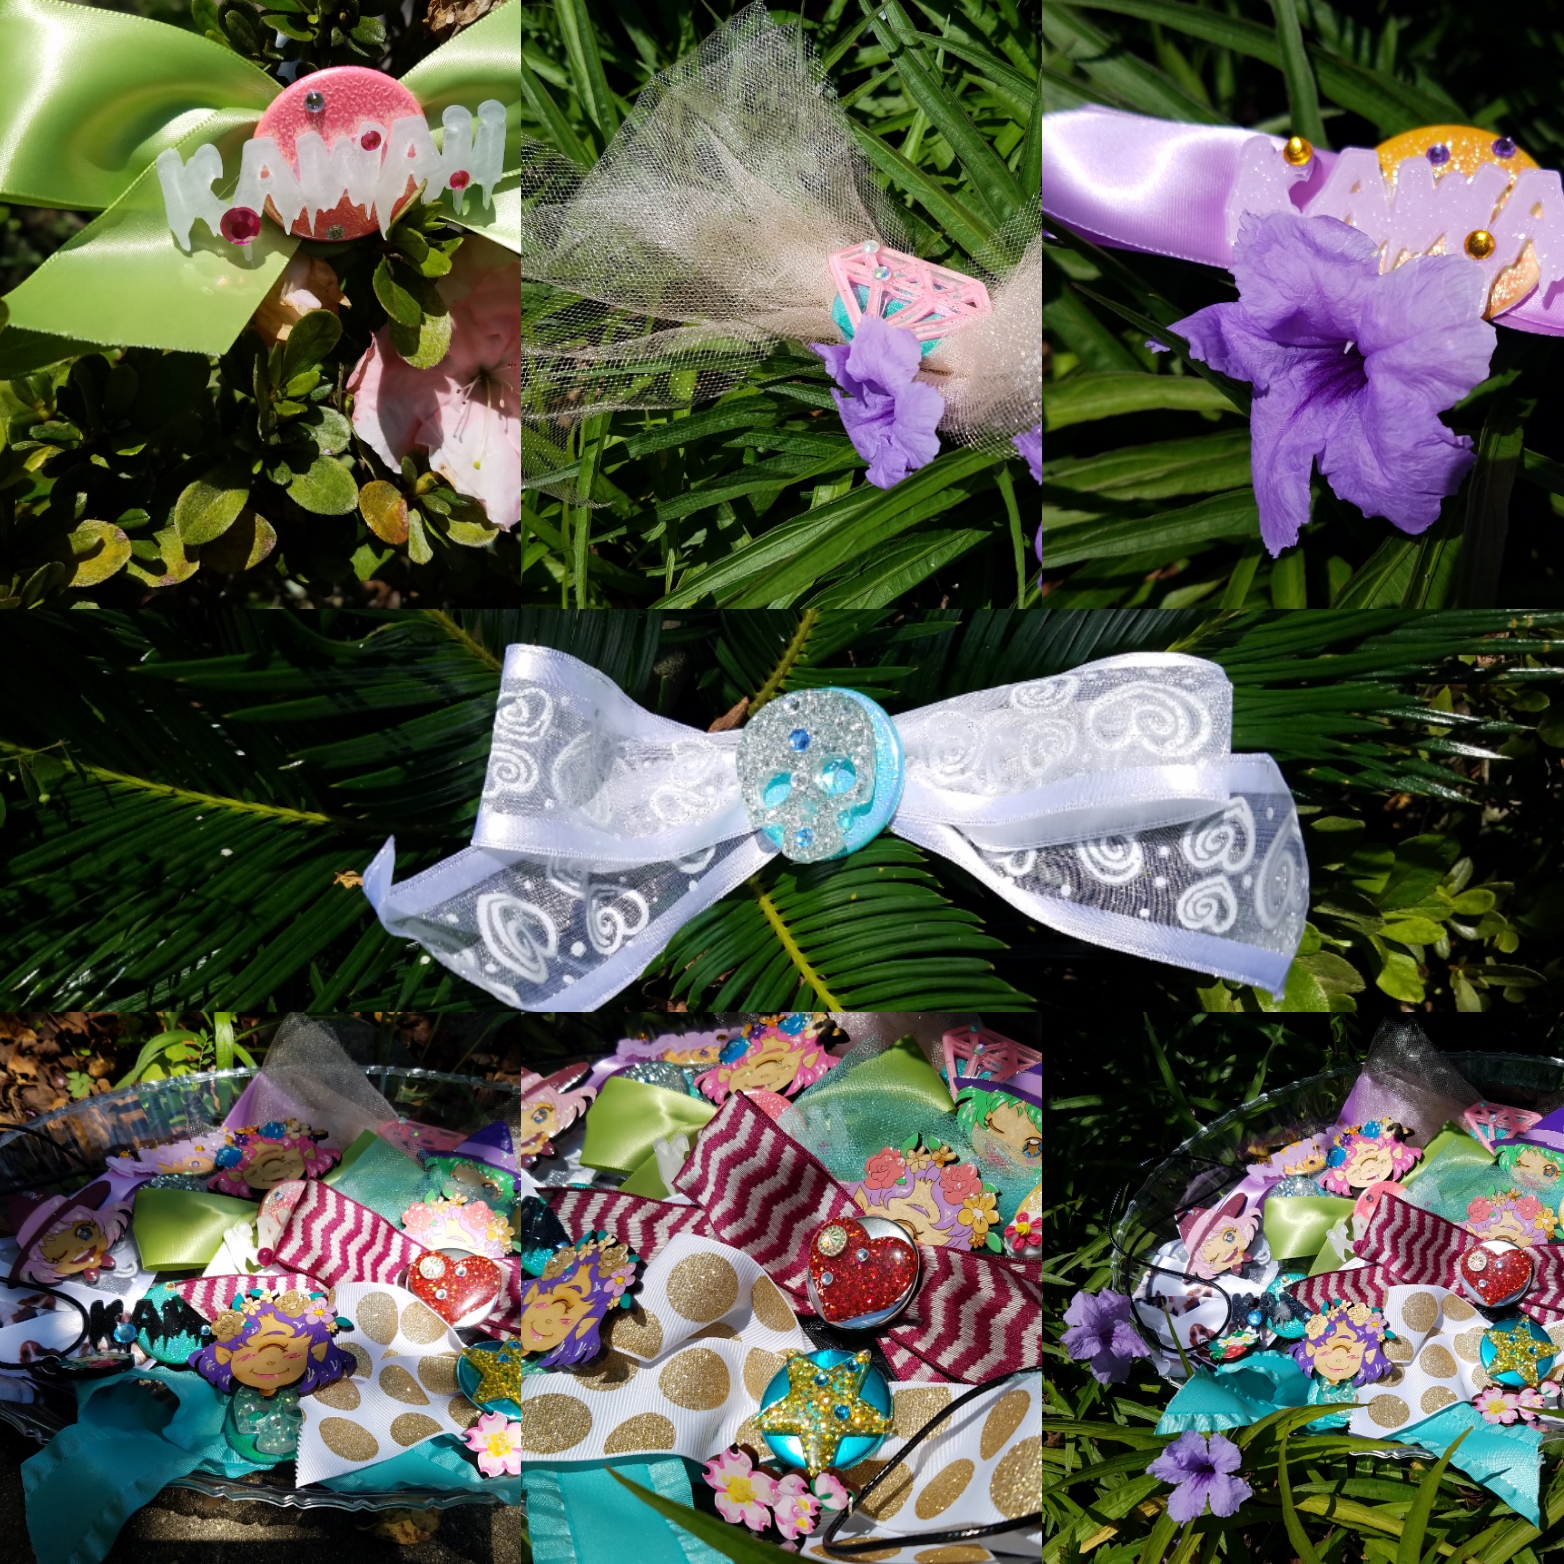
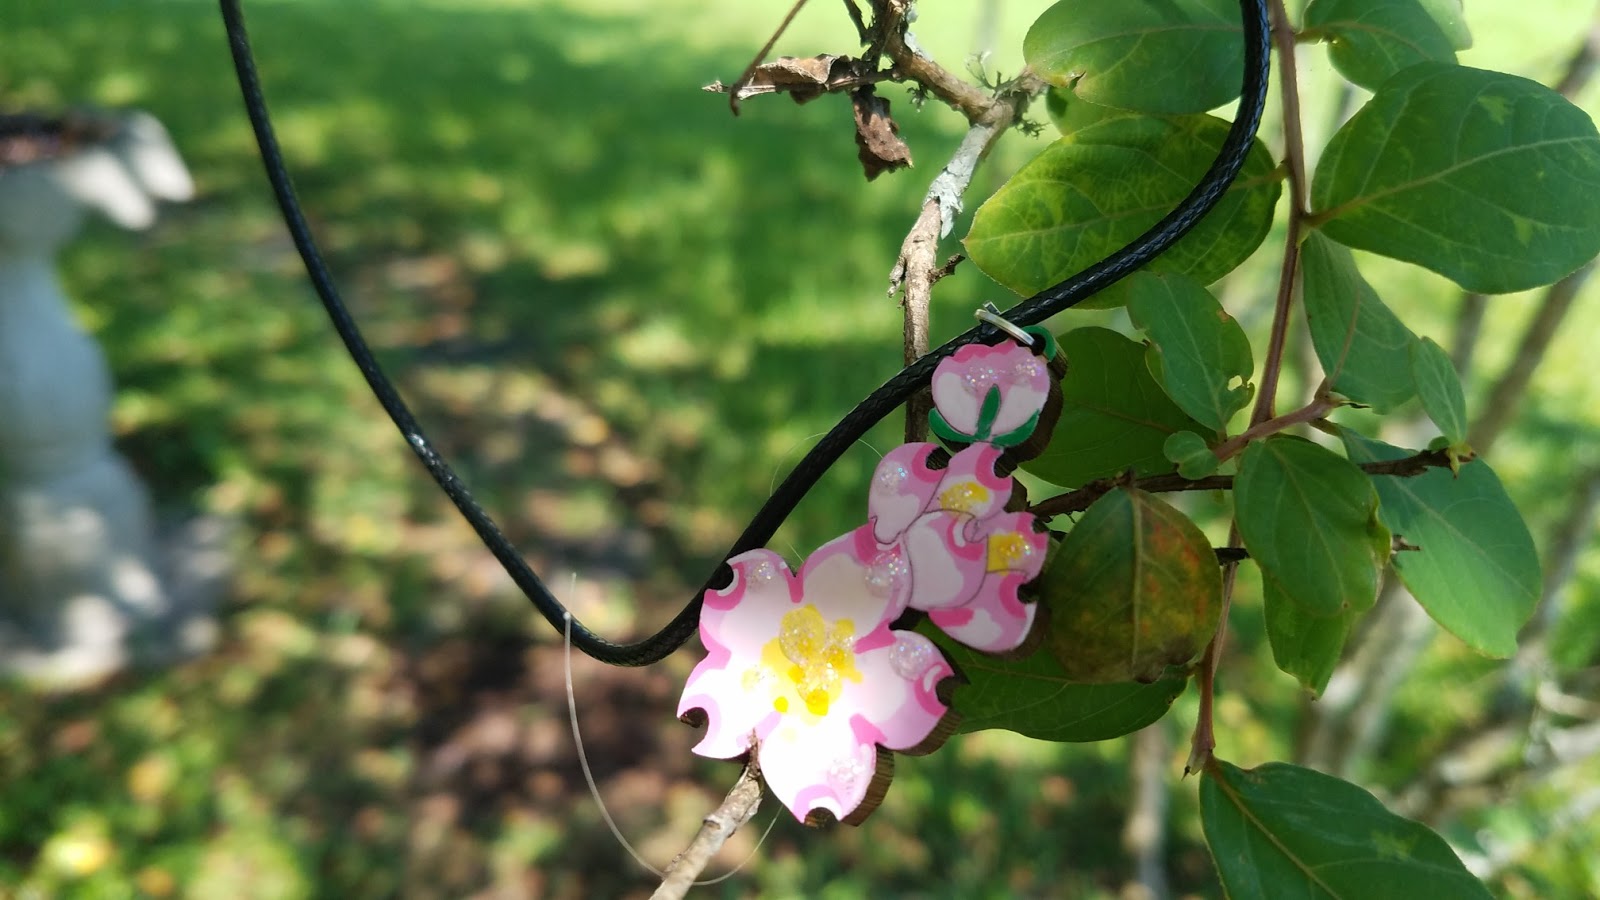
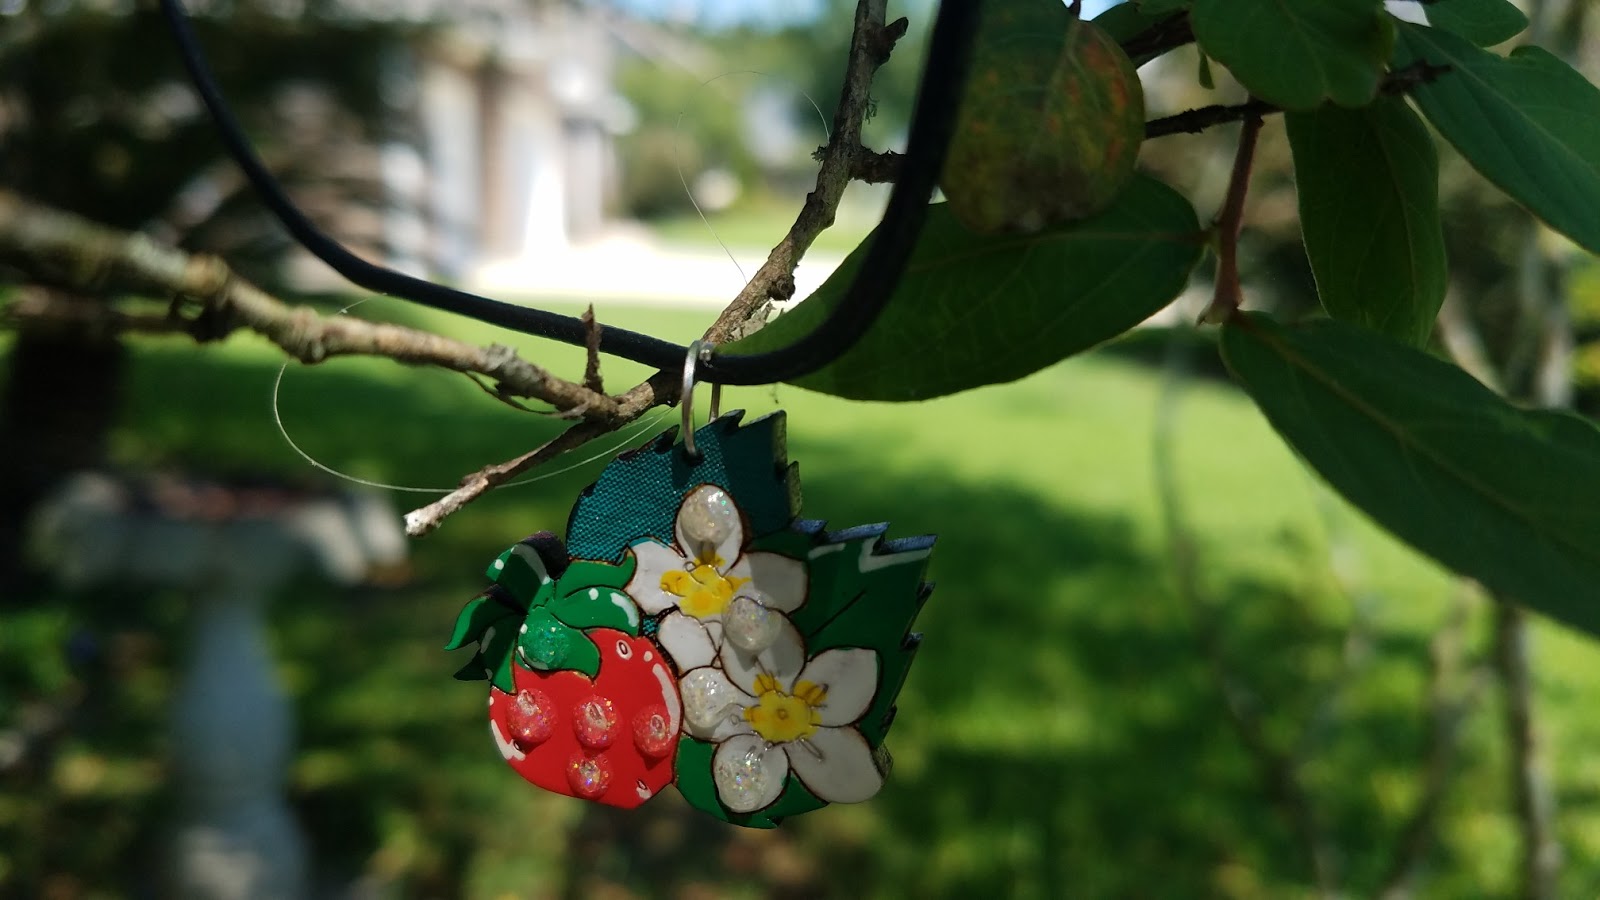
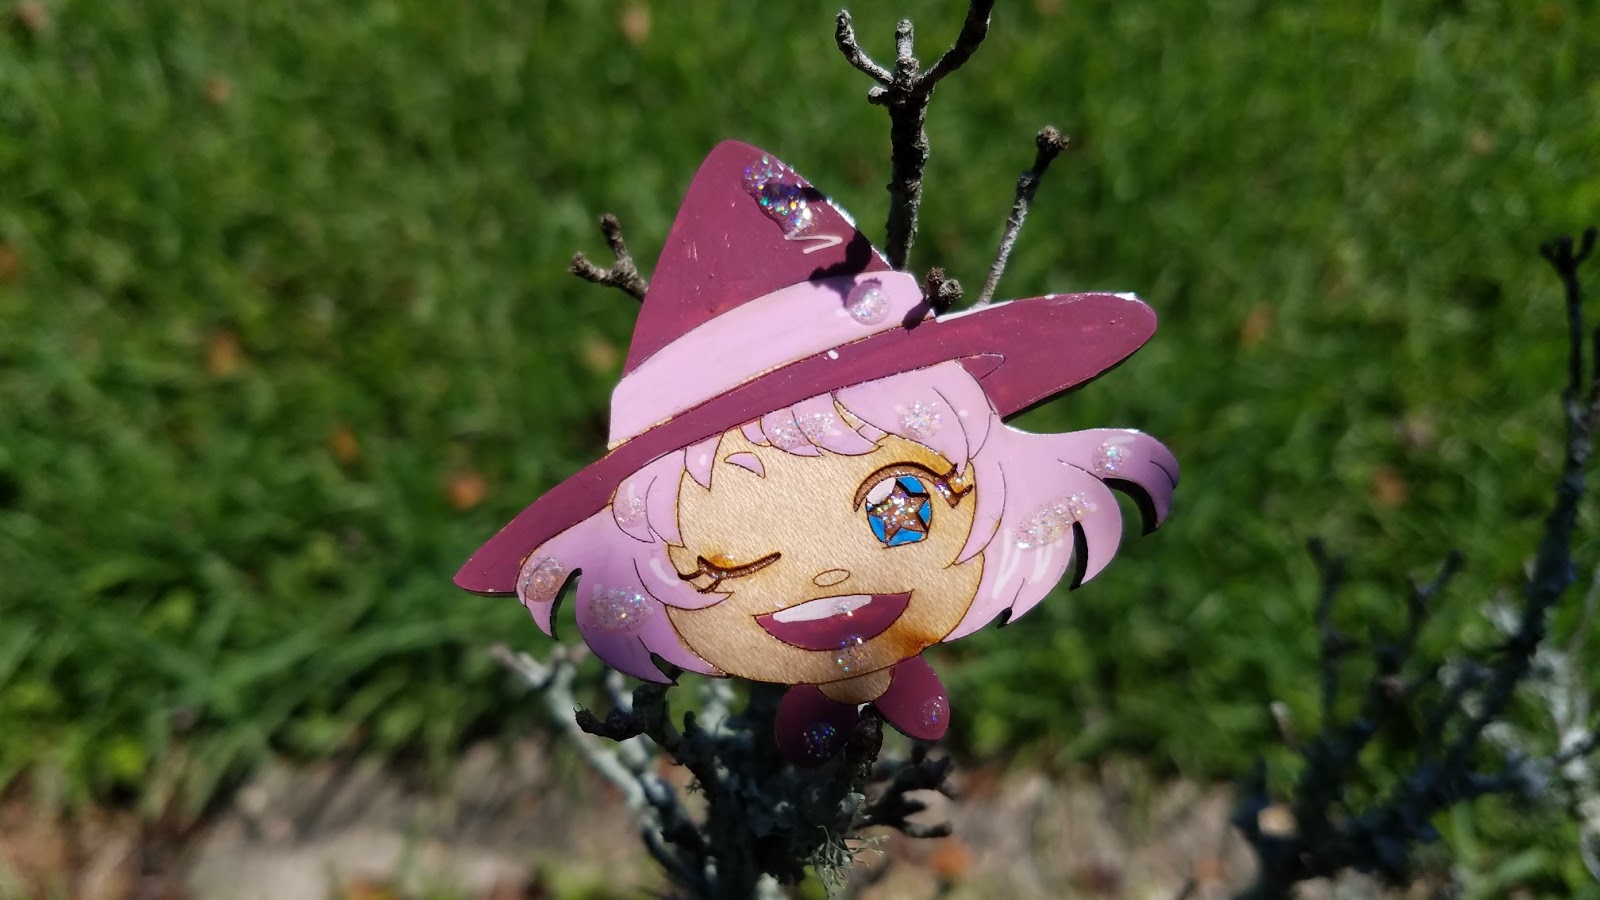
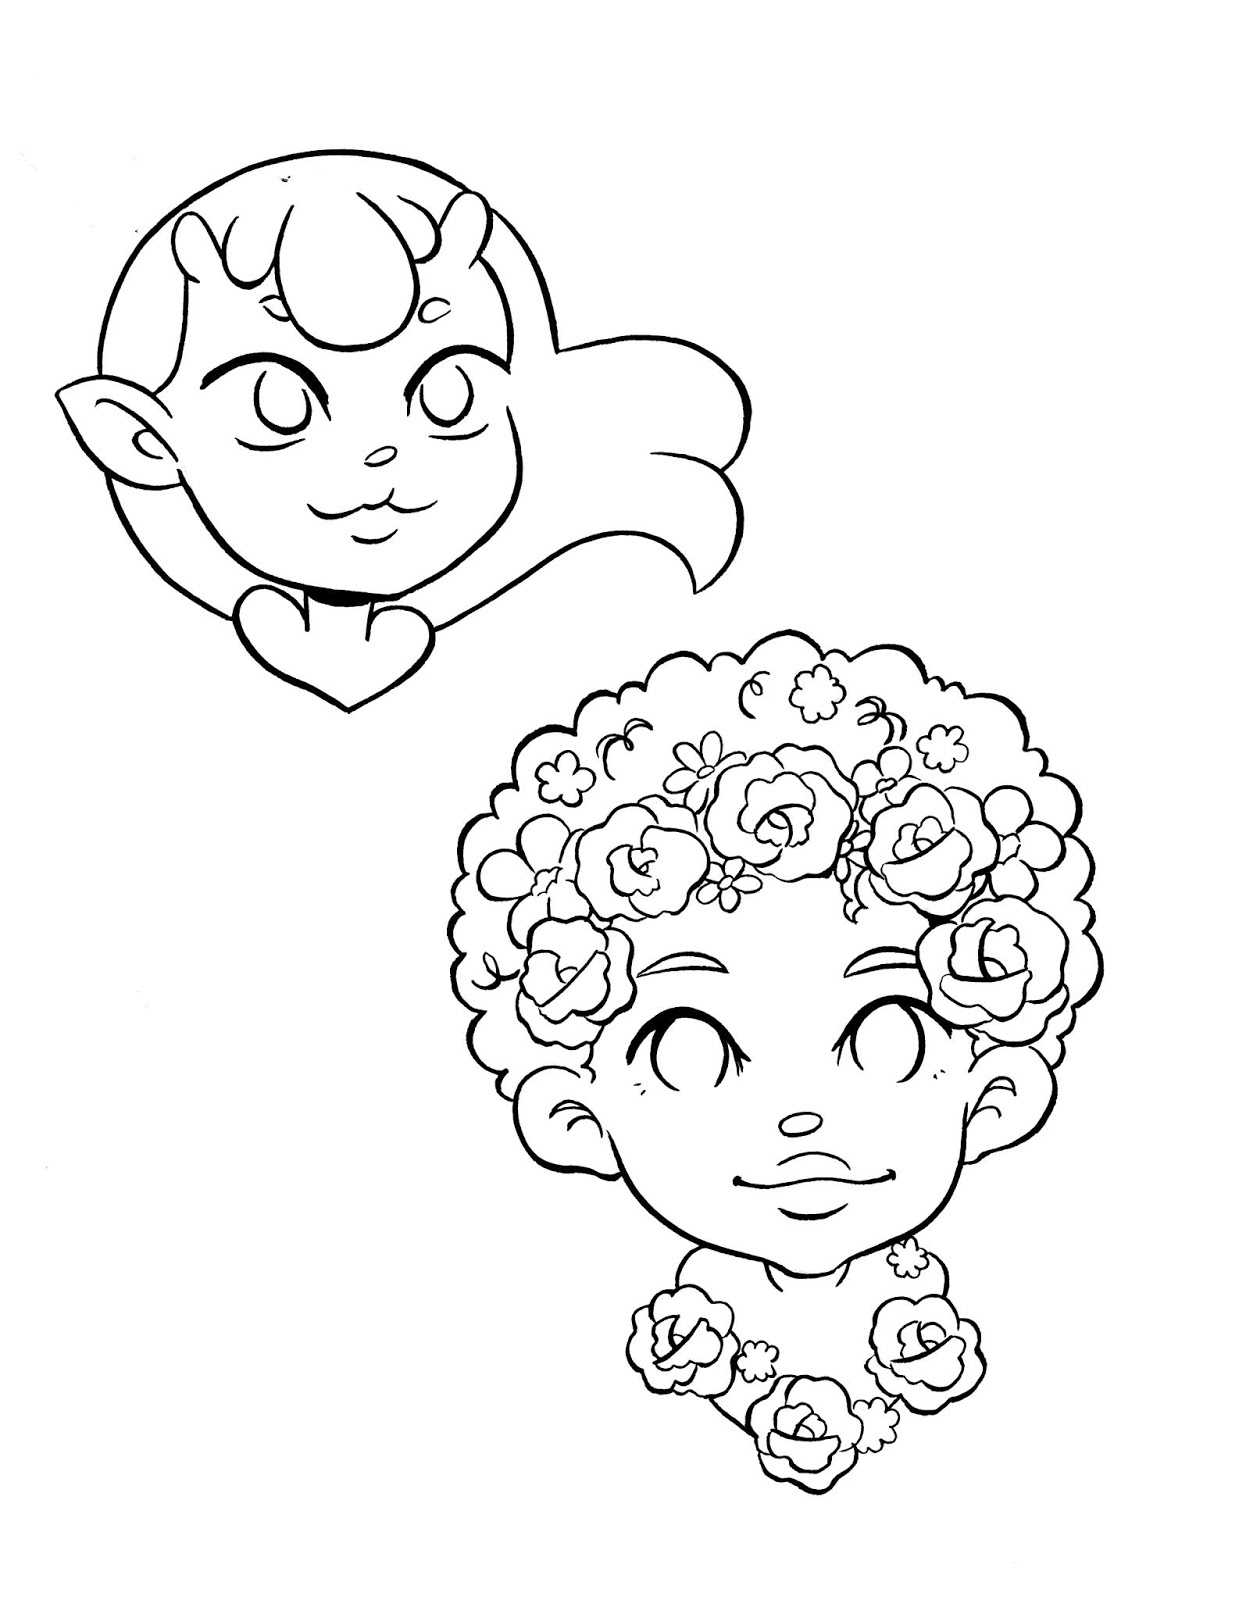
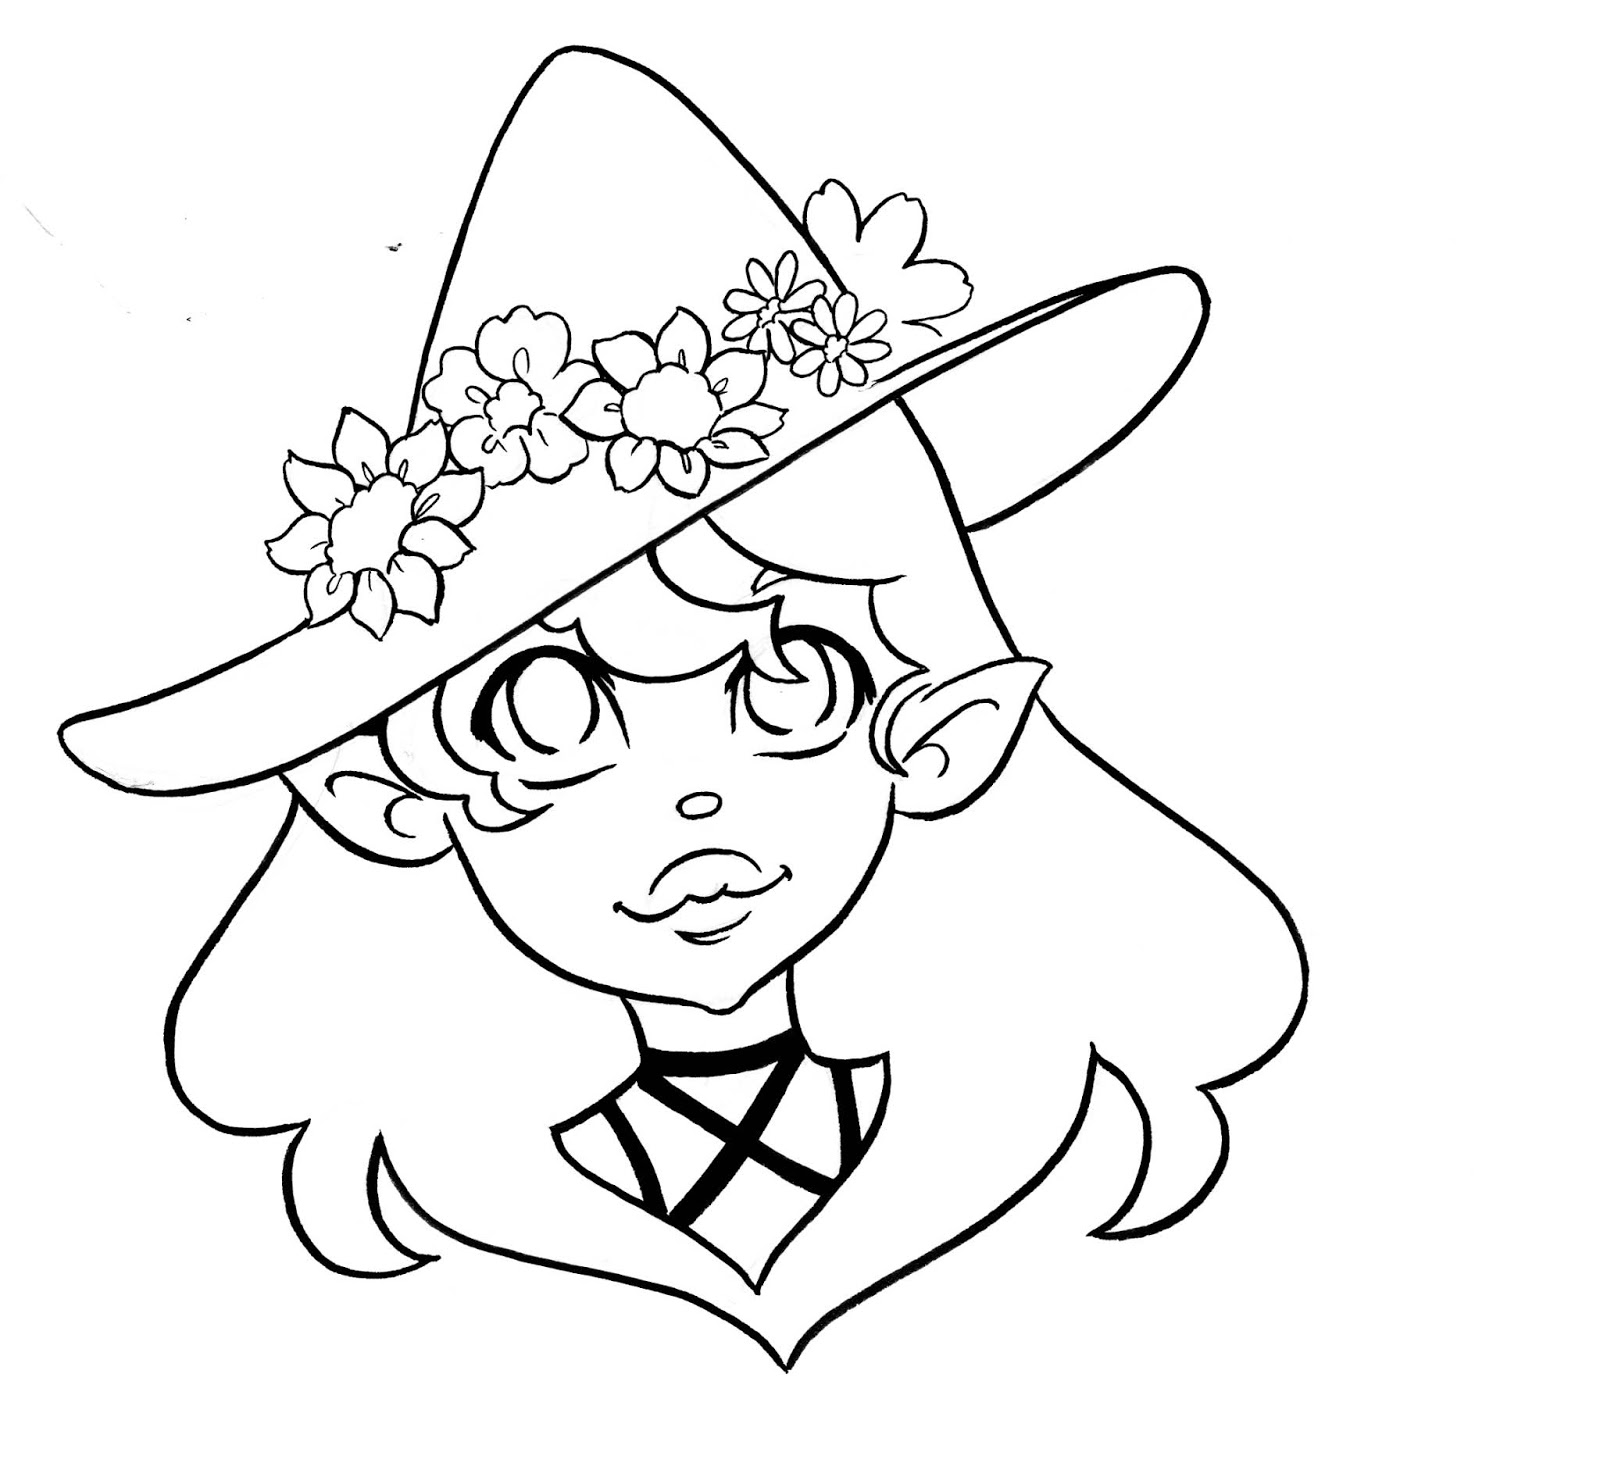
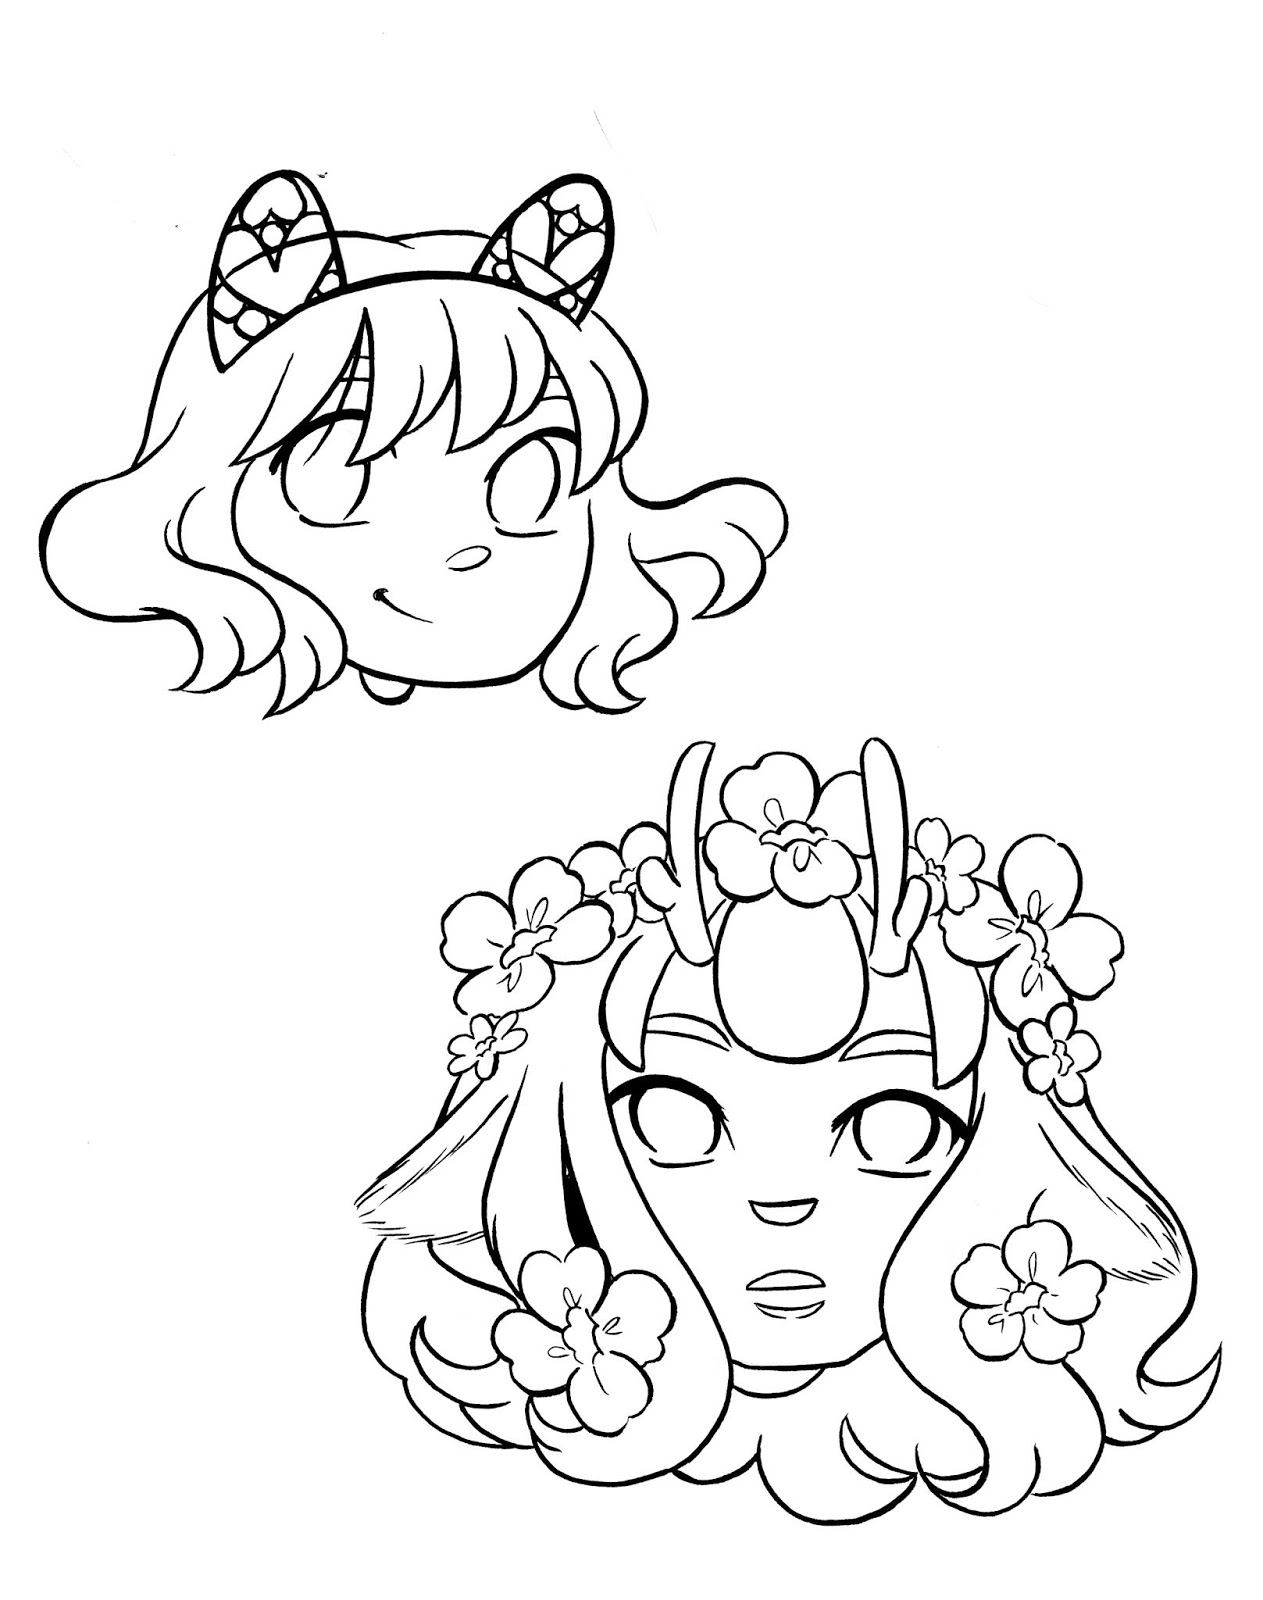
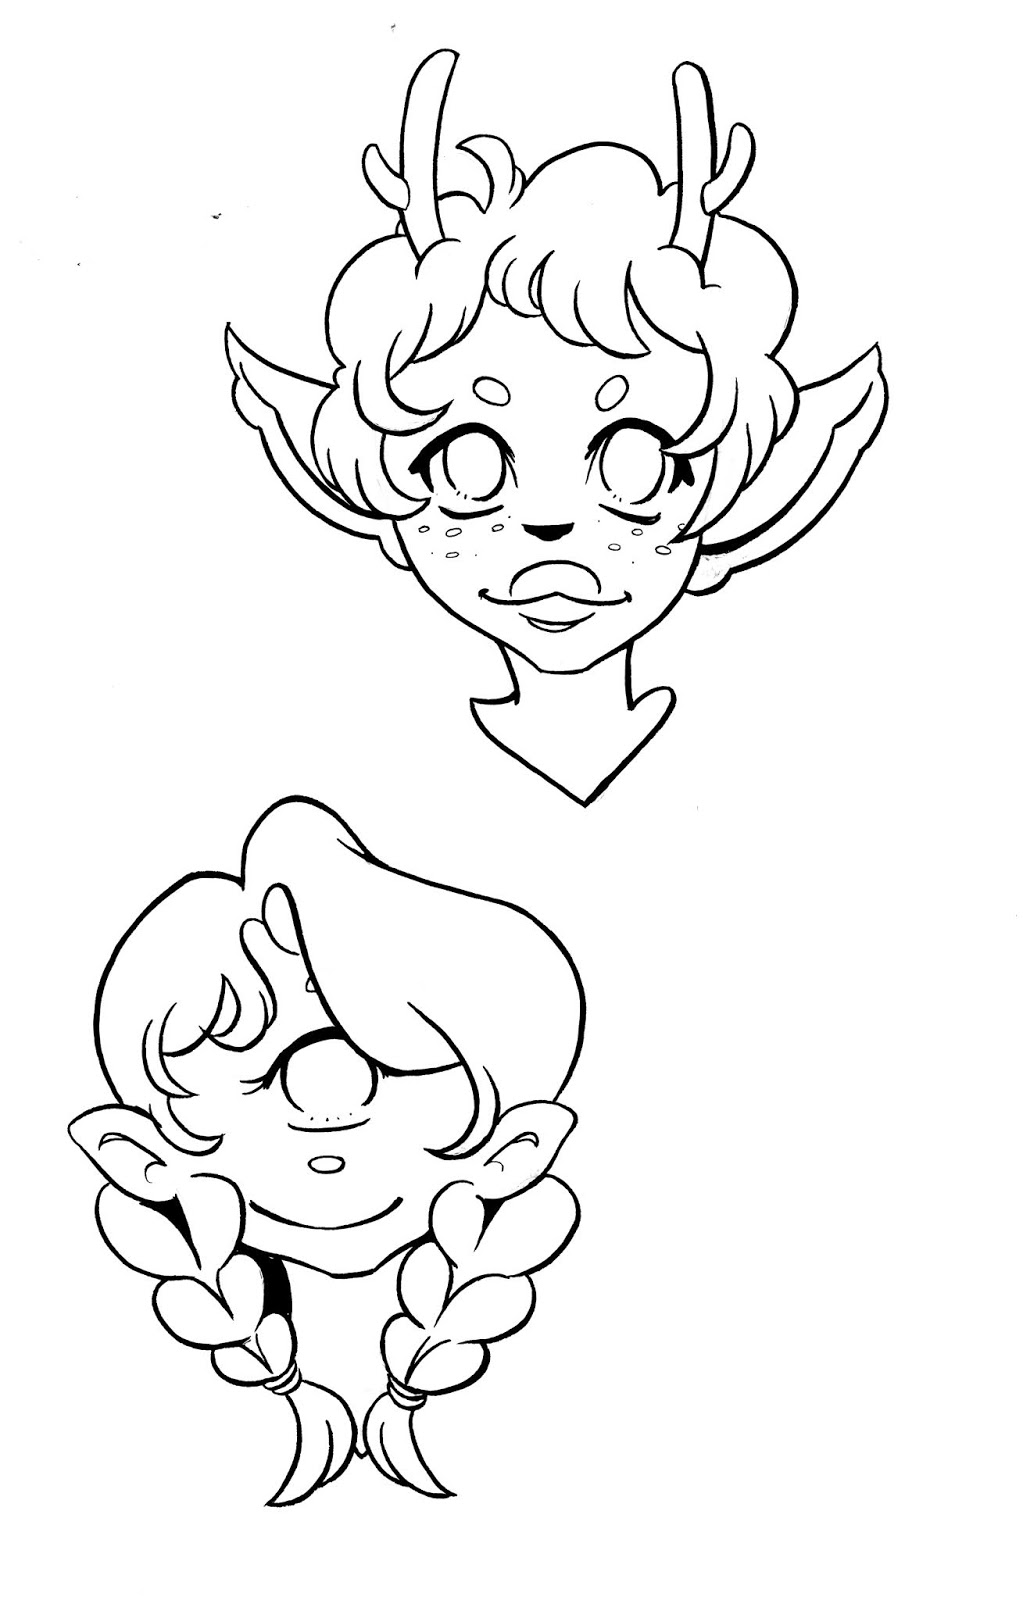
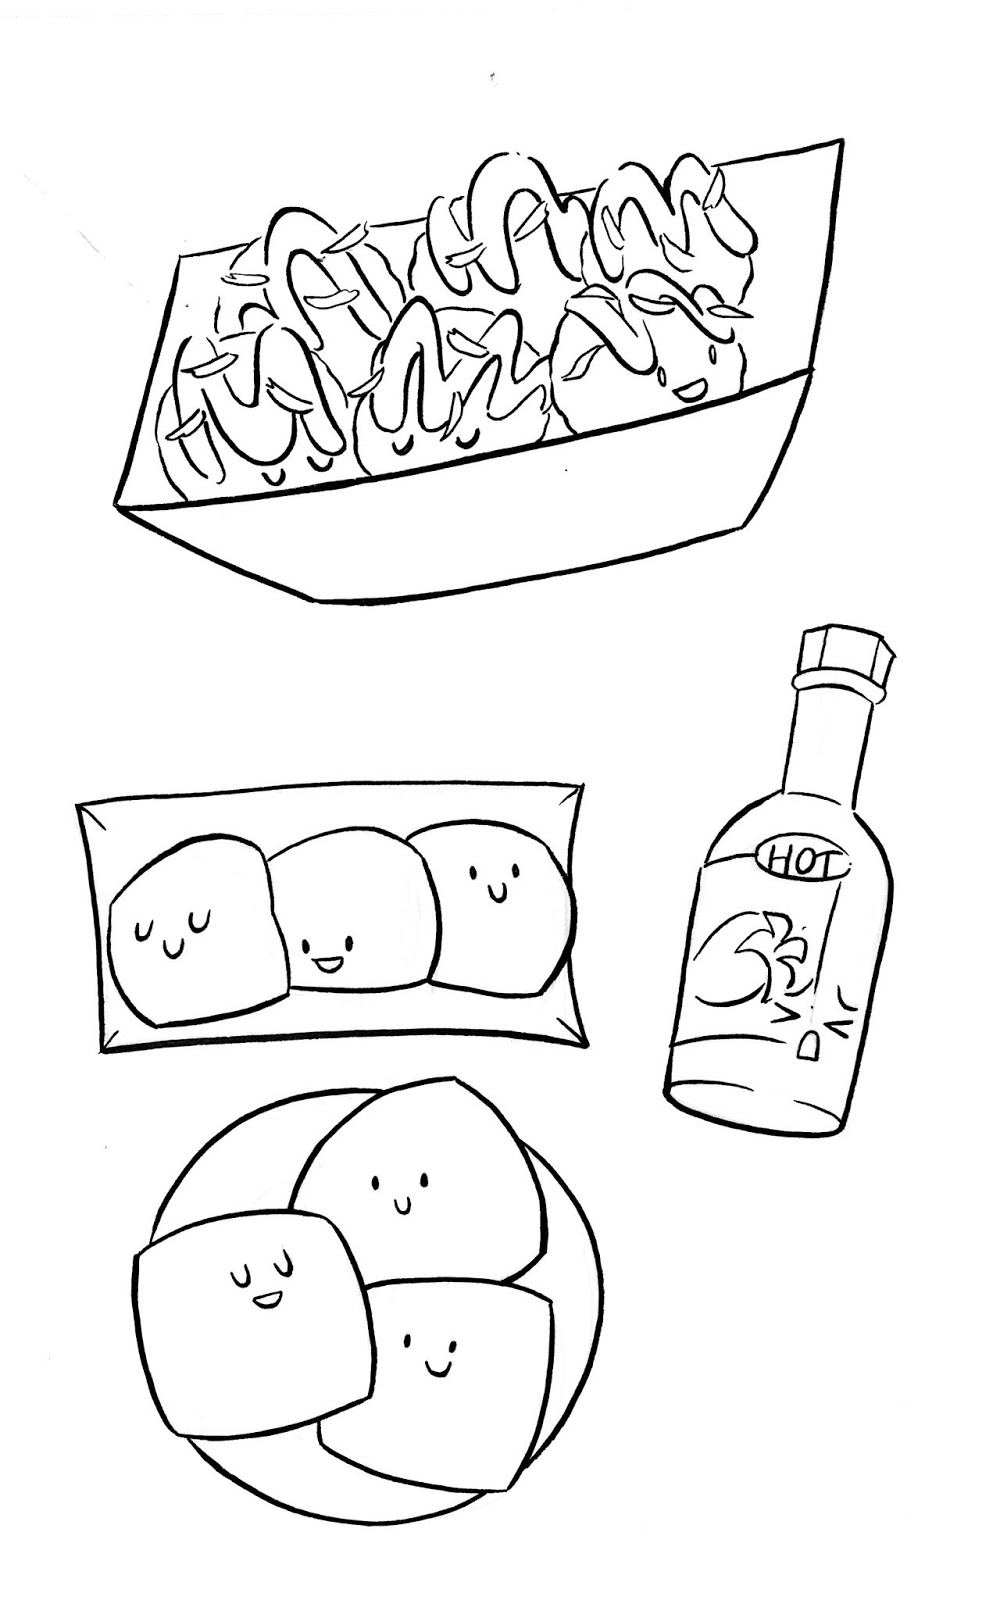
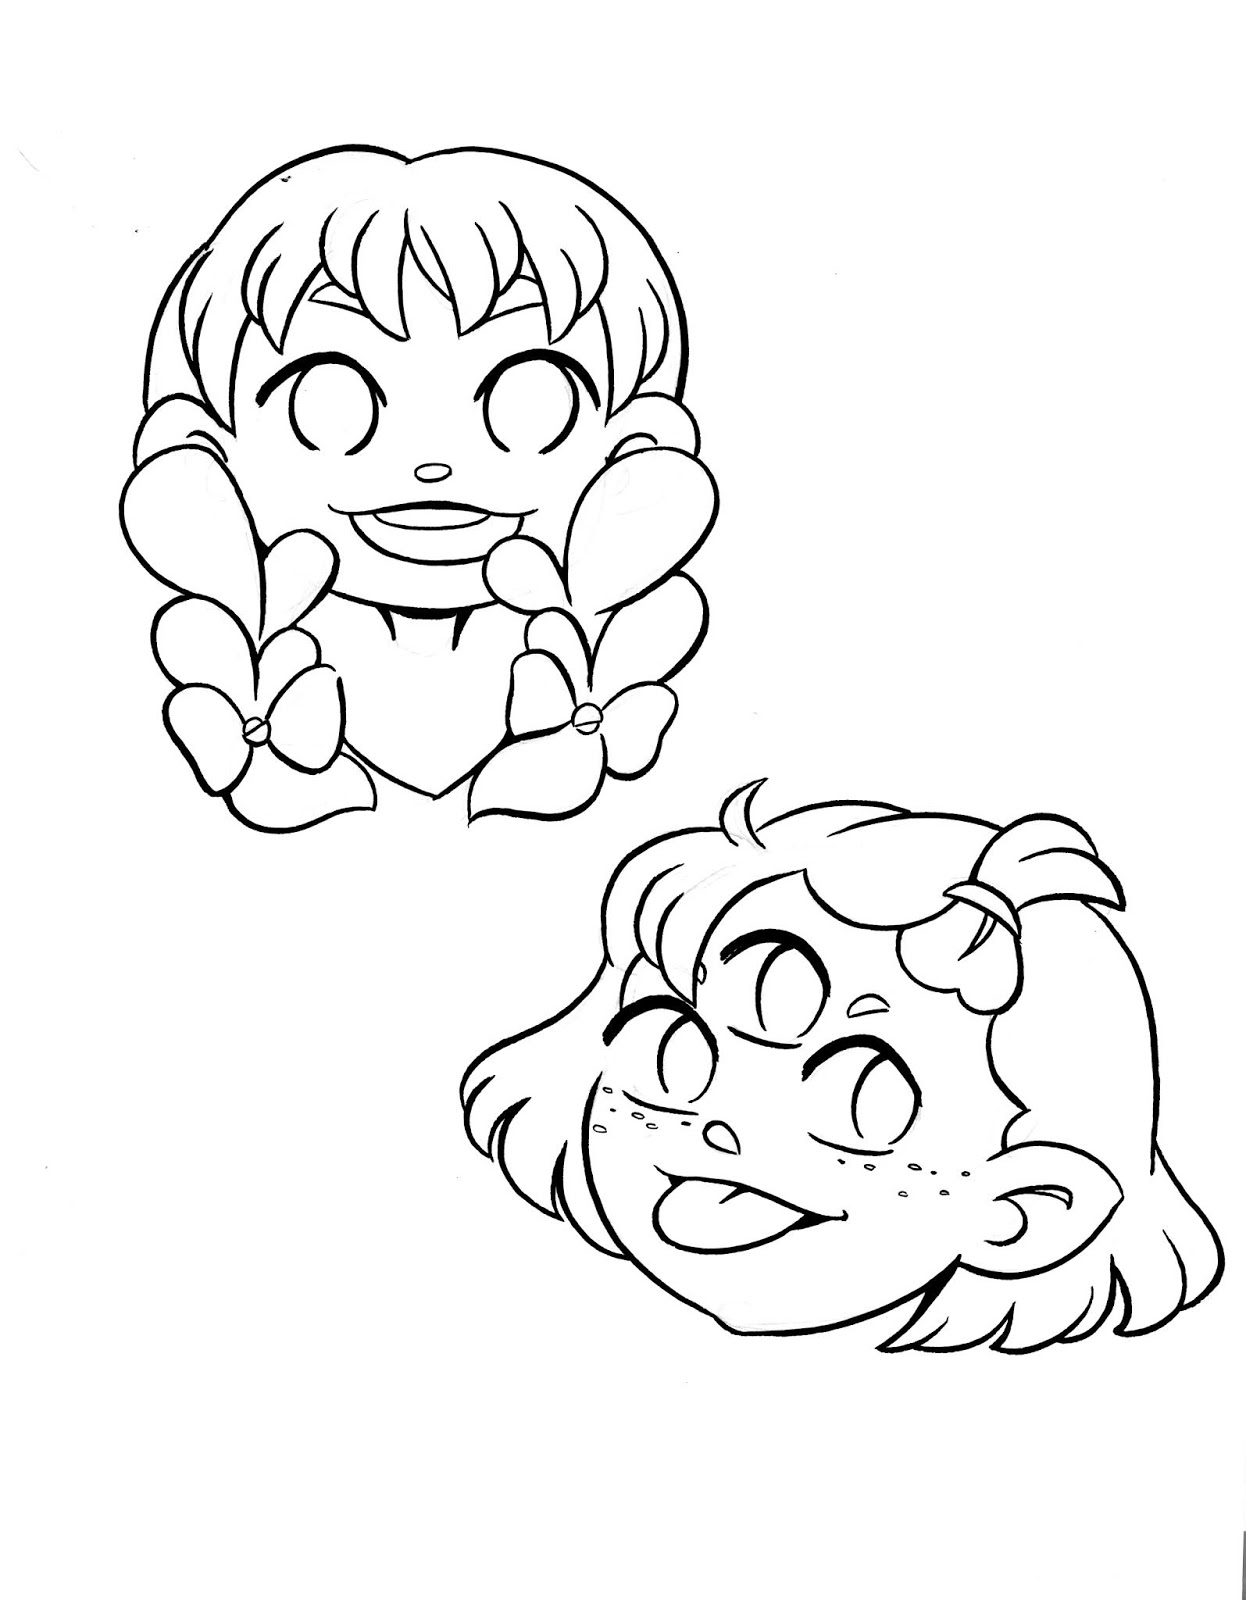
Potential 2018 Charm Designs
Design:12
 Design:34567
 Design8
 Design 9
 Design1011

Design 1213
 Design1415
 Design16171819
 Design2021
 Design 22
 Design23242526
Please consider donating to this blog or purchasing from Natto-shop (http://nattosoup.com/shop) if you want me to continue publishing quality content. All materials tested were purchased from my own pocket. Keep on Truckin' Nattosoup is not under any sponsorship.


