
Becca Hillburn's Blog, page 17
April 26, 2018
Tips for Running a Community Resource Patreon
How do Community Resource Patreons Differ from Webcomic, Commission, or Tutorial Patreons?
Money goes to support a project that is available free to the publicMinimum content behind paywallFunds go to purchase supplies, pay site costs, cover guest posts, remainder may b used to reimburse creator, but making a profit is not the intention
Best case scenario:
You've established a few years of contributing resources to the community of your choice, and have spent time and effort popularizing and promoting your resource before asking for money.
Ways to do this:
Moderate a Discord, Forum, or Comment section
Organize a Community Specific Resource- a wiki, an archive, a how-to
Examples: StArt Faire, Nattosoup Studio Art and Process Blog, How to be a Con Artist, Nattosoup Studio Youtube Channel
It can be difficult to get people to pay for what they've always consumed for free, so it's important to outline what you can do for them beyond what you've already done- give people a reason to care and a reason to back.
This can include:
Backer exclusive material
Early access material
Voting on what content is pursued
Before Launch:
When launching, clearly outline what you've done for the community over the years- numbers are good, but don't fudge themOutline the costs of operation- what you spend, and why people should help offset these costsOutline what backers will get in addition to the feel goods for helping keep a free resource aliveBe clear about what this Patreon is covering- for example, I try to be explicit that my Patreon does NOT cover 7" Kara.
On Your Patreon Page:
Make sure your mission statement is clearly listedClearly denote what the Patreon is covering, with links to the projects in questionClearly explain how Patreon funds will be used, and what their contributions coverIt's safe to assume if you have a long-running project, that most people visiting your Patreon are already fans of your work- you can skip the hard sell!Graphics are great, but if they distract or detract from your Patreon's mission, it's fine to stay text only
If your content has always been free access, don't start hiding it behind paywalls. Early Access denotes eventual public access (and is a great way to incentivize passionate fans), but you may have to challenge yourself to find other ways to incentivize backers.
Potential Backer Rewards:
Early Access to contentVoting rights on future contentBacker access to director's cut, or full videos (maybe including bloopers or deleted content)Additional update daysIf you're comfortable, opening up on a more personal level- cute pet photosPaid collaboration opportunities for other creatorsPatron only Discord channel
The goal is to add content and quality, not
After Launching:
Check in regularly! I find having a weekly newsletter with everything that went live- both to backers and to the public, is a great way to help people keep up with your workOutline your future goals for the project clearlyShow your backers what their funds have helped achieveGive your backers opportunities for input on future projectsSet milestones and host celebrationsFind ways to show your gratitude and thank your Patrons for their support and encouragement.Find ways to compensate those who have helped you along the way (ex: paid guest posts to add additional viewpoints and content)
Keep in Mind:
If you're a free community resource, people will still question why you do what you do, even if it's clearly outlinedThey will also question your credentials/authorityRunning a Patreon takes a lot of dedication, and may not be worth the additional workloadThat's ok! That's just part of the process- it isn't personal.
What to Avoid:
Guilt tripping your friends and followersLying about what you can deliver- it's fine if you have to adjust goals and tiers to reflect reality on the flyOverpromising on what you can't deliverPutting originally free content behind a paywallDon't make this an ego trip- this project is about the community you're serving. Don't take things too personally and try to keep a level headRemember the focus is community- don't position yourself as the leader unless that best serves your community. Don't promote yourself as THE authority (especially in comics, there are so many talented professionals!) but as AN authority.Also Try!Get others involved! People love collaboration, and collaborative opportunities should benefit both parties. It helps to have a clear payment plan ahead of time- something to incentive Patrons and possible collaboratorsThanking Patrons in your credits
Please consider donating to this blog or purchasing from Natto-shop (http://nattosoup.com/shop) if you want me to continue publishing quality content. All materials tested were purchased from my own pocket. Keep on Truckin' Nattosoup is not under any sponsorship.


April 23, 2018
Super Easy Lettering Hack
Today I'm going to show you a super simple trick to help you balance word balloons/text within your comic panels. If you struggle with placement or find you frequently cover important parts of your panels with necessary text, this tutorial should help you out!
The basics of this technique are very simple, but require you to work digitally in your earlier stages. I use Photoshop in this tutorial but any graphics software that allows lettering will work.
In this tutorial, I used Digital Strip 2.0 BB Regular and Indie Star BB Regular, both Blambot Fonts with a free license for indie comics.
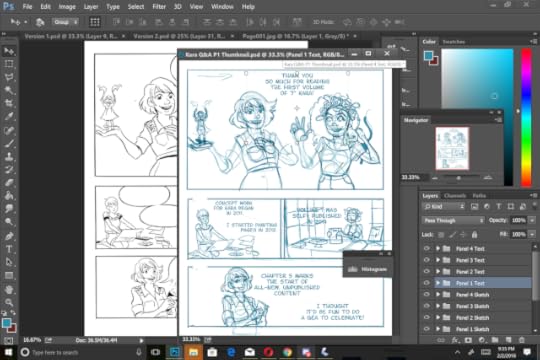
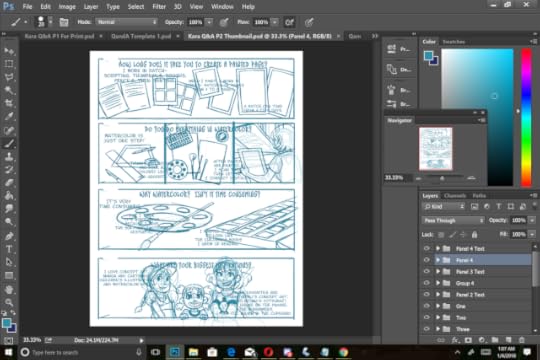
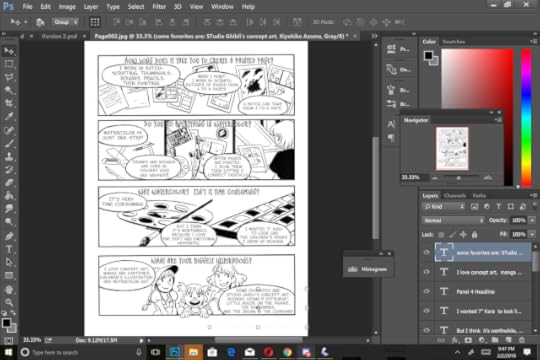
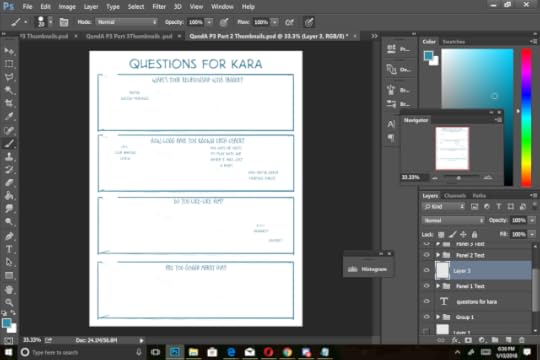
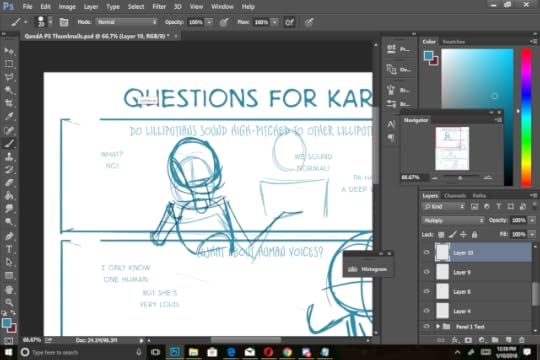
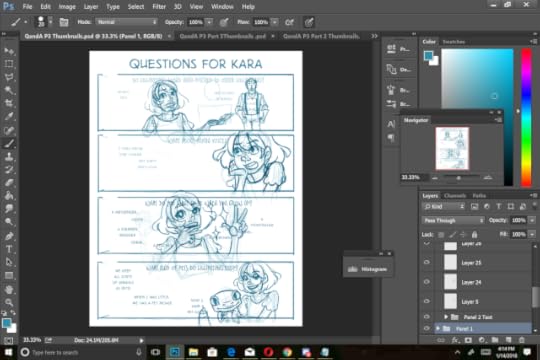
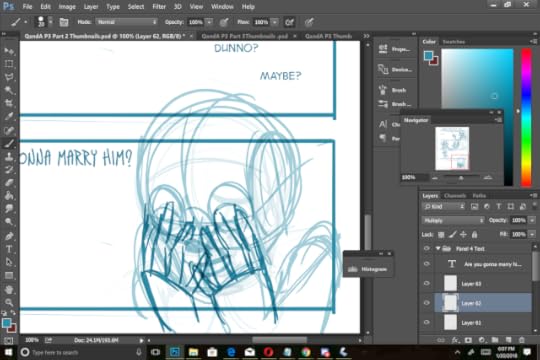
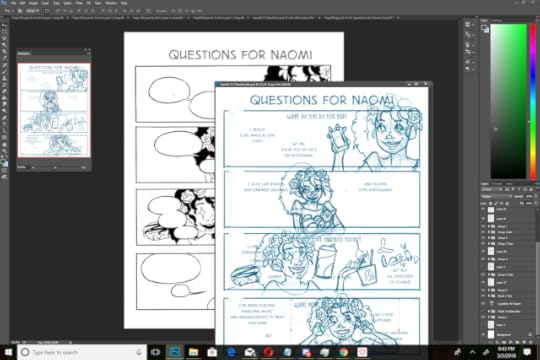
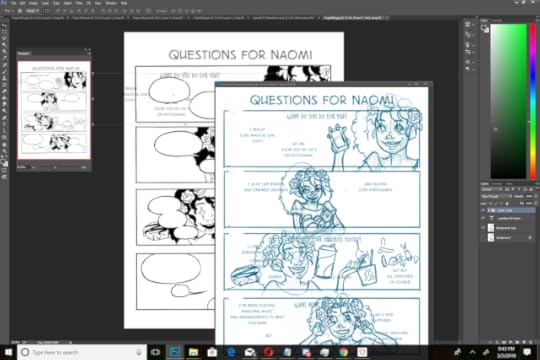
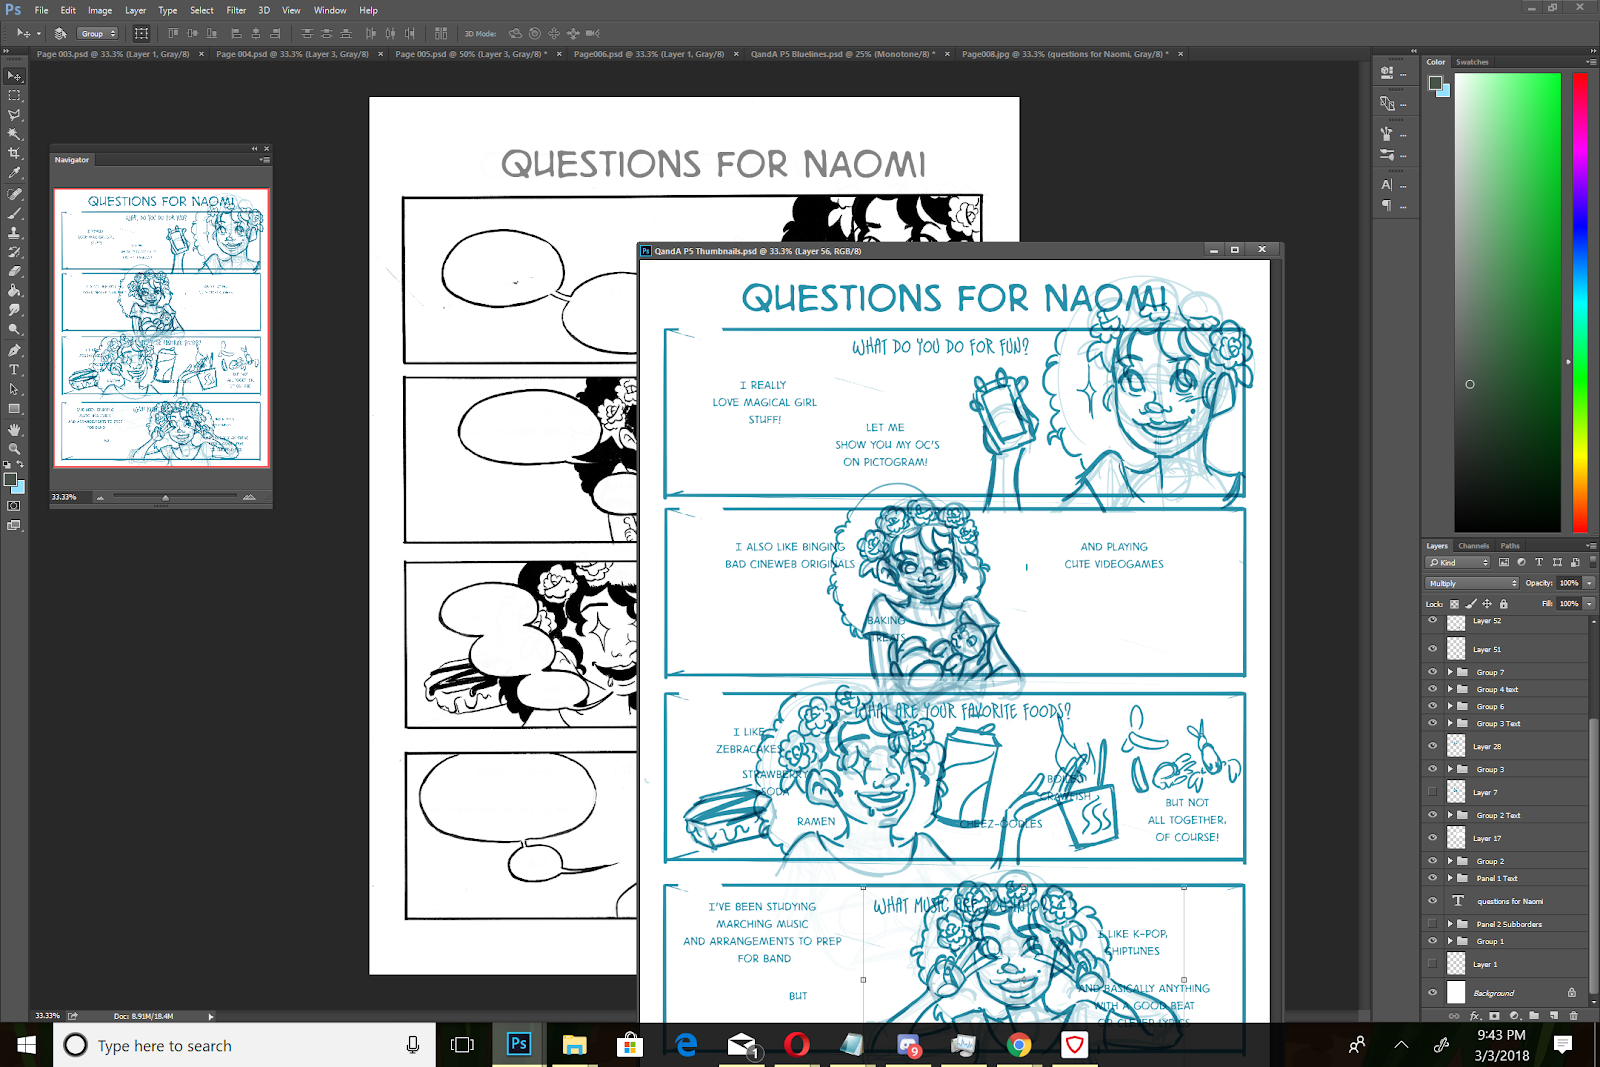
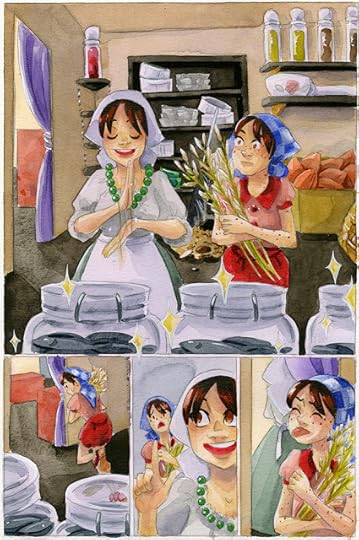
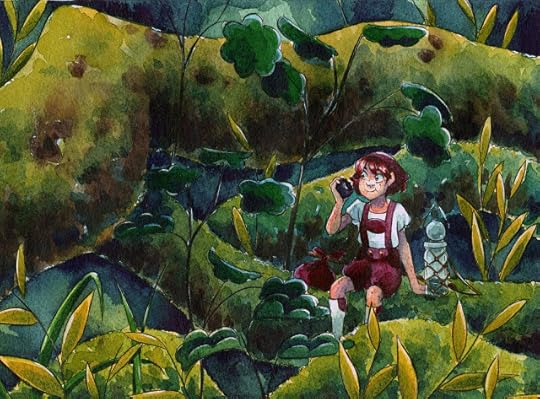
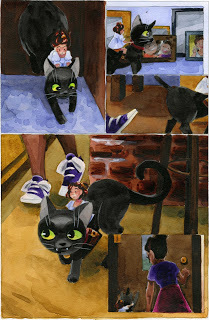
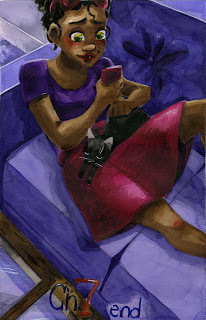
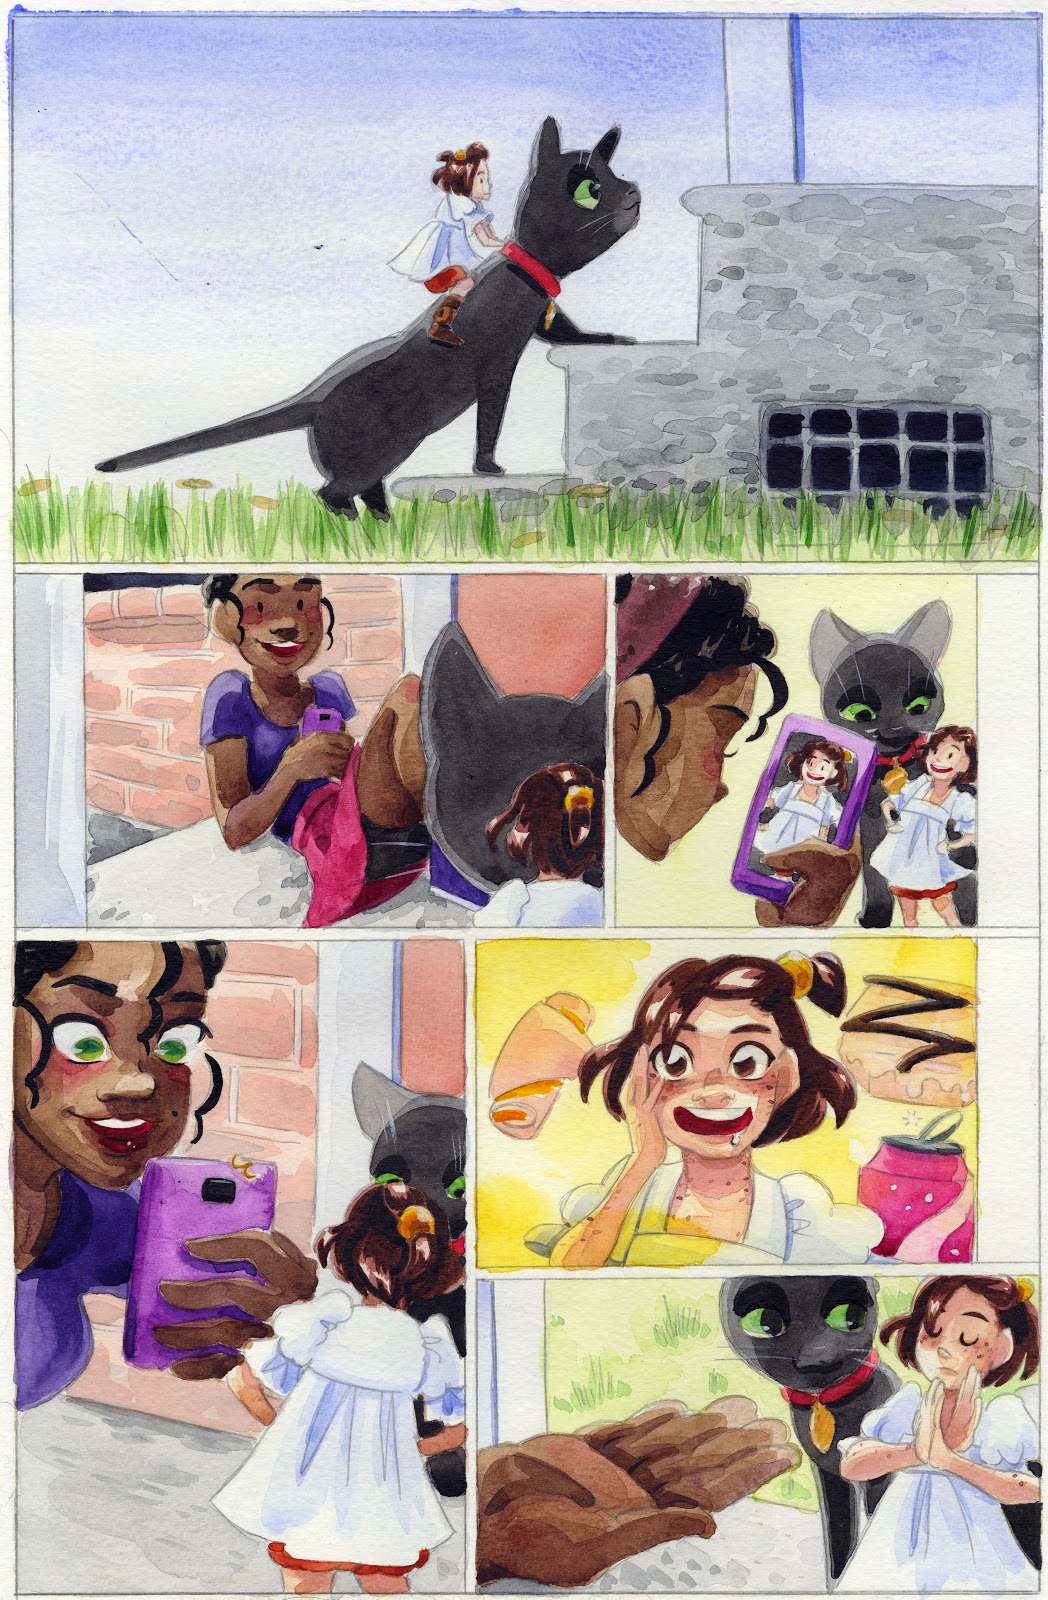
These pages were created as a bonus Q&A comic for 7" Kara, and were an excellent opportunity to practice some of the pacing techniques utilized by my webcomic peers. This includes writing as I went, finishing a page to completion before progressing to the next page, and digital production practices. While I enjoyed this experiment, I benefitted most from realizing that this sort of process does not work for me.
'
This post was brought to you thanks to Ink Drop Cafe. Ink Drop Cafe is a webcomic collective with thirteen phenomenal member comics, and loads of fantastic comic resources affiliated with the collective.

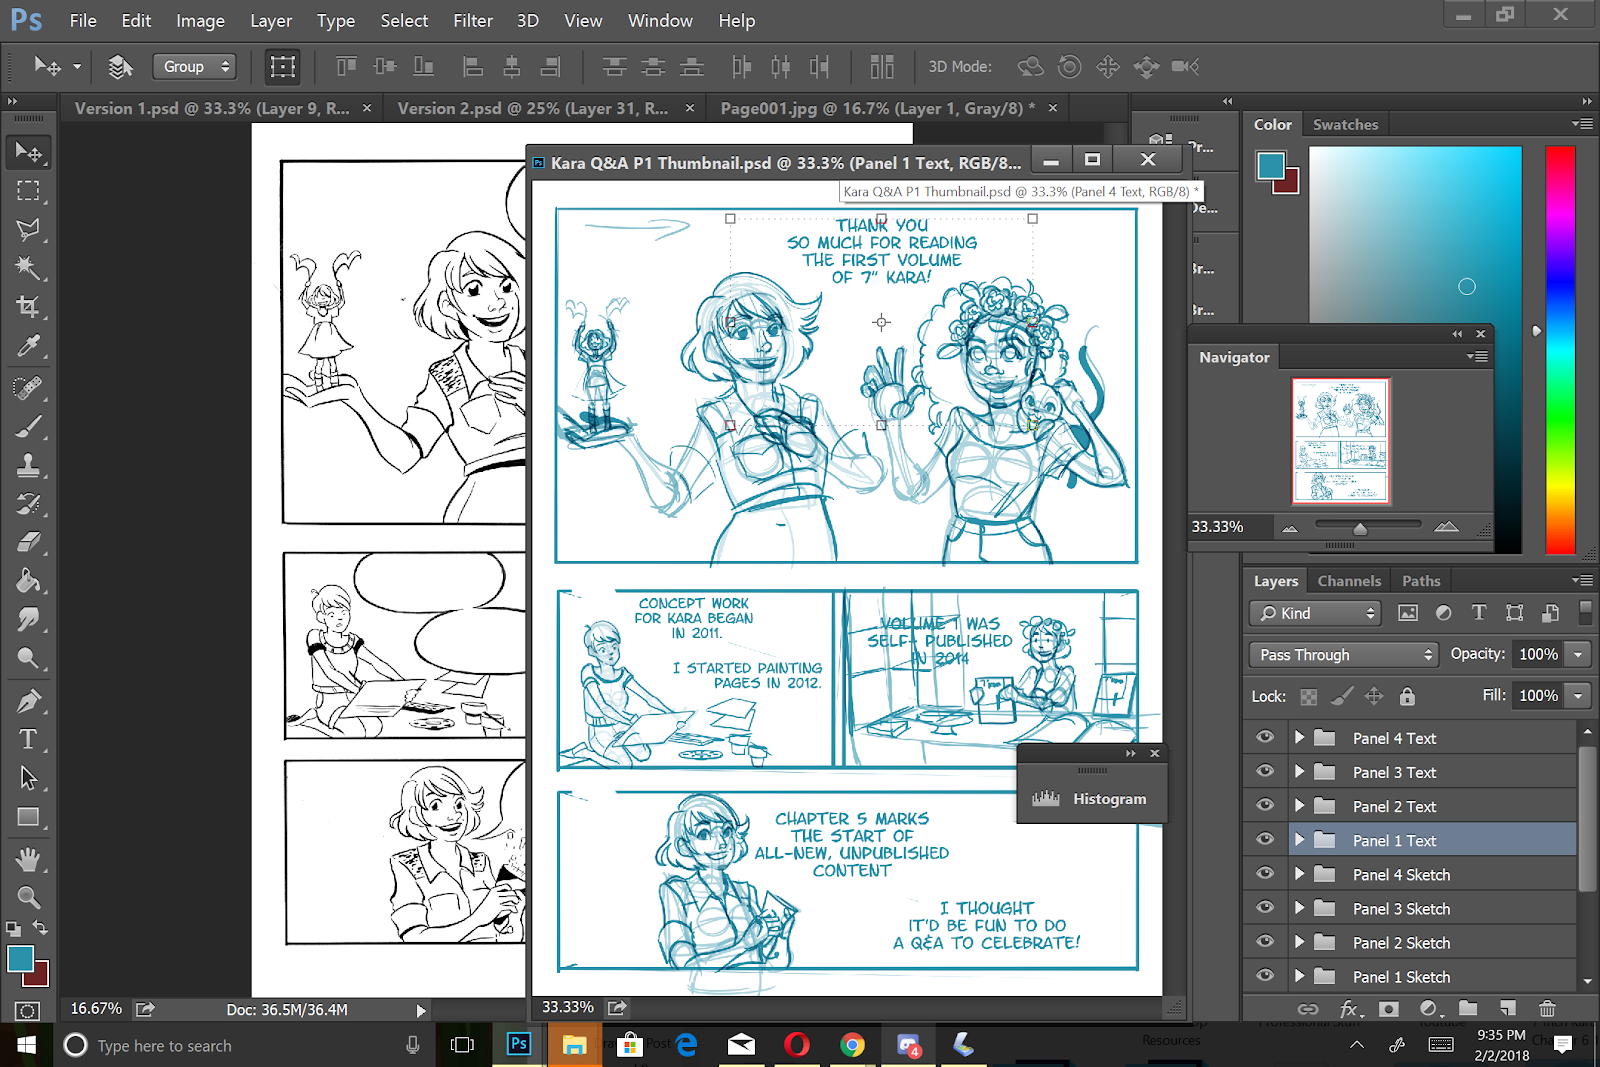
Lettering Your Template
Exact placement isn't necessary- you're going to move the text around frequently at this stage.
Sketching Your Figures and Adjusting Your Text
Begin sketching in your characters- a loose sketch is fine- and adjust the text around the characters (or vice versa!)
Tightening Your Sketch
At this stage, begin formatting your text to suit dialogue needs.
Lettering Tutorials:Comic Book Grammar and TraditionBetter Letterer- Comic Lettering TipsHandlettering- BlambotComic Lettering Tutorial: The Comic Lettering SpellQuick Word Balloon Tutorial
Save this file separately as Thumbnails or Sketch, you're going to want the PSD later.
If You Work Traditionally:
Printing Using methods covered in this Bluelines TutorialConvert Sketch to GrayscaleBoost ContrastConvert Sketch to Nonphoto BluelinesPrint onto Bristol Paper
Penciling and Inking
When Penciling and Inking, you do have the option to ink your letters at this time, but I focused on just drawing and inking my word balloons
Scan
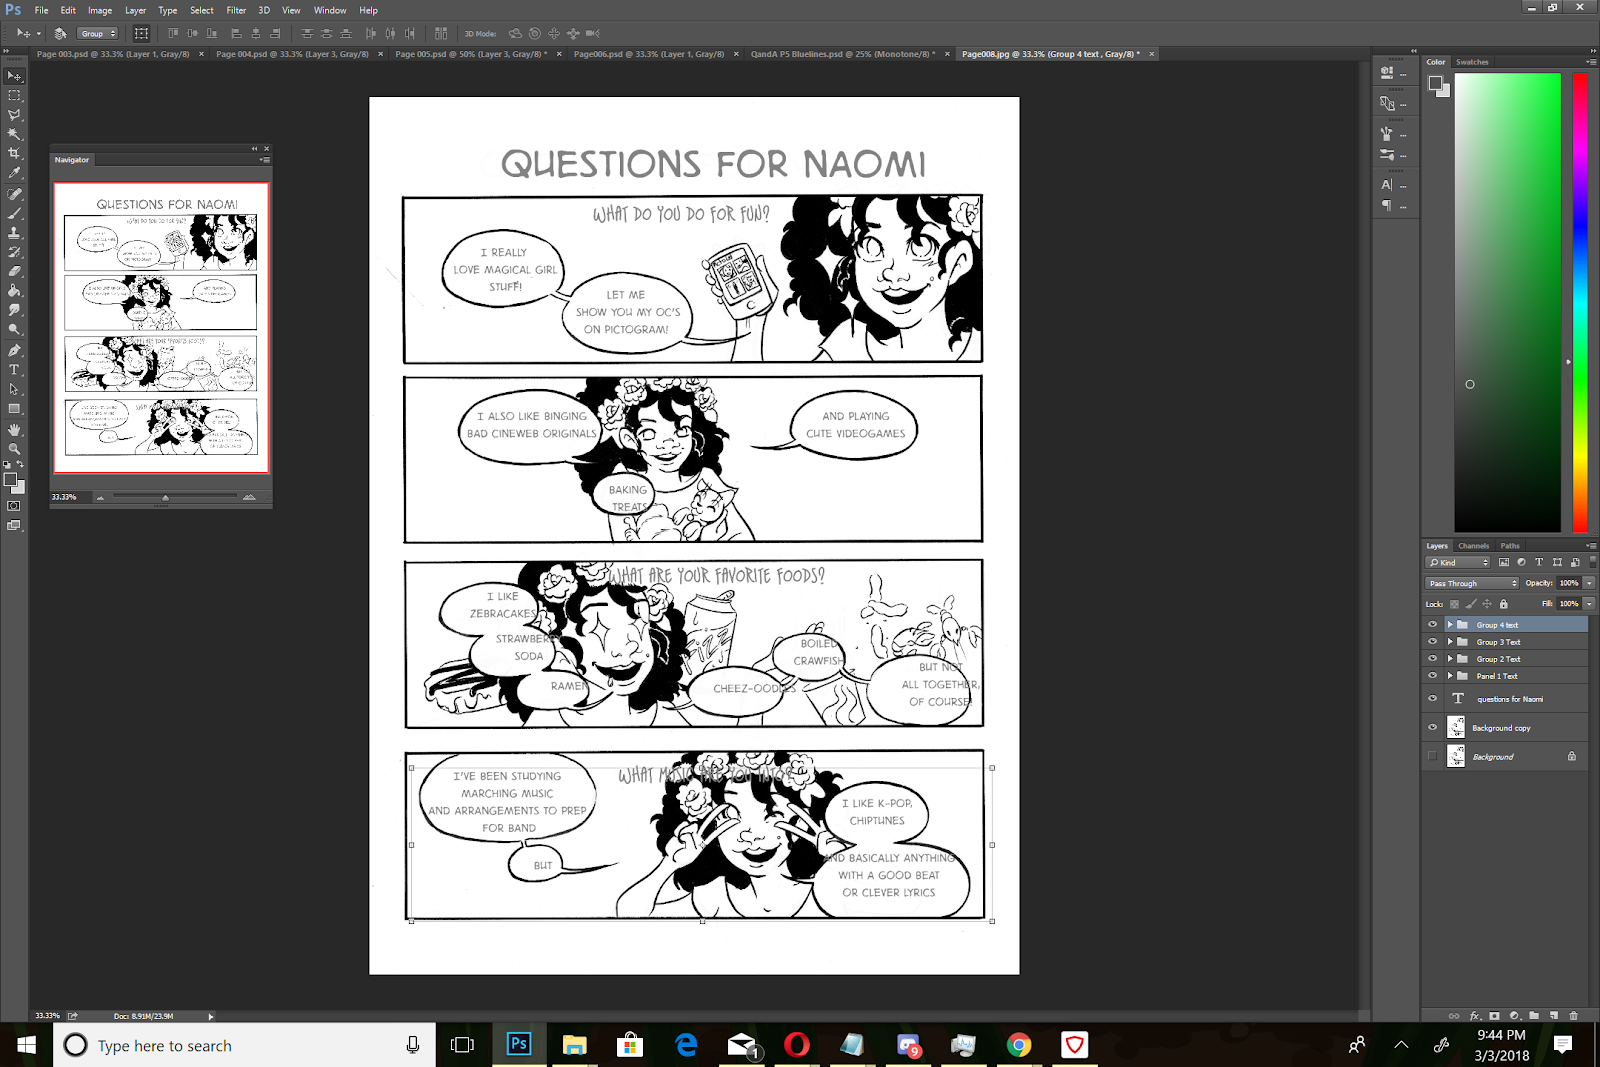
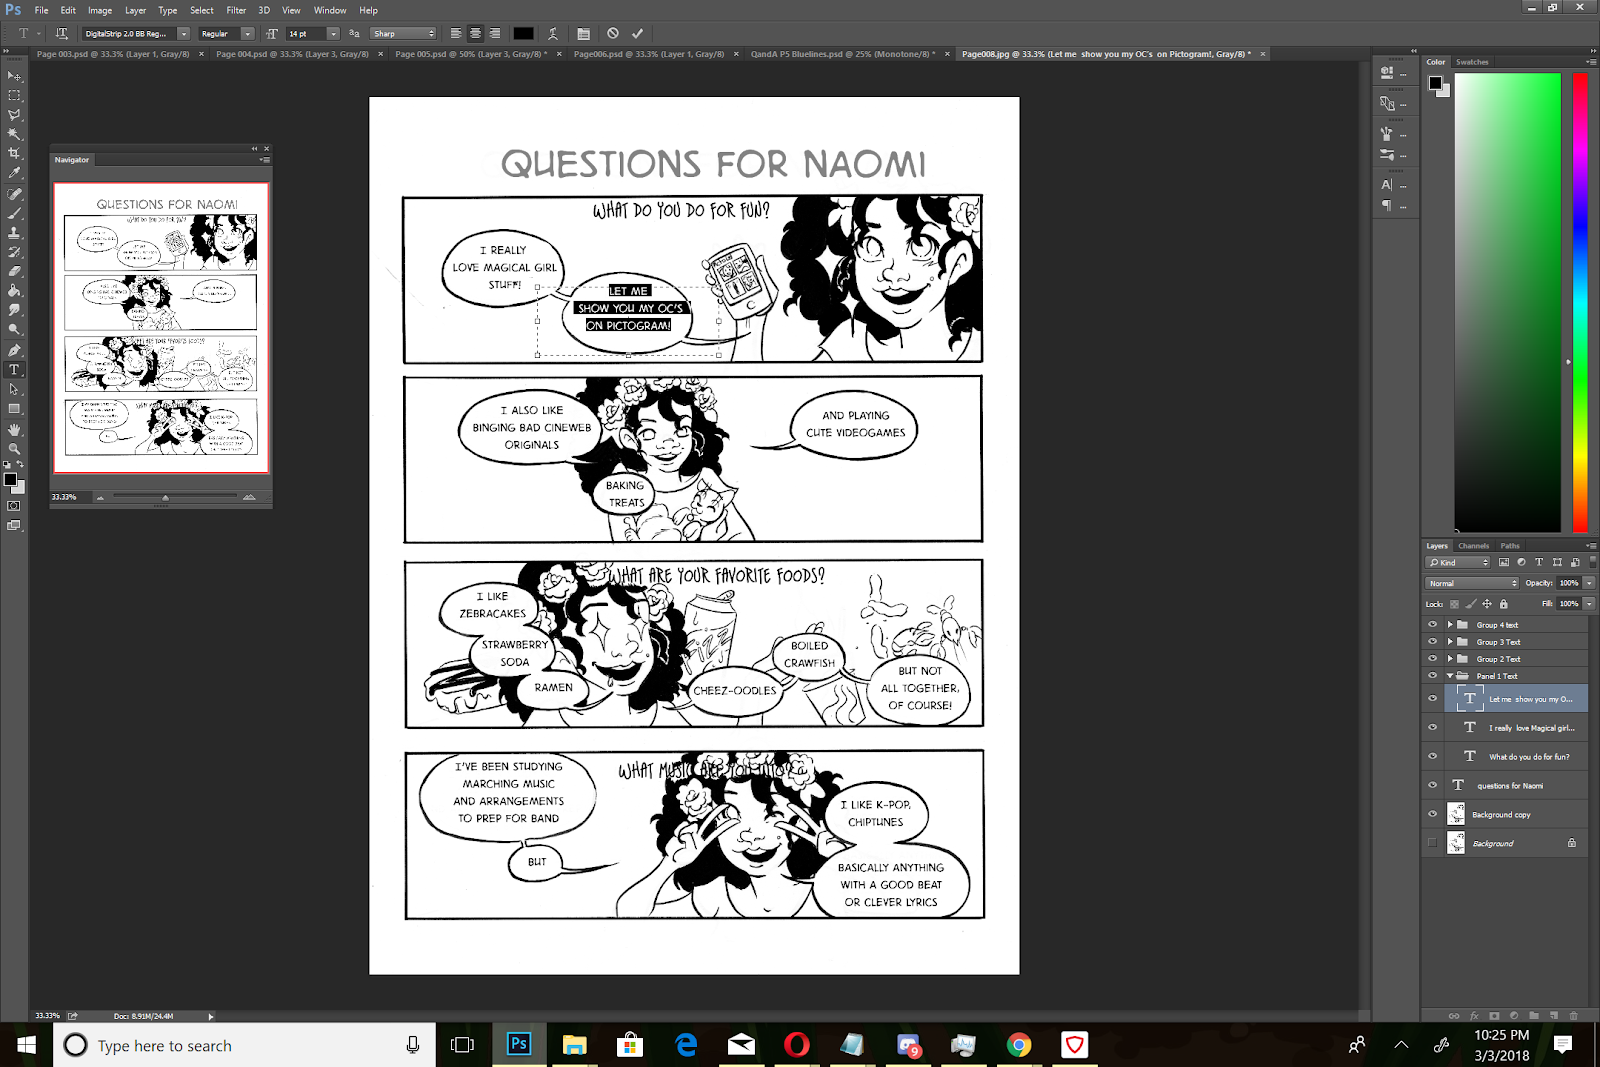
Lettering Your Final Page
Open your original sketch PSD, which should include your text files. Adjust the sizes of your two files so they are the same size.
EX:
9"x12", 300 DPI
Drag your text from the sketch file to your final file.

Adjust text so it suits the balloons you've inked.
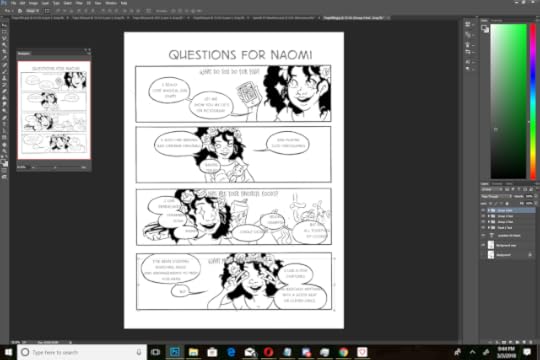

Adjust the color of your text so that it's black.
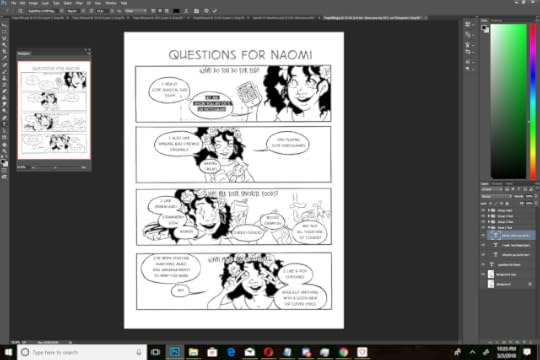
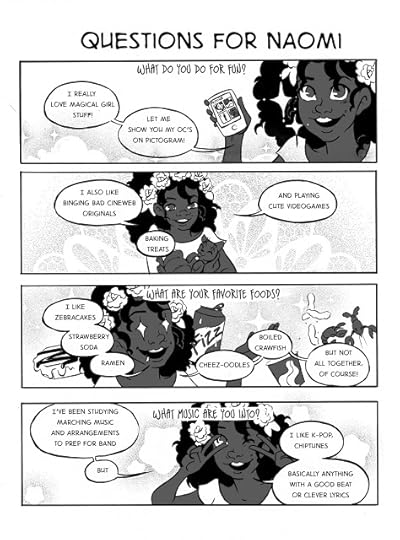
The Finished Page
 Note: Effects brushes (tones) were created by Kabocha! You can check them out here.
You can check out this bonus Q&A segment in it's finished form here!
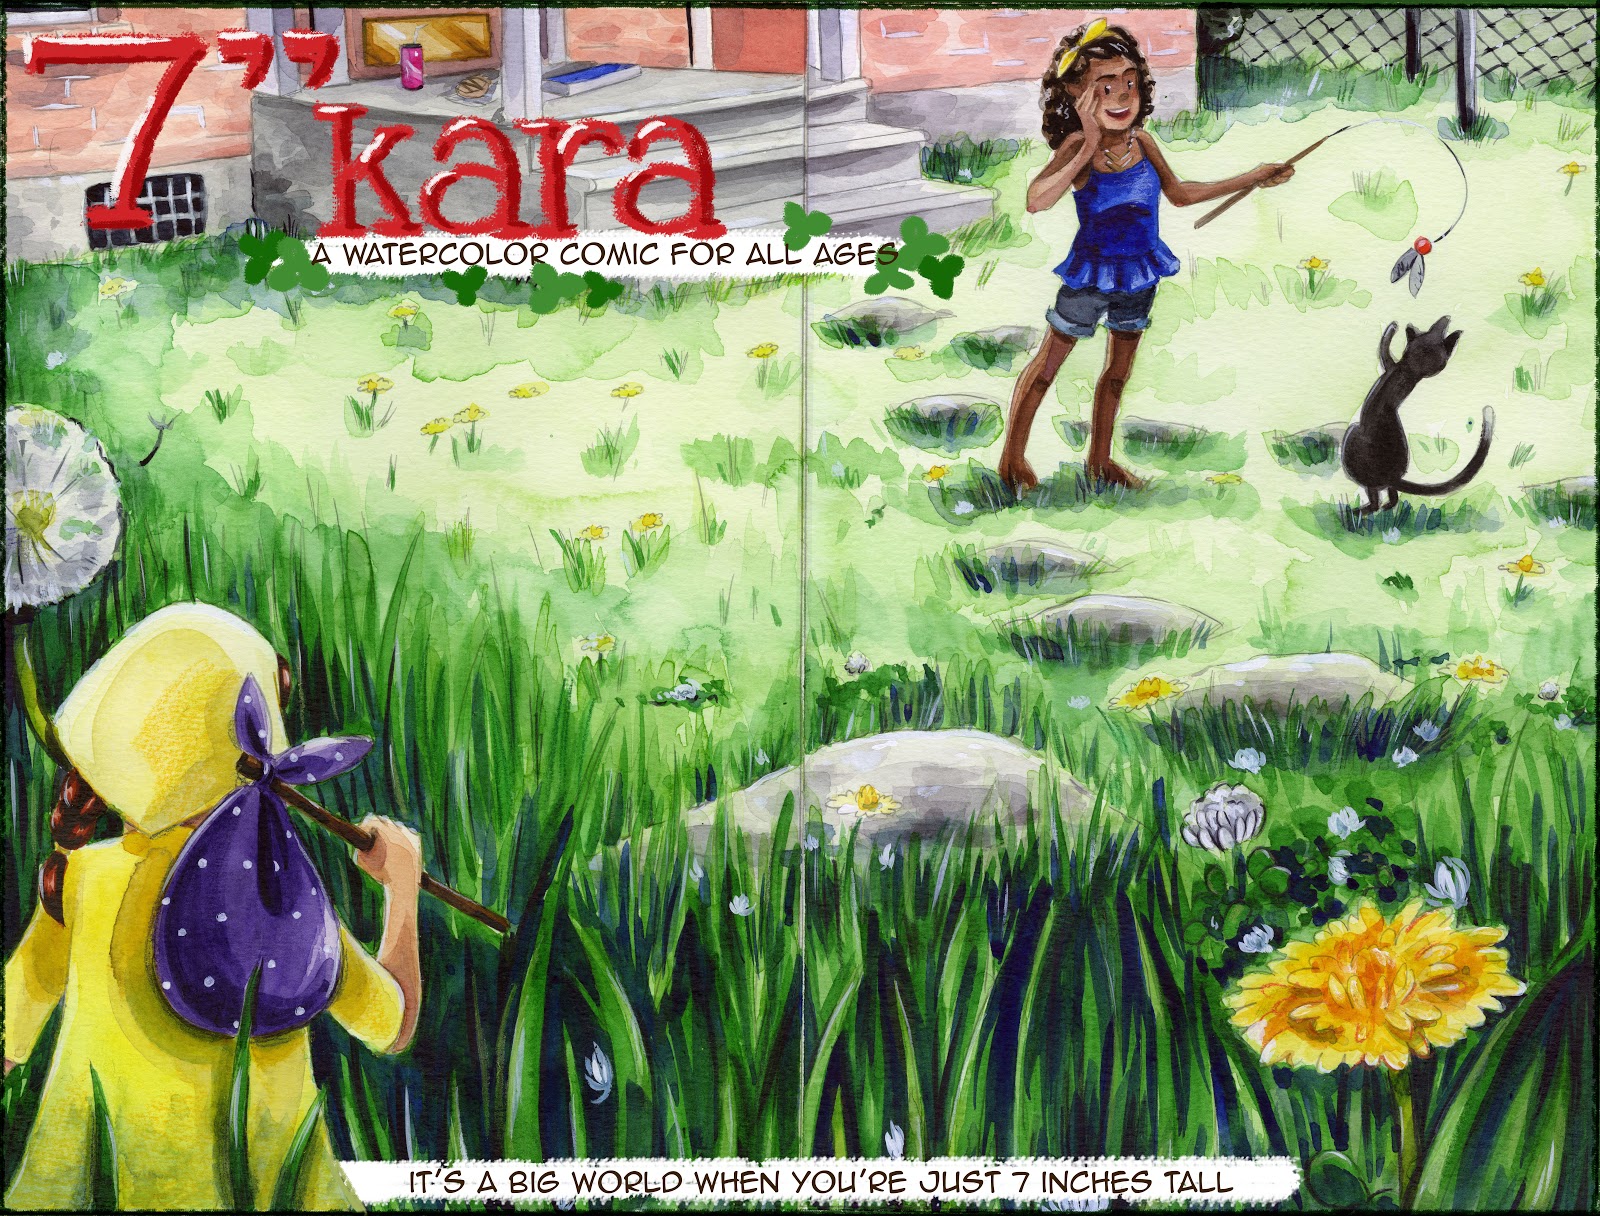
These bonus pages were created to celebrate the completion of 7" Kara Volume 1 as a webcomic!
 You can check out 7" Kara in its full watercolor glory at 7inchkara.com or 7inchkara.tumblr.com.
There are lots of methods for lettering comics out there, and it may take experimentation to find a method that works for you! So how do you guys letter your comics? Let me know on Twitter!
Please consider donating to this blog or purchasing from Natto-shop (http://nattosoup.com/shop) if you want me to continue publishing quality content. All materials tested were purchased from my own pocket. Keep on Truckin' Nattosoup is not under any sponsorship.
The basics of this technique are very simple, but require you to work digitally in your earlier stages. I use Photoshop in this tutorial but any graphics software that allows lettering will work.
In this tutorial, I used Digital Strip 2.0 BB Regular and Indie Star BB Regular, both Blambot Fonts with a free license for indie comics.
These pages were created as a bonus Q&A comic for 7" Kara, and were an excellent opportunity to practice some of the pacing techniques utilized by my webcomic peers. This includes writing as I went, finishing a page to completion before progressing to the next page, and digital production practices. While I enjoyed this experiment, I benefitted most from realizing that this sort of process does not work for me.
'


This post was brought to you thanks to Ink Drop Cafe. Ink Drop Cafe is a webcomic collective with thirteen phenomenal member comics, and loads of fantastic comic resources affiliated with the collective.

Lettering Your Template

Exact placement isn't necessary- you're going to move the text around frequently at this stage.
Sketching Your Figures and Adjusting Your Text

Begin sketching in your characters- a loose sketch is fine- and adjust the text around the characters (or vice versa!)
Tightening Your Sketch


At this stage, begin formatting your text to suit dialogue needs.
Lettering Tutorials:Comic Book Grammar and TraditionBetter Letterer- Comic Lettering TipsHandlettering- BlambotComic Lettering Tutorial: The Comic Lettering SpellQuick Word Balloon Tutorial
Save this file separately as Thumbnails or Sketch, you're going to want the PSD later.
If You Work Traditionally:
Printing Using methods covered in this Bluelines TutorialConvert Sketch to GrayscaleBoost ContrastConvert Sketch to Nonphoto BluelinesPrint onto Bristol Paper
Penciling and Inking
When Penciling and Inking, you do have the option to ink your letters at this time, but I focused on just drawing and inking my word balloons
Scan
Lettering Your Final Page
Open your original sketch PSD, which should include your text files. Adjust the sizes of your two files so they are the same size.
EX:
9"x12", 300 DPI

Drag your text from the sketch file to your final file.

Adjust text so it suits the balloons you've inked.

Adjust the color of your text so that it's black.
The Finished Page
 Note: Effects brushes (tones) were created by Kabocha! You can check them out here.
You can check out this bonus Q&A segment in it's finished form here!
These bonus pages were created to celebrate the completion of 7" Kara Volume 1 as a webcomic!
 You can check out 7" Kara in its full watercolor glory at 7inchkara.com or 7inchkara.tumblr.com.
There are lots of methods for lettering comics out there, and it may take experimentation to find a method that works for you! So how do you guys letter your comics? Let me know on Twitter!
Please consider donating to this blog or purchasing from Natto-shop (http://nattosoup.com/shop) if you want me to continue publishing quality content. All materials tested were purchased from my own pocket. Keep on Truckin' Nattosoup is not under any sponsorship.
April 19, 2018
All About Brusho- Watercolor Basics
Brusho is one of my favorite hidden watercolor gems. Mainly marketed at crafters in the US, these dye-based watercolors arrive in powdered form, and are highly water reactive. Every 'color' is really a myriad of tones, and some colors, such as black and gray, contain reds, oranges, and blues. Utilized with a light hand and discretion, Brusho can add a lot of life to your watercolor process.
Brusho is made by Colourcraft, a company located in Sheffield, England. They make and distribute a variety of art and craft products including materials for printmaking, fabric art, sketching, and art educational books. They carry brands such as Golden Artist Colors, Liquitex, Gelli plates, and Koh-i-noor as well.
There are a number of powdered, dye based watercolor products on the market besides Brusho-Ken Oliver Colorburst and Magicals and Magicals Shakers are all products have properties similar to Brusho, and are used in a similar manner. I only have experience with Brusho, but I have included reviews for the other products in the Second Opinions and Outside Resources section at the bottom of the post.
 Colored lead, watercolor, and Brusho on Fluid EZ Block watercolor paper
The Stats:
44 total colorsFour sets- the 8 Color Set (Yellow Ochre, Rose Red, Lime Green, Olive Green, Sandstone, Terracotta, and Burnt Sienna- all unique to the 8 color set), the 12 Color Set (Lemon, Yellow, Orange, Scarlet, Brilliant Red, Purple, Ultramarine, Leaf Green, Emerald Green, Turquoise, Dark Brown, and Black), the 24 Color Set (Lemon, Yellow, Gamboge, Orange, Vermillion, Scarlet, Brilliant Red, Ostwald Red, Crimson, Cobalt Blue, Ostwald Blue, Ultramarine, Prussian Blue, Turquoise, Leaf Green, Emerald Green, Sea Green, Violet, Purple, Light Brown, Dark Brown, Grey, Black, and White), Spritzer Set (Sunburst Lemon, Orange, Alizarin Crimson, Violet, Turquoise, Sea Green)Also available openstock from Dickblick, in 15gr pots for $4.89Dye BasedMade in the UK
Where to Buy:
DickBlick
David's Art Supply (New Orleans)
Amazon
Keep in mind:
Colourcraft claims that Brusho will hold up over time, but being dyebased, Brusho is not lightfast nor archival. Please take adequate precautions to protect your work.
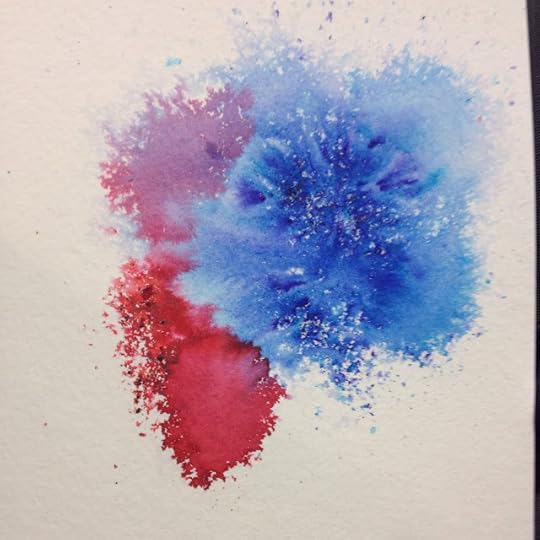
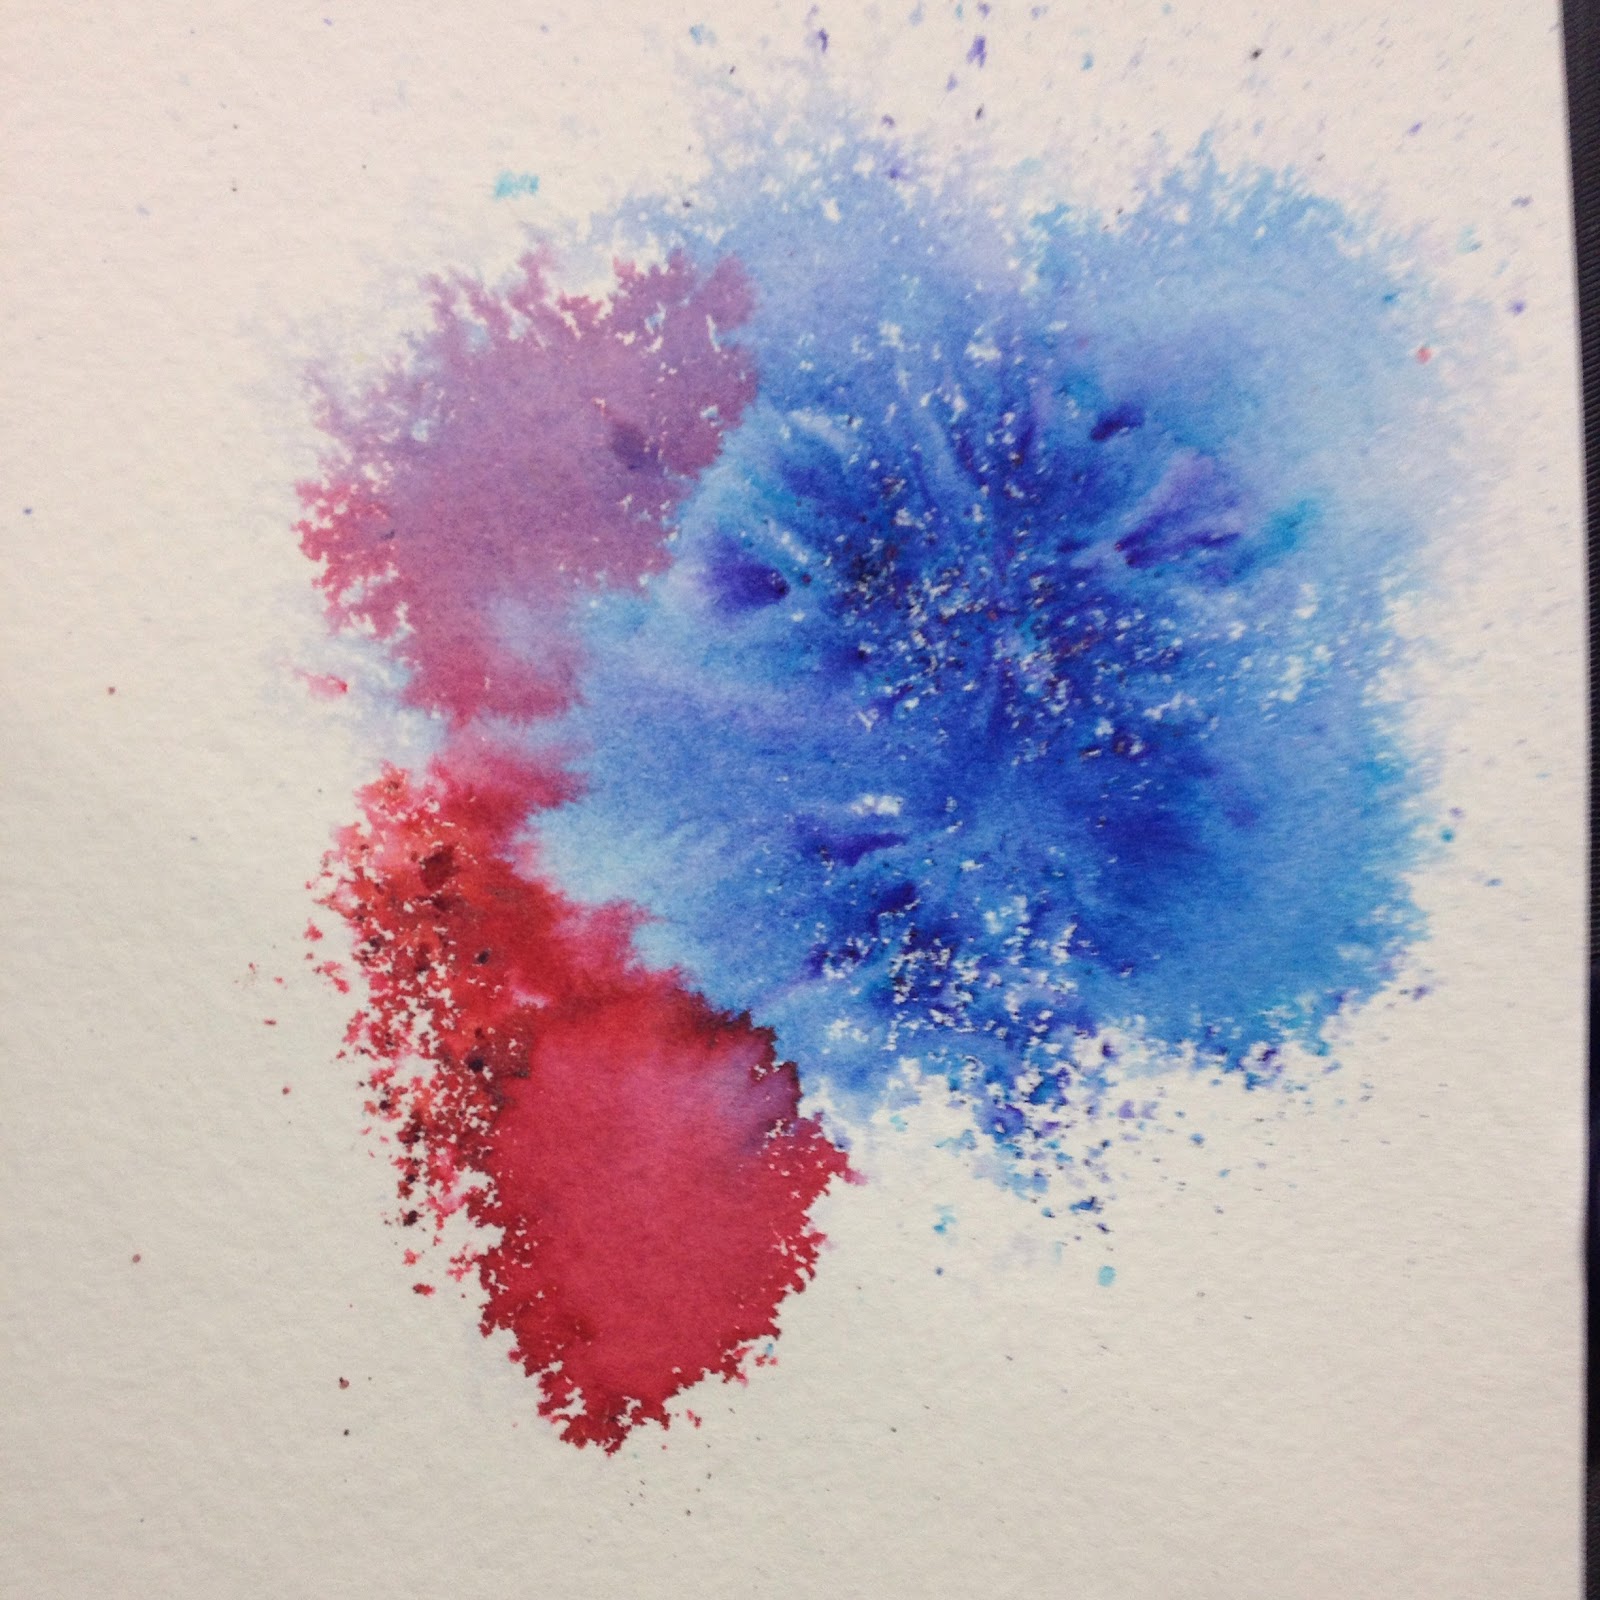
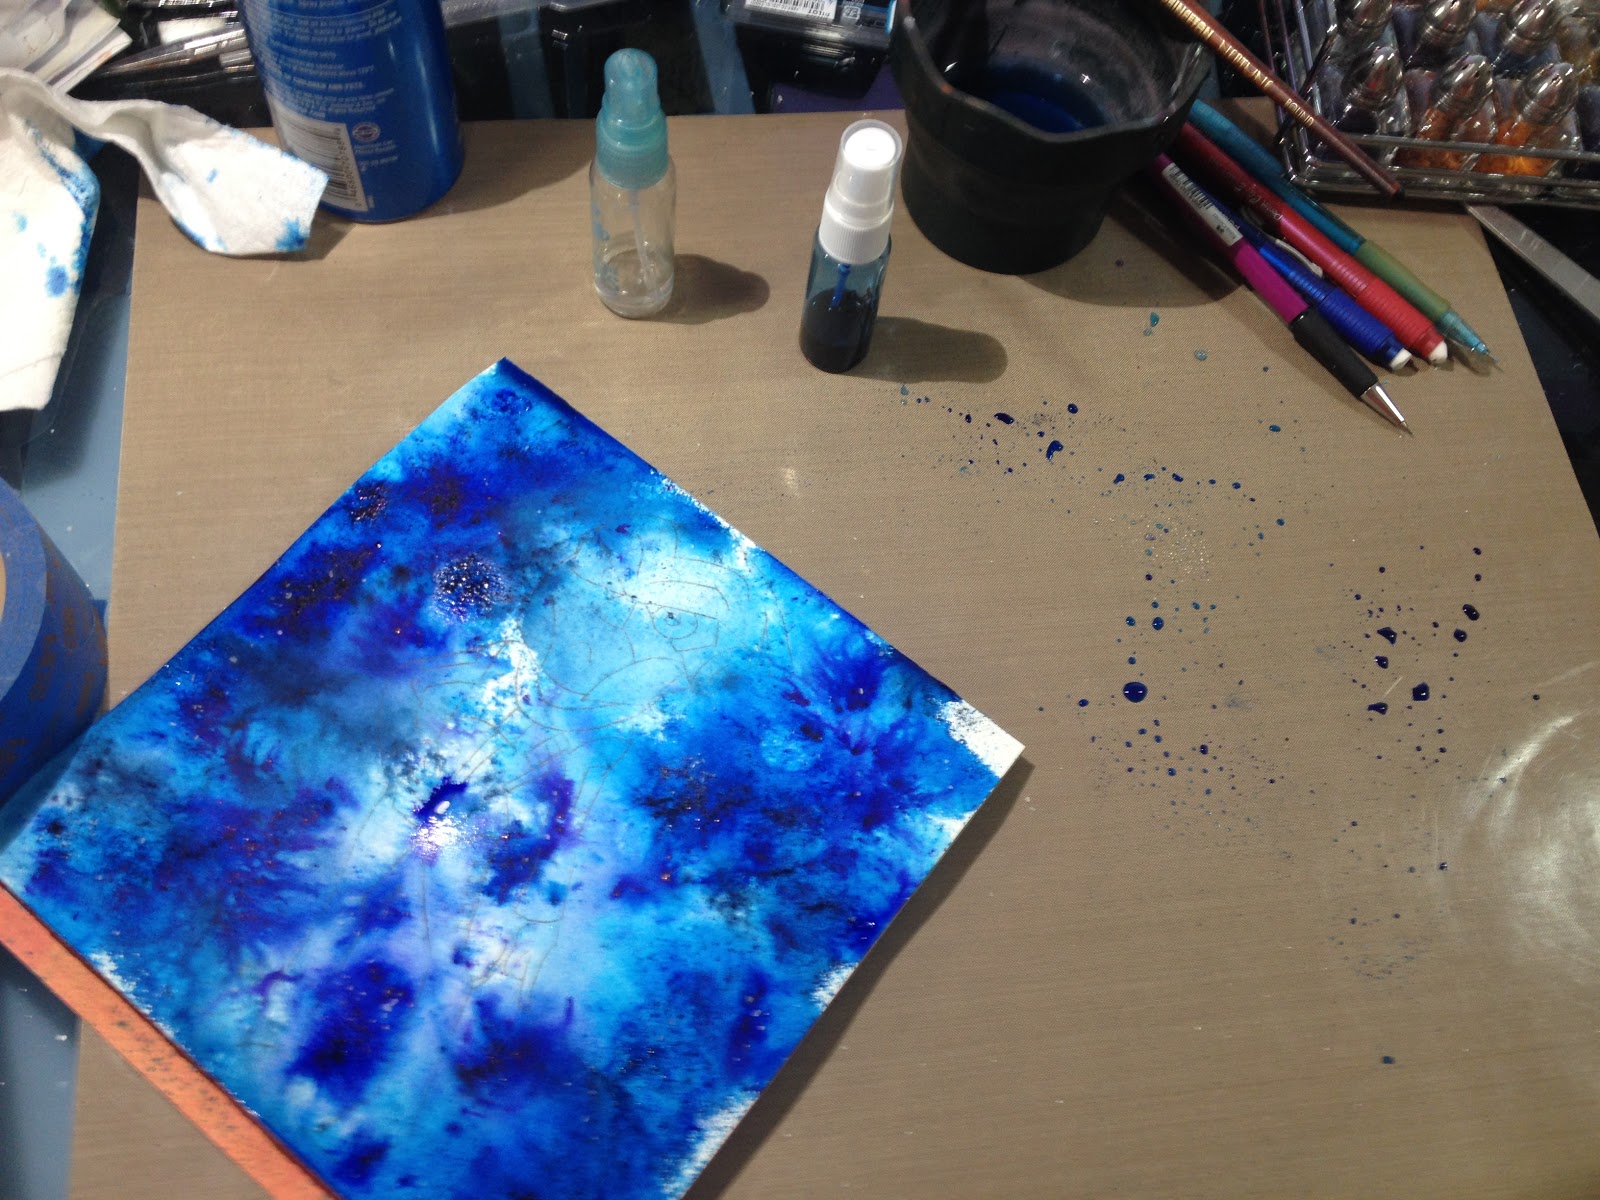
I love using Brusho to add vibrant splashes of color to my watercolor work. Brusho dyes are vivid and intense, and make for fun backgrounds or light embellishment within individual panels.
Brusho Basics
Unbox and Swatch-Brusho for Splatter Effects on Watercolor Paper
Beautiful Color Blooms- Swatching Brusho
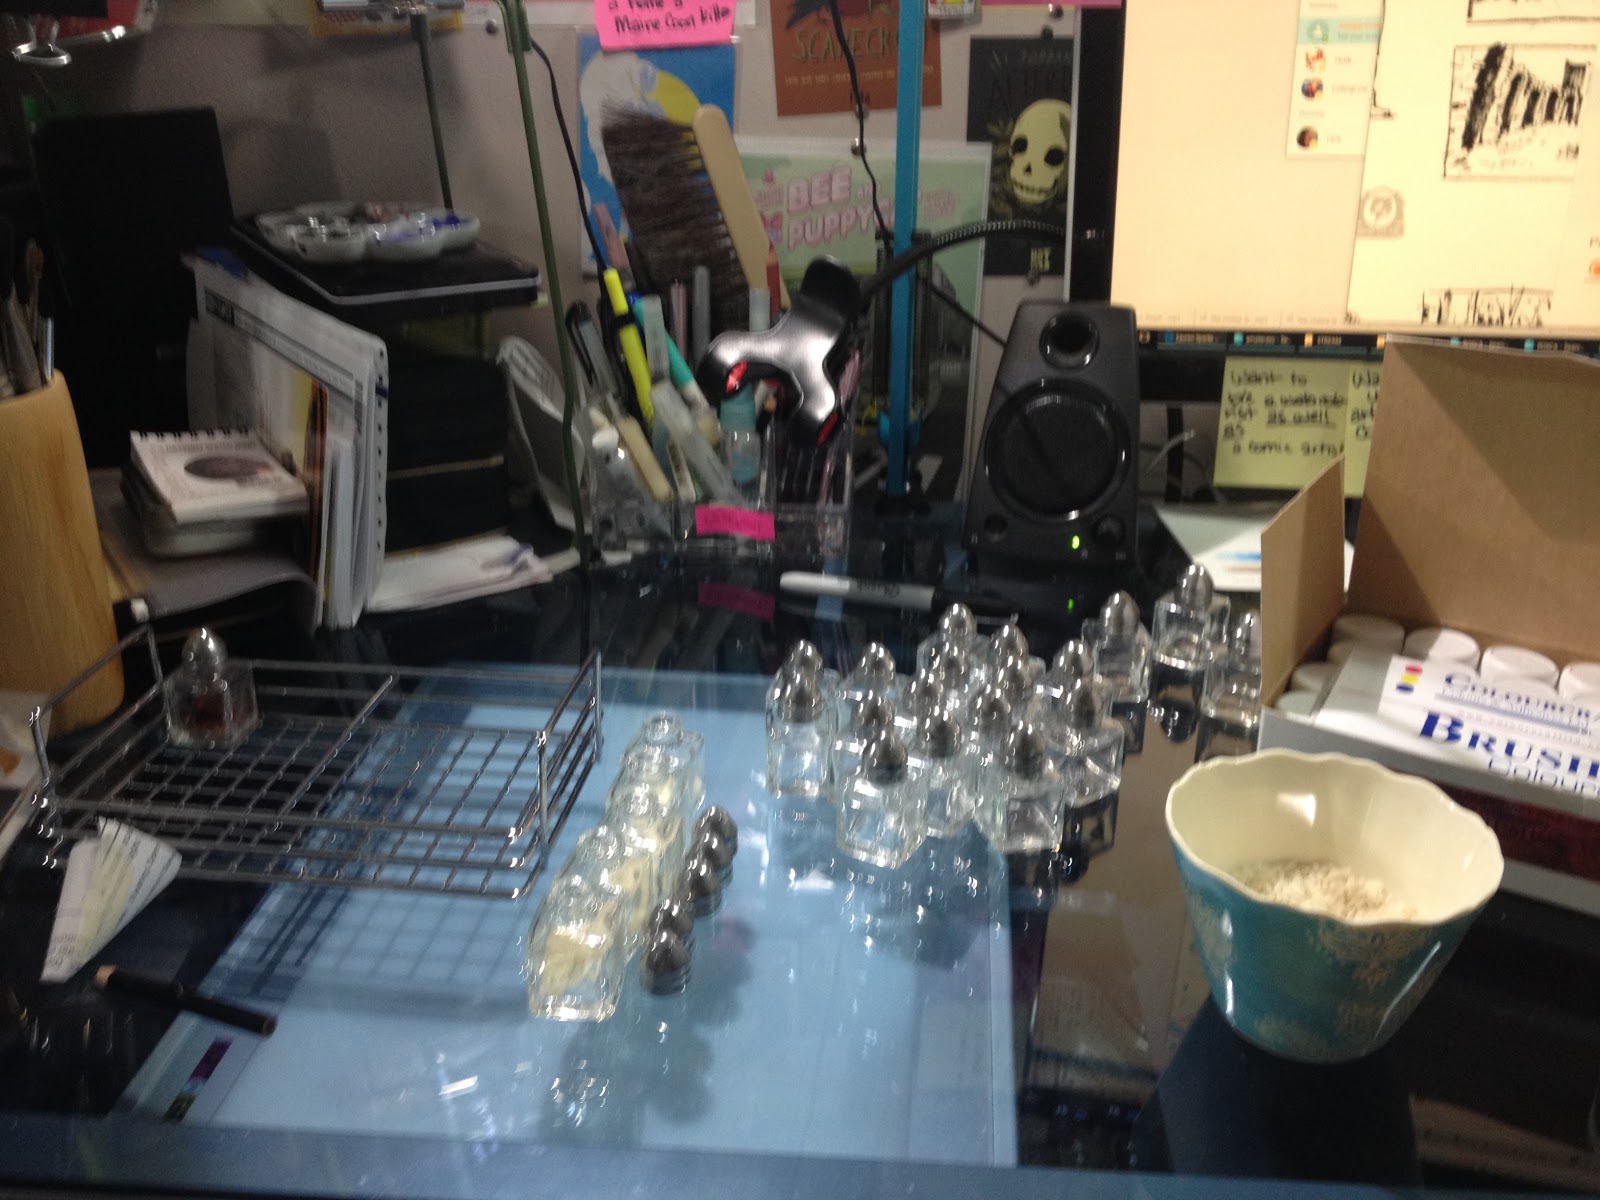
Handy Brusho Storage Hack
Materials Needed For Storage:
Salt Cellars
Mini Funnels (not shown, but hugely helpful)
Rice (to prevent clumping)

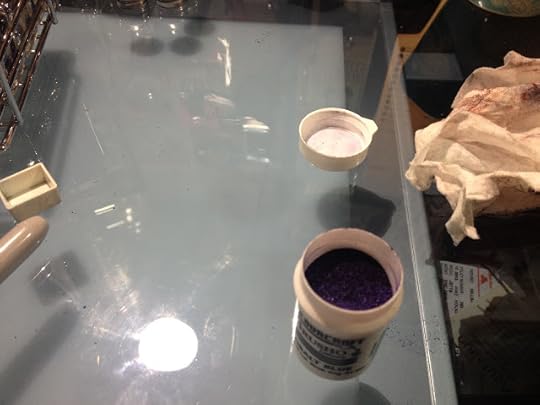
This is a fairly time consuming process, even with the recommended plastic funnels. I recommend you fill the salt cellars halfway with something that will absorb moisture (I use rice in this instance, but you could use silica if it's large enough not to go through the holes) beforehand, and then apply the Brusho on top. Eventually the two will get mixed, so you want something that won't effect the Brusho (rice has starch in it, which can cause blooming with water)
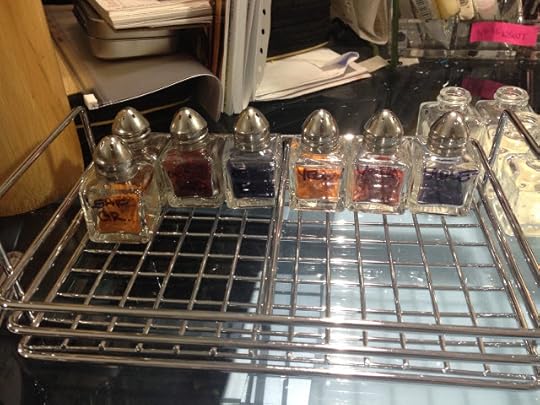
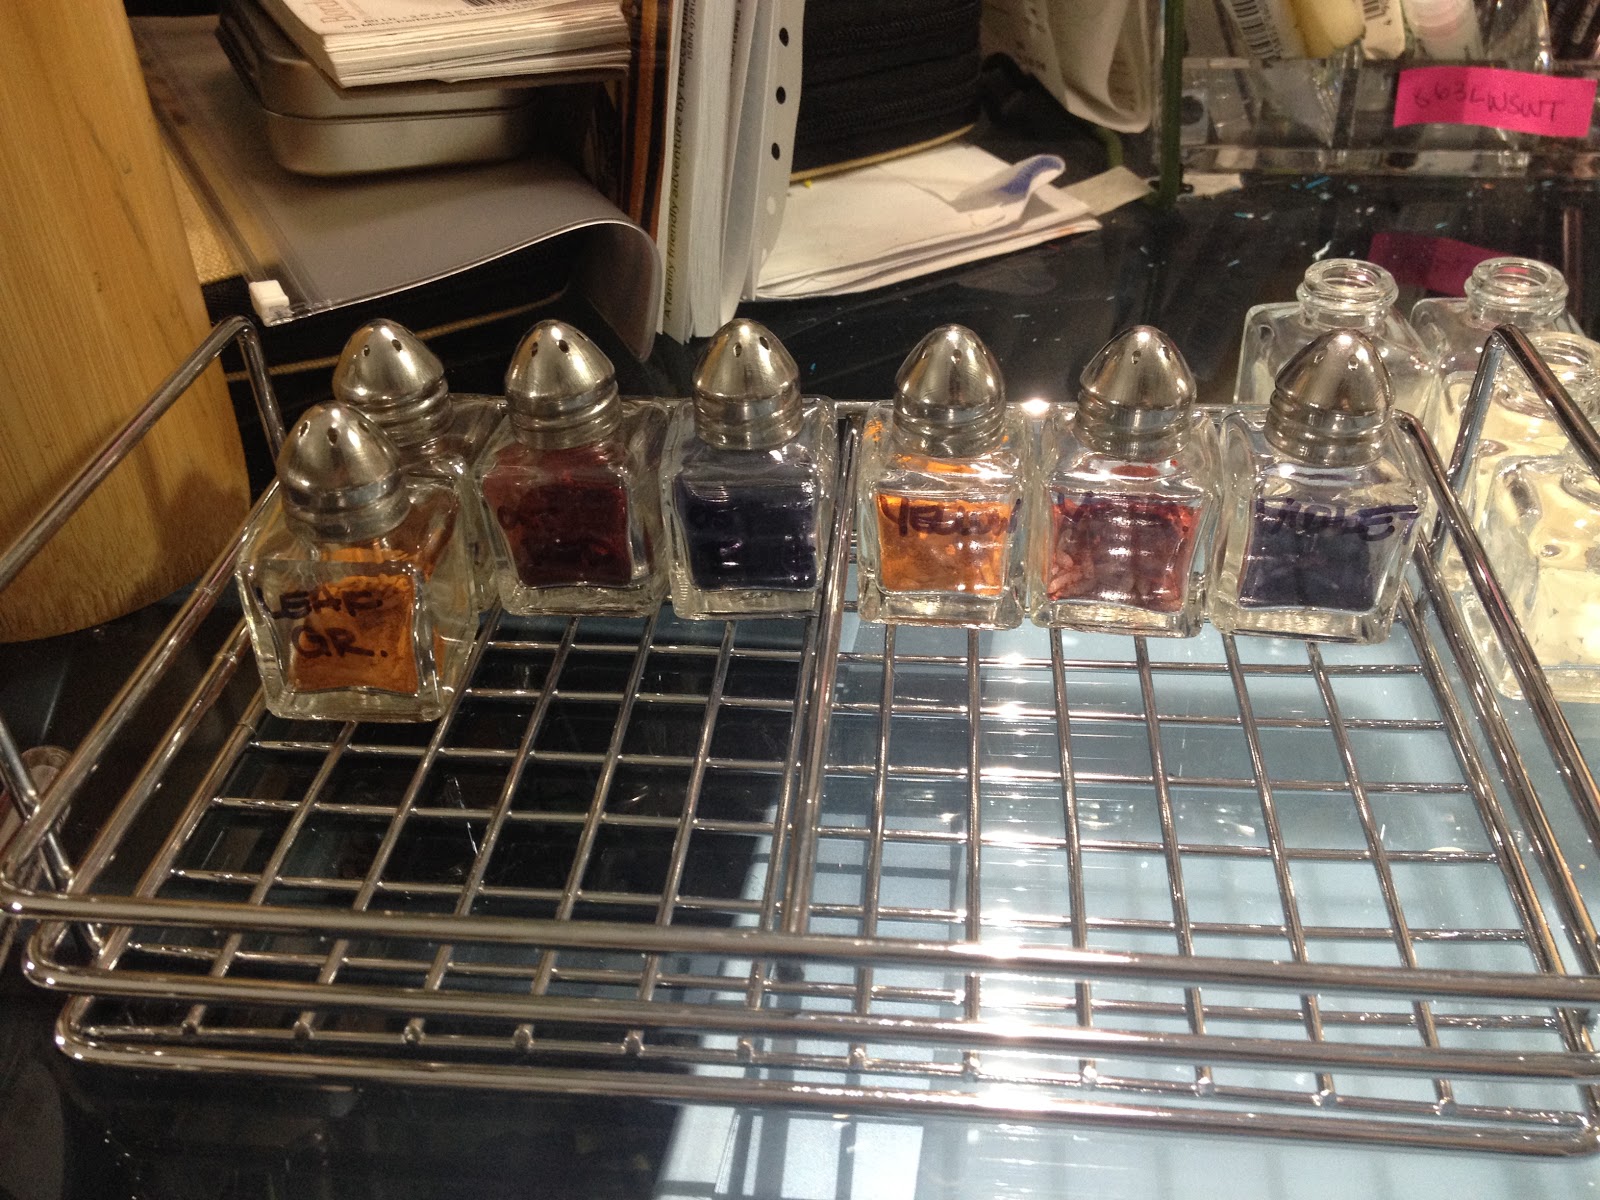
As you fill your salt cellars, it's helpful to label them with the color names.
Color Swatches:

Gamboge, Crimson, Orange,Brilliant Red, Ultramarine, Dark Brown Black, Gray, Cobalt Blue Scarlet, Sea Green
Light Brown, Ost Red, Ost BlueYellow, Vermillion, Violet BlueSea Green, Lemon, Emerald GreenPrussian Blue, Purple, Turquoise
Simple Brusho Tricks
Brusho can be a fantastic way to liven up backgrounds or planes of color. There are numerous ways you can use Brusho in this manner:Wet area beforehand (with mop), sprinkle on BrushoSprinle on Brusho, then wet with mopWet area beforehand (with spritzer), sprinkle on BrushoSprinkle on Brusho, then spritz with water
Brusho on Yupo Demonstration
Brusho Background Mini Tutorial
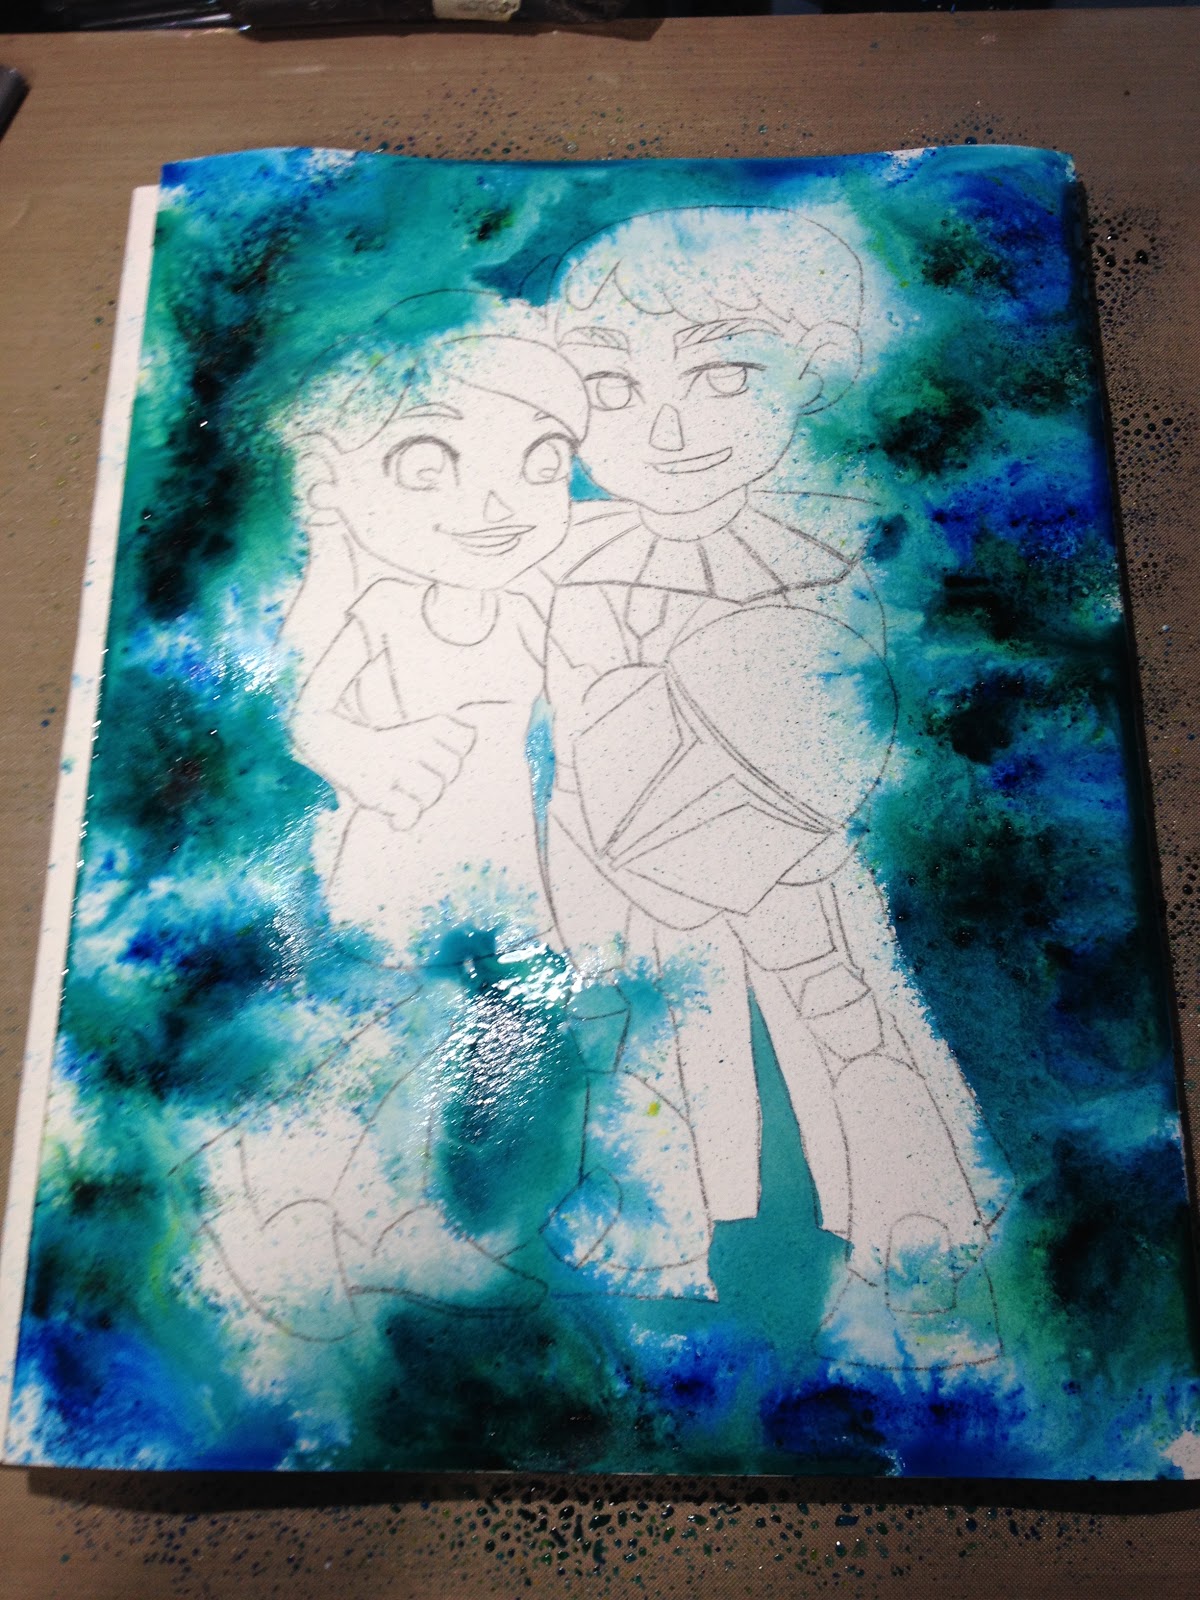
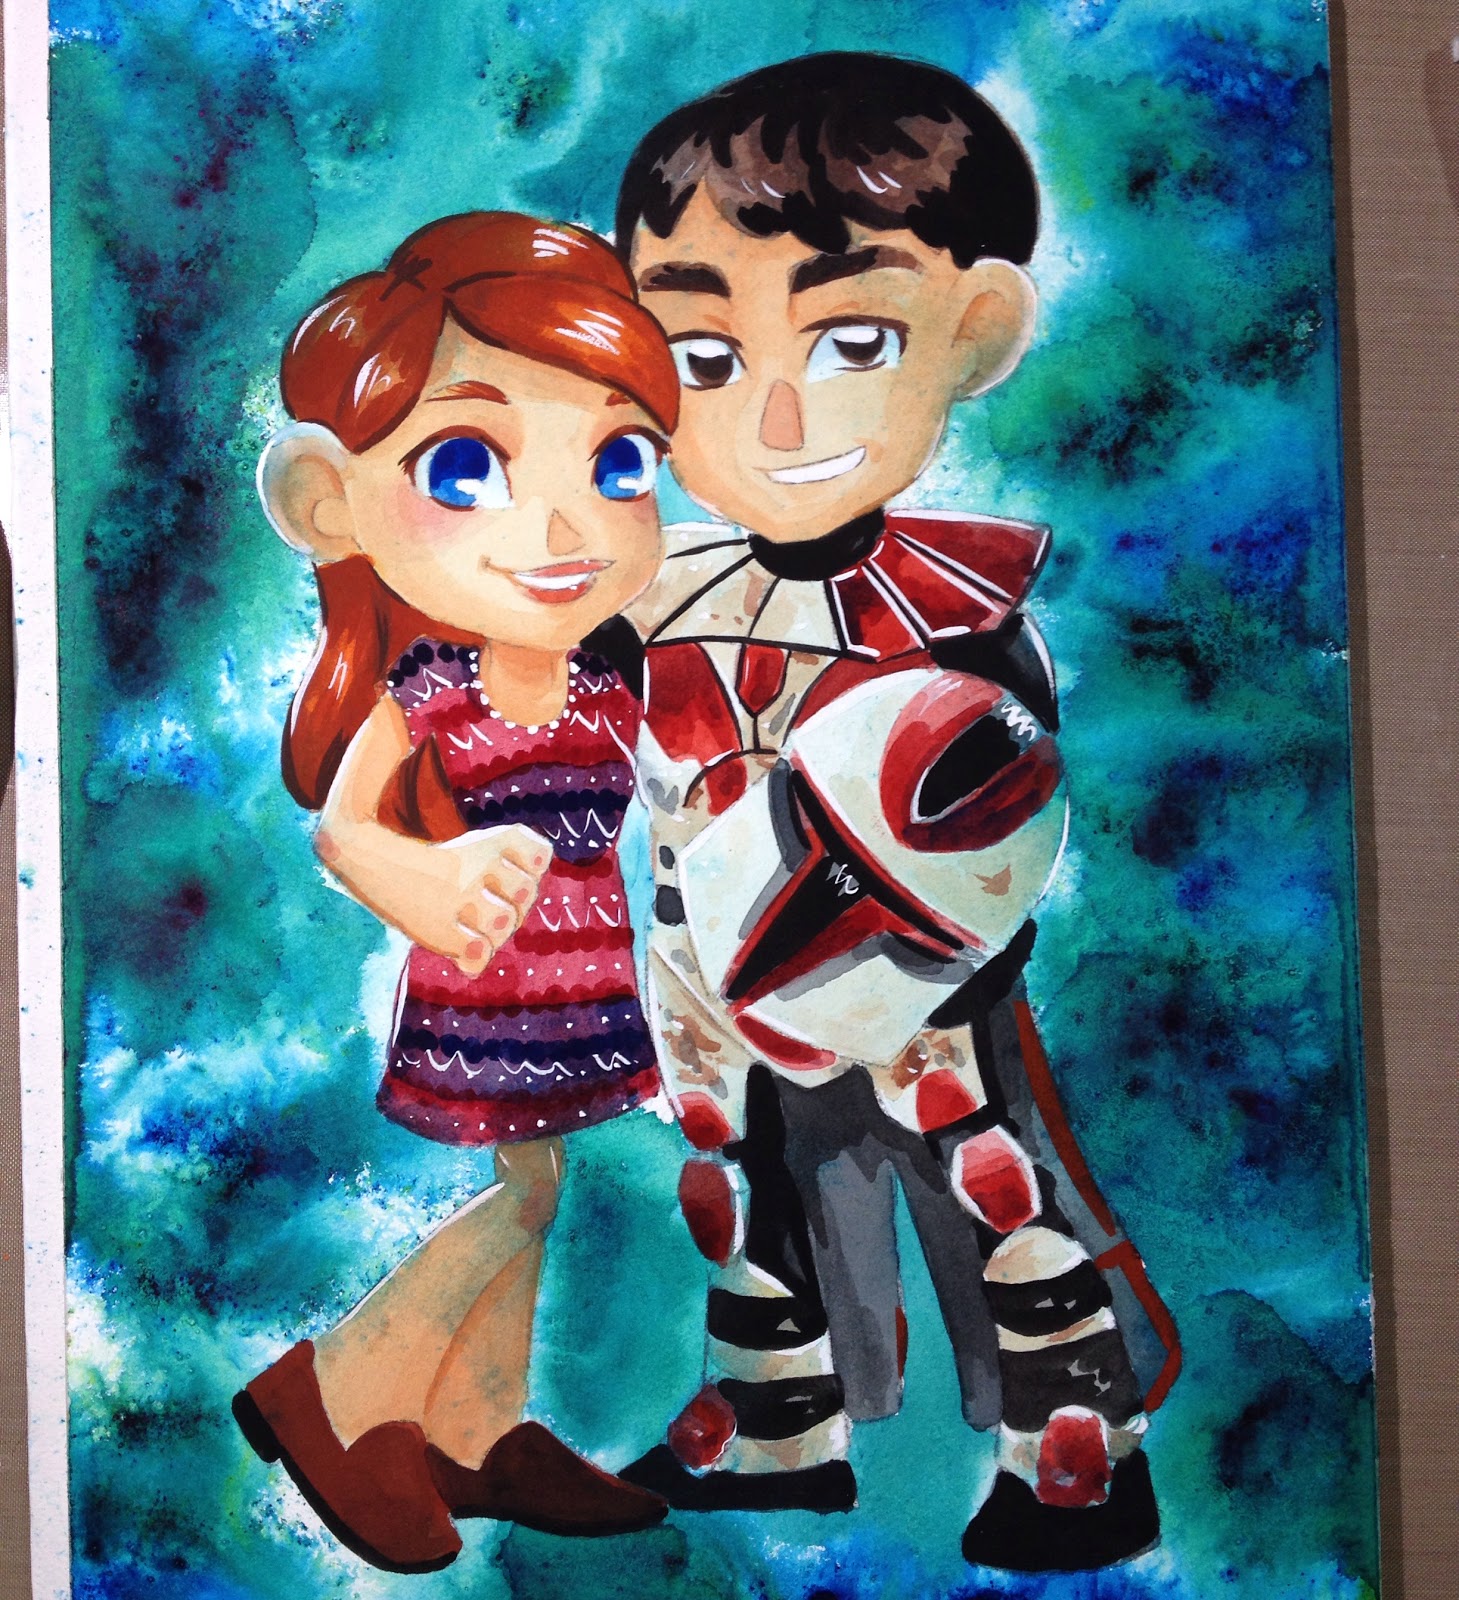
With this Garrus commission, I did not mask or preserve Garrus, I simply used the Brusho background as a base for his colors.
With this couple commission, I did reserve the figures (simply by not wetting or covering them with Brusho), but Brusho has a strong tendency to get everywhere. Fortunately the faces were fairly clear of Brusho, so this wasn't much of an issue.


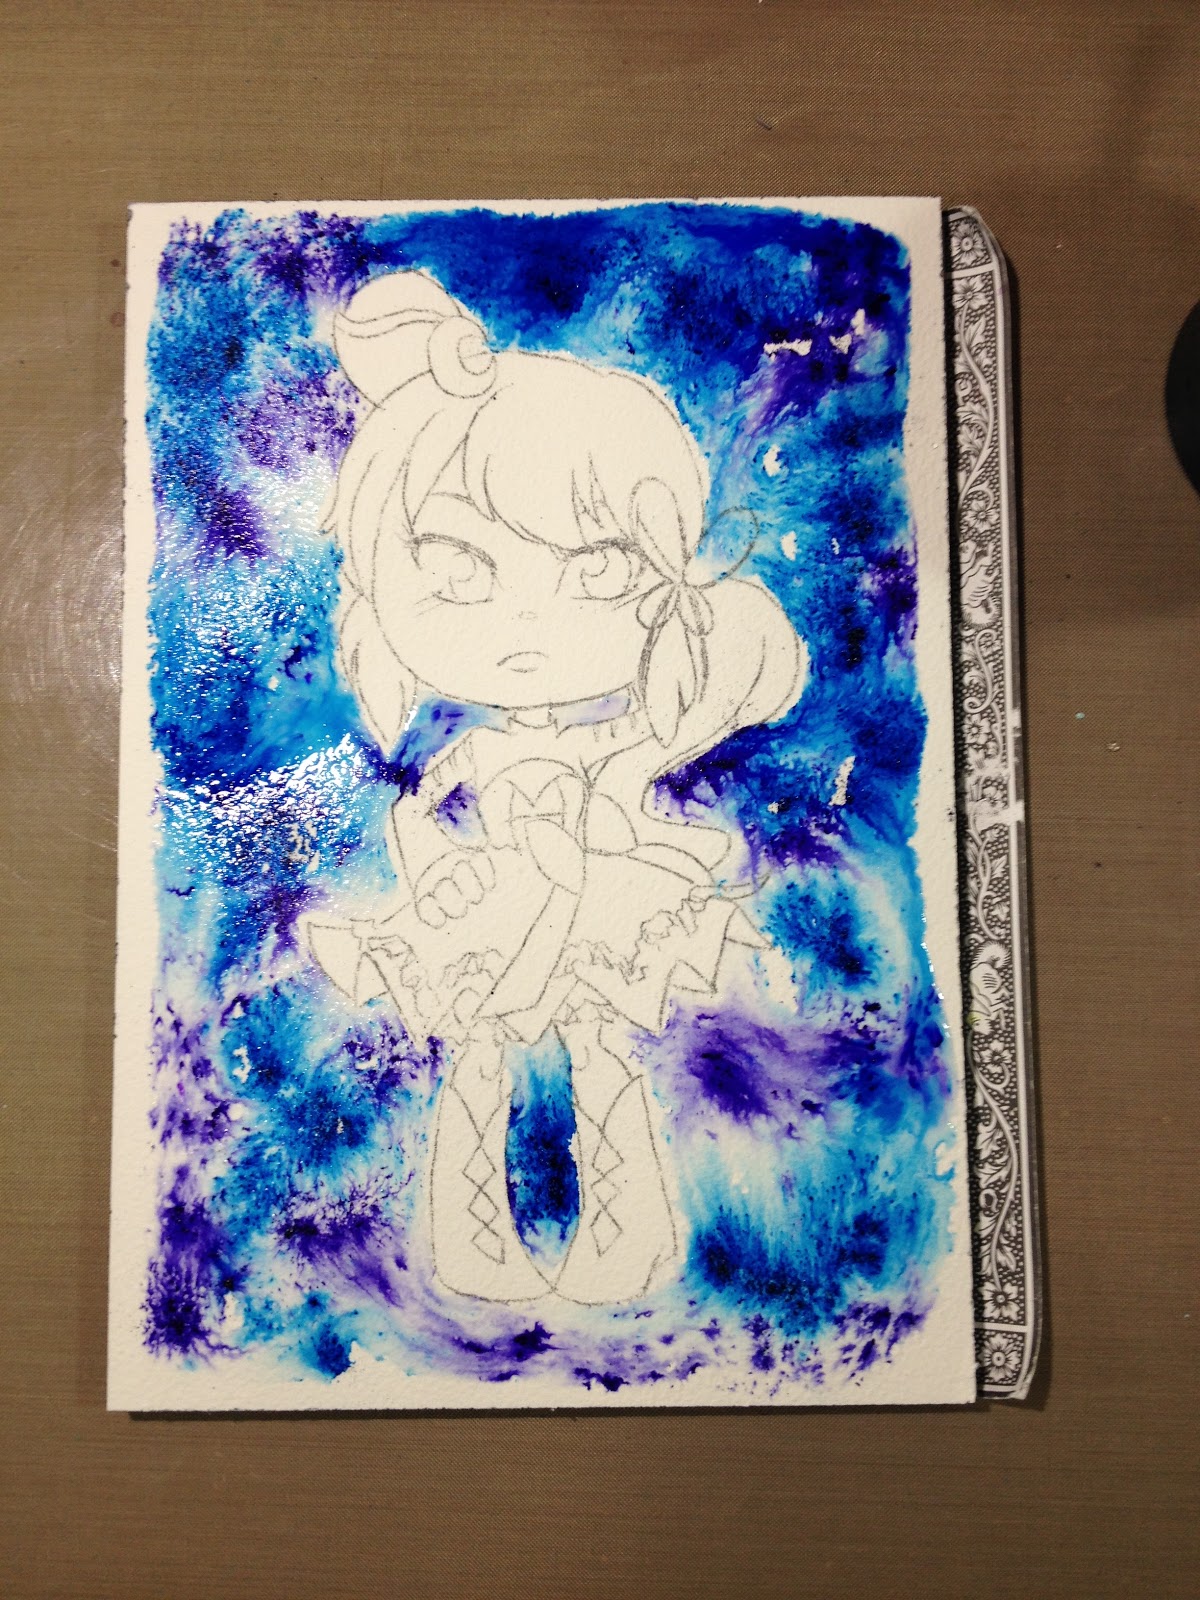
With this last commission, I used clear wax as a resist around the figure, creating a bit of a barrier between figure and Brusho.
Because Brusho is a water reactive dye, it may continue to reactivate as you paint. I've found it helpful to 'fix' my Brusho- activate it with water, allow it to dry, brush away the excess, and then apply a wash of clean water to the area I've reserved to activate any residual Brusho. Then, I quickly apply a clean paper towel to soak up water and hopefully some of the Brusho. The reserved area may be tinted the color of Brusho, but at least there won't be any unpleasant surprises!
You can reserve areas in a few ways- using Masking Fluid, or using wax resist.
Simple Watercolor Tutorial Brusho and Masking Fluid
Lime Brusho Timelapse:
Mixed Berry Timelapse
Wax Resist Tutorial
Kara Colorburst
Wax Resist Hack
These techniques are a great start for using Brusho!
More Advanced Techniques
Among Brusho enthusiasts, there's a plethora of techniques for you to explore! Below are just a few slightly more advanced techniques- none really require any special skills, but they may require more masking. For even more tutorials, I recommend checking out my Outside Sources and Second Opinions sections!
A Garden of Color-Brusho Watercolor Demonstration
Brusho for Moss and Sky Tutorial
Tutorial: Using Brusho Watercolors with Alcohol Markers
With this illustration, I finished the marker component before masking that off, then applied the Brusho.

With Masking Frisket and water, seepage can occur, but it is fairly minimal if you don't repeatedly soak the paper, and can be corrected with Opaque White.
Brusho Gallery:


The Verdict:
I've used Brusho frequently in my art and illustration for over two years now, and can honestly say it's changed the way I work, and the quality of commissions I offer at conventions. I love playing with Brusho, and introduce it frequently into my work. That said, it can be messy, it has a tendency to get EVERYWHERE, and can sometimes be a challenge to control. Even with its flaws, I think Brusho is a great addition to your studio or craft space, and encourage you to try it yourself!
Get Your Own:
Blick
Amazon
This post was brought to you thanks to the generosity of my Artnerds on Patreon!

Their continued support and encouragement helps off-set the costs of purchasing supplies fo review, hiring guest writers, and paying a video editor. If you enjoy content like this, and wish to help make it possible, please consider joining us on Patreon! Pledges start at just $1 a month, and Artnerds gain early access to video content
Second Opinions and Outside Resources:
ColourCraft FAQ
Ginger Blue: Watercolor with Brusho Crystal Colors (Review, Color Chart, and Storage Idea)
Craft Test Dummies: Brusho Crystal Colors Review
Sandy Allnock: Getting Started: Watercolor Powders
Ken Bromley Art Supplies- Brusho
Brusho Secrets-Painting with Brusho
Brusho Crystal Colour Basics by Joggles
Brusho Watercolor Powders: Jennifer McGuire Ink
Color Burst Ken Oliver Crafts Review and Demo 2 paintings
Brusho Crystal Colors Powdered Water-Based Dye
Brusho Crystal Colors Reviw/Demo & DIY Comparison
Magicals vs Brusho vs Magical Shakers Comparison Maremi's Small Art
How to Paint with Brusho: Positive Trees Exercise
Basic Brusho Techniques- How to Use Colourcraft Brusho Crystals
Brusho Watercolor with Ward Jene Stroud
Brusho Ink Painting Demonstration Part 1
Brusho Woodland Demo
SAA Live- Brusho Demo with Anita Pounder
Brusho Techniques- How to Use Colourcraft Brusho Thickener
Brusho Techniques- Freestyle Wet-In-Wet Thickener Cockerel
Simple Techniques Using Brusho Crystal Colours
Brushos and Embossing-Cardmaking Tutorial
Brusho Techniqus Imaginary Sunset
Brusho Flowers- Concord & 9th Pretty Petals
Watercolor Flower Series #11: Paint a Brusho Garden
Brusho Landscape Painting Demo
Watercolor Powder Techniques
Faithbook #3: Brusho Grizzly Bear
Brusho Masking
Getting Started: Watercolor Powders 1, Brusho v Colorburst
Getting Started: Watercolor Powders 3, Labels and Swatches
Please consider donating to this blog or purchasing from Natto-shop (http://nattosoup.com/shop) if you want me to continue publishing quality content. All materials tested were purchased from my own pocket. Keep on Truckin' Nattosoup is not under any sponsorship.
Brusho is made by Colourcraft, a company located in Sheffield, England. They make and distribute a variety of art and craft products including materials for printmaking, fabric art, sketching, and art educational books. They carry brands such as Golden Artist Colors, Liquitex, Gelli plates, and Koh-i-noor as well.
There are a number of powdered, dye based watercolor products on the market besides Brusho-Ken Oliver Colorburst and Magicals and Magicals Shakers are all products have properties similar to Brusho, and are used in a similar manner. I only have experience with Brusho, but I have included reviews for the other products in the Second Opinions and Outside Resources section at the bottom of the post.
 Colored lead, watercolor, and Brusho on Fluid EZ Block watercolor paper
The Stats:
44 total colorsFour sets- the 8 Color Set (Yellow Ochre, Rose Red, Lime Green, Olive Green, Sandstone, Terracotta, and Burnt Sienna- all unique to the 8 color set), the 12 Color Set (Lemon, Yellow, Orange, Scarlet, Brilliant Red, Purple, Ultramarine, Leaf Green, Emerald Green, Turquoise, Dark Brown, and Black), the 24 Color Set (Lemon, Yellow, Gamboge, Orange, Vermillion, Scarlet, Brilliant Red, Ostwald Red, Crimson, Cobalt Blue, Ostwald Blue, Ultramarine, Prussian Blue, Turquoise, Leaf Green, Emerald Green, Sea Green, Violet, Purple, Light Brown, Dark Brown, Grey, Black, and White), Spritzer Set (Sunburst Lemon, Orange, Alizarin Crimson, Violet, Turquoise, Sea Green)Also available openstock from Dickblick, in 15gr pots for $4.89Dye BasedMade in the UK
Where to Buy:
DickBlick
David's Art Supply (New Orleans)
Amazon
Keep in mind:
Colourcraft claims that Brusho will hold up over time, but being dyebased, Brusho is not lightfast nor archival. Please take adequate precautions to protect your work.
I love using Brusho to add vibrant splashes of color to my watercolor work. Brusho dyes are vivid and intense, and make for fun backgrounds or light embellishment within individual panels.
Brusho Basics
Unbox and Swatch-Brusho for Splatter Effects on Watercolor Paper
Beautiful Color Blooms- Swatching Brusho
Handy Brusho Storage Hack
Materials Needed For Storage:
Salt Cellars
Mini Funnels (not shown, but hugely helpful)
Rice (to prevent clumping)
This is a fairly time consuming process, even with the recommended plastic funnels. I recommend you fill the salt cellars halfway with something that will absorb moisture (I use rice in this instance, but you could use silica if it's large enough not to go through the holes) beforehand, and then apply the Brusho on top. Eventually the two will get mixed, so you want something that won't effect the Brusho (rice has starch in it, which can cause blooming with water)
As you fill your salt cellars, it's helpful to label them with the color names.

Color Swatches:

Gamboge, Crimson, Orange,Brilliant Red, Ultramarine, Dark Brown Black, Gray, Cobalt Blue Scarlet, Sea Green

Light Brown, Ost Red, Ost BlueYellow, Vermillion, Violet BlueSea Green, Lemon, Emerald GreenPrussian Blue, Purple, Turquoise
Simple Brusho Tricks
Brusho can be a fantastic way to liven up backgrounds or planes of color. There are numerous ways you can use Brusho in this manner:Wet area beforehand (with mop), sprinkle on BrushoSprinle on Brusho, then wet with mopWet area beforehand (with spritzer), sprinkle on BrushoSprinkle on Brusho, then spritz with water
Brusho on Yupo Demonstration
Brusho Background Mini Tutorial

With this Garrus commission, I did not mask or preserve Garrus, I simply used the Brusho background as a base for his colors.
With this couple commission, I did reserve the figures (simply by not wetting or covering them with Brusho), but Brusho has a strong tendency to get everywhere. Fortunately the faces were fairly clear of Brusho, so this wasn't much of an issue.

With this last commission, I used clear wax as a resist around the figure, creating a bit of a barrier between figure and Brusho.
Because Brusho is a water reactive dye, it may continue to reactivate as you paint. I've found it helpful to 'fix' my Brusho- activate it with water, allow it to dry, brush away the excess, and then apply a wash of clean water to the area I've reserved to activate any residual Brusho. Then, I quickly apply a clean paper towel to soak up water and hopefully some of the Brusho. The reserved area may be tinted the color of Brusho, but at least there won't be any unpleasant surprises!
You can reserve areas in a few ways- using Masking Fluid, or using wax resist.
Simple Watercolor Tutorial Brusho and Masking Fluid
Lime Brusho Timelapse:
Mixed Berry Timelapse
Wax Resist Tutorial
Kara Colorburst
Wax Resist Hack
These techniques are a great start for using Brusho!
More Advanced Techniques
Among Brusho enthusiasts, there's a plethora of techniques for you to explore! Below are just a few slightly more advanced techniques- none really require any special skills, but they may require more masking. For even more tutorials, I recommend checking out my Outside Sources and Second Opinions sections!
A Garden of Color-Brusho Watercolor Demonstration
Brusho for Moss and Sky Tutorial
Tutorial: Using Brusho Watercolors with Alcohol Markers
With this illustration, I finished the marker component before masking that off, then applied the Brusho.
With Masking Frisket and water, seepage can occur, but it is fairly minimal if you don't repeatedly soak the paper, and can be corrected with Opaque White.
Brusho Gallery:


The Verdict:
I've used Brusho frequently in my art and illustration for over two years now, and can honestly say it's changed the way I work, and the quality of commissions I offer at conventions. I love playing with Brusho, and introduce it frequently into my work. That said, it can be messy, it has a tendency to get EVERYWHERE, and can sometimes be a challenge to control. Even with its flaws, I think Brusho is a great addition to your studio or craft space, and encourage you to try it yourself!
Get Your Own:
Blick
Amazon
This post was brought to you thanks to the generosity of my Artnerds on Patreon!

Their continued support and encouragement helps off-set the costs of purchasing supplies fo review, hiring guest writers, and paying a video editor. If you enjoy content like this, and wish to help make it possible, please consider joining us on Patreon! Pledges start at just $1 a month, and Artnerds gain early access to video content
Second Opinions and Outside Resources:
ColourCraft FAQ
Ginger Blue: Watercolor with Brusho Crystal Colors (Review, Color Chart, and Storage Idea)
Craft Test Dummies: Brusho Crystal Colors Review
Sandy Allnock: Getting Started: Watercolor Powders
Ken Bromley Art Supplies- Brusho
Brusho Secrets-Painting with Brusho
Brusho Crystal Colour Basics by Joggles
Brusho Watercolor Powders: Jennifer McGuire Ink
Color Burst Ken Oliver Crafts Review and Demo 2 paintings
Brusho Crystal Colors Powdered Water-Based Dye
Brusho Crystal Colors Reviw/Demo & DIY Comparison
Magicals vs Brusho vs Magical Shakers Comparison Maremi's Small Art
How to Paint with Brusho: Positive Trees Exercise
Basic Brusho Techniques- How to Use Colourcraft Brusho Crystals
Brusho Watercolor with Ward Jene Stroud
Brusho Ink Painting Demonstration Part 1
Brusho Woodland Demo
SAA Live- Brusho Demo with Anita Pounder
Brusho Techniques- How to Use Colourcraft Brusho Thickener
Brusho Techniques- Freestyle Wet-In-Wet Thickener Cockerel
Simple Techniques Using Brusho Crystal Colours
Brushos and Embossing-Cardmaking Tutorial
Brusho Techniqus Imaginary Sunset
Brusho Flowers- Concord & 9th Pretty Petals
Watercolor Flower Series #11: Paint a Brusho Garden
Brusho Landscape Painting Demo
Watercolor Powder Techniques
Faithbook #3: Brusho Grizzly Bear
Brusho Masking
Getting Started: Watercolor Powders 1, Brusho v Colorburst
Getting Started: Watercolor Powders 3, Labels and Swatches
Please consider donating to this blog or purchasing from Natto-shop (http://nattosoup.com/shop) if you want me to continue publishing quality content. All materials tested were purchased from my own pocket. Keep on Truckin' Nattosoup is not under any sponsorship.
April 16, 2018
Sparkle Supplies: An Overview by Kabocha
Hey friends! Kabocha back, this time with a topic near and dear to my heart- sparkles and all that glitters! Over the years, not only have I made sparkle-tastic brushes for use in Photoshop and CSP, but I've dabbled and doodled with glittery paints and pigments.
Everyone loves to add a little shine to their work, and it's no surprise that you, too, might wonder, "How can I get my work to sparkle in the sunlight?"
(Or maybe you don't. That's fine too.)
Now, before you start saying, "But Kabocha! You didn't include my favorite supplies!" -- this list is primarily from my own experience and research. When I work with traditional media, my primary supplies are watercolor and alcohol markers, with some papers.
I'm considering this a curated list, so this isn't going to contain everything under the sun. Just so you know. If there is further information, I'll include links for you to further explore.
So, without further ado...
Key:✗✱✨✨✨✨✨✨I regret using this.Haven't usedEh. It's okay.It definitely sparklesYES
Disclaimer: Ratings are subjective and are based on my experience, if applicable. Some items might be included because they're on my wishlist or something.
Jump to...
Pens | Pigments & Powders | Mediums | Paints | Inks
PensZig Wink of StellaRating: ✨✨ (2 sparkles)
These pens are water and glycerin based. They're nice! I honestly wanted to love them.
I have a hard time getting them to feed, and then when I do get glitter to come out, they drip. Maybe I just have crap hand strength from carpal tunnel, so when I apply some, I apply too much?
Either way, they're perfectly acceptable glitter content.
I swatched these in December 2017, and have observed no serious yellowing over time, unlike the next item I'll talk about.
Spectrum Noir SparkleRating: ✨ (1 sparkle)
These are not archival safe. These pens yellow. They glitter, but they're not great for something you intend to keep long-term.
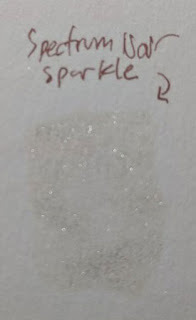 I did swatches of them on some Union Square mixed media paper in early 2017 -- and after about 6 months, they started to yellow.
Why? Glycerin, after time, just... yellows. It's part of how it breaks down in reaction to oxygen. So, this is great for short term projects, or maybe mixed in with paint -- but on its own?
Uni Ball Signo Sparkling Glitter Gel PensRating: ✱ (Haven't used)
So, in the interest in full disclosure: I've used the Uni Ball Signo Rainbow pens. Which were available in 2002/2003, if memory serves. I still have my set, but my main complaint with them is that they clog. A LOT.
Are the Sparkling pens different? Hell if I even know. After my experience with the Rainbow pens (and other glittery gel pens), I'm not inclined to give them another chance.
Sakura Gelly Roll PensRating: ✨✨✨ (3 sparkles)
I like these. I would recommend these.
Sakura's pens write pretty smoothly, and I've very rarely had any problems actually using them. I tend to use these for writing notes to folks!
If you DO get these, store them point-down or on their side. Just a warning.
atyou SpicaSet A | Set B
Rating: ✨✨ (2 sparkles)
I am indifferent to these. Heresy, I know. The nibs are TINY, which is okay for detail work, but there's not anything larger! They sparkle, they don't clog... But... I can't bring myself to care. The colors are all right, but if you try to layer them, you're going to bite into your paper a fair bit.
They are pigment based, and resist water pretty well.
As much as they were hyped, I feel like they're not as good as people made them seem.
Further reading: Guide to Metallic and Glitter Ink Pens and Markers (Jetpens)
Pigments & PowdersPearl Ex Powder Pigments Rating: ✨✨✨ (3 sparkles)
There are smaller sets of this to buy, of course! You can also get larger bottles of Pearl Ex pigments. (Pay attention and don't pick up the dyes if you're aiming for sparkly stuff!)
I've mixed the Pearl Ex pigments with Gum Arabic and water to create watercolors. If you're looking to make your own iridescent medium? I'd say use the Macropearl, which is more along the lines of the pigment size found in Winsor & Newton and DaVinci's' iridescent mediums.
The other colors are a little harder to mix, But overall work out decently.
Since this is a powder, you can mix it in with other types of media, such as acrylics or oils.
Sennelier Dry Pigments: IridescentRating: ✱ (Haven't used)
Out of all their dry pigments, I really could only find one which was iridescent. Sennelier is, in general, a very expensive paint brand, but a little bit does go a long way...
Colourarte PigmentsRating: ✱ (Haven't used)
I... have no idea how good or bad these are, but the color variety alone is enough to make me want to test these. They're mica-based, and look all right.
Holographic Nail Powder Rating: ✨✨✨ (3 sparkles)
Wait. What? Why am I including Nail Powder?
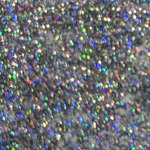
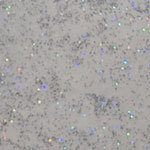 This stuff, sparkles like you would NOT believe. Also, you can mix it with gum arabic and create a suspension that can be applied to illustrations. I haven't tested this long-term to see how it holds up, but to be honest? It's cool for the short term effect!
I mixed this with Qor's watercolor medium. The pigment does clump up a bit, so I suggest going for a light application.
MediumsWinsor & Newton Iridescent MediumRating: ✨✨✨ (3 Sparkles)
This was my introduction to sparkly art supplies. Before this, I'd expected that if you wanted anything to sparkle with your paints, you'd have to go for crafting supplies, or look in the children's section. Man, was I surprised when I saw A.C. Moore had this. So I bought it.
It mixes very well with watercolor and water-based materials, but I wouldn't recommend it for anything like acrylics.
DaVinci Iridescent MediumRating: ✨✨✨ (3 Sparkles)
I picked this up as a recommendation from my friend Sammi. This comes in a jar, rather than a bottle. It's... Kinda like sparkle goop. Highly effective sparkle goop.
I like working with it - since its got a higher viscosity than the Winsor and Newton medium, you can really pick it up with your brush and spread it around thickly if you need.
American Journey Iridescent Medium for WatercolorsRating: ✱ (Haven't used)
From what I've heard, the American Journey line of art supplies is really quite good -- I just haven't had a chance or reason to buy from Cheap Joe's in a while.
PaintsArtist's Loft Fundamentals Pearlescent Watercolor Pan SetRating: ✗ (Nope.)
Honestly? I didn't like these at all. In my experience, these dried with kind of a chalky finish -- which I will wholly attribute to the base pigments having filler to them. Unfortunately, I don't personally have any swatches of these, but I do know someone who swatched them...
Finetec Coliro Metallic PaintsRich Pearl Set
Rating: ✱ (Haven't used)
These paints look lovely, but I honestly haven't had a chance to play with them! I should get my hands on them, as they're highly recommended by Becca.
Also available openstock from Paper and Ink Arts.
Zig Kuretake Watercolor PaletteRating: ✨✨ (2 Sparkles)
Firstly: These paints are super similar to the Jacquard Pearl Ex Watercolor CD set I picked up in 2012. These are SMALL cases, but holy crap, they go a long way!
These paints are best layered over another color
The only reason these get 2 out of 3 sparkles is because of the size -- they're too small to pick up a lot for a wide wash (unless you're stubborn), but great for small details. Would recommend picking up.
Yasutomo Niji Pearlescent WatercolorRating: ✨✨ (2 Sparkles)
You can find these all over at Michaels, A.C. Moore, and other craft stores! They're not bad, especially for the price. The paints are somewhat transparent, and also work very nicely on their own as opposed to layered on top of another color.
H20's by Colourarte - Shimmering WatercolorsRating: ✱ (Haven't used)
Formerly: Twinkling H20's Shimmering
I used these in their circular jars back in 2012. I was rather harsh on them -- when made wet, they didn't entirely dry, and stayed gummy for a long time. I also wasn't fond of how they separated when exposed to a lot of water. They are extremely sparkly, and you get a lot of pigment with them. They're re-releasing them as pans (and perhaps with a different formulation), so I must mark them as "untested" as I don't know how these changes will affect them.
Daniel Smith Luminescent WatercolorsRating: ✨✨✨ (3 Sparkles)
These are GREAT. The duochrome colors are some of my favorite -- their iridescence produces a color shift. Many colors have a base pigment to go along with the mica sparkles (such as electric blue), but they do have plain interference colors.
My only complaint is sometimes, older tubes separate out into gum arabic and pigment, but... eh.
I would link Daniel Smith's site, but it is unbearably slow.
Turner Acryl GouacheRating: ✨✨ (2 Sparkles)
The colors you're looking for in Turner's line are the "Lamé" colors. These are acrylic based, so please don't go into this expecting that they will behave like watercolor. I've tested these by brushing them over marker and watercolor pieces -- they work very nicely! The glitter's a little big, though, so it feels slightly clumpy. If you're an artist who uses acrylics or gouache, these will probably be quite pleasing.
InksThis is a section which is very, very broad. There's probably too much for me to cover, so I need to stick to a few tried-and-true favorites. You can find more shimmery inks over at Goulet Pens, though!
J. Herbin Inks1670 Anniversary Ink Series | 1798 Ink - Amethyste de L'Oural
Rating: ✨✨✨ (3 Sparkles)
I love these inks! They're great to work with, in any color. My favorites are the Ural Amethyst, Emerald of Chivor, and Cypress Carob. Several of the colors express shading characteristics as well as being shimmery, and are great for washes (as well as writing and drawing).
There are a lot of colors of these inks -- and they either come with a gold or a silver sparkle, which you can tell based on the cap color. I enjoy playing with these, especially since most of the colors shade very nicely.
FW Pearlescent Acrylic InksRating: ✨✨✨ (3 Sparkles)
These acrylic inks trend from sparkly/iridescent to more metallic, with pastel colors leaning towards sparkle. Some colors, such as Birdwing Copper, include an interferance color note, making thm slightly iridescent. These are acrylic, so while they can be mixed with other media, such as watercolor, once they're applied they're permanent. (Note: Added by Becca)
Hey!If you're looking for digital supplies - I strongly suggest you check out my FREE Photoshop brushes. Because, y'know, I make sparkly things.
Alternatively, you can check out my webcomic, Linked.
Please consider donating to this blog or purchasing from Natto-shop (http://nattosoup.com/shop) if you want me to continue publishing quality content. All materials tested were purchased from my own pocket. Keep on Truckin' Nattosoup is not under any sponsorship.
Everyone loves to add a little shine to their work, and it's no surprise that you, too, might wonder, "How can I get my work to sparkle in the sunlight?"
(Or maybe you don't. That's fine too.)
Now, before you start saying, "But Kabocha! You didn't include my favorite supplies!" -- this list is primarily from my own experience and research. When I work with traditional media, my primary supplies are watercolor and alcohol markers, with some papers.
I'm considering this a curated list, so this isn't going to contain everything under the sun. Just so you know. If there is further information, I'll include links for you to further explore.
So, without further ado...
Key:✗✱✨✨✨✨✨✨I regret using this.Haven't usedEh. It's okay.It definitely sparklesYES
Disclaimer: Ratings are subjective and are based on my experience, if applicable. Some items might be included because they're on my wishlist or something.
Jump to...
Pens | Pigments & Powders | Mediums | Paints | Inks
PensZig Wink of StellaRating: ✨✨ (2 sparkles)
These pens are water and glycerin based. They're nice! I honestly wanted to love them.
I have a hard time getting them to feed, and then when I do get glitter to come out, they drip. Maybe I just have crap hand strength from carpal tunnel, so when I apply some, I apply too much?
Either way, they're perfectly acceptable glitter content.
I swatched these in December 2017, and have observed no serious yellowing over time, unlike the next item I'll talk about.
Spectrum Noir SparkleRating: ✨ (1 sparkle)
These are not archival safe. These pens yellow. They glitter, but they're not great for something you intend to keep long-term.
I did swatches of them on some Union Square mixed media paper in early 2017 -- and after about 6 months, they started to yellow.Why? Glycerin, after time, just... yellows. It's part of how it breaks down in reaction to oxygen. So, this is great for short term projects, or maybe mixed in with paint -- but on its own?
Uni Ball Signo Sparkling Glitter Gel PensRating: ✱ (Haven't used)
So, in the interest in full disclosure: I've used the Uni Ball Signo Rainbow pens. Which were available in 2002/2003, if memory serves. I still have my set, but my main complaint with them is that they clog. A LOT.
Are the Sparkling pens different? Hell if I even know. After my experience with the Rainbow pens (and other glittery gel pens), I'm not inclined to give them another chance.
Sakura Gelly Roll PensRating: ✨✨✨ (3 sparkles)
I like these. I would recommend these.
Sakura's pens write pretty smoothly, and I've very rarely had any problems actually using them. I tend to use these for writing notes to folks!
If you DO get these, store them point-down or on their side. Just a warning.
atyou SpicaSet A | Set B
Rating: ✨✨ (2 sparkles)
I am indifferent to these. Heresy, I know. The nibs are TINY, which is okay for detail work, but there's not anything larger! They sparkle, they don't clog... But... I can't bring myself to care. The colors are all right, but if you try to layer them, you're going to bite into your paper a fair bit.
They are pigment based, and resist water pretty well.
As much as they were hyped, I feel like they're not as good as people made them seem.
Further reading: Guide to Metallic and Glitter Ink Pens and Markers (Jetpens)
Pigments & PowdersPearl Ex Powder Pigments Rating: ✨✨✨ (3 sparkles)
There are smaller sets of this to buy, of course! You can also get larger bottles of Pearl Ex pigments. (Pay attention and don't pick up the dyes if you're aiming for sparkly stuff!)
I've mixed the Pearl Ex pigments with Gum Arabic and water to create watercolors. If you're looking to make your own iridescent medium? I'd say use the Macropearl, which is more along the lines of the pigment size found in Winsor & Newton and DaVinci's' iridescent mediums.
The other colors are a little harder to mix, But overall work out decently.
Since this is a powder, you can mix it in with other types of media, such as acrylics or oils.
Sennelier Dry Pigments: IridescentRating: ✱ (Haven't used)
Out of all their dry pigments, I really could only find one which was iridescent. Sennelier is, in general, a very expensive paint brand, but a little bit does go a long way...
Colourarte PigmentsRating: ✱ (Haven't used)
I... have no idea how good or bad these are, but the color variety alone is enough to make me want to test these. They're mica-based, and look all right.
Holographic Nail Powder Rating: ✨✨✨ (3 sparkles)
Wait. What? Why am I including Nail Powder?
This stuff, sparkles like you would NOT believe. Also, you can mix it with gum arabic and create a suspension that can be applied to illustrations. I haven't tested this long-term to see how it holds up, but to be honest? It's cool for the short term effect!I mixed this with Qor's watercolor medium. The pigment does clump up a bit, so I suggest going for a light application.
MediumsWinsor & Newton Iridescent MediumRating: ✨✨✨ (3 Sparkles)
This was my introduction to sparkly art supplies. Before this, I'd expected that if you wanted anything to sparkle with your paints, you'd have to go for crafting supplies, or look in the children's section. Man, was I surprised when I saw A.C. Moore had this. So I bought it.
It mixes very well with watercolor and water-based materials, but I wouldn't recommend it for anything like acrylics.
DaVinci Iridescent MediumRating: ✨✨✨ (3 Sparkles)
I picked this up as a recommendation from my friend Sammi. This comes in a jar, rather than a bottle. It's... Kinda like sparkle goop. Highly effective sparkle goop.
I like working with it - since its got a higher viscosity than the Winsor and Newton medium, you can really pick it up with your brush and spread it around thickly if you need.
American Journey Iridescent Medium for WatercolorsRating: ✱ (Haven't used)
From what I've heard, the American Journey line of art supplies is really quite good -- I just haven't had a chance or reason to buy from Cheap Joe's in a while.
PaintsArtist's Loft Fundamentals Pearlescent Watercolor Pan SetRating: ✗ (Nope.)
Honestly? I didn't like these at all. In my experience, these dried with kind of a chalky finish -- which I will wholly attribute to the base pigments having filler to them. Unfortunately, I don't personally have any swatches of these, but I do know someone who swatched them...
Finetec Coliro Metallic PaintsRich Pearl Set
Rating: ✱ (Haven't used)
These paints look lovely, but I honestly haven't had a chance to play with them! I should get my hands on them, as they're highly recommended by Becca.
Also available openstock from Paper and Ink Arts.
Zig Kuretake Watercolor PaletteRating: ✨✨ (2 Sparkles)
Firstly: These paints are super similar to the Jacquard Pearl Ex Watercolor CD set I picked up in 2012. These are SMALL cases, but holy crap, they go a long way!
These paints are best layered over another color
The only reason these get 2 out of 3 sparkles is because of the size -- they're too small to pick up a lot for a wide wash (unless you're stubborn), but great for small details. Would recommend picking up.
Yasutomo Niji Pearlescent WatercolorRating: ✨✨ (2 Sparkles)
You can find these all over at Michaels, A.C. Moore, and other craft stores! They're not bad, especially for the price. The paints are somewhat transparent, and also work very nicely on their own as opposed to layered on top of another color.
H20's by Colourarte - Shimmering WatercolorsRating: ✱ (Haven't used)
Formerly: Twinkling H20's Shimmering
I used these in their circular jars back in 2012. I was rather harsh on them -- when made wet, they didn't entirely dry, and stayed gummy for a long time. I also wasn't fond of how they separated when exposed to a lot of water. They are extremely sparkly, and you get a lot of pigment with them. They're re-releasing them as pans (and perhaps with a different formulation), so I must mark them as "untested" as I don't know how these changes will affect them.
Daniel Smith Luminescent WatercolorsRating: ✨✨✨ (3 Sparkles)
These are GREAT. The duochrome colors are some of my favorite -- their iridescence produces a color shift. Many colors have a base pigment to go along with the mica sparkles (such as electric blue), but they do have plain interference colors.
My only complaint is sometimes, older tubes separate out into gum arabic and pigment, but... eh.
I would link Daniel Smith's site, but it is unbearably slow.
Turner Acryl GouacheRating: ✨✨ (2 Sparkles)
The colors you're looking for in Turner's line are the "Lamé" colors. These are acrylic based, so please don't go into this expecting that they will behave like watercolor. I've tested these by brushing them over marker and watercolor pieces -- they work very nicely! The glitter's a little big, though, so it feels slightly clumpy. If you're an artist who uses acrylics or gouache, these will probably be quite pleasing.
InksThis is a section which is very, very broad. There's probably too much for me to cover, so I need to stick to a few tried-and-true favorites. You can find more shimmery inks over at Goulet Pens, though!
J. Herbin Inks1670 Anniversary Ink Series | 1798 Ink - Amethyste de L'Oural
Rating: ✨✨✨ (3 Sparkles)
I love these inks! They're great to work with, in any color. My favorites are the Ural Amethyst, Emerald of Chivor, and Cypress Carob. Several of the colors express shading characteristics as well as being shimmery, and are great for washes (as well as writing and drawing).
There are a lot of colors of these inks -- and they either come with a gold or a silver sparkle, which you can tell based on the cap color. I enjoy playing with these, especially since most of the colors shade very nicely.
FW Pearlescent Acrylic InksRating: ✨✨✨ (3 Sparkles)
These acrylic inks trend from sparkly/iridescent to more metallic, with pastel colors leaning towards sparkle. Some colors, such as Birdwing Copper, include an interferance color note, making thm slightly iridescent. These are acrylic, so while they can be mixed with other media, such as watercolor, once they're applied they're permanent. (Note: Added by Becca)
Hey!If you're looking for digital supplies - I strongly suggest you check out my FREE Photoshop brushes. Because, y'know, I make sparkly things.
Alternatively, you can check out my webcomic, Linked.
Please consider donating to this blog or purchasing from Natto-shop (http://nattosoup.com/shop) if you want me to continue publishing quality content. All materials tested were purchased from my own pocket. Keep on Truckin' Nattosoup is not under any sponsorship.
April 12, 2018
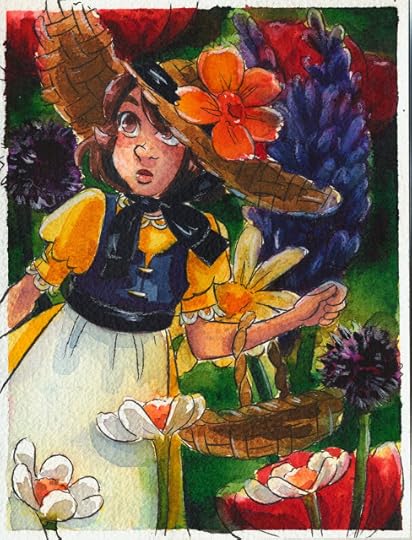
Nashville Cherry Blossom 2018

This Saturday is Nashville's Cherry Blossom Festival, downtown at the Nashville Public Square! The Festival is hosted by the Japan-America Society of Tennessee, Inc, and is part of Japan Week, which begins with MTAC and ends with the Cherry Blossom Festival.
Highlights include the Cherry Blossom Walk, activities for kids of all ages, suit sumo wrestling, the Pups in Pink Parade, and a cosplay contest, as well as vendors and artists selling all sorts of food and goods!
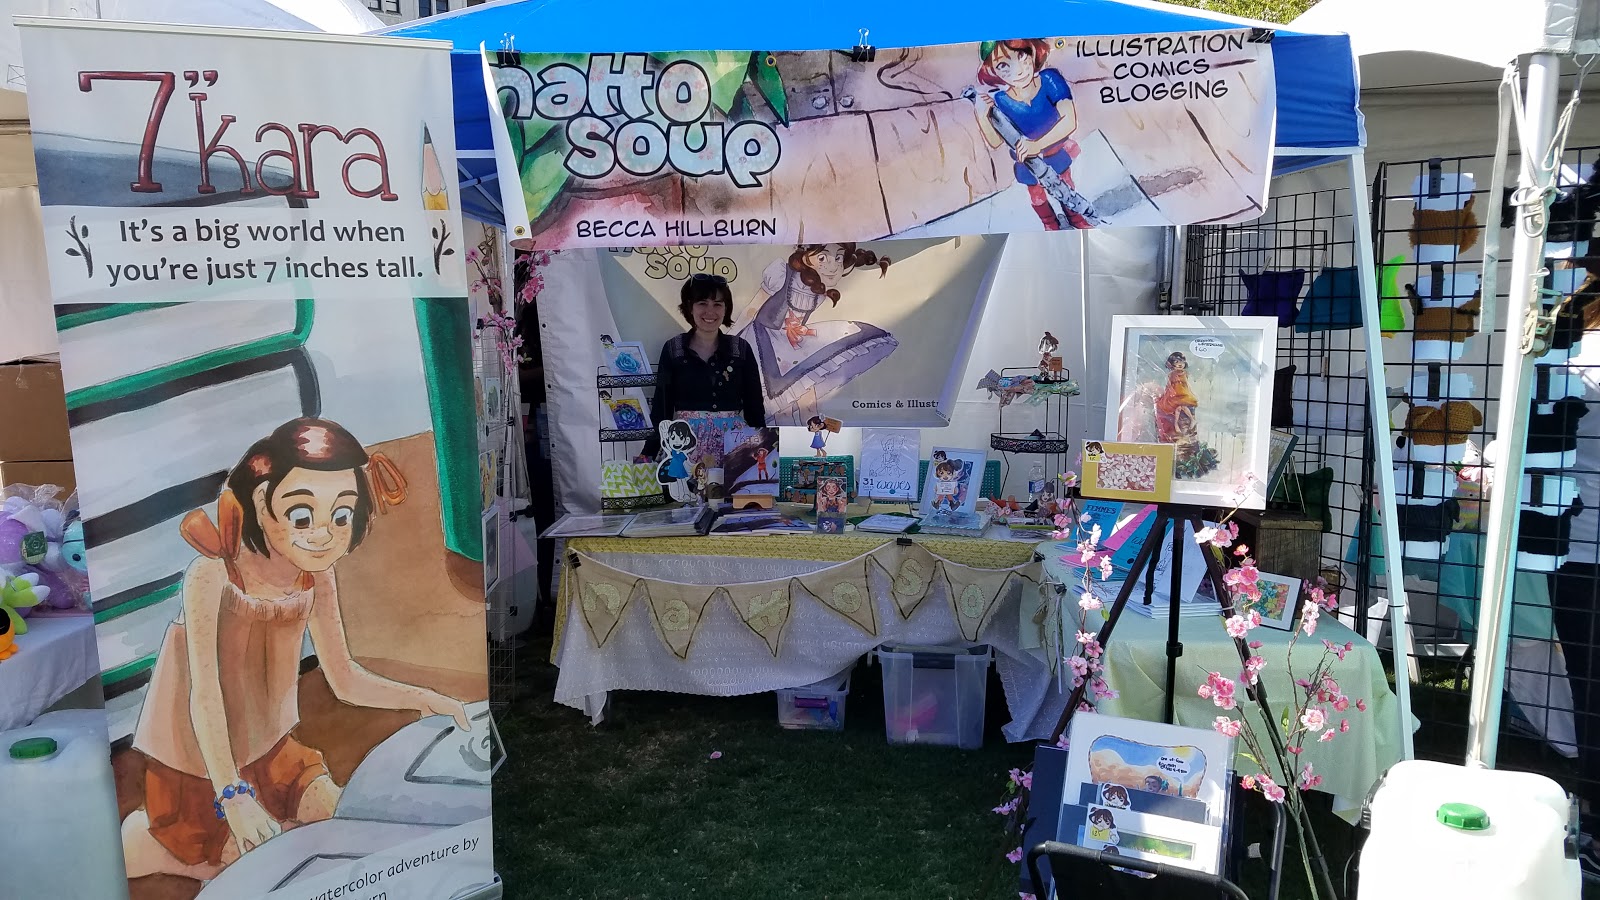
Due to the success of last year, I'm going to have a tent at the Festival!
Last Year's Setup (Look for something similar to this)


New this Year!
Handpainted handfans to keep you cool while the weather heats up!
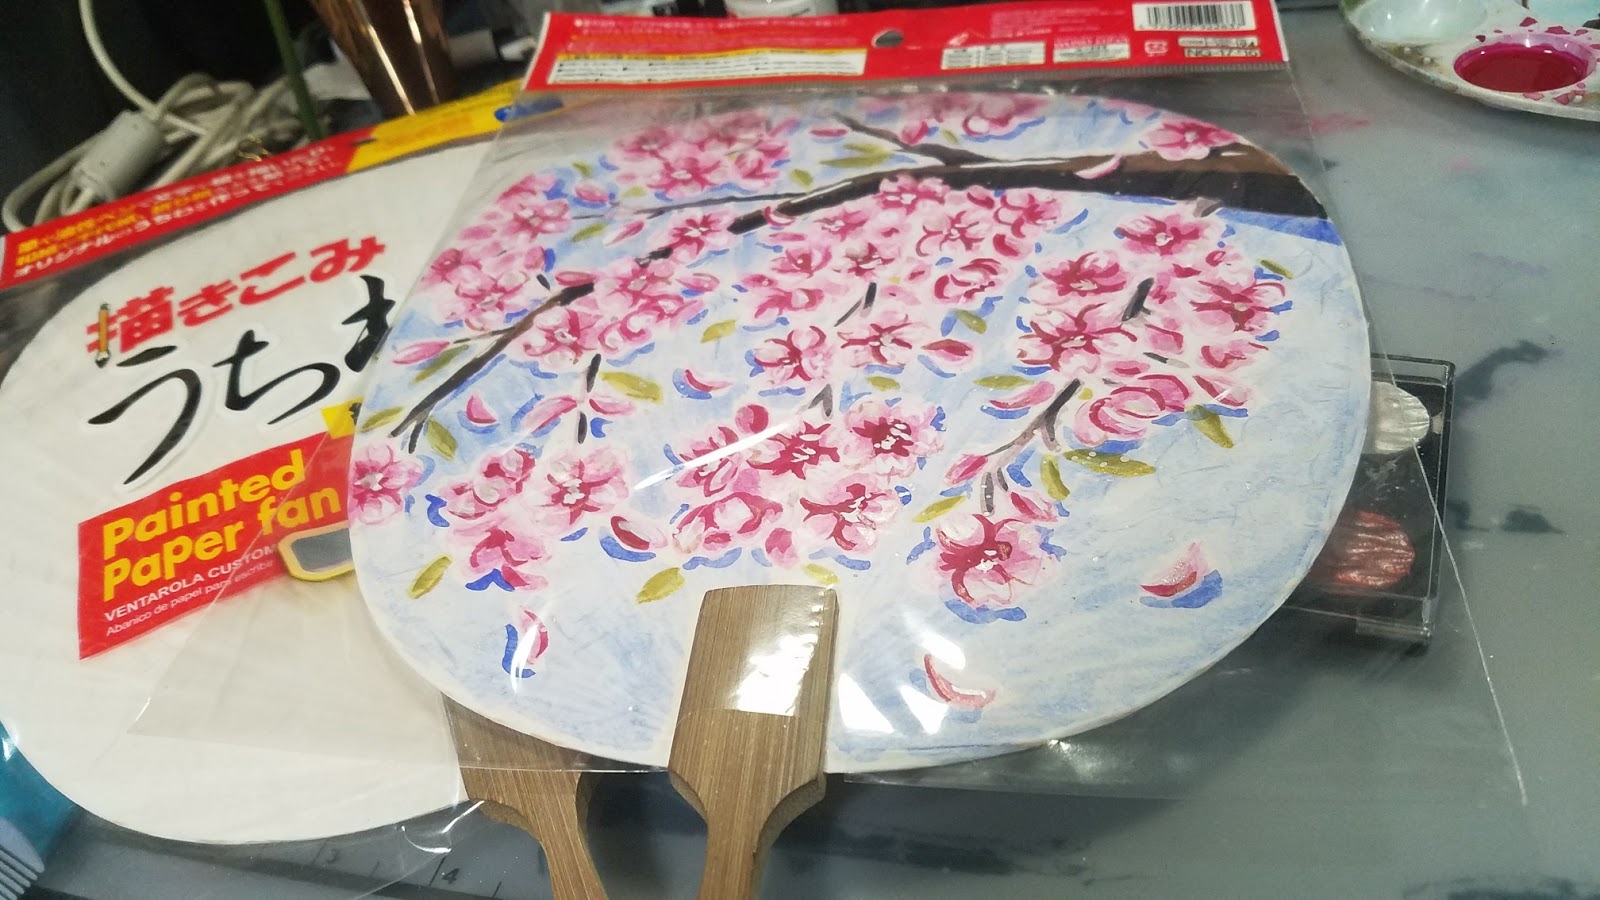 Cherry Blossoms
 Plum BlossomsAnd I'll have one more design finished by Saturday!
I'll also have:
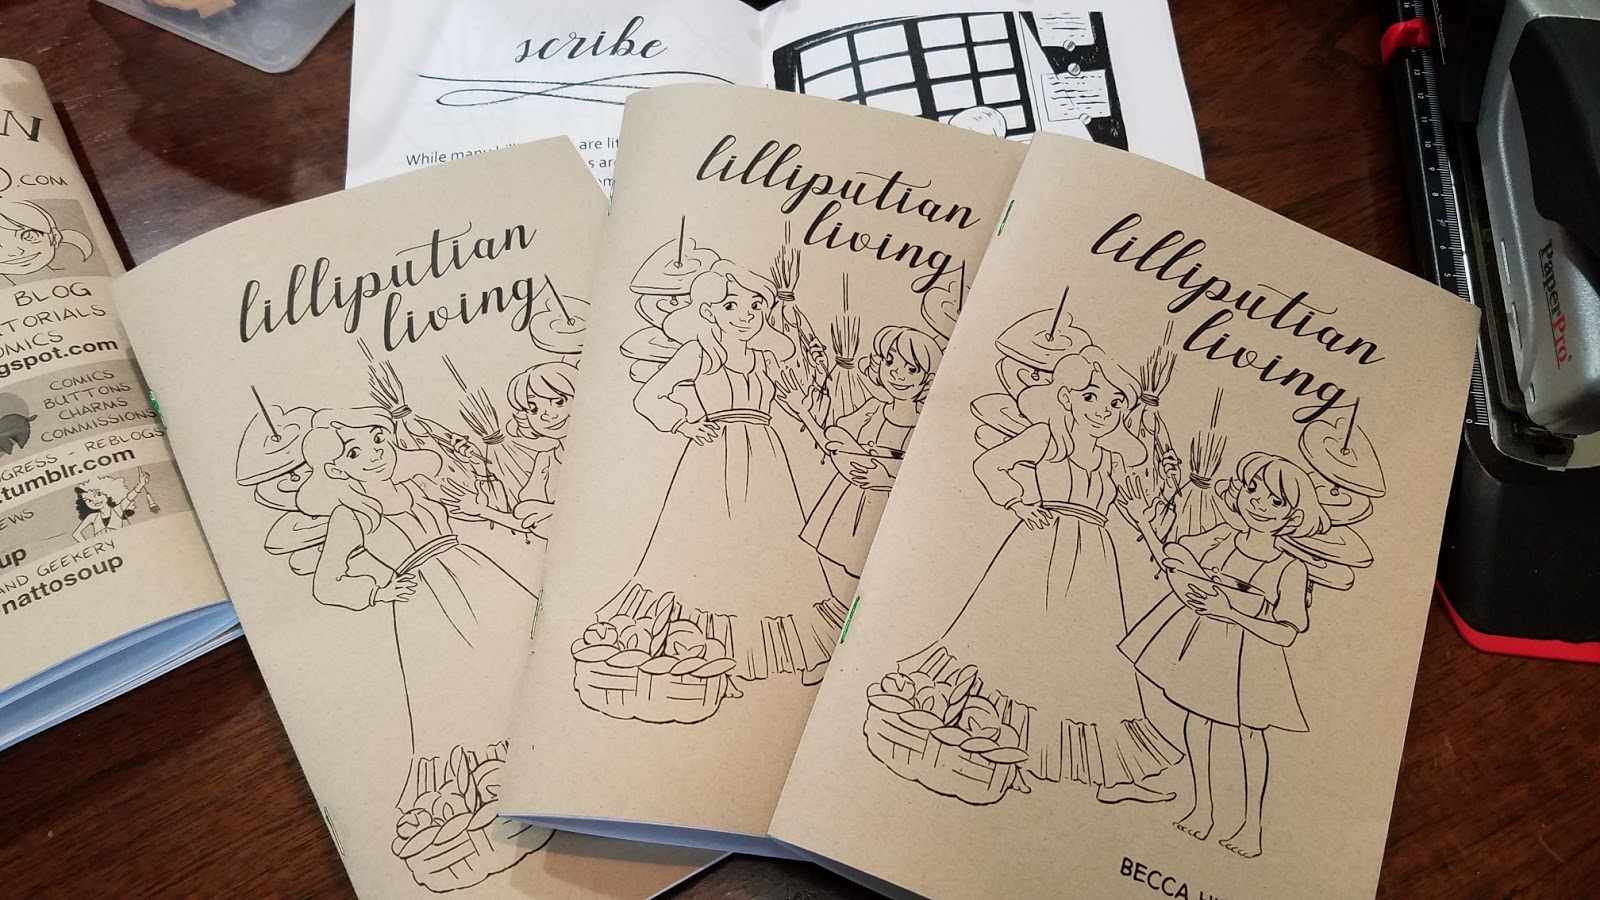
Books!
Copies of 1001 Knights, a lady knight anthology (Volume 3)
7" Kara
Lilliputian Living
Favorite Fictional Femmes
31 Days Under the Waves
Magical Girl March
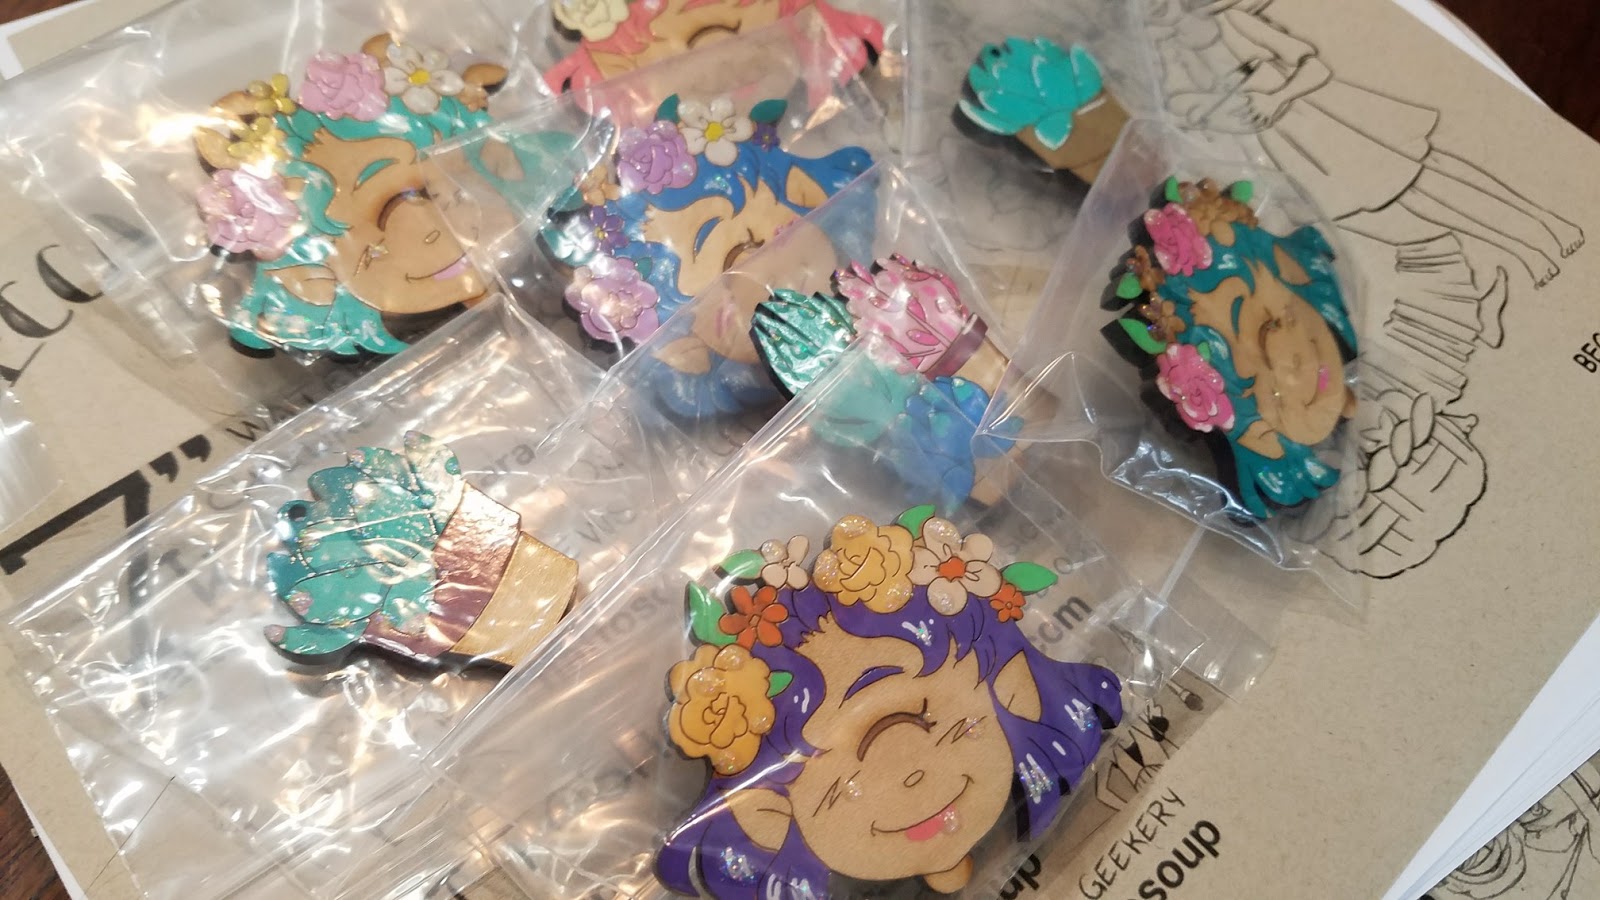
Cute things!
Handpainted wooden charms
Mini prints
Stickers
This is a free, all ages event open to the public, so if you're in the area, you should swing by!
For more information about the Nashville Cherry Blossom Festival, check out their homepage.
Interactive Directions:
Nashville Public Square is located at 4508 Price Circle Rd, Nashville, TN 37205
Please consider donating to this blog or purchasing from Natto-shop (http://nattosoup.com/shop) if you want me to continue publishing quality content. All materials tested were purchased from my own pocket. Keep on Truckin' Nattosoup is not under any sponsorship.

April 9, 2018
Blending, Layering, and Glazes for Pages- Watercolor Basics
The majority of time spent on a watercolor comic page is spent applying layers, blending, and applying glazes. These three techniques are very simple to learn, and while they do take some practice to master, can yield impressive results with just a short amount of study. Blending, layering, and glazing results can vary with the paper you use- for best results, I've found 100% cotton rag papers to be your best bet, but you can achiever fairly masterful results even on inexpensive cellulose papers.

We utilize these techniques in standalone illustrations as well as individual panels to develop interest, establish lighting, and build contrast.
The order of operations for best results on cellulose watercolor papers are:
Blending (wet into wet)Layering (wet over dry)Glazing (wet over dry, color over final layers)In today's post, I have a selection of short tutorials that demonstrate these techniques. If you would like to see any technique covered in more detail, either as a video or as a post, please let me know via the Contact Form on the left hand side of this blog. The example comic pages are from Chapter 7 of 7" Kara.
The materials for blending, layering, and glazing are pretty straightforward
Clean WaterSoft BrushesPaper towels or sponges
Blending:
 Illustration painted on Canson Heritage 140lb cotton rag cold press paper.
Blending is a wet into wet technique that works best when the paper is damp and receptive, but not saturated. Blending techniques can result in paper buckling if you're working with unstretched, unsecured paper. For multiple layers of blended techniques, or larger scale blends, I recommend working with papers that are 140lb or heavier.
Quick Wet into Wet Watercolor Techniques:
Painting Seagrass- A Wet into Wet Painting Tutorial:
Painting a Starry Sky in Watercolor:
Layering:
 Illustration completed on Fluid 100 cottonrag paper.
Layering is a wet over dry technique that works best if the paper is dry before the next layer is applied. If the paper no longer has a surface sheen and is not cool to the touch, it's dry enough to layer. Even if the surface is somewhat cool to the touch, unless the paper is saturated from prior layers, you can probably layer. Layering techniques work well on cellulose and cotton rag paper, and are a commonly used technique to develop depth, color, and volume.
The Eyes Have It- Blends and Layering in Watercolor:
Let's Paint a Succulent- Watercolor Tutorial
Negative Painting Demonstration:
Developing Lighting and Color Through Layering:
Basic Lighting and Contrast:
Basic Lighting and Contrast: Painting a Cube:
Basic Lighting and Contrast: Lighting a Sphere:
Basic Lighting and Contrast: Lighting a Cone:
Basic Lighting and Contrast: Lighting a Cylinder:
Glazing:
 This illustration was painted on Union Square Cold Press watercolor paper, a cellulose paper.
Glazing is used in a variety of ways. From adding shadows to adjusting color to lighting effects, glazing can be a helpful technique to know, but it requires discretion.
For glazing, I recommend you use a very soft brush, such as a squirrel hair brush. Stiffer bristle brushes, including synthetics, can disrupt prior layers of paint. I also recommend only applying a single layer of glaze to an area, as colors can quickly become muddy.
Glazing tends to work best on cotton rag papers with a fair amount of surface texture, but can work well on cellulose papers if handled with care.
Glazing Demonstration- Watercolor Tutorial:
I hope these tutorials and examples have been helpful for learning the basics of my three favorite techniques! If you guys would like to see any other techniques covered in depth, don't hesitate to chat me up on Twitter or email me!
If you enjoyed this post, please consider joining the Artnerd community over on Patreon.

Artnerds make content like this possible through financial and emotional support. In return, they get early access to Youtube content, as well as backer exclusives created just for them!
Please consider donating to this blog or purchasing from Natto-shop (http://nattosoup.com/shop) if you want me to continue publishing quality content. All materials tested were purchased from my own pocket. Keep on Truckin' Nattosoup is not under any sponsorship.

We utilize these techniques in standalone illustrations as well as individual panels to develop interest, establish lighting, and build contrast.
The order of operations for best results on cellulose watercolor papers are:
Blending (wet into wet)Layering (wet over dry)Glazing (wet over dry, color over final layers)In today's post, I have a selection of short tutorials that demonstrate these techniques. If you would like to see any technique covered in more detail, either as a video or as a post, please let me know via the Contact Form on the left hand side of this blog. The example comic pages are from Chapter 7 of 7" Kara.
The materials for blending, layering, and glazing are pretty straightforward
Clean WaterSoft BrushesPaper towels or sponges
Blending:
 Illustration painted on Canson Heritage 140lb cotton rag cold press paper.
 Blending is a wet into wet technique that works best when the paper is damp and receptive, but not saturated. Blending techniques can result in paper buckling if you're working with unstretched, unsecured paper. For multiple layers of blended techniques, or larger scale blends, I recommend working with papers that are 140lb or heavier.
Quick Wet into Wet Watercolor Techniques:
Painting Seagrass- A Wet into Wet Painting Tutorial:
Painting a Starry Sky in Watercolor:
Layering:
 Illustration completed on Fluid 100 cottonrag paper.
Layering is a wet over dry technique that works best if the paper is dry before the next layer is applied. If the paper no longer has a surface sheen and is not cool to the touch, it's dry enough to layer. Even if the surface is somewhat cool to the touch, unless the paper is saturated from prior layers, you can probably layer. Layering techniques work well on cellulose and cotton rag paper, and are a commonly used technique to develop depth, color, and volume.
The Eyes Have It- Blends and Layering in Watercolor:
Let's Paint a Succulent- Watercolor Tutorial
Negative Painting Demonstration:
Developing Lighting and Color Through Layering:

Basic Lighting and Contrast:
Basic Lighting and Contrast: Painting a Cube:
Basic Lighting and Contrast: Lighting a Sphere:
Basic Lighting and Contrast: Lighting a Cone:
Basic Lighting and Contrast: Lighting a Cylinder:
Glazing:
 This illustration was painted on Union Square Cold Press watercolor paper, a cellulose paper.
Glazing is used in a variety of ways. From adding shadows to adjusting color to lighting effects, glazing can be a helpful technique to know, but it requires discretion.
For glazing, I recommend you use a very soft brush, such as a squirrel hair brush. Stiffer bristle brushes, including synthetics, can disrupt prior layers of paint. I also recommend only applying a single layer of glaze to an area, as colors can quickly become muddy.
Glazing tends to work best on cotton rag papers with a fair amount of surface texture, but can work well on cellulose papers if handled with care.
Glazing Demonstration- Watercolor Tutorial:
I hope these tutorials and examples have been helpful for learning the basics of my three favorite techniques! If you guys would like to see any other techniques covered in depth, don't hesitate to chat me up on Twitter or email me!


If you enjoyed this post, please consider joining the Artnerd community over on Patreon.

Artnerds make content like this possible through financial and emotional support. In return, they get early access to Youtube content, as well as backer exclusives created just for them!
Please consider donating to this blog or purchasing from Natto-shop (http://nattosoup.com/shop) if you want me to continue publishing quality content. All materials tested were purchased from my own pocket. Keep on Truckin' Nattosoup is not under any sponsorship.
April 5, 2018
Our Artist Scholarship: NATTO (National Art & Trade Tuition Opportunity)
In keeping with our goal to provide egalitarian art education, we're pleased to continue the National Art & Trade Tuition Opportunity scholarship. Sponsored by Joseph Coco, and hosted by comic artist Becca Hillburn, the NATTO scholarship will give three student artists a financial opportunity to fund their pursuit of art education. Open to anyone interested in taking classes.
This year, we're shaking things up a bit. Last year, we received so many wonderful portfolios, it was difficult to pick just one winner. So we're going to give three aspiring art students—high school, college, or postgraduate students—funds to help pay for tuition, materials, or books. This scholarship is applicable to both in-person and online art education.
First place- $1000Second place- $500Third place- $250
You can apply for the NATTO scholarship here
Last year's winner was Eliana Falcon, the creator of Cosmic Fish, a beautiful digital webcomic. We asked Eliana to share a little about her experiences with the NATTO Scholarship
The funds for this scholarship were donated by Joseph Coco, who also handled the arrangements with Going Merry. Promotion, portfolio, and essay assessment will be handled primarily by me, Becca Hillburn.
Joseph Coco
What is Going Merry? GoingMerry is a new company which hopes to not only simplify and aggregate the process of applying for scholarships, but also to allow individuals and corporations to easily create scholarships. Its founders are courteous people who were fed up with the existing hunt-and-peck system of applying for scholarships and saddened by the number of students required to reject college acceptance letters due to financial concerns.
Who can apply? Anyone looking to return to school or resume education with a strong interest in sequential art—comics, children's books, animation, storyboarding.
What schools are eligible? Any school with an art program, including online art courses such as Schoolism.However, this is not for one off, inexpensive online education services like Skillshare. As an example of eligible schools, check this list. Applicable MoMa classes and SVA classes, as well as Watts Atelier would also be acceptable, as well as local community college classes.
What we're looking for:A portfolio of work (hosted through a website, do not send us images) with up to 12 pieces of art. Portfolio should include examples of sequential work, but this is not necessary for submission. Some example free portfolio sites include: DA Portfolio; Webflow; Tumblr.
A short essay of no more than 500 words on the type of sequential art you hope to make or to continue making in the future. Please mind spelling and grammatical errors when submitting through Going Merry.
Deadline: June 30th, 2017
How to apply:
Go to https://nattosoup.com/scholarshipClick "Apply Now", enter your e-mail address and click "Notify Me"You will receive an e-mail shortly after from our host site, Going Merry. Please click on the invitation link in the e-mail.This will take you to a sign up page. Complete the information on there and click "Sign Up"Go to "Qualified Awards" and select the National Art and Trade Tuition Opportunity Scholarship.I'm having trouble submitting:Going Merry has a brief waiting list for account creation, but they have been responsive to any issues which arise. They can be contacted through email via support@goingmerry.com.
Please consider donating to this blog or purchasing from Natto-shop (http://nattosoup.com/shop) if you want me to continue publishing quality content. All materials tested were purchased from my own pocket. Keep on Truckin' Nattosoup is not under any sponsorship.
This year, we're shaking things up a bit. Last year, we received so many wonderful portfolios, it was difficult to pick just one winner. So we're going to give three aspiring art students—high school, college, or postgraduate students—funds to help pay for tuition, materials, or books. This scholarship is applicable to both in-person and online art education.
First place- $1000Second place- $500Third place- $250
You can apply for the NATTO scholarship here
Last year's winner was Eliana Falcon, the creator of Cosmic Fish, a beautiful digital webcomic. We asked Eliana to share a little about her experiences with the NATTO Scholarship
Because of the Natto Soup Scholarship, I’m able to continue my studies and improve my comic and freelancing career. Although I was greatly delayed due to hurricane Maria back in September, and only recently was able to get back on my feet, I’m still eager to finally be able to pursue continued education using online and local courses now that things have normalized. I genuinely cannot thank Becca and John enough for the opportunity, their understanding, and giving artists this push to continue to try harder and improve.
The funds for this scholarship were donated by Joseph Coco, who also handled the arrangements with Going Merry. Promotion, portfolio, and essay assessment will be handled primarily by me, Becca Hillburn.
"I set up a small scholarship fund (on behalf of +Becca Hillburn) called the National Art & Trade Tuition Opportunity. It's for any artist interested in sequential art (comics, animation, storyboards) who wants to study art in college (undergrad or grad). You can apply if you have an online portfolio before July 1st, and should expect to hear back sometime in July. You don't need to be the best to win, so if you're on the fence about submitting, please do and help spread the word if you have any artists in your life. College is too expensive, so here's hoping I can help an artist not go into too much debt."
Joseph Coco
What is Going Merry? GoingMerry is a new company which hopes to not only simplify and aggregate the process of applying for scholarships, but also to allow individuals and corporations to easily create scholarships. Its founders are courteous people who were fed up with the existing hunt-and-peck system of applying for scholarships and saddened by the number of students required to reject college acceptance letters due to financial concerns.
Who can apply? Anyone looking to return to school or resume education with a strong interest in sequential art—comics, children's books, animation, storyboarding.
What schools are eligible? Any school with an art program, including online art courses such as Schoolism.However, this is not for one off, inexpensive online education services like Skillshare. As an example of eligible schools, check this list. Applicable MoMa classes and SVA classes, as well as Watts Atelier would also be acceptable, as well as local community college classes.
What we're looking for:A portfolio of work (hosted through a website, do not send us images) with up to 12 pieces of art. Portfolio should include examples of sequential work, but this is not necessary for submission. Some example free portfolio sites include: DA Portfolio; Webflow; Tumblr.
A short essay of no more than 500 words on the type of sequential art you hope to make or to continue making in the future. Please mind spelling and grammatical errors when submitting through Going Merry.
Deadline: June 30th, 2017
How to apply:
Go to https://nattosoup.com/scholarshipClick "Apply Now", enter your e-mail address and click "Notify Me"You will receive an e-mail shortly after from our host site, Going Merry. Please click on the invitation link in the e-mail.This will take you to a sign up page. Complete the information on there and click "Sign Up"Go to "Qualified Awards" and select the National Art and Trade Tuition Opportunity Scholarship.I'm having trouble submitting:Going Merry has a brief waiting list for account creation, but they have been responsive to any issues which arise. They can be contacted through email via support@goingmerry.com.
Please consider donating to this blog or purchasing from Natto-shop (http://nattosoup.com/shop) if you want me to continue publishing quality content. All materials tested were purchased from my own pocket. Keep on Truckin' Nattosoup is not under any sponsorship.
April 2, 2018
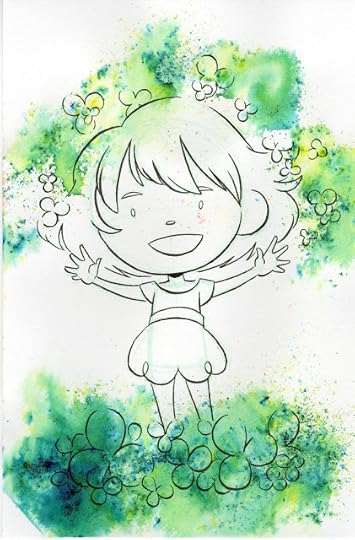
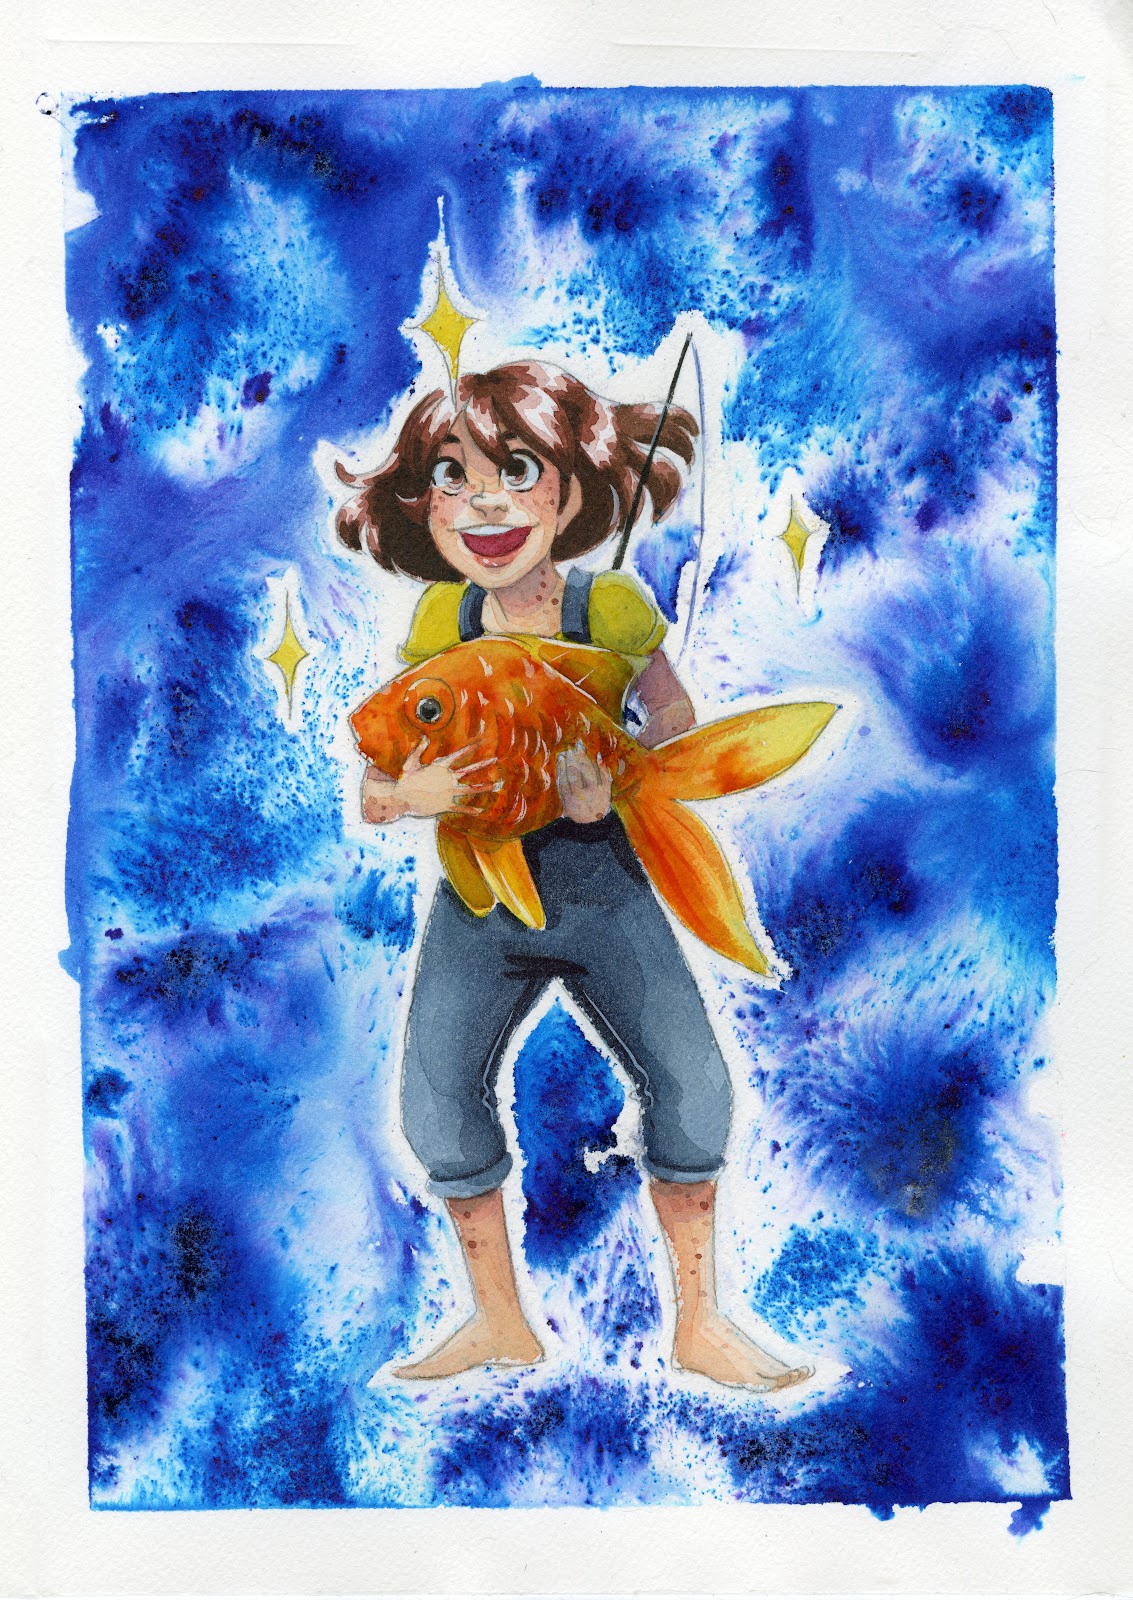
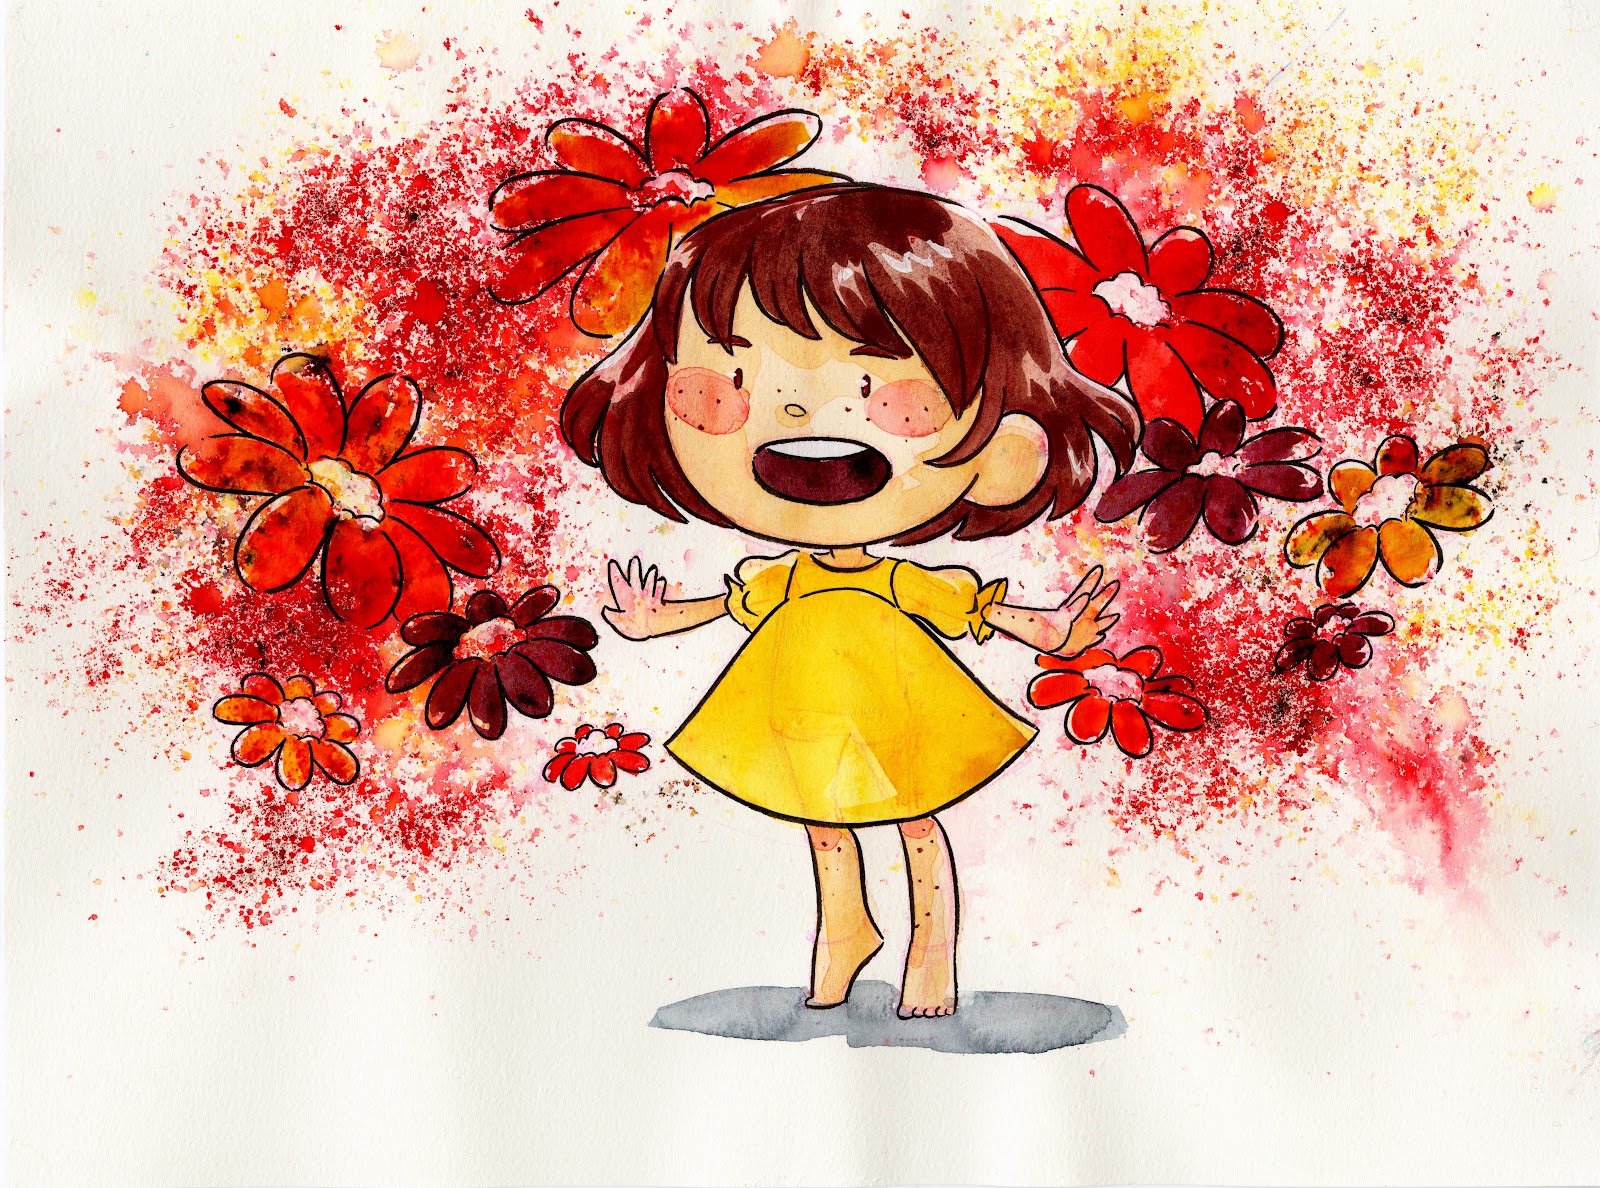
Recent Watercolor Illustrations
February and early March were busy months for watercolor! Between Chinese New Year, celebrating the one year launch anniversary for 7" Kara, ALAC submissions, and a few field tests, I did a lot of painting late winter. I don't share my art here often enough, so here are a few of my favorite watercolor or watercolor-esque pieces.
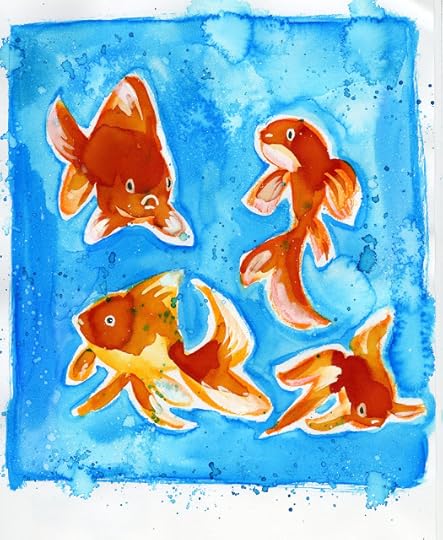
Chinese New Year Watercolor Illustration
This illustration was a gift to friends hosting a small Chinese New Year party. I wanted something simple but cute to give as thanks for inviting us.
Check out the process!
One Year Launchiversary Illustration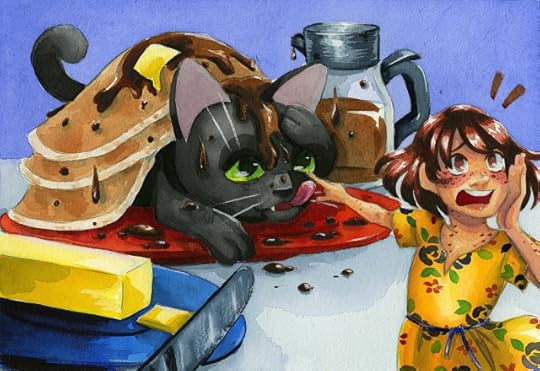
For this piece, I asked my Artnerds what they wanted to see, and a resounding number voted for Pancake the kitten under a stack of pancakes. The end result is undeniably cute!
Check out the process!
Launchivesary/Mijello Field Test
Check out the process!
ALAC Submission Illustrations
ALAC (a librarian conference) is going to be in New Orleans this year, so of course, I had to put in! I really wanted to knock it out of the park with my auction submission, so I created two pieces and allowed my Twitter friends and Artnerds to vote on which they preferred.
Read to Your Pets
Curled Up in a Good Book
Process videos coming to Youtube soon!
Holbein Field Test Piece
Process videos coming to Youtube soon!
Pentel Brushpen Tests
On Strathmore Watercolor Paper
On Canson Mixed Media Paper

Process Videos coming to Youtube soon!
Sennelier Watercolor Field Test
Kabocha sent a small testing set of Sennelier Artist Grade watercolors as an early birthday present (as well as a lovely 8"x8" pad of Arches cold press), and I had to get field testing!
Promo:
Full review and tutorial coming soon!
I hope you guys enjoyed my watercolor tour for late winter!
Please consider donating to this blog or purchasing from Natto-shop (http://nattosoup.com/shop) if you want me to continue publishing quality content. All materials tested were purchased from my own pocket. Keep on Truckin' Nattosoup is not under any sponsorship.
Chinese New Year Watercolor Illustration
This illustration was a gift to friends hosting a small Chinese New Year party. I wanted something simple but cute to give as thanks for inviting us.
Check out the process!
One Year Launchiversary Illustration

For this piece, I asked my Artnerds what they wanted to see, and a resounding number voted for Pancake the kitten under a stack of pancakes. The end result is undeniably cute!
Check out the process!
Launchivesary/Mijello Field Test

Check out the process!
ALAC Submission Illustrations
ALAC (a librarian conference) is going to be in New Orleans this year, so of course, I had to put in! I really wanted to knock it out of the park with my auction submission, so I created two pieces and allowed my Twitter friends and Artnerds to vote on which they preferred.
Read to Your Pets

Curled Up in a Good Book

Process videos coming to Youtube soon!
Holbein Field Test Piece

Process videos coming to Youtube soon!
Pentel Brushpen Tests
On Strathmore Watercolor Paper
On Canson Mixed Media Paper


Process Videos coming to Youtube soon!
Sennelier Watercolor Field Test
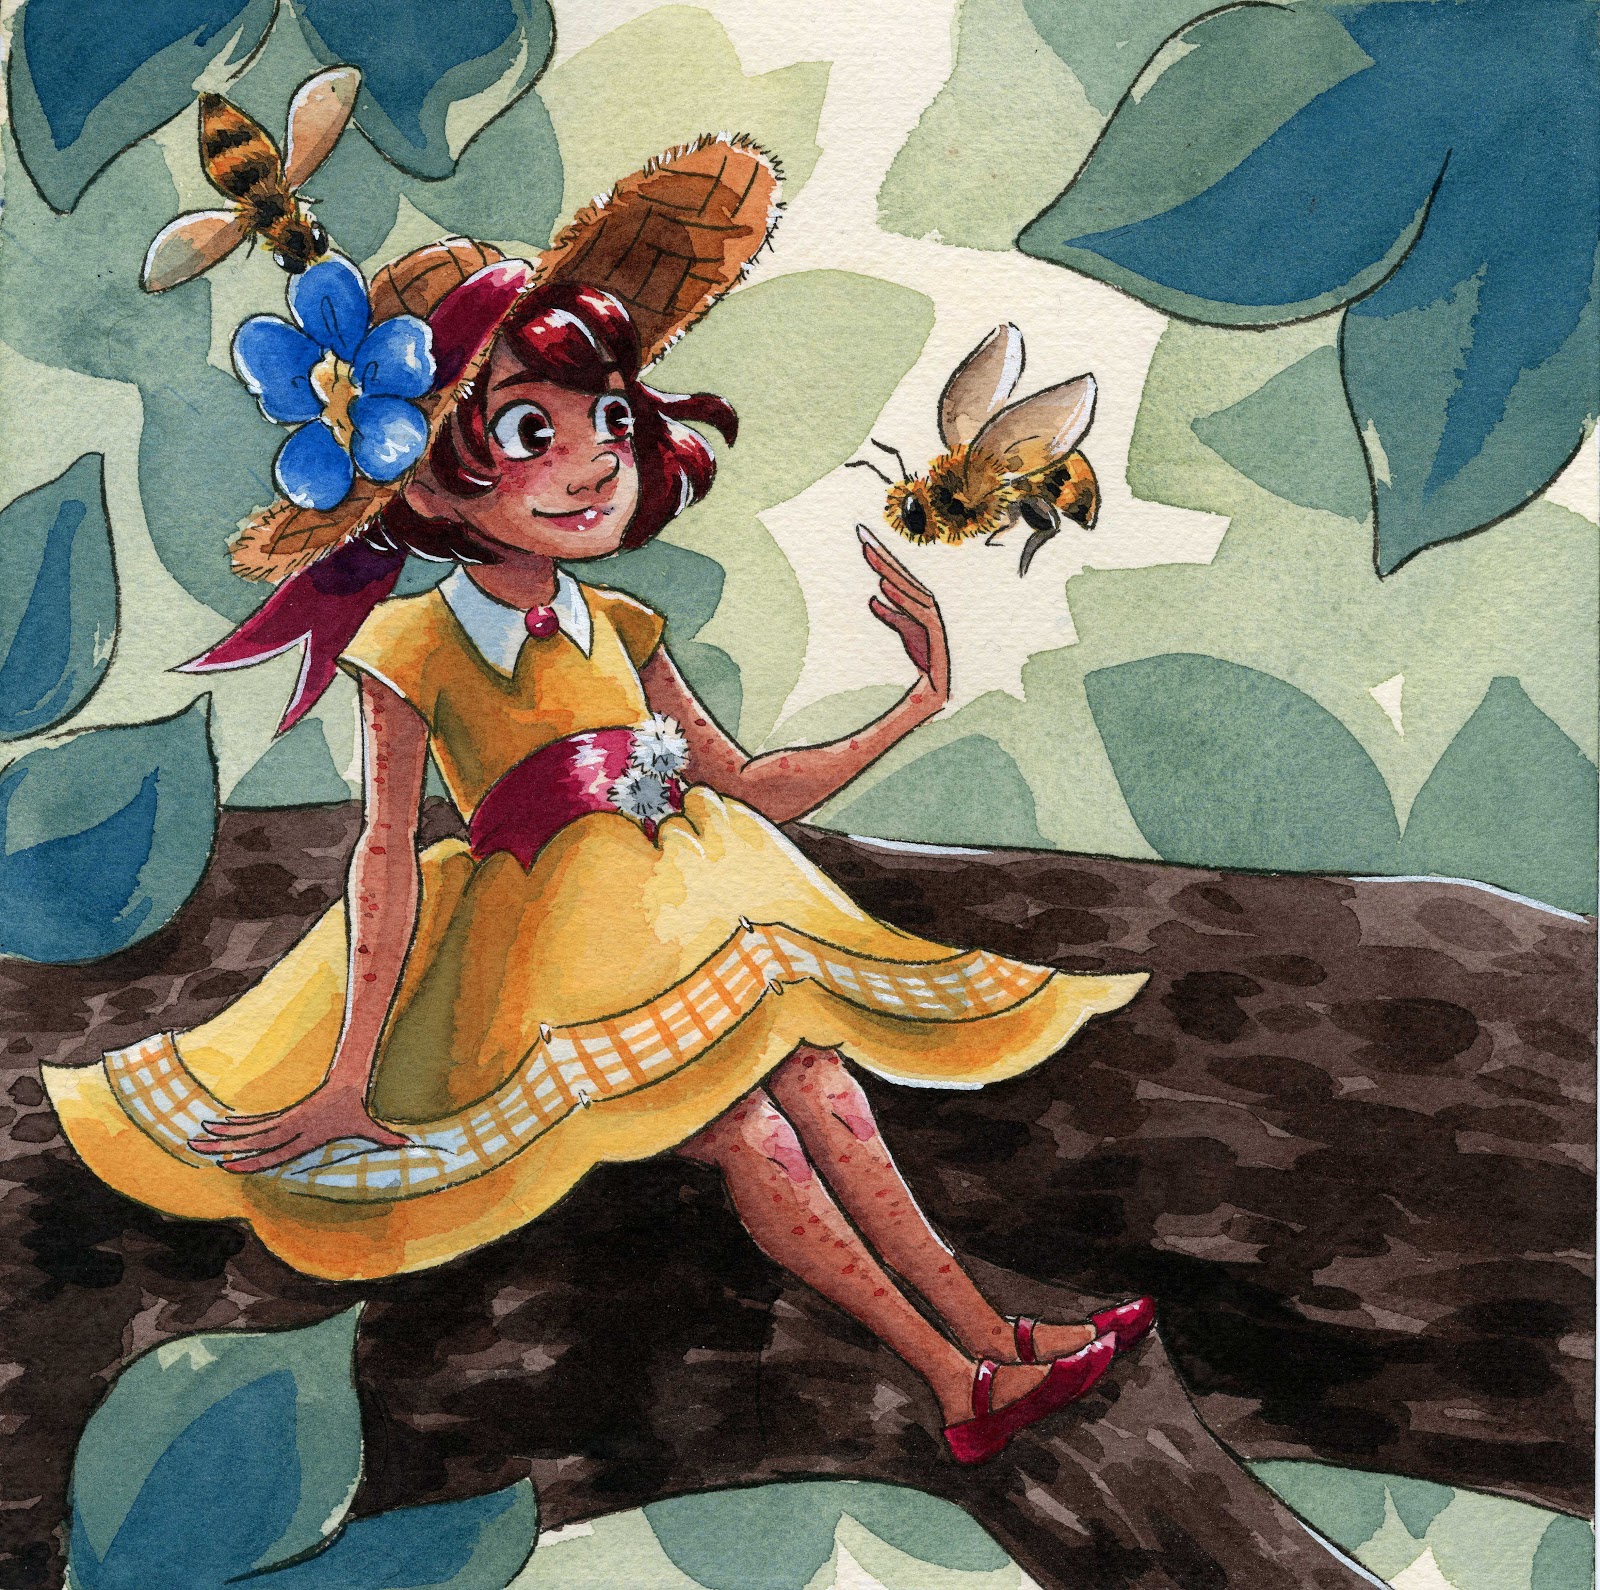
Kabocha sent a small testing set of Sennelier Artist Grade watercolors as an early birthday present (as well as a lovely 8"x8" pad of Arches cold press), and I had to get field testing!
Promo:
Full review and tutorial coming soon!
I hope you guys enjoyed my watercolor tour for late winter!
Please consider donating to this blog or purchasing from Natto-shop (http://nattosoup.com/shop) if you want me to continue publishing quality content. All materials tested were purchased from my own pocket. Keep on Truckin' Nattosoup is not under any sponsorship.
March 29, 2018
Con Announcement- MTAC 2018

Hey friends! I'm going to be at MTAC this upcoming weekend, in Nashville, TN!
I'll have:
Comics:
Copies of 7" Kara Volume 1
Preview Pages from Volume 2
1001 Knights Volume 3
Mini Comics:
Lilliputian Living
Magical Girl March
Favorite Fictional Femmes
Cute Stuff:
Stickers
Mini Prints
Handpainted Wooden Charms
As well as mini fandom watercolors and original watercolors for sale. I'm going to take commissions for Pencil and Inked Commissions until Sunday, and Mail in Commissions all weekend!
Brand New Mini Watercolors:
 Deku- BNHA
 Froppy-BNHA
 Bakugo- BNHA
 Sakura-Card Captor Sakura
 Madoka
 Hunk- Voltron
 Keith-Voltron
 Lance-Voltron
 Allura- Voltron
 Pidge-Voltron
 Shiro-Voltron
Please consider donating to this blog or purchasing from Natto-shop (http://nattosoup.com/shop) if you want me to continue publishing quality content. All materials tested were purchased from my own pocket. Keep on Truckin' Nattosoup is not under any sponsorship.

March 26, 2018
Lilliputian Portraits from Launch Anniversary
As you guys know, February 10th marked the one year anniversary for 7" Kara's webcomic debut. To celebrate, I hosted a livestream on Youtube full of giveaways- including an opportunity for viewers to submit a photo or reference to have themselves or their characters drawn as Lilliputians in Kara's world. Below are the resulting portraits- sketched in blue pencil and inked. Keep an eye on my channel for the upcoming timelapse process videos!
 Portrait from reference
 Shelby, an adorable tiny
 Kabocha's Aster and Fox, from the webcomic Linked
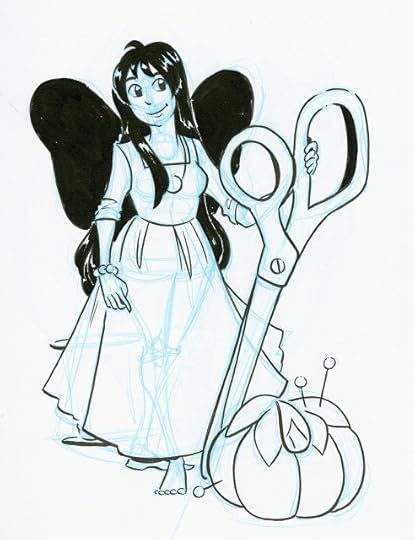 Mharz's Big Sis, from the comic The Angel with Black Wings
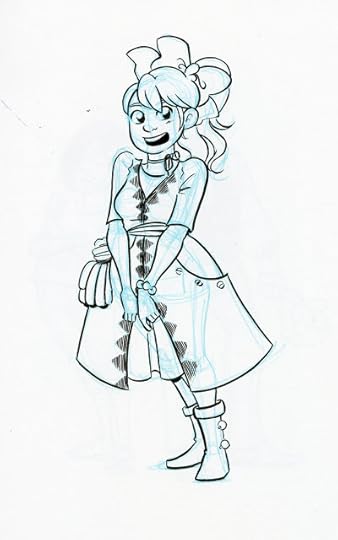 Nisa's beautiful OC, Solas
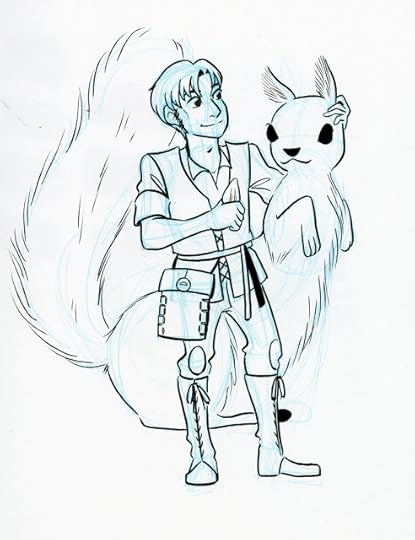 Respheal's Conan, from the comic Galebound
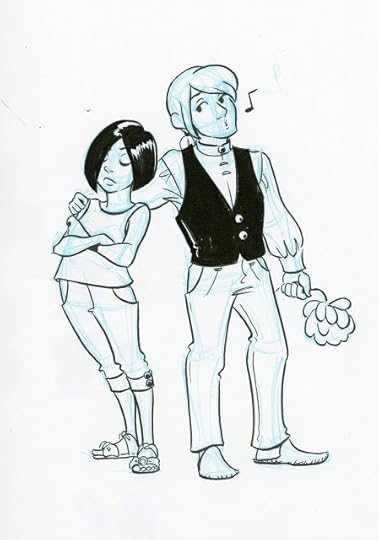
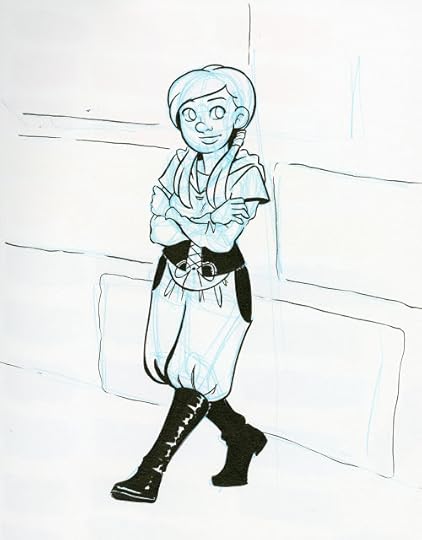 Character from Toefield’s mini comic
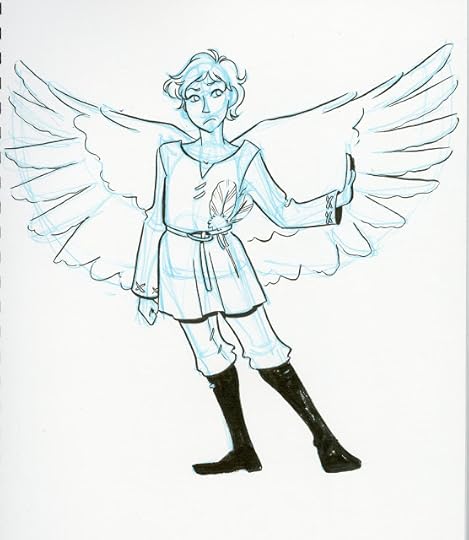 Diane’s Nikolai
Huge thanks to everyone who sent in reference and hung out during the stream! You guys made it a blast.
Please consider donating to this blog or purchasing from Natto-shop (http://nattosoup.com/shop) if you want me to continue publishing quality content. All materials tested were purchased from my own pocket. Keep on Truckin' Nattosoup is not under any sponsorship.
 Portrait from reference
 Shelby, an adorable tiny
 Kabocha's Aster and Fox, from the webcomic Linked
  Mharz's Big Sis, from the comic The Angel with Black Wings
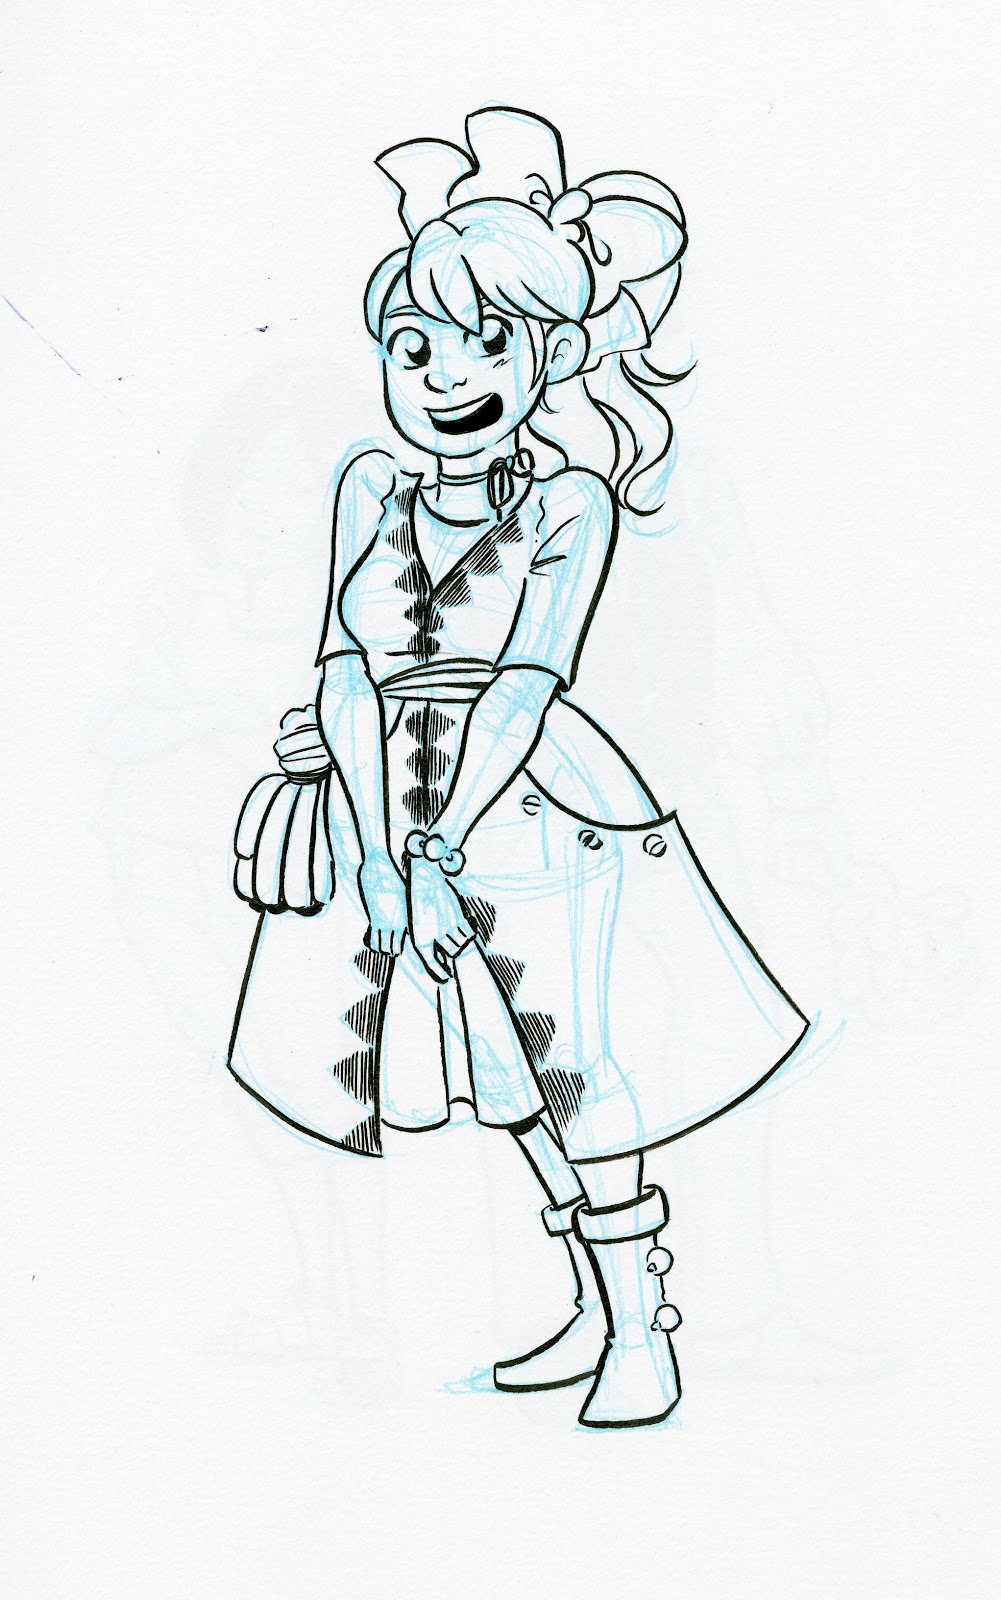 Nisa's beautiful OC, Solas
 Respheal's Conan, from the comic Galebound
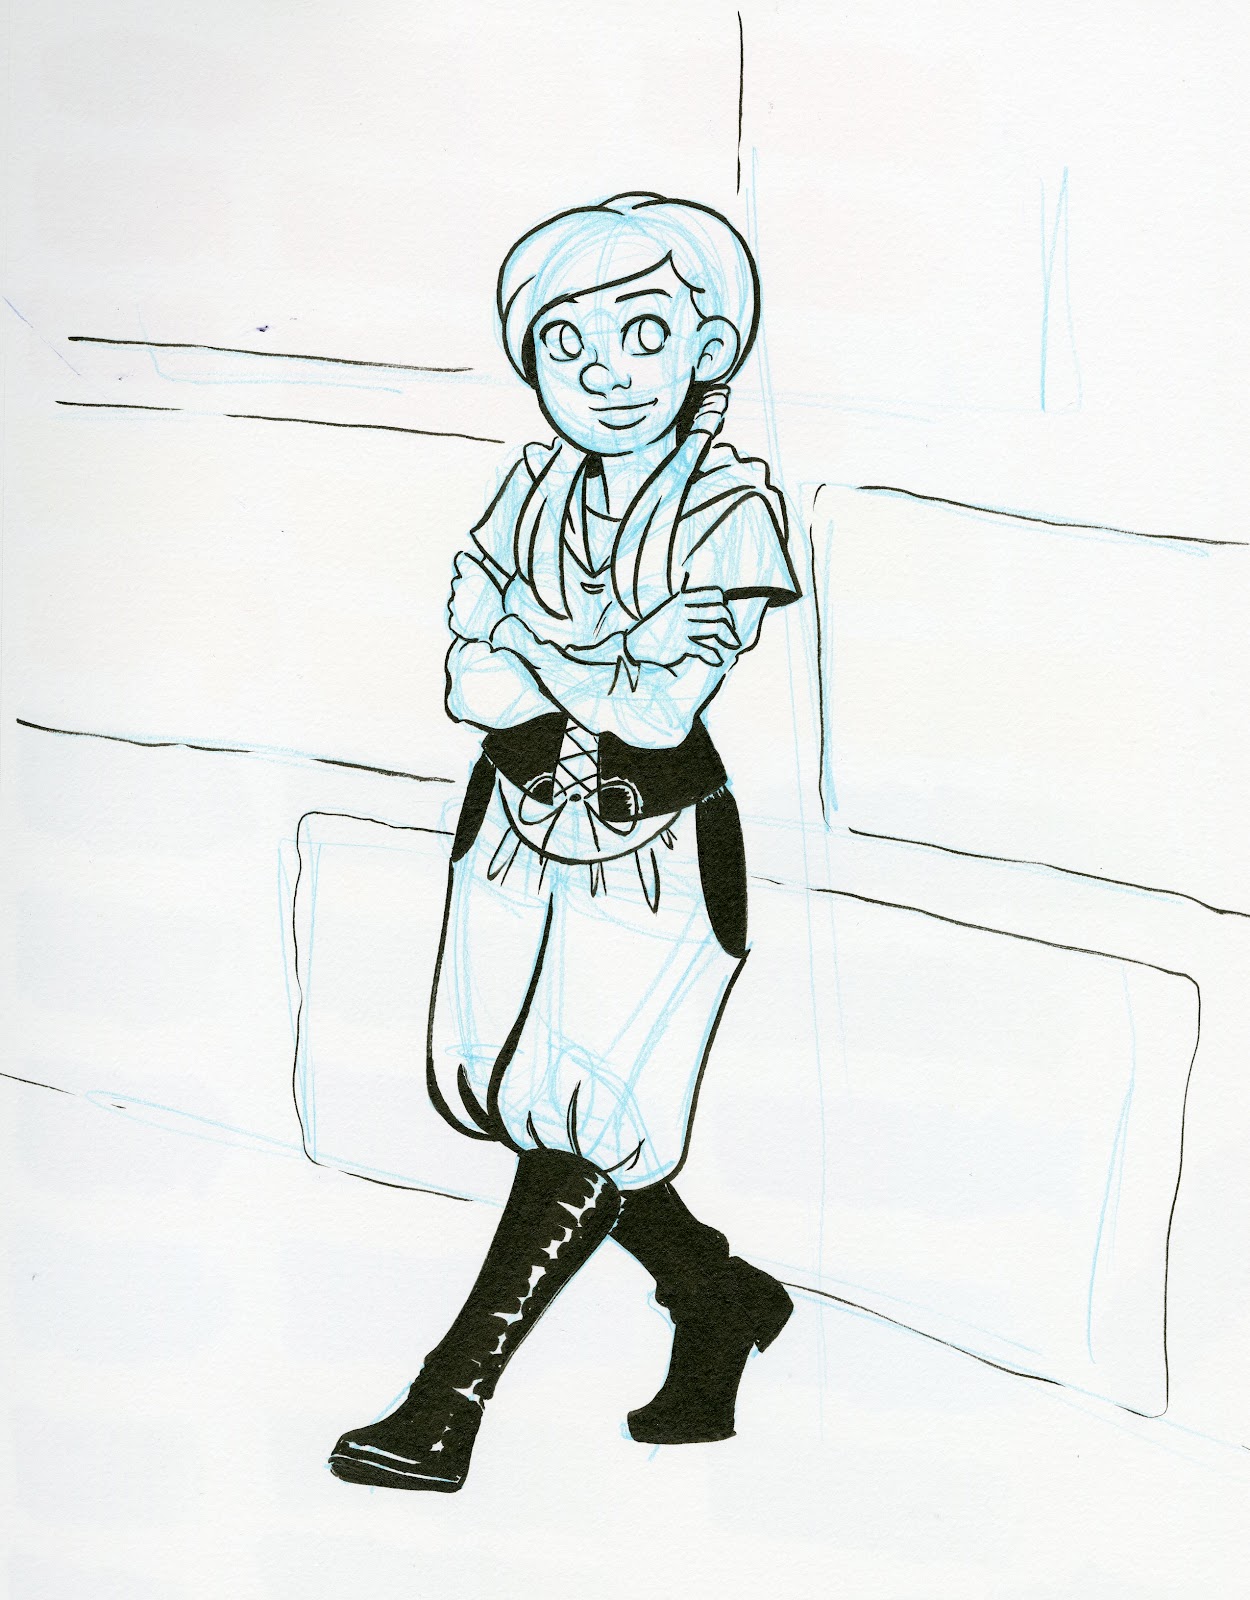 Character from Toefield’s mini comic
 Diane’s Nikolai
Huge thanks to everyone who sent in reference and hung out during the stream! You guys made it a blast.
Please consider donating to this blog or purchasing from Natto-shop (http://nattosoup.com/shop) if you want me to continue publishing quality content. All materials tested were purchased from my own pocket. Keep on Truckin' Nattosoup is not under any sponsorship.


