
Becca Hillburn's Blog, page 21
December 11, 2017
2017 Patreon Recap
Initially I was going to wait until the end of December to release this post, but in light of Patreon's recent changes, I feel it might be best if I release it now.
For the past two years, this blog has continued thanks to support, both financial and emotional, from my Artnerds on Patreon. As pageviews and vocal support for this blog have gone down over the years, Patreon support inspired me to keep writing and sharing, and to introduce increasingly lengthy and technical tutorial series (Watercolor Basics and Intro to Comic Craft). Without the support of my Artnerds, I would have tossed in the towel in early 2016.
This week, Patreon released a change to their fee structure (link post), that means Patrons now shoulder all the fees- $.35 a transaction+any international fees as well. Creators voiced their outrage and requested the ability to pay those fees, and Patreon doubled down, causing many creators to opt to leave Patreon.
I'm not currently in a position to do so- I'm about to be MIA for two weeks due to visiting family in Luling, and I generally have spotty internet at best. I've already notified my Artnerds of their options, and set up a poll, and when I'm at full capacity in January, I plan on acting based on their needs and requests.
If you enjoy the content on this blog, now would be a fantastic time to consider showing your support, either finacially or by signal boosting and sharing my work!
So what does Nattosoup Studio, Art and Process Blog have to offer?
What I currently offer:
Daily (or near daily) Early Access Videos to PatronsFrequent 'bonus' videos such as nib reviews, or Crayola tutorials- these are not part of the Youtube update scheduleMonthly Sketchbook PDFS (often multiple, separated out by media)Monthly Mini Comic and Art Resource DownloadsYoutube updates on Tuesday, Thursday, Friday, and SaturdayBlog updates on Monday and ThursdayPaid ($30) guest post opportunities to other artists and comic creatorsVideo Con RecapsComic Artist Interviews at most conventionsIntroduction and Population of Organizational HubpagesIntroduction of Longrunning, well researched series such as Intro to Comic Craft and Watercolor Basics
Not covered by Patreon
Answering Asks and creating Tutorials and Reviews for How to be a Con Artist
Working on and updating 7" Kara as a webcomic
Work with Ink Drop Cafe
Conventions and convention streams
'Bonus' videos like nib reviews, off the cuff things
Goals Unlocked by Patrons in 2017:
$125- Monthly Sketchbook PDF's
$90- Backer access to digital watercolor assets via Gumroad
$75- Backer access to a PDF copy of 7" Kara, Volume 1 via Gumroad
$60- Backer access to my library of mini comics via Gumroad
Money Earned from Patreon (Jan 2017-November 2017)
$1,222.24
(minus December)
Money Earned from Adsense
Blog: $41.47
Youtube: $450.08
(Blog and YT combined): $491.55
Money Earned from Project Wonderful: $3.44
Amazon Affiliates Earnings: $229.87
Total Earnings: $1947.10
Blog and Youtube Expenses for 2017
2.5k Giveaway:
First Prize- $80 in drawing supplies, plus $40 to ship to the UK (OUCH)
Second Prize- $60 in drawing supplies, plus $20 shipping (still ouch)
Third Prize- $40 in drawing supplies, plus $20 shipping
What this meant for the general audience: The chance to win free comic supplies.
Total Spent: $260
NATTO Scholarship- $1,000, sent via check
What this meant for the general audience: A small art focused scholarship with few strings attached, with little competition (we only had about 20 applicants)
Video Editor- Paid on average $205 a week to edit my backlog of video. Joseph estimates that we will have paid him $3690 by the end of this year.
What this means for Patrons: Near daily Early Access videos, when videos are available for me to upload.
What this means for the general audience: Updates have increased from twice weekly (Saturday and Tuesday) to nearly five days a week (Tuesdays, some Wednesdays, Thursdays, Fridays, Saturdays)
Guest Posts- $30 per guest post, 8 paid guest posts this year, $240 so far this year
What this means for the general audience: A wider perspective on how comics are made, what materials artists use, and what techniques are available. Paid writing opportunities for comic artists, opportunities for exposure and promotion, better SEO for their webcomic projects.
Materials to Review (this is not an all inclusive list by any means, just the materials I can quickly think of off the top of my head)
Blick Illustrator Markers (purchased for the YT)- Price is no longer available, a set of 12 is $14.99
Crayola Signature Brush Markers- $14.99
Crayola Gel Color Pencils- $17.72
Crayola Artist Color Pencils- $19.97
Yarka Student Watercolors- $5.99
Prang Student Watercolors- $6.99
Crayola Educator Watercolors- $6.29
Richeson Student Watercolors- $7.95
Daler Rowney AquafineWatercolors- $15.99
Lukas Aquarelle Watercolors- $16.99
Chameleon Color Tones Markers- $110
Chameleon Color Tops IndieGoGo- $40
Artist Loft Watercolors- $10
Prima Marketing Tropicals :$15
Prima Marketing Classics: $15
Jane Davenport Watercolor Set, Brights (at 50% off)- $31, I paid $15
Jane Davenport Mermaid Markers- $41
Jane Davenport Mermaid Markers, set of 5- $25
Jane Davenport Inkredible Inks: $4.79 each (x4)
Bainyo Watercolor Set: $13
Jerry Q Watercolor Set- $17
Estimated Total: $457.04
Burn It Box:
Winter: $20 for materials+ $20 shipping
Spring: $20 for materials+ $15 shipping
Summer: $20 for materials+ $20 shipping
Total Spent So Far: $115
Total Spent: $5,762.04
Total Earnings: -$3,814.94
Goals for Next Year:
Increase visibility and reach on Youtube and for this blogCover all blog and channel costs either by increased support, increased revenue, or decreased spendingFinish Watercolor Basics SeriesFinish Intro to Comic Craft SeriesBegin wrapping up the blog- I want to end it in 2019 and move the series to PDFsOffer alternatives to Patreon, as Patreon has been rude to creators and now charges the Patrons feesBegin offering legacy series as sectioned PDF's for sale on Gumroad and free to ArtnerdsOffer the Natto Scholarship again, this time with three prizesMore marker tutorialsDepending on financial support, may resume Scrawlrbox monthly unboxings and demonstrations
Please consider donating to this blog or purchasing from Natto-shop (http://nattosoup.com/shop) if you want me to continue publishing quality content. All materials tested were purchased from my own pocket. Keep on Truckin' Nattosoup is not under any sponsorship.


December 7, 2017
Intermediate Alcohol Marker Artist Gift Guide
Last year, I wrote a comprehensive gift guide for the beginner marker artist. This gift guide is full of brand recommendations, color recommendations, and even supplies that help your marker illustrations shine, and I strongly suggest you check it out if you haven't yet. Over the past year, I played with so many inks, spritzers, masks, and other materials, I thought it was high time I put together an intermediate alcohol marker artist gift guide.
Holiday Gift Guide: Alcohol Markers for the Aspiring Artist
If you're new to alcohol markers such as Copic markers, Chameleon markers, Prismacolor markers, Blick Studio Brush Markers, or alcohol inks, I can't recommend that post enough. I explain why alcohol markers are great for artists and crafters, I go over my favorite colors for skintones and more, I make set recommendations, and I go over all the basic accessories marker artists love.

So this year, I want to take it to another level. You've got your markers, you've been making art with it, and you want a little more flexibility. A little additional range.
Or maybe you know a marker artist or crafter who loves their alcohol markers, but wants a little more flexibility. You don't want to buy them markers (because you don't know what they have), but you don't mind buying them accessories. But what do you buy? What might they be missing?
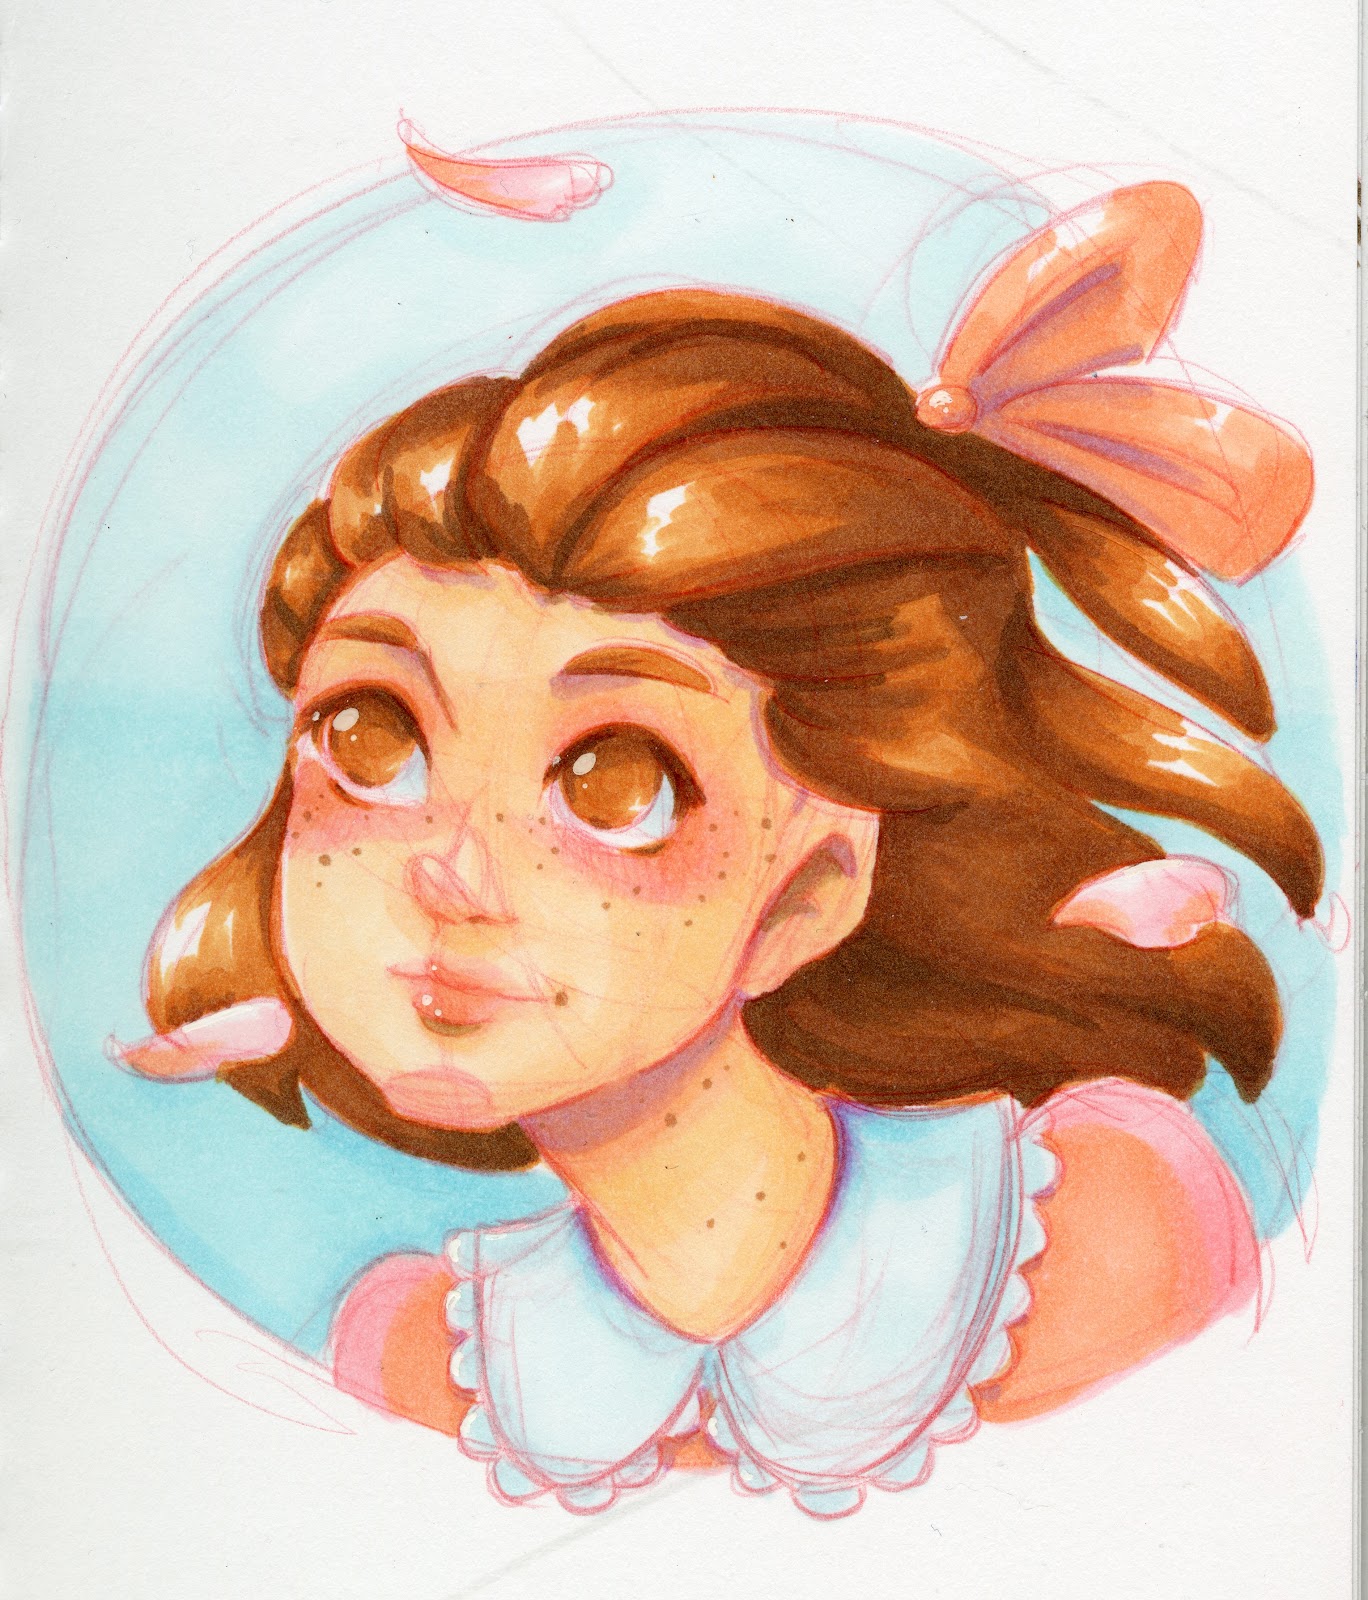
 A marker illustration created with custom Copic Wide markers, alcohol spray mists, masking, and Copic markers
If you like this gift guide, don't be shy! Shoot me an email and tell me so! Please make sure to share it with other artists and crafters on your favorite social media sites- Pinterest, Tumblr, Twitter, even Mastodon- this helps me out a lot! And if you really like this post, consider tipping me on Ko-fi or joining my artnered community on Patreon.
My marker buddy Kabocha helped with these recommendations, so please take a moment to check out her webcomic, Linked, and our webcomic collective, Ink Drop Cafe!
And please note, other than Amazon affiliate links, I am not affiliated with any of these brands, companies, or courses outside of my own.
Colored Leads:
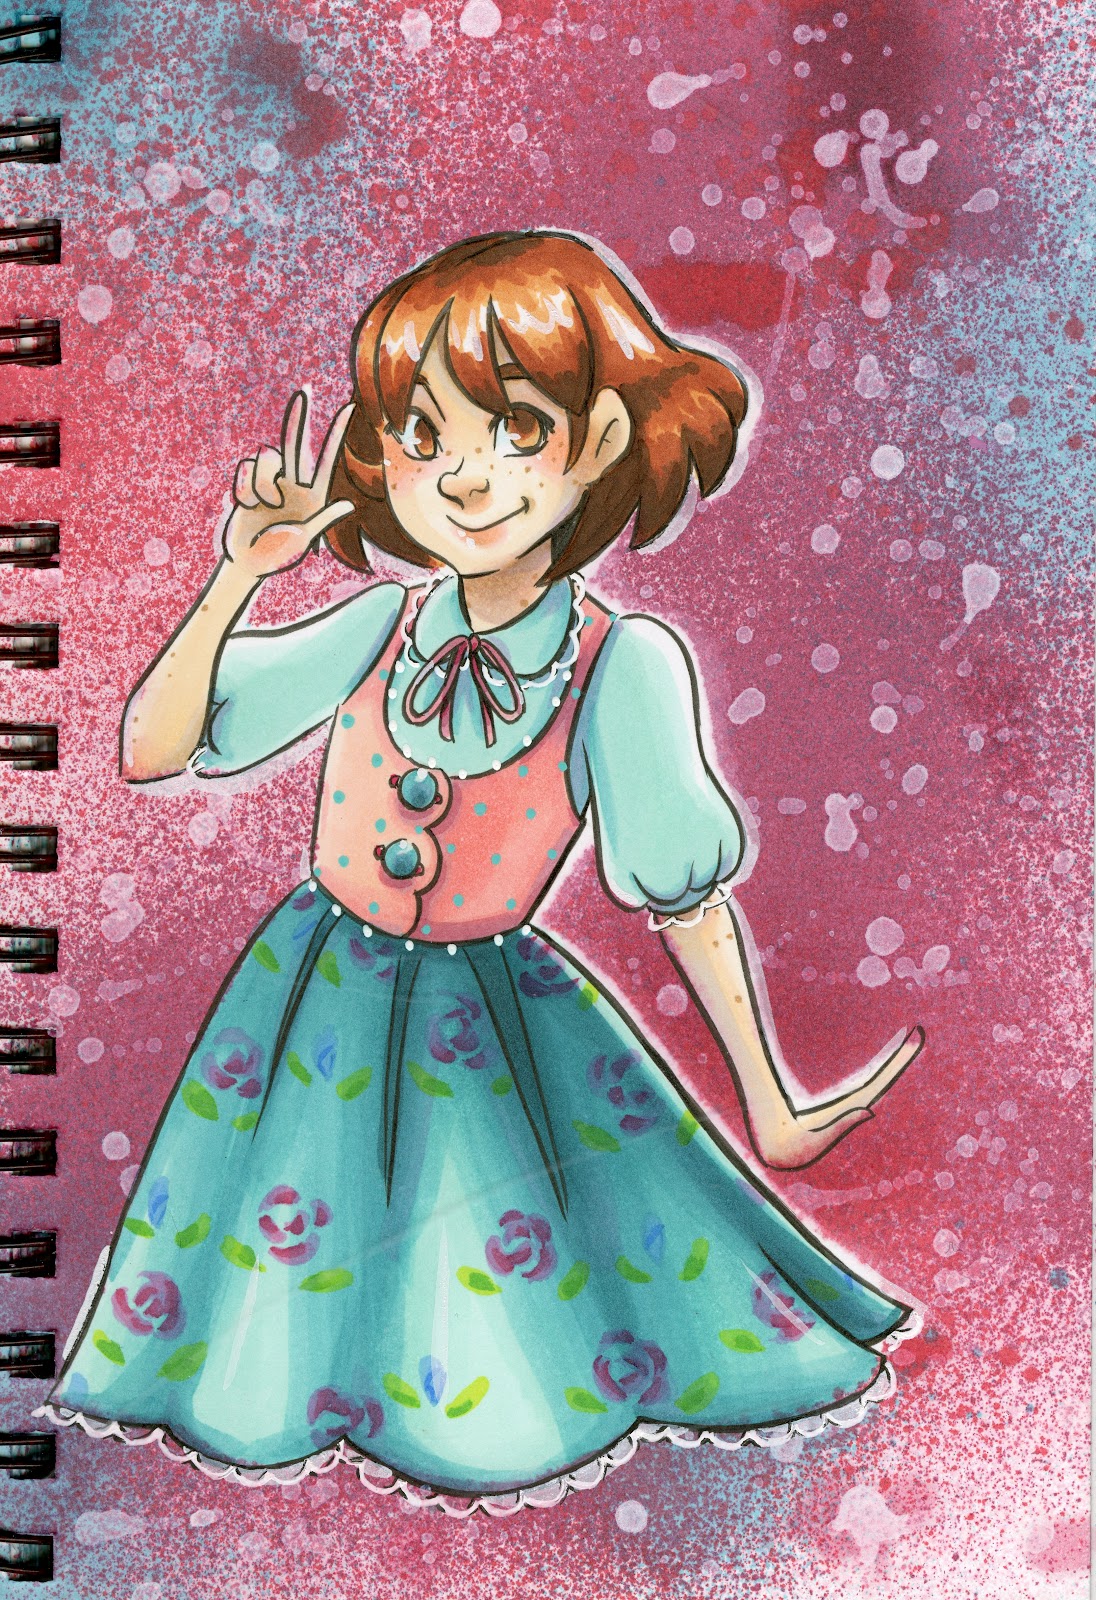
 A Copic Marker illustraiton that demonstrates the use of colored leads for a 'lineless' artstyle
Pilot Color Eno Leads
Pilot Color Eno Mechanical Pencils
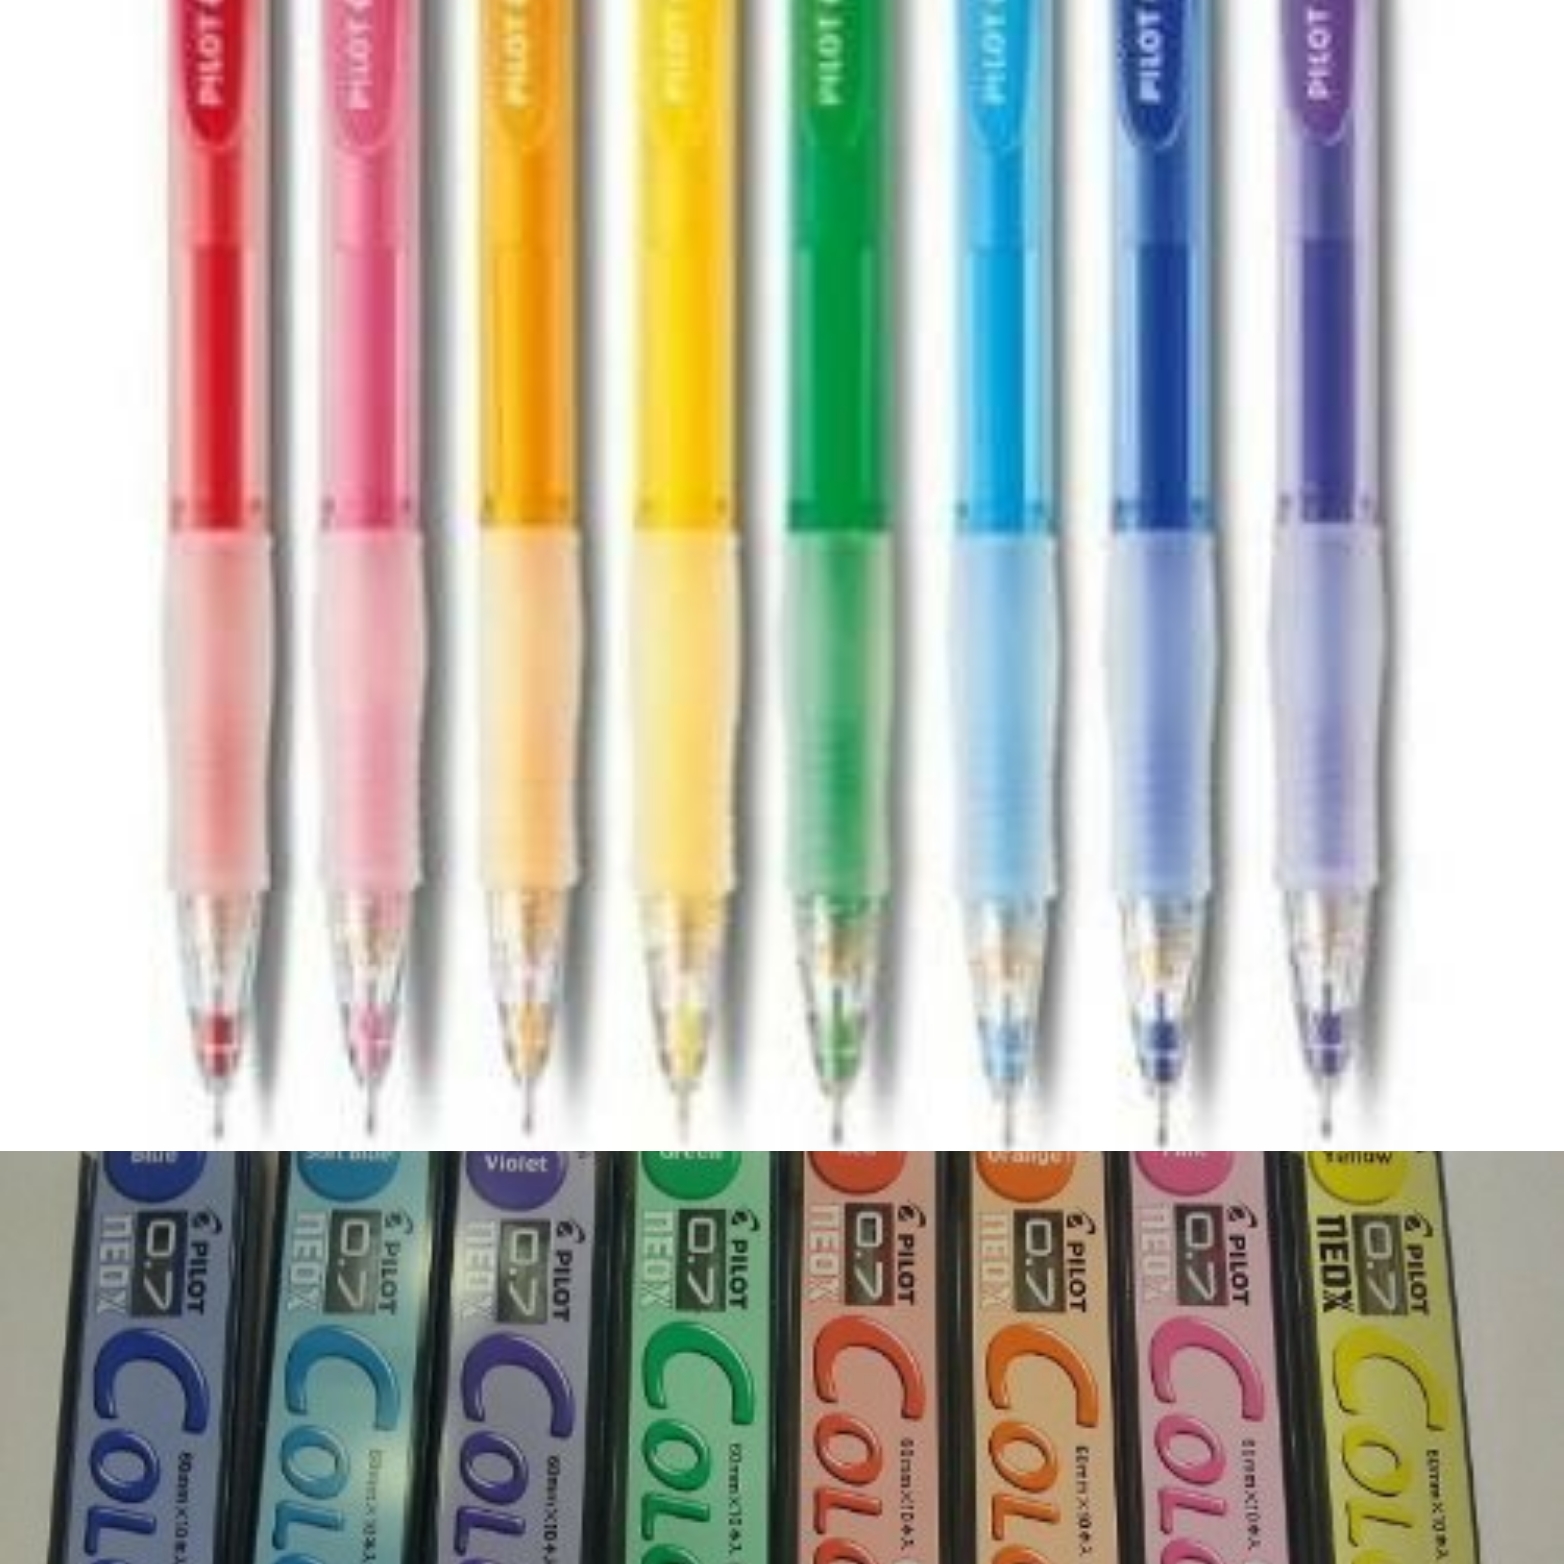 Top: Color Eno Mechanical Pencils
Bottom: Color Eno Mechanical Pencil Leads
I use these leads every single day- you often see Soft Blue in my inked sketches. These are my favorite leads, and I recommend them for all types of artists! They work with watercolor, waterbased markers, inks, and alcohol markers.
If you want to try these without making a large investment, I recommend buying the mechanical pencil set- they come with leads at an affordable price.
Tutorials:
Colored Lead Introduction
Giving Style to Your Characters with Colored Leads
Quick Colored Leads and Copic Markers Tutorial
Alcohol Inks:
 An alcohol marker illustration created using alcohol inks in spray bottles, dripped Snowcap, masks, and Copic and Blick Studio Brush Markers
 Left Row: Ranger Adirondack Alcohol Inks, Ranger Adirondack Snowcap Mixative, Spectrum Noir Refill Inks
Right Row: Ranger Adirondiack Alcohol Inks, Ranger Adirondack Metallic Mixatives, Kuretake Zig Kurecolor Alcohol Ink, Jacquard Pinata Alcohol Inks
Alcohol inks are often unnoticed by alcohol marker illustrators and artists- marketed mainly at crafters and stampers. But alcohol inks are a useful, affordable addition to your collection- perfect in spray bottles for soft spray mists, great for splatter effects, and ideal for filling empty markers.
Ranger Adirondack Inks:
Usually sold in sets of 3's
Openstock
Recommended Colors:
Patina
Botanical
Lettuce
Mermaid
Pool
Sunshine Yellow
Definitely Try:
Silver
Gold
White
Demonstration:
Tutorials:
These inks are pigmented, which makes them opaque. Not suitable for spray bottles, and marker suitability still pending.
Jacquard Pinata
These are often sold as a set online, but you can find them openstock
Both brands feature a eye dropper tip and a screw top- the Ranger ink bottles have a finer tip and make for easier filling.
These are both great if you want a small bottle of ink for an alcohol mister or for a custom Copic Sketch or Wide and are perfect for augmenting your marker collection with unusual colors without breaking the bank.
Copic Various Inks
If you use Copic Markers, you're familiar with these inks. You might not be familiar with other alcohol ink refills:
Kuretake Kurecolor
Spectrum Noir
Tutorials:
Making Alcohol Misters
Using Ranger Inks to Fill Copic Wides
Filling Copic Sketch Markers with Ranger Alcohol Inks
Alcohol Misters in Use:
Artsnacks June 2016 Challenge
Using Brusho Watercolors with Copic Markers
Rubbing Alcohol
High proof rubbing alcohol is essential for my marker work! In a spray bottle for toning down marker 'washes' and mists, used for cleaning overfilled markers, and cheaper than blending solution for large areas, rubbing alcohol is always at hand for easy access.
Markers:
Empty Copic Sketch
Filling Copic Sketch Markers with Ranger Alcohol Inks
Empty Copic Wide
Using Ranger Inks to Fill Copic Wides
These are great for filling with your favorite non-Copic inks. I love making custom Copic Wides for washes, as the Copic Wide selection includes fewer than 40 of the available Copic Colors, so I often buy empties to fill with my favorite Various Inks.
Colors to Augment Your Collection:
Copic is weak in a couple areas- it's great for skintones and muted colors, but not so great if you want intense color. For bright, vivid Purples, Blues, Red Violets, Greens, and Yellows, I turn to Prismacolor.
If you're interested in Copic, Blick Studio Brush Marker, or Shin Han Recommendations, I suggest you check out the Holiday Gift Guide: Alcohol Markers for the Aspiring Artist from last year.
Brilliant Prismacolor Markers I recommend:
Note: I'm still collecting Prismacolor markers, so this is by no means comprehensive
PB-17- Sunburst Yellow
PB-18-Yellow Ochre
PB-19-Canary Yellow
PB-25-Spring Green
PB-27-Chartreuse
PB-37-Light Aqua
PB-46-Aquamarine
PB-40-Neon Blue
PB-179-Copenhagen Blue
PB-51-Violet Dark
PB-127-Imperial Violet
PB-128-Parma Violet
PB-56-Rhodamine Dark
PB-177-Neon Pink
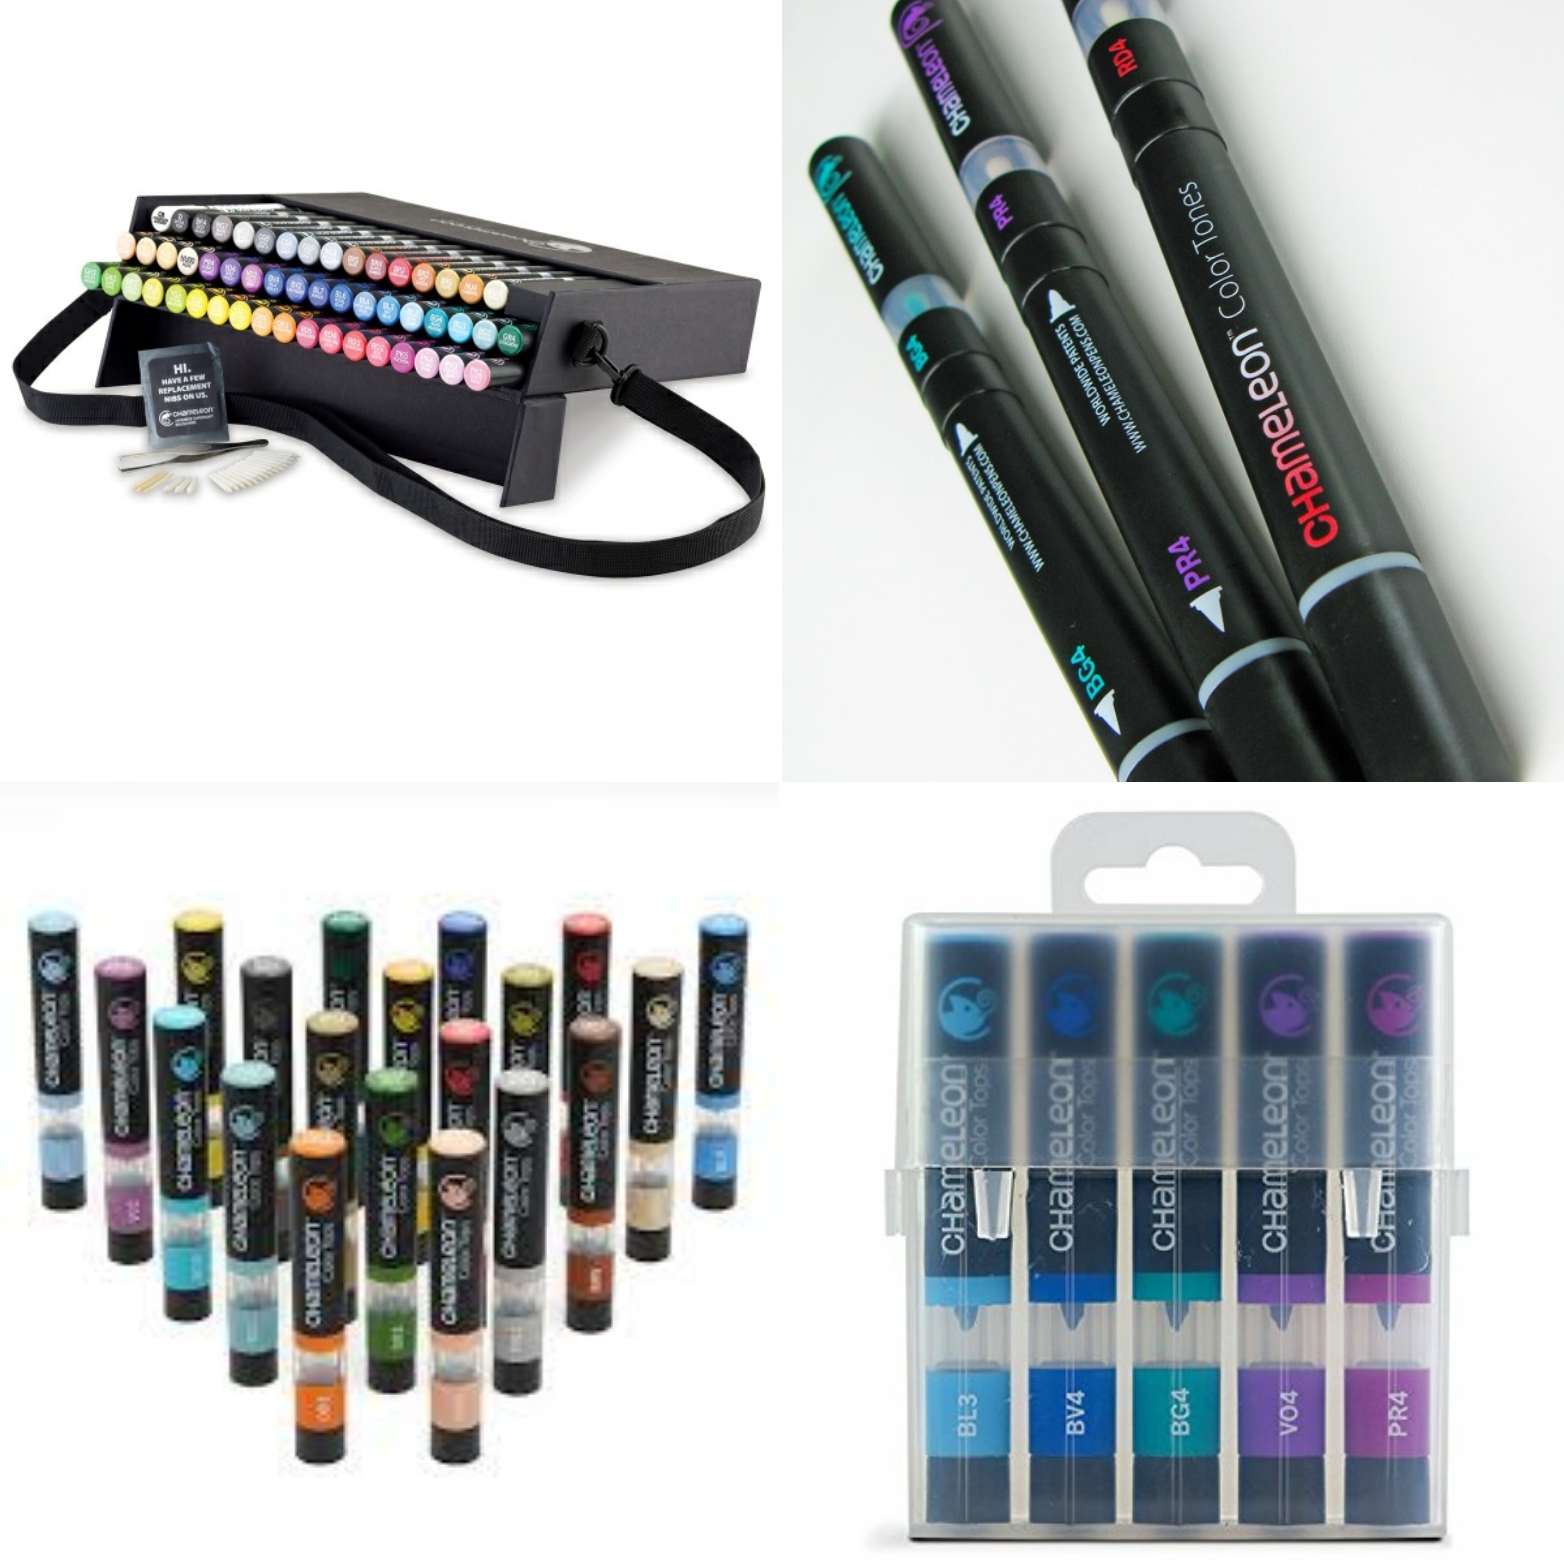 Top row: Chameleon Markers, Complete Set, Individual Chameleon Markers
Bottom Row: Chameleon Color Tops
Chameleon Markers
I have frequently complained that with so many companies entering the alcohol marker market, there's nothing new or innovative under the sun. Chameleon Markers are the exception and turn alcohol marker techniques on their heads- there is no blender marker, you infuse your original color with blender and it blends from light (blender) to original color. For many seasoned alcohol marker artists, this is difficult to get used to (I really struggle with it!) but many new users prefer it, as it means you don't need as large a collection.
Chameleon Markers Unboxing
Chameleon Marker Overview
Chameleon New 30 Swatch Test
Chameleon Color Tops
Color Tops are even more innovative than Chameleon Markers- they allow you to 'infuse' your Chameleon markers with another color.
Chameleon Color Tops Unboxing
Labelling Your Chameleon Color Tops
Chameleon Marker and Color Top Overview and Demonstration
Marker Papers:
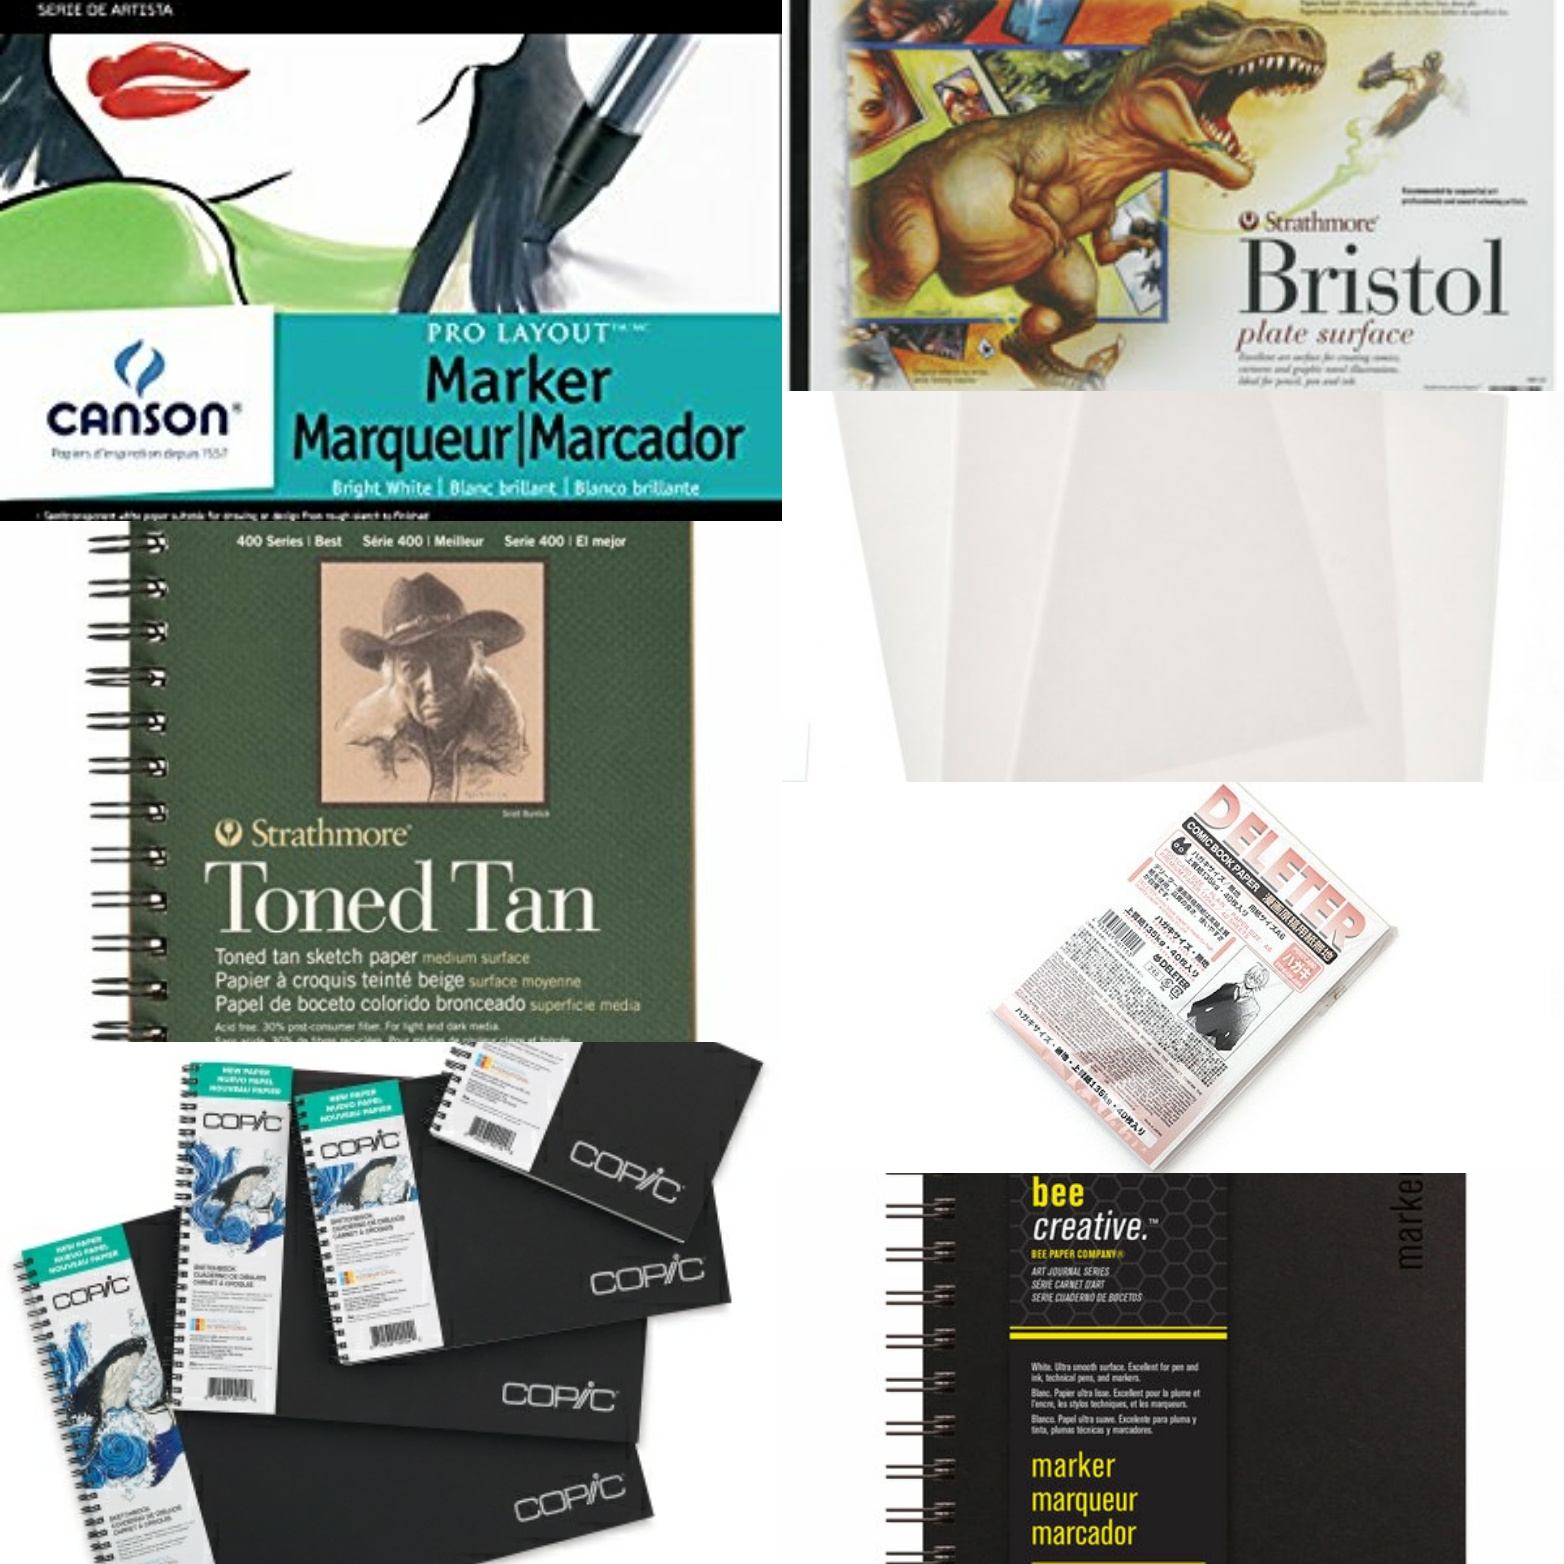 Top Row: Canson Pro Layout Marker Paper, Strathmore 500 Series Plate Bristol
Middle Row: Strathmore Toned Tan Paper, Vellum, Deleter Paper
Bottom Row: Copic marker sketchbooks, Bee marker paper sketchbook
Deleter Comic Paper
Strathmore 500 Series Plate Bristol
Vellum
Strathmore Toned Tan Paper
Canson Pro Layout Marker Paper
Canson Comic/Manga Illustration Pad
Glossy Photo Papers
Hot Press Watercolor Paper:
Strathmore Ready Cut Hot Press Paper
Sketchbooks:
Copic Paper Sketchbook
Bee Creative Marker Paper
Strathmore Visual Journal Plate Bristol
Marker Accessories
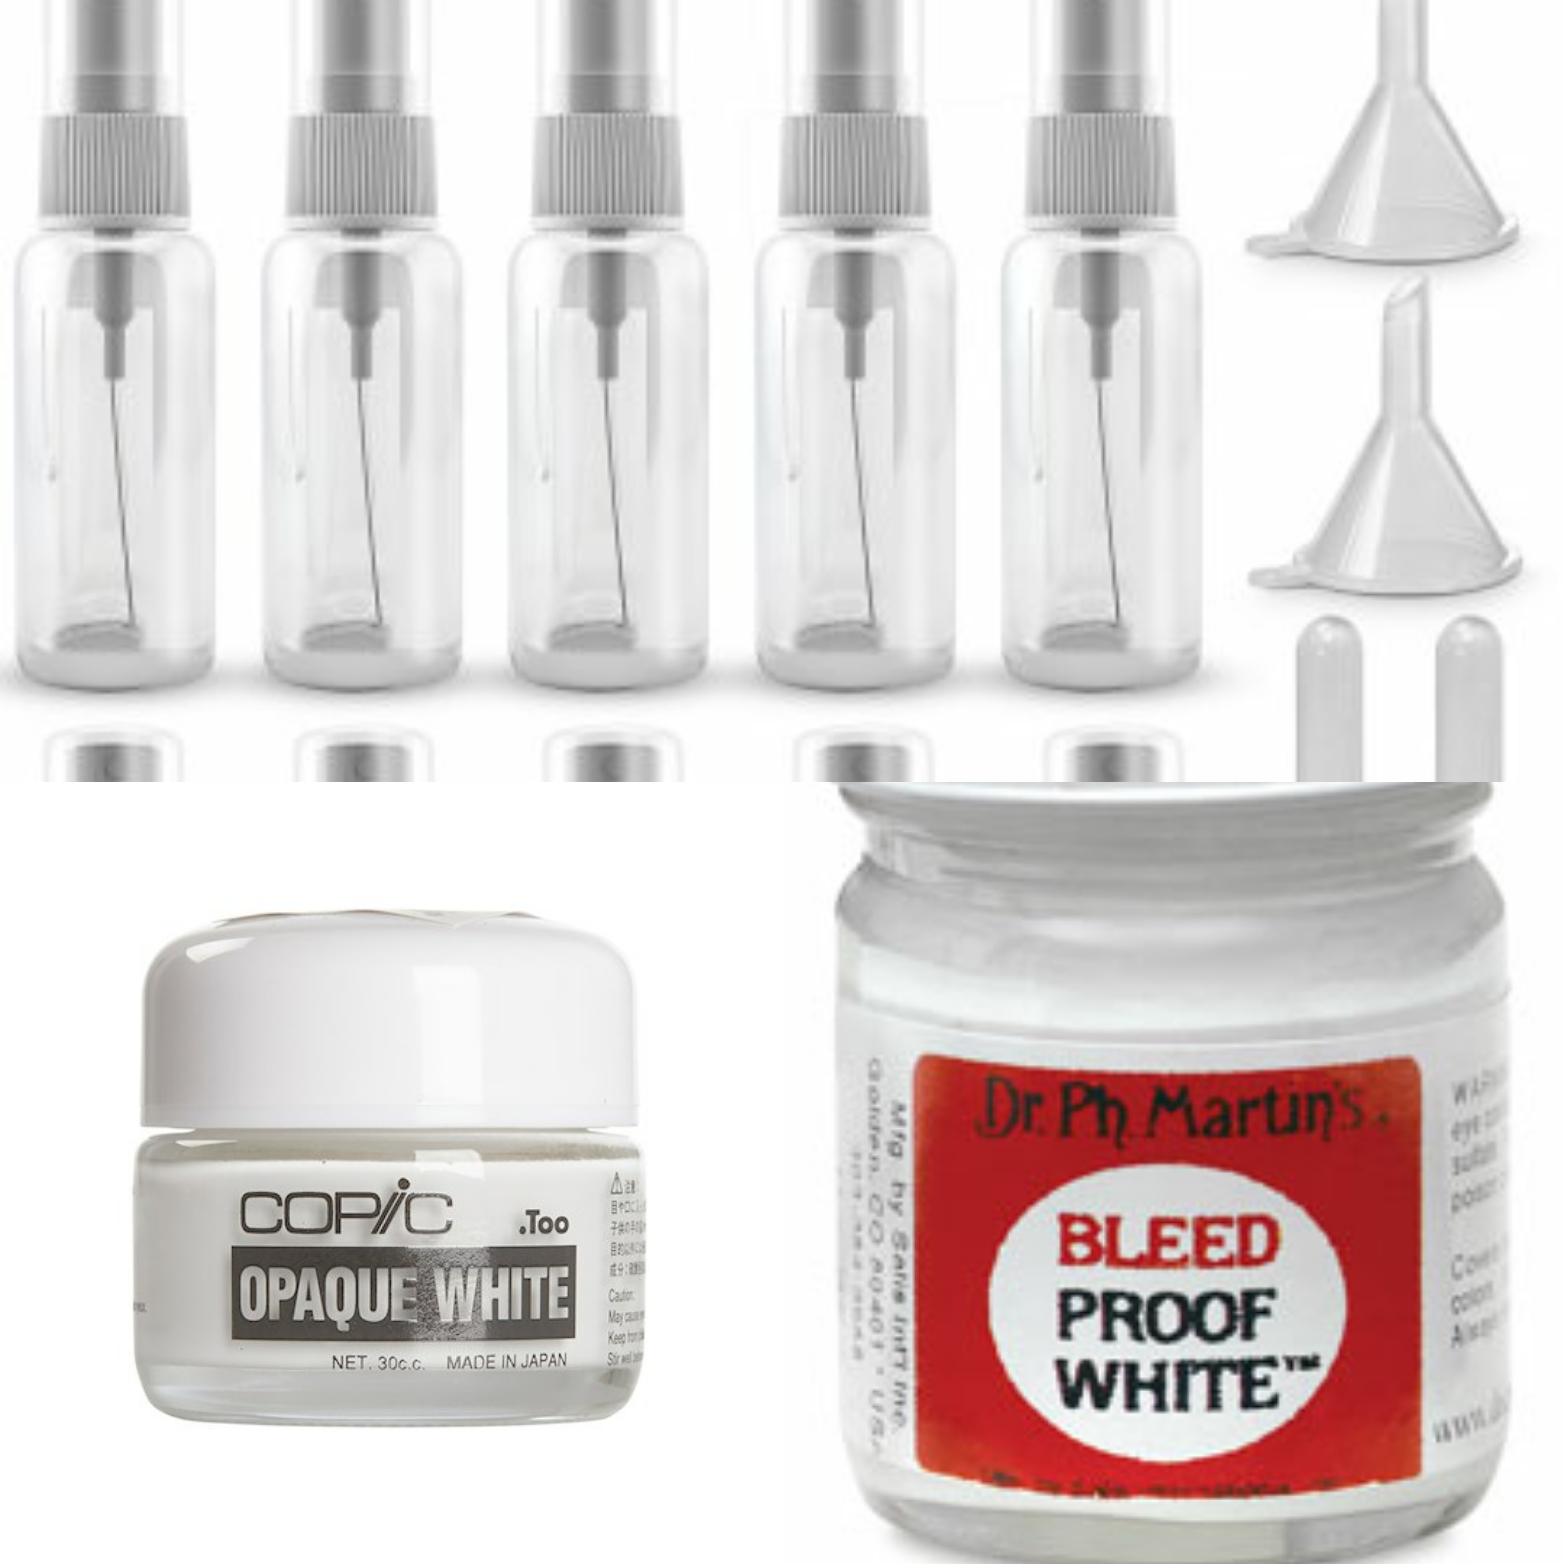 Top row: Small spray bottles
Bottom Row: Copic Opaque White, Dr Ph Martin's Bleed Proof White
Spray Bottles
Perfect for spray mists with your alcohol inks, or for your rubbing alcohol/colorless blender!
Tutorial:
Making Alcohol Misters
Alcohol Misters in Use:
Artsnacks June 2016 Challenge
Using Brusho Watercolors with Copic Markers
Spray Bottle Storage and Organization
Copic Opaque White
Dr Ph Martin's Bleedproof White
I love these thick white correctional inks! Like gouache, but so much easier to handle, and can be watered down.
Winsor and Newton Pigment Marker- White
You can build up progressively opaque highlights using this marker! Great if you want just a hint of white
Atomizers:
 Top Row: Copic ABS
Bottom Row: Ranger Spritzer, eBrush airbrush
Copic Air Brush System
Tutorial:
Materials and Mistakes: Masking for Copic ABS
Will It Work: Copic ABS and Blick Studio Brush Markers
Works with Blick Studio Brush Markers too!
Ranger Marker Spritzer Tool
Designed to work with Distress markers-waterbased markers- and may work with similarly sized waterbased markers. Features a screw to adjust sizes, and while it will not take Copic markers, it may take Neopikos.
eBrush Airbrush System
Supposedly works with a variety of marker brands.
Masks:
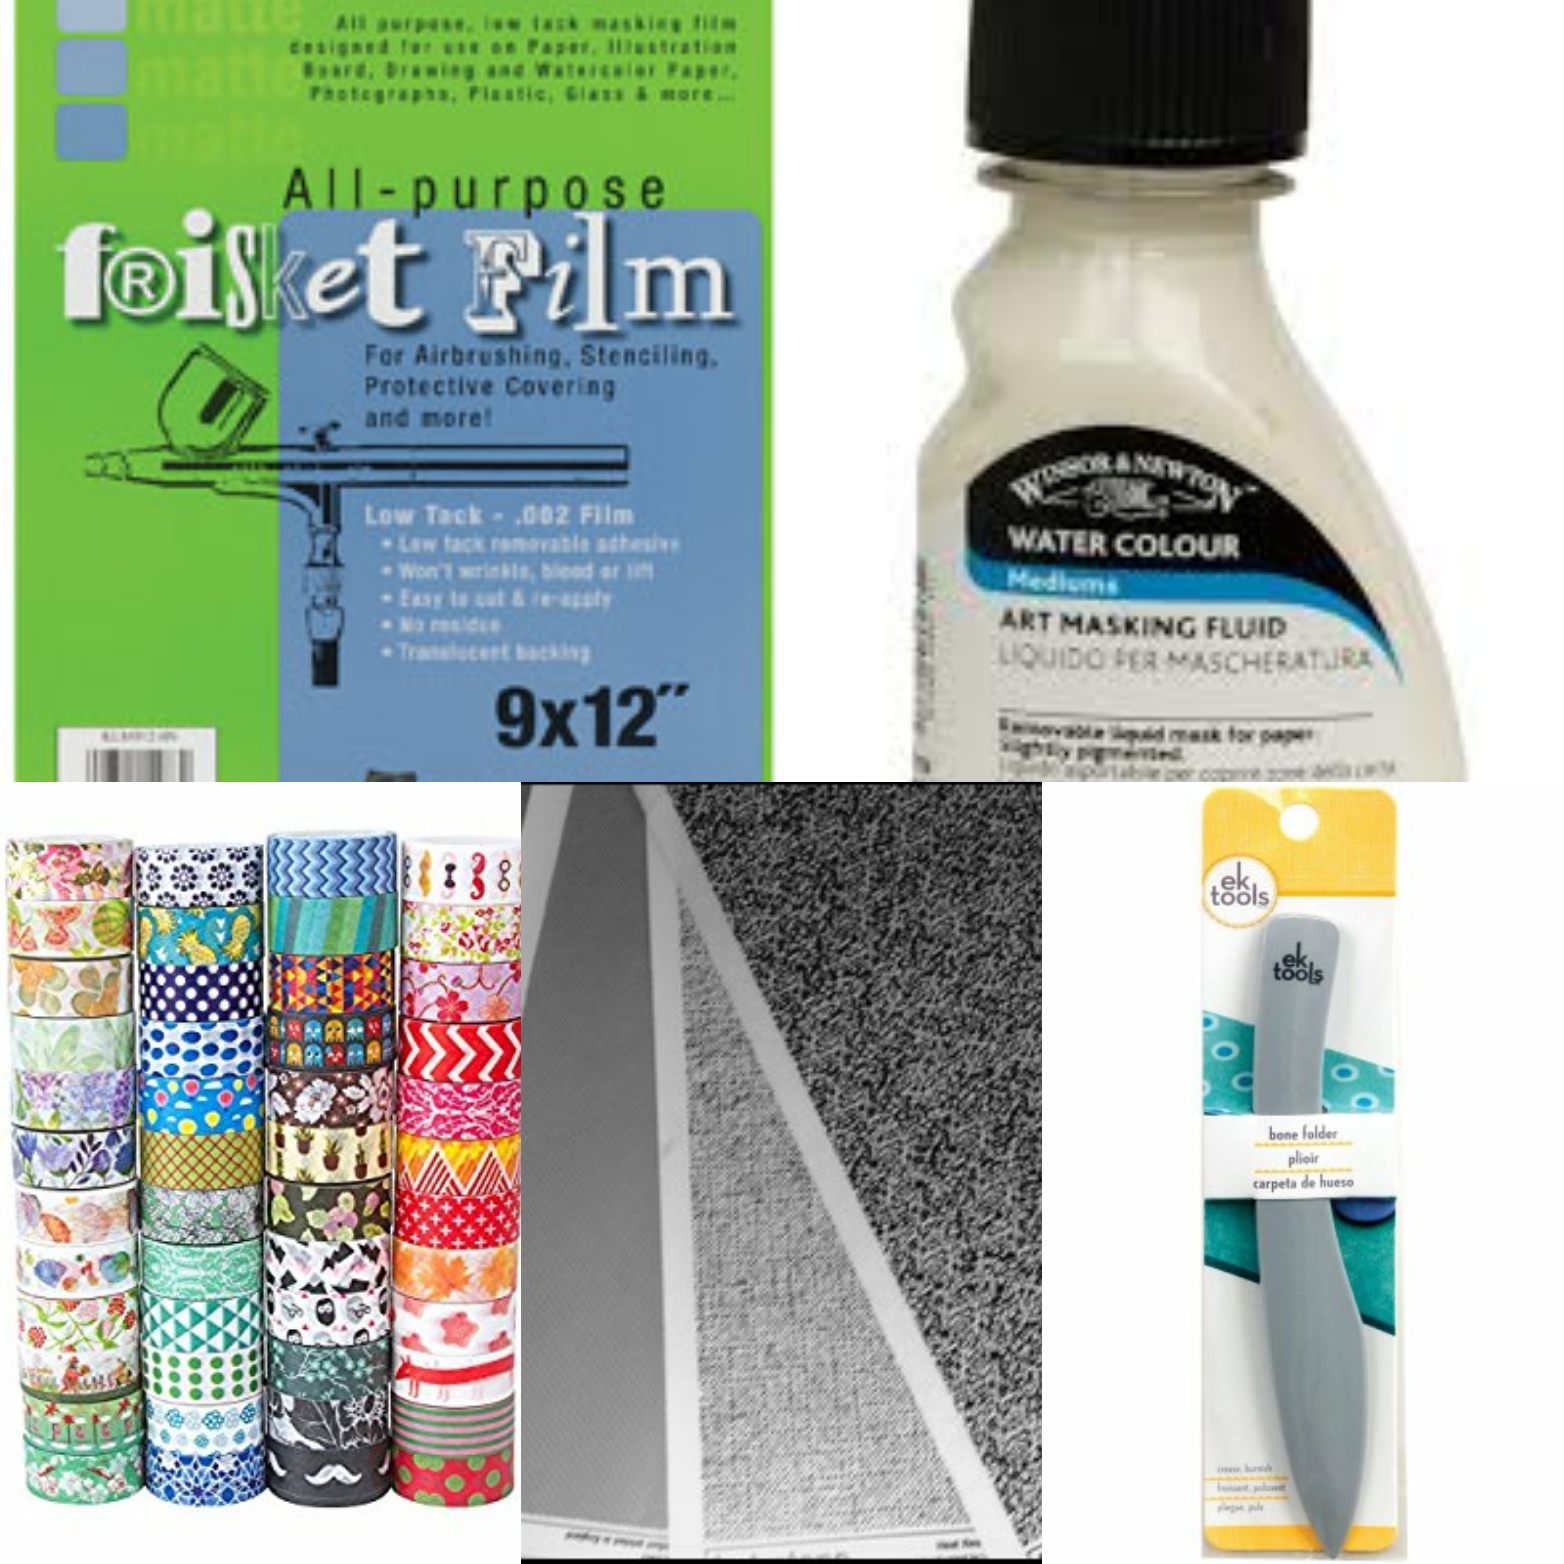 Top row: Grafix Masking Frisket Film, Winsor and Newton Masking Frisket
Bottom Row: Washi Tape, Japanese tone, bone folder
Tutorial: Masking Techniques for Copic Markers
Masking Frisket
Grafix All Purpose Low Tack Frisket Film
Tutorials:
Spray Inks and Lace Blick and Copic Marker Tutorial
Kara in the Flowers Marker Tutorial
Masking Fluid
I like Winsor and Newton's Masking Fluid
Synthetic Brush for application
Masking Tape
Washi Tape
Japanese Tone-
When it comes to markers and marker art, tone can be used like a frisket you can easily see! It's also great for adding monotone patterns on top of your marker art
Bone Folder
Useful for flatting tape, tone, or even making sure masking frisket film adheres properly
Masking Fluid
Masking Fluid Pick Up
Other Essentials
Exacto Blade
Thread Scissors
Tombow Removable Taperunner
Tombow Permanent Taperunner
Storage:
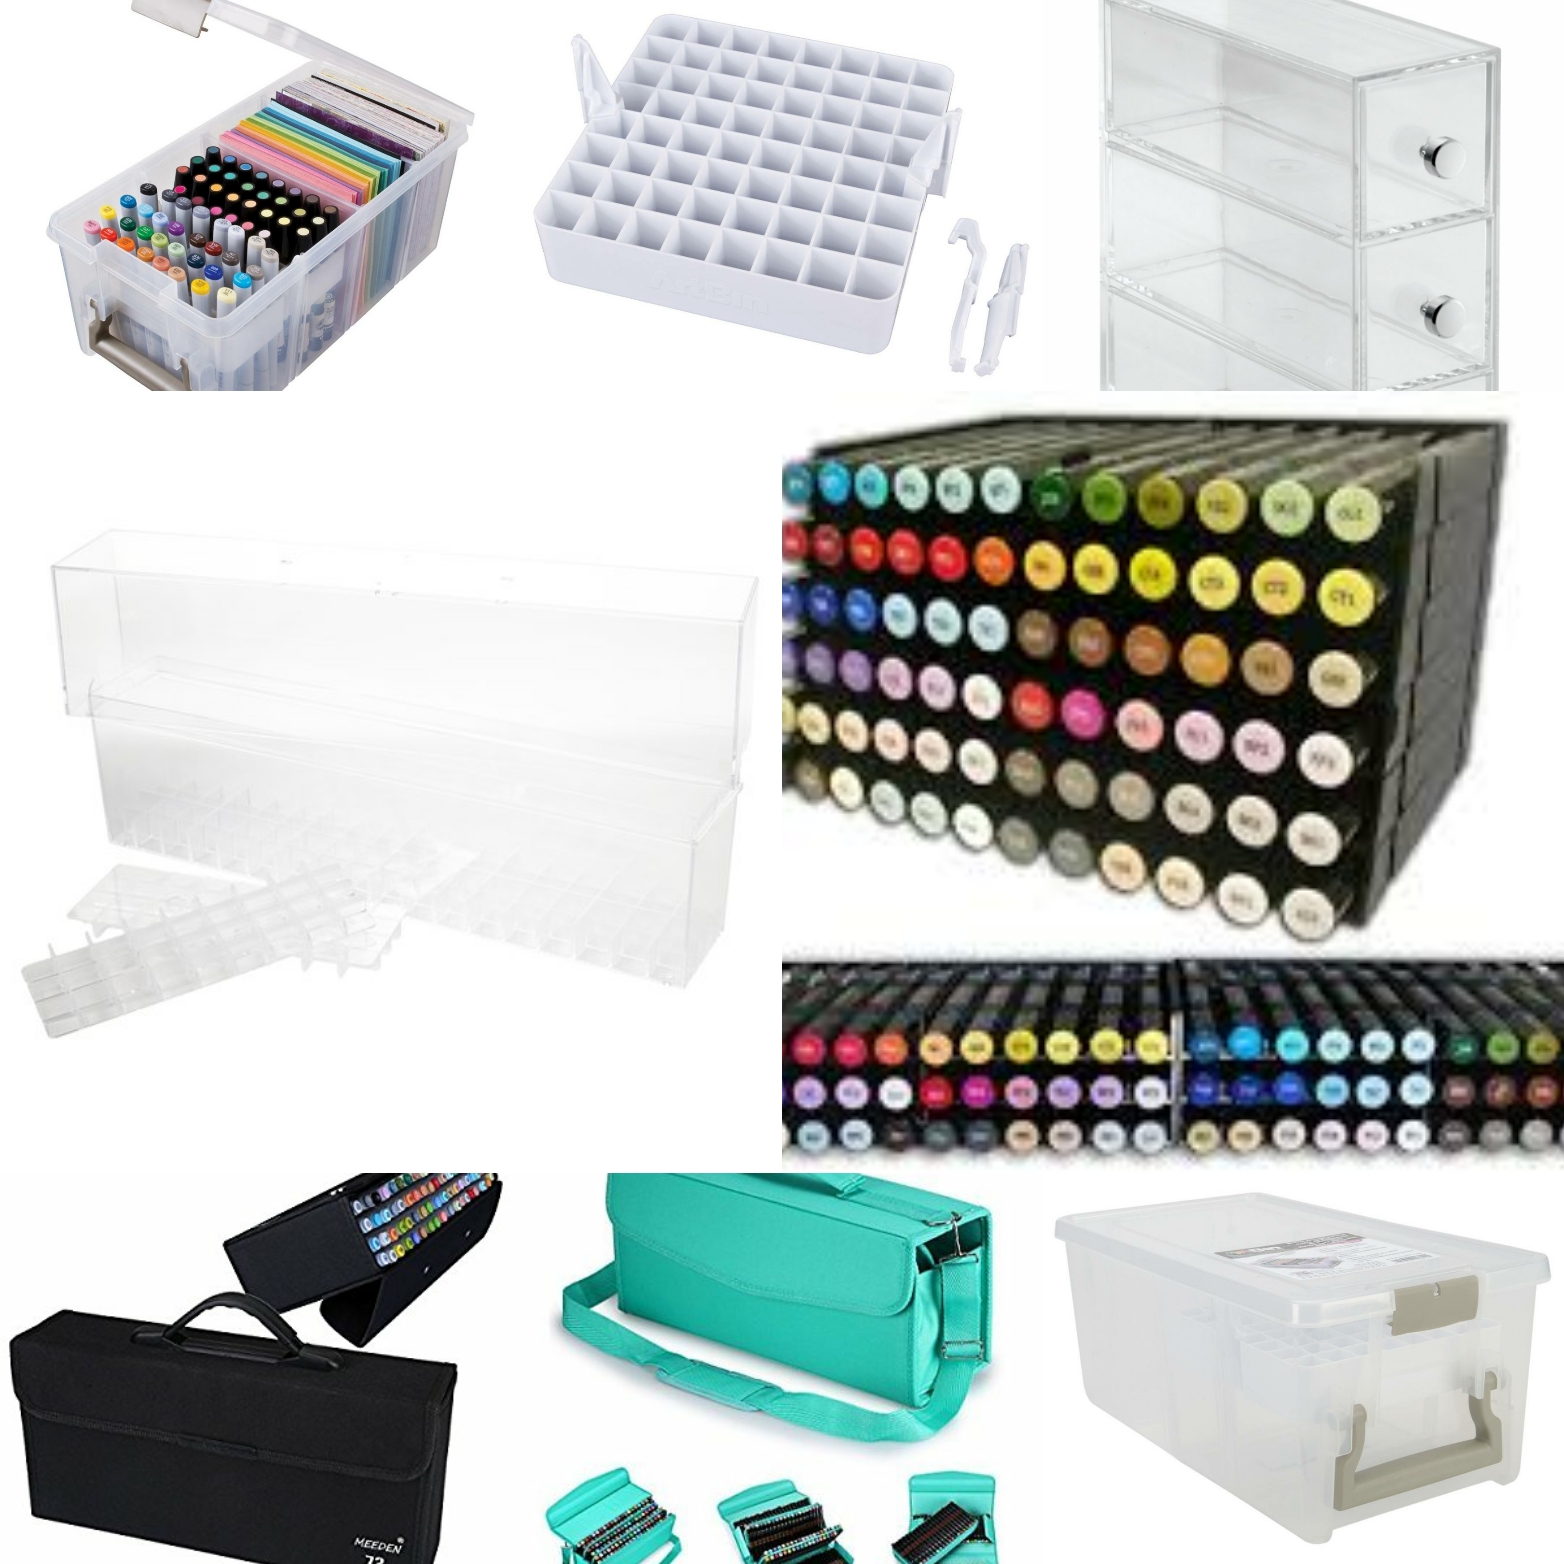 Top Row: Art Bin Marker Satchel, Marker Satchel insert, InterDesign 4 Draw Organizer
Middle Row: Copic 72 Marker Case, Spectrum Noir Marker Rack
Bottom Row: Meeden 72 Piece Marker Carrying Case, 120 Slot Marker Case, Artbin Marker Satchel
Artbin Marker Satchel
Marker Satchel Insert
InterDesign Clear 4 Drawer Organizer
This is almost identical to the system I use!
Marker/Paint/Ink Pad Organizer
Multipurpose Craft Storage Organizer
2-Drawer Craft Organizer Cube
InterDesign 3 Drawer Organizer
Copic Marker Sketch 72 Marker Case
Acrylic Marker Storage Rack
Kids Desk Pen Marker Organizer
Crafter's Companion Marker Storage Rack- 6 Racks
ArtBin Side Kick
Perfect for traveling with your markers. Sturdy and lockable.
Totes:
Storage Tote for Markers
Holds up to 130 Pens
Meeden 72 Piece Marker Carrying Case
80 Slot Heavy Duty Marker Case
120 Slot Marker Case
Chris W. 80 Slot Plastic Marker Carrying Case
Great to Have:
Toner Based Home Printer
Dell C1760NW
Great for printing lineart- both your own and digi stamps
Coloring Books and Packs:
Downloadable:
31 Days Under the Waves Coloring Pages
Favorite Fictional Femmes- Coloring Pages
Guardian: A Fantasy Armor Coloring Book
Vatican Assasins 5 Year Anniversary Coloring Page
The Coloring Book of (Scientifically Accurate) Dinosaurs
Physical:
The Coloring Book of (Scientifically Accurate) Dinosaurs
The Coloring Book of (Scientifically Accurate) Paleofauna
Everything Will Be Alright
Alcohol Marker Education:
Resources:
Copic Color Charts
Free:
Written:
Vanilla Arts
Nattosoup Studio Art and Process Blog
I Like Markers- owned by Marianne Walker, the author of many of the official Copic books
Copic Marker Tutorials
Color Me Copic
Distinctive Touches
The Creative Closet
Information about Copic Markers
Video:
Nattosoup Studio Youtube Channel
Draw with Jazza- Top 10 Tips for Using Copic Markers
Copic Marker Skin Tutorial- 9 Ways
Rambutan- How to Color Skin with Copic
Rambutan- How to Color Eyes with Copic
Paid:
Courses:
MarkerPainting.com
Books:
ElectricAbyss- The Art of Heidi Black- a tutorial book that covers more than just alcohol markers!
III Academy Mission 1
Great for beginner artists and colorists- features adorable art and tutorials for drawing and coloring
Copic Coloring Guide
Level 2: Nature
Level 3
Fine Details
Copic Maniac 1
German Marker Design Book
CF: Coloring Faces and Hair with Copic Markers
Coloring Flowers with Copic Markers
Intro to Coloring with Copic Markers
Please consider donating to this blog or purchasing from Natto-shop (http://nattosoup.com/shop) if you want me to continue publishing quality content. All materials tested were purchased from my own pocket. Keep on Truckin' Nattosoup is not under any sponsorship.

December 4, 2017
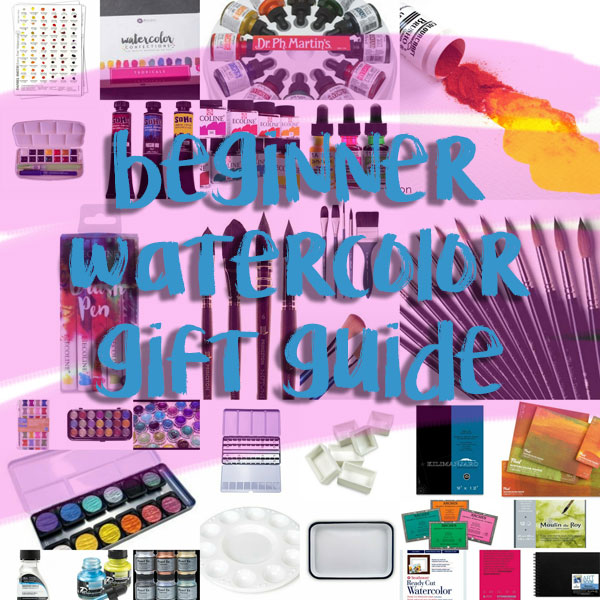
Watercolor Artist Gift Guide- Beginner
Recently I wrote a gift guide for young artists interested in watercolor. Over the years, I've gotten so many questions about watercolor supplies for beginning artists, and while I've answered most of those, I don't think I've ever really delved into it here on the blog.
Whether for yourself, a friend, or a loved one this holiday season, I hope my art supply gift guides help you find products that will inspire and illuminate the year to come.
I want to encourage you to buy the best you can afford at the time, especially if you think watercolor is a media you're going to pursue as part of your commercial art or if you want your illustrations to stand the test of time. Cheap watercolors often utilize dyes, optical brighteners, or glycerin, which all shorten the lifespan of your art, and may make the media more difficult to use. Both on this blog and on my Youtube channel, I regularly review inexpensive and cheap art supplies, so if you have any doubts, double check against my archives. For a personalized recommendation, feel free to email me.
More information on paints
More information on papers
More information on brushes
I go over basic terms and vocabulary briefly in my Watercolor Gift Guide for Young Artists (9-13), and in great detail in Watercolor Basics: Watercolor Terms You Should Know.
You can find an overview of the basic materials you'll need to get started (or to provide someone with a fresh start) in my Materials You'll Need to Get Started post.
I know most beginner watercolorists start their journey at Michael's. Later in December, I'm going to do a specialized watercolor artist tour of Michaels, but for now, please enjoy this general artist Michaels Tour.
Paints:
A warning- super cheap watercolors (like Crayola) contain dye, which isn't lightfast, and glycerin, which yellows over time, making those doubly not archival. Please do not use these for commission or paid work.
Cheap watercolors such as Artist Loft make heavy use of optical brighteners for color intensity. These layer poorly, turn muddy quickly, and will flake off your paper's surface.
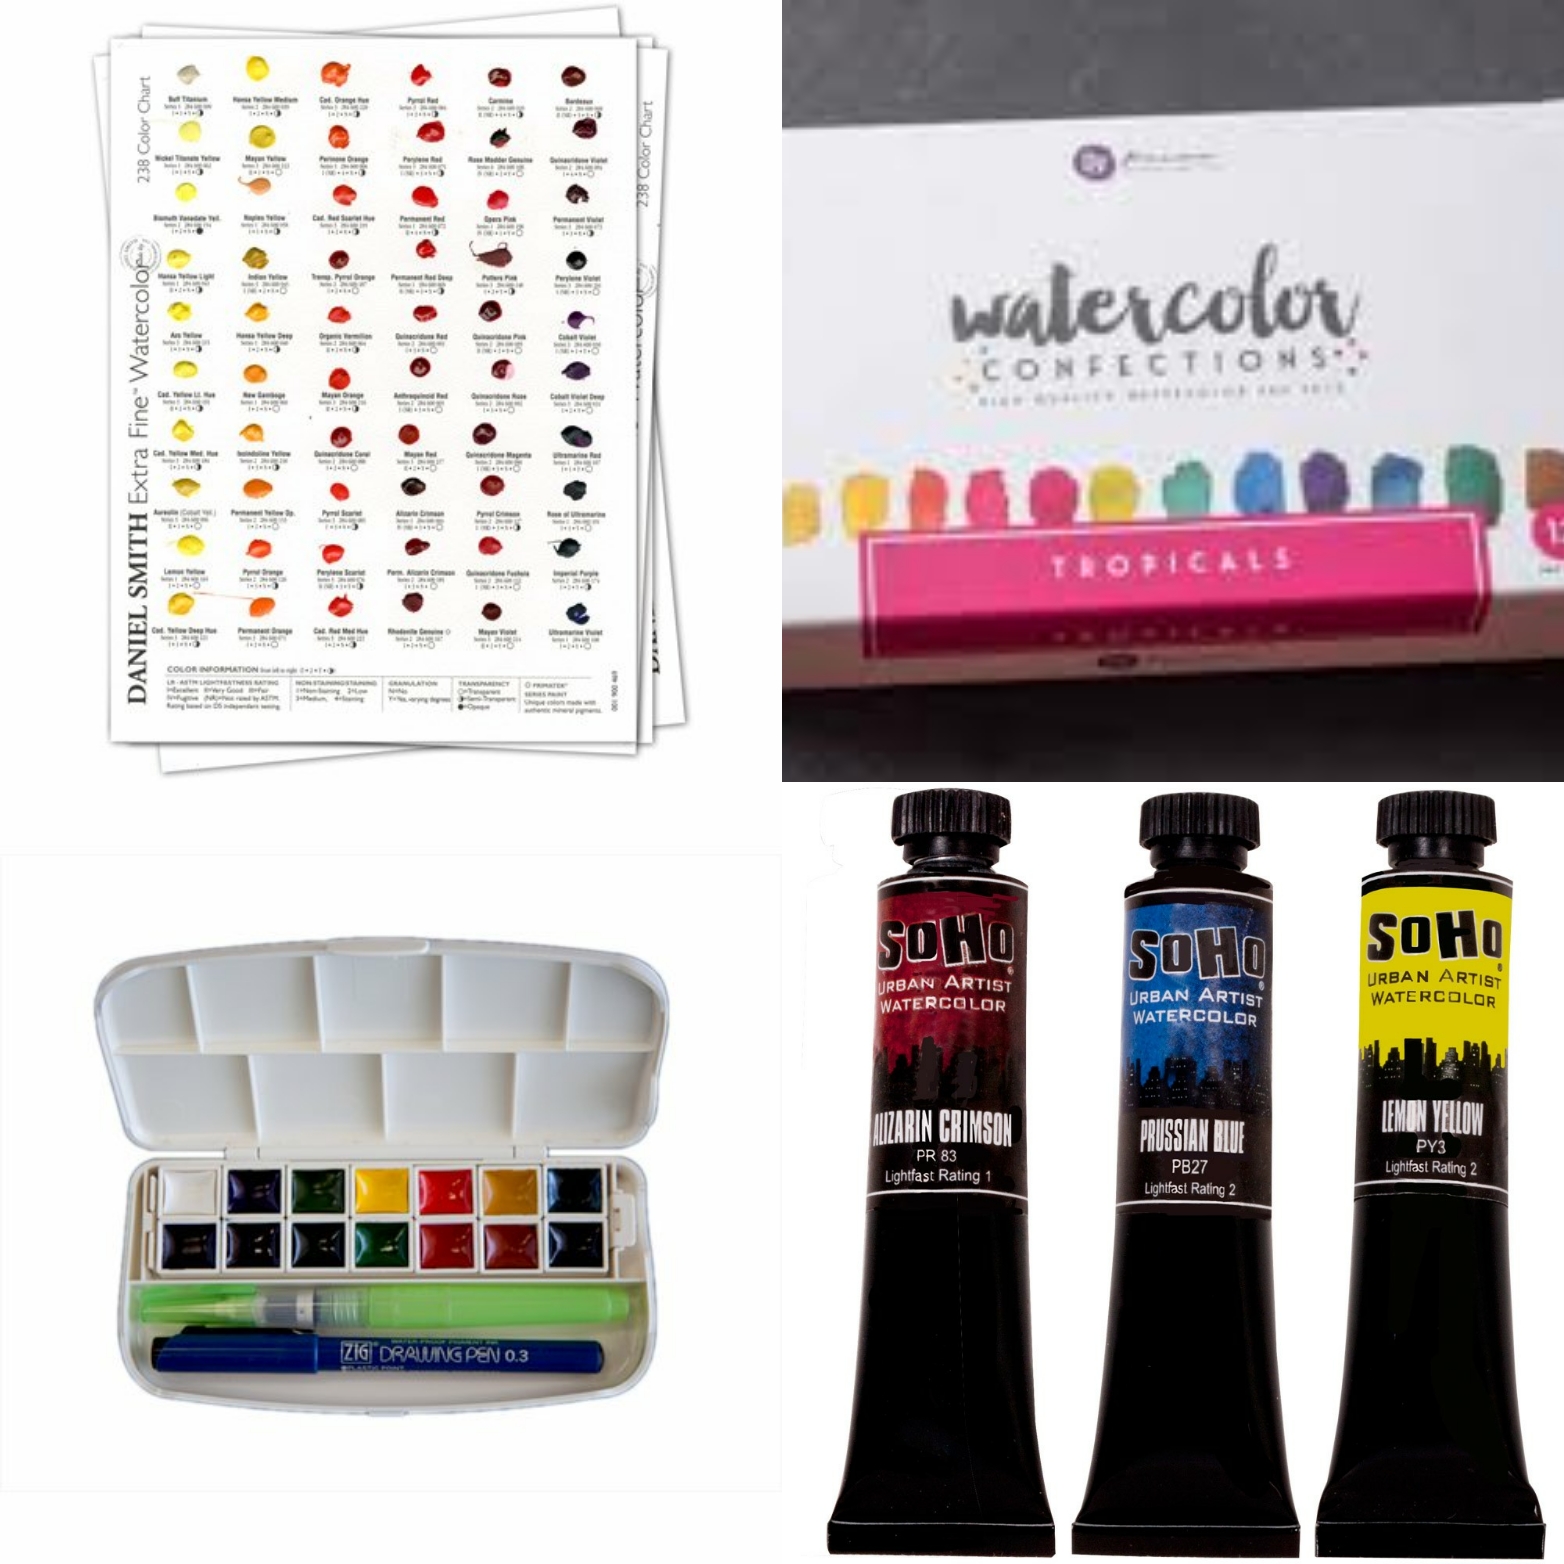 Top Row: Daniel Smith Dot Card, Prima Marketing Watercolor Confections in Tropicals
Bottom Row: Kuretake 12 Color set, SoHo watercolors
Most Bang for Your Buck:
Great for stocking stuffers!
Daniel Smith Dot Cards
Cheap Joes American Journey Watercolor Paint Samples
Joe's Sample Color Set of 4
Top Ten Sample Color Set
Quinacridone Sample Color Set
Joe's Essentials Sample Color Set of 12
Joe's Big Sample Set- 24 Colors
Kuretake Brush Pen Pocket Set
Inexpensive:
Pans:
Sakura Koi Field Watercolor Set
Review: Sakura Koi Field Set Mini Review
Tutorial/Field Test:
Prima Marketing Watercolor Confections Tropicals
Review:
Tutorial:
Prima makes multiple palette collections, but Tropicals is my favorite selection of the bunch. Tropicals features a very usable selection of colors. The prices for Prima Marketing Watercolor Confections vary on Amazon, so don't pay more than $20 for the paints and palette.
Lukas Aquarelle
This 12 color sketcher's set is perfect for travel, or artists who are just starting out with watercolor. The colors are saturated and quick to activate, making it great for on the go painting.
Kuretake Travel Watercolor Set
Kuretake 14 Color Set
Not just for travel! Compact sets like these are perfect for beginner watercolor artists, and provide a wonderful opportunity to learn color theory and color mixing.
Tubes:
SoHo Watercolors
Although I don't have a review prepared for these tube watercolors, I've used them in my watercolors and on my 7" Kara comic pages for years now. There have been claims that these are not fully lightfast, and while I don't have the machinery to test whether these watercolors will last 100 years, I have done a bit of lightfast testing within my grasp (swatches in a sunny window, left for about a year), and find them quite suitable for my needs. Some colors perform better than others, the only one I would outright avoid is Ultramarine Blue. Great if you want bright, intense, synthetic color.
Recommended Colors (these are based on my preferences)
Urban Blue Violet
Transparent Red
Indian Yellow
Permanent Mauve
Opera Rose
Blick Watercolors
In general, Blick's store brand produces high quality artist materials at a lower price. The Blick watercolors are excellent beginner tube watercolors, and can be squeezed into pans or a palette and reconstituted with water.
Cheap Joes Amerian Journey Watercolors
The storebrand for Cheap Joe's. I don't have much experience with these, but other watercolorists say they perform well.
Grumbacher Academy 10 Color Set
Cotman 12 Tube Set
Although I've warned artists off Cotman pan watercolors in the past, I find their tube watercolors to be quite acceptable, and very affordable. Blick sells Cotman watercolors openstock.
Nice:
 Top: Yarka Watercolors
Bottom: DiVinci whole pans, Daniel Smith Essential 6
Pans:
Blick Exclusive Winsor and Newton Half Pan Set with Palette, 12 Pans
Although I've never reviewed Winsor and Newton Professional Artist Watercolors as a stand alone product, I regularly use the semi moist half pans to paint illustrations and 7" Kara pages. While Winsor and Newton isn't for everyone, I've been satisfied with their performance over the years.
Winsor and Newton half pan watercolors are available open stock, so as you run out of colors, you can easily replace them.
Yarka St Petersburg Watercolors, 24 pans
When I first begain painting 7" Kara, I used a 24 set of Winsor and Newton watercolors, and a 24 set of Yarka St Petersburg watercolors. My Yarkas are still stashed away somewhere.
Da Vinci Pan Mixing Set of 12
Da Vinci were recommended by Kabocha, who says they perform as well as Daniel Smith.
Tubes:
Daniel Smith 6 Essential Colors
Review:
Tutorial:
Mijello Mission Gold Watercolors, 36 Color set with palette
I mention this in the Young Artist gift guide, but this is a perfect set to get started with, at a phenomenal price. Mijello makes a few grades
Holbein 5ml Watercolors, 24 color set
Holbein is an excellent brand, and while I don't have this particular set, I have many tubes of Holbein's Irodori line. These paints perform well, and reactivate from pans well.
Da Vinci- Tube Mixing Set
A recommendation from Kabocha! She says they're about on par with Daniel Smith watercolors, so I'll have to get my hands on a few tubes to try out.
Pre-Assembled Giftsets:
Inexpensive:
Kuretake Pocket Set
Includes waterbrushes and water bottle, all in a compact, pocket set! A perfect micro introduction to watercolor- just add a block of watercolor paper!
Kuretake Compact Box Set
Includes waterbrushes, palette, etegami postcards, and more! Everything you need to begin etegami watercolor.
Etegami tutorial
Etegami Demonstration Timelapse
Pricey:
Winsor and Newton Professional Water Color Compact Set
This was my first serious set, and the basis for my current palette!
Winsor and Newton Artist's Water Colour Half Pan Bamboo Box Set
Includes paints, paper, and a couple brushes
What about Gansai Tambi?
Gansai Tambi watercolors are highly praised in the craft world, and not without good reason. Inexpensive, huge pans of paint, Gansai Tambi seem like a perfect solution to expensive watercolor palettes. Keep in mind that gansai tambi watercolors do not handle like Western watercolors, and utilize a different type of binder. The end result is glossy, saturated color- great if you work with a minimum of layers, or want intense color immediately.
Gansai Tambi watercolors are frequently used for etegami postcards.
Kuretake Gansi Tambi 12 Color Painting Set
Gansai Tambi 36 Color Set
Liquid Watercolors:
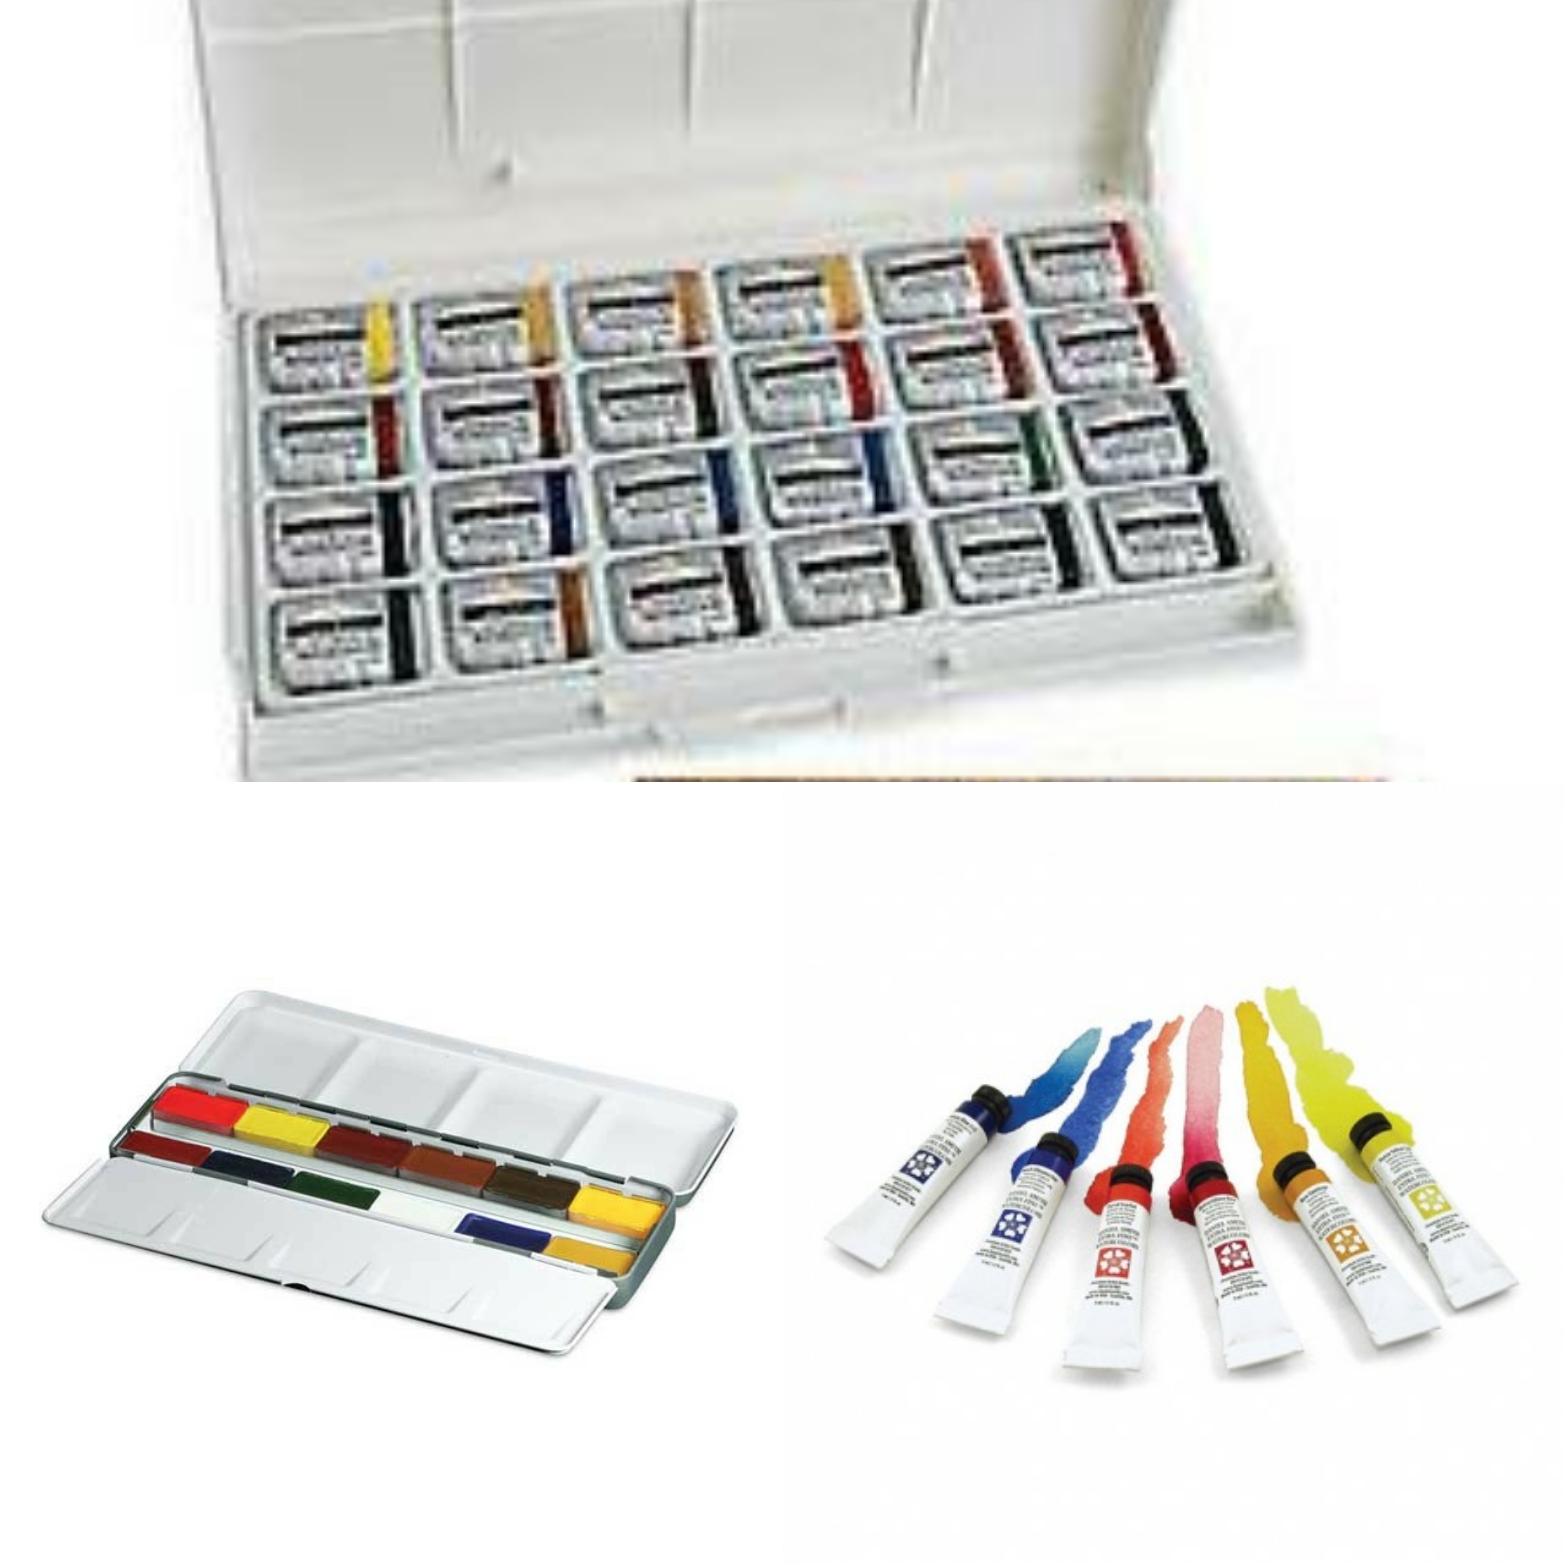
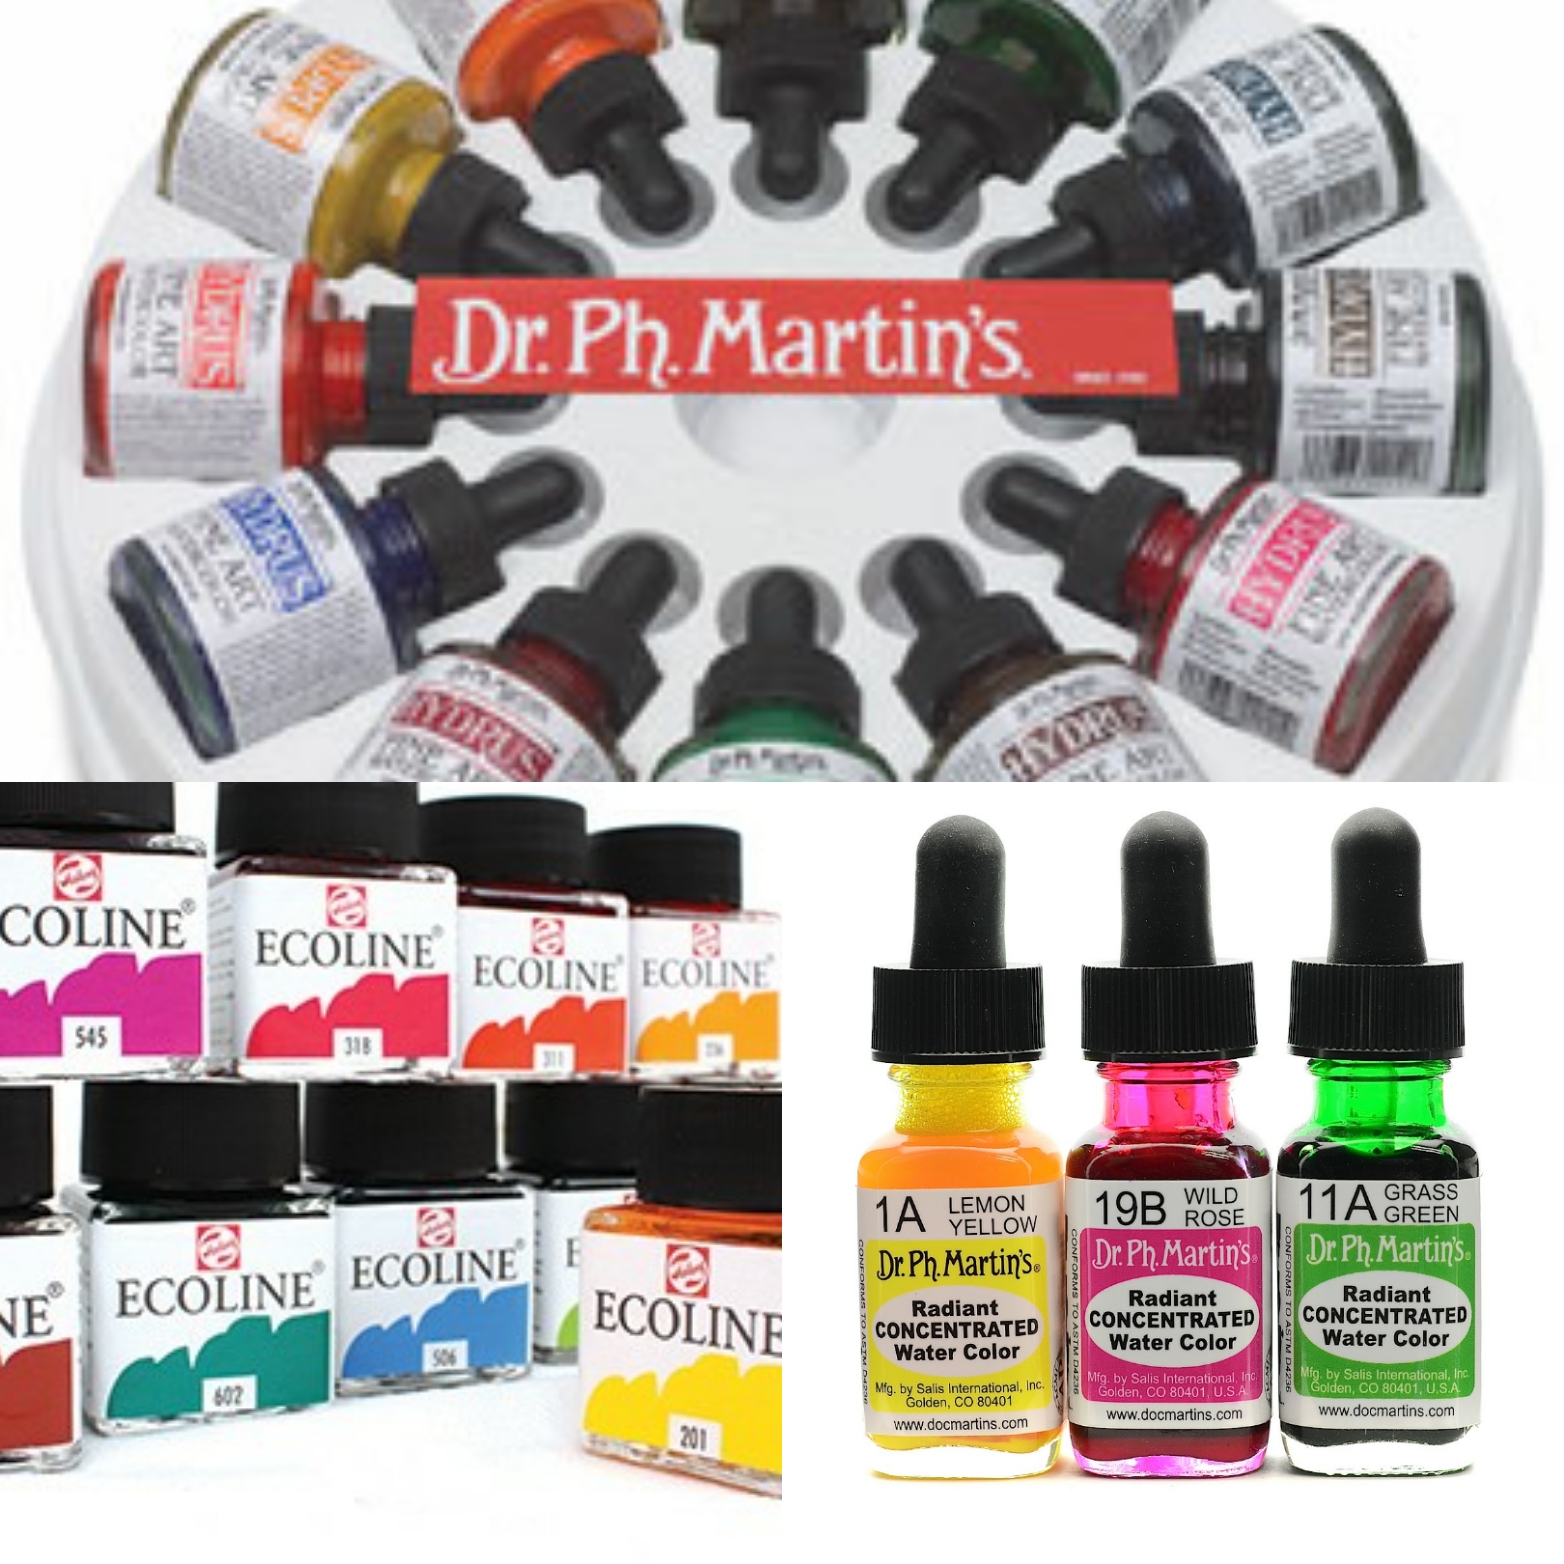 Top: Dr PH Martin's Hydrus Watercolors
Bottom: Ecoline Liquid Watercolors, Dr PH Martin's Concentrated Radiant Watercolor
Hydrus
Pigment Based liquid watercolor. Comes with an eyedropper
Swatch Video:
Royal Talens Ecoline
Dye Based. Can be used to refill Ecoline watercolor markers. Does not come with eyedropper.
Review:
Tutorial:
PH Martin's Radiant Concentrated Watercolor
Dye Based. Comes with an eyedropper.
Swatch Video:
AVOID:
Daler and Rowney Simply Watercolor Tubes
Review
Daler and Rowney Cake Watercolor Sets
Review
Artist Loft Watercolor Sets
Review
Field Test
Just about everything Crayola, at least when it comes to watercolor.
Fun Stuff:
 From top to bottom, in rows:
Brusho, Winsor and Newton Masking Fluid
Winsor and Newton Watercolor Markers, Ecoline Watercolor Markers
Spectrum Aqua watercolor markers, Zig Clean Color Real Brush
Derwent Inktense, Supracolor II
Brusho
Brusho is dye based, powdered crystal watercolor that explodes once it hits water. I love using Brusho, but keep in mind that since it's dye based, it is not lightfast or archival.
Tutorials:
Lime Brusho Timelapse
Brusho Background Mini Tutorial
Using Brusho with Alcohol Markers
Great Brusho Accessories:
Small Funnels
Salt Shakers
Metallic and Pearlescent Watercolors:
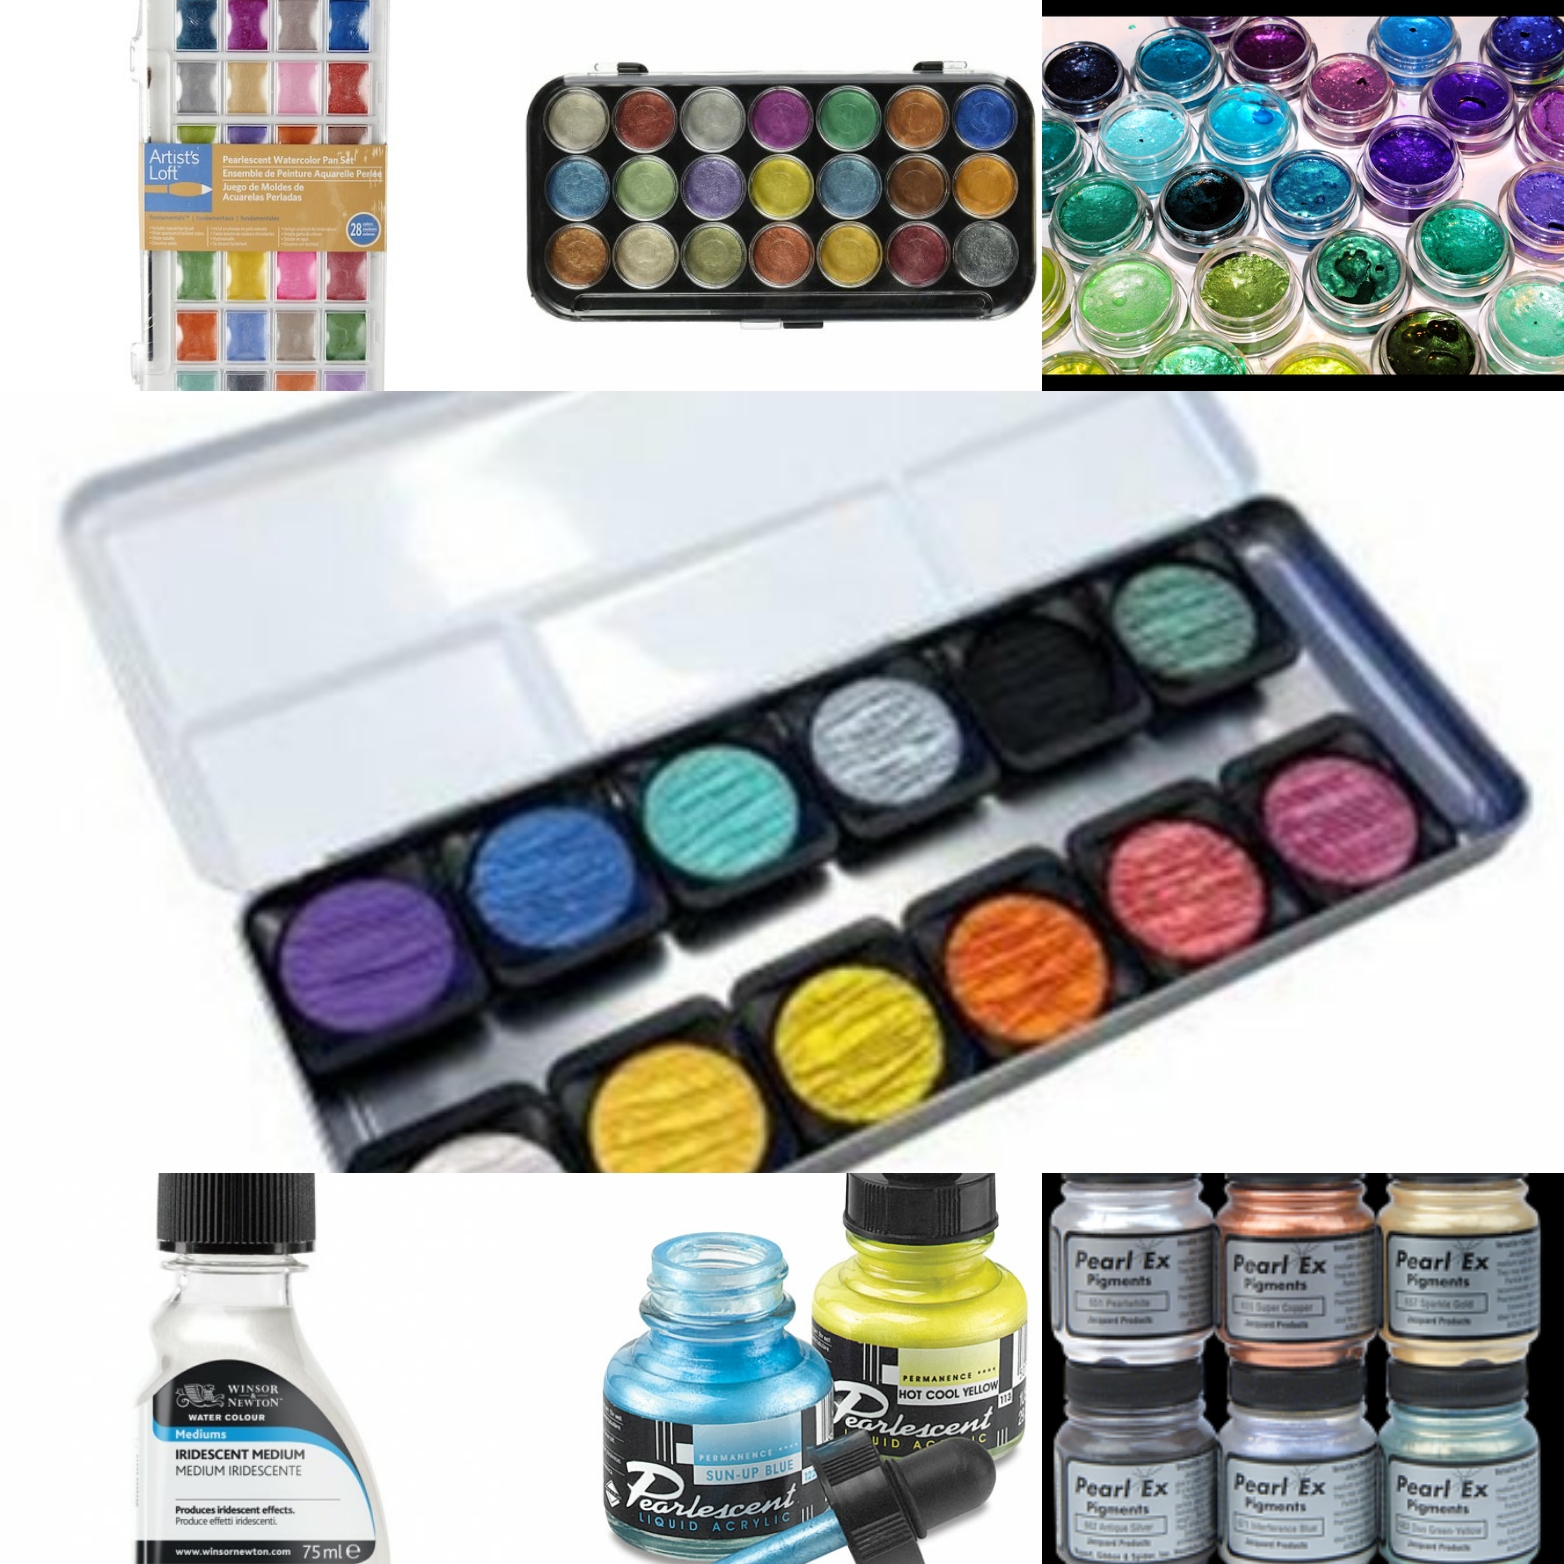 Top Row: Artist Loft Pearlescent Watercolors, Yasutomo Pearlescent Watercolors, Twinkling H20's
Finetec Pearlescent
Winsor and Newton Iridescent Medium, FW Pearlescent Acrylc Ink, Pearl EX powder
Cheap:
Artist Loft Pearlescent Watercolors
Yasutomo Pearlescent Watercolors
Twinkling H20's Metallic Watercolors
These have quite a bit of color to them, and are great for glazing over existing color if you want a little shimmer.
Nice:
Finetec Metallic or Pearlescent Watercolors
Or buy them openstock!
I love these, and have a few different sets- the pearlesents, the iridescents, and a few of the metallics. Great coverage and loads of sparkle without appearing glittery.
Winsor and Newton Iridescent Medium
This can be added to your watercolor mixes for custom iridescence.
Not Watercolor, But Great:
FW Pearlescent Acrylic Inks
I love using these acrylic inks to ink watercolor pieces, or for splatter effects. Available in brilliant colors including neons and interference colors.
Jacquard Pearl EX
This can be mixed in with your existing watercolor, or add a little water and paint with them.
Watercolor Markers:
Pigment Based Watercolor Markers:
Winsor and Newton Watercolor Markers
Review
Tutorial:
Watercolor Marker Workshop
Winsor and Newton Watercolor Marker Travel Set
Includes paper, brushes, and more, all in a carrying case.
Dye Based Watercolor Markers:
Dye-based watercolor markers will be more water reactive than pigment based markers, and are very likely to reactivate when water (or further layers) are introduced.
Ecoline Watercolor Markers
Review
Tutorial:
Step by Step Succulent with Ecoline
Spectrum Aqua Watercolor Markers
Review
Zig Clean Color Real Brush Markers
Review
Tutorial:
Axolotl Illustration Tutorial
These might be my favorite of the bunch- they're definitely the most versatile. Used on their own as waterbased markers or with water for watercolor effects, they're inexpensive, available in a huge range of colors, and the real brush is gentle on paper.
Watercolor Pencils:
I use both of these brands frequently on 7" Kara comig pages. They're some of the best water reactive pencils I've used. Don't mistake Derwent Inktense for Derwent watercolor pencils- Inktense pencils are indelible once wet, but deliver loads of vibrant color.
Derwent Inktense
Supracolor II
Masking Fluid:
Winsor and Newton Masking Fluid
This is the brand I use and have had best results with.
Pebeo Masking Fluid
This is the brand Kabocha uses and has had the best results with.
Masking Fluid Accessories:
Synthetic watercolor brushes
Brush Soap
Masking Fluid Pick Up
Palettes:
 Top Row: Empty Metal Palette, Half and Whole Pans
Round Welled Palette, Butcher's Tray
With paints, especially pick and mix sets, you need palettes!
Empty Metal Palettes
Empty Half and Whole Pans
Mixing Palettes:
10 Welled Round Palettes
Flower Palette
Butcher's Tray
Brushes:
When buying brushes, I recommend you buy your larger, more expensive brushes in synthetics, which are very affordable. From size 8 up, synthetics are a great way to have a variety of brush sizes without breaking the bank.
Synthetic:
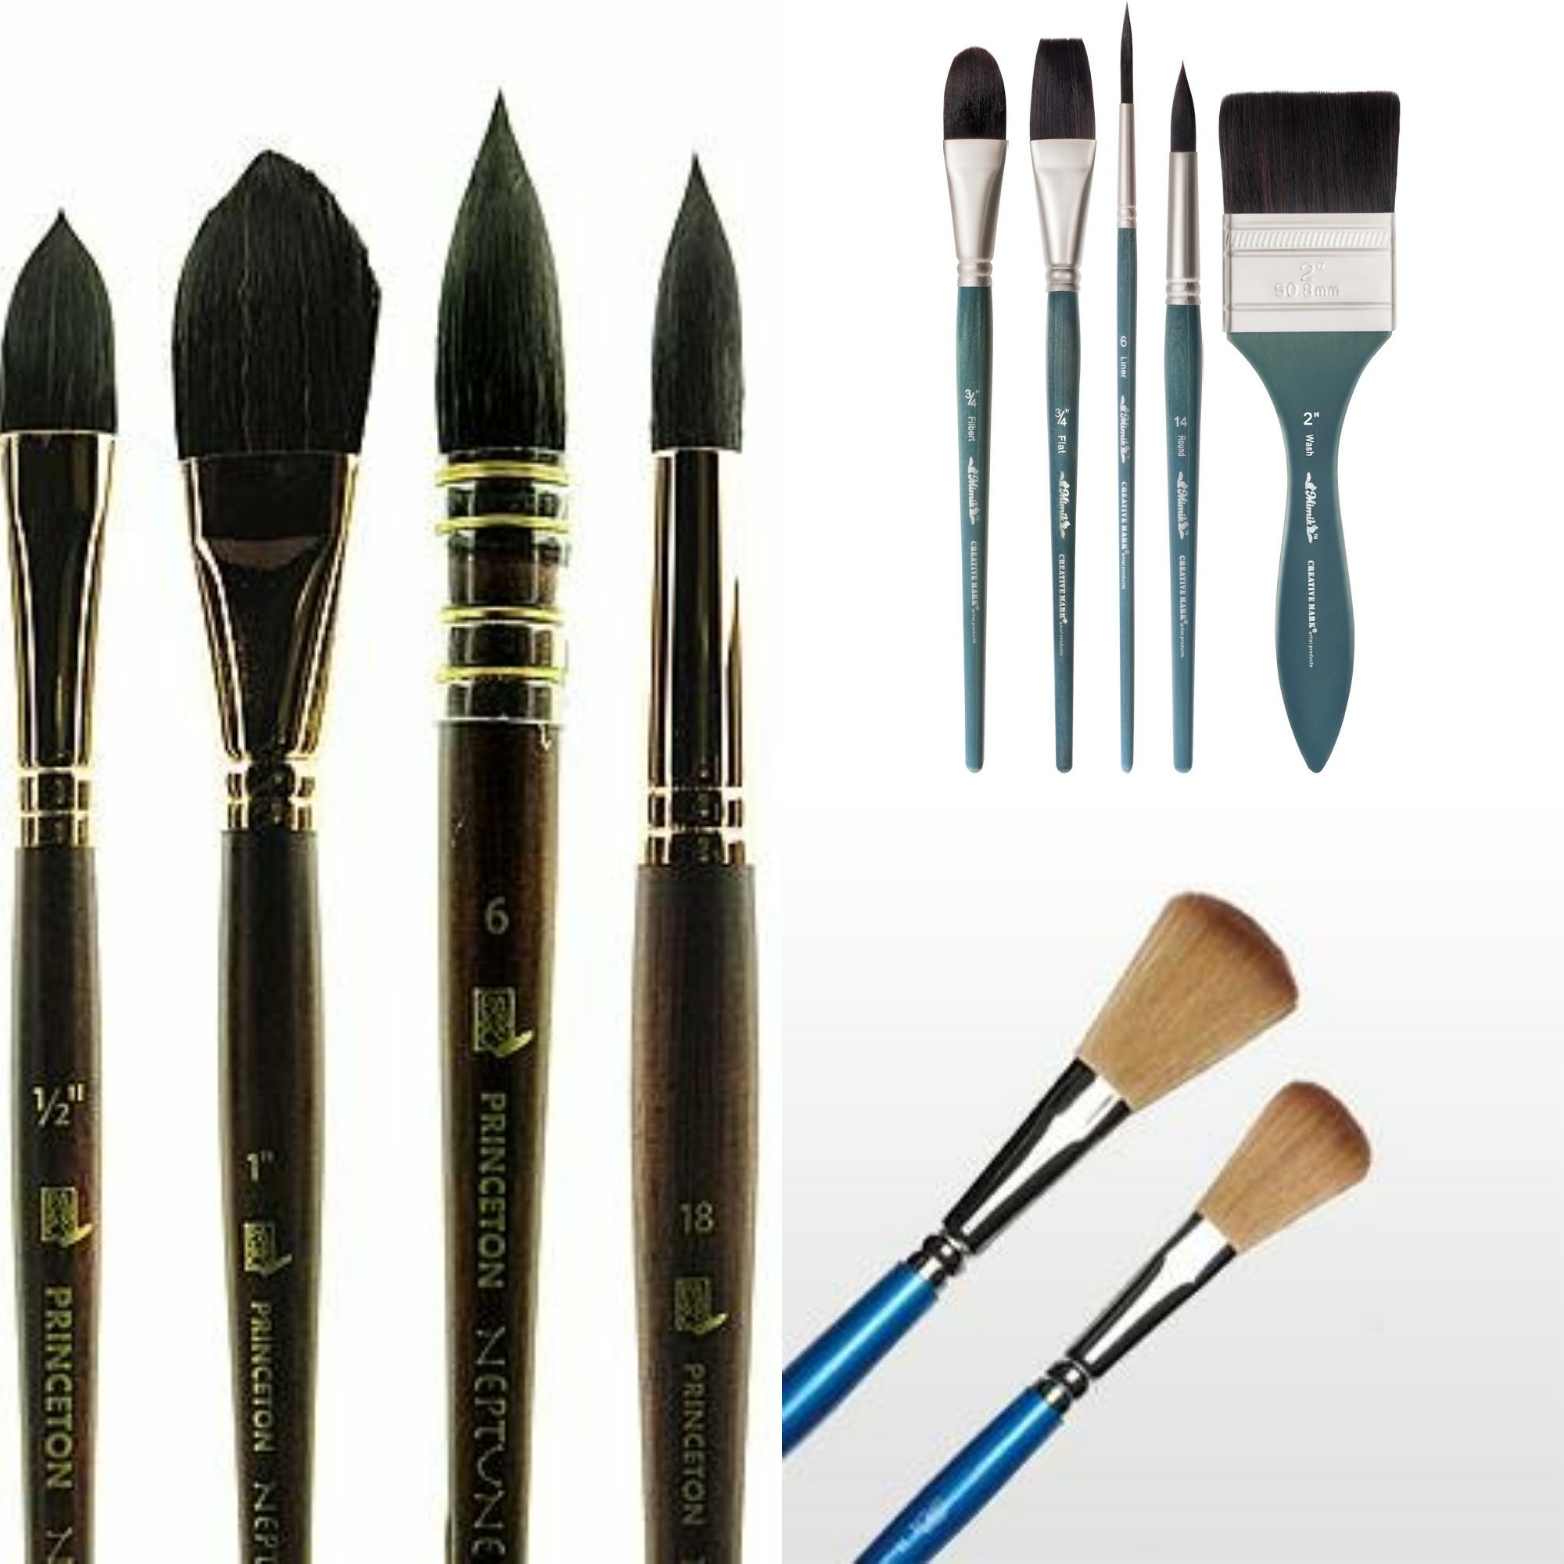 Princeton Neptune Brushes
Mimik watercolor brushes
Cotman Mops
Recommended Brushes:
Size 4 Round
Size 10 Round
Size 2 Round (for details)
Size 0 Round (for the finest details)
3/4" Flat (for washes)
1/2" Filbert
16mm 5/8 Mop (for washes)
Cotman Watercolor Brushes:
Mops
Flats
Filberts
Mimik Synthetic Brushes
Round 4
Round 6
Round 10
AND OR
Neptune
Round 4
Round 6
Round 10
Natural:
Squirrel:
Squirrel is an excellent natural fiber that has a large belly (useful for holding water and paint without it dripping all over your paper), but not quite as much snap as synthetics or Kolinsky. Squirrel is great for midsized brushes- 6, 8.
Blick Master Pure Squirrel Round Brush
Recommended Sizes:
Round 4
Round 6
Kolinsky Sable:
 Top to bottom: Creative Mark Rhapsody, Princeton 7050, Winsor Newton Series 7
Kolinsky sable is considered to be the highest quality material for watercolor brushes, and it's well worth investing in a few carefully chosen brushes. I find Kolinsky sable to be excellent for fine details- as the fibers hold lots of water and the brush is capable of snap. Kolinsky can be quite expensive, so I recommend using it for your smaller, detail brushes.
Creative Mark Rhapsody:
Round 2
Round 4
These are my mainstays- affordable, accessible, and perform quite well if properly cared for.
OR
Princeton 7050 Kolinsky Sable
Round 3
Round 4
OR
Escoda Reserva
Round 2
Round 4
And the most expensive last-
Winsor and Newton Series 7
Round 2
Papers:
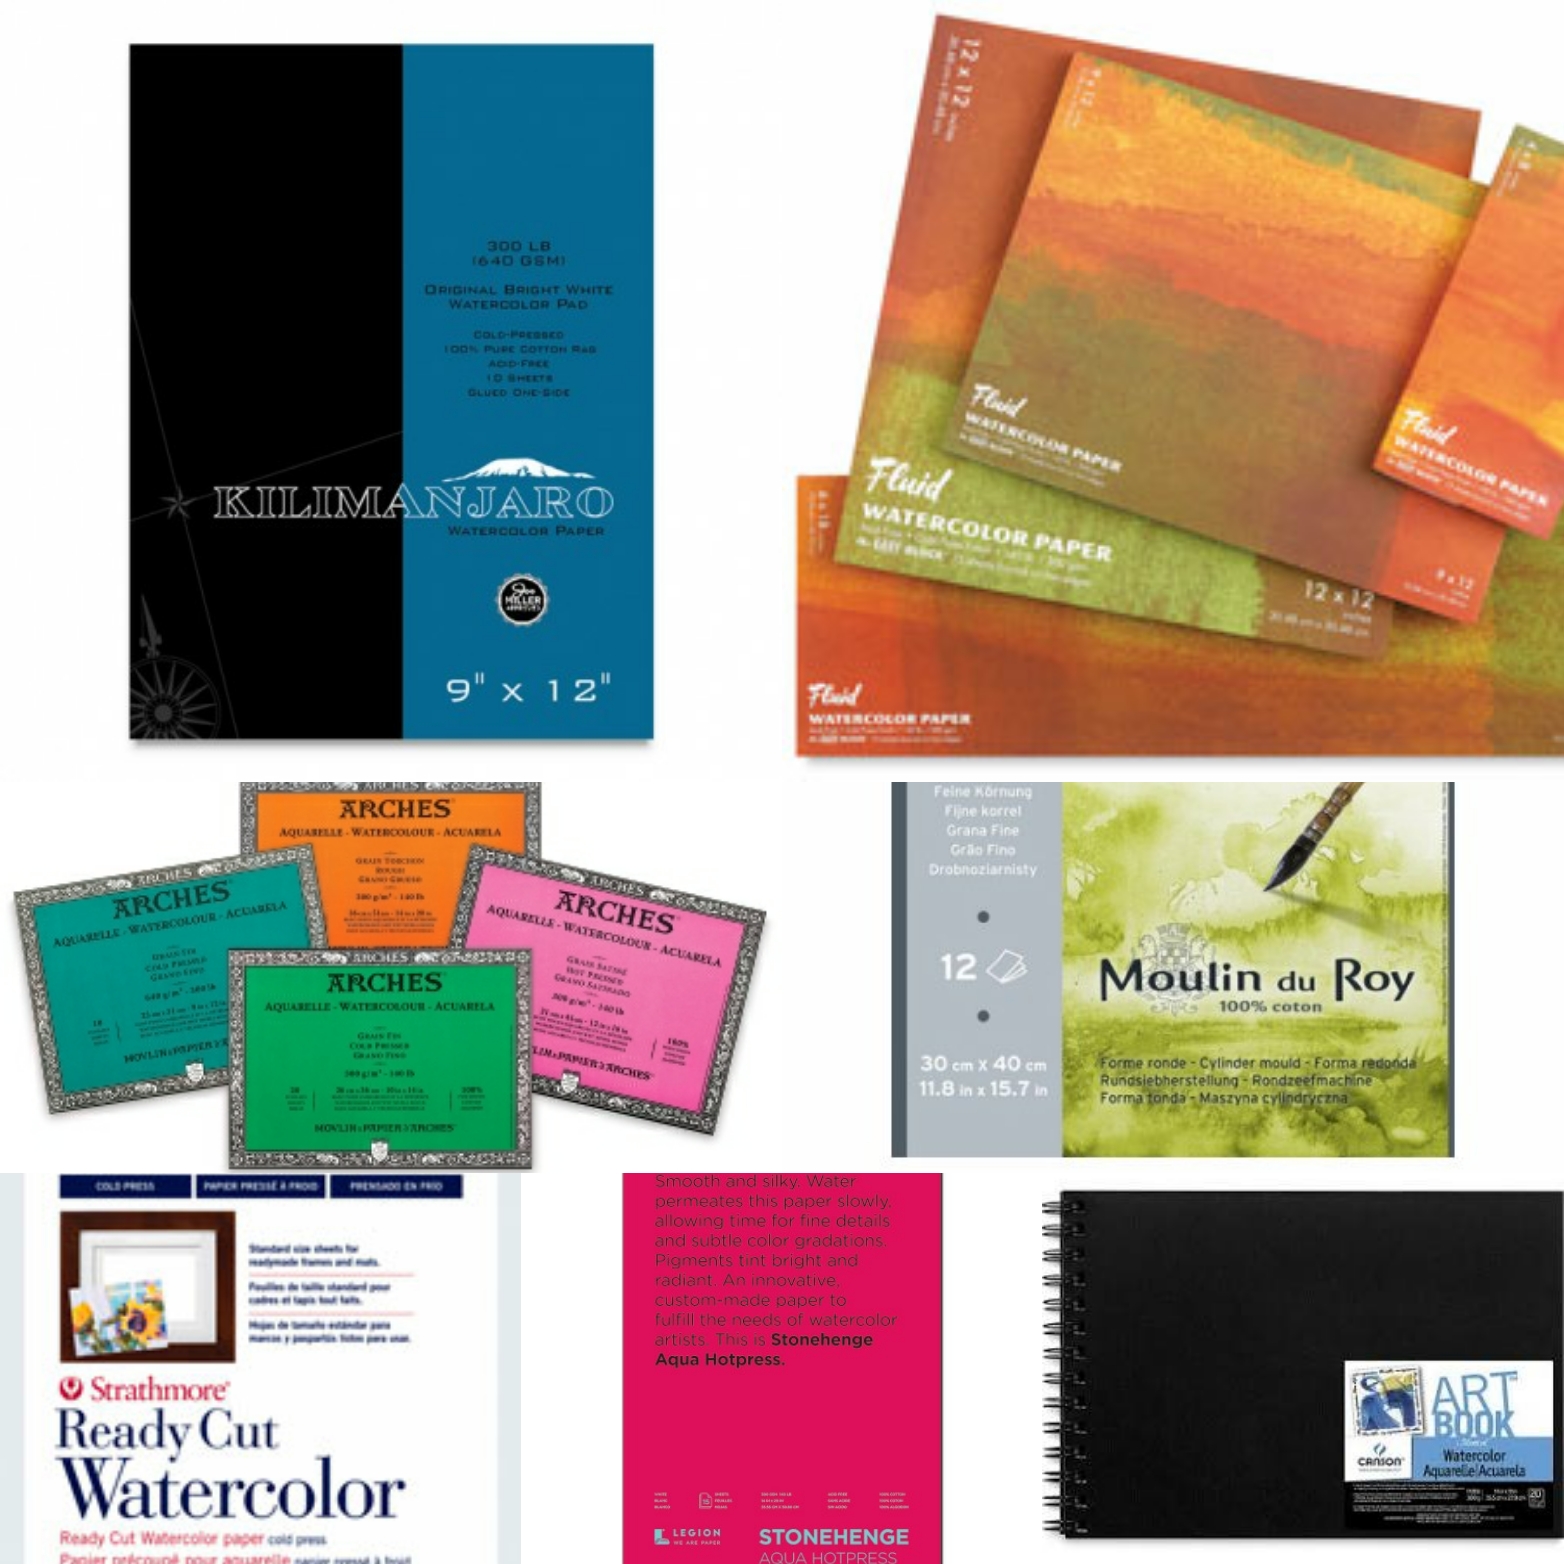 Top Row: Kilimanjaro Cold Press, Fluid EZ Block
Middle Rown: Arches Blocks, Canson Moulin du Roy
Bottom Row: Stratmore Ready Cut Watercolor Paper, Stonehenge Aqua Hotpress, Canson Montval Field Book
Weights:
140lb
Decently heavyweight paper that shouldn't buckle or cockle when stretched.
300lb
Heavyweight paper (almost a board) that generally does not need to be stretched.
Pad Bound:
Can be run through an inkjet printer at home to print bluelines
Block Bound:
Doesn't need to be stretched
Cold Press, Pads:
Cellulose Based:
Fluid EZ Block
Canson Montval
Canson Watercolor XL
Cotton Rag:
Cheap Joes Kilimanjaro
I love this paper!
Canson Moulin du Roy
Arches
140lb
300lb
Cold Press, Blocks:
Arches:
140lb
300lb
Fluid 100
Mixed Paper Packs:
Cheap Joe's Watercolor Sample Packs
Hot Press:
Cellulose:
Strathmore Hotpress
Union Square Hot Press
A textured hotpress that isn't bad to work on
Cotton Rag:
Fluid 100 Hot Press
Stonehenge Aqua Hot Press
Arches Hot Press
Thanks to Kabocha for the hot press recommendations!
Mixed Media Papers:
Strathmore 500 Series Illustration Board
Strathmore 500 Series Mixed Media Paper
Watercolor Sketchbooks:
Canson Montval
Strathmore Visual Journal
Watercolor
Mixed Media
Canson XL watercolor
Other materials:
Someone just starting out is going to need a lot of basics!
Waterproof Pens
 Top to Bottom: Copic Multiliners
Sakura Microns
Sakura Pigma FB, MB, BB
Copic Multiliners
Sakura Microns
These are available at Michael's and most hobby art supply stores in the art and scrapbooking sections
Zig Millennium
Sakura Pigma FB, MB, BB
These three brushpens provide a variety of lineweights and are alcohol marker and waterproof. I use these in many of my videos!
Sailor Mitsuo Aida
My go to for so many of my projects!
Pens for Watercolor and Markers at HobbyLobby
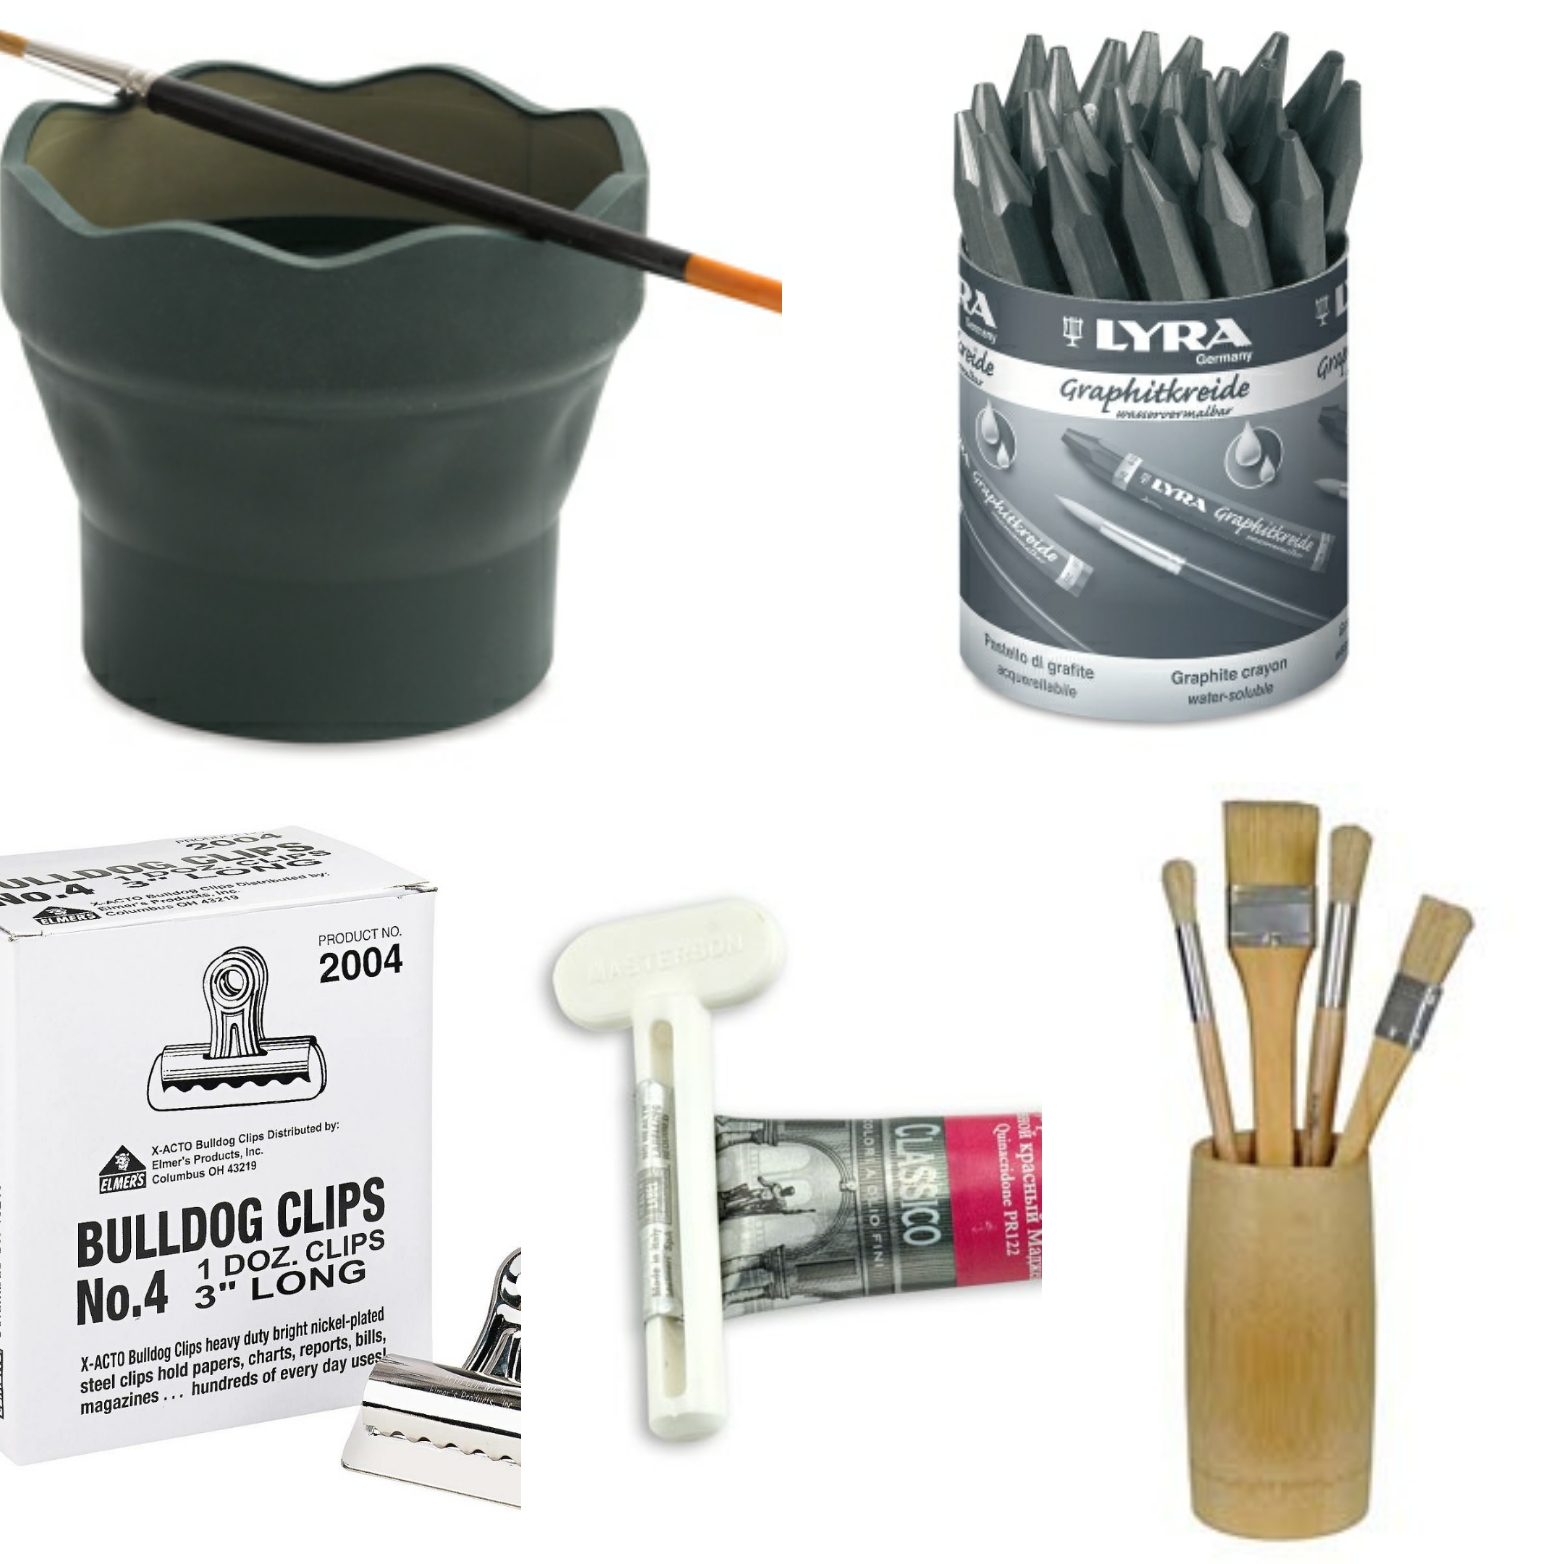 Top Row: Faber Castel Collapsable Cup, Lyra Graphite Sticks
Bulldog Clips, Paint Key, Bamboo Brush Cup
Graphite Sticks
Soft graphite sticks are great for graphite transfers- a useful technique for transferring illustrations onto your watercolor blocks.
Cups
You can really use any, but I particularly like these collapsable cups by Faber Castell. I recommend two dedicated watercolor cups- one for clean, one for dirty.
Spray Bottle
Eye Droppers
Paper Towels
Any paper towels will work, but I really love Viva paper towels, especially the ones with no texture.
Gator Board or Corrogated Plastic
I use this to serve as a support for my stretched watercolor pages.
Tutorial:
Masking Tape
I prefer the 3M blue crepe masking tape linked above- it adheres to the page without tearing the paper on removal.
Bulldog Clips
Binder Clips
I use binder and bulldog clips to help secure my paper to the board when stretching watercolor paper.
Paint Keys
Storage
Tiered plastic tackleboxes are great storage for watercolor tubes, unopened pans, empty half pans, and other small accessories.
Bamboo Brush Holder
Brush Roll
Clear Wax Crayons (or clear candles)
Useful for wax resist techniques
Travel:
Joe Miller's Travel Painter and Accessories
Education:
Free, Online:
Video:
My Favorite Watercolor Techniques
Glazes
Wax Resist
Written:
Top Techniques for Watercolor
Watercolor Basics: Step by Step: Glazes
Easy Blends and Fades
Tutorials:
Video:
Detailed Chibi Watercolor Tutorial
Over the Garden Wall Watercolor Tutorial
Watercolor over Fountain Pen P1
Watercolor over Fountain Pen P2
Delightful Cosplay Couple From Start to Finish
Dots for Eyes Chibi Watercolor Tutorial
Written:
Planning Your Watercolor Illustration
Penciling
Stretching Tutorial
Washes
Blocking In
Rendering
Adding Shadows
Adding Details
Step by Step Illustration Walkthrough:
Video:
Watercolor Basics Pencils
Watercolor Basics Stretching Demonstration
Blocking In Color
Rendering
Adding Shadows
Refining Your Image
Written:
Planning Your Watercolor Illustration
Penciling
Stretching Tutorial
Washes
Blocking In
Rendering
Adding Shadows
Adding Details
Panels and Workshops
MTAC Intro to Watercolor
Outside Reviews and Resources:
Please consider donating to this blog or purchasing from Natto-shop (http://nattosoup.com/shop) if you want me to continue publishing quality content. All materials tested were purchased from my own pocket. Keep on Truckin' Nattosoup is not under any sponsorship.

November 30, 2017
Watercolor Gift Guide for Young Artists Ages 9-13
This guide is designed to help a non-artist parent navigate watercolor supplies for a young, aspiring artist. I have provided links to outside resources, reviews, and tutorials when feasible, and explanations of commonly used terms that may cause confusion.
If you aren't familiar with watercolor, I recommend you read through the paper, brushes, and paints sections of my Watercolor Basics series for more detailed explanations behind my recommendations. If you still have questions or would like a customized recommendation based on your child and their needs, please email me.
If I haven't covered the age or experience level you're shopping for, please keep an eye out for more Holiday Gift Guides, coming soon!
This post is sponsored by my Patrons on Patreon, and all recommendations are my own, based on decades of experience and my own reviews. If you'd like to help support what I do, please purchase using my Affiliate links when feasible, and please considering joining my Artnerd community on Patreon. You can also tip me through my Ko-fi! For convenience, most items are sourced from Amazon, for easy one stop shopping.
Nattosoup's Holiday Gift Guide for Young Artists

This gift guide is designed for young, gifted and motivated artists from the ages of 9-13. For older artists, please keep an eye out for upcoming watercolor gift guides!
Paints
Dye vs Pigment
Most children's grade watercolors, such as Crayola, contain dye. These dyes are easier to wash out than pigments, hence 'washable' watercolors, but do not perform as well as pigment based watercolors. For an aspiring artist, dye based watercolors can be frustrating to use- so the recommendations I give in this post are for children's grade pigment based watercolors.
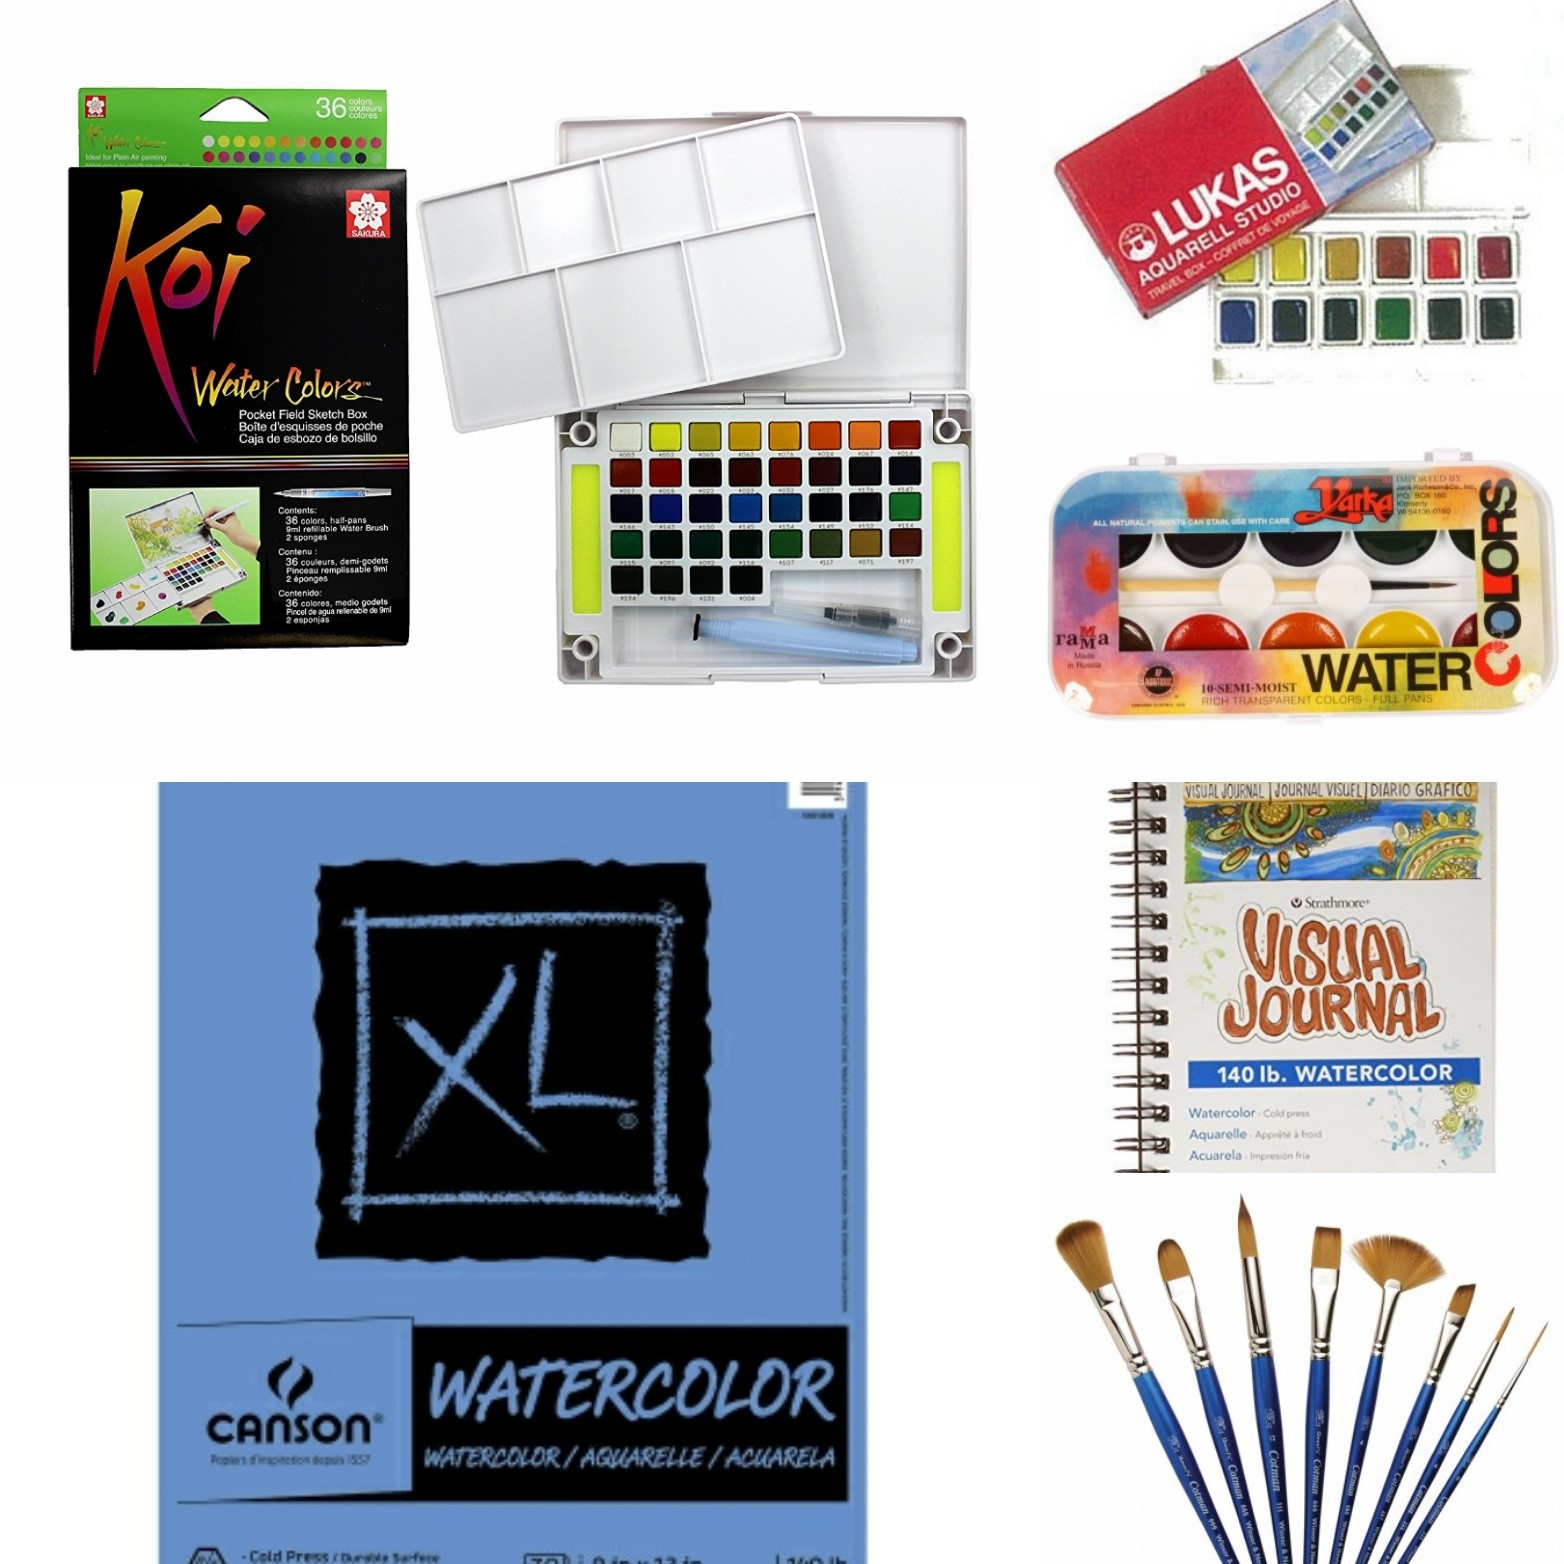
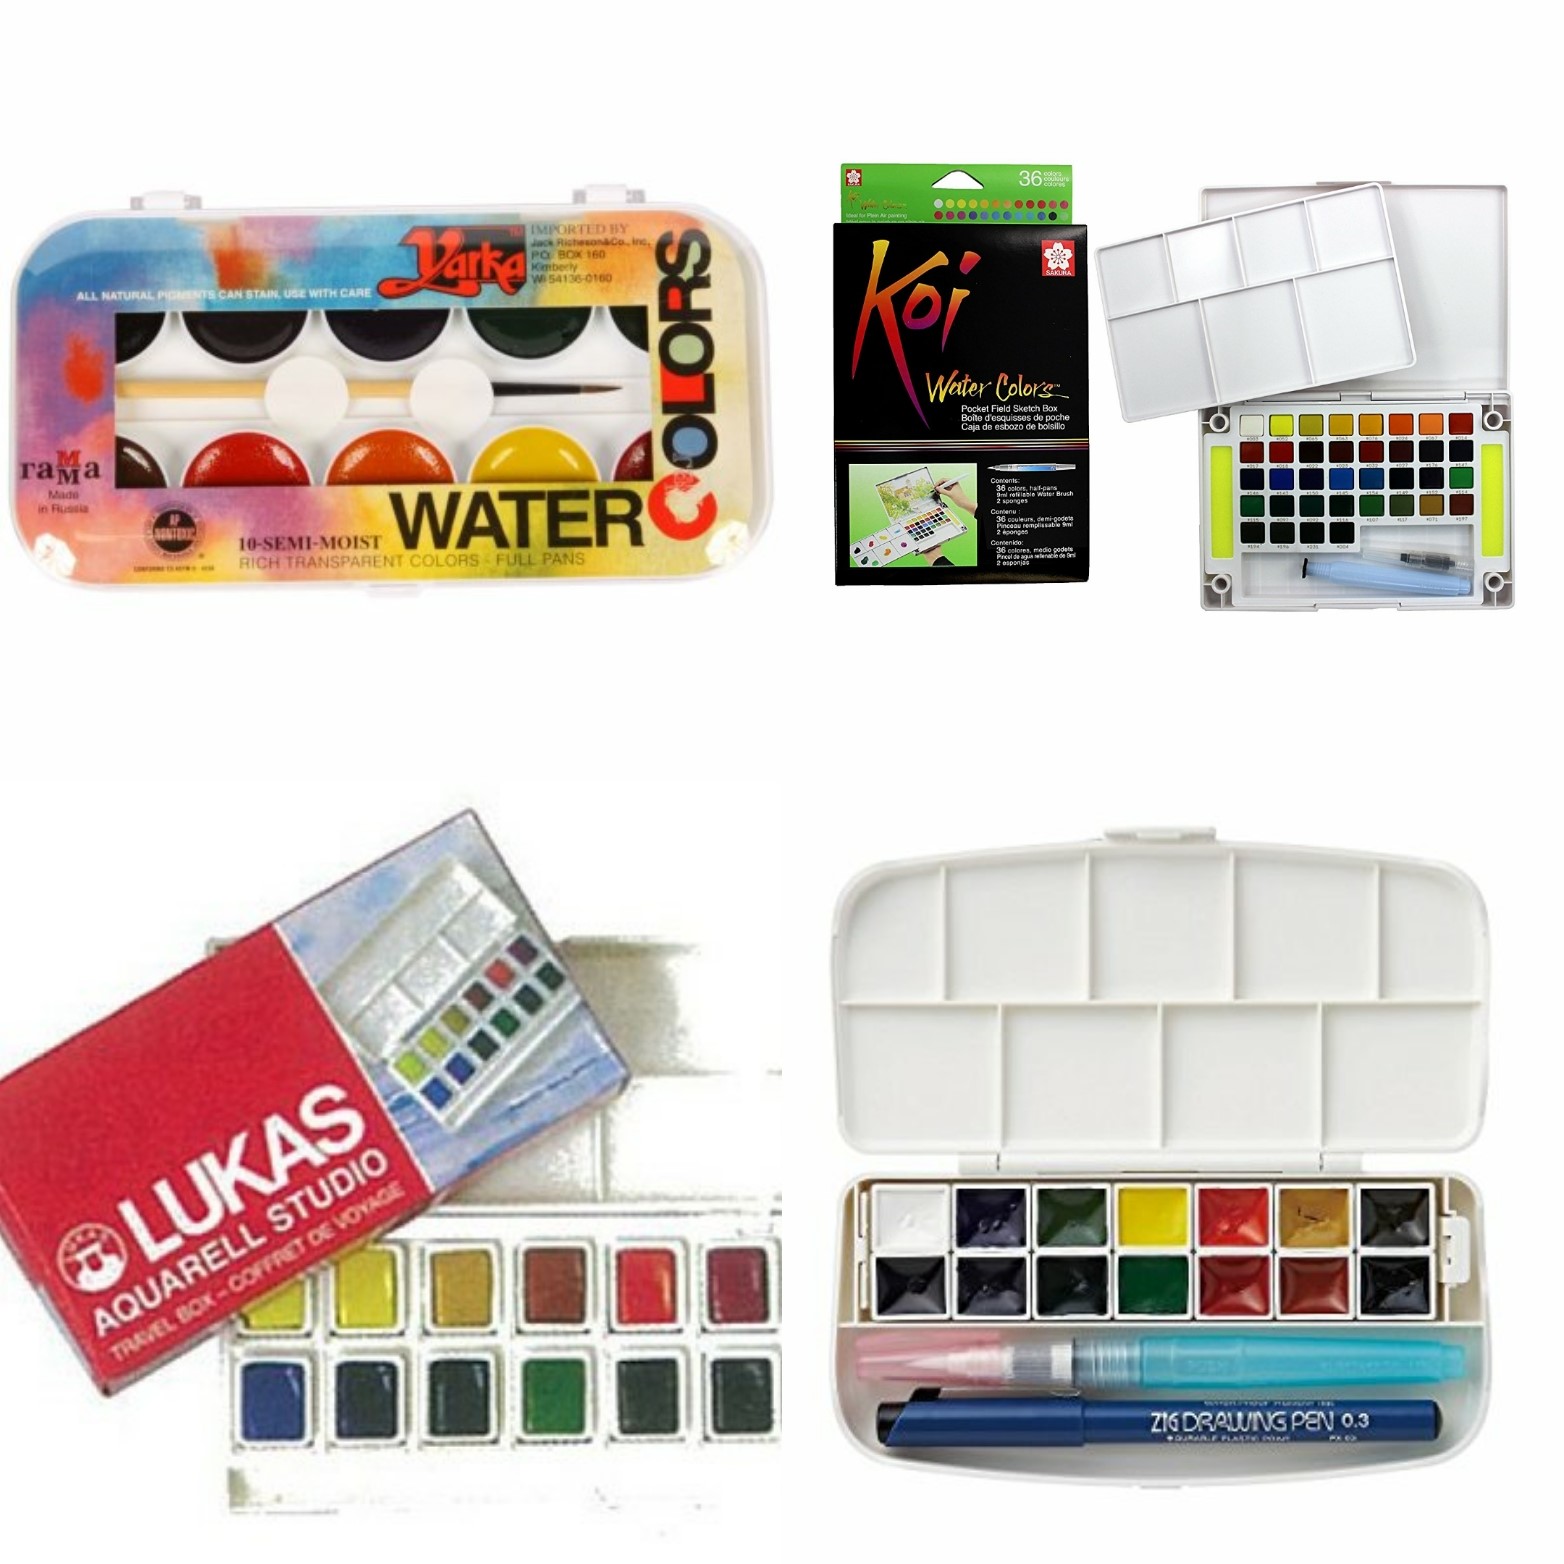
 Top Left to Right- Yarka Student Watercolors, Koi Field Set
Bottom Left to Right- Lukas Aquarelle Studio, Kuretake Travel Watercolor Set
Ok:
Yarka Rama Watercolors (distributed by Jack Richeson)
For the price, these are some of the best cheap watercolors I've reviewed, but even if you buy the largest set available, your child will still have to learn to mix colors. This makes for a stronger artist in the end, but not great for impatient kids who want all the colors now.
Better:
Sakura Koi Field Set
Perfect for kids who think they need ALL the colors. These colors are bright and brilliant, and you get a wide range, but care should be exercised when mixing and layering, as too many layers result in muddy paintings and lifting colors.
Review
Adult watercolors:
Keep in mind that watercolors aimed at older artists often use toxic substances such as cadmium, and should be used with caution and supervision.
For Serious Young Artists:
Lukas Studio Travel Set of 12
This pocket set is afforably priced and performs comparably with other adult-student grade watercolors- a bit better than Winsor and Newton's Cotman, in my experience. Colors are saturated and bright, but may present some of the same difficulties as the Sakura Koi set.
Kuretake Travel Set
I use this set on my travels too! This compact little set includes a waterproof pen and a waterbrush, in addition to a great collection of mixing colors.
Pans Vs Tubes
For younger artists, pans are low mess, low fuss, and are what I generally recommend.
Tubes are more economical than pans, and if you don't mind a little extra hassle (or have multiple artists in a household), are a good way to invest in a young artist's future.
Recommended Colors:
Alizarin Crimson
Cadmium Red Hue
Burnt Sienna
Sepia
Lamp Black
Dioxazine Violet
Cadmium Yellow Hue
Lemon Yellow
Pthalo Blue
Ultramarine Blue or Cobalt Blue
Hooker's Green
Sap Green
Yellow Ochre
Inexpensive, Student Grade Tube Watercolors:
Grumbacher Academy
Blick Artist Watercolors
Cotman
If you're buying tube watercolors, you're going to need half pans and a palette, or at the very least, a palette, to put them in.
 Top Left to right: Mijello, Honbay
Welled Pallete, Flower Palette
I recommend the Martin Mijello 18 Well Airtight watercolor palette- its airtight, has a gasket seal, plenty of room to mix paint, and shatterproof.
The Honbay 12 Color Artist Palette is more like a traditional travel palette, and also a great choice. It comes with 12 empty pans to fill with tube watercolor.
Other Types of Palettes:
For beginner artists, I find working with welled palettes to be most intuitive and easiest to achieve the desired color mixes. Plastic palettes are quite affordable, and I have a few favorites for illustration and comic page painting.
10 Welled Round Palettes
Flower Palette
Butcher's Tray
Watercolor Markers:
Crayola Supertips
Crayola Supertips, which are dye based, waterbased markers, can easily be used as waterbased markers! Check out this tutorial on how to do it!
Tutorial
Watercolor Pencils:
Prismacolor Watercolor Pencils
I'm not a fan of watercolor pencils, but they can be really helpful for tightening up details or doing smaller illustrations. Watercolor pencils can be frustrating to use as your sole medium, so I recommend mixing them up with regular watercolors.
Paper:
Sketchbooks just don't cut it when it comes to watercolor! You'll need something tougher, thicker, and designed to handle water- regular sketchbooks buckle, pill, and pool.
Great All Rounders:
Mixed Media Paper
Mixed Media paper is a great solution for artists who love to dabble with a variety of media. Markers, watercolor, inks- mixed media papers can handle them all!
Canson XL Mixed Media Paper
Available at Walmart, Michaels, and most art hobby stores. Canson XL Mixed Media paper has a bit of tooth, which makes it great for color pencils too.
Strathmore 300 Series Mixed Media Paper
Strathmore makes several grades of artist papers, from 100 (for young children) to 500 (very nice professional grade). The color of the cover often denotes the quality- the 300 series has a yellow cover,
Watercolor Paper:
Cellulose Vs Cotton Rag
Cellulose paper is made from woodpulp, and unless it's marked Acid Free, it will degrade over time (about ten years, less if displayed without protection). Cotton rag paper is generally considered artist quality and has properties that cellulose papers lack- more absorbent, often more forgiving. For young artists, cellulose paper is a great inexpensive start!
Cold Press Vs Hot Press
With cellulose papers, it really boils down to paper texture- smooth vs slightly textured. I find that for my work, slightly textured absorbs water better, and results in smoother washes and less streaking.
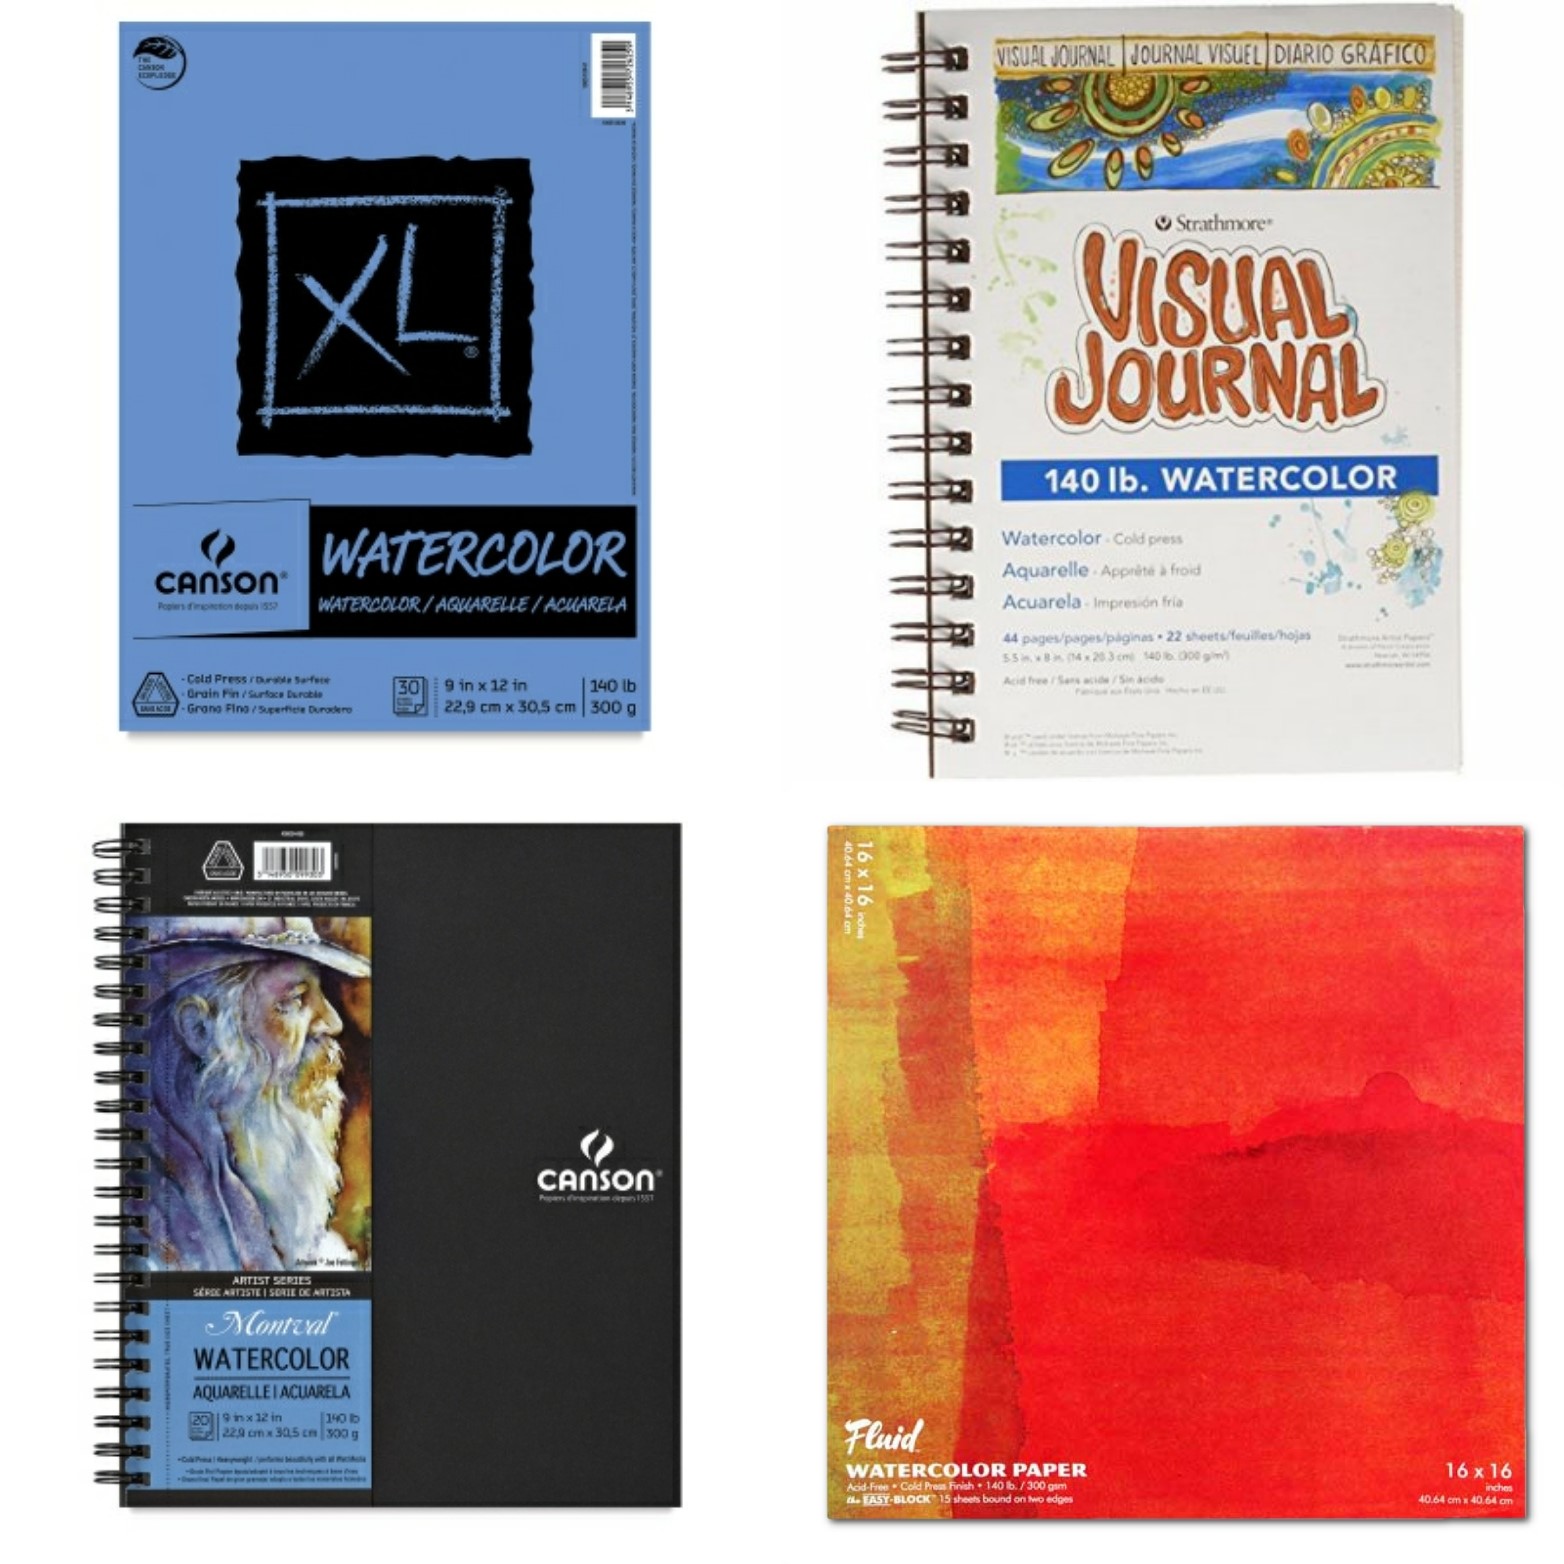
 Top Left to Right: Canson XL Watercolor, Strathmore Visual Journal in 140lb Watercolor
Canson Montval Sketchbook, Fluid EZ Block watercolor
Canson XL Watercolor Paper
Spiral Bound
Tape Bound
Great for practice, inexpensive, available just about anywhere, Canson XL Watercolor paper is great for practicing
Canson Montval Watercolor Sketchbook
Spiral bound
Slightly higher quality paper while still affordable. I use Montval for my watercolor comic, 7" Kara.
Strathmore Visual Journal 140lb Watercolor
While Strathmore's watercolor papers are some of my least favorite for detailed paintings, they're great for sketching, doodling, and practicing.
Canson Montval Artboard
No need to stretch or remove from a block! Artboards provide plenty of internal support for your paintings- they should not buckle or warp from water. This is great if your child wants to paint something for display, or for a gift.
Fluid EZ Block Watercolor Paper
A watercolor block, such as the Fluid EZ block, holds your paper tightly in place while you paint- no need to stretch the paper!
Brushes
Even a child watercolorist needs a handful of brushes to get the job done! There are several types of brushes available, some of the most commonly used in my studio are:
Mops
Flats
Rounds
Filberts
Synthetic Vs Natural
Synthetic brushes are usually made from nylon or Taklon, and can be white, black, or 'natural' colors.
Natural hair brushes materials include squirrel, goat, pony, and even boar bristles. The finest natural hair brushes are made from Kolinsky Sable, which can be quite expensive. Fortunately, if you're buying gifts for wee artists, this is many years in the future, and not something to worry about now.
Synthetics are much more affordable than most natural hair watercolor brushes, and are what I would recommend for most young artists. They're more durable than natural fibers, and can take wear and tear that would destroy a natural hair brush.
Recommended Brushes:
Size 4 Round
Size 10 Round
Size 2 Round (for details)
Size 0 Round (for the finest details)
3/4" Flat (for washes)
1/2" Filbert
16mm 5/8 Mop (for washes)
Natural Hair Brushes:
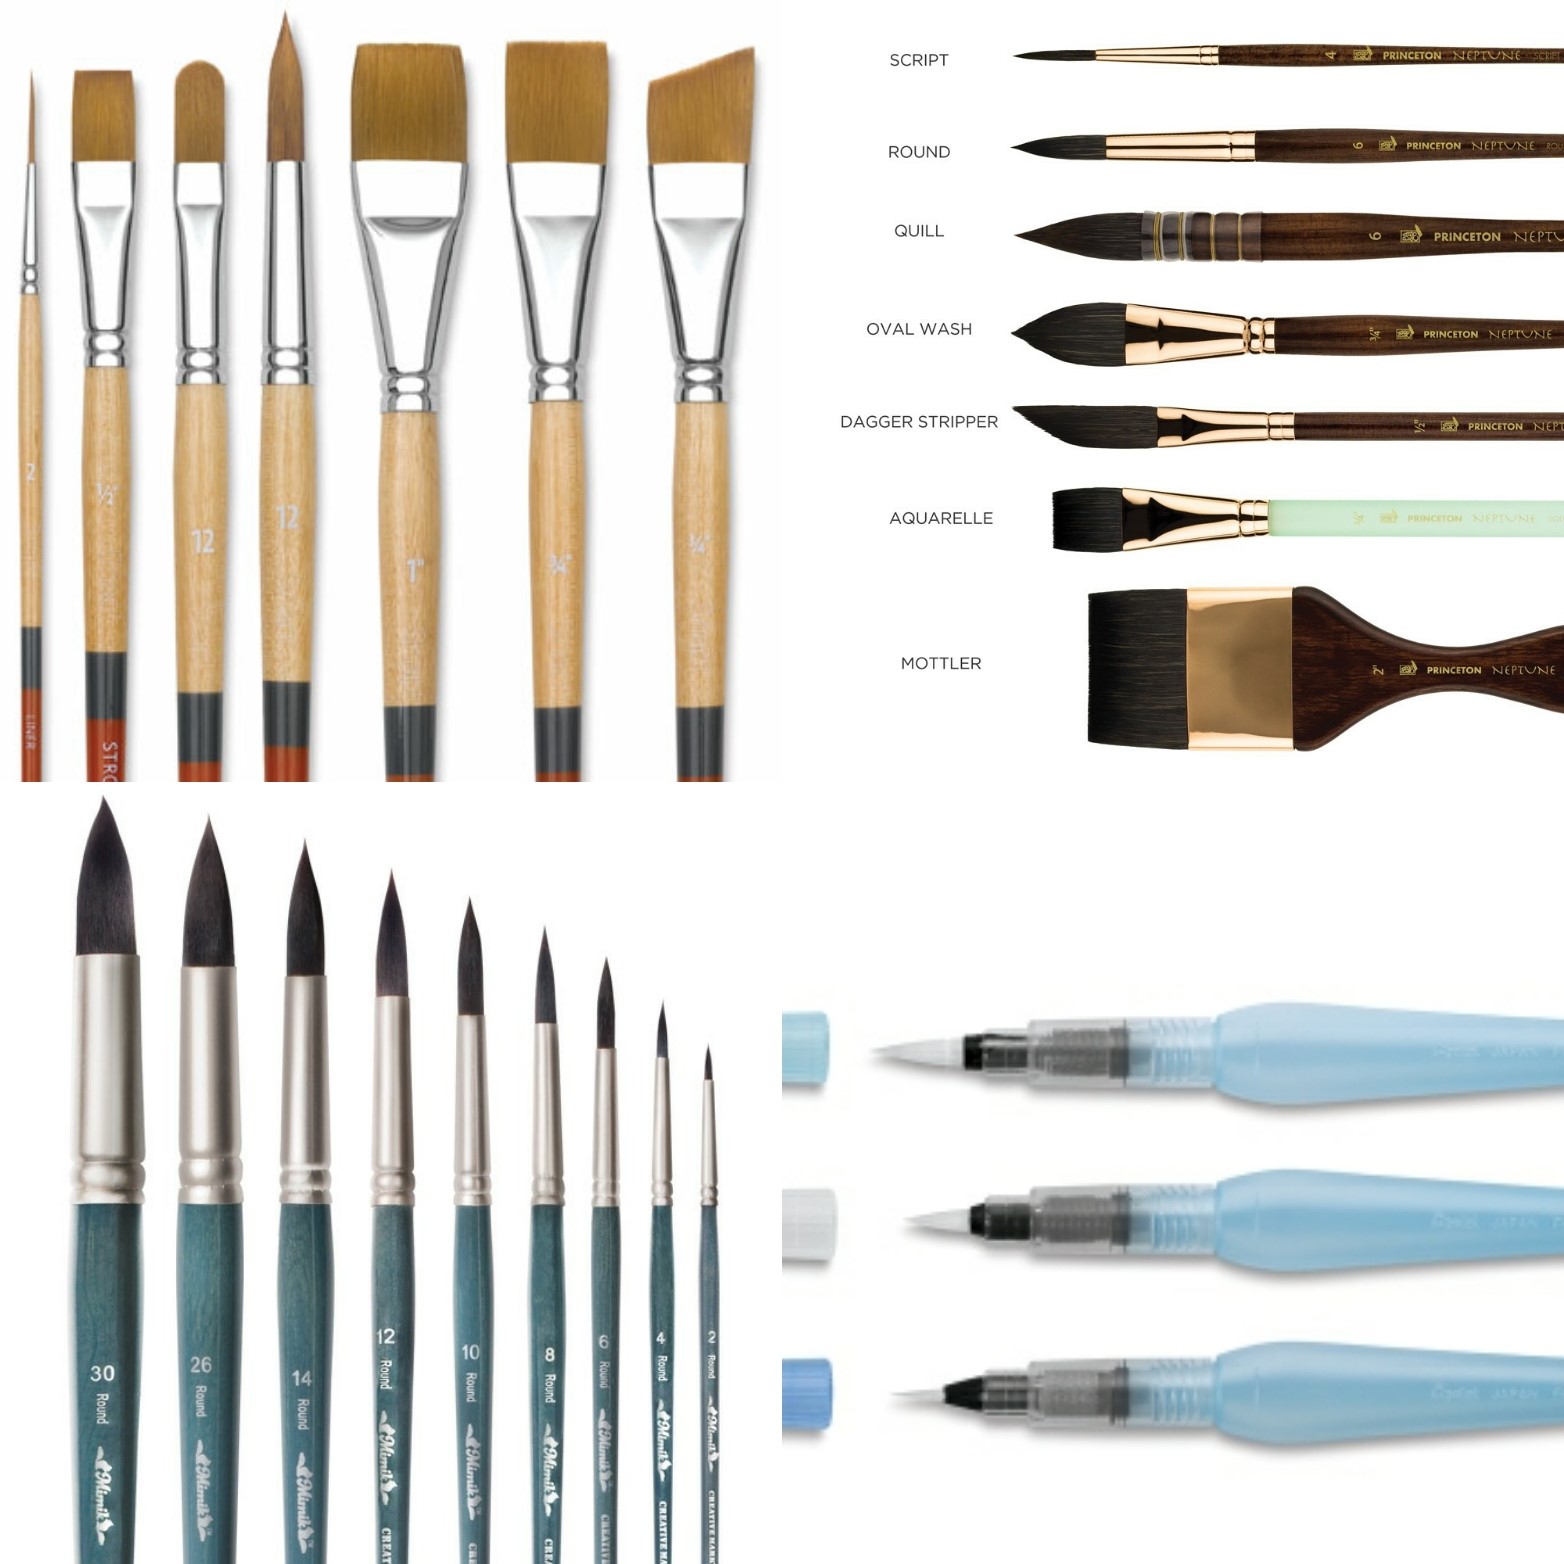
 From Left to Right: Blick Sumi Brushes, Yasutomo Student Hake Brushes, Blick Pointed Scholastic Round, Blick Master Squirrel
Sumi Brushes
Sumi brushes are a very affordable way to purchase natural hair brushes in larger sizes. Sumi brushes are often sheep's wool surrounded by pony hair, and hold A LOT of water. These can be great for small artists who like to paint big.
Pack of Three Wolf Hair Sumi Brushes
Blick Bamboo Brushes- Sizes 2, 4, 6
Hake Brushes:
Perfect for laying down washes and covering large areas fast. Soft natural fibers make this perfect for glazing, and hake brushes are very affordable.
Blick Hake Brushes
Yasutomo Student Hake Brushes
Traditional Western Watercolor Brushes:
Camel Hair:
One of the cheapest natural hairs used for watercolor, often included in children's watercolor sets. Camel hair brushes do not draw to a fine point, and may be frustrating to use.
Blick Scholastic Camel Hair Brush
Squirrel Hair:
A much better option, squirrel hair is pricier than camel, but will last for years with proper care and storage. Squirrel hair brushes hold plenty of water/paint, come to a fine point, and if well cared for, create lines both thin and thick.
Blick Master Pure Squirrel Round Brush
Recommended Sizes:
Round 4
Round 6
Kolinsky Sable:
Technically a type of squirrel. For young artists, these are not necessary, as synthetics, sumi, camel, and squirrel will get the job done nicely.
If you must:
Princeton 7050 Siberian Kolinsky
Creative Mark Rhapsody
Mixed Hair Brushes:
Often have the best properties of higher quality furs at a lower price point, and a great buy for beginner artists.
Blick Pointed Scholastic Round
Synthetic Brushes:
 From Top Left to Right: Princeton Snap! Synthetic Brushes, Princeton Neptun Synthetic Brushes
From Bottom Left to Right: Mimik Synthetic Brushes, Waterbrushes
When purchasing synthetic brushes, make sure you buy brushes for watercolor! Synthetics are made for oils and acrylics as well, and each type has different properties best suited to the media you're working with.
Synthetics are perfect for larger brushes- large rounds (8 and up), your mops, filberts, and flats.
Cotman Watercolor Brushes
Recommended:
Mops
Flats
Rounds
Filberts
Princeton Watercolor Brushes
Ok:
Snap!
Good:
Neptune
Mimik Synthetic Brushes
Waterbrushes:
To the uninitiated, waterbrushes, which are self-contained watercolor brushes, are very tempting. Waterbrushes can be a great addition to your art supply collection, but are not a replacement for traditional brushes.
Waterbrushes are great for travel or quick watercolor sketches, but are not necessarily suitable for more detailed or layered illustrations.
Most brands perform fairly equally, so there's no point in busting the budget for nice waterbrushes. There are decent knockoffs of popular styles available that will get the job done.
Meeden 6 Piece Waterbrush Set
Trasfit 6 Piece Waterbrush Set
Arteza 4 Piece Waterbrush Set
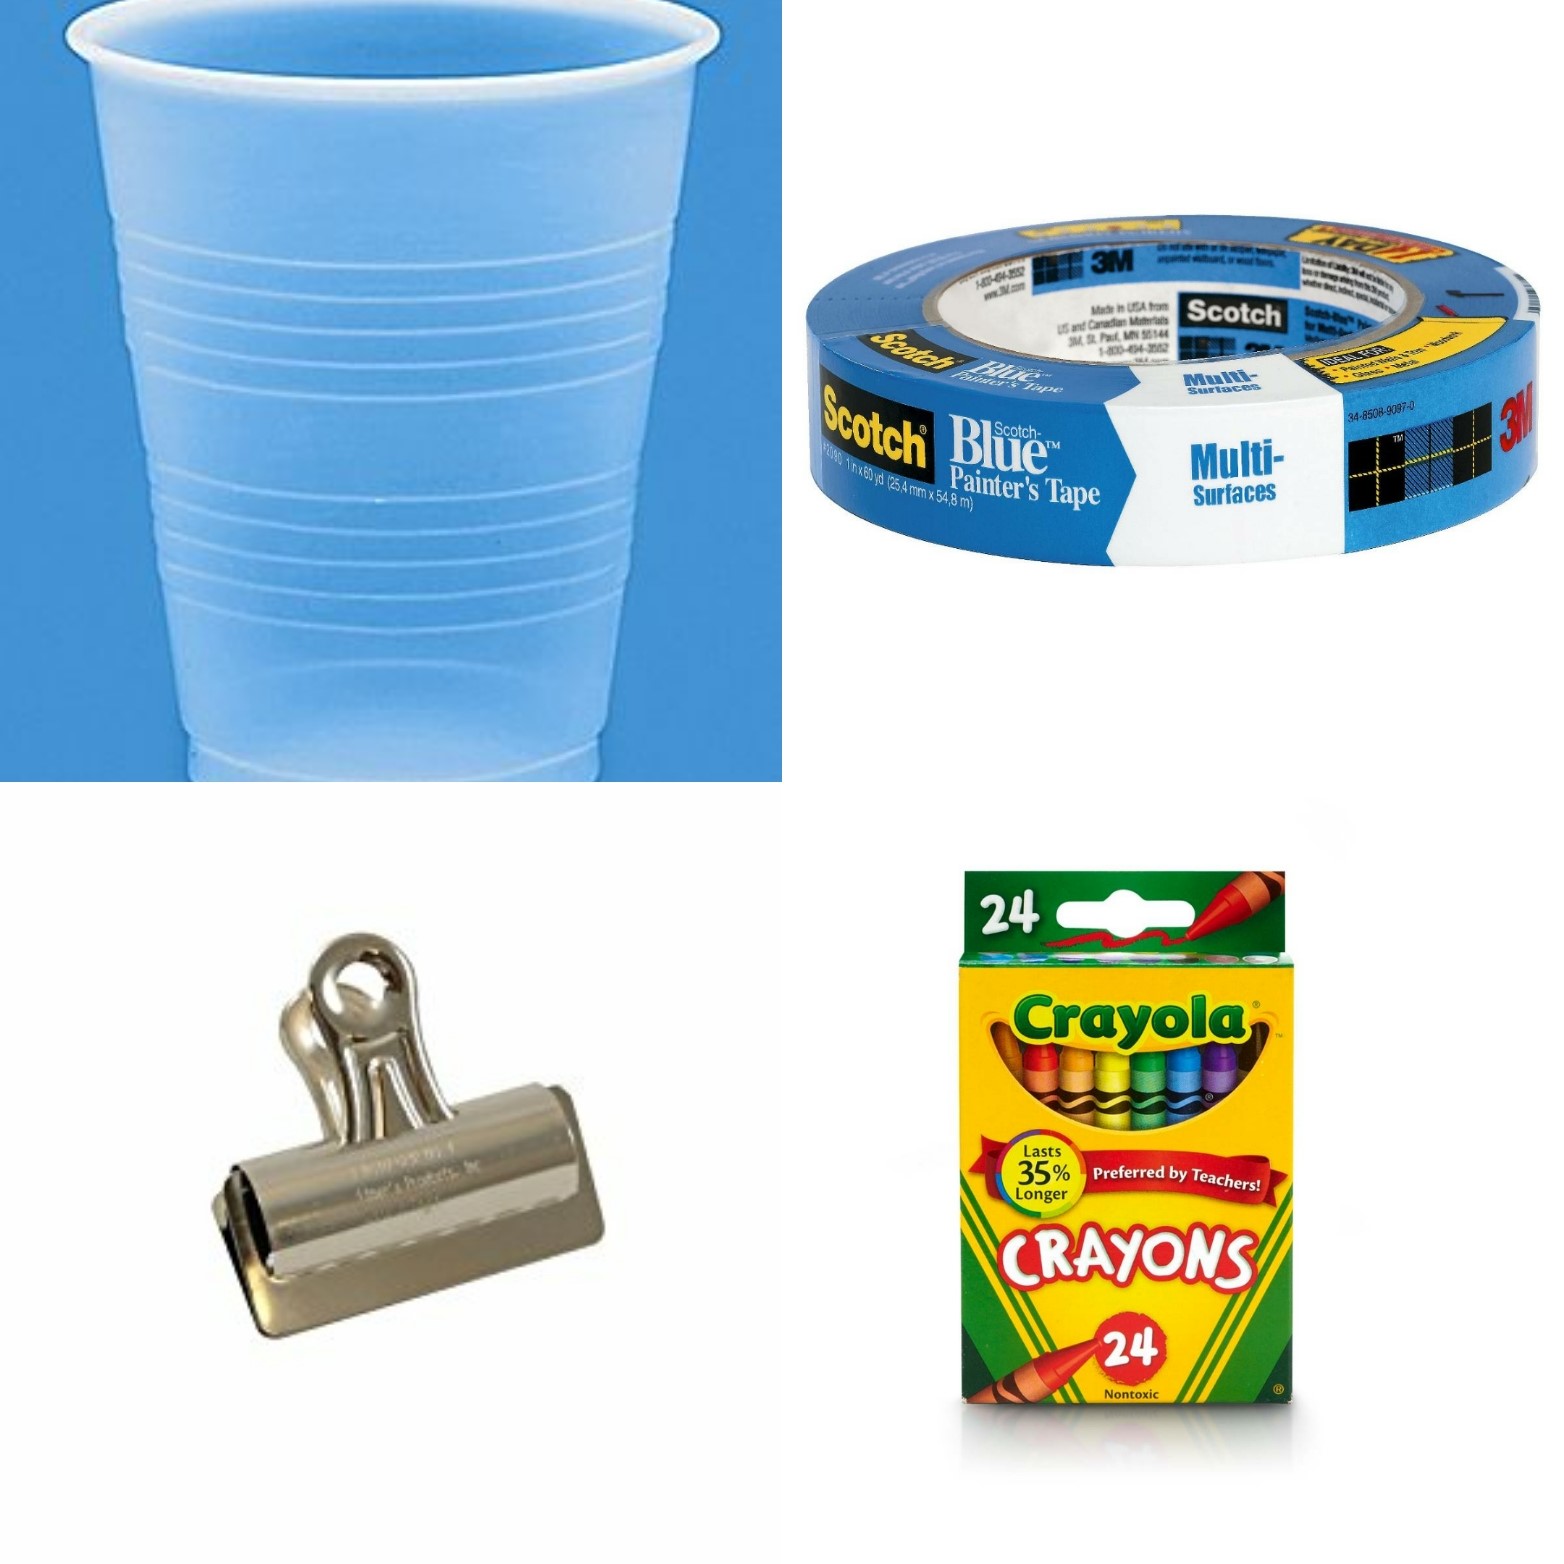
Other Materials

Cups- Any type will do
Paper Towels- Whatever is on hand is usually fine
Masking Tape- I prefer blue painters tape, but regularly white masking tape works fine. This is used to secure paper that is liable to buckling- either through stretching, taping the edges down on the pad, or just taping it to a support.
Bulldog Clips
Clear Wax Crayons (or clear candles)
Useful for wax resist techniques
Crayons, assorted
Useful for wax resist techniques
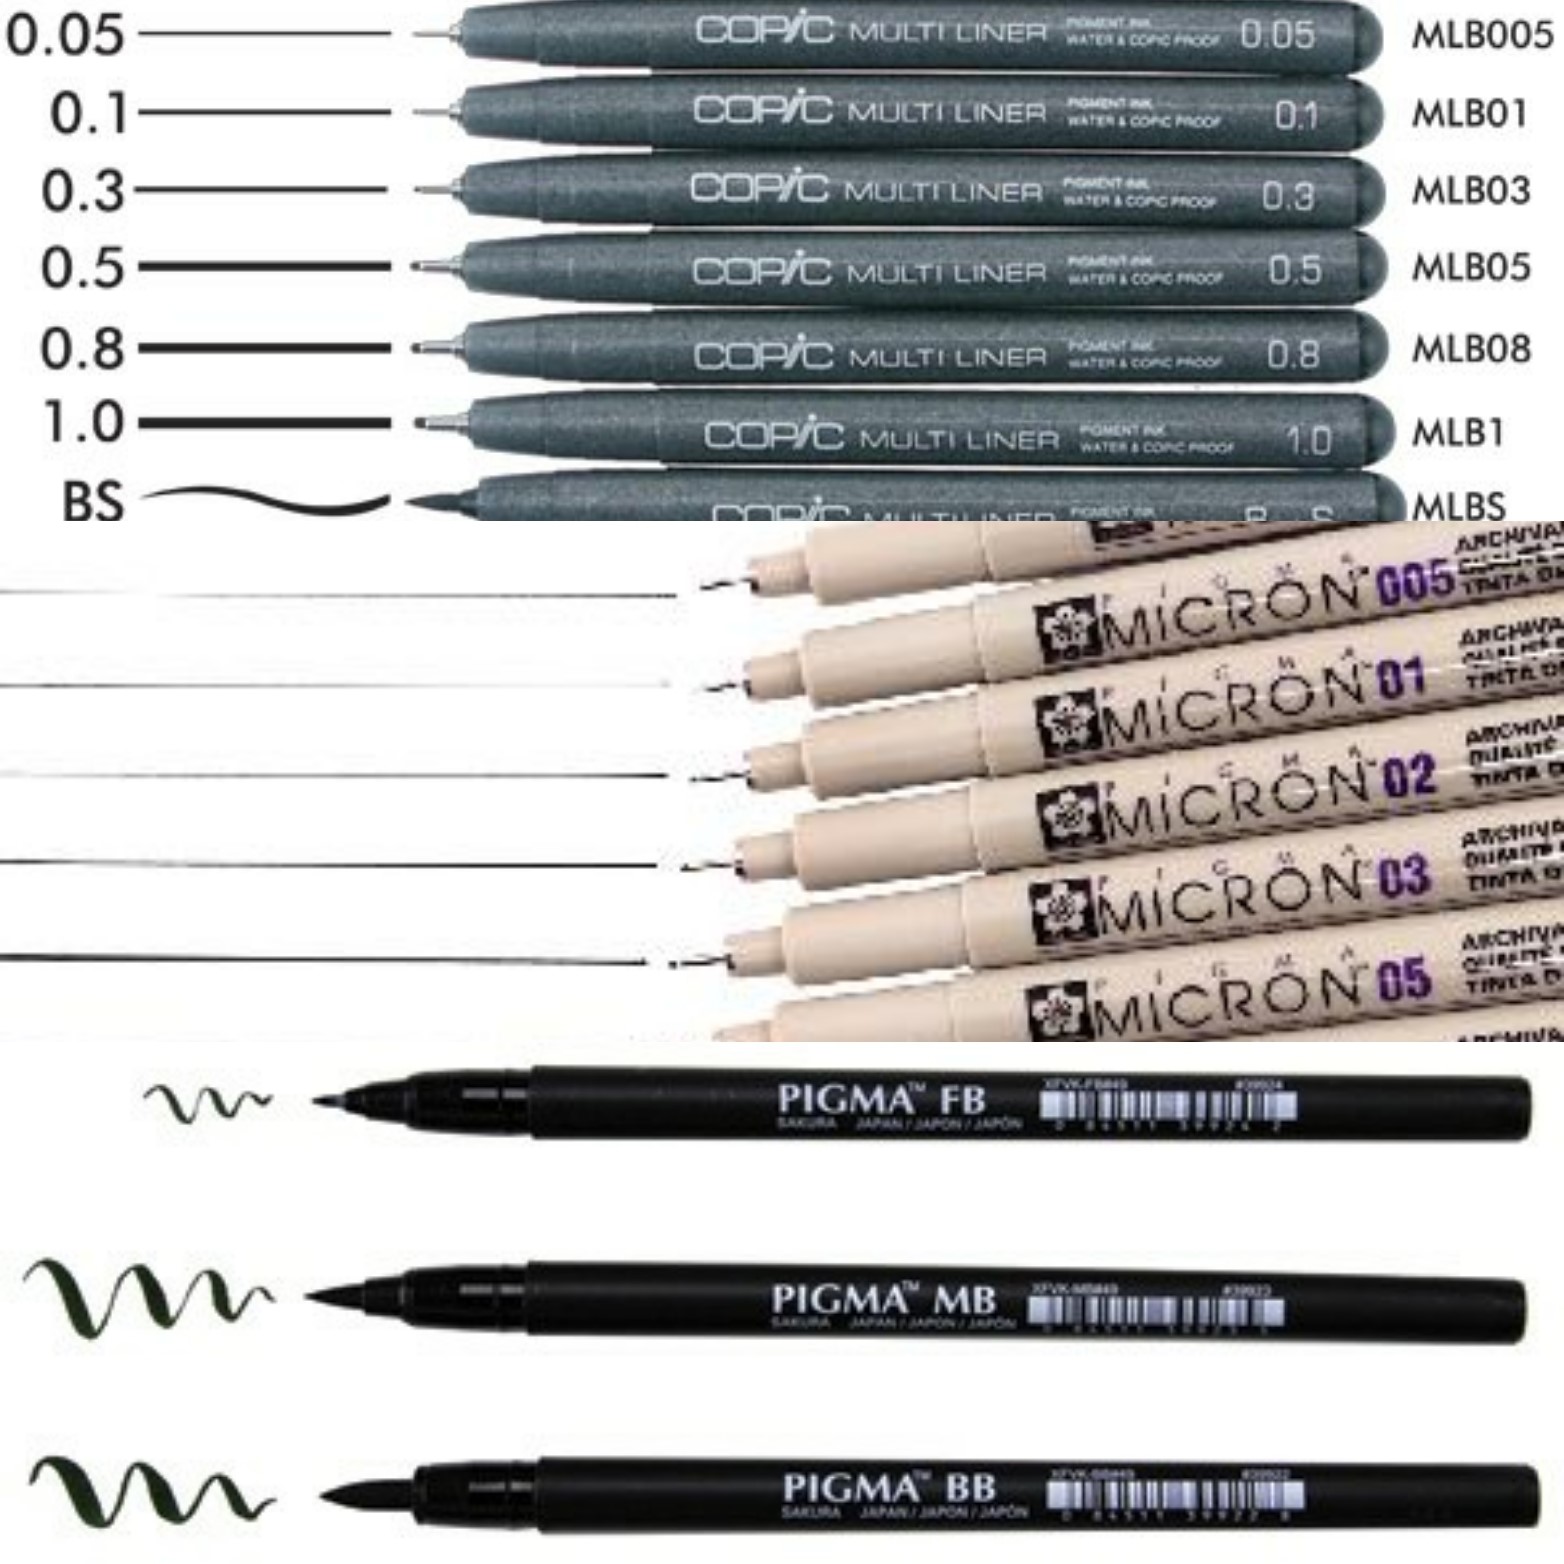
Waterproof Pens
 Top to Bottom: Copic Multiliners, Sakura Microns, Sakura Pigma Brushpens
Copic Multiliners
Sakura Microns
These are available at Michael's and most hobby art supply stores in the art and scrapbooking sections
Sakura Pigma FB, MB, BB
These three brushpens provide a variety of lineweights and are alcohol marker and waterproof. I use these in many of my videos!
Pens for Watercolor and Markers at HobbyLobby
Watercolor Instruction:
Free:
Watercolor Basics
A free watercolor course designed for illustrators and comic artists- and you already know the teacher!
Watercolor Playlist
Designed to accompany my Watercolor Basics course, I demonstrate materials and techniques on camera to provide real time instruction
Care and Basics:
Prepping Watercolor Brushes For First Use
Watercolor Basics Stretching Demonstration
Materials:
Watercolor Marker Workshop with Nattosoup
Brusho Background Mini Tutorial
Winter Satsumas in Clean Color Real Brush
Techniques:
Video:
My Favorite Watercolor Techniques
Glazes
Wax Resist
Written:
Top Techniques for Watercolor
Watercolor Basics: Step by Step: Glazes
Easy Blends and Fades
Tutorials:
Video:
Detailed Chibi Watercolor Tutorial
Over the Garden Wall Watercolor Tutorial
Watercolor over Fountain Pen P1
Watercolor over Fountain Pen P2
Delightful Cosplay Couple From Start to Finish
Dots for Eyes Chibi Watercolor Tutorial
Written:
Planning Your Watercolor Illustration
Penciling
Stretching Tutorial
Washes
Blocking In
Rendering
Adding Shadows
Adding Details
Step by Step Illustration Walkthrough:
Video:
Watercolor Basics Pencils
Watercolor Basics Stretching Demonstration
Blocking In Color
Rendering
Adding Shadows
Refining Your Image
Written:
Planning Your Watercolor Illustration
Penciling
Stretching Tutorial
Washes
Blocking In
Rendering
Adding Shadows
Adding Details
Panels and Workshops
MTAC Intro to Watercolor
Please consider donating to this blog or purchasing from Natto-shop (http://nattosoup.com/shop) if you want me to continue publishing quality content. All materials tested were purchased from my own pocket. Keep on Truckin' Nattosoup is not under any sponsorship.
If you aren't familiar with watercolor, I recommend you read through the paper, brushes, and paints sections of my Watercolor Basics series for more detailed explanations behind my recommendations. If you still have questions or would like a customized recommendation based on your child and their needs, please email me.
If I haven't covered the age or experience level you're shopping for, please keep an eye out for more Holiday Gift Guides, coming soon!
This post is sponsored by my Patrons on Patreon, and all recommendations are my own, based on decades of experience and my own reviews. If you'd like to help support what I do, please purchase using my Affiliate links when feasible, and please considering joining my Artnerd community on Patreon. You can also tip me through my Ko-fi! For convenience, most items are sourced from Amazon, for easy one stop shopping.
Nattosoup's Holiday Gift Guide for Young Artists
This gift guide is designed for young, gifted and motivated artists from the ages of 9-13. For older artists, please keep an eye out for upcoming watercolor gift guides!
Paints
Dye vs Pigment
Most children's grade watercolors, such as Crayola, contain dye. These dyes are easier to wash out than pigments, hence 'washable' watercolors, but do not perform as well as pigment based watercolors. For an aspiring artist, dye based watercolors can be frustrating to use- so the recommendations I give in this post are for children's grade pigment based watercolors.
 Top Left to Right- Yarka Student Watercolors, Koi Field Set
Bottom Left to Right- Lukas Aquarelle Studio, Kuretake Travel Watercolor Set
Ok:
Yarka Rama Watercolors (distributed by Jack Richeson)
For the price, these are some of the best cheap watercolors I've reviewed, but even if you buy the largest set available, your child will still have to learn to mix colors. This makes for a stronger artist in the end, but not great for impatient kids who want all the colors now.
Better:
Sakura Koi Field Set
Perfect for kids who think they need ALL the colors. These colors are bright and brilliant, and you get a wide range, but care should be exercised when mixing and layering, as too many layers result in muddy paintings and lifting colors.
Review
Adult watercolors:
Keep in mind that watercolors aimed at older artists often use toxic substances such as cadmium, and should be used with caution and supervision.
For Serious Young Artists:
Lukas Studio Travel Set of 12
This pocket set is afforably priced and performs comparably with other adult-student grade watercolors- a bit better than Winsor and Newton's Cotman, in my experience. Colors are saturated and bright, but may present some of the same difficulties as the Sakura Koi set.
Kuretake Travel Set
I use this set on my travels too! This compact little set includes a waterproof pen and a waterbrush, in addition to a great collection of mixing colors.
Pans Vs Tubes
For younger artists, pans are low mess, low fuss, and are what I generally recommend.
Tubes are more economical than pans, and if you don't mind a little extra hassle (or have multiple artists in a household), are a good way to invest in a young artist's future.
Recommended Colors:
Alizarin Crimson
Cadmium Red Hue
Burnt Sienna
Sepia
Lamp Black
Dioxazine Violet
Cadmium Yellow Hue
Lemon Yellow
Pthalo Blue
Ultramarine Blue or Cobalt Blue
Hooker's Green
Sap Green
Yellow Ochre
Inexpensive, Student Grade Tube Watercolors:
Grumbacher Academy
Blick Artist Watercolors
Cotman
If you're buying tube watercolors, you're going to need half pans and a palette, or at the very least, a palette, to put them in.
 Top Left to right: Mijello, Honbay
Welled Pallete, Flower Palette
I recommend the Martin Mijello 18 Well Airtight watercolor palette- its airtight, has a gasket seal, plenty of room to mix paint, and shatterproof.
The Honbay 12 Color Artist Palette is more like a traditional travel palette, and also a great choice. It comes with 12 empty pans to fill with tube watercolor.
Other Types of Palettes:
For beginner artists, I find working with welled palettes to be most intuitive and easiest to achieve the desired color mixes. Plastic palettes are quite affordable, and I have a few favorites for illustration and comic page painting.
10 Welled Round Palettes
Flower Palette
Butcher's Tray
Watercolor Markers:
Crayola Supertips
Crayola Supertips, which are dye based, waterbased markers, can easily be used as waterbased markers! Check out this tutorial on how to do it!
Tutorial
Watercolor Pencils:
Prismacolor Watercolor Pencils
I'm not a fan of watercolor pencils, but they can be really helpful for tightening up details or doing smaller illustrations. Watercolor pencils can be frustrating to use as your sole medium, so I recommend mixing them up with regular watercolors.
Paper:
Sketchbooks just don't cut it when it comes to watercolor! You'll need something tougher, thicker, and designed to handle water- regular sketchbooks buckle, pill, and pool.
Great All Rounders:
Mixed Media Paper
Mixed Media paper is a great solution for artists who love to dabble with a variety of media. Markers, watercolor, inks- mixed media papers can handle them all!
Canson XL Mixed Media Paper
Available at Walmart, Michaels, and most art hobby stores. Canson XL Mixed Media paper has a bit of tooth, which makes it great for color pencils too.
Strathmore 300 Series Mixed Media Paper
Strathmore makes several grades of artist papers, from 100 (for young children) to 500 (very nice professional grade). The color of the cover often denotes the quality- the 300 series has a yellow cover,
Watercolor Paper:
Cellulose Vs Cotton Rag
Cellulose paper is made from woodpulp, and unless it's marked Acid Free, it will degrade over time (about ten years, less if displayed without protection). Cotton rag paper is generally considered artist quality and has properties that cellulose papers lack- more absorbent, often more forgiving. For young artists, cellulose paper is a great inexpensive start!
Cold Press Vs Hot Press
With cellulose papers, it really boils down to paper texture- smooth vs slightly textured. I find that for my work, slightly textured absorbs water better, and results in smoother washes and less streaking.
 Top Left to Right: Canson XL Watercolor, Strathmore Visual Journal in 140lb Watercolor
Canson Montval Sketchbook, Fluid EZ Block watercolor
Canson XL Watercolor Paper
Spiral Bound
Tape Bound
Great for practice, inexpensive, available just about anywhere, Canson XL Watercolor paper is great for practicing
Canson Montval Watercolor Sketchbook
Spiral bound
Slightly higher quality paper while still affordable. I use Montval for my watercolor comic, 7" Kara.
Strathmore Visual Journal 140lb Watercolor
While Strathmore's watercolor papers are some of my least favorite for detailed paintings, they're great for sketching, doodling, and practicing.
Canson Montval Artboard
No need to stretch or remove from a block! Artboards provide plenty of internal support for your paintings- they should not buckle or warp from water. This is great if your child wants to paint something for display, or for a gift.
Fluid EZ Block Watercolor Paper
A watercolor block, such as the Fluid EZ block, holds your paper tightly in place while you paint- no need to stretch the paper!
Brushes
Even a child watercolorist needs a handful of brushes to get the job done! There are several types of brushes available, some of the most commonly used in my studio are:
Mops
Flats
Rounds
Filberts
Synthetic Vs Natural
Synthetic brushes are usually made from nylon or Taklon, and can be white, black, or 'natural' colors.
Natural hair brushes materials include squirrel, goat, pony, and even boar bristles. The finest natural hair brushes are made from Kolinsky Sable, which can be quite expensive. Fortunately, if you're buying gifts for wee artists, this is many years in the future, and not something to worry about now.
Synthetics are much more affordable than most natural hair watercolor brushes, and are what I would recommend for most young artists. They're more durable than natural fibers, and can take wear and tear that would destroy a natural hair brush.
Recommended Brushes:
Size 4 Round
Size 10 Round
Size 2 Round (for details)
Size 0 Round (for the finest details)
3/4" Flat (for washes)
1/2" Filbert
16mm 5/8 Mop (for washes)
Natural Hair Brushes:
 From Left to Right: Blick Sumi Brushes, Yasutomo Student Hake Brushes, Blick Pointed Scholastic Round, Blick Master Squirrel
Sumi Brushes
Sumi brushes are a very affordable way to purchase natural hair brushes in larger sizes. Sumi brushes are often sheep's wool surrounded by pony hair, and hold A LOT of water. These can be great for small artists who like to paint big.
Pack of Three Wolf Hair Sumi Brushes
Blick Bamboo Brushes- Sizes 2, 4, 6
Hake Brushes:
Perfect for laying down washes and covering large areas fast. Soft natural fibers make this perfect for glazing, and hake brushes are very affordable.
Blick Hake Brushes
Yasutomo Student Hake Brushes
Traditional Western Watercolor Brushes:
Camel Hair:
One of the cheapest natural hairs used for watercolor, often included in children's watercolor sets. Camel hair brushes do not draw to a fine point, and may be frustrating to use.
Blick Scholastic Camel Hair Brush
Squirrel Hair:
A much better option, squirrel hair is pricier than camel, but will last for years with proper care and storage. Squirrel hair brushes hold plenty of water/paint, come to a fine point, and if well cared for, create lines both thin and thick.
Blick Master Pure Squirrel Round Brush
Recommended Sizes:
Round 4
Round 6
Kolinsky Sable:
Technically a type of squirrel. For young artists, these are not necessary, as synthetics, sumi, camel, and squirrel will get the job done nicely.
If you must:
Princeton 7050 Siberian Kolinsky
Creative Mark Rhapsody
Mixed Hair Brushes:
Often have the best properties of higher quality furs at a lower price point, and a great buy for beginner artists.
Blick Pointed Scholastic Round
Synthetic Brushes:
 From Top Left to Right: Princeton Snap! Synthetic Brushes, Princeton Neptun Synthetic Brushes
From Bottom Left to Right: Mimik Synthetic Brushes, Waterbrushes
When purchasing synthetic brushes, make sure you buy brushes for watercolor! Synthetics are made for oils and acrylics as well, and each type has different properties best suited to the media you're working with.
Synthetics are perfect for larger brushes- large rounds (8 and up), your mops, filberts, and flats.
Cotman Watercolor Brushes
Recommended:
Mops
Flats
Rounds
Filberts
Princeton Watercolor Brushes
Ok:
Snap!
Good:
Neptune
Mimik Synthetic Brushes
Waterbrushes:
To the uninitiated, waterbrushes, which are self-contained watercolor brushes, are very tempting. Waterbrushes can be a great addition to your art supply collection, but are not a replacement for traditional brushes.
Waterbrushes are great for travel or quick watercolor sketches, but are not necessarily suitable for more detailed or layered illustrations.
Most brands perform fairly equally, so there's no point in busting the budget for nice waterbrushes. There are decent knockoffs of popular styles available that will get the job done.
Meeden 6 Piece Waterbrush Set
Trasfit 6 Piece Waterbrush Set
Arteza 4 Piece Waterbrush Set
Other Materials
Cups- Any type will do
Paper Towels- Whatever is on hand is usually fine
Masking Tape- I prefer blue painters tape, but regularly white masking tape works fine. This is used to secure paper that is liable to buckling- either through stretching, taping the edges down on the pad, or just taping it to a support.
Bulldog Clips
Clear Wax Crayons (or clear candles)
Useful for wax resist techniques
Crayons, assorted
Useful for wax resist techniques
Waterproof Pens
 Top to Bottom: Copic Multiliners, Sakura Microns, Sakura Pigma Brushpens
Copic Multiliners
Sakura Microns
These are available at Michael's and most hobby art supply stores in the art and scrapbooking sections
Sakura Pigma FB, MB, BB
These three brushpens provide a variety of lineweights and are alcohol marker and waterproof. I use these in many of my videos!
Pens for Watercolor and Markers at HobbyLobby
Watercolor Instruction:
Free:
Watercolor Basics
A free watercolor course designed for illustrators and comic artists- and you already know the teacher!
Watercolor Playlist
Designed to accompany my Watercolor Basics course, I demonstrate materials and techniques on camera to provide real time instruction
Care and Basics:
Prepping Watercolor Brushes For First Use
Watercolor Basics Stretching Demonstration
Materials:
Watercolor Marker Workshop with Nattosoup
Brusho Background Mini Tutorial
Winter Satsumas in Clean Color Real Brush
Techniques:
Video:
My Favorite Watercolor Techniques
Glazes
Wax Resist
Written:
Top Techniques for Watercolor
Watercolor Basics: Step by Step: Glazes
Easy Blends and Fades
Tutorials:
Video:
Detailed Chibi Watercolor Tutorial
Over the Garden Wall Watercolor Tutorial
Watercolor over Fountain Pen P1
Watercolor over Fountain Pen P2
Delightful Cosplay Couple From Start to Finish
Dots for Eyes Chibi Watercolor Tutorial
Written:
Planning Your Watercolor Illustration
Penciling
Stretching Tutorial
Washes
Blocking In
Rendering
Adding Shadows
Adding Details
Step by Step Illustration Walkthrough:
Video:
Watercolor Basics Pencils
Watercolor Basics Stretching Demonstration
Blocking In Color
Rendering
Adding Shadows
Refining Your Image
Written:
Planning Your Watercolor Illustration
Penciling
Stretching Tutorial
Washes
Blocking In
Rendering
Adding Shadows
Adding Details
Panels and Workshops
MTAC Intro to Watercolor
Please consider donating to this blog or purchasing from Natto-shop (http://nattosoup.com/shop) if you want me to continue publishing quality content. All materials tested were purchased from my own pocket. Keep on Truckin' Nattosoup is not under any sponsorship.
November 27, 2017
APE Post Mortem Recap
This year, a handful of artists have taken a stab at roasting the Alternative Press Expo on Twitter. While I appreciate that they're willing to share their experiences with others, I wish they were doing so on a more archival platform- by the time people are Googling APE next year, their tweets will be long lost to the sands of time.
For the most part, I've stopped writing formal recaps- they flat out aren't worth the time investment on my part. I've switched over to video recaps, and I feel they better capture shows as a whole, but I have some amends to make, so I thought a hybrid was in order. I recorded video before, during, and after APE to try and capture the whole experience and give a well rounded idea of the show.
Before the show, there was no buzz about APE. In prior years, you'd see artists talk about prepping for APE at least two weeks before the show, if not a month. This year, not a peep. The artist friends I mentioned it to were surprised APE still existed- it'd all but fallen off the map.
APE Saturday Morning
Saturday Afternoon Walkabout
Sunday Recap
Not mentioned in the videos:
Writers and Visual Artists (WAVA) Meetup- not affiliated with APE: Fliers were passed out on Saturday for the WAVA meetup on Sunday. The fliers mentioned agents, writers, editors, and artists, but it seemed to be mostly artists with a smattering of writers. It was still a fun experience, and a good opportunity to meet other artists, although time was extremely limited. Historically, these events have never resulted in anything for me, but are still fun to attend.
Verdict:
This year's APE was awful- one of the worst 'large' indie shows I've done, and I did TCAF the year they installed a Children's Sauna for the kidlit artists to stew in. I've done some awful shows, and APE was one of the worst- certainly the worst show I've flown to attend. And I feel partially responsible for that- I'm one of the few convention artists who regularly shares recaps, and I was a bit remiss in last year's. I feel like I gave the impression that APE was a better show than it was, fueled by my own decent experience there- we met a lot of awesome artists, had a lot of great chats with customers, I sold $600 worth of stuff, won best table (and a free table for 2017) and sold out of 7" Kara at the show last year. The warning signs were all there- slow sales with a brief uptic on Saturday, no publicity or buzz, annoyed artists, but I neglected to mention that. I wanted to give APE a chance to turn around.
APE Post Mortum
Last Year's Video Recap
After APE 2016, Heidi and I attended the after party at Bar-tiki. It was a sparsely attended event, and it gave us an opportunity to talk to Dan Vado, APE's current owner, candidly about APE, our experiences, and what could be done to improve. Although he didn't take notes at the time, he did seem open to our suggestions- we experienced none of the hostility some artists have experienced. We followed that meeting up with a list of the changes we discussed- easy and inexpensive ways to promote the con via social media, fliers, and local outreach, and Heidi even volunteered her time if he were willing. We wanted to give Vado time and a chance to turn the con around, as indie cons in general are increasingly difficult to get into, and we wanted to see the situation improve. Nothing we suggested was followed up on, and Heidi's generous offer was left unclaimed.
Things We Suggested:Fliers in coffeeshops, comic shops, tech company campuses, around the cityOutreach to other conventionsAds on radio, tvRevitalize APE social media- Tumblr features for attending artists, Instagram, Twitter engagementReduce admission for attendeesReduce table costs for artists
So now, all I can do is strongly recommend that if you're reading this, skip APE. Indie cons have gotten increasingly difficult to get tables at, attendance at most is so high that many artists see poor sales as customers can't discover new content, so APE might seem tempting. Instead, attend a local indie comic con- you're more likely to meet other artists, make new friends, and not break the bank doing either.
Please consider donating to this blog or purchasing from Natto-shop (http://nattosoup.com/shop) if you want me to continue publishing quality content. All materials tested were purchased from my own pocket. Keep on Truckin' Nattosoup is not under any sponsorship.
November 23, 2017
What Art School Actually Did For Me
Right now, a lot of people are dismissing the benefits of an art school or art focused education. It's easy to dismiss- an art education has many risks, often a delayed reward if any. However, I do not regret my pursuit of formal art education, only the lack of fairly compensated oppportunites for artists, and I've done my best to make access to art education accessible to others regardless of income. Over the years, I've have freely shared information I acquired online as well as through art school, I promote other online art educations, especially those who teach comic process at an accessible level, and we've even given away a $1000 art focused education scholarship this July to help one artist pursue their dreams in any capacity possible. I genuinely love art education, in all it's forms, and encourage everyone to seek what they can- from books, Youtube, blogs, courses, or workshops.
I do not regret my choices in pursuing formal art education, and I'd like to share what this pursuit has actually added to my life, in hopes of presenting a realistic alternative to the naysayers, and provide an alternate opinion. This said, I will share one salient piece of advice:
Do not go into debt for an art education. It will never pay for itself.
If you're interested in purusing art education and cannot afford to attend schooling, keep an eye on the blog for a follow up post sharing affordable options to pursue art education.
My Art Education History
Education: Self motivated, self directed art study for almost a decade, at a time when such information was scarce and I lived in an art poor area of the country.
I've regularly written, thumbnailed, and drawn comics since I was thirteen- art school did not make me draw comics. I am self motivated, but lacked access to information, and needed guidance and critique that self study cannot provide.
Education: Bachelors of Art from a small university in Louisiana- the University of New Orleans. Digital art, painting, illustration courses at my local university- full ride scholarship, left with no debt and a degree. Minor in Earth Environmental Science.
I attended a small local university- the University of New Orleans, after hearing the painting professor speak about the new illustration department, which would focus on watercolor. Unfortunately, Hurricane Katrina destroyed these nascent plans, but I was stuck at this university and had to make the best of it. I opted to major in Digital Media as our options were limited to Digital Media, Painting (acrylic), Photography, or Sculpture, and UNO's digital media focus was on video effects and editing.
Education: SCAD- wanted that MFA as well as an art school experience that actually catered to illustration and sequential art as legitimate artforms. Partial scholarship- academic. Rest was paid out of pocket, by the inheritance money my father left after dying of lung cancer. Graduated with an MFA with no debt.
Continued to pursue art, this time my passion, comics, at an accredited art university- the only one at the time to offer an actual legitimate masters degree in sequential art (comics, storyboards, children's books). An MFA is 90 credit hours, an MA is 45 credit hours, but an MFA in sequential art is a terminal degree, meaning I am qualified to teach at any level, including undergraduate and graduate. During my time at SCAD, I completed two student teaching internships and one TAship, teaching comic craft to students ranging from elementary school to undergraduate.
What Art School Did For Me
Structured lessons, objections, and classwork in such a way that I could make measurable progress extremely fast.Gave everyone an even playing field education- we all had a basis of knowledge- vocab, books, abilityOpportunities for structured, intelligent, and educated critique based on drawing skills and storytellingClasses in concept design, storybuilding and scriptwriting, storytelling for comics, maquette creation, hand lettering and more-specialized and taught by people who had worked professionally in the fieldAccess to professionals- artists of all types at Comic Art Forum, Editors through Editors Day, professors who had worked in the comic and animation industriesCOURAGE to pursue portfolio reviews, additional critique, and to defend my choicesSTRUCTURE although I never lacked for this, having someone with an experienced eye guide my work and studies helped me improve greatly and fastNetwork of other artists My first two good job opportunities were because I was a SCAD kid- working at Doodle Studios-doing contract work for Lego, and doing bit and piece work for Viz MediaFirst opportunity to have work in an anthology (SCAD Travel anthology)I learned what comic process worked for the type of comics I wanted to make, and I learned my own limits and how to set schedules trying to pull everything together before finalsProfessional mores and valuesTabling at conventions regularly and professionally because I met Heidi through SCAD, and to be honest, without SCAD leveling the playing field between us, we probably would never have gotten past our initial biases to become real friendsThe grace to respect the differing experiences and educations of others around me and learn from themMultiple student teaching and TA opportunities, giving me the chance to regularly teach art and comics to a variety of age groups from elementary to undergradThat MFA piece of paper. Although it hasn't worked for me here in Nashville, I am qualified to teach art at a college level. I worked damn hard for that paper, and am very proud of my efforts. Confidence to record and share my journey
I acknowledge this access to education put me in a place of privilege- that's why I share it every chance I can- on this blog, on my YT channel, through workshops and panels that I generally produce free of charge, with materials I've purchased out of pocket.
People assume learning through the resources made available online counts as 'self-taught'- it does not. This is self motivated, self directed informal art education, and I champion it because it's a fine way to learn the ropes without breaking the bank, but to insinuate that you taught yourself without outside assistance diminishes the work of those who freely shared their knowledge and experience with you.
If you can't go to art school and need to pursue art informally for awhile, that's ok. If you can afford to go to art school, or pursue a formal education in the arts, that's also fantastic. Your journey is up to you- the only thing that makes you less is when you diminish the journey for others to lift yourself up.
Please consider donating to this blog or purchasing from Natto-shop (http://nattosoup.com/shop) if you want me to continue publishing quality content. All materials tested were purchased from my own pocket. Keep on Truckin' Nattosoup is not under any sponsorship.
November 20, 2017
Mailbag: October and November 2017
From now on, questions sent to the blog will be answered in Mailbag on a monthly basis! This allows me to share information that might be interesting or helpful to many
Question:
Hi, I'm trying to find a decent watercolor paper to use Penny Black brush stroke stamps with. I been using Canson and Strathmore 140. I use the Holtz stamp positioner so I can apply multiple colors over any spot of the stamp and not 'loose' my place. But these have too big of a tooth. Is that how it's said? I need something a bit smoother and I was sold Ranger Distress watercolor paper. I was wondering what your opinion is of this watercolor paper and if there is a suitable paper available that's not quite as expensive as I have to do a lot of experimenting to find a combination of colors that sings to me. Nothing comes quick or easy for me. I don't know about others, but pulling inspiration into reality is a difficult process. But I love it. Thanks Cheryl Cunningham, Seattle WA.
Regards,Cheryl Cunningham
Answer:
Hi Cheryl!
I think you're looking for a hot press watercolor paper- this would have a smooth finish with no tooth at all. I can recommend Fluid EZ Block watercolor paper in hot press as an affordable hot press paper. Union Square and Fabriano Studio Hotpress are also good choices.
Hot press watercolor paper will still take watercolor without too much buckling, won't require any additional stretching or support if you're just doing light washes, but it may blend different from cold press watercolor papers.
Question:
Hi Becca, I have stumbled upon your website and enjoyed reading some of your posts! I tried the Copic Ciao (brush tip end) marker and loved it but can not use it due to the odor. Would you say that the Pitt Big Brush is the most similar in a water based marker. I loved the flexibility and sponginess of the Copic Ciao. It just felt so wet or something, maybe more like an actual painting brush than a hard marker tip (I would classify myself as a crafter rather than an artist so I apologise if my words are not right). Anyways I loved the way those markers felt and wondered if you knew the closest alternative in an odorless waterbased marker. Thank you so much for your help, Erika
Regards,Erika
Answer:
Hi Erika!
I love the Super Brush used in the Copic Ciao and Copic Sketch too! Those are foam rubber brushes- that's why it's so juicy and springy. Pitt Big Brush pens use compressed felt or fiber for their brushes, and use India Ink, so unlike most waterbased markers, once Pitt Pen ink is dry, it's permanent. Pitt Pens can still be blended while wet and on the right paper- Pitt Pen on Yupo is a lot of fun!
If you're looking for a waterbased marker with that same spring, Zig Art and Graphic Twin markers with the old nibs are perfect for that- their foam rubber nibs have lots of spring! You can check out my review for those markers here. I also really like Tombow ABT markers (not quite as springy, but easier to find) and Zig Clean Color Real Brush Markers (these feature individual nylon bristle brushes, so they're even more like painting!)
Question:
My sister is allergic to the alcohol fumes, but she would like to use markers more like permanent BIC markers. Do you have any suggestions?
Regards,Christina
Answer:
Hi Christina!
If your sister is allergic to alcohol marker fumes, Bic Mark Its are probably not the solution you guys are looking for. What properties is she interested in? Is she looking for waterfastness? Permanence? Blendability? Lightfastness? Luminance? Brilliance?
Waterproof:
POSCA markers
Liquitex or Molotow Acrylic Markers
Pitt Brush Pens and Pitt Big Brush Brush Pens
These are blend while wet but are permanent when fully dry.
Non Waterproof:
Brilliant, blendable color (dye based):
Dr PH Martin's Liquid watercolors
Ecoline Liquid Watercolors
Jane Davenport Mermaid Markers
Fountain pen inks like Diamine Flowers or Music sets (you can also order samples from Goulet and Anderson pens) in waterbrushes
Spectrum Aqua Watercolor Markers
Ecoline Watercolor Markers
Waterbased Markers:
Zig Brushables
Zig Art and Graphic Twin
Tombow ABT
Zig Clean Color Real Brush
Up and Up Waterbased Markers with a Tombow ABT blender
Crayola Supertip Waterbased Markers
Pigment Based:
Winsor and Newton Watercolor Markers
Here's a whole playlist of waterbased and watercolor marker tutorials!
All of the links used in this post link to reviews, tutorials, or field tests that demonstrate these products. I hope this was helpful for your sister- please write back and share the results!
This concludes the October/November Mailbag! If you have any questions, please don't hesitate to email me using the contact form in the left hand sidebar! Future questions will be answered in Mailbag features. Google comments don't work reliably using Google +, so if I don't respond to comments, it's because I'm not seeing them.
Please consider donating to this blog or purchasing from Natto-shop (http://nattosoup.com/shop) if you want me to continue publishing quality content. All materials tested were purchased from my own pocket. Keep on Truckin' Nattosoup is not under any sponsorship.
Question:
Hi, I'm trying to find a decent watercolor paper to use Penny Black brush stroke stamps with. I been using Canson and Strathmore 140. I use the Holtz stamp positioner so I can apply multiple colors over any spot of the stamp and not 'loose' my place. But these have too big of a tooth. Is that how it's said? I need something a bit smoother and I was sold Ranger Distress watercolor paper. I was wondering what your opinion is of this watercolor paper and if there is a suitable paper available that's not quite as expensive as I have to do a lot of experimenting to find a combination of colors that sings to me. Nothing comes quick or easy for me. I don't know about others, but pulling inspiration into reality is a difficult process. But I love it. Thanks Cheryl Cunningham, Seattle WA.
Regards,Cheryl Cunningham
Answer:
Hi Cheryl!
I think you're looking for a hot press watercolor paper- this would have a smooth finish with no tooth at all. I can recommend Fluid EZ Block watercolor paper in hot press as an affordable hot press paper. Union Square and Fabriano Studio Hotpress are also good choices.
Hot press watercolor paper will still take watercolor without too much buckling, won't require any additional stretching or support if you're just doing light washes, but it may blend different from cold press watercolor papers.
Question:
Hi Becca, I have stumbled upon your website and enjoyed reading some of your posts! I tried the Copic Ciao (brush tip end) marker and loved it but can not use it due to the odor. Would you say that the Pitt Big Brush is the most similar in a water based marker. I loved the flexibility and sponginess of the Copic Ciao. It just felt so wet or something, maybe more like an actual painting brush than a hard marker tip (I would classify myself as a crafter rather than an artist so I apologise if my words are not right). Anyways I loved the way those markers felt and wondered if you knew the closest alternative in an odorless waterbased marker. Thank you so much for your help, Erika
Regards,Erika
Answer:
Hi Erika!
I love the Super Brush used in the Copic Ciao and Copic Sketch too! Those are foam rubber brushes- that's why it's so juicy and springy. Pitt Big Brush pens use compressed felt or fiber for their brushes, and use India Ink, so unlike most waterbased markers, once Pitt Pen ink is dry, it's permanent. Pitt Pens can still be blended while wet and on the right paper- Pitt Pen on Yupo is a lot of fun!
If you're looking for a waterbased marker with that same spring, Zig Art and Graphic Twin markers with the old nibs are perfect for that- their foam rubber nibs have lots of spring! You can check out my review for those markers here. I also really like Tombow ABT markers (not quite as springy, but easier to find) and Zig Clean Color Real Brush Markers (these feature individual nylon bristle brushes, so they're even more like painting!)
Question:
My sister is allergic to the alcohol fumes, but she would like to use markers more like permanent BIC markers. Do you have any suggestions?
Regards,Christina
Answer:
Hi Christina!
If your sister is allergic to alcohol marker fumes, Bic Mark Its are probably not the solution you guys are looking for. What properties is she interested in? Is she looking for waterfastness? Permanence? Blendability? Lightfastness? Luminance? Brilliance?
Waterproof:
POSCA markers
Liquitex or Molotow Acrylic Markers
Pitt Brush Pens and Pitt Big Brush Brush Pens
These are blend while wet but are permanent when fully dry.
Non Waterproof:
Brilliant, blendable color (dye based):
Dr PH Martin's Liquid watercolors
Ecoline Liquid Watercolors
Jane Davenport Mermaid Markers
Fountain pen inks like Diamine Flowers or Music sets (you can also order samples from Goulet and Anderson pens) in waterbrushes
Spectrum Aqua Watercolor Markers
Ecoline Watercolor Markers
Waterbased Markers:
Zig Brushables
Zig Art and Graphic Twin
Tombow ABT
Zig Clean Color Real Brush
Up and Up Waterbased Markers with a Tombow ABT blender
Crayola Supertip Waterbased Markers
Pigment Based:
Winsor and Newton Watercolor Markers
Here's a whole playlist of waterbased and watercolor marker tutorials!
All of the links used in this post link to reviews, tutorials, or field tests that demonstrate these products. I hope this was helpful for your sister- please write back and share the results!
This concludes the October/November Mailbag! If you have any questions, please don't hesitate to email me using the contact form in the left hand sidebar! Future questions will be answered in Mailbag features. Google comments don't work reliably using Google +, so if I don't respond to comments, it's because I'm not seeing them.
Please consider donating to this blog or purchasing from Natto-shop (http://nattosoup.com/shop) if you want me to continue publishing quality content. All materials tested were purchased from my own pocket. Keep on Truckin' Nattosoup is not under any sponsorship.
November 16, 2017
Guest Post: Mharz and The Angel With Black Wings
If there’s anything I’ve learned in the years of doing art is that it’s an endless experimentation. It’s fascinating how each artists have their own sets of principles, and methods of doing things. Today, I am happy to share my very own comic making process in this nice little blog post!
First off, a bit about me. Hello my name is Mharz and I’ve been doing webcomics since 2014. Prior to that, I was working in animation industry since 2012. I never went to art school and all the knowledge I have in art is based from my experience working in the industry and self-learning. I currently have three webcomics: The Angel with Black Wings, about the friendship between a human boy and a guardian angel; CHAMPS, about an MMA’s conquest in the octagon and in love; and The Robonoid Fan about different kinds of adults. In addition to that, I’m also currently doing pencils and inks for Donathin Frye’s I, Necromancer. I know… I have many stuffs to do.
I also do occasional drawing tips based on my experience in animation. Anyway, enough about the intros and let’s get this process started. I kinda have like a wide variety of methods but for the sake of simplicity, I’m just gonna discuss my comic making process for The Angel with Black Wings.
For starters, I’m gonna divide my process into three phases. This is something I have adopted in animation production: Pre-production, Production, and Post-production.
Pre-production
This is the phase where I outline, plot and thumbnail the story. I usually do it every 5 chapters so I won’t burn out. This is the most gruelling phase for me and really requires me to use too much mental power.
I am very old-fashioned when it comes to writing and I really prefer to write in paper because (1) I get tired easily if I sit in the computer for too long and I can write on paper while I’m lying down, (2) I can bring them anywhere in case I unexpectedly thought of something, I can write it without the need of gadgets and internet.I like to keep notebooks for writing.
Here’s one of the pages of the notebook scanned. I deeply apologize for my ugly handwriting. XD

As you can see, I prefer writing in prose than in script format. In this stage, I’m not thinking of the panelling and layout just yet and my priority is to just the story flow. I’m not that smart to think of so many things at once. So I continue this process until I finished five chapters before proceeding to the next stage which is thumbnails/storyboard.
Now this is the stage where I start to think of the story as a bunch of comic page. My thumbnails are really just a bunch of very rough sketches. I also do this in paper as well.
I have worse sketches than this, trust me. I usually sketch very fast on this stage so that the momentum and my brain won’t slow down. Bear in mind that this layout is not set in stone. If I thought of something better in the production phase, I’d definitely roll with that but it’s nice to have a clear visual reference. Once all five chapters has been fully thumbnailed, it’s finally time to move onto the next phase.
Production
This is the phase where I really draw the actual page. It’s finally time to go digital because I prefer drawing in digital. Before I start of the actual page, I do the backgrounds first. I’d be the first one to admit to you that I don’t have much patience in drawing backgrounds especially buildings so to make up for it, I’m gonna use my good ‘ol buddy, Sketchup.
For those who don’t know, Sketchup is a 3D software. It’s definitely not the best software around but I chose it since it’s fairly easy to use (at least I think so) and also the myriad of 3D models they have in 3D Warehouse. (I usually just use the most generic looking 3D models)

This particular model was made from putting some buildings I made in addition to pre-made models I’ve downloaded from 3D warehouse. Another reason why I prefer using sketchup is they have this setting where the models look like they’re 2D lineart as seen on the image and I’m heavily utilizing it. This way, I don’t really have to spend extra time lining them. (Of course, I can make it work since my setting is modern day.)
Anyway, let’s just save the more elaborate explanation and usage of sketchup in a future post. We still have a lot to discuss.
After I picked the proper camera angle for the background, I exported it as a PNG image and now it’s time to move onto the pencils (but I really just refer to it as rough sketches).
I’m using Medibang Paint Pro for pencils and inks, by the way. I just love how tight their stabilizers are and it’s really compatible with my hand strokes. The paper size I use is A4 at 300 dpi since it’s a pretty common size in our country and it’s also directly proportional to my intended print size which is A5.
With my thumbnails as the guide, I do these in order, sketch the panel border, paste the backgrounds, draw the character constructions.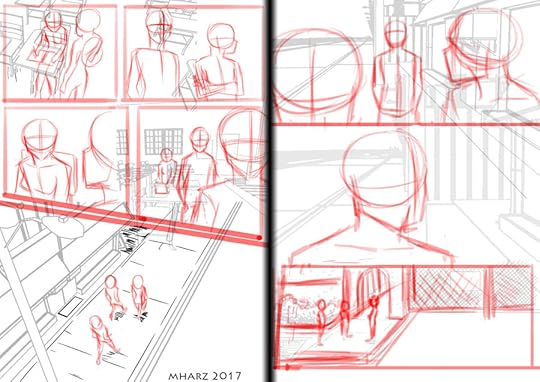
I usually add the background first so that I can figure out the perspective and the footing of the characters. I do the construction in red lines out of habit really. If you look back from the thumbnails you’ll notice that I made some last minute changes at the layout of the last panel. I realized that one panel where Ray is looking from behind is pretty redundant so I took it down and shifted the bottom panel to be wide.
Now I can add details or what we normally call in our studio, tiedown.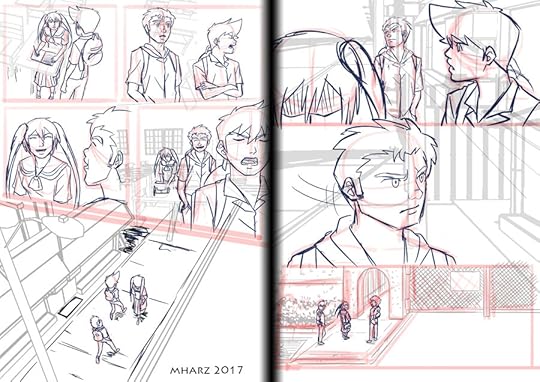
I use blue lines for this one so I won’t confuse it with grays/black once I start to ink. These steps are very essential to me since I tend to flop at drawing without doing these steps. Once I finished the tiedown I can finally do inks/clean-up.
I almost forgot to mention what brushes I used for the sketches. Anyway, I only use Medibang’s default pencil and pen brush. No fancy mumbo jumbo there.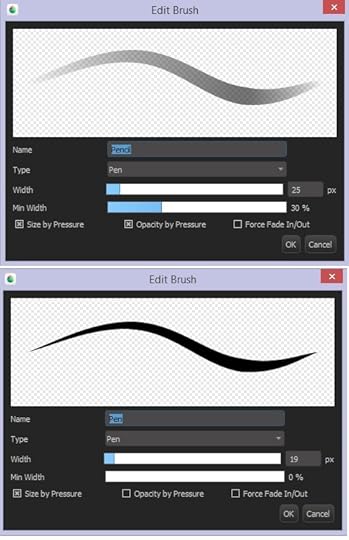 Now using the same pen brush, I ink the lovely characters.
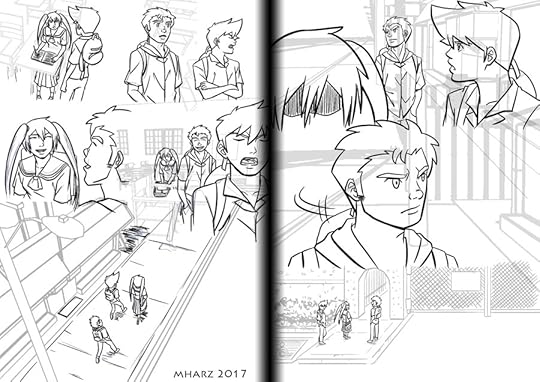
I’m gonna clean the backgrounds and remove the lines that should be obscured in a bit but first I’d like to point out something first: When I do the inks I make sure that the lines are aliased. For those who aren’t familiar of the term, aliasing is the sharpness of the lines. Example:
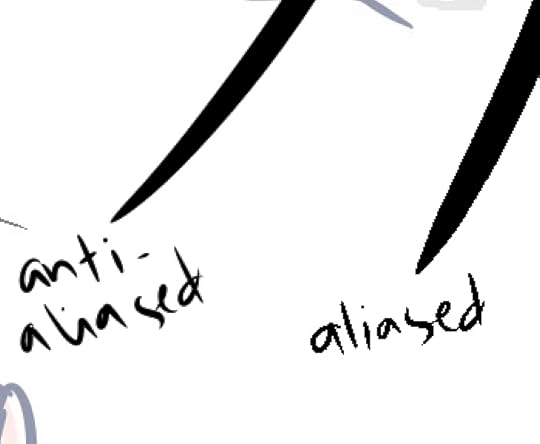
Aliased lines are more sharp and crisp albeit jagged when zoomed-in. The reason I picked aliased lines when inking is because it’s easier and cleaner to flat than anti-aliased lines and since I’m drawing at 300 dpi, the jaggedness won’t be that obvious. Although I wouldn’t recommend it for lower resolution drawings.
After all the inking. Medibang’s job is now complete and I’m gonna jump onto a different software: Good ‘ol Photoshop. I actually just use an old CS2 because I can’t afford the monthly ones.
I added the legit panel borders and cleaned up the unnecessary lines and viola! Time for do the tones!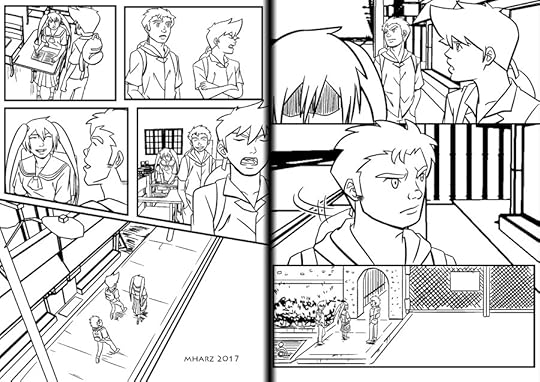
When adding the tones, I select the areas I want to fill with the magic wand tool. Here’s my settings:
I expand the selection so the grays will go slightly underneath the lines and won’t have those strange white gaps. To do this go to Select > Modify > Expand like shown in the image: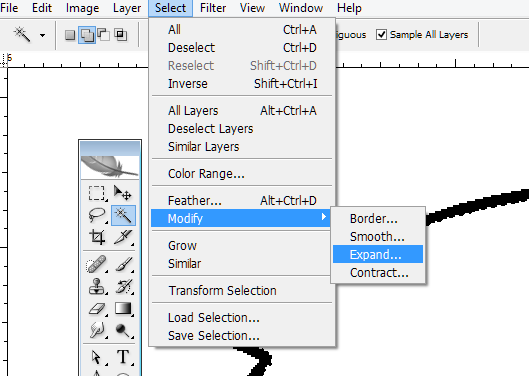
After some doohickey, the grays and blacks are now added. I separated the grays and black in different layers. I just use gradients on the backgrounds. I only add shading if I need to emphasize on the lighting so most of the time I only have flat and gradients on the pages. I also added some noise filter so the tones have texture and not plain looking.
This is the end of the production stage.
Post-production
In animation, this is the phase where you add fancy effects. In my comic making process, in addition to adding effects when necessary, this is where I do the texts as well as the final edits. I added the text first before adding the speech bubbles. If you can afford it, get an editor. Sadly I’m a poor sap who can’t afford to pay people so I have to do everything on my own.
And it’s done! I usually export it for print size before shrinking it down for web uploads. I usually do Production and Post-production in a per page basis. With this method I can finish 1-2 pages per day. The 3D backgrounds helped considerably in my production time. This is the method that worked for me but like I said at first, every artists have their own set of principles that worked for them so be sure to constantly experiment to find what’s suitable for you!
If you have any questions, or want to stay updated if I posted new artworks or drawing tips, you can follow me in these parts of the internet:
Twitter: http://twitter.com/avimharz
Instagram: http://instagram.com/avimharz
Website, comics and drawing tips: http://mharz.com
Please consider donating to this blog or purchasing from Natto-shop (http://nattosoup.com/shop) if you want me to continue publishing quality content. All materials tested were purchased from my own pocket. Keep on Truckin' Nattosoup is not under any sponsorship.
First off, a bit about me. Hello my name is Mharz and I’ve been doing webcomics since 2014. Prior to that, I was working in animation industry since 2012. I never went to art school and all the knowledge I have in art is based from my experience working in the industry and self-learning. I currently have three webcomics: The Angel with Black Wings, about the friendship between a human boy and a guardian angel; CHAMPS, about an MMA’s conquest in the octagon and in love; and The Robonoid Fan about different kinds of adults. In addition to that, I’m also currently doing pencils and inks for Donathin Frye’s I, Necromancer. I know… I have many stuffs to do.
I also do occasional drawing tips based on my experience in animation. Anyway, enough about the intros and let’s get this process started. I kinda have like a wide variety of methods but for the sake of simplicity, I’m just gonna discuss my comic making process for The Angel with Black Wings.
For starters, I’m gonna divide my process into three phases. This is something I have adopted in animation production: Pre-production, Production, and Post-production.
Pre-production
This is the phase where I outline, plot and thumbnail the story. I usually do it every 5 chapters so I won’t burn out. This is the most gruelling phase for me and really requires me to use too much mental power.
I am very old-fashioned when it comes to writing and I really prefer to write in paper because (1) I get tired easily if I sit in the computer for too long and I can write on paper while I’m lying down, (2) I can bring them anywhere in case I unexpectedly thought of something, I can write it without the need of gadgets and internet.I like to keep notebooks for writing.
Here’s one of the pages of the notebook scanned. I deeply apologize for my ugly handwriting. XD
As you can see, I prefer writing in prose than in script format. In this stage, I’m not thinking of the panelling and layout just yet and my priority is to just the story flow. I’m not that smart to think of so many things at once. So I continue this process until I finished five chapters before proceeding to the next stage which is thumbnails/storyboard.
Now this is the stage where I start to think of the story as a bunch of comic page. My thumbnails are really just a bunch of very rough sketches. I also do this in paper as well.
I have worse sketches than this, trust me. I usually sketch very fast on this stage so that the momentum and my brain won’t slow down. Bear in mind that this layout is not set in stone. If I thought of something better in the production phase, I’d definitely roll with that but it’s nice to have a clear visual reference. Once all five chapters has been fully thumbnailed, it’s finally time to move onto the next phase.
Production
This is the phase where I really draw the actual page. It’s finally time to go digital because I prefer drawing in digital. Before I start of the actual page, I do the backgrounds first. I’d be the first one to admit to you that I don’t have much patience in drawing backgrounds especially buildings so to make up for it, I’m gonna use my good ‘ol buddy, Sketchup.
For those who don’t know, Sketchup is a 3D software. It’s definitely not the best software around but I chose it since it’s fairly easy to use (at least I think so) and also the myriad of 3D models they have in 3D Warehouse. (I usually just use the most generic looking 3D models)
This particular model was made from putting some buildings I made in addition to pre-made models I’ve downloaded from 3D warehouse. Another reason why I prefer using sketchup is they have this setting where the models look like they’re 2D lineart as seen on the image and I’m heavily utilizing it. This way, I don’t really have to spend extra time lining them. (Of course, I can make it work since my setting is modern day.)
Anyway, let’s just save the more elaborate explanation and usage of sketchup in a future post. We still have a lot to discuss.
After I picked the proper camera angle for the background, I exported it as a PNG image and now it’s time to move onto the pencils (but I really just refer to it as rough sketches).
I’m using Medibang Paint Pro for pencils and inks, by the way. I just love how tight their stabilizers are and it’s really compatible with my hand strokes. The paper size I use is A4 at 300 dpi since it’s a pretty common size in our country and it’s also directly proportional to my intended print size which is A5.
With my thumbnails as the guide, I do these in order, sketch the panel border, paste the backgrounds, draw the character constructions.
I usually add the background first so that I can figure out the perspective and the footing of the characters. I do the construction in red lines out of habit really. If you look back from the thumbnails you’ll notice that I made some last minute changes at the layout of the last panel. I realized that one panel where Ray is looking from behind is pretty redundant so I took it down and shifted the bottom panel to be wide.
Now I can add details or what we normally call in our studio, tiedown.
I use blue lines for this one so I won’t confuse it with grays/black once I start to ink. These steps are very essential to me since I tend to flop at drawing without doing these steps. Once I finished the tiedown I can finally do inks/clean-up.
I almost forgot to mention what brushes I used for the sketches. Anyway, I only use Medibang’s default pencil and pen brush. No fancy mumbo jumbo there.
Now using the same pen brush, I ink the lovely characters.
I’m gonna clean the backgrounds and remove the lines that should be obscured in a bit but first I’d like to point out something first: When I do the inks I make sure that the lines are aliased. For those who aren’t familiar of the term, aliasing is the sharpness of the lines. Example:
Aliased lines are more sharp and crisp albeit jagged when zoomed-in. The reason I picked aliased lines when inking is because it’s easier and cleaner to flat than anti-aliased lines and since I’m drawing at 300 dpi, the jaggedness won’t be that obvious. Although I wouldn’t recommend it for lower resolution drawings.
After all the inking. Medibang’s job is now complete and I’m gonna jump onto a different software: Good ‘ol Photoshop. I actually just use an old CS2 because I can’t afford the monthly ones.
I added the legit panel borders and cleaned up the unnecessary lines and viola! Time for do the tones!
When adding the tones, I select the areas I want to fill with the magic wand tool. Here’s my settings:
I expand the selection so the grays will go slightly underneath the lines and won’t have those strange white gaps. To do this go to Select > Modify > Expand like shown in the image:
After some doohickey, the grays and blacks are now added. I separated the grays and black in different layers. I just use gradients on the backgrounds. I only add shading if I need to emphasize on the lighting so most of the time I only have flat and gradients on the pages. I also added some noise filter so the tones have texture and not plain looking.
This is the end of the production stage.
Post-production
In animation, this is the phase where you add fancy effects. In my comic making process, in addition to adding effects when necessary, this is where I do the texts as well as the final edits. I added the text first before adding the speech bubbles. If you can afford it, get an editor. Sadly I’m a poor sap who can’t afford to pay people so I have to do everything on my own.
And it’s done! I usually export it for print size before shrinking it down for web uploads. I usually do Production and Post-production in a per page basis. With this method I can finish 1-2 pages per day. The 3D backgrounds helped considerably in my production time. This is the method that worked for me but like I said at first, every artists have their own set of principles that worked for them so be sure to constantly experiment to find what’s suitable for you!
If you have any questions, or want to stay updated if I posted new artworks or drawing tips, you can follow me in these parts of the internet:
Twitter: http://twitter.com/avimharz
Instagram: http://instagram.com/avimharz
Website, comics and drawing tips: http://mharz.com
Please consider donating to this blog or purchasing from Natto-shop (http://nattosoup.com/shop) if you want me to continue publishing quality content. All materials tested were purchased from my own pocket. Keep on Truckin' Nattosoup is not under any sponsorship.
November 15, 2017
NOCAZfest Announcement
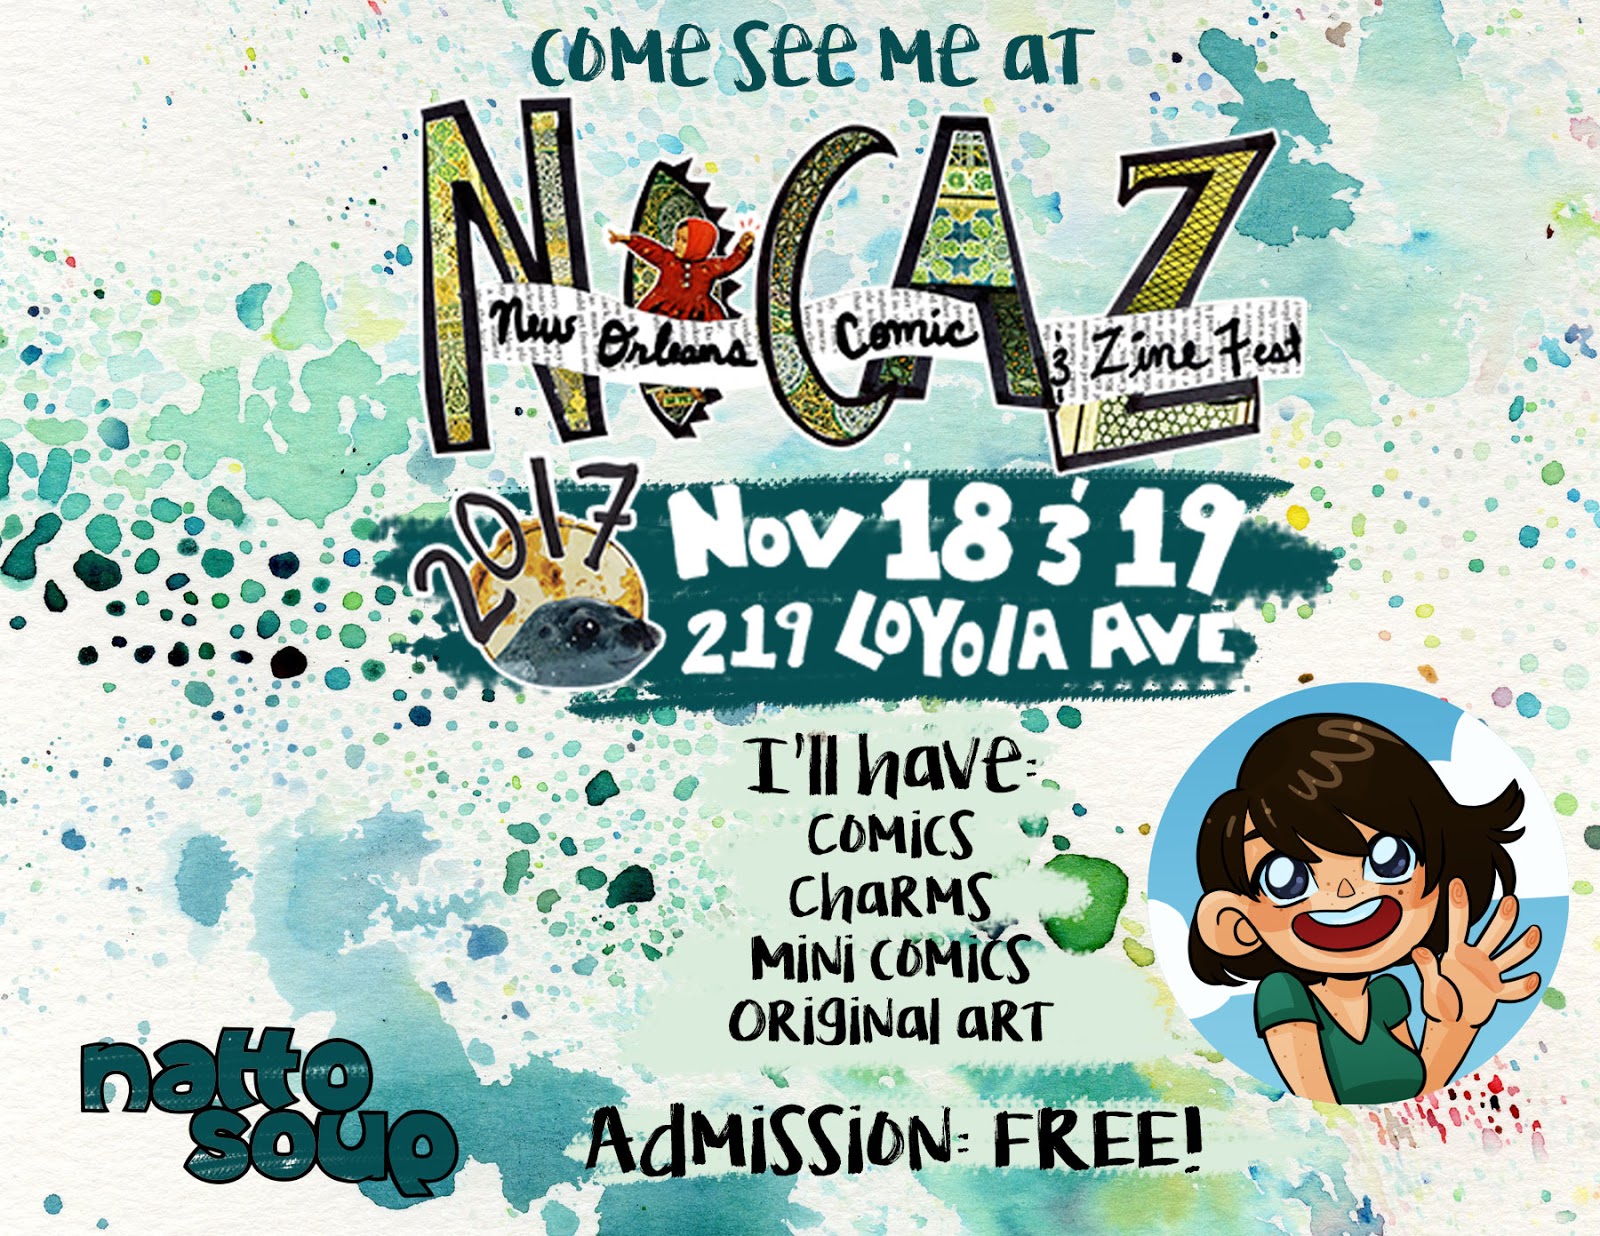
It's that time of year again! I'm tabling at NOCAZfest in New Orleans, Louisiana November 18th and 19th! NOCAZfest is a two day indie comic show held at the New Orleans Public Library on 219 Loyola Avenue. There's tons of great artists, comic creators, zine makers, and more, and admission is free! Family friendly tables will be marked by balloon, so if you're shopping with little ones, head for those tables.
I'm flying in from Nashville, and I'll have copies of my Inktober 2017 zine, Lilliputian Living. I'll have free copies of Cicada Summer- Pickin n Peelin for kids and to trade, as well as stickers, mini prints, wooden charms, and more! For those of you who missed me at Mechacon, this is a great opportunity to get caught up!
On Sunday, I have a hands on inking workshop-
 Lets Get Inky is a combination panel and workshop that will present attendees with a variety of inking materials and present an opportunity to play. This is a free workshop that is open to the public, and all are welcome to attend and learn a little about traditional inking.
Please consider donating to this blog or purchasing from Natto-shop (http://nattosoup.com/shop) if you want me to continue publishing quality content. All materials tested were purchased from my own pocket. Keep on Truckin' Nattosoup is not under any sponsorship.

November 13, 2017
Guest Review: Feather on Minso and Yokoyaya
Two Japanese Dollar Stores: Minso and Yokoyaya
Hello! I’m Feather and this is my first review here! I’m just a weird little fledgling comic artist, creator of Prompt Execution and Perfection, a Mary Sue story. I am not the most well versed in art in terms of all the different mediums but I do enjoy trying them. With that out of the way, let’s get into things.
Just a little about this post, if you love Japanese Dollar Stores, then this is the post for you. I’m going to drop two store rundowns, one I found in Hong Kong and then revisited again in my local area, and the other one is pretty much a Daiso store with another name.
NOTE! I am just focusing on the stationary sections of the stores, these are general stores with other cool items and things to explore. Another thing is I am not a professional, so I do recommend everyone to give everything a fair go due to probably knowing more about the materials than I do. I just like to have an excuse to buy stationery and art supplies.
Yokoyaya
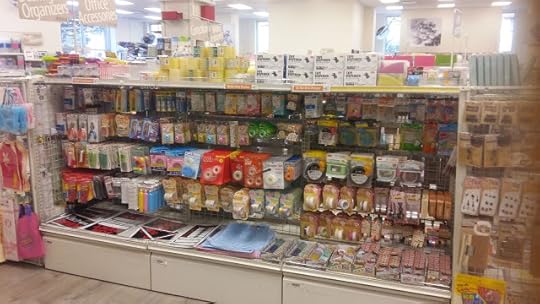
Yokoyaya is the store which I mentioned being the Daiso store with another name. Daiso is another Japanese Dollar Store, with products usually in the $2 CAD (I live in Canada) range. Everything I see in the aisles of Yokoyaya, I have seen at the Daiso. Even the packaging had Daiso’s branding on it. It also seems to have shorter shelving than my local Daiso, meaning you had to slightly crouch to look at things. At least the flags telling you what the items in the area are really did help. It is also slight smaller than Daiso as well, with Daiso being on two floors and Yokoyaya being only one floor but slightly wider.
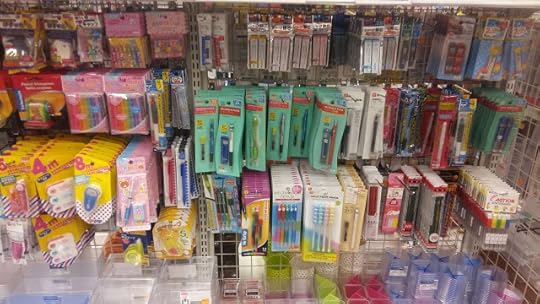
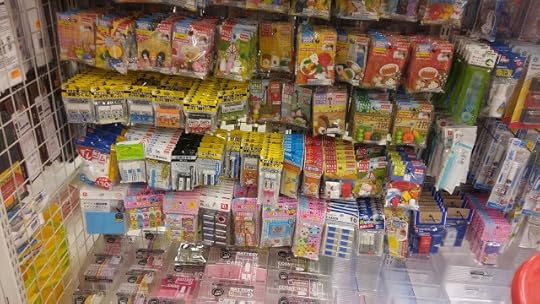
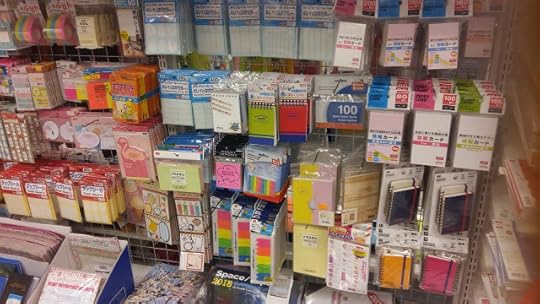
Since I really didn’t need anything from this shop, I went and grabbed three things actually. Well, the last one is just a bag of candy because I enjoy some hard soda flavoured candies but two actual things from the Stationery section.

First thing I picked up were these postcards, made of pretty sturdy cardstock. I needed a bunch of them for Christmas cards so this was my main pick up. I will be testing all the pens from my other purchase on this paper. I also realized taking pictures of bright white paper on my white desk was stupid so I put a bit of grey newsprint underneath to show off the sheets. They are four inches wide and a bit bigger than five and a half inches long. Like… 5.75 inches? There are 55 of them and I think they are a really good deal at two dollars a pack.
 The packaging for stickers is beyond necessary
 Yokoyaya Happy, seriously
The second thing I bought happened to be this really overly packaged bundle of sticky notes. It has a good spread of different sticky notes I would totally use everyday like the ‘Don’t forget’ and ‘To Do list’, except for the weird Happy Sticky note. Like I have no idea why I would ever need a Happy Sticky note and it still boggles me why they pick Happy as their final word choice. I didn’t open up this one and try it because I have tried this product in another general amount and all I can say is it sticks, you can write on it, that’s all. Stick time is decent, just don’t play with it too much. Also I’m gifting it to a friend who doesn’t have a Daiso, Yokoyaya, or a Minso near them. Tragic.
Would I recommend either product? I do recommend the postcards, they are really nice and has a good snap to them. The Sticky notes book set? I prefer normal ones but if you really want to go all out on decorating, go for it.
Since it took me around 45 minutes to get to the Yokoyaya, instead of the 10 minutes it would take me to go to the closer Daiso near me, I would not go back to Yokoyaya again unless I’m in the area to begin with.
Wrap up Thoughts:Pros:Price - Everything is around $2, which is great.If you don’t have a Daiso in your area, you might have a Yokoyaya.Better signs than Daiso to tell you where things are.Not as crowded as a Daiso.
Cons:(Personal) Location, I’m near a Daiso, I don’t need to go to a Yokoyaya.Smaller space, less selection.The lower shelving might be hard for some people’s backs.(Personal) I also somehow hurt myself on the metal spinners trying to get into the shop for some reason. Don’t be like Feather, enter shops carefully.
Silly Yokoyaya, that isn’t from Daiso…
Minso

First note about their stationary section is they have a lot more sets to sell than their loose items. They are a $2.99 CAD store, which is literally three dollars okay we don’t even have the penny anymore! It ranges up of course, seeing up to eight dollars and I think some items around the store are even more. I noticed they have a bunch of oil pastels and coloured pencils. I didn’t pick up any of those because they are not mediums I’m familiar with or use frequently.

There was a good selection of notebooks to pick from, which I picked one up as well as a tester. Funny enough, it was the most expensive thing in comparison out of everything else I bought. They had a lot of assorted options, I didn’t have time to check them all which is a shame.


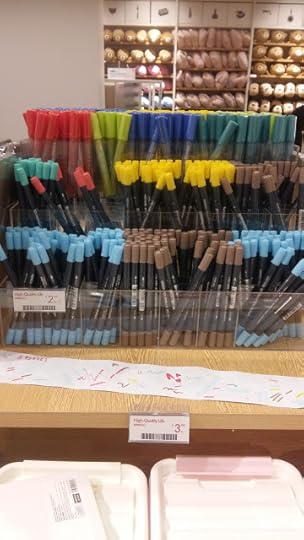
Here is the pen area, it was just one side of the shelves and one tiny display. They were buy three for three dollars, pretty much a dollar each which was a great deal. I grabbed a bunch here.
NOTE! Here was a mistake I did, I just grabbed and didn’t check. A few of my pens had a plastic seal over them to keep them fresh, and I didn’t check all of them, meaning I accidently grabbed either their testers which were unmarked or someone already opened them to test out. It was some bad luck but remember to check your pens always!
So what was my actual Minso haul? Well first I want to note I have been to this store before when I was visiting family in Hong Kong, so I already had some Minso brush pens, and I bought doubles for testing and for a friend.

I bought the Hong Kong set awhile ago, HK Pens at Work
The bottom two were my duplicates, which you will see tested later. And here is that postcard paper doing it’s work, showing it can handle the mediums quite well. It was really nice to use these brush markers, having a nice brush tip and a bullet nib I can use to write notes with.
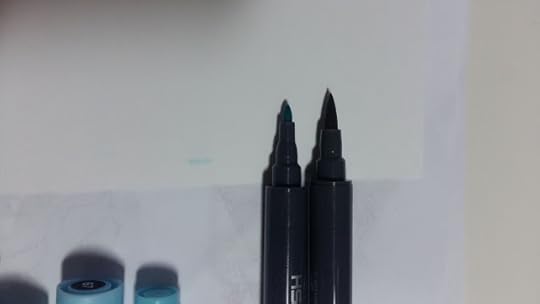
The three there are the ones I picked up from this store, with their smaller colour selection. Definitely something I have to mark them down for, their lack of colour choices limits what you can do greatly. The writing flow is smooth with no hiccups, and the tips can take pressure and abuse well due to my heavy hand when I write. I will always buy these again when I use up my current ones.
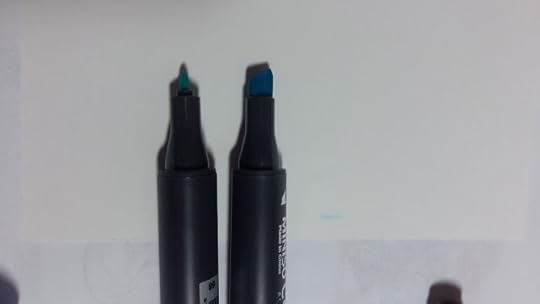
These were some alcohol based markers, I am not very well versed in this category either. I tried them out and they didn’t smell as heavy as other brand of alcohol based markers so I give that a plus since the smell is what puts me away from them in the first place. I say they are slightly streaky from when I tested them, but it could be me putting uneven pressure on it.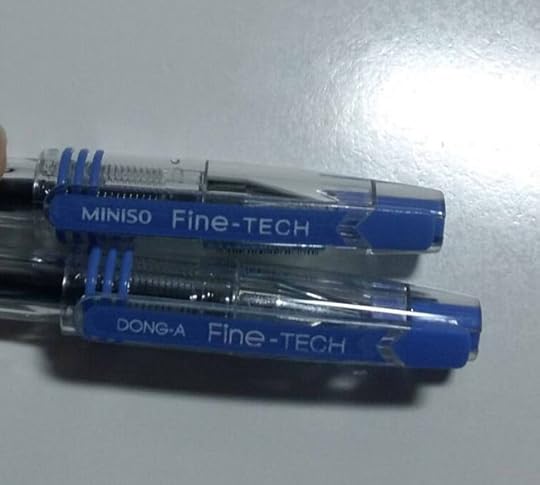 Lol Branding
Fun little thing, I found a Minso brand Fine Tec and then I remembered I had something similar so behold my Dong-A pen which is the exact freaking pen. Just the branding was different and some of the labels. They wrote the same way, and had the same colour. But the fun fact is they cost me differently. It was a sad discovery.
 Death Marker
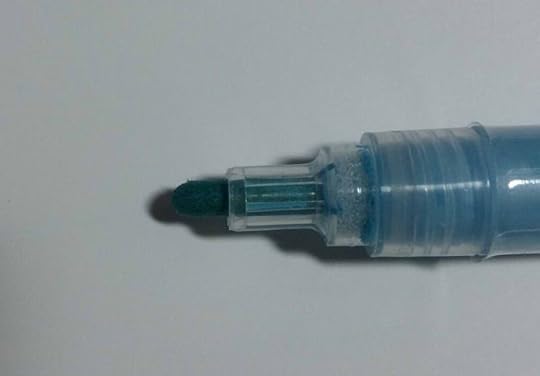 I cry
I cry
This acrylic paint marker was one of the ones I think I grabbed the tester of, the nib was already saturated with the liquid, and had a chip in it. It was one of those shake and press to get it to work type of pens and I’m never good with those markers so I will definitely never use this much and probably never buy anything of that same vein. I didn’t like the flow of it and I found it really spotty. It kinda also just went everywhere when I tried to do the nib pressing thing.
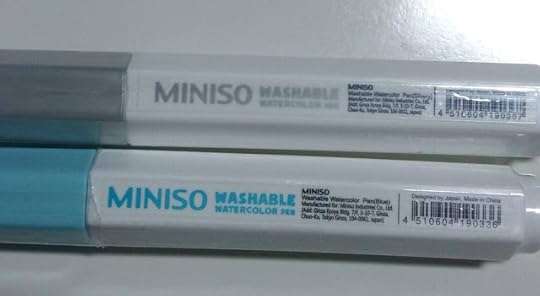

The blue marker of the two watercolour pens was another of the already opened and used ones. The metallic marker was fresh though, and I love how bright it is and how metal it looks. Flows nicely, both of them actually, but I am not sure what I would use them for other than maybe an accent on some line art. Nib press with control, because my heavy hand just makes it puddle everywhere. But the puddle was smaller than the previous pen.

Test all the markers, That’s metal
Here is the compiled look of all the supplies, tested on that postcard paper. Cool note is the alcohol based marker didn’t bleed through to the other side, just barely started to. Might be good for all those people who use a lot of alcohol based markers.
Here is that book I talked about. I didn’t own a lot of sketchbooks with rings on the short end, so I picked it up. Had really nice cream tone paper, but it was kinda thin. Probably good for landscape sketching. Had a somewhat hard cover, basic enough to keep the book a book.


Of course I tested my more frequently used mediums on it, and that alcohol based marker a try as well. Well the paper is super thin so I don’t think I will be using the backside of it if I do drop a few strokes of colour on it.
I definitely recommend the water based brush pens, and specifically the metallic watercolour pen with the shake and press nib. The Fine Tec is decent but I had a few Fine Tecs before and sometimes they jam up really badly due to ink drying and I have to get a new one. Everything else is things I don’t frequently use, so I can’t give a strong recommendation to them.
Wrap up Thoughts:Pros:
Price - Everything is around $3, a little bit more expensive than Daiso but you can still get the dealsGood quality for what they are sellingGood place to find some brush pens for cheap, even could be a cheaper alternative to the same thing
Cons:
Limited colour selection, and general limited selection when comparing locationsBe careful of people who uncapped the pens already, or accidentally picking up a tester since they are unmarked(Personal) Got assaulted by their perfume section right at the front of the store when walking in. Had to exit to breathe and cough.
Thank you so much for reading! I hope you found some supplies you would like to try or look around for these two stores! Thanks to Becca for being an amazing person. Have a great day everyone and keep looking for those dollar stores!
You can find me at:Website: http://featheryterrarium.com/Webcomics at: https://tapas.io/FeatheryJustice
I go by FeatheryJustice on almost all my social media.
Deviantart: https://featheryjustice.deviantart.com/Tumblr: http://featheryjustice.tumblr.com/
Instagram: https://www.instagram.com/featheryjustice/
Please consider donating to this blog or purchasing from Natto-shop (http://nattosoup.com/shop) if you want me to continue publishing quality content. All materials tested were purchased from my own pocket. Keep on Truckin' Nattosoup is not under any sponsorship.
Hello! I’m Feather and this is my first review here! I’m just a weird little fledgling comic artist, creator of Prompt Execution and Perfection, a Mary Sue story. I am not the most well versed in art in terms of all the different mediums but I do enjoy trying them. With that out of the way, let’s get into things.
Just a little about this post, if you love Japanese Dollar Stores, then this is the post for you. I’m going to drop two store rundowns, one I found in Hong Kong and then revisited again in my local area, and the other one is pretty much a Daiso store with another name.
NOTE! I am just focusing on the stationary sections of the stores, these are general stores with other cool items and things to explore. Another thing is I am not a professional, so I do recommend everyone to give everything a fair go due to probably knowing more about the materials than I do. I just like to have an excuse to buy stationery and art supplies.
Yokoyaya
Yokoyaya is the store which I mentioned being the Daiso store with another name. Daiso is another Japanese Dollar Store, with products usually in the $2 CAD (I live in Canada) range. Everything I see in the aisles of Yokoyaya, I have seen at the Daiso. Even the packaging had Daiso’s branding on it. It also seems to have shorter shelving than my local Daiso, meaning you had to slightly crouch to look at things. At least the flags telling you what the items in the area are really did help. It is also slight smaller than Daiso as well, with Daiso being on two floors and Yokoyaya being only one floor but slightly wider.

Since I really didn’t need anything from this shop, I went and grabbed three things actually. Well, the last one is just a bag of candy because I enjoy some hard soda flavoured candies but two actual things from the Stationery section.
First thing I picked up were these postcards, made of pretty sturdy cardstock. I needed a bunch of them for Christmas cards so this was my main pick up. I will be testing all the pens from my other purchase on this paper. I also realized taking pictures of bright white paper on my white desk was stupid so I put a bit of grey newsprint underneath to show off the sheets. They are four inches wide and a bit bigger than five and a half inches long. Like… 5.75 inches? There are 55 of them and I think they are a really good deal at two dollars a pack.
 The packaging for stickers is beyond necessary
 Yokoyaya Happy, seriously
The second thing I bought happened to be this really overly packaged bundle of sticky notes. It has a good spread of different sticky notes I would totally use everyday like the ‘Don’t forget’ and ‘To Do list’, except for the weird Happy Sticky note. Like I have no idea why I would ever need a Happy Sticky note and it still boggles me why they pick Happy as their final word choice. I didn’t open up this one and try it because I have tried this product in another general amount and all I can say is it sticks, you can write on it, that’s all. Stick time is decent, just don’t play with it too much. Also I’m gifting it to a friend who doesn’t have a Daiso, Yokoyaya, or a Minso near them. Tragic.
Would I recommend either product? I do recommend the postcards, they are really nice and has a good snap to them. The Sticky notes book set? I prefer normal ones but if you really want to go all out on decorating, go for it.
Since it took me around 45 minutes to get to the Yokoyaya, instead of the 10 minutes it would take me to go to the closer Daiso near me, I would not go back to Yokoyaya again unless I’m in the area to begin with.
Wrap up Thoughts:Pros:Price - Everything is around $2, which is great.If you don’t have a Daiso in your area, you might have a Yokoyaya.Better signs than Daiso to tell you where things are.Not as crowded as a Daiso.
Cons:(Personal) Location, I’m near a Daiso, I don’t need to go to a Yokoyaya.Smaller space, less selection.The lower shelving might be hard for some people’s backs.(Personal) I also somehow hurt myself on the metal spinners trying to get into the shop for some reason. Don’t be like Feather, enter shops carefully.
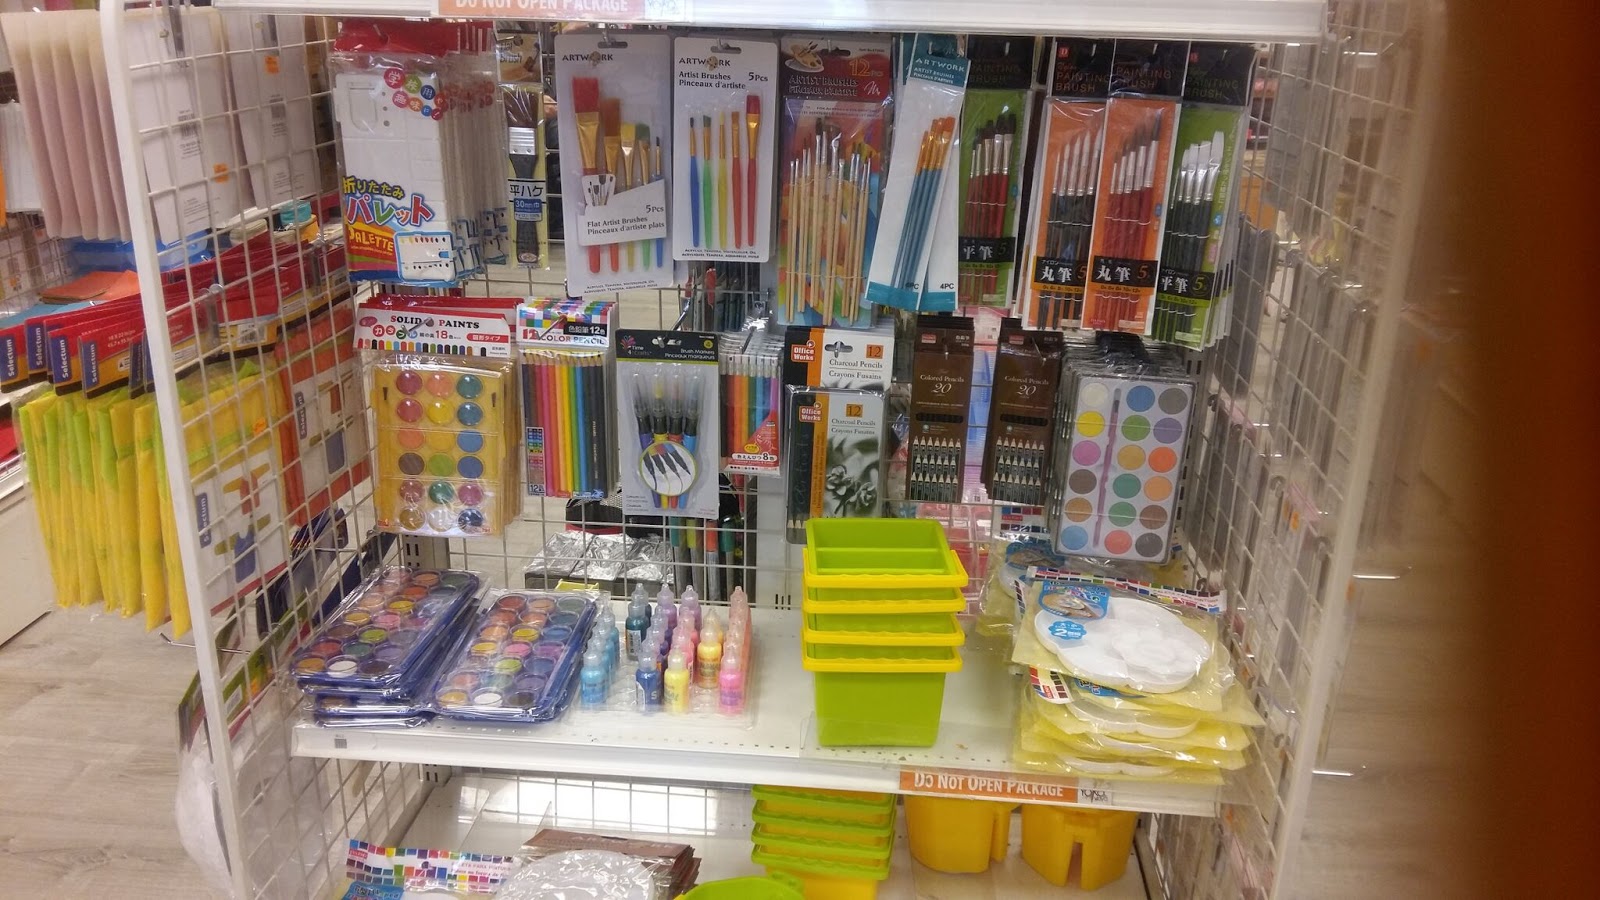
Silly Yokoyaya, that isn’t from Daiso…
Minso
First note about their stationary section is they have a lot more sets to sell than their loose items. They are a $2.99 CAD store, which is literally three dollars okay we don’t even have the penny anymore! It ranges up of course, seeing up to eight dollars and I think some items around the store are even more. I noticed they have a bunch of oil pastels and coloured pencils. I didn’t pick up any of those because they are not mediums I’m familiar with or use frequently.

There was a good selection of notebooks to pick from, which I picked one up as well as a tester. Funny enough, it was the most expensive thing in comparison out of everything else I bought. They had a lot of assorted options, I didn’t have time to check them all which is a shame.


Here is the pen area, it was just one side of the shelves and one tiny display. They were buy three for three dollars, pretty much a dollar each which was a great deal. I grabbed a bunch here.
NOTE! Here was a mistake I did, I just grabbed and didn’t check. A few of my pens had a plastic seal over them to keep them fresh, and I didn’t check all of them, meaning I accidently grabbed either their testers which were unmarked or someone already opened them to test out. It was some bad luck but remember to check your pens always!
So what was my actual Minso haul? Well first I want to note I have been to this store before when I was visiting family in Hong Kong, so I already had some Minso brush pens, and I bought doubles for testing and for a friend.
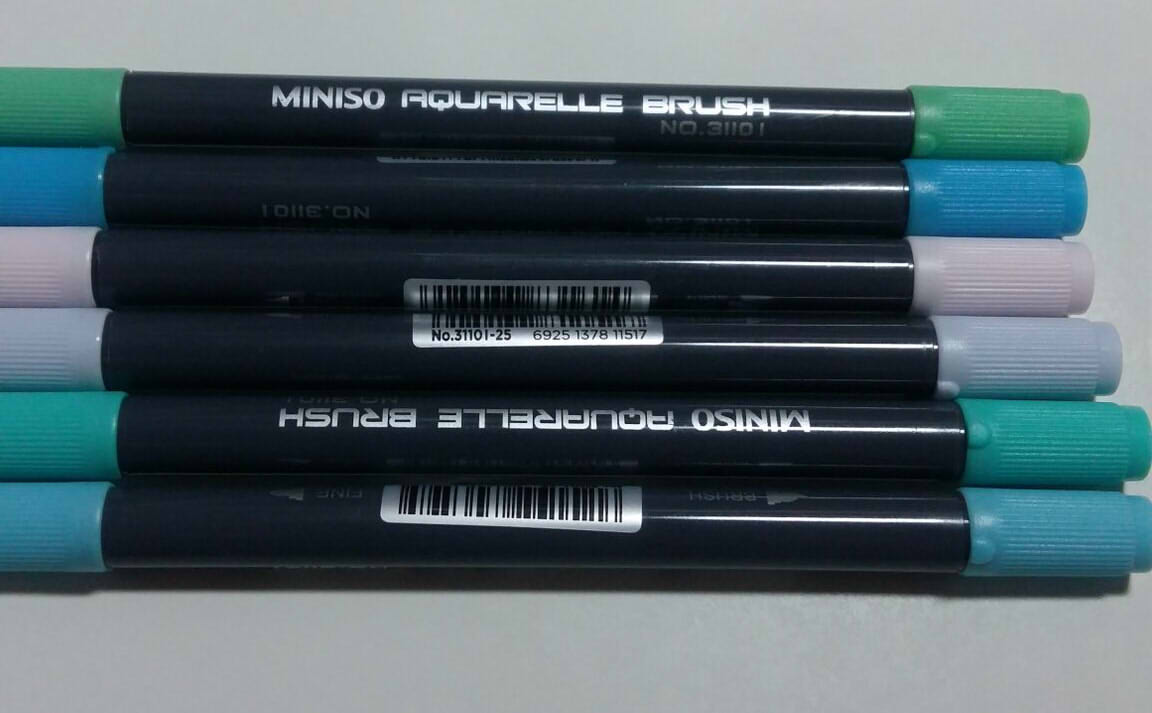
I bought the Hong Kong set awhile ago, HK Pens at Work
The bottom two were my duplicates, which you will see tested later. And here is that postcard paper doing it’s work, showing it can handle the mediums quite well. It was really nice to use these brush markers, having a nice brush tip and a bullet nib I can use to write notes with.
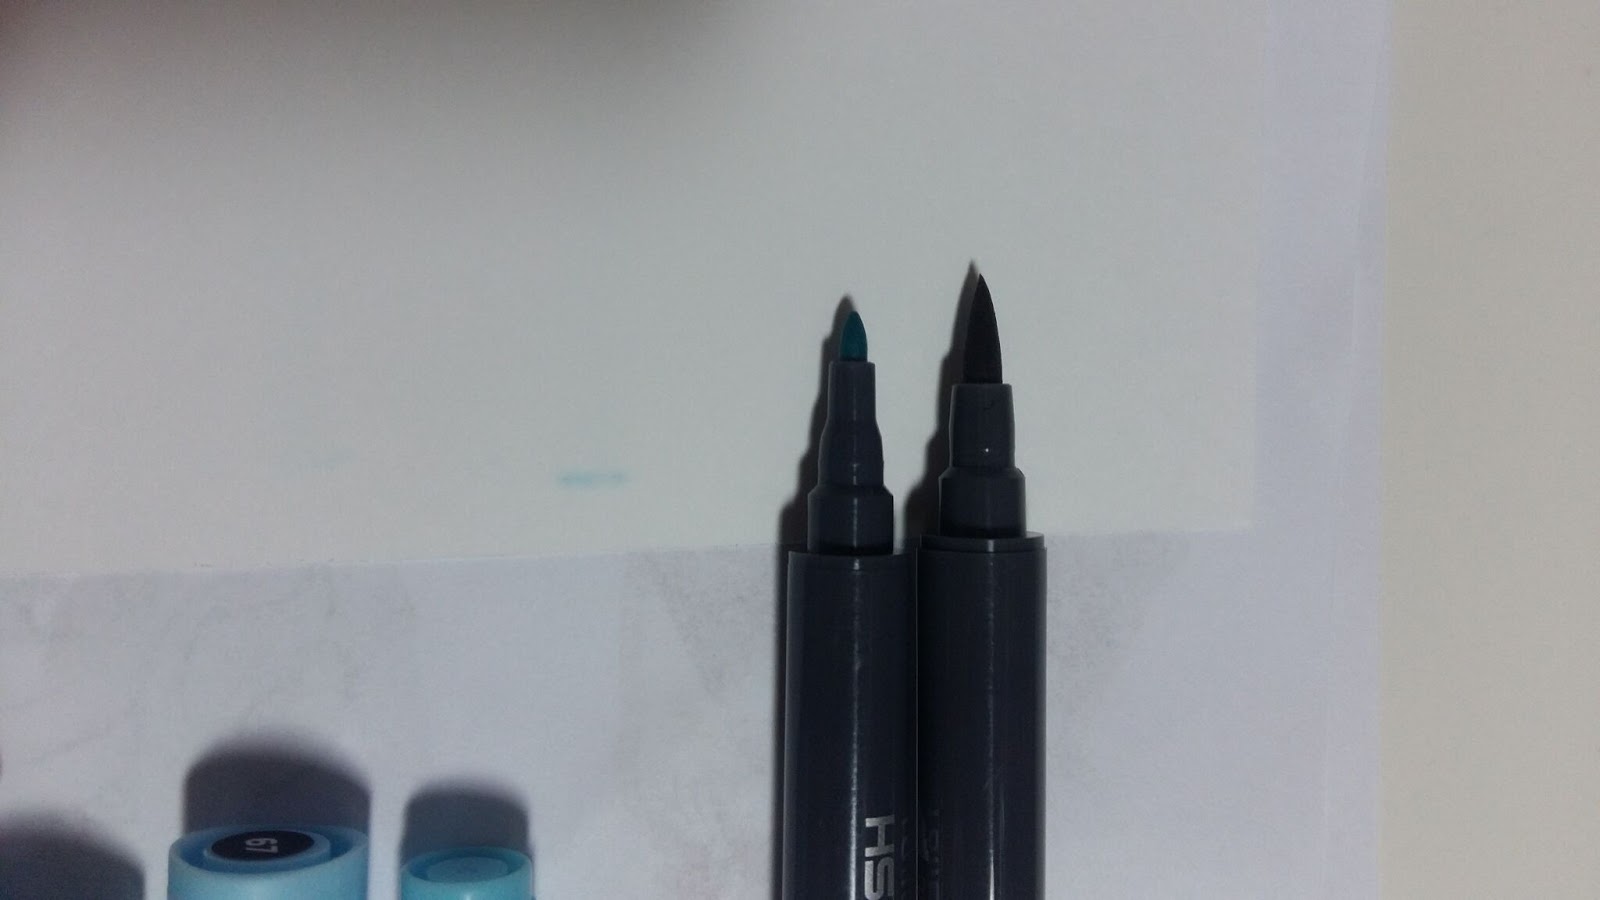
The three there are the ones I picked up from this store, with their smaller colour selection. Definitely something I have to mark them down for, their lack of colour choices limits what you can do greatly. The writing flow is smooth with no hiccups, and the tips can take pressure and abuse well due to my heavy hand when I write. I will always buy these again when I use up my current ones.
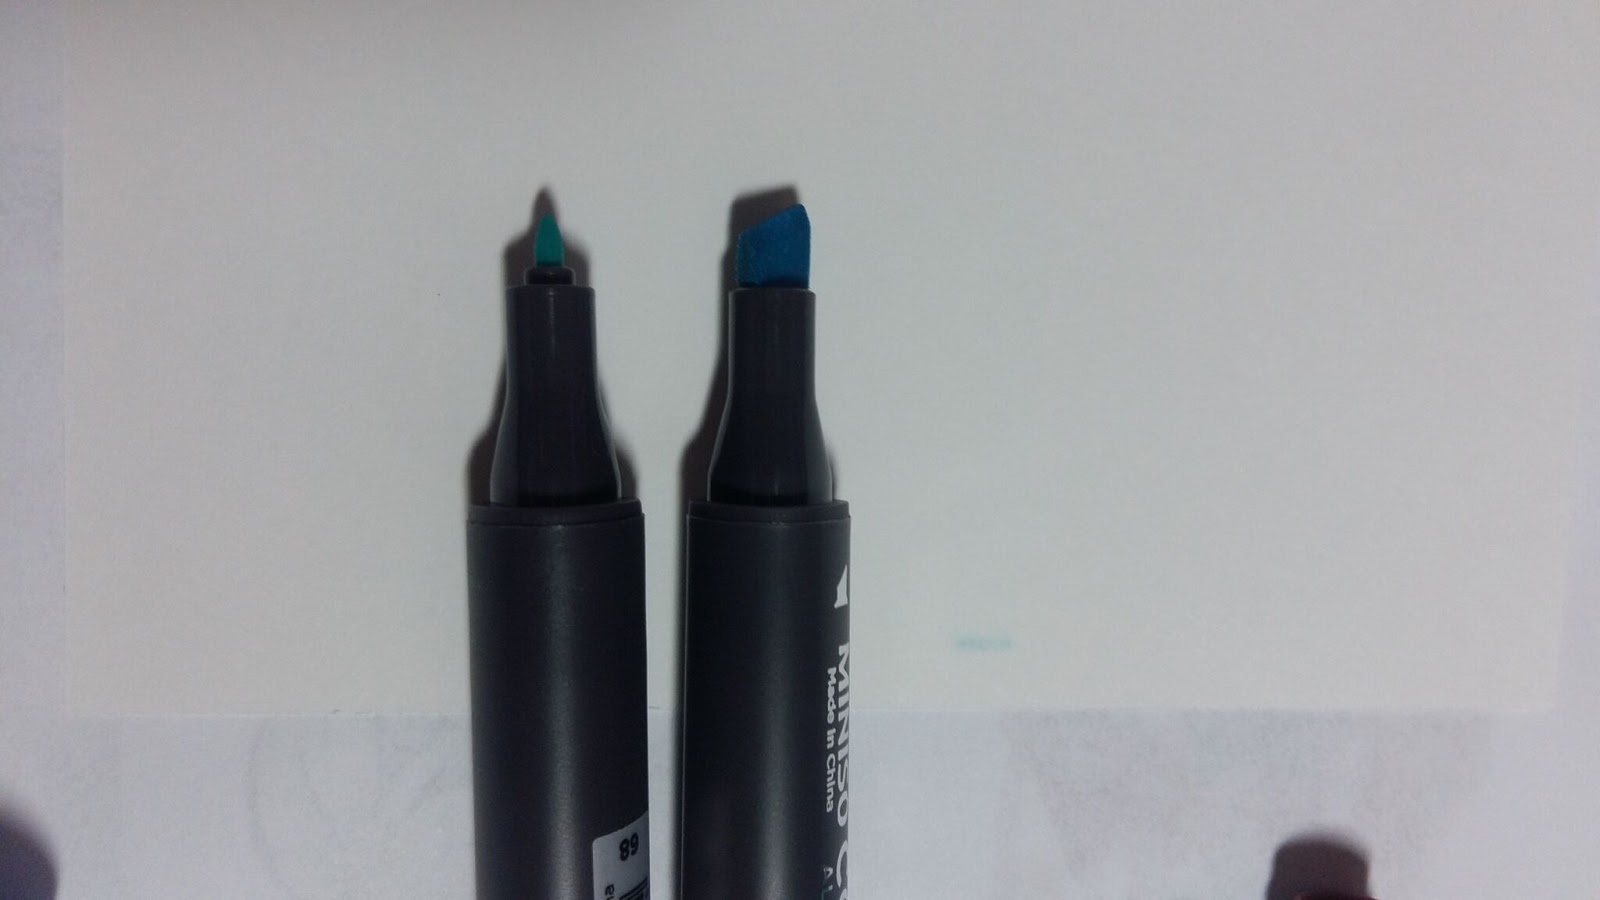
These were some alcohol based markers, I am not very well versed in this category either. I tried them out and they didn’t smell as heavy as other brand of alcohol based markers so I give that a plus since the smell is what puts me away from them in the first place. I say they are slightly streaky from when I tested them, but it could be me putting uneven pressure on it.
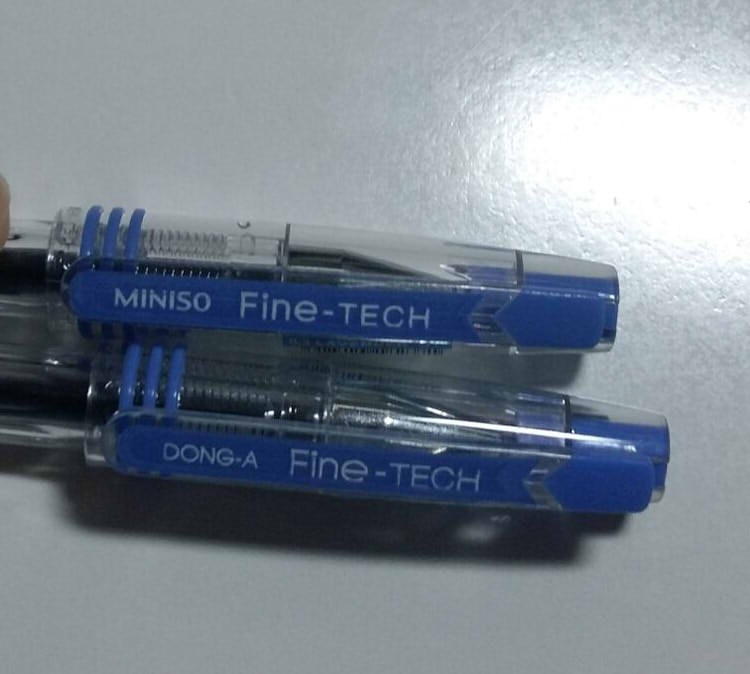 Lol Branding
Fun little thing, I found a Minso brand Fine Tec and then I remembered I had something similar so behold my Dong-A pen which is the exact freaking pen. Just the branding was different and some of the labels. They wrote the same way, and had the same colour. But the fun fact is they cost me differently. It was a sad discovery.
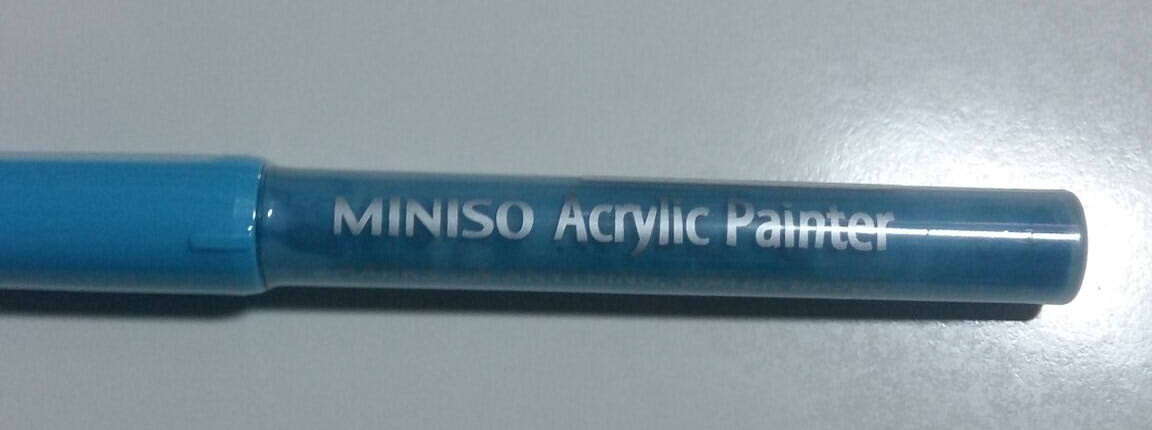 Death Marker
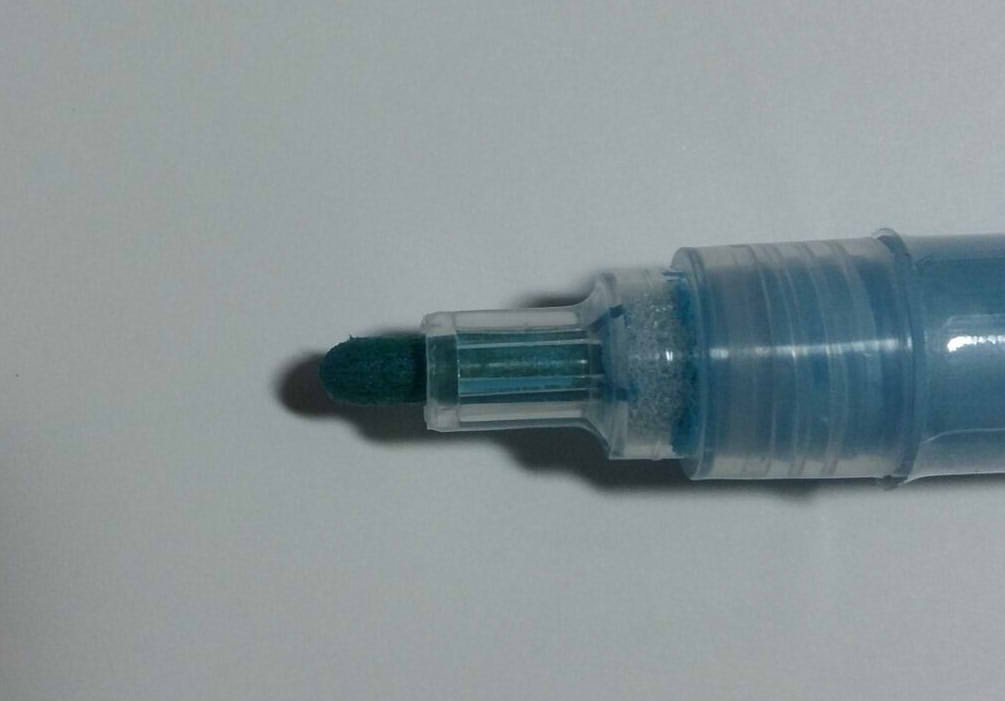 I cry
I cry
This acrylic paint marker was one of the ones I think I grabbed the tester of, the nib was already saturated with the liquid, and had a chip in it. It was one of those shake and press to get it to work type of pens and I’m never good with those markers so I will definitely never use this much and probably never buy anything of that same vein. I didn’t like the flow of it and I found it really spotty. It kinda also just went everywhere when I tried to do the nib pressing thing.
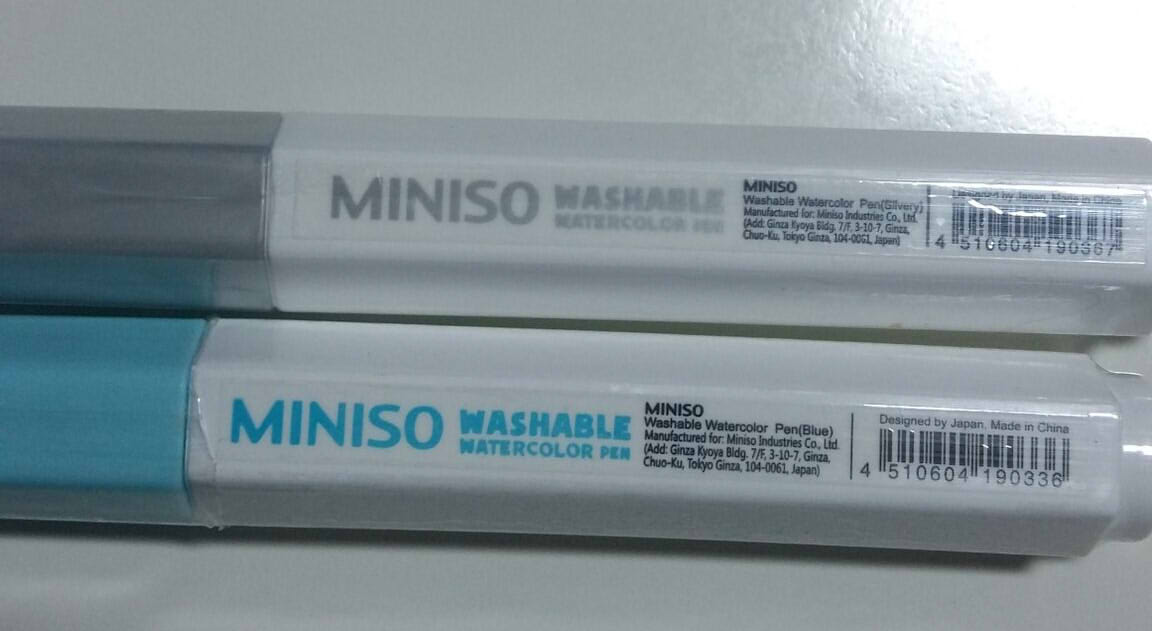
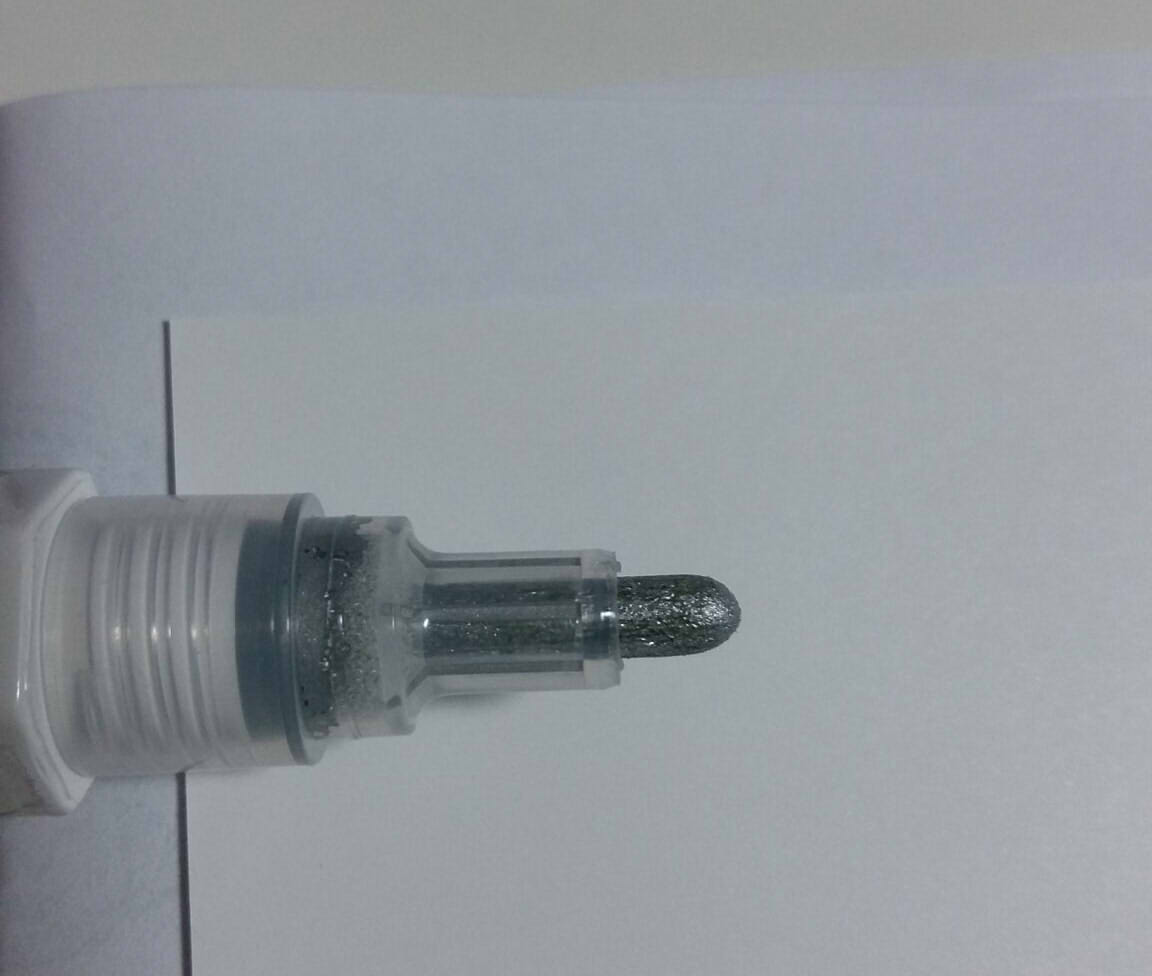
The blue marker of the two watercolour pens was another of the already opened and used ones. The metallic marker was fresh though, and I love how bright it is and how metal it looks. Flows nicely, both of them actually, but I am not sure what I would use them for other than maybe an accent on some line art. Nib press with control, because my heavy hand just makes it puddle everywhere. But the puddle was smaller than the previous pen.
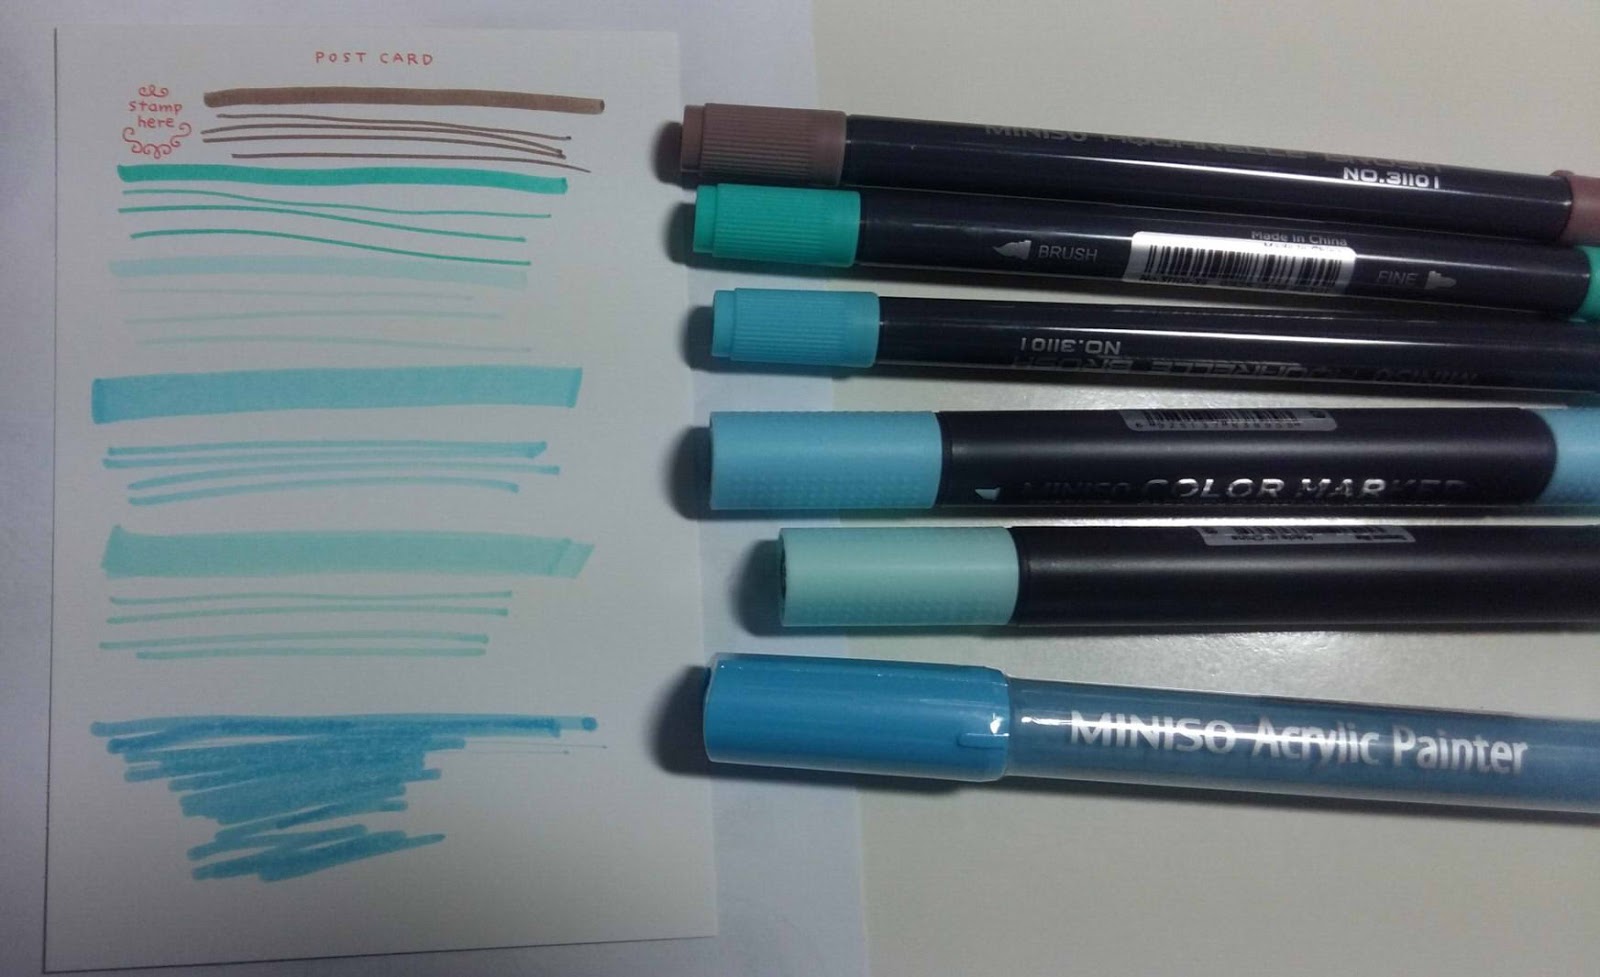
Test all the markers, That’s metal
Here is the compiled look of all the supplies, tested on that postcard paper. Cool note is the alcohol based marker didn’t bleed through to the other side, just barely started to. Might be good for all those people who use a lot of alcohol based markers.

Here is that book I talked about. I didn’t own a lot of sketchbooks with rings on the short end, so I picked it up. Had really nice cream tone paper, but it was kinda thin. Probably good for landscape sketching. Had a somewhat hard cover, basic enough to keep the book a book.
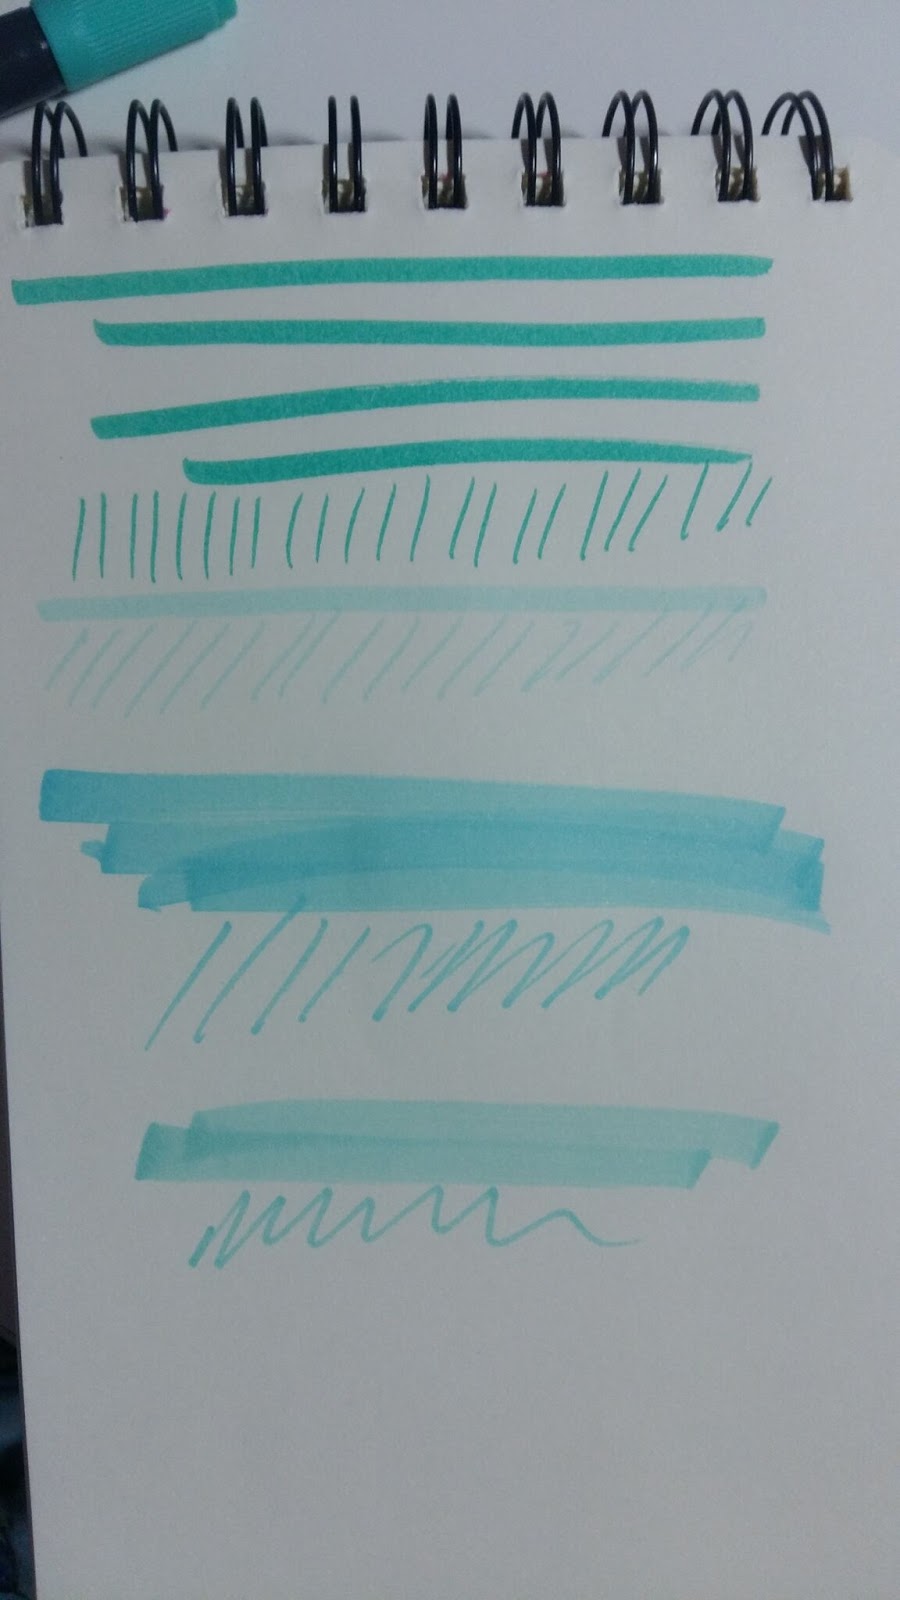
Of course I tested my more frequently used mediums on it, and that alcohol based marker a try as well. Well the paper is super thin so I don’t think I will be using the backside of it if I do drop a few strokes of colour on it.
I definitely recommend the water based brush pens, and specifically the metallic watercolour pen with the shake and press nib. The Fine Tec is decent but I had a few Fine Tecs before and sometimes they jam up really badly due to ink drying and I have to get a new one. Everything else is things I don’t frequently use, so I can’t give a strong recommendation to them.
Wrap up Thoughts:Pros:
Price - Everything is around $3, a little bit more expensive than Daiso but you can still get the dealsGood quality for what they are sellingGood place to find some brush pens for cheap, even could be a cheaper alternative to the same thing
Cons:
Limited colour selection, and general limited selection when comparing locationsBe careful of people who uncapped the pens already, or accidentally picking up a tester since they are unmarked(Personal) Got assaulted by their perfume section right at the front of the store when walking in. Had to exit to breathe and cough.
Thank you so much for reading! I hope you found some supplies you would like to try or look around for these two stores! Thanks to Becca for being an amazing person. Have a great day everyone and keep looking for those dollar stores!
You can find me at:Website: http://featheryterrarium.com/Webcomics at: https://tapas.io/FeatheryJustice
I go by FeatheryJustice on almost all my social media.
Deviantart: https://featheryjustice.deviantart.com/Tumblr: http://featheryjustice.tumblr.com/
Instagram: https://www.instagram.com/featheryjustice/
Please consider donating to this blog or purchasing from Natto-shop (http://nattosoup.com/shop) if you want me to continue publishing quality content. All materials tested were purchased from my own pocket. Keep on Truckin' Nattosoup is not under any sponsorship.


