
Painting Your Comics: Watercolor Basics
At this point, my Watercolor Basics series intersects with my Intro to Comic Craft: Step by Step series. If you've followed along with Intro to Comic Craft, you should have comic roughs ready to either print out and ink, or print out and paint. And if you've been following along with Watercolor Basics, you should have your images converted to bluelines, and know the paper settings for printing on watercolor paper at home (link), and have your pages penciled (link). You should also know how to stretch your watercolor comic pages.
You should also have completed a few standalone watercolor illustrations using the steps covered in the Step by Step portion of Watercolor Basics. I high recommend practicing before you dive into pages- watercolor gets easier with practice!
If you've done these things, you're definitely ready to start painting your own watercolor comics!

This post is part of my ongoing Watercolor Basics series! If you're interested in learning how to watercolor, or watercoloring your comic pages, you've come to the right place! For step by step tutorials on just about everything, check out the Watercolor Basics hubpage. If you'd like a more detailed demonstration or tutorial on a topic that's already been covered, please feel free to email me.

The Watercolor Basics series is made possible thanks to the generosity of my Artnerds on Patreon. To help support the work I do, please consider joining the Artnerd community, and gain early access to videos, backer exclusive process work and comics, and more!
Watercolor Comic Page Order of Operations:
PrintPencilStretchTone and UnderglazeBlock in- Background, large elementsBlock in- Characters, smaller elementsDevelop skin by adding layers of same or similar tint and saturationAdd blushDevelop shadow colors on skinBegin tightening detail- blocking in smaller objects, adding textureAdd shadow using same colorAdd shadow using complimentary or neutral tintWork with opaque colors, colors that muddy when glazes are addedAdd in fine detail using a small brush- eyelashes, final layers of hairAdd in detail using color pencils, watercolor pencilsAdd in white highlights
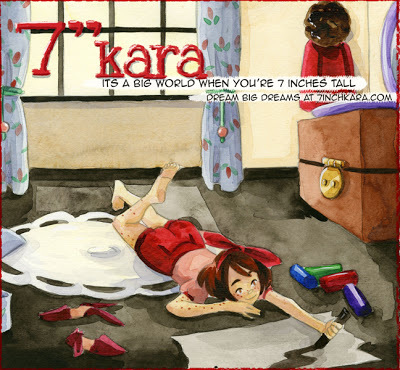
The pages used in this post are from Chapters 6 and 7 of my watercolor comic, 7" Kara. You can read Volume 1, which includes chapters 1 through 4 at 7inchkara.com.
Some Stats about 7" Kara
Paper used:
Canson Montval 11x14 watercolor paper, 140lb. 12 sheets per pad
Paints used:
Custom palette of Winsor & Newton, Holbein, Daniel Smith, and SoHo watercolors
Brushes Used:
Creative Mark Rhapsody Rounds-0-4
Cotman wash brushes
Mimik 1" Filbert
Larger rounds- Mimik, Neptune, Halcyon (6-10)
For Stretching:
3M Blue Painter's Tape
White Gatorboard
Viva Papertowels
Pages completed:
Volume 1:
Chapter 1: 12
Chapter 2: 24
Chapter 3: 12
Chapter 4: 14
Volume 2:
Chapter 5 24 pages
Chapter 6 32 pages
Chapter 7: 34 pages
Total Pages Painted: 152 Kara pages
I paint my comic pages in batches- anywhere from two to six pages per batch, and batches usually constitute a scene. This requires a huge amount of space, so I paint on the floor, sitting on an anti-fatigue mat. Sets of pages take anywhere from three to six days to complete. Once pages are finished, I scan them with a large format scanner, color correct in Photoshop, and complete my comic pages digitally (corrections, borders, lettering, and word balloons).
Watercolor Comic Painting: 7" Kara Chapter 6:
Painting Pages- Working on a Double Page Comic Spread
Watercolor Painting on the Floor
Chapter 7- A Week of Watercolor
Tips for Painting Comic Pages in Batch:
Taking daily photos of progress really helps to remind you that you ARE making progressContrast is key, especially for comic pages that can end up busyWork from big to small- big fields of flat color to progressively more detailed areas. I save tight details like eyes and adding white for last.Convenience colors are exactly that- a huge convenience! Pre-mixed colors will save you time and paint for frequently used colors.Regularly wash and condition your natural hair brushes to keep them in top shape. I recommend Old Master's brush soap, occasionally conditioning with inexpensive human hair conditioner.Watercolor comic pages require a lot of time, so if you want to do a watercolor webcomic, I recommend having a hefty buffer if you wish to update regularly.
Process Photos from Chapter 6
To follow my comic creation progress, I highly recommend you check me out on Instagram! I regularly share comic painting progress, as well as process and progress from other illustrations I'm working on!
Over the next few weeks, I'm going to cover a few techniques and tricks that are particularly useful for painting watercolor comic pages, so if that's something that's interesting to you, let me know!
Please consider donating to this blog or purchasing from Natto-shop (http://nattosoup.com/shop) if you want me to continue publishing quality content. All materials tested were purchased from my own pocket. Keep on Truckin' Nattosoup is not under any sponsorship.
You should also have completed a few standalone watercolor illustrations using the steps covered in the Step by Step portion of Watercolor Basics. I high recommend practicing before you dive into pages- watercolor gets easier with practice!
If you've done these things, you're definitely ready to start painting your own watercolor comics!

This post is part of my ongoing Watercolor Basics series! If you're interested in learning how to watercolor, or watercoloring your comic pages, you've come to the right place! For step by step tutorials on just about everything, check out the Watercolor Basics hubpage. If you'd like a more detailed demonstration or tutorial on a topic that's already been covered, please feel free to email me.

The Watercolor Basics series is made possible thanks to the generosity of my Artnerds on Patreon. To help support the work I do, please consider joining the Artnerd community, and gain early access to videos, backer exclusive process work and comics, and more!
Watercolor Comic Page Order of Operations:
PrintPencilStretchTone and UnderglazeBlock in- Background, large elementsBlock in- Characters, smaller elementsDevelop skin by adding layers of same or similar tint and saturationAdd blushDevelop shadow colors on skinBegin tightening detail- blocking in smaller objects, adding textureAdd shadow using same colorAdd shadow using complimentary or neutral tintWork with opaque colors, colors that muddy when glazes are addedAdd in fine detail using a small brush- eyelashes, final layers of hairAdd in detail using color pencils, watercolor pencilsAdd in white highlights
The pages used in this post are from Chapters 6 and 7 of my watercolor comic, 7" Kara. You can read Volume 1, which includes chapters 1 through 4 at 7inchkara.com.

Some Stats about 7" Kara
Paper used:
Canson Montval 11x14 watercolor paper, 140lb. 12 sheets per pad
Paints used:
Custom palette of Winsor & Newton, Holbein, Daniel Smith, and SoHo watercolors
Brushes Used:
Creative Mark Rhapsody Rounds-0-4
Cotman wash brushes
Mimik 1" Filbert
Larger rounds- Mimik, Neptune, Halcyon (6-10)
For Stretching:
3M Blue Painter's Tape
White Gatorboard
Viva Papertowels
Pages completed:
Volume 1:
Chapter 1: 12
Chapter 2: 24
Chapter 3: 12
Chapter 4: 14
Volume 2:
Chapter 5 24 pages
Chapter 6 32 pages
Chapter 7: 34 pages
Total Pages Painted: 152 Kara pages
I paint my comic pages in batches- anywhere from two to six pages per batch, and batches usually constitute a scene. This requires a huge amount of space, so I paint on the floor, sitting on an anti-fatigue mat. Sets of pages take anywhere from three to six days to complete. Once pages are finished, I scan them with a large format scanner, color correct in Photoshop, and complete my comic pages digitally (corrections, borders, lettering, and word balloons).
Watercolor Comic Painting: 7" Kara Chapter 6:
Painting Pages- Working on a Double Page Comic Spread
Watercolor Painting on the Floor
Chapter 7- A Week of Watercolor
Tips for Painting Comic Pages in Batch:
Taking daily photos of progress really helps to remind you that you ARE making progressContrast is key, especially for comic pages that can end up busyWork from big to small- big fields of flat color to progressively more detailed areas. I save tight details like eyes and adding white for last.Convenience colors are exactly that- a huge convenience! Pre-mixed colors will save you time and paint for frequently used colors.Regularly wash and condition your natural hair brushes to keep them in top shape. I recommend Old Master's brush soap, occasionally conditioning with inexpensive human hair conditioner.Watercolor comic pages require a lot of time, so if you want to do a watercolor webcomic, I recommend having a hefty buffer if you wish to update regularly.
Process Photos from Chapter 6
To follow my comic creation progress, I highly recommend you check me out on Instagram! I regularly share comic painting progress, as well as process and progress from other illustrations I'm working on!
Over the next few weeks, I'm going to cover a few techniques and tricks that are particularly useful for painting watercolor comic pages, so if that's something that's interesting to you, let me know!
Please consider donating to this blog or purchasing from Natto-shop (http://nattosoup.com/shop) if you want me to continue publishing quality content. All materials tested were purchased from my own pocket. Keep on Truckin' Nattosoup is not under any sponsorship.


No comments have been added yet.


