
Marisa McClellan's Blog, page 35
September 13, 2017
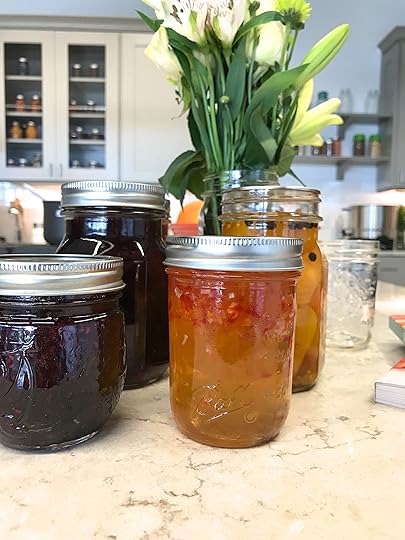
Preserving with Mrs. Wages Pickled Okra and Vegetables Mix
This post is written in partnership with my friends at Mrs. Wages. Hope you enjoy!
This is it, friends. The last big push of the summer canning season. This is the time of year when I do things like make big vats of peach butter (cooking down as I type), scramble to get my hands on the last of the tomatoes, and I take canning help wherever I can get it.
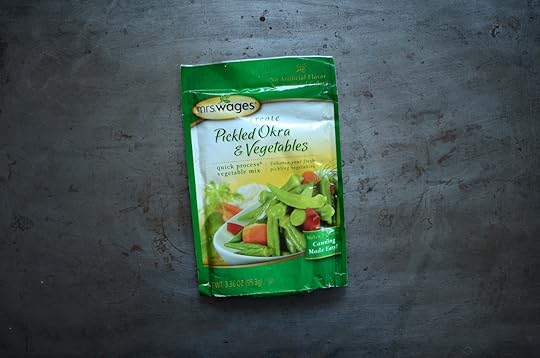
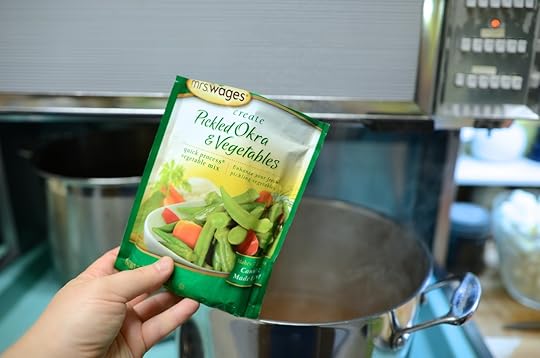
Recently, one of my favorite canner helpers is the Pickled Okra and Vegetables spice mix from Mrs. Wages. It came to my rescue last week, when I was short on time and creativity, but had produce spilling out all over my kitchen.

The beauty of a mix like this is that is allows me to put myself on auto-pilot and just follow the instructions written on the back of the packet.
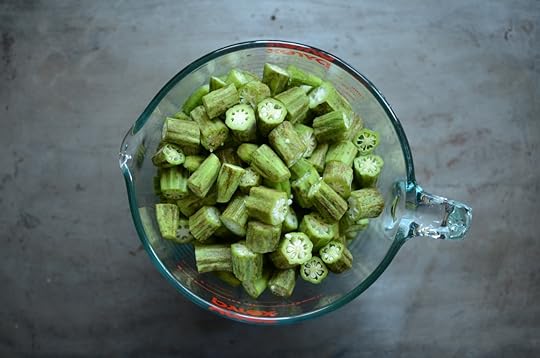
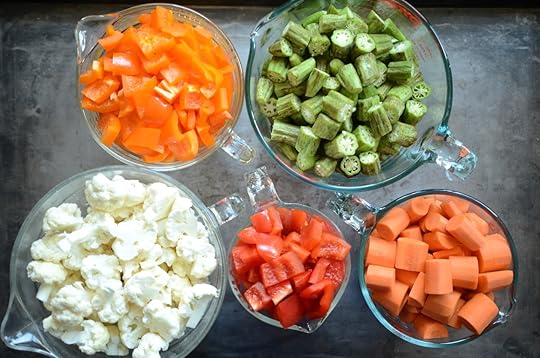
With this recipe, you prep all the veg. I used carrots, okra, cauliflower, and peppers, just like the instructions told me.

While you’re working breaking down your vegetables into pleasingly similarly sized bits, you pour a bunch of vinegar into a large pot and bring it to a boi.
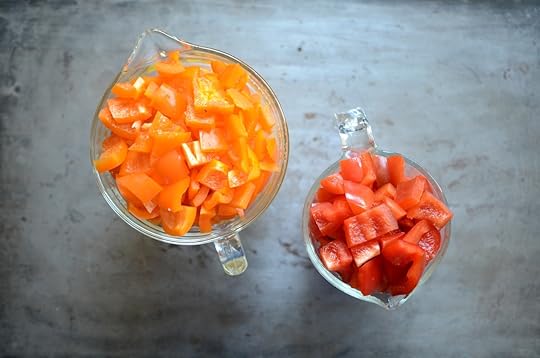
Look at those peppers! Aren’t they pretty?
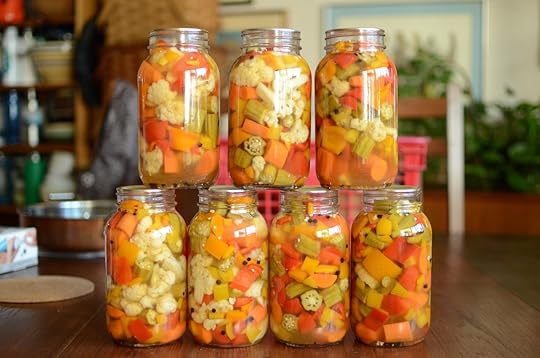
This packet makes seven quarts of pickles, so make sure you have a canning pot warming and your jars are prepped.
When your veg is chopped, your jars are warming, and they vinegar is boiling, add the spice mix to the pot.
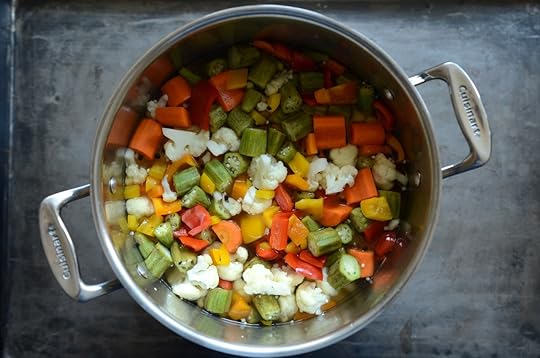
Now it’s time to make some pickles. You can either toss your vegetables together in a big bowl and pack them into jars, or you can heap them into the brine and warm them up a bit (this transforms the pickle into a hot pack preserve, and helps you squeeze a bit more produce into your jars).
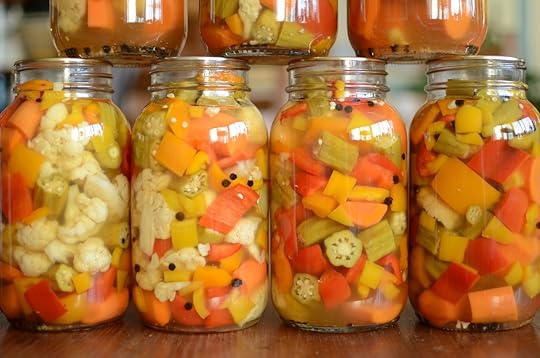
Once the veg and brine is divided between the prepared jars, you wipe the rims, apply the lids and rings, and process. And boom, seven quarts of colorful, delicious pickles (I took a jar to a party last week and they were a big odl hit).
Related Posts:
September Sponsors: Cuppow, Fillmore Container, EcoJarz, Mason Jar Lifestyle, CanningCrafts, and Mrs. Wages
Giveaway: Mrs. Wages Tomato Prize Pack
July Mastery Challenge: Pickled Blistered Shishito Peppers


September 12, 2017
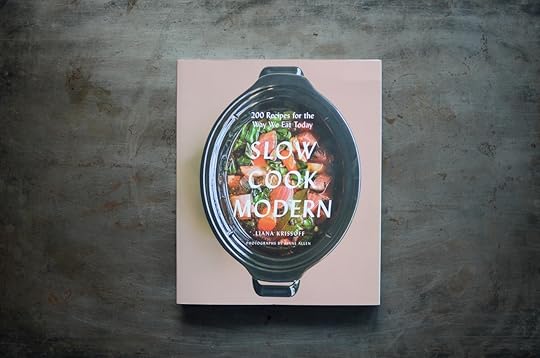
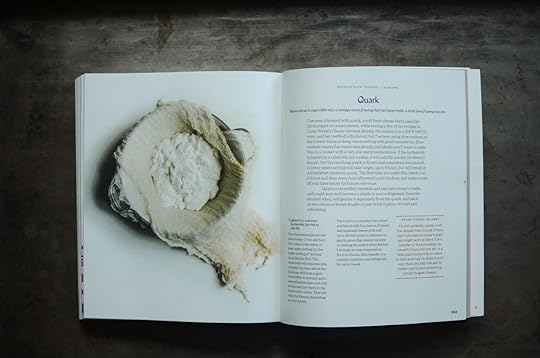
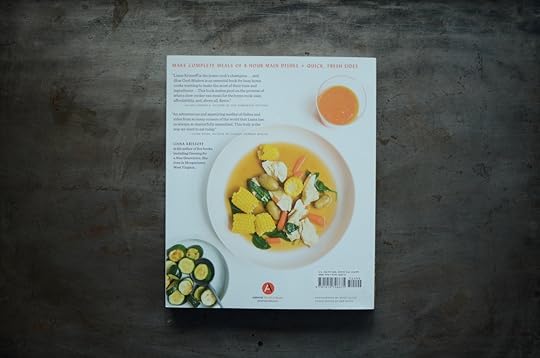
Giveaway: Slow Cook Modern by Liana Krissoff
These days, electric pressure cookers are the hot culinary appliance. And while I love the ability to cook and braise quickly, slow cookers will forever be at the top of my kitchen helper hit parade (as I type this, I have two running in my kitchen).
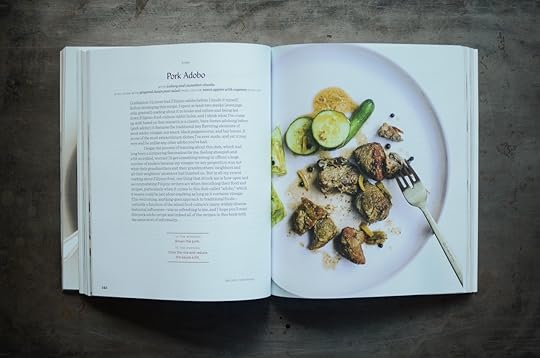
Happily Liana Krissoff, one of my favorite cookbook authors, is also a devoted slow cooker fan. Her brand new book, Slow Cook Modern, is the most useful and practical take on making dinner in the slow cooker that I’ve ever seen. It’s also a ridiculously beautiful book.

There are a lot of things that are brilliant about this book. First is the fact that all the slow cooker recipes are designed to cook for 8 hours. That means, you can set up your slow cooker in the morning, go to work, and actually come home to a meal (if you have a long commute time, make sure to use a slow cooker that will switch to ‘Keep Warm’ after a pre-programmed amount of time). So many slow cooker recipes are written to cook for 3-4 hours, which is not at all useful for people who work outside their homes.
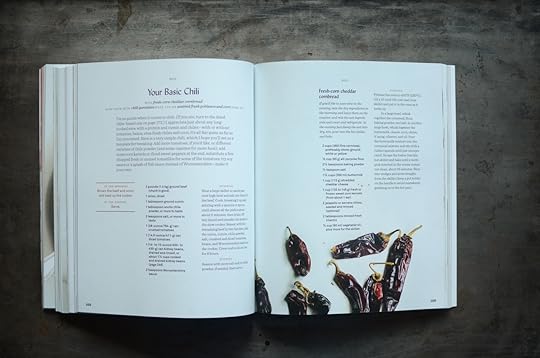
The second thing that’s really inspired about this book is that every soup, stew, braise, and roast comes paired with a side recipe, as well as suggestions for other sides in the book that would go nicely with that dish. These sides are worth the price of admission alone.
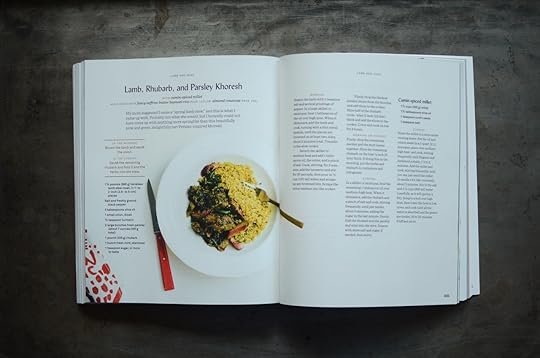
All the recipes are organized by what you need to do the in the morning and what you’ll do just before serving. There are pages with ideas for what to do with leftovers. There are a handful of recipes for slow cooker stock. There’s a chili base that I want to make this week. There’s even a recipe for slow cooker quark that I’ll be sharing on Friday! So much goodness!
I feel like this is a book that I could spend the next couple years work through and exploring. I can’t wait to dig in (and the two eggplants in my fridge mean that the Eggplant Tian on page 28 will be happening this week).
Thanks to the lovely folks at Abrams, I have a copy of this brilliant book to giveaway this week. Let’s do this one the old school method.
Leave a comment on this post and share your favorite slow cooker dish.
Comments will close at 11:59 pm eastern time on Sunday, September 17, 2017. Winners will be chosen at random and this post will be updated with the winner.
Giveaway open to United States and Canadian residents.
One comment per person, please. Entries must be left via the comment form on the blog at the bottom of this post.
Disclosure: Abrams provided both review and giveaway copies at no cost to me. No additional compensation was provided.
Related Posts:
Giveaway: Will It Skillet by Daniel Shumski
Giveaway: Broth & Stock from the Nourished Kitchen
Giveaway: Whiskey by Michael Dietsch
September 8, 2017
How to Make Fresh Tulsi Tea
Even though 2017 isn’t over yet — and it’s been a pretty big year already — I know I’ll remember it as the year I met tulsi.
I was introduced to this mesmerizing plant through the yearlong monthly herbal medicine class I’m taking with a clinical herbalist and teacher here in West Philly, Kelly McCarthy of Attic Apothecary.
I meet with her and around 15 other students one full Sunday per month at historic Bartram’s Garden, where we also maintain raised beds and learn to grow herbs from wilderness gardener (and herbalist) Mandy Katz from seed to harvest.
I think it was the second class, sitting outside with our notebooks on a balmy day this April when we studied the nervous system. We learned about adaptogens, plants that contain compounds that can help the body and mind deal with stress.
There are several, like ashwagandha root, as well as some fungi, like prized reishi mushrooms. But tulsi — also known as holy basil — piqued my interest, since I already dry and brew my own blend of culinary basil varieties for tea.
Kelly has said that if she could recommend one herb to everyone, it would be tulsi — that if everyone just got their daily dose of heady, stress-relieving tea, we’d all feel a little better.
And after taking it daily as a tea made from the dried herb (purchased through Mountain Rose herbs), I have to agree with her: during difficult, stressful times, my regular tulsi habit did seem to help make life a little brighter, a little easier to deal with.
However, tea made from dried tulsi, while pleasant to drink, is somewhat unremarkable: dark in color, earthy and tannic, and only slightly reminiscent of the pungent, bubblegum-sweet essence of the fresh herb.
It wasn’t until I was regularly harvesting it from my garden this summer that I really got to know this herb — and I had to learn to remake my daily tea all over again.
The first time I tried to make fresh tulsi tea, I had just picked an armload of the plant’s fragrant flowering tops from the patch in my front yard. Before laying it out to begin the drying process, I boiled water and threw several sprigs into a 24-ounce glass jar, then muddled with a spoon to bruise the leaves a bit. I poured the water, covered it (to help keep the volatile oils, which would otherwise escape with the steam, in the jar), and waited 15 minutes or so.
While the tea was tasty, its color was pale and its flavor was rather faint — not exactly the heady experience I’d heard my teacher rhapsodize about. I was missing something.
The next day when I went to make my daily tea, I grabbed another handful of that same batch of fresh tulsi, now laying limp on the counter where I’d left it the day before.
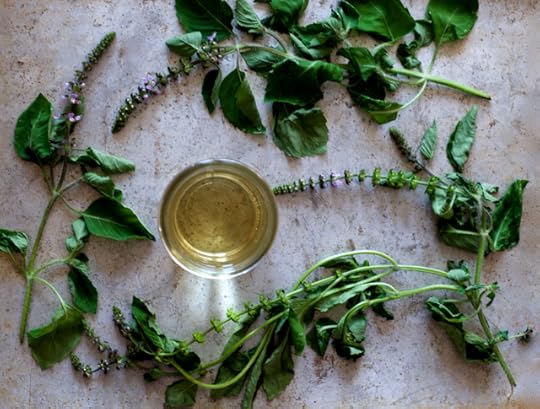
I followed the same steps — boil, pour, steep, sip — but this time, the tea was transformed: it was darker in color now, like white wine, with zestier flavor and more powerful aroma than the last batch. Breathing in over my glass, it felt like I was inhaling the herb’s promised vitality.
The difference? That wilting step. Basic online research hasn’t turned up the answer to why a plant’s essence is more available to infuse after a day or so off the plant — maybe the leaves’ cell walls relax and give up their goodness more easily? — but I’m sold on this method. I want to try it with other fresh tea herbs from my garden before the season is over to see how wilting affects the flavor.
Your best bet for finding fresh tulsi is to grow it yourself and harvest the tops (four to six inches of each spring) every few days — it will grow tiny purple flowers and flourish in the heat. Failing that, ask around at your farmers’ market, Whole Foods, or area Indian grocery for holy basil, a.k.a. Ocimum sanctum (rama variety, which you see in the photo, is the most common).
And if you can only get your hands on dried tulsi, it’s still worth trying out as a tasty everyday tonic. In addition to stress, this antioxidant herb is recommended by herbalists to help with depression, anxiety, inflammation and immunity-building, appetite stimulation, and even as a pre-treatment for potential oxidative damage, like sunburn.
Take a look at my “fresh” tulsi tea recipe below. And if tulsi’s not your thing (or you can’t find it where you are), try it out with other leafy tea herbs from the garden, like lemon balm, mint, or anise hyssop — all great medicinal and culinary herbs.
PrintHow to Make Fresh Tulsi Tea
Ingredients
Four to six sprigs of fresh tulsi (or swap out tulsi for fresh mint, lemon balm, anise hyssop, or another tea herb)One quart of water
Instructions
Lay out tulsi sprigs and leaves in a single layer on a clean dish towel or drying rack. Allow to sit for one full day to wilt.Once the herb is wilted, heat water to 190 degrees F or just below boiling.
Place the wilted tulsi in a quart canning jar. Pour the hot water over the herbs. Cover the jar with a lid or plate to capture the volatile oils.
Steep at least 15 minutes.
Strain if desired and drink, or cool further, pour over ice, and enjoy.3.1http://foodinjars.com/2017/09/make-fresh-tulsi-tea/
Related Posts:
How to Make Your Own Tonic Water
Red Currants, Dry Canning, and Family Traditions
How to Build a Summertime Cheese Board
September 6, 2017
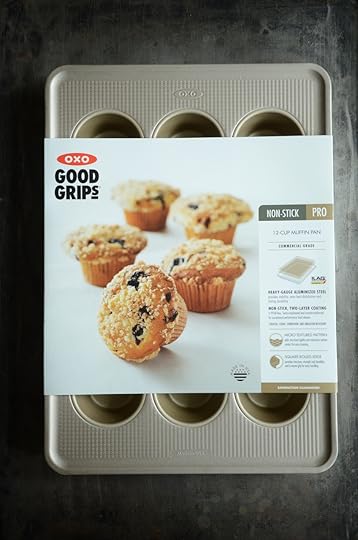
Bake a Difference with OXO For Cookies for Kids’ Cancer + Oatmeal Muffins
It’s that time of year again, when the folks at OXO host a blogger campaign for Cookies for Kids’ Cancer. The goal is to help raise both awareness and funds for childhood cancer research. For every blogger who dedicates a post to the topic, they donate $100 to the cause.
I participated last year, sharing my story of losing a friend to cancer when I was in middle school, and making a batch of tasty cookie bars from Dorie’s Cookies.
This year, I’m offering up a batch of muffins rather than cookies, thankfully, I’m told that they’ll still count. And if you missed Shianne’s story last year, consider hopping over to that blog post to read it.
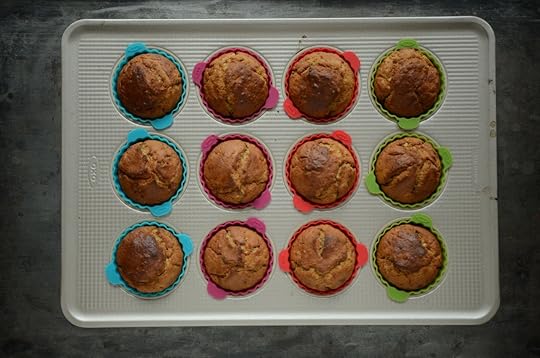
OXO sent me their Non-Stick Pro 12 Cup Muffin Pan, a dozen Silicone Baking Cups, and Baker’s Decorating Tool and told me to be creative. I spent a little time worrying about doing that decorating tool justice before realizing that one should always write what they know (as it were).
And so I opted to adapt a simple oatmeal muffin recipe from the classic and invaluable King Arthur Flour Baker’s Companion and use the filling tip on the decorating tool to give them a plum butter center. It worked better than I’d even hoped. Next time I’m invited to a brunch potluck, I know what I’ll be bringing!
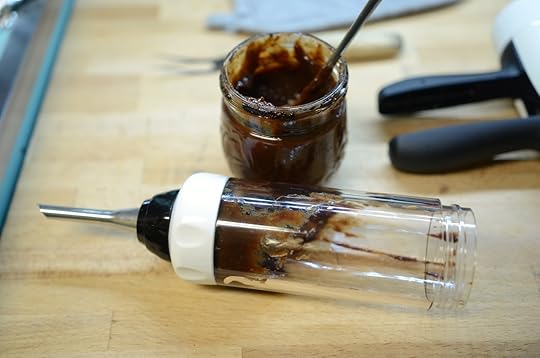
I’m not someone who typically goes in for fancy decorations on baked goods of any stripe (I’d be a terrible contestant on the Great British Bake Off), and so it was my first experience using a decorating tool. I was happy to discover that it was really intuitive to use and fun to booth. I predict that there will be more jam-filling and piped frosting in my future thanks to this devise.

Oh, and if you don’t have a nifty tool for filling your muffins with jam, they would be equally good if you split them and simply gave them a healthy dollop.
Disclosure: OXO sent me the tools you see above. No additional compensation was provided for this post.
PrintBake a Difference with OXO For Cookies for Kids’ Cancer + Oatmeal Muffins
Yield: makes 12 muffins
Ingredients
1 cup rolled oats1 1/2 cups plain yogurt
1/2 cup milk
1 egg
4 tablespoons melted butter
1 1/2 cups whole wheat pastry flour
1/2 cup brown sugar
1 1/2 teaspoons salt
1 teaspoon baking powder
3/4 teaspoon baking soda
2 teaspoons cinnamon
3/4 teaspoon nutmeg
Instructions
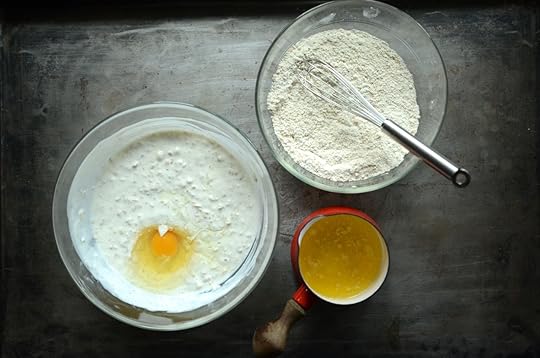
In a large bowl, combine the oats, yogurt, and milk and let them sit for at least an hour (you could also combine them in a jar the night before you plan on baking and keep them in the fridge).When you're ready to bake, preheat the oven to 425F.
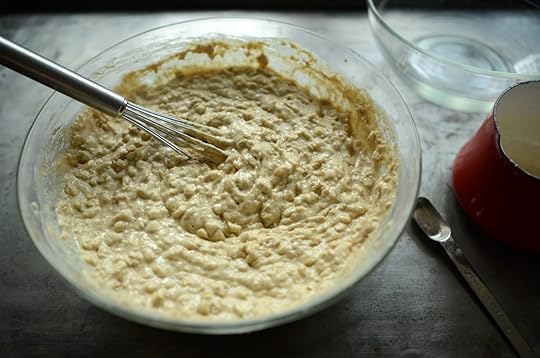
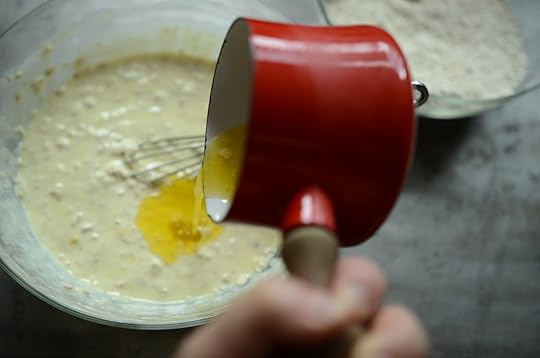
Add the egg and melted butter to the oat mixture and stir to combine.
In another bowl, whisk together the flour, sugar, salt, baking powder, baking soda, cinnamon, and nutmeg. Add to the oat mixture and stir until just incorporated.
Divide batter between 12 lined muffin cups.
Bake for 18-20 minutes, until a cake tester comes out clean. 3.1http://foodinjars.com/2017/09/bake-difference-oxo-cookies-kids-cancer-oatmeal-muffins/
Related Posts:
Mary’s Maine Bars & Bake a Difference with OXO For Cookies for Kids’ Cancer
Quick Pickled Apple Matchsticks & OXO Chef’s Mandoline
New Year, New Breakfast with OXO
September 5, 2017
Fruit Butter for the September Food in Jars Mastery Challenge
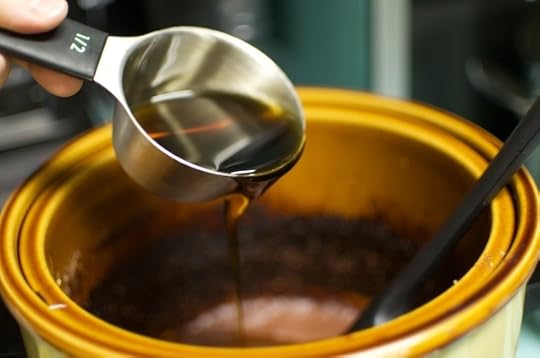
It’s September and that means it’s time to explore another food preservation skill in the crazy journey we know as the Food in Jars Mastery Challenge. This month, we’re digging into fruit butters. For the purposes of this challenge, we’re including butters made from winter squash and sweet potatoes, provided that they are made for the fridge or freezer (since they are too dense to be canned). It can be sweetened in any which way you want and can even be made without additional sweeteners.
Remember that the goal of this challenge is to help you expand your skills while creating something that you’ll actually use. So choose an approach or recipe that will satisfy both your own learning and help you make something delicious.
What is a fruit butter?
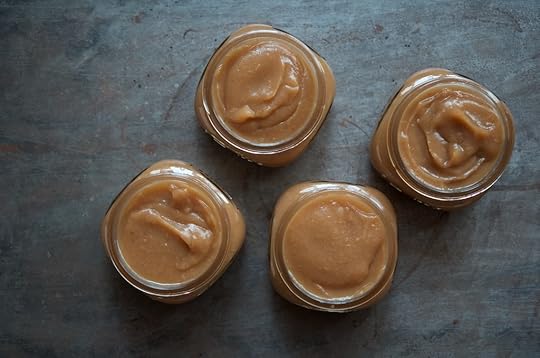
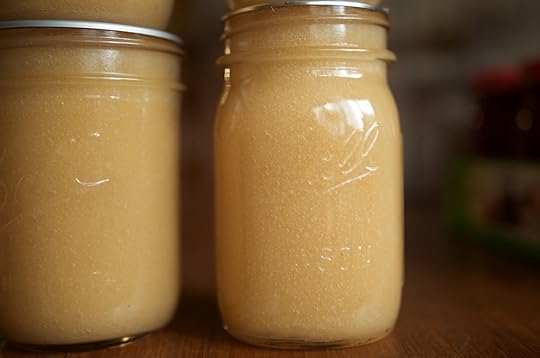
A fruit butter is a product that is so named because it mimics the smooth spreadability of softened butter. It is made from a puree that is cooked low and slow for a number of hours, in order to evaporate the excess liquid, concentrate flavors and intensify the innate sweetness in the fruit. Thanks to this concentration, it typically contains a minimal amount of additional sweetener.
How do you make fruit butters?
The basics of making fruit butters are these. You puree some fruit. You cook it down slowly until thick. You add sweeteners, spices, and acid (to balance the flavors) to taste and preserves.
There are three standard approaches to making fruit butters.
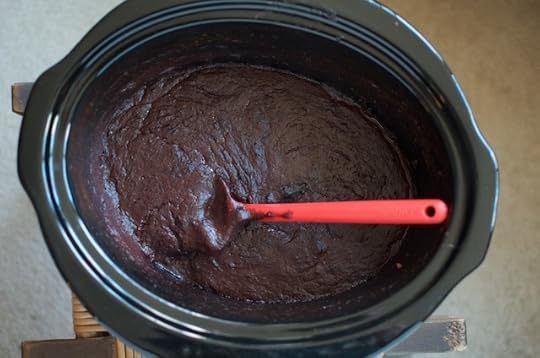
Slow Cooker – This is my favorite method for making fruit butters because it is relatively hands off, can be done outside of the kitchen (great for busy cooking days), and is produces the steady, low heat that fruit butters love. Just remember to prop the lid to allow for the steam to vent.
Stove Top – When you’re in a hurry and you have the time to tend the cooking puree, small batches can be done on the stove top. Just keep stirring to prevent scorching.
Oven – Another beloved technique. I often start with whole fruit when making fruit butters, roast them until soft, smash the fruit in the pan, and then continue to cook, stirring regularly. The best part of these oven roasted butters is that they develop a rich, caramelized flavor.
The Recipes
Strawberry Rhubarb Butter
Strawberry Maple Butter
Slow Cooker Blueberry Butter
Oven Roasted Apricot Butter
Oven Roasted Nectarine Butter
Slow Cooker Peach Vanilla Butter
Spiced Plum Butter
Slow Cooker Brown Sugar Plum Butter
Tomato Butter
Maple Bourbon Apple Butter
Low Sugar Gingery Apple Butter
Spiced Apple Butter
Maple Sweetened Pumpkin Butter
Related Posts:
August Mastery Challenge Round-Up: LTP and Steam Canning
September Sponsors: Cuppow, Fillmore Container, EcoJarz, Mason Jar Lifestyle, CanningCrafts, and Mrs. Wages
Submit your August #fijchallenge Projects!
September 4, 2017
August Mastery Challenge Round-Up: LTP and Steam Canning
A post shared by Heidi Graham (@socks2go) on Aug 27, 2017 at 8:26am PDT
Hello canners! So sorry for the delayed August report. I came down with the flu on August 31 and it really threw off my work plans. Happily, I’m better now and back with a little round-up. I say little, because on the whole, a lot of you did not like this month’s challenge and so participation was super low. I get it. Not every technique is for every person. Hopefully we’ll all get back on track with fruit butters in September (they’re fun! and versatile! and so tasty swirled into yogurt!).
In August, 32 die hard canners reported their participation in the Mastery Challenge. Of those 32, 25 people tried their hand at low temperature pasteurization and seven took a stab at steam canning.
As is often the case, people reported feeling uncertain about the skills prior to trying them, but once they’d tackled them, those feelings improved. Here are the charts for LTP.

And here are the feelings about steam canning.
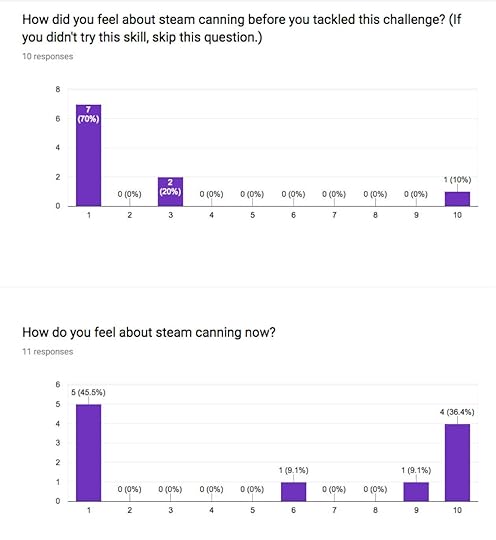
These numbers look a little wonky, because only seven people said they tried steam canning, but more are reporting here. I feel like we can probably safely discount four people who said they felt negatively after trying. Though I’m no statistician.
A post shared by Candice (@muffinlady01) on Sep 3, 2017 at 6:36am PDT
Here’s what people made!
Pickled Beetroot with Caraway – Tandy Sinclair
Sweet Watermelon Rind Pickles – Cooking with Mary and Friends
Vermont Maple Pickles – Casula Mellita
Bread and Butter Pickles – Cathy Kempf
Yellow Tomato and Basil Jam – Heidi Graham
Kosher Dills with Horseradish – kktippster
Garlic Dills – Will Graves
Garlic and Serrano Dill Pickles – Grace Lee
Dill Pickles – Tesla Anomaly
Spicy Green Tomato Pickles – Brit in the South
Super Crunchy Dill Pickles – Candice Conway
Old Bay Pickles – Kate Locke
Linda Z’s Bread and Butter Pickles – Sally Latenser
And that’s it for the round-up for this month!
Related Posts:
Skills for the August Mastery Challenge
Submit your August #fijchallenge Projects!
Fruit Butter for the September Food in Jars Mastery Challenge
September 1, 2017
September Sponsors: Cuppow, Fillmore Container, EcoJarz, Mason Jar Lifestyle, CanningCrafts, and Mrs. Wages
Welcome to September! It’s the start of the month and so it is time to thank the businesses that help make this site possible. Please do show them that you appreciation their support with your time and attention!
And if your company, shop, or family business is interested in reaching the food-loving and engaged Food in Jars audience, you can find more details here. Leave a comment on this post or drop me a note to learn more!
In the top spot are our friends at Cuppow. They are the creators of the original mason jar travel mug topper and the BNTO, a small plastic cup that transforms a canning jar into a snack or lunch box. They’ve got their Glass Travel Mug back in stock and it’s the perfect way to tote your hot and cold drinks this fall!
Lancaster, PA-based and family-owned Fillmore Container are next! They sell all manner of canning jars, lids, and other preservation gear. As always, their blog is an amazing resource for all things jar-related. This post on drying herbs in the oven is perfect for end-of-season putting up!
Our friends over at EcoJarz are on board again this month. They make an array of products designed to fit on top of mason jars, including cheese graters, coffee brewers, and stainless steel storage lids. AND, they’ve making their PopTop lids in new, fun colors!
Mason Jar Lifestyle is a one-stop shopping site for all the jar lovers out there. They sell all manner of mason jar accessories and adaptors. If you’re in the market for lids, straws, sprouting lids, and cozies to transform your mason jars into travel mugs, make sure to check them out. They’ve always got something new on offer, like these coffee and tea strainers that fit wide mouth jars.
Next up is CanningCrafts. Shop owner Alison sells an array of ready made and custom mason jar labels for all your various preserves, syrups, and backyard honey. I particularly love her line of labels encouraging people to return the jar! When next you need labels for a special project, check out CanningCrafts.
Our friends at Mrs. Wages are on the roster again this month. They make pectin, vinegar, and more canning mixes than I can count. Their website is an incredible preserving resource and I can’t say enough good things about their salsa mix. If you need a little help getting your produce into jars, remember to seek out their products! They’re also sponsoring the giveaway this week, make sure to enter!
Related Posts:
July Sponsors: Cuppow, Fillmore Container, EcoJarz, Mason Jar Lifestyle, CanningCrafts, and Mrs. Wages
June Sponsors: Cuppow, Fillmore Container, EcoJarz, Mason Jar Lifestyle, CanningCrafts, and Mrs. Wages
March Sponsors: Cuppow, Fillmore Container, EcoJarz, MightyNest, Mason Jar Lifestyle, and CanningCrafts
August 31, 2017
A Trip to Fishers, IN with Newell Brands, makers of Ball® Fresh Preserving Products
A few weeks ago, I was invited by Newell Brands, makers of Ball® Fresh Preserving Products to Fishers, IN, where I spent an action-packed day and a half with three other bloggers to peek behind the scenes and participate in Can-It Forward Day festivities.
I flew in to Indianapolis and met up with Linda and Kathryne, of Garden Betty and Cookie and Kate, respectively (Heather from Whipperberry arrived a little after we did). Our first stop was Minnetrista in Muncie.

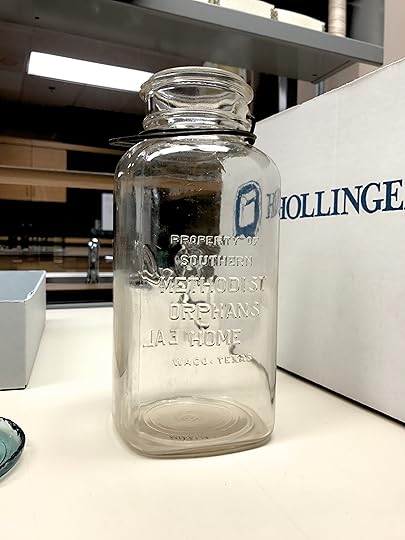
Minnetrista is the original Ball family homesite and now houses an extensive collection of artifacts and archival material from the Ball family as well as East Central Indiana. If you’re a jar lover, it’s most certainly worth a visit, but if you can’t swing a trip, start by browsing their collection database online (try the random image search. It’s fascinating).

Their collection includes vast number of unique jars, tea sets, old jar molds, and even a small collection of Bob Ross painting (happy little trees!) I particularly loved the story of the jar pictured above. They were made specially for the Southern Methodist Orphan Home during the Great Depression.
The Home distributed them to residents of Waco, TX and asked that each household fill one or two jars while they were putting up their harvest. This way, the orphans had plenty to eat, even during the leanest of years.
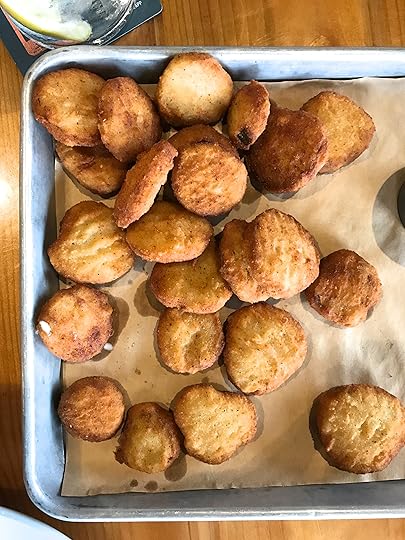
After our tour of Minnetrista, we had dinner at Thr3e Wise Men in Muncie. We had a ton of food, including some seriously delicious fried pickle chips.
After dinner, I snuck away for a couple hours to see an old friend who moved to Muncie a several years ago. I met his kids, held their youngest (just a week old!), and caught up on their life.

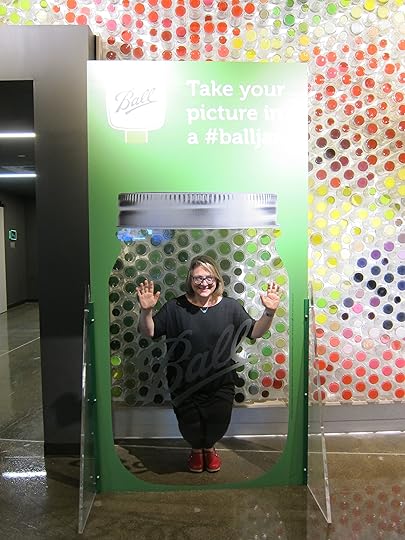
The next day started bright and early, with breakfast with the Newell Brands, makers of Ball® Fresh Preserving Products team. After we were fed and had coffee, it was time to take a tour of the packaging plant. I kind of loved the toe protectors we were given to wear (they looked oddly good with my red clogs). Not pictured were the neon vests, hard hats, safety glasses, and earplugs we were also assigned.
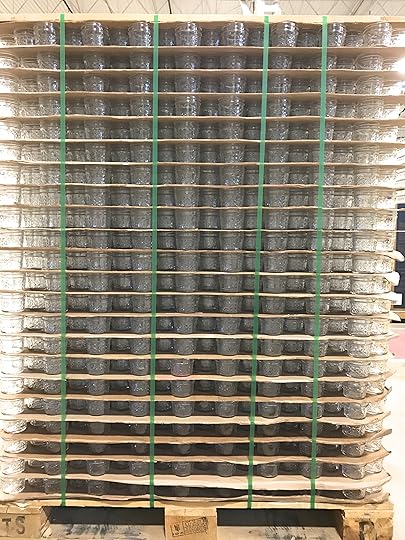
Ball® jars are made primarily in a factory north of Muncie, and then they’re transported (stacked and strapped to pallets, like you see pictured above) to the facility in Fishers. This is where they’re checked over, given lids and rings, grouped into boxes, and wrapped in plastic.
The machine they use to put the lids and rings on the jars was fascinating (it was kind of steam punky), but sadly it is proprietary equipment and so I couldn’t take any photos or video of it work its magic.
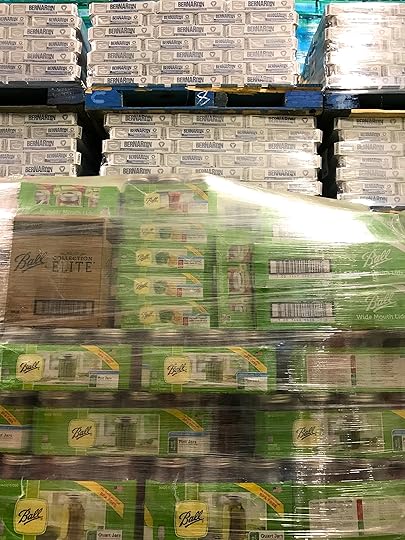
They process Ball®, Kerr, Golden Harvest, and Bernardin (Canada!) jars in that facility. This is also where they package jars up into smaller lots for various retailers. When you see a fancy jar end-cap display at your grocery store, it probably started life in Fishers.

Looking out at row after row of jars, I couldn’t help but imagine a game show for canners in the style of Supermarket Sweep. Winner gets to run around and grab all the jars they can in just 60 seconds (sadly, it’ll never happen. But it’s fun to dream!).
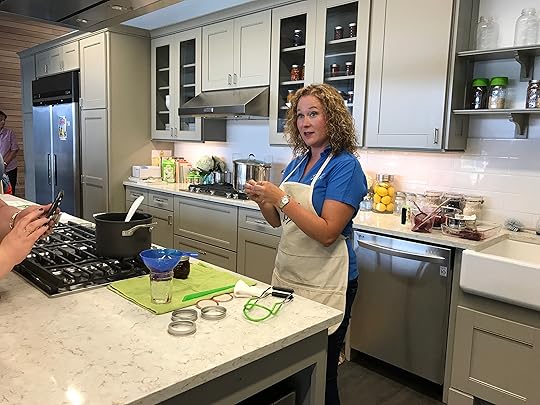
Once our tour was over, we had a short canning class with Jess Piper. She’s a member of the customer support team at Newell Brands, makers of Ball® Fresh Preserving Products and if you reach out to them with a question or issue, she may well be the one to help you resolve your query. Jess also does the bulk of the on-camera presentations for Ball, is a certified canning expert, and is a delightful human.
You might think I’d feel silly taking a canning class, but I always find it useful to hear how other people present canning information. One tidbit I picked up is the fact that mason jars are designed to withstand a 90 degree F temperature change, but more than that and you risk thermal shock. I hadn’t know the exact temperature range before. Never stop learning!
After our class, we had lunch and then got down to the business of filming the Can-It Forward video segments. My segment was going to be the last to air and so we were the last to film. We demonstrated Habanero-Apricot Jelly (made with dried apricots and perfect for off-season canning!) and Sriracha Ketchup and then used them in a recipe (you’ll have to watch the segment to see what we made!).

The time flew by and before I knew it, we were done. Everyone piled into the bus and we headed to dinner. There had been talk of going to the Indiana State Fair afterwards, but it had been a full day and we were all ready to tumble into our respective beds after dessert came.

The Preserving Summer Canning Series we filmed aired throughout August. You can watch Kathryne, Linda, Heather, and me over on the Ball® Fresh Preserving Products Facebook page. Make sure to let me know what you think!
Disclosure: I am a paid partner for Newell Brand, makers of Ball® Fresh Preserving Products. However, all thoughts and opinions expressed are entirely my own.
Related Posts:
Can-It Forward Day 2017
Ball FreshTECH Automatic Home Canning System
A Trip to the HQ of Ball® Fresh Preserving Products by Newell Brands in Fishers, Indiana
A few weeks ago, I spent an action-packed day and a half in Indiana, at the Headquarters of Ball® Fresh Preserving Products by Newell Brands in Fishers. I was there with three other bloggers, to peek behind the scenes and participate in some Can-It Forward Day festivities.
I flew in to Indianapolis and met up with Linda and Kathryne, of Garden Betty and Cookie and Kate, respectively (Heather from Whipperberry arrived a little after we did). Our first stop was Minnetrista in Muncie.
Minnetrista is the original Ball family homesite and how houses an extensive collection of artifacts and archival material from the Ball family as well as East Central Indiana. If you’re a jar lover, it’s most certainly worth a visit, but if you can’t swing a trip, start by browsing their collection database online (try the random image search. It’s fascinating).
Their collection includes vast number of unique jars, tea sets, old jar molds, and even a small collection of Bob Ross painting (happy little trees!) I particularly loved the story of the jar pictured above. They were made specially for the Southern Methodist Orphan Home during the Great Depression.
The Home distributed them to residents of Waco, TX and asked that each household fill one or two jars while they were putting up their harvest. This way, the orphans had plenty to eat, even during the leanest of years.
After our tour of Minnetrista, we had dinner at Thr3e Wise Men in Muncie. We had a ton of food, including some seriously delicious fried pickle chips.
After dinner, I snuck away for a couple hours to see an old friend who moved to Muncie a several years ago. I met his kids, held their youngest (just a week old!), and caught up on their life.
The next day started bright and early, with breakfast at the Headquarters for Ball® Fresh Preserving Products by Newell Brands in Fishers. After we were fed and had coffee, it was time to take a tour of the packaging plant. I kind of loved the toe protectors we were given to wear (they looked oddly good with my red clogs). Not pictured were the neon vests, hard hats, safety glasses, and earplugs we were also assigned.
Ball® jars are made primarily in a factory north of Muncie, and then they’re transported (stacked and strapped to pallets, like you see pictured above) to the facility in Fishers. This is where they’re checked over, given lids and rings, grouped into boxes, and wrapped in plastic.
The machine they use to put the lids and rings on the jars was fascinating (it was kind of steam punky), but sadly it is proprietary equipment and so I couldn’t take any photos or video of it work its magic.
They process Ball®, Kerr, Golden Harvest, and Bernardin (Canada!) jars in that facility. This is also where they package jars up into smaller lots for various retailers. When you see a fancy jar end-cap display at your grocery store, it probably started life in Fishers.
Looking out at row after row of jars, I couldn’t help but imagine a game show for canners in the style of Supermarket Sweep. Winner gets to run around and grab all the jars they can in just 60 seconds (sadly, it’ll never happen. But it’s fun to dream!).
Once our tour was over, we had a short canning class with Jess Piper. She’s a member of the customer support team at Newell Brands, makers of Ball® Fresh Preserving Products and if you reach out to them with a question or issue, she may well be the one to help you resolve your query. Jess also does the bulk of the on-camera presentations for Ball, is a certified canning expert, and is a delightful human.
You might think I’d feel silly taking a canning class, but I always find it useful to hear how other people present canning information. One tidbit I picked up is the fact that mason jars are designed to withstand a 90 degree F temperature change, but more than that and you risk thermal shock. I hadn’t know the exact temperature range before. Never stop learning!
After our class, we had lunch and then got down to the business of filming the Can-It Forward video segments. My segment was going to be the last to air and so we were the last to film. We demonstrated Habanero-Apricot Jelly (made with dried apricots and perfect for off-season canning!) and Sriracha Ketchup and then used them in a recipe (you’ll have to watch the segment to see what we made!).
The time flew by and before I knew it, we were done. Everyone piled into the bus and we headed to dinner. There had been talk of going to the Indiana State Fair afterwards, but it had been a full day and we were all ready to tumble into our respective beds after dessert came.
The Preserving Summer Canning Series we filmed aired throughout August. You can watch Kathryne, Linda, Heather, and me over on the Ball® Fresh Preserving Products Facebook page. Make sure to let me know what you think!
Disclosure: I am a paid partner for Newell Brand, makers of Ball® Fresh Preserving Products. However, all thoughts and opinions expressed are entirely my own.
Related Posts:
Can-It Forward Day 2017
Ball FreshTECH Automatic Home Canning System
Red Currants, Dry Canning, and Family Traditions
Regular Food in Jars contributor Alex Jones is back with another post from her canning trenches. This time, she’s sharing her experience trying dry canning (aka open kettle canning) with her Canadian relatives. -Marisa

As I’m sure is the case with many of you readers, I first learned to can thanks to recipes and tips here on Food In Jars.
Marisa’s enthusiasm, knowledge, and clear, well-researched recipes and instructions have always made it easy to understand the principles of safe and delicious canning. Ever since then, I’ve felt confident in putting up seasonal produce and even developing or tweaking recipes of my own, knowing that they were based on safe, tested, well-researched information. And I’d never known anyone who practiced home preserving any other way.
That is, until I paid a visit to family in Quebec earlier this month.
My mother’s 10 brothers and sisters, as well as many of my twenty-odd cousins, still live in a section of rural Quebec sandwiched between Montreal to the north and the U.S. border to the south. I spent summers visiting there, swimming in the lake, picking berries, and getting a taste of rural life.
Now that I’m grown, I still like to pay an annual visit to the family homestead, and one of the highlights of the trip each summer is checking out my aunts’ huge, enviable vegetable gardens. (My mom seems to be the only one of the eight women in her generation who isn’t crafty, but that tendency was clearly passed on to me.)
This year, my aunt Dorothy — who grows, stores, cans, freezes, and pickles enough produce so that she barely shops for it in the winter — concluded the annual garden tour by giving my partner and I a big bowl and a directive to take a pass at her prolific red currant bush, still dripping with ruby-red fruit after several harvests and jamming sessions. Red currants being one of the few summer fruits I have trouble getting my hands on, I enthusiastically complied.
We left with two quarts of berries — but I’d have to turn them into jam before crossing back into the States or risk confiscation by the border guards, who are under orders to confiscate fresh foods like eggs and produce from travelers.
Another aunt, Patricia, came to the rescue, offering the use of her kitchen for the afternoon and even digging up some dusty Bernardin jars from the attic for me to use. But when I asked her where I’d find two large pots — one to cook the jam and one to heat the water bath — she said, “What do you need two pots for?”
After a few minutes of incredulous questions from both sides, it became clear that we had really different ideas about how to preserve this fruit.
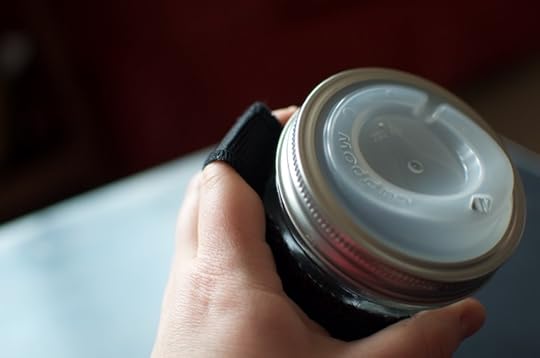
When they put up jam, I learned, my aunts practice dry canning. This method eschews the jars’ standard 10-minute bath in boiling water in favor of heating clean jars in the oven to sanitize them, pouring a kettle of boiling water over the bands and fresh lids, filling the jars, sealing, and allowing them to cool until the seals ping.
While I was a little skeptical, I realized I’d enjoyed jam made by my aunts in this way for years before — so I let Aunt Patricia lead me through the process.
(It’s worth noting that for low-acid foods like tomatoes, my relatives will go for a water bath process when preserving, saving dry canning for only high-acid, high-sugar recipes like jam and jelly. I certainly wouldn’t have gone along with any low-acid preserving recipes that don’t stick to the standards put forth by trusted sources like the National Center for Home Food Preservation.)
After cooking the jam — using this recipe from David Lebovitz with less sugar — we filled the heated jars, topped them with the scalded lids, and waited for them to seal.
While all five of the half-pint jars I made sealed just fine after the initial cooling period, two of them have since failed, prompting a transfer to the fridge — and indicating that while good results are possible with this method, it’s less effective than a water bath, in my experience.
But otherwise, the jam looks and tastes great, three weeks later. (My aunt also stores her open jars of jam in the cupboard; signs of mold, she says, are a cue to scrape anything unwelcome off the surface and transfer the jars to the fridge. Then again, she eats jam on homemade bread almost every morning, so it probably goes pretty quickly.)
I haven’t included a recipe here, since I’m not encouraging anyone to try dry canning at home. But the experience stuck with me: So many of my crafty, foodie practices have been learned on the job or through the Internet rather than being passed down through generations. None of this was taught to me growing up by someone I knew and trusted.
I’ve never come up against resistance to contemporary techniques from anyone, let alone family who have spent a lifetime making preserves by what are now considered outdated methods. With a lower-risk recipe like jam, I just had to give this technique a try.
I might not have an acre of garden to harvest from or a my own woods in which to forage, but I was able to connect with a family tradition through this method. I don’t see myself dry canning again in the future, but I’m thankful for this reminder to learn from my elders and to better understand the way things used to be done as well as how they’re done now in my preserving practice.
Related Posts:
How to Make Your Own Tonic Water
Guest Post: Five Canning and Preserving Survival Tips by Lynne Curry
How to Build a Summertime Cheese Board


