
Marisa McClellan's Blog, page 36
August 29, 2017
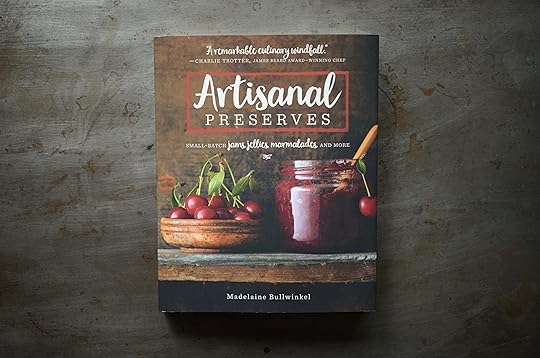
Cookbooks: Artisanal Preserves
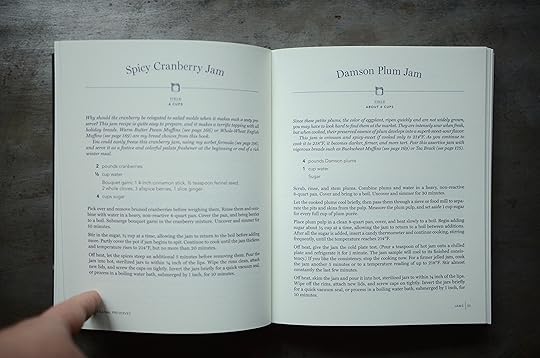
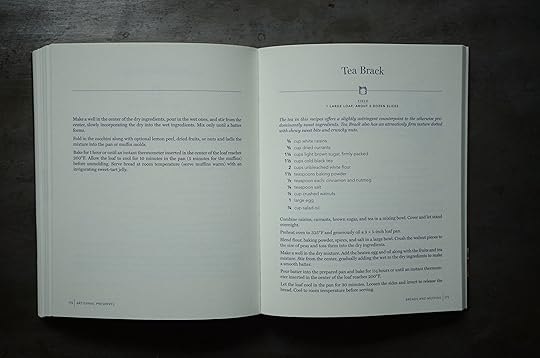
In the last ten years or so, we (the cookbook consuming population) have become accustomed to cookbooks that burst with juicy images. However, there’s much to be said for quieter books that put the focus on the words and recipes rather than the art.

One such book that landed on my desk recently is Madelaine Bullwinkel‘s Artisanal Preserves. It’s a revised reissue of her Gourmet Preserves that was first published in 1987 and is unassumingly charming.
The book features traditional jams, jams without added sugar, jellies, marmalades, preserves, breads and muffins, and desserts. As you can see from that list, it’s a volume that focuses on the sweet side of preserving rather than trying to cover the entire spectrum.
There’s much in this book that intrigues me. Ones that are particularly triggering my interest are Tomato and Prune Jam (page 50), Rosemary Red Onion Jelly (page 103), Lime Zucchini Marmalade (126), Pear and Grape Preserves (page 158), and Marmalade Muffins (page 172).
If you like vintage cookbooks that burst with voice and personality, then the reissue of this canning classic is very much for you. If you can’t abide books without pictures, you should probably give this one a pass.
Related Posts:
Cookbooks: The Joys of Jewish Preserving
Cookbooks: Homegrown Pantry
Cookbooks: Bread Toast Crumbs


Submit your August #fijchallenge Projects!
August is nearly over! Yet another month that has gone whooshing by with dizzying speed! I hope everyone has enjoyed their summer and managed to sneak in at least a little food preservation.
I posted the link to the submission form for this month’s Mastery Challenge in the monthly introductory post, but wanted to share it again here in case there were some of you who didn’t see it.
If you want to be counted in the August tally and included in the round-up, please use this form to submit your project by Wednesday, August 30 (that’s tomorrow!). The form is below!
Loading…
Related Posts:
Submit your April Mastery Challenge Projects!
Submit your March Mastery Challenge Projects Here!
Skills for the August Mastery Challenge
August 28, 2017
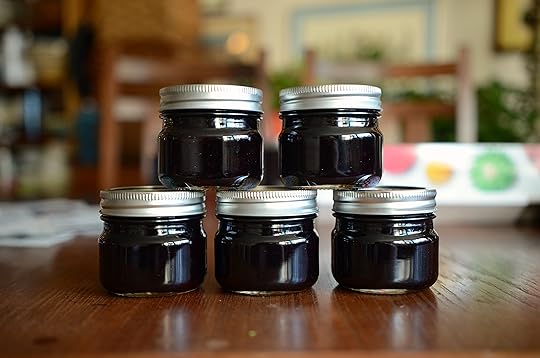
Wild Blueberry Jam with Berries from Maine
A few weeks ago, I did a slightly crazy thing. On Friday morning, I packed up my car, did some quick grocery shopping, and spent eight hours driving to Maine to teach a class at Frinklepod Farm. I got there around 10:30 pm, tumbled into a cozy bed tucked into stone room in a majestic barn, and woke up to a gorgeous morning, ready to teach.
I spent seven hours setting up, teaching (such a delightful group of students!), and cleaning up (thankfully, I had plenty of help from Flora and MaryJo) and then hopped back in the car and drove myself home. All told, I was only there for about 16 hours. I wish I’d managed to spend a little more time in Maine, but the craziness of late summer didn’t allow for me to spend any more time away from home.
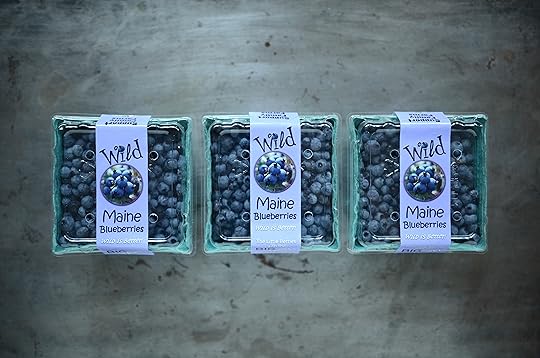
Despite the shortness of my visit, I did manage to bring a little bit of Maine back home with me. Three perfect pints of intensely flavorful wild Maine blueberries.
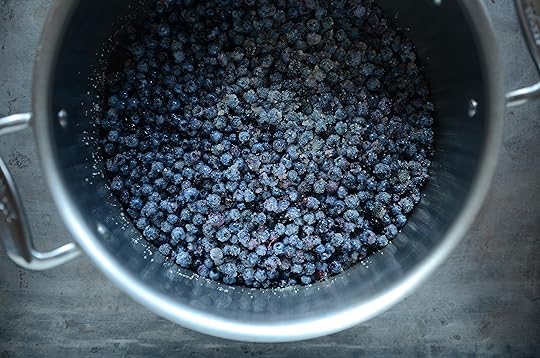
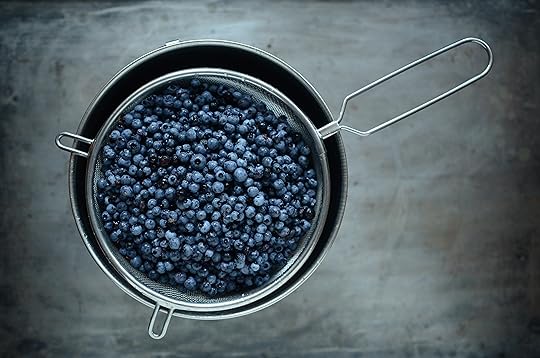
Now, we get plenty of cultivated blueberries here in Philly, but these tiny wild berries are a different beast. Sturdy, tart, and intensely flavorful, they make gorgeous jam. They are also a little fiddly to separate from their stems (which is why, if you look closely, you’ll see a few stems. I lost my patience with trying to remove them all).
I used a ratio of three parts fruit to one part sugar for this batch (calculating by weight). This means, if you have access to wild blueberries and don’t have the exact amount that I used, you can still proceed with what you’ve got.
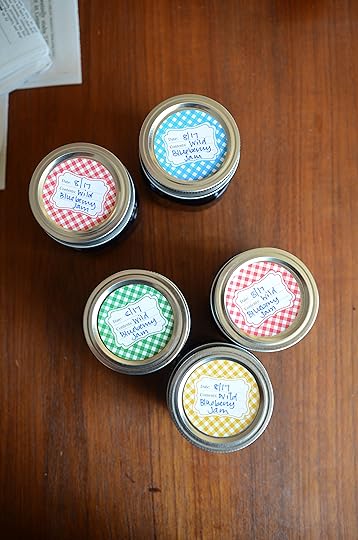
I might need to drive to Maine again next summer, so that I can make more of this tasty jam. (The jar labels pictured above are from site sponsor CanningCrafts and the jars are from site sponsor Fillmore Container).
PrintWild Blueberry Jam
Yield: makes 5-6 quarter pints
Ingredients
3 pints wild blueberries (about 2 1/4 pounds)12 ounces granulated sugar
1 tablespoon powdered fruit pectin
1 teaspoon cinnamon
1/2 teaspoon freshly grated nutmeg
1/2 lemon, zested and juiced
Instructions
Prepare a canning pot and 5-6 quarter pint jars.Wash the blueberries and pick them over for stems and leaves. Pour them into a wide, non-reactive pot and add the sugar, pectin, cinnamon, nutmeg, and lemon zest and juice.
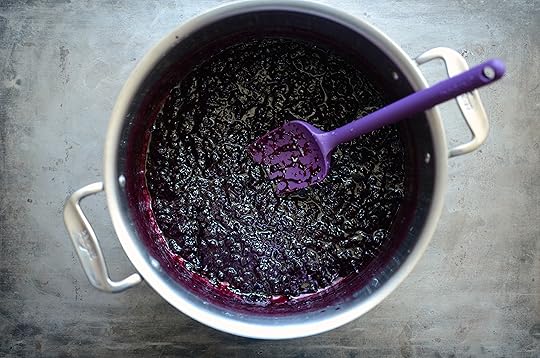
Using a potato masher, break up the berries and work in the spices.
Place the pot on the stove over high heat and bring to a boil. Reduce the heat to medium-high and cook, stirring regularly for 15-20 minutes, until the jam passes your set test of choice.
When you're satisfied with the consistency of the jam, remove the pot from the heat. Funnel the jam into the prepared jars, leaving 1/4 inch headspace.
Wipe the rims, apply the lids and rings, and process in a boiling water bath canner for 10 minutes.
When the time is up, remove the jars and set them on a folded kitchen towel to cool. When the jars have cooled enough that you can comfortably handle them, check the seals. Sealed jars can be stored at room temperature for up to a year. Any unsealed jars should be refrigerated and used promptly. 3.1http://foodinjars.com/2017/08/wild-blueberry-jam-berries-maine/
Related Posts:
Upcoming Classes: Facebook! Glen Mills, PA! Sewell, NJ! Arundel, ME!
July Sponsors: Cuppow, Fillmore Container, EcoJarz, Mason Jar Lifestyle, CanningCrafts, and Mrs. Wages
June Sponsors: Cuppow, Fillmore Container, EcoJarz, Mason Jar Lifestyle, CanningCrafts, and Mrs. Wages
August 25, 2017
The Dinnertime Hand-off with Blue Apron
Today’s post is sponsored by Blue Apron.
Over the last year, I’ve had several opportunities to write about my experiences with Blue Apron meal kits. I’ve shared how I used them to be a good houseguest, how they helped me avoid take-out while preparing for a conference, and how they bumped me out of my weeknight dinner rut.
This time, our box of three meal kits (we get the plan designed for two people. Bigger households might like the family plan better) made all the difference during a week when I down with a rotten cold. Here’s why. Most of the time, when I make dinner, all the information lives in my head. I don’t follow a lot of recipes and often simply improvise with what we have.
This is an approach that works well for us when I’m functioning at the top of my game. But on those nights when I am sick, tired, or have to teach a class, keeping everything in my head makes it hard for Scott to step in and make dinner happen.
However, when we have a Blue Apron recipe to make, the hand-off is seamless. We’ve already got all the high-quality ingredients necessary, so there’s no shopping necessary. Then, I can start things, tell him exactly what I’ve done, and he can simply pick up where I’ve left off. Being able to surrender dinner responsibility to him without worry made all the difference for me this week. It was magical.
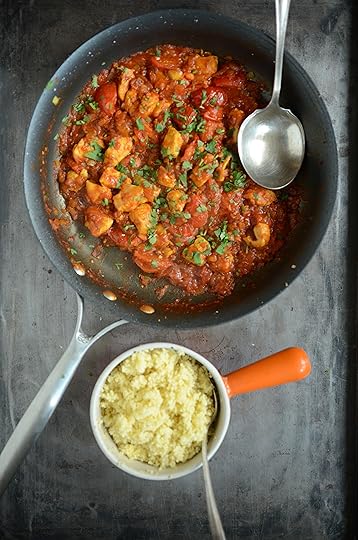
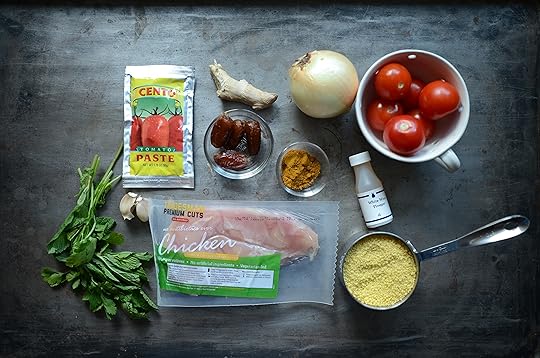
Another really exciting thing that happened for us with this Blue Apron box was the fact that one of the recipes helped push the boundaries of Scott’s culinary comfort zone. The chef-designed recipe for Chicken Tagine with Cherry Tomatoes, Dates, and Couscous initially did not speak to him (he’s not typically a fan of dried fruit in savory dishes). But after his plate was clean, he said he enjoyed it and would happily eat something like it again. Score one for Blue Apron!
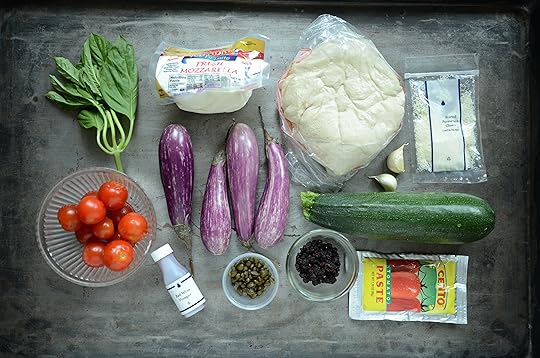
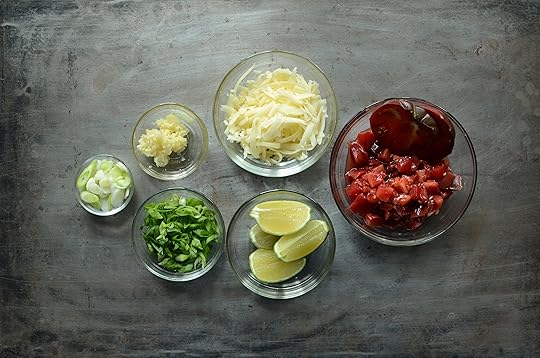
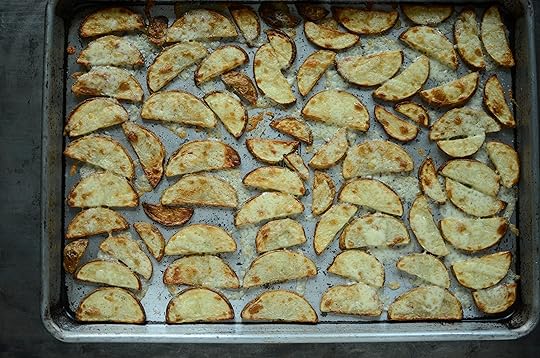
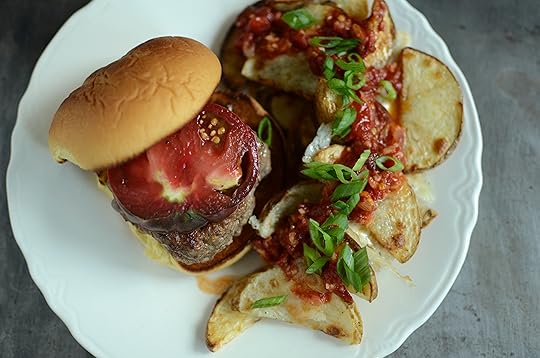
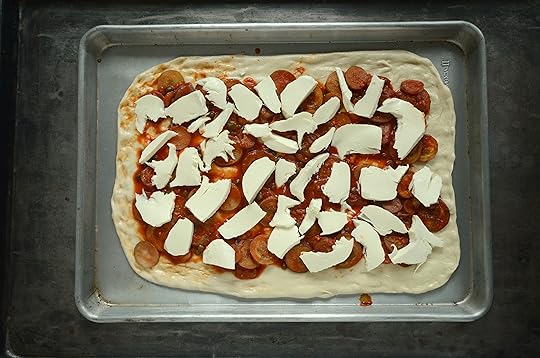
In addition to the Chicken Tagine, we also had these Heirloom Tomato, Lamb, and Beef Burgers with Loaded Cheesy Potatoes (the burgers were really good, but those potatoes were amazing!) and the Fairytale Eggplant and Mozzarella Pizza (another winner).
One of the worries that people often have about Blue Apron is the amount of packaging involved. I continue to be impressed with how the amount of packing materials seems to reduce with every order I receive (and most of it is recyclable). If you can’t recycle the materials in your area, you can also opt to return the packing materials through the mail for reuse and recycling.

If you’re intrigued by my experience with Blue Apron, they’ve got an offer for you, too! The first fifty readers to use this link to sign up for the service will get three meals for free on their first Blue Apron order.
Oh, and if you want to take a peek at more of the possible meals you’ll get from Blue Apron, check out their recipe page.
Disclosure: This post is sponsored by Blue Apron. They sent me a 2-Person box, containing three meals for two people. They’ve also compensated me for my time and attention. However, all thoughts and opinions expressed are entirely mine.
Related Posts:
Early Summer Cooking with Blue Apron
A Late Winter Cooking Reset with Blue Apron
Cooking Dinner with Blue Apron
August 22, 2017
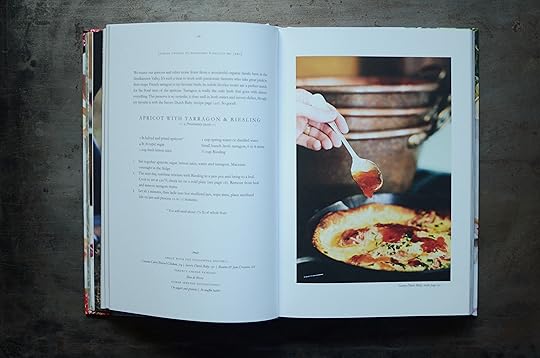
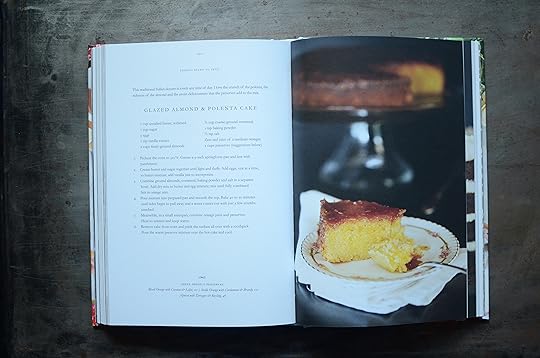
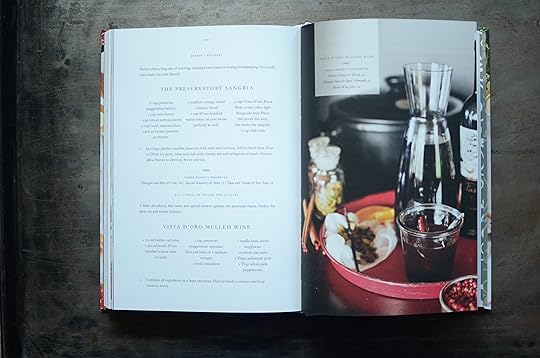
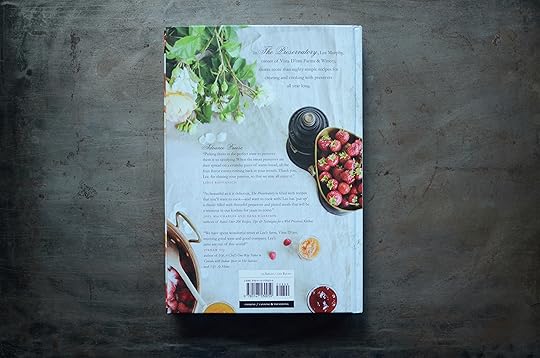
Cookbooks: The Preservatory
Want a book with truly unique preserve recipes, along with good ideas to use them up? Then make sure to get a copy of The Preservatory!
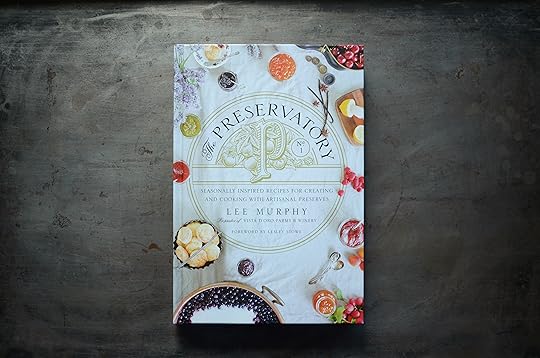
Back in late June, I spent a day in New York at the summer Fancy Food Show. While there, I met Lee Murphy. She’s the owner and head jam maker at Vista D’Oro Farms and Winery in British Columbia and the author of The Preservatory, a lovely new preserves cookbook that was published this spring.
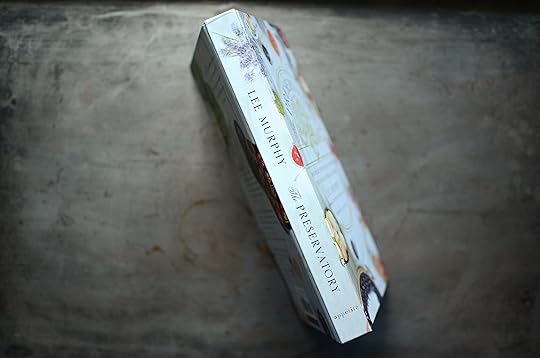
This gorgeous, hard cover book contains 80 recipes. Forty preserves and another 40 dishes, drinks, and baked goods that you can make with the contents of those glowing jars. The contents are organized by season, which is a structure I always appreciate.
I am so intrigued by the various preserves in this book. I’ve written a whole lot of recipes for jams, chutneys, butters, and spreads in my day and there are things in these pages that I’d never, ever thought of attempting. Three that particularly catch my attention are Sweet Corn with Espelette and Chardonnay (page 65), Spicy Sweet Charred Onion and Figs (page 86), and Olive with Orange and Lemon.
These recipes are all highly acidified with both lemon and apple juice and are given instruction for processing in a boiling water bath canner (though inexplicably, she gives a range of times for the boiling water bath). Still, that onion and fig jam speaks to me. I’m going to try and get my hands on some figs this week.
As far as the recipes designed to use up your preserves, there’s so much I want to make. I’ve bookmarked a number of them, and have my eye on the Savory Dutch Baby (page 130) for this weekend.
Bottom line on this book is that it contains some really interesting, creative recipes, unlike anything I’ve seen before. If you’re looking to bring some new inspiration into your homemade pantry, I can’t recommend it highly enough.
Related Posts:
Canning Book: Putting Up More
August 21, 2017
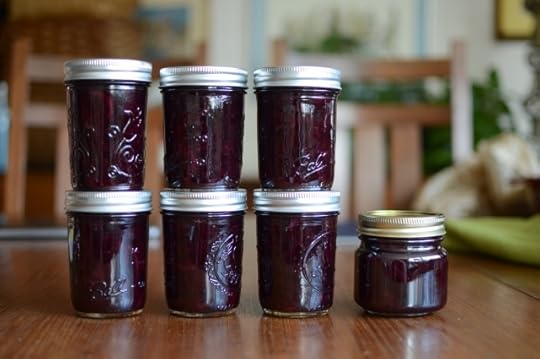
Sweet Cherry Meyer Lemon Marmalade
Time is running out on cherry season but there’s still time to make this Sweet Cherry Meyer Lemon Marmalade! And if you can’t find Meyers, regular lemons will also do (thought get organic if you can!).
Back in early July, the good folks from the Washington State Stone Fruit Growers sent me a giant box of cherries as part of this year’s Canbassador program (8th year! Crazy!). I shared a recipe for spiced cherry preserves and another for sweet cherry ketchup, and then life got a little crazy (vacation! work travel! an endless cold!).
I promised I’d share recipes for the final two things I made with my cherry shipment, and I’m going to fulfill half that promise tonight with this recipe for Sweet Cherry Meyer Lemon Marmalade (I can’t find my notes from the cherry black raspberry jam, so that recipe may be lost until next season when I can take another stab at the combination).
I’m also motivated to get this recipe up because while sweet cherries are still available fresh, I hear that they’ll be around stores for no more than another week or two. So while we’re on clock here, it is still possible to make this preserve this year!
I’ve made a lot of different things with sweet cherries over the years and I’ve found that the preserves I like the best are the ones in which I aggressively temper their sweetness with tart, tangy, and sour flavors (case in point, these lightly pickled sweet cherries).
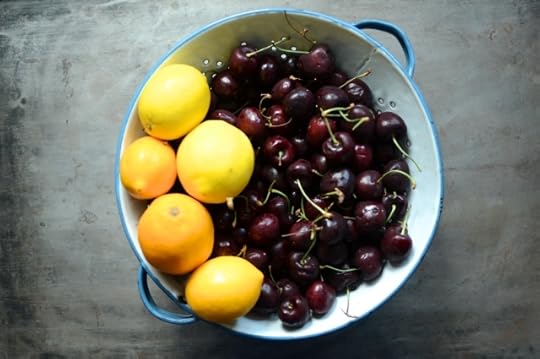
In the case of the this marmalade, I use a full pound of Meyer lemons to bring the pucker. These particular lemons were grown by the always-delightful Karen of Lemon Ladies Orchard and I hear she’s got a few summer lemons available, should you need to get your hands on some.
I approach this recipe over the course of two days. On day one, the cherries are stemmed, heaped in a pan with a cup of water, and simmered until soft. Then they’re left to sit overnight until cool. Simultaneously while the cherries do their initial cook, the lemons are cut into slivers, placed in a roomy bowl and covered them with two cups of water. They also soak overnight (this helps soften the rind and makes for a more pleasing finished texture.
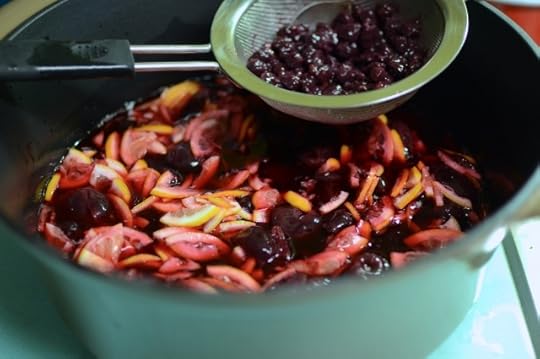
The next day, you pinch the pits out of the cherries, add the lemons and their water, along with four cups of sugar. Finally, you boil it all down into a pleasingly sweet, tart, and spreadable marmalade that married seasons and flavors beautifully.
Oh, and one last thing. Should you want to see what some of the other Canbassadors have done this year, make sure to follow the Washington State Stone Fruit folks on social media, as they’ve been sharing all the posts. Here’s where you can find them.
Facebook | Instagram | Twitter | Pinterest
PrintSweet Cherry and Meyer Lemon Marmalade
Yield: makes between 6 and 7 half pints
Ingredients
3 pounds sweet cherries1 pound Meyer lemons (other varieties can be used if Meyers are unavailable)
4 cups sugar
Instructions
Remove stems from cherries and wash well. Heap the cherries in a large pot that has a tight-fitting lid. Add 1 cup water and place pot on the stove. Cover and bring to a boil over high heat. Reduce the heat to medium and simmer for 20-25 minutes, until the cherries are quiet tender. When time is up, remove pot from heat and let sit until completely cool (I typically cook the cherries in the evening and then let them cool overnight).Wash the lemons. Cut away both the stem and blossom ends and slice each lemon into quarters. Cut away the thin strips of white pith from the interior of the wedges and use the tip of your knife to poke out the seeds. Cut each quarter into thin slices from top to bottom.
Once all the lemons are sliced, place them in a bowl (along with any of their liquid that you were able to capture) and add 2 cups of water. Let the sliced lemons soak overnight.
The next day, use your fingers to pop the pits out of the now-cool cherries. Add the lemons and their soaking liquid, along with the 4 cups of granulated sugar. Stir to combine and to help the sugar being to dissolve.
Place the pot back on the stove and set the burner to high.
Bring the contents of the pot to a boil and cook, stirring regularly, until the cherry and lemon mess has reduce by at least half and is starting to shape up into marmalade. You may need to reduce the heat as cooking progresses so that you maintain a low boil without scorching the bottom of the pot.
While the marmalade cooks, prepare a boiling water bath canner and 7 half pints (though you may not need all of them).
Test for set using both the plate and temperature tests (required temp is 220F).
When you deem that the marmalade is done, remove the pot from the heat.
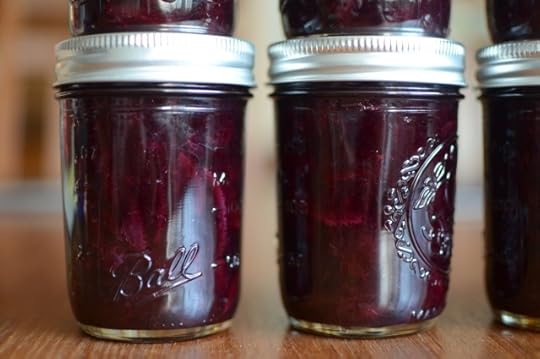
Funnel the finished marmalade into the prepared jars, leaving 1/4 inch headspace.
Wipe the rims, apply the lids and rings, and process in a boiling water bath canner for 10 minutes.
When the time is up, remove the jars and set them on a folded kitchen towel to cool. When the jars have cooled enough that you can comfortably handle them, check the seals. Sealed jars can be stored at room temperature for up to a year. Any unsealed jars should be refrigerated and used promptly.
3.1http://foodinjars.com/2017/08/sweet-cherry-meyer-lemon-marmalade/
Related Posts:
Sweet Cherry Ketchup
Nectarine Conserve with Lemon, Raisins and Walnuts
Peach Habanero Hot Sauce
August 14, 2017
Canning Peaches with True Value
I’m partnering today with True Value to share some canning tricks and recipe for canning peaches in syrup. Make sure to read through to the end for a chance to win a $50 True Value gift card!
As someone who does a lot of canning, I am often asked about my favorite places to get canning jars and equipment. One of my favorite places to recommend is True Value hardware store. Most locations carry the canning basics (though it’s always a good idea to call your local store and ask about their stock before hopping in the car).
If they don’t have it in stock, you can almost always order the jars online and use their ship-to-store option. That way, you can get exactly what you need, you don’t have to pay for all those heavy jars, and you support a local business.
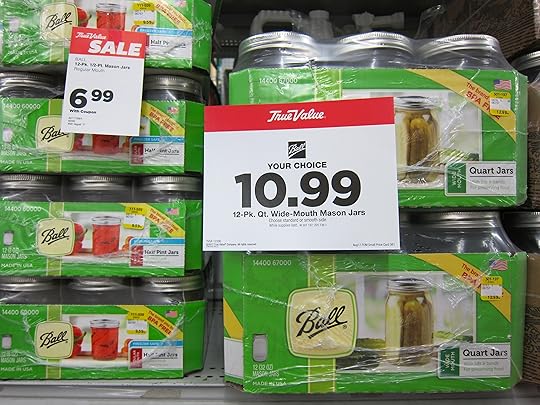
For this post, I took a little field trip out to a True Value location near me. They had a wide range of jars, as well as pickling salt, basic canning tools, a copy of the latest edition of the Ball Blue Book, and even a replacement pressure canner weight (while it looked like it had been there for awhile, those things don’t expire, so it was still good).
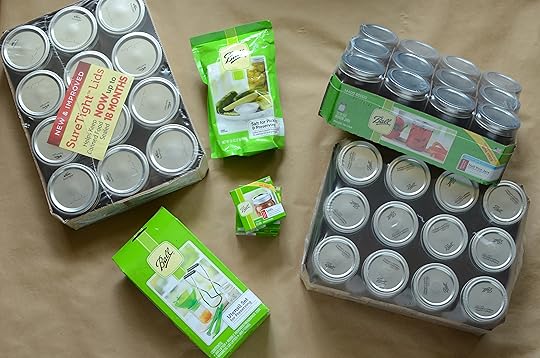
I came home from my outing with three cases of jars (regular mouth half pints, wide mouth half pints, and some of the new smooth-sided pints). I also picked up a new utensil set, some extra lids (because while jars and rings can be used over and over, the flat lids can only be used once), and some pickling salt (I was out!).
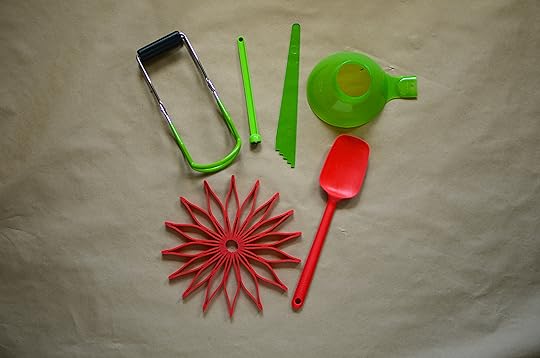
Any time you tackle a canning project, you want to take stock of what you have. You’ll need a large pot to serve as your boiling water bath canner (you can find more detail about that here), as well as a rack to drop in the bottom. This lifts the jars off the bottom of the pot and allows the water to circulate. I often use the flexible silicone trivet pictured above, but a round cake cooling rack is also a really good option.
You also need the tools that come in the canning Utensil Kit (jar lifter, wide mouth funnel, and headspace measure), and a heatproof spoon or spatula with which to stir.
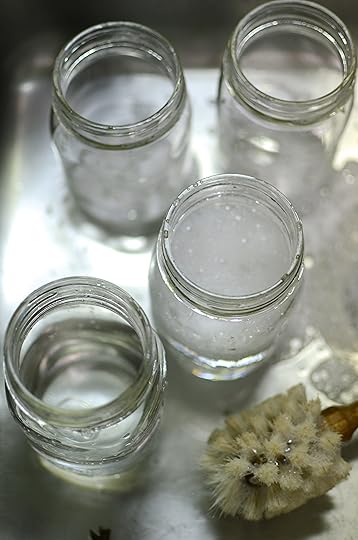
When you’re ready to get started, take the jars out of their packaging. Remove the lids and rings and wash the jars, lids, and rings in warm soapy water. I’ve been in the factory where Ball jars are fitted with lids, boxed, and sealed and it not a sterile environment. Those jars my look clean, but they’re filled with factory dust and residue. Wash them.
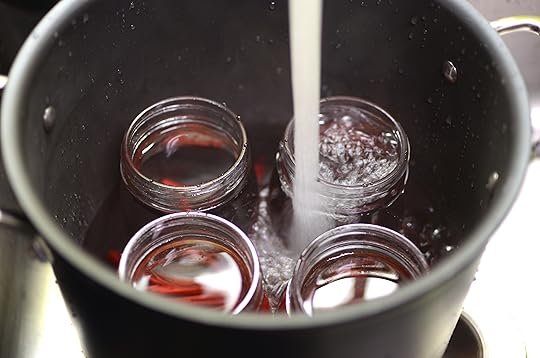
Once your jars squeaky clean, fit your rack into the bottom of the canning pot and arrange your jars on top. Fill the jars with warm tap water and then fill the pot up to the rims of the jars.
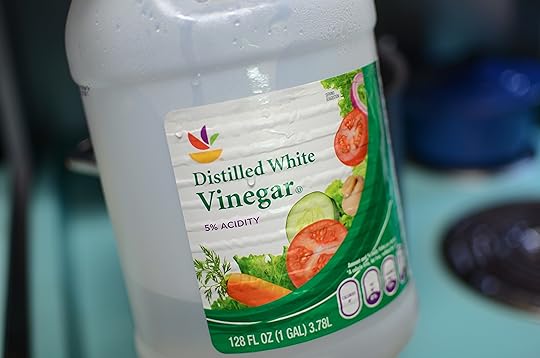
Set that pot on the stove, add a healthy splash of white vinegar (this helps keep your jars and pot clean, and if you have hard water, will prevent any minerals from depositing on your jars). Bring the pot to boil and reduce the heat to your lowest simmer, to keep the jars warm.
The rule of thumb is that hot food needs to go into hot jars. While mason jars are designed to withstand temperature changes of up to 90 degrees F, any more of a change could cause thermal shock which will lead to breakage.
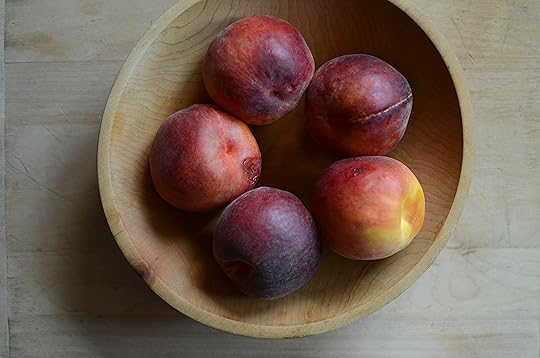
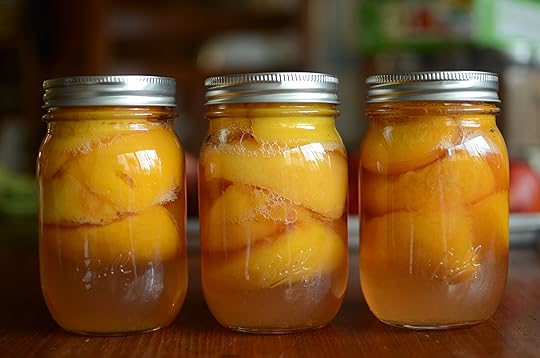
Now that your jars are ready, it’s time to start making your preserve. We’re in the midst of peach season here in Philadelphia and so I opted to make a small batch of preserved peach quarters, packed in a light syrup. For those of you concerned about the amount of sugar, know that it doesn’t really sink into the peaches too much, and will greatly help prevent the peaches from browning. However, if you prefer, you can also pack these peaches in fruit juice.
First, make the syrup. Combine 3 cups of water with 3/4 cups granulated sugar in a 4 quart saucepan. Add 2 tablespoons of bottled lemon juice (this is present to help prevent browning) and bring to a simmer. Stir occasionally to ensure that the sugar dissolves.
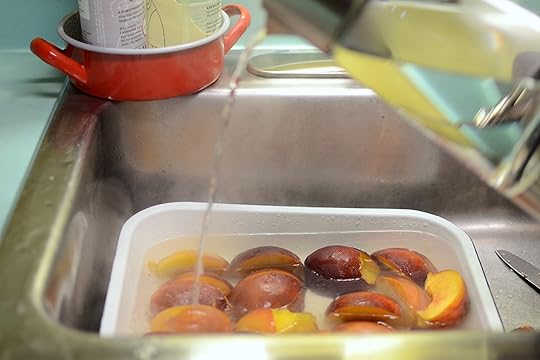
Cut three pounds of peaches into quarters, remove the pits, and arrange the peaches in a heatproof baking dish (it’s best to do this in your sink). Bring a kettle of water to a boil. Once it is hot, pour it over the peaches and let them sit for 2-3 minutes.
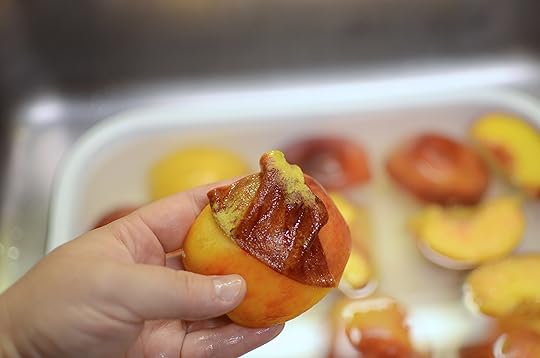
When the time is up, run cold water over the peaches. Provided that the peaches were ripe enough (peeling underripe peaches is torture), the peels should lift off easily. As you work, gently slide each peeled peach quarter into the hot syrup so that the amount of time the peaches are exposed to the air is limited.
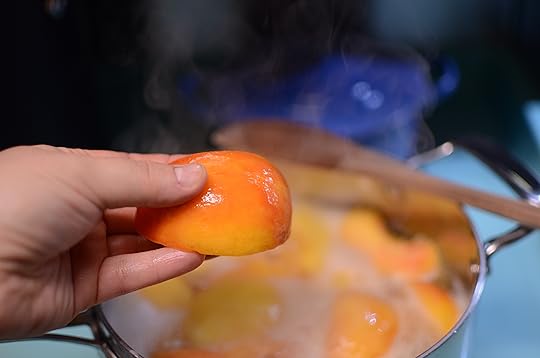
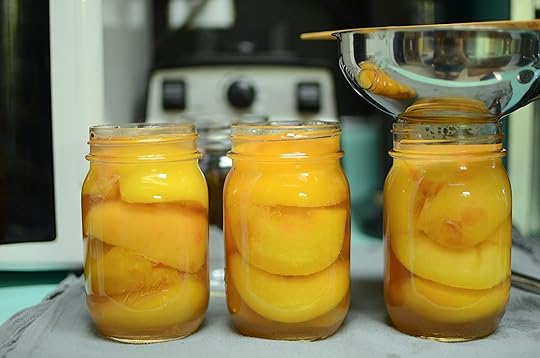
Once all the peaches are peeled and in the pot, bring the syrup to a boil and cook for one minute. Remove the pot from the heat. Pull the hot canning jars out of the canning pot and arrange them on a folded kitchen towel. Position a wide mouth funnel on top of a jar and use a slotted spoon to portion the hot peach quarters into the jars.
Top the jars with syrup and use a utensil like a wooden chopstick or the bubbling tool that comes in the utensil kit to ease out any trapped air bubbles. Fill the jars with syrup, leaving 1/2 inch headspace.
Wipe the rims of the jars with a damp paper towel. Center a clean lid on the jar and apply the ring. Tighten it only until it meets resistance. You don’t want to overtighten it, as that could cause the lid to buckle during processing. Place the jars in the canner, put the lid on, and bring the pot up to a rolling boil. Process the peaches in your canning pot for 20 minutes (if you live at elevations above 1,000 feet, you’ll need to increase your processing time. Check out the chart here).
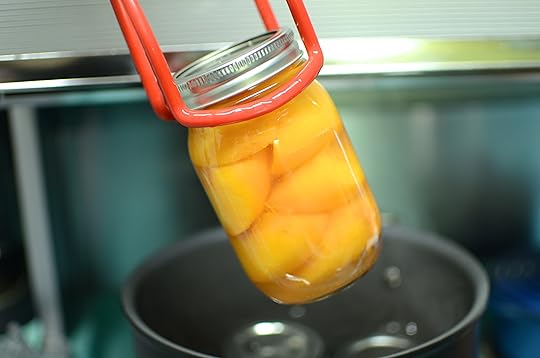
When the time is up, turn off the heat, pull the canner off the hot burner, and remove the lid. Let the jars cool in the canning pot for five minutes (this helps prevent liquid from siphoning out of the jars and produces a stronger seal). Once that time is up, remove the jars from the pot and set them back on the folded kitchen towel.
Let them cool undisturbed for at least 12 hours. Once that time is up, check the seals. If the lids are concave and seem strongly adhered to the jars, you are good. Wipe any sticky residue off the jars and store in a cool, dark place. For the best quality peaches, eat them within a year.
This post was written in partnership with True Value hardware. As part of our agreement, they gave me $100 to spend on canning gear at my local shop. I only ended up spending about half what they allocated and so I’ve decided to share the remaining $50 True Value gift card with one of you! Please use the widget below to enter.
Related Posts:
Giveaway: Anolon Vesta Cast Iron 7 Quart Casserole
Giveaway: Mrs. Wages Tomato Prize Pack
Giveaway: Grater Set from EcoJarz
August 9, 2017
Small Batch Nectarine Lime Jam Recipe
On the hunt for a quick, satisfying preservation project? Look no further than this small batch nectarine lime jam recipe!
I love making tiny batches of jam (I often wish I could write a second volume of Preserving by the Pint, because I so enjoy developing small, quick preserving recipes). This one is a three ingredient job, made with just 1 1/2 pounds of nectarines (thanks Washington State Stone Fruit Growers!), a scant cup of sugar, and the zest and juice from a small lime.
Cooked down in a stainless steel skillet, it needs no more than 15 minutes on the stove. You can either process it, or funnel it into a jar, pop it in the fridge, and eat it until it is gone. Fast. Easy. Good.
PrintSmall Batch Nectarine Lime Jam
Yield: makes between 2 and 3 half pints
Ingredients
1 1/2 pounds nectarines (about 4 cups chopped)1 cup sugar
1 lime, zested and juiced
Instructions
Prepare a boiling water bath canner and three half pint jars.Combine the nectarines, sugar, and lime zest and juice in a low, wide, non-reactive pan.
Bring to a boil over high heat and then reduce the heat to medium. Simmer until thick (12-18 minutes, depending on the height of the heat and the width of your pan).
Funnel into the prepared jars. Wipe the rims, apply the lids and rings, and process in a boiling water bath canner for 10 minutes.
When the time is up, remove the jars and set them on a folded kitchen towel to cool. When the jars have cooled enough that you can comfortably handle them, check the seals. Sealed jars can be stored at room temperature for up to a year. Any unsealed jars should be refrigerated and used promptly.3.1http://foodinjars.com/2017/08/small-batch-nectarine-lime-jam/
Related Posts:
Strawberry Ginger Jam
Low Sugar Apricot Strawberry Jam
Indiana Peach Chutney Recipe
August 8, 2017
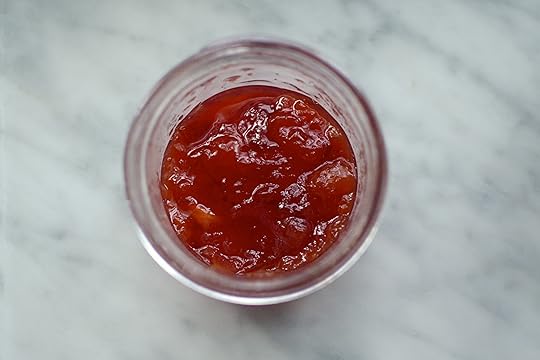
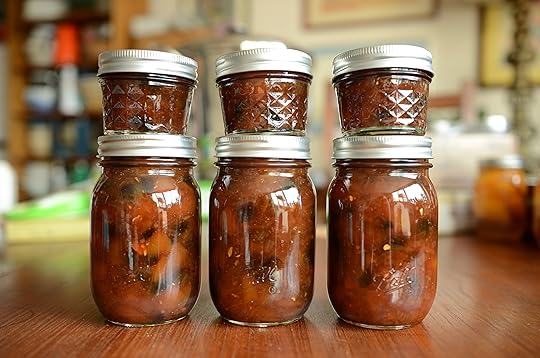
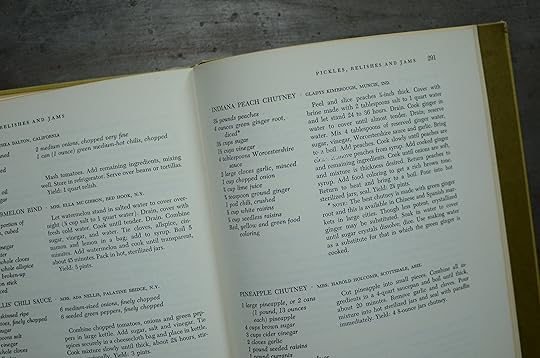
Indiana Peach Chutney Recipe
A vintage recipe updated for modern palates and kitchens, this take on Indiana Peach Chutney is a little spicy, perfectly sweet, and is ideal for preserving peach season.
I woke up Sunday morning, itching to get rid of some cookbooks. At least once a year, I like to sort through my absurdly large collection and move some things along. My criteria for letting go of books is pretty simple (if a little haphazard).
If I’ve never cooked from it, I pull it from the shelf and flip through. If nothing strikes my fancy, it goes in the outward bound stack. If spot something that tickles my culinary creativity, I drop a marker in the book and either put it back on the shelf or, if it’s something I want to make in the immediate future, I put the book on my desk.
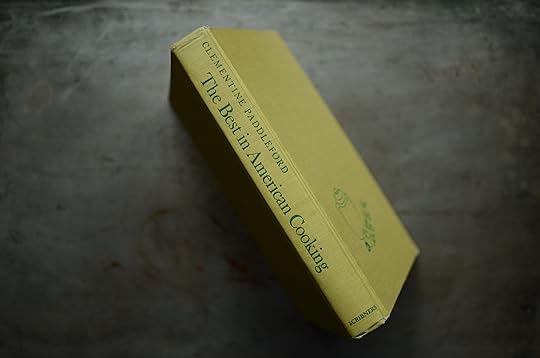
I had spent the previous couple days in Indiana for the Can-It Forward Day festivities, and so when I evaluated whether I was going to keep my copy of Clementine Paddleford’s The Best in American Cooking, the recipe for Indiana Peach Chutney caught my eye.
It also spoke to me because I had a fridge full of peaches and nectarines from the latest shipment from Washington State Stone Fruit Growers and needed to start moving that fruit into jars.
Of course, I didn’t follow the recipe to the letter. To begin with, I don’t have the patience for a process that requires one to poach the fruit in a sugar syrup until translucent (I used a combination of peaches and nectarines, and didn’t peel any of them, either).
Next thing to go was the two styles of raisins (I had dark ones in abundance and so that’s what I used). Finally, I couldn’t abide the idea of adding food coloring. I was certain that whatever color it ended up being would be totally fine.
If you tuned in to Monday night’s livestream (catch the next one on Monday, August 21 at 9 pm eastern), this is the recipe I used to demonstrate steam canning (I promised it a bit earlier than this, but such is life).
The finished flavor is gingery, a little bit spicy, and very fruity. Like many other chutneys, this one is going to be great with cheese, perfect as a bright condiment alongside grain bowls, and delightful on a post-Thanksgiving turkey sandwich.
PrintIndiana Peach Chutney
Yield: Makes between 3 1/2 and 4 pints
Ingredients
3 1/2 pounds peaches or nectarines, pitted and chopped (about 8-9 cups)3 cups granulated sugar
1 1/2 cups apple cider vinegar
3/4 cup freshly squeezed lime juice
1/4 cup Worcestershire sauce
1 large onion, diced
1 cup raisins
4 ounces fresh ginger, grated
2 large garlic cloves, pressed
1 teaspoon ground ginger
1 jalapeno, sliced open halfway
Instructions
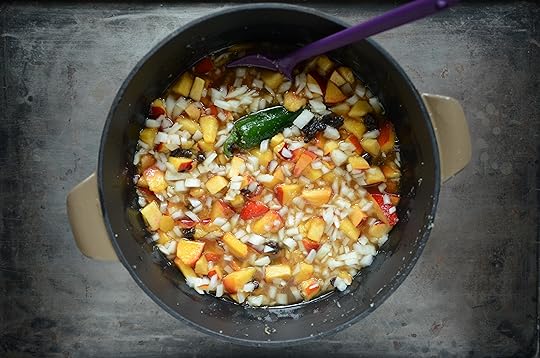
Prepare a boiling water bath canner and enough jars to hold between 3 1/2 and 4 pints.In a large, non-reactive pot, combine the peaches, sugar, vinegar, lime juice, Worcestershire sauce, diced onion, raisins, grated ginger, garlic, ground ginger, and the jalapeno that you've sliced along the sides in order to release the flavor (you will remove the jalapeno at the end of cooking).
Place the pot on the stove over high heat and bring to a boil. Once it starts to bubble, reduce the heat to medium-high and cook, stirring regularly until the chutney has reduced by about half and has thickened significantly. On my stove, this took a little over an hour.
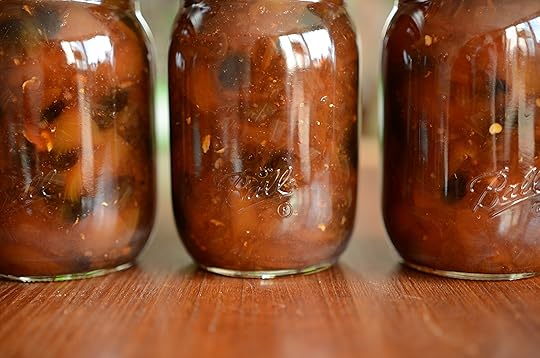
When the chutney feels done to you, remove the pot from the heat and funnel it into the prepared jars, leaving 1/2 inch headspace.
Wipe the rims, apply the lids and rings, and process in a boiling water bath canner for 15 minutes.
When the time is up, remove the jars and set them on a folded kitchen towel to cool. When the jars have cooled enough that you can comfortably handle them, check the seals. Sealed jars can be stored at room temperature for up to a year. Any unsealed jars should be refrigerated and used promptly. 3.1http://foodinjars.com/2017/08/indiana-peach-chutney/
lkjlk
Related Posts:
Small Batch Nectarine Lime Jam Recipe
Low Sugar Spiced Peach Jam
Green Tomato Chutney
August 7, 2017
Giveaway: Anolon Vesta Cast Iron 7 Quart Casserole
I bought my first piece of enameled cast iron cookware in the spring of 2007. It was from TJ Maxx and cost all of $40 (which felt like a fortune on my grad student budget). It was lime green, held about five quarts, and I thought it was the nicest thing in my kitchen. Heartbreakingly, the enamel began to chip and crack after only dozen uses.
Since then, I’ve had a number of pieces of enameled cast iron from a number of different makers, but continue to search for the unicorn of this category. A piece that is affordable enough that I can recommend it to someone on a grad school budget, that doesn’t chip easily, holds enough to feed a crowd, and is great for cooking down jams, fruit butters, and sauces.
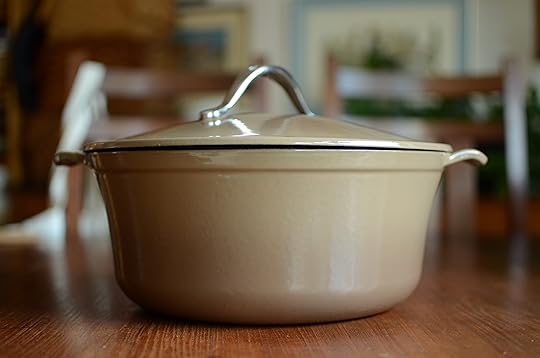
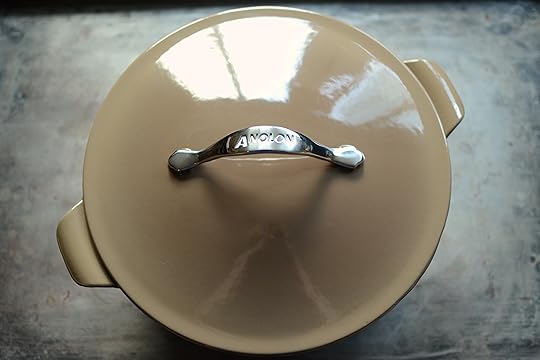
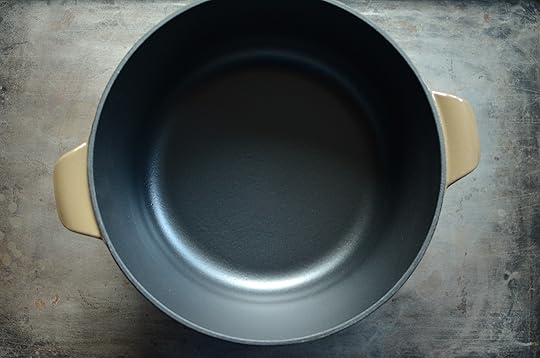
Friends, I think I’ve finally found the mythical creature of enameled cast iron cookware and it’s known as Anolon’s Vesta Cast Iron 7 Quart Casserole. The outside is an elegant coffee color and the interior sports a matte black enamel interior. The underside of the lid is studded with raised nubs that are designed to channel flavorful liquid back into the food as it cooks. It conducts heat evenly, cleans up beautifully, and is far more affordable than other enameled cast iron pots of comparable size.
Now, if this pot looks familiar, that’s because I featured the braiser from this line a couple of years back. And while I still regularly employ that braiser, this seven quart casserole is the pot that’s taken up permanent residence on my stove top. I’ve used it for at least eight batches of jam, chutney, and compotes, as well as several rounds of soup and pasta sauce. It’s a work horse and I couldn’t be more pleased with it.
If you watched my livestream earlier tonight, you saw me scooping chutney out of this very pot! And happily, this week the folks at Anolon are letting me give away one of these highly useful, totally durable, and perfectly elegant casseroles away to a lucky blog reader! Use the widget below to enter!
For more information about Anolon and their cookware, follow them on social media. Here’s where you can find them.
Facebook | Twitter | Instagram | Pinterest | YouTube
Disclosure: Anolon is provided both the casserole you see here and the one I’m giving away at no cost to me. All opinions expresses are entirely my own.
Related Posts:
Giveaway: Anolon Vesta Cast Iron 5 Quart Braiser
Plum Cardamom Jam and a Anolon Advanced 11-Piece Cookware Set Giveaway [sponsored]
Giveaway: Anolon Tri-Ply 5 Quart Dutch Oven


