
Marisa McClellan's Blog, page 2
December 30, 2021
Mulled Apple Cider Syrup
Make a batch of mulled apple cider syrup to keep in your fridge. You’ll be ready for festive sparkling drinks all season long.
This post is sponsored by the makers of Ball® home canning products.*
Between fertility treatments, being pregnant, and time spent nursing, it’s been over than four years since I’ve had more than a tiny sip of alcohol. In that time, I have developed a deep appreciation for syrups, shrubs, and other flavorful mixers that can bring easy interest to a glass of sparkling water.
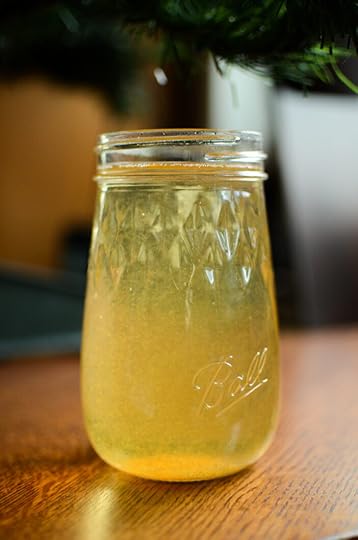
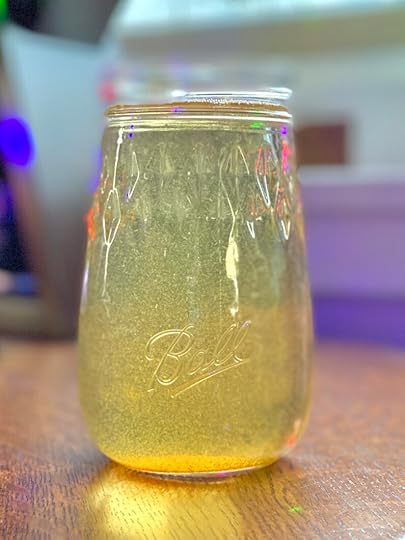
When my friends at @ballcanning asked me to come up with something festive for the holiday season, my thoughts immediately landed on sharing my favorite mulled apple cider syrup. Combined with sparkling water and served in a Ball® Flute Pint Jar, it is fun, refreshing, and decidedly celebratory.
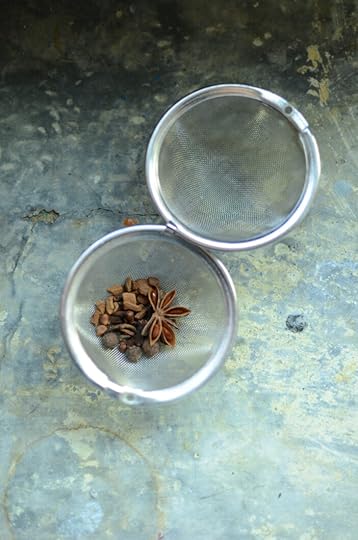
Combine a half gallon of fresh apple cider in wide pot. Add some mulling spices. I used cloves, star anise, allspice berries, and cinnamon, contained in a tea ball for easy removal. Then bring it to a boil. You want to stay close as it comes up to a simmer, in order to skim the foam that will build on the surface. Once you’ve removed the foam, allow the cider to boil down for 45 to 60 minutes. You want the cider to reduce until you have about 12 ounces.
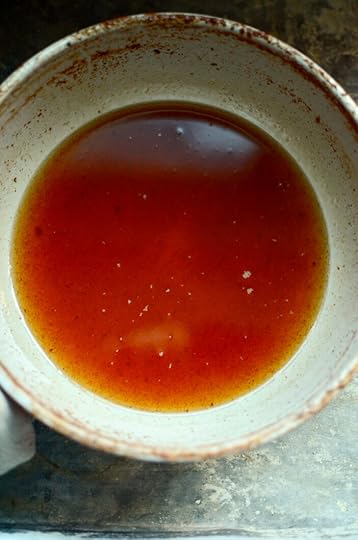
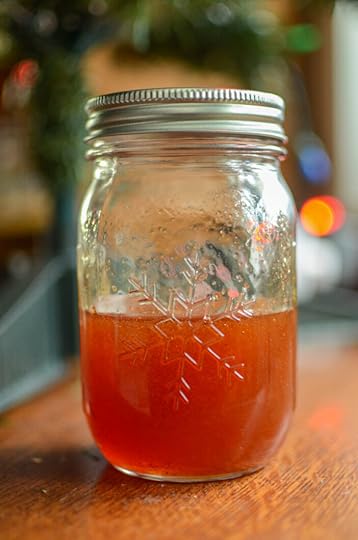
When it has reduced sufficiently, let it cool in the pot until room temperature. Once cool, pour into a Ball® Snowflake Keepsake Pint Jars, cap with a Ball® Leakproof Storage Lid, and refrigerate until you’re ready to use it.
When you’re ready to build your drink, gather the syrup, a Ball® Flute Jar, and some chilled fizzy water. Fill the jar three-quarters the way with sparkling water. Add a healthy dollop of apple cider syrup and a generous spoonful of pickled cranberries with their liquid. Stir to combine and add more sparkling water to fill the jar (you don’t want to add it all at the beginning because it will certainly bubble over while you’re mixing).
Here’s to fun, alcohol free drinks! I hope you all have a very happy new year!
 PrintMulled Apple Cider Syrup#wprm-recipe-user-rating-0 .wprm-rating-star.wprm-rating-star-full svg * { fill: #343434; }#wprm-recipe-user-rating-0 .wprm-rating-star.wprm-rating-star-33 svg * { fill: url(#wprm-recipe-user-rating-0-33); }#wprm-recipe-user-rating-0 .wprm-rating-star.wprm-rating-star-50 svg * { fill: url(#wprm-recipe-user-rating-0-50); }#wprm-recipe-user-rating-0 .wprm-rating-star.wprm-rating-star-66 svg * { fill: url(#wprm-recipe-user-rating-0-66); }linearGradient#wprm-recipe-user-rating-0-33 stop { stop-color: #343434; }linearGradient#wprm-recipe-user-rating-0-50 stop { stop-color: #343434; }linearGradient#wprm-recipe-user-rating-0-66 stop { stop-color: #343434; }Total Time 1 hourAuthor Marisa McClellanIngredients1/2 gallon fresh apple cider1 piece star anise1 piece cinnamon stick, crushed1/2 teaspoon cloves1/2 teaspoon whole allspiceInstructionsPour the apple cider into a large pot that has ample room for boiling. Bundle the spices into a tea ball or a length of cheesecloth and add it to the pot. Place the pot on the stove over high heat and bring to a boil. When foam begins to form on the top of the cider, skim it off with a large spoon. Continue to boil until the juice has reduced to just 1 1/2 to 2 cups. This will take about an hour. Let the syrup cool in the pot and then funnel into a jar and refrigerate. The finished syrup will keep 3-4 weeks in the fridge.
 *Disclosure: This is a sponsored post that is part of an ongoing partnership with the Fresh Preserving Division of Newell Brands. They have provided jars, equipment and monetary compensation. All thoughts and opinions expressed remain my own.


December 22, 2021
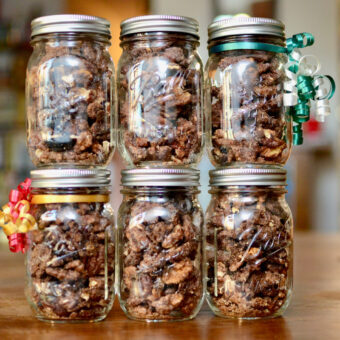
Spiced Nuts for Holiday Giving
Sweet, crunchy spiced nuts are simple to make and win raves from everyone who tastes them. Add them to a cheese board or add them to a hearty winter salad.

This post is sponsored by the makers of Ball® home canning products. *
My list of to-make holiday treats is ever evolving. Every year, I start baking thinking that I know exactly what I’m going to make. And then I spot a new recipe and am overcome with the urge to try it out. This is doubly true if said treat can be gifted in a festive Ball® Snowflake Keepsake Jar. You all know how I feel about jars!
Last year, at the very moment when I thought my making was done, my Instagram friend Heather shared her recipe for spiced nuts. Suddenly, I was not done. I had to make those nuts.
Friends. They were so easy and turned out incredibly well. Everyone I shared them with came back with raves. My mom was a big fan (she liked to add them to salads) and they are now on the yearly holiday list.
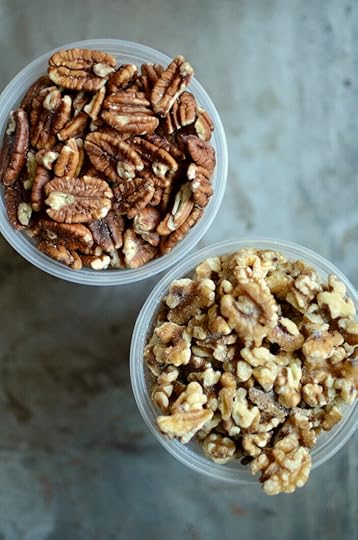
I did tweak Heather’s recipe slightly. I changed one of the spices, use slightly less sugar, and combine both pecans and walnuts in my mix (she uses just pecans). It’s a flexible and forgiving recipe, so I am certain every one of you could make similar small changes and still have happy outcomes.
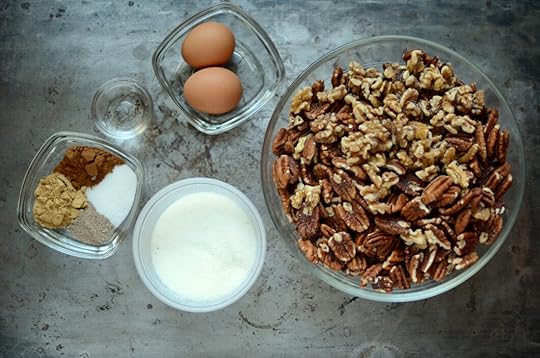
You start by whisking together two egg whites with two tablespoons of water. Add the nuts and stir to coat. Pour the nuts into a colander so the excess liquid can drain away and let them drip for a little while. Once the excess has drained away, whisk the sugar, salt, and spices together in a large bowl. Add the nuts and toss to coat.
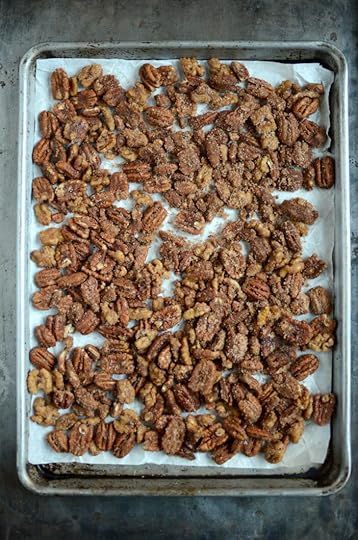
Divide the nuts between two parchment lined baking sheets and roast for 35-40 minutes at 300°F. Rotate the sheets at least once during baking.

Once the nuts are done, let them cool fully on the baking sheets before breaking them apart. Portion them into Ball® Snowflake Keepsake Pint Jars and add them to your gift bags and baskets. They keep at room temperature for 3-4 weeks and longer if you store them in the fridge or freezer.
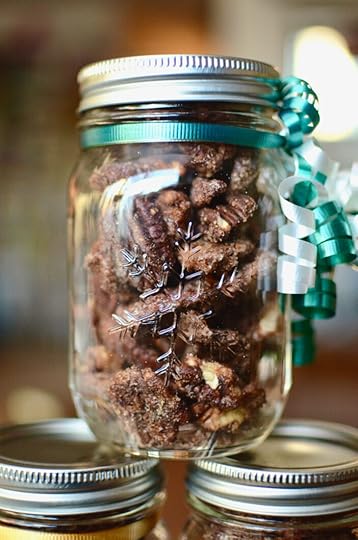
I’m not typically someone who goes big on jar wrapping or decorations (I like to put my effort into the contents of the jars), but I will occasionally pull out the curling ribbon. A couple of colors tied around the neck of the jar and curled does make it feel more festive and celebratory.
What treats did you make this holiday season? I’d love to hear!
 PrintSpiced Nuts#wprm-recipe-user-rating-0 .wprm-rating-star.wprm-rating-star-full svg * { fill: #343434; }#wprm-recipe-user-rating-0 .wprm-rating-star.wprm-rating-star-33 svg * { fill: url(#wprm-recipe-user-rating-0-33); }#wprm-recipe-user-rating-0 .wprm-rating-star.wprm-rating-star-50 svg * { fill: url(#wprm-recipe-user-rating-0-50); }#wprm-recipe-user-rating-0 .wprm-rating-star.wprm-rating-star-66 svg * { fill: url(#wprm-recipe-user-rating-0-66); }linearGradient#wprm-recipe-user-rating-0-33 stop { stop-color: #343434; }linearGradient#wprm-recipe-user-rating-0-50 stop { stop-color: #343434; }linearGradient#wprm-recipe-user-rating-0-66 stop { stop-color: #343434; }Prep Time 20 minutesCook Time 40 minutesAuthor Marisa McClellanIngredients2 egg whites2 tablespoons water2 teaspoons salt2 pounds raw pecans or walnuts, (or a combination of both)1 1/4 sugar1 tablespoon cinnamon2 teaspoons ginger1 teaspoon cardamomInstructionsPreheat oven to 300°F. Line two rimmed cookie sheets with parchment or silicone baking mats. In a large bowl, whisk the egg whites, water, and salt together. Add nuts and toss to coat. Pour the nuts into a colander and let them drain for 10 minutes or so. Whisk together the sugar, cinnamon, ginger, and cardamom. Combine the sugar mixture with the nuts and stir until well coated. Divide the nuts between the two prepared baking sheets. Bake for 35 to 40 minutes, rotating the sheets at least once during baking. When the time is up, remove the nuts from the oven and let them cool fully. Once they are completely cool, break them into pieces and store in glass jars.
 *Disclosure: This is a sponsored post that is part of an ongoing partnership with the Fresh Preserving Division of Newell Brands. They have provided jars, equipment and monetary compensation. All thoughts and opinions expressed remain my own.
December 6, 2021
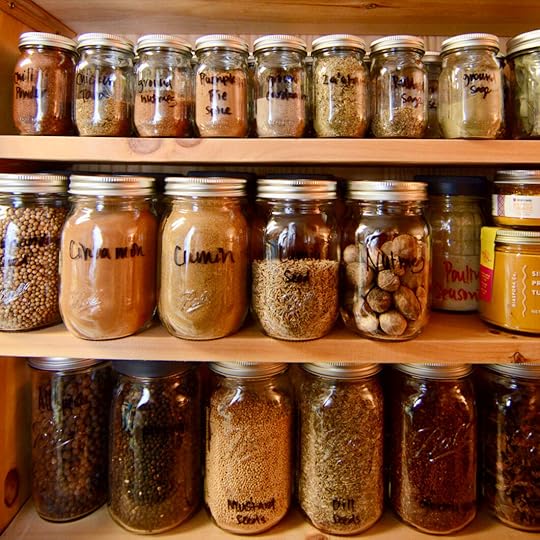
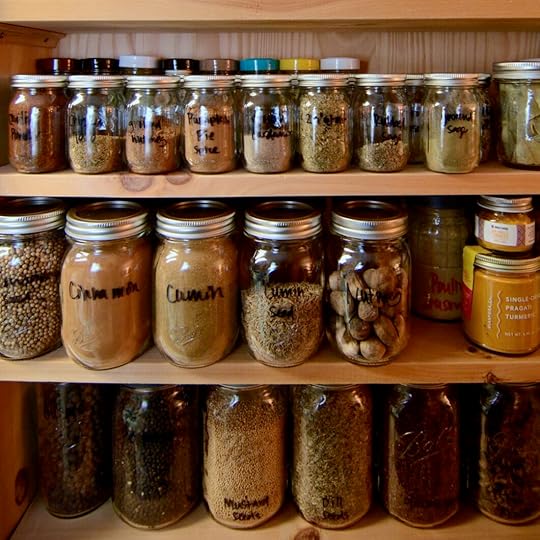
Spice Shelf Overhaul with Ball® Mini Storage Jars
Cleaning and reorganizing my spice shelf using a whole bunch of Ball® Mini Storage Jars has left me with a storage solution that is beautiful and easy to use!
This post is sponsored by the makers of Ball® home canning products.*
The week before Scott and I got married, my dad cut a hole in my kitchen wall and built a massive spice shelf into the space he carved out. As soon as he put the final shelf into place, I filled up those shelves with jars of spices and never looked back.
That was a little over 12 years ago now. I’m embarrassed to admit that in the intervening years, I’ve never taken everything down, purged spices, and thoroughly cleaned the shelves. I’ve spot cleaned on an as-needed basis, but it was just never a priority. However, lately I’ve been trying to tackle these small projects. It gives me a sense of accomplishment in season of life where there’s not a whole lot of that.
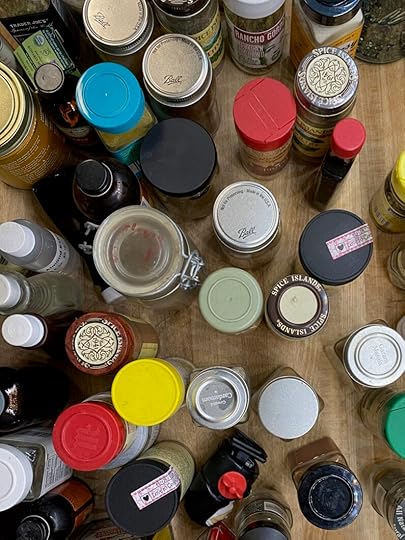
I started by pulling every jar, tin, and bag down so that I could see what I had. Once the shelves were empty, I took the boards down and scrubbed them in the sink. I wanted the cleanest slate I could get.
I discovered that I had three jars of oregano, another three of turmeric, and two of ground nutmeg (which is particularly weird, since I typically use freshly grated). Once I purged and grouped the various spices, I started decanting and consolidating. I used more than a dozen Ball® Mini Storage Jars for my smaller quantity spices. They hold 4 ounces and look like mini pint jars. They aren’t safe for canning, but they do a great job of keeping herbs and spices neatly contained and easily to hand.
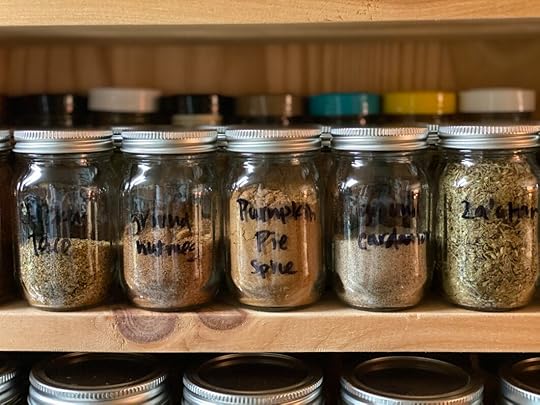
I keep some spices in larger quantities than fit into those cute Ball® Mini Storage Jars, and so I also used a some Ball® Smooth Sided Pint Jars and a handful of Ball® Wide Mouth Quarts. I love how uniform everything looks. It’s a big step up from my previous hodgepodge of jars, boxes, and tins.
Having my spices cleaned, sorted, and organized feels amazing. I feel like holiday cooking and baking will be much more pleasant and satisfying this year than it would have been otherwise.
Do you have a cleaning project that leaves you with a similar sense of satisfaction? I’ve love to hear about it!
*Disclosure: This is a sponsored post that is part of an ongoing partnership with the Fresh Preserving Division of Newell Brands. They have provided jars, equipment and monetary compensation. All thoughts and opinions expressed remain my own.
November 17, 2021
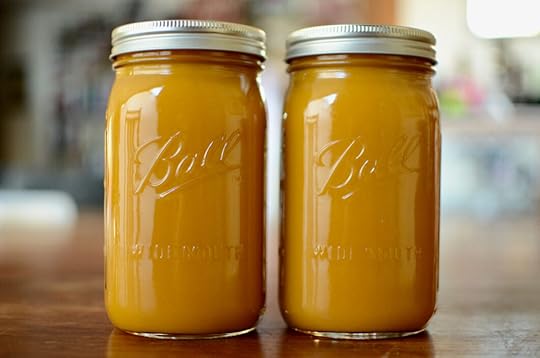
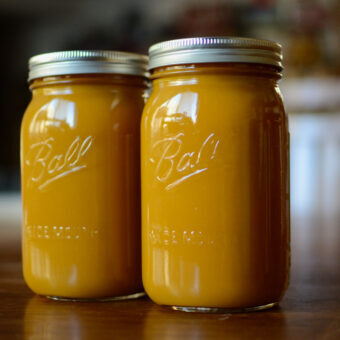
Butternut Squash Soup
Attending an autumnal potluck? Have a friend in need of some care? Fill a Ball® Quart Jar with butternut squash soup and take it to go!
This post is sponsored by the makers of Ball® home canning products.*
This time of year always awakens my urge to make a huge amount of food and gather people around a table. There’s just something about the cooler days of fall that makes me long for the coziness of a small (or not so small) party. Before kids and the pandemic, I was known among my friends and family for my willingness to host or be hosted, always with plenty of delicious things made for sharing.
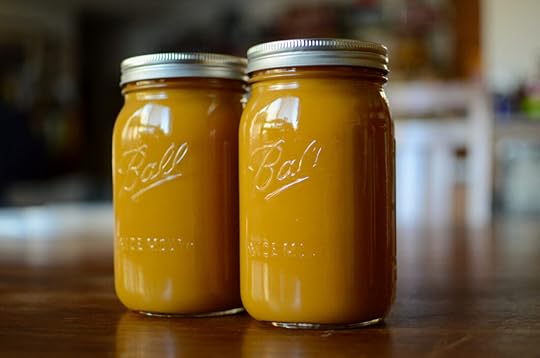
The last couple of years have made most gatherings impossible, but the urge to cook and share still bubbles up within me as soon as the leaves turn and the air goes crisp. And so I’ve been channeling that energy into little edible care packages for my friends and neighbors. Most recently, I’ve been making batches of butternut squash soup with toasty seeds. I funnel the soup into Ball® Quart Jars and put the seeds in a tiny jar or baggie so they don’t lose their crunch.
With holiday gatherings of all stripes on the horizon, this would also be a great way to bring butternut squash soup to a collaborative meal. Whenever I bring soup to a gathering, I also pack up a pot for reheating as well as my collection of ramekins so that the host doesn’t have to worry about vessels (small coffee mugs or teacups also work perfectly for little servings of soup).
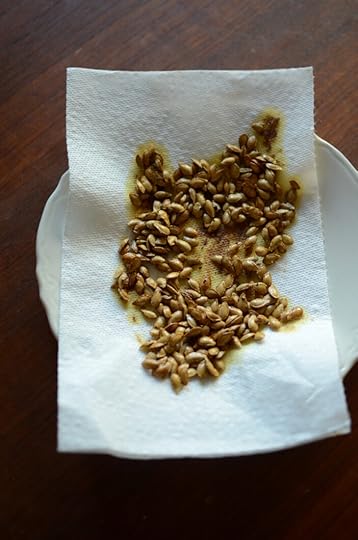
Let’s talk about those seeds for a second. The ones you see pictured here are the seeds I scooped from the center of the squash just before roasting. While the squash was in the oven, I picked off the stringy bits, gave them a rinse, and boiled them in salted water for 15 minutes (this helps flavor the seeds). Then I spread them on a plate to dry.
Once they were fully dry, I melted butter in a medium sized skillet, and added the seeds along with a little cinnamon and hot chili. Then I toasted them, stirring regularly, until the seeds began to pop. Finally, scooped the seeds out of the pan and let them drain on a paper towel. They are flavorful and add just the right amount of texture to the otherwise smooth soup.
I do think it’s important at this point to remind you that things like butternut squash soup aren’t safe for canning. I’m simply using these jars for storage and transportation. This soup is not shelf stable and there’s no safe way to can a soup like this, even with a pressure canner. The only way to safely pressure can pumpkin or squash is to do cubes packed in water. I wrote a blog post about how to do just that way back in 2010, if you’re interest in learning how to do it (I also have a recipe for soup using those cubes of canned pumpkin, if you want to know how I used it).
How are you using Ball® jars to share with your friends, family, and neighbors these days? And do you feel a similar urge to gather and feast this time of year?
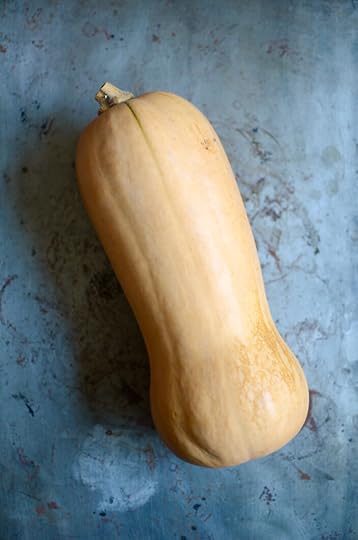
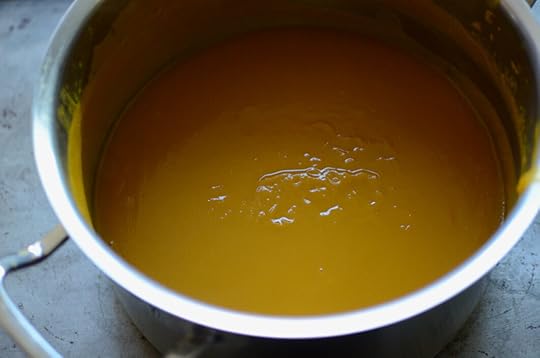
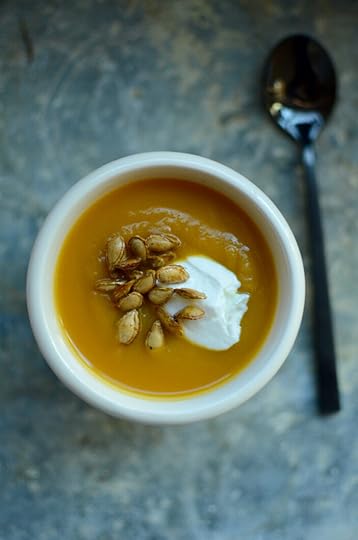
 PrintButternut Squash Soup#wprm-recipe-user-rating-0 .wprm-rating-star.wprm-rating-star-full svg * { fill: #343434; }#wprm-recipe-user-rating-0 .wprm-rating-star.wprm-rating-star-33 svg * { fill: url(#wprm-recipe-user-rating-0-33); }#wprm-recipe-user-rating-0 .wprm-rating-star.wprm-rating-star-50 svg * { fill: url(#wprm-recipe-user-rating-0-50); }#wprm-recipe-user-rating-0 .wprm-rating-star.wprm-rating-star-66 svg * { fill: url(#wprm-recipe-user-rating-0-66); }linearGradient#wprm-recipe-user-rating-0-33 stop { stop-color: #343434; }linearGradient#wprm-recipe-user-rating-0-50 stop { stop-color: #343434; }linearGradient#wprm-recipe-user-rating-0-66 stop { stop-color: #343434; }Course SoupPrep Time 15 minutesCook Time 1 hour 30 minutesTotal Time 1 hour 45 minutesServings 8 cupsAuthor Marisa McClellanIngredients1 large butternut squash1 tablespoon olive oil1 large onion, diced2 large garlic cloves, minced or pressed1 tablespoon freshly grated ginger6 cups chicken or vegetable stock1 tablespoon fresh lemon juice1 tablespoon butter1/2 teaspoon cinnamon1/8 teaspoon Aleppo pepper, or other hot chili powderInstructionsPreheat oven to 400°F. Cut butternut squash in half and remove seeds. Set squash cut side down on a rimmed baking sheet and add enough water to fully over the bottom of the pan. Place it in the oven and bake for 45 minutes to an hour, until the squash is fork tender. Place the seeds in a small pot of salted water and simmer for 15 to 20 minutes. Drain them and set them on a plate to dry. Once the squash is tender, remove the pan from the oven and allow it to cool until you can handle it without burning yourself. Scrape the squash away from the skin and reserve. You need approximately 6 cups of cooked squash for the soup. Place a soup pot on the stove over medium high heat. Add the olive oil and heat it until it shimmers. Add the onion, garlic, and ginger, and cook for 3-4 minutes, until the onion begins to color. Add the squash and stock. Stir to combine. Cover and simmer for 15 to 20 minutes, until the onions are tender. Remove the pot from the heat and puree smooth with an immersion blender. Add the lemon juice and taste. Add salt and more lemon juice, if necessary. To toast the seeds, place a medium skillet over high heat. Add the butter. Once it melts, add the seeds and stir to coat. Season with the cinnamon and Aleppo pepper and continue to stir the seeds until they begin to pop. Drain them on a paper lined plate. To serve, ladle the soup into small bowls (I like to use small ramekins or mugs for this soup). Top with a dollop of plain Greek yogurt or creme fraiche, and a scattering of the freshly toasted seeds.
 *Disclosure: This is a sponsored post that is part of an ongoing partnership with the Fresh Preserving Division of Newell Brands. They have provided jars, equipment and monetary compensation. All thoughts and opinions expressed remain my own.
November 4, 2021
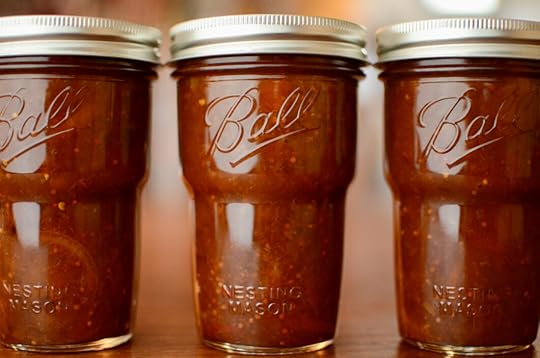
Lemon Peach Turmeric Chutney
Earthy and unusual, this Lemon Peach Turmeric Chutney is an unexpected winner. Pair it with crumbly cheddar and a tender oatcake.
This post is sponsored by the makers of Ball® home canning products.*
Chutneys are one of my favorite things to make, particularly during the waning days of the canning season. After months of carefully cooking batches of jam to the set point and hand packing jars of pickles, I like a preserve that allows you to dump everything in a pot and simply cook it until it has thickened.
This Lemon Peach Turmeric Chutney from @ballcanning has all the ease of a traditional chutney, but it raises the bar in terms of flavor and interest. The peaches and whole sliced lemon provide brightness, while the chilies and turmeric bring heat and earthiness. It is sweetened with honey and coconut sugar, which means that the sweetness doesn’t overpower the other flavors.
 How to Make Lemon Peach Turmeric Chutney
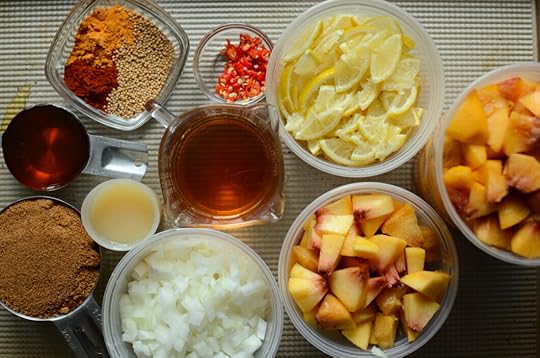
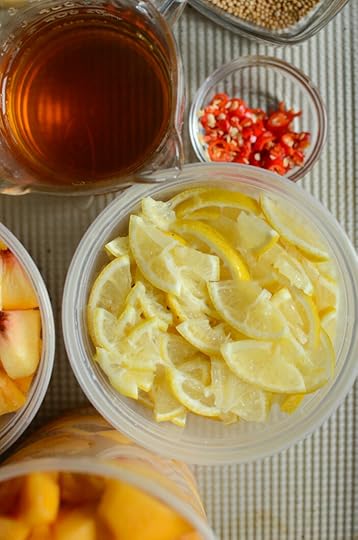
This recipe does entail a good bit of knife work. Set aside a good 45 minutes to prep all the ingredients and queue up a favorite podcast to keep your mind busy while your hands work. Peel and chop the peaches until you have six generous cups. Wash a pound of Meyer lemons well (if you can’t get Meyer lemons, opt for the smoothest skinned organic lemons you can find). Cut them into quarters, remove the seeds, and slice them into slivers.
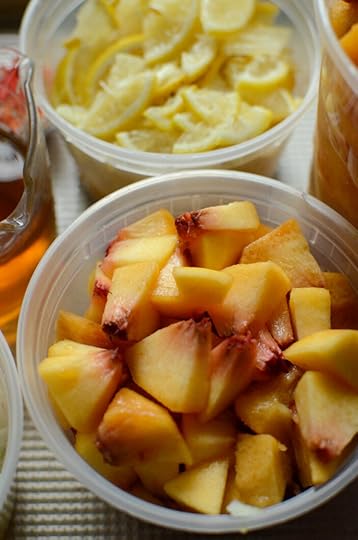
Carefully dice your chilies (remember your disposable gloves!), measure out the apple cider vinegar and lemon juice, grate up some ginger and garlic, portion out the honey and coconut sugar, and finally, prepare your spices.
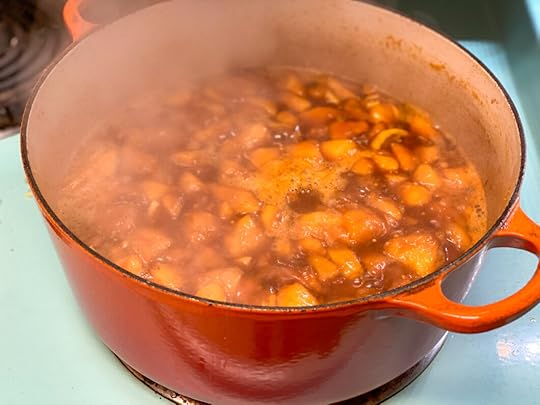
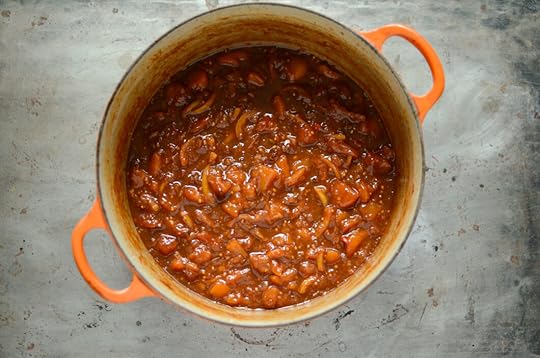
Once all that knife and prep work is finished, it’s time to cook. Choose a nonreactive pot (avoid bare cast iron, aluminum, or copper) that can hold at least 5 quarts. Add all your ingredients, stir well, and bring to a boil. Once the ingredients are boiling merrily, reduce the heat and continue to cook until the chutney has thickened. This should take between 30-40 minutes.
 How to Can Lemon Peach Turmeric Chutney
While your chutney cooks down, set up your canning pot. Fit your pot with a rack (I like the silicone mat that comes with the Ball® Canning Starter Kit). Place four pint jars on top of the mat (this recipe will yield at least three pints, but sometimes produces four, so it’s better to be prepared than have to hurriedly warm another jar) and fill the jars and pot with tap water. Add a generous splash of white vinegar to prevent mineral deposits on your jars, and place the pot on the stove to heat.
Wash your new lids and rings with warm, soapy water and set them aside so that they’re ready for you when you’re ready for them.
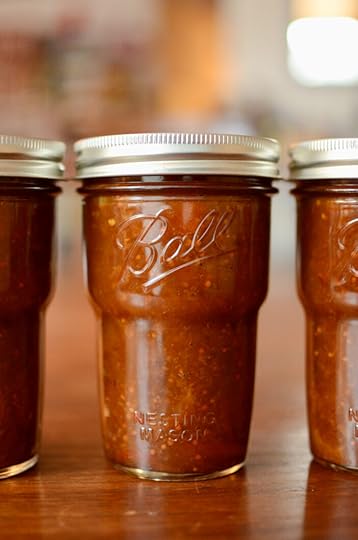
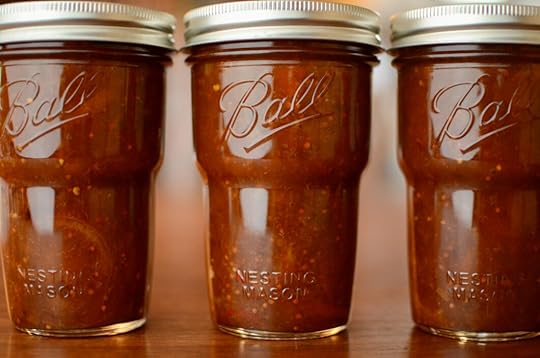
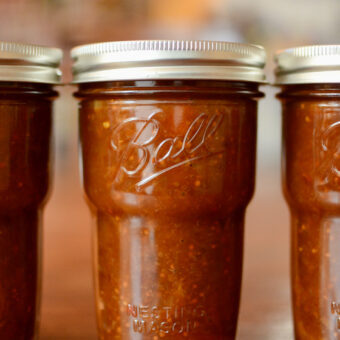
Once the chutney is done cooking, it’s time to can. Use canning tongs to remove a prepared jar (I used Ball® Nesting Pint Jars) from your canner. Funnel the hot chutney into the jar, leaving 1/2 inch headspace. Remove the air bubbles (be vigorous here, this chutney is chunky and so wants to trap air pockets).
Wipe the rim, apply a clean, new lid and a ring and return the jar to the canner. Repeat this process with the remaining jars and chutney. Process the sauce for 15 minutes, adjusting for altitude if you live above 1,000 feet in elevation.
When the processing time is up, turn off the heat, remove the lid from the pot and let the jars stand in the pot for an additional five minutes (this allows them to cool more gradually, which helps prevent siphoning and should also help develop a more robust seal).
Remove the jars from the canner and set them on a folded kitchen towel. Let them sit undisturbed for 12-24 hours so they can fully cool and seal. Before storing, make sure to check that the seals are firm and unbending. Sealed jars are shelf stable up to 18 months, any unsealed jars should be refrigerated and used promptly.
As with all chutneys, this one will be good the day it was made but will continue to improve over time. Whenever I open a jar, I like to give it a chance to breathe before serving, so that you taste more than just vinegar and lemon juice. Serve this chutney with a cheeseboard, or alongside holiday meals.
 PrintLemon Peach Turmeric Chutney#wprm-recipe-user-rating-0 .wprm-rating-star.wprm-rating-star-full svg * { fill: #343434; }#wprm-recipe-user-rating-0 .wprm-rating-star.wprm-rating-star-33 svg * { fill: url(#wprm-recipe-user-rating-0-33); }#wprm-recipe-user-rating-0 .wprm-rating-star.wprm-rating-star-50 svg * { fill: url(#wprm-recipe-user-rating-0-50); }#wprm-recipe-user-rating-0 .wprm-rating-star.wprm-rating-star-66 svg * { fill: url(#wprm-recipe-user-rating-0-66); }linearGradient#wprm-recipe-user-rating-0-33 stop { stop-color: #343434; }linearGradient#wprm-recipe-user-rating-0-50 stop { stop-color: #343434; }linearGradient#wprm-recipe-user-rating-0-66 stop { stop-color: #343434; }A naturally sweetened chutney featuring peach chunks and thinly sliced whole lemons. Servings 3 pintsAuthor Marisa McClellanIngredients3 large Meyer lemons (about 1 pound), quartered, seeded, and thinly sliced1 medium onion, small diced8-10 peaches, peeled and roughly chopped2 red chilies, minced2 cloves garlic, minced2 teaspoons grated fresh ginger1 cup coconut sugar1/4 cup honey1/4 cup bottled lemon juice2 tablespoons salt1 1/2 teaspoons turmeric powder2 teaspoons mustard seeds1 teaspoon smoked paprikaInstructionsPrepare boiling water canner. Heat jars in simmering water until ready to use, do not boil. Wash lids in warm soapy water and set aside with bands. Combine all ingredients in a large stock pot and bring to a boil over high heat. Lower heat and simmer, stirring occasionally, until chutney is thickened and reduced, about 30 minutes. Ladle hot chutney into a hot jar leaving 1/2 inch headspace. Remove air bubbles. Wipe jar rim. Center lid on jar and apply band, adjust to fingertip tight. Place jar in boiling water canner. Repeat until all jars are filled. Process jars 15 minutes, adjusting for altitude. Turn off heat, remove lid, let jars stand 5 minutes. Remove jars and cool 12-24 hours. Check lids for seal, they should not flex when center is pressed.
 *Disclosure: This is a sponsored post that is part of an ongoing partnership with the Fresh Preserving Division of Newell Brands. They have provided jars, equipment and monetary compensation. All thoughts and opinions expressed remain my own.
October 30, 2021
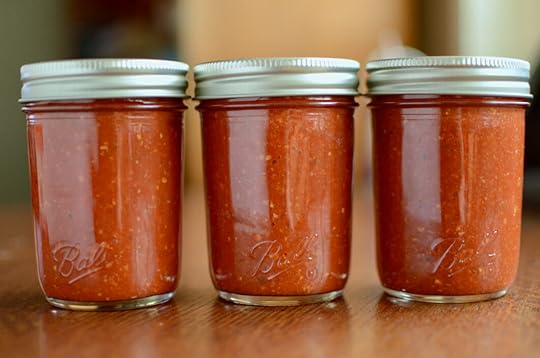
Homemade Harissa Sauce
Just a small spoonful of this homemade harissa sauce brings a powerful boost of flavor to soups, stews, and braises. Add some to your next pot of chili!
This post is sponsored by the makers of Ball® home canning products. *
I started keeping store bought jars of harissa sauce in my fridge a handful of years ago. It’s such an easy way to add a punch of flavor to a quick skillet meal or a simple pot of soup. One of my favorite dishes to make when I only have myself to feed is a speedy simmer of chickpea, onion, spinach, and harissa (just use a little. It packs a punch!).
Even though harissa sauce is one of my pantry staples, it never occurred to me to make it myself. I wrongly assumed that it would be hard to do and then need a spot in my constantly overflowing freezer. Happily, both those assumptions were incorrect. It’s not hard to do and this recipe has been designed to go in a water bath so that it is shelf stable.
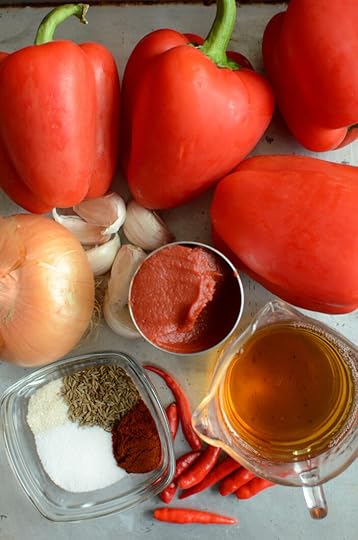
 How to Make Homemade Harissa Sauce
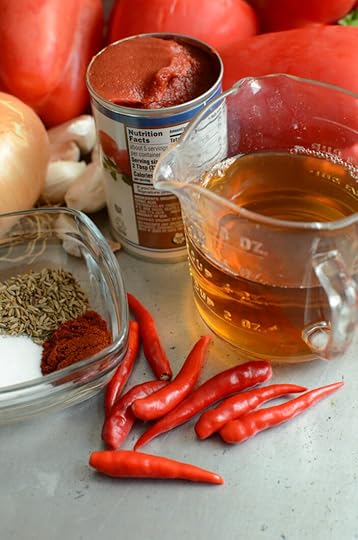
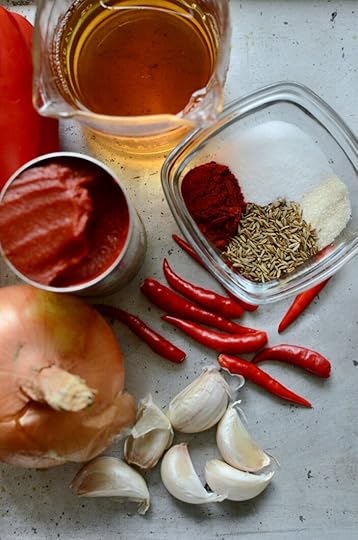
To make this homemade harissa, you need four sweet red peppers, 8 birdseye chilis, an onion, 6 cloves of garlic, 5 tablespoons tomato paste, 3/4 cup of apple cider vinegar, 2 teaspoons salt, and 1 teaspoon each of sugar, cumin seed, and smoked paprika.
You start by roasting the sweet and hot peppers. I always do this under my broiler, but you can use whatever method works best for you. Once they have a nice char on all sides, remove the pan from the oven and let them cool until you can handle them.
When the peppers are cool, remove the skins and seeds, and chop the peppers (I used the mini food processor attachment for my immersion blender and it made so much less mess than doing them on a cutting board would have). Make sure to wear gloves when you’re handling the hot peppers, as even after roasting, they are still potent. You don’t want their oil on your hands.
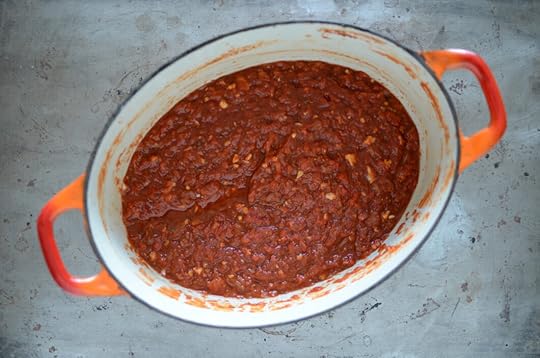
When you’re ready to make your homemade harissa, pour your chopped peppers into a nonreactive pot. Add the minced onion, garlic, tomato paste, vinegar, salt, sugar, cumin seed, and smoked paprika.
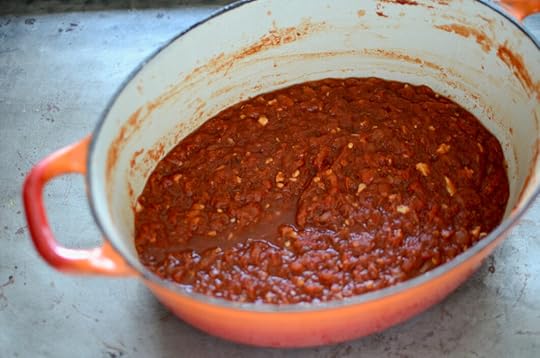
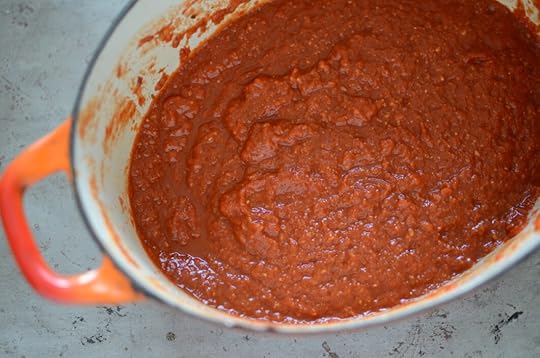
Bring the contents of your pot to a boil. Reduce the heat and simmer for about ten minutes, until the onions are soft and it no longer looks watery. Using an immersion blender, puree the harissa to your desired texture.
While the harissa cooks, prepare a boiling water bath canner.
Fit your pot with a rack (I like the silicone mat that comes with the Ball® Canning Starter Kit). Place three half pint jars (I used Ball® Smooth Sided half pints here) on top of the mat and fill the jars and pot with tap water. Add a generous splash of white vinegar to prevent mineral deposits on your jars, and place the pot on the stove to heat.
Wash your new lids and rings with warm, soapy water and set them aside so that they’re ready for you when you’re ready for them.
Get a preheated jar from your prepared canner. Funnel the hot harissa into the jar, leaving 1/2 inch headspace. Remove air bubbles. Wipe the rim, apply a clean, new lid and a ring and return the jar to the canner. Repeat this process with the remaining jars and butter. Process the sauce for 15 minutes, adjusting for altitude if you live above 1,000 feet in elevation.
When the processing time is up, turn off the heat, remove the lid from the pot and let the jars stand in the pot for an additional five minutes (this allows them to cool more gradually, which helps prevent siphoning and should also help develop a more robust seal).
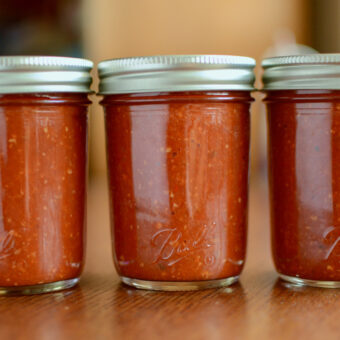
Remove the jars from the canner and set them on a folded kitchen towel. Let them sit undisturbed for 12-24 hours so they can fully cool and seal. Before storing, make sure to check that the seals are firm and unbending. Sealed jars are shelf stable up 18 months, any unsealed jars should be refrigerated and used promptly.
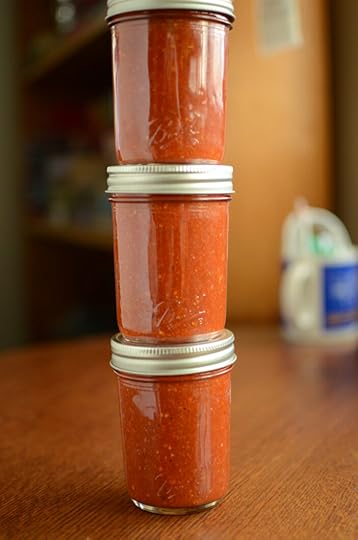
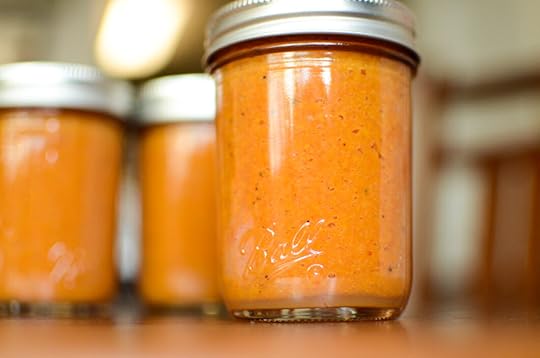
My finished yield was three full half pint jars, with a few tablespoons leftover that went straight into the fridge. I made a black bean and corn soup for dinner that night and used a little to help flavor the broth. It was delicious.
If you try your hand at homemade harissa, please come back and let me know how it turned out for you!
 PrintHarissa Sauce#wprm-recipe-user-rating-0 .wprm-rating-star.wprm-rating-star-full svg * { fill: #343434; }#wprm-recipe-user-rating-0 .wprm-rating-star.wprm-rating-star-33 svg * { fill: url(#wprm-recipe-user-rating-0-33); }#wprm-recipe-user-rating-0 .wprm-rating-star.wprm-rating-star-50 svg * { fill: url(#wprm-recipe-user-rating-0-50); }#wprm-recipe-user-rating-0 .wprm-rating-star.wprm-rating-star-66 svg * { fill: url(#wprm-recipe-user-rating-0-66); }linearGradient#wprm-recipe-user-rating-0-33 stop { stop-color: #343434; }linearGradient#wprm-recipe-user-rating-0-50 stop { stop-color: #343434; }linearGradient#wprm-recipe-user-rating-0-66 stop { stop-color: #343434; }Originally from North Africa, harissa is a flavor packed hot sauce. Total Time 2 hoursServings 3 half pintsAuthor Marisa McClellanCost $10EquipmentBaking sheetLarge saucepanCanning potImmersion blender3 half pint canning jars, with new lids and clean ringsIngredients4 red peppers, roasted, peeled, seeded, and diced8 bird's eye or other small red chili, roasted, seeded, and diced1 large yellow onion, finely diced (about 1 1/2 cups)6 cloves garlic, minced5 tablespoons tomato paste3/4 cup apple cider vinegar2 teaspoons salt1 teaspoon smoked paprika1 teaspoon cumin seeds1 teaspoon sugarInstructionsCombine all ingredients in a saucepan over medium heat, bring to a boil. Lower heat and simmer until onions are softened, about 10 minutes. Use an immersion blender to puree harissa to desired consistency; leave slightly chunky or puree completely. Prepare boiling water bath canner while sauce is cooking. Heat jars in simmering water until read to use, do not boil. Wash lids in warm soapy water and set aside with bands. Ladle hot harissa sauce into a hot jar, leaving 1/2 inch headspace. Remove air bubbles. Wipe jar rim. Center lid on jar and apply band, adjust to fingertip tip. Place jar in boiling water canner. Repeat until all jars are filled. Process jars 15 minutes, adjusting for altitude. Turn off heat, remove lid, let jars stand 5 minutes. Remove jars and cool 12-24 hours. Check lids for seal. They should not flex when center is pressed.
 *Disclosure: This is a sponsored post that is part of an ongoing partnership with the Fresh Preserving Division of Newell Brands. They have provided jars, equipment and monetary compensation. All thoughts and opinions expressed remain my own.
October 23, 2021
Pancakes with Preserves
It’s National Canning Day! In honor, the makers of Ball® home canning products asked me to turn some of the preserves I’ve made using their recipes into a meal. Given that my sons are my best culinary audience these days, I sharing our regular Sunday morning meal of pancakes with preserves.

This post is sponsored by the makers of Ball® home canning products.*
Canning is an act that always gives pleasure twice. The first fun happens in choosing the recipe, getting the ingredients, and making the product. Later, comes the joy of opening the jar and enjoying the contents. I love the summer preserving season but I experience such cozy satisfaction once the days cool and it’s time to start using up what I’ve put up.
Now that my twins are a little older (they turned two in July), I’ve learned that the enjoyment that accompanies opening those jars has increased, because now I get to share it with them. Most Sunday mornings, the boys and I let Scott sleep in and we head to the kitchen to make pancakes. They aren’t much help with the cooking yet (but oh, how much they want to be!), but they are very able and enthusiastic eaters.
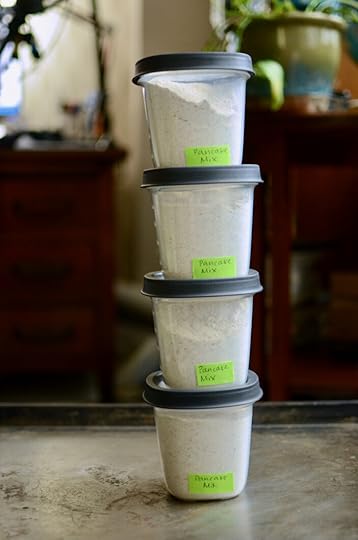
I make a point of always having pancake mix around, because if you have that, making pancakes is easy. When I have the time, I stir up a big batch using my dad’s recipe, portion it into Ball® Freezer Jars, and stash them in the freezer. If I can’t manage that, I buy a box from the grocery store. Both make perfectly good pancakes and that’s all I’m after.

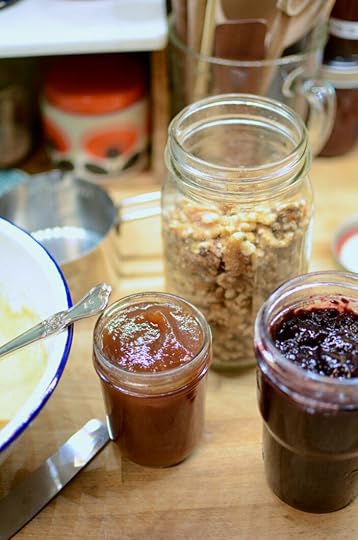
Sammy and Declan get the first batch of pancakes that come off the griddle each time (toddlers have no patience). I spread them with low sugar jam or fruit butter (right now, we’re working our way through a jar of the Salted Caramel Pear Butter from @ballcanning that I made in late August), cut them into squares and scoot them off the cutting board and onto their high chair trays.

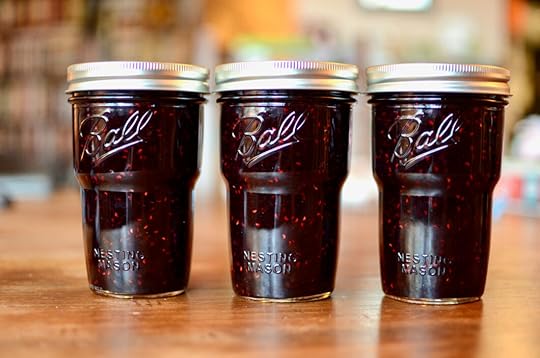
While they eat, I head back to the stove to make pancakes for Scott and me. I like to tuck bits of broken walnuts into mine, as they add texture and protein. Right now, the preserve I use to sweeten my stack is the Mixed Berry Jam I made in May. It’s sweet, tart, and is just so good on the pancakes. Scott skips the assorted jams and goes straight for the maple syrup jug (there’s a reason it’s a classic choice!).

It’s a meal that everyone loves and much like with canning, it brings me pleasure both in the making and the having. I hope that all my guys look forward to our Sunday morning pancakes and preserves for many years to come!
*Disclosure: This is a sponsored post that is part of an ongoing partnership with the Fresh Preserving Division of Newell Brands. They have provided jars, equipment and monetary compensation. All thoughts and opinions expressed remain my own.
October 5, 2021
Banana Ketchup
Sweet, tangy, and perfectly spiced, this Banana Ketchup will have you rethinking your condiment habits from here on out.
This post is sponsored by the makers of Ball® home canning products.*
I regularly get questions about how to preserve bananas. In the past, my default answer was to guide people away from trying it. The reason? Bananas are low in acid and there’s long been a dearth of reliable, scientifically tested recipes employing them. However, things are changing. The makers of Ball® home canning products have recently added this canning safe recipe for banana ketchup to their library of preserves.
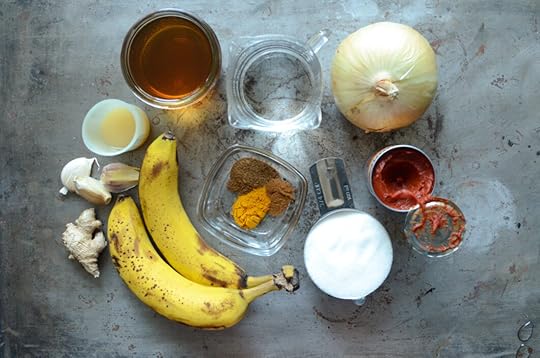
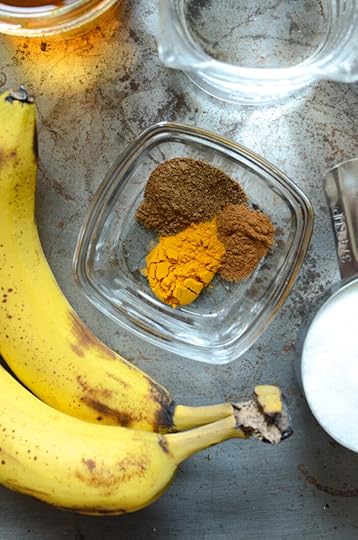
To make this sweet, zippy preserve, you need two cups of mashed banana (I needed four bananas to total this amount), 2 cups of chopped onion, 3 garlic cloves, 2 teaspoons freshly grated ginger, 1-2 birds eye chilis, 1 cup water, 3/4 cup sugar, 2 tablespoons tomato paste, 1 cup apple cider vinegar, 1/2 teaspoon allspice, 1/2 teaspoon turmeric, 1/4 teaspoon cinnamon, and 2 tablespoons bottled lemon juice.
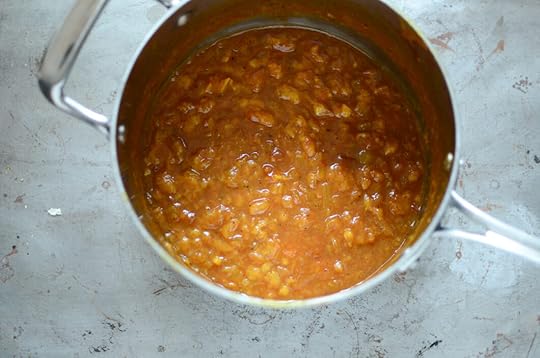
You start by simmering the onion and garlic in 1/4 cup of water until they’re soft. While the aromatics cook, prepare a boiling water bath canner and 4 half pint jars. Wash your new lids and rings with warm, soapy water and set them aside so that they’re ready for you when you’re ready for them.
Then you add the rest of the ingredients and cook, stirring regularly, until it has thickened. This should take 15-20 minutes. And just a note here. Make sure to use a silicone spoon or a wooden spoon that you don’t mind dyeing a vibrant shade of yellow. Even though there’s only 1/2 teaspoon of turmeric in this recipe, it’s still potent enough to stain everything it comes into contact with.
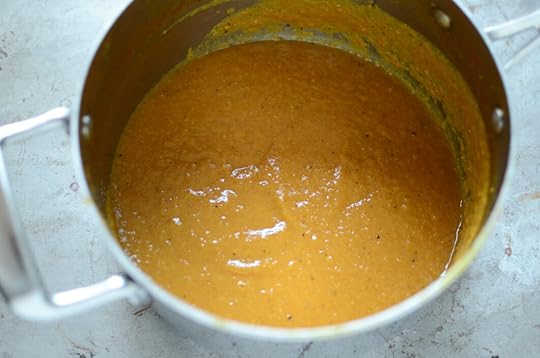
Once the ketchup is done cooking, use an immersion blender to puree it smooth. Use canning tongs to remove a hot jar (I used Ball® Smooth Sided Half Pint Jars) from your prepared canner. Funnel the hot banana ketchup into the jar, leaving 1/2 inch headspace. Remove the air bubbles. Wipe the rim, apply a clean, new lid and a ring and return the jar to the canner. Repeat this process with the remaining jars and ketchup. Process the sauce for 20 minutes, adjusting for altitude if you live above 1,000 feet in elevation.
When the processing time is up, turn off the heat, remove the lid from the pot and let the jars stand in the pot for an additional five minutes (this allows them to cool more gradually, which helps prevent siphoning and should also help develop a more robust seal).
Remove the jars from the canner and set them on a folded kitchen towel. Let them sit undisturbed for 12-24 hours so they can fully cool and seal. Before storing, make sure to check that the seals are firm and unbending. Sealed jars are shelf stable up to 18 months, any unsealed jars should be refrigerated and used promptly.
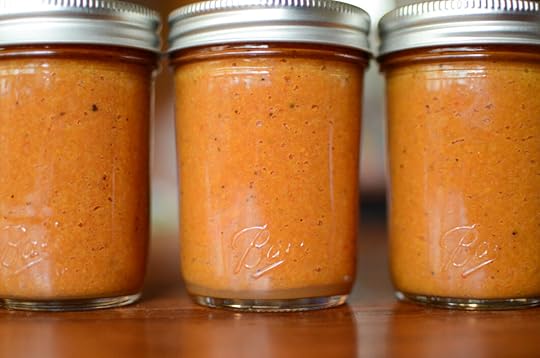
My finished yield ended up being three half pints and a few spoonfuls that I popped into a 4 ounce jar and put in the fridge. This ketchup is delicious anywhere that you’d use the traditional tomato version. So far, I’ve enjoyed mine with roasted sweet potato wedges and spread onto a black bean burger.
 PrintBanana Ketchup#wprm-recipe-user-rating-0 .wprm-rating-star.wprm-rating-star-full svg * { fill: #343434; }#wprm-recipe-user-rating-0 .wprm-rating-star.wprm-rating-star-33 svg * { fill: url(#wprm-recipe-user-rating-0-33); }#wprm-recipe-user-rating-0 .wprm-rating-star.wprm-rating-star-50 svg * { fill: url(#wprm-recipe-user-rating-0-50); }#wprm-recipe-user-rating-0 .wprm-rating-star.wprm-rating-star-66 svg * { fill: url(#wprm-recipe-user-rating-0-66); }linearGradient#wprm-recipe-user-rating-0-33 stop { stop-color: #343434; }linearGradient#wprm-recipe-user-rating-0-50 stop { stop-color: #343434; }linearGradient#wprm-recipe-user-rating-0-66 stop { stop-color: #343434; }Sweet, tangy, and perfectly spiced, Banana Ketchup will be your new favorite condiment. Prep Time 10 minutesCook Time 45 minutesServings 3 half pintsAuthor Marisa McClellanIngredients2 cups mashed bananas1 large onion chopped (about 2 cups)3 garlic cloves minced2 teaspoons grated fresh ginger1-2 bird's eye chilis chopped1 cup water divided3/4 cup sugar2 tablespoons tomato paste1 cup apple cider vinegar1/2 teaspoon allspice1/2 teaspoon turmeric1/4 teaspoon cinnamon2 tablespoons bottled lemon juiceInstructionsSaute onion and garlic in 1/4 cup of the water over medium heat until soft. Add remaining ingredients and cook at a simmer stirring continuously until thickened, about 15 minutes. Prepare boiling water bath while sauce is cooking. Heat jars in simmering water until ready to use, do not boil. Wash lids in warm soapy water and set aside with bands. Puree until smooth using an immersion blender or in the bowl of a food processor. Ladle hot ketchup into a hot jar, leaving 1/2 inch headspace. Remove air bubbles. Wipe jar rim. Center lid on jar and apply band, adjust to fingertip tight. Place jar in boiling water bath canner. Repeat until all jars are filled. Process jars for 20 minutes, adjusting for altitude. Turn off heat, remove lid, let jars stand 5 minutes. Remove jars and cool 12-24 hours. Check lids for seals, they should not flex when center is pressed.
 *Disclosure: This is a sponsored post that is part of an ongoing partnership with the Fresh Preserving Division of Newell Brands. They have provided jars, equipment and monetary compensation. All thoughts and opinions expressed remain my own.
September 17, 2021
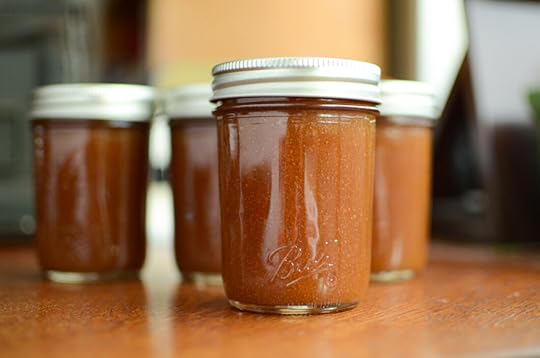
Salted Caramel Pear Butter
Humble pear butter gets a sweet, salty, and habit forming makeover in this recipe for Salted Caramel Pear Butter. Try it on ice cream!
This post is sponsored by the makers of Ball® home canning products.*
Pears are such a great fruit for preserving. They make gorgeous jams, compotes, preserves, syrups, chutneys, and even caramel sauces. They are also perfect for cooking down into fruit butters. I typically make pear butters with lots of lemon juice and limited sweeteners, but when I saw this more indulgent Ball®Salted Caramel Pear Butter, I knew I’d have to make a batch.
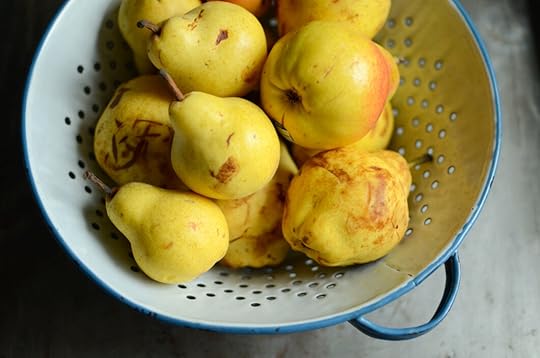
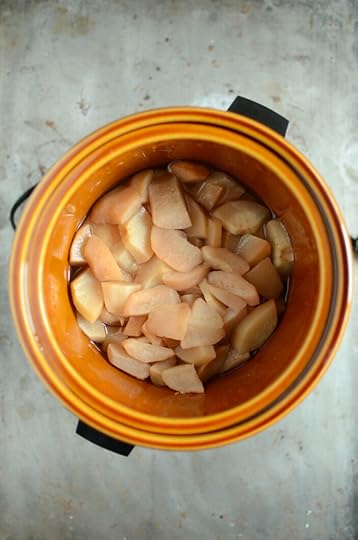
You start with four pounds of pears. Peel and slice them, and heap them in a slow cooker. I used a four quart cooker and it was the ideal size. Add 1/3 cup of apple cider (not vinegar!) and 2 tablespoons of lemon juice.
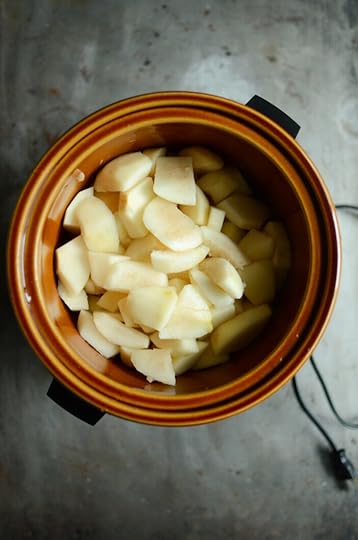
Put a lid on the cooker, set it to high and cook for about 40 minutes, or until the pears are tender enough to puree with an immersion blender or in a blender carafe.
I used my favorite vintage slow cooker so it took closer to an hour for my pears to cook to the point where they were soft enough to easily blend.
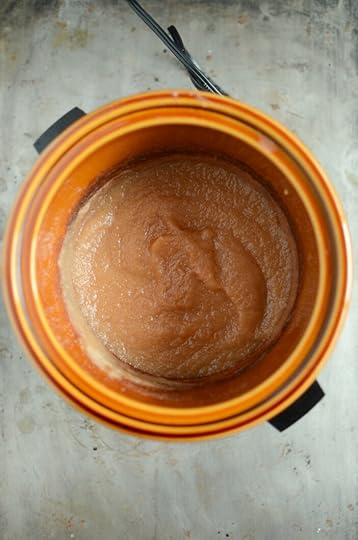
Once you’ve blended your pears, stir in 2 1/2 cups of dark brown sugar (this ingredient brings the caramel flavor, so don’t skimp and don’t swap in light brown sugar) and 2 teaspoons of flakey sea or kosher salt.
Cook on high for 3 or 4 hours, giving the butter a stir whenever you walk by (about every half hour is ideal). Make sure to vent the slow cooker by either putting the lid on at an angle, or by placing a chopstick or wooden spoon across one end of the cooker. Rest the lid on the chopstick/wooden spoon so that the steam can escape.

When the pear butter has reduced in volume, has thickened nicely, and sits up tall in the bowl of a spoon, it is done and is ready to can.
Prepare your boiling water bath canner.
Fit your pot with a rack (I like the silicone mat that comes with the Ball® Canning Starter Kit). Place four half pint jars (I used Ball® Smooth Sided half pints here) on top of the mat and fill the jars and pot with tap water. Add a generous splash of white vinegar to prevent mineral deposits on your jars, and place the pot on the stove to heat.
Wash your new lids and rings with warm, soapy water and set them aside so that they’re ready for you when you’re ready for them.

Get a hot jar from your prepared canner. Funnel hot pear butter into the jar, leaving 1/4 inch headspace. Wipe the rim, apply a clean, new lid and a ring and return the jar to the canner. Repeat this process with the remaining jars and butter. Process the sauce for 15 minutes, adjusting for altitude if you live above 1,000 feet in elevation.
When the processing time is up, turn off the heat, remove the lid from the pot and let the jars stand in the pot for an additional five minutes (this allows them to cool more gradually, which helps prevent siphoning and should also help develop a more robust seal).
Remove the jars from the canner and set them on a folded kitchen towel. Let them sit undisturbed for 12-24 hours so they can fully cool and seal. Before storing, make sure to check that the seals are firm and unbending. Sealed jars are shelf stable up 18 months, any unsealed jars should be refrigerated and used promptly.
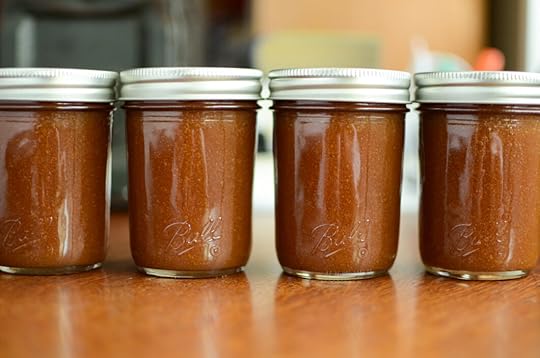
The finished butter is just so good. I love it on peanut butter toast, but I can also imagine using it to fill a harvest-themed layer cake. It would also be excellent swirled into yogurt, oatmeal, or cottage cheese. I can also see it being a really great addition to holiday gift baskets. All I know is that I’m going to need another batch!
Click here for the Salted Caramel Pear Butter recipe!*Disclosure: This is a sponsored post that is part of an ongoing partnership with the Fresh Preserving Division of Newell Brands. They have provided jars, equipment and monetary compensation. All thoughts and opinions expressed remain my own.
September 15, 2021
Zesty Salsa
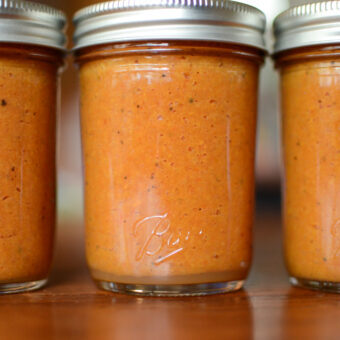
Do you like your salsa to serve up a serious kick? Then this Zesty Salsa from @ballcanning is for you!
This post is sponsored by the makers of Ball® home canning products.*
Canning tomatoes is something I do every year. Even the summer when my twins were newborns, I managed to pulp, pack, and preserve a half bushel box. In years past, I would often do as much as 150 pounds (a slightly insane endeavor in an 80 square food kitchen). When it comes to what I preserve, whole peeled tomatoes and a reduced puree are top on my must-make list, but salsa always holds that critical third position.
I certainly appreciate salsa to pair with chips or tacos. I also reach for a jar when braising chicken thighs, or when I need to give a pot of chili an easy flavor lift. This year, I’ve started building my homemade salsa stash with a batch of Ball® Zesty Salsa.
This thick, super spicy salsa gets its signature zest from 2 1/2 cups of hot peppers (over a pound!) and it’s not built for the faint of heart (or taste buds). I’ve taken care to clearly mark the jars I made so my husband knows not to grab those. He is not equipped for intense spice.
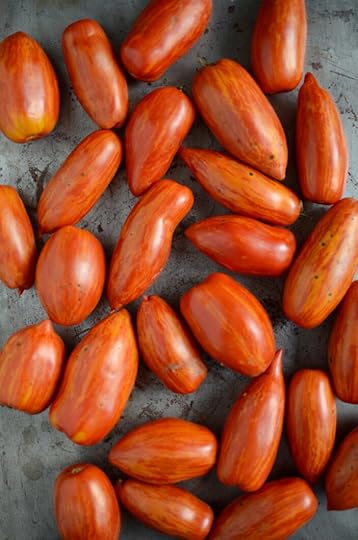
You start by prepping your tomatoes. You need 10 cups of peeled and chopped tomatoes. I ended up using around 6 pounds to get to that volume. Because this is a relatively small amount of tomatoes (at least when compared to many other tomato products), I peeled them using my alternative method.
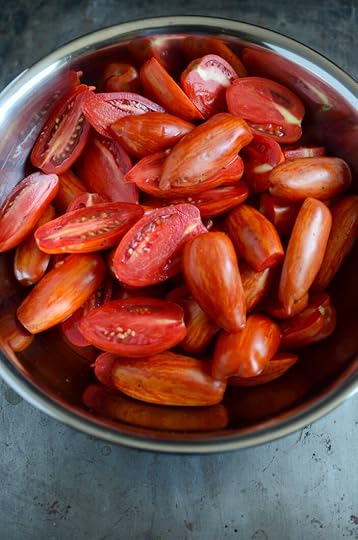
Place a large heatproof baking dish in the sink. Put a full tea kettle on to boil. While it heats, cut your tomatoes in half and remove any particularly woody cores. Arrange the tomato halves, cut side down, in the baking dish. Once they’re all in there, cover them with the freshly boiled water from your kettle. Let them sit for 2-3 minutes.
Once you notice that the edges of the peels are curling away from the meat of the tomato, you’re ready to drain. Protect your hands from the heat and tip the pan a little to drain off some of the hot water. Then run cold tap water over the tomatoes. Proceed to peel and chop. I find that this technique is easier and makes a lot less mess than the traditional blanch and shock method we’ve all been taught.
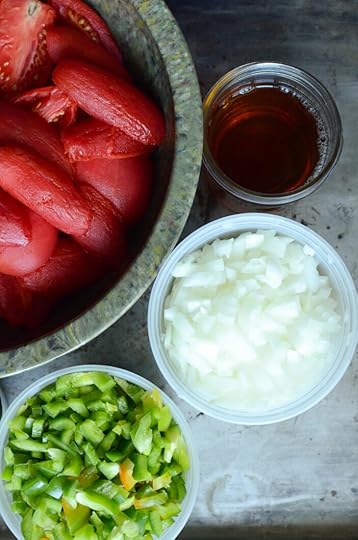
When your tomatoes are ready, get the rest of the ingredients prepared. Chop enough green peppers and onions to total 5 cups each (for me, this was five large peppers and three large onions). Finally, mince up hot peppers and measure out 2 1/2 cups. Please remember to wear kitchen gloves and take care with any boards and implements that have come in contact with your hot peppers.
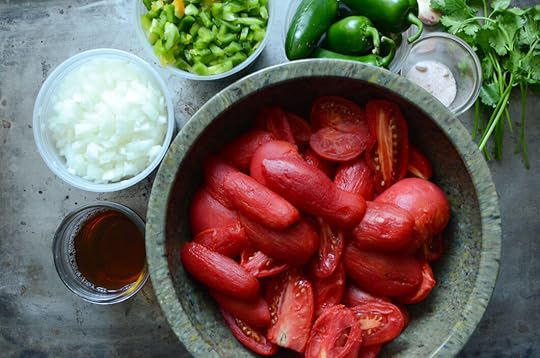
In addition to the tomatoes, green peppers, onions, and hot peppers, you also need apple cider vinegar, garlic, cilantro, and salt. Here’s the full Zesty Salsa recipe.
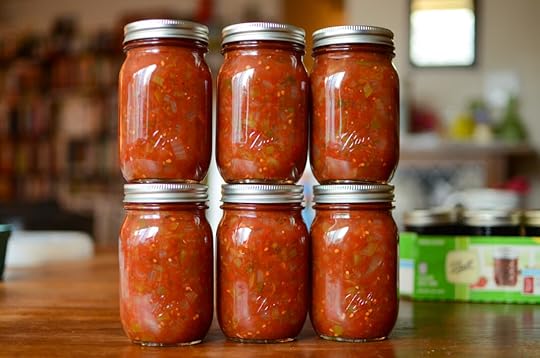
Once all your ingredients are prepped, take a moment to get your canning pot set up. Fit your pot with a rack (I like the silicone mat that comes with the Ball® Canning Starter Kit). Place six pint jars (I used Ball® Smooth Sided pints here) on top of the mat and fill the jars and pot with tap water . Add a generous splash of white vinegar to prevent mineral deposits on your jars, and place the pot on the stove to heat.
Wash your new lids and rings with warm, soapy water and set them aside so that they’re ready for you when you’re ready for them.
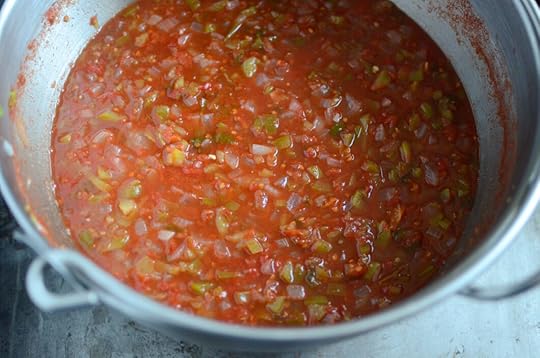
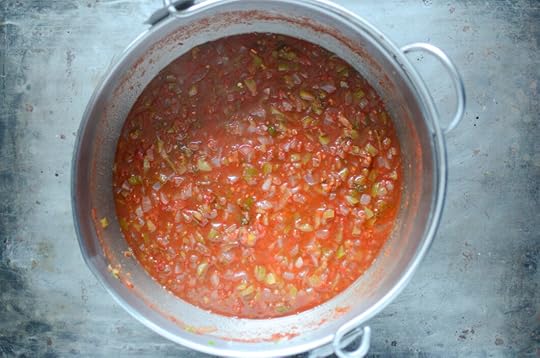
Now it’s time to cook. Place a large, non-reactive pot on your stove. Add the tomatoes, green peppers, onions, hot peppers, vinegar, garlic, cilantro, and salt. Stir to combine and bring the salsa up to a boil. Cook for approximately 10 minutes, stirring regularly, until the salsa has thickened a bit.
Once the salsa is done, remove the pot from the stove and get a hot jar from your prepared canner. Funnel some sauce into the jar, leaving 1/2 inch headspace. Wipe the rim, apply a clean, new lid and a ring and return the jar to the canner. Repeat this process with the remaining jars and sauce.
Process the salsa for 15 minutes, adjusting for altitude if you live above 1,000 feet in elevation. When the processing time is up, turn off the heat, remove the lid from the pot and let the jars stand in the pot for an additional five minutes (this allows them to cool more gradually, which helps prevent siphoning and should also help develop a more robust seal).
Remove the jars from the canner and set them on a folded kitchen towel. Let them sit undisturbed for 12-24 hours so they can fully cool and seal. Before storing, make sure to check that the seals are firm and unbending. Sealed jars are shelf stable for up to 18 months. Any unsealed jars should be refrigerated and used promptly.
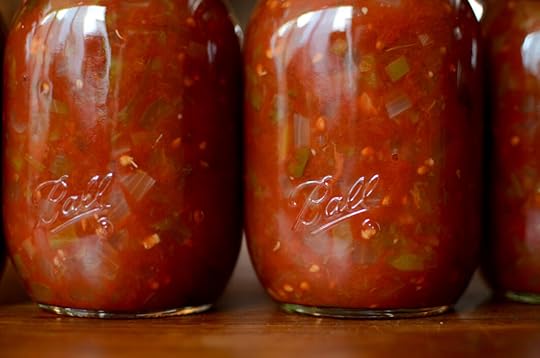
The finished salsa is flavorful and perfect for all of your favorite salsa applications. Just know that the taste of vinegar is fairly assertive, so if you don’t like vinegar-based salsas, this one might not be for you. And remember, with acidified products like this one, following the recipe and including the full amount of vinegar is critical for a safe, shelf stable product.
*Disclosure: This is a sponsored post that is part of an ongoing partnership with the Fresh Preserving Division of Newell Brands. They have provided jars, equipment and monetary compensation. All thoughts and opinions expressed remain my own.


