
Marisa McClellan's Blog, page 149
October 9, 2012
Canning 101: How to Use One Piece Lids
I find myself functioning within the “better late than never principle” more often than I like to admit. My frequent delays bedevils many in my life (particularly my punctual husband), but as I built this career as a writer/teacher/canning crusader, I find that there is nearly always more for me to do than there is time in which to do it. So tasks back up, I take days to answer questions and I don’t always do everything I promised within the timeframe I had hoped.
Like this post on canning with one piece lids. I had intended to write it the week I posted the Fillmore Container giveaway, but it just didn’t happen then. Happily, it’s happening today. Better late than never, right?
So. When it comes to home canning, the USDA and the National Center for Home Food Preservation recommend that we use mason jars with two piece lids. These two part lids are recommended because they are easy to use, known to seal reliably, and it’s easy to tell if the jars sealed (remove rings and grasp edges of lid. If it holds fast, it is sealed).
One piece lids are a little bit more mysterious. For a first time user, there’s not a lot of information about which one piece lids are right for home canning, how to prepare them for canning and even how tightly you should turn them to ensure a good seal.
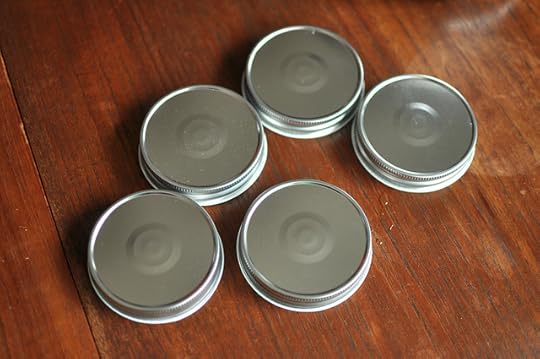
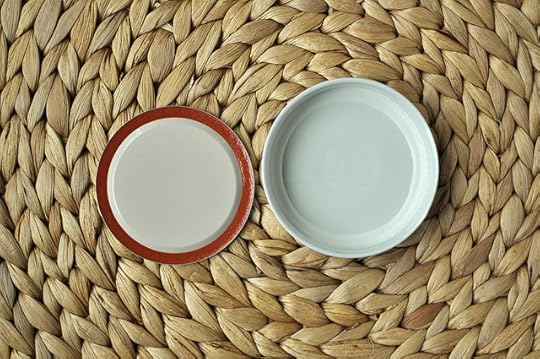
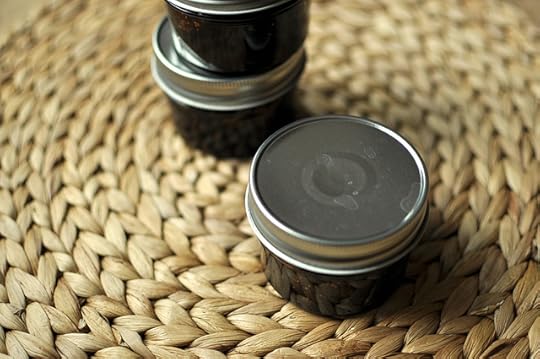
When you buy one piece lids for canning, you want to get ones that are lined with plastisol, have a button in the center (to better show that it has sealed) and are expressly designed for boiling water bath canning (do not order the ones that are for hot fill only). You don’t want to use lug lids, as they don’t fit mason jars.
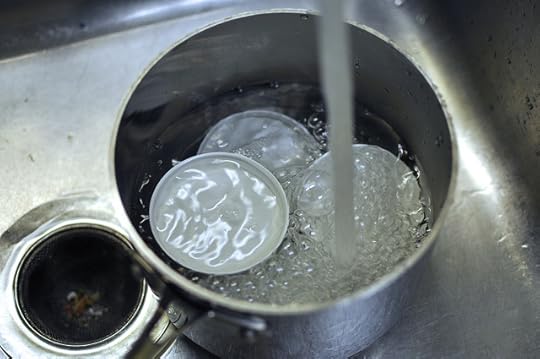
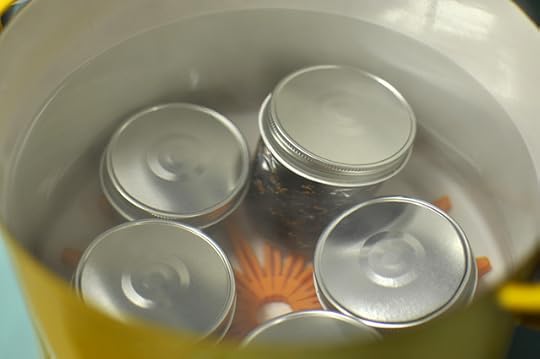
When you’re ready to can with these lids, place them in a small saucepan (just like you would with your flat lids), cover them with warm water and place on the stove.

Bring the lids to a gentle boil, reduce the temperature and simmer the lids for approximately 10 minutes before applying the lids.
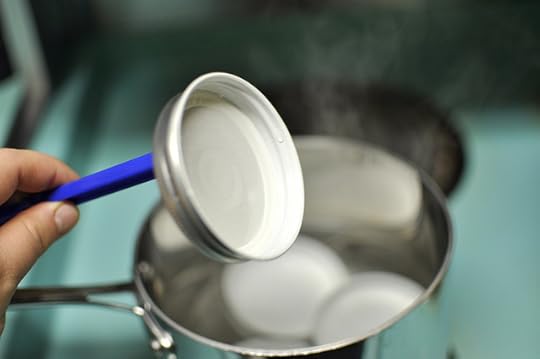
When you’re ready to close your jars, use a jar lifter to pull the lids out of the water, one at a time. Make sure to have a towel or hot pad handy so that you don’t burn your hands while tightening down the lids. When you screw this lids on, you only want to tighten them to the point when you feel the rim of the jar make contact with the sealing compound. Don’t go any tighter or the air won’t be able to escape and you will have compromised your seal.
Place capped jars into your boiling water bath and process as you would any other jar. When the time is up, turn off the heat, remove the lid from the pot and let the jars remain in the hot water for an additional five minutes. This extended heat exposure helps reduce siphoning and gives the sealing compound just a little bit more time to soften and develop a relationship with the rim of the jar.
Remove jars from water bath and place them on a folded kitchen towel to cool. Don’t hover over your jars, give them some time to create their vacuum. These lids often take longer to seal than their two piece brethren, so don’t start panicking if they take an hour or more to finally pop.
When jars are cool, test seals by pushing down on the lid of the jar. If the lid is firm and the button is concave, they are ready to be stored in the pantry. If you have any doubts about the quality of your seal, place the jar in the refrigerator and use the product promptly.
Related Posts:
Canning 101: Choosing Jar Size
Driscoll’s Berries Canning & Preserves Twitter Chat Tonight!
Canning 101: Learning to be Flexible


October 8, 2012
Giveaway: Tiny Tree Canner Print by Johanna Wright
If you’ve been reading this site for any length of time, you’ll know I don’t limit my use of jars just to canning. I store dry goods and leftovers in them, keep pens and scissors stashed inside those with chipped rims and have even dedicated a giant jar to corralling my husband’s LEGO collection. In addition to pressing jars into service wherever possible, I also happen to be something of a fool for depictions of jars and the act of canning.
So, when author (she has written two beautiful
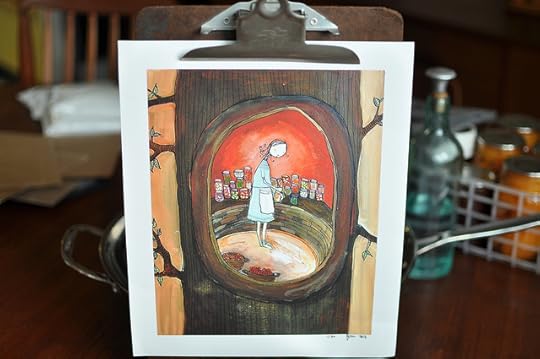
 books for children) and artist Johanna Wright got in touch back in the summer and asked if I’d like “Tiny Tree Canner,” one of her canning-related prints, I said yes immediately. I am entirely charmed by this image of a woman doing her canning in the center of a cozy tree. What’s more, I am tickled by how it visually evokes the idea of “squirreling away.” I know that I’m not the only one who sometimes refers to her preserving in that manner.

Johanna Wright grew up in Eugene, Oregon and currently lives in Portland. Though she’s not a canner herself, she grew up around it. She initially painted this image as a gift for her mom and when her sisters spotted it, they wanted it as well. So prints were made and happily, they’re now available for the rest of us too!
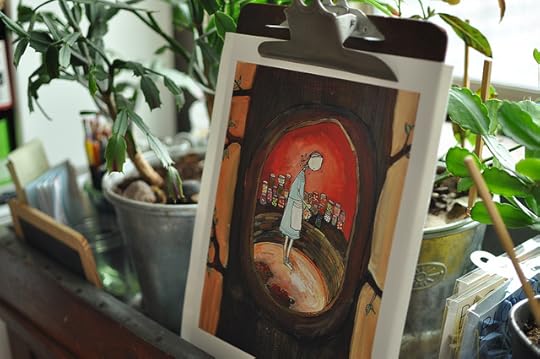
In addition to this image, she also has two different prints in her shop of floating jars (one is done on an orange background and the other is done on a turquoise background that I think is the exact same color as my stove). I am tempted.
I realize that none of us are quite prepared to start talking seriously about the holidays yet (though Macy’s seems entirely ready, they were setting up the holiday tableware when I walked through two weeks ago), but should you be shopping for a jar lover or avid canner this holiday season, you might want to consider one of Joanna’s prints! At $25, they’re quite affordable. A basic frame from a Ikea and you have a lovely gift.
Joanna has given me a second “Tiny Tree Canner” print to give away to one of my readers. If you want to throw your hat in the ring for a chance at it, here’s what you do.
Leave a comment on this post. Tell me about the best gift you ever gave or received.
Comments will close at 11:59 pm east coast time on Friday, October 12, 2012. Winner will be chosen at random and will be posted to the blog over the weekend.
Giveaway is open to US and Canadian residents.
One comment per person, please. Entries must be left via the comment form on the blog, I cannot accept submissions via email.
Disclosure: Joanna Wright gave me the print you see pictured here, along with an additional one for this giveaway. I was not compensated for running this post and my opinions remain my own.
Related Posts:
Giveaway: Joy of Cooking and 2013 Calendar
Photos from the FiJ Flickr Group + Fillmore Container Giveaway Winner
Giveaway: Four Ounce Smooth Sided Jars from Fillmore Container
October 7, 2012
Photos from the Flickr Pool + Joy of Cooking Giveaway Winner
It’s Sunday evening! The time when I feature your photos from the Food in Jars Flickr pool and announce the winner of the previous week’s giveaway. If you want to see your photos here, head over to Flickr and join the group!
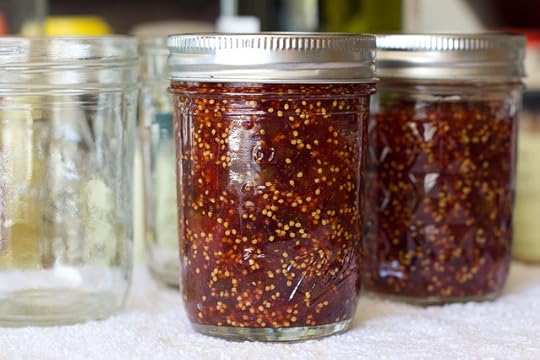
A small batch of the chunky fig jam (from my cookbook!), made by Flickr user bogiebogie and blogged over at her site, Knit Flix. I don’t think there’s anything more beautiful than fig jam.
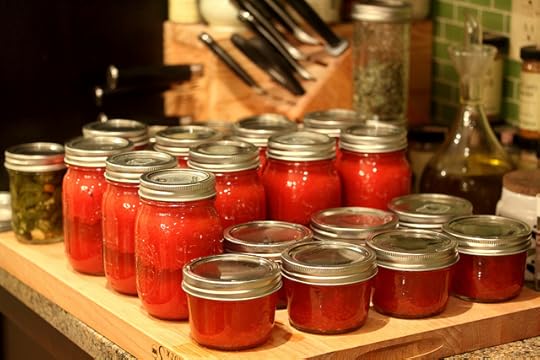
Eight half-pints of honeyed jalapeno rings, seven half-pints of red pepper jelly, and ten pints of tomato sauce. Quite an impressive daily tally from the team behind the blog and Flickr account, Interchangeable Parts.

There’s no detail in the description for this image, but I’m guessing that these are three jars of dilly beans (and don’t you love the way that little layer of carrots looks? What a smart way to ensure you’ve got a full jar for processing!). This one is from Sarah, who blogs at Get Cooking.
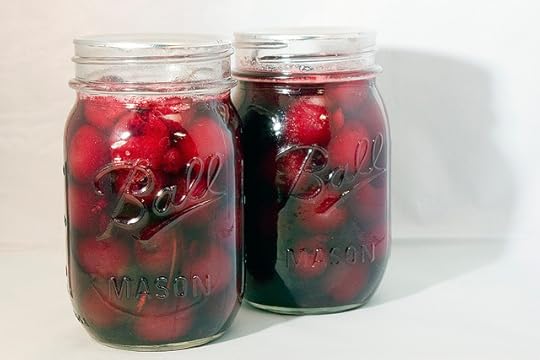
Hello pretty maraschino cherries! I tasted a friend’s batch at the Philly Food Swap last week and it made me think that I must add these to my to-make list for next summer. So good and so different from store-bought (through really, I should have known. Homemade is nearly always better). Thanks for the lovely pic, Lori!
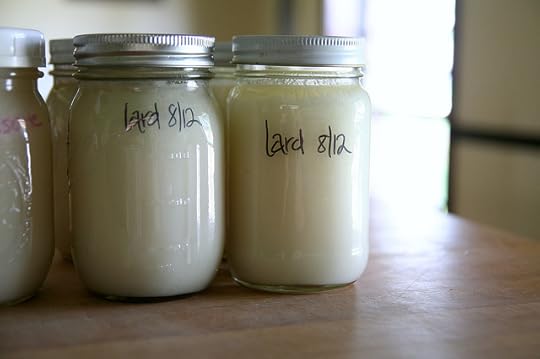
Home-rendered lard by Stephinie at Gypsy Forest. Who knew that fat could be so pretty!
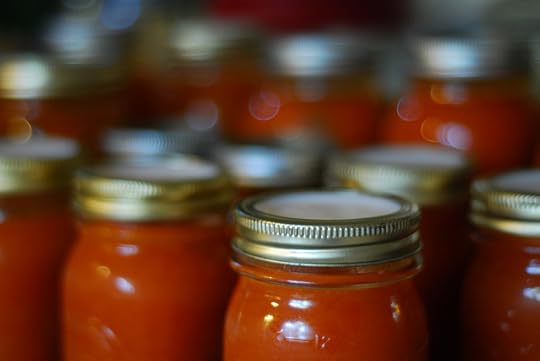
Pressure canned tomato soup from Melissa, she of Bridgman Pottery fame. As a long-time wearer of red clogs, I am entirely smitten with her new line of pottery that features little red clogs.
* * * * * * *
 It was such a joy to read all your stories of cookbooks, family and food in last week’s giveaway. According to my very unofficial tally Joy of Cooking and Betty Crocker were the most popular books, with Better Homes and Gardens coming in close at their heels (Fannie Farmer also made a strong showing, too). It was fun to see the shout-outs for the various Moosewood cookbooks as well, that’s another series that’s near and dear to my heart.
The winner is Alaina, who blogs at Shoes of Life. She said, “My mother’s go to cookbook was a church cookbook from our town. Literally everything came from there. She did own a better homes and gardens, but it did not get nearly the use. I have coveted a copy of joy for a long time.”
Alaina, covet no longer! I’ll be in touch to hook you up with your very own copy!
Related Posts:
Photos from the FiJ Flickr Group + Fillmore Container Giveaway Winner
Giveaway: Joy of Cooking and 2013 Calendar
Reader Submitted Photos + Blossom Trivet Giveaway Winners
October 3, 2012
Homemade Jar Flour Shaker
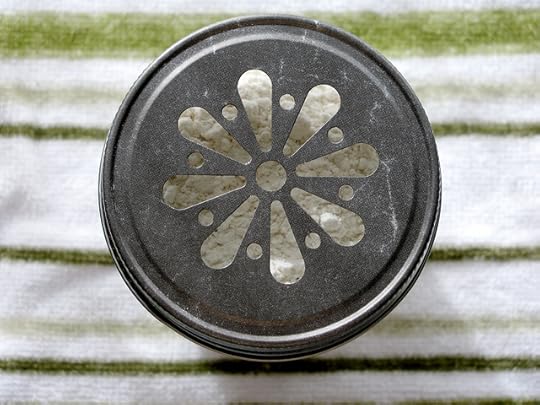
This clever idea is the brainchild of canner and fellow Portland, Oregon expat Jessica Smedley. She recently picked up a few of these punched out canning jar lids, popped on a jar of all-purpose flour and had herself an instant flour shaker.
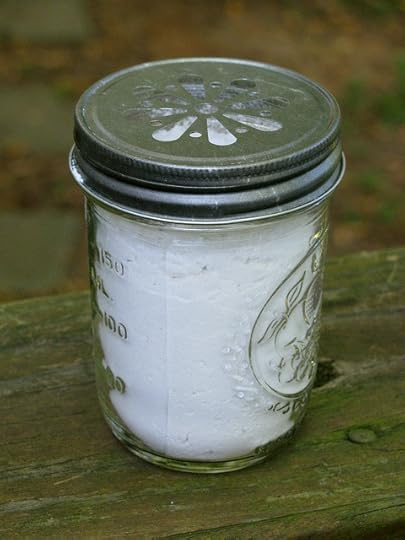
I’ve recently started feeding and using my sourdough starter again (I am amazed that I didn’t manage to kill it during many months of neglect this summer) and regularly find myself needing to dust my countertop with a little flour before kneading my bread dough. This little rig would be just the thing to make that task a little easier.
If you want to set up your own flour shaker, you can buy these lids from the folks at Fillmore Container. Thanks for sharing your idea, Jessica!
Related Posts:
Giveaway: Four Ounce Smooth Sided Jars from Fillmore Container
October 2, 2012
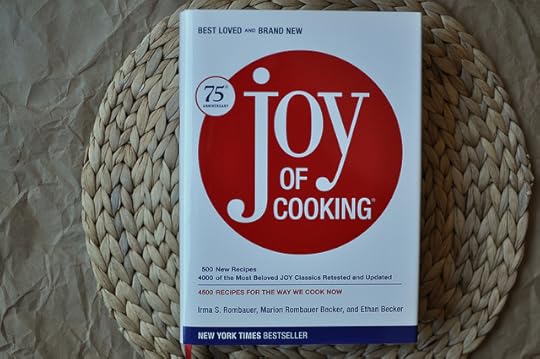
Giveaway: Joy of Cooking and 2013 Calendar

In my years of cooking, one of the things I’ve found is that most everyone has a foundational cookbook to which they are most loyal. Some of us come from households that held Better Homes and Gardens dear, while others preferred Betty Crocker and its patterned red and white cover. Whether your mother or grandmother consulted Fannie Farmer, Southern Living or the Farm Journal cookbook, up until recently, most homes had at least one of these much-loved, comprehensive volumes in residence near the kitchen.
Me, I come from a Joy of Cooking household. I grew up with the edition of JOY that was bound in turquoise fabric and was first released sometime in the early 1960′s. It was a primary culinary reference in our house, particularly in the years before the internet made it easy to find 12 different recipes for the same cake in seconds. That book taught me to make crepes and peanut butter cookies, and one of my favorite family traditions is the yearly Christmas Eve consultation, in which we pull out my parents’ battered copy of JOY to check the turkey roasting information and plan our timing for the following day.

The copy of JOY that I was raised with was a gift from my grandma Bunny to her new daughter-in-law, soon after my parents got married. My mother was a touch insulted at first (the implication being that she was not an able cook), but rapidly came to appreciate the utility of such a gift.
Like many things that have lived and been loved for more than 40 years, it doesn’t look the way it once did. The dust jacket is long since gone. The front cover fell off sometime in the mid-ninties and was reattached with a wide strip of silver tape (this repair is reinforced every decade or so). Many of the pages have been enhanced with splashes of water or oil or gravy and don’t behave entirely like paper anymore.
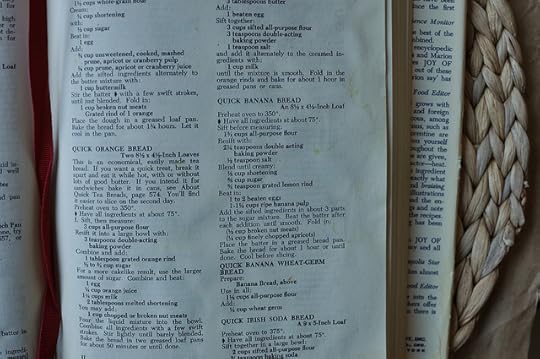
In recent years, I’ve become something of a Joy of Cooking collector. I have six editions, which represent the changing food culture over the last eight and a half decades. Most often, I turn to the one that matches the copy I grew up with (happily, it was a hand-me-down from my great-Aunt Anne. It came with complete with a few of her annotations). I regularly use the recipe for Quick Banana Bread and have made the Cornbread on page 578 so many times that I could probably stir it together without ever once glancing at the page.
Recently, I’ve found myself in correspondence with Megan Scott. She and her husband (congratulations on your recent wedding, you two!), John Becker are the latest members of the Rombauer/Becker family to be working on the JOY legacy. They’ve redesigned the website and are regularly posting useful, thoughtful food writing and recipes. It’s a delight to see such a beloved institution in such capable hands.
Earlier this summer, as Megan and I exchanged emails and talked about the possibility of me contributing a guest post to their site, she offered to send me a copy of the 75th anniversary JOY. It was at that moment that I confessed my ridiculous affection for the Joy of Cooking. I asked if instead of sending me another copy to add to my stack, could we give it away to one of my readers? She said yes and did me one better by throwing in one of the 2013 Joy of Cooking desk calendars.
If you’d like a chance to win a copy of the 75th anniversary edition of the Joy of Cooking and the 2013 desk calendar, here’s what you do.
Leave a comment on this post. Tell me which cookbook was your family’s favorite. If you have a beloved recipe, please share that too.
Comments will close at 11:59 pm east coast time on Friday, October 5, 2012. Winner will be chosen at random and will be posted to the blog over the weekend.
Giveaway is open to US residents.
One comment per person, please. Entries must be left via the comment form on the blog, I cannot accept submissions via email.
Disclosure: This copy of the 75th anniversary edition of the Joy of Cooking and the 2013 desk calendar have been provided to me at no cost. However, I’ve not been compensated for this post and my opinions are entirely my own.
Related Posts:
Photos from the FiJ Flickr Group + Fillmore Container Giveaway Winner
Giveaway: Four Ounce Smooth Sided Jars from Fillmore Container
My Berlin Kitchen Giveaway + Spiced Plum Butter
September 30, 2012
Photos from the FiJ Flickr Group + Fillmore Container Giveaway Winner
I’m back from a whirlwind weekend in Washington, D.C. I am so appreciative that so many of you guys took time out of your weekend to come to the demos at the US Botanic Garden to watch me make jam. Thank you, thank you!
We’re firmly in harvest time and that means that there are some WONDERFUL photos landing in the Food in Jars Flickr pool. Here are a few (and at the bottom of the post, the winner of the Fillmore Container giveaway is revealed!).
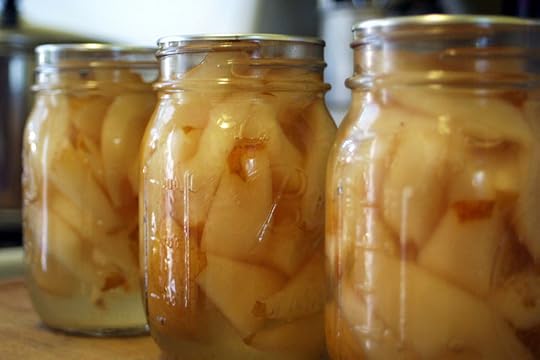
This first photo comes from Christina who blogs at My Homespun Home. She canned up pears in vanilla syrup. Yum!

This next image is a visual inventory of the canning that Shauna did this summer. She reflects on her summer of canning at her blog, Eating With S.O.L.E. I am so impressed by her organization!
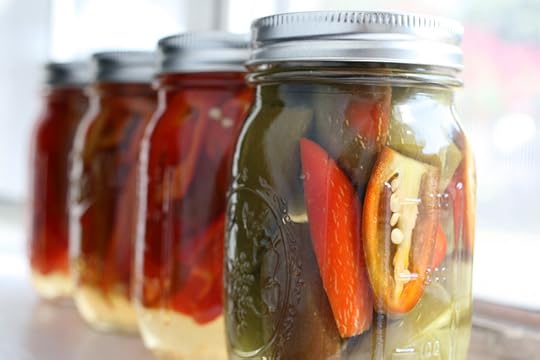
Pickled peppers from Lacey, who blogs at Thyme on My Side. It reminds me that I have some peppers in my crisper that may have already turned to mush. Here’s hoping there are few in there that I can salvage!

Applesauce in pint and a half jars! I still just love seeing this size jar in use out there in the wild. This photo comes to use from Lynn, who’s Flickrstream is bursting with preserve-y goodness.
This last image is of the cinnamon maple sunflower seed butter that Stephinie made and posted about on her blog, Gypsy Forest. She was inspired by the recipe that Heidi posted on 101 Cookbooks, which was in turn inspired by the recipe in my cookbook. I love it when it works out like that!

Fillmore Container giveaway winner time! Many thanks to all who entered and took the time to share how you’d put these smooth-sided four-ounce jars to work in your own households! The winner is commenter #804, Emily. She said,
Those are great jars! I think I’d use them for jam, because I’m the only one in my house who likes jam and I always like to have a variety of flavors, but have a hard time eating a big jar of jam before it goes bad. ![]() You’re right that they’d also be perfect for spices.
You’re right that they’d also be perfect for spices.
 If you didn’t happen to win this giveaway, I have good news for you. Fillmore Container was so impressed by the number of you that turned out for the giveaway that they’ve decided to do it again over on their blog this week.
All you have to do is check out the many jars they sell and leave a comment on their site, sharing which size jar you’d most like to try in your kitchen. If you’re the lucky winner, you’ll get a case of those jars to use. Head on over and enter for another opportunity to win jars!
Related Posts:
Giveaway: Four Ounce Smooth Sided Jars from Fillmore Container
Reader Submitted Photos + Blossom Trivet Giveaway Winners
Wüsthof Chai Dao Knife Giveaway Winner
September 27, 2012
This Weekend at the United States Botanical Garden
Tomorrow morning, I’m packing up my canning gear and hitting the road again. This time, I’m heading south to Washington, D.C., for a pair of canning demonstrations at the United States Botanical Garden. On Saturday, I’ll be demonstrating a small batch of tomato jam* and Sunday, I’ll be making pear vanilla jam. Both demos are from 12 noon – 1 pm and are entirely free (there’s no charge to visit the Gardens either). If you live in the D.C. area, I’d love to see some of you there.
In other class news, October is turning into the month of Pear Vanilla Jam classes. I’m teaching this recipe four times. It’s one of my favorite preserves, so I’m entirely delighted by this turn of events. On October 2, I’m at Pennypack Farm in Horsham. Saturday, October 6, I’m teaching an Indy Hall version of the class (email me to sign up for that one). October 13, I’m at Greensgrow and on October 18, I’m at the Whole Foods Market in Plymouth Meeting, PA.
I know it sounds repetitive to teach the same recipe so many times, but the way I see it is the recipe is just the vehicle that gives us the opportunity to get into the nitty gritty of canning. While I have a mental list of all the things I plan on covering in the class, each session is guided by the questions and problems you all bring to the table. No class is ever identical, which makes it fun for me and interesting for my repeat students.
For all my classes, make sure to check the classes tab up above. I update the page regularly, so keep your eyes peeled!
*The website says that Bernadine Prince is leading the demo on Saturday, but I’m subbing in for her.
Related Posts:
Food in Jars Cookbook Events This Weekend
Classes and Demos: Blooming Glen Farm! Carlisle, PA! Whole Foods Market! And More!
Spring and Summer Classes at Greensgrow
September 26, 2012
Weddings, Winners and Chocolate Cake

I spent most of last week out in Carmel Valley, helping get ready for my sister’s wedding. I baked cakes, cooked meals for crowds, snuggled with my nephew and picked Meyer lemons from the tree in the backyard.
I had every intention of finding time to post here while I was away, but I was unprepared for just how full the whole experience would be (it didn’t help that I had the stresses of weather delays, missed flights and wayward baggage). My best laid plans went right out the window when I realized that it was far more important for me to soak up all the family time I could instead of gluing myself to my laptop screen. I am so glad I did, too.
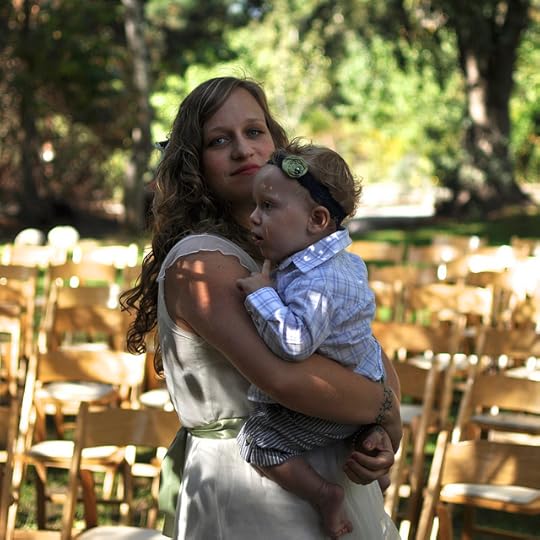
The wedding was beautiful and my sister, her kind man and their sweet babe deserved every moment of the love that was heaped upon them from the gathered crowd of friends and family. After a short service under a rustic, flower-laden chuppah, there was food, music and dancing.
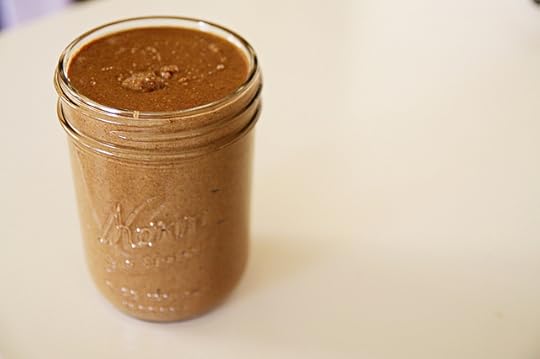
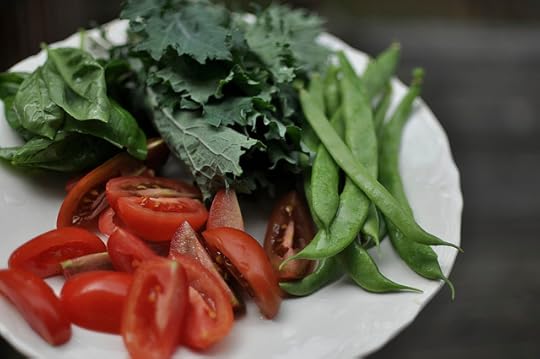
Dinner was catered by the taqueria that Andrew has been eating at his entire life, supplemented by vast plates of kale salad. For dessert, there were cookies from a local bakery, as well as the flourless chocolate cakes that I made (I also cooked up a batch of raspberry jam to serve with it. Nothing complements chocolate like raspberries).
Three years ago (today!), when Scott and I got married, I also baked in the days before the wedding. I knew that the best way to have delicious cake (and not pay a fortune for it) was to make it myself. My mother thought I was insane, but I’ve never regretting spending that time whisking and baking. I was so happy to be able to do the same for Raina.
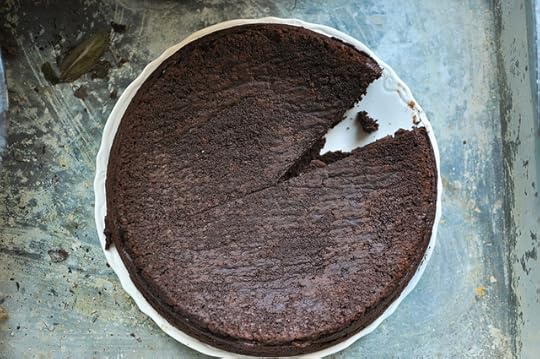
I made eight flourless chocolate cakes (though only seven made it to the ceremony, one was eaten to crumbs two nights before) in a borrowed kitchen. I packed two springform pans, parchment paper and a hand mixer into my suitcase (which just added to the stress over the missing luggage) and bought the ingredients as a local Safeway when I arrived. With my mom’s help, we managed six cakes on Thursday and squeezed in the last two on Friday.
They are dense, rich, deeply chocolate-y and just the thing to serve at a wedding where you want to celebrate the sweetness of life. You’ll find the recipe after the jump!
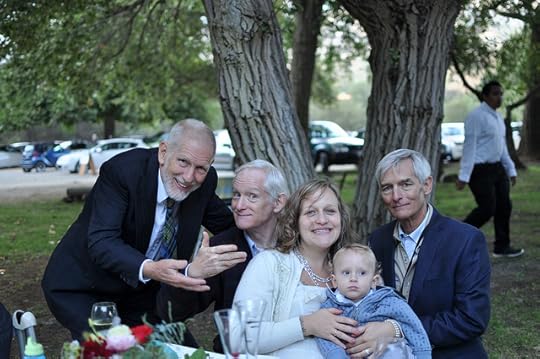
I love this picture. It’s my dad and his two brothers (on either side), posing with Raina and Emmett.
Scott and I got back to Philly on Sunday night and I’ve spent the last few days trying to catch up with email and meet deadlines. I’m working on an article for Table Matters about root vegetable soups right now, and so I spent most of today roasting, simmering and pureeing. I’ve been writing some nice little pieces for them of late, if you haven’t clicked over recently and read about versatile baking mixes, fruit butters and home-flavored salts.
Giveaway Update
 Thanks for all your entries to the My Berlin Kitchen giveaway! The winner is commenter #490. She said, “My favorite food memory would have to be Thursday night dinners I used to throw for friends when we were in college…we’d eat, watch Seinfeld, and just have a good time. I think it was experimenting with cooking in those days that made me feel secure in the kitchen.” What a lovely memory, Courtney!
Print
Flourless Chocolate Tort
Ingredients
8 ounces semi-sweet chocolate, broken into bits1 cup unsalted butter, plus more for the pan
1 1/2 cups sugar
6 eggs
1 cup unsweetened cocoa powder
1/4 cup of Frangelico
Instructions
Preheat oven to 350 degrees. Butter a 9-inch spring form pan and line the bottom with a circle of parchment paper (this helps prevent the cake from sticking to the pan).Create a double boiler by setting a large glass or stainless steel bowl over a saucepan with 2-3 inches of water in the bottom (the trick to a double boiler is to make sure the bowl is not in contact with the water).
Place double boiler over medium high heat. Add chocolate and butter to the bowl and let melt. Whisk together.
Once the chocolate and butter are melted, remove the bowl from its perch on the saucepan and place it on a folded kitchen towel on your counter (best not to put a hot bowl directly on your surface). Whisk in the sugar (an electric hand mixer is best, but you can also do it by hand).
Break the eggs into a spouted measuring cup and whisk the eggs in one at a time (breaking them into the measuring cup means that you won’t have to put the mixer down each time you need to add an egg).
Sift 1 cup of unsweetened cocoa powder into the batter and gently beat to combine (start on the mixer’s lowest setting and slowly work upwards).
Add the Frangelico and mix to combine.
Scrape the batter into the prepared spring form pan. Gently bang the pan on your counter a few times to remove some of the air bubbles.
Bake at 350 degrees for 45-50 minutes. Cake is done when the center looks set (shake the pan slightly and look for any sign of a wiggle).
Remove cake from oven and let cool for at least 20 minutes before removing it from the spring form pan. When cake is completely cool, wrap it in 2-3 layers of plastic wrap and store in the refrigerator or freezer until you’re ready serve. Allow cake to come to room temperature prior to serving. Schema/Recipe SEO Data Markup by ZipList Recipe Plugin2.0http://www.foodinjars.com/2012/09/weddings-winners-and-chocolate-cake/
Related Posts:
Food in Jars + Raina Rose = Jam Fest 2012
Two Weeks in Austin and a New Baby Boy
The Raina Rose Baby Benefit
September 24, 2012
Giveaway: Four Ounce Smooth Sided Jars from Fillmore Container
Over the years that I’ve been canning, I’ve acquired a fairly vast assortment of jars. Some of the basic type that can be picked up at any grocery or hardware store, while others are older models that can only be found at yard sales and secondhand shops.
Whenever I take pictures of my preserves in these vintage jars, I’m asked to name the source of these pretty jars. Most of the time, I end up disappointing the questioner when I confess that I picked up the jars in question at a tag sale in rural Pennsylvania some years back.
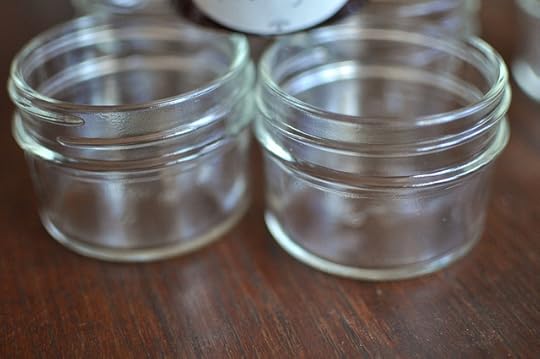
Happily, today is going to be a little different. The jars I’m showing off in these photos aren’t vintage and impossible to find. These four-ounce, smooth-sided jars are from Fillmore Container, cost just $3.99 a dozen and are quite easy to order (the shipping can get spendy though, so consider pairing up with a friend to keep it affordable).
When I first discovered these jars, I was ridiculously happy (yes, I do realize that it’s a little silly to have one’s joy level attached to the accessibility of a particular canning jar, but it’s me we’re talking about). You see, while I’ve always appreciated having the four-ounce jar as an option in my canning, I’ve never liked the quilted finish that Ball uses on that size. I’d seen photos of these smooth-sided quarter pints in the past, but I wasn’t sure how to get my hands on some.
Then, back in August, Lisa Reinhart from Fillmore Container came to my canning demo at Lemon Street Market in Lancaster City and brought a dozen of these smooth-sided little jars with her. I was over the moon (particularly since she sent me home with the box). I’ve since used them for all manner of things from basic canning projects to spice storage (without the quilting, it’s much easier to tell the dried basil from the oregano with just a glance).
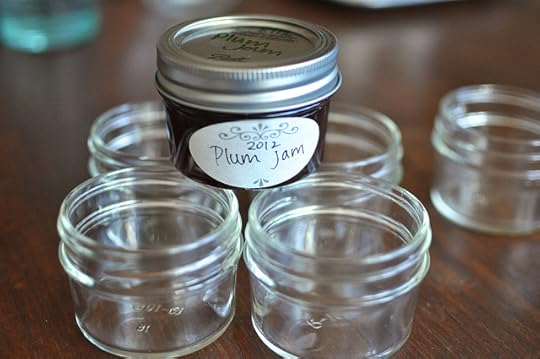
I also love the absence of pattern because it means that there are far fewer limitations when it comes to labeling these jars. Instead of being tethered to a small label, you can devise a longer sticker that bends around the entirety of the jar. Or, you can use one of the new stickers from Ball that dissolves when soaked (that’s what I’m using above), but not worry about placing it precisely in the area designed for it.
As you start to plan your holiday gift giving, consider this size for your projects. I am certain that my Pear Vanilla Jam would look gorgeous in these jars, as would any number of chutneys, jellies and syrups.
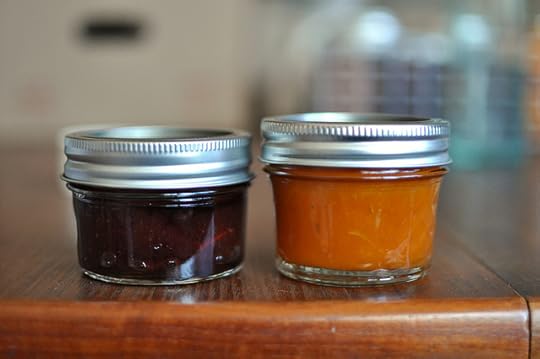
As you can see from the photo above, these smooth-sided jars (on the left) are little squatter than the quilted versions. However, they hold the same amount and the conventional two-piece lids fit them perfectly. That said, if you want to go for a different look, Fillmore also sells one-piece lids that are designed for boiling water bath canning as well. They come in red, green, yellow, black, white, silver and gold and are quite easy to use (I’ll have a tutorial on using one-piece lids up later this week).
Thanks to Fillmore Container, I have a case of 12 jars and 12 one-piece lids (winner gets to choose the color) to give away to one reader of this blog. Here’s what you do to enter.
Leave a comment on this post and tell me how you’d use these four-ounce, smooth-sided jars.
Comments will close at 11:59 pm east coast time on Friday, September 28, 2012. Winner will be chosen at random and will be posted to the blog over the weekend.
Giveaway is open to US residents.
One comment per person, please. Entries must be left via the comment form on the blog, I cannot accept submissions via email.
Finally, make sure to click on over to the Fillmore Container blog. They have a little interview with me up there right now and have a signed copy of my book, along with my favorite blossom trivet, to give away as well.
Disclosure: Fillmore Container gave me a dozen of these jars and lids to try out and they’re also providing the same for this giveaway. However, my opinions are uninfluenced by the gift and my opinions are entirely my own.
Related Posts:
Photos from the FiJ Flickr Group + Fillmore Container Giveaway Winner
Giveaway: Jars To Go Lunch Tote
Homemade Jar Flour Shaker
September 17, 2012
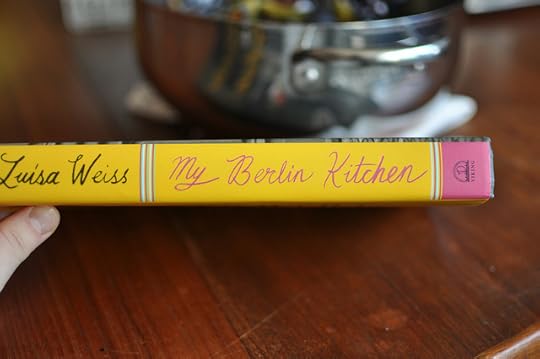
My Berlin Kitchen Giveaway + Spiced Plum Butter
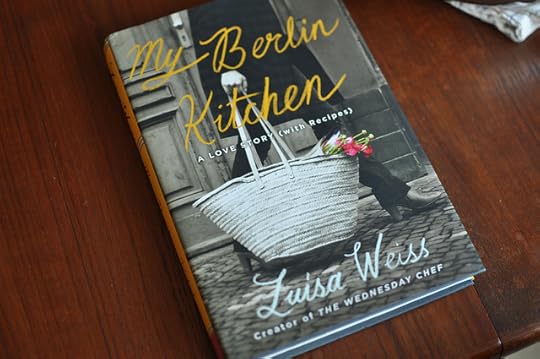
I first discovered The Wednesday Chef sometime in early 2006. I had become an avid reader of blogs about a year before (they were a great way to keep my mind off my terrible day job) and was always on the hunt for new sites to add to my list of bookmarks. Luisa’s voice and perspective on food resonated with me immediately. I spent a morning engrossed in her archives and once caught up, tried never to miss a new post.
In fact, it’s fairly safe to say that I’ve read nearly everything that Luisa Weiss has ever posted to the internet (I hope that doesn’t make me sound like a stalker. I swear, I’m just a fan). And, when an advanced copy of My Berlin Kitchen arrived just before the mini-vacation that Scott and I took few weeks back, I tucked it into my travel bag and proceeded to read it in a single, giant gulp.

As I read, I dog-eared recipes I wanted to remember. I marked the Pizza Siciliana and the Poppy Seed Whirligig Buns. I’m hoping to make the Yeasted Plum Cake before their season is entirely gone and, come Christmas, I’m definitely planning on making the Fruit Bread on page 161. It sounds dense and divine.
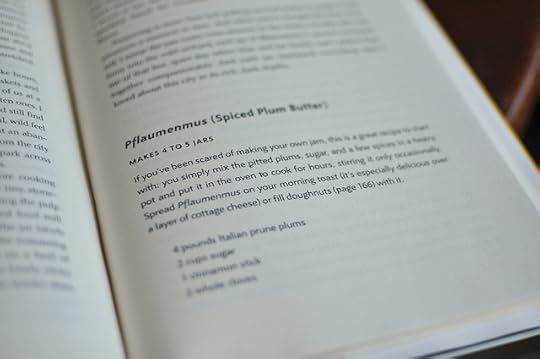
As I read, there was one recipe that jumped out at me more insistently than the rest and cried out to be made immediately. The Pflaumenmus or Spiced Plum Butter on page 237 had my name written all over it (particularly since I had the necessary four pounds of Italian prune plums at home, thanks to the Washington State Fruit Commission and their Canbassador program).
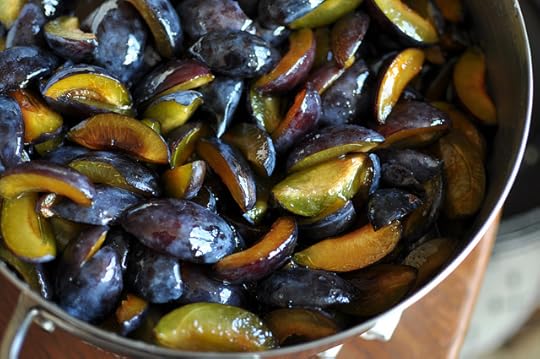
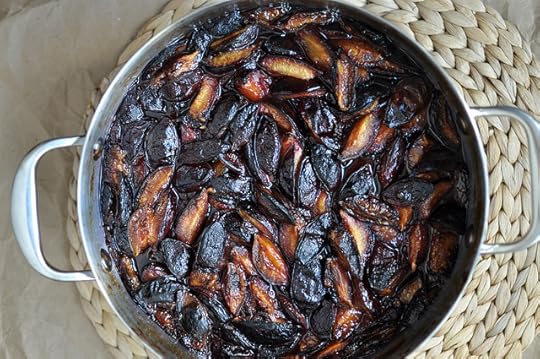
Of course, I’ve made plum butters before, but never with this particular technique. Luisa has you quarter the plums, stir them together with a bit of sugar, a cinnamon stick, and a couple cloves and let them sit overnight. The next day, once they’re nice and juicy, you pop the pan into the oven and bake them them at moderate heat.
After their time in the heat, the plums are incredibly tender and fragrant. The liquid has thickened a great deal and the slumping fruit just smells incredible.
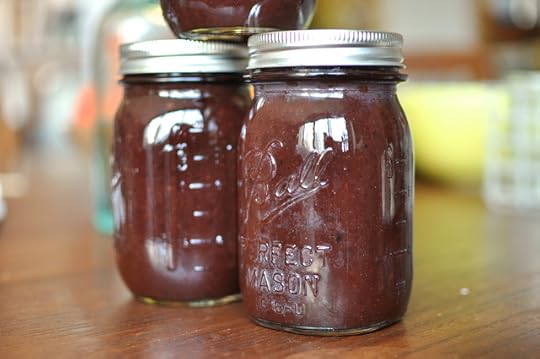
Once pureed, she has you funnel the prepared butter into sterilized jars and use the inversion method to seal. This is the only place where I diverged from the recipe as written and I chose to run my jars through a boiling water bath for 10 minutes. Because this is a relatively low sugar preserve, I wanted to ensure that all bacteria was killed and the best way to do that is with a hot water bath.
Now, just a note about the yield. The recipe says that it makes four to five jars, but doesn’t specify the sizes of those jars. I found that after pureeing, I had exactly enough butter to fill three pint jars. I imagine the jars Luisa used were a bit smaller than a standard pint and so figure my yield was just about right (I did the math and found that had I used the 1/5 L Weck jars, I’d have filled exactly five jars).
I plan on applying this same overnight maceration and oven roasting to other fruits, because it made for such a nice finished product and filled my apartment with the most delicious smells.
Thanks to the nice folks at Viking, in addition to getting to share the plum butter recipe with you (it’s after the jump), I also have a copy of My Berlin Kitchen to give away. If you’d like a chance to win it, here’s what to do.
Leave a comment on this post and share your favorite food memory.
Comments will close at 11:59 pm east coast time on Friday, September 21, 2012. Winner will be chosen at random and will be posted to the blog over the weekend.
Giveaway is open to US residents.
One comment per person, please. Entries must be left via the comment form on the blog, I cannot accept submissions via email.
Disclosure: Viking sent me an advanced copy of My Berlin Kitchen and are providing the copy for this giveaway. However, I’ve not been paid to host this giveaway and my opinions are entirely my own.
Print
Spiced Plum Butter
Ingredients
4 pounds Italian prune plums2 cups sugar
1 cinnamon stick
2 whole cloves
Instructions
Pit and quarter the plums and put them in a heavy 4-quart pot. Add the sugar, the cinnamon stick, and the cloves. Stir well and let sit overnight or four 8 hours.The next day, heat the oven to 350 degrees. Put the pot, unlidded, into the oven and cook for 2 hours, stirring the mixture occasionally.
Sterilize the glass jar and lids in boiling water.
When the plums have broken down and the liquid has reduced to a thick jam, remove pot from the oven and fish out the cinnamon stick (if you can find the cloves, fish them out too).
Puree the jam with an immersion blender until it resembles a fruit butter, and then fill the sterilized jars with the hot puree, screw on tops and immediately turn the jars upside down. If you prefer a jam with discernible chunks of fruit, however, don't puree the jam; simply ladle the hot jam into the sterilized jars.
Let the jars cool complete before turning the right side up again and labeling them. The jam will keep for at least a year.
Schema/Recipe SEO Data Markup by ZipList Recipe Plugin2.0http://www.foodinjars.com/2012/09/my-berlin-kitchen-giveaway-spiced-plum-butter/
(Marisa’s note: You can also process the jars in a boiling water bath canner for 10 minutes if you’d prefer to do it the American way.)
Recipe from My Berlin Kitchen: A Love Story (with Recipes) by Luisa Weiss, published by Viking, 2012.
Related Posts:
Giveaway: Joy of Cooking and 2013 Calendar
Photos from the FiJ Flickr Group + Fillmore Container Giveaway Winner
Giveaway: Four Ounce Smooth Sided Jars from Fillmore Container


