
Marisa McClellan's Blog, page 28
March 21, 2018
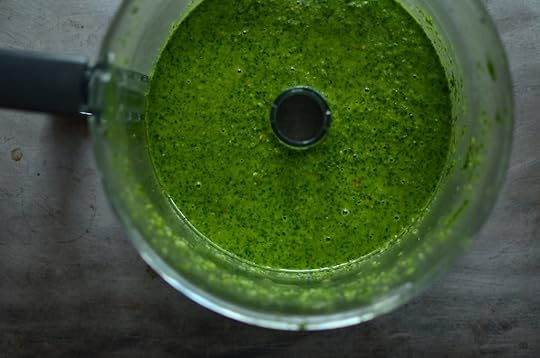
Quick Homemade Chimichurri
Looking for a kitchen project that is quick, versatile, and absolutely wonderful? Look no further than this easy recipe for homemade chimichurri!
I haven’t been doing a whole lot of exciting cooking lately. Ever since finishing my cookbook draft, I’ve been drifting through meal prep. I’ve made big pots of soup that last most of the week. There’s been at least one batch of bean-centric chili. More sheet pans of roasted vegetables than I can count. I’ve also relied heavily on a some Costco favorites (their pre-cooked chicken skewers and bags of kale and Brussels sprouts salad spring immediately to mind).
The long and short of it is that while we’ve been eating relatively healthy, vegetable-focused food, it hasn’t yielded much that I can write about.
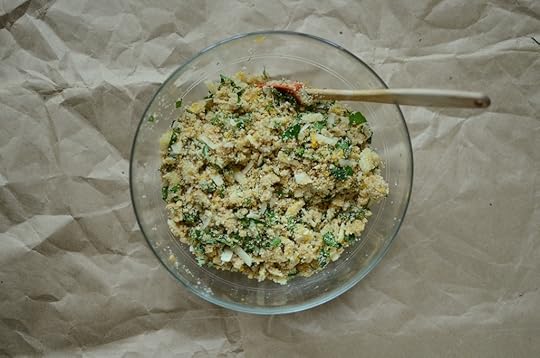
However, there is one thing I’m excited to talk about. A couple weeks back, I was at Joy’s house recording an episode of Local Mouthful. When we finished, we were both ravenous. Joy heated up some meatballs from her freezer, cooked up some quinoa and pulled a tub of homemade chimichurri out of the fridge. The meatballs and quinoa were good, but the chimichurri, well, it was amazing.
It’s a condiment made from parsley, oregano, garlic, vinegar, olive oil, red chili flakes, and salt that was originally devised in Argentina to serve on top of grilled meat. It’s something I’ve had over the years at various restaurants, but it never clicked for me until I had Joy’s version. So bright, green, and fresh (I think the fresh element is a big part of the appeal, particularly since we’re living through another major snow storm right now).
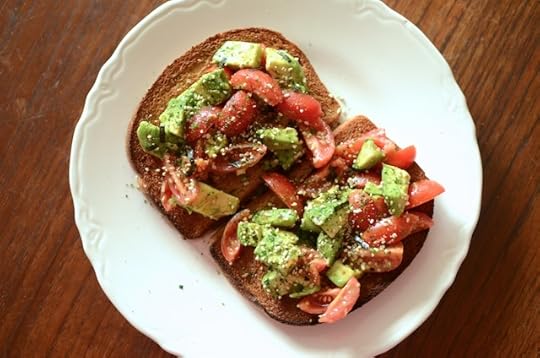
I’ve made two big batches since them and have been spooning it over everything that seems even marginally appropriate. Roasted vegetables! Hummus! Scrambled eggs! Turkey sandwich! Mealtime is chimichurri time right now.
Print
Quick Homemade Chimichurri
Ingredients
2 cups parsley
2 tablespoons fresh oregano
4-5 garlic cloves
2 tablespoons red wine vinegar
1 teaspoon salt
pinch red chili flakes
1/2 cup extra virgin olive oil
Instructions
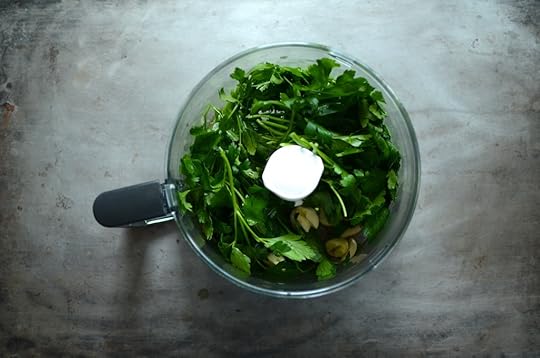
In the work bowl of a food processor, combine the parsley, oregano, garlic, vinegar, salt, and chili flakes. Pulse 4-5 times to help start the blending process. Then, with the motor running, stream in the olive oil.
Taste and adjust acid, salt, and heat levels as you feel is needed.
When you're happy with it, scrap the chimichurri into a jar and refrigerate. It will keep at least a week in the fridge.
4.26
http://foodinjars.com/2018/03/quick-homemade-chimichurri/
Related Posts:
Resolution Recipes – An eBook from Local Mouthful
Hear Me Each Week on Local Mouthful
Local Mouthful’s 25th Episode


March 15, 2018
Getting Your Kitchen Ready for Spring
Where I am, it feels like spring has sprung — about three weeks early for the calendar, but after the crazy severe winter we’ve had, I’ll take it. Winter aconite and snowdrops are blooming, the days are getting longer, and I had to take off two of my four layers while walking around downtown Philly earlier this week.
Part of me doesn’t feel quite ready for spring and everything it brings — prepping the garden, starting seeds, lots of cleaning — and another part of me can’t wait to walk around outside in a tank top and dig in the dirt.
To help ease the transition into spring, I’ve been making a mental list of the tasks I’ll tackle around my kitchen in the coming weeks. Every year, organizing the freezer — the one on top of my fridge and my apartment-sized chest freezer — is on the list.
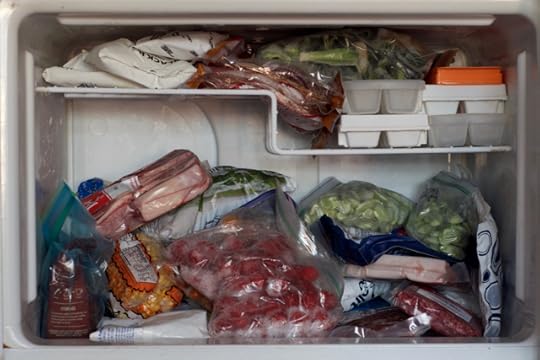
In a short burst of activity, I took the initiative to tackle the upright freezer. I admit that I didn’t defrost and fully clean it, but I was short on time and eager to make a little progress and get the clutter out, so I did a quick cull and organize — it took all of 15 minutes, but made me feel accomplished and life a little tidier.
When I do a deep dive into the freezers, I always discover forgotten treasures I can add into my meal planning and some, er, missed opportunities that are long overdue for a trip to the compost bucket.
I found a pack of ground lamb from a friend’s farm that I had forgotten about, plus some freezer-burned smoothie berries from at least 2 summers ago…and a bag of cherry tomatoes from (yikes) 2015. Also discovered: Dried mushrooms a friend had given me at least five years ago, an ancient handful of pistachios, and nearly unrecognizable roasted jalapeños also went into the compost.
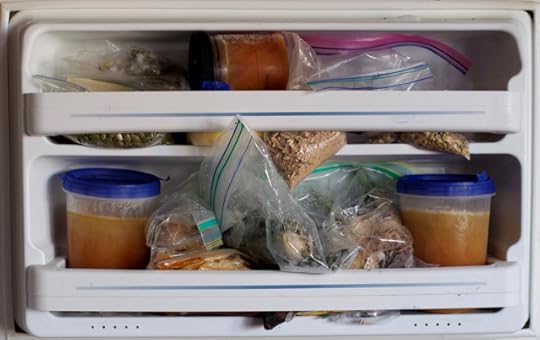
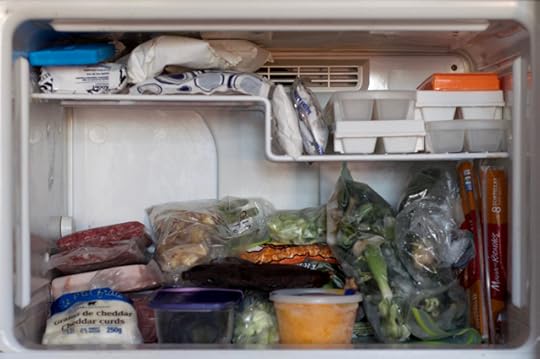
What was left? Lots of ice packs (I like to have an easy-to-grab stash for cheese events, but there were way too many in there), frozen pastured meats, 2017-edition current bagged veggies, ginger and turmeric, stock makings (leek tops and celery), whole wheat tortillas (they were on sale), and a tub of the best pumpkin puree, a reminder to make one last batch of brown butter pumpkin muffins before the weather turns.
The freezer’s cluttered door shelves looked much tidier, with containers of tomato broth, frozen bananas, cheesemaking cultures, and both sweet cream and cultured butter sitting upright with a bag of chipotle peppers and a few veggie dumplings. (Please don’t judge my Wawa coffee — it was purchased on Christmas morning last year so that my partner and I could survive the holiday in a caffeine-free household, and I decided we’d keep it for emergencies.)
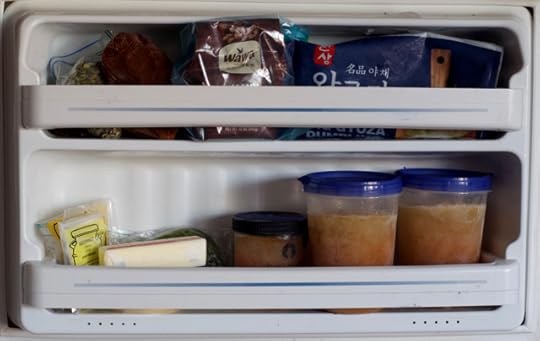
The tomato broth and one of the bags of lima beans will go into a soup with some parmesan rinds and maybe some orzo or Israeli couscous before the weather gets much warmer, and I’ll use the other bag with the sweet corn and roasted poblanos (they’re in there too), a jar of tomatillo sauce, and chicken thighs to make a chunky green chili. Don’t you love shopping your own freezer?
Here are a few of the other tasks I’ll take care of as the season changes so that I’m ready for a delicious season of cooking and preserving:
Deep-cleaning the stove top (including behind the dials)
Culling, cleaning, and organizing the chest freezer (I need to devote a day to this one)
Performing a ruthless KonMari of my pantry — I have cans of fava beans in there from 2011 that I somehow haven’t been able to make myself throw away
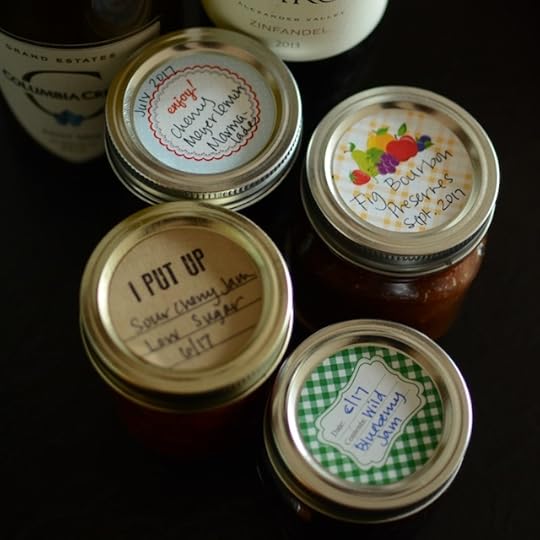
An inventory of both full and empty jars in my canning closet
Getting rid of the bottles I never use on top of the fridge and deep cleaning that surface
Selling or giving away kitchenware I never use
What are some of the ways you get your kitchen ready for spring (and the forthcoming canning season)?
Related Posts:
Pantry Management: Organizing Your Freezer for the Year Ahead
How to Make Meyer Lemon Confit
How to Make Crispy Shiitake Mushroom Snacks
March 12, 2018
Where I’m Going, Where I’ve Been – March 2018

Though the true start of the canning season is still a ways off where I live, my calendar is beginning to fill up with classes and events (and if you want me to come and teach at your school, church, farm, library, or market in 2018, now’s the time to get in touch!).
Where I’m Going
My first in-person class of the season in Saturday, March 24 from 9:30 to 11:30 am at Valley Variety in Hudson, NY. In this two-hour workshop, we’ll make a batch of low sugar strawberry vanilla jam. It’s a good opportunity to learn more about Pomona’s Pectin, the role of sugar in canning, and how to process jars in a boiling water bath. Whether you’re a new canner or someone who’s looking to refresh your skills, this will be a good class for you! $80. Register here.
If you’re not in the Hudson Valley or can’t swing the class, I’m also restarting my regular Facebook Livestreaming demos. The first one of the season will be on Monday, March 19 at 9 pm ET/6 pm PT. These are free, hour-long sessions in which I’ll demonstrate how to make a recipe from one of my books and I’ll answer all your questions. Make sure to like and follow the Food in Jars Facebook page to get the notification when the livestream is beginning!
Where I’ve Been
Many moons ago, I had a conversation with Aleen Simms for Originality, the podcast she co-hosts with K. Tempest Bradford. I love the format of this podcast, because Aleen and Tempest share snippets of what their guests have to say and then use those bits of audio as a springboard into their own conversation. The episode went live last month and you can listen to it here.
Also, do you know that I also co-host a podcast? Called Local Mouthful, it’s a show in which Joy Manning and I talk shop with obsessed home cooks everywhere. I mention it because it’s come to my attention that I don’t do a great job making sure that my Food in Jars readers know about the show and I really think you guys would like it. We talk about food news, offer audio recipes, interview cookbook authors, and share all our culinary tricks and tips. If this sounds like something you’d dig, subscribe here!
Related Posts:
Resolution Recipes – An eBook from Local Mouthful
Cranberry Blueberry Jam
Upcoming Classes: Facebook! Glen Mills, PA! Sewell, NJ! Arundel, ME!
March 11, 2018
Links: Quick Pickles, Granola Bars, and Jewish Food
Hey friends! I am so sorry that I was absent for so long. I was fully absorbed in writing my next book and since turning the manuscript in two weeks ago, I’ve been struggling to find my way back here. I’ve really missed the sense of connection and community that comes when I write in this space on a regular basis.
So I’m here and I starting things back up with a collection of links.
Smoky bacon jam (not safe for canning, but perfect for the fridge).
(I wish I had some of these right now).
Quick pickled apples (a great project if you’re itching for a spring).
Purim is over, but I’m happy to eat hamantaschen no matter the time of year. Two fun versions.
Grain-free granola. Yes, please.
If you want oats in your granola, these bars look promising.
Maple-sweetened chamomile lemon syrup. So soothing.
Alexandra’s Kitchen is my first stop when I want to bake bread. Right now, I’m hungry for her Quinoa and Flax Toasting Bread.
Walnut olive miso sauce. Sounds like a delicious umami bomb.
If you haven’t spent an hour or two exploring this 100 Most Jewish Foods package from Tablet Mag, please do so. It’s so good and makes me immediately hungry.
I’ll be back with more goodies tomorrow. Thanks for reading!
Related Posts:
Links: Upcoming Events, Cherry Preserves, and Winners
Links: Strawberries, Rhubarb, Mulberries, and Winners
Links: Pickled Strawberries, Green Onion Kimchi, and Winners
March 7, 2018
How to Make Meyer Lemon Confit
Regular Food in Jars contributor Alex Jones is dropping in today with a brilliant idea for how to make lemon confit. These oil-poached lemon slices produce both deeply infused olive oil and tender slivers of lemon, ready to be chopped and stirred into braises, vinaigrettes, and batches of hummus. I am planning on starting a batch of my own immediately. -Marisa

Every winter, I look forward to my box of tart, aromatic sunshine from Lemon Ladies Orchard, which I first learned about thanks to Marisa’s devotion to them on this very blog.
Sometimes I ask for it as a Christmas gift and spend the week between the holidays happily preserving. But this year, I ordered up a five-pound box of their gorgeous, organic Meyer lemons to brighten things up during the long midwinter stretch in February.
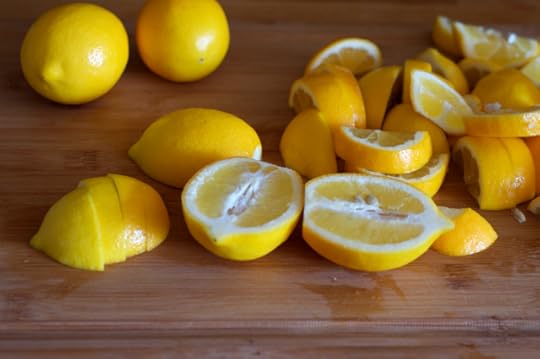
So far, I’ve preserved lemons in salt, made lemon syrup (the classic Joy of Cooking lemonade concentrate recipe that my mom made when I was a kid is my favorite), infused vinegar with the excess peels, and dehydrated several racks of thin slices to pop in my herbal tea till these precious lemons come into season next year.
I’ve reserved a handful for lemon bars and maybe a mini batch of velvety lemon curd, too. But I really wanted to try something new this year, maybe something savory. This Los Angeles Times compilation of 100 ways to use Meyer lemons — intended to ease the burden on Californians blessed with a backyard citrus bounty — offered an idea I’d never tried before: Meyer lemon confit.
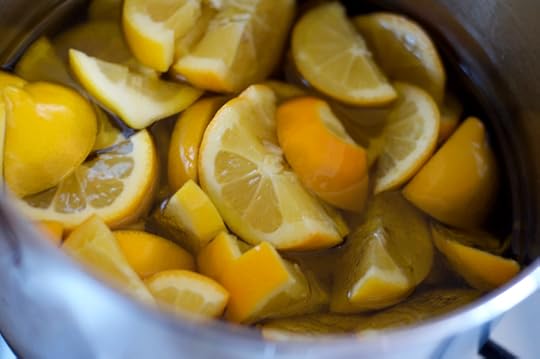
You’ll often see salt-preserved lemons referred to this way (“confit” comes from the French word “confire,” meaning to preserve, so it makes sense). But this method preserves the lemons in fat — olive oil, to be precise. Slice the lemons, cover with oil, and cook them at the barest simmer over very low heat for an hour.
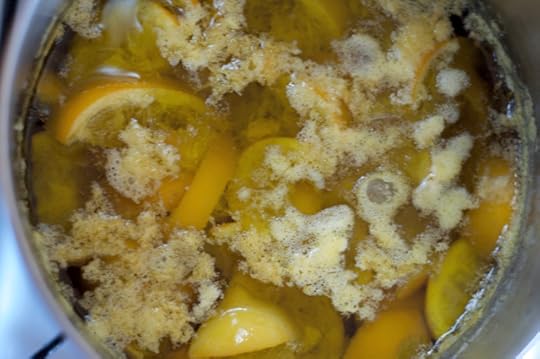
The olive oil is infused with a heady combination of brightness from the lemon oil, tartness from the juice, and a bitter undertone from the pith. The lemon itself becomes milder, the peel tender — almost like salt-preserving the lemon, minus the long wait and without the overpowering saltiness.
Scoop out the oil and use it in salad dressings or marinades, then top the veggies with finely-diced pieces of lemon. Puree the mixture with fresh herbs and use as a dip for crusty, fresh bread or pita. Chop the thin-skinned lemons and toss them with steamed red potatoes and herbs in a vinegary potato salad, or rub minced lemons on chicken thighs before roasting. I bet you could add a whole new dimension to a lemony olive oil cake with this infused oil, too.
You could take this preparation a step further and make variations with other flavors: add herbs like thyme or rosemary, or maybe a bundle of parsley stems; another option could be bay leaves and black peppercorns.
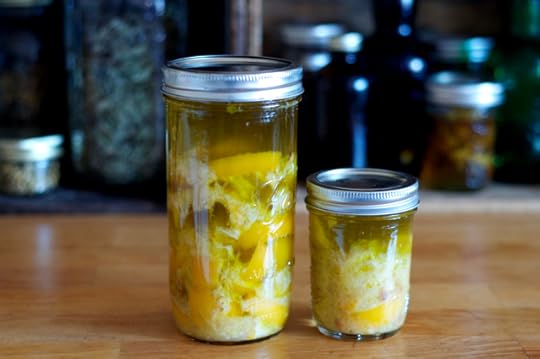
While this recipe can’t be canned, your lemon confit will keep for at least two weeks in the fridge (or months in the freezer), so you can add a lush, lemony note to dishes long after Meyer lemon season has ended. How are you preserving Meyer lemons this winter to last all year long?
Print
How to Make Meyer Lemon Olive Oil Confit
Ingredients
6 organic Meyer lemons
Olive oil to cover (around 2 cups)
Optional: herbs and spices like black peppercorns, bay leaves, rosemary, thyme, or parsley stems
Instructions
Wash and dry the lemons, then halve lengthwise and cut into slices between 1/4" and 1/2". Put the slices in a heavy-bottomed medium-sized pot or saucepan. Add good olive oil (it doesn't have to be extra virgin) to cover the lemon slices.
Heat the mixture under the lowest possible heat for one hour. You're looking for a slow simmer — the occasional lazy bubble — but want to avoid a full simmer.
When time's up, remove the pot from the heat. As soon as the mixture is cool, seal in jars, label with the date, and store in the refrigerator for up to 2 weeks or in the freezer for up to 6 months.
4.26
http://foodinjars.com/2018/03/how-to-make-meyer-lemon-confit-olive-oil/
Related Posts:
Tips for Selecting, Prepping, and Preserving Lemons
How to Make Your Own Tonic Water
Air-Dried Lemon Peel
March 2, 2018
March Sponsors: Cuppow, Fillmore Container, EcoJarz, Mason Jar Lifestyle, and CanningCrafts
Happy March, dear readers! It’s the start of the month and that means that it’s time to thank the businesses that help make this site possible. Please do show them that you appreciate their support with your time and attention!
In the top spot are our friends at Cuppow. They are the creators of the original mason jar travel mug topper and the BNTO, a small plastic cup that transforms a canning jar into a snack or lunch box. One of my goals for the new year is to drink 3 quarts of water a day, and my Cuppow lid helps me stick to that goal without spilling all over the place.
Lancaster, PA-based and family-owned Fillmore Container are next! They sell all manner of canning jars, lids, and other preservation gear. If you’re looking to get into kombucha brewing, they’ve recently published a guide with gear recommendations for both single batch and continuous brewing!
Our friends over at EcoJarz are another stalwart sponsor. They make an array of products designed to fit on top of mason jars, including cheese graters, coffee brewers, and stainless steel storage lids. If you’re hoping to get into fermentation this year, their fermenting kit is a useful and affordable option!
Mason Jar Lifestyle is a one-stop shopping site for all the jar lovers out there. They sell all manner of mason jar accessories and adaptors. If you’re in the market for lids, straws, sprouting lids, fermentation weights, airlocks, tea light converters, cozies, and more, make sure to check them out. I particularly love their one-piece stainless steel lids, paired with leakproof silicone liners. They make it easy to transport soup to work without spilling a drop!
Next up is CanningCrafts. Shop owner Alison sells an array of ready made and custom mason jar labels for all your various preserves, syrups, and backyard honey. Make sure to subscribe to the CanningCrafts newsletter, because you’ll get a 10% off coupon code!
And if your company, shop, or family business is interested in reaching the food-loving and engaged Food in Jars audience, you can find more details here. Leave a comment on this post or drop me a note to learn more!
Related Posts:
February Sponsors: Cuppow, Fillmore Container, EcoJarz, Mason Jar Lifestyle, and CanningCrafts
January Sponsors: Cuppow, Fillmore Container, EcoJarz, Mason Jar Lifestyle, and CanningCrafts
December Sponsors: Cuppow, Fillmore Container, EcoJarz, Mason Jar Lifestyle, CanningCrafts, and Mrs. Wages
February 21, 2018
Sponsored: Fennel Gruyere Gratin + Anolon Vesta Baker Giveaway

The last couple of months have all been leading up to this week. The first draft of my next cookbook is due to my editor on Friday, just as the yearly conference for the International Association for Culinary Professionals begins. This is typically the only conference I attend each year, and it’s an chance to see friends and colleagues, as well as make new connections that will hopefully lead to more work and opportunities.
Originally founded in 1978 by a group of cooking school owners and instructors (including Julia Child, Jacques Pépin, and Anne Willan), over the last 40 years IACP has become a robust professional organization for food writers, cookbook authors, bloggers, editors, food tour guides, and others.
As part of the lead-up to the conference, I was asked by the folks at Anolon (they’re dedicated IACP sponsor) to dream up a recipe inspired by one of the organization’s founders. I chose to look at Anne Willan’s life and work as a starting place for my dish.

I met Anne briefly at my very first IACP conference in 2012 (just before Food in Jars came out!), when she was promoting her amazing book The Cookbook Library (if you love cookbooks, you must check out this book. It covers the four centuries of cooking and recipe writing that led us to the point of culinary literacy where we are today). I remember thinking that I would be incredibly fortunate to have even half the career that she has had.
Starting with the knowledge that Anne was the founder of the La Varenne Cooking School in Paris, I knew my dish would need to be grounded in French cooking. I took a wander through her website and paged through the copy of La Varenne Pratique that I inherited from my Aunt Flora, and decided I’d make a gratin.
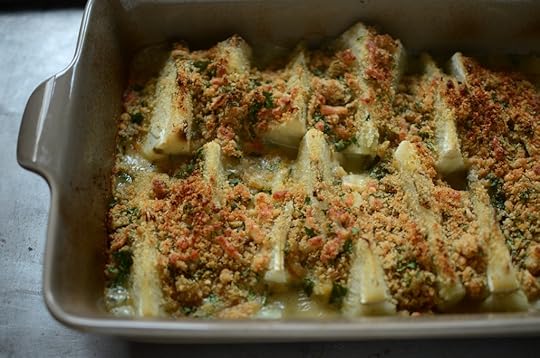
The thing I love about a gratin is that it is versatile and relatively easy (a necessity as I approach my deadline!). We think of gratins as being heavy dishes that are full of cheese, but they can actually be relatively light. I only use three ounces of cheese in this particular version. For a side that feeds produces between six and eight servings, that’s not overly cheesy at all!

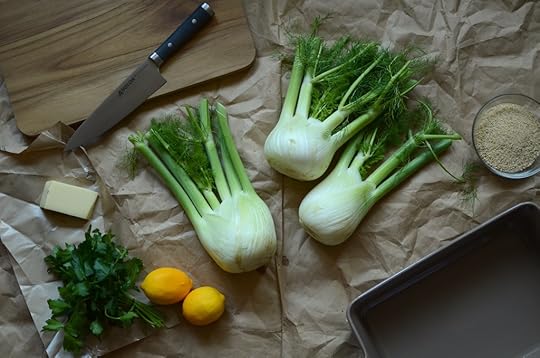
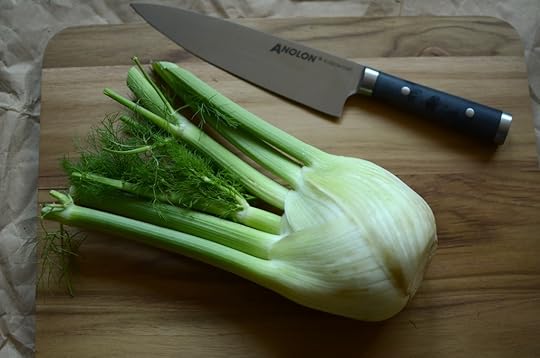
I used fennel as the primary ingredient because it brings a lot of flavor to the dish and I can almost always get really fresh, beautiful fennel at my local produce shop. However, you could apply this same technique to zucchini, cabbage, Brussels sprouts, winter squash, or various root vegetables.
I used an assortment of Anolon tools while creating this dish that you’ll see pictured throughout this post. They sent me a trio of blazingly sharp and easy-to-handle knives, a sturdy teak cutting board, and the Vesta Stoneware 9 x 13 Baker in Umber. I was particularly excited to use the Vesta baker because I’ve been on the lookout for a good, deep 9 x 13 pan this one fits the bill perfectly.
Thanks to the folks at Anolon, I have one of these lovely Vesta Stoneware 9 x 13 Baking Pans in Umber to giveaway to one of you! Please use the widget below to enter!
a Rafflecopter giveaway
Disclosure: This is a sponsored post. Anolon paid me to write this post and develop the recipe you see below. They sent me the baker, knives, and cutting board to feature in this post. And, they are providing the stoneware baker for giveaway. However, as always, the words and thoughts expressed here are entirely my own.
Print
Fennel Gruyere Gratin + Anolon Vesta Baker Giveaway
Ingredients
2-3 fennel bulbs
1 1/2 cups chicken stock
6 tablespoons melted butter, divided
1 teaspoon salt
1 cup unseasoned bread crumbs
3 ounces gruyere, finely grated
3 tablespoons chopped fresh flat-leaf parsley
1 medium lemon, zested and juiced
1 garlic clove, pressed or grated on a microplane
1/4 teaspoon freshly ground black pepper
Instructions
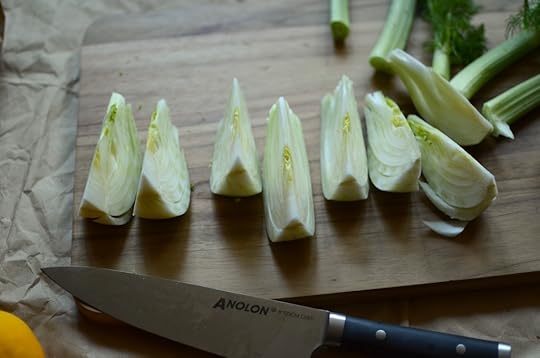
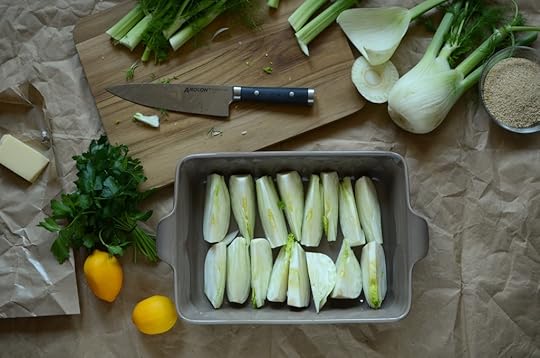
Preheat the oven to 400°F/204°C. Trim away the stem ends of the fennel. Cut the bulb into wedges. Depending on how large the bulbs are, opt for quarters, sixths, or eighths. Arrange the fennel wedges in a 9 x 13 inch baking dish. Combine the chicken stock and 3 tablespoons of melted butter and pour it over the fennel. Season with salt and cover the pan tightly with aluminum foil.
Bake the fennel wedges for 45 to 50 minutes, until they are super tender. You should be able to poke the bit of core in each wedge with a paring knife and have the knife slide in easily.
While the fennel cooks, make the topping. Combine the breadcrumbs, cheese, parsley, lemon zest and juice, garlic, and black pepper with the remaining melted butter and stir to combine. It should look like damp sand when you’re finished. If it seems too wet, add a pinch more breadcrumbs to even it out.
Leaving the pan uncovered, return it to the oven and bake for another 10 to 15 minutes, until the topping nicely browned and your kitchen smells delicious.
Serve hot.
4.26
http://foodinjars.com/2018/02/sponsored-fennel-gruyere-gratin-anolon-vesta-baker-giveaway/
Related Posts:
Check the recipe index for more tasty preserves!
February 15, 2018
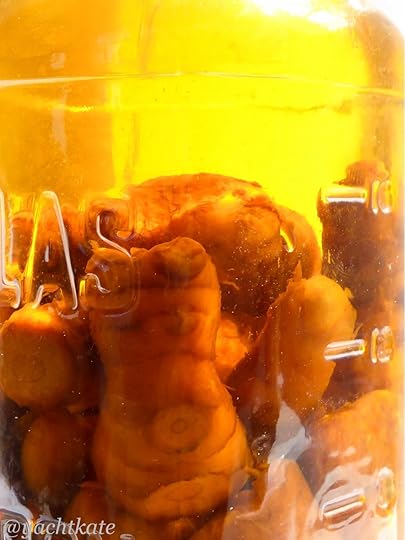
Guest Post: Ginger and Turmeric Preserved in Alcohol with Heather Francis
Today’s guest post is from adventurer and home canner Heather Francis. She is originally from Nova Scotia, Canada but has lived and worked on the ocean for over a decade. A professional cook who’s worked on both land and sea, these days you’ll find her in the galley of Kate, the Newport 41’ sloop she and her Aussie partner, Steve, have been sailing since 2008. They are currently looking for wind in the Philippines. Follow their adventures on Yacht Kate.
Fresh ginger is something that I always have in my galley; it’s peppery, citrus bite a staple in the quick, Asian-inspired dishes that I regularly prepare. However, it is not really something have room for in my fridge. I know a piece of ginger isn’t all that big, but when your total cold storage space isn’t much bigger than the freezer section of a typical domestic refrigerator you tend to be picky about what goes into it.
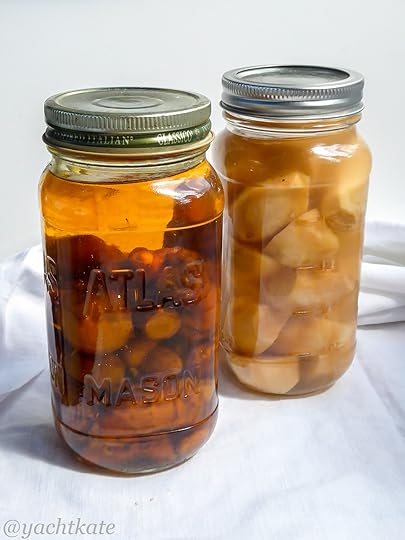
Years I ago I discovered that you can preserve ginger, and other rhizomes like turmeric, simply by submersing it in alcohol. The method that has a two-fold result; fresh ginger/turmeric that is ready to add to any dish, and some delightfully flavoured alcohol ready to add to your sundown cocktail. And best of all, no fancy equipment or refrigeration required.
All you will need is a large, clean glass bottle with a tight-fitting lid, enough ginger or turmeric to fill it, a sharp paring knife and a bottle rum, gin or vodka, depending on your tastes.

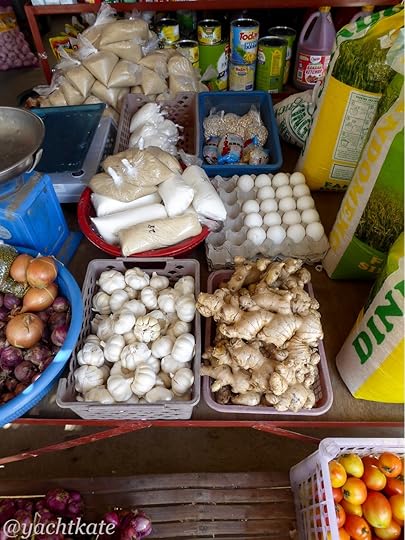
When buying ginger or turmeric look for pieces that are plump with tight, shiny skin. Fresh, young ginger will have juicy, tender flesh without a lot of fibrous strings, which makes it easier to grate when using it later. Stay away from anything that looks shriveled and dry.
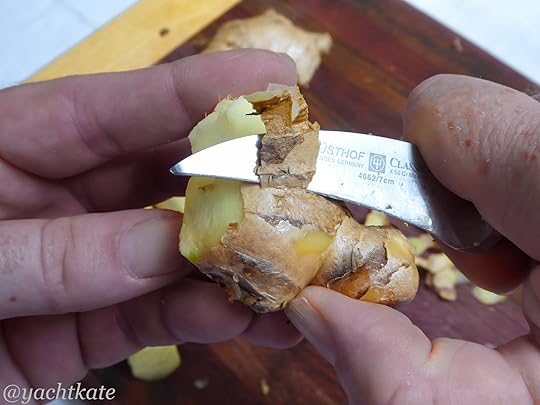
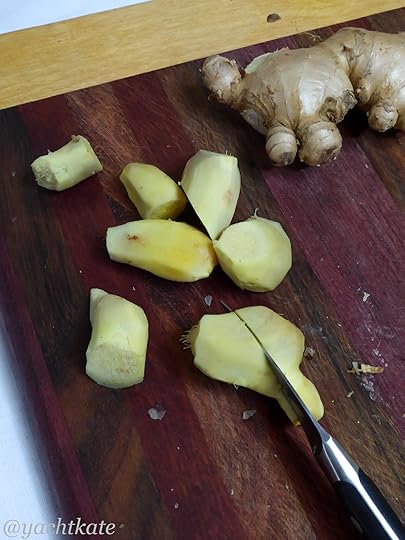
I use a paring knife to peel the ginger and cut it into rough 1” pieces, the size I would use for cooking. If you prefer you can use another tool or a fancy gadget to peel the ginger however, I find a knife efficient and since ginger is so cheap in the tropics I am not overly concerned about the small amount of wastage. If you are using turmeric, you may want to wear gloves as it will stain your skin (and everything it touches) vivid yellow.
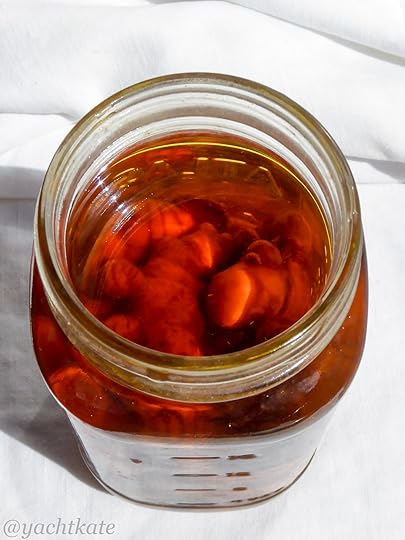
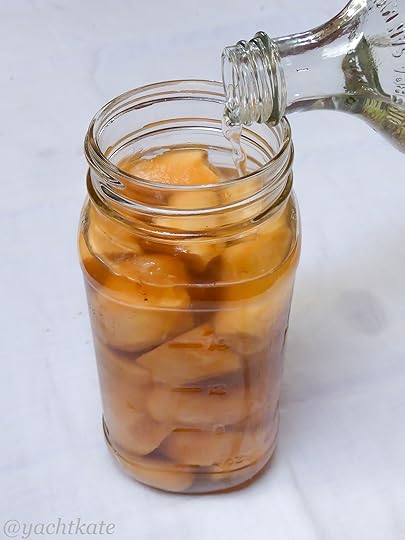
Then pack the ginger into a jar, leaving about a ½” head space. You may need to shake and arrange the odd-shapes pieces to get them to fit. Next pour the alcohol over the ginger, making sure to cover it completely. As long as the ginger is totally submerged and away from air it will stay preserved. All that is left it to screw on the lid and put it in a cool spot, out of direct sunlight.
You can use the ginger right away, but the flavour takes a while to infuse into the alcohol, so I generally forget about it for at least 2-3 weeks. Depending on the size of the jar it can take me a month or so to work my way through the ginger.
When your recipe calls for ginger simply fish out a piece with a clean utensil and grate it into your dish. The ginger or turmeric will soften the longer it is left in the alcohol, but the flavour will not deteriorate. And, no need to worry about the alcohol flavouring your dish, it will burn off in the heat of your skillet. If you find yourself thirsty one fine evening, make sure to top up the alcohol to prevent spoilage.

I prefer to use rum over ginger and gin over turmeric, but if you’re a vodka drinker it will work well too. Because this process ends up flavouring the alcohol it is a fabulous way to perk up a less than sophisticated bottle of booze. In fact, you can just use this technique to flavour your tipple of choice and create your very own signature cocktail.
Cheers!
Print
Turmeric Gin and Soda with Mango
Ingredients
1 1/5 ounce turmeric gin
Splash of soda water
Slice of perfectly ripe mango
Instructions
Serve over ice in a high ball glass, muddling the mango after presentation to enhance the flavour.
4.21
http://foodinjars.com/2018/02/guest-post-ginger-turmeric-preserved-alcohol-heather-francis/
Related Posts:
Guest Post: Sailboat Canning and Mango Chutney from Heather Francis
Guest Post: Pink and Yellow Pickled Eggs from Heather Francis
Guest Post: Cranberry Blueberry Compote from Heather Francis
February 13, 2018
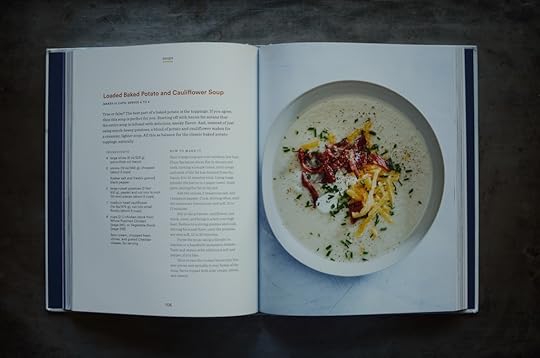
Loaded Baked Potato and Cauliflower Soup from Healthyish and OXO
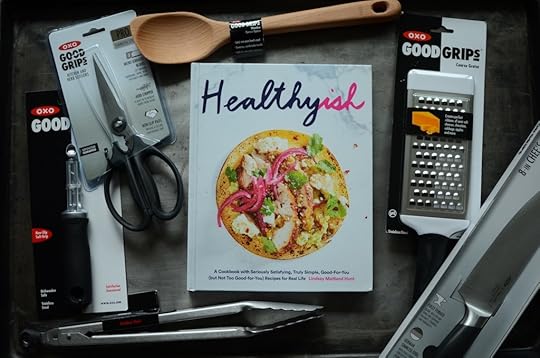
Back in January, before I entered all the “all work, all the time” stage of my book writing process, I said that I would participate in a blogging challenge with OXO. This one featured the new cookbook Healthyish by Lindsay Maitland Hunt and an array of OXO tools. I opted to make the Loaded Potato and Cauliflower Soup and soon after, received a copy of the book and some of the tools necessary to make a batch.
I unpacked the book and the tools, took some pretty pictures, and then got swept away in my own book frenzy. However, with the post deadline approaching, I did the hard mental work of switching gears (I’ve been so singularly focused that I’m fairly certain that my brain made a loud, screeching sound as I opened the book) and planned to make some soup.
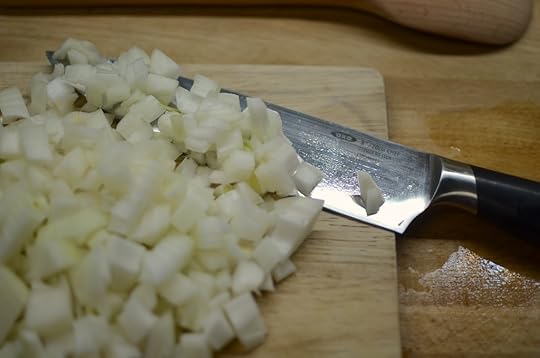
I read the through the recipe, made a grocery list, and walked to pick up the ingredients I needed. Back home, I chopped, stirred, and pureed. As I worked, I realized that making someone else’s recipe was exactly what I needed. I didn’t have to take notes, measure the size of my dice, or pay close attention to the exact duration of the cooking time (when I develop recipes, I often run a stop watch to ensure that I exactly capture the timing).
It was also a pleasure to have some new OXO tools to use. I’m been in such ruts with my gear that the new equipment brought a really pleasurable lift to the act of cooking.
Here’s what they sent:
The Pro 8 inch Chef’s Knife – Wickedly sharp right out of the package and the perfect weight for flying through vegetables.
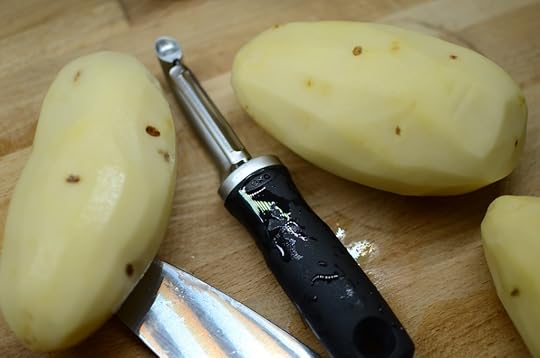
The Swivel Peeler – Grippy, sharp, and put my stained Y-model to shame.
The Wooden Corner Spoon – Made of solid wood and carved to the perfect angle for getting into the corner of the pot.
The Kitchen and Herb Scissors – Perfect for slicing the bacon into slivers for garnish, and the blades come apart for easy cleaning.
The Coarse Grater – This grater laughed at my hard cheddar and reduced it to shreds with ease. It’s also a far more pleasurable to clean than my ancient box grater.
The 12 inch Tongs – They are now the longest reaching tongs in my kitchen. They’re good for flipping bacon, retrieving toast, and grabbing boxes of crackers from on top of the fridge.
We ate this twice for dinner and each time I was reminded that of the importance of taking time to eat good food and relax a little, even during the most stressful times. I look forward to cooking more of the recipes from Healthyish (though probably not until the book is turned in).
Print
Loaded Baked Potato and Cauliflower Soup from Healthyish and OXO
Ingredients
4 large slices (8 oz/225 g) extra-thick cut bacon
2 onions (12 oz/340 g), chopped (about 2 cups)
Kosher salt and freshly ground black pepper
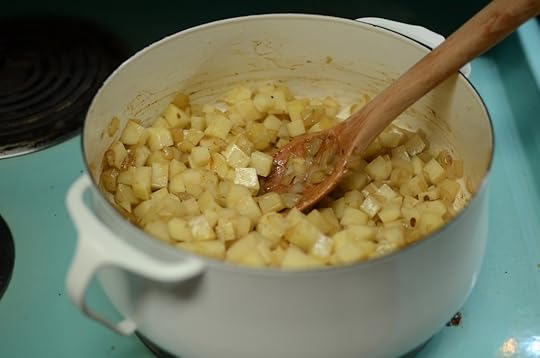
2 large russet potatoes (2 lbs/910 g), peeled and cut into 1/2 inch (12-mm) pieces (about 5 cups)
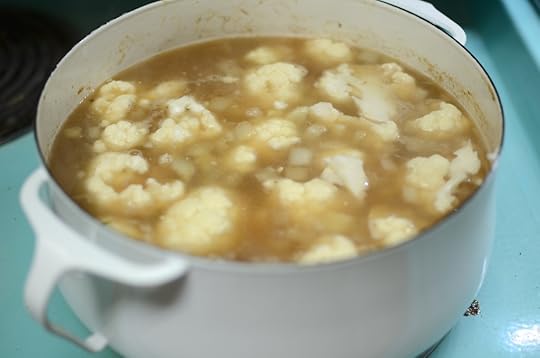
1 medium head cauliflower (1 1/4 lbs/570 g), cut into small florets (about 6 cups)
8 cups (2L) chicken stock
Sour cream, chopped fresh chives, and grated Cheddar cheese, for serving
Instructions
Heat a large soup pot over medium-low heat. Place the bacon slices flat in the pot and cook, turning a couple of times, until crips and most of the fat has drained from the bacon, 8 to 12 minutes total. Using tongs, transfer the bacon to a paper towel-lined plate, leaving the fat in the pot.
Add the onions, 2 teaspoons salt, and 1 teaspoon pepper. Cook, stirring often, until the onions are translucent and soft, 10 to 12 minutes.
Stir in the potatoes, cauliflower, and stock, cover, and bring to a boil over high heat. Reduce to a strong simmer and cook, stirring here and there, until the potatoes are very soft, 15 to 20 minutes.
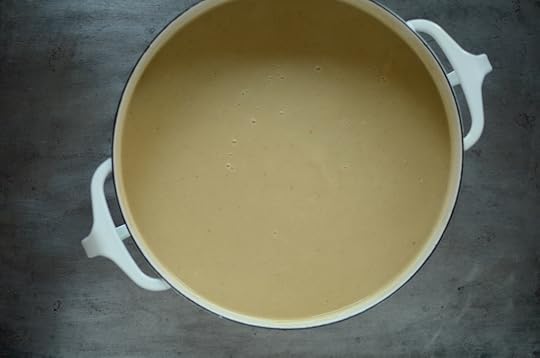
Puree the soup, using a blender in batches or a handheld immersion blender. Taste and season with additional salt and pepper, if you life.
Slice or tear the cooked bacon into bite-size pieces and sprinkle it over the bowls of the soup. Serve topped with sour cream, chives, and cheese.
4.21
http://foodinjars.com/2018/02/loaded-baked-potato-cauliflower-soup-healthyish-oxo/
Related Posts:
Check the recipe index for more tasty preserves!
February 6, 2018
How to Make Crispy Shiitake Mushroom Snacks
Regular Food in Jars contributor Alex Jones drops by to offer a delicious DIY snack – crispy shiitake mushrooms! I wish I had a batch to nibble right now! -Marisa
I consider myself incredibly lucky to work alongside sustainable farmers and food producers here in southeast Pennsylvania. This community has changed my life for the better in more ways than one: it’s given me work, purpose, inspiration, and an education around food and agriculture.
And, of course, there’s the ability to share in the bounty that comes along with running a CSA or working a farmers’ market.
I’ve written about my friends at Primordia Farm before — they’re a first-generation clan of mushroom farmers and foragers, growing beautiful fungi high on Hawk Mountain in Berks County, right near the Appalachian Trail. And with them as my farmers’ market neighbors, I’m lucky to have access to delicious, immaculately grown mushrooms year-round.
While there are a million recipes you can make with the mushrooms they grow — shiitake, maitake (also known as hen of the woods), royal trumpet, lion’s mane — my favorite preparations tend to be the simplest, making the most of the unique textures and flavors that these fascinating organisms bring to the kitchen.
Sure, you can sautée or roast up a batch of just about any mushroom in butter, olive, or coconut oil and it’ll be tasty. But I’m the only mushroom eater in my household — so if I don’t have a specific dish in mind for my fungi, I tend to turn them into one on of my favorite kinds of food: crunchy, crispy, salty snacks.
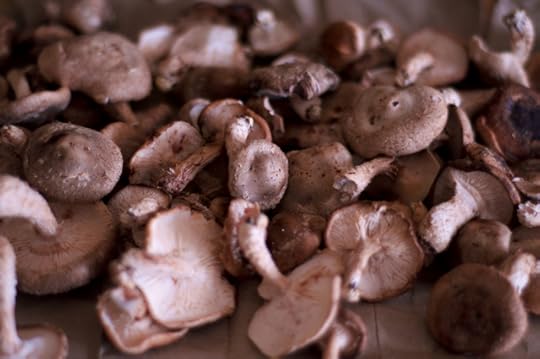
While both maitake and royal trumpet mushrooms can achieve a pleasantly crunchy texture when broken into thin fronds (the former) or sliced into planks or rounds (the latter), my favorite ‘shroom to snack-ify is shiitake. They’re easy to trim, and their round shape is somewhat chip-like — and when roasted with olive oil and a big pinch of sea salt, they’re incredibly delicious.
If you can, start with a batch of shiitakes that are consistently sized — or cut larger caps into halves or quarters before roasting so they cook a little more evenly.
The caps will shrink, too. So if you want shiitake snacks large enough to dollop with herbed fromage blanc or a punchy blue cheese spread (for example) for a little party hors d’oeuvre, choose larger mushrooms. If you want to add some bacon bits-esque umami and crunch to a salad, for example, smaller mushrooms are just fine to use.
First, make sure your mushrooms are clean — brush them off if you must, but don’t wash them or get them wet. (Thanks to their growing methods, Primordia’s mushrooms are never dirty.) Next, trim the stems from your shiitakes. You can do this with a paring knife or (my preference) a pair of kitchen shears. Toss the stems into the bag of veggie scraps in your freezer that you save for stock.
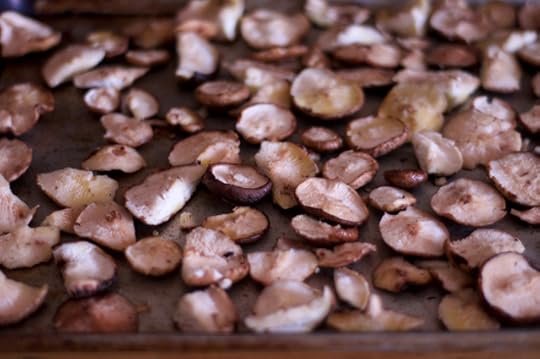
Then put your caps into a large bowl with a few big glugs of olive oil, then quickly toss them around to coat — the mushrooms will absorb that oil right away, so add another glug or two and repeat. Toss with a big pinch of salt, then spread the caps, gill-side-up, onto a baking sheet in a single layer.
Bake them at 400 degrees, checking every 10 minutes or so. Your timing will vary depending on the size of your mushrooms and the temperament of your oven — this batch took about 35 minutes in mine, which tends to run cool. Be sure to rotate the pan each time you check; you can also pull out the pan and flip each cap over with tongs — but to be honest, I usually skip this step.
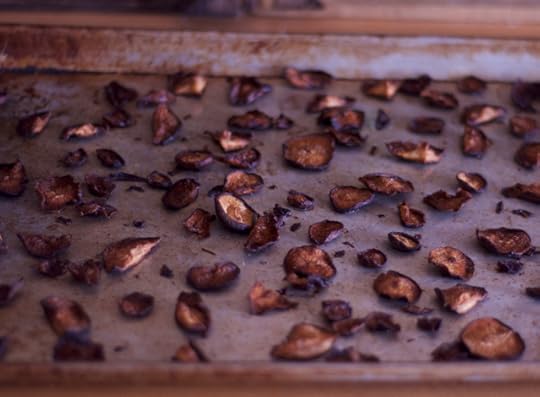
As the mushrooms get closer to doneness, the smaller caps will start to curl and crisp up before the larger ones. The trick is to pull out the pan when the larger pieces are crispy as possible without burning the little guys. (The ones in this photo actually darkened a little more than I would have liked between the time I pulled them out of the oven and took this last shot. They still tasted fine, though.) So be careful not to overdo it.
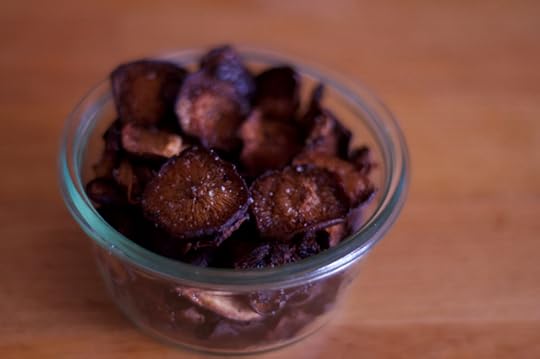
Once your mushrooms are done, you can toss them with just a little more olive oil and any additional spices — like fresh-ground black pepper, smoked paprika, herbs, or toasted sesame seeds, for example — and let them sit until they’re cool enough to handle (the umami aroma in your kitchen will make it hard to wait this long).
I suppose you could store the crisped mushrooms in a sealed jar on your countertop for a day or two, once they’ve cooled completely.
But to be honest, I’ve never gotten that far — in my house, they get devoured in a matter of minutes.
Print
Crispy Shiitake Mushroom Snacks
Ingredients
12 ounces shiitake mushrooms
4-5 tablespoons of olive oil
Kosher salt
Optional: spices or toppings like smoked paprika, black pepper, rubbed thyme, zaatar, or toasted sesame seeds.
Instructions
Preheat oven to 400 degrees F.
Remove any dirt that may be clinging to the caps of your mushrooms, but do not get them wet. Trim off stems and discard or save for veggie stock. Halve or quarter any large caps so that they're more consistent with the majority of the cap sizes.
Toss the caps in a bowl with a few tablespoons of olive oil. After the first mixing, add a few tablespoons more and toss again. Add a big pinch of kosher salt and toss one more time.
Lay out the caps in a single layer, gill side up, on a baking sheet. Try not to let the mushrooms touch.
Bake for 25-40 minutes, checking every 5 minutes starting at the 20 minute mark. Rotate the pan halfway through the baking time; you can also use tongs and flip the caps, gill side down, halfway through cooking. The mushrooms are done when the edges of all the mushrooms are curling in and the smaller ones are crisp.
When done, remove the mushrooms from the oven, cool, and enjoy. Or, before cooling, toss with one last tablespoon of olive oil and optional additional flavors. Eat immediately.
4.21
http://foodinjars.com/2018/02/how-to-make-crispy-shiitake-mushroom-snacks/
Related Posts:
Preserves in Action: Kimchi Noodle Soup
How to Make Fromage Fort
Mastery Challenge: Apple-Quince Fruit Cheese


