
Marisa McClellan's Blog, page 24
June 26, 2018
Honey Cinnamon Pears from Ball® Fresh Preserving Products
This post is sponsored by Ball® Fresh Preserving Products by Newell Brands.

Last month, I teamed up with my friends at Ball®Fresh Preserving Products by Newell Brands to share their recipe for Mixed Berry Jam and the Jammy Baked Oatmeal that I made with it. This month, we’re talking pears.

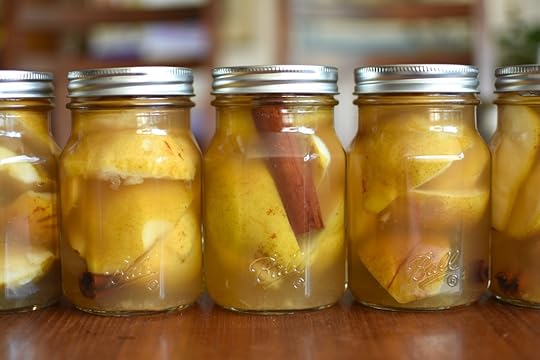
Honey Cinnamon Pears, to be precise. In this recipe, quartered pears are briefly simmered in a syrup made from apple juice and honey before being packed into Ball® Pint Jars with a cinnamon stick, topped with the syrup, and processed in a boiling water bath. It’s a really easy and approachable recipe (no peeling!) that produces perfectly sweet pears kissed with a hint of cinnamon.
To make these pears, start by getting your jars warming in the canning pot (for this project, I used the Ball® Sharing Jars). Fit your canning pot with a rack, place the jars on top and fill both the jars and the pot halfway with water. Bring it to a simmer over low heat and keep it around 180F until you are ready to fill the jars. Wash lids and rings in hot, soapy water and set them aside.
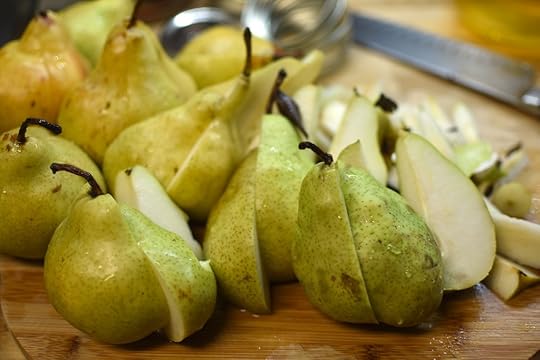
Once your canning gear is all set, you turn your attention to the pears. Wash them well (make sure to remove any stickers!), cut them into quarters, and cut away the cores.

As you work, place the cut pears into a bowl of acidulated water (that’s a fancy word for water spiked with either lemon juice or Fruit Fresh) to prevent the pears from browning.

Once the pears are prepped, make the syrup. Combine water, apple juice, and honey in a large saucepan (you want to use something large enough to eventually hold all the pears.
When the syrup comes to a simmer, add the pears to the pot and let them stay in the syrup just until they’re heated through (too much time in the syrup will lead them to overcook and fall apart, so stay attentive).
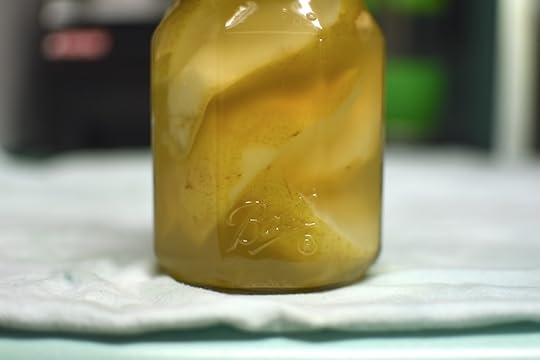
As soon as the pears are warm, it’s time to fill the jars. Remove a single jar from the canning pot and place it on a folded towel or cutting board. Place a cinnamon stick in the bottom of the jar and funnel the warm pear quarters into the jars. Use a chopstick to help settle them into place (I found that I could get 6-7 pear quarters into each jar).
Top the pears with the syrup and remove any trapped air bubbles, taking care to maintain a headspace of 1/2 inch. Wipe the rim of the jar, place a lid on top, secure it with a ring (finger tip tight, please), get that jar in the canner, and repeat with the next jar.
These pears are good to eat with yogurt or cottage cheese. You can warm them and serve them over pancakes or waffles. Or you could turn them into sorbet. Check back tomorrow to learn how to do just that!
Print
Honey Cinnamon Pears from Ball® Fresh Preserving Products
Yield: makes 6-7 pints
Ingredients
6 pounds mixed green and red pears, unpeeled, quartered and cored
3 tablespoons Fruit Fresh or lemon juice
3 cups water
2 cups unsweetened apple juice
1 tablespoon lemon juice
1 cup honey
6 cinnamon sticks
Instructions
Prepare boiling water canner. Heat jars in simmering water until ready to use, do not boil. Wash lids in warm soapy water and set aside with bands.
Combine Fruit Fresh or lemon juice in a bowl with enough water to cover pear quarters; let soak until syrup is simmering.
Combine water, apple juice, 1 tablespoon lemon juice and honey in a 4 quart saucepan set over medium heat. Bring to a simmer.
Add pears to honey syrup and stir gently until heated through.
Place one cinnamon stick into a jar; pack hot pears in jar leaving a ½ inch headspace. Ladle hot syrup over pears, leaving a ½ inch headspace. Remove air bubbles. Wipe jar rim. Center lid on jar and apply band, adjust to fingertip tight. Place jar in boiling water canner. Repeat until all jars are filled.
Process jars 20 minutes, adjusting for altitude. Turn off heat, remove lid, let jars stand 5 minutes. Remove jars and cool 12-24 hours. Check lids for seal, they should not flex when center is pressed.
4.29
http://foodinjars.com/2018/06/honey-cinnamon-pears-from-ball-fresh-preserving-products/
Disclosure: This post is sponsored by Newell Brands as part of a compensated partnership. All thoughts and opinions are entirely my own.
Related Posts:
Mixed Berry Jam from Ball® Fresh Preserving Products
Giveaway: Decorative Lids from Mason Jar Lifestyle
Sponsored Post: Meet McDonald Paper & Restaurant Supplies


June 25, 2018
In Taproot and Edible Philly
My work as a freelance writer for magazines has ebbed and flowed a lot over the years. When I was first starting out in this world, I saw magazines as the pinnacle of success and would move heaven and earth to place pieces in those glossy pages. However, over time I realized that I was giving a lot of best my work to magazines and that in the long run, I’d be better served by sharing those ideas here.
In the last couple of years, I’ve found something of a happy medium and have found a niche occasionally writing about some of my favorite topics for magazines I value and appreciate.
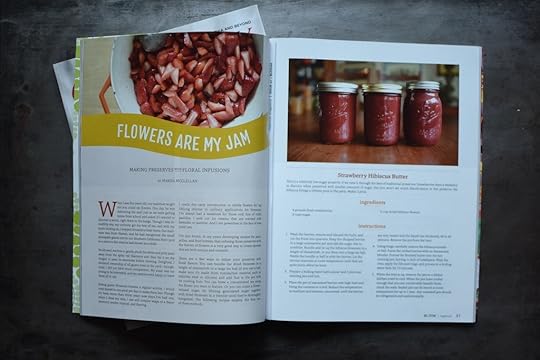
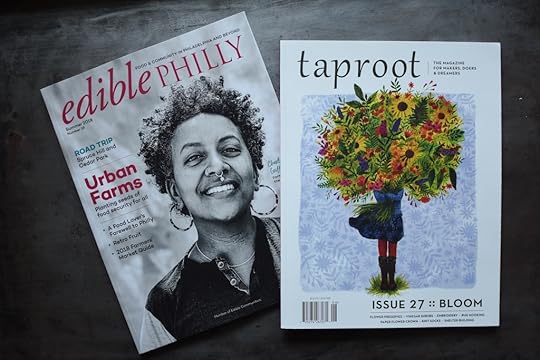
This quarter, I have pieces in two such publications. First up is a piece I wrote for Taproot on the topic of infusing flowers into my homemade preserves (the theme of this issue is Bloom). The recipes included in the piece are for Strawberry Hibiscus Butter, Chamomile Jelly, and Meyer Lemon Lavender Jam.
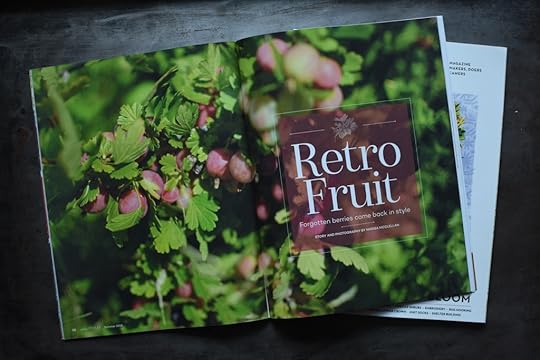
The other story is in the summer issue of Edible Philly and this piece was a year in the making. It’s about the resurgence of currants and gooseberries after years of a US ban. In the Philly area, you can get them from Ben Wenk at Three Springs Fruit Farm and they make excellent jams and jellies.
Go check them out!
Related Posts:
A Gravy Story in the Fall Issue of Edible Philly
Links: Citrus, Taproot Mag, and the Yohann iPad Stand
In Praise of Seconds + Other Good Things
June 20, 2018
Honey Sweetened Strawberry Jam on 100 Days of Real Food
Over the last several years, I’ve become something of an expert on preserving with sweeteners other than refined sugar (I even wrote a whole book on the topic). If you sift through the archives of this site, you’ll find a number of naturally sweetened recipes.
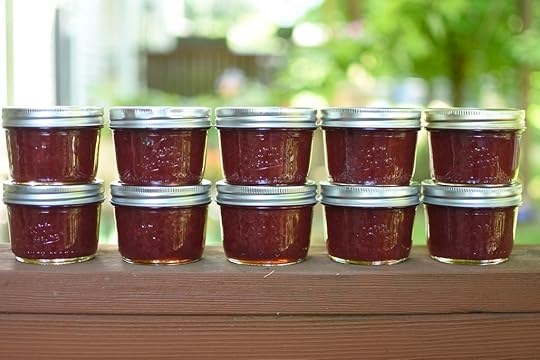
Occasionally, I even get tapped to write about these alternatively sweetened preserves for other sites and publications. One such recent gig was a guest post I wrote for the lovely folks at 100 Days of Real Food about making a big batch of strawberry jam, sweetened with honey.
If that’s the kind of recipe you’re looking for these days, you can find it right here! Enjoy!
Related Posts:
Honey Sweetened Strawberry Vanilla Jam
Guest Post: Honey-Vanilla Bean Quince Preserves from Camille Storch
Guest Post: Fruit Leather from the Mid-winter Pantry
June 18, 2018
Small Batch Spiced Blueberry Jam
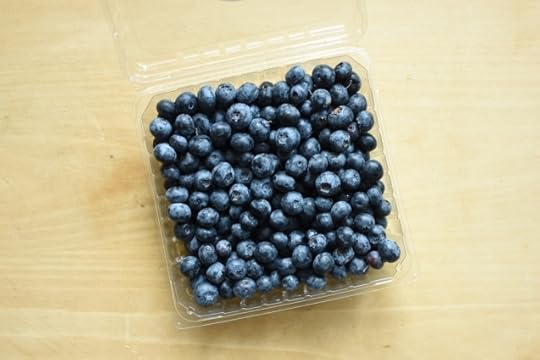
On tonight’s live broadcast over on Facebook (Monday, June 18, 9 pm ET/6 pm PT), I am going to be making a small batch of spiced blueberry jam. This recipe is super speedy, because blueberries need so little prep and because it’s a small batch (it cooks down in less than 15 minutes!).
I will show you how to process the jars so that it’s shelf stable, but you could also scrape the jam into a couple containers, stash them in the fridge, and eat through them over the course of the next couple months. Perfect for folks who want to make their jam right now!
Oh, and don’t forget about Can Together! This month, we’re focusing on berry preserves. If you make something with berries and post it to social media, make sure to use the hashtag #cantogether so that you fellow jammers and picklers can find you. Let’s keep our preserving community strong!
Print
Small Batch Spiced Blueberry Jam
Ingredients
1 1/2 pounds blueberries, rinsed and picked over for any lingering stems
3/4 cup sugar, divided
1 teaspoon cinnamon
1/2 teaspoon nutmeg
1/4 teaspoon cloves
1 tablespoon fresh lemon juice
Instructions
Prepare a small water bath canning pot and three half pint jars.
Pour the clean blueberries in a low, wide, non-reactive skillet. Using a potato masher, work the blueberries until they're mostly crushed. Stir in the sugar.
Place the pan on the stove over high heat and bring the fruit to a boil. Cook, stirring regularly for 8-10 minutes, until the fruit starts to thicken into jam.
Add the cinnamon, nutmeg, and cloves, along lemon juice.
Continue to cook for another 2-3 minutes, until the jam has thickened and you can sculpt it in the pan.
Funnel the jam into the prepared jars. Wipe the rims, apply the lids and rings, and process in a boiling water bath canner for 10 minutes.
When the time is up, remove the jars and set them on a folded kitchen towel to cool. When the jars have cooled enough that you can comfortably handle them, check the seals. Sealed jars can be stored at room temperature for up to a year. Any unsealed jars should be refrigerated and used promptly.
4.29
http://foodinjars.com/2018/06/small-batch-spiced-blueberry-jam/
Related Posts:
Yellow Plum Apricot Jam + Facebook Live
Links: Rhubarb Compote and Homemade Harissa
Where I’m Going, Where I’ve Been – March 2018
June 17, 2018
Links: Rhubarb, Lemon Curd, and Crumbles
It’s been ages since I’ve done one of these link round-ups, but given that I have a nice cache of links set by and a couple things I want to share, I thought it was high time.
First, the shares.
I’m doing a Facebook Livestream on Monday, June 18 at 9 pm ET/6 pm PT. You’ll find me over on the FIJ Facebook, making a small batch of blueberry jam (I’ll post the recipe tomorrow!) and answering questions. Please do tune in.
Speaking of Facebook, did you know that Food in Jars has a community discussion group over there? We do! It’s a place where you can chat with your fellow canners, ask questions, and share recipes. The only requirements are that you stay on topic and that you’re kind to your fellow members. To join, go here.
My classes and events page is currently up-to-date with all my upcoming classes for the summer. If you’ve been wanting to take a class, check it out.
Now, the links.
Rhubarb hard cider jam.
Roasted rhubarb vinaigrette.
Rhubarb and rye crumble.
Microwave lemon curd.
Quick kimchi pancakes.
Sheet pan quiche.
Spring pickles.
Cherry cheesecake cookies.
How to make creamy sunflower seed butter.
May you have a lovely week, full of food, canning, and summer fun!
Related Posts:
Links: Stewed Rhubarb, Wilted Greens Pesto, and Winners
Links: Rhubarb Compote and Homemade Harissa
Links: Quick Pickles, Granola Bars, and Jewish Food
June 15, 2018
Cooking from Just Cook It! with OXO’s One Stop Chop
This blog post was written in partnership with OXO.
I recently had a conversation with a friend about the kitchen tools one should pack when spending a week at a vacation rental. I went through my standard list – a couple sharp knives, a good peeler, a rasp-style zester, a big cutting board, olive oil and vinegar, flaky sea salt (a must for corn on the cob), pre-ground coffee, peanut butter, and homemade jam.
She was on board with everything I listed, but when I got to the end, she turned to me and asked, “What do you think about bringing a food processor?”
I told her that she was nuts. Vacation cooking is about simplicity. Food in the summer is so gorgeous that you don’t have to do much to it to make it amazing. Sadly, she was not entirely convinced (I believe she had things like fresh pesto and pureed homemade salsas in mind).
This post is written in partnership with OXO.
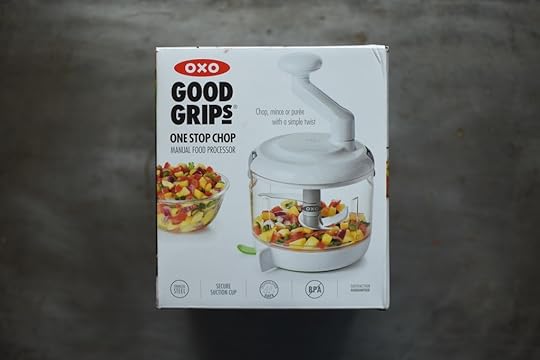
However, had I known about the One Stop Chop from OXO before I had this conversation, I would have heartily suggested that she consider bringing it. It’s the perfect tool those moments when you’ve got a lot of chopping to do, but can’t be bear the idea of pulling out and then washing your full-sized food processor. It’s great for small batches. And because it’s small and light, it travels very, very well.
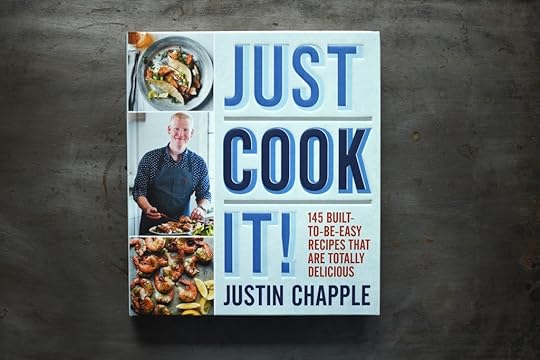
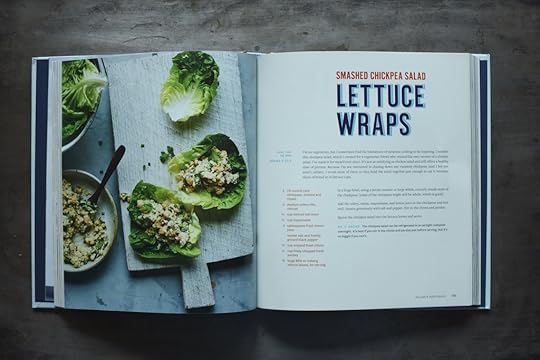
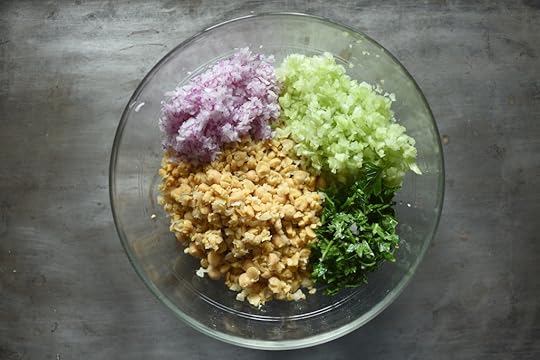
The folks at OXO sent it to me, along with the copy of Just Cook It! (pictured above) by Justin Chapple, asking me to find a recipe in the book to make that would partner well with the One Stop Chop. After a trip through the book (which is a really terrific volume on approachable, tasty home cooking), I settled on the recipe for Smashed Chickpea Salad Lettuce Wraps.
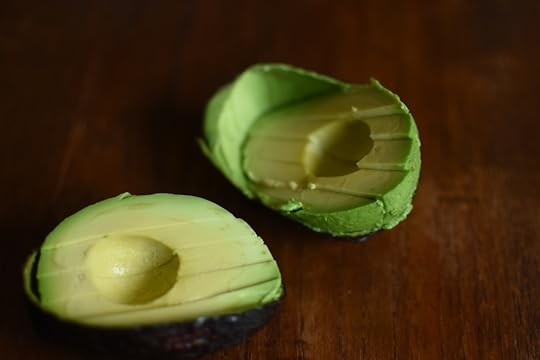
The concept behind this dish is that it’s essentially chicken salad, with smashed chickpeas playing the role of the chicken. As someone who is slowly inching away from animal proteins but loves chicken salad, this recipe spoke to me.
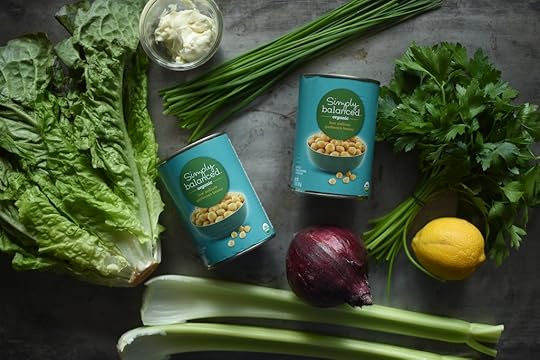
Another thing I liked about it is that it’s a really pantry-friendly recipe. Other than the freshly snipped chives, everything it calls for are staples in my kitchen (and in a pinch, one could always use some dried parsley in place of the fresh).

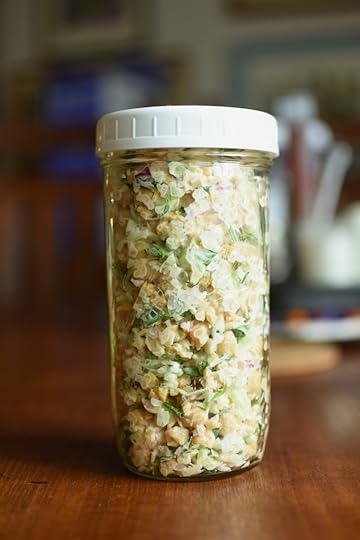
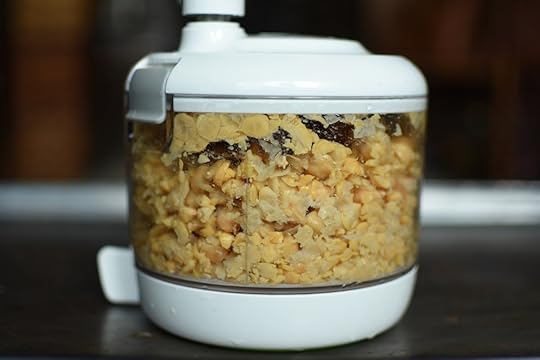
The instructions call for you to rinse the chickpeas, put them in a bowl and mash them with a potato masher. Because I had the One Stop Chop at my disposal, I used it to break them down instead. The container was able to accommodate both cans of chickpeas and broken them down really quickly.
Another thing that I like about the One Stop Chop is that it has a leaver that allows you to suction the bowl in place on your counter. This means that you can apply a goodly amount of force to the handle as you first get the chopping going, without having to work against yourself to keep it in place. It also has a little tab that you lift to quickly break the suction when you need to move the bowl again. It’s a really smart design.

Once all your ingredients are chopped, you stir them together with a relatively small amount of mayonnaise (for those of you who are entirely plant-based eaters, all this recipe needs is a vegan mayo to work for you). Justin recommends that you eat this tucked into lettuce cups, though that felt a little gimmicky to me.
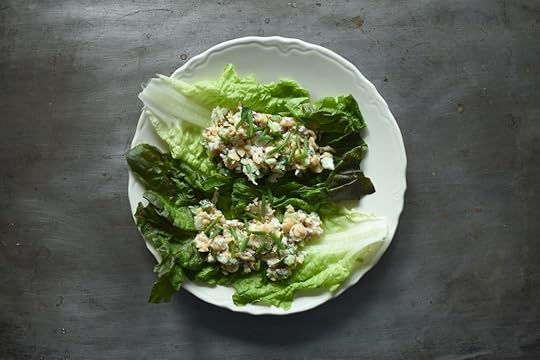
After I took that final picture, I torn the lettuce into bits and turned it into a salad, which felt far more manageable. I ate the chickpea salad for lunch on three consecutive days and enjoyed it each time (chances are good that I’ll make another batch next week).
Print
Smashed Chickpea Salad Lettuce Wraps
Ingredients
2 (15-ounce) cans chickpeas, drained and rinsed
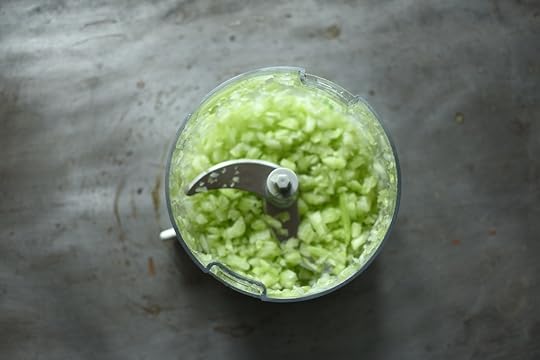
2 medium celery ribs, minced
1/3 cup minced red onion
1/4 cup mayonnaise
3 tablespoons fresh lemon juice
Kosher salt and freshly ground black pepper
1/4 cup snipped fresh chives
1/2 cup finely chopped fresh parsley
12 large Bibb or iceberg lettuce leaves, for serving
Instructions
In a large bowl, using a potato masher or large whisk, coarsely smash most of the chickpeas (some of the chickpeas might still be whole, which is good).
Add the celery, onion, mayonnaise, and lemon juice to the chickpeas and mix well. Season generously with salt and pepper. Stir in the chives and parsley.
Spoon the chickpea salad into the lettuce leaves and serve.
4.29
http://foodinjars.com/2018/06/cooking-from-just-cook-it-with-oxos-one-stop-chop/
Related Posts:
Check the recipe index for more tasty preserves!
June 13, 2018
Homemade Watermelon Juice
Redeem mediocre watermelons by turning them into homemade watermelon juice! All you need is cubed fruit, lemon juice, a sweetener, and a blender!

This is a tale of a mediocre watermelon and its eventual redemption. It all started last week, during a trip to Trader Joe’s. They had a bin of watermelon in the entry way and I was entranced. You see, I am one of the people who can eat endless amounts of watermelon and in the height of summer, I often work my way through a couple sizable melons per week (my husband does not partake. He is strictly a cantaloupe man).
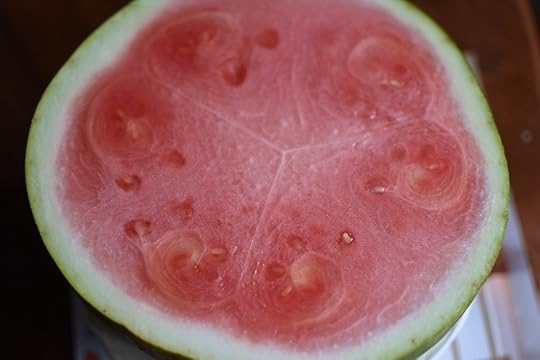
I tapped a few melons and lifted a couple possible candidates into the air, hoping to find a good one using both science (hollow sound) and intuition (feel). Hoping for the best, I finally hefted a gorgeously striped watermelon into my cart. Walking home with one bag on my shoulder and the watermelon cozied up in my favorite mesh sack, I was so looking forward to eating a bowl of melon cubes.
I think you know what comes next. The melon I had so carefully chosen was not a winner. It was pale, mealy, and barely sweet. For a moment, I contemplated bagging it up and taking it back to Trader Joe’s for a refund. But then, I realized there was an answer.
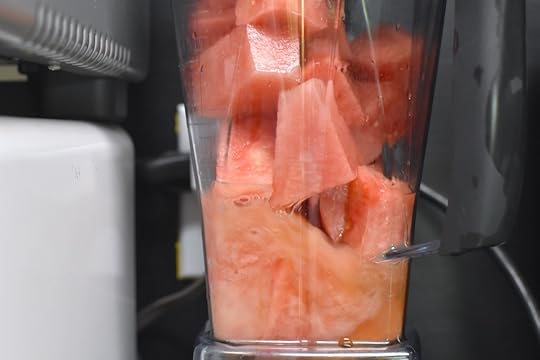
The prior weekend, I had spent some time with a friend who had mentioned how much she liked the watermelon juice sold at a local-to-her taco truck. I cubed the watermelon and threw it in the blender with the juice of a lemon (lime would have also been good) and a tablespoon of agave nectar (I had a bottle that was nearly kicked and I wanted to use it up. Honey or even maple syrup would also be good).
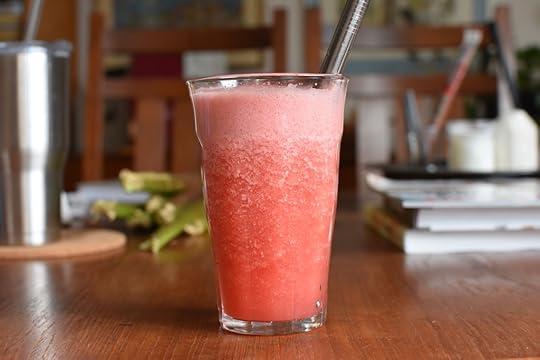
The additional acid and sweetness brought the watermelon into balance and it became a truly delightful drink. It kept in the fridge for about 48 hours. It did separate a bit as it sat, but could be brought back together with a quick shake.
I’m not going to offer a specific recipe because every watermelon will be different (and some won’t want any additional sweetness at all). But if you find yourself in possession of a lackluster melon this summer, instead of bemoaning your fate, turn it into juice!
Related Posts:
Check the recipe index for more tasty preserves!
June 12, 2018
Giveaway: Decorative Lids from Mason Jar Lifestyle
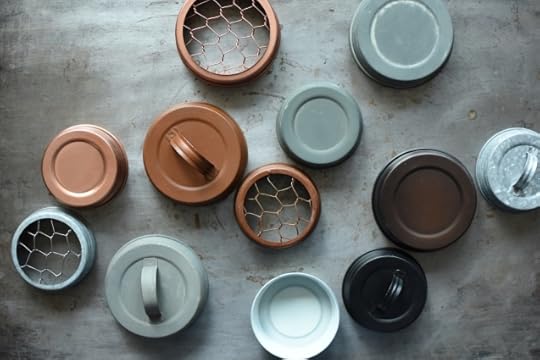
In my household, mason jars are our default vessels. Canning is certainly one of their primary uses, but we also employ them for storing leftovers, corralling LEGO collections, stashing office supplies, arranging flowers, and displaying rocks gathered on vacation. They are truly all-purpose containers.

One issue that I’ve run into in the past when using mason jars for all manner of things is that sometimes, you get weird olfactory cross-contamination when it comes to the lids (ask me what happens when you store Q-Tips under a lid that once protected pickles).

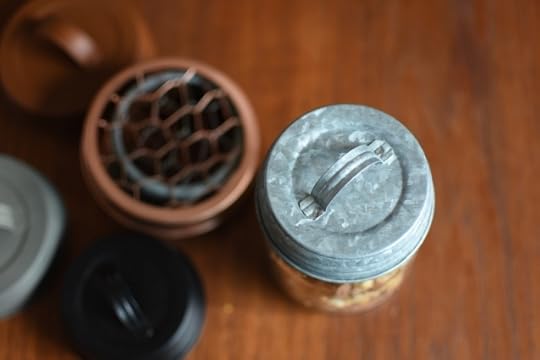
To keep this weirdness at bay, I’ve got a small assortment of decorative lids from Mason Jar Lifestyle that are not designed for food use. This means I keep them expressly for all the other things that I stash in jars, thus keeping the cotton balls free of relish memories and ready to serve another day. They also can fit over the flat lids on most jars, if you want to use them to dress up jars you’re giving as gifts.
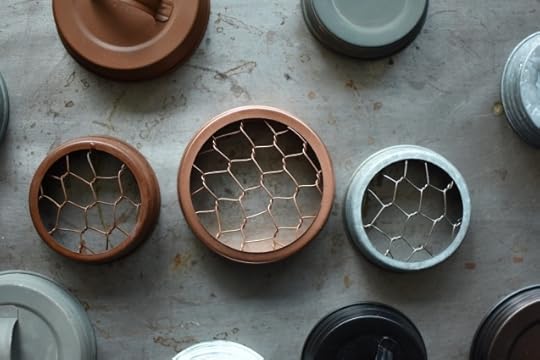
If you find yourself in the market for decorative lids, I highly recommend checking out the assortment that Mason Jar Lifestyle sells. They’ve got everything from lids with vintage styling (galvanized or oil-rubbed), lids with handles (you can tuck a flat canning lid into these if you are desperate to use them in your pantry), flower frogs, and so much more.
This week, I’m giving away two sets of decorative lids (winners get to choose an assortment of eight lids) here on the blog and another set over on Instagram. Make sure to enter in both places to increase your chances of winning!
Disclosure: Mason Jar Lifestyle is a Food in Jars partner and this giveaway is a component of our partnership. Their continued sponsorship helps keep this blog afloat. All thoughts and opinions expressed in this blog post are entirely my own.
Related Posts:
Giveaway: Silicone Sleeves from Mason Jar Lifestyle
Giveaway: Primo Manual Water Pump + Water Coupons
Giveaway: Raw Rutes Yaozu 2 Liter Fermenting Crock
June 10, 2018
Can Together: June is for Berries
Ever since June rolled into town, I’ve been finding myself thinking about last year’s Mastery Challenge. I really loved the feeling of canning along with so many of you throughout 2017 and have been missing that feeling of so many of being part of a canning collective. I’ve also felt sort of sad that I never rounded up that project in a comprehensive way (I was so deep in the book writing process by the end of 2017 that I just couldn’t manage).
And so, I’ve decided to bring it back, albeit in a slightly scaled down format. Here’s the plan. Once a month, we’ll focus on a different category of produce (except in September, where we’re switching to a category of preserve). I will try to do my best to make the topics open enough that they work for everyone, regardless of location (though those of you in the Southern Hemisphere might need to think creatively or use frozen fruit).
I won’t do a comprehensive monthly round-up. Instead, use the tag #cantogether on social media and I’ll do my best to retweet and share. I will occasionally do a post on the site featuring some of the preserves you all have made, but knowing the way I function, I can’t promise it will be precisely at the end of each month.
Here’s what I’m thinking for topics. These might shift and change a little as people give me feedback about what works for them.
June – Berries
July – Stonefruit
August – Tomatoes
September – Pickles, Chow Chow, and Relish (produce selection is maker’s choice)
October – Apples and pears (I recommend chutney!)
November – Cranberries
December – Citrus
Since we’re already so far into this month, I’m not going to give you too much guidance beyond the suggestion that you make something with berries. High sugar, low sugar, naturally sweetened, jam, butter, sauce or whole fruit preserve. The selection is up to you. The goal is to have fun and make the world feel a little smaller by canning together.
Related Posts:
Fermentation for the November Mastery Challenge
Submit your October Mastery Challenge Here!
Dehydrating and Pressure Canning for the October Mastery Challenge
June 6, 2018
Homemade Granola Bars with Nuts and Seeds
Many years ago, I wrote a weekly column for the Food Network’s blog. It was called The Weekender and was designed to feature the kind of project cooking best tackled on a Saturday or Sunday. I cooked a whole bunch of things that were way out of my comfort zone during the three year period I had that gig and I learned a heck of a lot along the way.
I often go back and reference select elements of the dishes I made during that run (the spice rub on this chicken is brilliant and I use it all the time). Another technique that I’ve used and adapted a lot over the years is this one for granola bars.
It comes from an episode of Sunny Anderson’s show, Home Made in America, in which she searched out secrets from home cooks. The thing that sets this granola bar apart from others I’ve made is that it results in a nicely chewy, not-too-sweet, easy to eat snack.
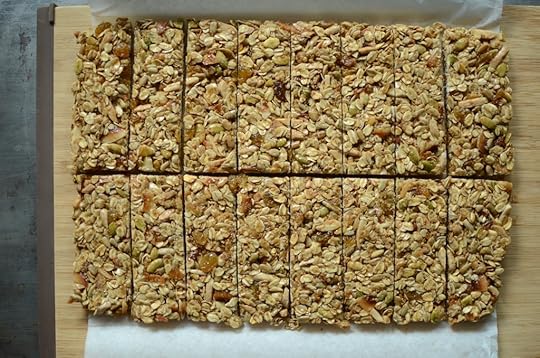
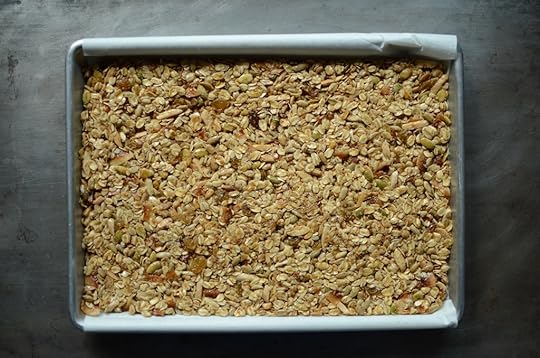
The one thing I do differently from the recipe as written is that I don’t bake the bars. Once I press them into the pan, I just let them cool until they firm up. This makes it a good one for summer, because the time the oven is on is minimal.
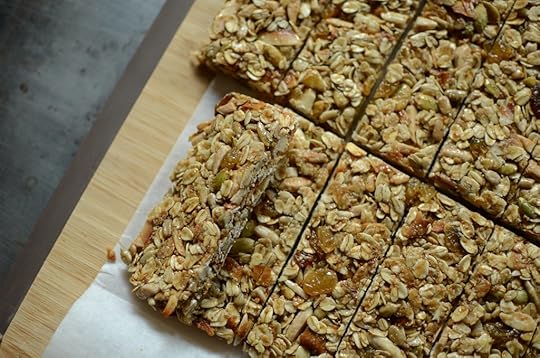
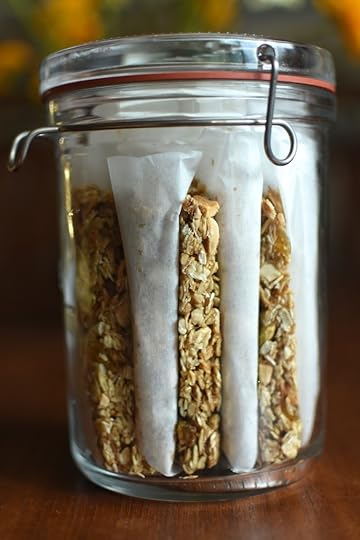
Once the slab is cool, I cut them into bars, wrap them up in pieces of parchment paper (often using the same sheet that I lined the pan with) and then tuck them into a big jar.
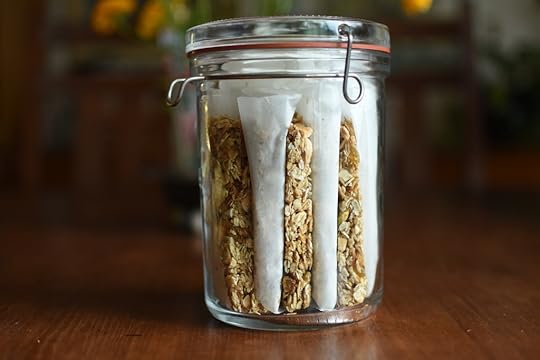
They keep a couple weeks on the counter and even longer in the freezer. Oh, and if you need to avoid nuts because of allergies, omit the almonds, add more sunflower seeds, and proceed as directed.
Print
Homemade Granola Bars with Nuts and Seeds
Ingredients
2 cups/210 g rolled oats
2/3 cup/100 g slivered almonds
1/3 cup/50 g sunflower seeds
1/3 cup/40 g pumpkin seeds
1/3 cup/20 g dried coconut
1/3 cup/50 g flax meal
2/3 cup/225 g honey
2 tablespoons/30 g coconut oil
1/2 teaspoon vanilla extract
1/4 cup/50 g raisins
1/2 teaspoon nutmeg
1/4 teaspoon salt
Instructions
Preheat the oven to 350°F/177°C. Line a quarter sheet pan or 9x13 inch baking pan with parchment paper so that it hangs over the edge of the pan on two sides.
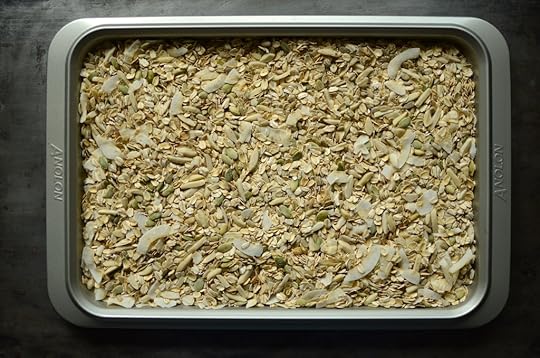
Combine the oats, almonds, sunflower seeds, pumpkin seeds, coconut, and flax meal in a bowl and stir to combine. Transfer the mixture to a large, rimmed baking sheet and toast in the oven for 15 to 20 minutes, until the nuts and seeds smell fragrant.
While the oat mixture toasts, combine the honey, coconut and vanilla in a small saucepan. Bring to a boil and simmer for 10 to 12 minutes, until it turns a dark, copper color (if you like to use a thermometer, you don't want to go beyond 250F).
Put the toasted oats, nuts, and seeds in a large bowl. Add the raisins, nutmeg, and salt and stir to combine. Pour in the honey and oil mixture and stir until everything is evenly coated.
Scrape the batter into the parchment-lined pan and pat it out with the bake of a spatula into an even layer. Let the slab cool to room temperature. Cut into 16 bars. Wrap them in plastic or more parchment paper and store in a zip top plastic bag or a large, glass jar.
They will keep at room temperature for about two weeks. For longer storage, freeze.
4.29
http://foodinjars.com/2018/06/homemade-granola-bars-with-nuts-and-seeds/
Related Posts:
Sponsored Post: Craftsy’s Free Class Creative Ways with Whole Grains


