
Marisa McClellan's Blog, page 23
July 12, 2018
My Jars Didn’t Seal! What Happened?
We’ve all been there. You’re at the end of a canning project, the jars out of the canning pot and are cooling on the counter. As you clean up, you notice that there’s one jar that didn’t seal. Or worse yet, none of the jars have sealed. If this has happened to you, two questions probably popped to mind. Why did this happen and what can I do to fix it. Let’s tackle these one at a time.
Why did this happen?
It could be that your canning pot wasn’t at a full, rolling boil for the entire canning process. Without that full boil, it could be that the jars didn’t fully vent the oxygen in the headspace. Without a thorough venting, there won’t be enough of a pressure differential to cause the vacuum seal to form when the jars come out of the canner.
Another possibility is that there was a physical barrier to the seal forming. In most cases, this happens when you don’t wipe your rims completely, or some food particle gets pushed out of the jar during processing.
Sometimes the lids are to blame. Really old lids sometimes lose the ability to create a full seal. And of course, if you’re reusing lids, the chances that they will provide a high quality seal are very low.
There was a chip or crack in the rim of your jar. This will prevent a seal every time. You can prevent this simply by carefully looking over your jars before filling and canning.
Improper headspace. Under or over filling your jars can sometimes cause the seal to fail.
Occasionally, the rings are the culprit. While it is important to only tighten to fingertip tight to allow the oxygen to vent, if you leave them too lose, that can cause a seal failure.
How to fix it?
The best way to handle jars that failed to seal depends on the product you’re dealing with and how many jars have failed. If you have just one or two jars that failed, the easiest thing to do is to put them in the fridge and eat or share them promptly. The reason for this is that to reprocess jars always results in some loss of product and quality.
When it comes to pickles, trying to reprocess them isn’t ideal, because any additional heat exposure will soften their texture. This is particularly true for cucumber pickles.
When it comes to jams and other sweet preserves, there are more options. If the entire batch has failed to seal, the best method is to open the jars, reheat the jam, prep the jars, use new lids, and reprocess.
If you have just one or two jars that didn’t seal and you don’t want to go with the refrigeration plan, there’s another way. Once the jars have cooled completely, put new lids on the jars (taking care to wipe the rims and make sure that you’re getting the rings tightened properly). Place those room temperature jars in a canning pot of cold water. Bring that pot of water to a boil slowly, so that the contents of the jars heat along with the water. Once it reaches a rolling boil, process as you always do. The jars should seal properly this time around.
Related Posts:
My Jam Didn’t Set! What Should I Do?
Canning 101: Resources for New Canners
Canning 101: How to Make Jam With Frozen Fruit + Apricot Meyer Lemon Jam


July 11, 2018
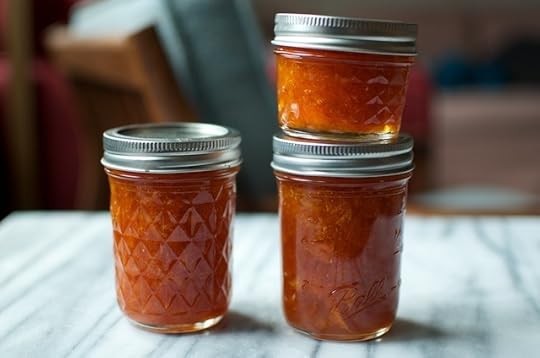
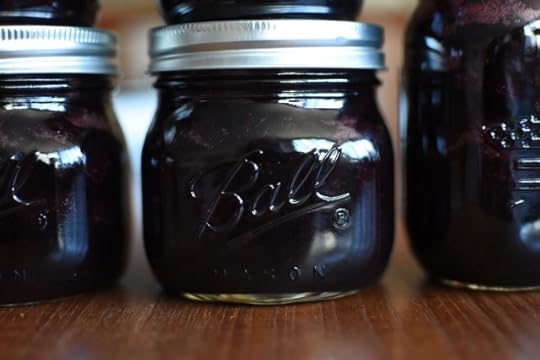
Sweet Cherry Balsamic Jam
Last week was supposed to be cherry week, but with the holiday my posting schedule got a little derailed. Including this one, I still have four cherry recipes to share, so I’m going to get them up as quickly and efficiently as possible so that they can still be useful this season.
I made this Sweet Cherry Balsamic Jam using some of the cherries that the folks from the Northwest Cherry Growers sent as part of their annual Canbassador program (here’s my round-up from last year).
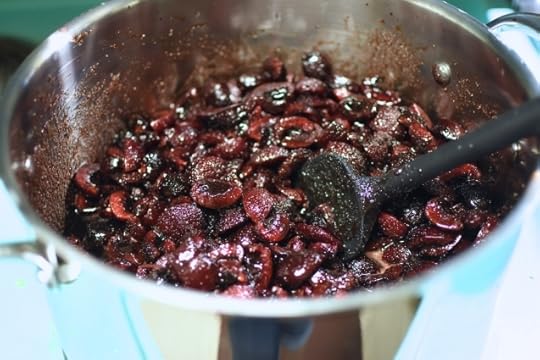
One of the tricky things about making jam from sweet cherries is finding a way to avoid that cloying, cough syrup flavor. This recipe manages it beautifully by using a relatively low amount of sugar and including a full cup of balsamic vinegar. It might seem like a lot at first, but as the jam cooks down, it achieves balance.
Finally, this jam uses Pomona’s Pectin to effect a set. I haven’t tested it with other varieties of low sugar pectin, so can’t speak to their utility here. It won’t set with regular fruit pectin because there’s not enough sugar to create the gel. If you can’t get your hands on Pomona’s, you could make it without additional pectin and treat it like a spoonable fruit preserve rather than a jam.
Print
Sweet Cherry Balsamic Jam
Ingredients
4 pounds cherries, pitted and quartered
3 cups granulated sugar
1 cup balsamic vinegar
1 tablespoon calcium water
1 tablespoon Pomona's Pectin
Instructions
Prepare a boiling water bath canner and enough jars to hold 4 pints.
In a low, wide, non-reactive pot, combine the pitted cherries, 2 1/2 cups sugar, balsamic vinegar, and all the calcium water.
Set pot over high heat and bring to a rolling boil. Reduce heat to medium-high and cook at a vigorous boil for 20 to 25 minutes, until the volume has reduced by at least one-third.
Stir pectin into the remaining sugar and stream it into the cooking jam, using a whisk to stir to help prevent clumps.
Return the contents of the pot to an active boil and cook for an additional 2 minutes and then start looking for signs of thickening (it should be pretty clear as Pomona's pectin sets quickly). Once you see some thickening, remove the pot from the heat.
Funnel the jam into the prepared jars, leaving 1/2 inch headspace. Wipe the rims, apply lids and rings, and process in a boiling water bath canner for 10 minutes.
When the time is up, remove the jars and set them on a folded kitchen towel to cool. When the jars have cooled enough that you can comfortably handle them, check the seals. Sealed jars can be stored at room temperature for up to a year. Any unsealed jars should be refrigerated and used promptly.
4.29
http://foodinjars.com/2018/07/sweet-cherry-balsamic-jam/
Related Posts:
Small Batch Sweet Cherry Lime Jam
Washington State Cherries, Peaches, Nectarines, and Plums
Spiced Plum Jam
July 10, 2018
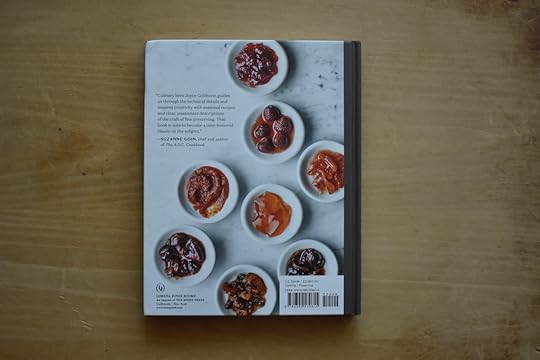
Cookbook: Jam Session
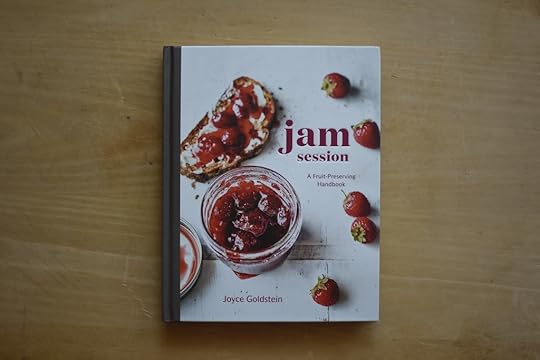
Today, let’s talk about a new preserving cookbook. Called Jam Session (can you believe that no one had yet used this name for a canning book?), it is written by chef, author, and restaurateur Joyce Goldstein. Joyce has been an active preserver for more than fifty years and this book sings with her experience and expertise.
The first thing you notice about this book upon opening it is its beauty. The photography is well-lit, balanced, and does a fantastic job of letting the texture and quality of the produce be the star. The recipes are organized in a way that is usable and readable. And the recipes are appealing, varied, and run a range that includes both classics and inventions that are unique to Joyce.
The book is organized by season and within each quarter of the year, the recipes are then ordered by kind of fruit. I like the organizational structure, but do question the fact specific months have been included as subheads under the seasons. One of the things I’ve learned in my years as a preserving writer is that by the time we see strawberries in Philadelphia, the Florida season has been over for months. Why add something that makes the book feel exclusive rather than inclusive?
That said, there are a huge number of recipes I’ve marked in this book that I am interested in trying (or, at least, borrowing concepts from). In addition the preserves pictured in this post, I want to make the Apricot Ginger Jam (how is it possible that I’ve not combined those two before?), the Raspberry Rose Jam, and the Whole Spiced Figs in Tea Syrup.
Now, for a couple hesitations about this book. Joyce only uses homemade apple pectin when recipes need help setting up. Her reason is that commercial pectins can impart a bitter flavor. I struggle with this reasoning because requiring homemade pectin will surely create an insurmountable stumbling block for a number of home cooks and the recipes included in this book all appear to include ample sugar to combat any potential bitterness.
My other hesitation about this book is in the processing instructions. Current guidelines require that jars are processed at a full, rolling boil. This book instructs the user to process at an active simmer. While this might not seem like much of a difference, I worry that a difference of 10 to 15 degrees could be enough to put some jars at risk of spoilage.
I don’t mean to be overly critical. Truly, there is much to love about this book. It’s gorgeous, the recipes are appealing, and it makes me itch to hop up and head for the kitchen. Perhaps it will find a place on your shelf!
Disclosure: I received my copy of Jam Session as a free review unit from the publisher. No payment was provided for this post and all opinions expressed her are entirely my own.
Related Posts:
Cookbooks: Pretty Simple Cooking
Cookbooks: Southern From Scratch
Cookbooks: Bring It!
July 9, 2018
Giveaway: OXO Jam Making Essentials
Are you on the search for equipment to elevate your jam making game? Look no further than these tools from OXO and enter the giveaway for a chance to win a set!
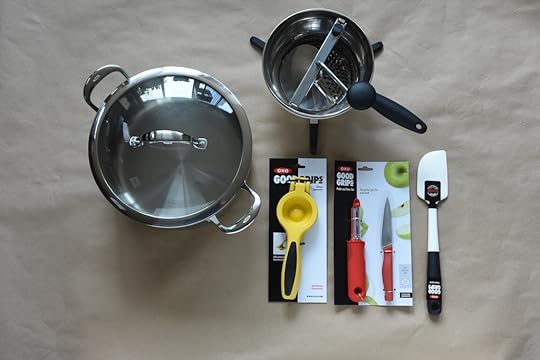
I often think of July as the pinnacle of the jam making season. It is the moment when berries, peaches, currants, cherries, plums, and even early apples are all competing for space at markets and in our kitchens. I find that the secret to being able to make the most of the abundance is to be prepared with sturdy, durable equipment. To that end, I’ve teamed up with my friends at OXO to show you some gear that can help make your jam making efforts a little easier.
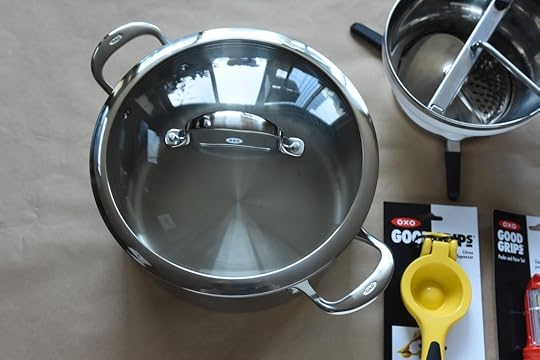
Most critical is a good pot to cook your jam. Some people like using copper preserving pans while others prefer enameled cast iron. While those are both good, my preference is always a low, wide, stainless steel pan that can hold about 8 quarts. Stainless steel is a non-reactive metal, so it will never impart a metallic flavor into your preserves (copper is reactive and can leave your jam tasting tinny if you don’t use enough sugar).
Stainless steel is also the most forgiving surface. If you burn your jam in an enameled cast iron pot, you might be able to soak and scrub the burned spot off, but the finish will never be the same. When you burn in stainless steel, elbow grease and steel wool will eventually make you whole again.
Right now, the jam pan in constant rotation in my kitchen is the OXO Good Grips Stainless Steel Pro 8 Quart Covered Casserole (OXO | Amazon). It is similar is size, shape, volume, and performance to my favorite All-Clad jam pan, but at a third of the price. I often briefly simmer small stone fruit and let them cool before pitting to make the process easier, and the glass lid makes it easy to see when to turn off the heat. It’s also got volume markers up the side of the interior, which helps you have an idea of what your yield is going to be. All in all, it’s an excellent pan.
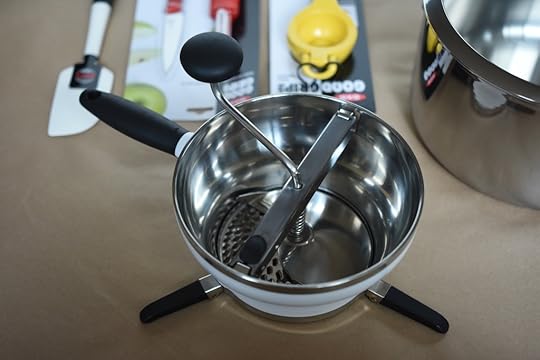
Another tool I turn to all summer (and fall!) long is the OXO Good Grips Food Mill (OXO | Amazon). It can strain out the seeds from berry and grape pulp, separates tomato skins from the meat, and does a masterful job of making applesauce that is smooth but not entirely without texture. I went through several food mills before this one found its way into my kitchen, and if it broke, I would replace it with an identical model.
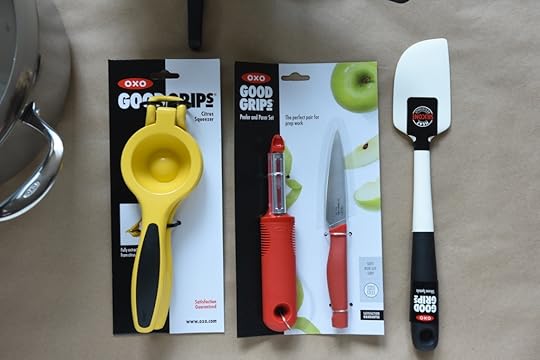
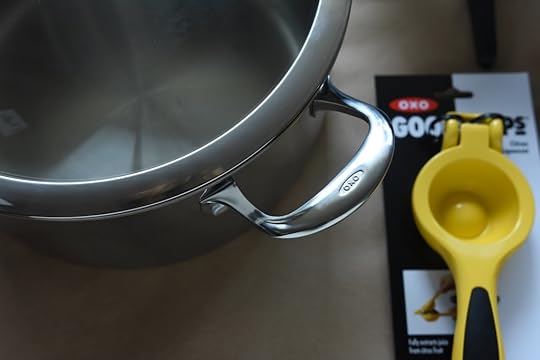
Finally, the hand tools. I would be lost without a sharp paring knife (OXO | Amazon), a good peeler (OXO | Amazon), a heat-proof spatula (OXO | Amazon), and a citrus squeezer (OXO | Amazon). I particularly like having these tools in bright colors because that helps them stand out from the peels and stem ends (I can’t be the only person who’s ever accidentally thrown away a peeler because it blended into the scraps too well).
Thanks to the good folks at OXO, I have a second set of jam making gear to give away to one lucky Food in Jars reader. Please use the widget below to enter.
Disclosure: OXO has provided the equipment you see pictured here, along with the second giveaway set, at no cost to me. No additional funds were exchanged and all opinions are entirely my own.
Related Posts:
Giveaway: An OXO Berry Pack
Giveaway: Decorative Lids from Mason Jar Lifestyle
Giveaway: Printable Jar Labels from Worldlabel
July 5, 2018
July Sponsors: Fillmore Container, EcoJarz, McDonald Paper, and Mason Jar Lifestyle
Happy July, dear readers! It’s the start of the month and that means that it’s time to thank the businesses that help make this site possible. Please do show them that you appreciate their support with your time and attention!
Lancaster, PA-based and family-owned Fillmore Container are first! They sell all manner of canning jars, lids, and other preservation gear. They’ve got so much going on for summer, including a fermentation class on July 21, new iLid colors, and a big sale on Mrs. Wages mixes. You can also find just about every Ball jar currently available over on their website, so if you’re looking for a particular style, check them out.
Our friends over at EcoJarz are another stalwart sponsor. They make an array of products designed to fit on top of mason jars, including cheese graters, coffee brewers, and stainless steel storage lids. I’m a huge fan of their smoothie lover’s gift set for frosty summer shakes and smoothies!
Back for another month is McDonald Paper & Restaurant Supply. Based in Brooklyn, they are open to the public and sell all manner of culinary supplies. Restaurant supply stores are a great way to get affordable, durable kitchen gear (including jars!). I’m a big of their big food storage containers for macerating fruit for jam.
Mason Jar Lifestyle is a one-stop shopping site for all the jar lovers out there. They sell all manner of mason jar accessories and adaptors. If you’re in the market for lids, straws, sprouting lids, fermentation weights, airlocks, tea light converters, cozies, they are there for you.
And if your company, shop, or family business is interested in reaching the food-loving and engaged Food in Jars audience, you can find more details here. Leave a comment on this post or drop me a note to learn more!
Related Posts:
June Sponsors: Fillmore Container, EcoJarz, McDonald Paper, Mason Jar Lifestyle, and CanningCrafts
May Sponsors: Cuppow, Fillmore Container, EcoJarz, McDonald Paper, Mason Jar Lifestyle, and CanningCrafts
July Sponsors: Cuppow, Fillmore Container, EcoJarz, Mason Jar Lifestyle, CanningCrafts, and Mrs. Wages
July 4, 2018
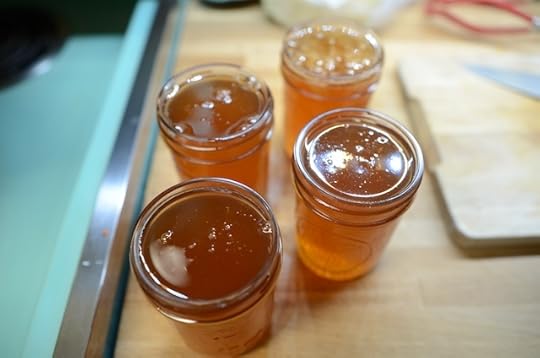
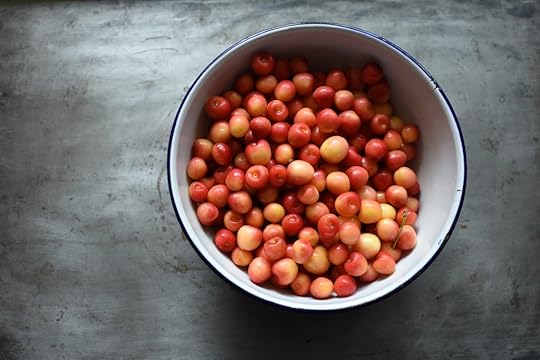
Rainier Cherry Almond Preserves
I don’t often can with Rainier cherries because they are fragile and expensive (and truly, I love eating them without any embellishments). However, I managed to get out to Rowand’s Farm in New Jersey this year while there were still some in the trees and picked enough that I felt okay about surrendering a few pounds to the canning pot.
The preservation technique for these cherries is similar to the one I use for the bourbon sour cherries I posted yesterday. The cherries are pitted and macerated with sugar. Once they’re juicy, you scrape them into a pot, add the lemon juice, and bring them to a boil.
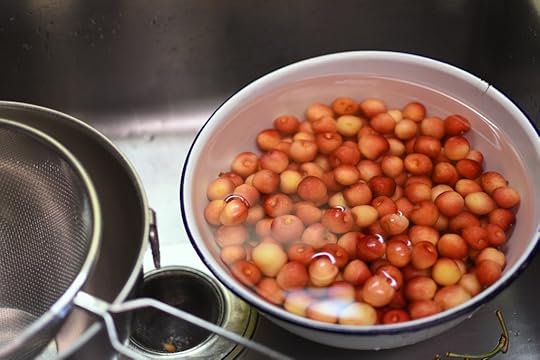
They cook for just five or six minutes. This is long enough for the cherries to soften a bit, release the bulk of their internal air (so that they don’t float), and for the syrup to thicken a little. Once you determine that the cooking process has gone as long as is necessary, you add the almond extract so that the flavor doesn’t have time to evaporate (to make these even more closer to the sour cherries, you could use amaretto in place the extract).
Then they are ladled into jars, lidded, and processed in a boiling water bath canner. These are a treat spooned into oatmeal in the wintertime or portioned out over slices of poundcake.
Print
Rainier Cherry Almond Preserves
Ingredients
2 1/2 pounds Rainier cherries, pitted
2 cups sugar
1/4 cup lemon juice
1 1/2 teaspoons almond extract
Instructions
Prepare a boiling water bath canner and enough jars to hold five half pints (the yield will be somewhere between 4 and 5 half pints).
Place the pitted cherries in a pan that holds at least five quarts (these cherries will foam a lot) and add the sugar and lemon juice. Stir to help the sugar dissolve.
Once the contents of the pan look juicy, place it on the stove over high heat.
Bring the cherries and their liquid to a boil and let them cook at a good clip for 5 to 6 minutes, until cherries soften a little and the liquid in the pan as thickened a bit. Add the almond extract.
Remove pan from heat, funnel cherries and syrup into prepared jars, leaving 1/2 inch headspace. Use a wooden chopstick to remove any trapped air bubbles and adjust the headspace as is necessary. Wipe the rims, apply the lids and rings, and process in a boiling water bath for 10 minutes.
When the time is up, remove the jars and set them on a folded kitchen towel to cool. When the jars have cooled enough that you can comfortably handle them, check the seals. Sealed jars can be stored at room temperature for up to a year. Any unsealed jars should be refrigerated and used promptly.
4.29
http://foodinjars.com/2018/07/rainier-cherry-almond-preserves/
Related Posts:
Sour Cherry Preserves with Bourbon
Small Batch Sweet Cherry Lime Jam
Links: Goosecherry Jam, Pickled Corn, and Cherry Week
July 3, 2018
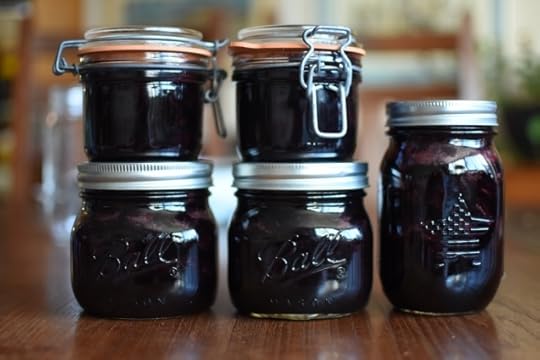
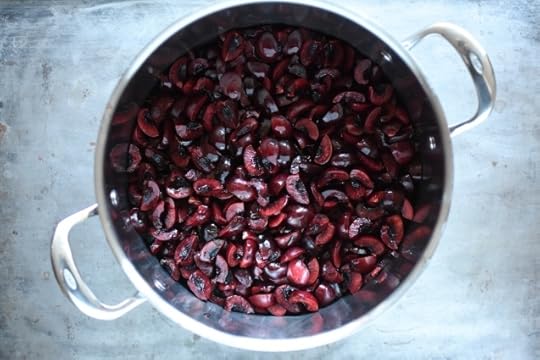
Sour Cherry Preserves with Bourbon
It’s day two of cherry week and today, I’m sharing one of my favorite recipes from my second cookbook, Preserving by the Pint. For this one, you simmer sour cherries together with sugar, lemon juice, and bourbon together for five or six minutes, until the liquid thickens a little and the cherries are just soft. The alcohol cooks off as the syrup boils, so there’s no lingering booziness, just a little extra richness that helps balance the flavor of the tart cherries.
This exact recipe doesn’t work well with sweet cherries, but one could add a splash of bourbon to this approach, to approximate the flavor.
Make sure to check back tomorrow for another recipe featuring cherries!
Print
Bourbon Sour Cherry Preserves
Yield: makes 2 to 3 half pints
Ingredients
1 1/2 pounds sour cherries, pitted
1 1/2 cups sugar
2 tablespoons lemon juice
2 tablespoons bourbon
Instructions
Prepare a boiling water bath canner and 3 half pint jars.
Place the pitted cherries in a pan that holds at least five quarts (these cherries will foam a lot) and add the sugar, lemon juice, and bourbon. Stir to help the sugar dissolve.
Once the contents of the pan look juicy, place it on the stove over high heat.
Bring the cherries and their liquid to a boil and let them cook at a good clip for 5 to 6 minutes, until cherries soften a little and the liquid in the pan as thickened a bit.
Remove pan from heat, funnel cherries and syrup into prepared jars, leaving 1/2 inch headspace. Use a wooden chopstick to remove any trapped air bubbles and adjust the headspace as is necessary. Wipe the rims, apply the lids and rings, and process in a boiling water bath for 10 minutes.
When the time is up, remove the jars and set them on a folded kitchen towel to cool. When the jars have cooled enough that you can comfortably handle them, check the seals. Sealed jars can be stored at room temperature for up to a year. Any unsealed jars should be refrigerated and used promptly.
4.29
http://foodinjars.com/2018/07/sour-cherry-preserves-with-bourbon/
Related Posts:
Small Batch Spiced Blueberry Jam
Giveaway: Raw Rutes Yaozu 2 Liter Fermenting Crock
Peach Jam with Brown Sugar and Bourbon
July 2, 2018
Small Batch Sweet Cherry Lime Jam
To kick off Cherry Week, I’m sharing my small batch recipe for Cherry Lime Jam. This is the recipe I demonstrated last week during my livestream with Jenny from The Domestic Wildflower. This little batch cooks up in 15 minutes and yields two half pints with a little leftover for immediate eating. The flavor of the limes helps balance the intensity of the cherries and makes for a very tasty PB&J.
You can get the recipe and watch the livestream after the jump!
Print
Small Batch Sweet Cherry Lime Jam
Ingredients
1 1/2 pounds sweet cherries, pitted
1 1/2 cups granulated sugar
zest from 1 lime
juice from 2 limes
Instructions
Prepare a boiling water bath canner and two half pint jars.
Combine the cherries and sugarin a low, wide, non-reactive pan.
Bring to a boil over high heat and then reduce the heat to medium. Simmer, stirring regularly and occasionally mashing with a potato masher until thick (12-18 minutes, depending on the height of the heat and the width of your pan). Towards the end of cooking, add the lime zest and juice.
Funnel into the prepared jars. Wipe the rims, apply the lids and rings, and process in a boiling water bath canner for 10 minutes.
When the time is up, remove the jars and set them on a folded kitchen towel to cool. When the jars have cooled enough that you can comfortably handle them, check the seals. Sealed jars can be stored at room temperature for up to a year. Any unsealed jars should be refrigerated and used promptly.
4.29
http://foodinjars.com/2018/07/small-batch-sweet-cherry-lime-jam/
Related Posts:
Check the recipe index for more tasty preserves!
July 1, 2018
Links: Goosecherry Jam, Pickled Corn, and Cherry Week
Happy Sunday, friends! Just a quick reminder that tomorrow night is Food in Jars TV night over on Facebook. I’ll be demonstrating how to make the Bourbon Sour Cherries from my second book, Preserving by the Pint at 8 pm ET/6 pm PT. These cherries come together quickly and are perfect for cocktails, serving with stinky cheeses, or eating directly from the jar with a spoon.
Now, links.
Goosecherry jam
Apple pie jam
Cocktail cherries
Cherry chutney
Pickled corn
Swedish quick pickles
Pickled green tomatoes
Southern chow-chow
Any green pesto
Pickled beef tacos
Blackberry jam cake
Blueberry buckle
Savory tomato poundcake
And look! I’m in the Portland Curbsider, the trash and recycling newsletter for the city. I keep wondering if my childhood teachers have seen this and recognized me.
This week on the blog, look for a nonstop celebration of cherries. I’m going to be posting a new recipe every day, featuring sweet cherries, sour cherries, and Rainier cherries (by the time the week is over, I will have processed through nearly 25 pounds). While you await all these new recipes, here are some of my favorite cherry recipes from the archives.
Sweet Cherry Meyer Lemon Marmalade
Sweet Cherry Ketchup
Spiced Cherry Preserves
Sweet Cherry Barbecue Sauce
Sweet Cherry Rhubarb Jam
Cherry Kompot
Sweet Cherry Chutney
Pickled Sweet Cherries
Low Sugar Sour Cherry Jam
Spiced Cherry Preserves
Apricot and Sweet Cherry Compote
Sweet Cherry and Peach Preserves
Related Posts:
Links: Rhubarb Compote and Homemade Harissa
Links: Pickled Strawberries, Green Onion Kimchi, and Winners
Small Batch Spiced Blueberry Jam
June 27, 2018
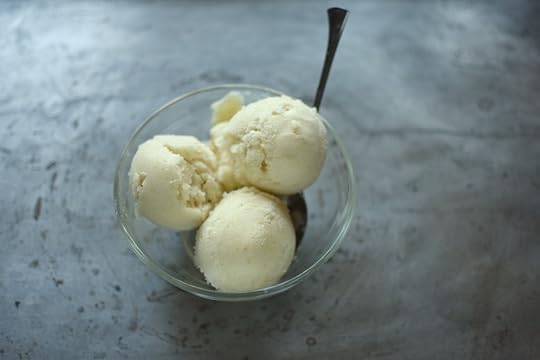
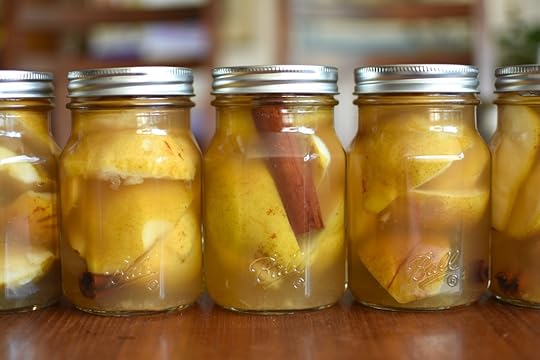
Honey Cinnamon Pear Sorbet
This post is sponsored by Ball® Fresh Preserving Products by Newell Brands.
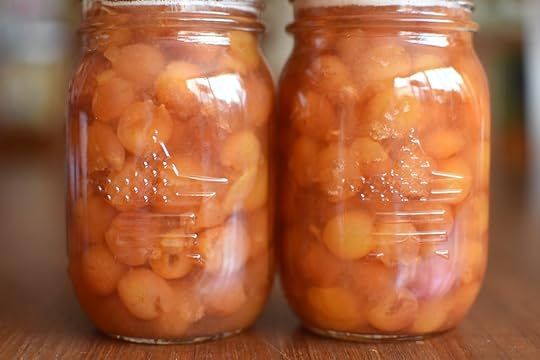
Yesterday, I showed you how to make Honey Cinnamon Pears. A building block of the homemade pantry, these pears are great at breakfast (in oatmeal! over pancakes!), lunch (with yogurt! in a smoothie!), or dinner (sliced over salad! as dessert!).
In addition to being something that you can serve straight from the jar, home canned pears can also be a really useful ingredient in other dishes and recipes. I often puree them and use them in baked goods (the same way you would use applesauce) and I love to turn them into homemade sorbet.
With the arrival of the hot weather, I’ve got my ice cream maker out for the season and have been turning any fruit I can get my hands on into heat-beating desserts. Because the primary ingredient in this sorbet is just fruit, the finished product is a great way to satisfy your sweet tooth without overdoing it. Sorbet is also a really thoughtful treat to make for dinner guests who can’t eat dairy.
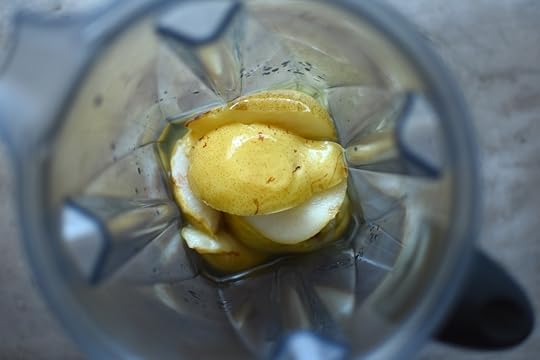
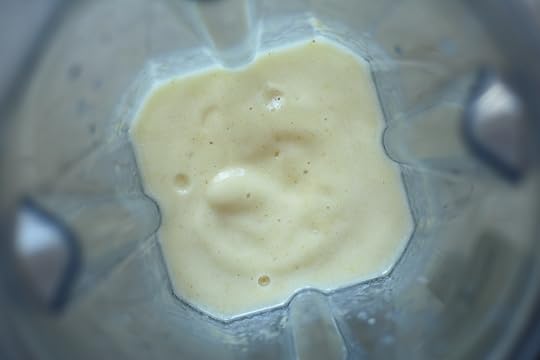
You start with one quart or two pints of canned fruit. In this case, I canned my pears in Ball® Sharing Jars. and so I opened up two jars (you should have approximately three cups of fruit and one cup of canning liquid). The contents of these jars goes into the blender with 1/4 cup of sugar and a couple tablespoons of lemon juice and you puree it until really smooth (really work them so that the skin gets fully pureed).
Then taste the puree to ensure that the flavors are well balanced. Add more lemon if you find that the flavor is a little flat. If you can’t taste the cinnamon as much as you’d like, add a pinch of ground. Remember also that the puree should be a little sweeter than you’d like if you were eating it at room temperature. Freezing mutes the sweetness and if you want it to taste satisfyingly sweet once frozen, the base needs to be a little extra.
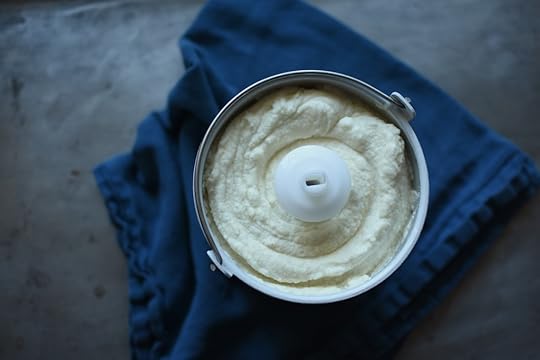
Chill the sorbet base until it is quite cold. Once it is well-chilled, you pour it into an ice cream maker and freeze it until firm. If you don’t have an ice cream maker, you can also pour it into a loaf pan and freeze it granita-style, scraping it with a fork several times during the freezing process to help aerate and break up the mixture.
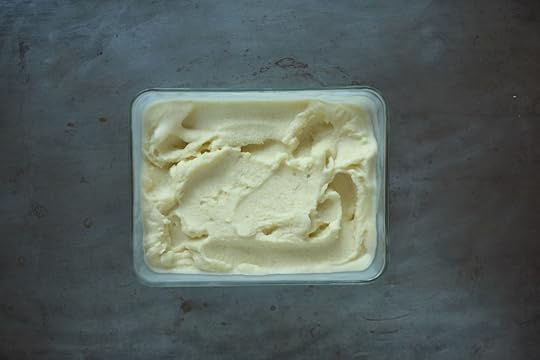
The end result is a frozen dessert that is surprisingly creamy for something that doesn’t contain any dairy. It has pleasingly mild flavor that is really refreshing and cooling. I hope you try it!
Print
Honey Cinnamon Pear Sorbet
Yield: makes about 5 cups
Ingredients
2 pints (about three cups fruit and one cup syrup) Honey Cinnamon Pears
1/4 cup granulated sugar
2 tablespoons fresh lemon juice
Instructions
Pour the pears and their liquid into a blender container. Add the sugar and lemon juice. Puree to combine.
Pour the pear puree into a container and refrigerate until cold, about 45°F. Freeze as instructed by your ice cream maker. When the sorbet is sufficiently frozen, transfer it to an airtight container, cover tightly and freeze. It will keep for at least a week in the freezer.
4.29
http://foodinjars.com/2018/06/honey-cinnamon-pear-sorbet/
Disclosure: This post is sponsored by Newell Brands as part of a compensated partnership. All thoughts and opinions are entirely my own.
Related Posts:
Honey Cinnamon Pears from Ball® Fresh Preserving Products
Mixed Berry Jam from Ball® Fresh Preserving Products
Giveaway: Decorative Lids from Mason Jar Lifestyle


