
Marisa McClellan's Blog, page 20
September 4, 2018
Whole Grain Baking in Taproot Grain
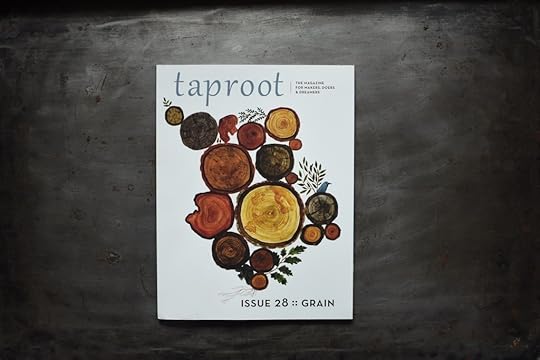
Over the last few years, I’ve become a semi-regular contributor to Taproot Magazine, which makes me quite happy. In this most recent issue, I have a trio of whole grain recipes that I think you all might really enjoy.
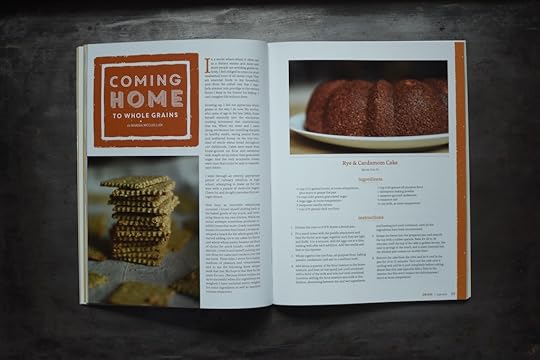
There’s a nubbly rye cake generously flavored with cardamom, a sturdy stack of oatmeal crackers, and a whole wheat shortcake that I made with strawberries but could easily be made with preserved fruit all winter long.
If this speaks to you, consider getting yourself a subscription to the magazine! It makes for a lovely mailbox treat!
Related Posts:
Check the recipe index for more tasty preserves!


Fermented Hot Sauce Livestream Tonight!
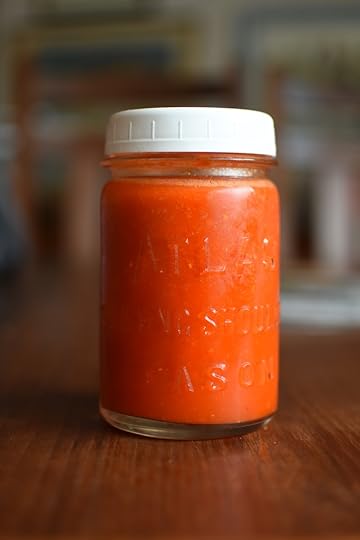
My first September livestream is tonight at 9 pm eastern, 6 pm pacific. Because there were so many comments and questions on this Instagram post, I’m going to spend my time tonight showing you how to start this easy fermented hot sauce. I’ll answer questions, talk about how to troubleshoot the fermentation process, and what to do with this tasty preserve when it’s all done.
For those of you who want a recipe to work from, I will use a similar technique as is detailed in this blog post.
Watch live here!
Related Posts:
Links: Goosecherry Jam, Pickled Corn, and Cherry Week
Small Batch Spiced Blueberry Jam
Links: Rhubarb Compote and Homemade Harissa
September 3, 2018
Whole Grain Baking in Taproot Grain

Over the last few years, I’ve become a semi-regular contributor to Taproot Magazine, which makes me quite happy. In this most recent issue, I have a trio of whole grain recipes that I think you all might really enjoy.

There’s a nubbly rye cake generously flavored with cardamom, a sturdy stack of oatmeal crackers, and a whole wheat shortcake that I made with strawberries but could easily be made with preserved fruit all winter long.
If this speaks to you, consider getting yourself a subscription to the magazine! It makes for a lovely mailbox treat!
Related Posts:
Check the recipe index for more tasty preserves!
Fermented Hot Sauce Livestream Tonight!

For this first livestream of September I demonstrated how to make two variations of fermented hot sauces. This topic was motivated because there were so many comments and questions on this Instagram post.
For those of you who want a recipe to work from, I used a similar technique as is detailed in this blog post. To watch the livestream, scroll down to the bottom of this post. It’s hidden after the jump.

If you’re looking for more information about fermentation (and more specifically, fermenting spicy things), these books will help you out.
Ferment Your Vegetables by Amanda Feifer – A terrific book written by a fellow Philadelphian that features lots of small batch ferments and creative flavor combinations.
Preservation Pantry by Sarah Marshall – Sarah is the fermentation mastermind behind the company Haute Sauce. Her book contains a world of tasty things, including some of her most delicious spicy concoctions.
Fiery Ferments by Kirsten K. Shockey and Christopher Shockey – The best and most comprehensive book available on fermenting spicy things. If this is your favorite category, this book should be on your shelf.
Fermented Vegetables also by Kirsten K. Shockey and Christopher Shockey – For more basic ferments, organized by vegetable, this book is invaluable.
Related Posts:
Check the recipe index for more tasty preserves!
August 30, 2018
Peach Mustard
It’s day four of Peach Week 2018! Monday, I shared a tiny batch of Peach Cardamom Jam. Tuesday was all about the Peach Walnut Conserve! On Wednesday, we moved on to Peach Chutney with Toasted Whole Spices. Today is Peach Mustard day.

Homemade mustards are great. Easy to make and super delicious, they are a fun way to bring a little extra magic to your next sandwich. The primary trick I’ve learned over the years of making mustards is that they taste better when you grind or crush the seeds rather than blitzing them in a blender or food processor. It’s more work, but the flavor payoff is really great. The best way to do it is to double up some resealable food storage bags and then bash them with a rolling pin or sturdy bottle.
This blog post was written in partnership with the good people at the Washington State Stone Fruit Growers as part of my role as official Canbassador. They sent me 18 pounds of peaches and asked me to preserve them. I’ll be posting peach recipes all week long, so check back tomorrow for the next installment. For more about Washington State Fruit, follow them on social media!
Facebook | Instagram | Twitter | Pinterest

Print
Peach Mustard
Yield: makes 3 to 4 half pints
Ingredients
2 large yellow peaches, pitted and peeled
1/4 cup yellow mustard seeds
1/4 cup brown mustard seeds
1 cup granulated sugar
1/2 cup freshly squeezed lemon juice
1/2 cup apple cider vinegar
1 tablespoon kosher salt
Instructions
Take the peeled peaches and place them a blender or a container into which an immersion blender can fit. Puree the peaches smooth and measure out two cups of puree.
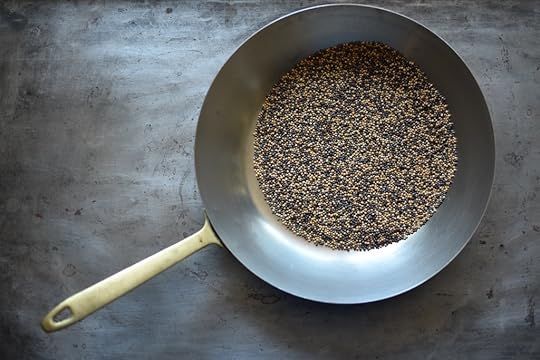
Put the mustard seeds in a dry skillet and toast them for 1 to 2 minutes, just until they start to pop. Transfer them to a plate to cool. Once they're cool, put them in nested resealable bags. Close the bags tightly and crush the seeds using a rolling pin or heavy-based bottle.
Pour the peach puree into a small saucepan and add the crushed mustard seeds, sugar, lemon juice, vinegar, and salt and stir to combine.
Cook, stirring constantly for 5 to 7 minutes, until the mustard begins to thicken.
To can, funnel mustard into hot jars, leaving 1/2 inch headspace. Wipe the rims, apply lids and rings, and process in a boiling water bath canner for 15 minutes.
When the time is up, remove the jars and set them on a folded kitchen towel to cool. When the jars have cooled enough that you can comfortably handle them, check the seals. Sealed jars can be stored at room temperature for up to a year. Any unsealed jars should be refrigerated and used promptly.
4.29
http://foodinjars.com/2018/08/peach-mustard/
Related Posts:
Peach Chutney with Toasted Whole Spices
Peach Walnut Conserve
Peach Cardamom Jam
August 29, 2018
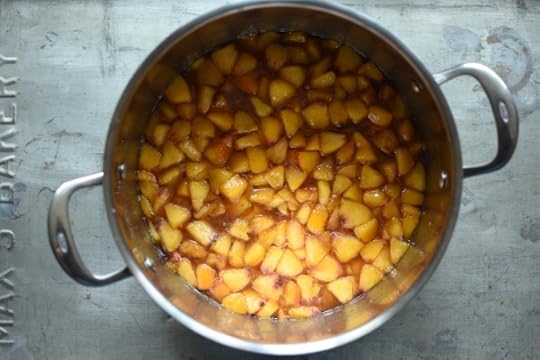
Peach Chutney with Toasted Whole Spices
It’s day three of Peach Week 2018! Monday, I shared a tiny batch of Peach Cardamom Jam. Yesterday was all about the Peach Walnut Conserve! Today, we’re moving on to chutney.

I’ve been making versions of this chutney for more than eight years now. I originally devised it using tomatoes and have since made it with plums, pears, and now, peaches. It’s got a seriously assertive flavor, thanks to a healthy dose of vinegar and all those spices.
Often I will tell you that it doesn’t matter how you cut your fruit, but when it comes to this preserve, I advise you to be thoughtful with your cuts so that they are of mostly uniform size. It helps the chutney cook evenly and makes for a really beautiful finished product.
If you follow me on Instagram, you might have spotted this photo, in which I called this my Indian spiced peach chutney. I’ve decided to let that title go, because this preserve is an invention built on things I’ve read and experienced. It has no right to claim any kind of authenticity.
This blog post was written in partnership with the good people at the Washington State Stone Fruit Growers as part of my role as official Canbassador. They sent me 18 pounds of peaches and asked me to preserve them. I’ll be posting peach recipes all week long, so check back tomorrow for the next installment. For more about Washington State Fruit, follow them on social media!
Facebook | Instagram | Twitter | Pinterest
Print
Peach Chutney with Toasted Whole Spices
Yield: makes 4 to 5 half pints
Ingredients
3 pounds peaches, pitted, peeled, and diced
1 1/2 cups granulated sugar
1 1/2 cups apple cider vinegar
1 cup golden raisins
2 teaspoons kosher salt
1 teaspoon mustard seed
1 teaspoon fennel seed
1 teaspoon celery seed
1 teaspoon cumin seed
1 teaspoon crushed red pepper flakes
Instructions
Prepare a boiling water bath canner and sufficient jars.
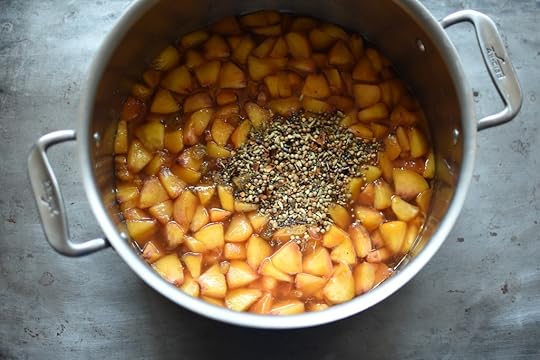
In a medium, non-reactive pot, combine the prepared peaches, sugar, vinegar, raisins, and salt. Stir to combine and set aside.
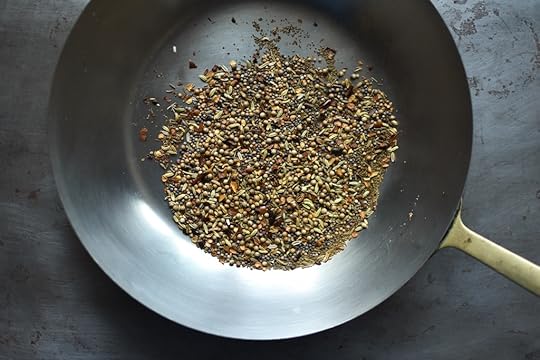
In a dry skillet, combine the spices and toast over medium heat for 2-3 minutes, stirring constantly. They are finished when the mustard seeds begin to pop.
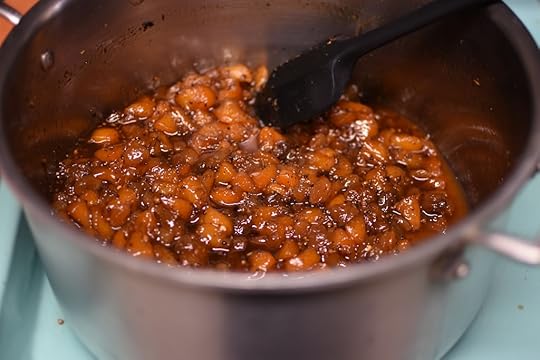
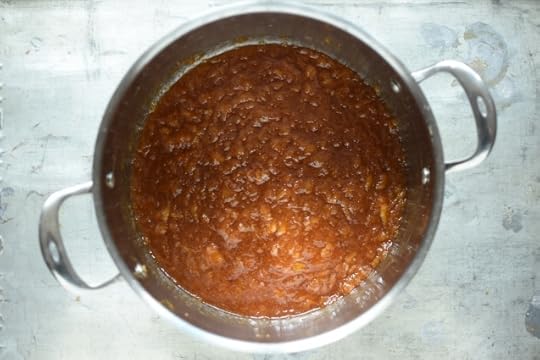
Add the toasted spices to the peaches and stir to combine. Place the pot on the stove over high heat and bring to a boil. Reduce the heat to medium-high and cook, stirring regularly, until the liquid reduces, the peaches darken and soften, and the total volume has reduced by at least one-third.
When you feel that the chutney is done, remove the pan from the heat.
Funnel the finished chutney into the prepared jars, leaving 1/2 inch headspace.
Wipe the rims, apply the lids and rings, and process in a boiling water bath canner for 15 minutes.
When the time is up, remove the jars and set them on a folded kitchen towel to cool. When the jars have cooled enough that you can comfortably handle them, check the seals. Sealed jars can be stored at room temperature for up to a year. Any unsealed jars should be refrigerated and used promptly.
4.29
http://foodinjars.com/2018/08/peach-chutney-with-toasted-whole-spices/
Related Posts:
Peach Walnut Conserve
Peach Cardamom Jam
Sweet Cherry Meyer Lemon Marmalade
August 28, 2018
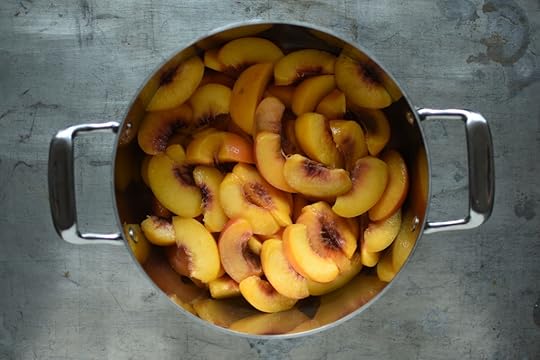
Peach Walnut Conserve
It’s day two of Peach Week 2018! Monday, I shared a tiny batch of Peach Cardamom Jam. Today, it’s Peach Walnut Conserve!
A conserve is essentially a compote with extra bling. It typically consists of larger pieces or slices of fruit, spiced liberally, simmered until tender (but not falling apart), and then studded with dried fruit or toasted nuts (occasionally even both!).
I tend to make conserves towards the end of summer, when I’ve realized that my yearly jam needs have mostly been met (this year, it was 25 pounds of apricots that pushed me over that line).
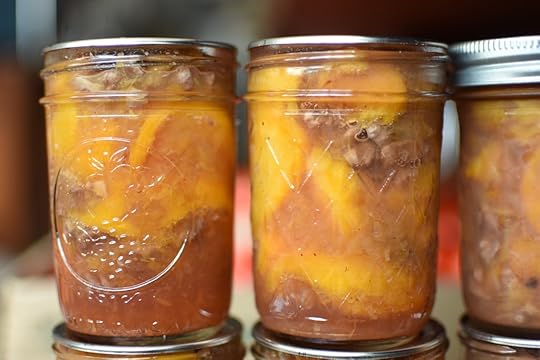
I like these less ordinary preserves because they are nice to things to take to potlucks and they make nice gifts (particularly if you know someone who likes to build a good cheese board).
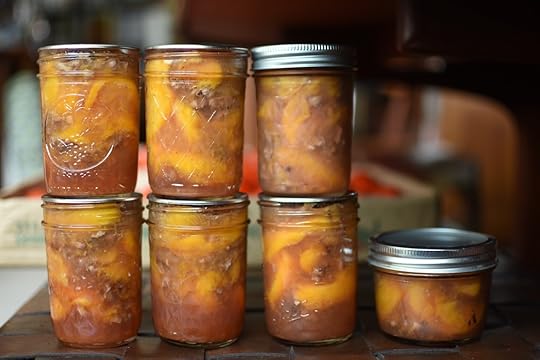
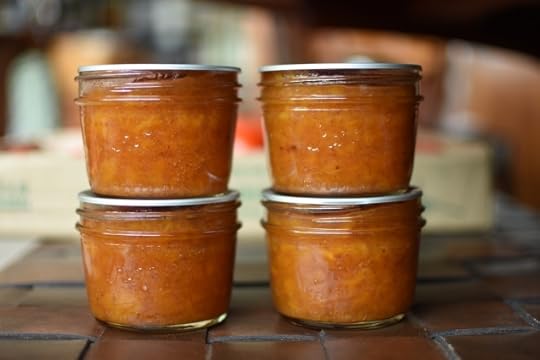
One of the jars I processed over the weekend didn’t seal (you can see in the picture above that one of the jars had been in the fridge) and I ate half the jar for lunch with a scoop of cottage cheese. It sounds like a lunch counter diet plate, but I promise you, it’s the pinnacle of satisfaction.
This blog post was written in partnership with the good people at the Washington State Stone Fruit Growers as part of my role as official Canbassador. They sent me 18 pounds of peaches and asked me to preserve them. I’ll be posting peach recipes all week long, so check back tomorrow for the next installment. For more about Washington State Fruit, follow them on social media!
Facebook | Instagram | Twitter | Pinterest
Print
Peach Walnut Conserve
Yield: makes between 6 and 7 half pints
Ingredients
3 pounds peaches
1 1/2 cups granulated sugar
2 lemons, zested and juiced
1/2 teaspoon freshly grated nutmeg
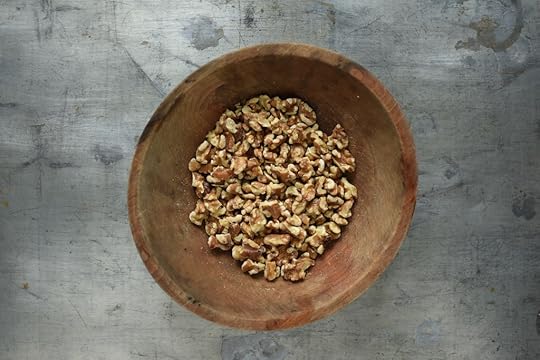
1 cup walnuts, toasted and chopped
Instructions
Prepare a boiling water bath canner and 7 half pint jars.
Cut the peaches into quarters and remove the pits. Heap the peach pieces into a heatproof bowl and put the bowl in the sink.
Bring a kettle of water to a boil. Once it's hot, pour the hot water onto the peaches. Cover the bowl with a pot lid or sheet pan and let the peaches sit for 3 to 4 minutes. When the time is up, carefully tip most of the hot water out into the sink. Run cold tap water over the peaches until they're cool enough to handle.
Remove the peels from the peaches and cut each quarter into 2 to 3 slices. Place the peeled peach slices into a medium, non-reactive pan.
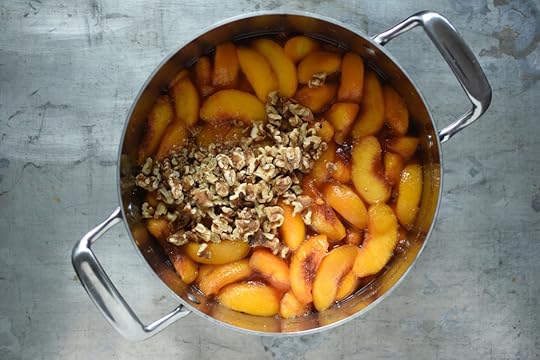
Add the sugar, lemon zest and juice, and the nutmeg to the peaches and stir to combine. Let it sit for 15 or 20 minutes, until the sugar has dissolved and the fruit is juicy.
Set the pot on the stove over high heat. Bring to a boil and then reduce the heat to medium-high.
Cook, stirring regularly, until the conserve has thickened and reduced by about a third.
Near the end of cooking, stir in the walnuts.
When you're happy with the consistency of the conserve, remove the pot from the heat.
Funnel the conserve into the prepared jars. Wipe the rims, apply the lids and rings, and process in a boiling water bath canner for 15 minutes.
When the time is up, remove the jars and set them on a folded kitchen towel to cool. When the jars have cooled enough that you can comfortably handle them, check the seals. Sealed jars can be stored at room temperature for up to a year. Any unsealed jars should be refrigerated and used promptly.
4.29
http://foodinjars.com/2018/08/peach-walnut-conserve/
Related Posts:
Peach Cardamom Jam
Sweet Cherry Meyer Lemon Marmalade
Sweet Cherry Butter
August 27, 2018
Peach Cardamom Jam
Every summer for the last nine years, I’ve teamed up with the folks at the Washington State Fruit Commission. As one of their Canbassadors, they send me boxes of fruit. I take those cherries, peaches, and plums into my kitchen, turn them into various preserves and then share what I’ve done here.
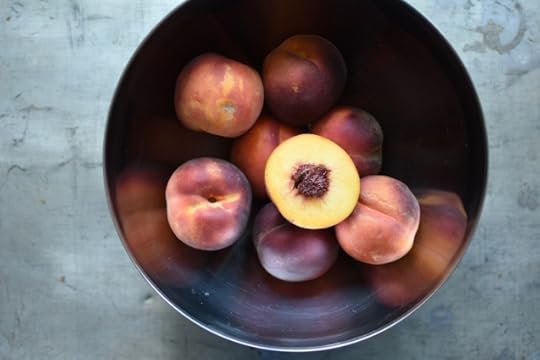
Earlier in the summer, they sent me some cherries, which became Sweet Cherry Butter and Cherry Balsamic Jam. More recently, they sent me 18 pounds of the most glorious, fragrant peaches. I’ve turned them into five different preserves and over the course of this week, I’ll share those recipes right here.

For this first recipe, I’ve made a relatively small batch of peach cardamom jam. This is made without added pectin and requires constant stirring and a bit of bravery at the end of cooking for it to thicken sufficiently. Use a wide pot, turn the heat down a little, and trust your judgment. I have no doubt you can do it.
I use ground cardamom for this preserve and I love both the intense flavor and speckled appearance that it gives the finished jam. You could also try using lightly crushed whole cardamom pods, but take care to count how many you put in so that you can pull them out when the jam is finished (I imagine 5 or 6 pods should do it).
If you want to see what some of the other Canbassadors have done this year, make sure to follow the Washington State Stone Fruit Growers and Northwest Cherries folks on social media, as they’ve been sharing the posts. Here’s where you can find them.
Facebook | Instagram | Twitter | Pinterest
Print
Peach Cardamom Jam
Yield: 4 half pints
Ingredients
3 pounds peaches, pitted, peeled, and diced
2 cups granulated sugar
1 teaspoon ground cardamom
1 lemon, juiced
Instructions
Prepare a canning pot and four half pint jars.
Combine the prepped peaches, sugar, cardamom and lemon juice in a low, wide, non-reactive pot and stir to combine.
Once the sugar has started to dissolve and there's some liquid in the pot, place it on the stove over high heat and bring to a boil. Reduce the heat to medium-high and cook, stirring regularly for 15-20 minutes, until the total volume in the pot has reduced by at least one-third and the jam looks quite thick.
As the jam cooks, use a potato masher to help break down the peaches.
Funnel the jam into the prepared jars, leaving 1/2 inch headspace.
Wipe the rims, apply the lids and rings, and process in a boiling water bath canner for 10 minutes.
When the time is up, remove the jars and set them on a folded kitchen towel to cool.
Once the jars have cooled enough that you can comfortably handle them, check the seals. Sealed jars can be stored at room temperature for up to a year. Any unsealed jars should be refrigerated and used promptly.
4.29
http://foodinjars.com/2018/08/peach-cardamom-jam/
Related Posts:
Sweet Cherry Meyer Lemon Marmalade
Sweet Cherry Butter
Sweet Cherry Balsamic Jam
August 23, 2018
Summer Vegetable Braise with Roasted Garlic Roma Tomato Sauce
This post is sponsored by Ball® Fresh Preserving Products by Newell Brands.
Yesterday, I showed you how to make the Roasted Garlic Roma Tomato Sauce from Ball® Fresh Preserving Products. This thick, flavorful sauce is a winner, because it’s both easy to make (the roasting/grilling step makes the tomatoes so easy to peel) and because it’s so versatile once in the jar.
It could easily replace the jars of store bought sauce we all keep around for nights when we can’t manage much, but it also can be used as a component in a longer cooking dish as well. That’s what I’ve done here. I’ve taken this tasty sauce and have combined it with some of the summer veg that’s so abundant right now. The result? A hearty, meatless braise that is simple to make but nice enough to serve to company.
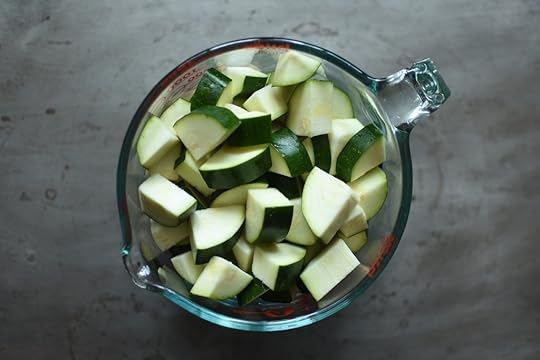
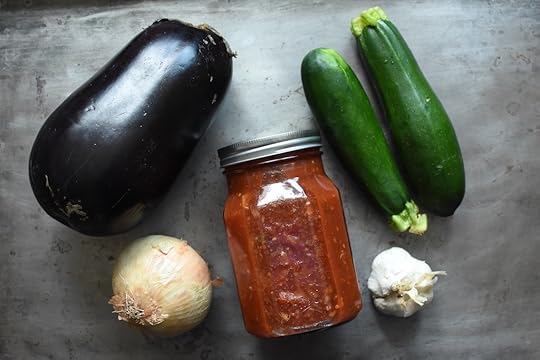
You start the way so many of these things start. But warming a couple tablespoons of olive oil in a roomy pot and adding a chopping onion. Once that onion begins to color, you add a cubed eggplant (no need to salt or drain) and stir it well into the onions, so that it will also start to brown a bit. Then you add the zucchini and a couple crushed garlic cloves and work them in.
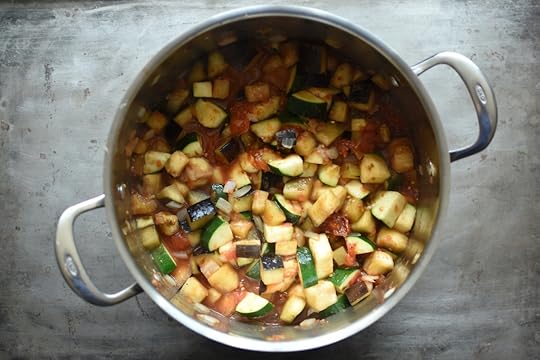
Once all the veg has had a chance to brown and soften a little, you add a quart of the Roasted Garlic Roma Tomato Sauce. Pour a cup of water into the jar and swirl it around well (so as not to leave behind even a bit of that flavor) and pour it into the pot as well. Give everything a good stir, reduce the heat to medium-low so that you maintain a very slow, lazy simmer, put a lid on the pot, and cook for about an hour. You want to stir occasionally to ensure that the bottom of the pot doesn’t burn, but otherwise it’s very hands off.
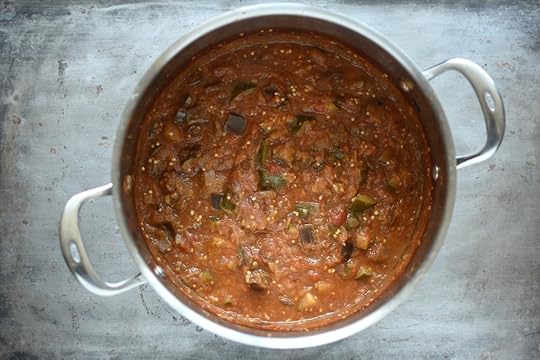
When the hour is up, remove the lid from the pot, turn the heat up to medium, and simmer a little more vigorously to cook off any water the braising process brought to the surface of the stew. Once it is as thick as you’d like it, taste to ensure that the seasoning levels are good. Finally, you are ready to serve.
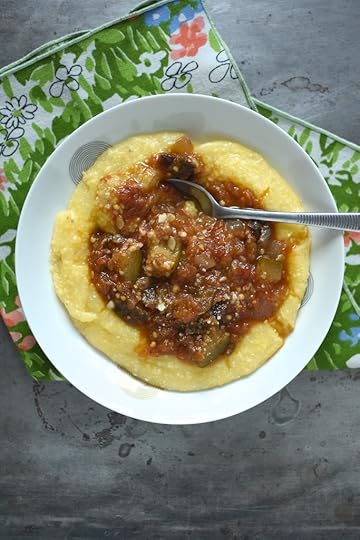
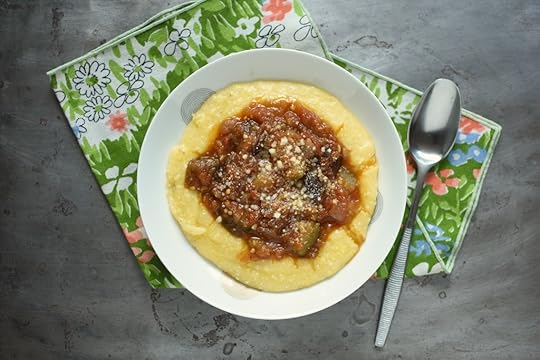
I like to ladle this braise over a puddle of freshly cooked polenta (simmer 1 part coarse cornmeal with 4 parts salted water, until creamy and quite thick). If I don’t have the time to cook polenta, I’ll toss it with cooked penne or gemelli. Topped with a pinch of grated parmesan cheese, it makes a lovely late summer meal.
Print
Summer Vegetable Braise with Roasted Garlic Roma Tomato Sauce
Yield: serves 8 to 10
Ingredients
2 tablespoons extra virgin olive oil
1 medium yellow onion, diced
1 large eggplant, diced
2-3 small zucchini, diced
2 garlic cloves, mashed or pressed
1 quart Roasted Garlic Roma Tomato Sauce
1 cup water
2 teaspoons salt
3/4 teaspoon coarsely ground black pepper
cooked polenta or pasta to serve
Instructions
Place a large pot on the stove over medium-high heat. Add the olive oil and let it heat just until it begins to shimmer
Add the onions and cook for 2-3 minutes, until they start to develop some color.
Add the eggplant and stir to incorporate. Finally, add the zucchini and garlic and stir to combine.
Cook for 3-4 minutes, until the vegetables start to color. Add the tomato sauce, water (the best way to do this is to pour the water into the sauce jar and give it a swirl, so that you don't lose any flavor), salt and pepper and stir to combine.
Reduce the heat to medium-low, cover, and cook for 45 minutes to an hour, until the vegetables have softened, but haven't lost all identity.
Remove the lid, increase the heat a little, and simmer more actively to cook off any watery liquid that might have accumulated on the surface of the braise.
Taste and adjust the salt and pepper levels, as needed.
Serve over cooked polenta or pasta and top with grated Parmesan cheese.
If you can, make this braise the day before you want to serve it, as it improves overnight in the fridge.
4.29
http://foodinjars.com/2018/08/summer-vegetable-braise-with-roasted-garlic-roma-tomato-sauce/
Disclosure: This post is sponsored by Newell Brands as part of a compensated partnership. All thoughts and opinions are entirely my own.
Related Posts:
Roasted Garlic Roma Tomato Sauce from Ball® Fresh Preserving Products
Honey Cinnamon Pear Sorbet
Honey Cinnamon Pears from Ball® Fresh Preserving Products
August 22, 2018
Roasted Garlic Roma Tomato Sauce from Ball® Fresh Preserving Products
This post is sponsored by Ball® Fresh Preserving Products by Newell Brands.
So far this summer, I’ve written three pairs of posts in partnership with my friends at Ball®Fresh Preserving Products by Newell Brands. In May, it was all about their Mixed Berry Jam and the Jammy Baked Oatmeal I made with it. In June, we focused in on Honey Cinnamon Pears and the Honey Cinnamon Pear Sorbet I turned them into. Last month, the starter recipe was Kosher Dill Pickle Spears (so crisp and tangy!) and the transformation was a batch of Pasta and Kosher Dill Pickle Salad.
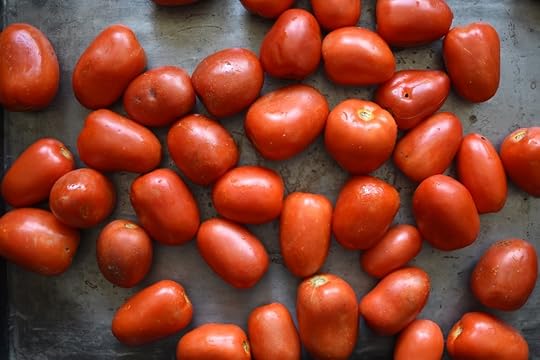
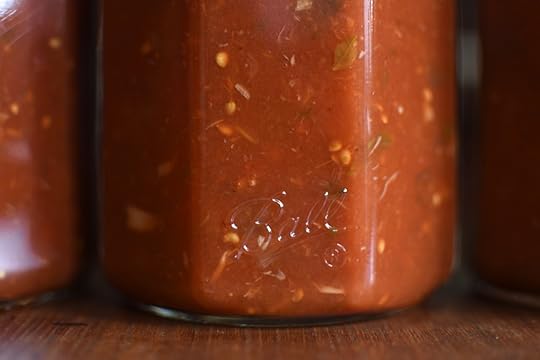
This month, we’re talking tomatoes. In my area, they are finally starting to show up at farmers markets with heady abundance. I am buying them 10 or 25 pounds at a time in order to put up enough various tomato products to get me through the year (my goal is to do enough tomato puree, whole peeled, and salsa to get me through to next August).

I am also going to make room for several more batches of this Roasted Garlic Roma Tomato Sauce from Ball® Fresh Preserving Products because it is super flavorful. This recipe uses a peeling technique that I’d heard about but never tried before. Instead of blanching the tomatoes in a large pot of water, you broil them (I cut mine in half prior to broiling so that I didn’t have to turn them)! It worked so well. The recipe says you can also do it on the grill, which would be a great way to keep all that heat out of the house.
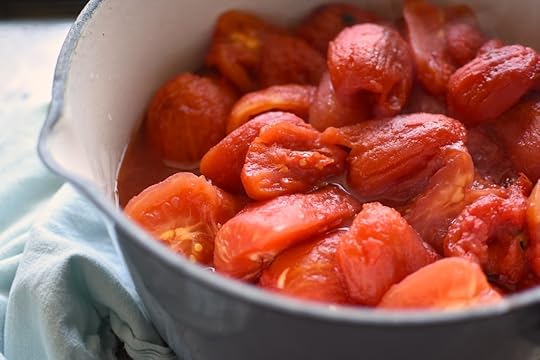
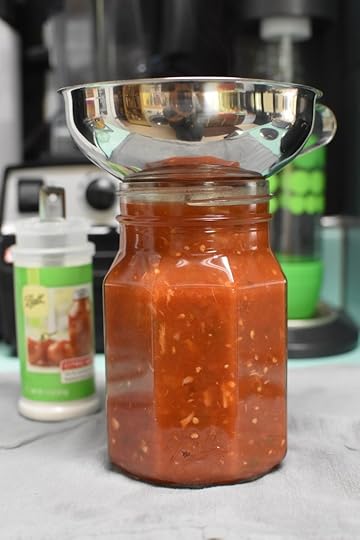
Once the tomatoes are peeled, you squeeze out the seeds, chop them roughly and heap them in a pot (the tomatoes you see pictured above were just the peeled halves. I seeded and chopped after this).
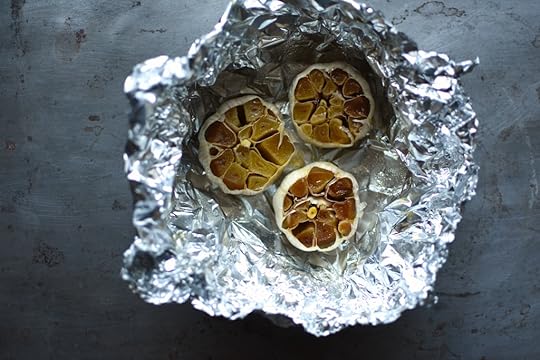
Once the tomatoes are prepped, you add some chopped onion, three heads of roasted garlic, fresh basil and oregano, and a little salt. Heat to a low simmer and cook until thoroughly warmed through (I confess, I reduced mine a little as the tomatoes put off a good bit of water).
While the sauce heats, prepare a boiling water bath canner and three quart jars.
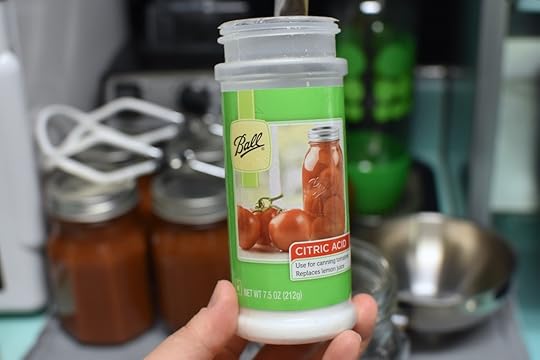
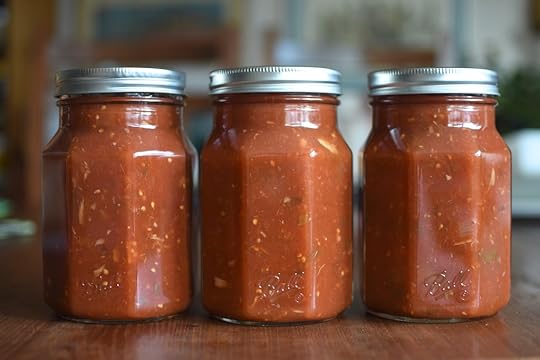
Once you judge that the sauce is done, remove one jar from the canner. Add 1/2 teaspoon citric acid (you could also use 2 tablespoons bottled lemon juice if you prefer), and funnel in some of the sauce, filling to 1/2 inch headspace. Stir with a wooden or plastic chopstick to remove any trapped air bubbles. Wipe the rim, apply a lid and ring, and place the jar back in the canner. Repeat with the remaining jars and sauce.
These jars are processed for 40 minutes at a full rolling boil (remember, if you live at elevation, you need to adjust your processing time accordingly). When the time is up, remove the lid, turn off the heat, and let the jars cool slowly in the canner. Once that time is up, remove the jars from the canner and let them cool on a folded kitchen towel. Once the jars are entirely cool, check them to ensure that the jars have sealed fully and completely.
This sauce is a great pantry builder, because it can be heated and served over pasta, polenta, or sauteed greens. I like to use it in combination with zucchini and eggplant, for a tasty summer vegetable braise. Check back for that recipe tomorrow!
Disclosure: This post is sponsored by Newell Brands as part of a compensated partnership. All thoughts and opinions are entirely my own.
Related Posts:
Honey Cinnamon Pear Sorbet
Honey Cinnamon Pears from Ball® Fresh Preserving Products
Mixed Berry Jam from Ball® Fresh Preserving Products


